HOLIDAY DONATION DRIVE - SUPPORT MSW - DO YOUR PART TO KEEP THIS GREAT FORUM GOING! (Only 72 donations so far out of 49,000 members - Can we at least get 100? C'mon guys!)
×


Louie da fly
-
Posts
7,989 -
Joined
-
Last visited
Content Type
Profiles
Forums
Gallery
Events
Everything posted by Louie da fly
-
I'm sending you a PM.
-
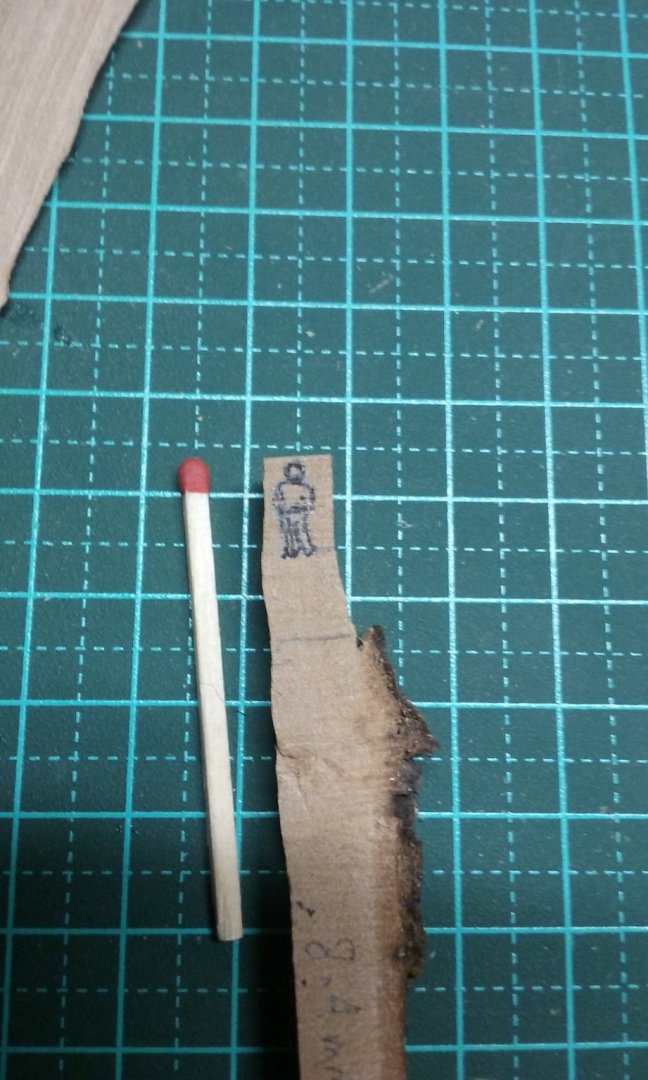
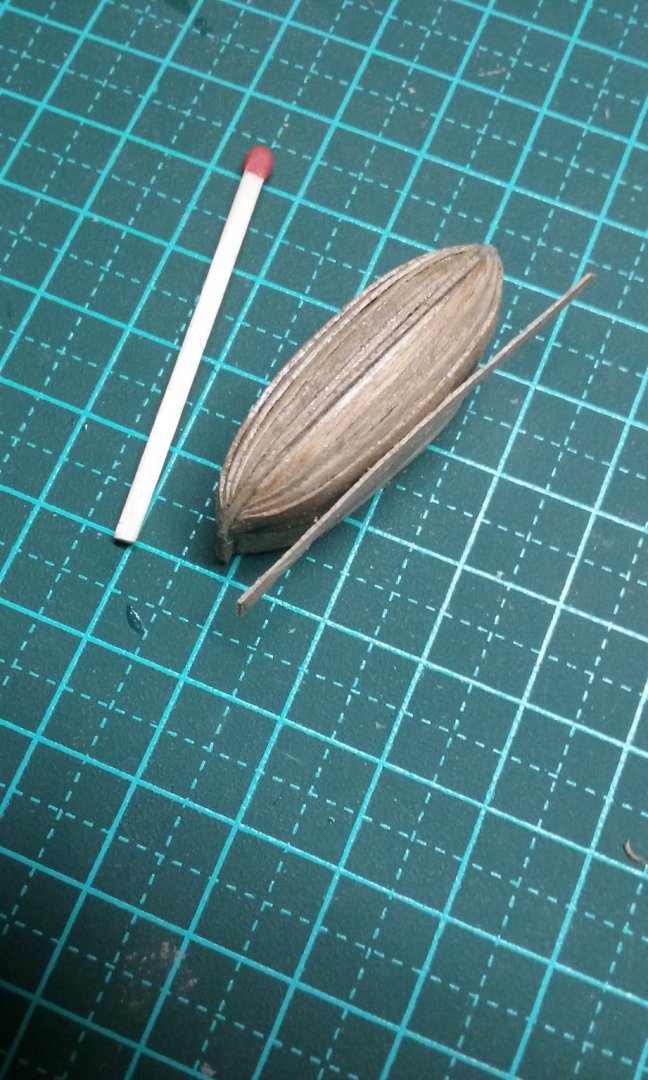
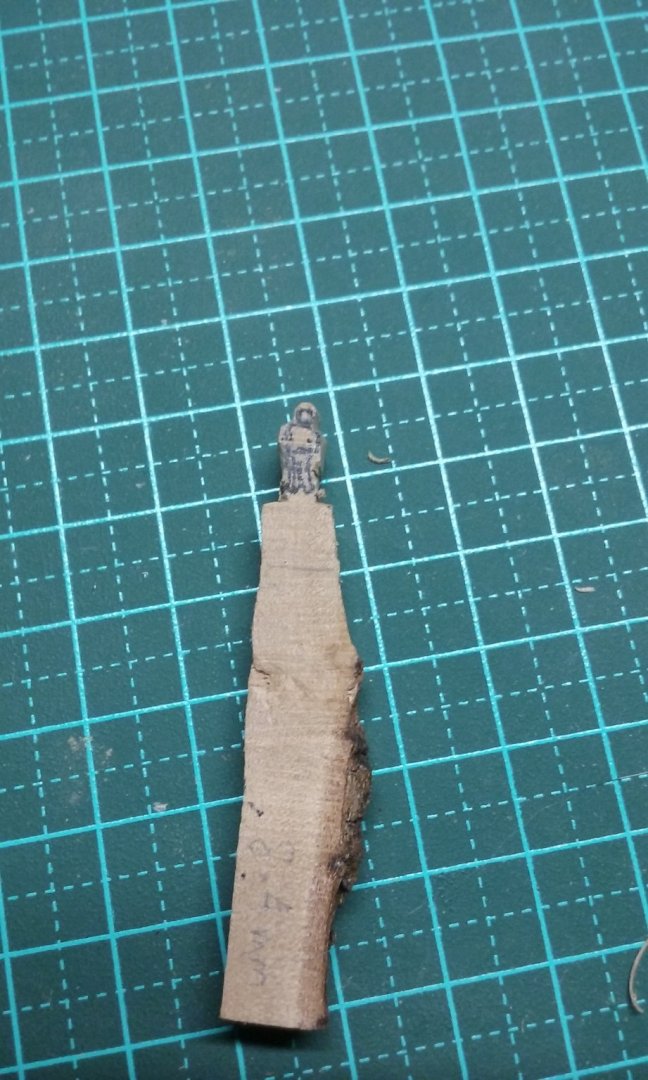
 Thanks for the info and advice, Liteflight. 1. I used Gladwrap on the plug of my dromon with good results, but I felt the longboat was too tiny. I hope I don't regret it! 2. I'm fortunate that I'm pretty crap at using a drop-saw (the only tool available when I was cutting sheets from the the bit of walnut tree-trunk which the neighbour gave me when he cut down his dead tree). It meant that some 1mm sheets were 3mm thick, some 2mm, some 1mm, and some paper thin, which is what I'm using for the longboat planking. I now have a bench saw, but it's not yet installed in the re-vamped workshop, so I'll have to see if that works any better. 3. I think the final option would be the one And here's a bit of progress. More planks on the butter longboat. I've been using finger and thumb as "clamps" to fix the ends to the stem and sternpost. Just a bit of patience while the glue dries. I've added a stringer halfway up the aftercastle bulwark for belaying (about waist height or a bit above) - IIRC Mondfeld's book says such things as belaying pins, kevels etc may not have existed in the period we're talking about, and cleats at this scale would just be too small. Here's the rudder - rough cut out, and finished (took about 5 minutes). Now I have to work out what to make my pintles and gudgeons from. I'm leaning toward blackened paper, but I haven't yet made up my mind. I do have very thin aluminium, but paint scrapes off it very easily. Maybe I can rustle up some brass shim. And first moves on another figure to go on deck. He's shorter than Henry - only 8.4mm instead of 9.4mm. Steven
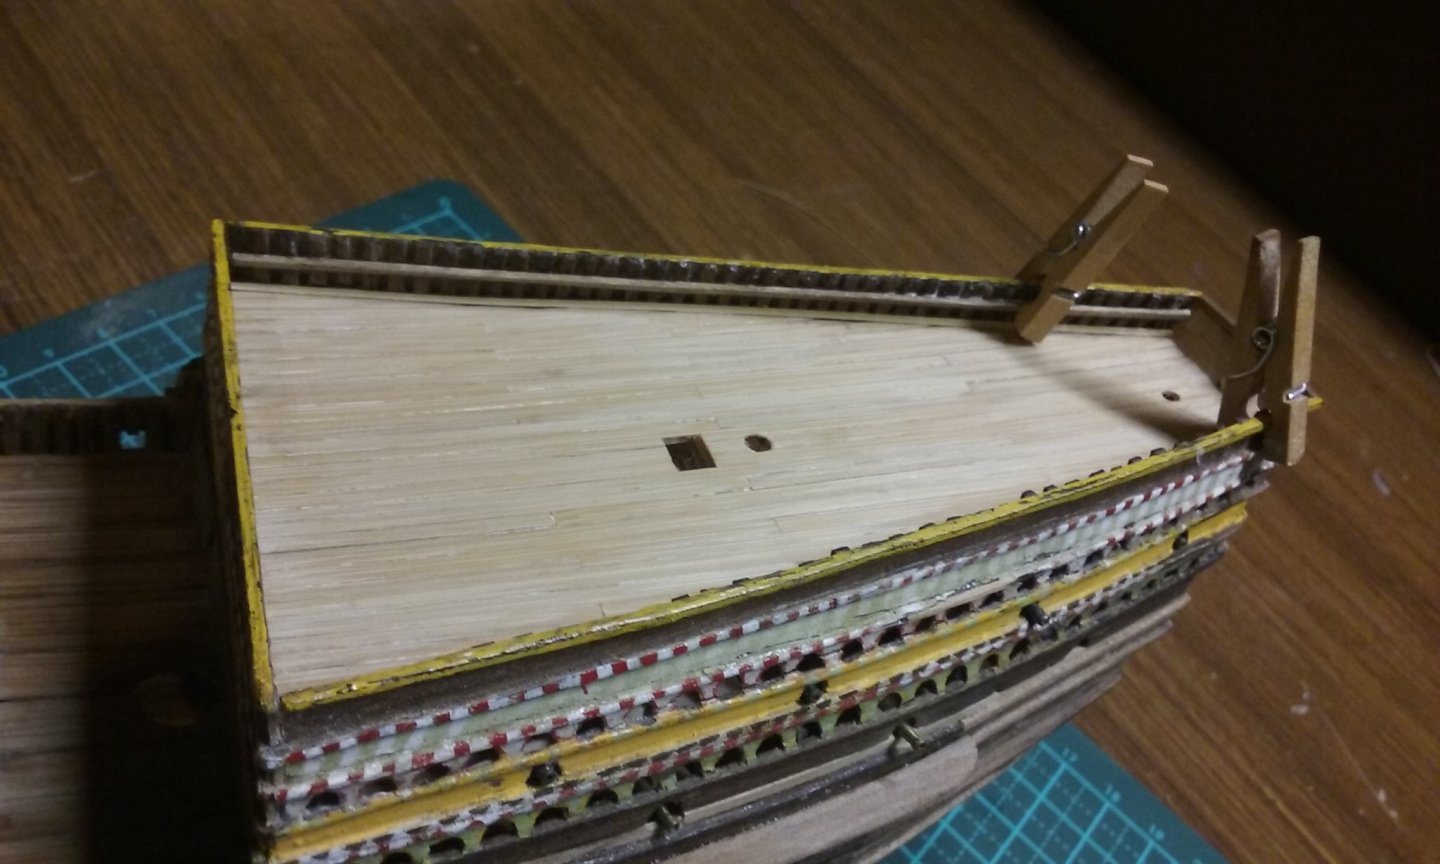
- 740 replies
-
- 7
-

-
- Tudor
- restoration
- (and 4 more)
-
Bulging 2nd Planks
Louie da fly replied to drjeckl's topic in Building, Framing, Planking and plating a ships hull and deck
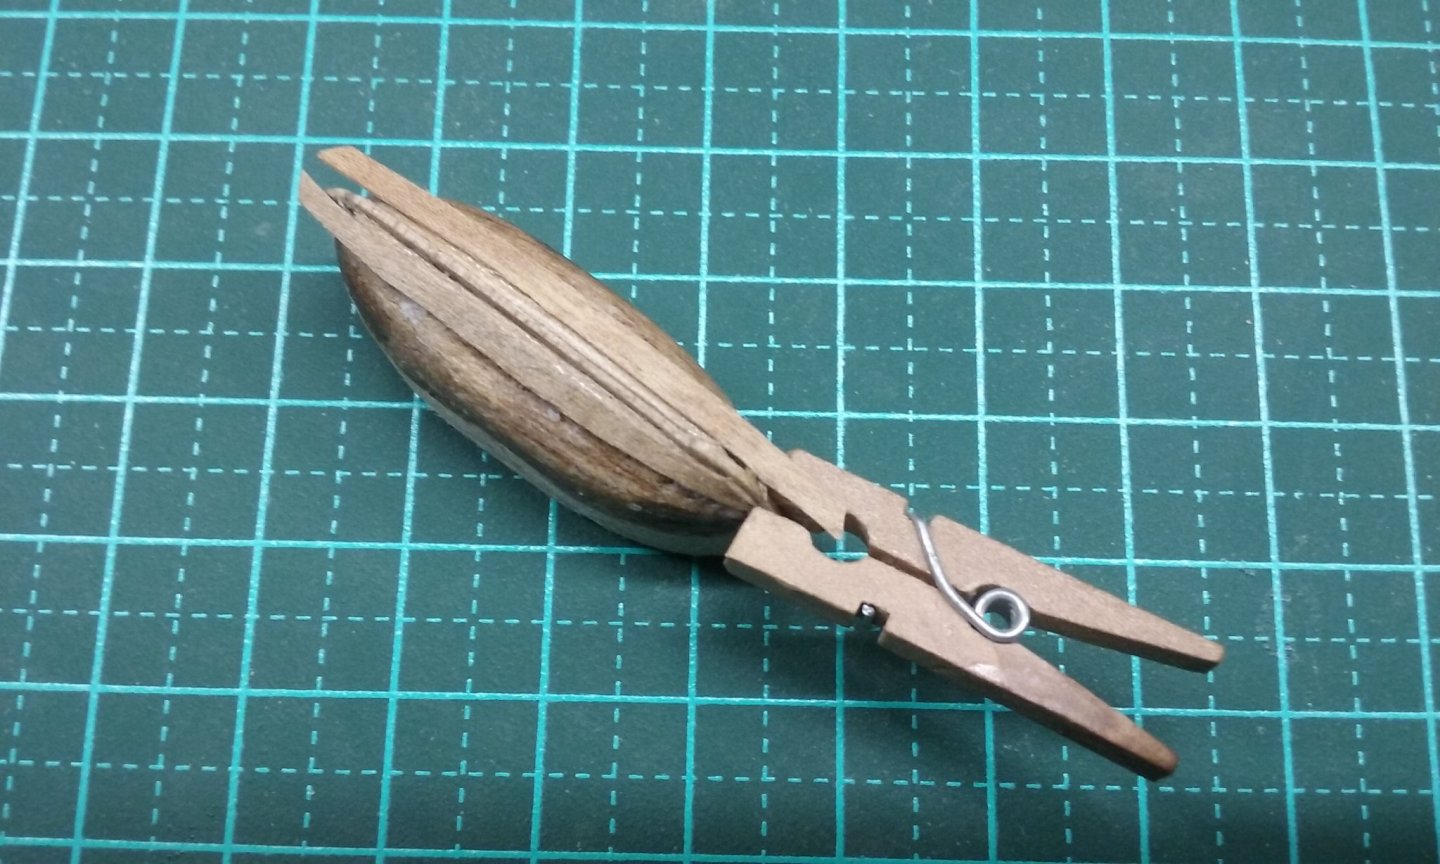
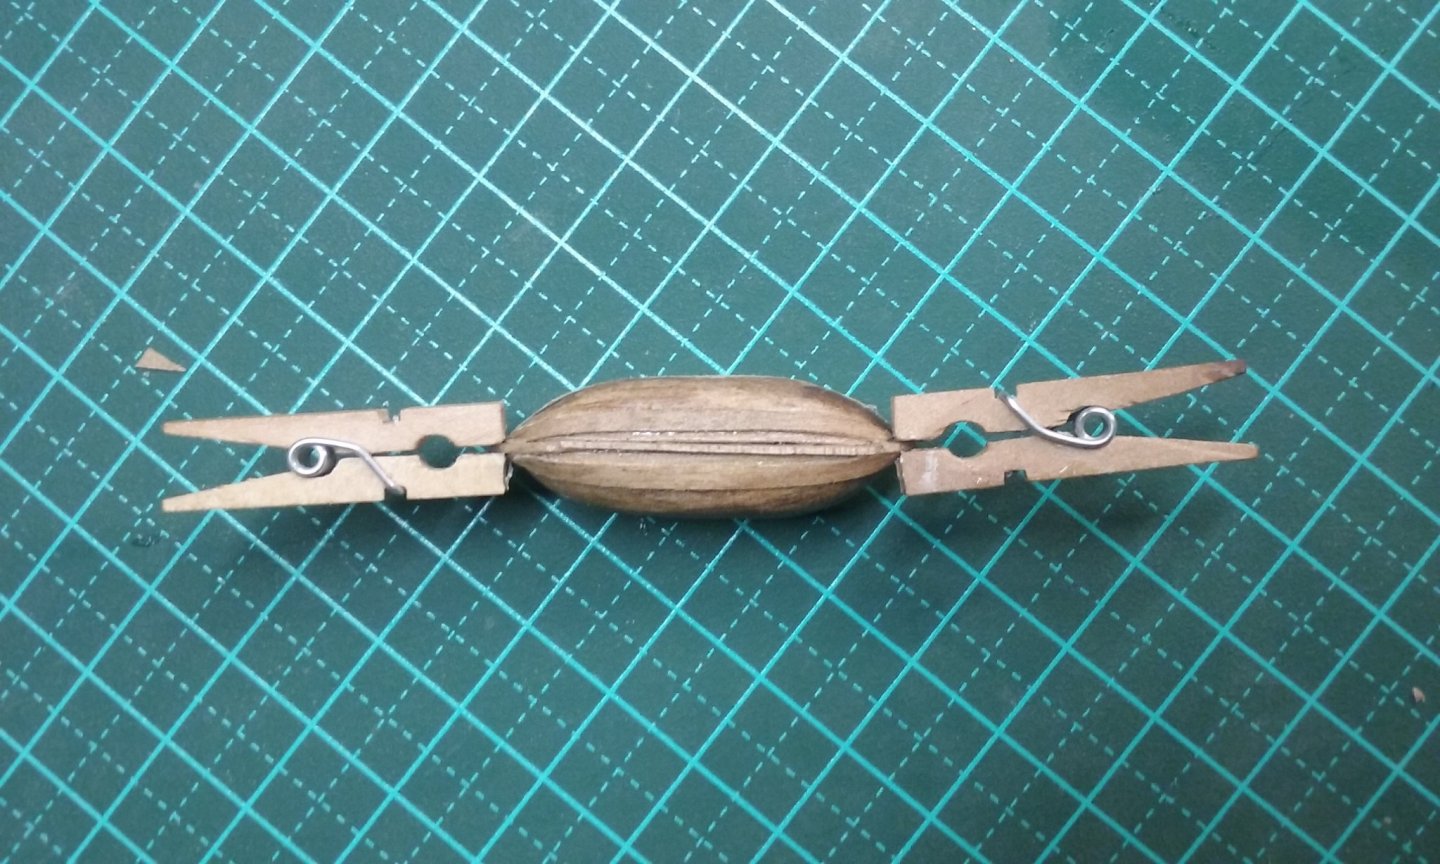
Yes, when no other clamps will do the job, the "Five finger" clamps and a little patience (reading, watching tv) seem to work best. Having got to the stage where nothing else works, not even my tiny clothespegs, I'm currently using that technique on the planking of the longboat for my Henry Grace a Dieu, where the planks join the stem and sternposts. Time consuming, but it works. Steven -
Maybe - I dunno. It doesn't seem to be on the footage.
-
Yes, that looks really good. It's nice once you've worked out all the problems and are able to get an assembly line going. Can get a bit boring after awhile, but with only 17 more to go you shouldn't suffer too much. I'm glad the memorial service went off ok. Best wishes, Steven
-
Hi David, and welcome to MSW. What you've done so far looks really good. Take it slow and carefully - you seem to be doing that already - and you'll end up with something to be really proud of. Good to see you're planning a build log. I'd recommend you start sooner rather than later - I know it can sometimes be a bit daunting putting one's efforts up for all to see, but the people here are very helpful and supportive, and can often give help and advice that will help you overcome the problems all modelmakers encounter at some stage or another. Oh, and we get to see your model taking shape! In case you haven't already come across them, the instructions for starting your build log are here: Good to have you on board! Steven
-
Hi and welcome to MSW, Dennis. Good to see you're planning to start a build log for your model. In case you haven't already come across them, the instructions for doing so are here: Good to have you aboard. Steven
-
Welcome to MSW, Sigmadog! I'd like to second Mark's recommendation that you start a build log. It's a great way to get help and advice, and we get to see your build taking shape. The instructions are here: You will make mistakes - that's inevitable. But each mistake is a learning experience, preparing you for a better model next time you build. And nobody makes the perfect model or fails to make mistakes, even the most experienced modeller. They just make more ambitious mistakes! Good to have you aboard. Steven
-
Same here. How do you stand in the ship's "hull" to keep your footprints from interfering with what's already been excavated? Steven
-
Though this video is ostensibly about the sword found at Sutton Hoo, the footage of the excavation is fascinating. None of the timber survived - they figured out the shape of the ship, frames, planking and nails by following the discoloration in the sand of the burial mound. How's that for careful work! Steven
-
Welcome back, Darren. That's quite a collection you've got there! I note that you're just down the road from me. Maybe we could get together and talk ship modelling at some point. Steven
-
Could be - I dunno. But I might make use of the phenomenon if I need to . .
- 740 replies
-
- 1
-
-
- Tudor
- restoration
- (and 4 more)
-
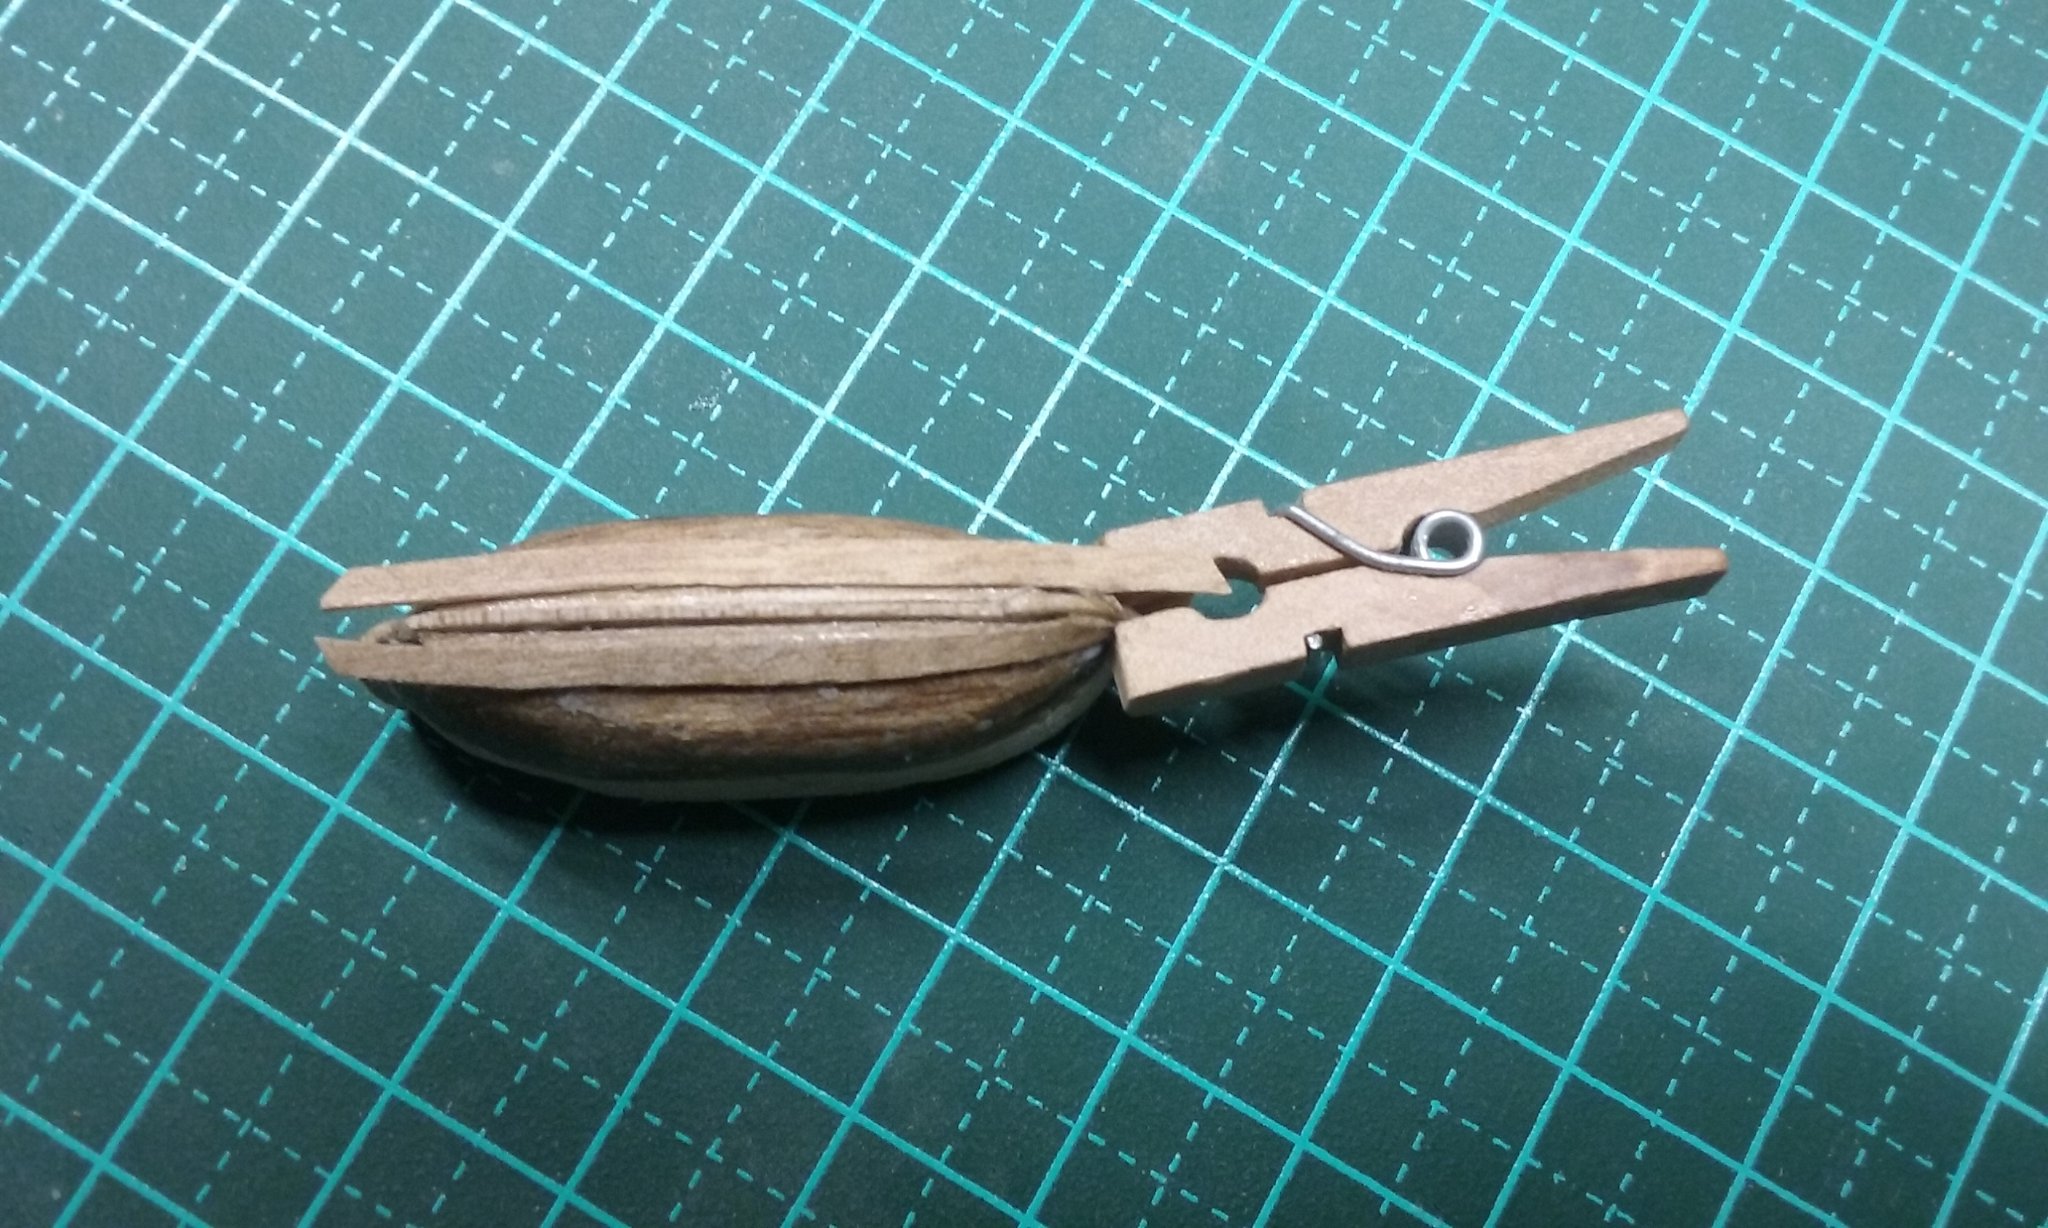
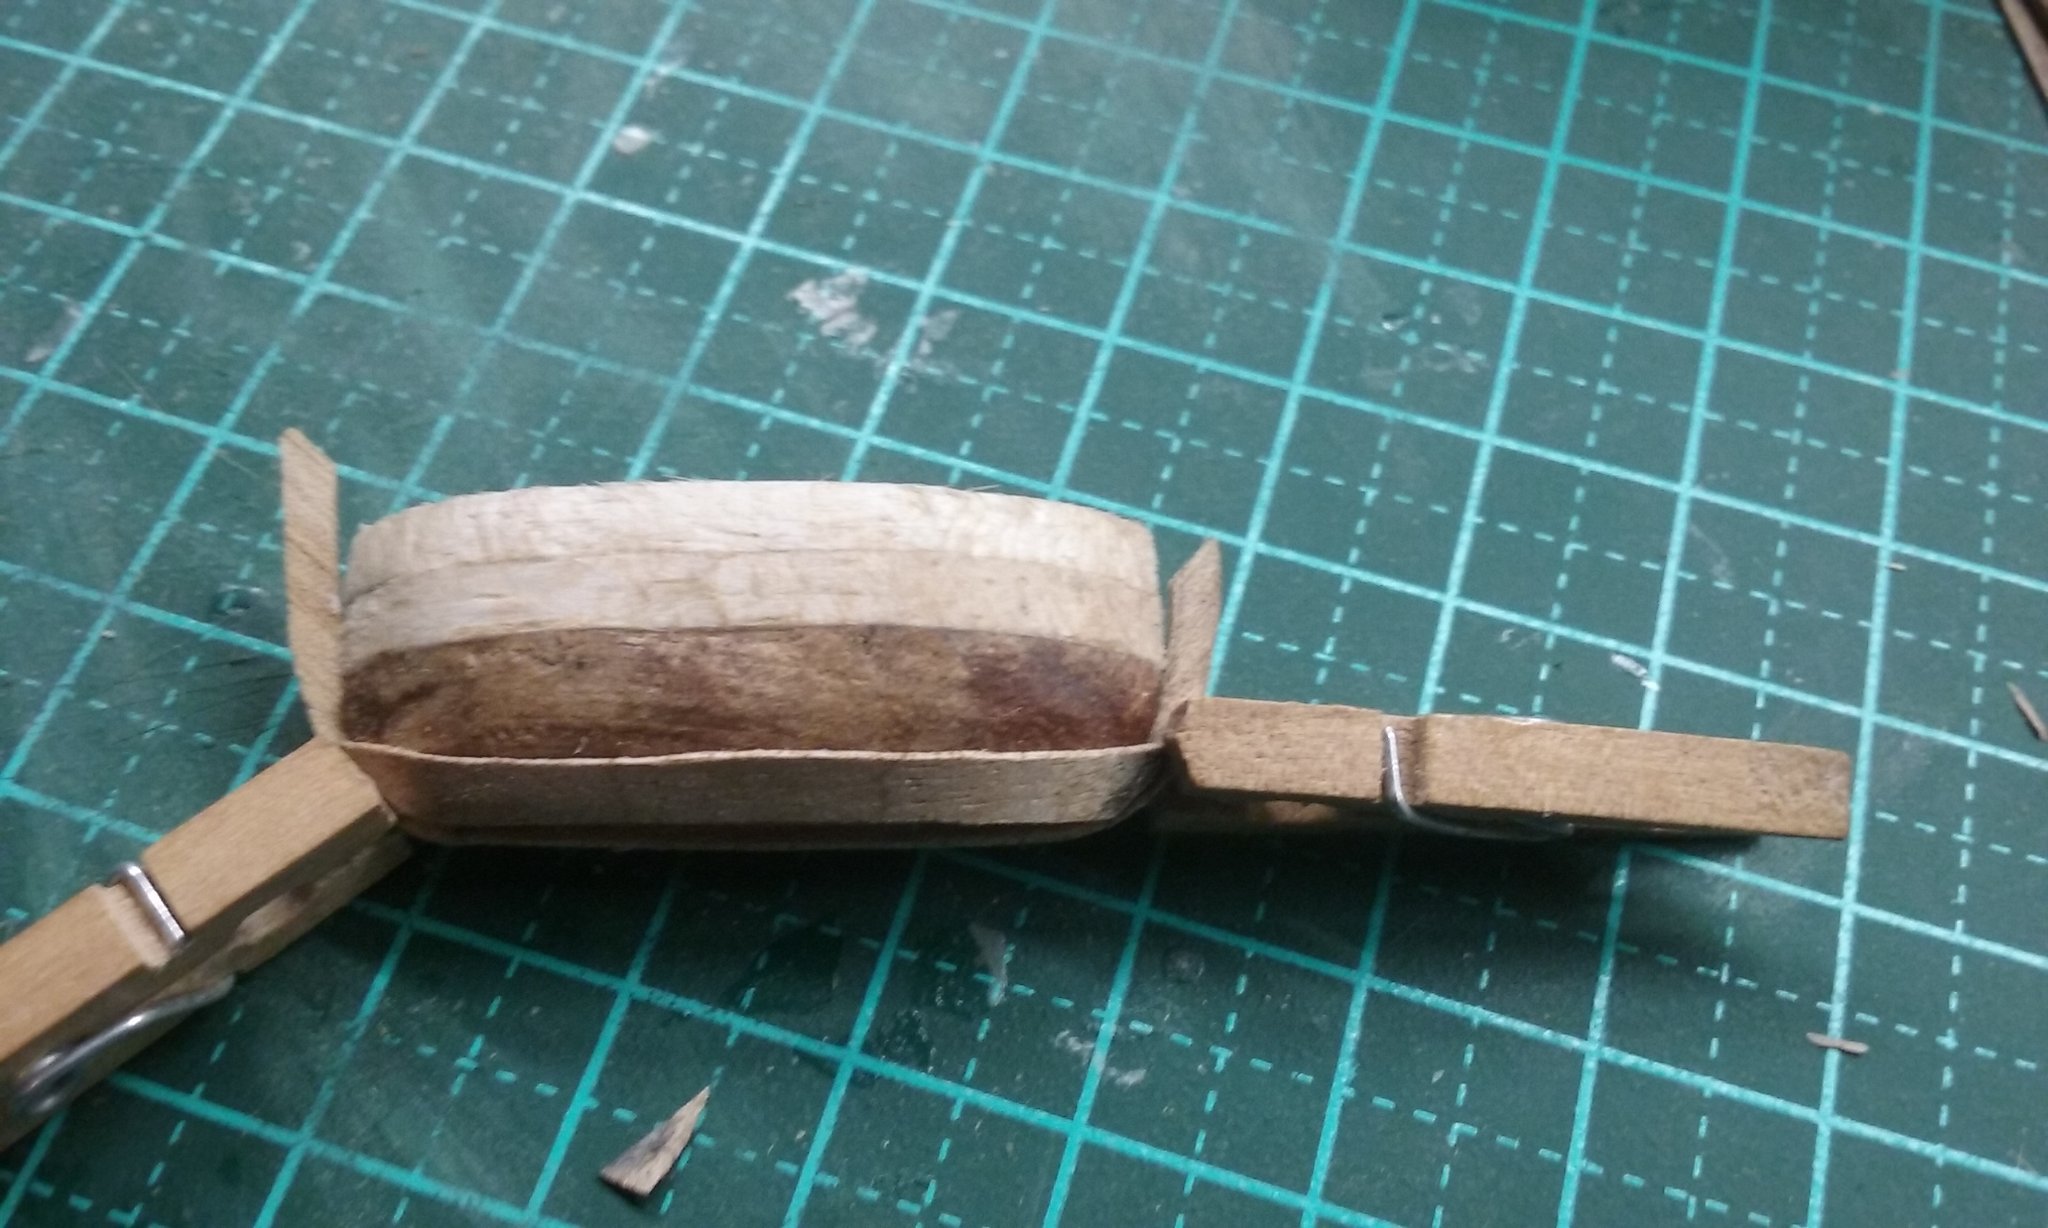
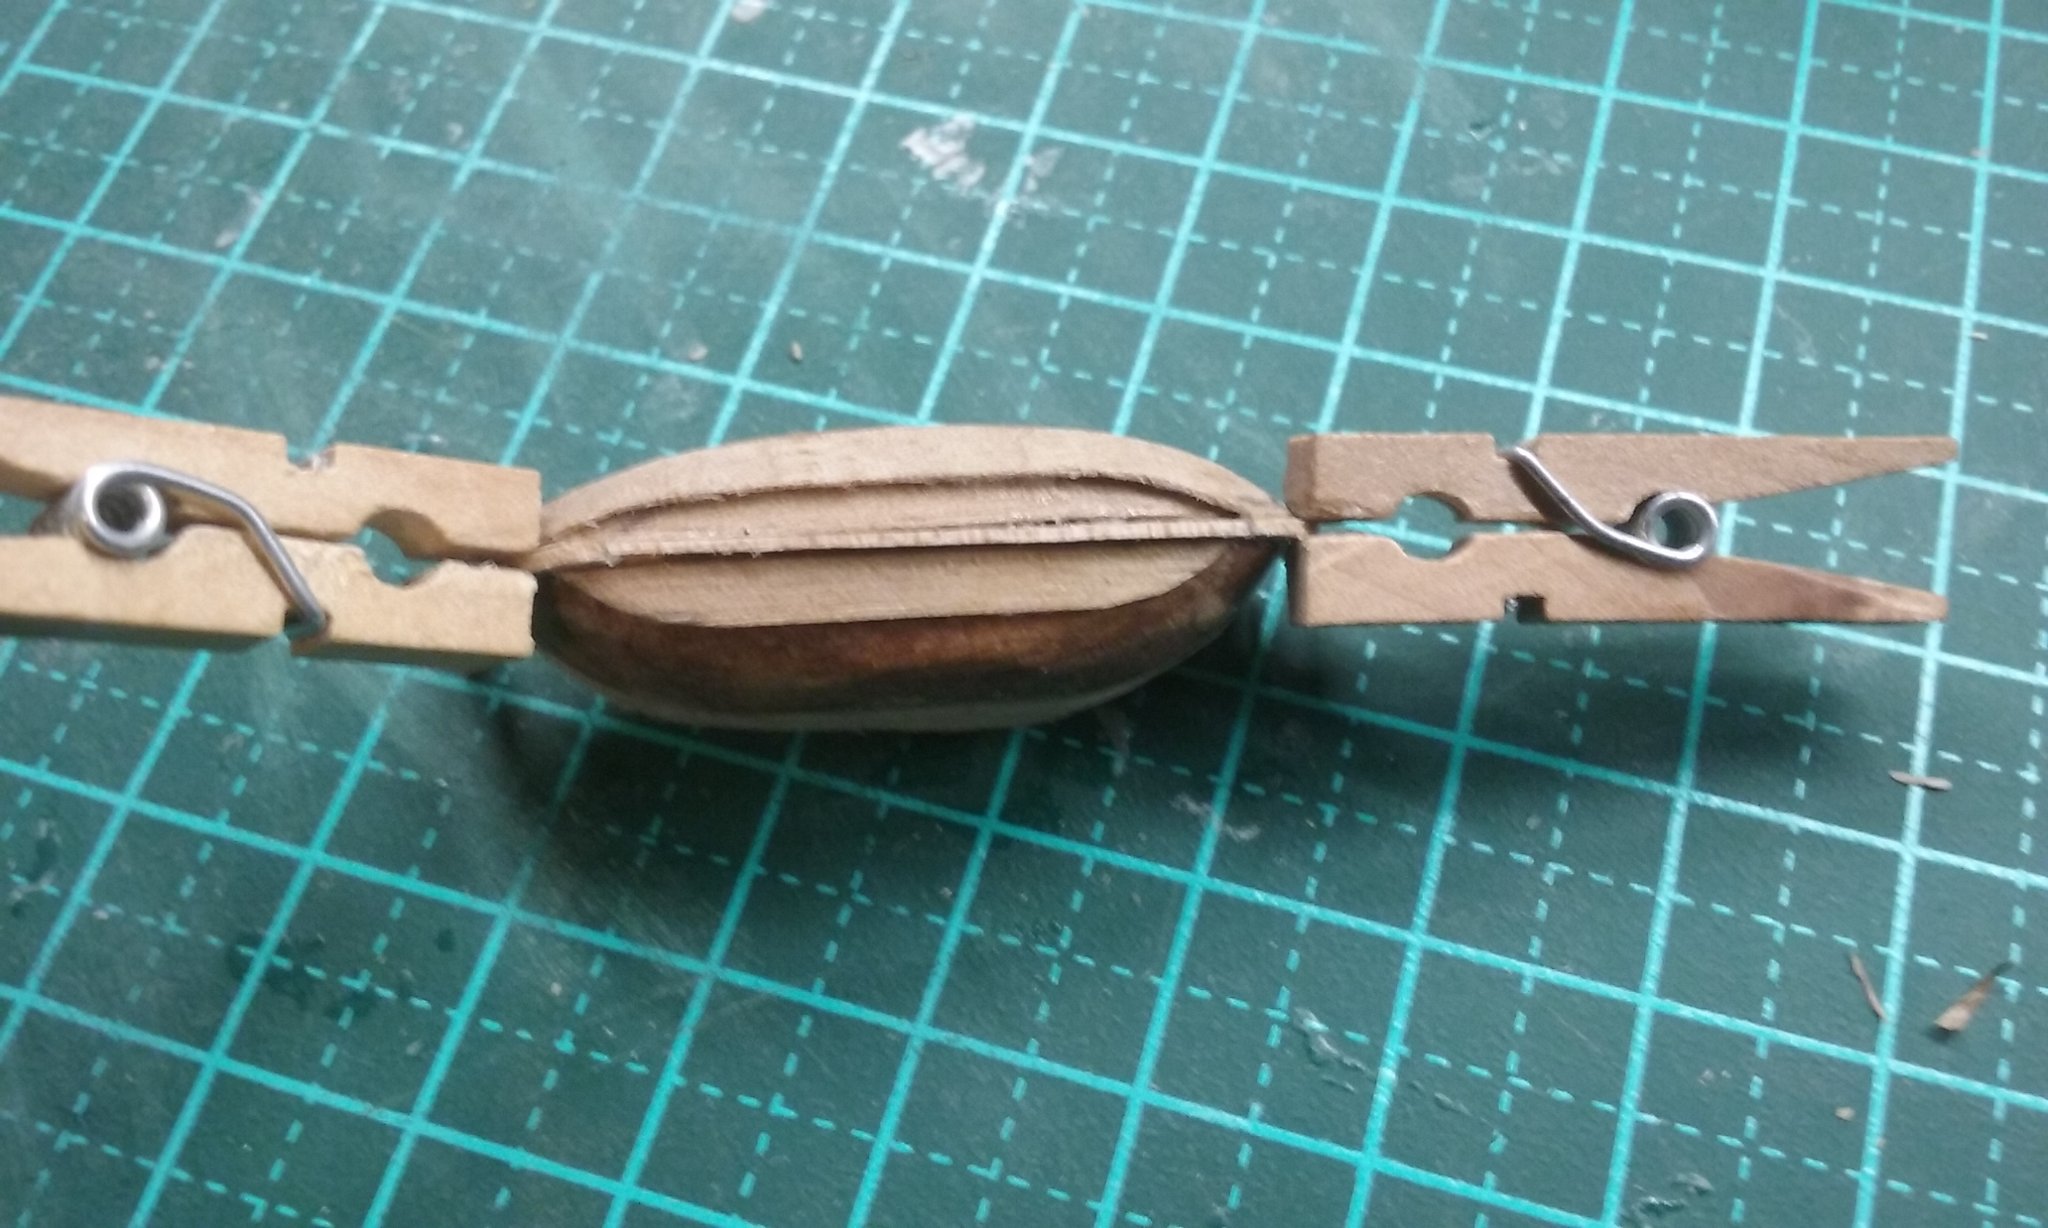
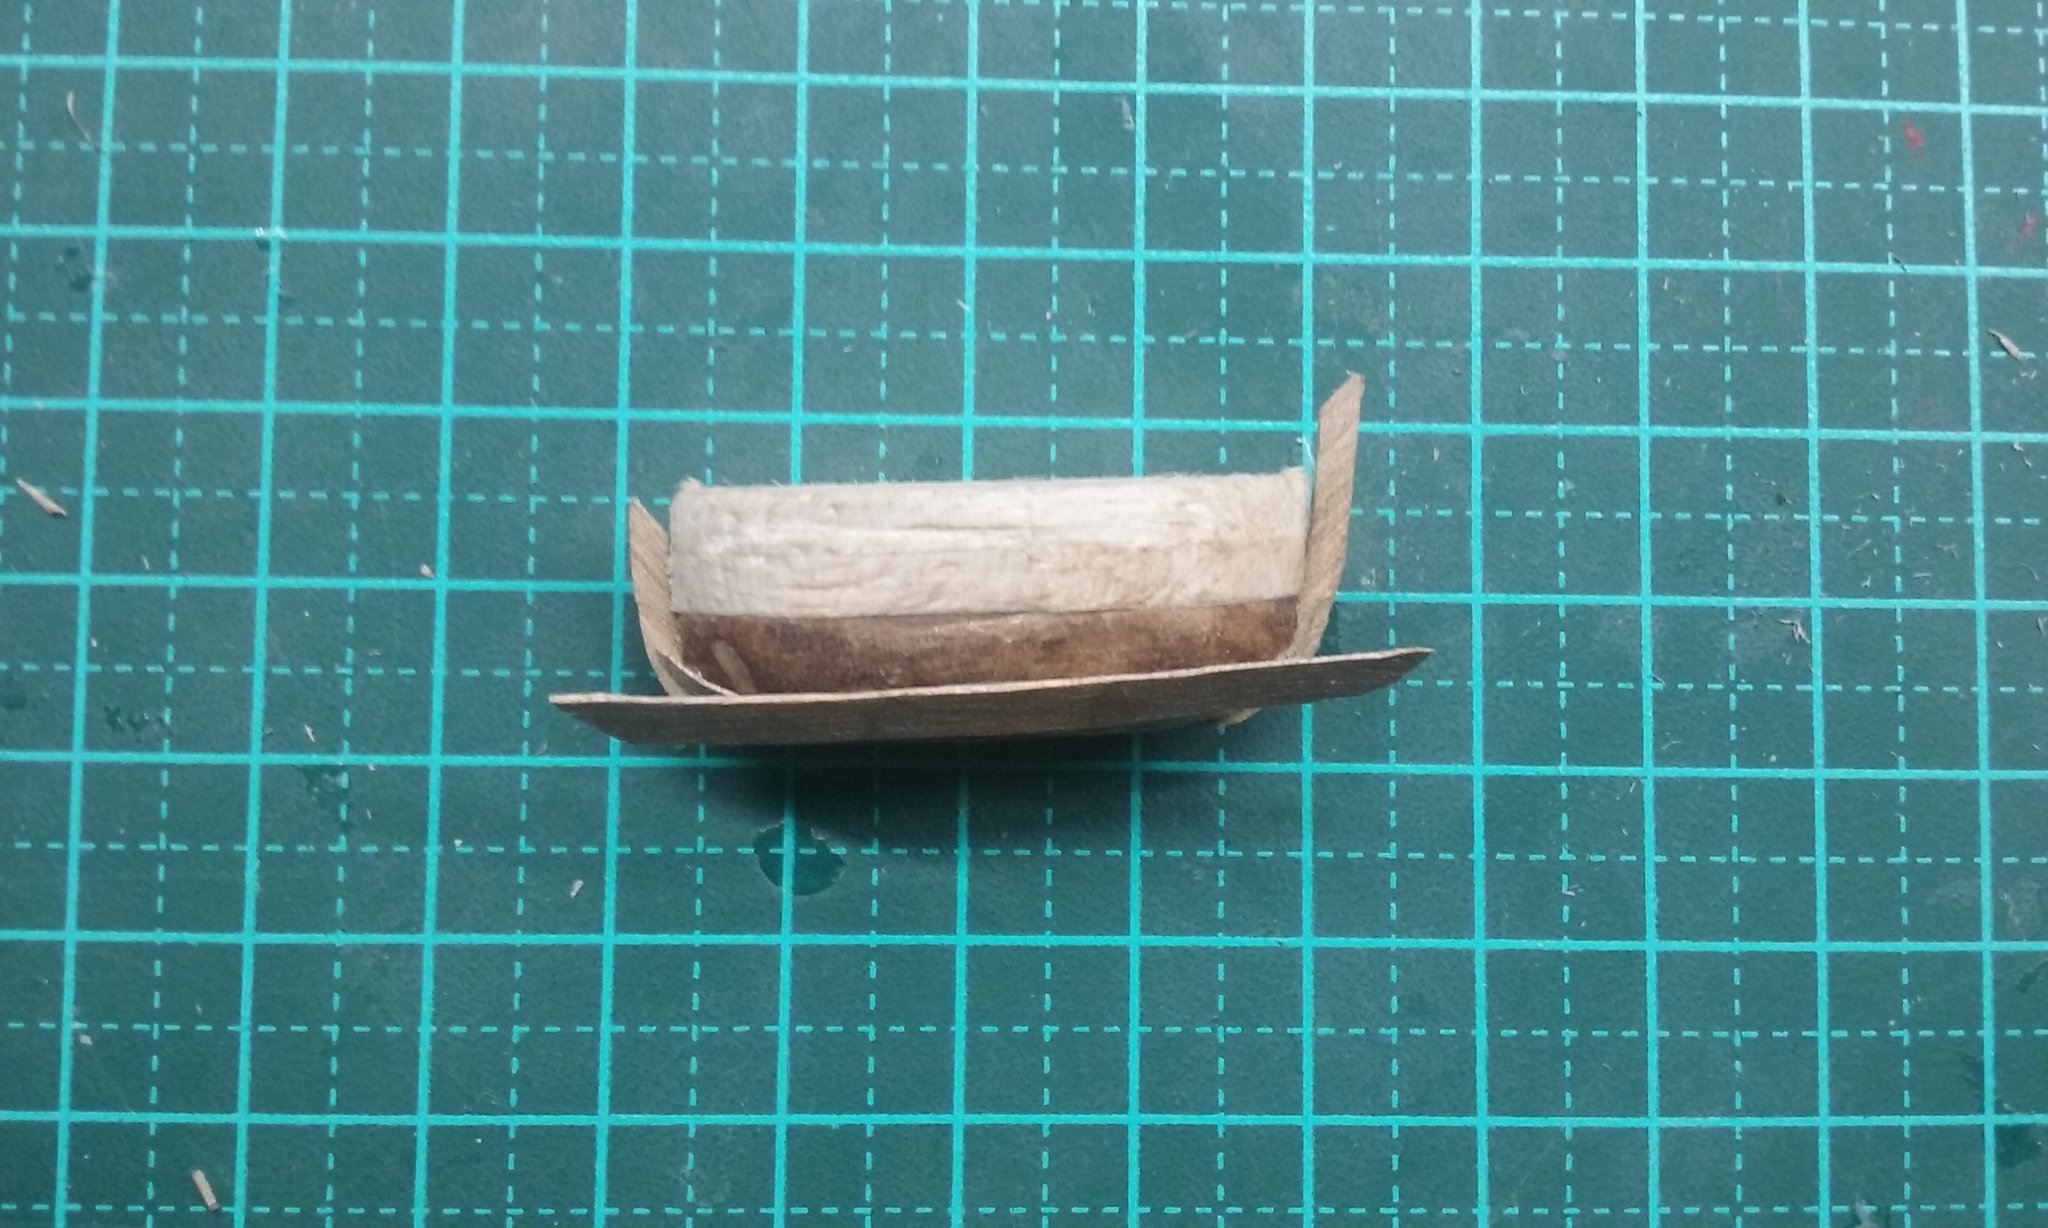
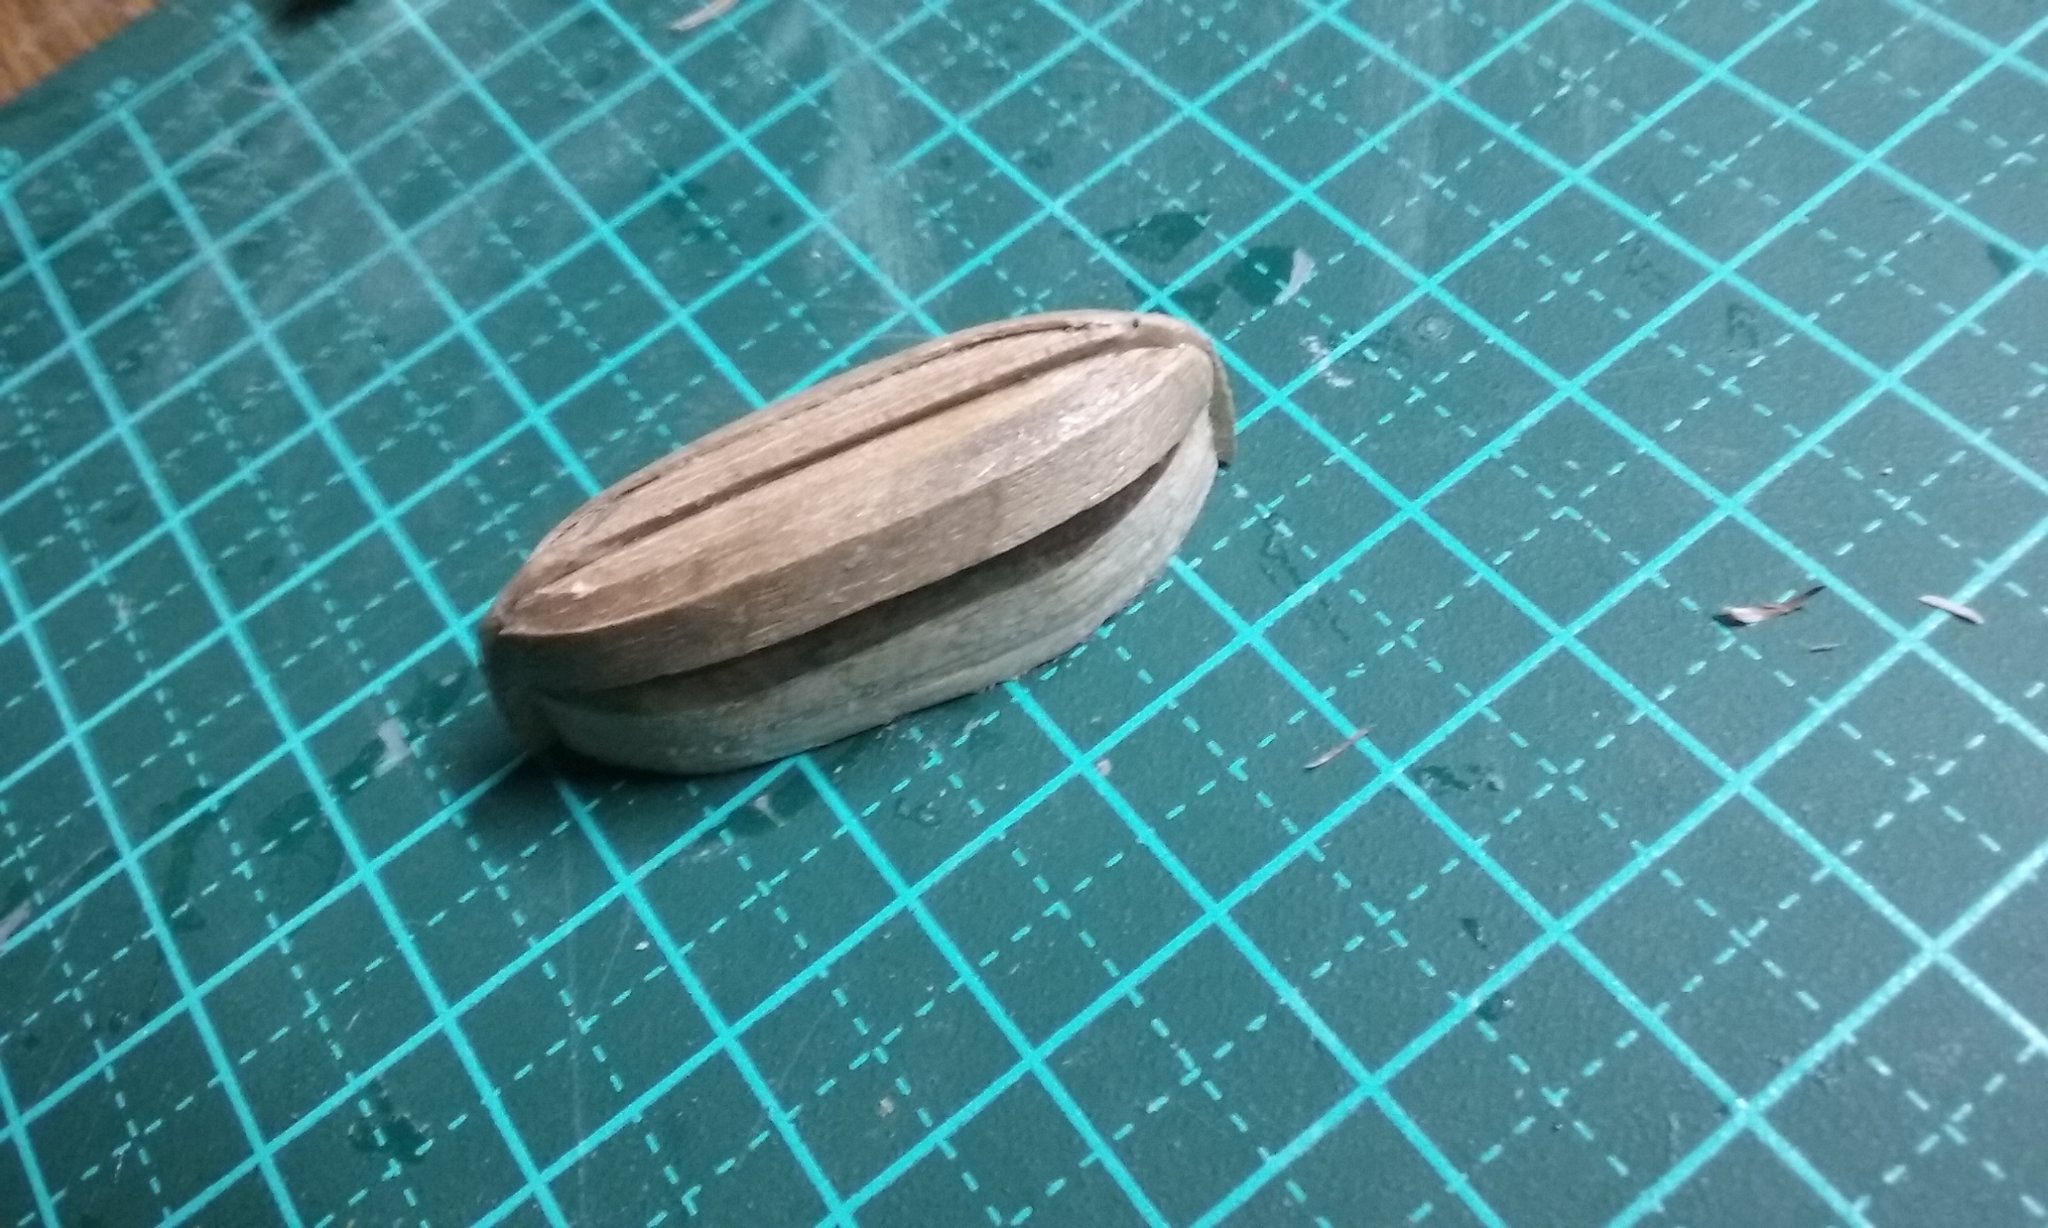
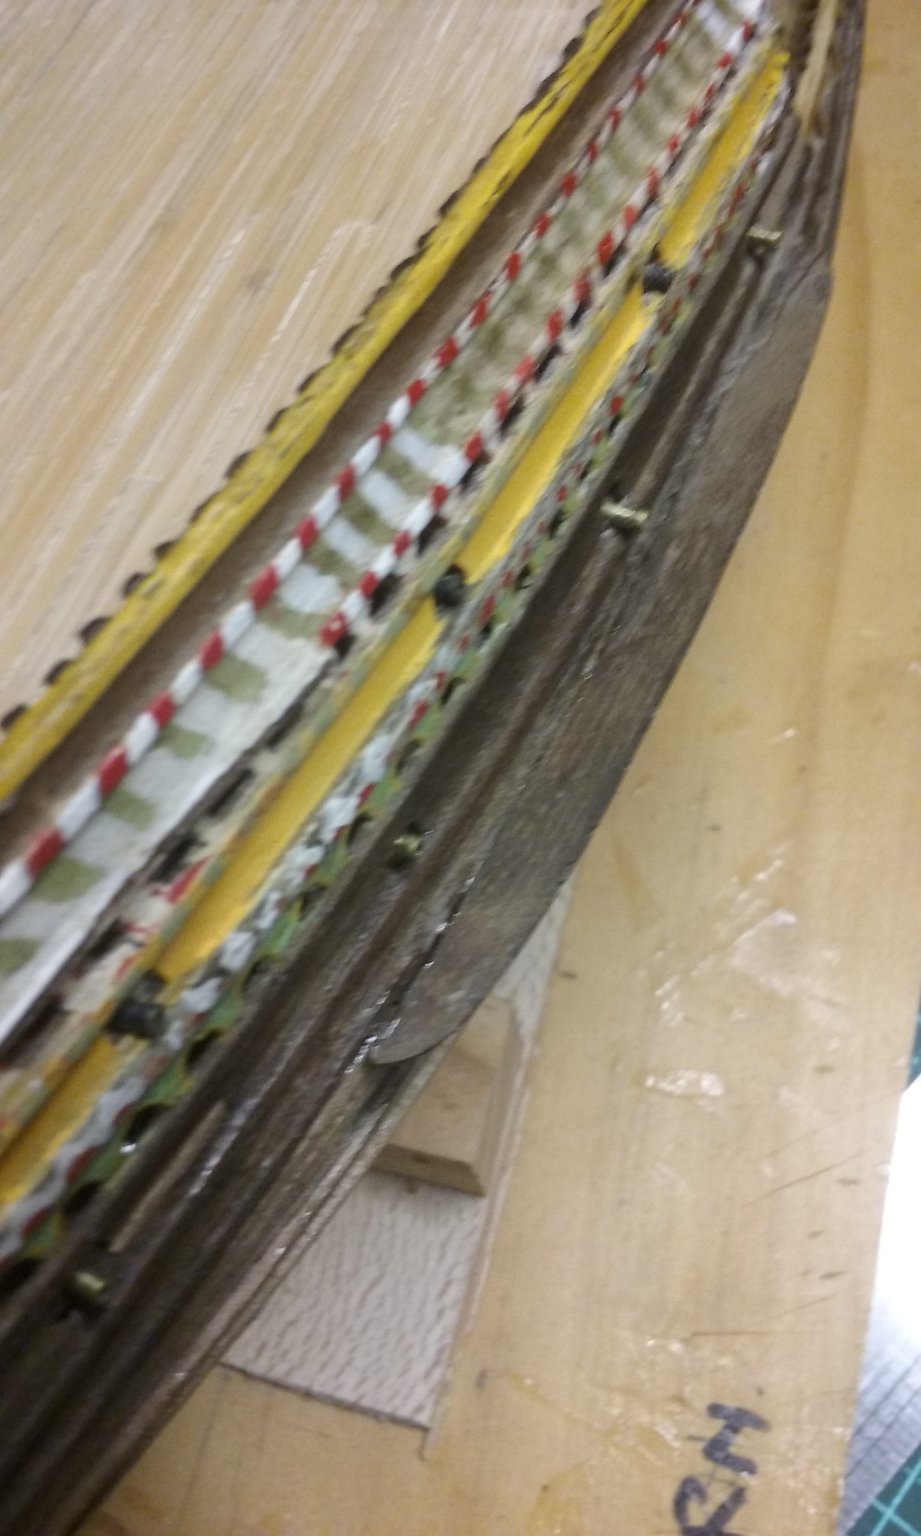
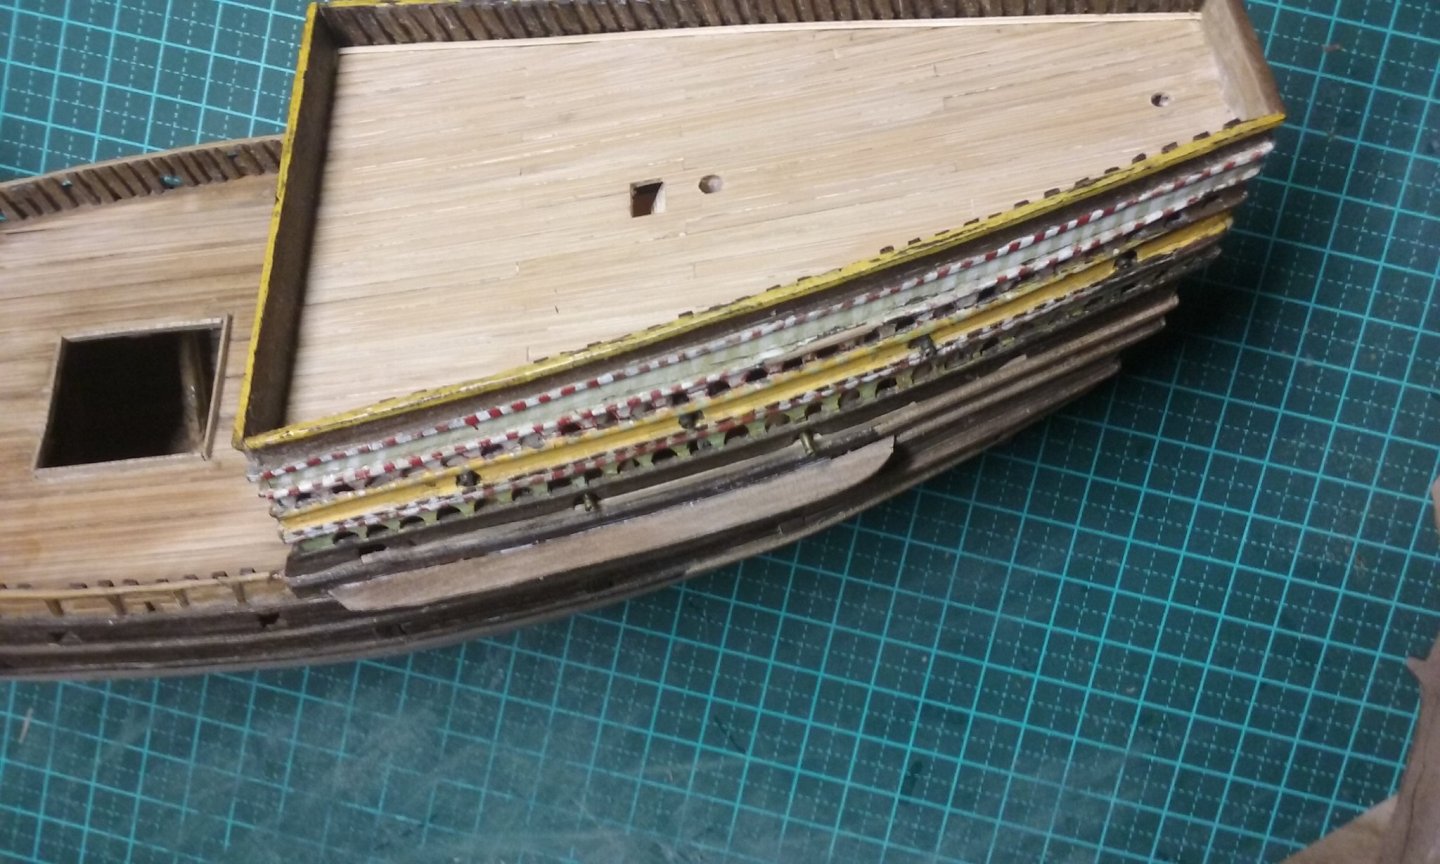
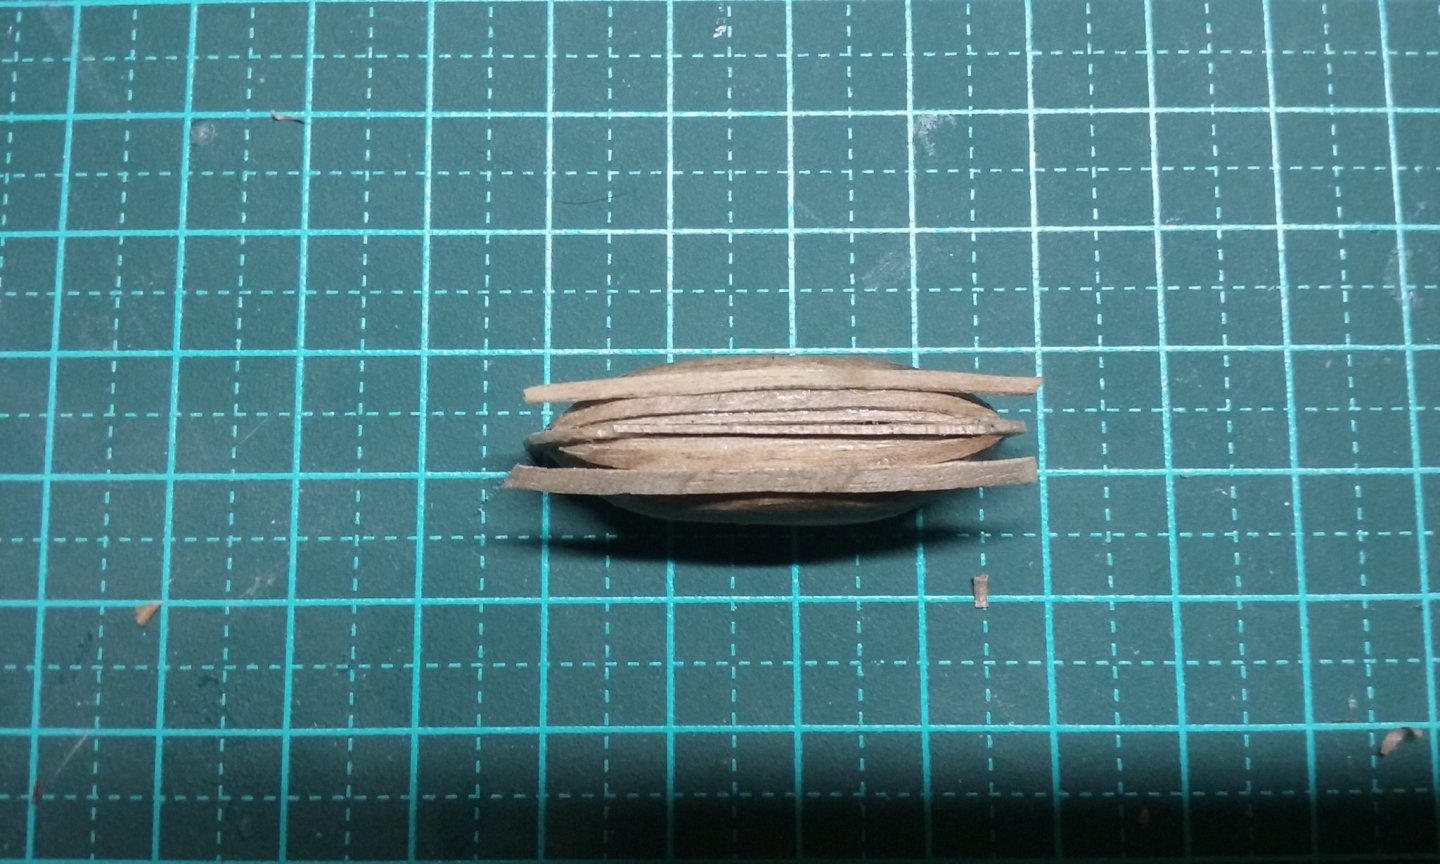
Some more work - I decided the starboard main channel could still be salvaged if I inserted a sliver of wood in the gap: I've glued on the new port main channel to replace the one that was lost. And I've glued back the piece of the port side fore channel that broke off sometime in the past (I'll tidy up the glue once it's set): And I bit the bullet with the longboat, pulled off all the planks and split them in half lengthways to make them narrower, so they follow the hull shape better and are more correct to 1:200 scale. And started putting them back on. Very difficult to clamp these - there's really nothing for the clamps to "bite" on, so most of the time I hold the ends of the planks between finger and thumb till the glue dries - not easy; keeps slipping out of my hand. Something I found very interesting, which might be occasionally of help when working with thin wood - rubbing alcohol (isopropyl alcohol/isopropanol), which I use to dissolve PVA (white) glue, also seems to soften wood! I wouldn't recommend it as a standard technique (apart from anything else, the fumes aren't good for you, the usual ways of bending wood are perfectly adequate, and I don't know what the long term effects on the wood will be). But if you are trying to bend some thin wood into a very tight curve, it might help. Steven


- 740 replies
-
- 11
-
-
- Tudor
- restoration
- (and 4 more)
-
Happy to help. Here's an example of the results on my Henry Grace a Dieu (Great Harry) restoration. Just a patch on the forecastle cleaned, the rest as it was when I started to restore her. So it does work. "Mild enzymatic solution", eh? I might use that in future . . .
-
Nice model, mate. A soft brush to start with. Not sure compressed air is a good idea. Surprisingly enough, the ideal thing to clean an old ship model seems to be human saliva on a cotton bud/Q-tip. Ship restorers in museums use it, and the Victoria and Albert Museum in London uses it to clean ancient artefacts. I've had great success with it in cleaning my 50-year old model of the Henry Grace a Dieu. The only thing I'd recommend is that rather than refreshing the saliva by putting the Q-tip in your mouth after cleaning (as I did), you put some spit into a little bowl or something of the sort and dip the Q-tip in. Once she's all clean, you can get started on rigging etc. The paint work looks good, and with a bit of luck won't need repair. And in my view a little patina of age enhances the look of the model - shows its history, as you might say. And start a build log - it's the best way to get help and advice - and we get to see your progress photos. The instructions are here (as yours is effectively a scratch build, not a kit) Steven
-
Welcome to MSW, Pete! That's a beautiful model of the Flirt. When you start on your Beagle, make sure to start a build log. It's a great way to get help, advice and encouragement - and we get to look at your progress photos. The instructions are here: Good to have you on board, and have fun with it! Steven
-
Thanks for the likes, people. Roger, the paper idea for planking sounds interesting. The wood I'm using (walnut) is almost paper thin but somewhat brittle, but I'm also considering going back to bamboo, which I found very strong and flexible in very thin planks. I agree about the Mary Rose boats - I shared your disappointment and disillusionment. AFAIK no boats have been recovered (I'm sure we would have been told), so I'm assuming they just made them up. I'm far more interested in following the iconographic evidence unless something concrete turns up in the archaeological record. The Anthony Roll and the Embarkation at Dover show boats (one boat in the latter seems to have a transom stern) and there are others if you're prepared to do the work of looking for them. But nothing reliable otherwise. Banyan, I can still see evidence of the neglect; particularly the paintwork still needs to be repaired. I don't mind a bit of patina, but this paint has cracked and peeled. BTW, I think I should change the title of this thread - on reflection it was more like 50 years of neglect. Steven
- 740 replies
-
- 6
-
-
- Tudor
- restoration
- (and 4 more)
-
You're obviously aware of the model's shortcomings. But to me she looks beautiful. Steven
- 48 replies
-
- 2
-
-
- dusek
- viking knarr
- (and 1 more)
-
That's a good point, Backer. I hadn't really thought about that - most longboats are at 1:50 or at the most 1:100 - so I suppose what'm doing is rather more of a challenge. Could explain why I'm having so much hassle with it. Steven
- 740 replies
-
- 3
-
-
- Tudor
- restoration
- (and 4 more)
-
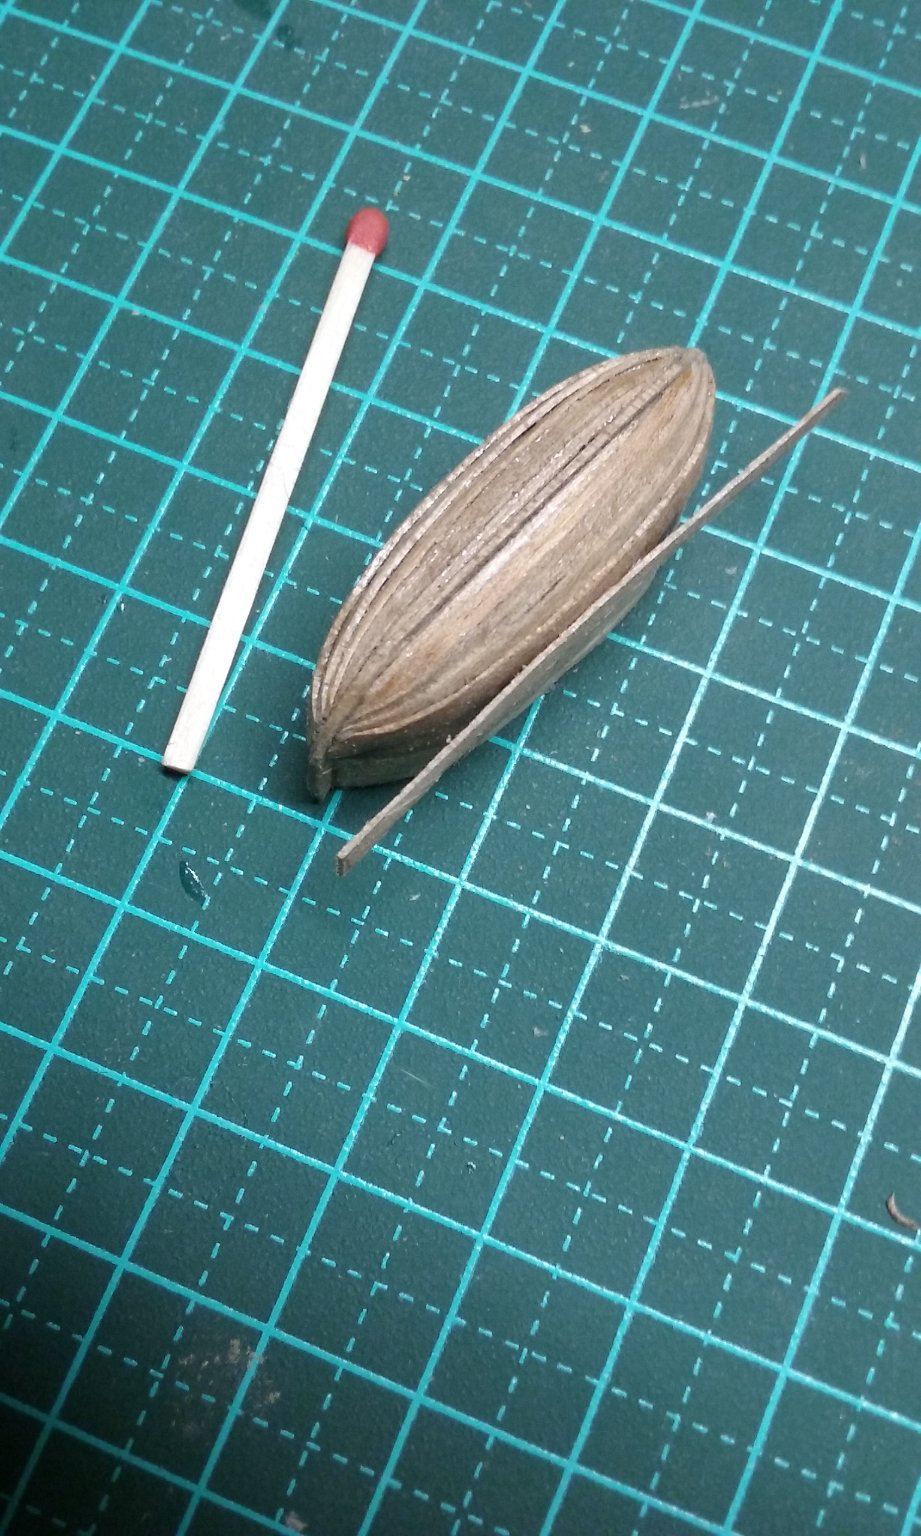
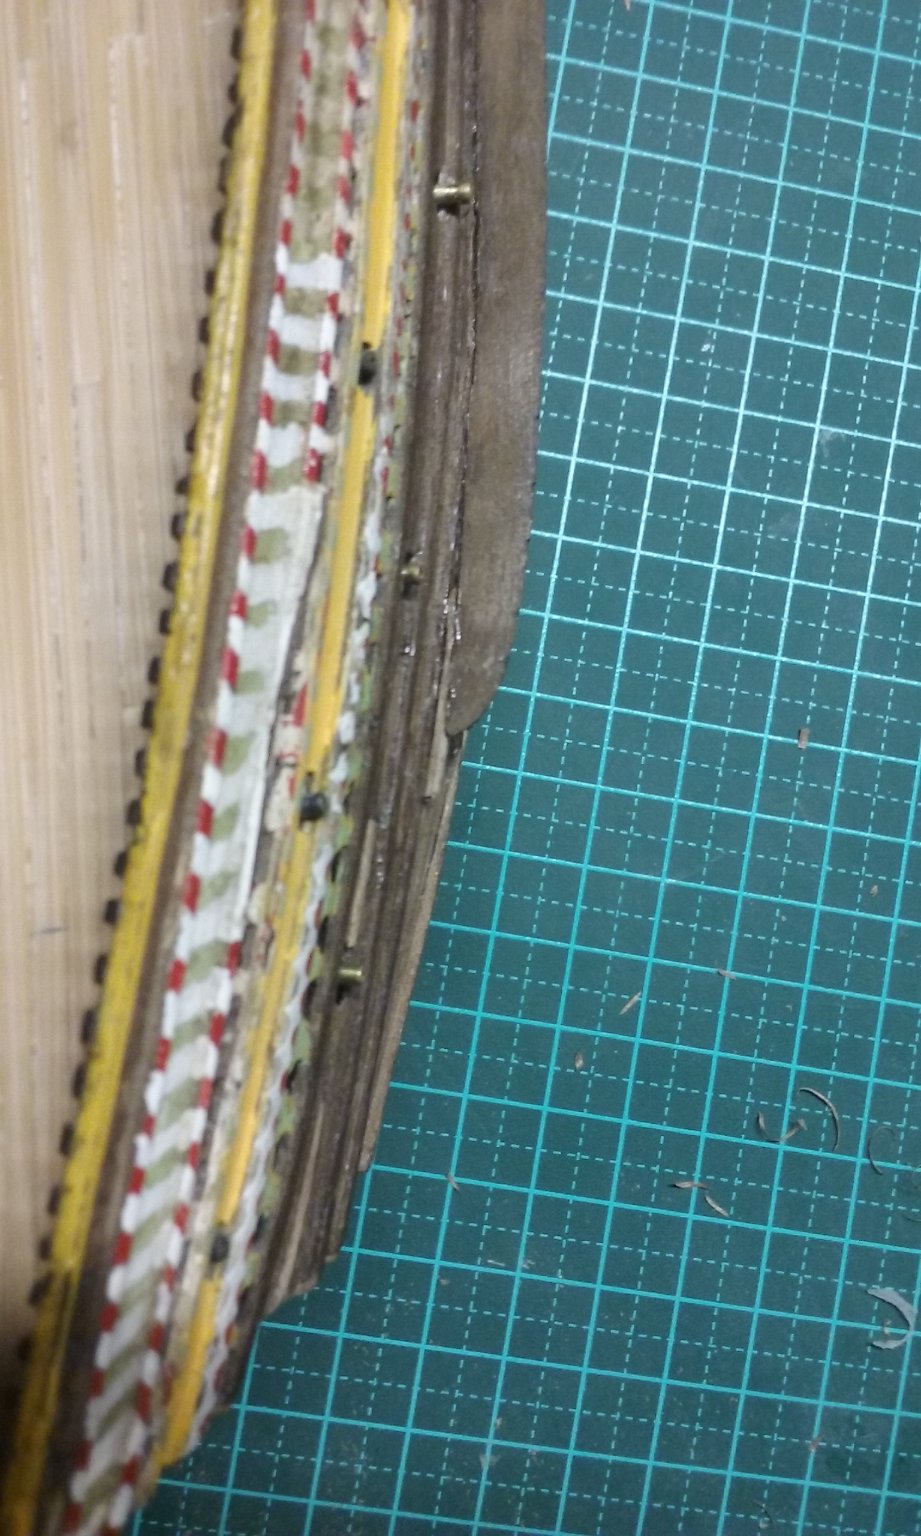
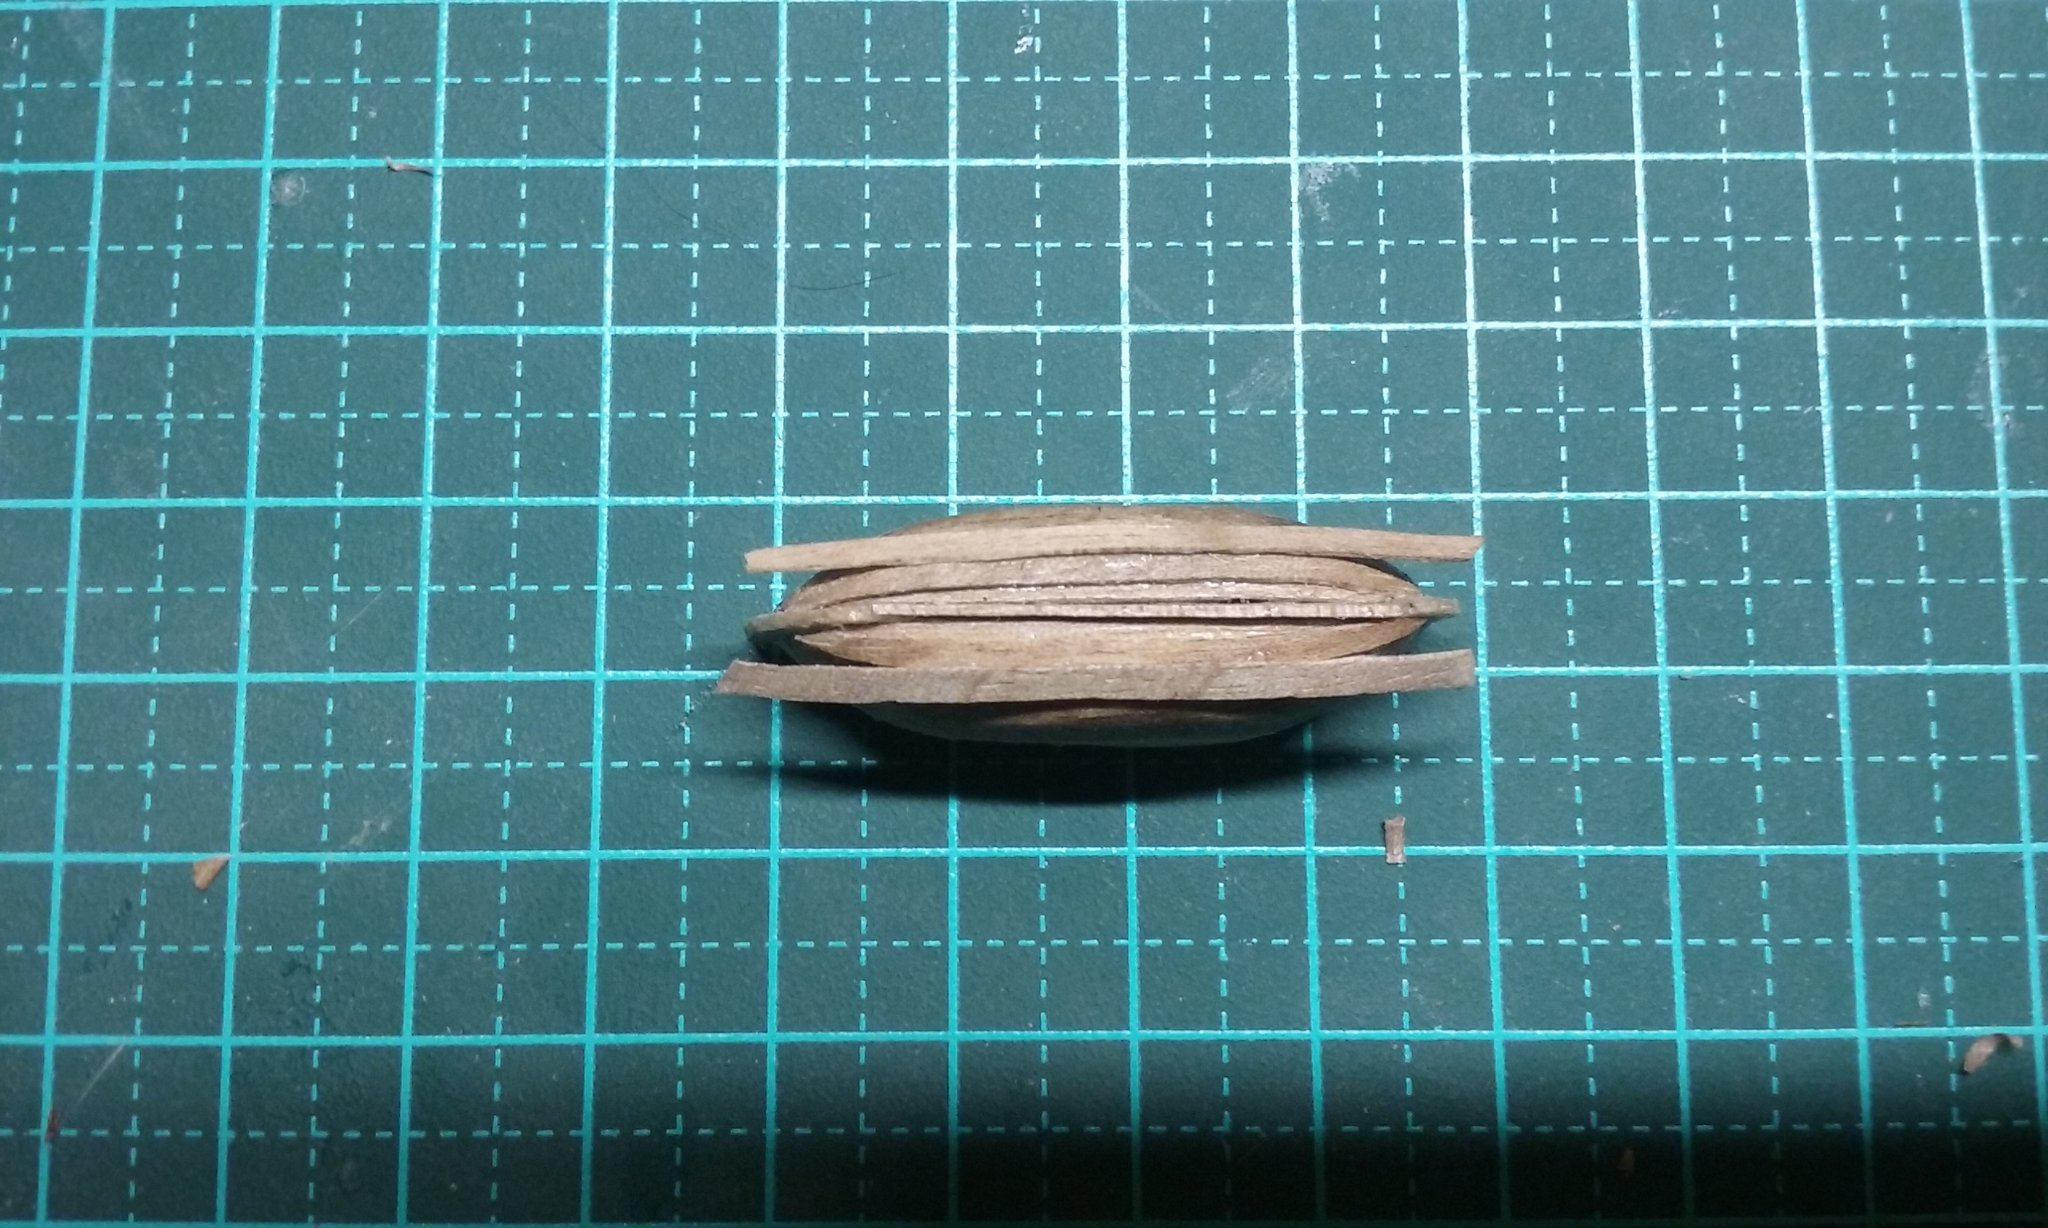
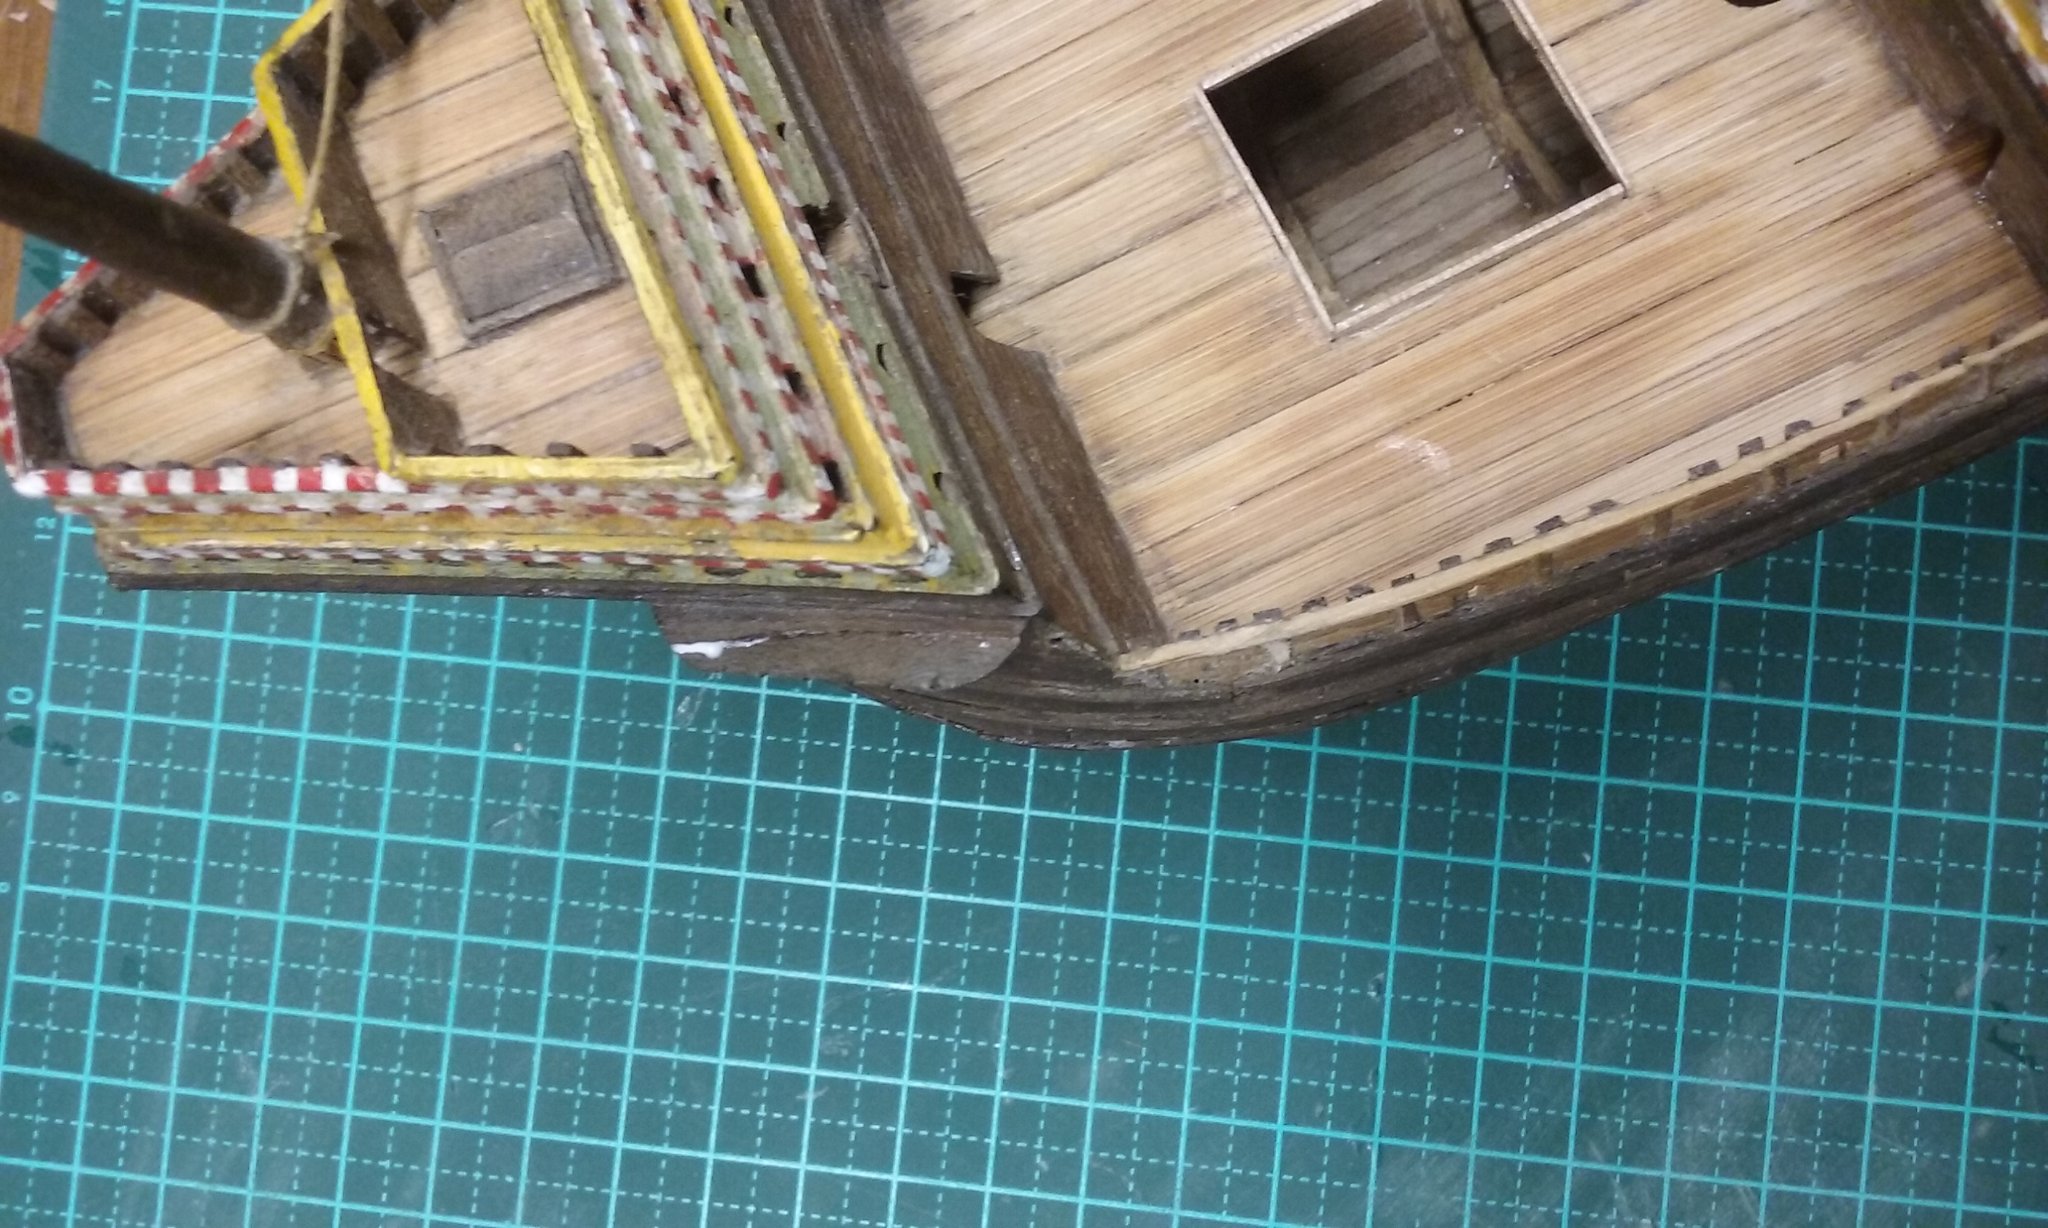
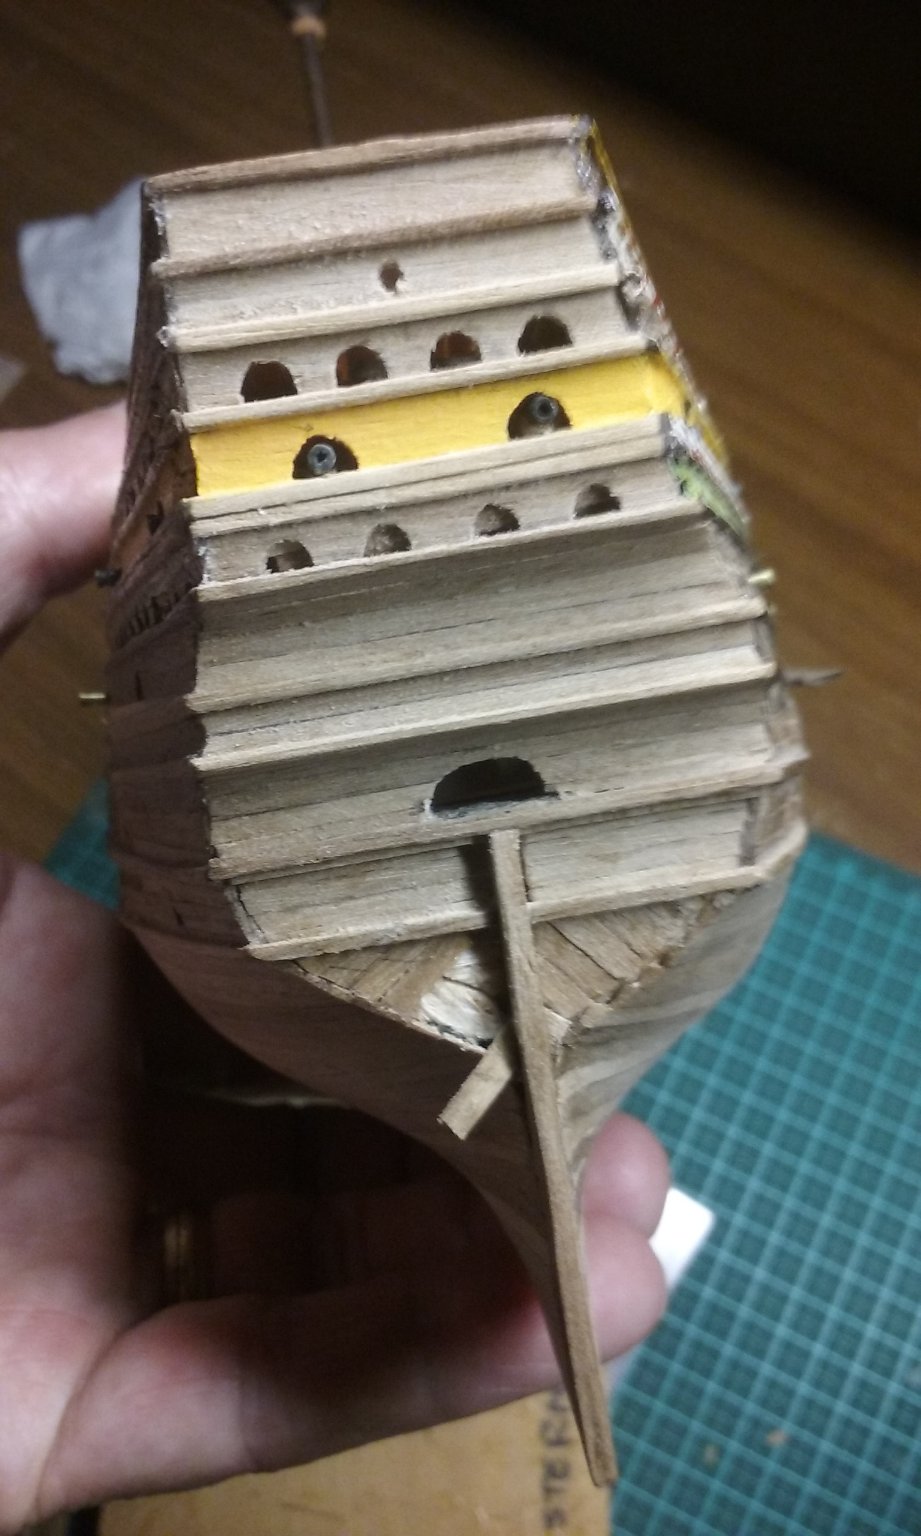
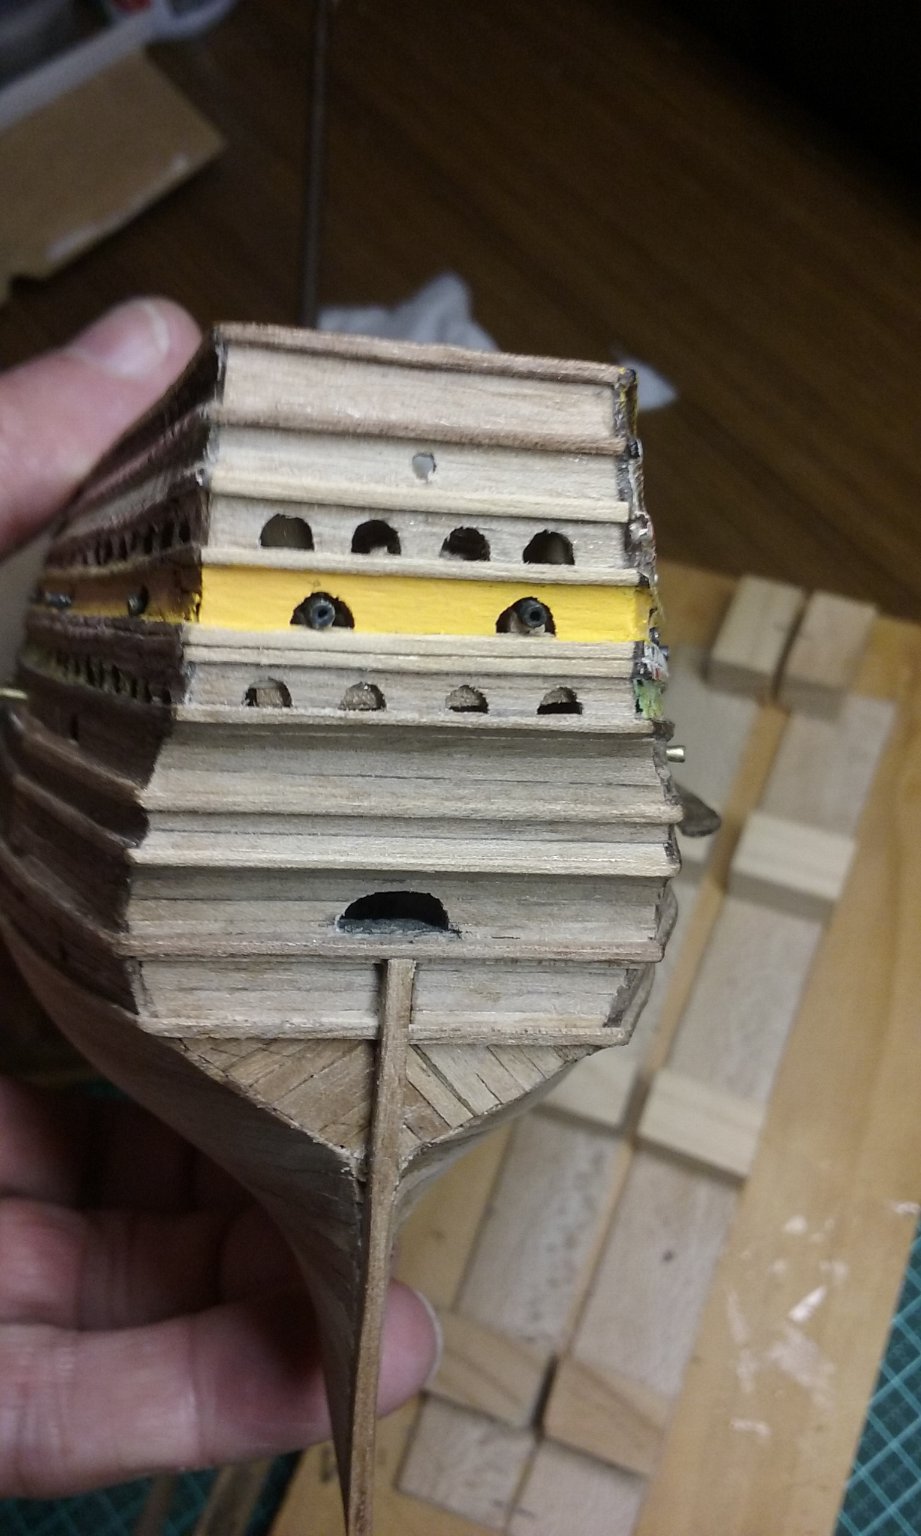
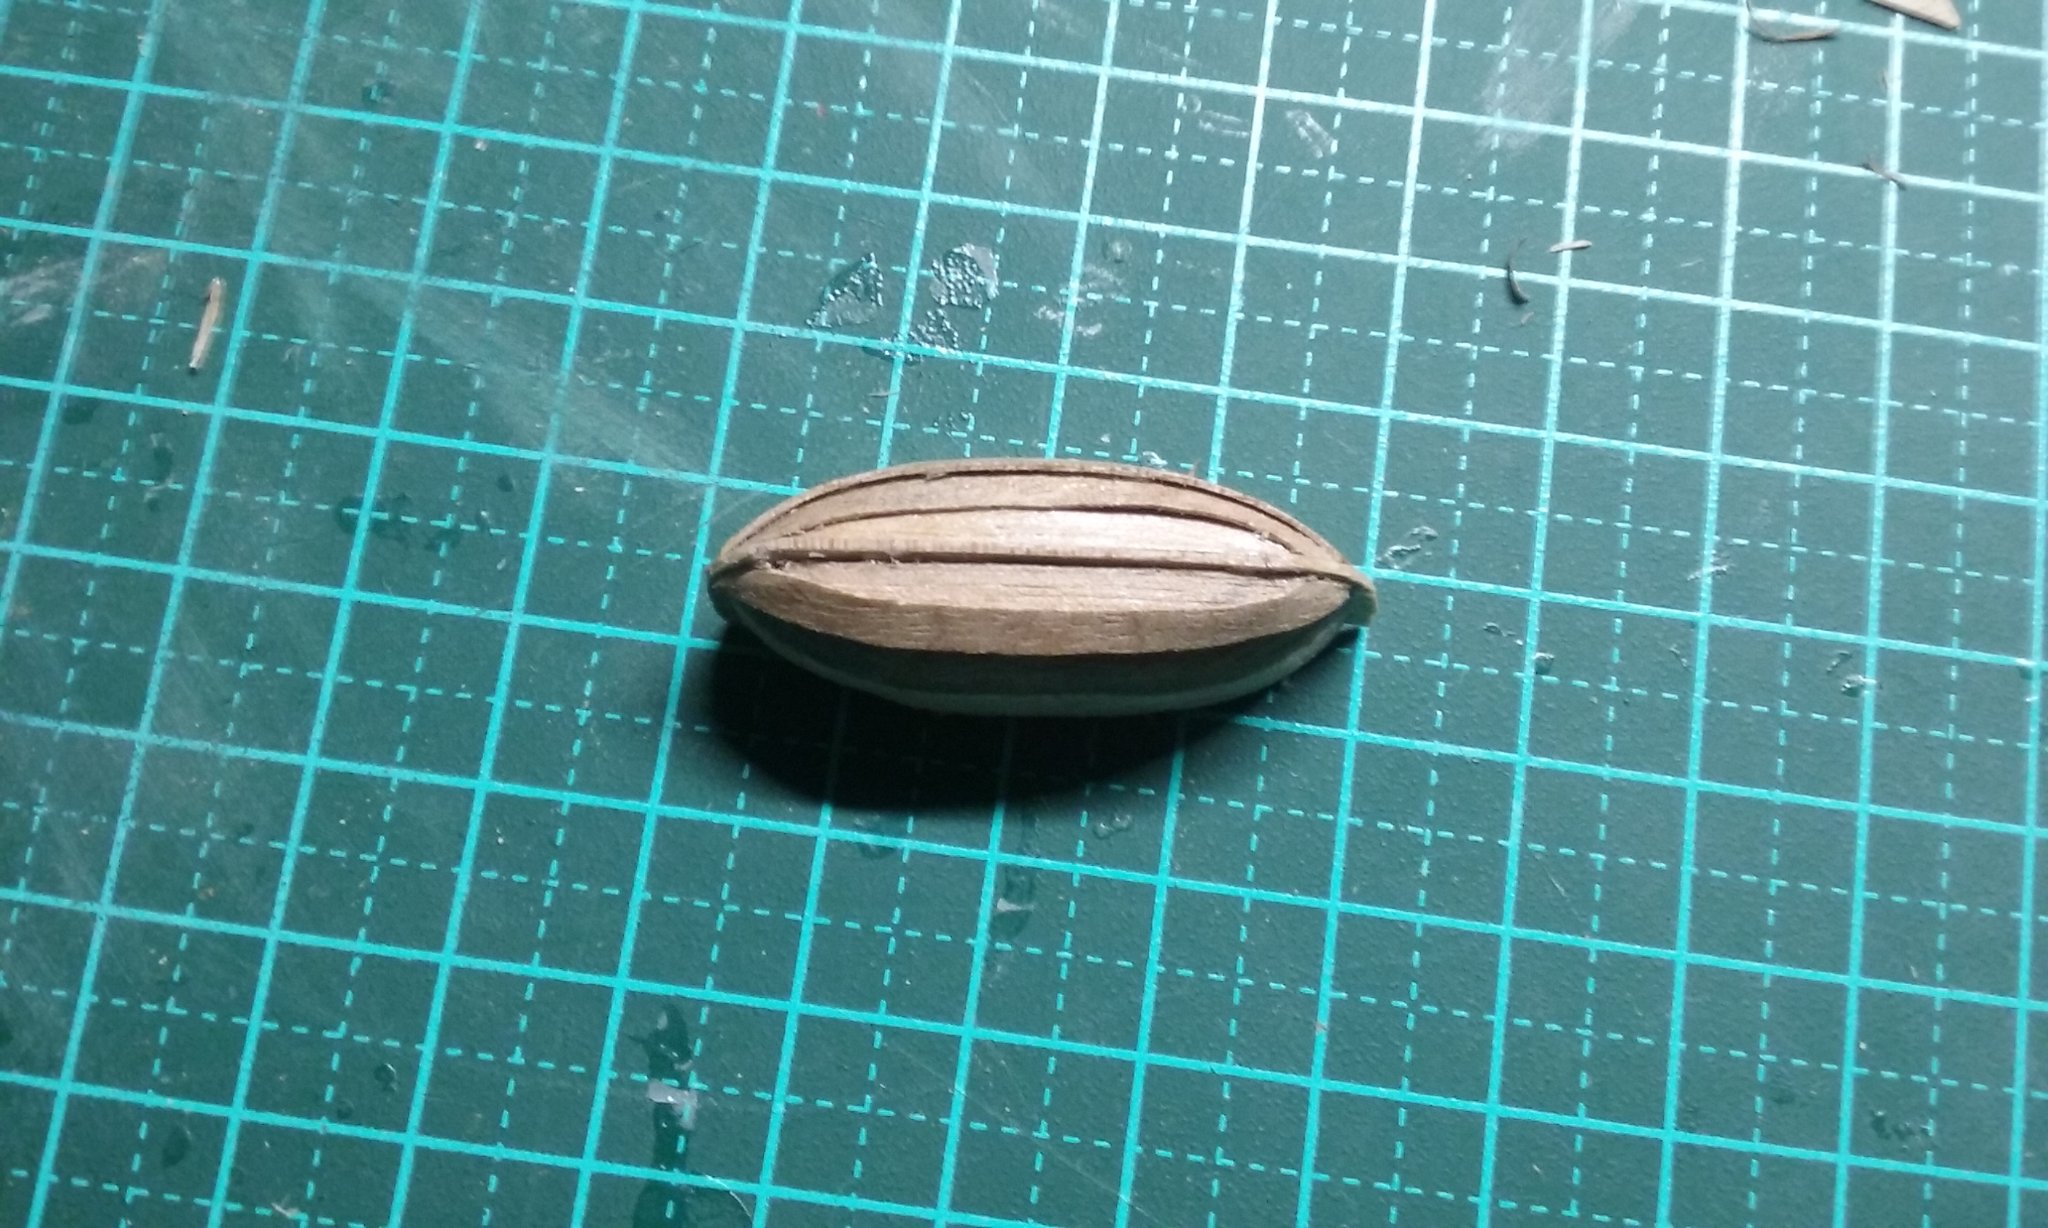
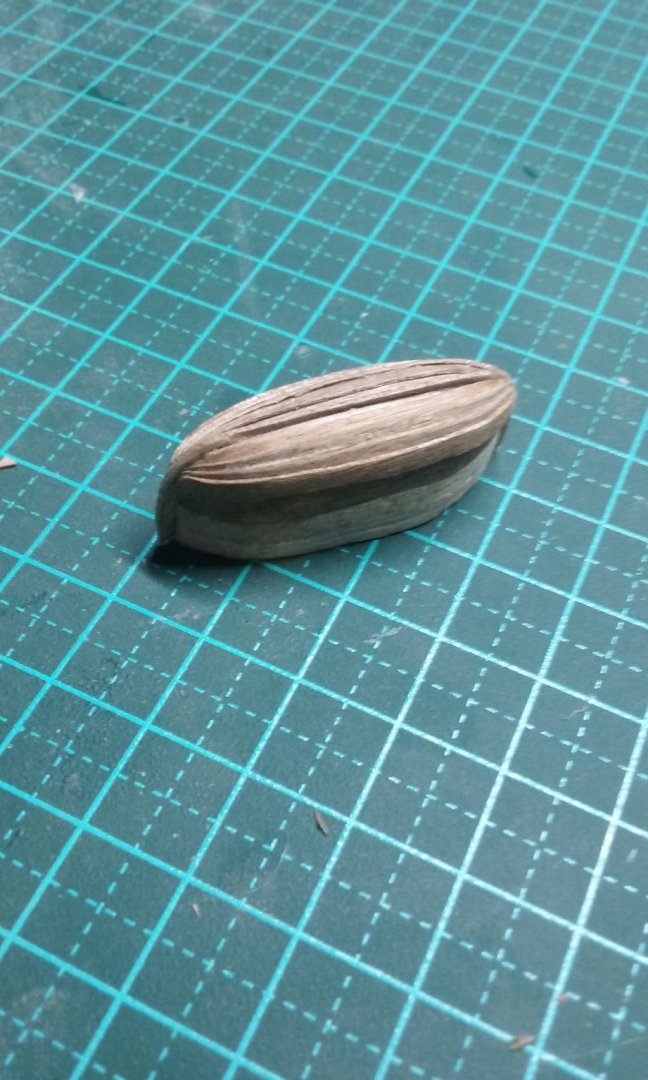
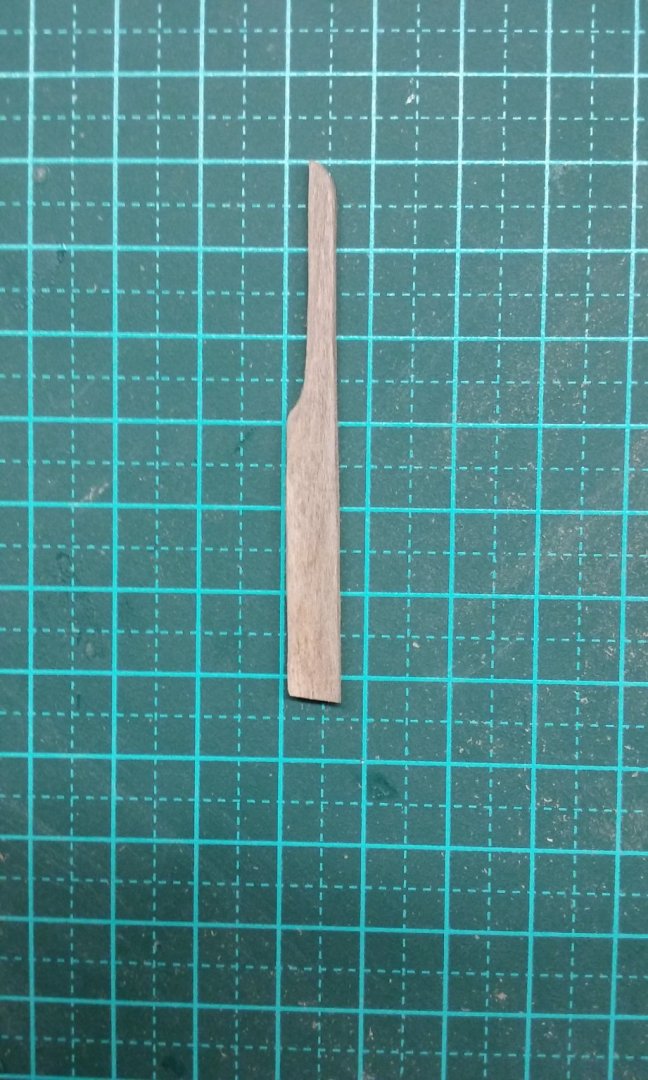
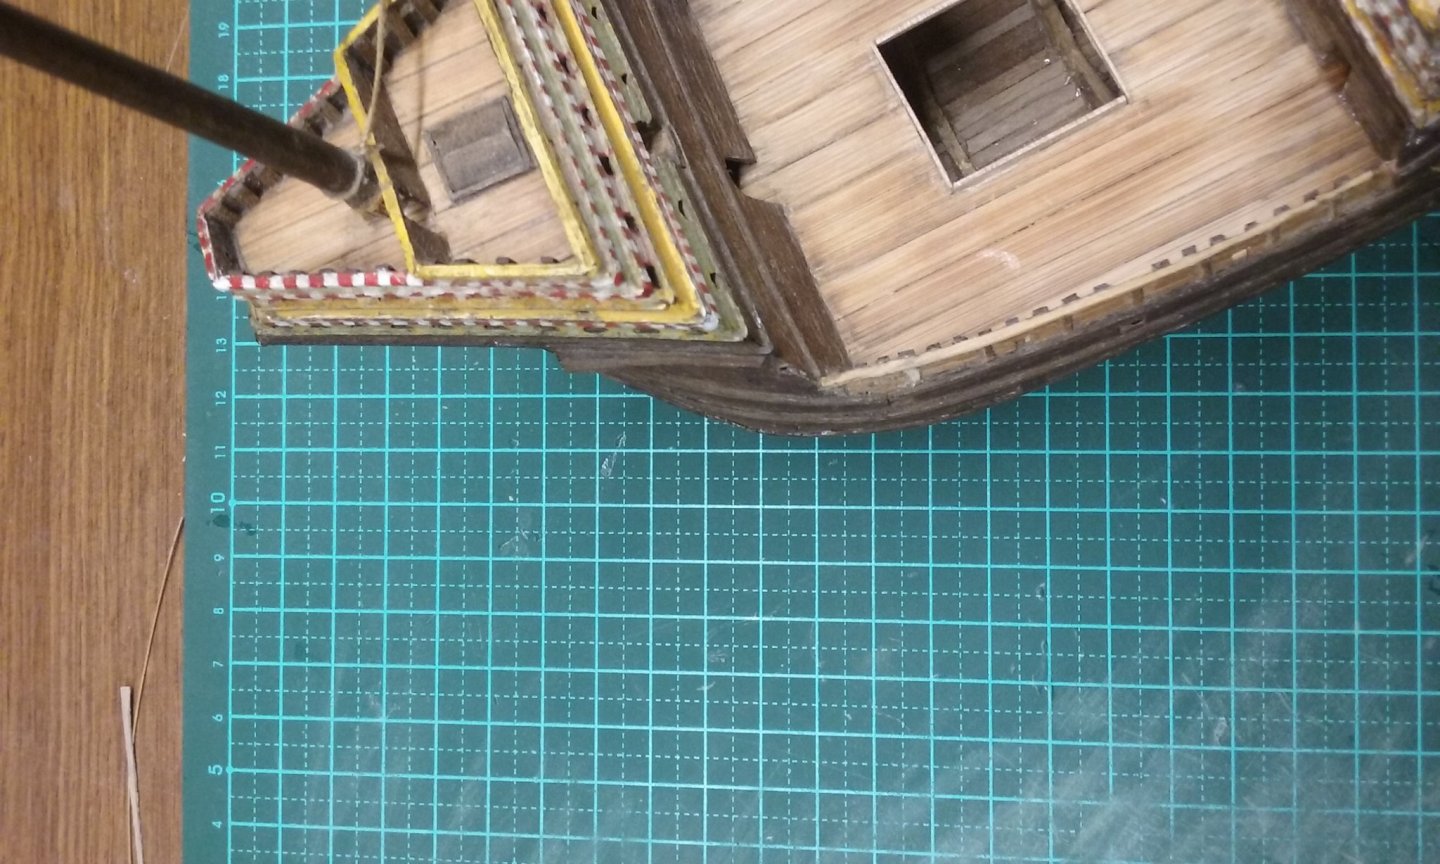
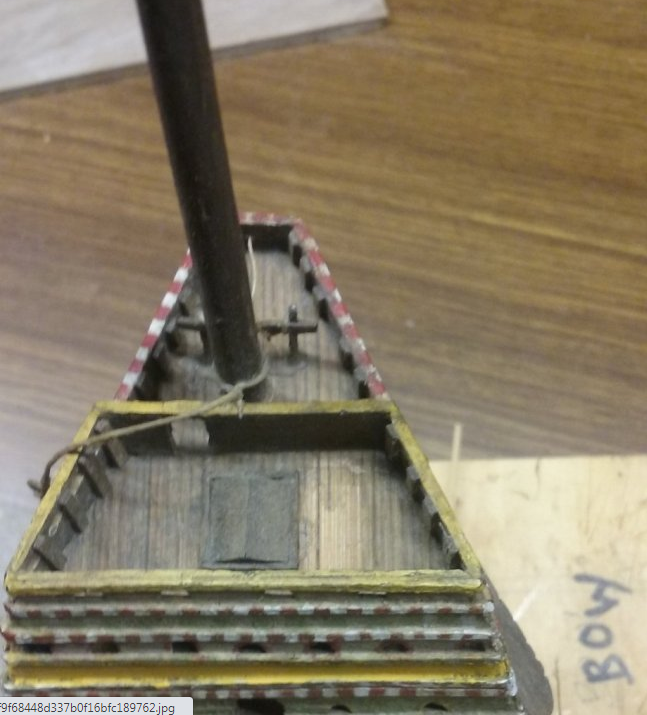
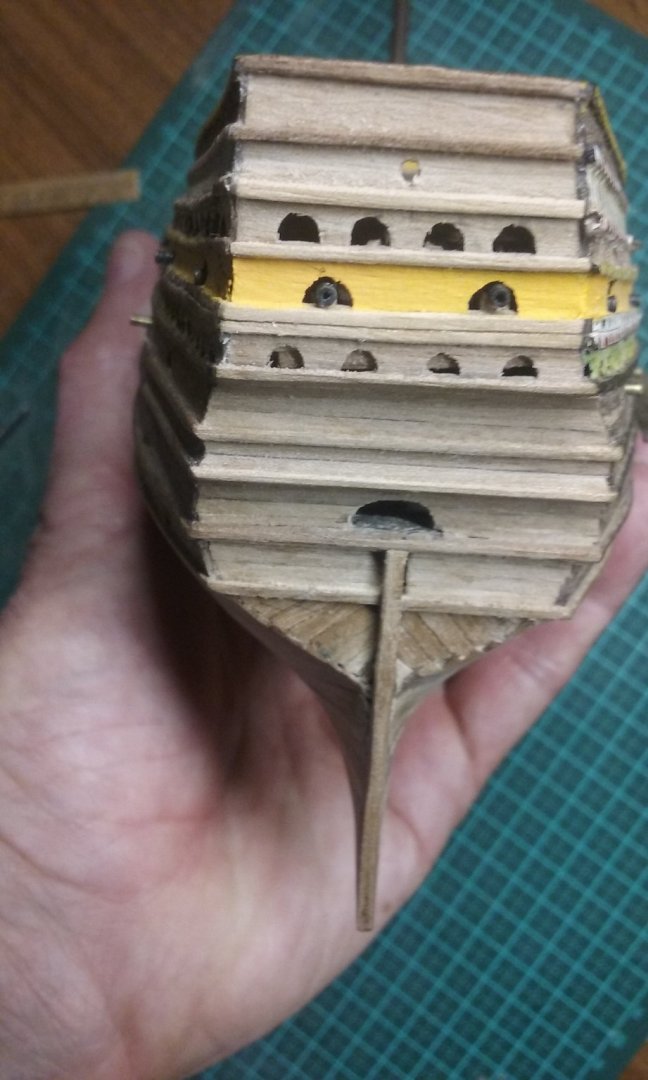
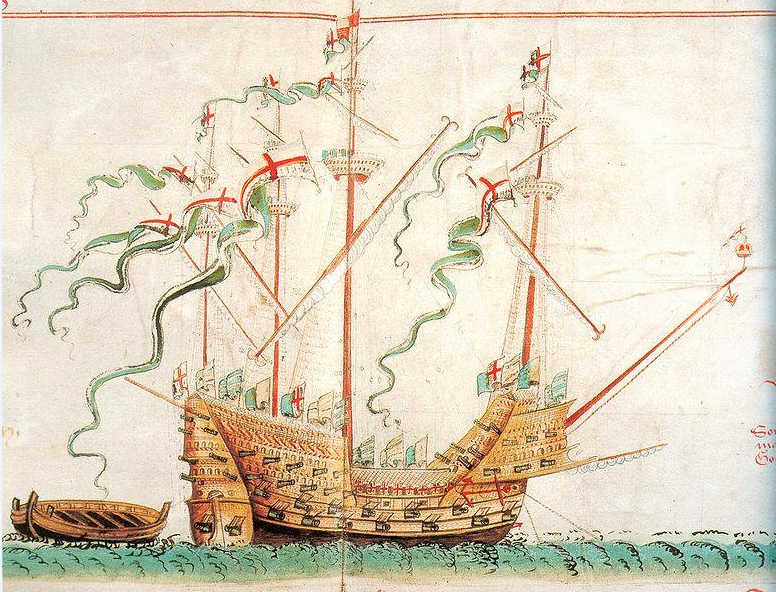
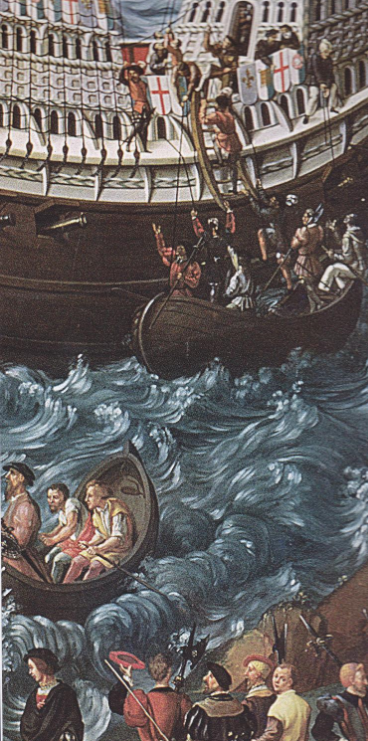
Well, I had to pull all the planks off the flat stern and do it again. If you look at the photo of the stern in my previous post you'll see that where the side planks meet the stern planks, the join is a sort of zig-zag. This is because the side planks don't join the frame at right angles they were all somewhat twisted. I was able to smooth off the outside of the planks by sanding them, but the inner sides of the planks were still twisted, forming the zig-zag. I was nearly finished planking the stern, having decided "that'll be good enough" when I decided "No, it really won't - it'll sneer at me every time i look at it." I needed to smooth off the inside surface of the side planking, and that meant all the stern planking would be too short. I wasn't sure exactly what configuration these flat sterns have at the join. I wasn't going to just follow other people's models, but I realised there are existing ships I can work from - I first thought of the Batavia - quite a bit of the stern still exists. Unfortunately the timbers at the join are all so badly worn you really can't see how they were joined. Then of course I thought of the Vasa - much better. Note that the join seems to be arranged so an absolute minimum of end grain is exposed to the elements. So here's my second attempt at Great Harry's stern planking. I'm much happier with it. Port side first - stern planks being replaced: And now the starboard side. Penultimate plank in place: And all finished: Of all the things that went missing in the 50 or so years between making the ship and returning to it, what I most regret losing is the longboat. I made it from very thin slivers of bamboo. I didn't use a plug - in fact I have absolutely no recollection of how I made it - I remember it had a keel (bamboo) and a transom stern, but I don't even remember if it had frames. But it was quite beautiful. Now I'm making a replacement - on a plug - and this time it's double-ended. Although there are contemporary pictures of boats with transom sterns, both those of the Great Harry show double-ended boats, so I'm going with that. This is my first bit of clinker building, and I have to admit I'm not too happy with the way it's going. The strakes are way too wide in my opinion even if you allow for the overlap, and anyway they overlap too much. I'll continue with it and see how it ends up, but I'm seriously considering doing another one. (BTW Druxey, I made the plug taller than the boat was going to be because I was originally going to follow Woodrat's technique of putting frames in first, then changed my mind.) Last thing. The main starboard channel had broken off at some point in the past (the port channel went the way of all flesh). I had intended to keep the starboard one and tried gluing it back on. Unfortunately, with the reconfiguration of the after half of the ship, making the stern considerably narrower, the channel no longer fits. You can see the gap at the after end. I thought about adding a bit of timber to fill the gap, but I think I'll probably have to make a whole new channel. Steven


- 740 replies
-
- 15
-
-
- Tudor
- restoration
- (and 4 more)
-
Looking for plans or possible models of Magellan's ships.
Louie da fly replied to J11's topic in Nautical/Naval History
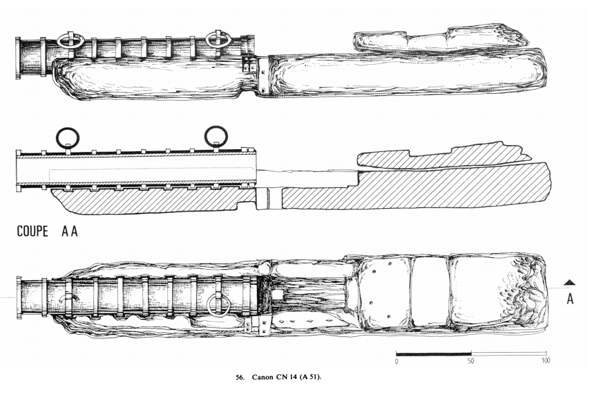
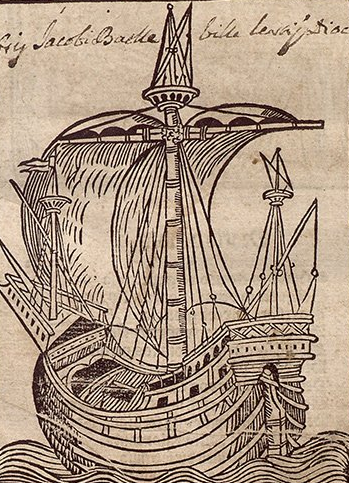
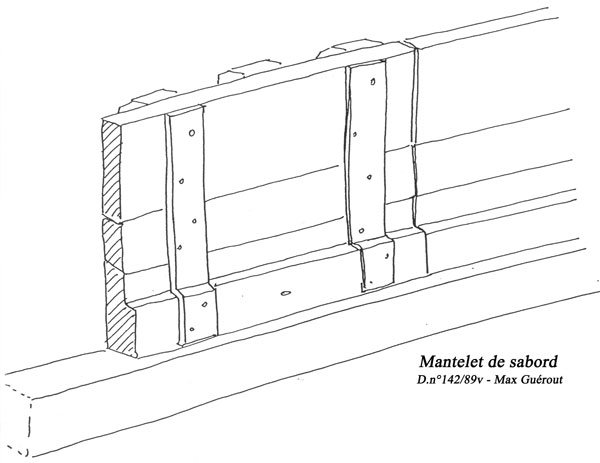
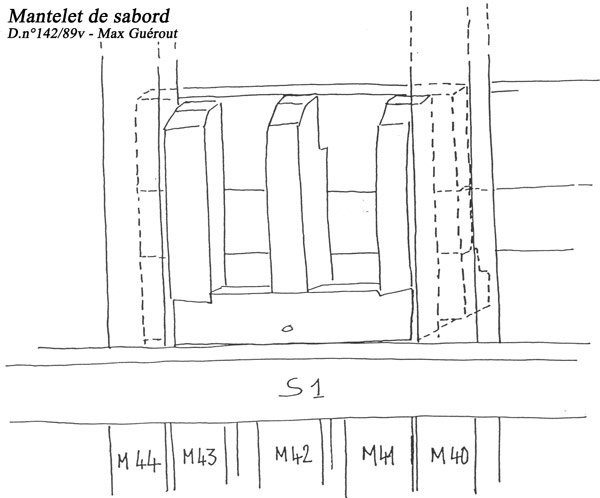
Jonathan, that's some nice stuff you've posted. I'd heard of this wreck before, but you've added to my fund of knowledge on it. I was looking at the armament issue - Pigafetta mentions swivel guns and "bombards", which are probably guns like these from the Lomellina (Genoese) sunk in 1516 (probably built in 1503 because that's when her predecessor sank) In each case the scale is in centimetres. In these the barrel is built up of iron staves like a barrel and held together with iron rings shrunk on. The Lomellina was about twice the length of the Victoria, and is believed to have had between 10 and 15 guns of this type. So proportionately, the Victoria probably would have maybe 6 or 8 guns - I'd be going for the lower figure. The guns were found in line with the forecastle and aftercastle, not in the waist as I'd have expected. But note the location of the guns in our Catalan friend; however the Lomellina's gunports seem to have been lower down, and perhaps the ones in the Catalan ship weren't as heavy. The Lomellina also had gunports and port lids: External view Internal view Hope that helps. Steven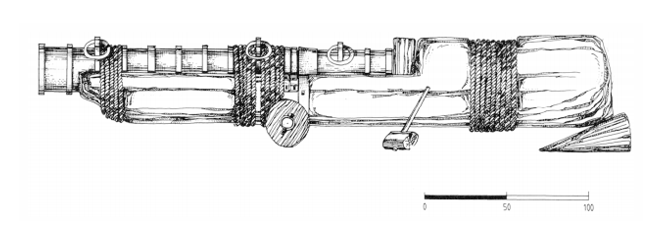


-
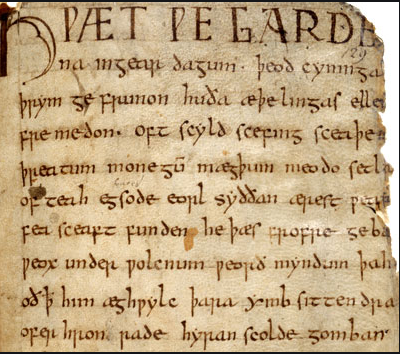
I'm not that fluent! But I do have it in OE with a word-by-word translation, plus another full Modern English translation. I occasionally open it and struggle along for awhile before I give up in case my brain explodes. But I was very pleased with myself when I recognised without being told that the passage I was looking at in the "Teach Yourself OE" text was the opening of the parable of the prodigal son. And at one point I could recite the Lord's Prayer in OE - forgotten it now. And though it's even more difficult when not only the language but the letter forms have changed so much over the centuries, I managed to translate from a short passage in OE (in the original script) that it dealt with Lot , who it described as Abraham's "broor sunu" (brother's son - i.e. nephew). Of course apart from historical records such as the Anglo-Saxon Chronicle, much of the text available to us is from the Bible, because that's what clerks (a word which was originally clerics) concerned themselves with and wrote down. But I think that's enough from me - I really don't want to be derailing the thread. Steven

-
Try it in Old English - this is the first page of Beowulf - 11th century AD. It says HWAET WE GARDE na in gear dagum theod cyninga thrym ge frunon hutha aethelingas eller fremedon. Oft scyld scefing sceathe thraetum monegu maegthum meodo fetla of teah egfode eorl sythan aerest . . . etc etc You can see the "long s" in the words I've put in bold. It goes back a lo-o-o-ong way . . . Note also the way they had not one, but two distinct individual letters and - each of which stands for the sound we now write as "th". Oh, and "w" is written Back to your scheduled programming . . .


-
It's definitely a step upward, but if you take your time and some care, it's really just a matter of doing more of the same thing over and again. But of course an Elizabethan ship has its own quirks and I'd highly recommend you have a look at Backer's phenomenally researched and carried out Pelican/Golden Hind at https://modelshipworld.com/topic/14188-pelican-later-renamed-as-golden-hind-by-backer-scale-145-galleon-late-16th-century/ for the inspiration, if nothing else. But it's also chock-a-block with period detail Backer's spent tremendous time and effort finding out and shared with the rest of us. Best wishes, Steven