MORE HANDBOOKS ARE ON THEIR WAY! We will let you know when they get here.
×


Louie da fly
-
Posts
7,985 -
Joined
-
Last visited
Content Type
Profiles
Forums
Gallery
Events
Everything posted by Louie da fly
-
 That's looking very good, John. A nice methodical start to your planking. Steven
- 48 replies
-
- 1
-

-
- dusek
- viking knarr
- (and 1 more)
-
Welcome to the ranks of galley-builders, Nicholas. Can't answer your question, but I'm sure someone here will be able to help. Are there notches in the false keel that correspond with those two bulkheads, so the slot in the bulkhead slides over the slot in the false keel, as in a halving joint? It's not unusual to have to "bash" a kit to get it right, but gather as much information as you can before you commit yourself to something you might have to repair later . Good luck with it! Steven
-
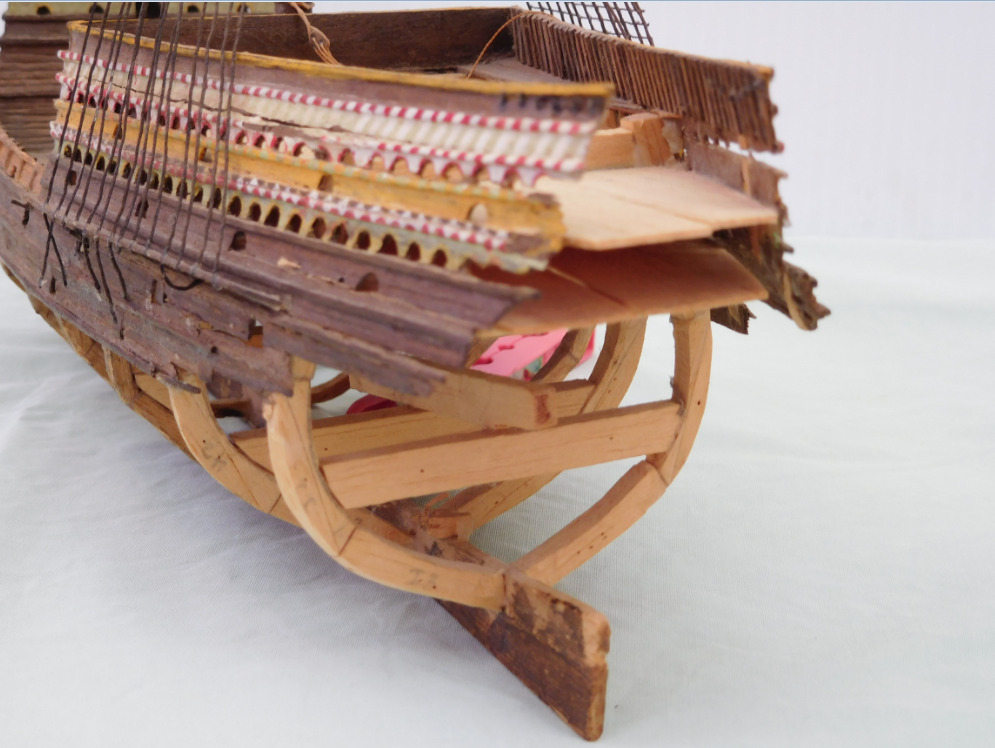
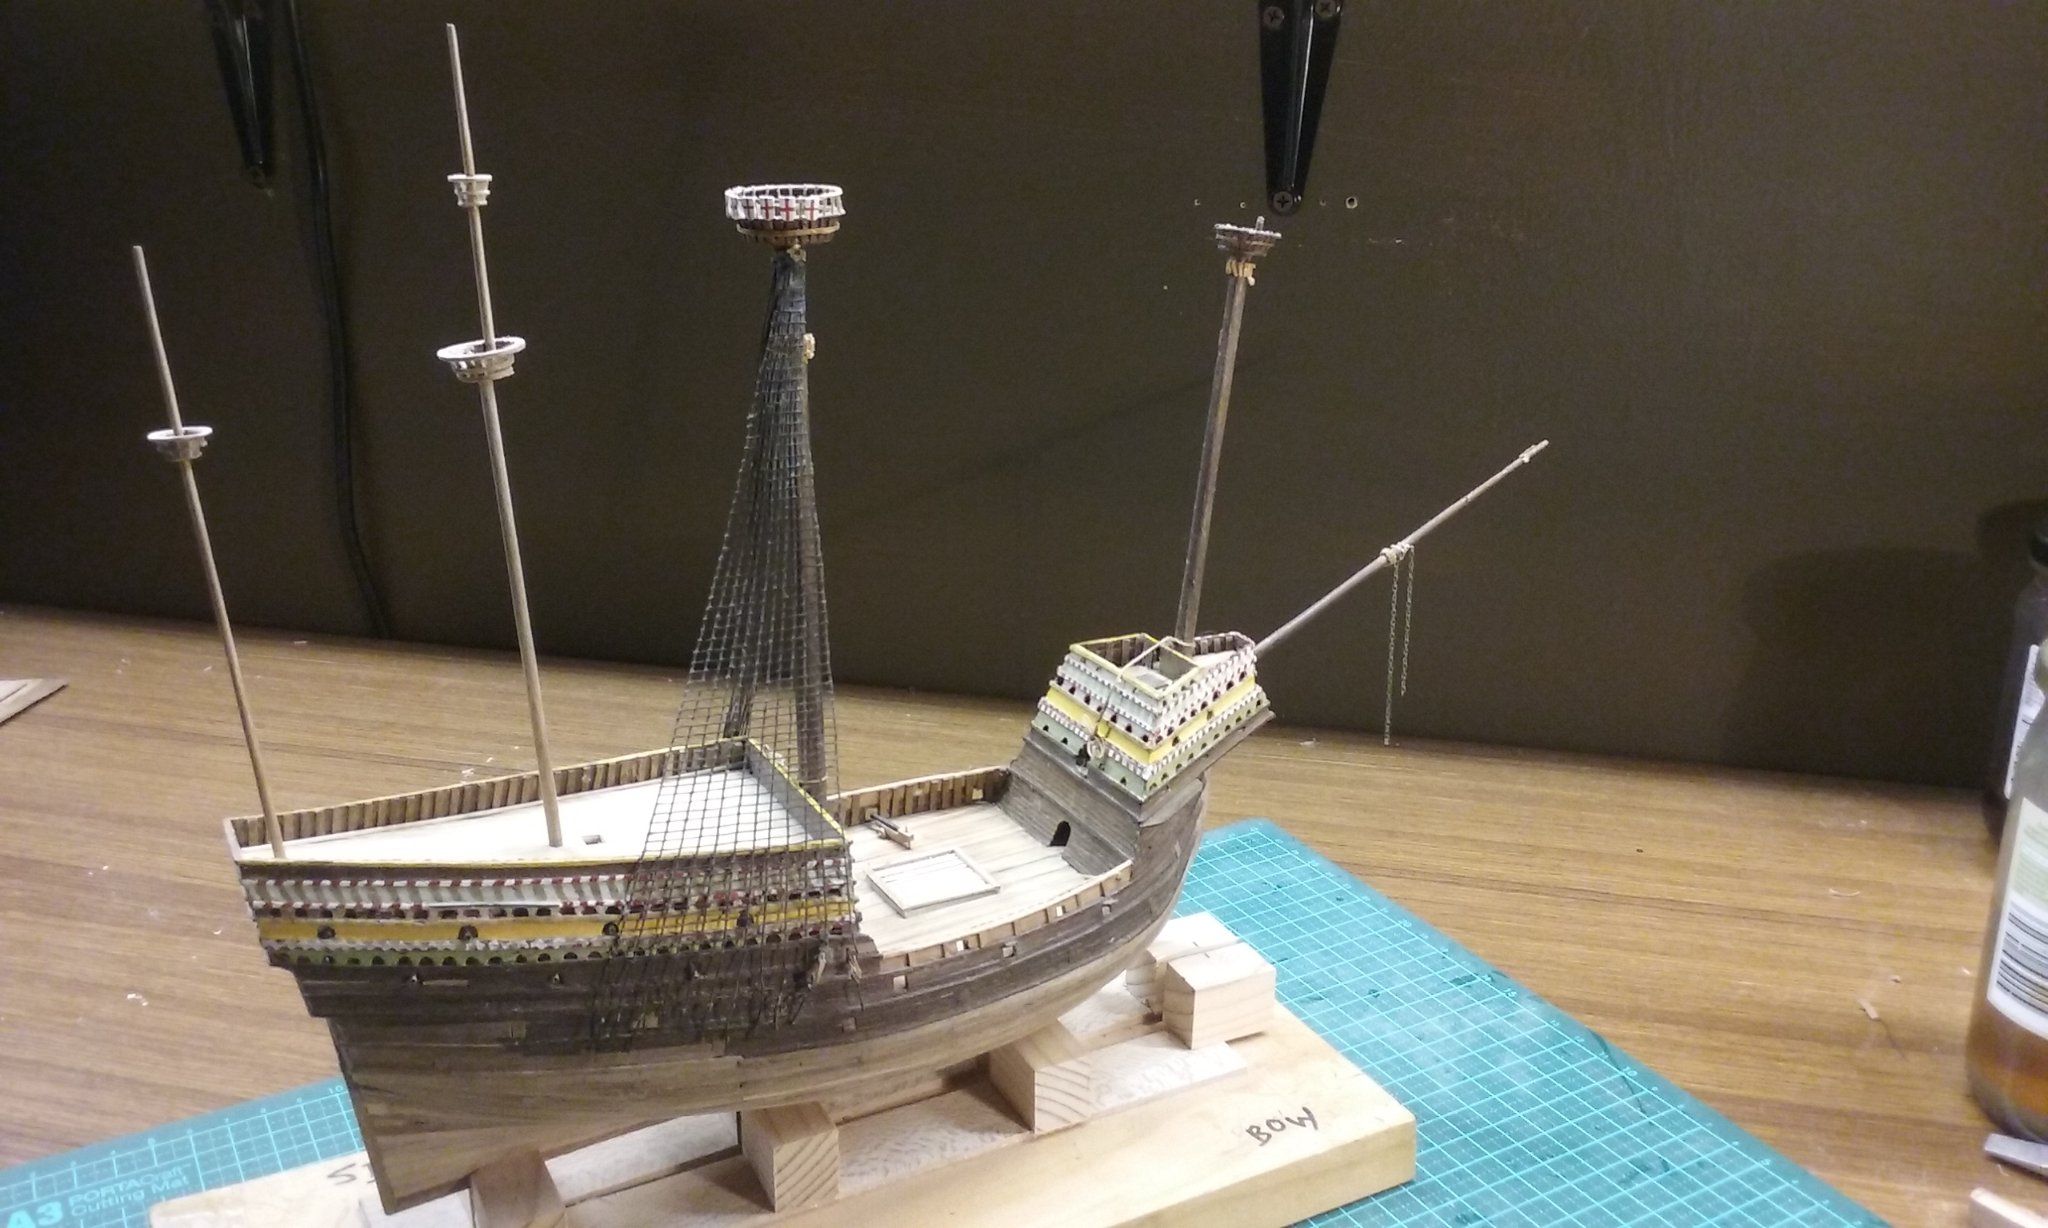
Here are a couple more photos - Waterways added to the aftercastle deck (absolutely vital - to cover up gaps at the edge of the decking which you can see through down to the gunports below). masts and bowsprit dry fitted. Still sanding the underwater planking.
- 740 replies
-
- 10
-
-
- Tudor
- restoration
- (and 4 more)
-
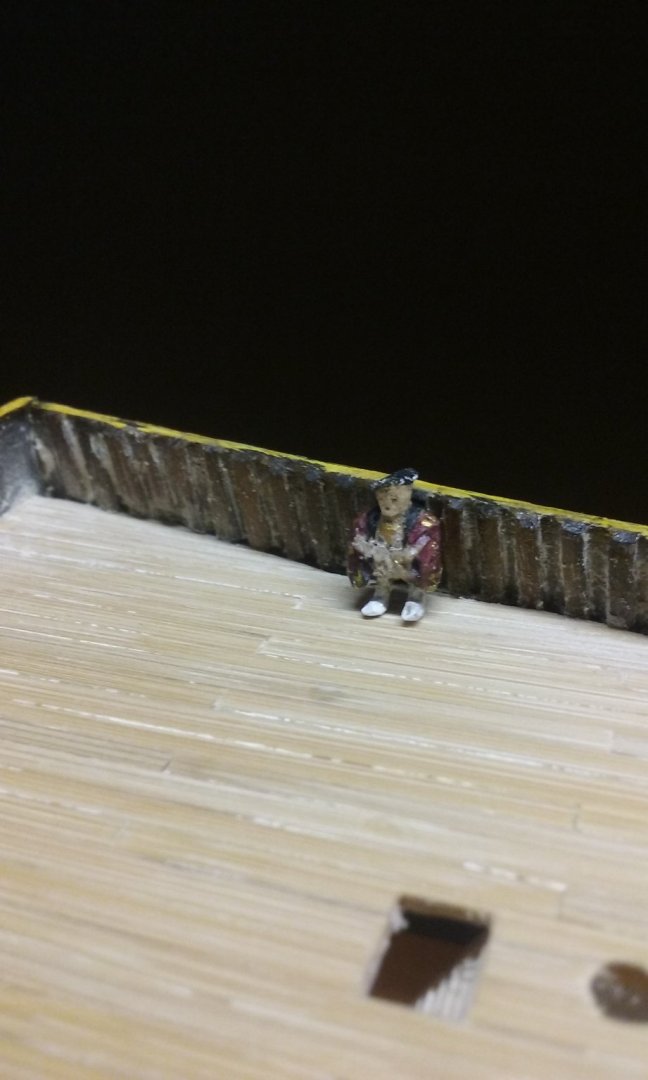
Ah, but he's a king. How do you know he's a king? Because he hasn't got sh*t all over him (Monty Python and the holy Grail).
- 740 replies
-
- 3
-
-
- Tudor
- restoration
- (and 4 more)
-
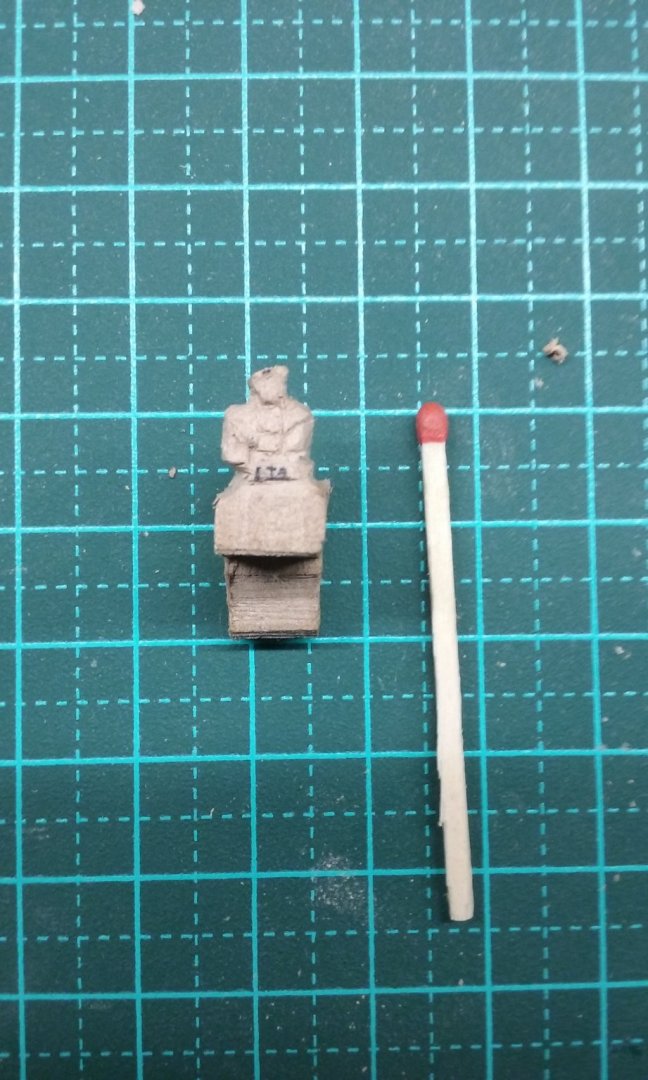
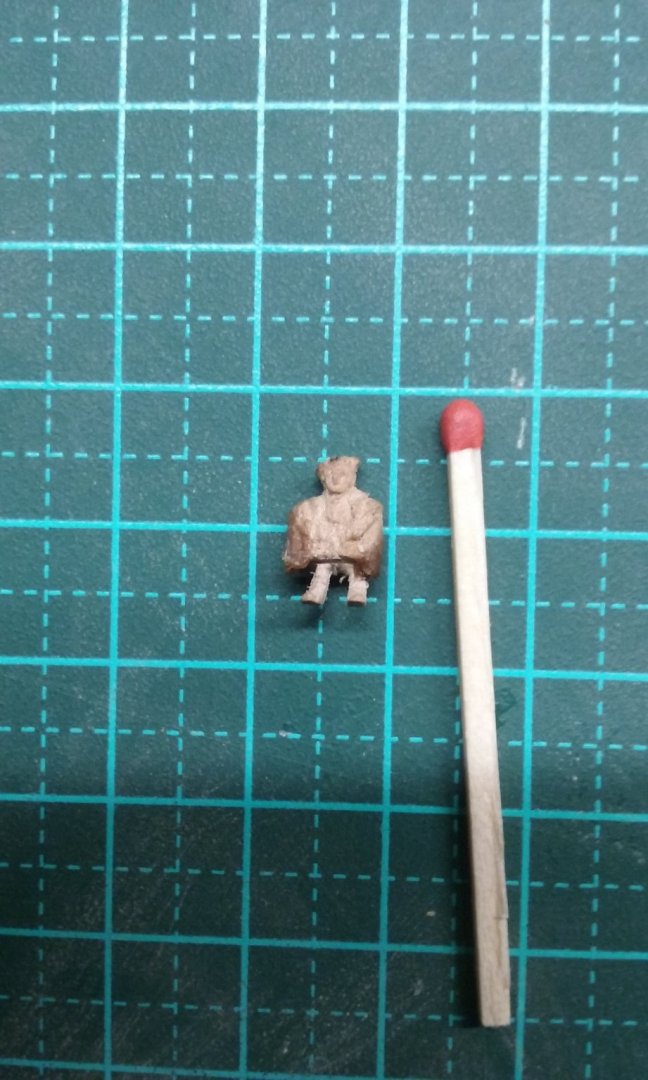
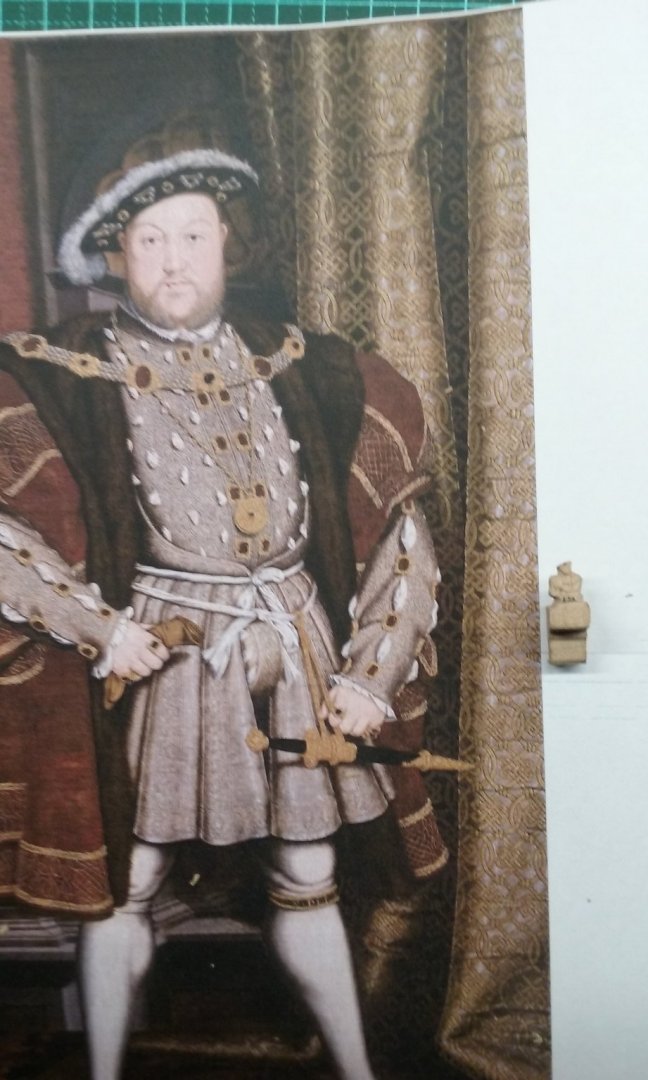
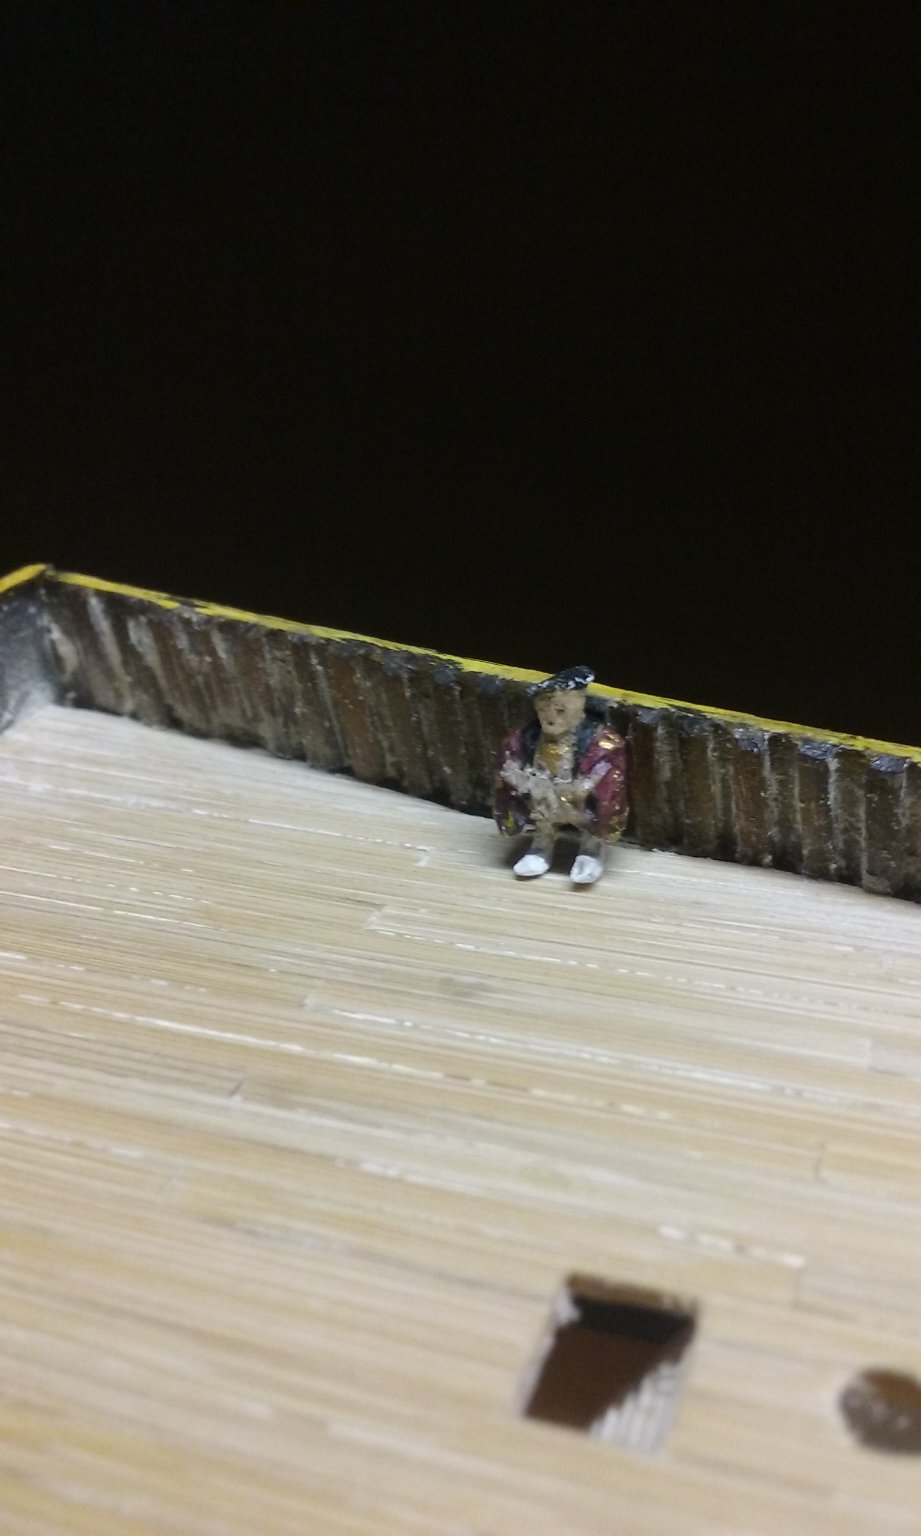
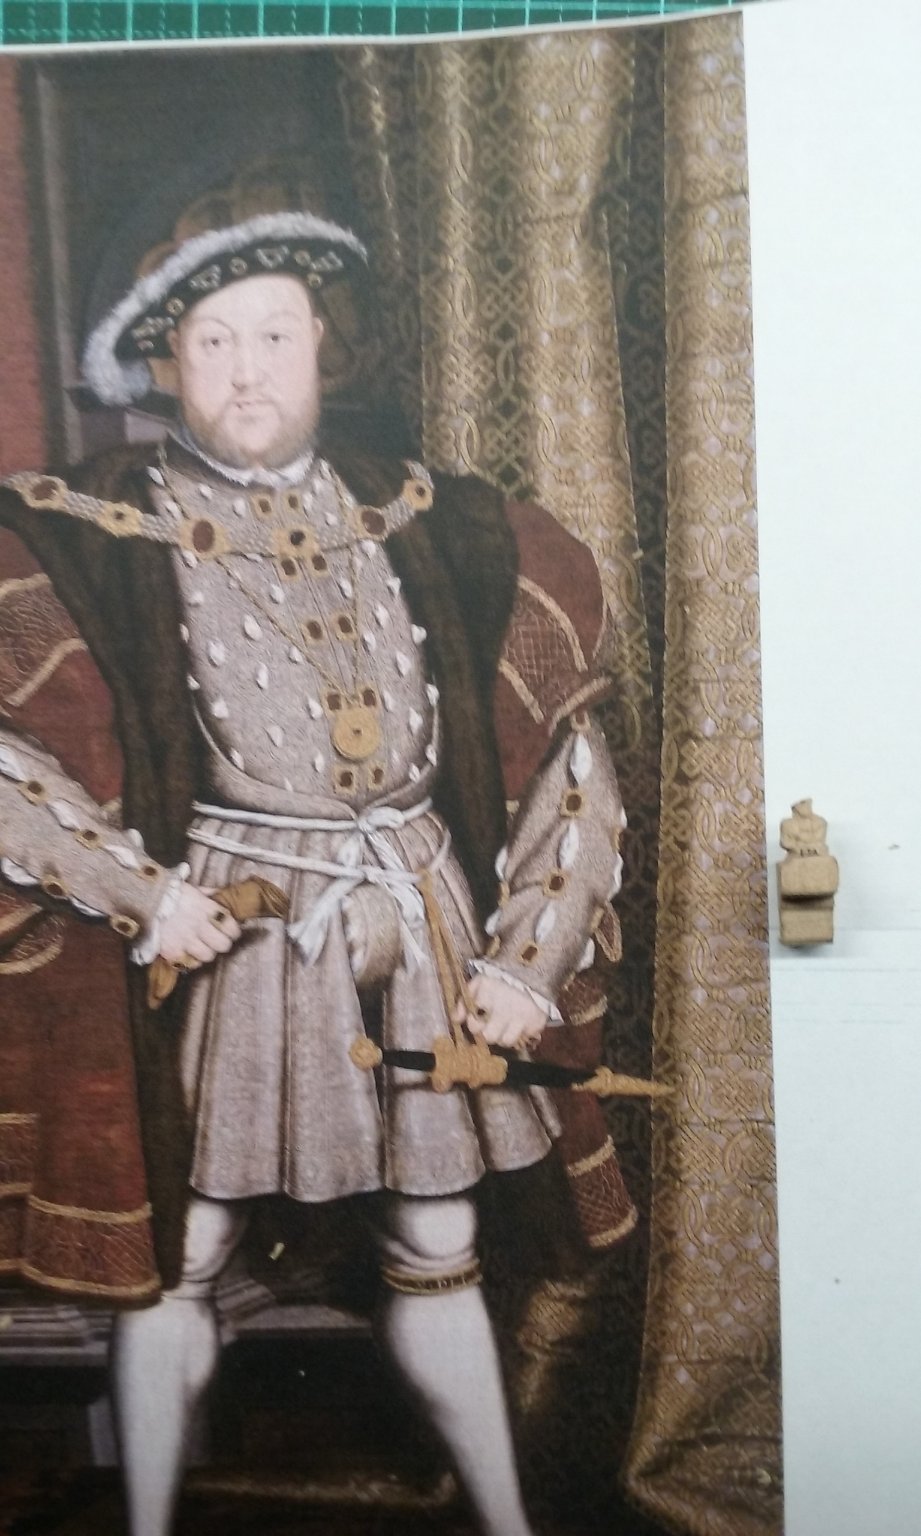
Thanks Andrew and Jeff. I think I need to tone down the whiteness of his shoes (even though the Breugel Holbein painting shows them that colour) - it makes his pedal extremities look colossal (his feet's too big) Steven
- 740 replies
-
- 5
-
-

-
- Tudor
- restoration
- (and 4 more)
-
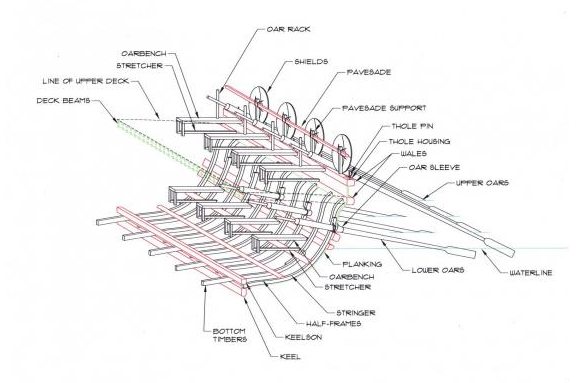
Thanks for the link, Larry. However, I'm afraid much of this article is fairly shallow, and a fair bit of it is wrong. (That it uses footage from the horribly inaccurate TV show "The Vikings" is also a point against it. That really isn't what Vikings looked like and the author should know it.) The quote from the link "Special fastening points were developed that allowed the shields to be fixed along the boat’s edges." - no problem with that part. But "This protected the crew from any projectile weapons from the shores, but also made for an efficient wind and wave break." is speculation with no real proof. There's no evidence that the shields were used to protect against archery from the shores (though it's an interesting idea and by no means impossible - absence of evidence isn't evidence of absence). I'd also take issue with the idea that shields would act as a wind or wave break - in my opinion they'd be quite likely to be dislodged by any sort of a decent sea. I haven't studied the pavesade (shield rack) on Viking ships in any detail, so I can't say this with any great confidence, but that's the way it seems to me. Round shields are pretty open to acting like a sail and they'd have to be tied on pretty securely not to be blown away or swept away by waves. It would be interesting to find out whether anybody's ever tried it out in heavy seas with a replica Viking ship - there are enough of them around. I spent 20 years as a Viking period re-enactor and got heavily into the historical basis for this stuff. The Viking weapons, except perhaps the two-handed axe, were no different from those of the cultures they warred against. Their main advantages were surprise and mobility, appearing out of nowhere and attacking before a proper defence could be assembled. In set-piece battles - one army against another - against, say, the Anglo-Saxons, they lost about as often as they won. Steven
-
That's amazing work, Kris. I've never tried Rhino - just AutoCad, Sketchup and Revit. None of them are capable of this kind of thing. Steven
-
She's looking really good, Marcus. Having followed your build, I've decided that no matter how beautiful a fluit may be, I really don't think I want to take one on. Just TOO difficult getting the shape right. I take my hat off to you for your persistence - and your courage in ripping stuff off and starting again till you get it right. Steven
- 332 replies
-
- 2
-
-

-
- fluit
- abel tasman
- (and 1 more)
-
Interesting. The frames in mediaeval (and earlier) Mediterranean ships in general followed a . . pattern of alternating floor timbers and paired half-frames . . . Floor timbers span the bottom of the ship, with their extremities extending just to the turn of the bilge [on each side of the ship]; in contrast, half-frames span the width of the keel and extend up one side of the ship, through the turn of the bilge to, or just beyond, the first wale . . . At each frame station, floor timbers and half-frames are paired with futtocks placed adjacent to, but not fastened to, the floor timber or half-frame, with ends overlapping by the width of one or more planks. This combined ease of manufacture and construction with the requisite strength. Steven
- 179 replies
-
- 6
-
-
- longship
- Helga Holm
- (and 1 more)
-
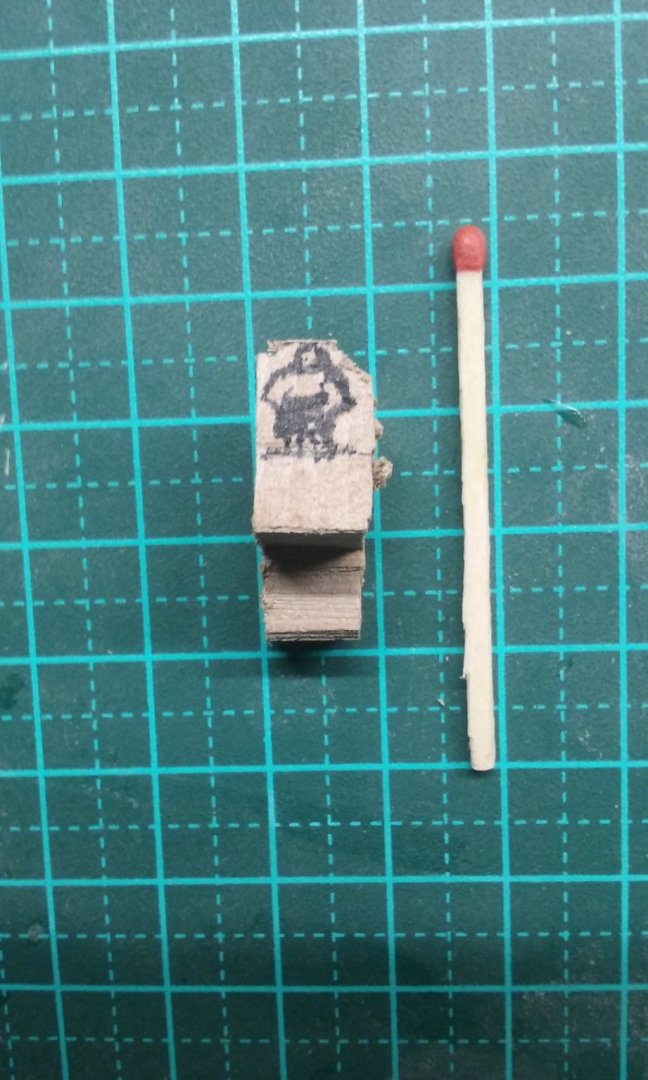
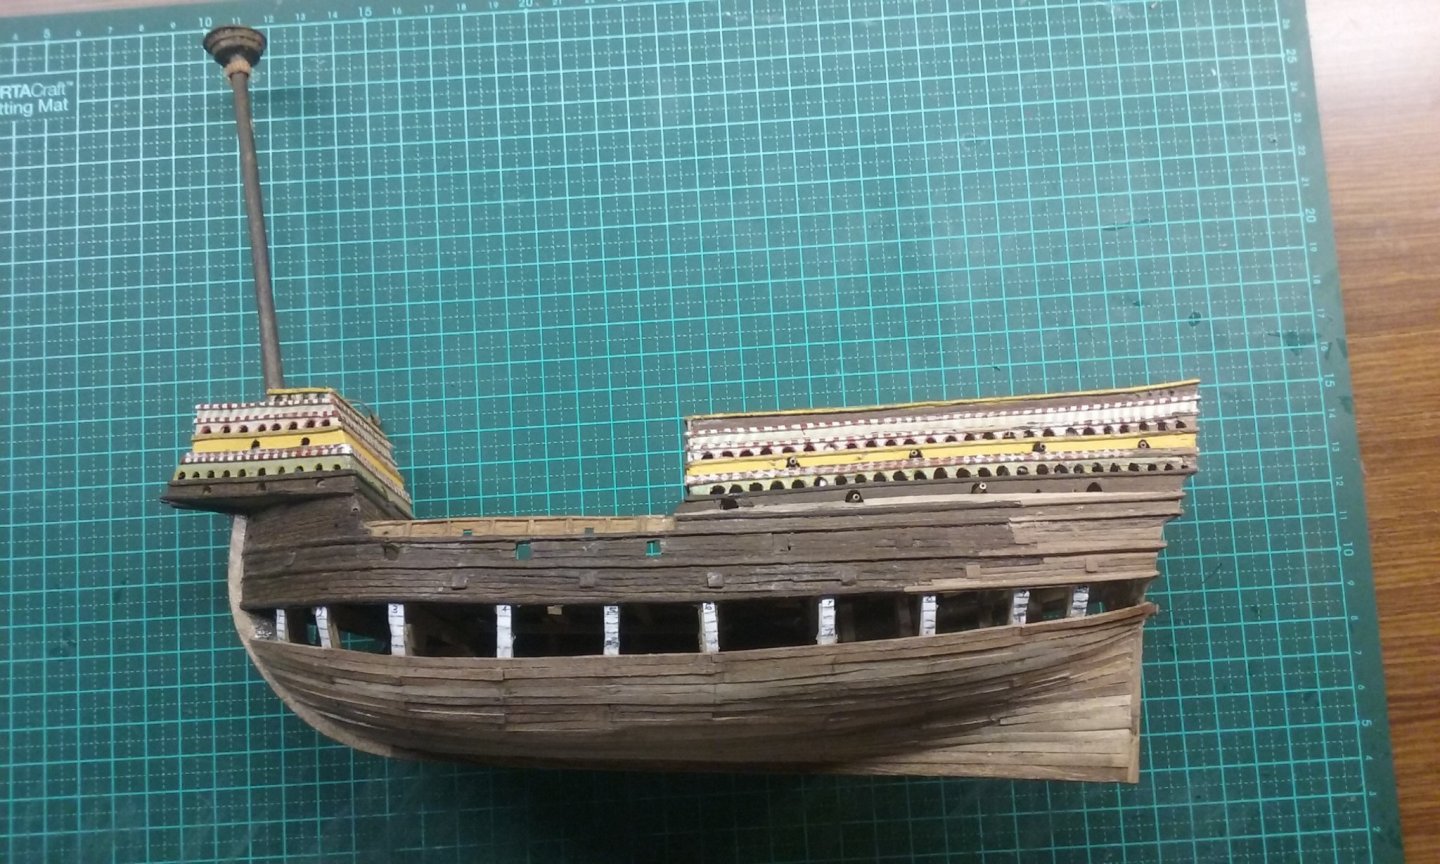
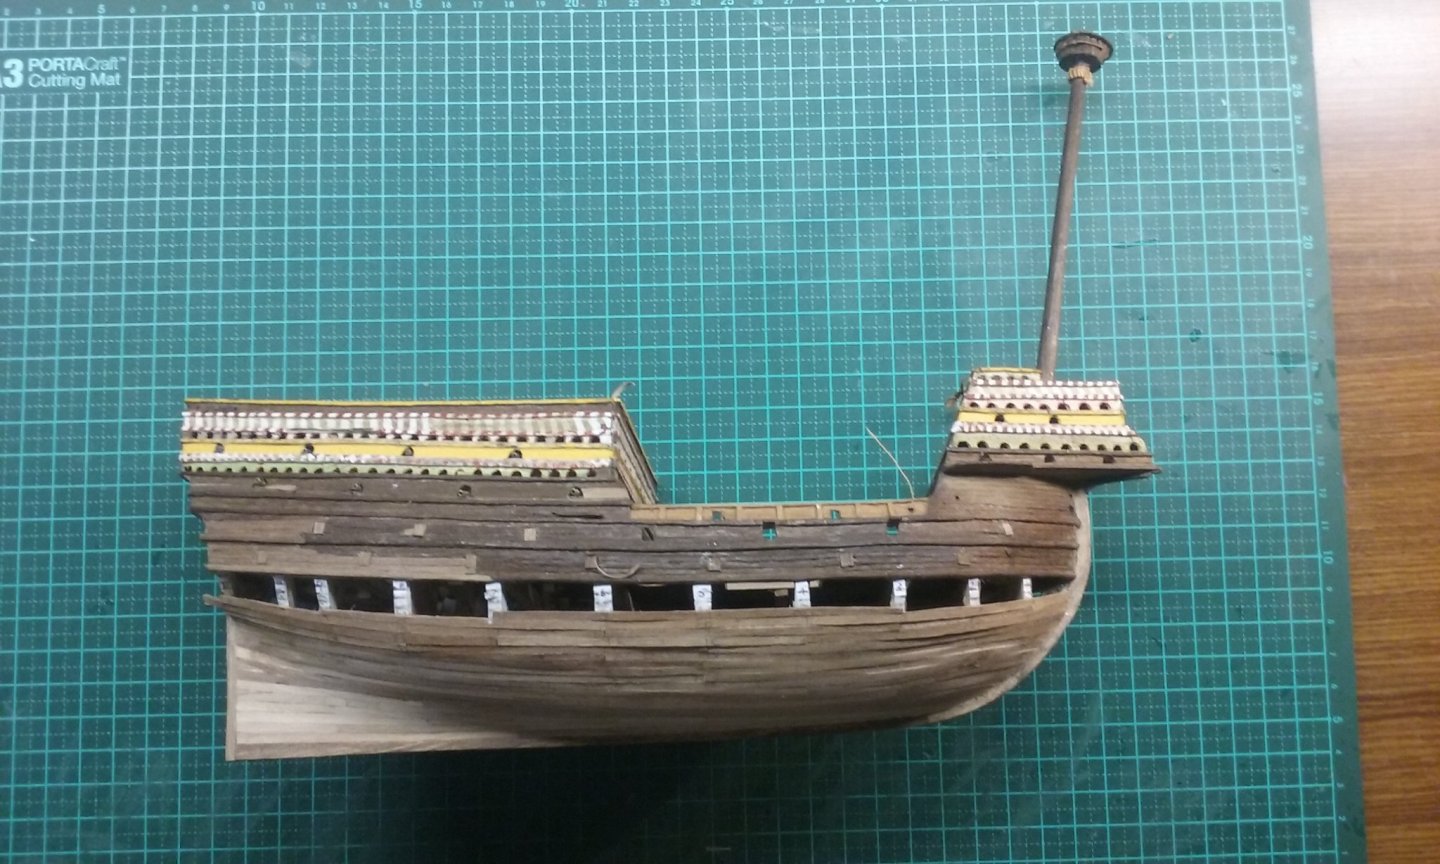
Thanks, Tony. Much appreciated. It was very much a labour of love, and much of the pleasure came from the research itself. There are things I would change if I were to do it again - make it 2 metres longer, raise the "tail", the poop deck and the forecastle, and have the wales at the "tail" a different shape (they should have converged to a point - the way they are affected the planking layout adversely). There are still plenty of "educated guesses" in my version of the vessel, and many details could be interpreted differently. But generally very happy with it. I'm now working on restoring the model I made of Henry VIII's Henry Grace a Dieu (Great Harry) which I built when I was 17. Making good progress and pretty happy with it. Learning a lot as I go. Steven
-
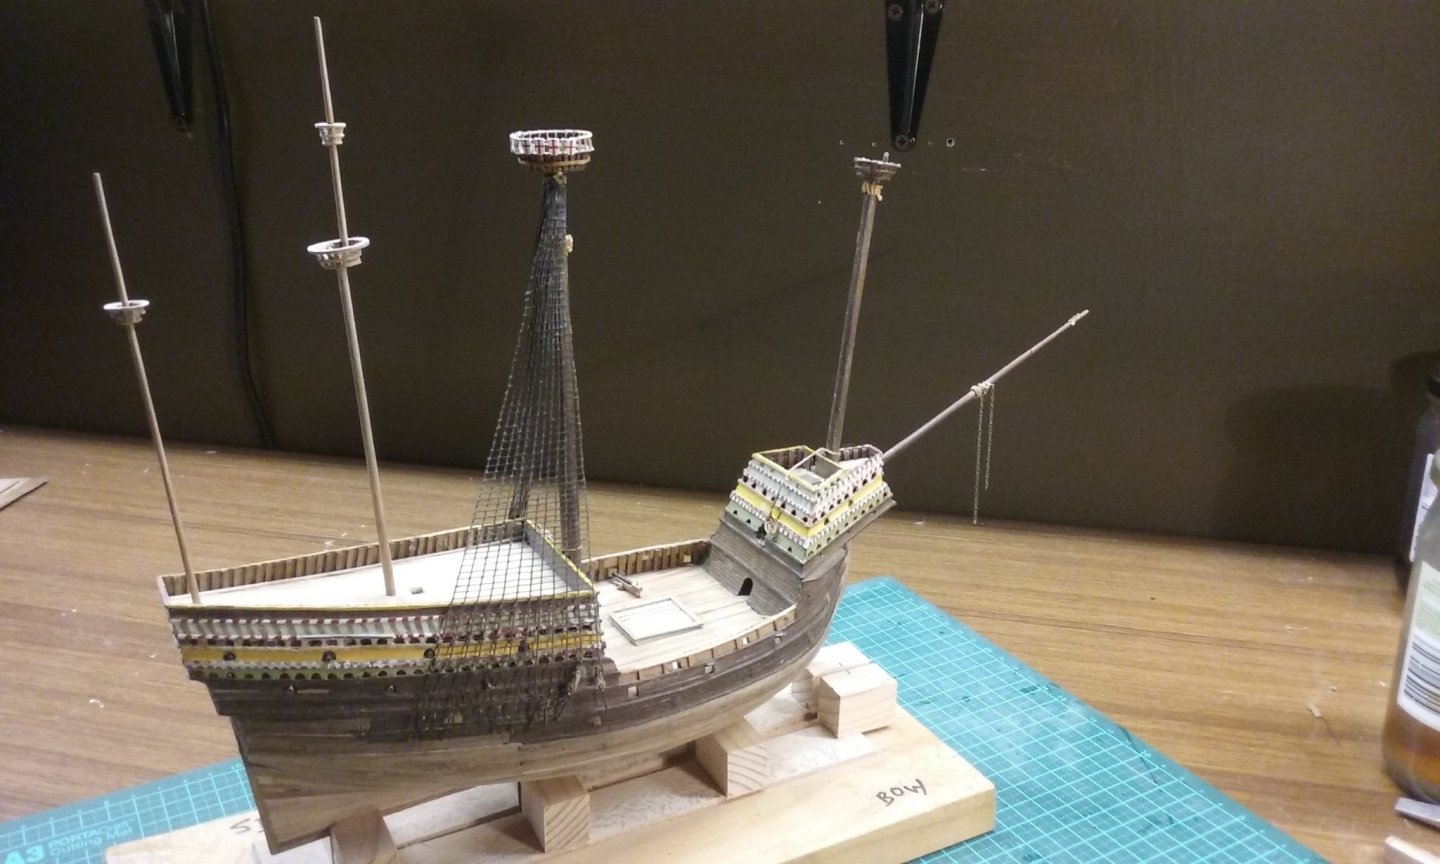
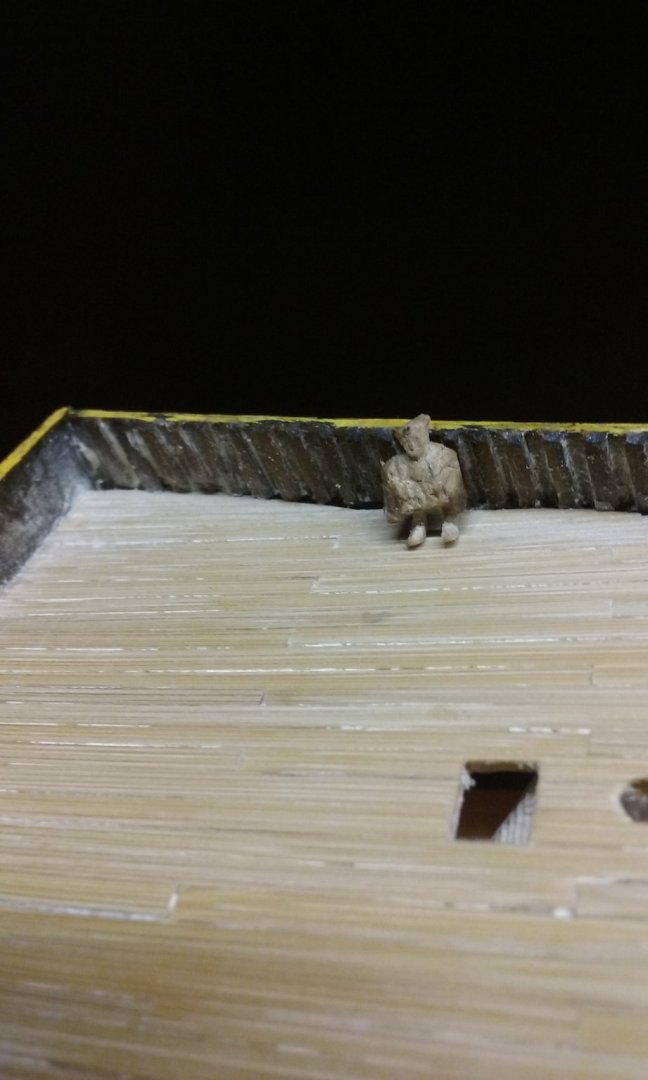
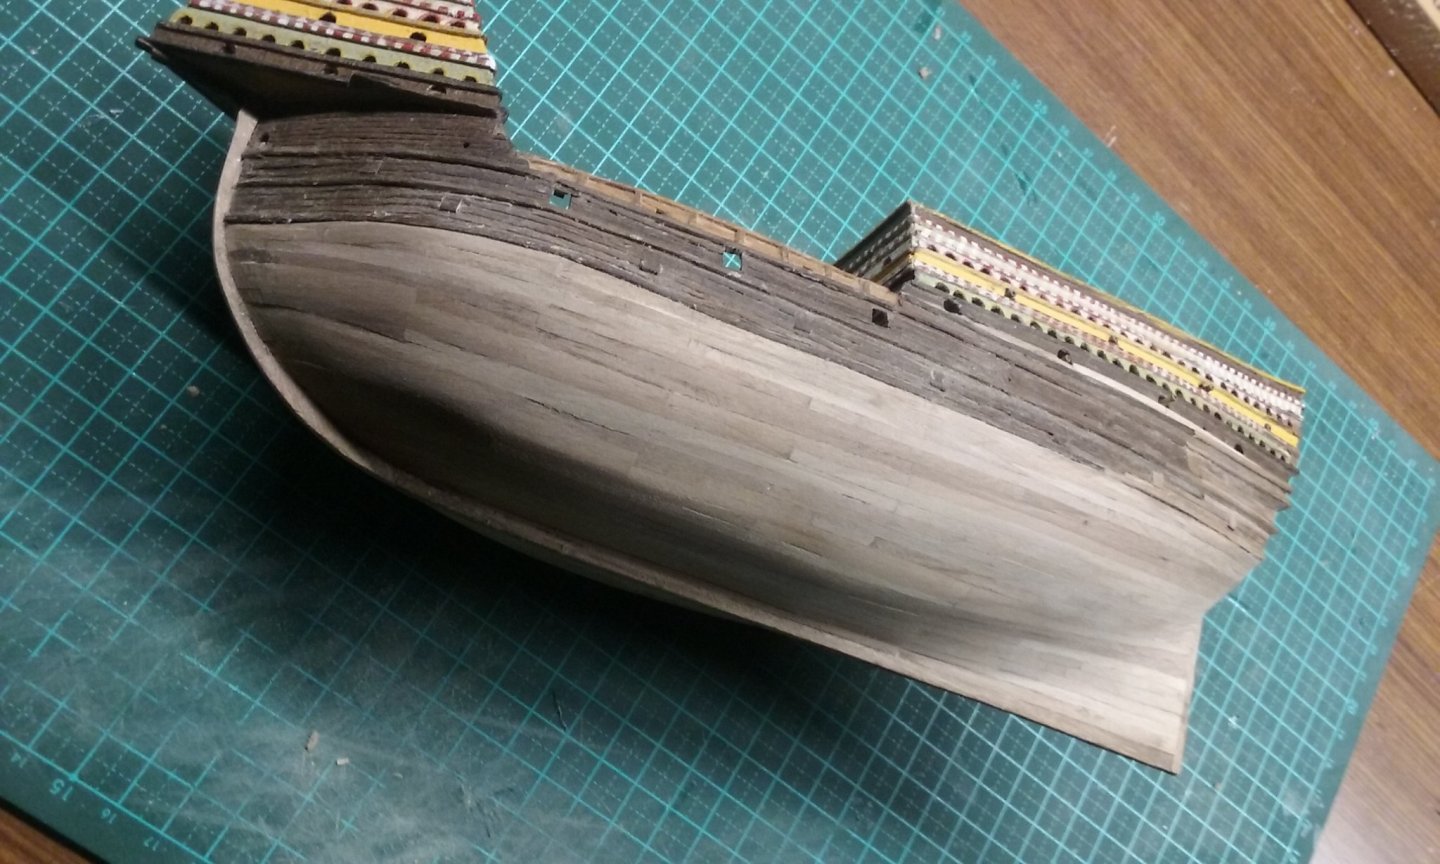
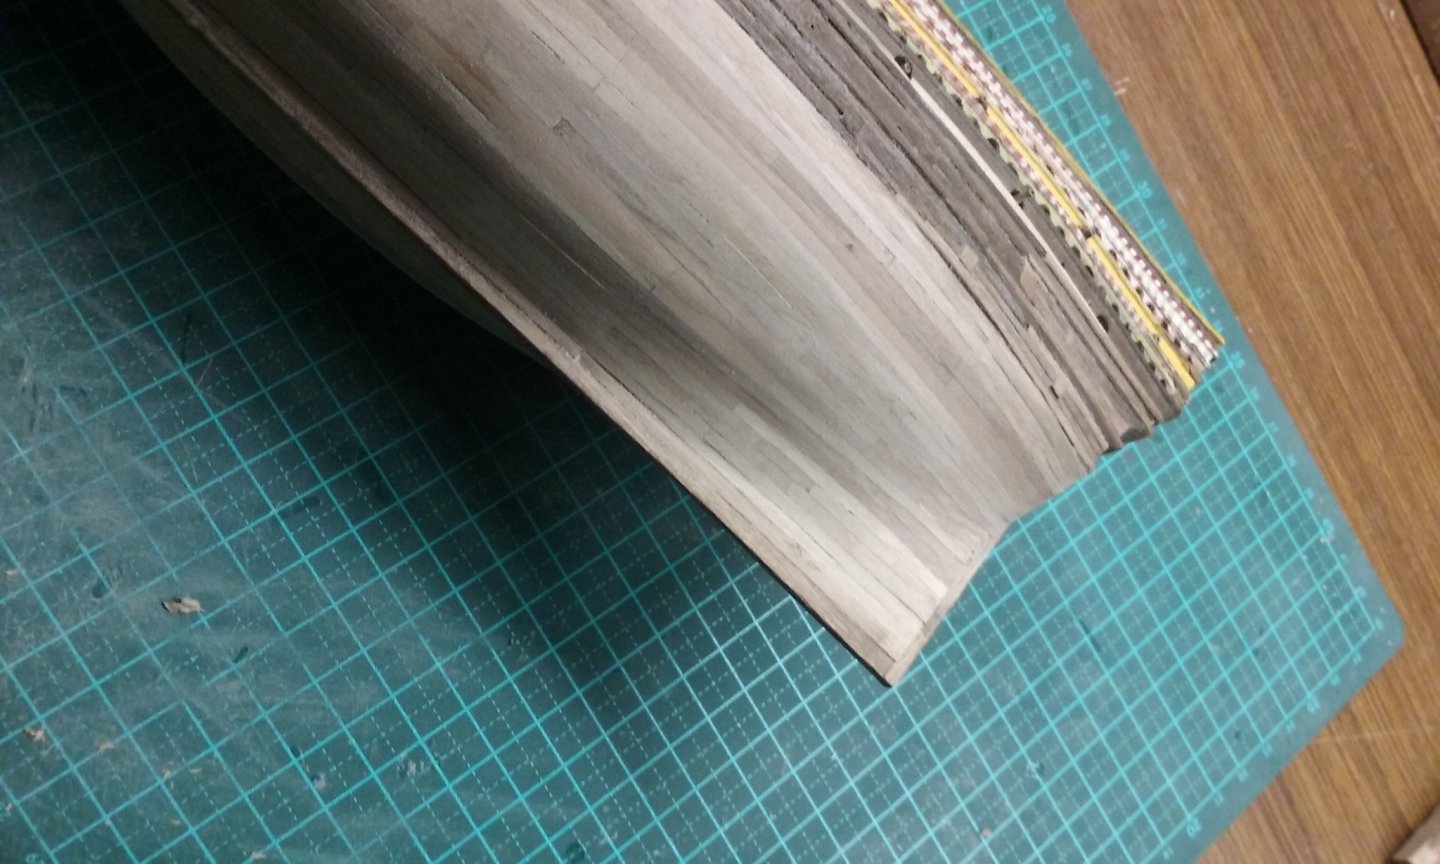
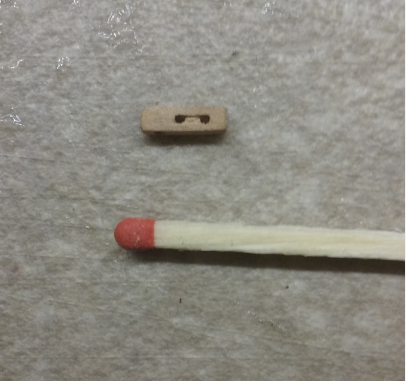
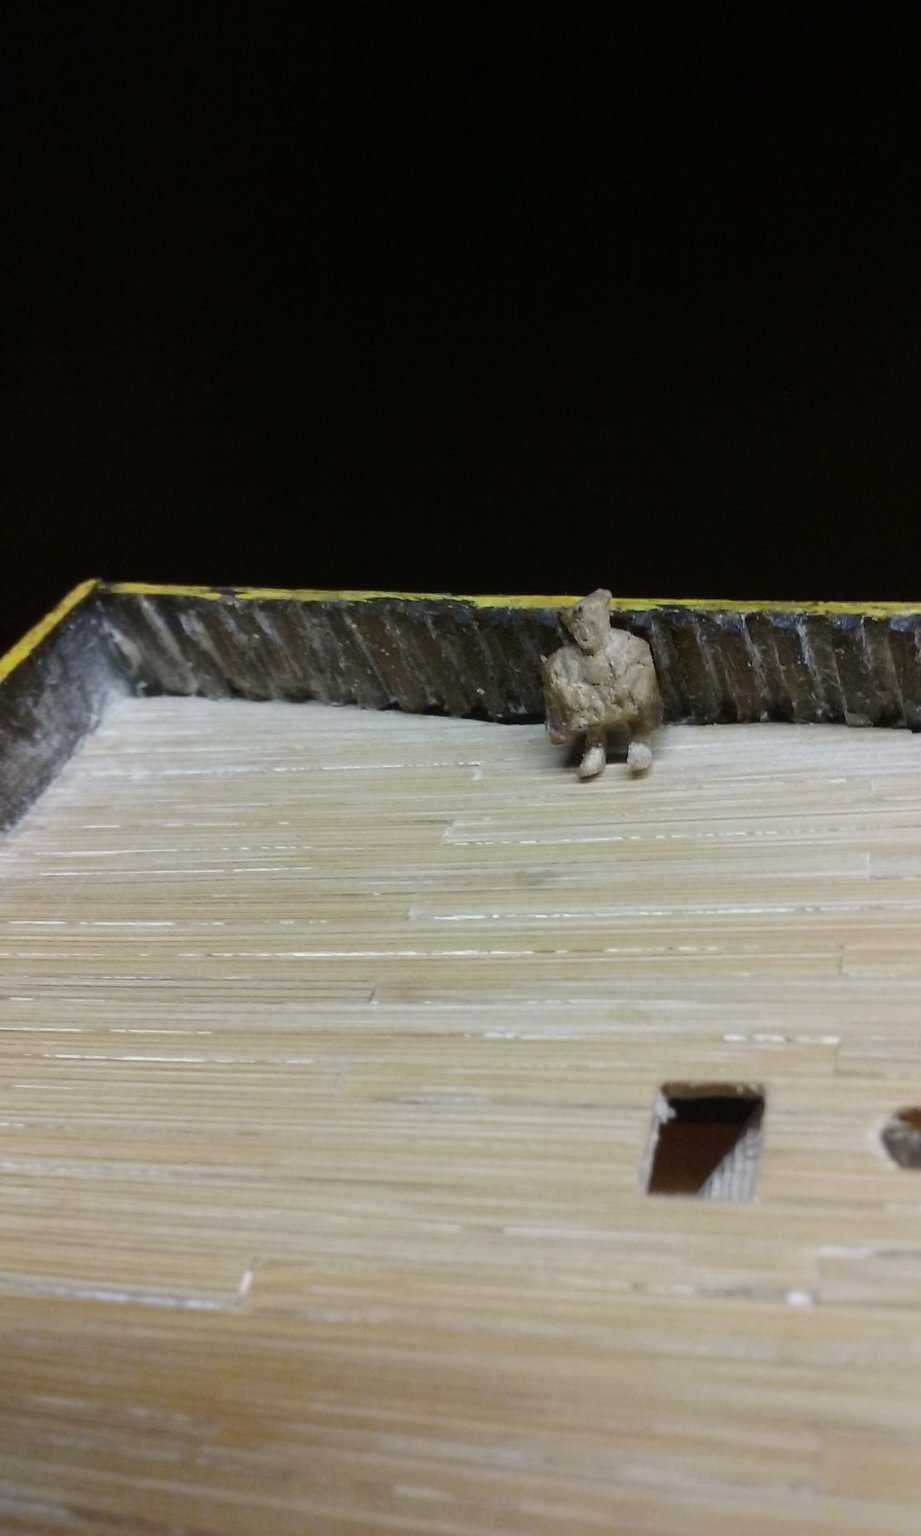
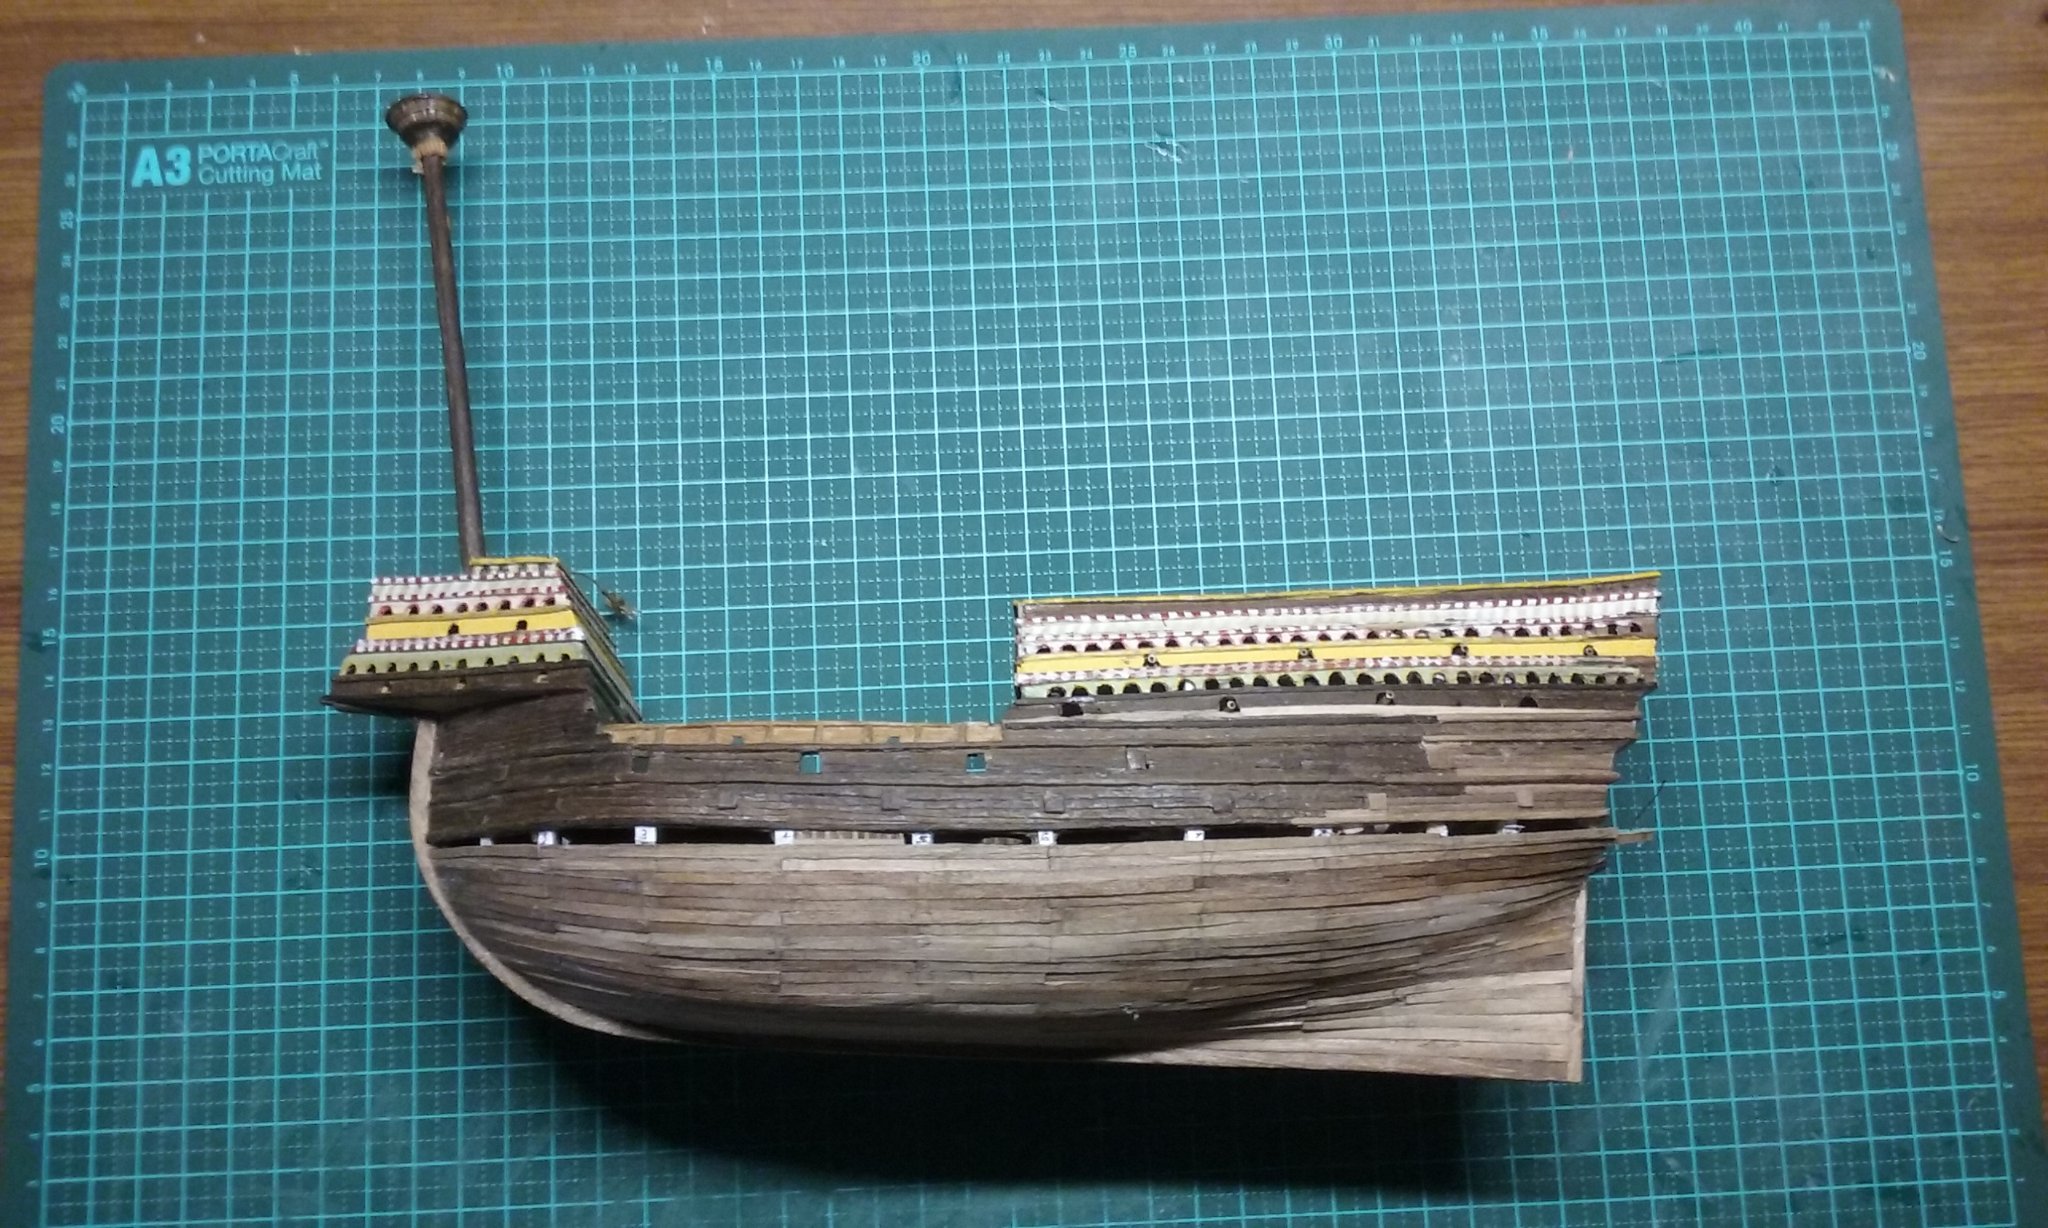
Is that a challenge? (Note the extra gigantic match stick . . . 9 metres long ) He's 9.4mm (just under 0.4 inches) tall. That's 188 cm (6'2") in real life - Henry was very tall for the time. Looks better to the naked eye than he does in the photo (possibly because with the naked eye it's all blurry to me). And I've done some sanding of the planks: Starting to look much nicer, and most of those ugly inequalities in the planking that were preying on my mind are vanishing. I do love that beautiful curve at the stern. Steven

- 740 replies
-
- 14
-
-
- Tudor
- restoration
- (and 4 more)
-
Nice to see another bireme under way. Congratulations! And welcome to the special kind of insanity that goes with building a model of a galley - an extra level above the normal insanity of ship modelling (I should know!). Steven
-
I haven't been back to this for awhile. It's really looking good!
-
Thanks, Rodolfo. It sounds like you've got it all worked out well in advance. Once you have everything made, you can see how well it all works together. My own blocks so far have simply been carved from a single piece of wood, with the "sheave" made by drilling two holes and carving out a groove between them. (Note the giant matchstick ). I like your idea better, even if the sheaves don't pivot. Steven
-
That looks good, Bolin. It looks like it should work. There's always a bit of "try it and see" with this kind of activity. Steven
- 179 replies
-
- 3
-
-
- longship
- Helga Holm
- (and 1 more)
-
- Actually, from the archaeology I've seen, planking usually was a case of "what can we get hold of ?"
- 740 replies
-
- 8
-
-
- Tudor
- restoration
- (and 4 more)
-
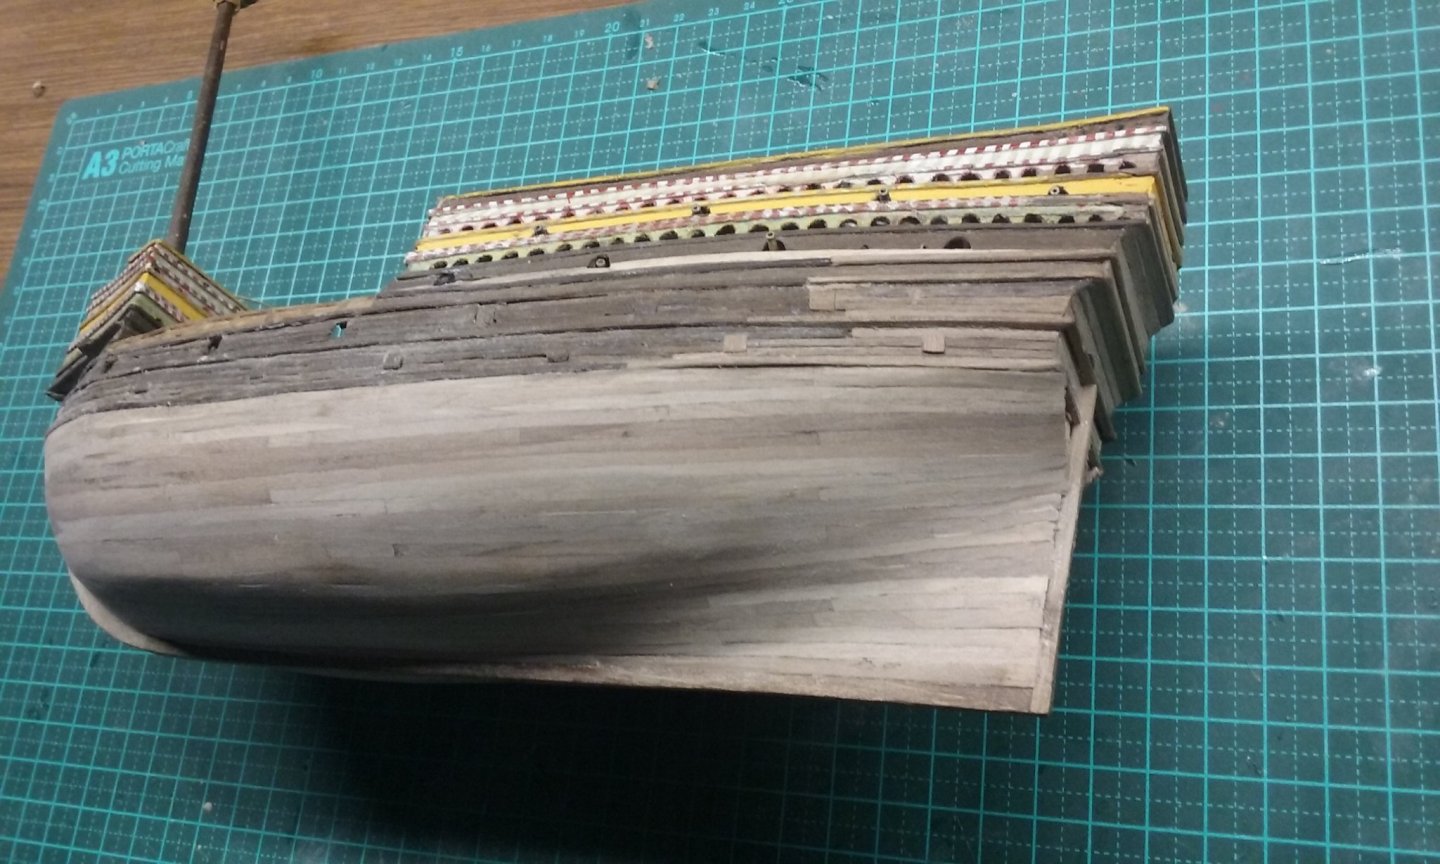
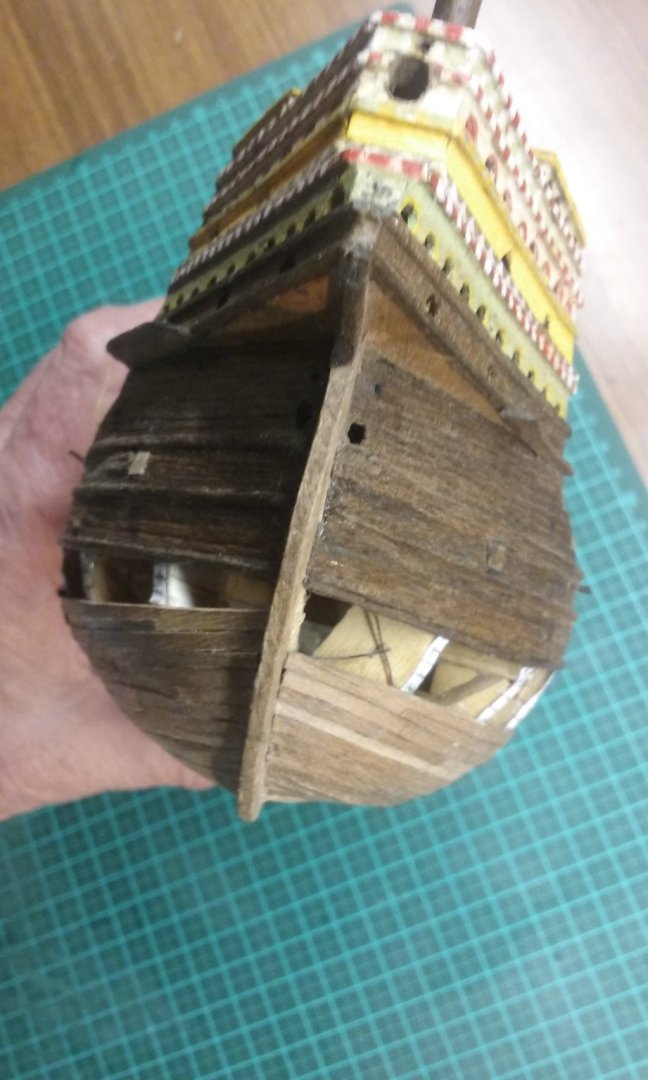
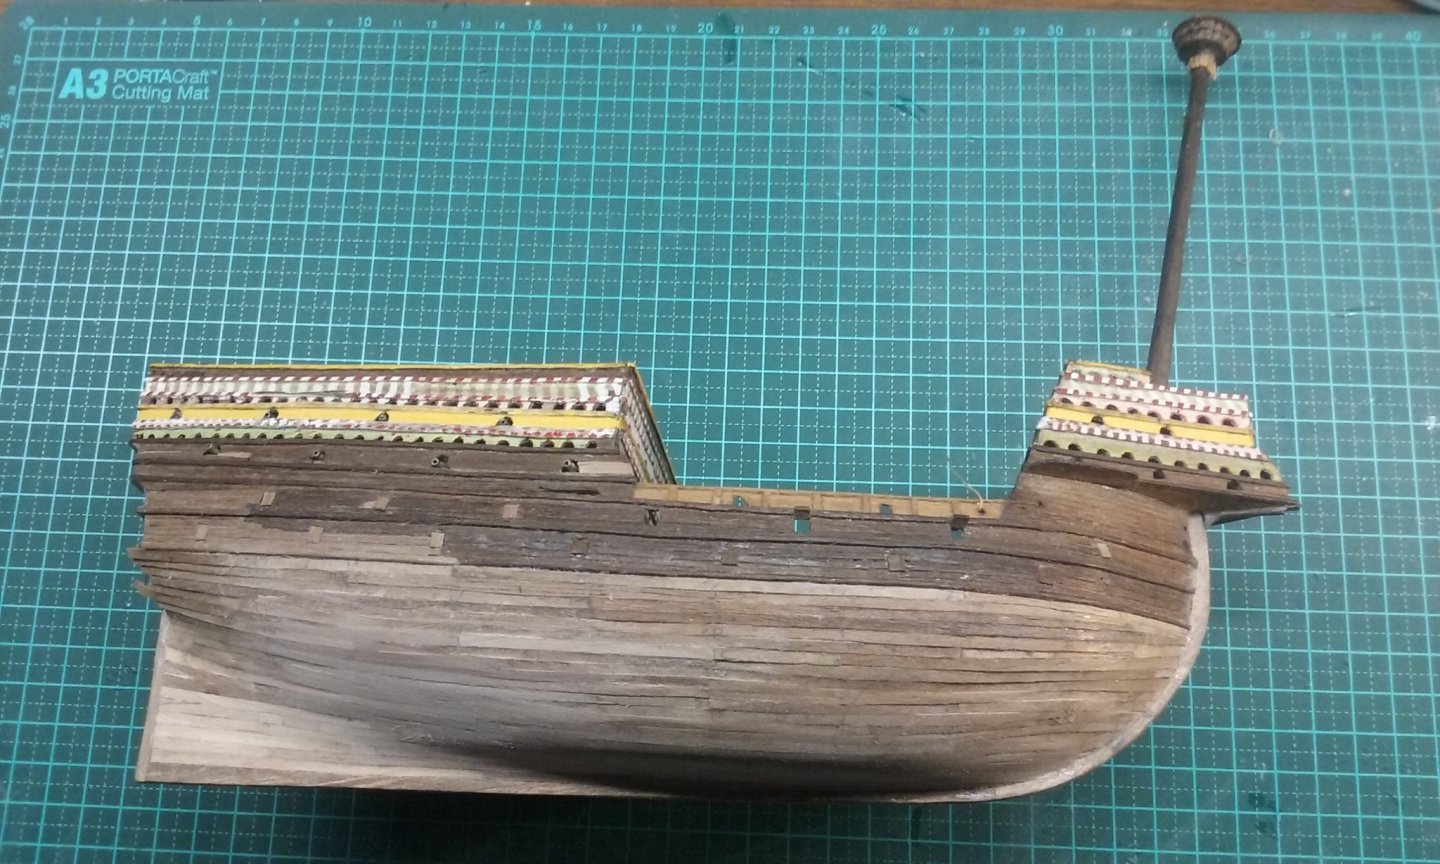
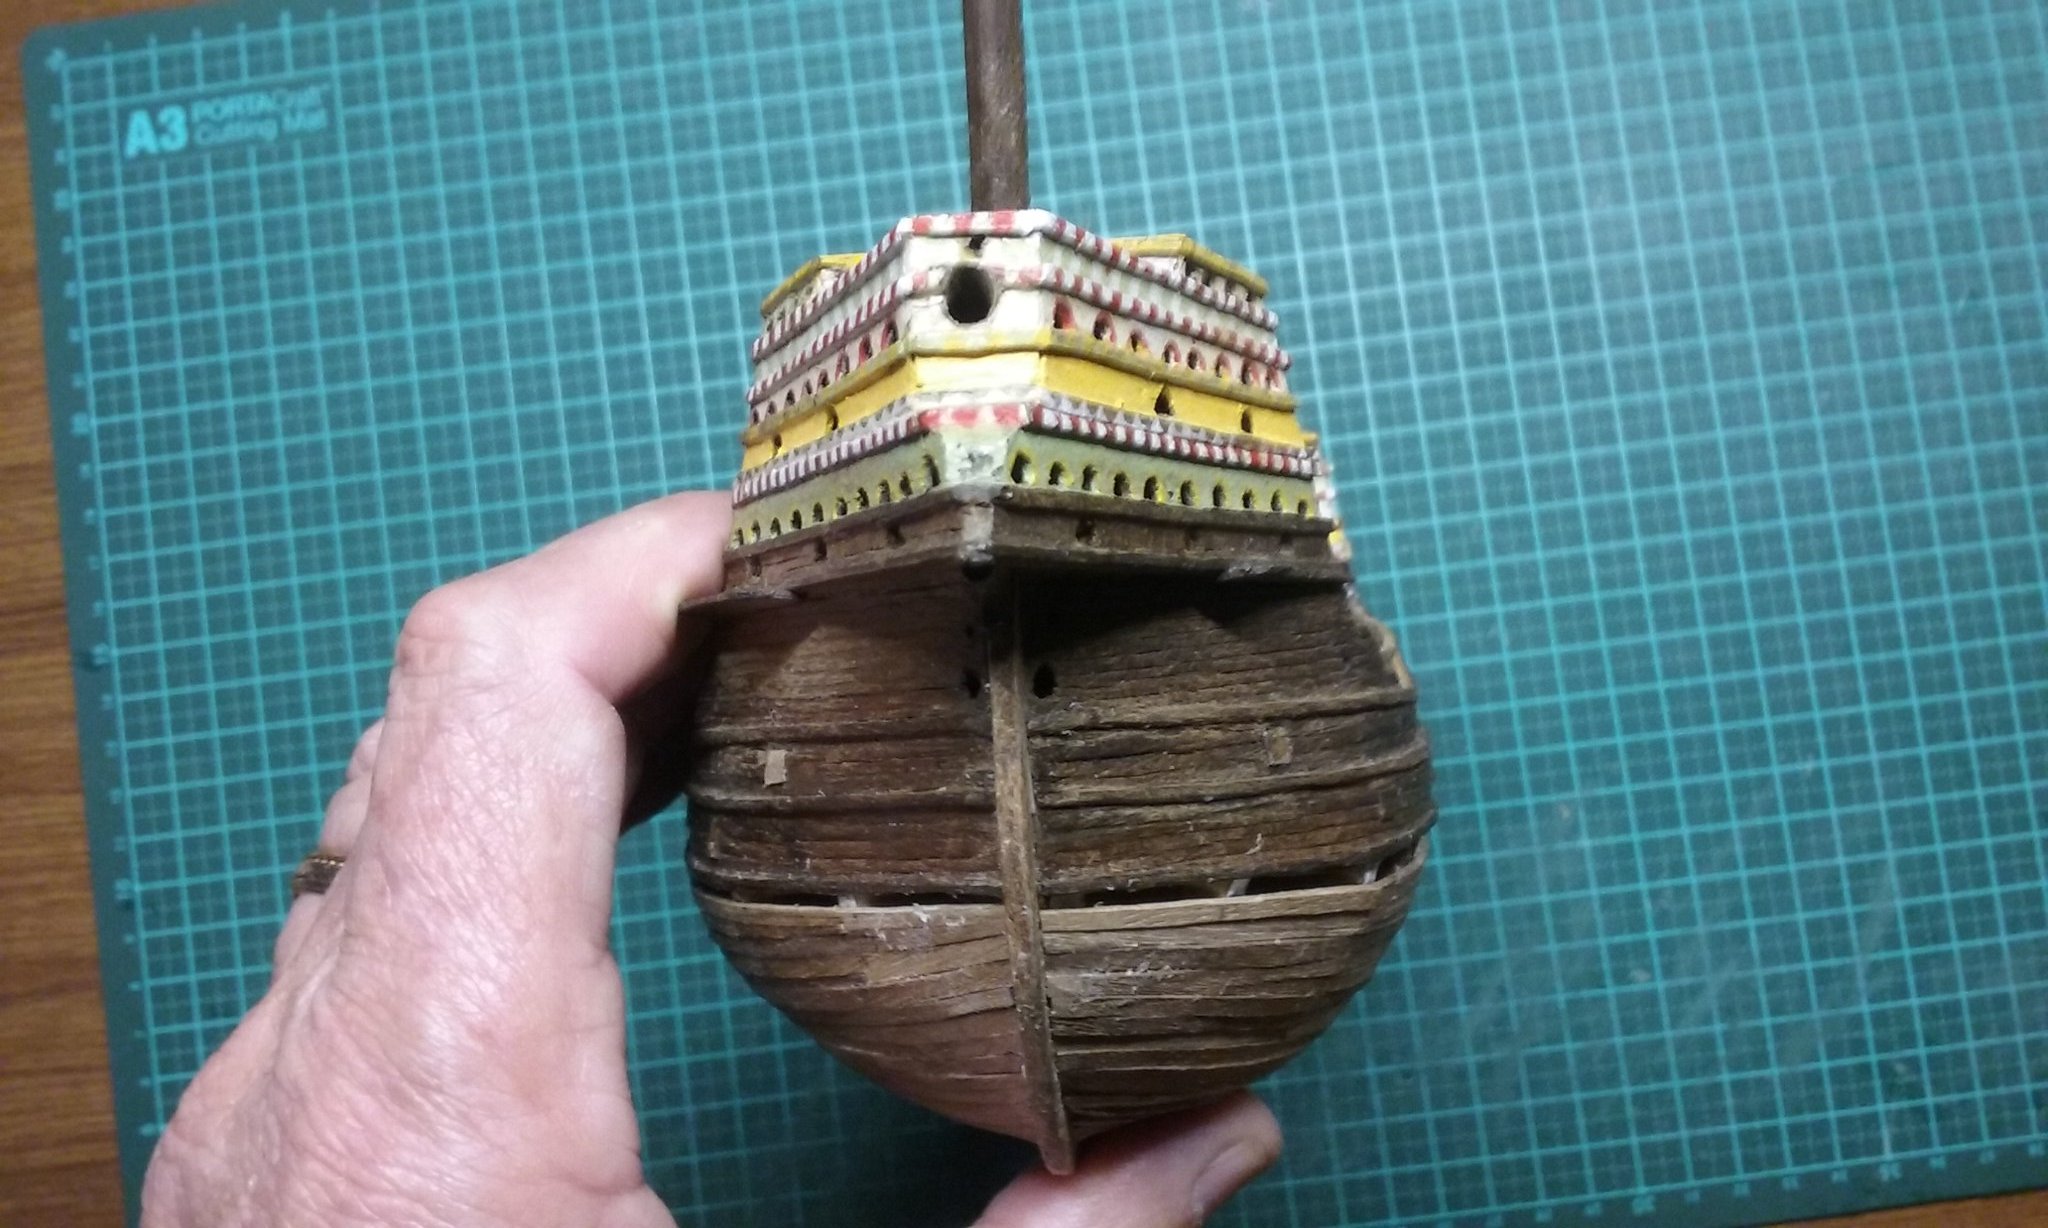
Thank you, Roger. When I first built her I had the lines at the stern completely wrong - the bilge was almost down to keel level. in fact it wasn't until I was making the new frames for the rebuild that I realised that with a flat stern the bottom of the hull shouldn't go all the way down - it should end near the waterline so the water could flow past it and reach the rudder. And that was one of the main things I had to change with the rebuild. One of the big advantages (apart from increased accuracy) is the much more beautiful underwater lines at the stern. Looking back on it I myself am amazed at what I was able to achieve at that age. I'd previously done two pretty basic solid hull waterline models (a brig and a frigate), I'd made two fair-sized plastic models of the Victory (Revell and Airfix) and I'd built a (probably very inaccurate) balsa model of an excursion ferry called the Zephyr that plied across to Rottnest Island from Perth in Western Australia where I lived. (I think it must have been POB - I don't remember). Some of the things on the Great Harry model - to be honest I have no idea how I did them back then. But I agree - despite having to replace/rebuild much more than I'd expected, I believe she was definitely worth restoring. Because of the difference in wood colours, it's pretty obvious which bits are original and which are new - but though I didn't like it to start with I now think that's a good thing. Steven
- 740 replies
-
- 9
-
-
- Tudor
- restoration
- (and 4 more)
-
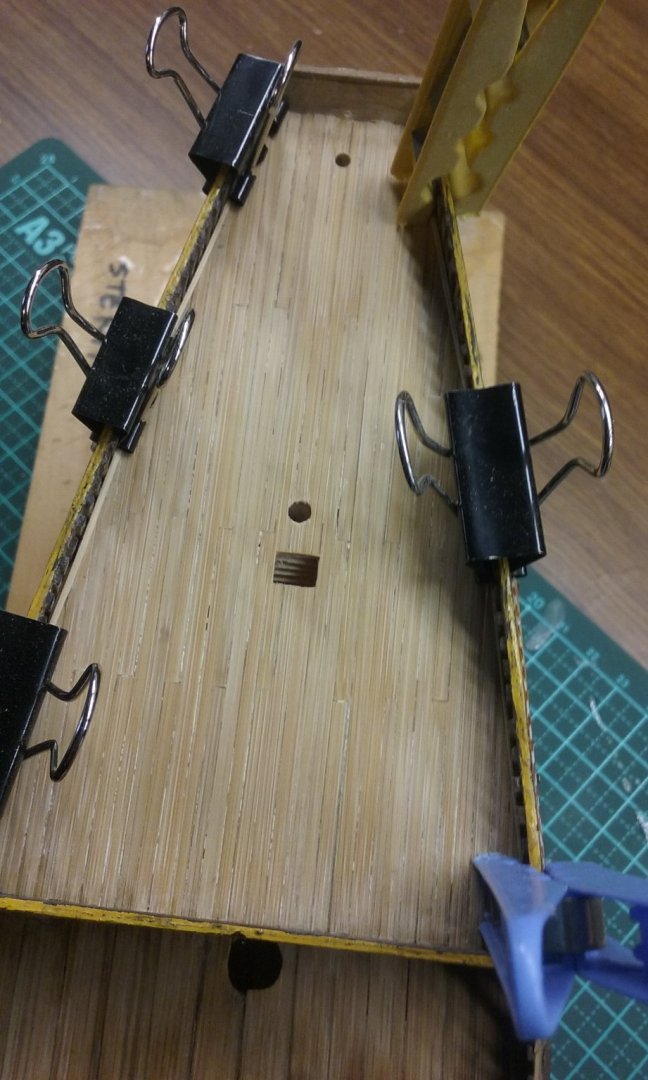
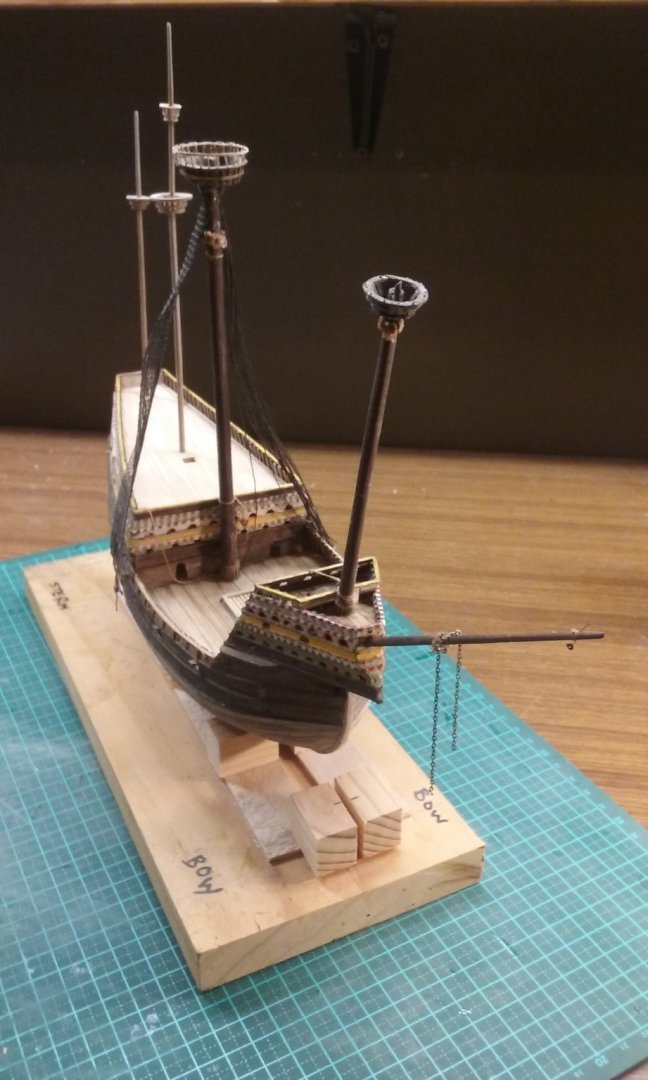
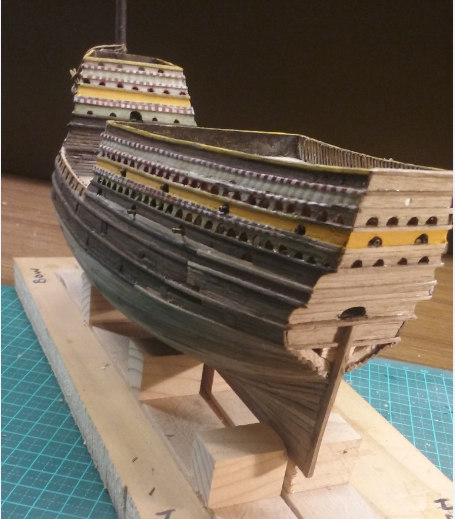
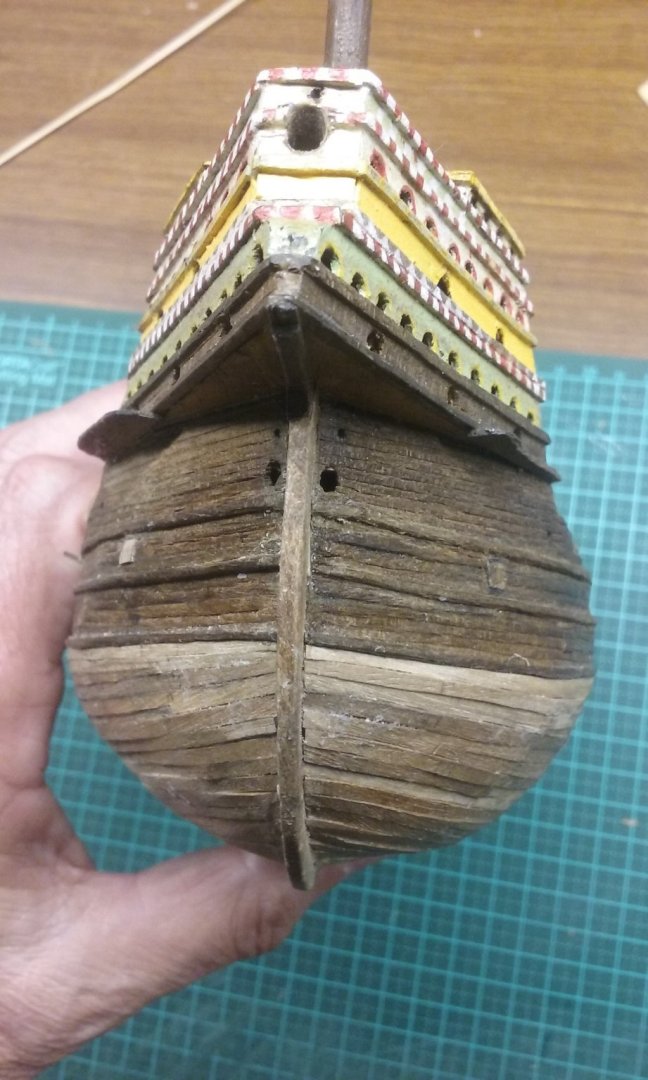
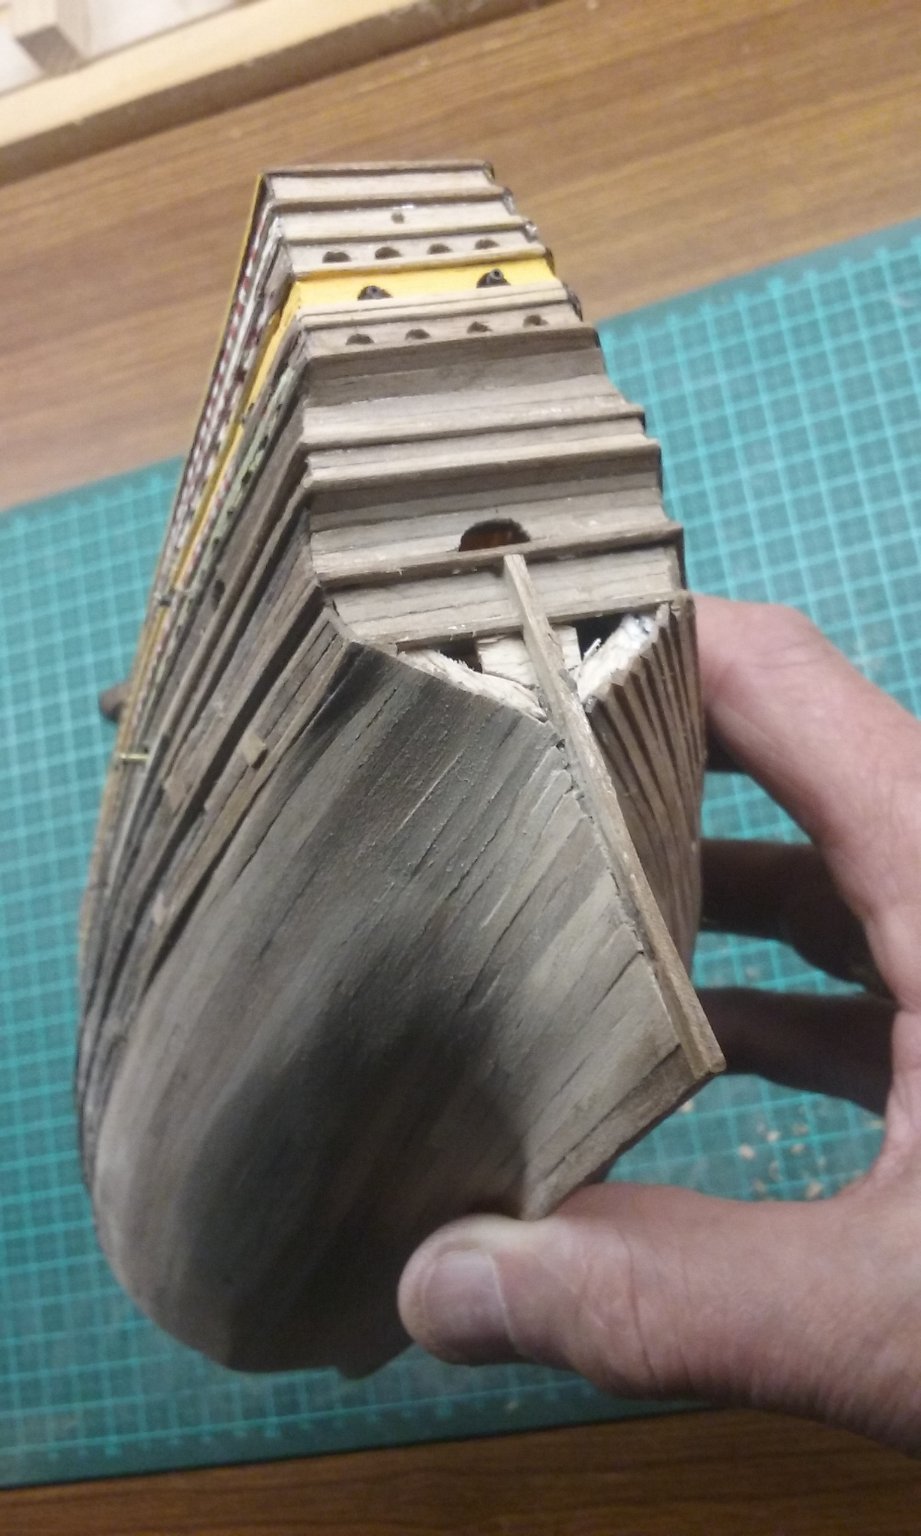
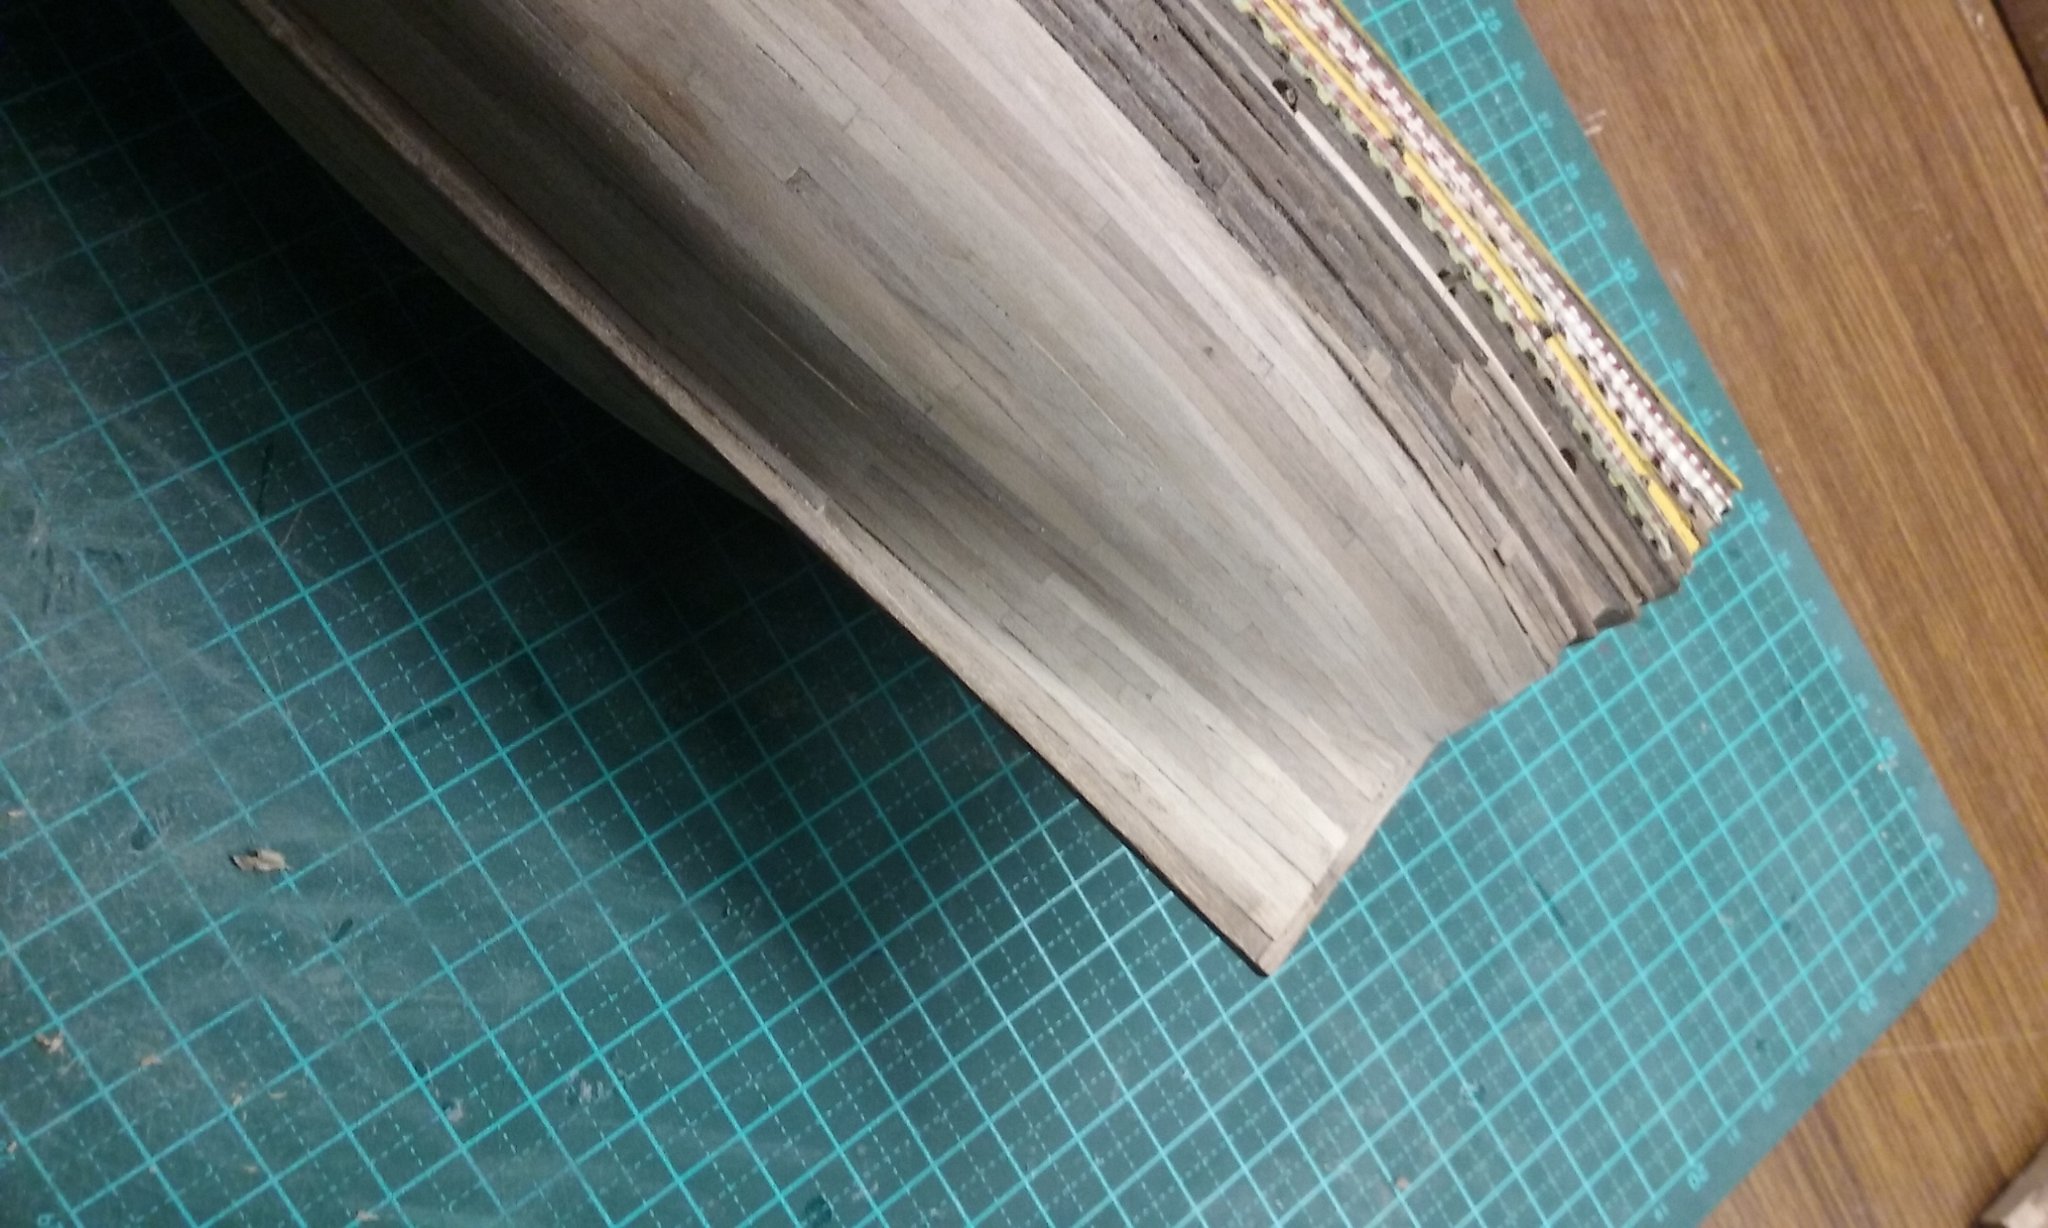
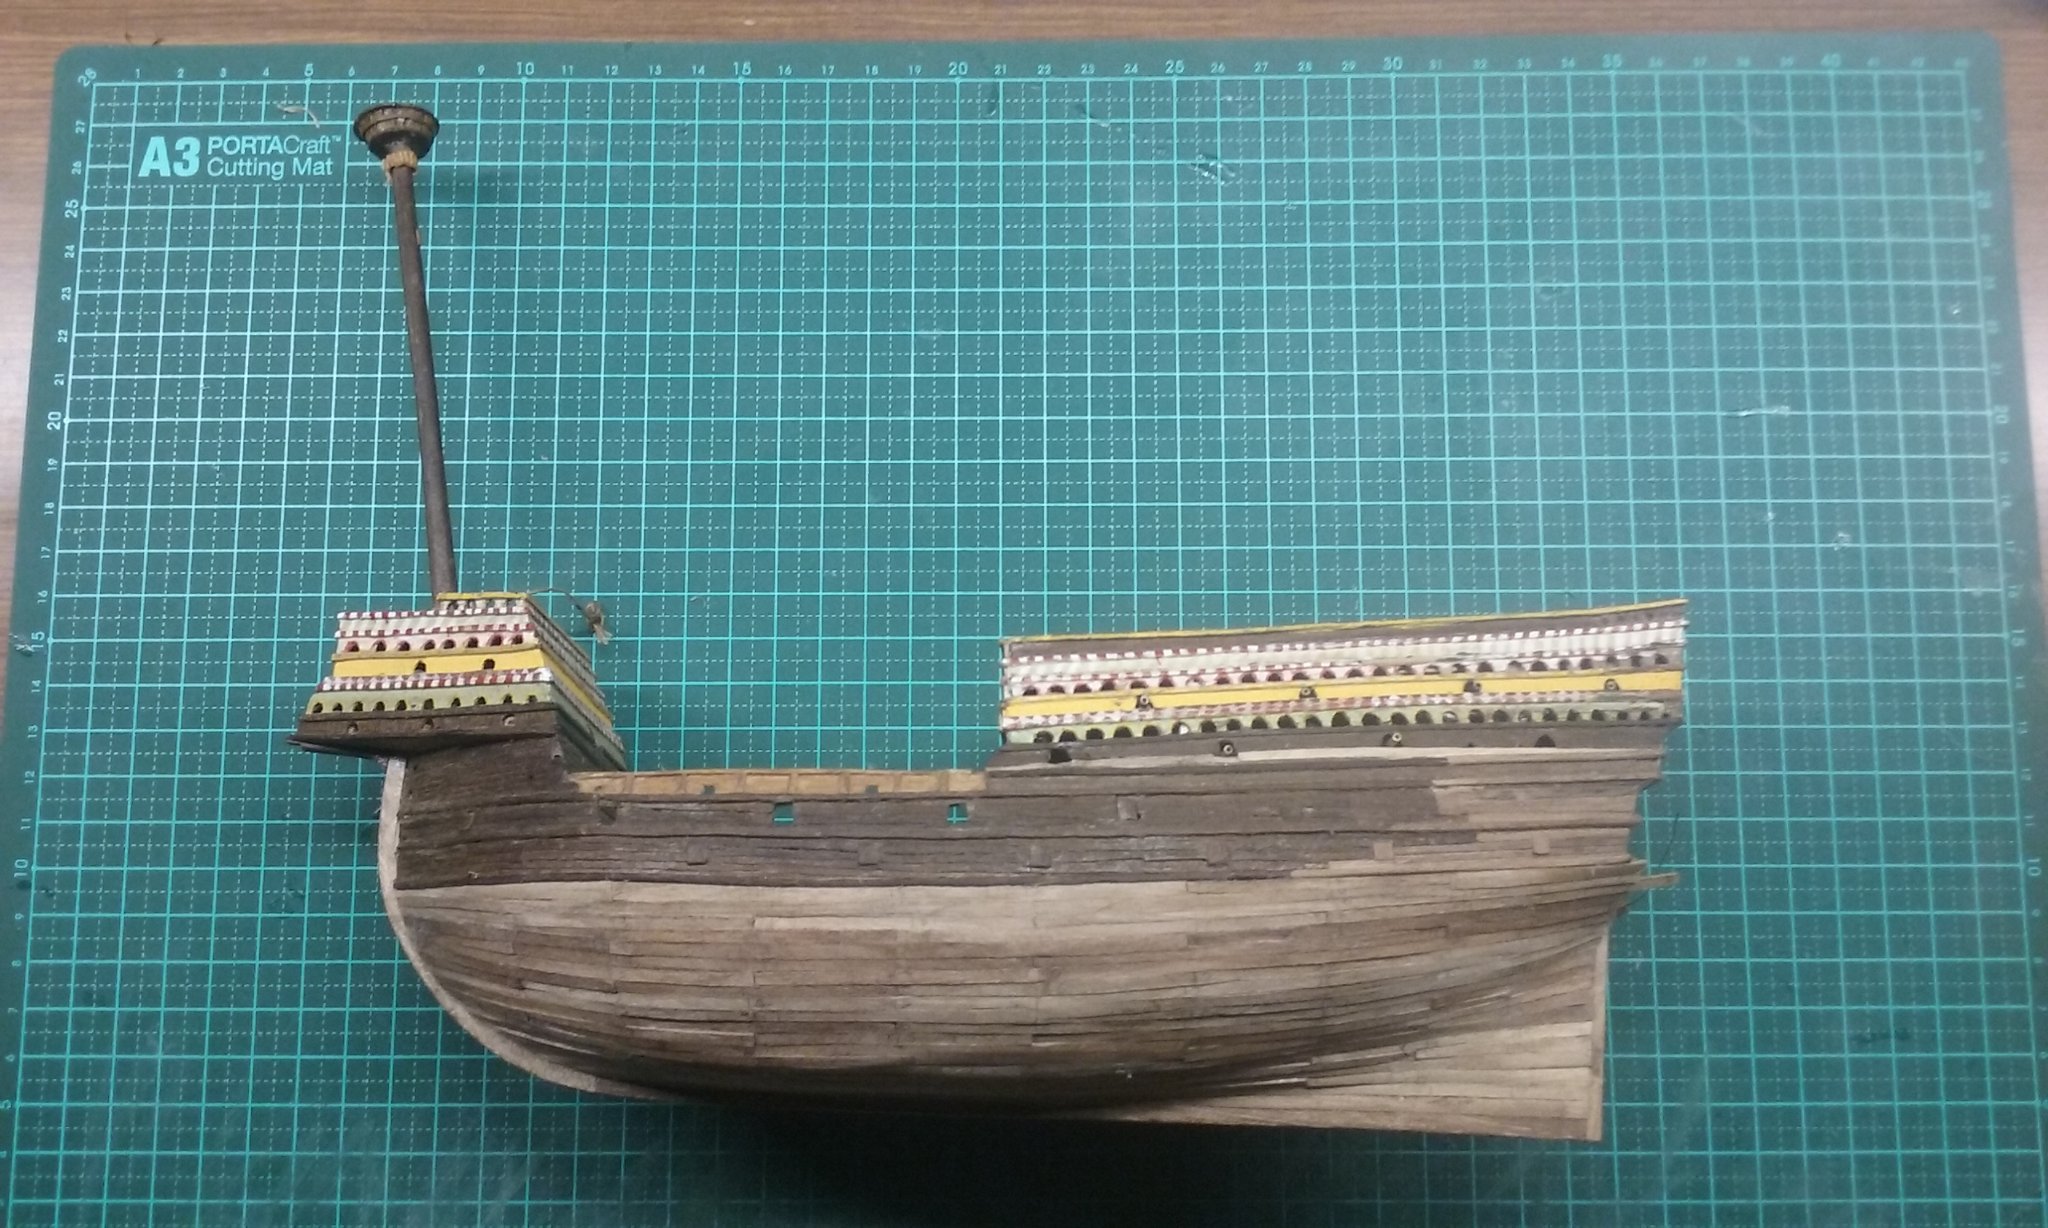
The Great Harry planking has been a real trial for me, but I must say I'm glad I decided to make it a learning process rather than try for perfection. I've made quite a lot of mistakes - the planking of the two sides isn't equal and as it's effectively POB (i.e. there were only a small number of "frames") I could only have the planking shift repeat every three rows, not the four I'd hoped for. And I kept losing track of the planking shifts - another lesson to learn, particularly when the arrangement was affected by drop planks. Still, unless you're really looking for the mistakes they're not obvious, and once I've sanded the planking I think it'll look pretty good. Note the lack of symmetry between the planking of the port and starboard sides. But who's going to notice except me? And in future models I'll take much more care to keep it even. Lots of excess messy glue but the sanding will take care of that. And here's the planking of the port side finished: Ever since I heard the Flanders and Swann song Have Some Madeira M'dear I've wanted to use the word antepenultimate (the posh way of saying "third last") in a sentence. And I've finally got my chance. Here is the antepenultimate plank in place . . . going. . . Going . . . Gone. And now for the sanding . . . Steven
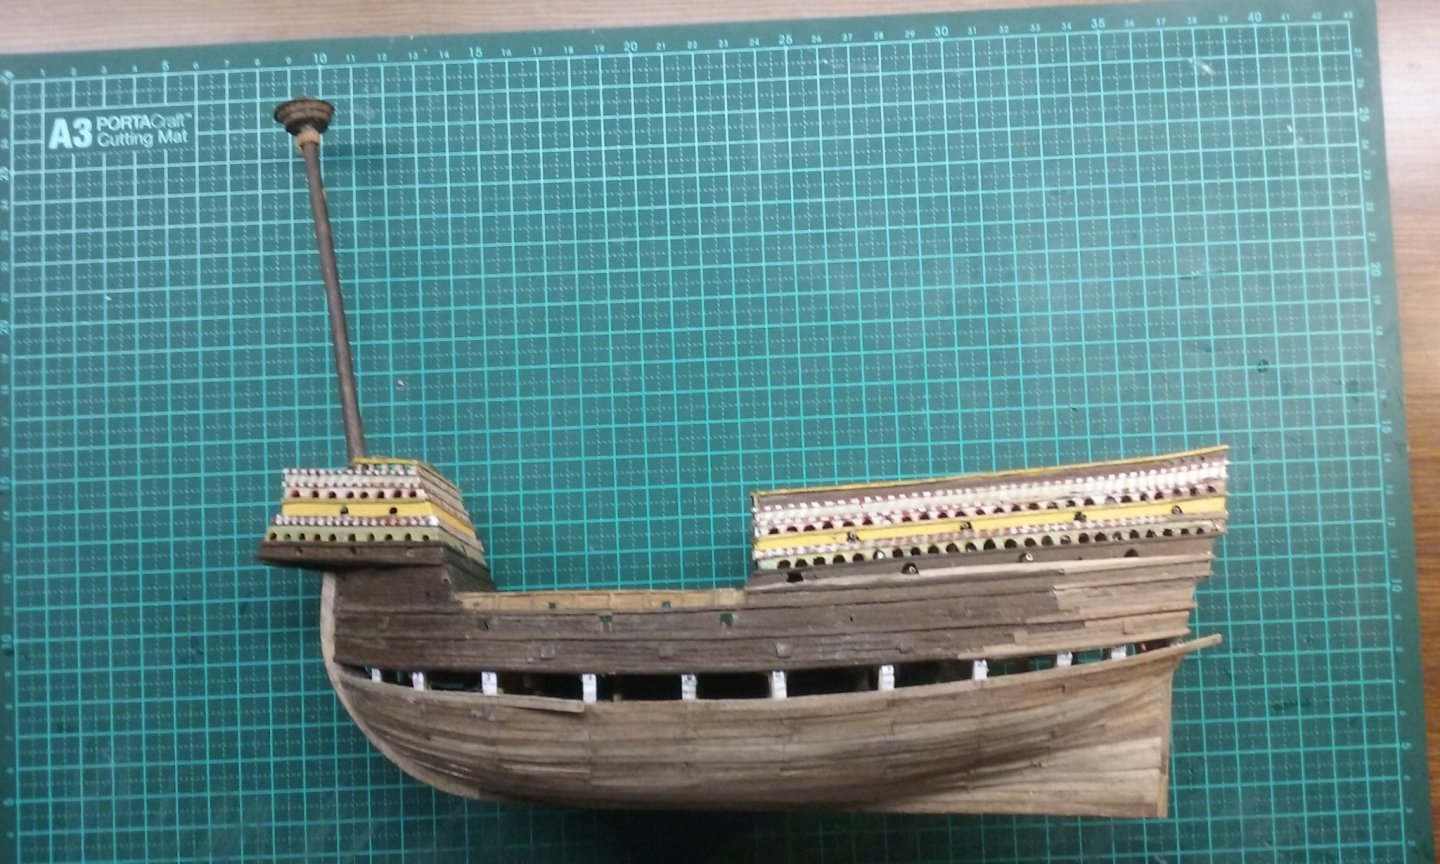
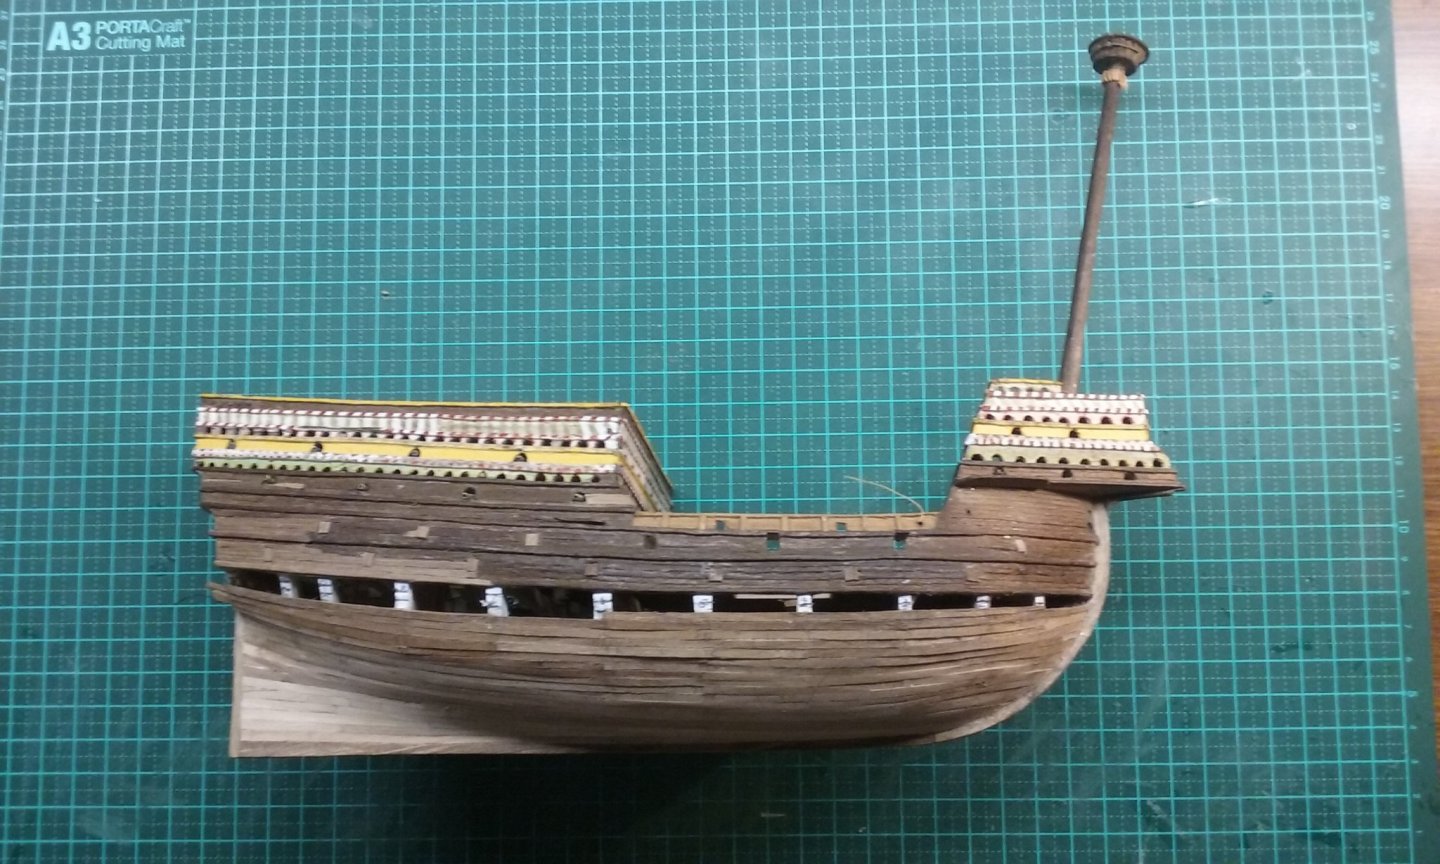
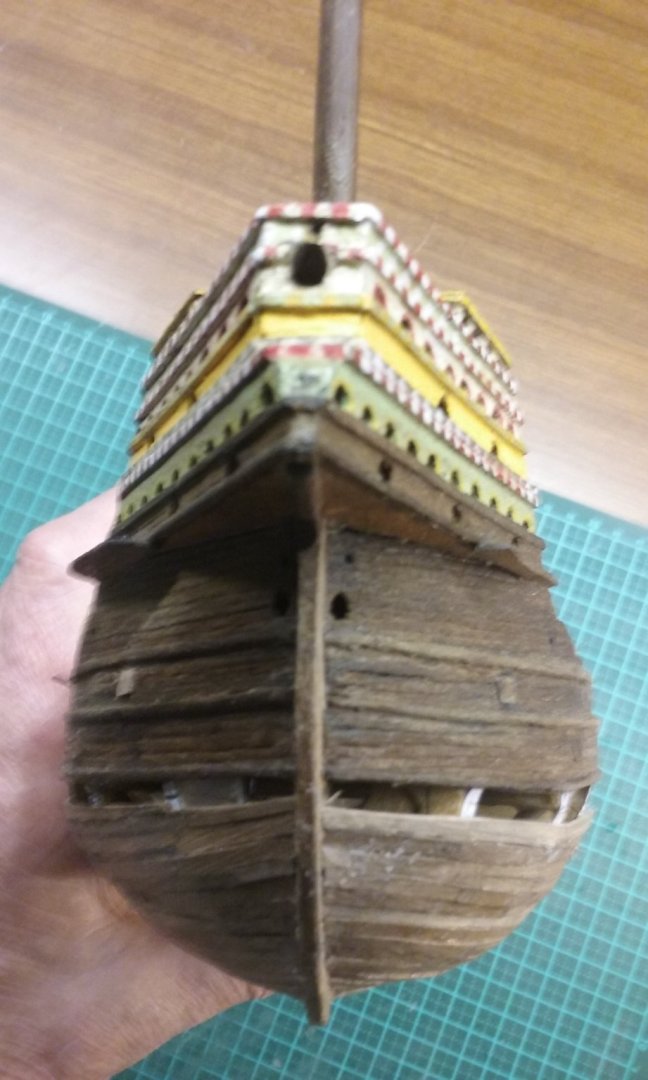
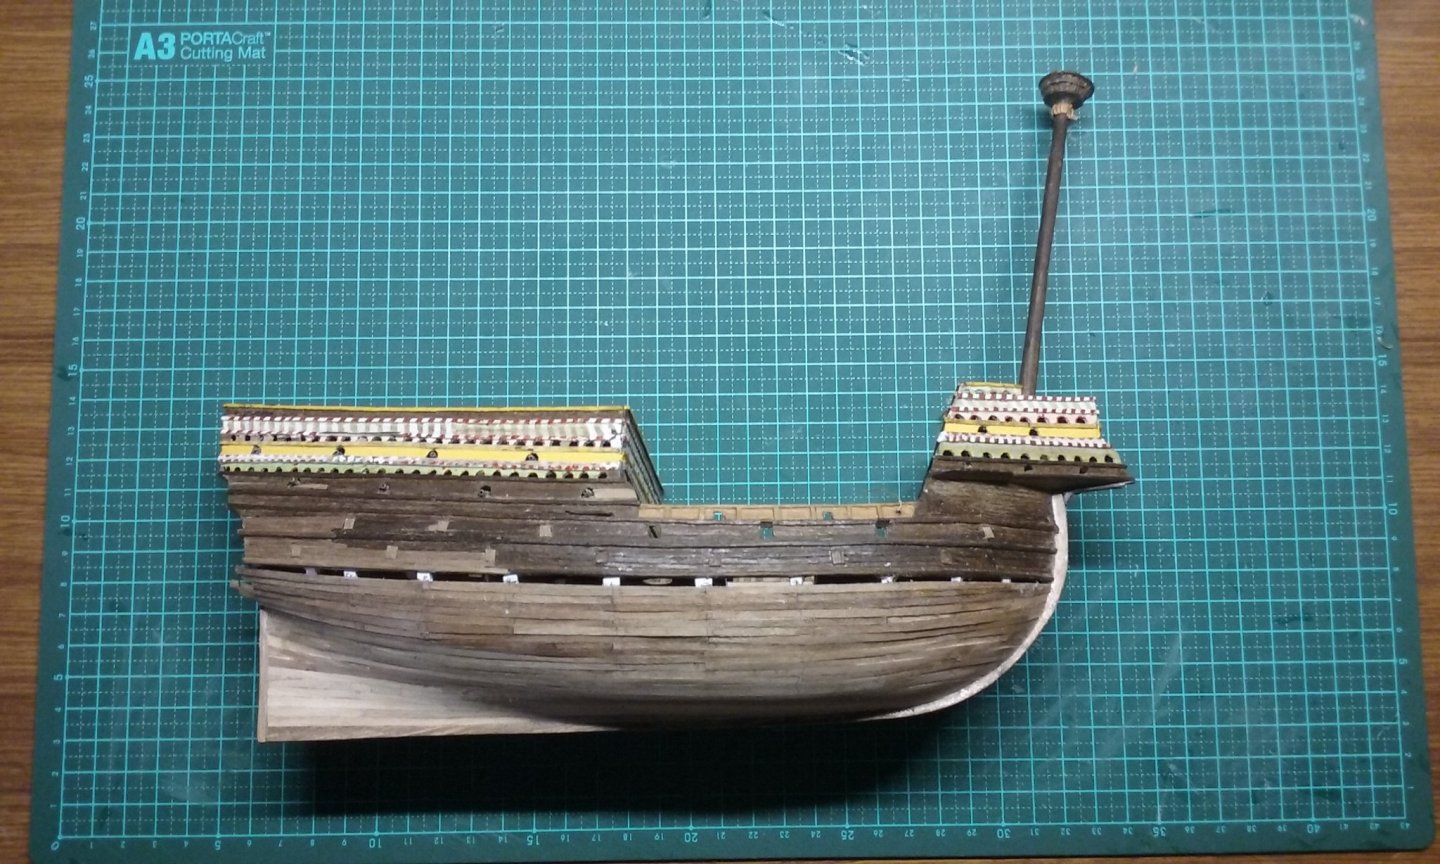
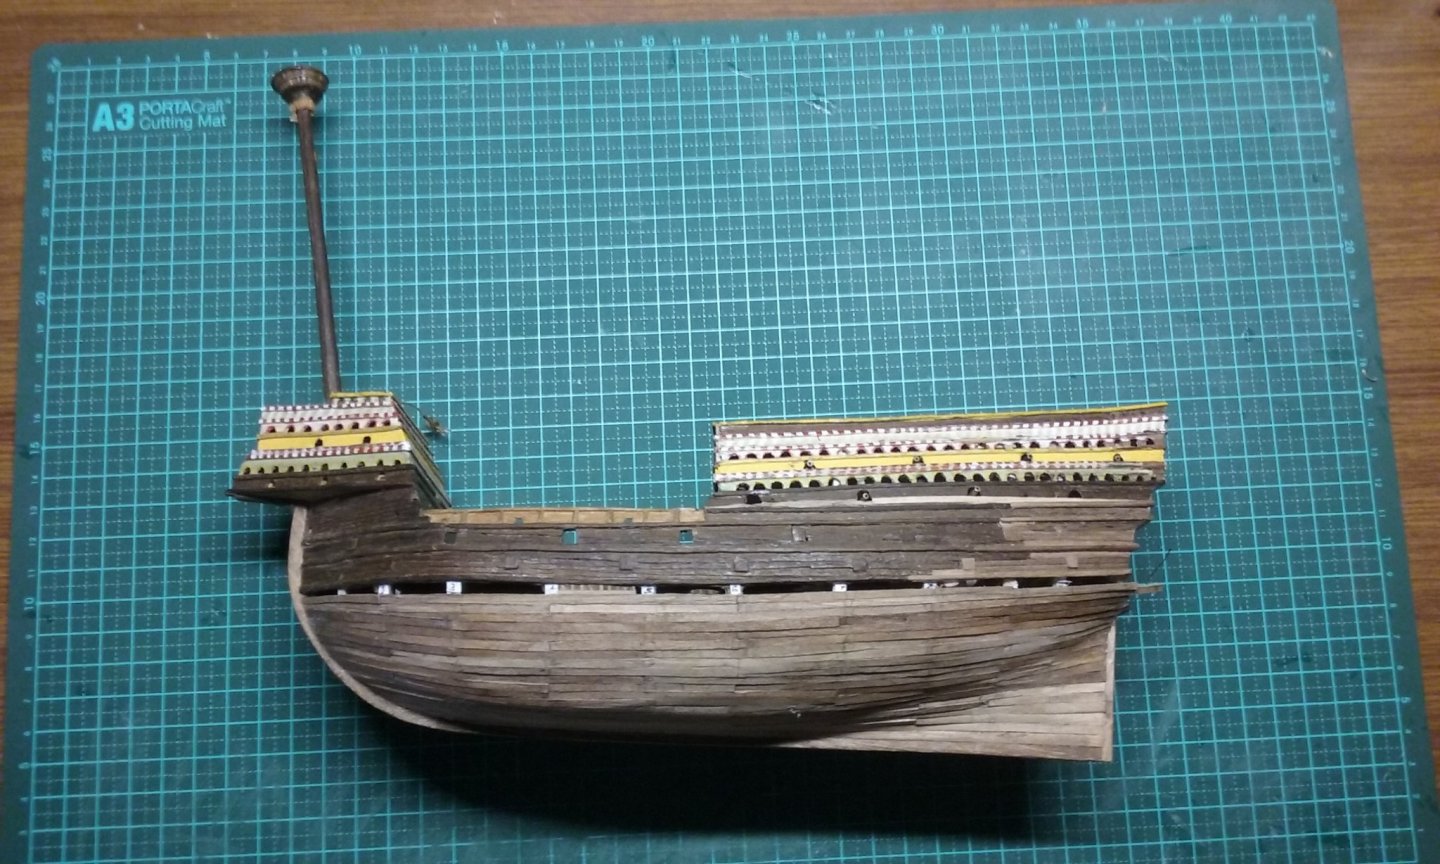

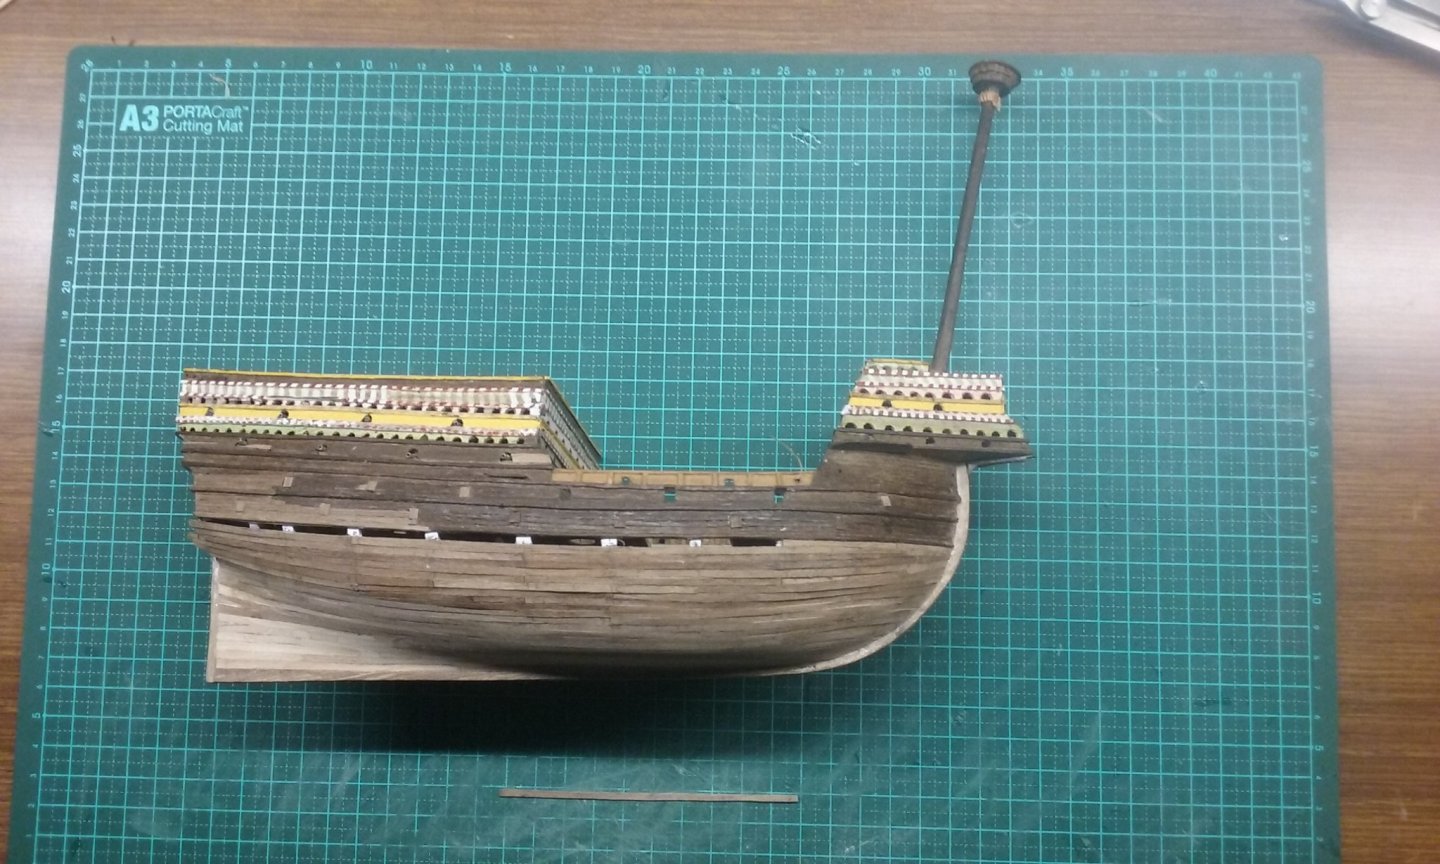
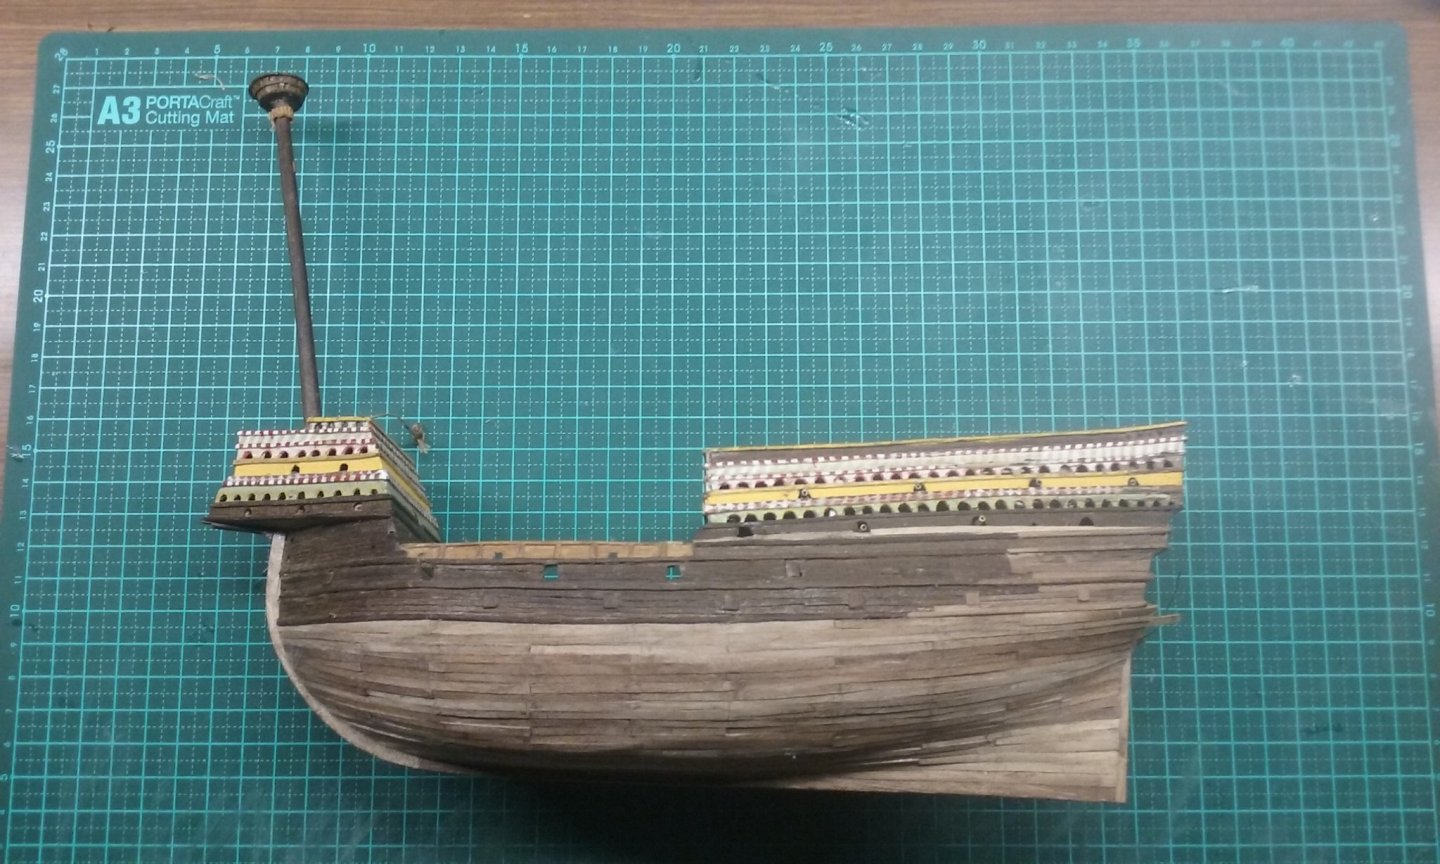
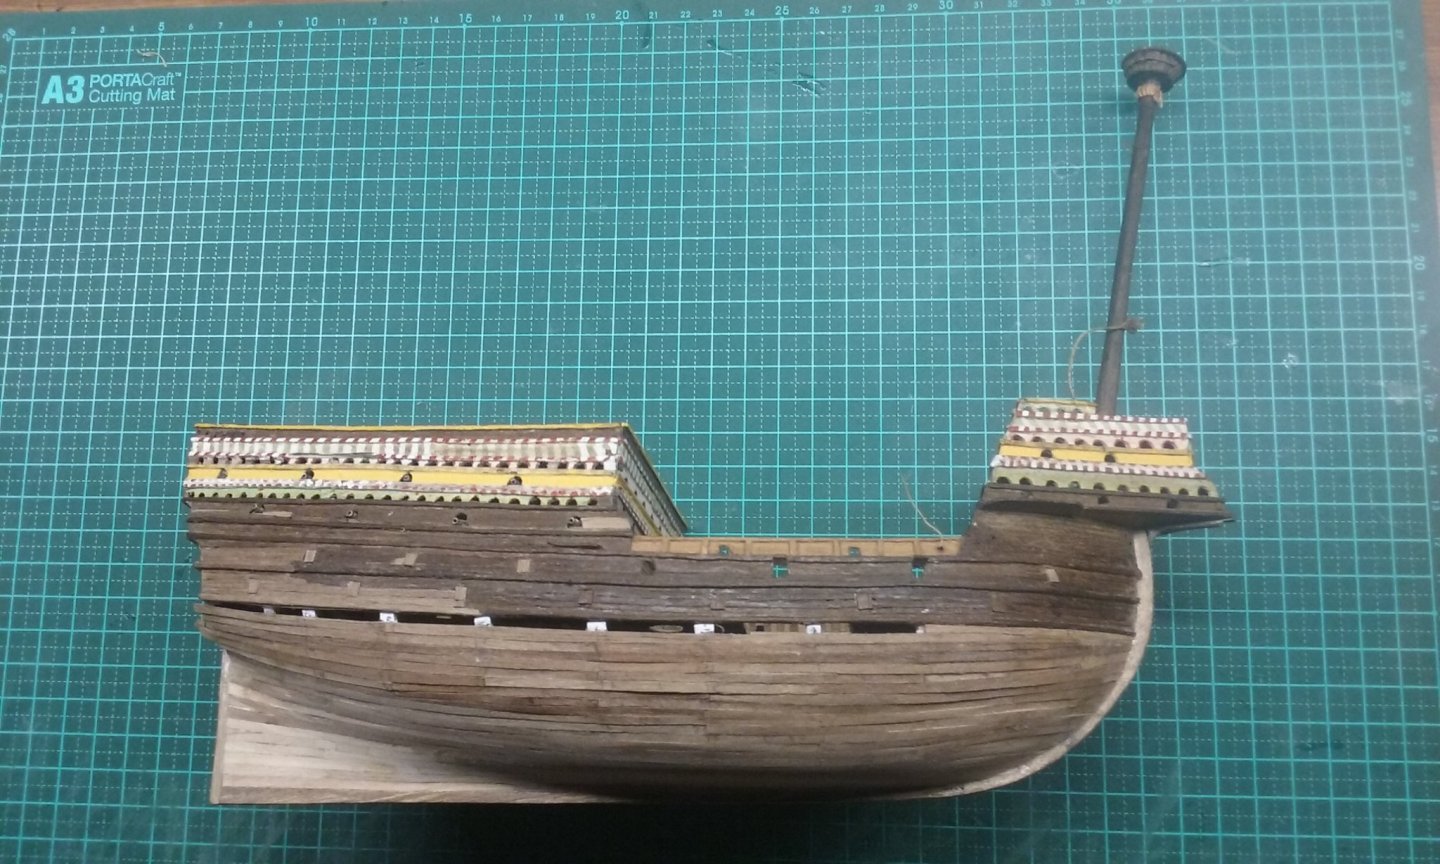
.thumb.jpg.3b4343e4d5a2b3603df0d52718f1bbb8.jpg)
- 740 replies
-
- 11
-
-
-
- Tudor
- restoration
- (and 4 more)
-
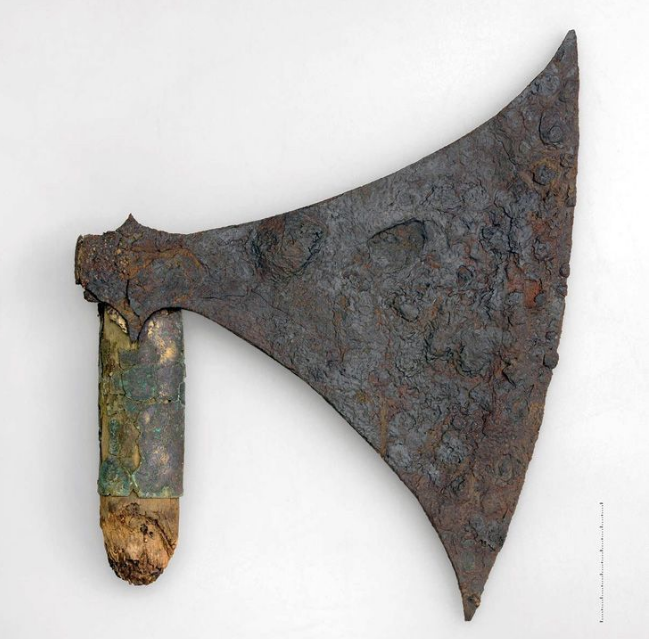
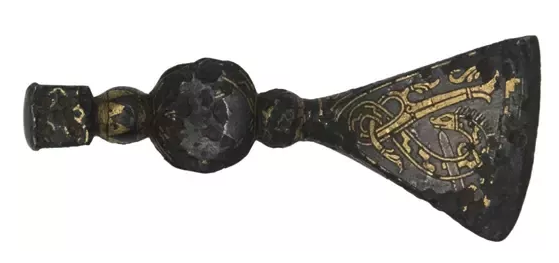
Not sure if a shieldmaiden would be on a ship like that, but assuming she would, her sword and sax (dagger) are extremely accurate, as is the equipment of the axeman. That's a very pretty axe head (as axeheads go - I guess you have to be really into this stuff to call an axehead pretty, but look at these ones . . .) Just from an aesthetic viewpoint, I think that is such an elegant shape. And then there's the decorated ones . . . Unlike where you are, it's high summer here in Ballarat. So why is it so cold and rainy? (or is that an oxymoron? (Ballarat = cold and rainy).

-
That sequence sounds good - but only trying it out will tell you if it's right. I see you have the crosstrees in the list but haven't mentioned he trestletrees. Are you doing them at the same time as the crosstrees? I do like your blocks. Next time I make blocks I think I'll use this method (I've bookmarked this page for later reference). Do the sheaves turn or are they fixed in place? Happy New Year, Steven
-
You've done a really nice job with her, Chimp. "Beginner", indeed! I was in Bristol in 2009 and saw both the Great Britain (which was why we went there) and also the Mathew, which I wasn't expecting. Didn't get to see Brunel's wonderful bridge close up, but saw it from a distance. Unfortunately, the camera ran out of puff just at the wrong moment, so only got a few photos. I had a friend from Bristol so I was ready fr the accent- at least I thought I was . . . but getting directions from a bus driver showed me how wrong I was . . . Steven
-
Beautiful - just beautiful.


.jpg.ed3b9ca01f326e746d8ef22ed7bf86d1.jpg)