HOLIDAY DONATION DRIVE - SUPPORT MSW - DO YOUR PART TO KEEP THIS GREAT FORUM GOING! (Only 13 donations so far - C'mon guys!)
×


Louie da fly
-
Posts
7,986 -
Joined
-
Last visited
Content Type
Profiles
Forums
Gallery
Events
Everything posted by Louie da fly
-
 And some footage of Basil Brown himself! https://www.bbc.co.uk/archive/sutton_hoo_dig_collection/zs6xqfr
 -
Thanks Roger and Druxey for the suggestions. Druxey, I don't have the equipment for the accuracy needed to use your technique; no drill press - not yet at any rate. It's in its box, waiting for electricity to be connected to the shed. Roger, if all else fails I may look at resin, but I'm trying to avoid modern materials as much as possible. I'd probably lean more toward card impregnated with glue - at least card's made out of wood . I'll keep these options in mind if needed, but so far I seem to be having success with the technique I'm using. Here are the mainmast starboard upper deadeyes attached to the shrouds. I'm still getting a bit of splitting when I enlarge the holes, but the thread is keeping the deadeyes in one piece. I think I can get this to work, as once the lanyards are threaded through I'll add a dab of glue to each where needed to keep everything together. Steven
- 740 replies
-
- 7
-

-
- Tudor
- restoration
- (and 4 more)
-
Johnny, sounds like a very good idea. The only thing I'd recommend is make one strip first, and see how it goes. It would be a tragedy if you made a whole lot of them and they all turned out to be too narrow, so there wasn't enough deadwood next to the holes, causing them to split. Bookbinding sounds fascinating. The only thing I've ever done in the field is glue back together some of my old valued paperbacks in which the glue has deteriorated with age, causing the pages to come adrift - not very successfully, I might add Steven
- 740 replies
-
- 2
-
-
- Tudor
- restoration
- (and 4 more)
-
Exactly Oh, and I was getting YK 12 (9th century) mixed up with the almost identical YK 11 (7th century). Steven
-
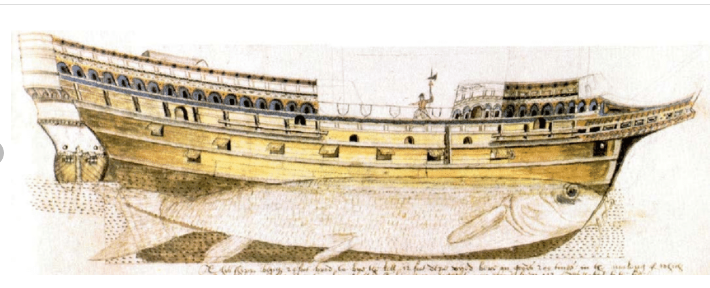
Thanks, people. J11 - it's not a kit. I scratch built it after drawing up the plans, based on a copy of the Anthony Roll picture, the coloured reconstruction picture on the first page of this log, and a reconstruction cross-section, all from Björn Landström's book The Ship. I must have been pretty keen when I was seventeen. Unfortunately my plans went the way of all flesh in the 50 years between building it and restoring it - I've no idea what happened to them. It'd be nice to have kept them as a record. Snug Harbor Johnny - just be aware I've changed my technique a bit - now instead of making the strip thick enough to get several deadeyes from one "triangle", I make it the final thickness of a single deadeye, and only try for one. Otherwise the extra ones just split. And I put the three holes near the top (not too close!) of a rectangular piece of wood with enough wood either side of the holes - and at the top - to avoid splitting, and I only do one deadeye at a time. And don't shape the triangle until the holes are in place. I expect your Vasa is a larger scale than mine anyway, so you probably won't have as much of a problem. Steven


- 740 replies
-
- 8
-
-

-
- Tudor
- restoration
- (and 4 more)
-
I tried to find the Tapestry on-line; no luck. But Vroom would have been 29 when the battle took place, so there's a good chance he was at least familiar with the type of ship the Revenge was. He may have actually talked to people who knew what she looked like - he may even have seen her before she departed on her last voyage. On the other hand, he may have just made it up . . . Me too. I got hooked on Tolkien in my teens, way back in the 60's - bought the three-volume hardback LOTR out of my pocket money. I just recently re-read the Silmarillion. Only took about a week to recover . . . Steven
-
But did you get blood on the model? It doesn't count otherwise . . .
-
Not a bad idea, Mark - head it off at the pass (as they say in the cowboy movies). Steven
- 740 replies
-
- 3
-
-
- Tudor
- restoration
- (and 4 more)
-
Fascinating, Círdan (love the name, BTW - as in Círdan the Shipwright?). I've never seen these before. You're probably right. In Henry VIII's time it would have been more likely (as shown in the Anthony Roll), but by the reign of Elizabeth the palette was apparently a lot wider, if Matthew Baker is to be believed. I note that all the ships are depicted with only three masts. Is there any documentary evidence for the Revenge having four, or is that just imagination on the part of the kit manufacturers? Steven
-
In Germany a reconstruction has been built of the Oberstimm-type ship, called the Fridericiana Alexandrina Navis. It was built in 2016 and has recently been under maintenance, renewing the paintwork etc. https://www.egea-ev.de/projekte/ https://www.geschichte.phil.fau.de/files/2019/10/Ancient-Warfare-13.2_FAN_Dreyer.pdf For those who have facebook, you can see more at https://www.facebook.com/roemerbootFAN Steven
-
- 2
-
-
A bit of the history . . . And here's a video from the people in the UK who are building a full-sized replica: Here's their website - https://saxonship.org/?fbclid=IwAR2tmg3x4sTXGqSmQi60mBwmmIaJzlpQfs9BK1PWbSn9NkONbBwpwiF8gVQ fascinating! Steven
-
Thanks for all the likes and comments. Keith and Jeff, I think card is as likely to tear as wood is to split. But I'm amazed they make triangular card deadeyes that small. Druxey, I considered plastic, and even got some plastic to try out (just the lid off a coffee jar), but haven't got round to it. Now that I seem to have a workable technique I think I'll keep on with it (and anyway I'd prefer to use wood if I can - traditional material and all that). Once I've made all the 2mm deadeyes I have to work out how to make smaller ones - wood just won't do the job. But I have some ideas, probably involving thread and glue to make a composite "blob" that will act as a deadeye. Steven
- 740 replies
-
- 6
-
-
- Tudor
- restoration
- (and 4 more)
-
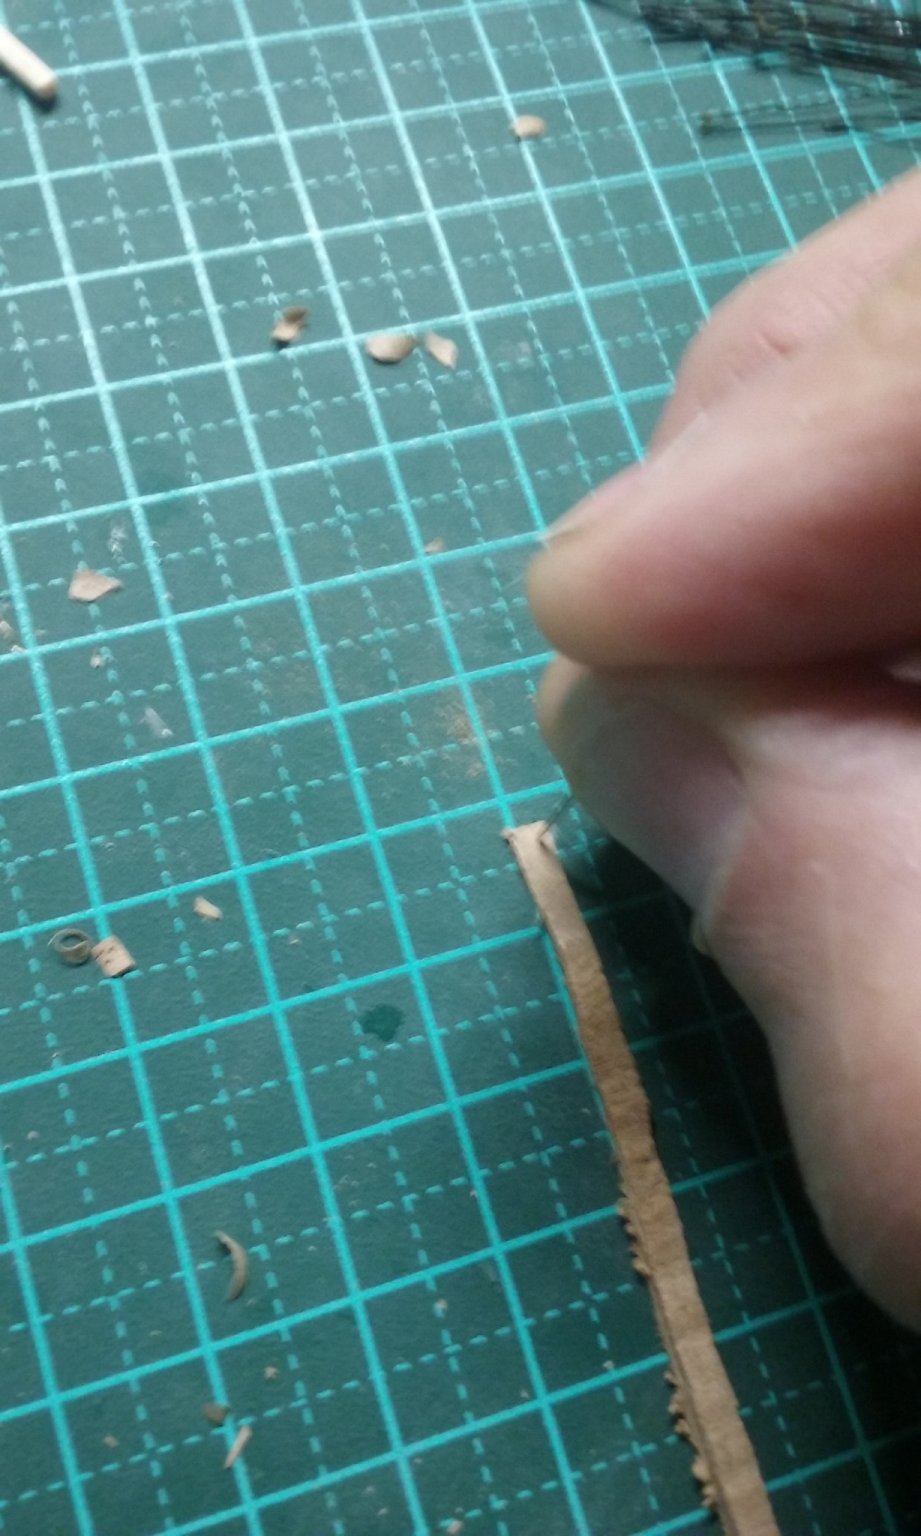
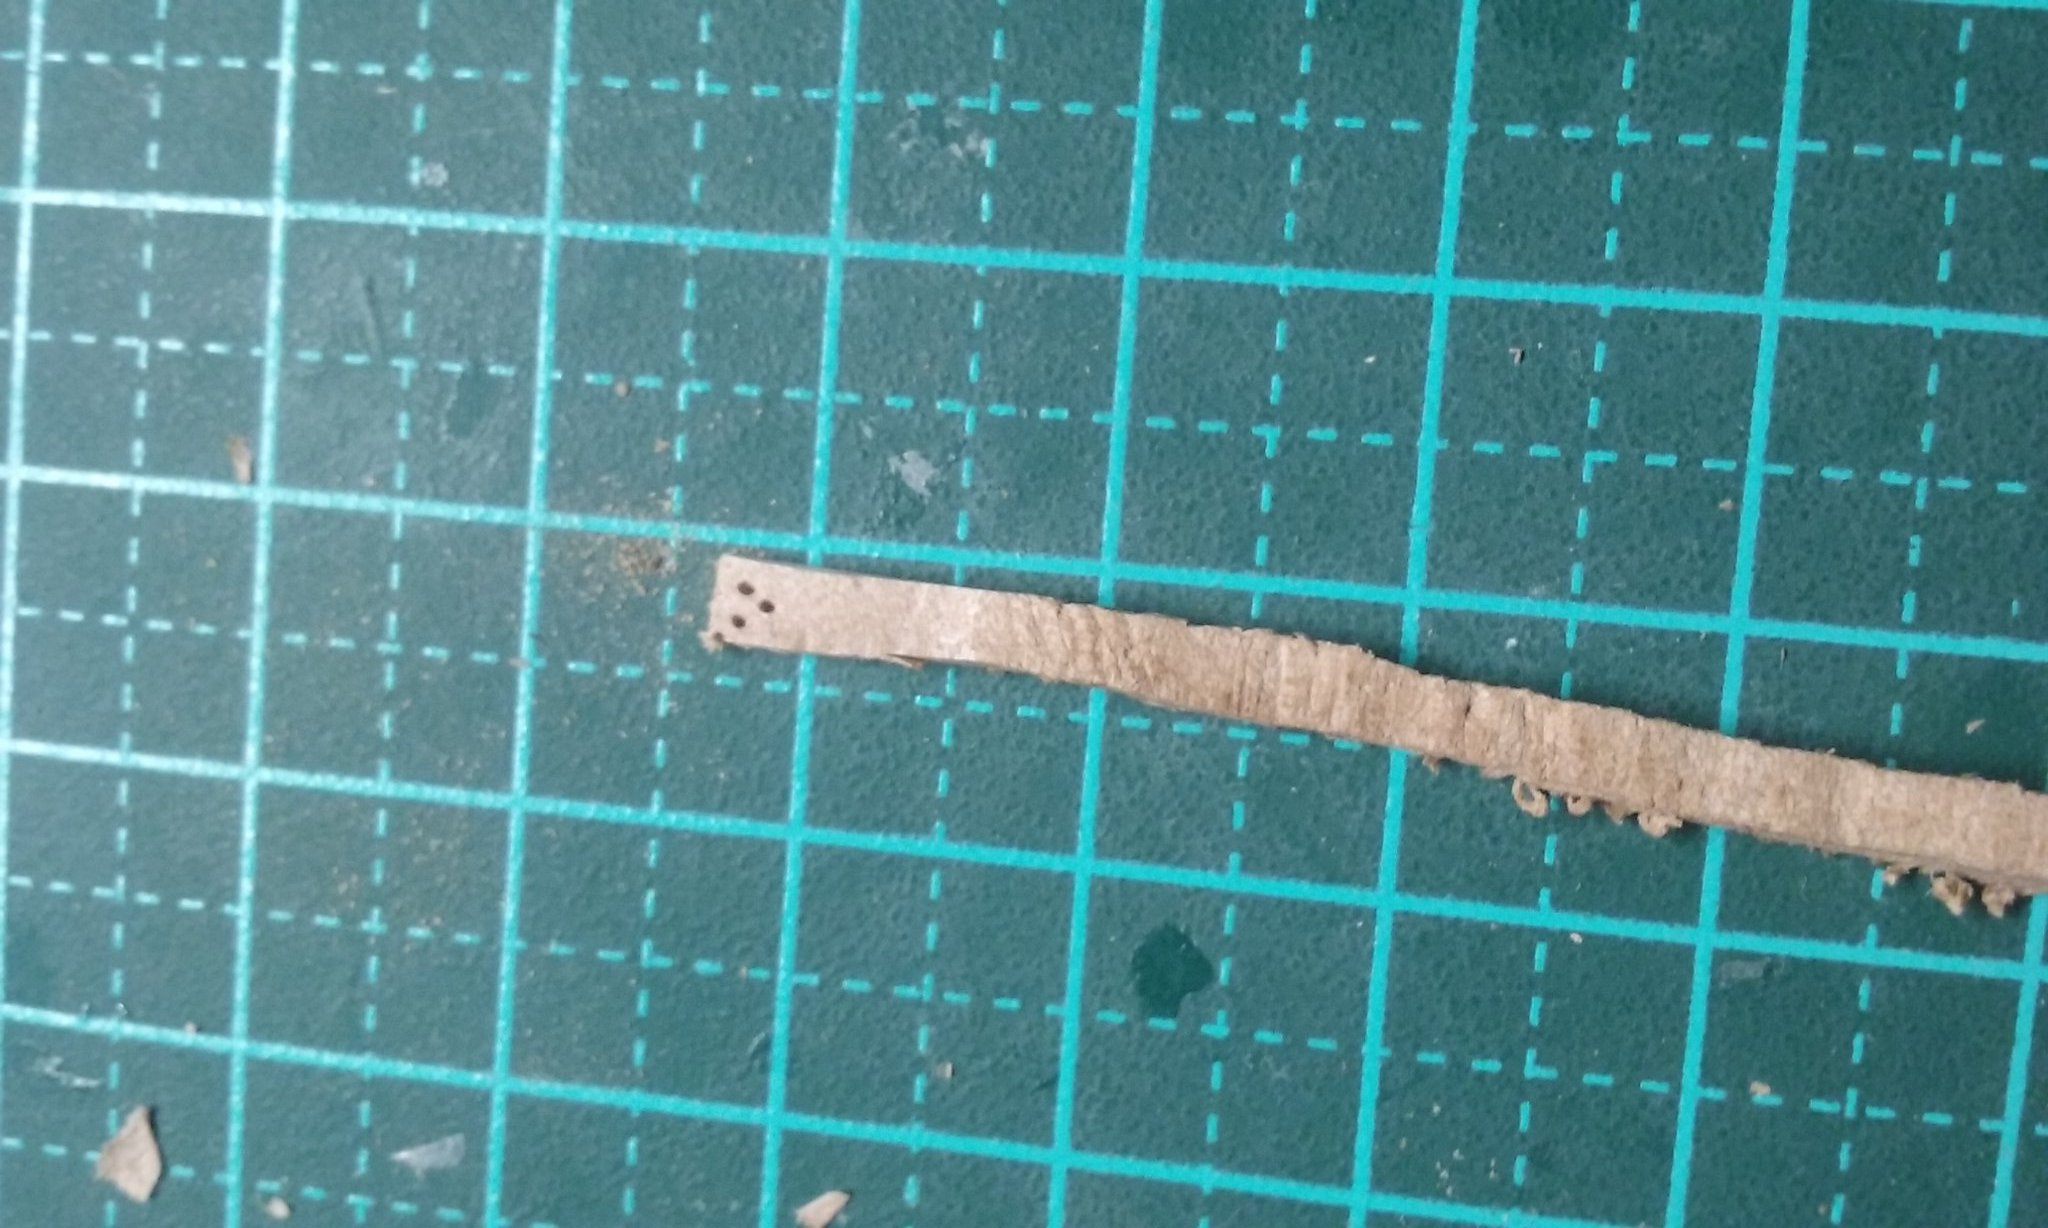
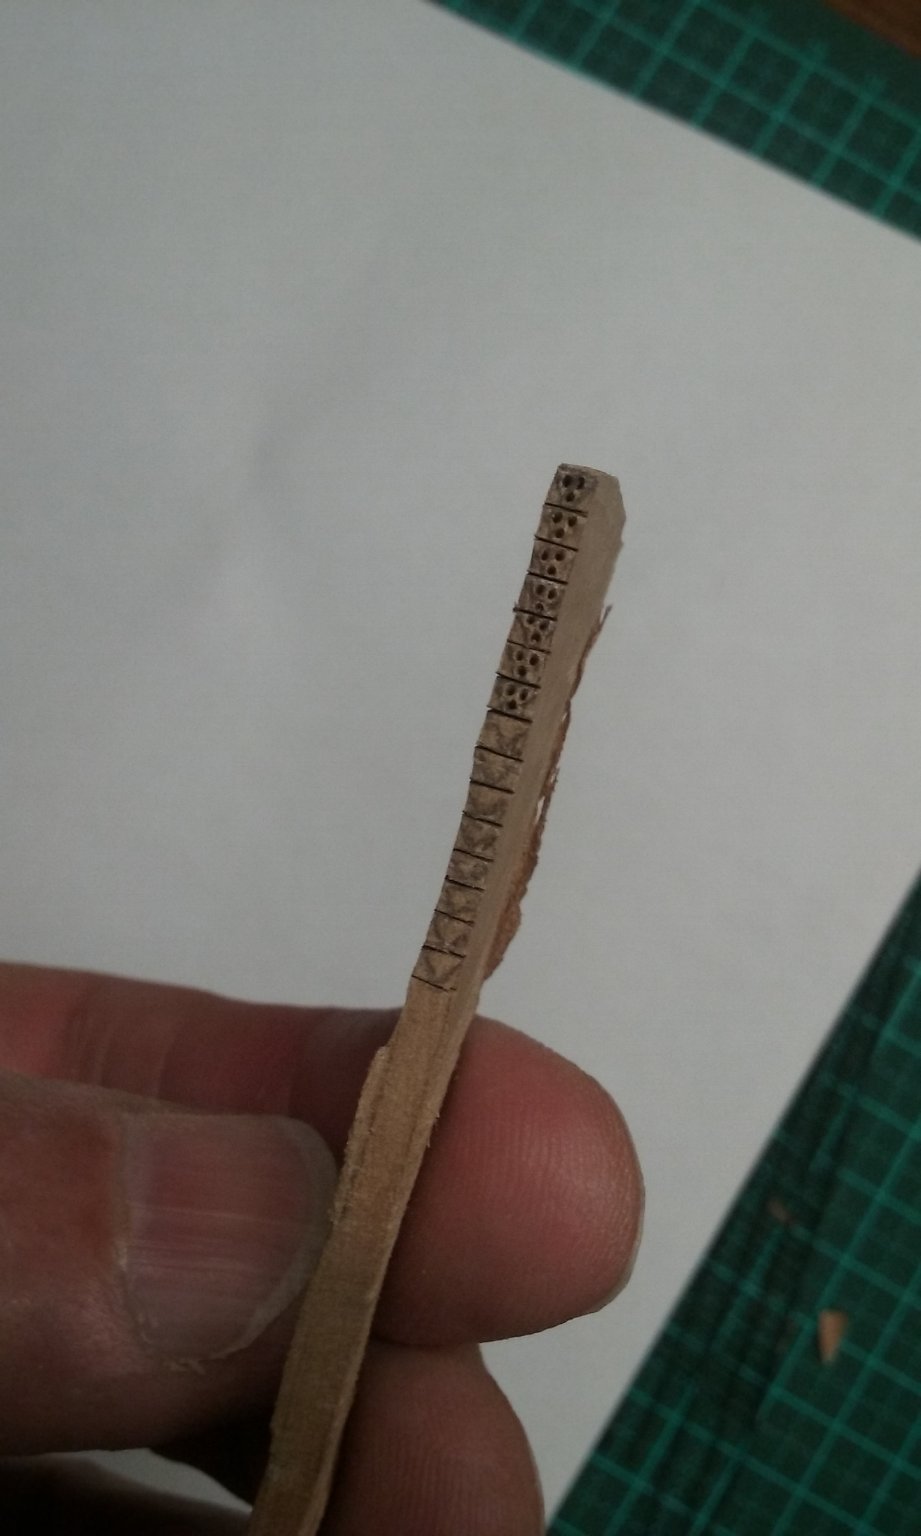
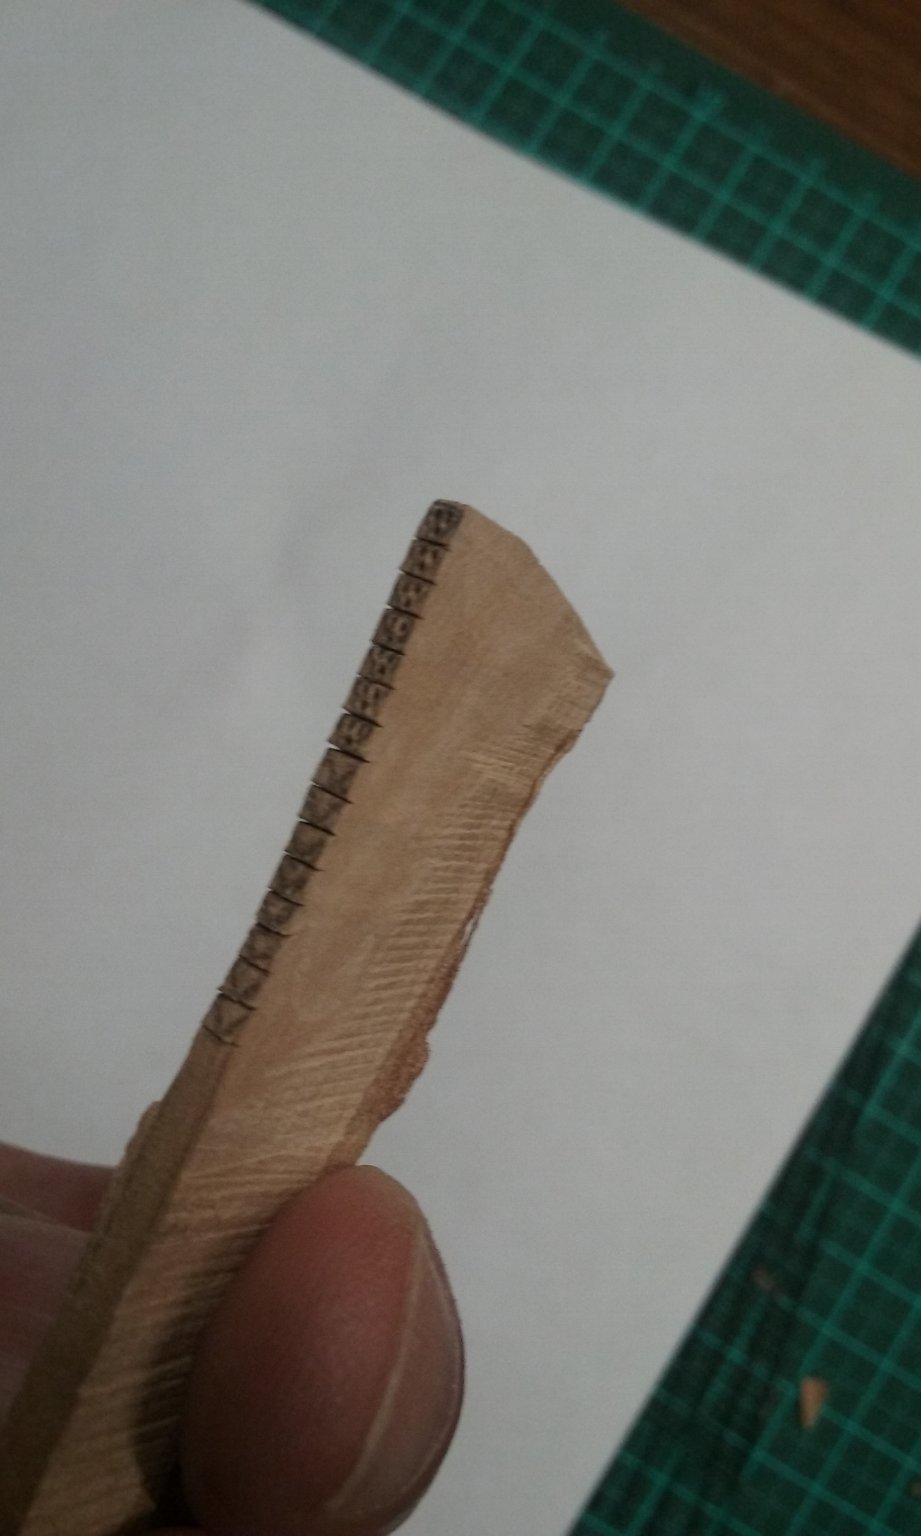
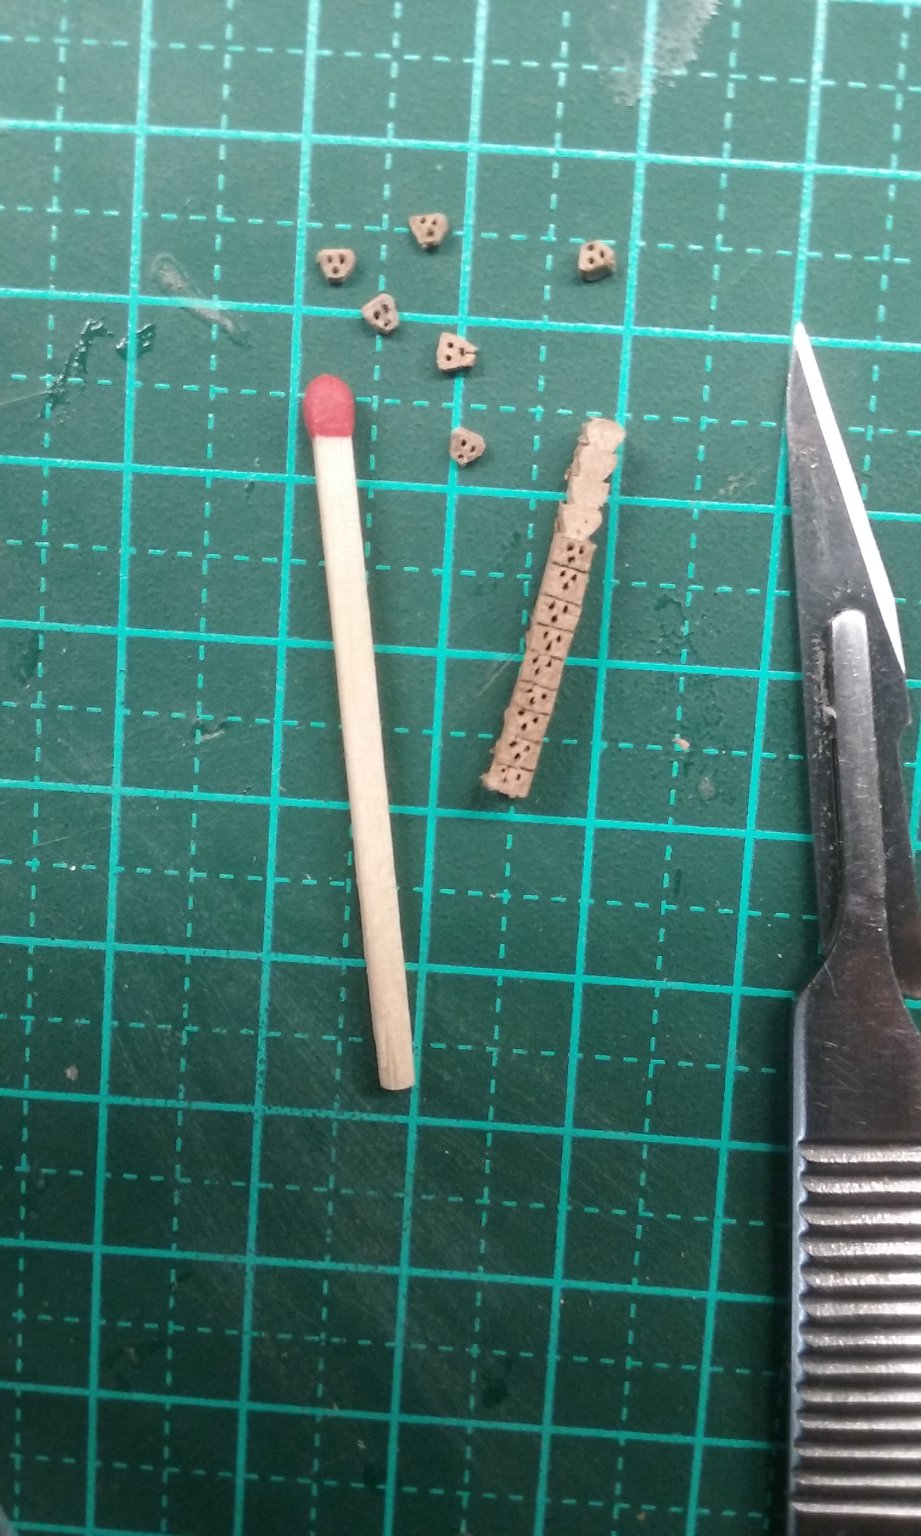
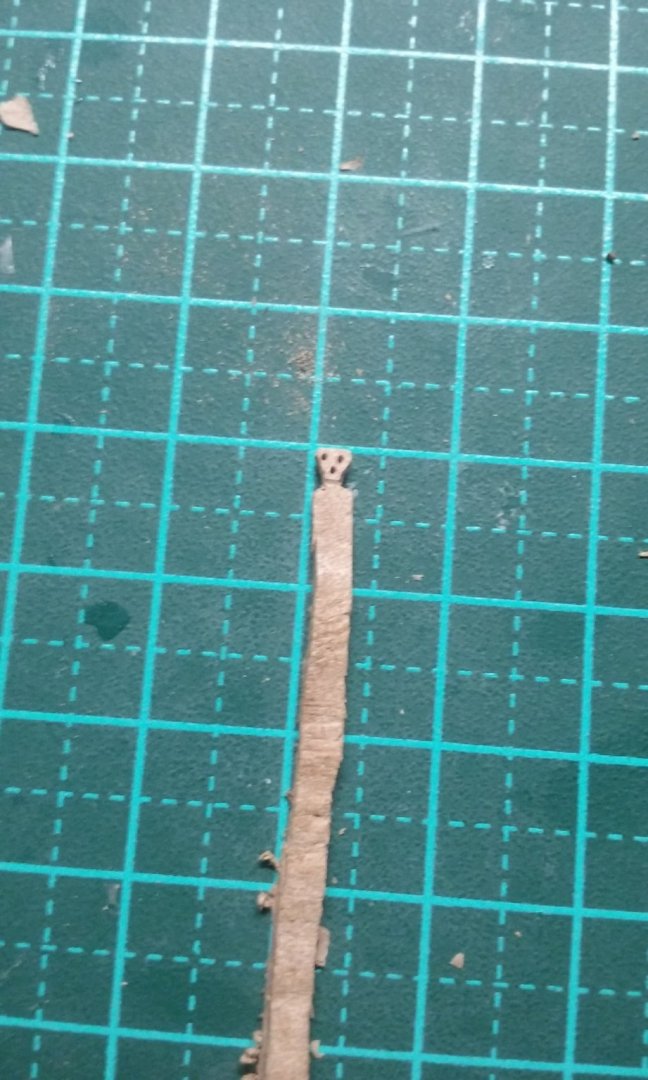
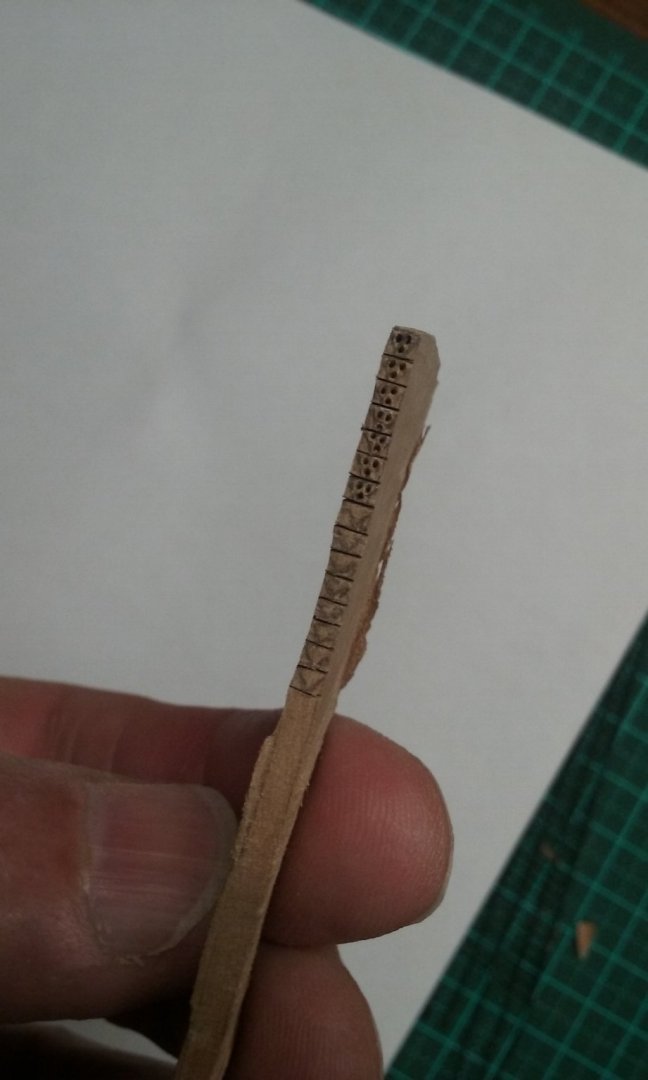
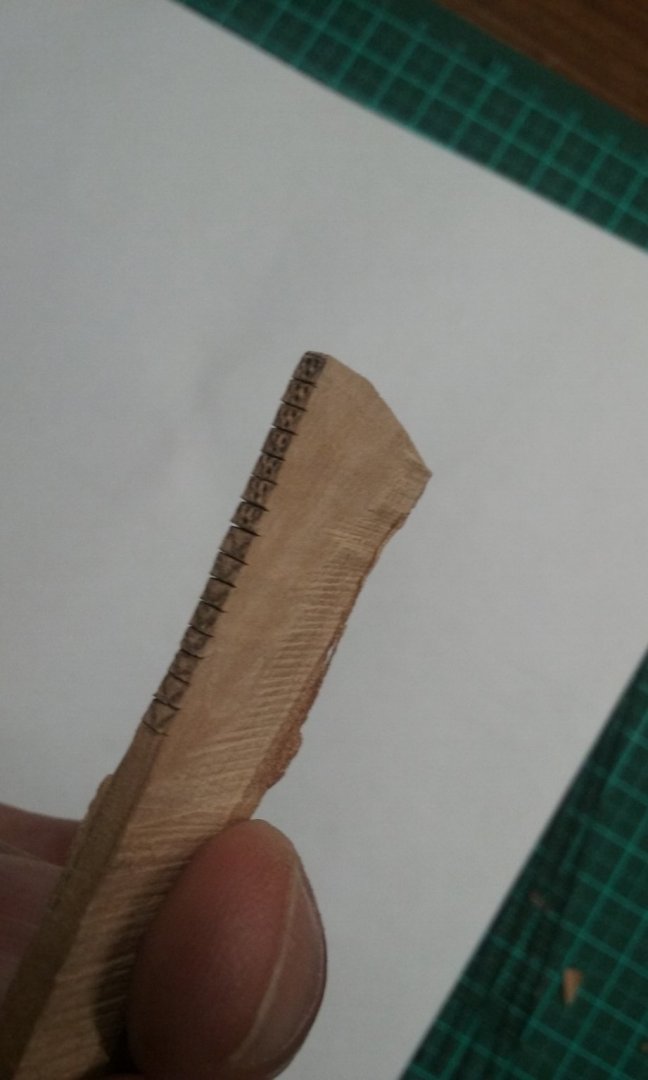
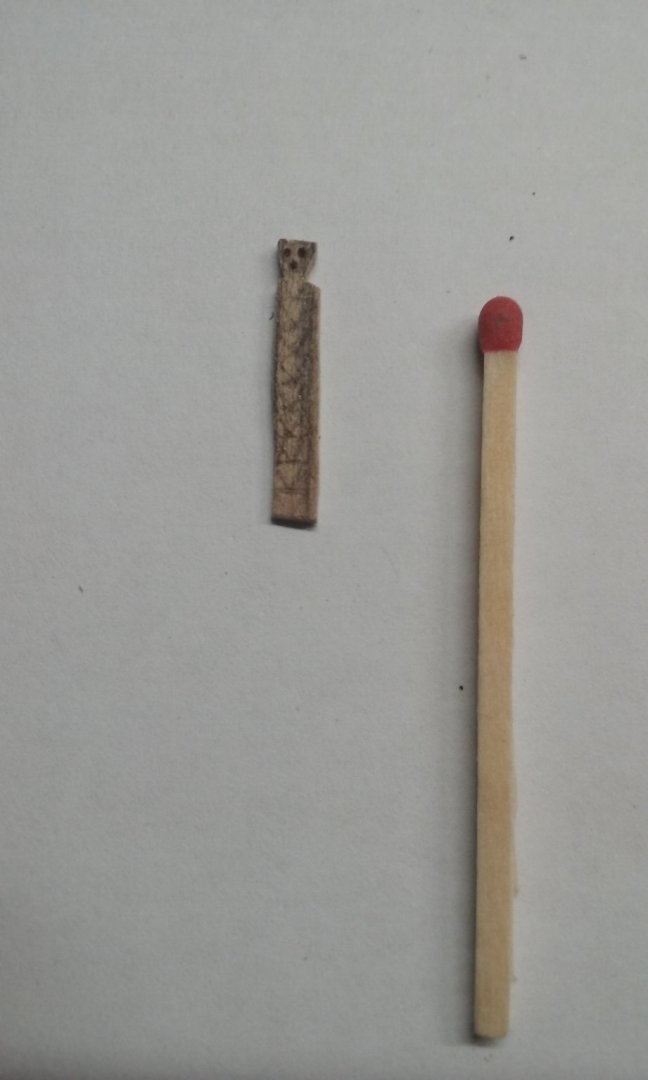
A word of warning - building a mid-16th century vessel at 1:200 scale means that your biggest deadeyes are triangles 2mm on each side. This is not easy to do. The corner of a triangle splits off far more easily than would happen if the deadeyes were circular. Holes big enough for the lanyards to pass through are likely to split the wood the deadeyes are made from, no matter how tight the grain. I tried various ways to make them, preferably mass-produced (the main shrouds alone need 48 deadeyes). I tried making them from the walnut sheet I already had - immediate splitting. Then I tried carving multiples from pear wood, which has a much finer grain. After several failed attempts I found the best way is to have a rectangular strip of pear wood a fair bit wider than the deadeye, so there's extra wood either side of the holes. Put the three holes in with a dressmaker's pin, but not too deep, to avoid splitting. Then I thinned the pear wood a fair bit. Then individually carve triangles, one at a time, and split each one off from the base piece. They still split pretty easily. I glued the split ones back together before moving forward. I discovered that I had the deadeyes too close together in the base piece and I wasn't able to make a good-looking triangle - had to cut the bottom apex off so it didn't interfere with the next deadeye. So the final configuration has the triangles just a bit further apart (there are two in this picture - the top one split so I had to glue it back together - which is why one of the holes is gummed up; the bottom one worked well). And here's the best one (the bottom one in the picture above). Then glue the bottom of the shroud around the deadeye. This holds the deadeye together so it won't split when you push the pin all the way through to complete the holes for the lanyard. Note that there are already two pairs of deadeyes in place - I made these when I was 17 years old. I have no idea how I did it back then . . . Once I've made all the 2mm deadeyes (and now I'm fairly confident I can do them in large numbers) I have to work out how I'm going to do the small ones for the topmasts and mizzens . . . Steven


- 740 replies
-
- 14
-
-
- Tudor
- restoration
- (and 4 more)
-
Damn! I didn't check the title at the top of the page! I just re-checked Mott's TAMU paper The Development of the Rudder A.D. 100-1600 and the major change in side-rudder design occurred around the 12th or 13th century, from symmetrical to "unbalanced". This made it a much more efficient aquafoil (like an aerofoil, but in water). Anything before that followed the same general design (with minor variations) as those of the Ancients. Steven
-
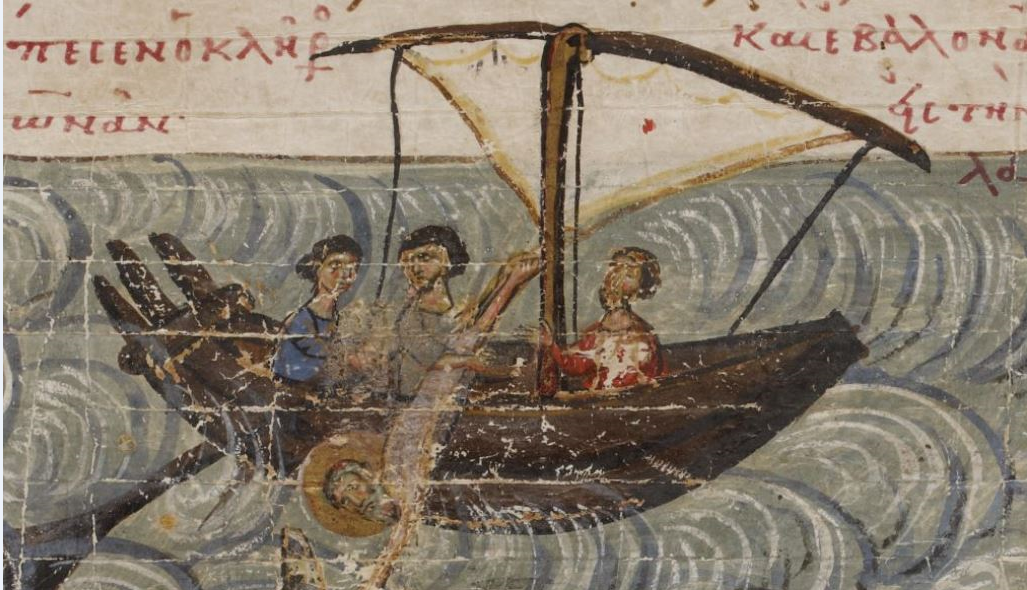
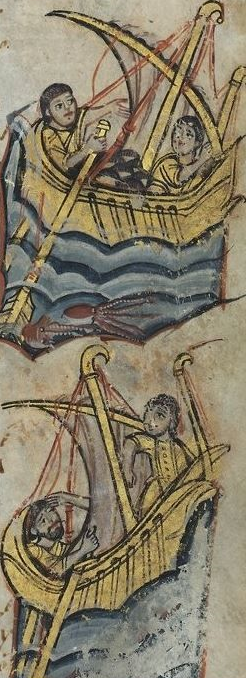
Thanks, Dick. This Byzantine representation of Jonah getting chucked over the side (BL Add MS 19352 Theodore Psalter 1066 CE. Constantinople. f.201r) seems to show a spindle just where yours is - I've seen a reconstruction drawing of YK11 that has a sheave in the top of the mast, but below the hockey stick (which seems to make the hockey stick itself redundant, so is probably an incorrect interpretation). And this (Sacra Parallela. Bibliotheque National de France Gr. 923 f. 207r -9th century) seems to show the halyard hanging forward of the mast as you describe above. That makes sense - the ship's supposed to be 6th century A.D., isn't it? Still really the classical period in a lot of ways. Steven
-
That's actually looking pretty good, Amos. Just remember - sandpaper and woodfiller (best made from your own sawdust - or better still sandings - they're finer particles - and dilute PVA (white) glue - that way it should be easier to match the wood colour) are your friends. Keep up the good work. Steven
-
You might also like to check out this thread - a good one for the first-time builder. And when you do start, make sure to make a build log - the instructions are here A great way to get help and advice - and encouragement (when it all seems too much). And - welcome to MSW! Steven
-
Interesting idea. As I recall, your original concept was a groove in the top of the hockey stick, following its curve. But that would expose the halyard to perhaps unacceptable amounts of chafing. As I understand it, with this one the halyard goes over the sheave and then through a curved hole in the hockey stick? Is there any contact between the halyard and the inside of the curved hole, or does it run completely free? Steven
-
Very interesting J11. I can't answer for the kit or its historical accuracy - I just don't know anything about it, but it looks like quite an old kit, probably from before the Mary Rose (Great Harry's little sister) was recovered. If you were as interested in converting this to as accurate as possible a model (given the current state of knowledge) as you've been doing with the Alabama it would take a fair bit of bashing. I've got a lot of information on ships of this period which could be of value to you in this regard. On the other hand, there's a lot to be said for just building it as it comes out of the box. Steven
- 740 replies
-
- 3
-
-
- Tudor
- restoration
- (and 4 more)
-
And now Netflix has a movie about it!
-
There was certainly "usual practice" regarding plank widths. According to Wolfram zu Mondfeld's book Historic Ship Models, "Until the end of the 17th century the width of planks varied between 18ins and 13ins (the older, the wider), in the 18th century between 14ins and 11ins, and in the 19th century the average was 12ins. " - they steadily got narrower - whether to more easily follow the hull shape or perhaps because bigger trees had already been cut down? If you can get hold of the above book, I'd highly recommend it. I've found it very helpful indeed. Steven
-
I've started a Pinterest page with contemporary pictures of galleons - it's at https://www.pinterest.com.au/lowe1847/galleons/ I've still got quite a few pictures to add, but it might be of use to you - quite a few of the pictures are in colour (though most of those are not English). Steven
-
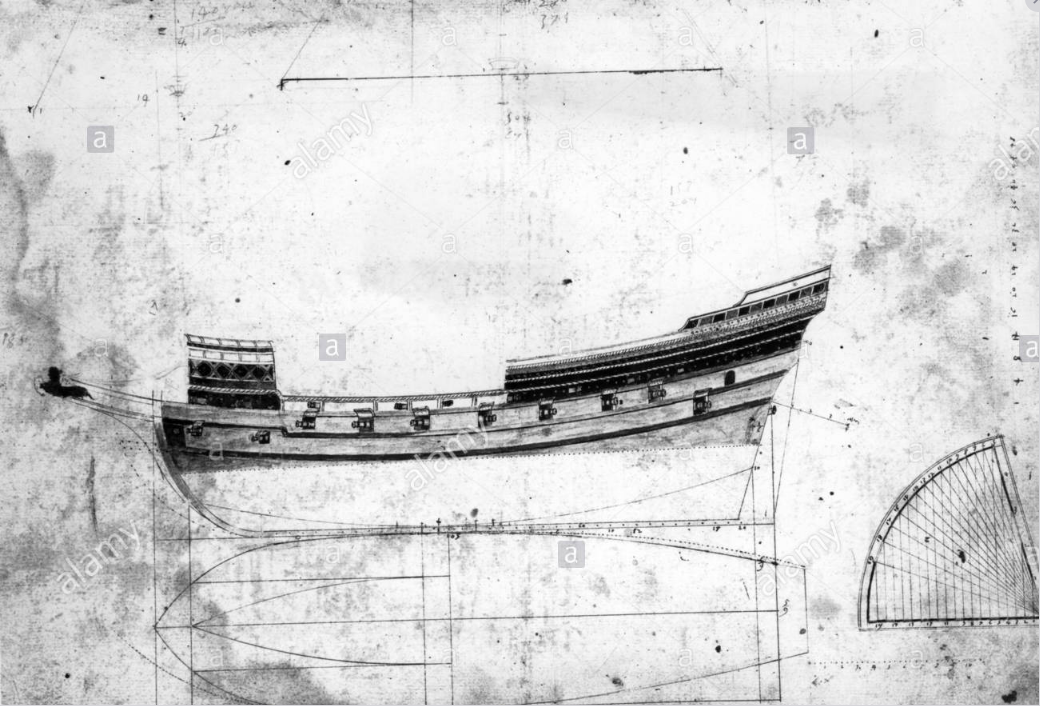
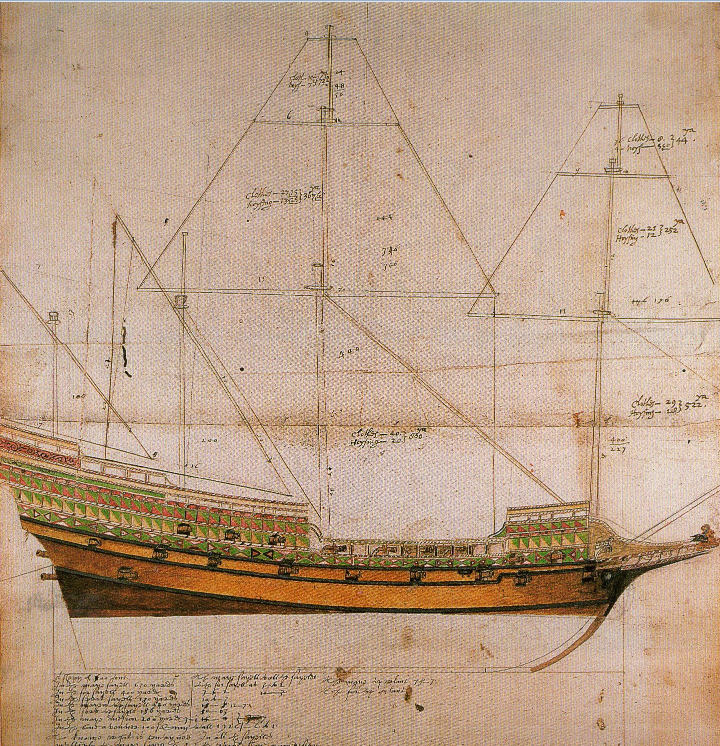
Nice to see your build progressing well, Meriadoc (love the name!). I'd recommend you look also at this - there's some serious research information in it that would apply very much to your own build. Of course there are no genuine contemporary pictures of the Revenge herself, and as far as I know, no descriptions of her colour scheme. So any model is an "impression" of what she might have looked like, based on the evidence available - effectively a "typical" English galleon of the right general size and armament. Regarding colours, probably your best bet is to look at contemporary pictures - not modern interpretations - of galleons (particularly English ones such as Matthew Baker's Fragments of English Shipwrightry) and take your lead from them. Oh, and say hullo to Peregrine Took for me . . . Steven