Supplies of the Ship Modeler's Handbook are running out. Get your copy NOW before they are gone! Click on photo to order.
×


Louie da fly
-
Posts
7,982 -
Joined
-
Last visited
Content Type
Profiles
Forums
Gallery
Events
Everything posted by Louie da fly
-
 Wow. Just, wow.
 -
Looking good, Dick. Are you going to put a "hockey stick" top on the mast? I know you've got some very interesting ideas on how that all worked and it would be good to see it carried out in practice.
-
Welcome to the ranks of mediaeval ship modellers - a rather small and very select group . Information for ships of this period is often scarce and a lot is based on "educated guesswork" from archaeological finds. However there are a couple of pretty good knarr wrecks that have been discovered and quite a bit of info available on them. In my opinion, the research and speculation is at least half the fun. I'll be interested in seeing the progress of your build.
- 48 replies
-
- 1
-

-
- dusek
- viking knarr
- (and 1 more)
-
Hi Bluebeard, As far as I know there aren't any logs for Marisstella's cog, but if you look in the pre-1500 sections for kits and scratch builds, you'll find some cog builds which might be of help to you. Are you working on this model at the moment, or planning to start it? If so, I'd recommend you start a build log of your own - a great way to get help and advice. There are quite a few of us interested in things mediaeval, so you're in good company. And you'll get a fair bit of help and attention because we mediaeval freaks tend to feel like the poor relations compared with later periods, and stick together
-
Very nice work, Rodolfo. Unfortunately commercial suppliers don't really think much about making equipment for mediaeval and Renaissance ships, and the only option seems to be to make one's own. But I've noticed more and more people are getting interested in these periods, so perhaps the suppliers will eventually start making stuff for them. You're doing a beautiful job with your model.
-
Planking methods
Louie da fly replied to Charlie pal's topic in Building, Framing, Planking and plating a ships hull and deck
The main issue with this is making sure you don't end up with the last plank too wide or too narrow. If you have a look at the planking tutorials they advise dividing the area to be planked into "bands" of maybe half a dozen planks, using either battens or threads running from one end of the ship to the other. And then subdividing the bands into individual plank widths by making marks on the frames, and making sure your plank widths actually align with these marks, to stop "creeping cumulative inaccuracies". As far as I can see, if you do this carefully and methodically there shouldn't be any reason not to start from both sides and end up in the middle. -
Ah and on the cover of the book I can see a "canoe tree", from which a panel of bark has been stripped to make the canoe . If you keep your eyes open you often see them out in the countryside. Simple, but apparently very worthwhile vessels if you knew how to deal with them.
-
Hi Harvey, and welcome to MSW. Do you have a next project planned? I'd highly recommend you start a build log. A good way to get to know the people here, and get help and encouragement. The instructions are here: https://modelshipworld.com/topic/24705-before-you-post-your-build-log-please-read-this-starting-and-naming-your-build-log/ Living where I do, I wouldn't mind seeing some photos of your canoe. Steven
-
Moltinmark, that's a very nice model. For your Sea Witch you should start a build log. The instructions are here: https://modelshipworld.com/topic/24705-before-you-post-your-build-log-please-read-this-starting-and-naming-your-build-log/ Not only do you get to show off your build, but it's a great way to get help and advice (and encouragement), and ask questions when you hit problems. And don't get to worried about being a beginner - the skill level here ranges from total newbies (and you're no longer one of them) to the demigods of modelling, and everybody in between. The people here are very helpful and friendly, as you've probably already worked out. And have fun with it. Steven
-
Welcome to MSW, Sean! You might like to have a look at this thread - it might help you decide what to make next. https://modelshipworld.com/topic/18657-new-to-ship-modelling-but-what-do-you-build-first/ On the other hand, as you've already completed one model, you might want to tackle something a little more advanced (though I believe these are still very worthwhile models to make). I just had a look at Euromodel's Royal William - I can see why you wouldn't want to tackle it straight away. Beautiful ship, though! And when you're ready for it, it'll be something to be really proud of. Whatever you do make next, make sure you start a build log. The instructions are here: It's a very valuable way to get feedback on your model, advice, help and encouragement. And we get to see your build! And don't be afraid to ask questions - there's no such thing as a stupid question - and you'll probably find any problem you encounter has already been faced and solved by someone on the forum who will be most happy to help. Steven
-
Welcome to MSW, CJS. Do you have a model under way, or a particular one planned? Either way, you should start a build log - it's a great way to get help and advice, and encouragement as well, and as an added benefit, we get to see your model under way (one of the pleasures of this club). And ask questions - if there's anything you need to know, chances are someone here will know the answer. Best wishes, Steven
-
There's certainly plenty of evidence that shipwrights used naturally curved timbers - in fact there's evidence that in Basque territory in the 15th and 16th century they went as far as to grow forests of trees trained to the shapes they wanted.
- 186 replies
-
- 6
-
-
- keelless
- reverse clinker
- (and 4 more)
-
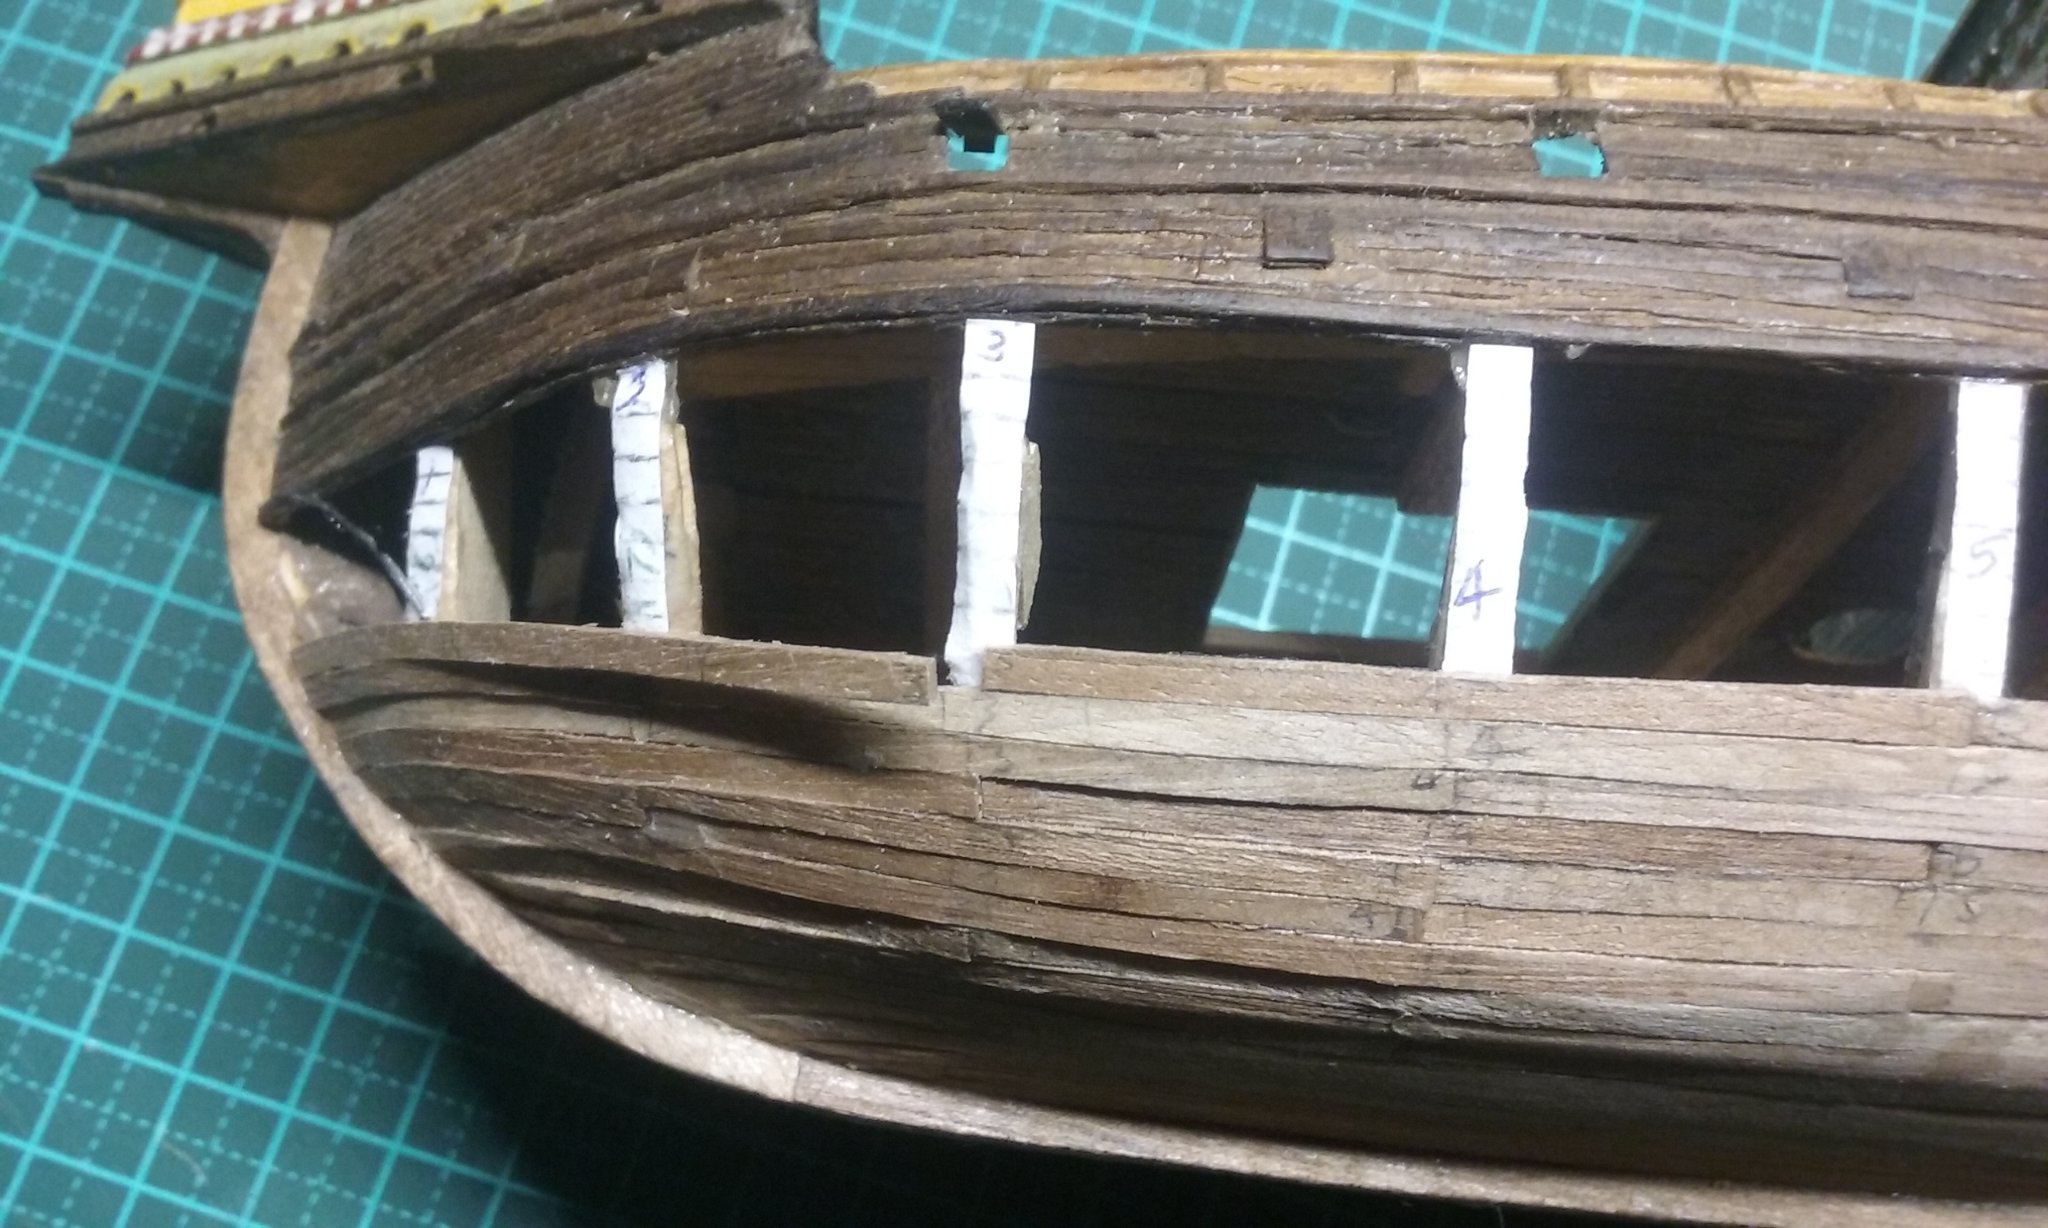
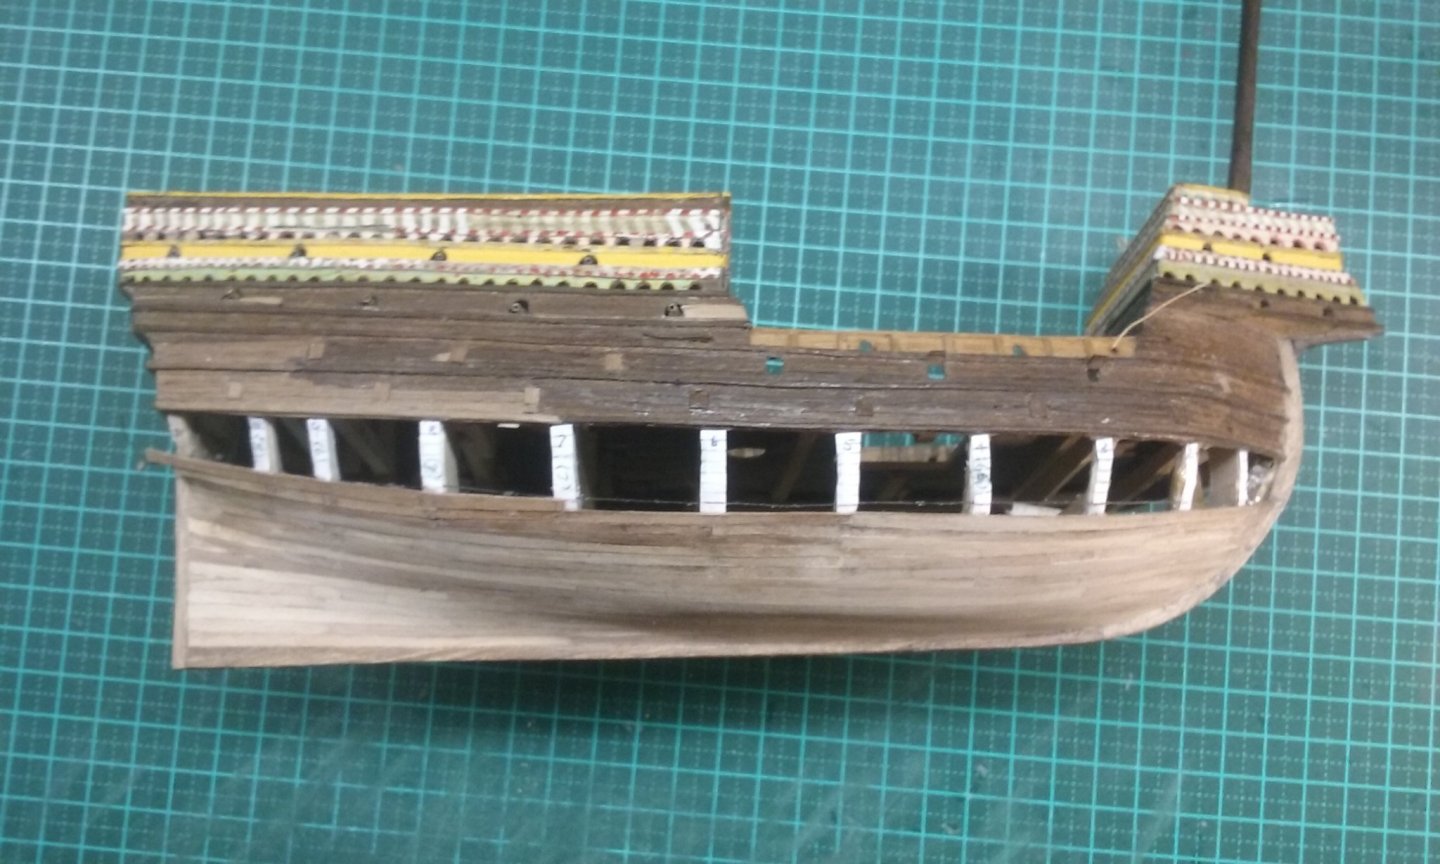
Thanks for the likes and for the positive comments. They're much appreciated. I'm still planking - not finished yet, but I've reached the last guiding piece of cotton on one side and half a plank away on the other - so I'm on the homeward run. It can be a bit shambolic at times. I had to re-make this plank three times - the first three snapped when I tried to bend them to shape - I finally decided it was the sheet of wood that was at fault and made the fourth plank from a different bit, which worked. And this is the third attempt at this plank - the first two turned out just that bit too short (like about 1/32" - just too much for me to decide "that's close enough - I can use a bit of filler there"). Third time lucky. I've just glued the forward end and when the glue is dry I bend it fully to shape and glue the rest. I usually just hold it in place with my fingers till the glue is dry. More in due course . . .


- 740 replies
-
- 9
-
-
- Tudor
- restoration
- (and 4 more)
-
Sounds really interesting. I've never used this but I'd be interested to know how it behaves.
-
Beautiful work. I love the fact that you're taking the extra trouble to explore the options with something as simple as a set of blocks. It adds to the authenticity of the model, and also allows you to test the practicality of the various different layouts.
-
Yet another brilliant addition to a superb build. So impressive.
-
Congratulations on an impressive (and obviously rewarding) build. I know how you feel about finishing - I had the same with my own dromon. The igures are a nice addition - I like the fact that your grandsons will have that connection with it.
- 35 replies
-
- 1
-
-
- english man o war
- revell
- (and 2 more)
-
Brian, in itself this model is not worth a whole lot of money, but its true value lies in its connection with your father and the memories you have of him.
-
Yep, the idea of the curved deck is to let water run off to the sides and out the scuppers. But it also adds strength to the deck beams to have them slightly curved (any weight on the deck puts the beams in compression - rather like the bed of a truck, which bows upwards slightly lengthways, so when the load is added they end up straight - if the bed started out straight it'd bow downwards when the load was added). I'm surprised I've missed this build so far. I like what you're doing with it, and your "kit-bash" is going to lift it above the common run of plastic models. Good to see you've got Backer following your build. He's our resident expert on galleons - what he doesn't know about them isn't worth knowing. Steven
-
It's been a while since I visited this log. You've made very good progress. And you've dealt with the inevitable mistakes and other issues as you've gone along in a very workmanlike way - and not let them stop you. Every model is a learning process, and I think you're learning a lot of lessons in this build - often the hard way! I'm not sure whether you were uncertain of the likelihood of single-masted vessels of this type when you wrote or whether it just reads that way. But they are certainly represented in contemporary pictures - just as often as multi-masted ones - see https://www.pinterest.com.au/lowe1847/proto-carracks/ And for more contemporary representations of true carracks of this period (i.e. with more than one mast), see https://www.pinterest.com.au/lowe1847/carracks/ Looking good. Steven
-
Your build has always looked good, but your most recent efforts have raised it a further notch in quality. A very enjoyable build to watch. Steven
-
Welcome to MSW, Jose! I'd highly recommend you start a build log for your next model. It's a very good way to get help, advice and encouragement from the members here. A lot of the time a problem you're faced with in your build has already been encountered and solved by somebody else. And ask lots of questions. There's no such thing as a stupid question. Here are the instructions on how to start your log: You'll probably make mistakes as you go - we all do. Don't worry about them too much - they're an opportunity to learn, and you won't repeat that mistake in your next builds (if you're anything like me you'll find new and more interesting mistakes to make!). Every new build is likely to be better than the last. Keep your old models - they're a great way of measuring your increased skills and mastery. And have fun with it! That's why we're all doing this.
-
Help! What is the Meaning of BIS
Louie da fly replied to robnbill's topic in Masting, rigging and sails
It happens in French as well. In fact French audiences don't yell "encore!", they yell "Bis!". And you occasionally get a couple of houses sharing the same street number (perhaps for historical reasons to do with subdividing the property, or a stuff-up when the street numbers were originally allocated) - where we might have No. 29 and No, 29A Veebelfetzer Street, they'd have 29 and 29 Bis Rue Veeblefetzer. -
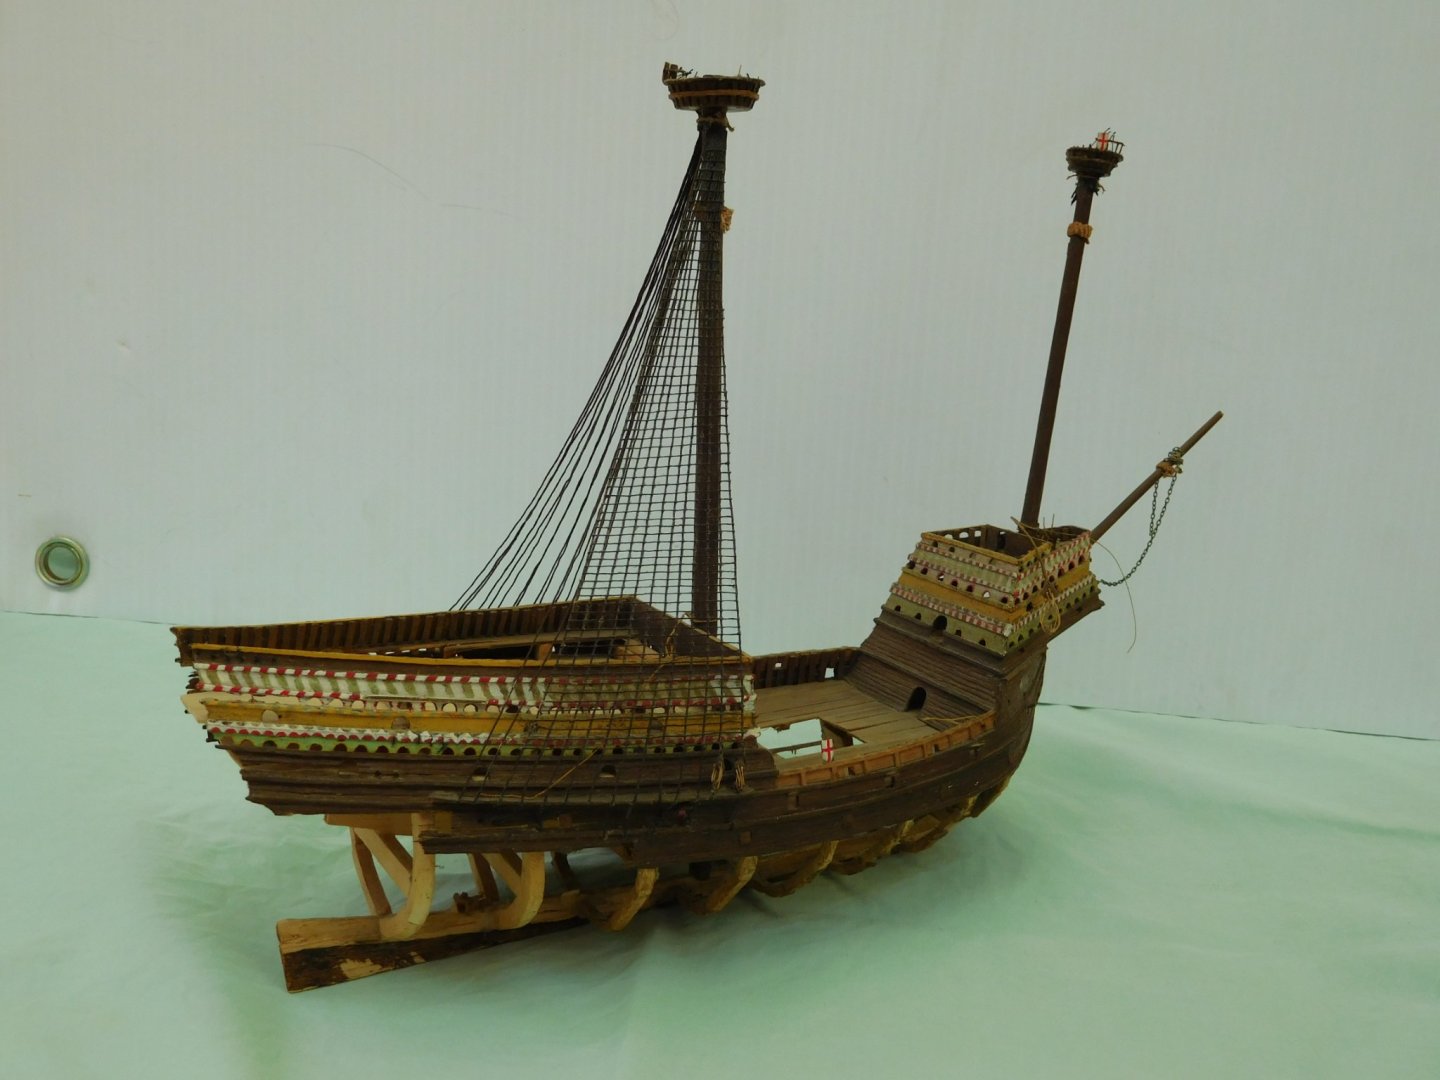
Thanks, Druxey. To be honest, I'm pretty amazed myself that I was able to do that back then. I really don't remember how I did it, but it certainly seems to have worked. Here's a photo which gives some idea of the remnants of the railing before I pulled it all to bits for the rebuild:
- 740 replies
-
- 8
-
-
- Tudor
- restoration
- (and 4 more)
-
Yes, it would probably have to be coated in something that looked like pitch. Most ships in contemporary illustrations seem to be black (= pitch). Then there's always the "wear and tear" to be expected on a working ship. I can't remember his name, but one of our members in Turkey has done a couple of Turkish working boats with all the mess and neglect you'd expect in such a vessel - and they looked fantastic. Still perhaps it's better to have it pristine. It's be a real shame to mess it up with a bad weathering job after doing such a wonderful job of building it.