HOLIDAY DONATION DRIVE - SUPPORT MSW - DO YOUR PART TO KEEP THIS GREAT FORUM GOING! (Only 13 donations so far - C'mon guys!)
×


Louie da fly
-
Posts
7,986 -
Joined
-
Last visited
Content Type
Profiles
Forums
Gallery
Events
Everything posted by Louie da fly
-

Introduction / Planning a rebuild
Louie da fly replied to BobMcM's topic in New member Introductions
Welcome the MSW, Bob! That's a really nice model, and well worth fixing up. First word of advice - go slowly, don't hurry into anything. There are a few decisions to make - do you want to clean her, or leave her with that (rather beautiful) patina? Next word of advice - do a search (top right hand corner of this page) for the words restoration, restoring etc. You should find some very good build logs of models other people have restored (I'm doing one myself) and pick up some valuable information that should help you in your own project. Third word - start a build log. It's a wonderful way to get help and advice from the friendly crew here. And I'm sure a lot of people will be fascinated by the model and your work on her. Yours is really a "scratch-build", even though you're repairing an existing model - the instructions for starting a build log are here: And look at other builds of similar ship models, check out the "masts and rigging" section of this forum, and look for photos and representations of similar ships as a guide (Google is your friend in this regard, as is Pinterest). And above all, have fun with it! That's what it's all about, after all. Good to have you aboard. Steven -
Welcome to MSW - from the other side of the world! By all means lurk till you feel ok with posting - but do start a build log for your puffer when you begin building. A lot of people feel a bit overawed by the whole idea of putting their stuff up for view, in case they get criticised or laughed at, or their stuff isn't good enough to pass muster. Be sure that will never happen to you here - I've never come across such a supportive, positive forum, where everybody is so friendly and helpful. And it's a very good way to get help and advice. The instructions for starting a build log are here: Nice to have you on board!
-
Welcome to MSW - or at least to the "talk-talk" section - I see you've actually been a member for a good while but hiding your light under a bushel. Any chance of seeing some photos of your schooner? And do you have another one in the pipeline? If so, make sure you do a build log for it - a great way to get help, advice and encouragement. And till last year a name that wouldn't have caused much comment . . . Anyway, good to hear from you. Steven
-
Welcome to MSW from the antipodes! That St Gabriel looks like having a very difficult hull to shape - all those tight curves! The Occre Golden Hind looks like a good project. It makes a very attractive model. In case you haven't already worked it out, the instructions for a build log are here: Have fun with it, and if you have any questions, the friendly members here are very helpful.
-
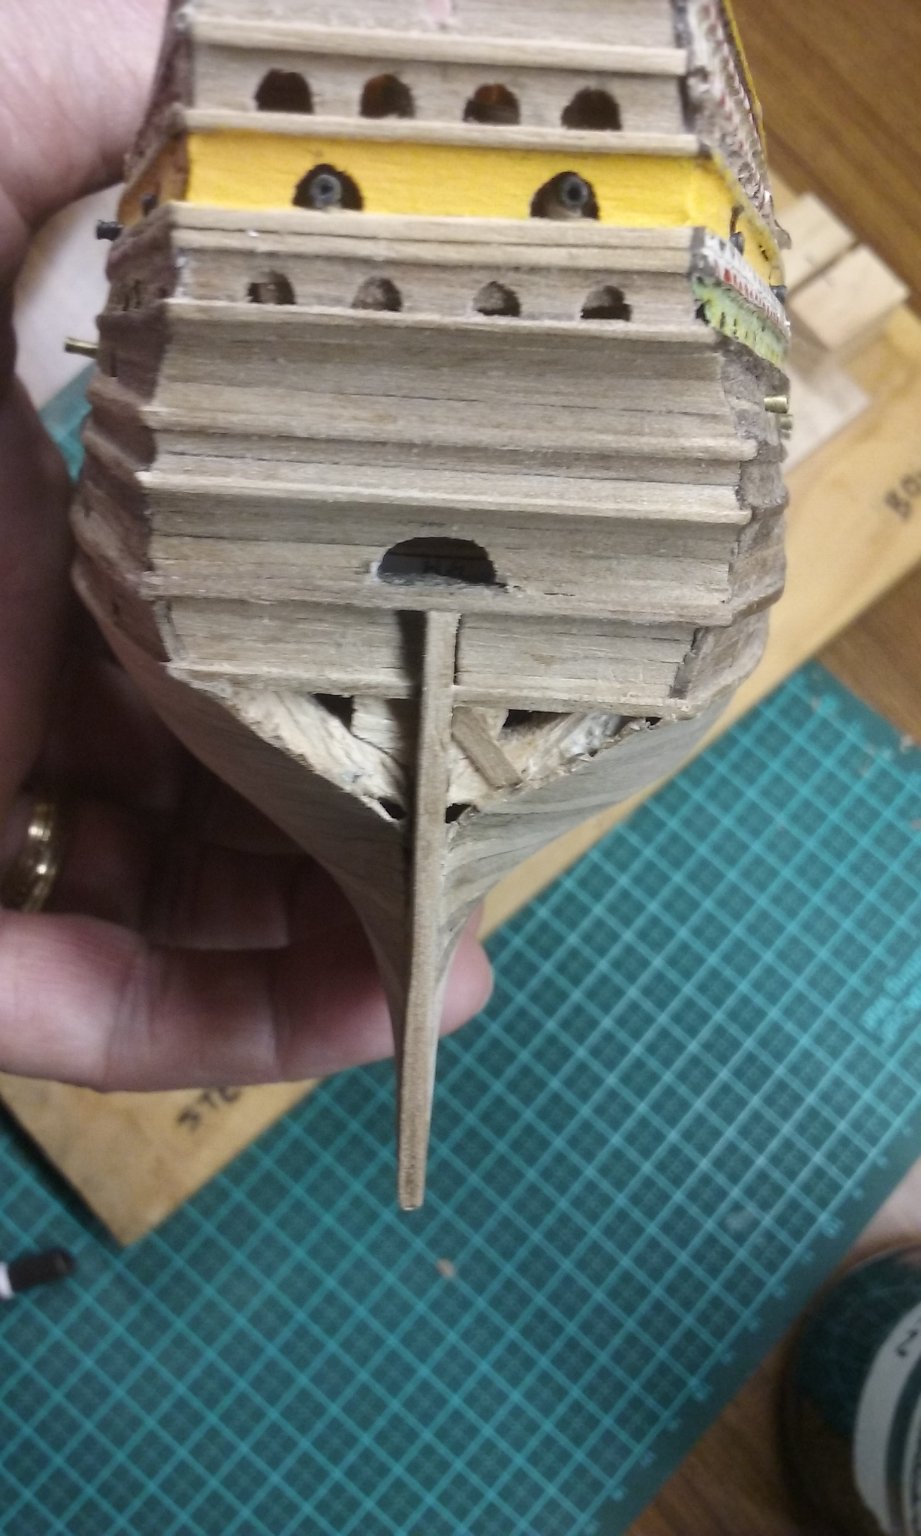
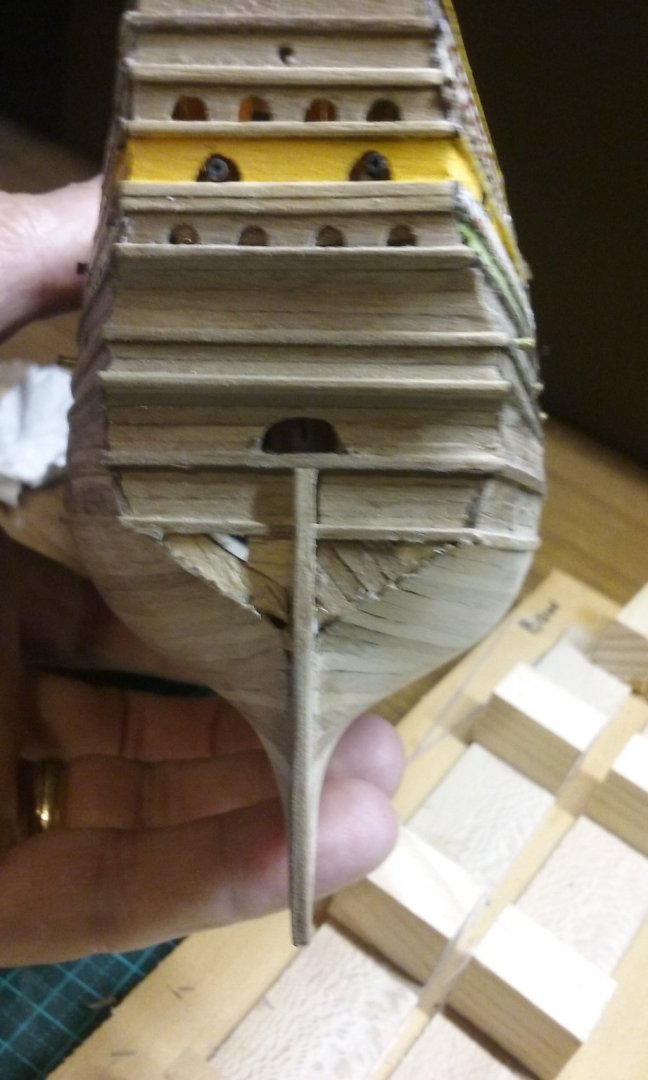
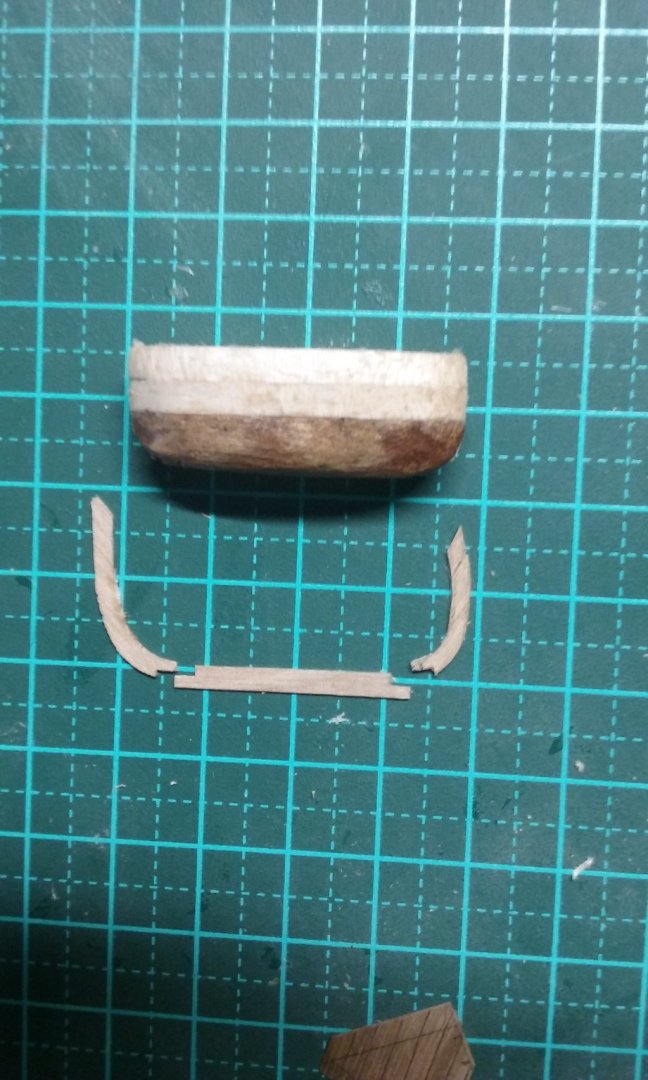
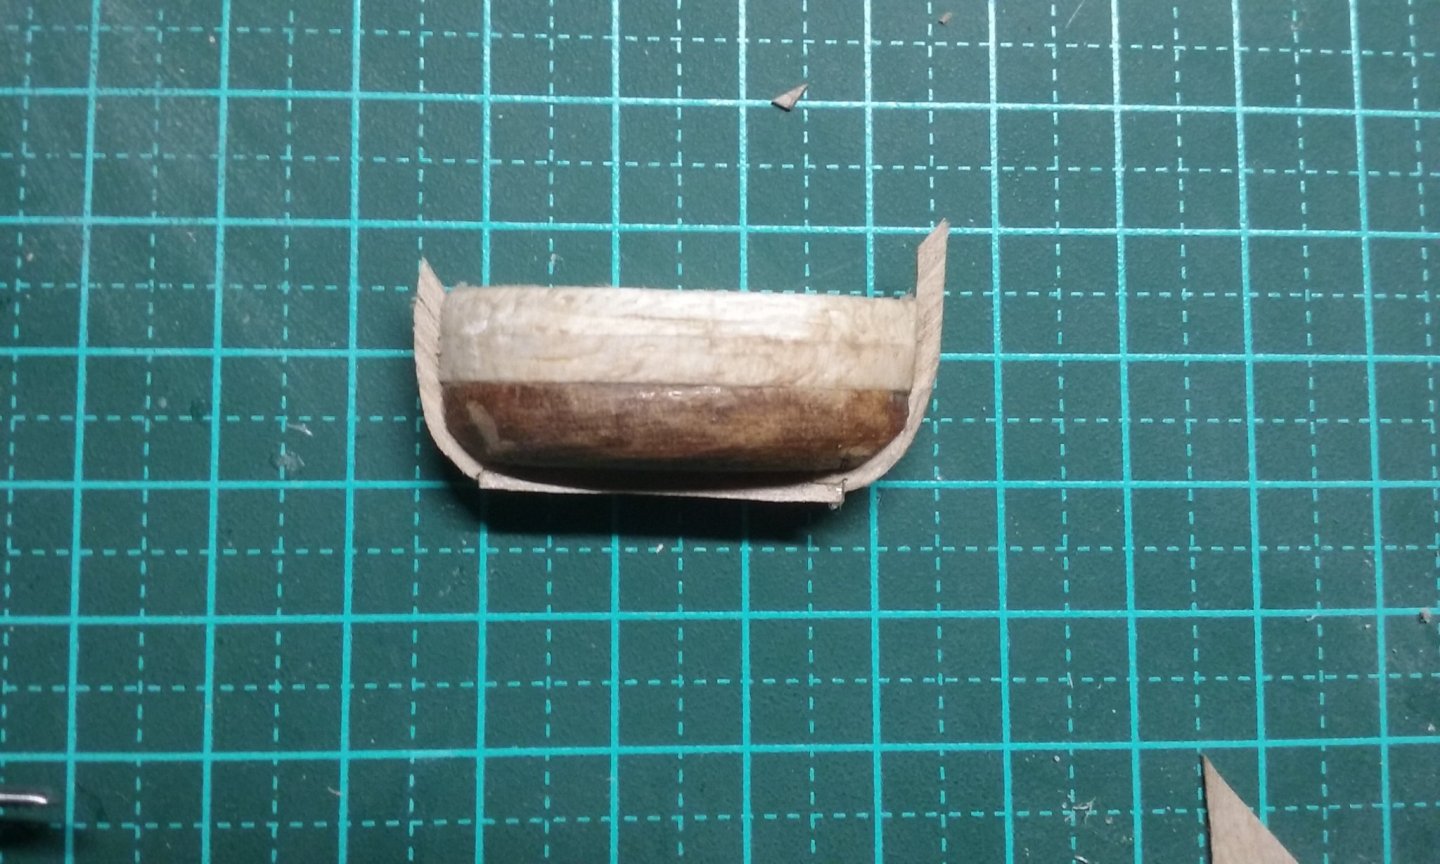
Now the hull has been fully sanded and I'm working on planking the stern just above the waterline. Nearly finished. More photos when I get it all done. And I've finally bitten the bullet to start on the longboat. Built on a plug (which I smothered with butter - hey, it was easily to hand and today's pretty warm - but I wiped the surplus off with a tissue - - to stop the boat sticking to the plug). Waiting for the glue to dry. Next to start putting on the strakes. Steven


- 740 replies
-
- 11
-

-
- Tudor
- restoration
- (and 4 more)
-
Making very good progress, John. That's looking very good and you seem to be solving the problems as they come up very nicely. Steven
-
Good to see. Hadn't heard from you for awhile and was beginning to worry you'd given up on it. It looks really good - weird but good. Looking forward to the next instalment.
- 186 replies
-
- 2
-
-
- keelless
- reverse clinker
- (and 4 more)
-
You've made a good start on the rigging, but you're right about the instructions. I think when in doubt, go back to the painting - that's pretty much the best authority (assuming you can see the details sufficiently). I'm sending you a PM with the best copy I know of attached, so you can get as much detail as possible.
-
Beautiful colour and those rivets are very believable. Steven
- 179 replies
-
- 5
-
-

-
- longship
- Helga Holm
- (and 1 more)
-
I got into building design after the change to metric. But there were still plenty of house plans at 1:96 (8 feet to the inch) which had to be converted to 1:100 - an almost insignificant difference - but not quite! And then you'd find a site plan where the lengths of the boundaries were in links (100 links=1 chain=66 feet - the length of a cricket pitch - because there are 100 links to a surveyor's chain) which had to be converted to metric = 201.168 mm. Close to 0.2 metres - but not close enough! The area of a house is still quoted in squares by salesmen = 100 square feet. But when you are drawing it, you convert to square metres - 9.54 square metres to the square. This one I have by heart, just like a foot is 304.8 mm. Hours of fun! Steven
-
Well, some of us use metric. My previous model was 1:50, and now my current (restoration) is 1:200. Finished size of the model has to come into it - if the model is too big for the place it's to be displayed you should be looking at a smaller scale. On the other hand if it's too small to see, maybe you need it to be bigger. Stellar exceptions to this are Javier Baron's tiny models of Mediterranean sailing vessels, and some amazing battleships at 1:1500 scale by Joe100. Steven
-
Beautiful pieces - they'll add a very good air of reality to the whole thing.
-
I like the logical and systematic way you're approaching this. I think making a model is always a bit of a tension between accuracy and practicality, and when you're "bashing' a kit to make it more historically accurate there's always the question of how far to go. And really, it's your choice - whatever seems right to you. This isn't going into a museum to be scrutinised by academics, it's your relaxation and enjoyment. I've hit the same problem with my Great Harry because I built it before the Mary Rose was recovered, so it's full of details which later turned out to be inaccurate. So I'm always up against the issue of how far to change it from my original concept. My idea in restoring it was to just return it to the way it would have been had I finished it at the time, but I've been very inconsistent, changing some things in line with what I know now and leaving others as they were when I first built her. Like I said - your decision - do what you think is right for you. And maybe one day you will revisit and build another one more in line with what you know now. Steven
-
Convergent evolution, I'm sure. The guy's wearing what's called a "barrel helm" or "great helm" - at about 1215 this is quite an early one - they were in vogue for a couple of centuries. Despite appearances, the visibility through the eyeholes is pretty good, and you'll note the many breathing holes in the lower half - very important when you're exerting yourself. Steven Steven

- 740 replies
-
- 6
-
-
- Tudor
- restoration
- (and 4 more)
-
Kit bashing is a very loose term. The common factor is starting with a kit. The "bashing" can mean adding details the kit doesn't provide because of cost factors, correcting inaccuracies in the kit, changing the way it's presented (say with the sails partly furled rather than all on display), or with (say) battle damage (rare) or weathering, or as you're intending, turning it into a different ship. Bulkheads shouldn't warp after assembly unless you leave it for awhile before adding the planking, decking etc, which adds stiffness and support. If they do warp - or they're already warped when you take them out of the box, contact the manufacturer - the ethical ones will replace the warped parts. If that doesn't work, you can make your own - one of the advantages of working in wood. Steven
-
Well the original Matthew Paris did do some pictures of ships . . .

- 740 replies
-
- 6
-
-
- Tudor
- restoration
- (and 4 more)
-
First I know of is Matthew Paris (Oops!) Baker "Fragments of Ancient Shipwrightry" 1586 - about 40 years later, but I'm sure the principle had been known for a long time. (Matthew Paris was a completely different dude - a chronicler and artist in the 13th century.) Steven
- 740 replies
-
- 3
-
-
- Tudor
- restoration
- (and 4 more)
-
Aha! Well, having seen the cross-section, the plank does seem to be in the right orientation after all. I wouldn't sand it - if that's the way it's supposed to be, leave it as it is. It does look strange, though, doesn't it?
- 48 replies
-
- 1
-
-
- dusek
- viking knarr
- (and 1 more)
-
The second-last plank in the second photo seems to be at an unusual angle - but this may just be a fault of the photo. Certainly, clinker planking can be very difficult to get exactly right. It's probably best to just leave it as it is rather than try to change it. Overall, looking very good. Steven
- 48 replies
-
- 1
-
-
- dusek
- viking knarr
- (and 1 more)
-
Though the Gokstad ship's shields didn't have them, there's a fair bit of evidence that shields of the period also had the face covered with leather, which added strength and rigidity. Then the leather rim was sewn on through holes in the circumference of the shield-board. But I just can't see it being likely they would have put them in place if they were going to encounter any kind of weather (or waves, for that matter). Steven
-
BSI insta-cure glue - that's CA or cyanoacetate (super-glue), yes? A couple of problems with that stuff (apart from its toxic fumes) - first it's not very forgiving - once you put the pieces together you have very little time to make sure you've got it correctly aligned. Second, there are doubts about its longevity. Do a search in the "Search" function (top right of the page) on CA glue - there are several discussions about it. Some people swear by it, but for a newbie it might be better to use PVA (white) glue. I very rarely use CA, I find PVA is best for about 95% of the gluing I do. And when I make a mistake (as we all do), often I can pull it apart and remedy it before the glue has dried. You only need to put glue on the surfaces where the joins between pieces are - I'd be putting a thin layer of glue in both the slots of the false keel and the slots of the frames - if I put glue on only one surface it seems to get soaked up by the other surface and the joint doesn't "make" properly. But that's with PVA - not sure about how it goes with CA. Good to hear you've resolved the problem with the frames fitting properly. Steven
-
Looking good. Regarding the problem with the over-short plank at the bow, you might consider removing it and making a new one. If you're using PVA (white) glue, rubbing alcohol (isopropyl alcohol or isopropanol) will dissolve it. And it's probably better to do it early rather than later, when it might get in the way of other things. Those pegs for the rails look good, but they can break if you accidentally brush against the railing (don't ask me how I know). Metal pins might be better, but if the wooden ones are thick enough you might be ok. Steven
-
That whipstaff assembly for the rudder/tiller looks really good. And the planking on the deck, as well. Do you use an automatic translator? Sometimes your posts say "deck" and sometimes "bridge". I suspect they are the same word in Italian. But only "deck" is correct here, because the bridge is a completely different part of a ship; it's the structure at the top of a modern vessel where the captain works. I am very impressed by your lighting - electronics are a mystery to me, but I can appreciate the excellence of the work of others. Steven
-
Thanks, mate. Your planking regimen sounds like a good one. It's better to take more time and get it right than to hurry and get it almost right. I'm sure your model will look very good when it's finished. Steven