Louie da fly
-
Posts
7,990 -
Joined
-
Last visited
Content Type
Profiles
Forums
Gallery
Events
Everything posted by Louie da fly
-
 That was pretty much Cap'n Atli's conclusion, as well. That shows the difference between mere theorising (where it seems logical that oar length would be an important factor) and practical experience, which shows that it really doesn't make much difference. Steven
- 179 replies
-
- 2
-

-
- longship
- Helga Holm
- (and 1 more)
-
Looking good. mate.
-
I agree with Kurt - the fan sheet is the way to go for the job you're doing - but Jim is also correct when cutting. I used to be a building designer - when measuring up a building I was taught to do a "continuous measure". Measure everything in relation to a specified "zero" point. So if measuring a wall with windows, doors etc, rather than measure from the corner to the first window, then the width of the window etc etc, I'd hook the tape measure to the corner of the wall and treat that corner as zero, and then all measurements were taken in relation to that point - i.e the distance from the corner to the window, then from the corner to the other side of the window, then from the corner to the next window etc etc. Steven
-
That dinghy turned out very well. On to the next project . . .
- 135 replies
-
- 2
-
-
- billing boats
- half moon
- (and 1 more)
-
Die Kogge Von Bremen by kentyler
Louie da fly replied to kentyler's topic in - Subjects built Up to and including 1500 AD
You've probably been pushing the work through the saw too hard. It's something I'm guilty of, and it makes the blade bend sideways. Steven -
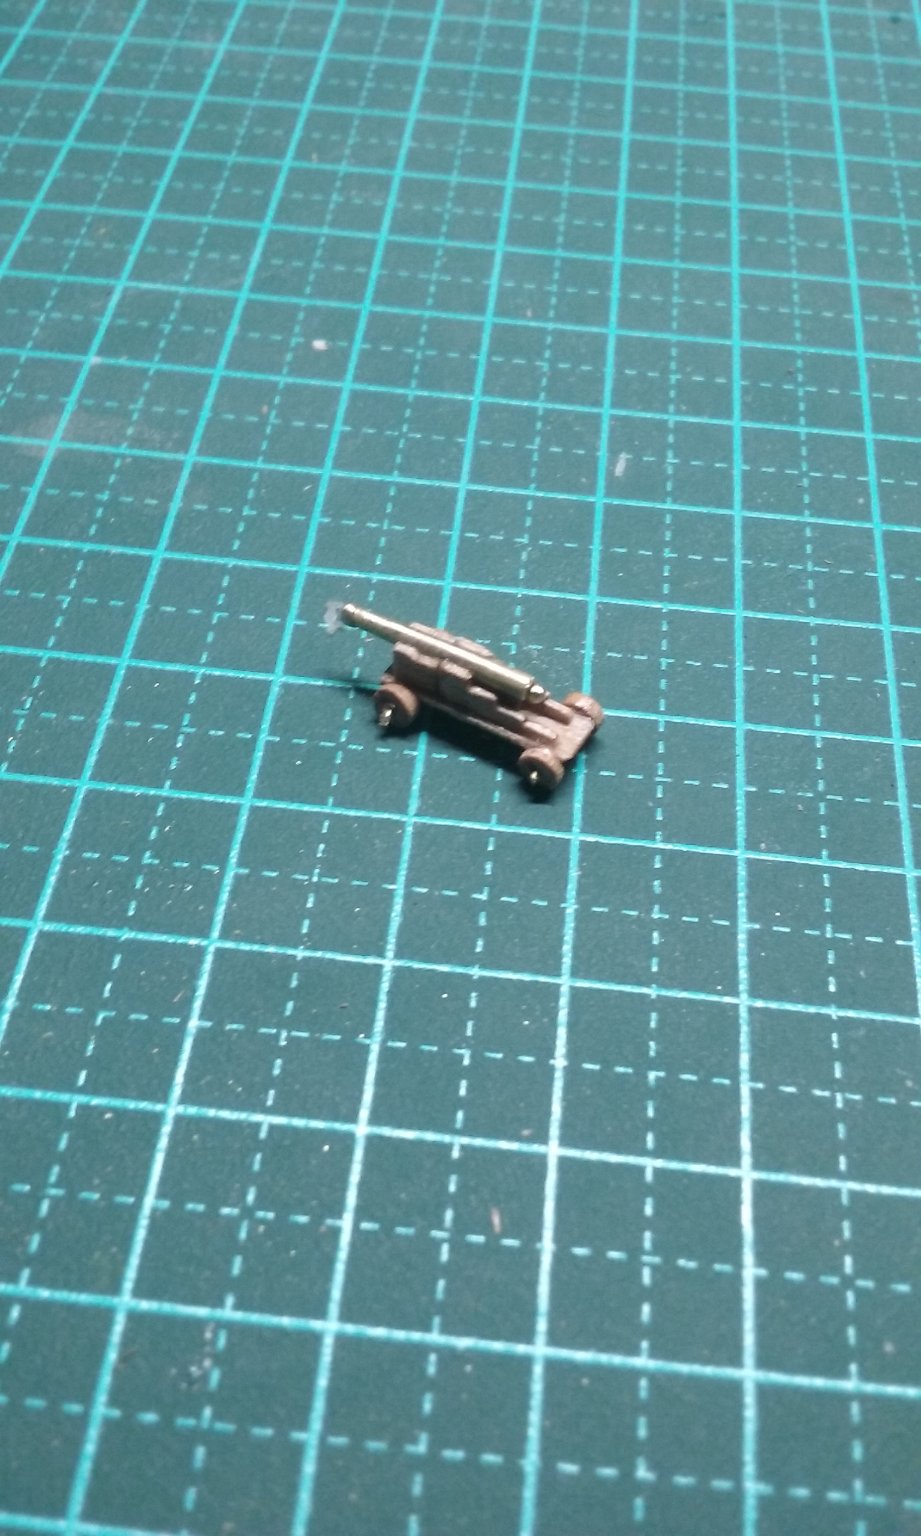
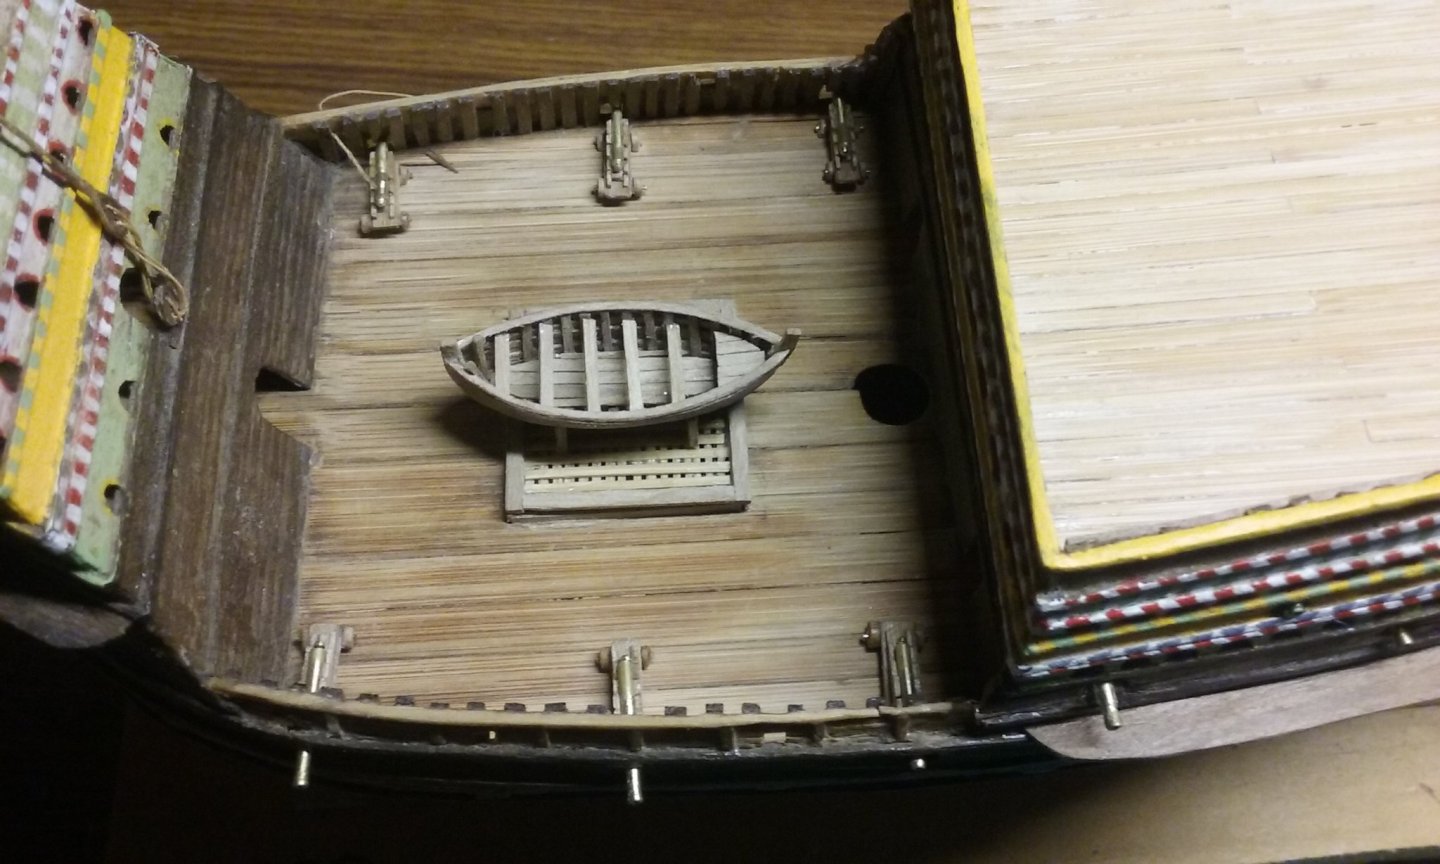
And here are the cannon in place. I not only had to sand down many of the wheels, I even had to whittle away at the tops of the gunports to get the barrels to fit through. Not a lot you can do about that - you only find out when everything's made, and all you can really do is adjust things a bit, unless you want to start again from scratch (which I'm not prepared to do!) I'm going to put the breechings on the cannons, but I'm not so sure about adding the tackle for running them up. Gunports had only been in use for a relatively short time when the ship was built, and I'm not sure there'd been enough action with guns to get people thinking in turns of tackle - perhaps they were more likely to run the guns up by main force, as they did on land. They'd only just started using 4-wheeled carriages - most of them still had a pair of wheels at the front and a skid at the back. Granted the circumstances were different, particularly with a ship heeling over. I realise that's going out on a limb a bit and there's no real evidence to justify it (or to disprove it, for that matter) , but that's what I've decided to do. Steven
- 740 replies
-
- 12
-
-
- Tudor
- restoration
- (and 4 more)
-
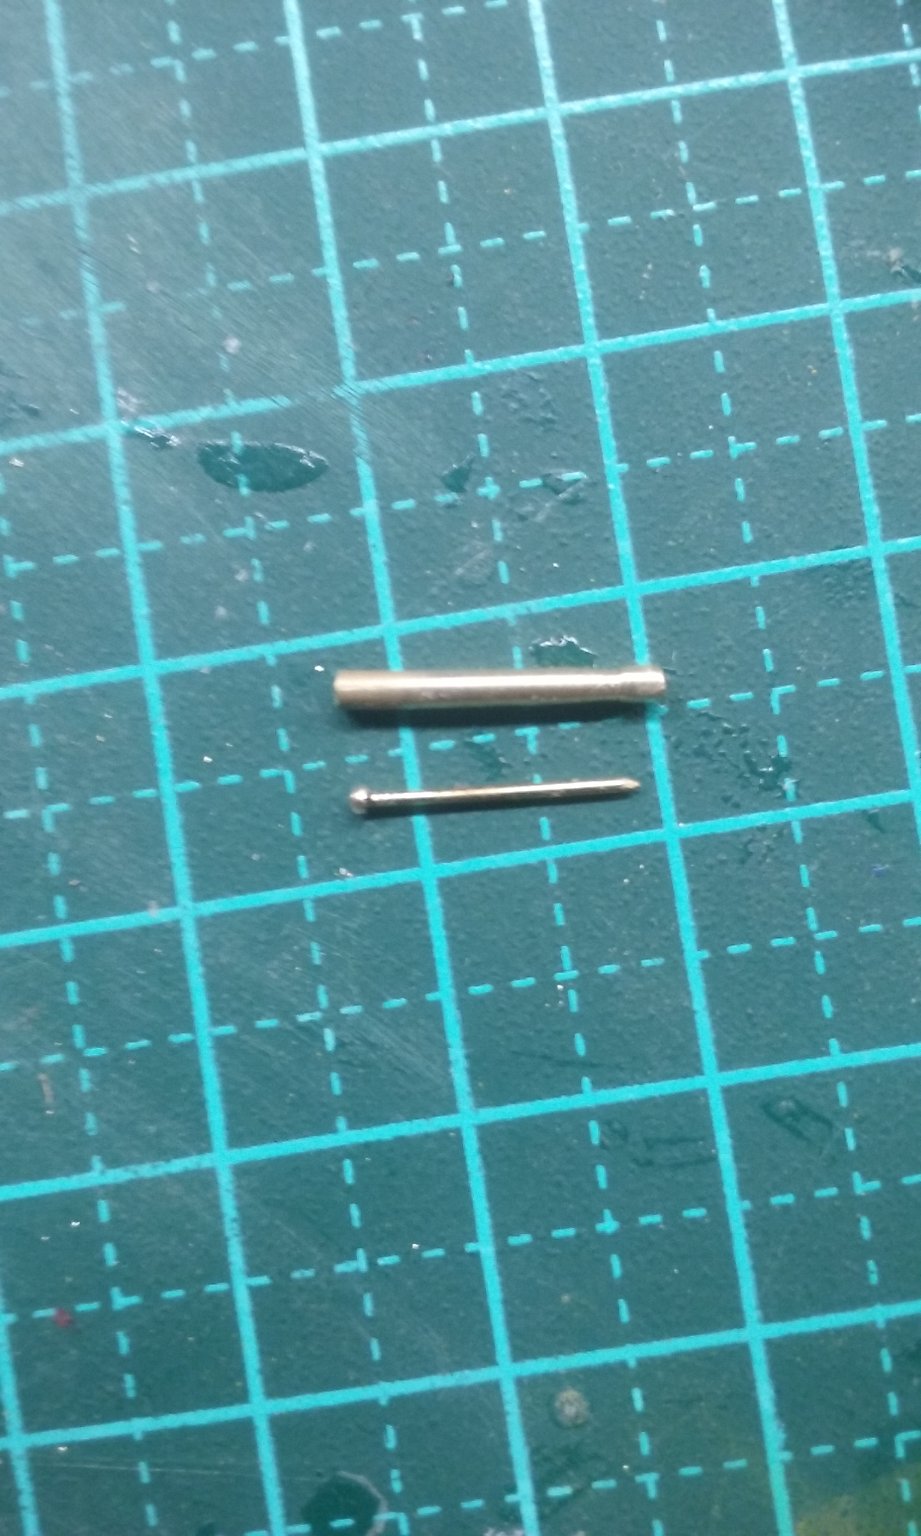
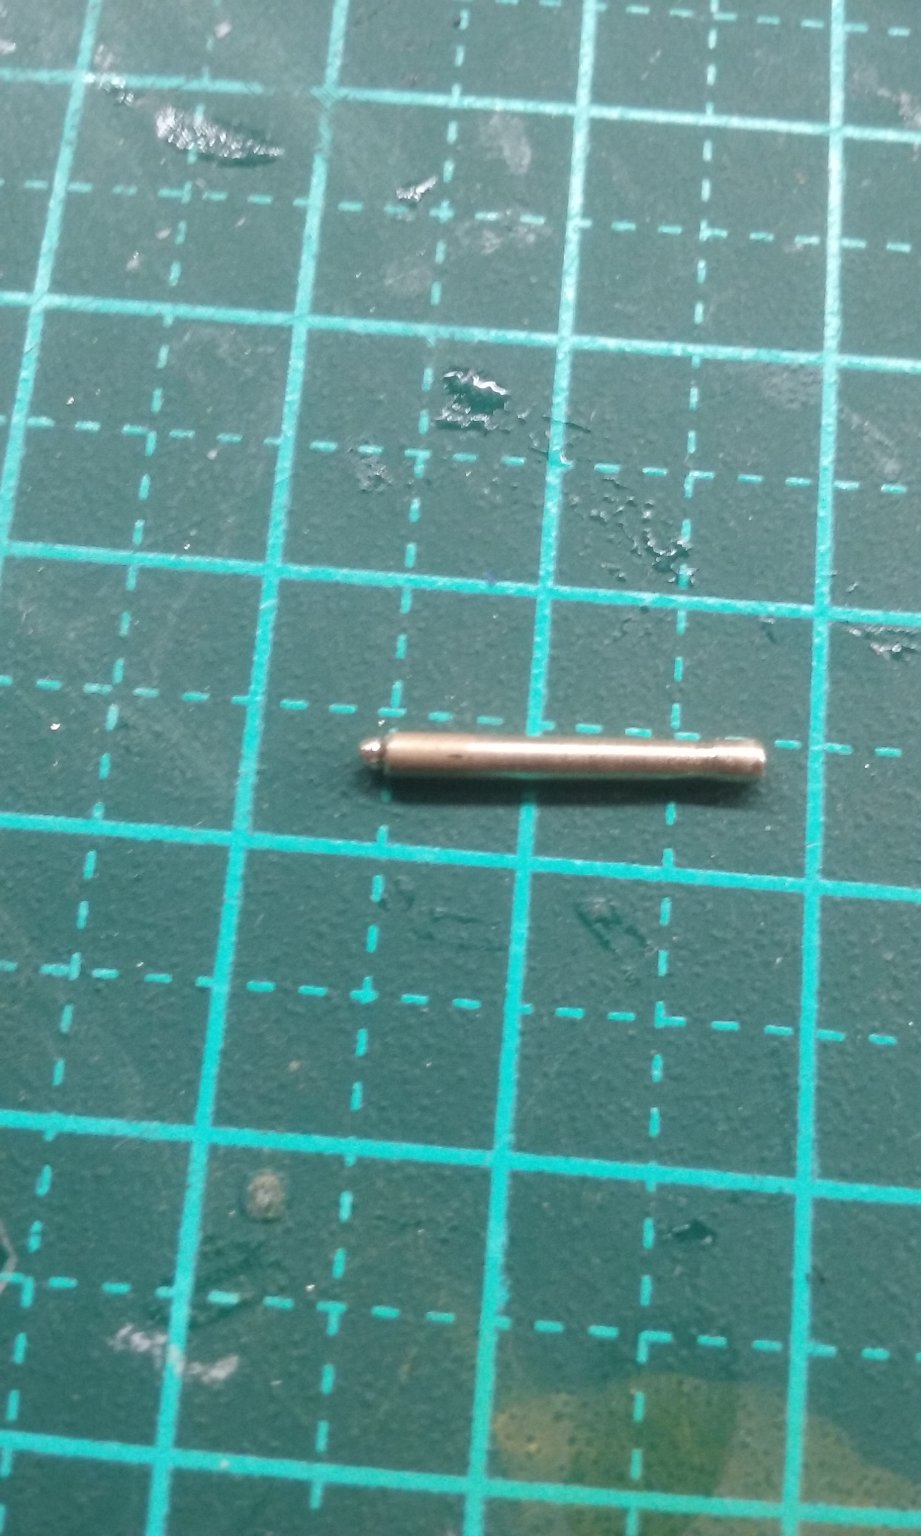
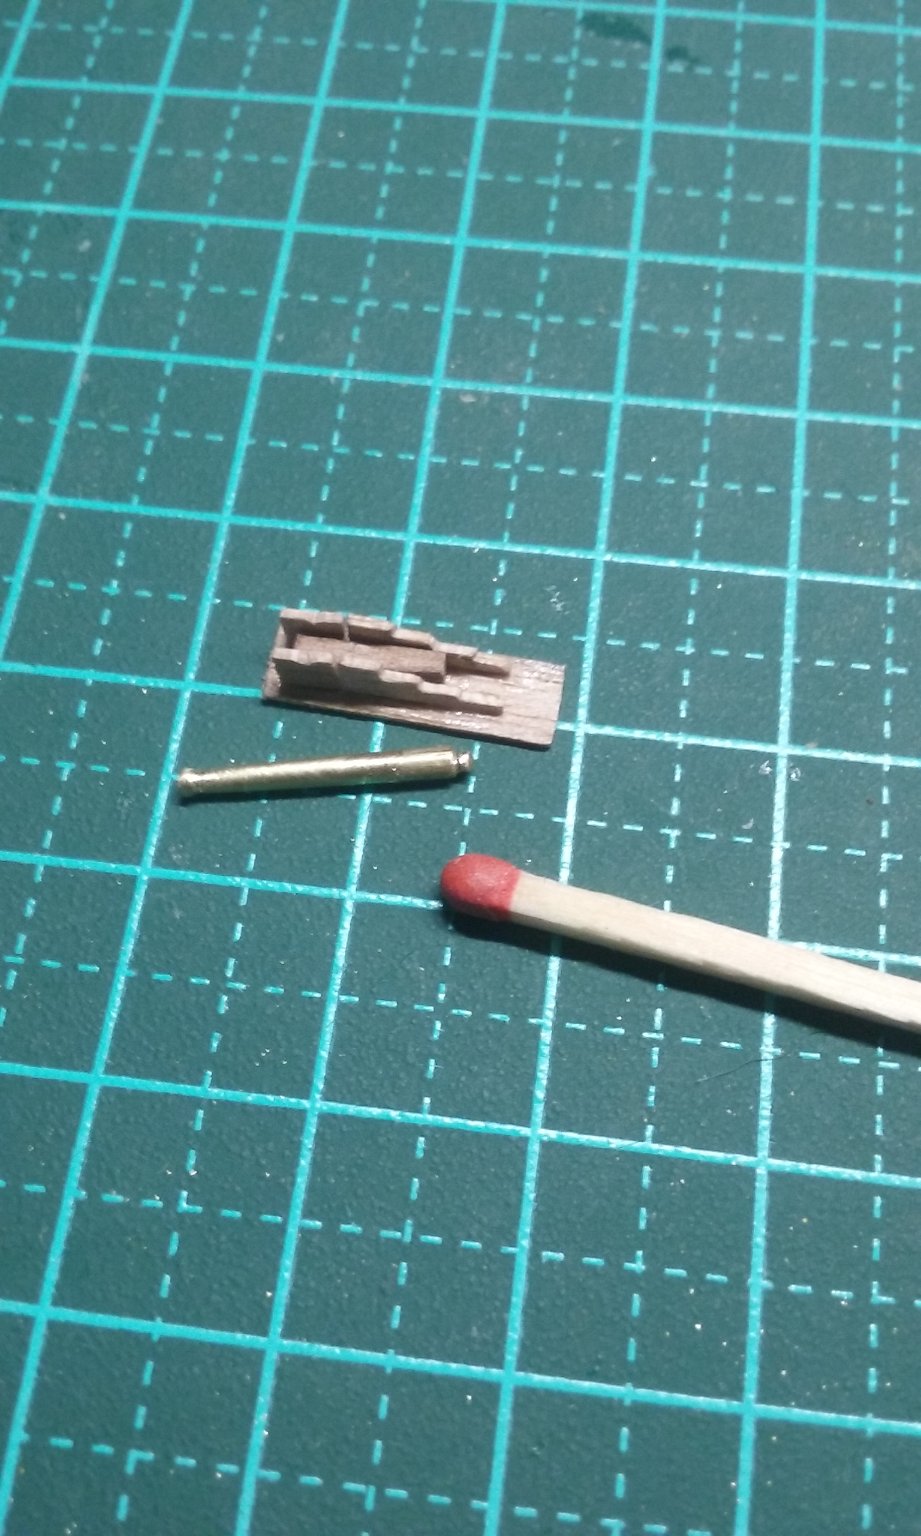
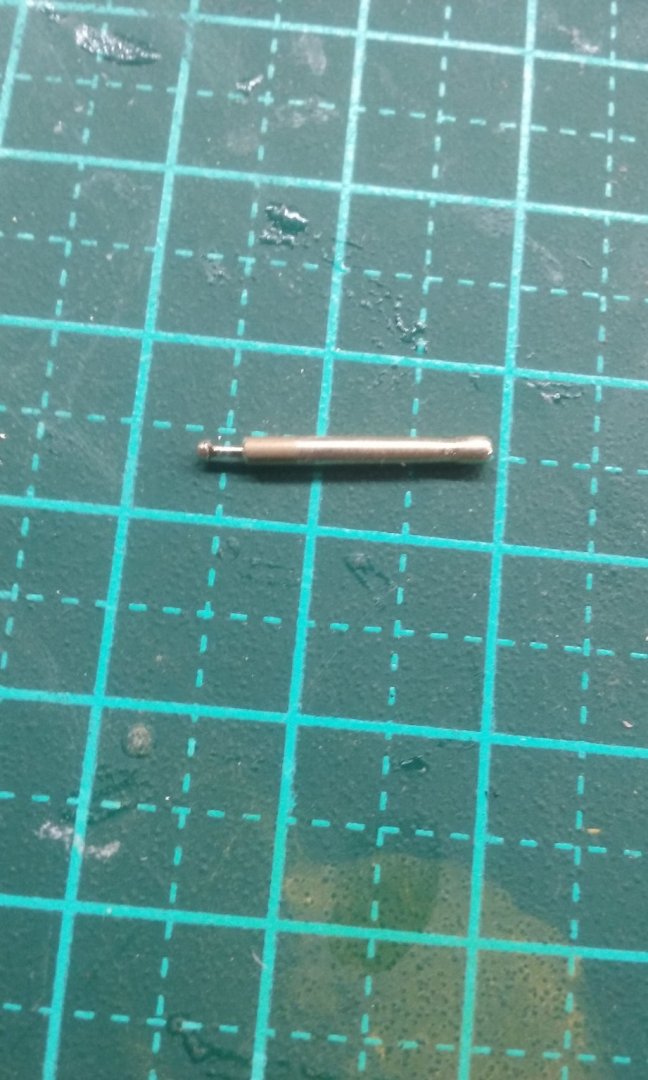
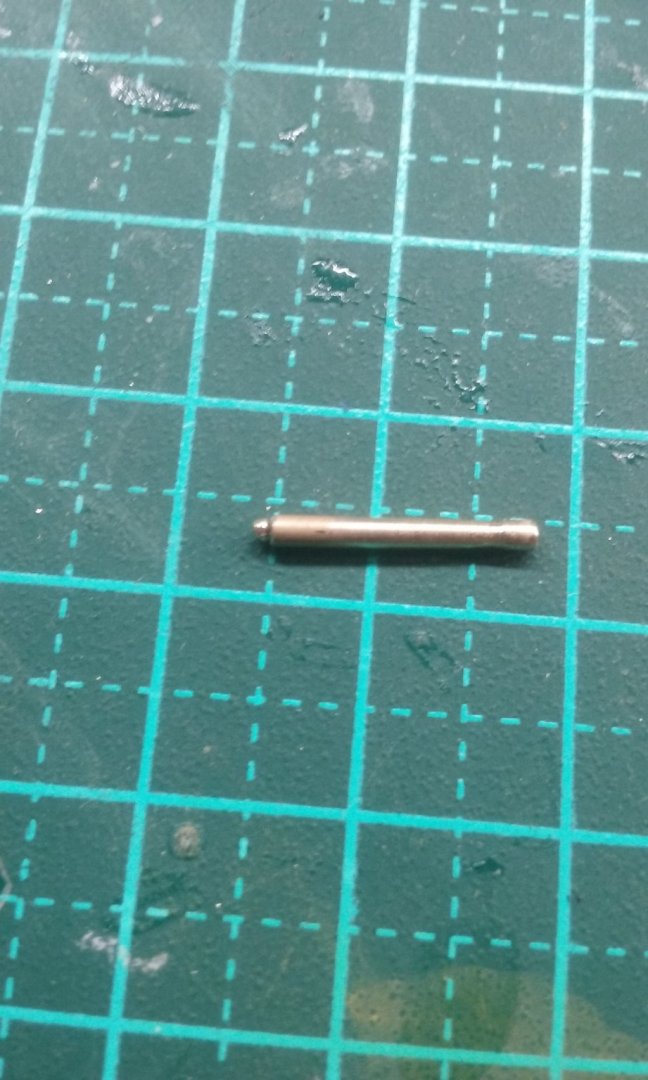
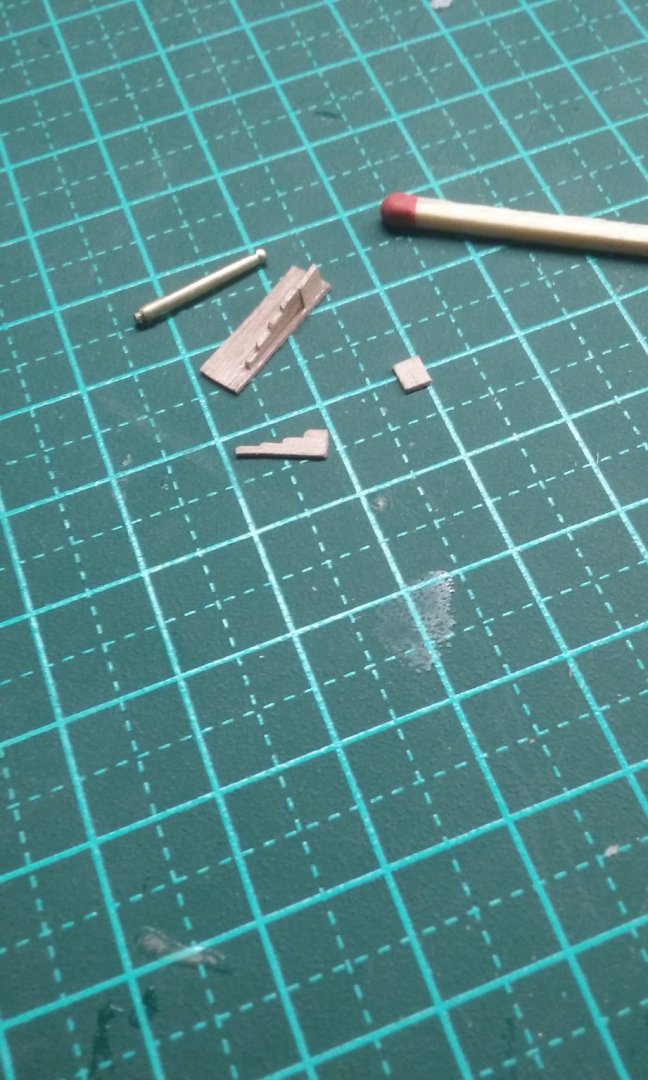
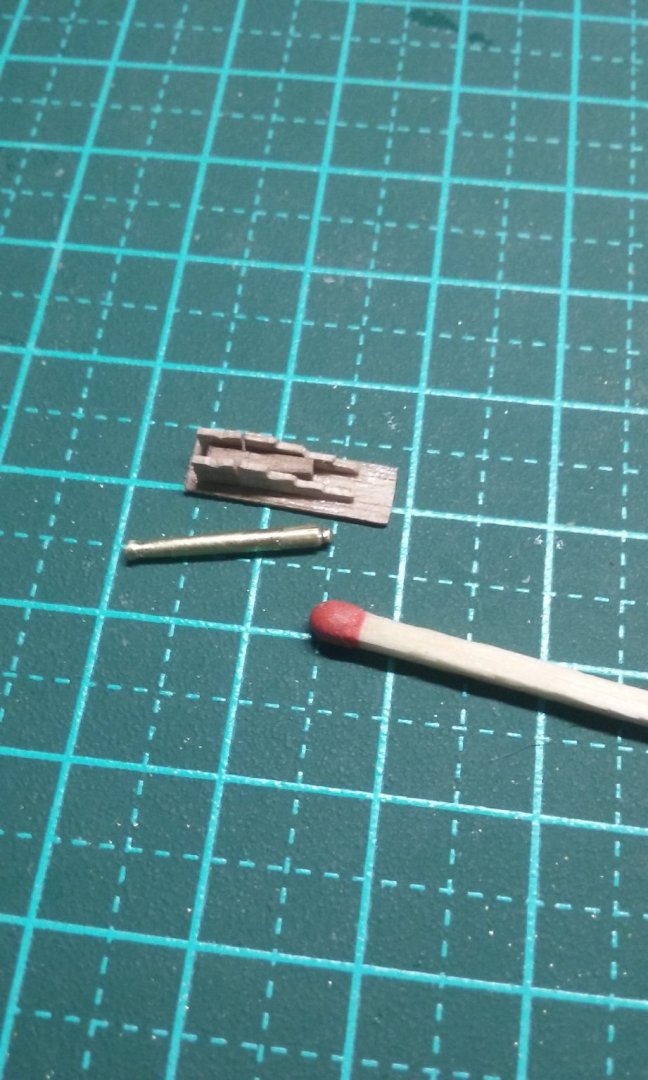
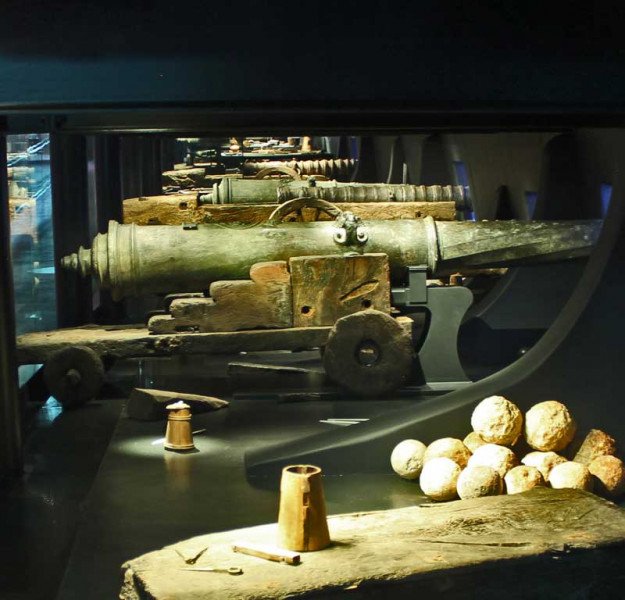
Here are the cannons for the main (lower) deck, which is open to the sky so the carriages can be seen. They're based on those found on the Mary Rose, though I haven't been able to reproduce the shape of these rather unusual barrels with the equipment to hand (hell, at this scale, I haven't even given them trunnions!). I made the barrels the same way as I have previously, with a piece of brass tube from a hobby shop in my "poor man's lathe" (electric drill), and shaped with a small hacksaw and files. And here's the cascabel, made from yet another "sequin pin" with the head filed down: I glued it in place with CA. And here's the construction of a gun carriage (note the giant matchstick): The wheels were cut from a piece of pear wood I'd carved into a cylinder and drilled the holes for the axles with another sequin pin. And more sequin pins for the axles. And all complete. Some of them are a little too high to fit through the gunports, but I'll just sand the wheels down a bit and they should be fine. Steven
- 740 replies
-
- 15
-
-
- Tudor
- restoration
- (and 4 more)
-
Die Kogge Von Bremen by kentyler
Louie da fly replied to kentyler's topic in - Subjects built Up to and including 1500 AD
Good progress, Ken. I'm looking forward to seeing the next step. Steven -
A beautiful result, John! Steven
-
There's quite a few of us Aussies here. Welcome, Gaz! Do you have a ship you're planning to build? Steven
-
Well, this is a step forward in a way - when I first built the model I never got around to making and fitting the rudder. Most of what I've done so far is simply re-doing what I did way back then. But this is new. I'm not saying that means I'm getting close to finishing or anything like that, but it is nice to be doing something I haven't done before. Steven
- 740 replies
-
- 3
-
-
- Tudor
- restoration
- (and 4 more)
-
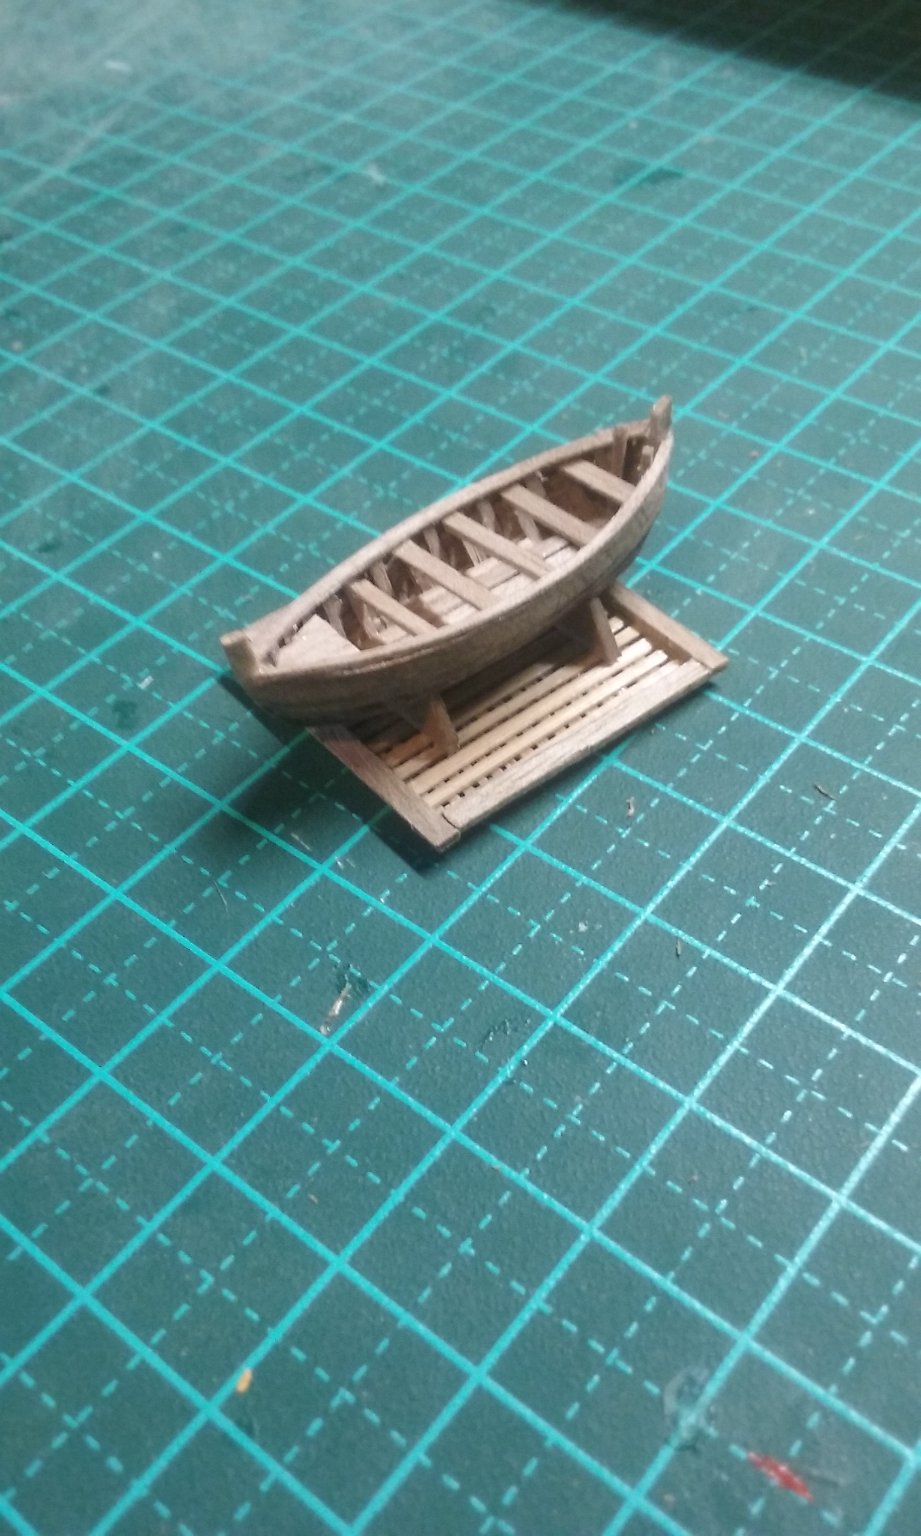
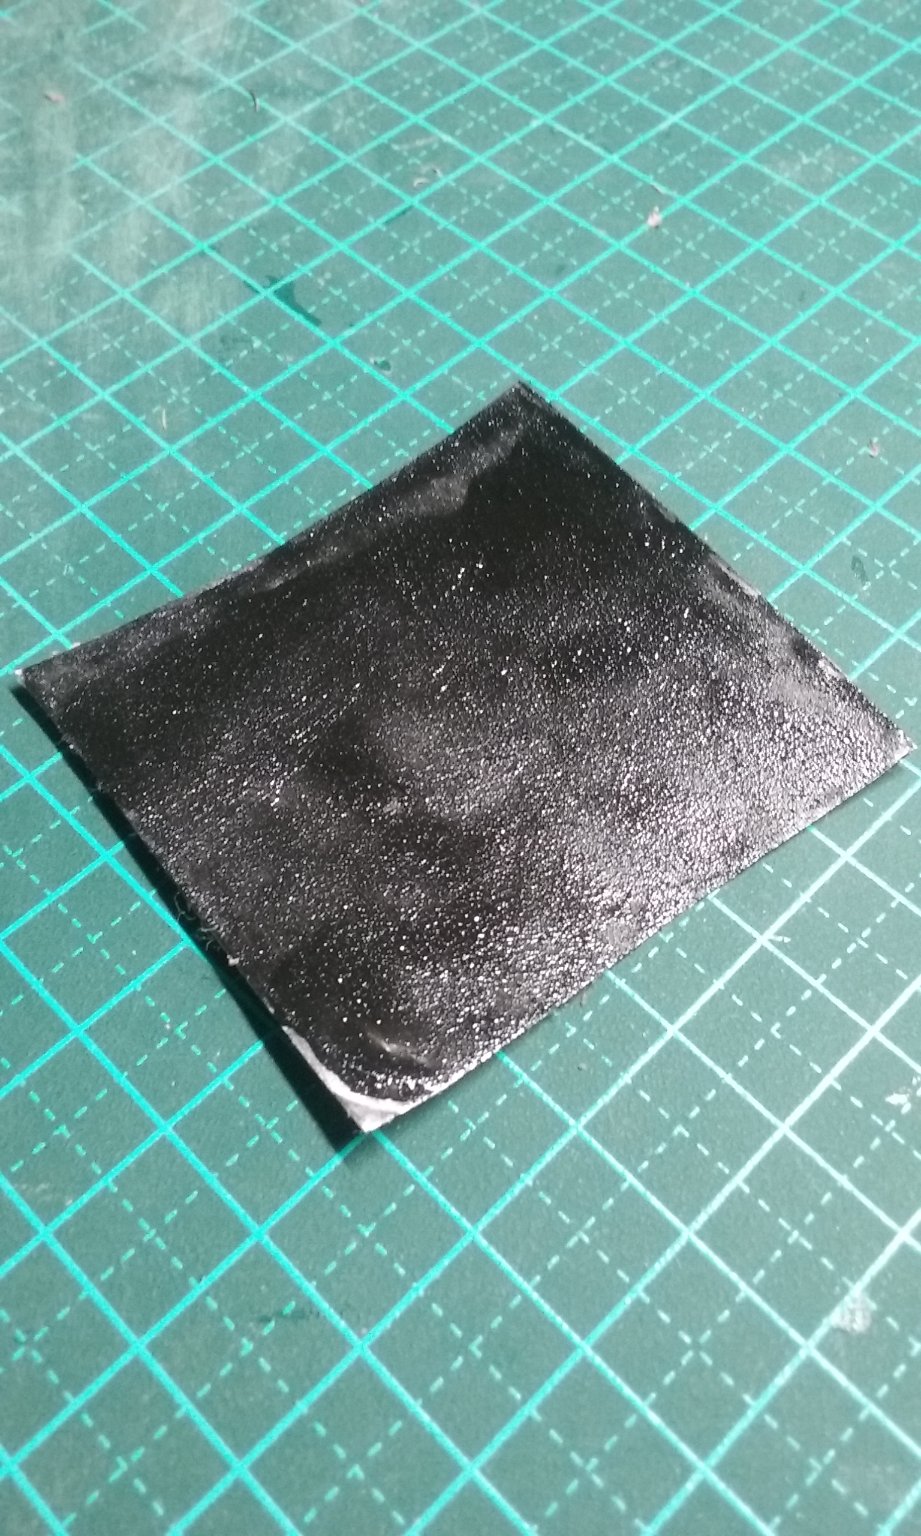
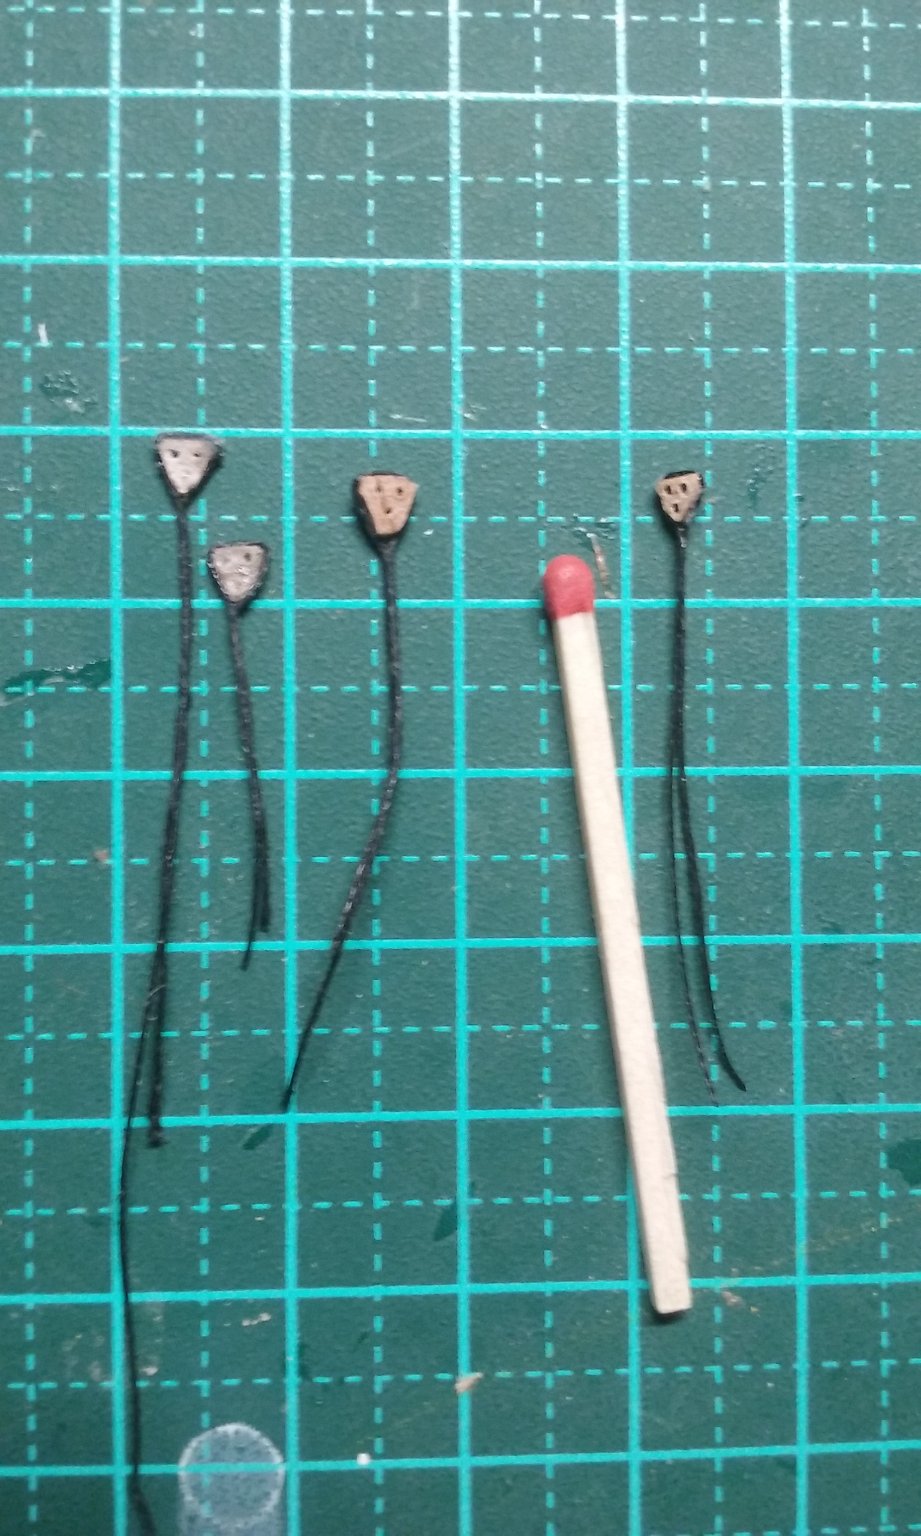
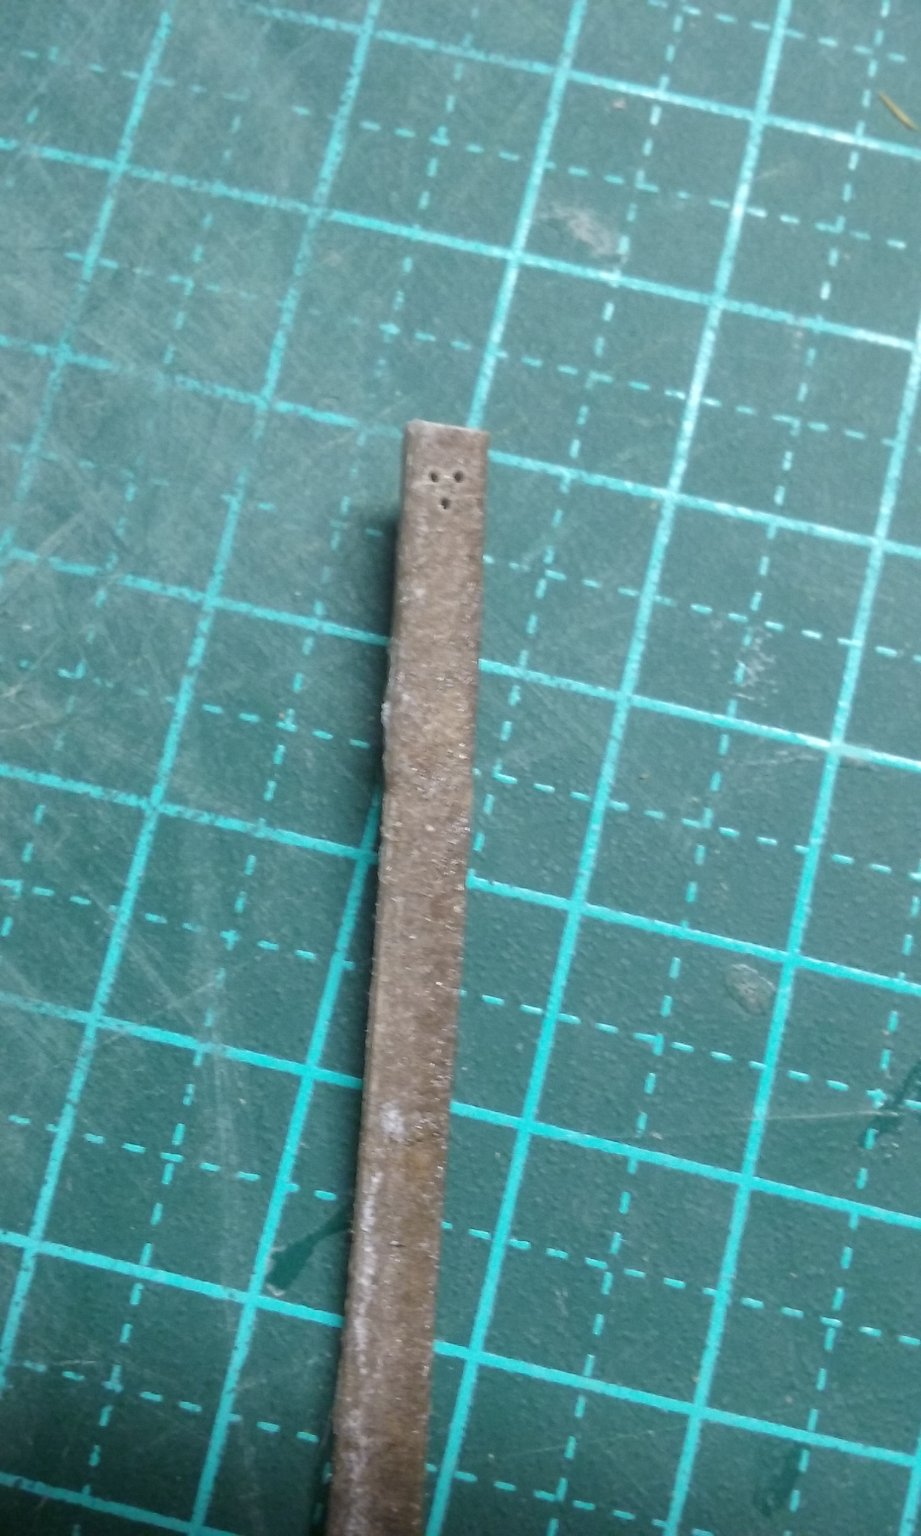
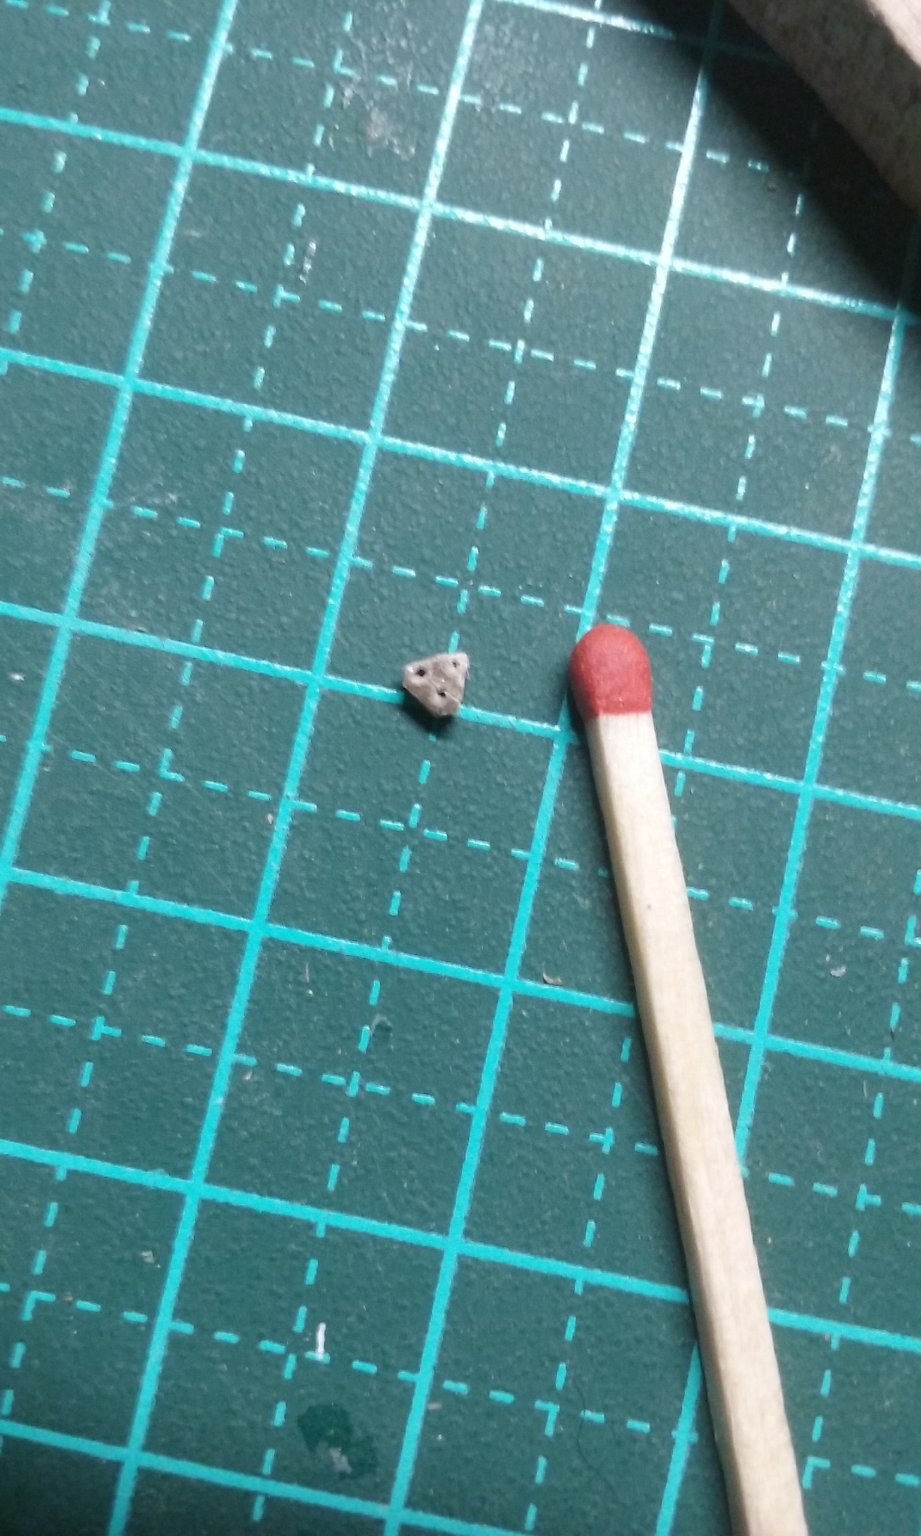
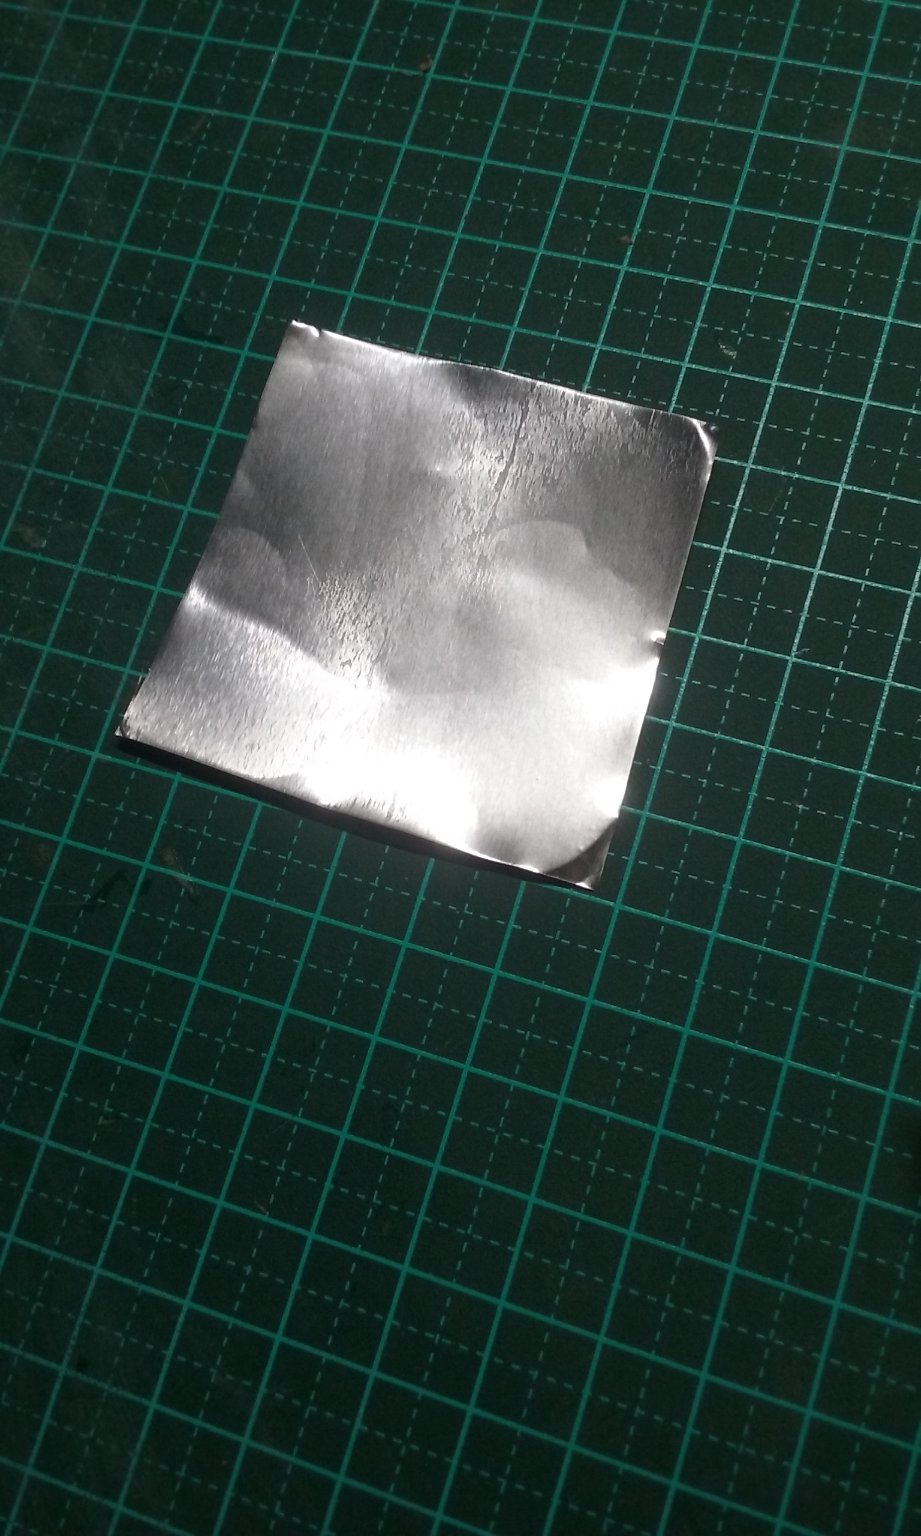
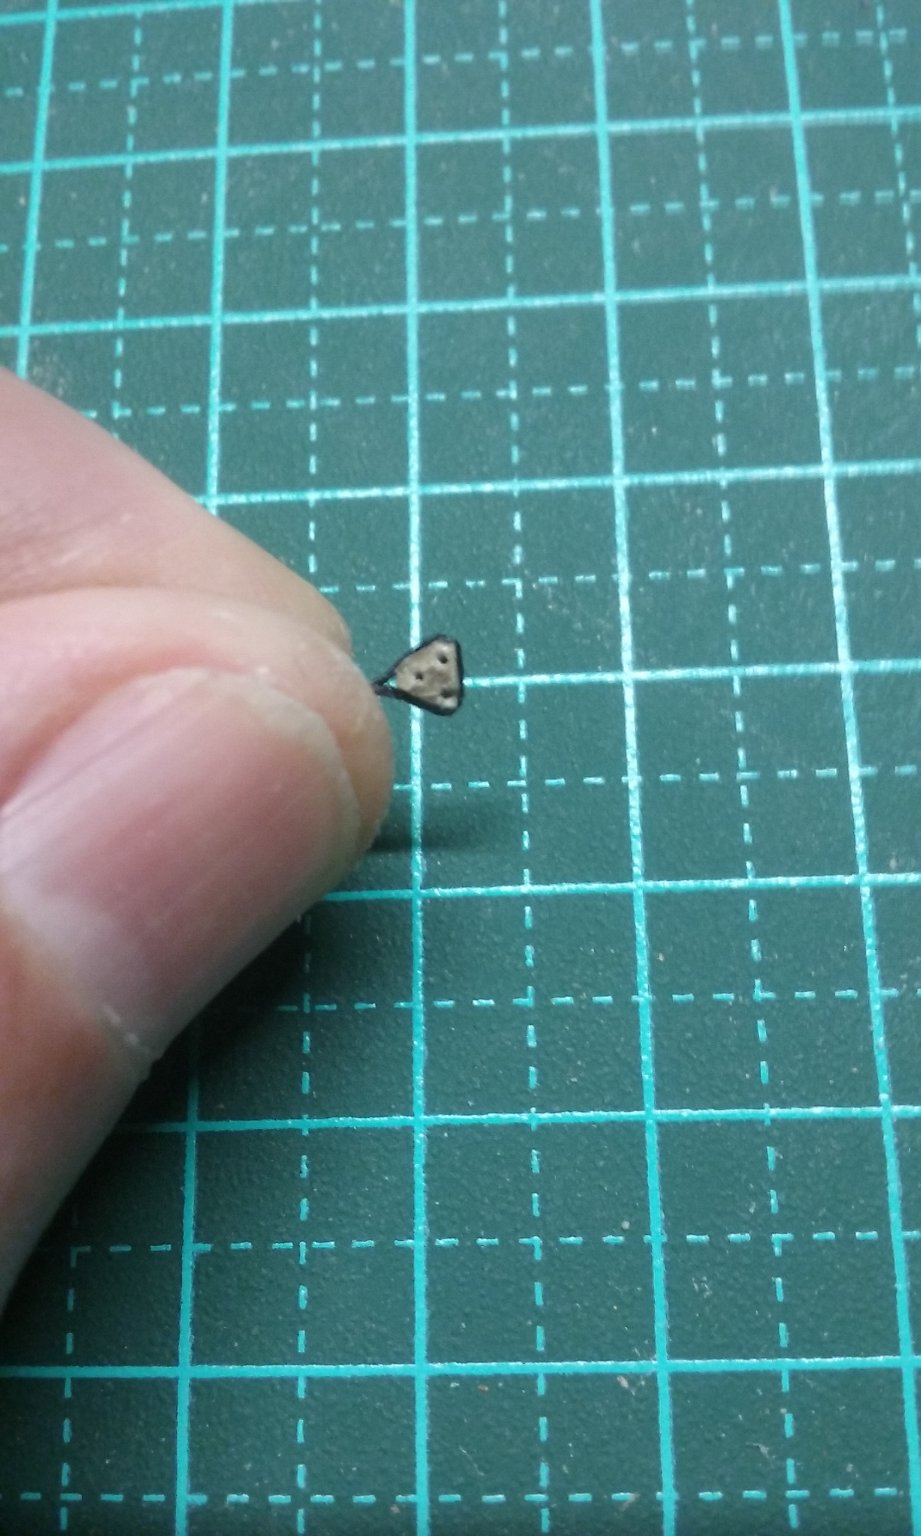
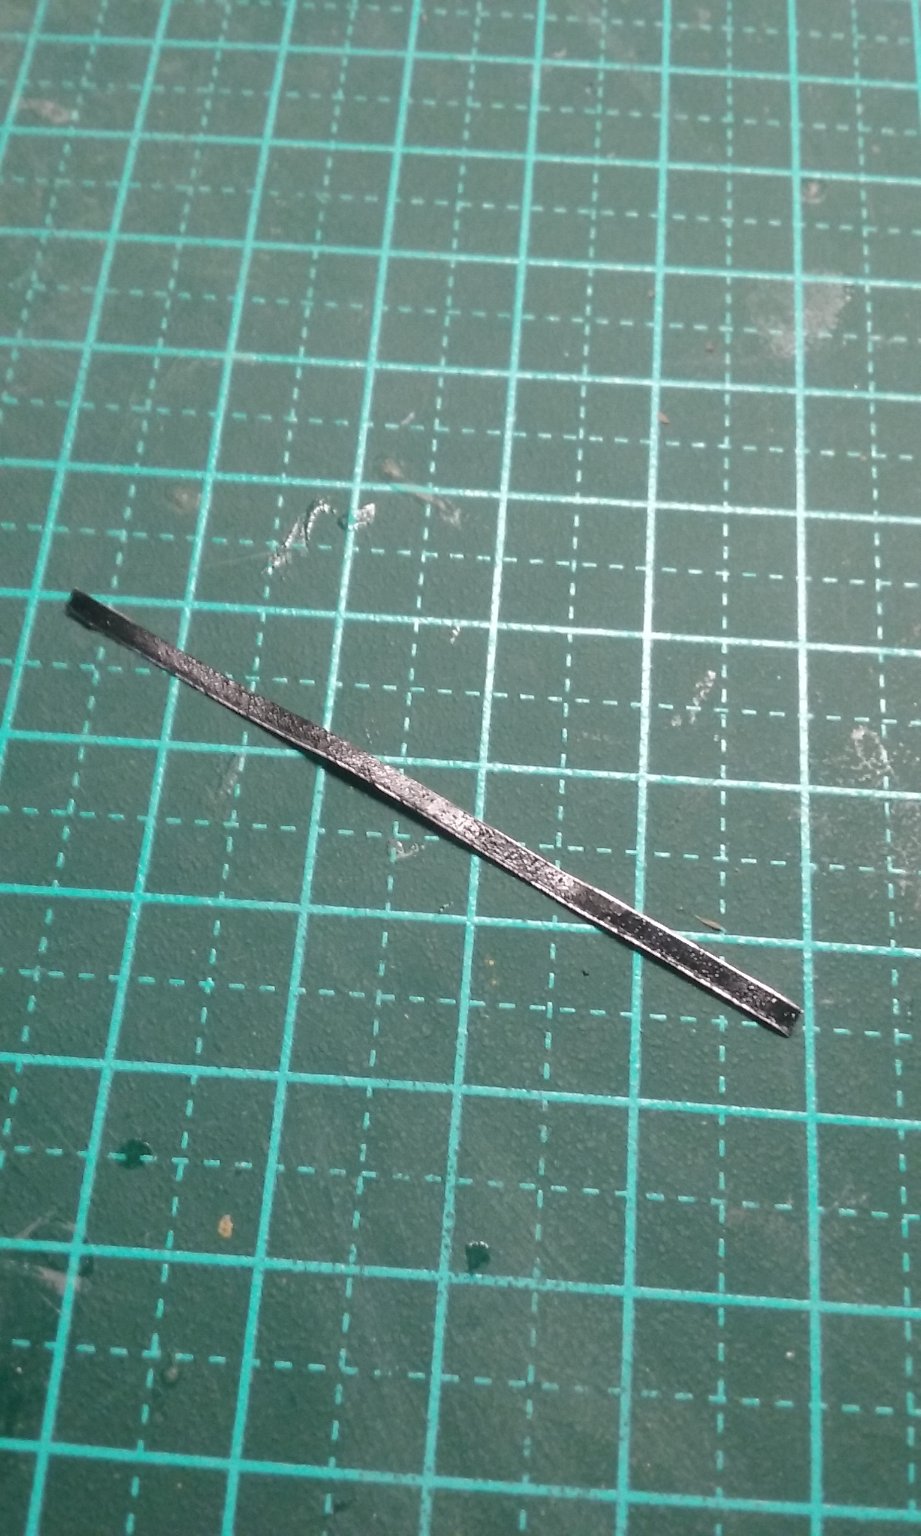
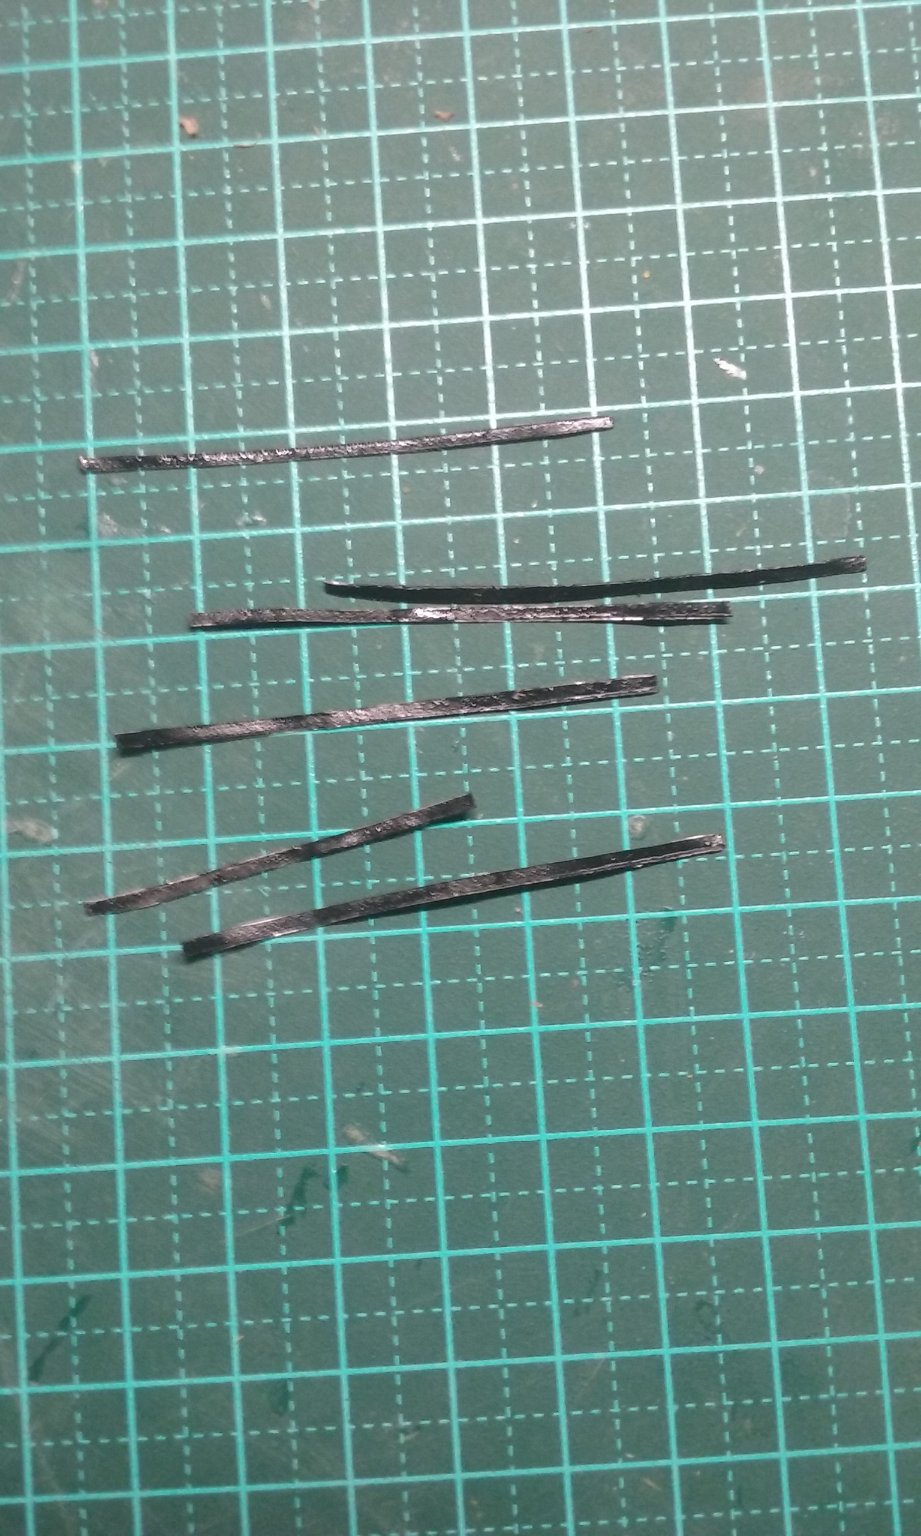
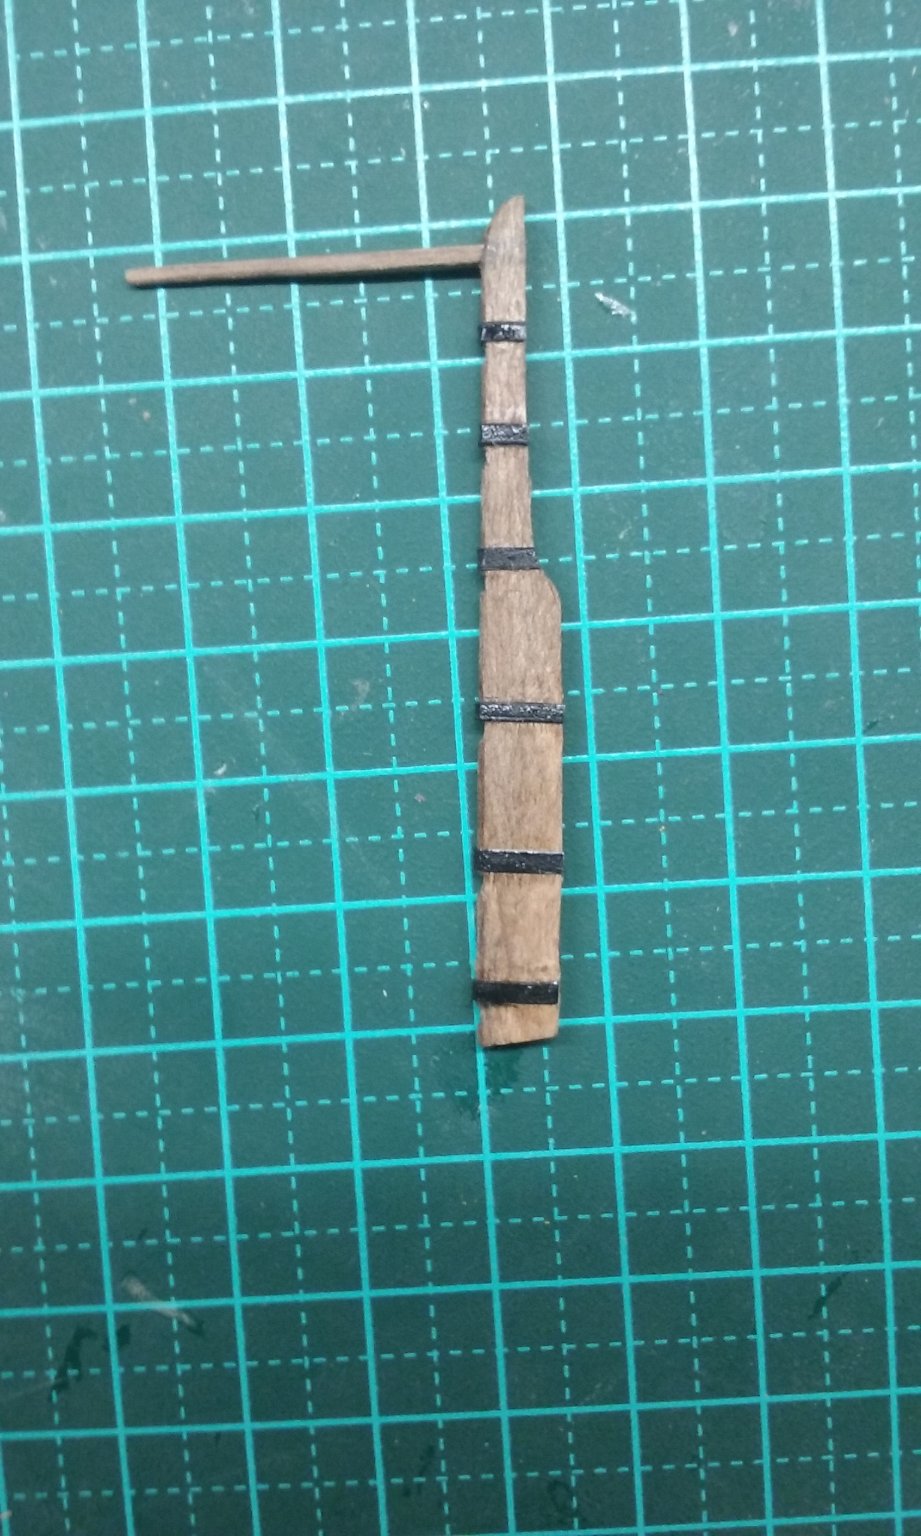
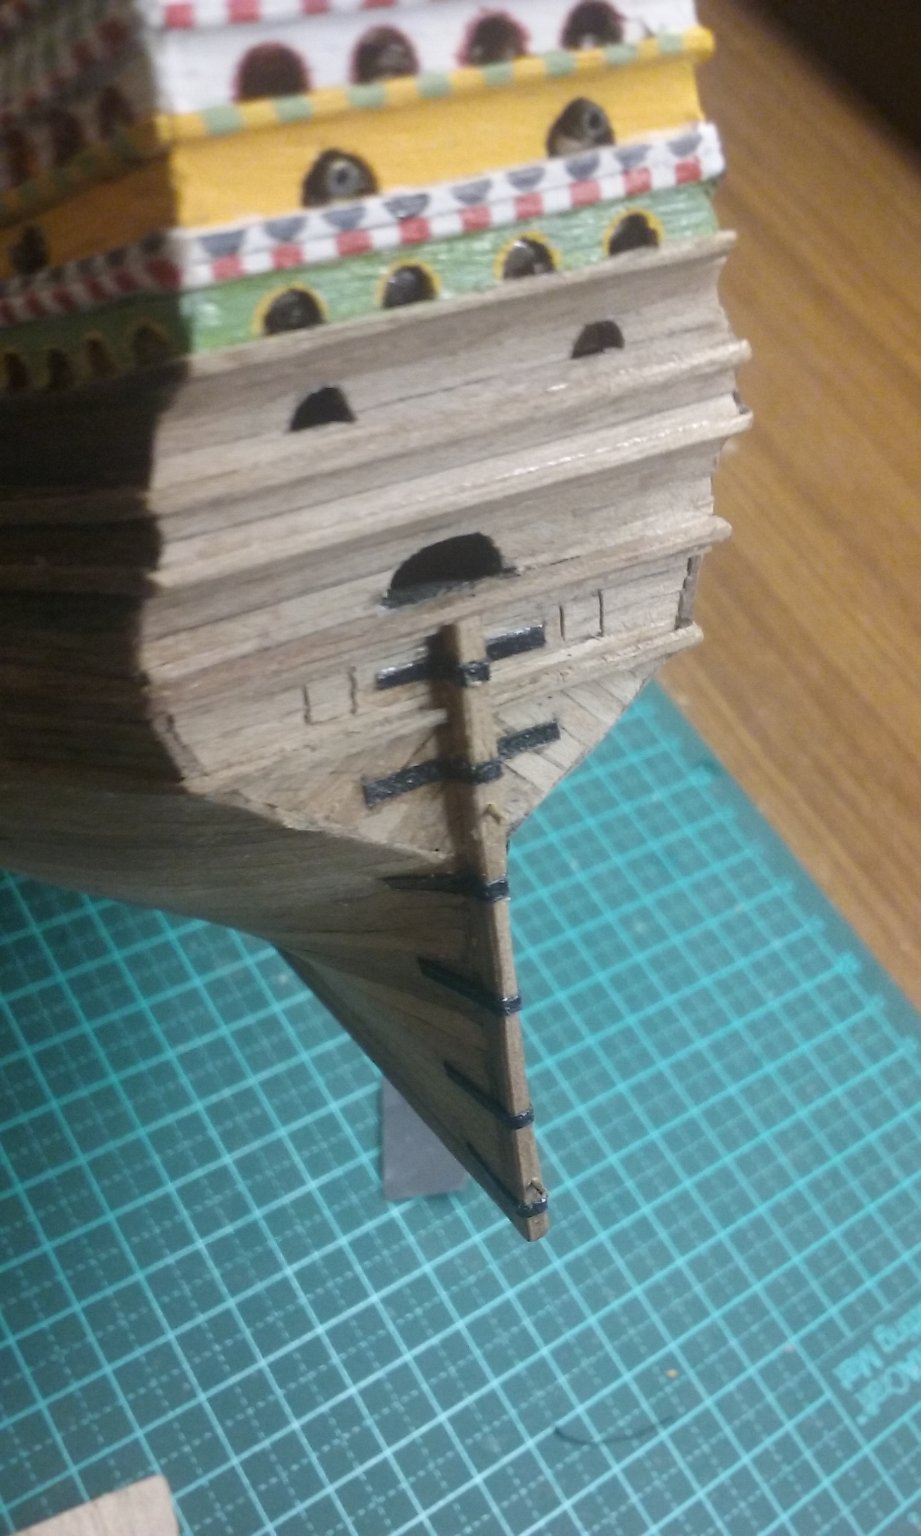
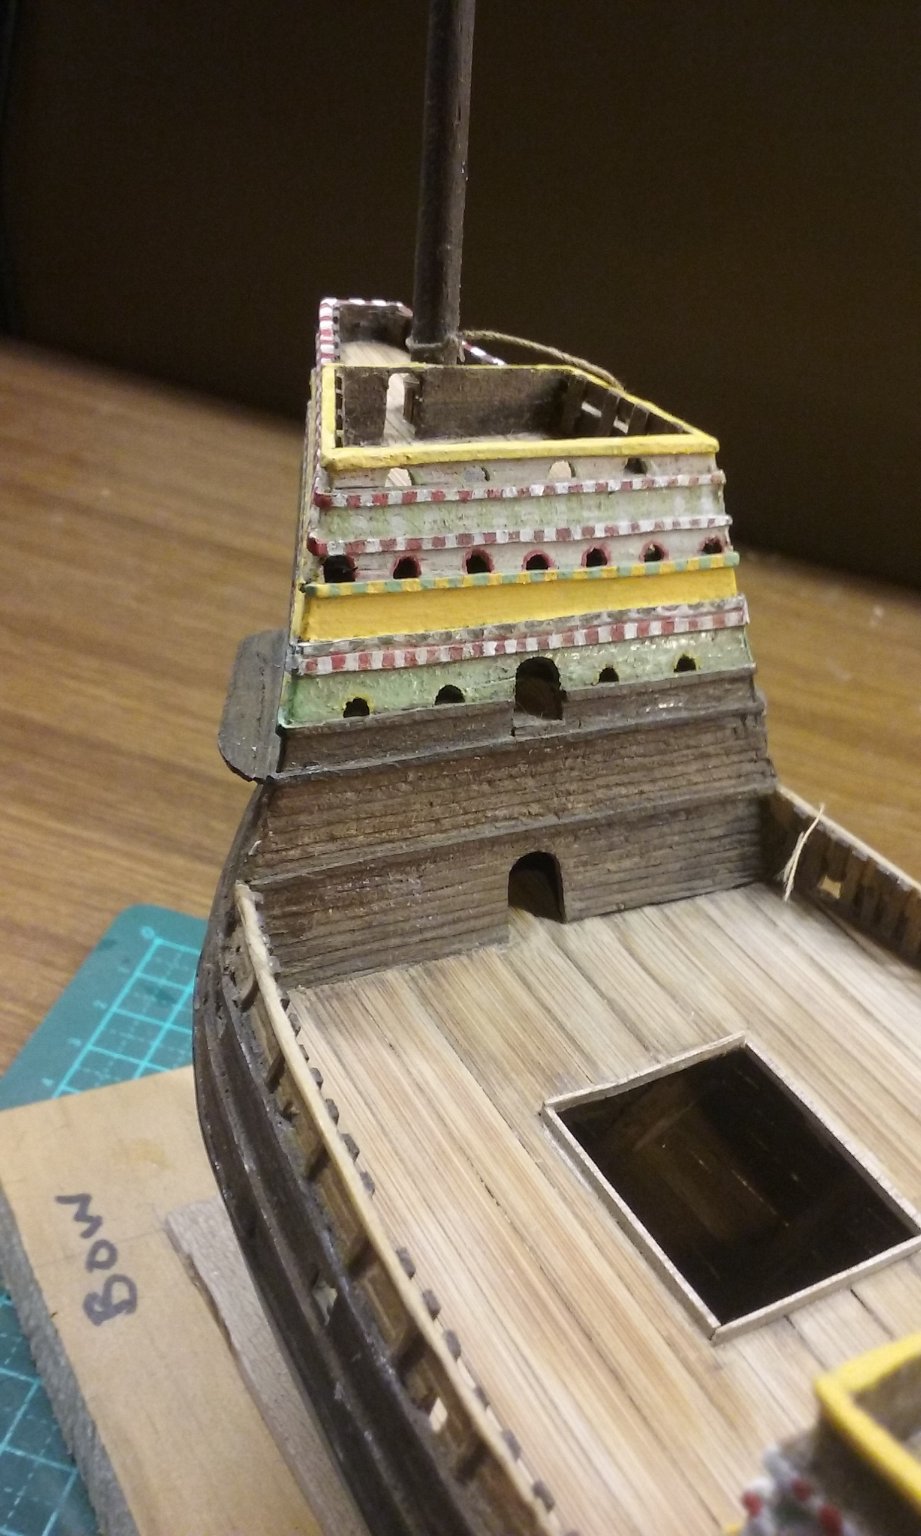
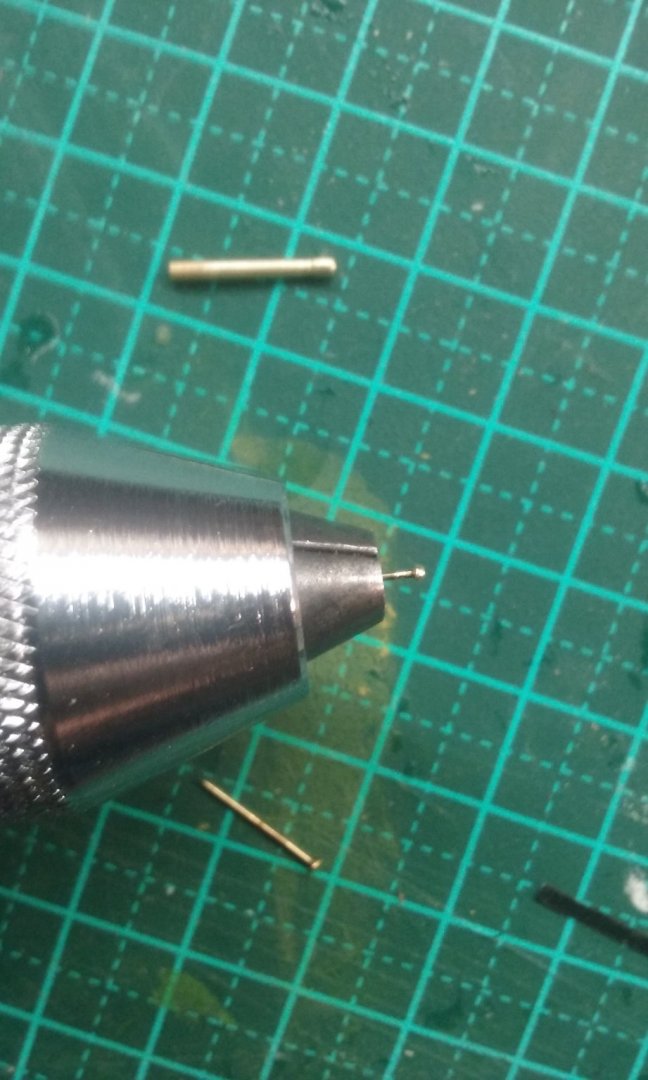
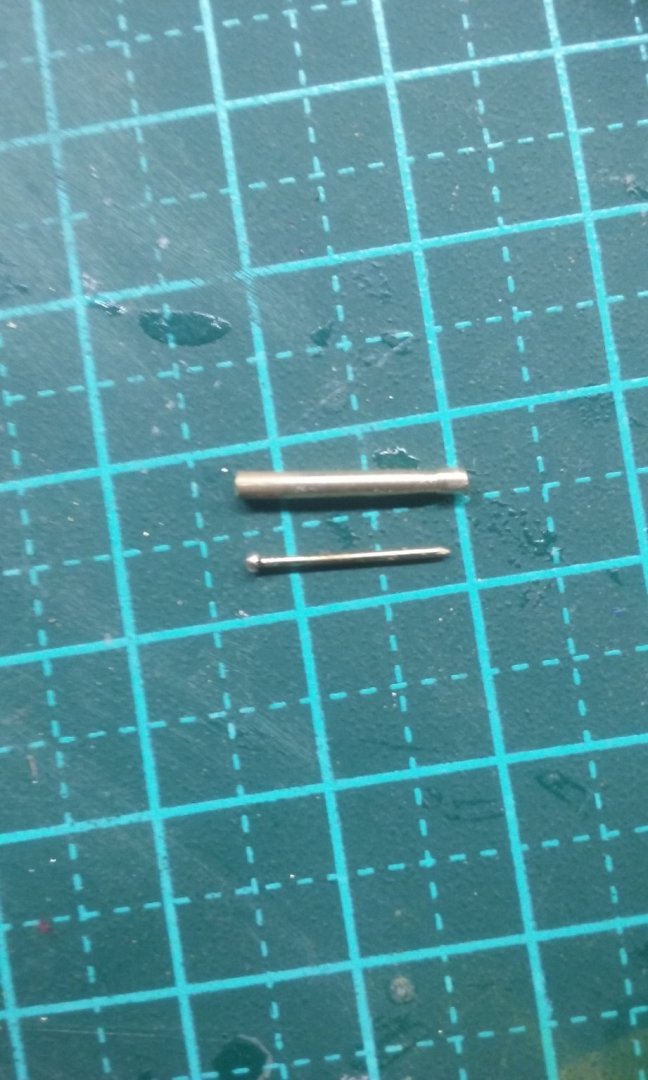
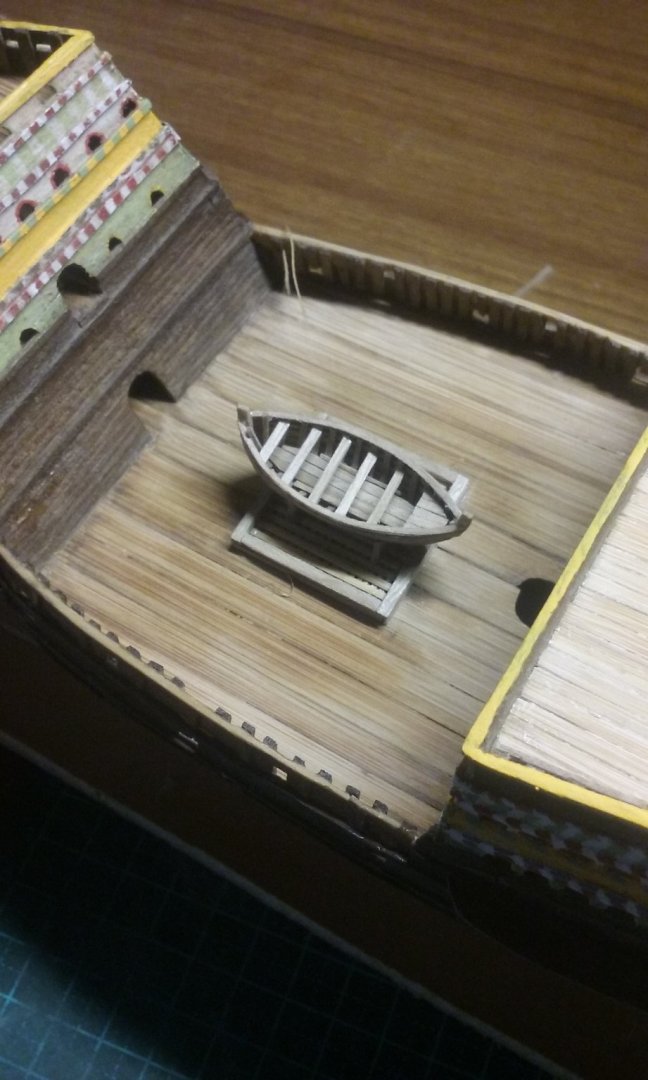
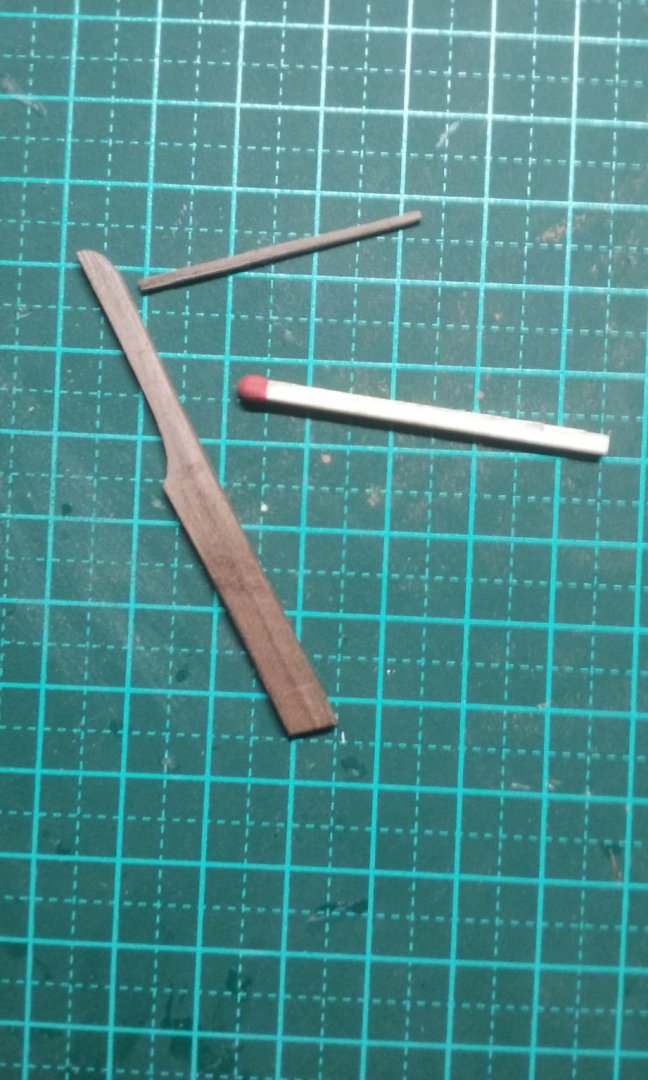
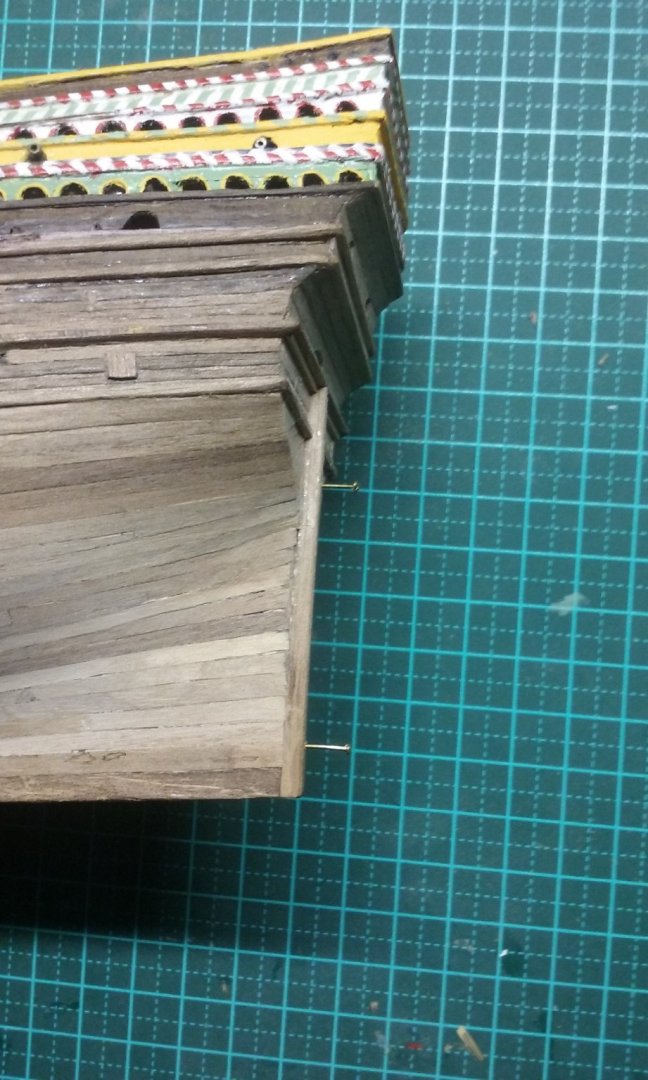
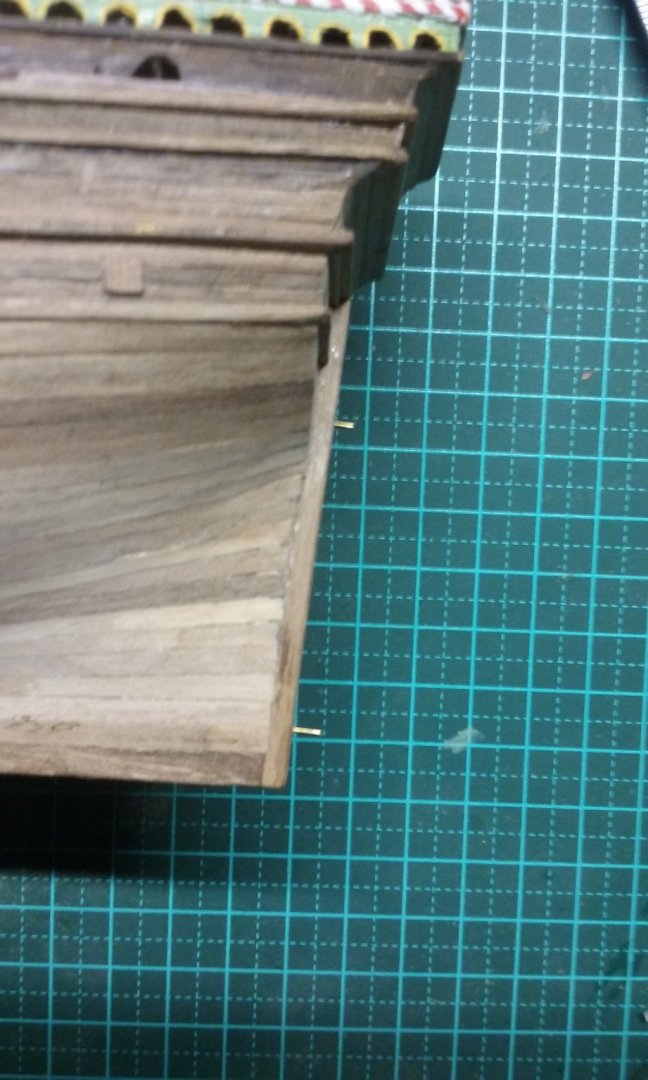
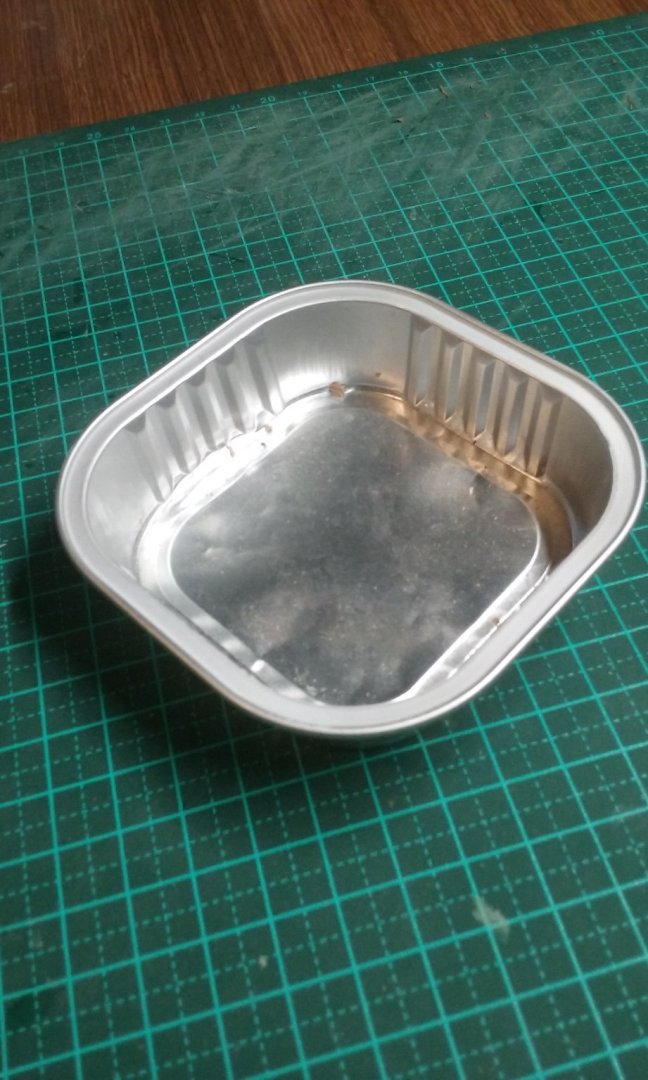
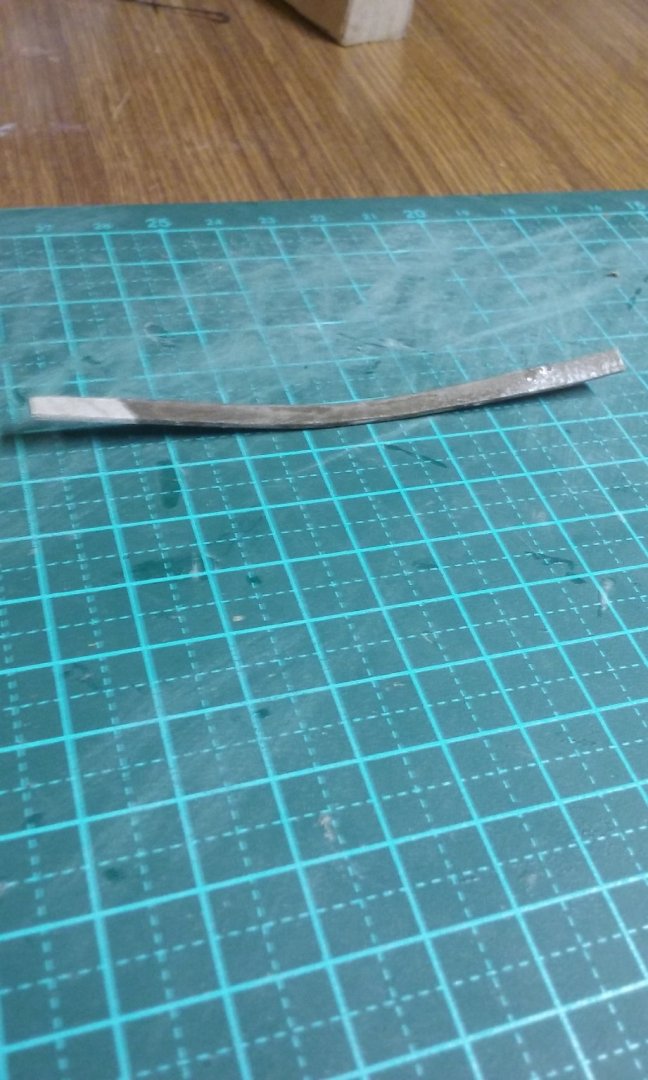
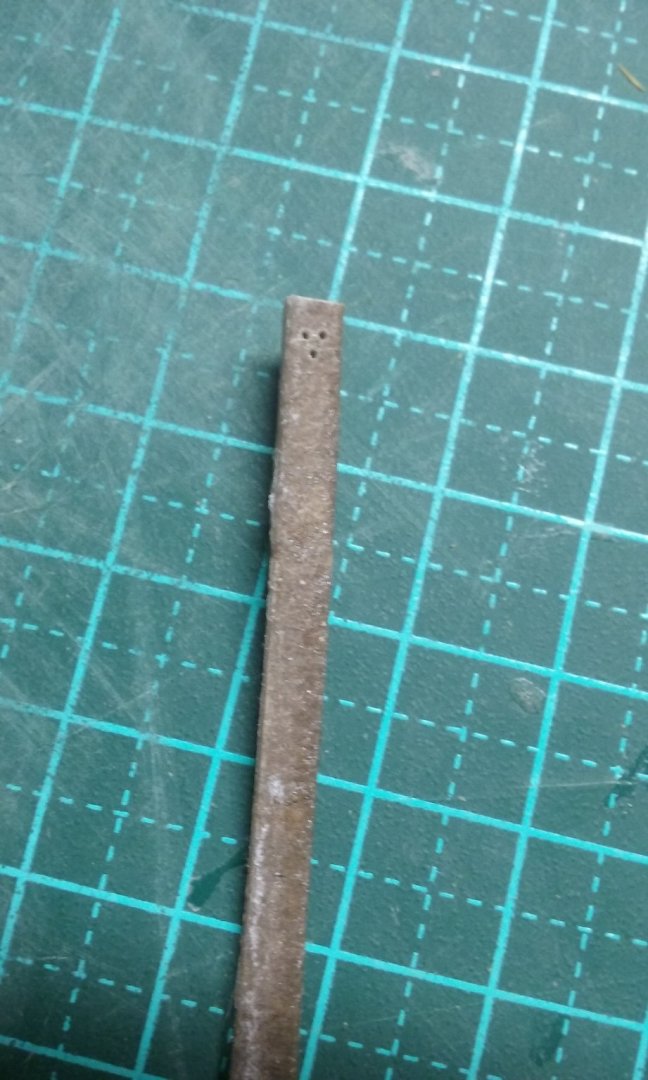
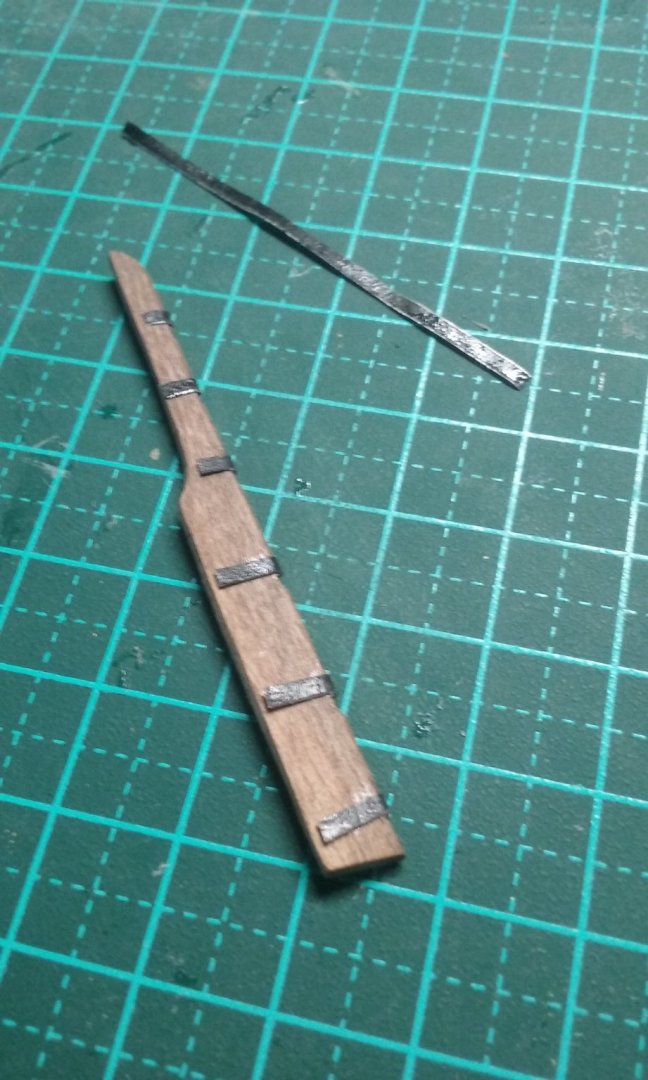
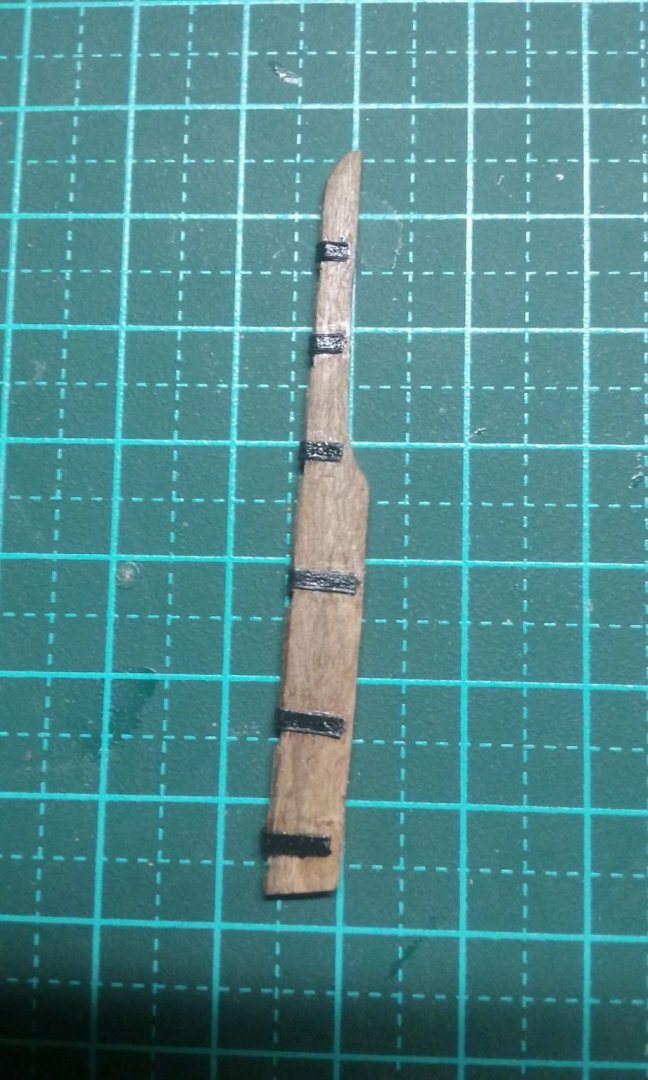
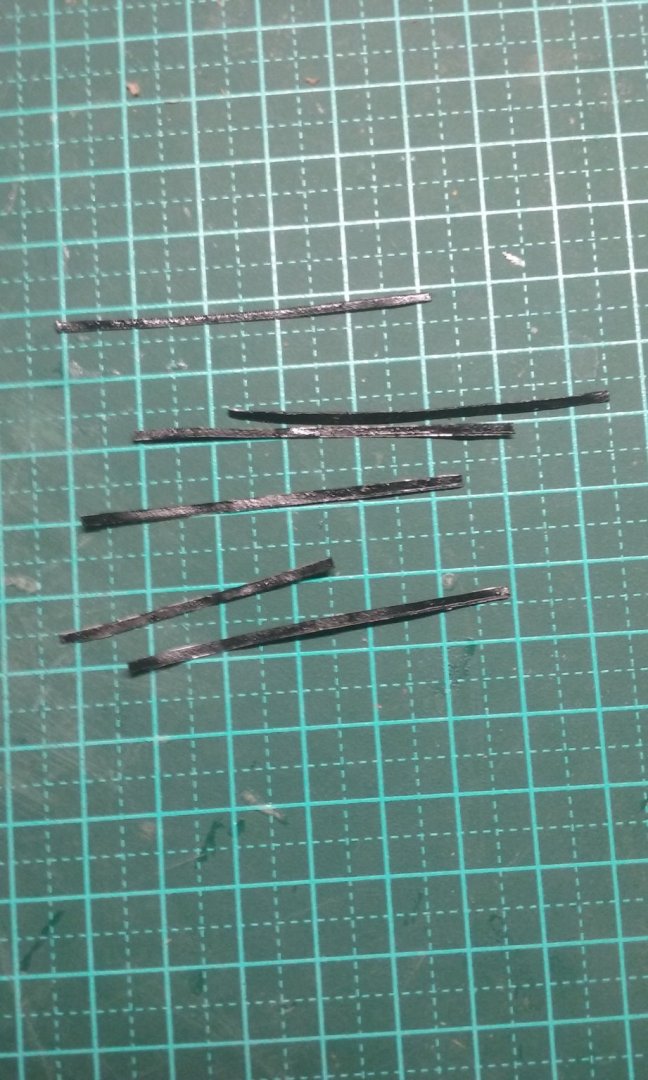
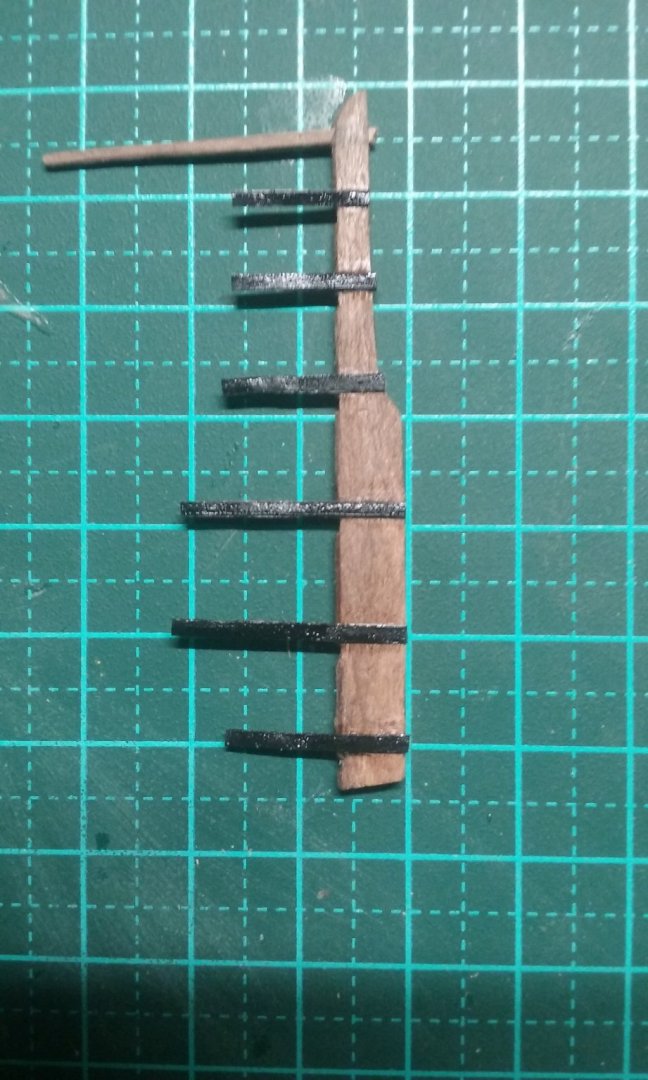
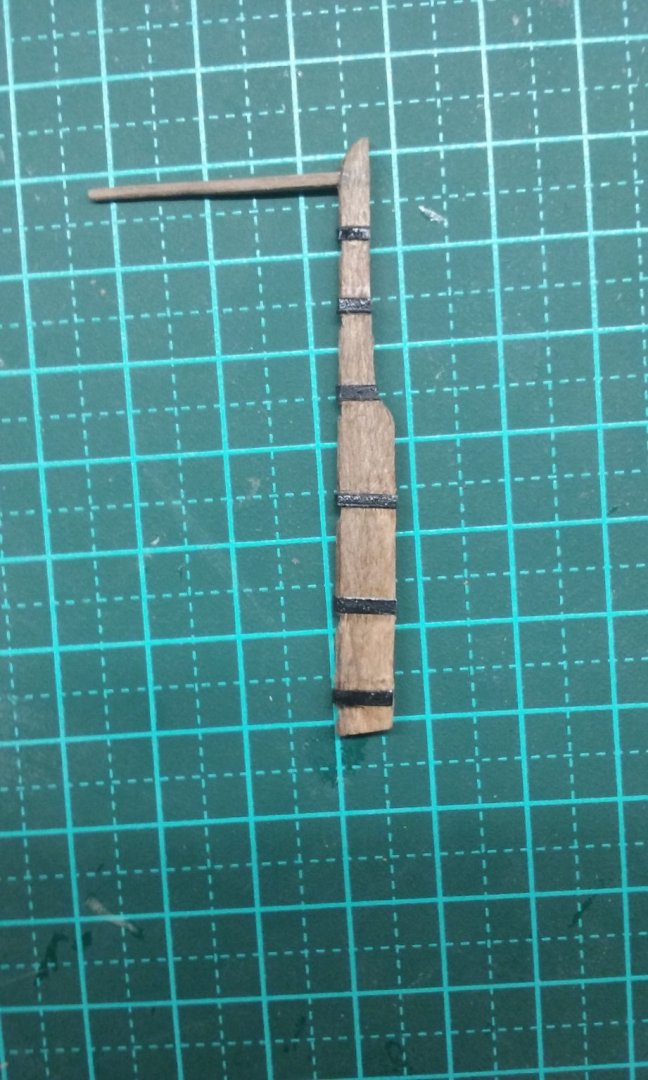
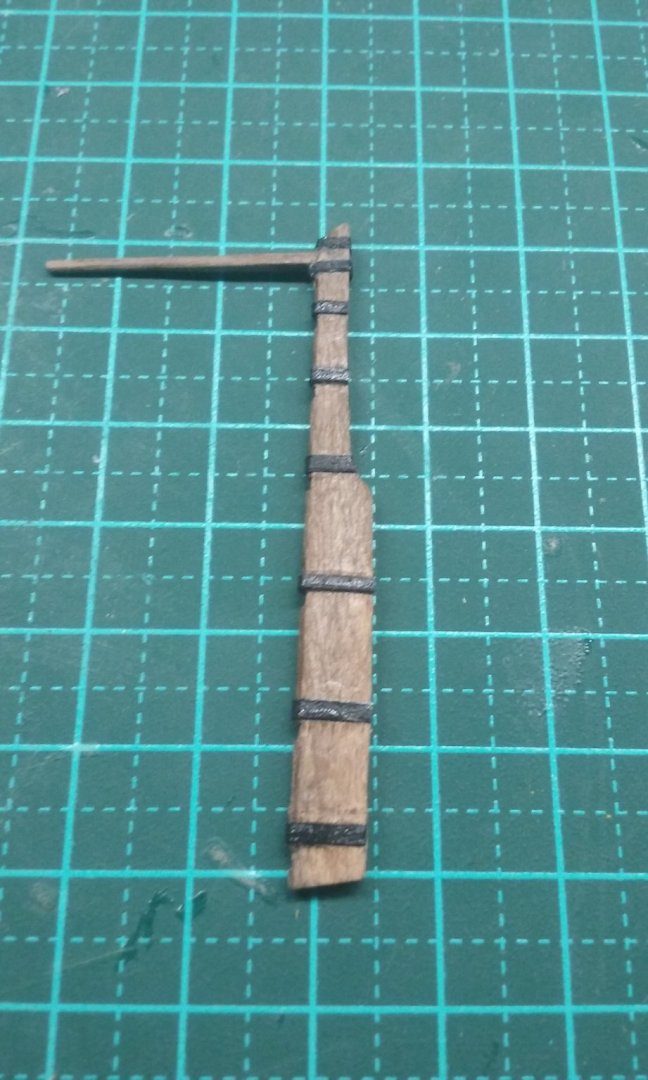
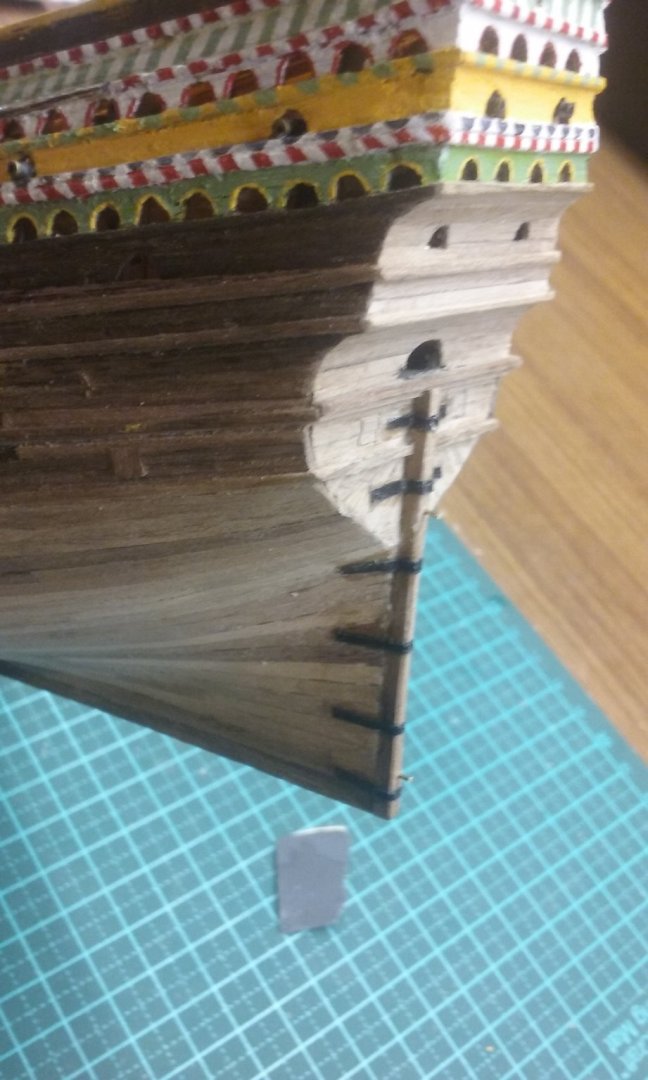
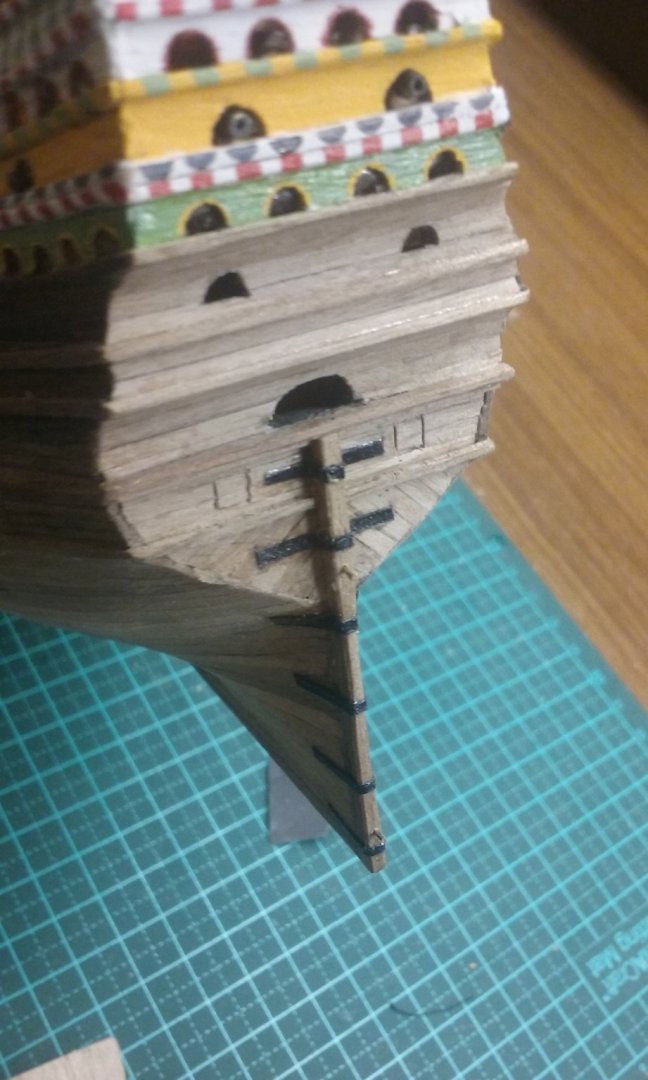
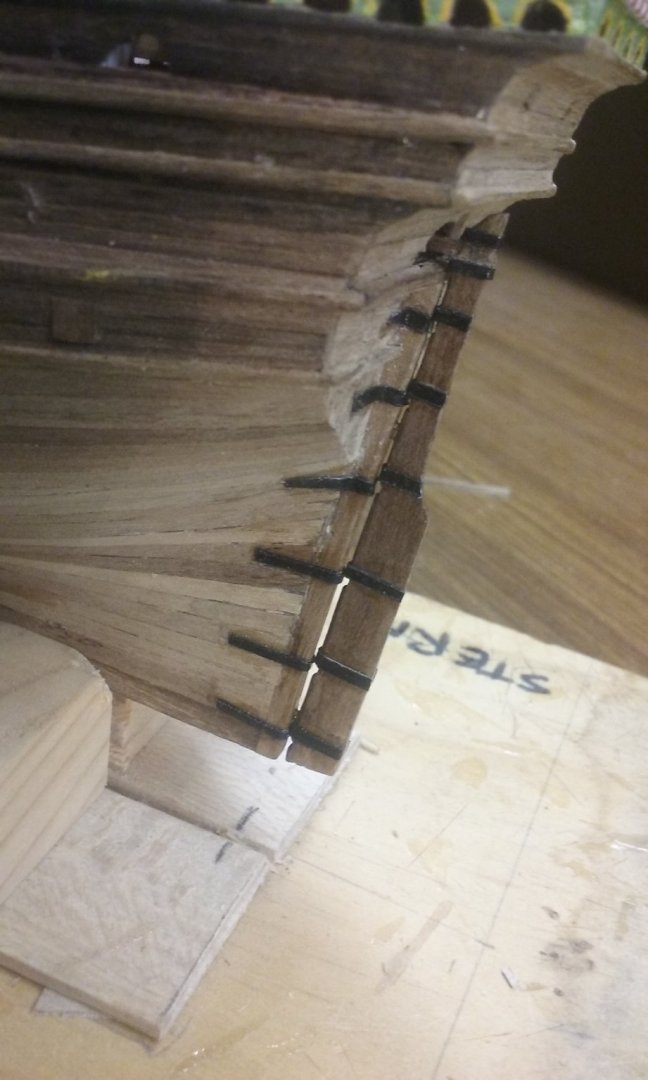
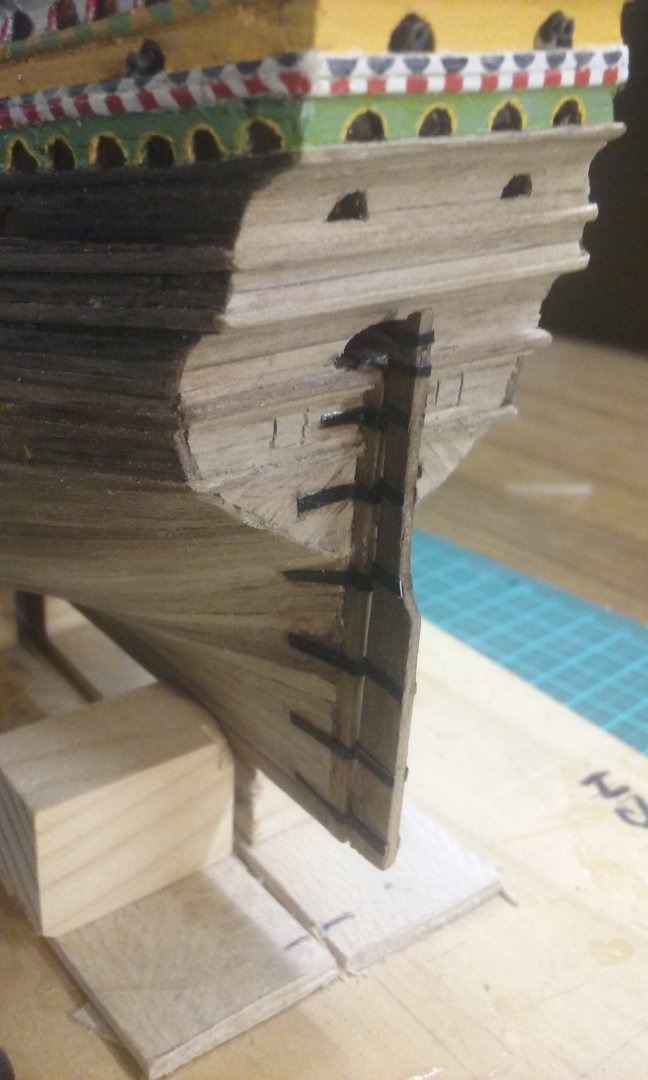
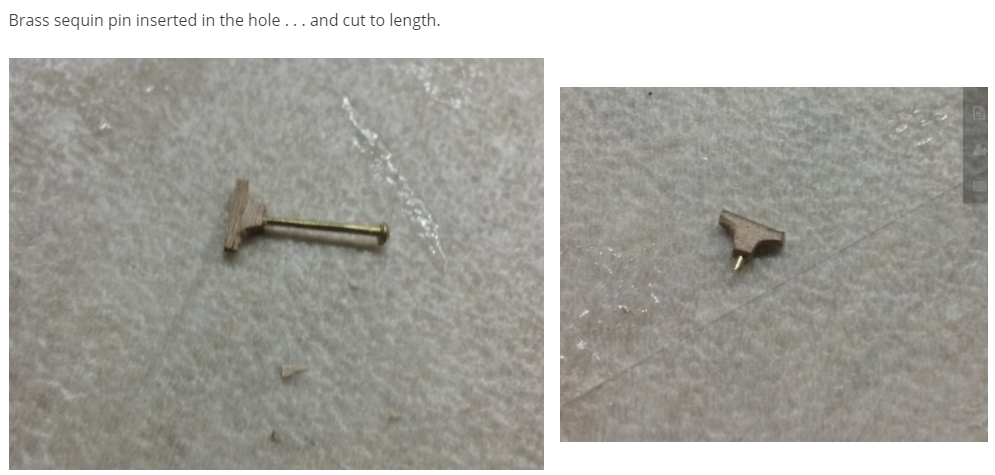
I've made the chocks for the longboat and glued the chocks to the longboat and the hatch cover. I've dry fitted the assembly to the deck to give an idea of how it's going to work. I've finally decided not to continue trying to make the deadeyes out of wood - I just get too many failures from splitting. So I'm goingahead with card impregnated with CA. It works much better. Here's a strip of card to cut them from, and the three holes drilled with a bit made of a brass "sequin pin" (very useful, these - about the diameter of a dressmaker's pin but with a point like a nail, so it acts as a drill bit - you can get them from art supply shops). Trimmed to shape and the strop attached on one side: And carried around the other two sides. And a few deadeyes - some of wood and some of card. At this scale there's really no point in making chains for the lower end of the deadeye assembly - much too fiddly - so I'm just going to fake it with thread. When I made the model way back in the day I had no idea that chains existed anyway. I next went to work on the rudder. Here it is all cut out, with the tiller next to it. I thunk and thunk about how to attach the rudder to the sternpost - there's no way I'm going to make pintles and gudgeons at this scale. I went back to my tried and tested method of inserting pins. Those sequin pins are a Godsend. First photo shows them complete, the second one shows them trimmed to length. For the rudder irons I went back to my trusty aluminium foil catfood containers. They're purely for decoration. When I tried blacking the aluminium previously, I found the paint scraped off really easily. So this time I tried roughening the surface with sandpaper. It seemed to work, though I think I should have brushed off the sandings better as I seem to have got some grit in with the paint. But I don't think this is really a serious issue. I cut strips with a craft knife: I wasn't happy with my first attempt: So I did it a different way. I used CA glue in this case - PVA (white glue) doesn't stick to metal. And finally glued the rudder in place. Voila! Steven


- 740 replies
-
- 15
-
-
- Tudor
- restoration
- (and 4 more)
-
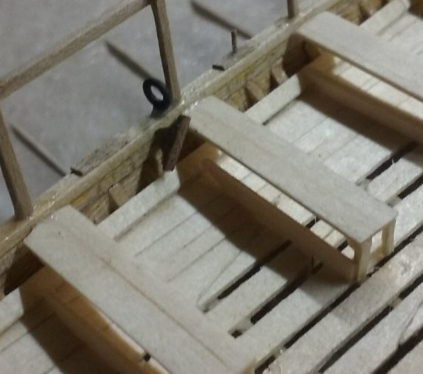
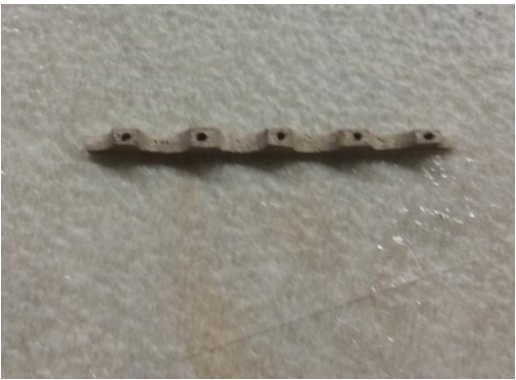
If you have a fine enough drill you might be able to drill holes at each end of the part to be added, and insert a brass "sequin" pin (available at art suppliers - they're about the same diameter as a dressmaker's pin) in each hole, with a mating hole where the pin will go on the main body of the model. I used a cut-down sequin pin as my drill bit. The end of one of these pins isn't a perfect point - it's more like the point of a nail, so it acts like the cutting point of a drill. This is how I attached cleats to my dromon model: Mass produced cleats with holes for pins. Then I cut the piece into individual cleats. Then; And cleat in place: I hope this helps. Steven
-
Sooner you than me, mate . By the way, some time ago I was wondering what effect the "pointy at both ends" shape of Viking ships would have on whether the oar lengths would need to be different. So I asked someone (Cap'n Atli) who regularly rows a Viking ship reconstruction, and here's his reply. Thought it might be of interest to you in your build: http://forums.armourarchive.org/phpBB2/viewtopic.php?f=16&t=179436&p=2733651&hilit=longship+oar+length#p2733651 Steven
- 179 replies
-
- 2
-

-
-
- longship
- Helga Holm
- (and 1 more)
-
Nice save on the bulkheads being in the way of the deck beams. The build is going well. And looking good. I still can't get over the difference in the hull shape of reconstructions before and after the discovery of the Bremen cog. This is how they thought a cog would look - much narrower (at least at the top) than it turned out to be. Steven
- 130 replies
-
- 4
-
-
- wütender hund
- hanseatic
- (and 2 more)
-
Strictly, I'm a crow-eater - I was born in South Australia when my parents were over there for work, but I got out of by the time I was two and grew up in Attadale, so I regard myself as a West Australian. Steven
-
Of course they're honky nuts! Takes me back to when I was a boy scout and we went to a Jamboree in Victoria. All us sandgropers had woggles [A woggle is a device to fasten the neckerchief, or scarf, worn as part of the Scout or Girl Guides uniform, originated by a Scout in the 1920s] made of nice big honky nuts, which nobody else had because they don't grow big enough anywhere else. They hardly qualify as wood, though I don't know what else you'd call them. But I'm sure you've seen them after the weather has got to them; they are incredibly fibrous. They also make fantastic coals for a barbecue - just keep on glowing - I've never tried mallee roots, but I think they must be similar. Steven
-
Hello from a newbie with L plates on!
Louie da fly replied to Pirategirl's topic in New member Introductions
That's a pretty place. Nice to live on the coast. No hurry about starting your build. It's not a race. Just enjoy yourself. Steven -
Thanks, Druxey. Of course I can see all the faults in the paintwork, but I doubt I'll be able to do it any better, so I'm leaving it at that. Steven
- 740 replies
-
- 2
-
-
- Tudor
- restoration
- (and 4 more)
-
Hi, Pat, and welcome to MSW. I agree with Bruce and Mark that you should start a build log when you begin your model. It's a very good way to get help and advice - and encouragement from the other members here. The instructions are at https://modelshipworld.com/topic/24705-before-you-post-your-build-log-please-read-this-starting-and-naming-your-build-log/ Welcome aboard! Steven
-
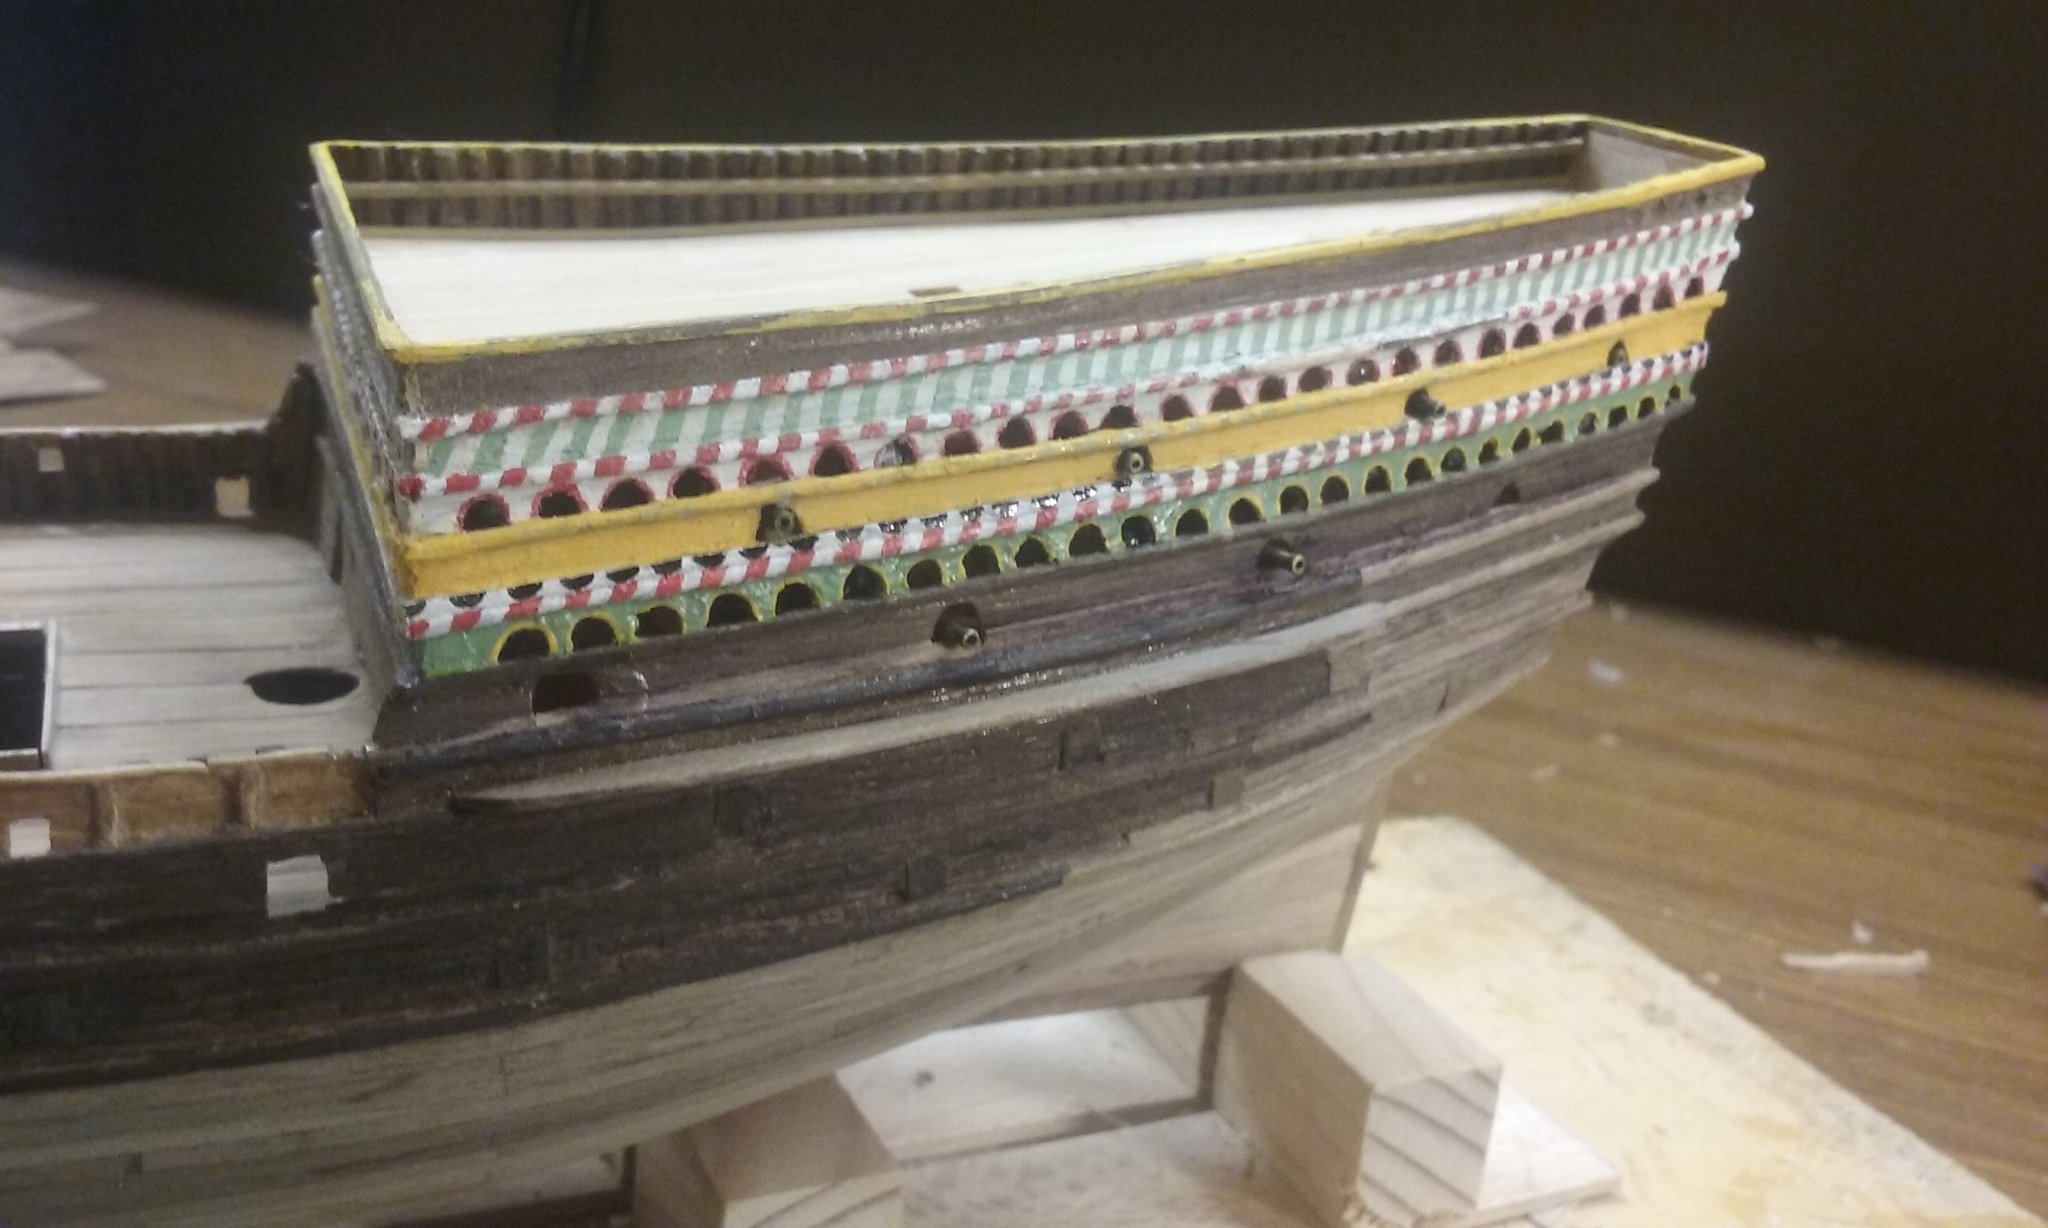
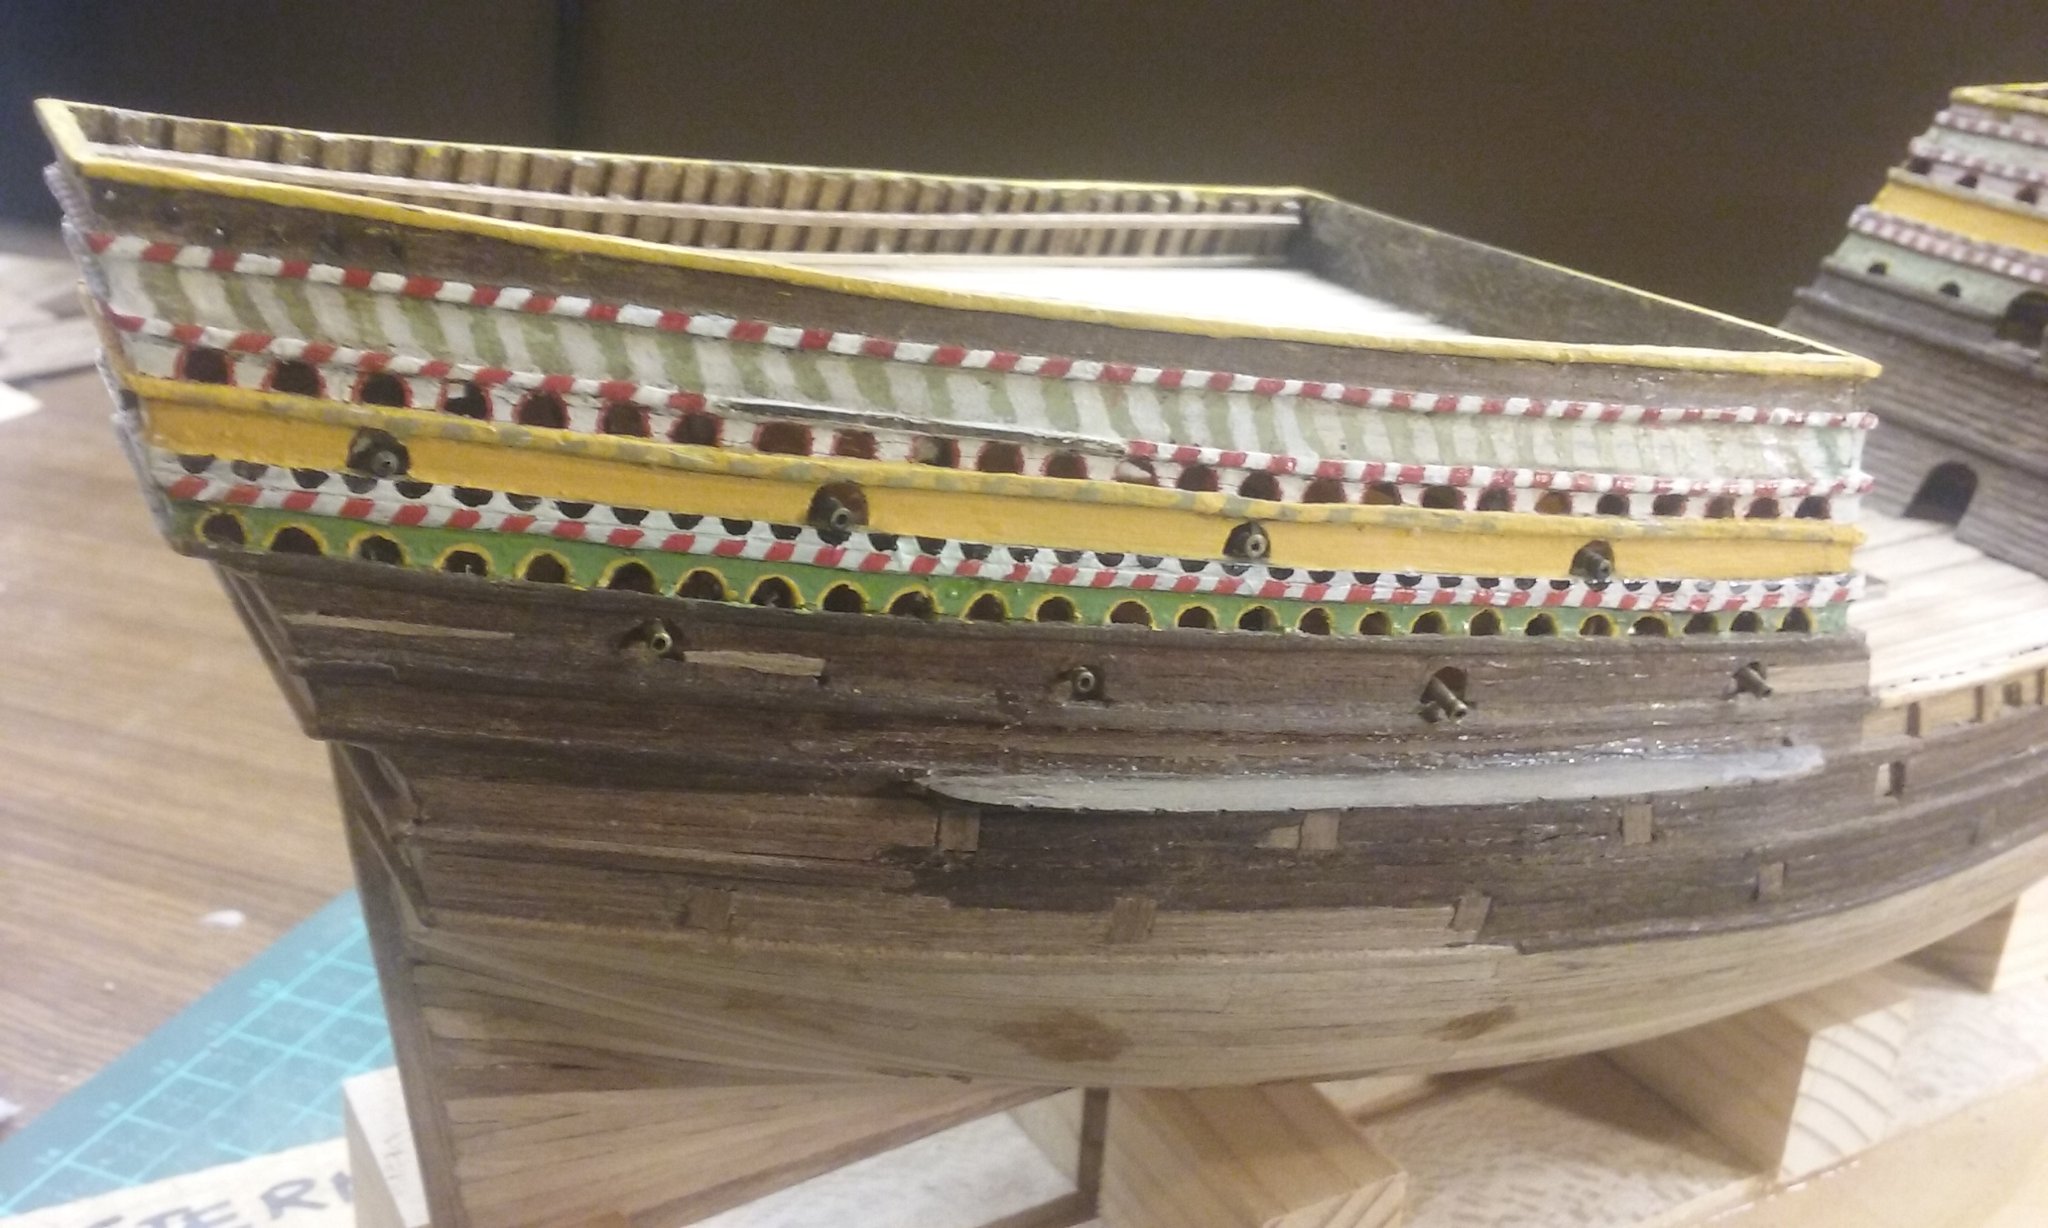
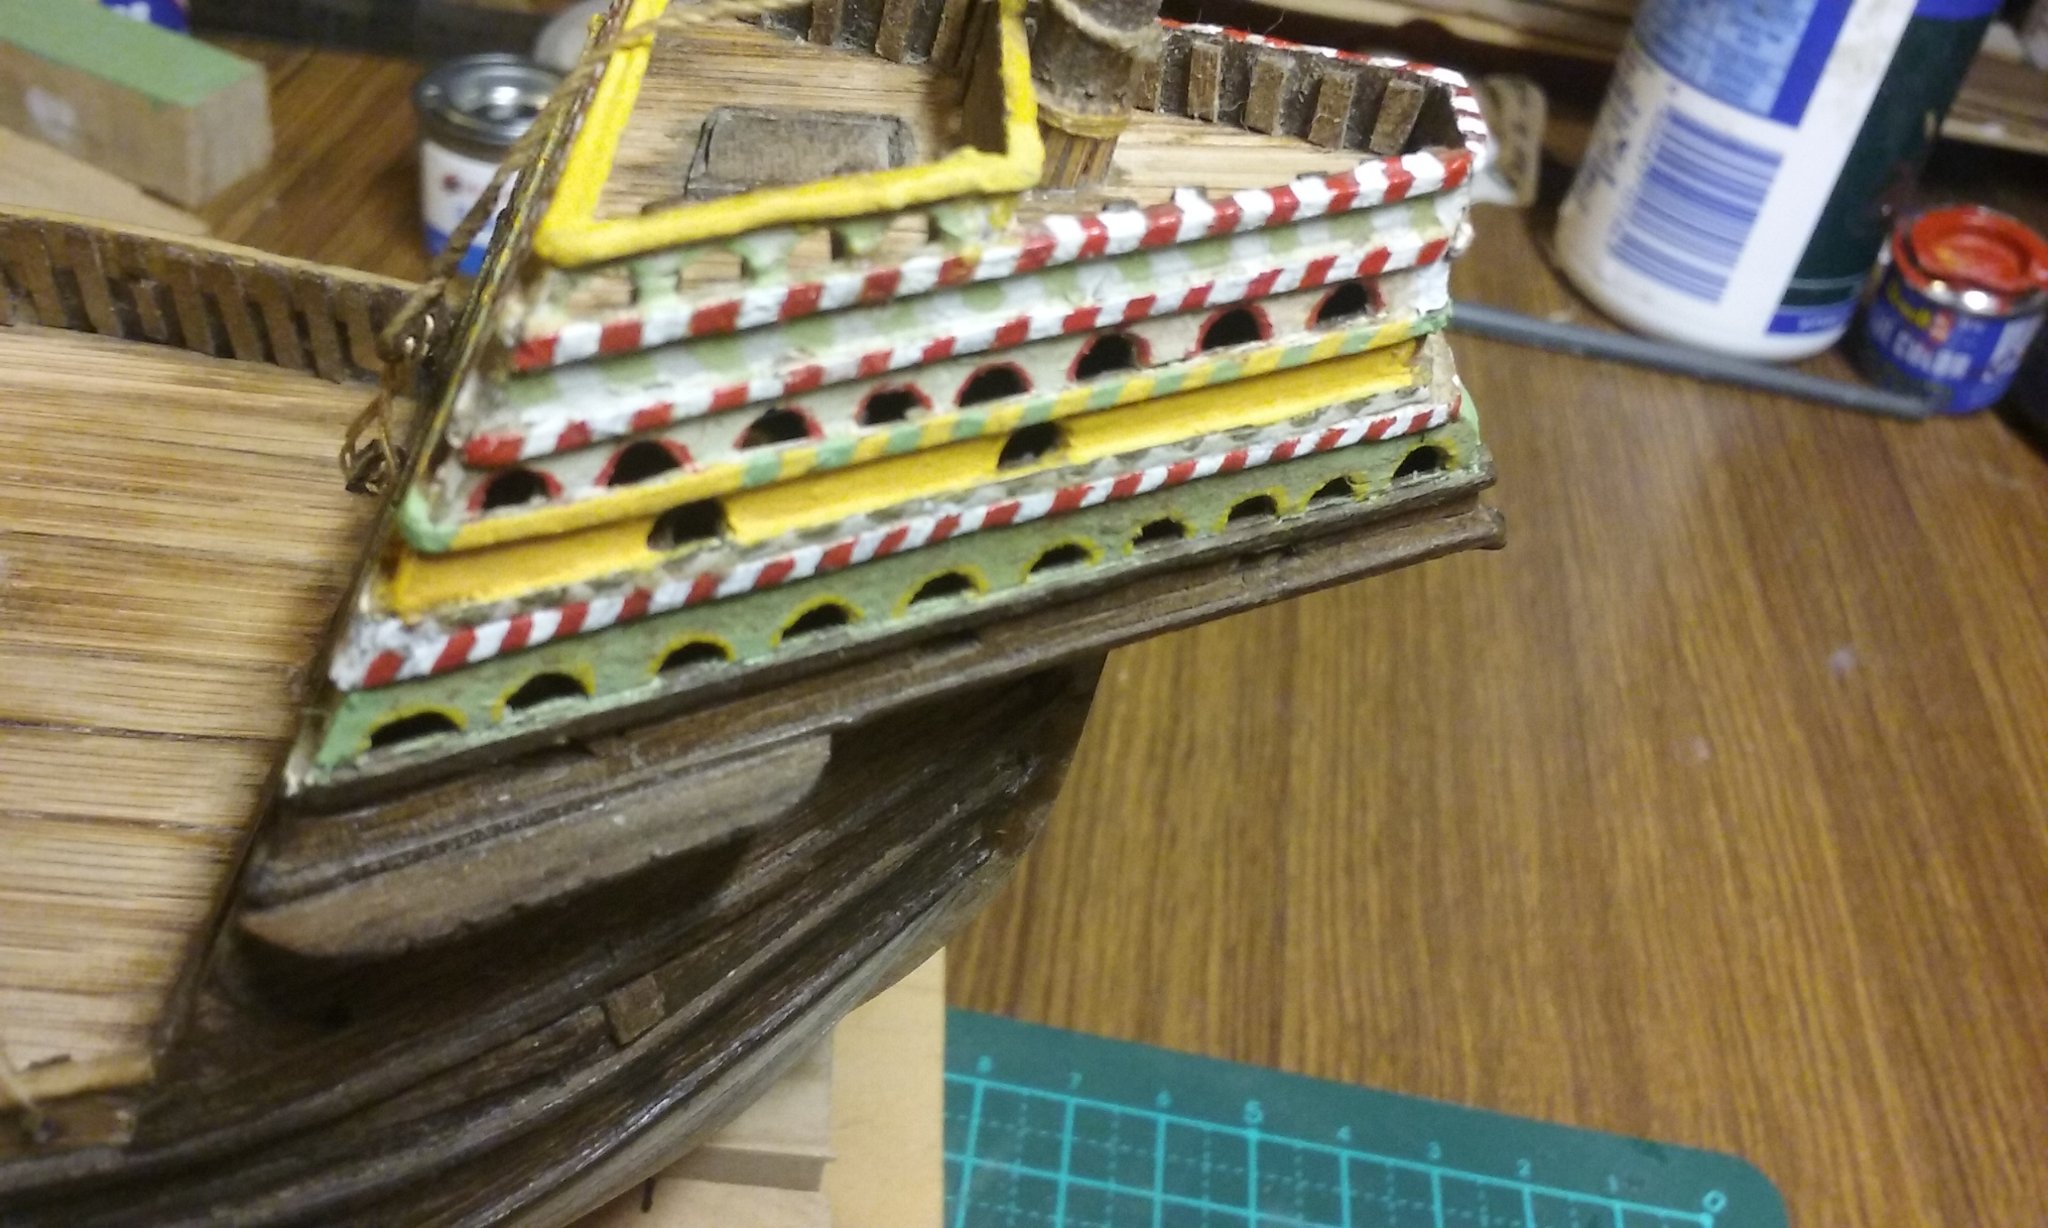
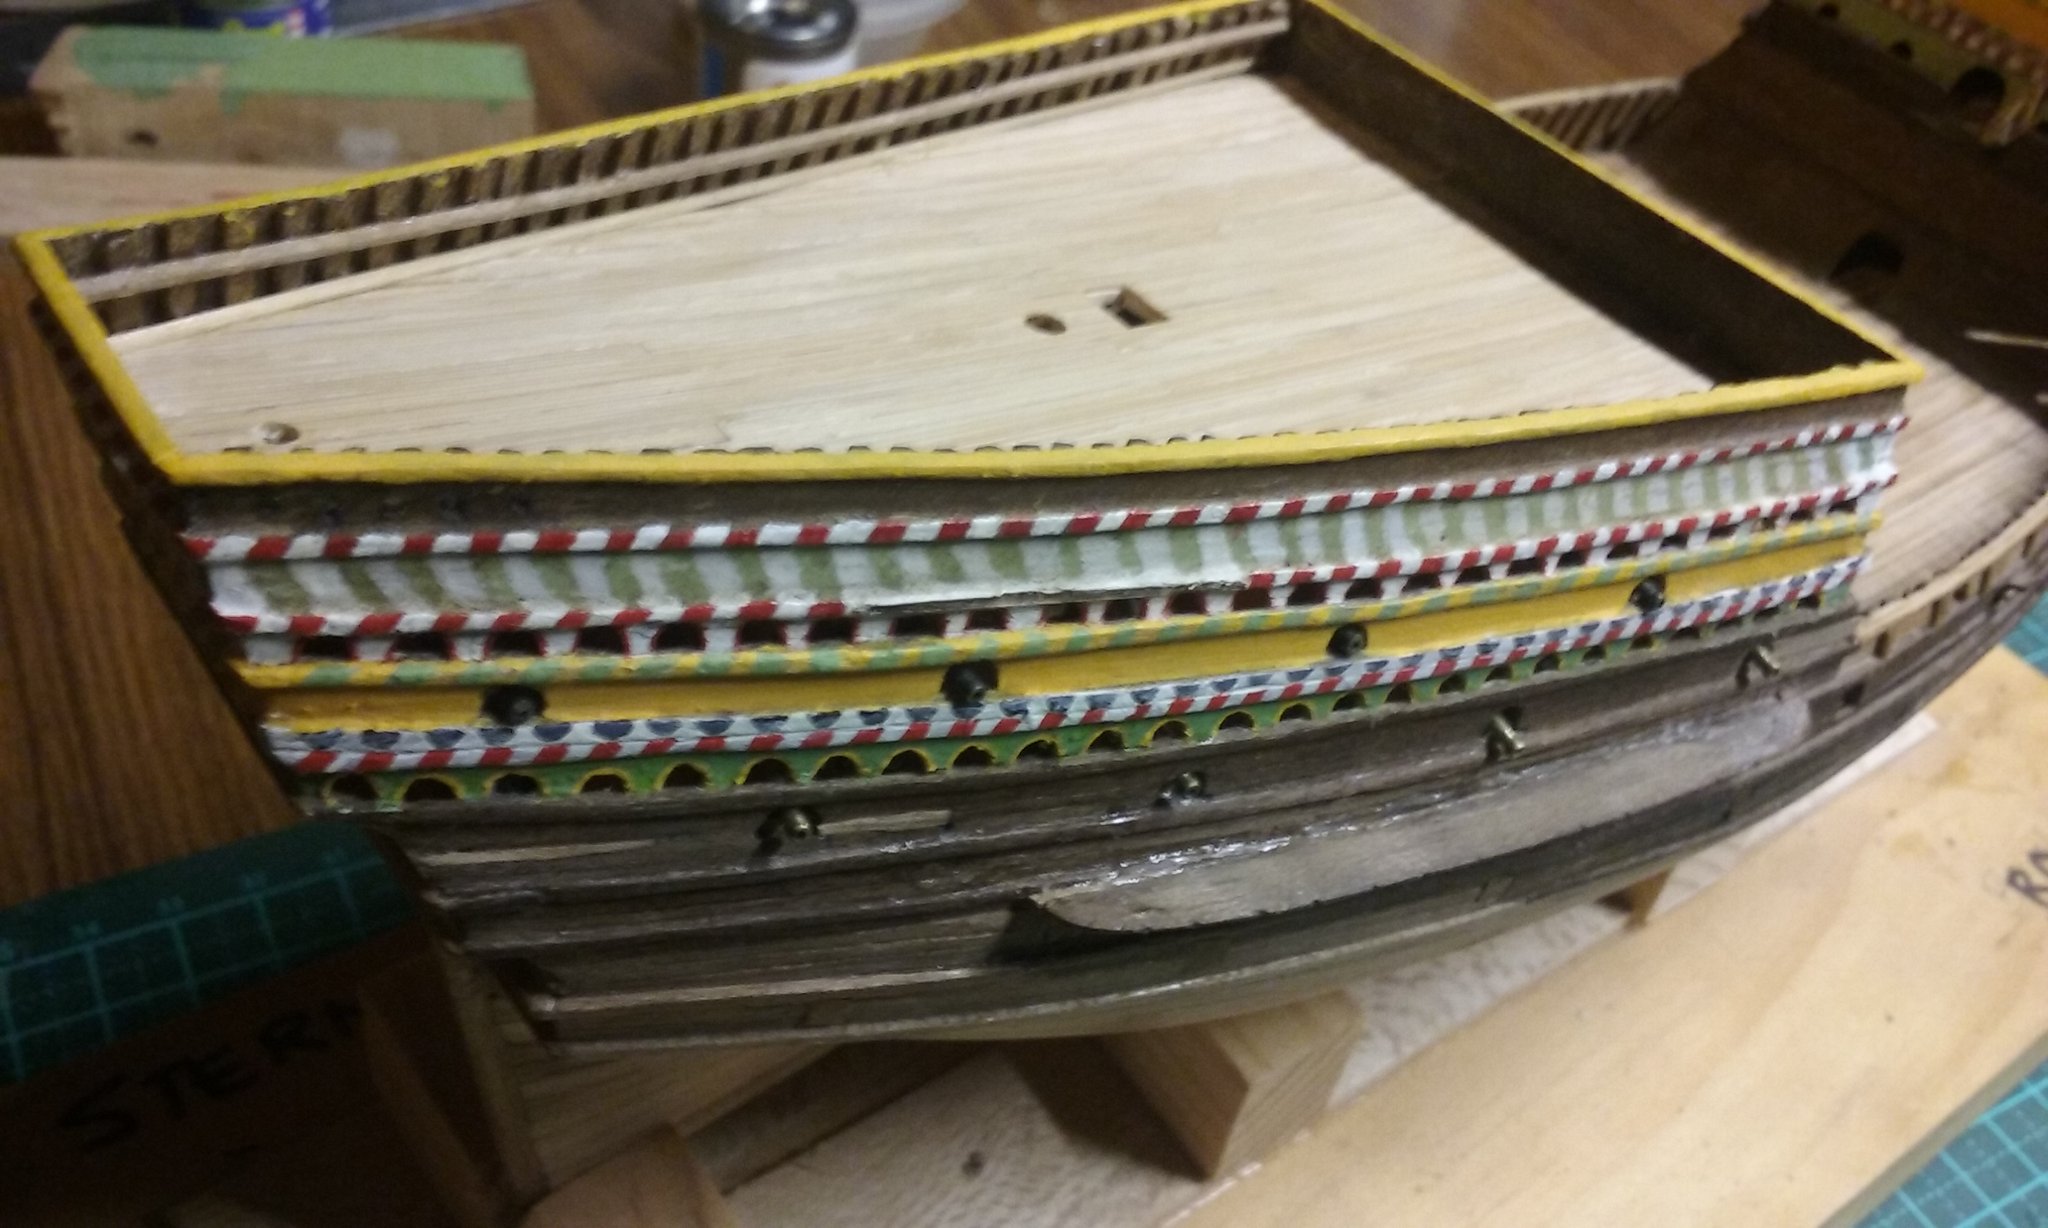
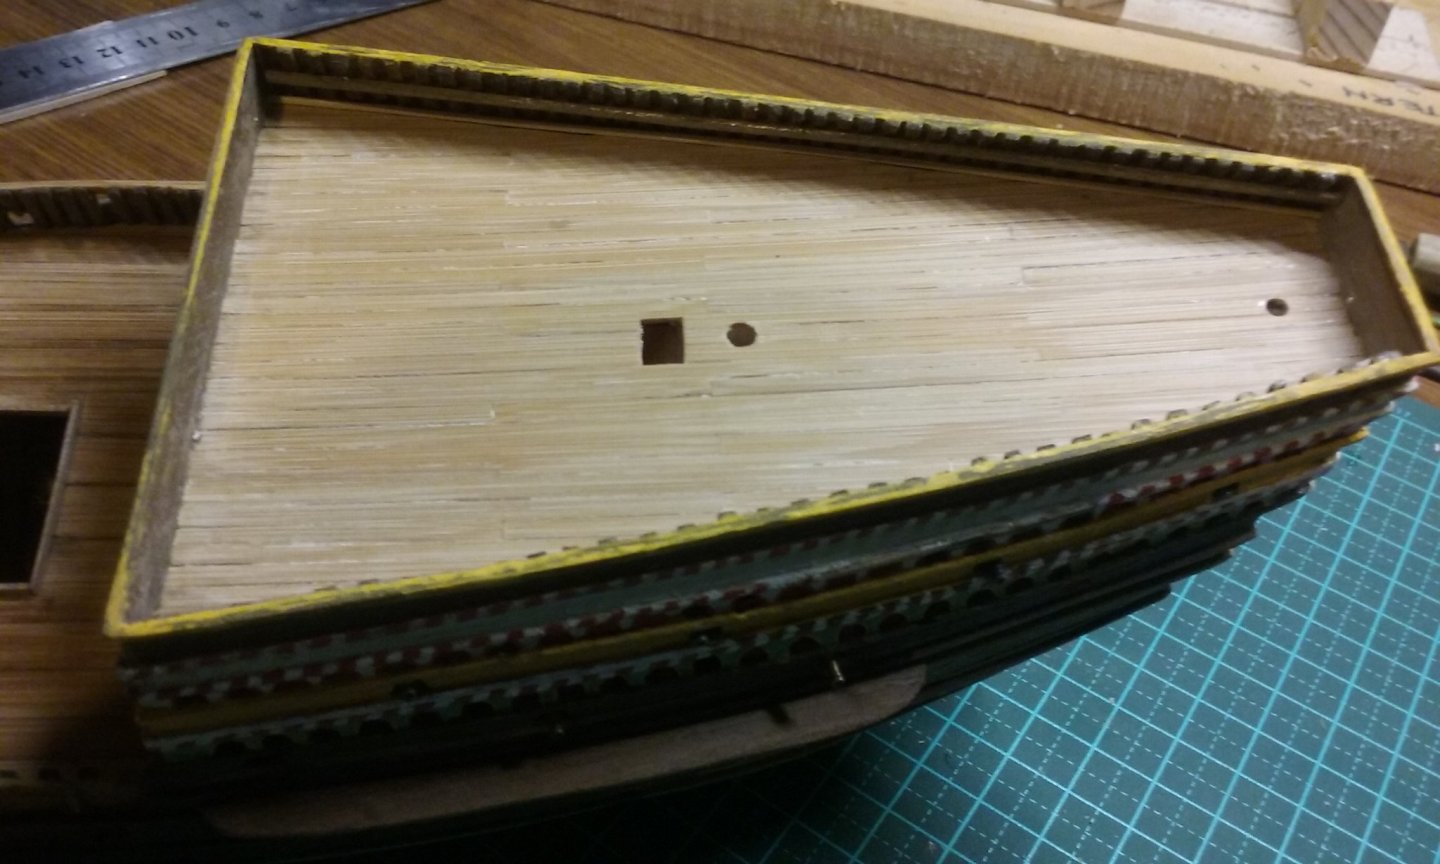
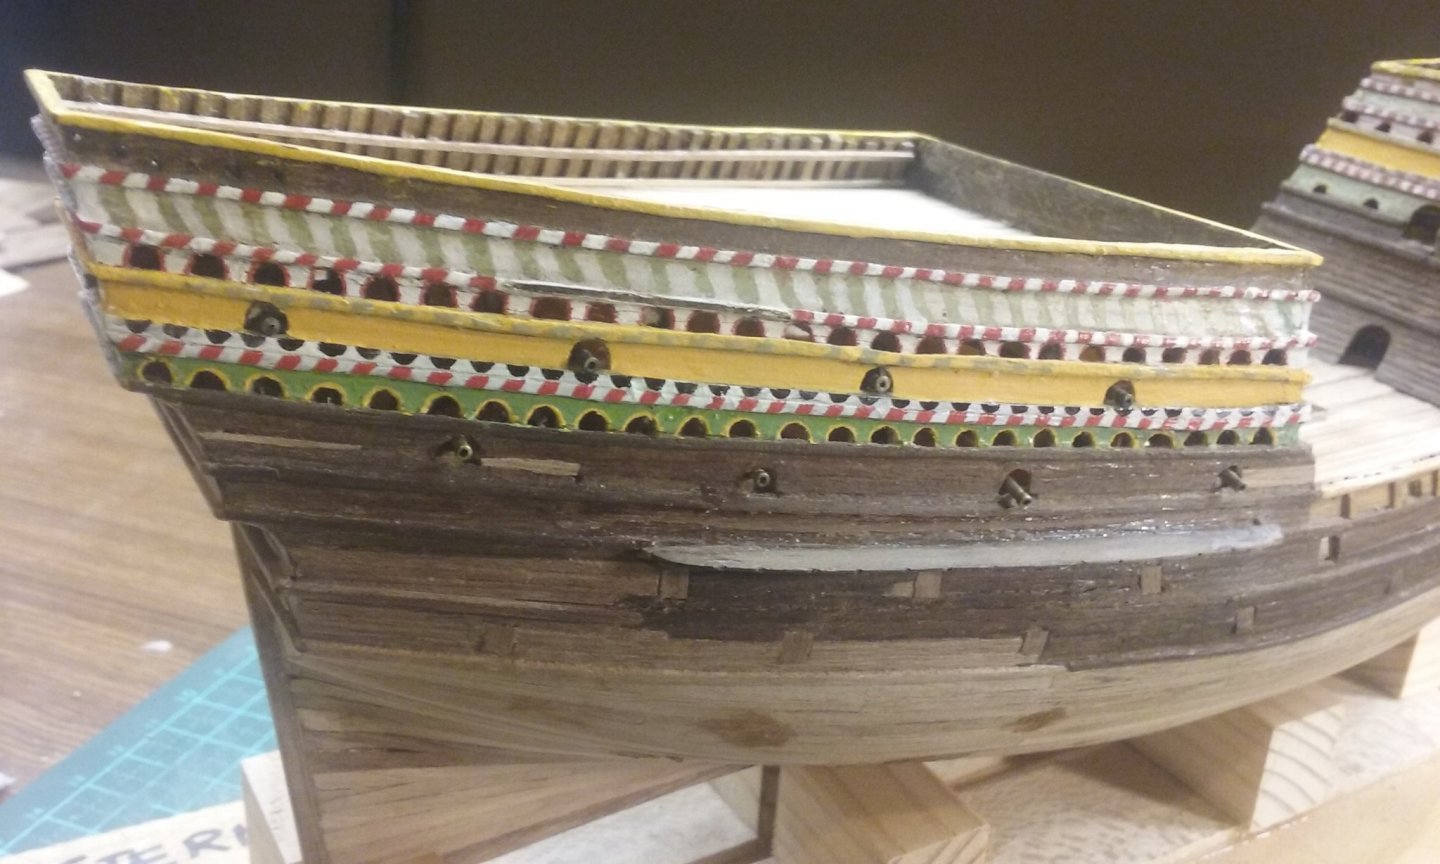
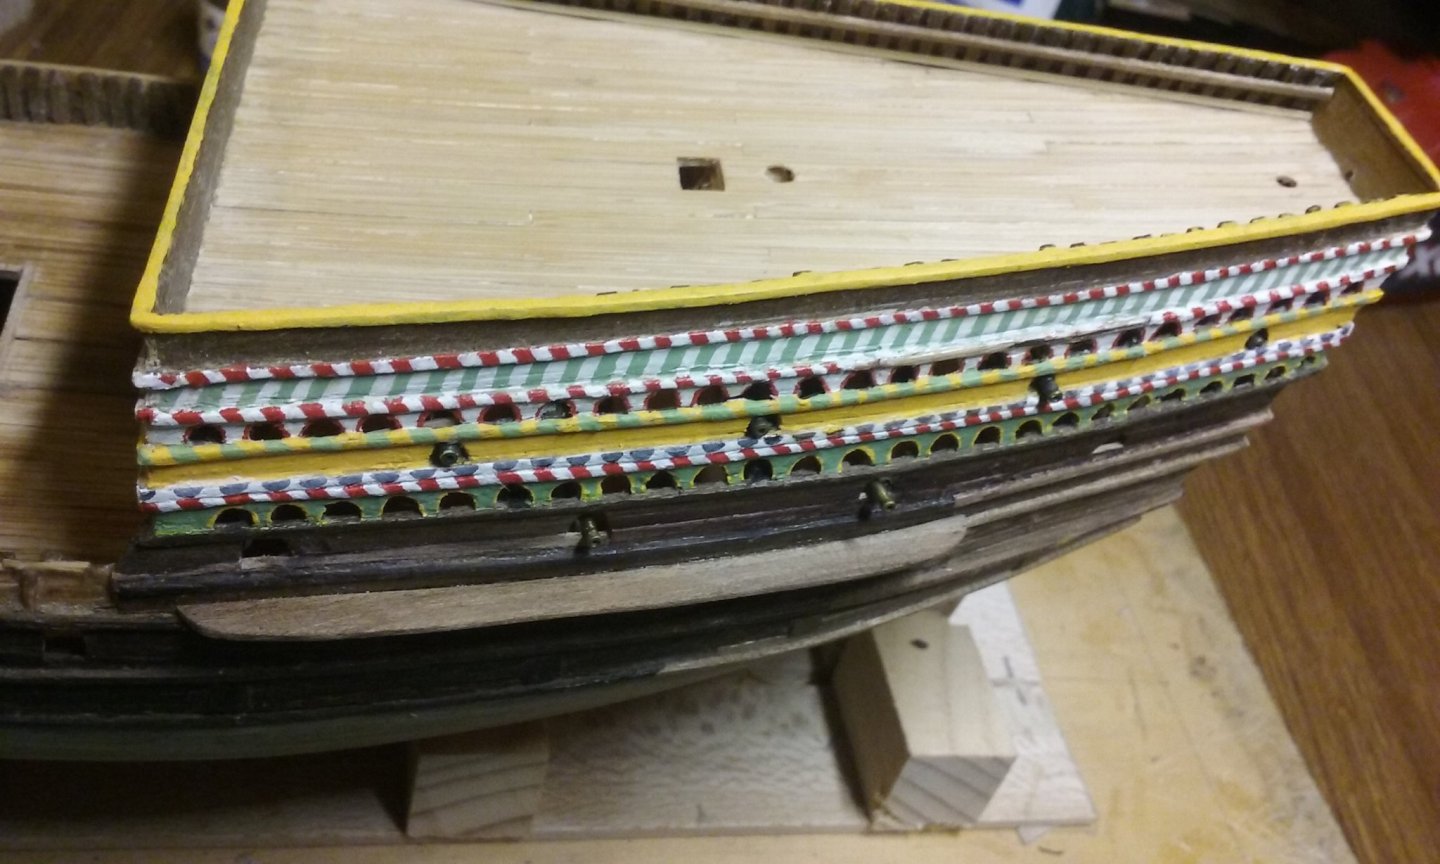
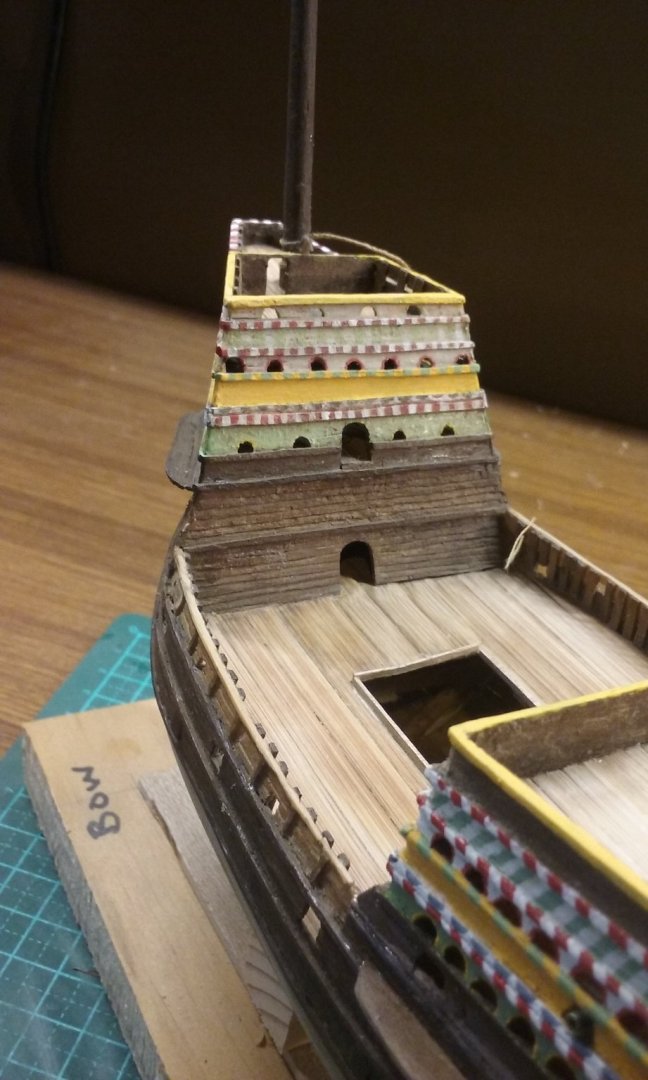
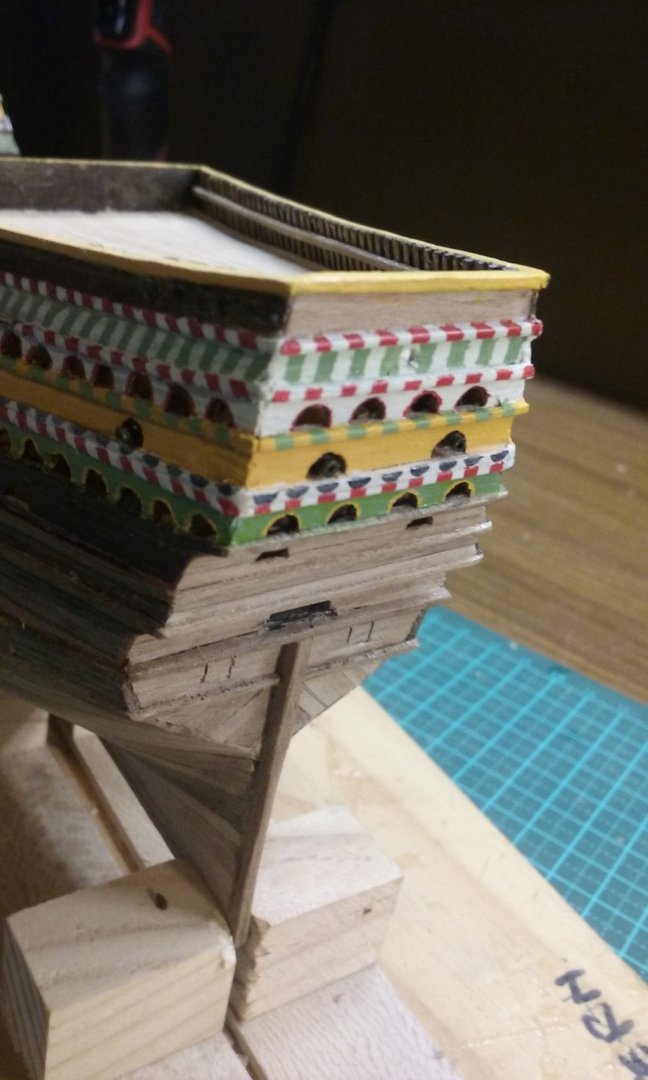
I discovered some gaps between the planking, so I put filler in them. Later on I sanded it down again so it all looks nice and smooth now. Decided the paintwork on the top wale of the aftercastle was too rough so I sanded it down again. Discovered that though the red and white zig-zags on the starboard side were correct, those on the port side were facing the wrong way. So I fixed them. And now I've done all the painting I'm prepared to do. I've left some of the original paintwork unchanged, but most of it needed freshening up. Steven


- 740 replies
-
- 13
-
-
- Tudor
- restoration
- (and 4 more)
-
I finally got to see the movie "The Dig". Very good indeed, despite the unnecessary additions to the story. Just a shame Basil Brown never lived to see that he finally got the credit for the discovery. They could have showed more of the treasure, though. Apparently someone was engaged to make exact copies of the artefacts for the movie, and when they had them out on display I recognised most of them from having seen them "in the flesh". Unfortunately the helmet was in so many fragments when found that it couldn't possibly be shown in the movie. Apparently Basil Brown excavated four of the mounds at Sutton Hoo, ending with the "big one" - something I hadn't been aware of. Steven
-
Hello from a newbie with L plates on!
Louie da fly replied to Pirategirl's topic in New member Introductions
Hi Jas, and welcome to MSW. Where in WA do you live? As an old sandgroper I may know it - though I was raised in Perth I got around a fair bit. I'd also recommend you start a build log - and don't worry that your model might not be "good enough" (something i think worries a lot of people starting out). This forum caters to everyone from total newbies to the demigods of modelling who write textbooks on the subject, and everyone in between. And no matter what level of skill you're at people will be very helpful and friendly. The instructions for starting a build log for a kit are at https://modelshipworld.com/topic/24705-before-you-post-your-build-log-please-read-this-starting-and-naming-your-build-log/ Welcome aboard! Steven -
Hi, Smellycat (I've decided NOT to ask the origin of the name!) and welcome to MSW. We have two kinds of build log here - one for kits, the other for scratch builds. Your restoration isn't quite either one, but is nearer to a scratch build, so that's probably where you should put your log. The instructions are here. https://modelshipworld.com/topic/8-before-you-post-your-build-log-please-read-this-starting-and-naming-your-scratch-build-log/ Mark's advice is good. I'm doing a restoration myself (see below). It's actually very enjoyable (despite the occasional melt-down moment). If you have any questions or want to find something out during your restoration, ask on your log. The people here are very helpful and friendly. Good to have you on board. Steven