


GuntherMT
-
Posts
2,213 -
Joined
-
Last visited
Content Type
Profiles
Forums
Gallery
Events
Posts posted by GuntherMT
-
-
-
Thank you all for your comments and likes.
Hamilton, both the main guns and the swivel guns are from Syren (Chuck).
- Dimitris71, GLakie, Jack12477 and 2 others
-
 5
5
-
Hi Mario.
In your frames that have yet to be cut, you have blue tape (painters masking tape it looks like) under the paper pattern. What is the reasoning/purpose behind that, rather than simply gluing the pattern onto the wood like I have seen in many other builds?
Thanks,
- Cap'n Rat Fink and Canute
-
2
-
-
-
I use it full strength after cleaning the brass with the Jax cleaner, applying with a paint brush and just keep 'painting' the part until it's dark, then drop it into water to rinse. Works quite well on the brass I've used it on. In some cases I've done multiple 'coats'. I don't let the chemical stay on the brass very long each time before rinsing.
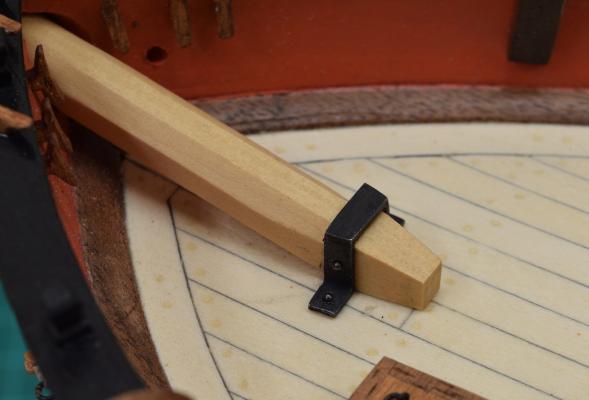
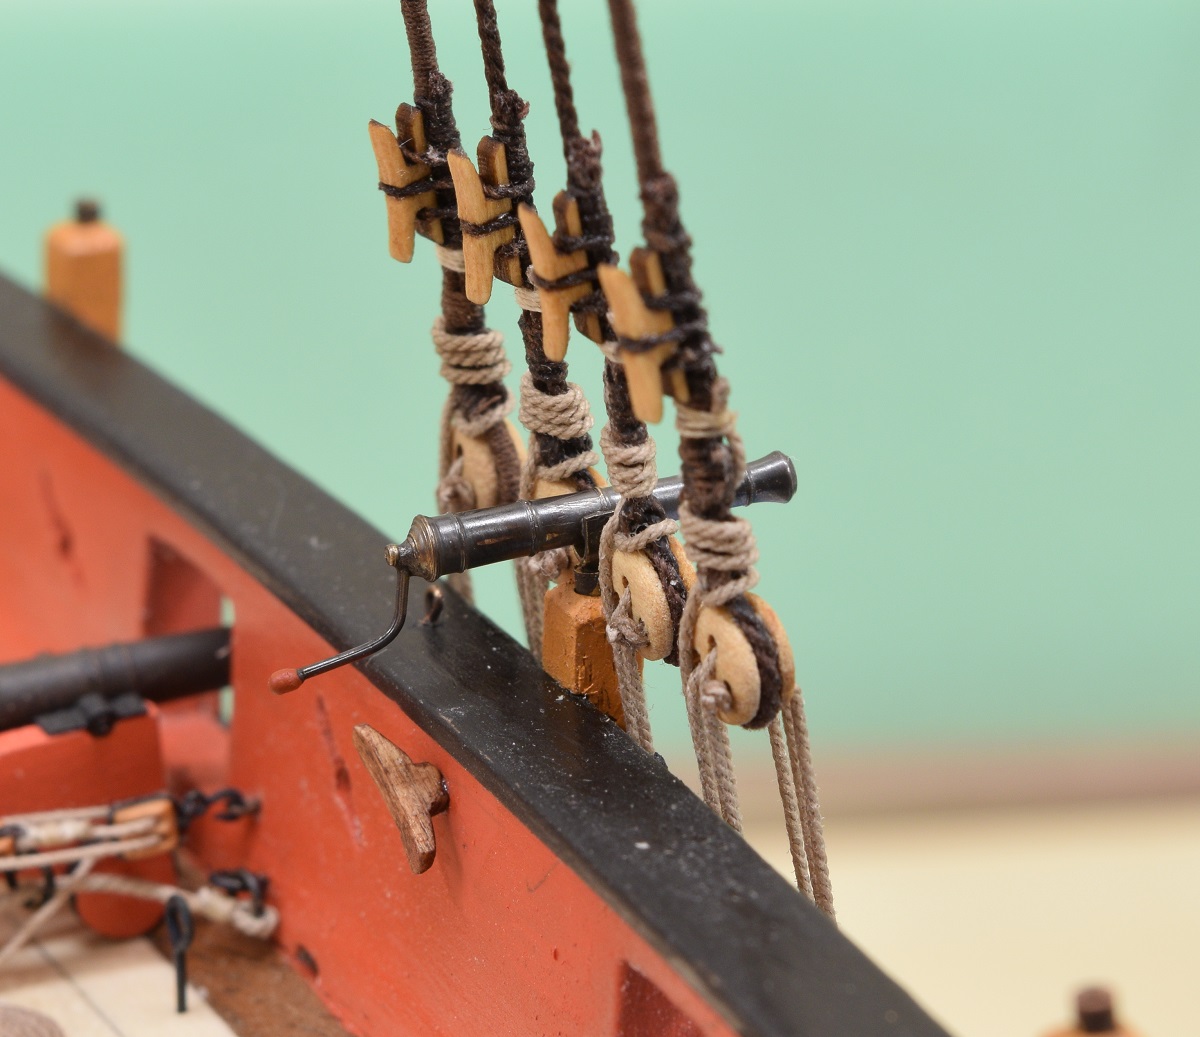
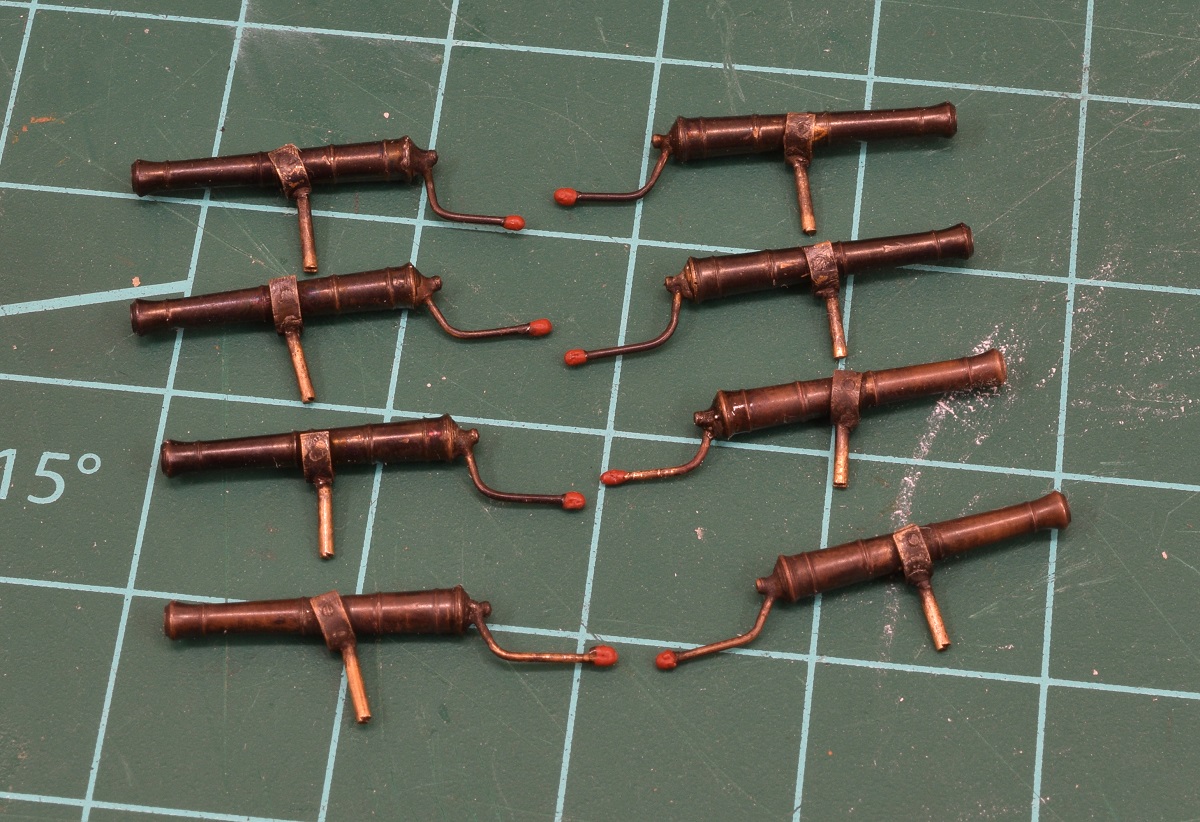
This swivel gun was blackened with Jax Pewter Black using this technique, as was the bowsprit foot strap. The gun is a brass barrel from Syren, the handle is K&S brass rod, and the mount is also K&S strip and rod. The strap is K&S brass and soldered. The solder on both is Solder-It paste.

- zoly99sask, shiloh, dgbot and 7 others
-
10
-
I've only built 2.5 kits so far. My first was a Constucto, and the second Model Shipways. I also did a side build of a Midwest kit.
Constructo - cheaper kit, the bulkheads were too few and too far apart in my opinion. Not a bad kit overall, but the material was thin and easily broken. The wood types included were nice, and it did build into a decent looking model, although I replaced the oversized and extremely fuzzy rigging line. Instructions were terrible, and I don't know if I could have finished it without finding MSW.
Midwest canoe - Simple kit with decent wood and good instructions. Still some issues, but nothing show stopping. Not a lot of extra material if you make major mistakes.
Model Shipways - Armed Virginia Sloop - Frame and bulkheads tightly spaced and good quality basswood. Lots of extra material included. Instructions are quite decent. Some of the cast parts are quite decent, others fairly bad. Rigging line is terrible, and blocks are also pretty bad, I replaced both. Excellent customer service and parts replacement support. Don't get their paint, it's pretty bad. Overall a good quality kit, in my opinion.
- Mike Dowling, mtaylor and Canute
-
3
-
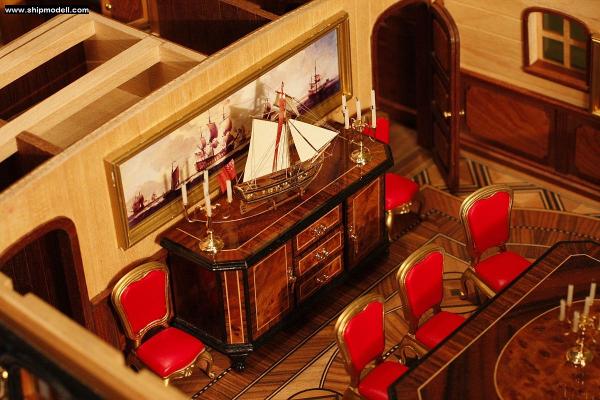
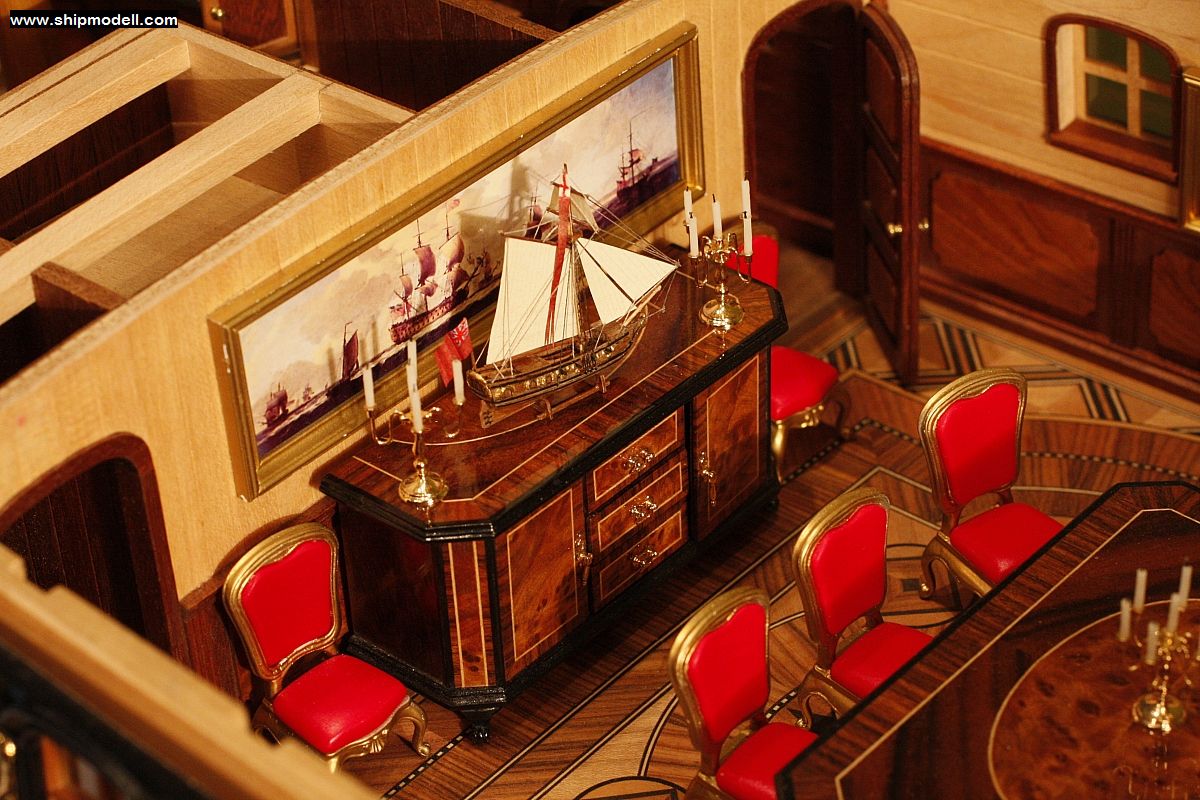
Holy crap. Spend the time to look at that Royal Caroline. It has crazy stuff like this:
- zoly99sask, shihawk, toms10 and 16 others
-
19
-
-
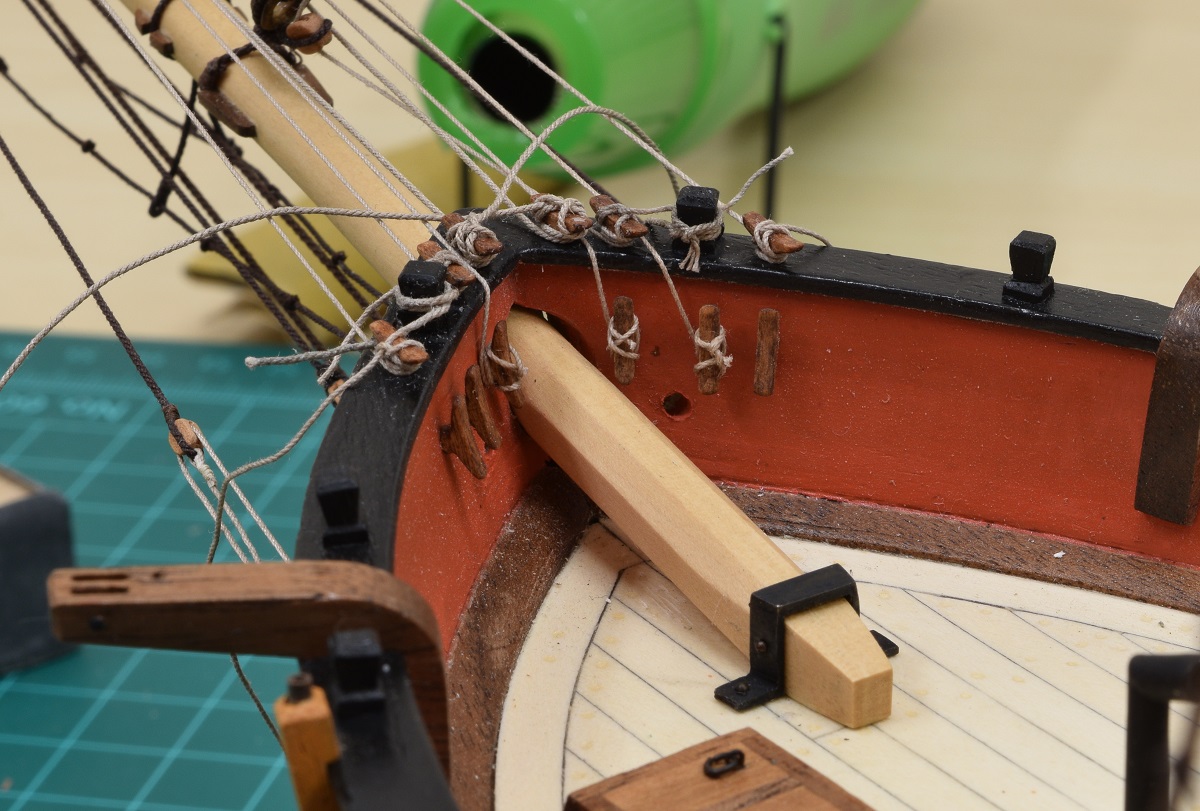
Thanks again for all the amazing comments on the rope coils. Sometimes it's the little things that get noticed the most!
Tonight I worked on the anchor lines on the deck, but no photo's as they are currently under weights to dry, the larger rope doesn't behave nearly as nicely while wet and is a lot stiffer.
I also broke out the soldering stuff and worked on fixing my swivel guns. I had bad solder joints that broke on three of them, which of course needed to be repaired. In the process of fixing 3, I broke 2 again, which is pretty much how all of my soldering on the swivel guns has gone, but after a few more attempts, I got them all together and the joints seem to be good now. I re-blackened the newly repaired guns, and now all 8 swivels are pretty much ready to go on the ship after the anchor's are finished.
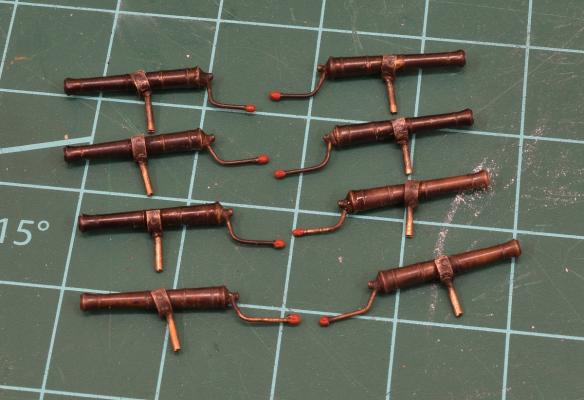
I may do another blackening treatment on them, but I sort of like the 'rough worn' look that they currently have, so I might just leave them be.
May not get anything else done until Sunday, as tomorrow is a release at work, and Sunday I'm going to be sailing.
Until then, cheers!
-
I secured my lines to cleats just like you would on a real boat, then after all the rigging was done I went through and adjusted everything how I wanted, then coated all the cleat and other belaying points in 50/50 white glue/water mixture to secure them, and after it dried and I was ready to drop the rope coils over them, trimmed the line up close and placed the rope coils.
-
Thank you all. I'm fairly pleased overall with how they came out.
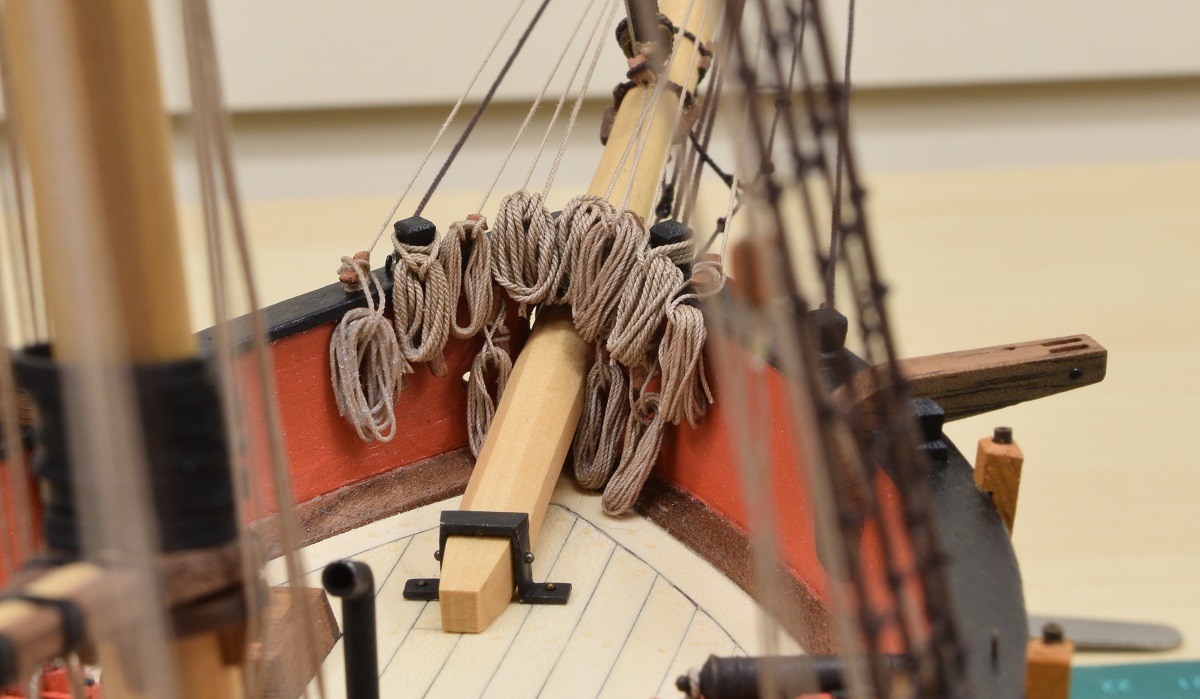
Brian,coils look absolutely real! Very good job. Congratulations! Except one first on the left side. To many glue. But maybe it must dry? I use the similar technology, but diluted the white glue with water. Proportion about 1: 3. The glue then is not visible. If I need to change the shape of the coil, used the hot air gun. The coil become more soft and are easy to change it shape.
The model looks very well. Nice and clean. Many details as in real ship! I impatiently look forward to the next model.
Regards Antanas
Good feedback Antanas, and yes, that coil on the left was still dripping wet when the photo was taken, it doesn't look like that anymore. I am using a 1:1 glue/water mix, and every coil was thoroughly soaked, and as you can see from the photo's when it dries you can not see the glue at all.
Good tip on the hot air gun, I haven't tried that.
- Canute, GLakie, Dimitris71 and 1 other
-
4
-
-
Beautiful planking work!
- mtaylor, GLakie, avsjerome2003 and 1 other
-
4
-
-
My understanding is that the picture you show is the entire process of line preservation, which we (model builders) simply refer to as serving. I've never heard of worming done on it's own, it's just the first step of the entire process that ends with the coating of the served line.
Worming was done to fill in the low points in the large line so that the following steps had more of a round shape to work on. In the scales that we work in, the serving with a dark thread is simulating the tarred (slushing) line after serving, and I'm not even sure how one would go about doing a wormed line at scale, and since the serving would cover it up anyway, I'm not sure why you'd do it, except maybe just to see if you could!
-
Thank you all for the compliments and the likes on the rope coils. I do appreciate them!
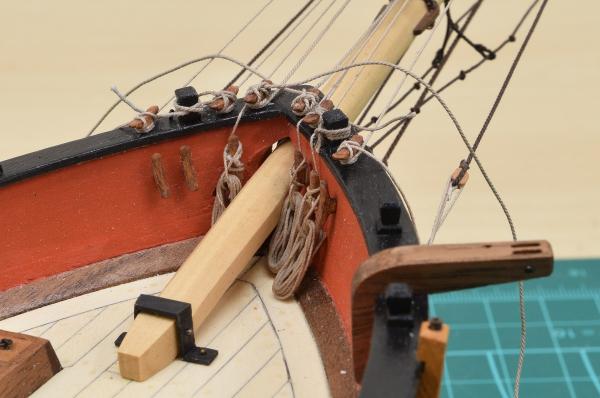
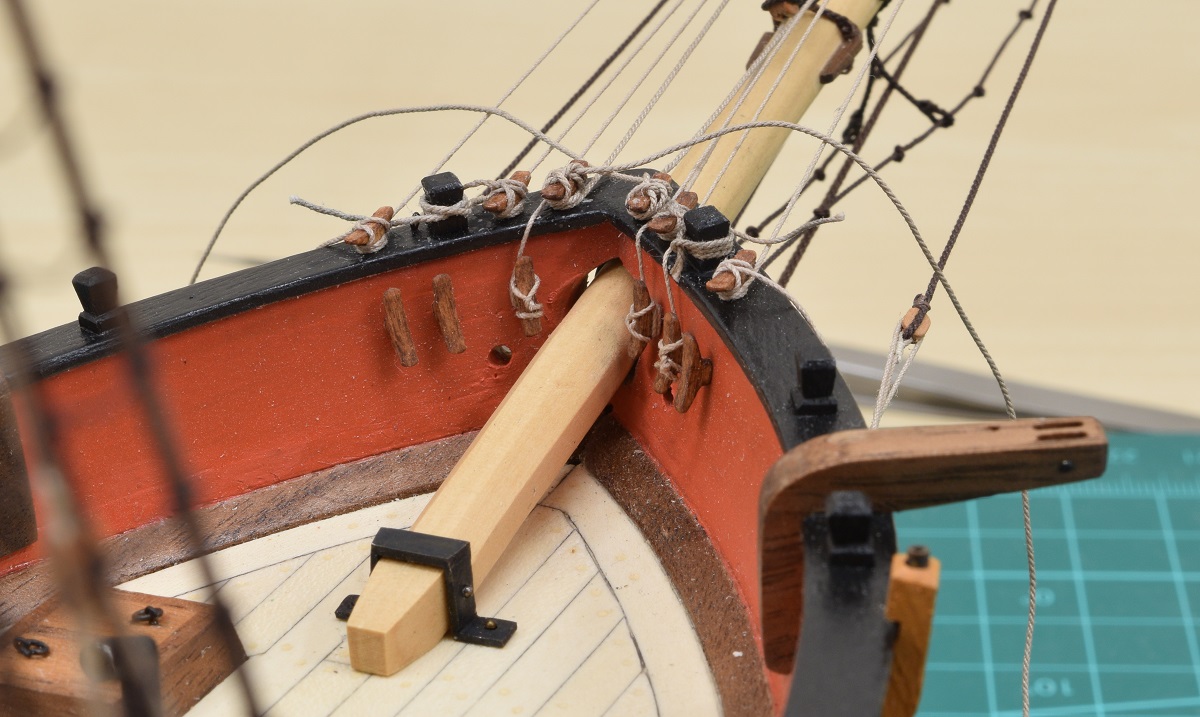
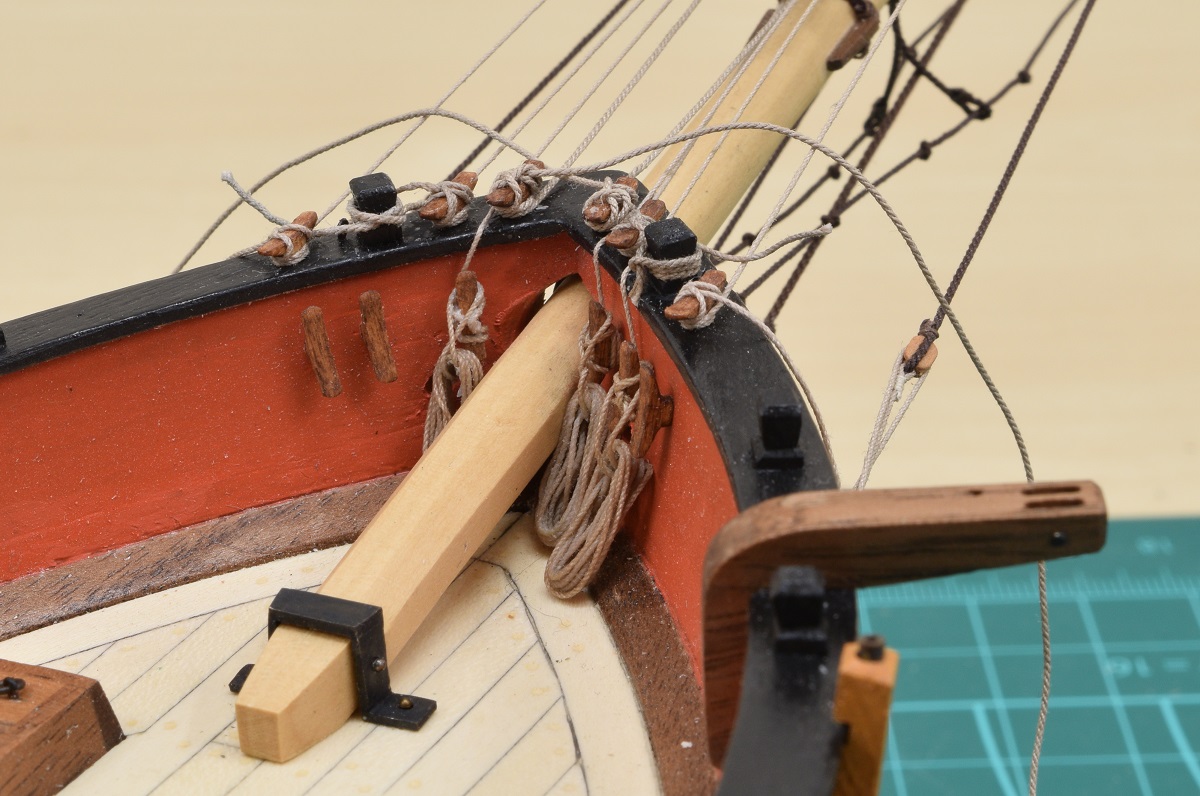
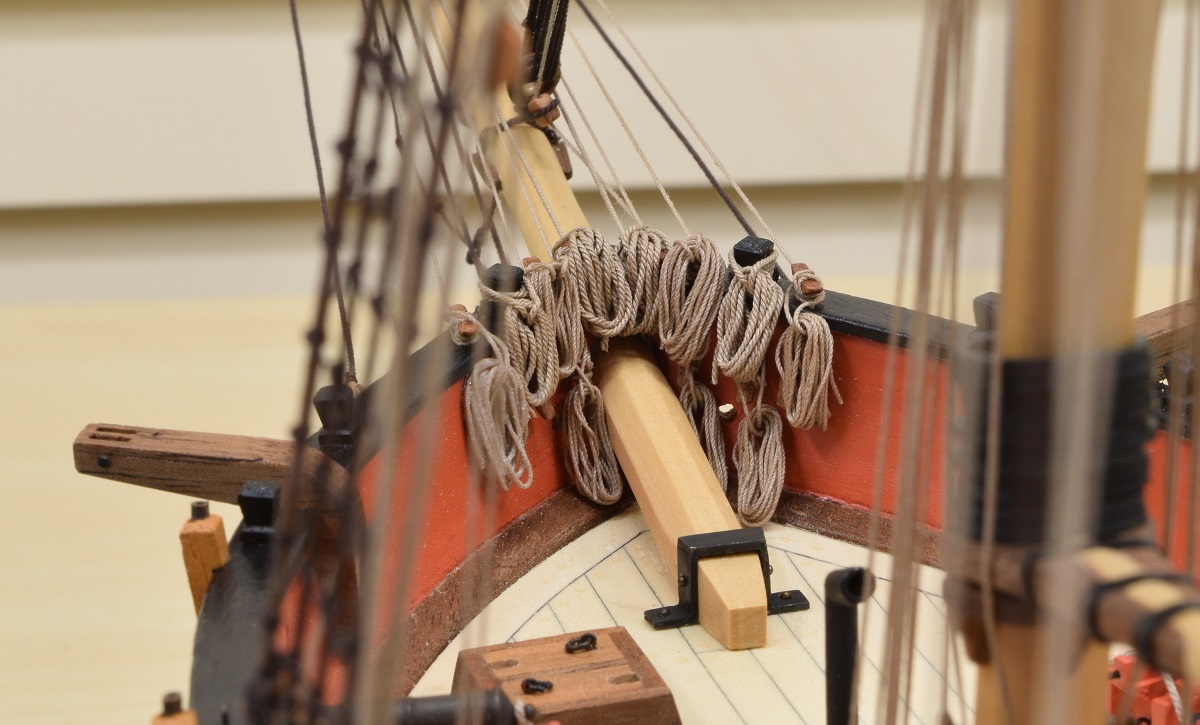
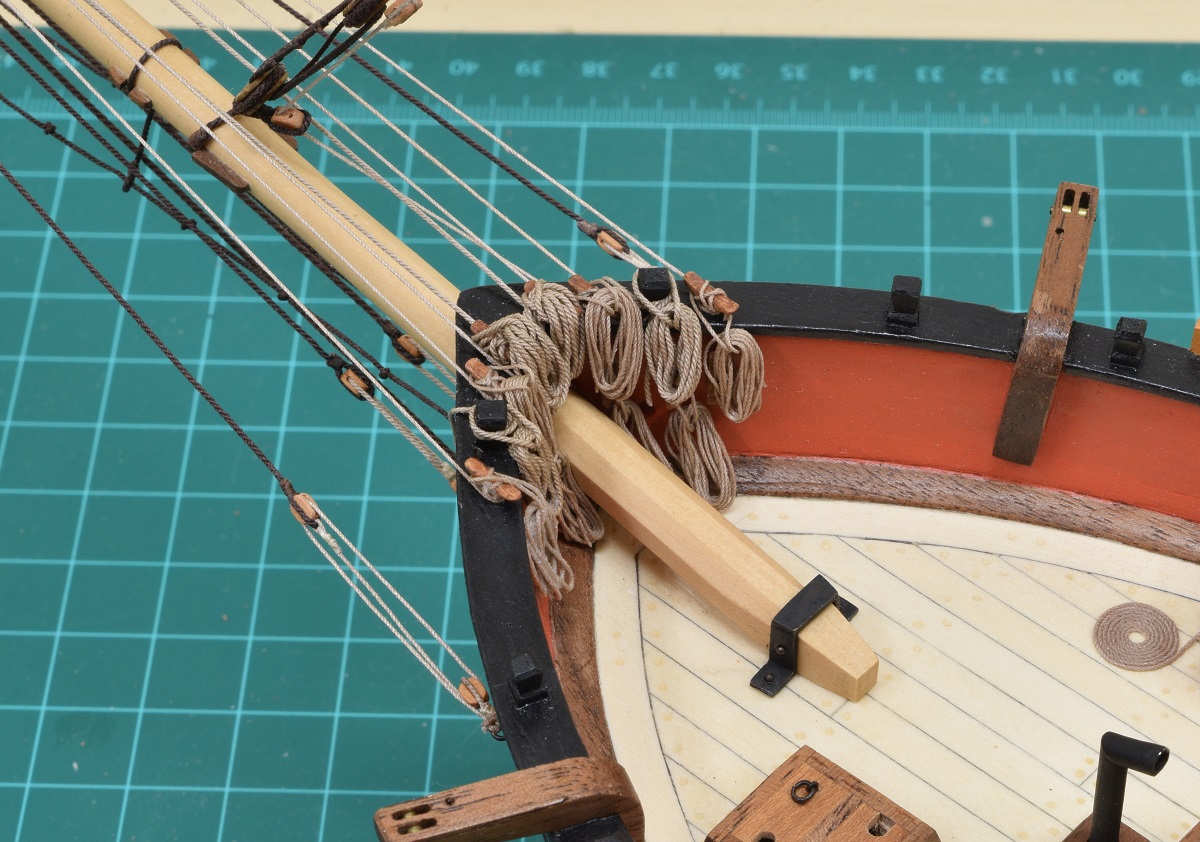
So yea. Rope coils. I don't know why, as they really aren't any more tedious than lots of other things I've done on the ship, but I really had a hard time motivating myself to finish these, but I think the end result is certainly worth the effort expended. I finally finished up the bow tonight.There are 11 lines that terminate at the bow (would be more if I was building this with sails). Here is what it looked like with the lines terminated, but not trimmed, before I started adding the coils.
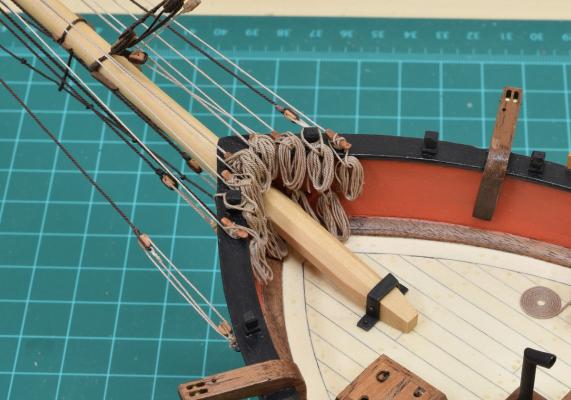
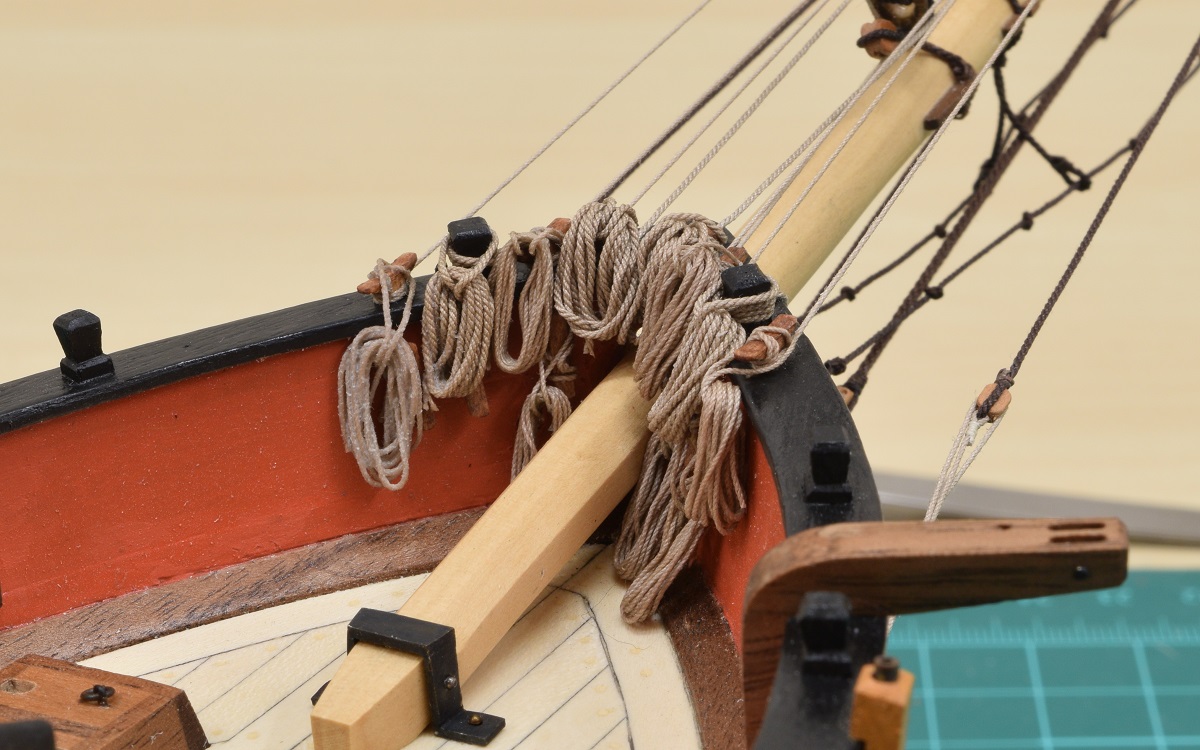
 First step was to add the three coils for the lower tier of ropes on the bulkhead. I did this over the weekend at some point.
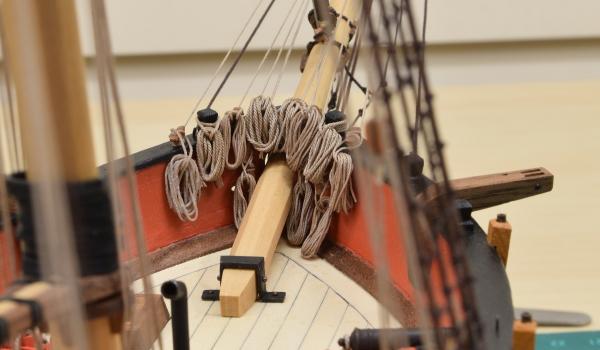
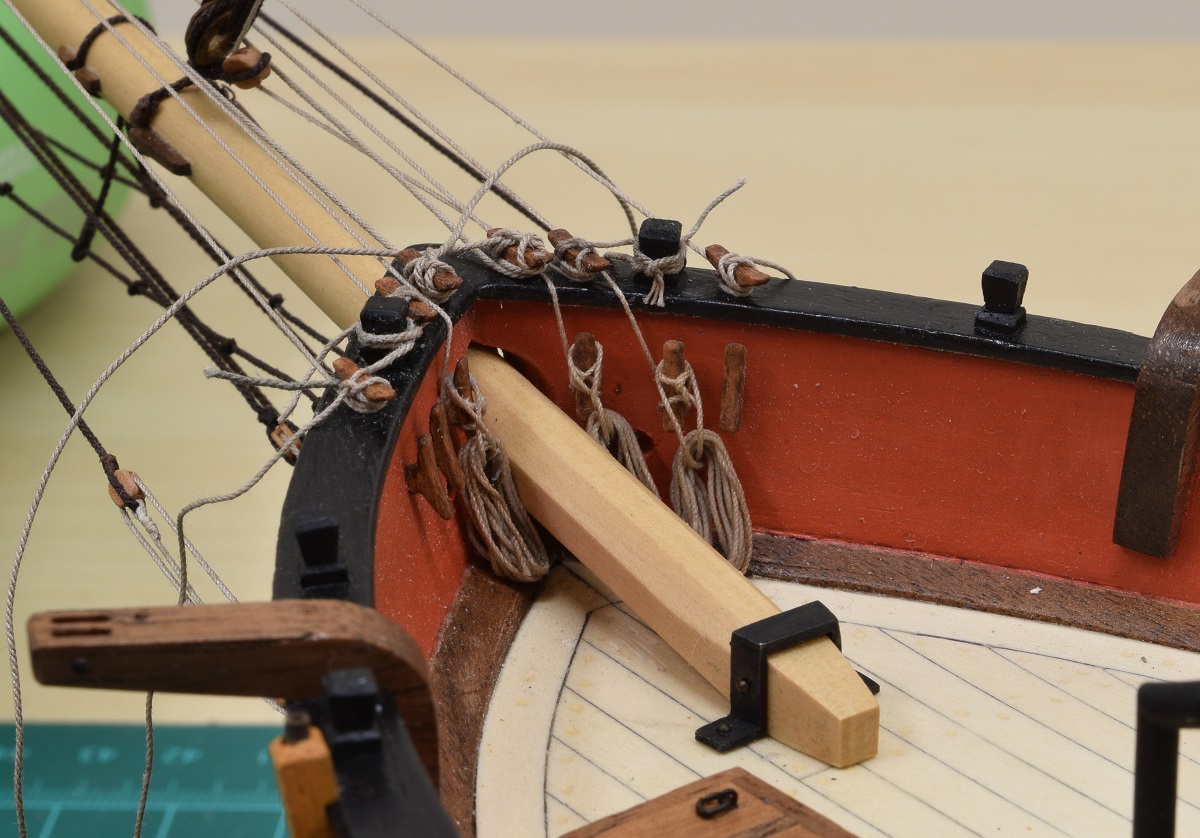
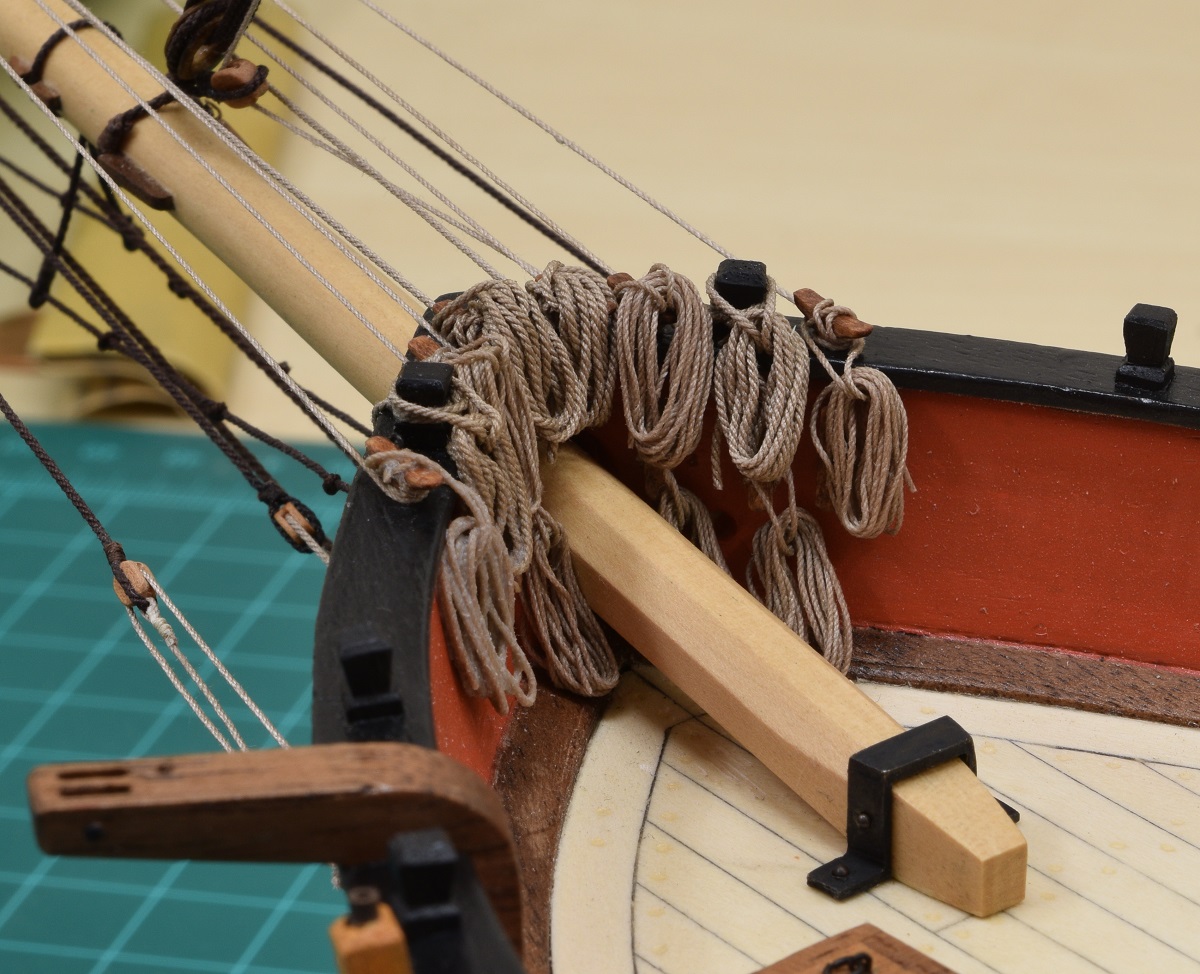
 Then tonight I got busy after work, which was a bit early since today was a telecommute day, and I knocked out all 8 of the coils along the cap-rail at the bow.
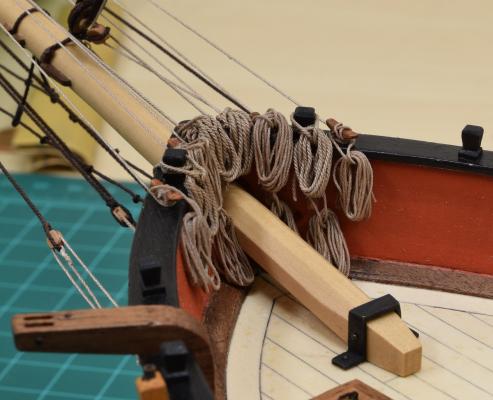


 Next I need to rig the anchors up, which of course means making a couple of buoys and then rigging the catheads to attach to the anchor rings. I need to decide whether to rig them hanging, or lashed to the timberheads. I might do one of each. Then of course, I have to make coils for all 4 of those ropes, and then coil the main anchor cable on the deck after running them through the hawse holes.Once that's done, I have to fix the few swivel guns that are still not fixed, and I'll be done with the ship (but not the display base).Strange to be this close to finished after all this time.
 -
I think you'll be more than happy that you chose to serve the lines, I think it makes a great difference in how well the rigging looks, even though it doesn't seem to be noticeable at times, it really does change the overall look.
- CaptainSteve, Canute, mattsayers148 and 4 others
-
7
-
-
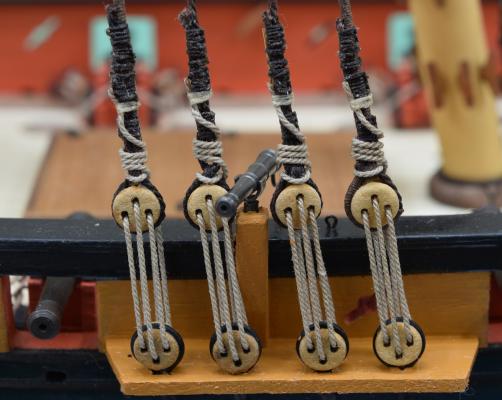
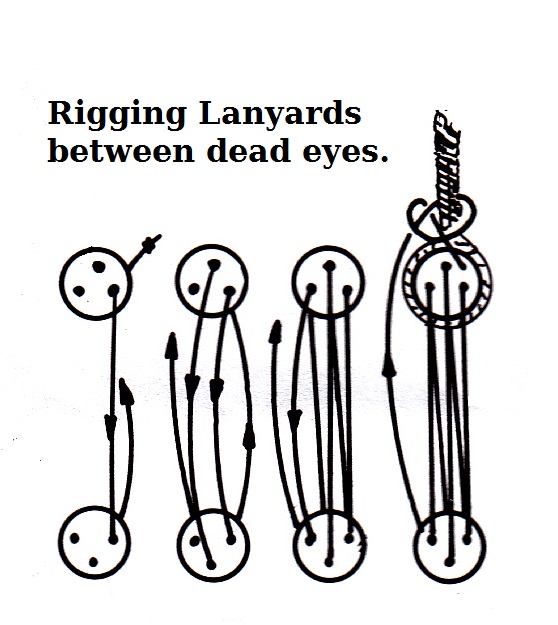
Another suggestion, for the dead-eyes themselves, they should be relatively even spacing (this can be accomplished by holding them in various sorts of jigs you can find throughout other build logs here while attaching the shrouds), and they are actually designed to be aligned in a specific way.
What I mean by that, is that the holes in the top dead-eye should form a triangle with the point 'up', and the holes in the bottom dead-eye should form a triangle with the point 'down'. Once they are aligned like that, there is a specific way to route the lanyard through the holes that will make them all look the same, and be properly rigged. See the attached drawings for the orientation and the way the lanyard is routed.
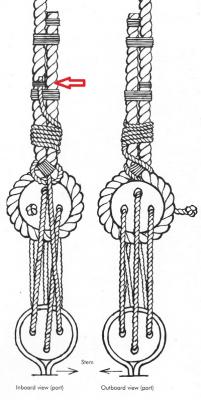
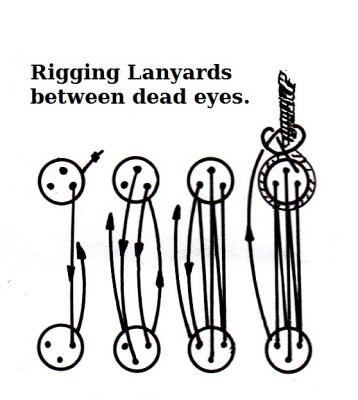
Ignore the red arrow, that was something I put in there for a different discussion.
- Salty Sea Dog and Canute
-
2
-
-
For applying glue (Titebond and Weldbond both) I use a syringe. I'll never go back to using glue straight out of a bottle (even a small one). That little one looks like it's a great improvement over the big glue bottle though!
-
-
Absolutely fantastic detail work, both on the railings, and the pool. Thank you for sharing your techniques with the photo-etch railings too, I see a lot of use of photo-etch in modeling, but rarely see anyone show exactly how they handle, form, and attach it. Great stuff!
- Jack12477, Mirabell61, mtaylor and 3 others
-
6


USS Independence by Philthy - Artesania Latina
in - Kit build logs for subjects built from 1751 - 1800
Posted
Not a bad way to make filler blocks at all actually.