HOLIDAY DONATION DRIVE - SUPPORT MSW - DO YOUR PART TO KEEP THIS GREAT FORUM GOING!
×


GuntherMT
-
Posts
2,213 -
Joined
-
Last visited
Content Type
Profiles
Forums
Gallery
Events
Everything posted by GuntherMT
-
Welcome aboard! There are a few of us ship-builders scattered around the Phoenix area, but no regularly meeting group/club other than one in Sun City that meets during the workday making it impossible for anyone who isn't retired to attend. I live on the opposite corner of the city as you, out in Buckeye, but I know we have a couple MSW members in the SE valley area much closer than you.
-
Planking looks great so far, well done! Start a build log so we can follow along, and welcome back to MSW! The AVS is a great kit, I really enjoyed building it (link to log in my signature). I also used Bob's practicum as a guide most of the way through the build, it's a useful tool, but be careful when you get to the rigging and read through all of it before you start and realize that he doesn't enjoy rigging, so he misses stuff and goes out of order, forgets to place things and then never tells you but you see it in later photo's, so you'll need to really pay attention to the plans there.
-
Some good looking models you've made... welcome back to making sawdust!
-
Either way will work, but shimming them up will preserve the bottom of the bulkhead shape and probably make fairing easier as fairing the top of the bulkheads for the deck is pretty straightforward and simple compared to fairing the bulkheads for planking. You can also test fit the planking where the gap is between the bottom of the bulkheads and the top of the keel. If they fit nicely then no shimming or adjustment is needed, just fairing before you plank.
-
Ah.. I see you did open your own introduction thread! Welcome to MSW, and congrats on completing a lovely model for your first build.
-
That's a great job for a first build, congratulations and welcome to the addiction. Oh, and welcome to MSW too. You should probably post your own introduction thread instead of hiding in someone elses!
-
That's gonna look really nice after you get it sanded and some poly or something on it. Very nice work.
-
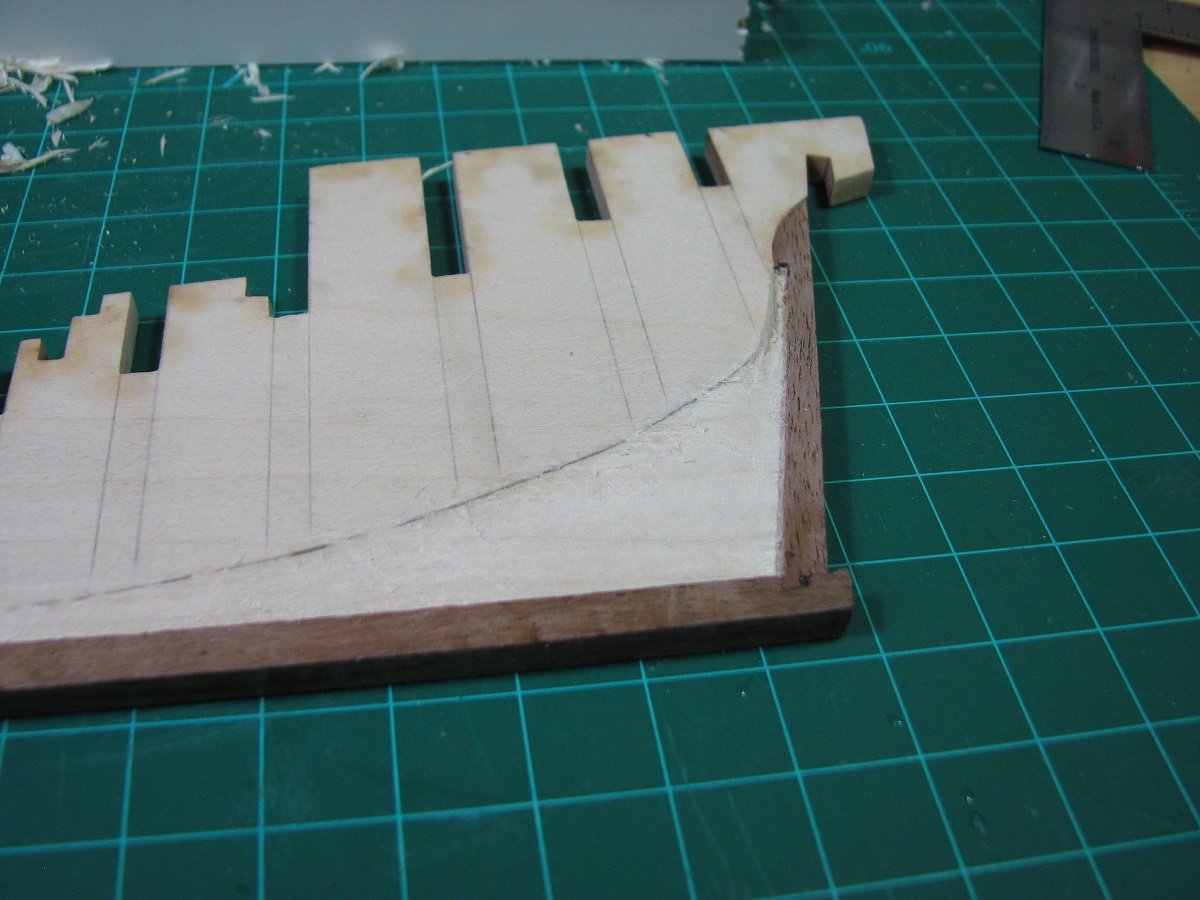
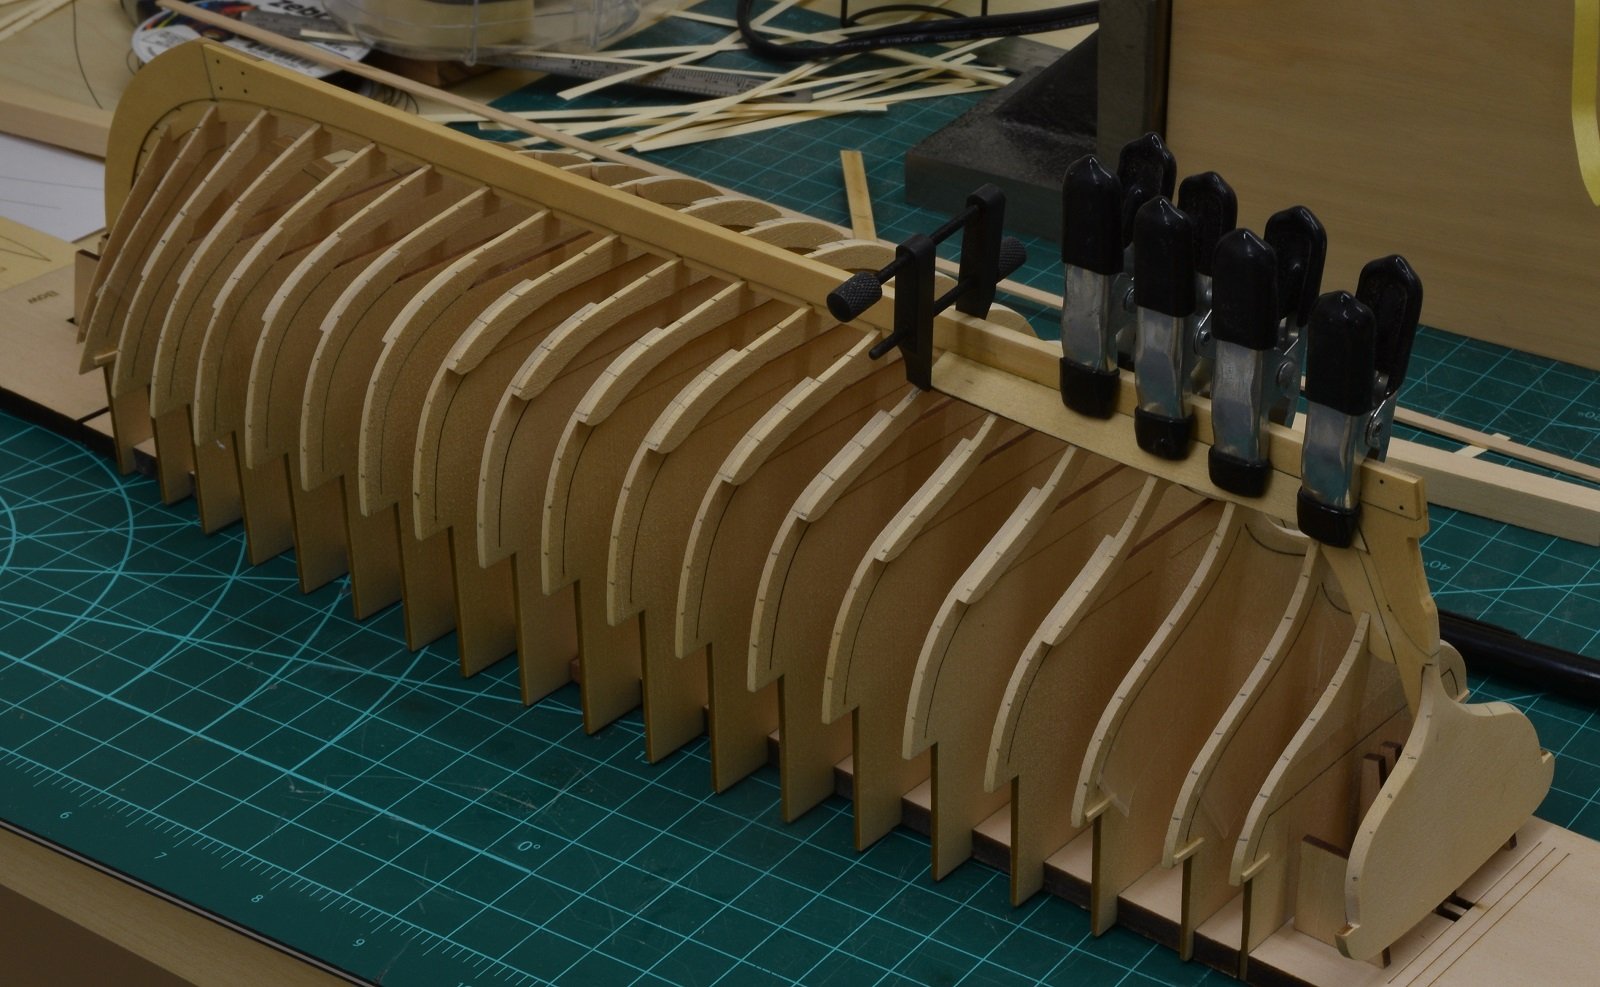
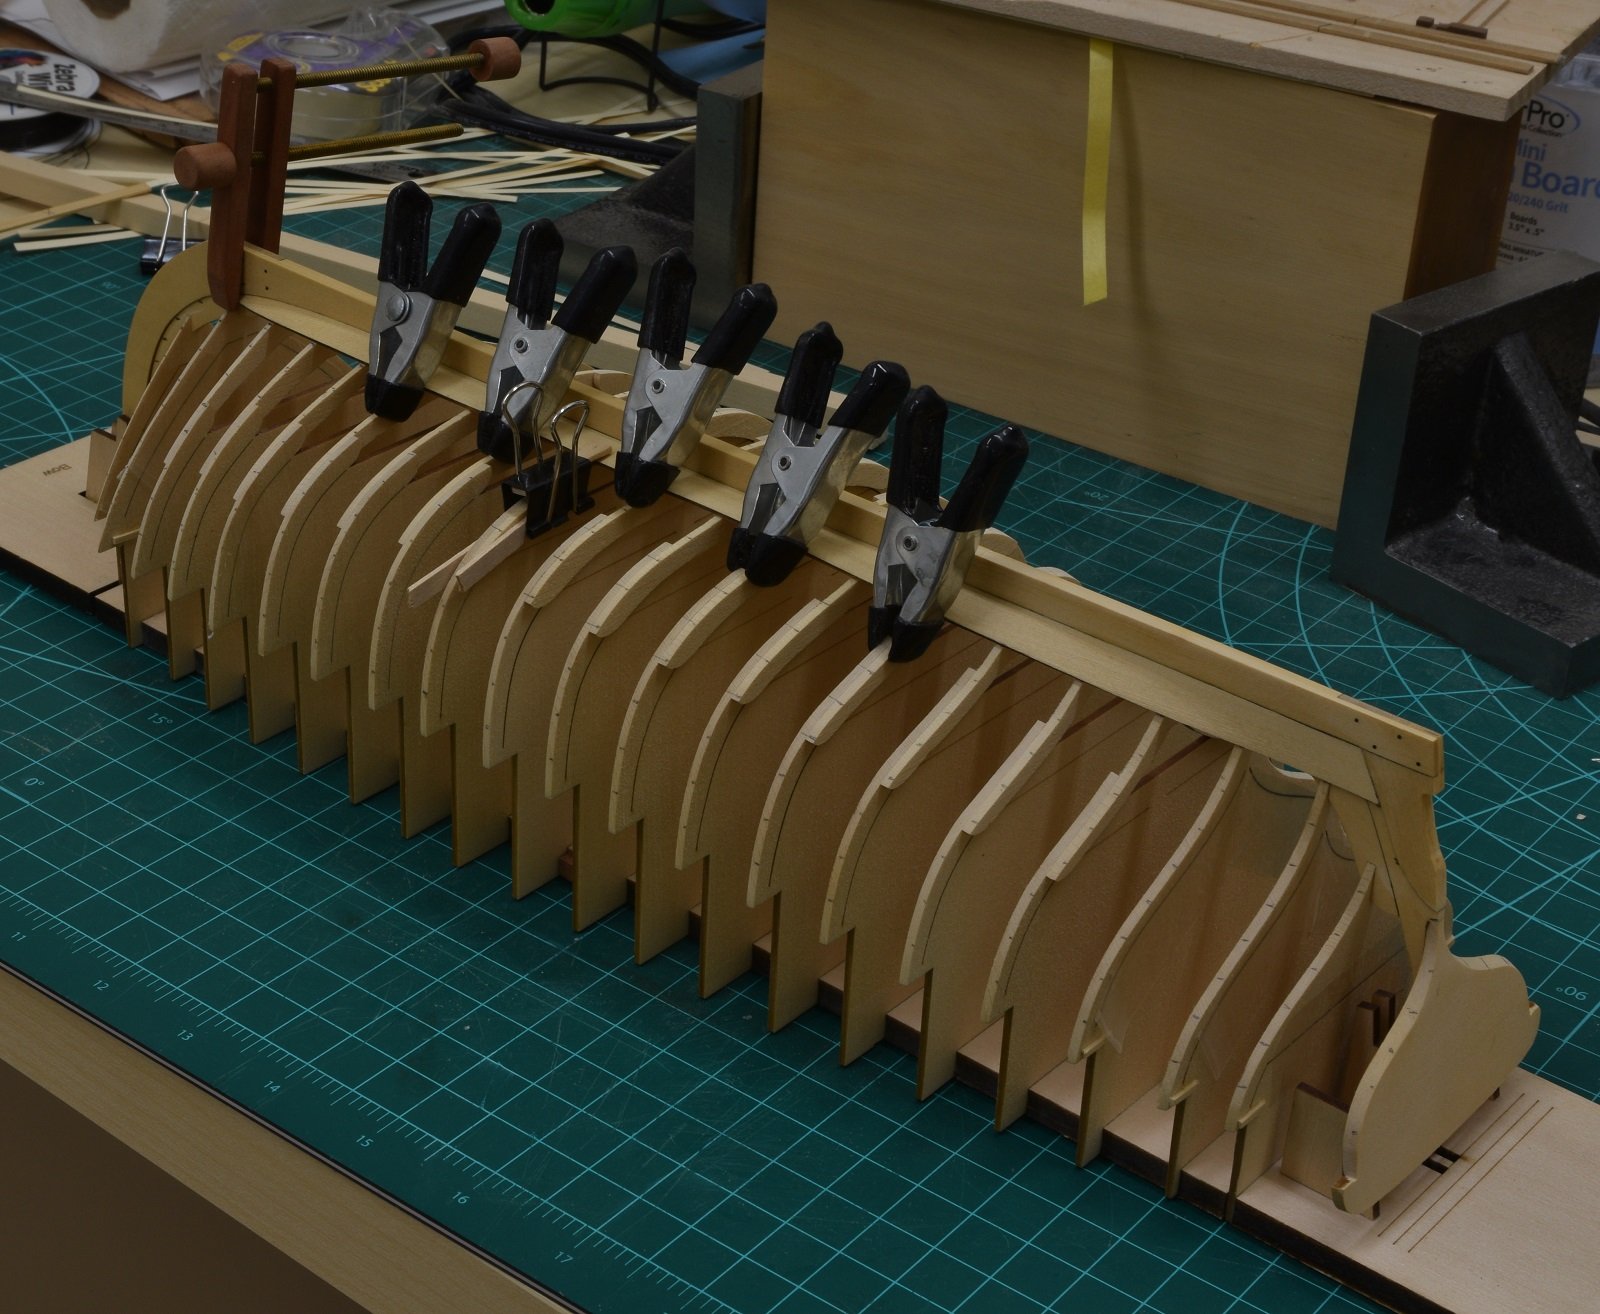
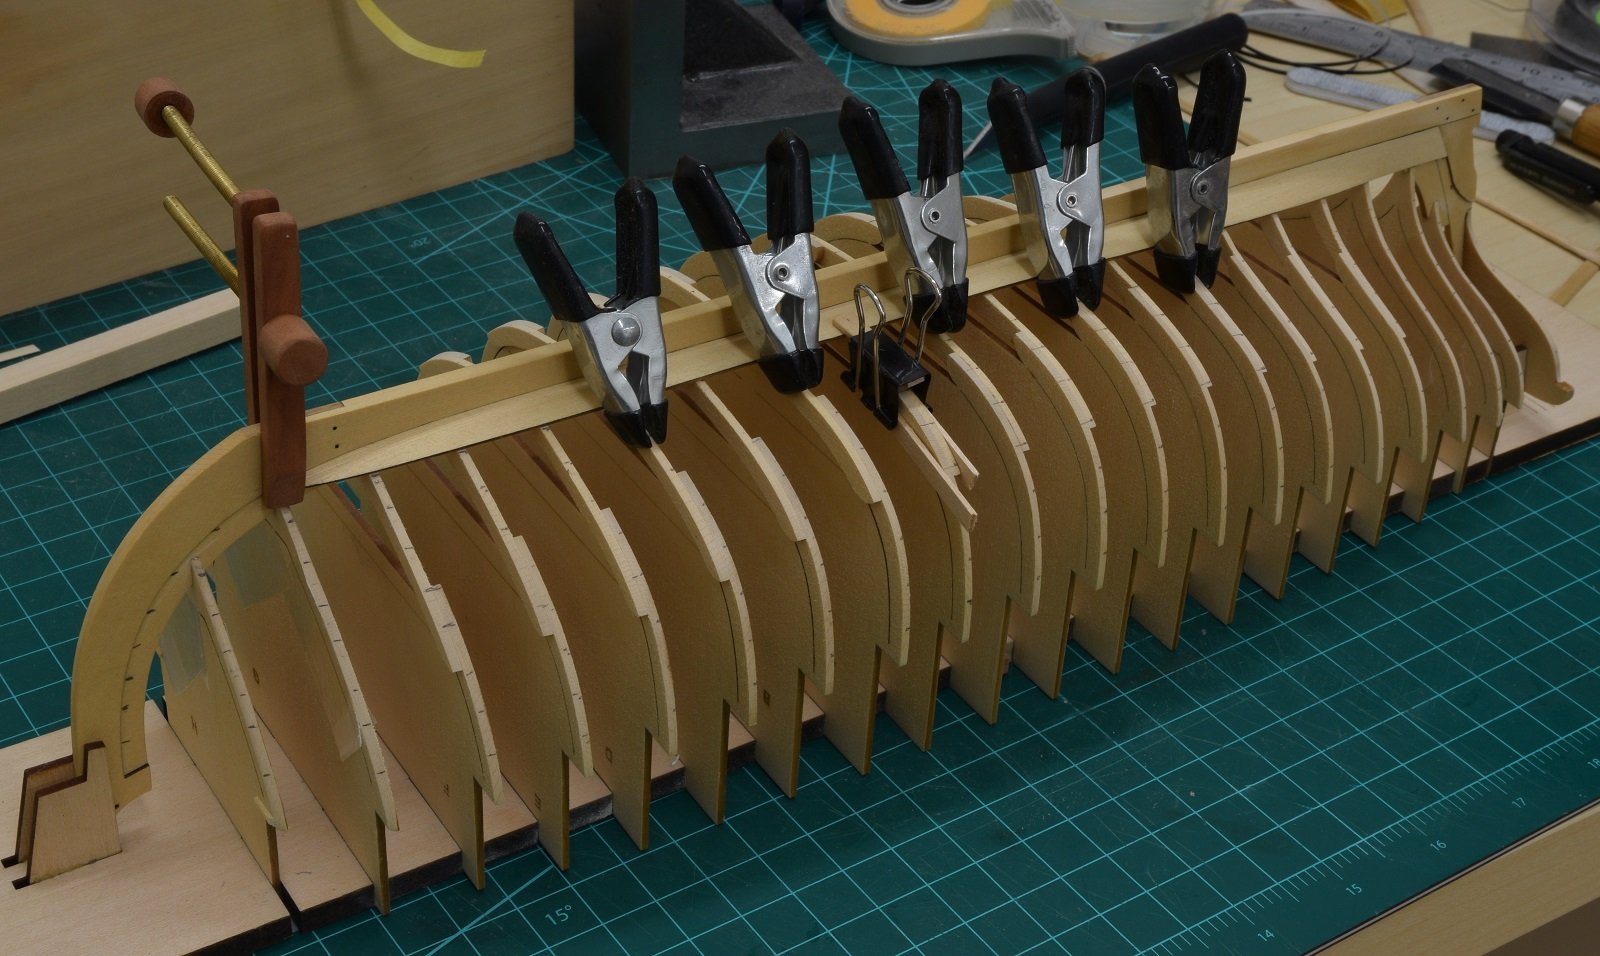
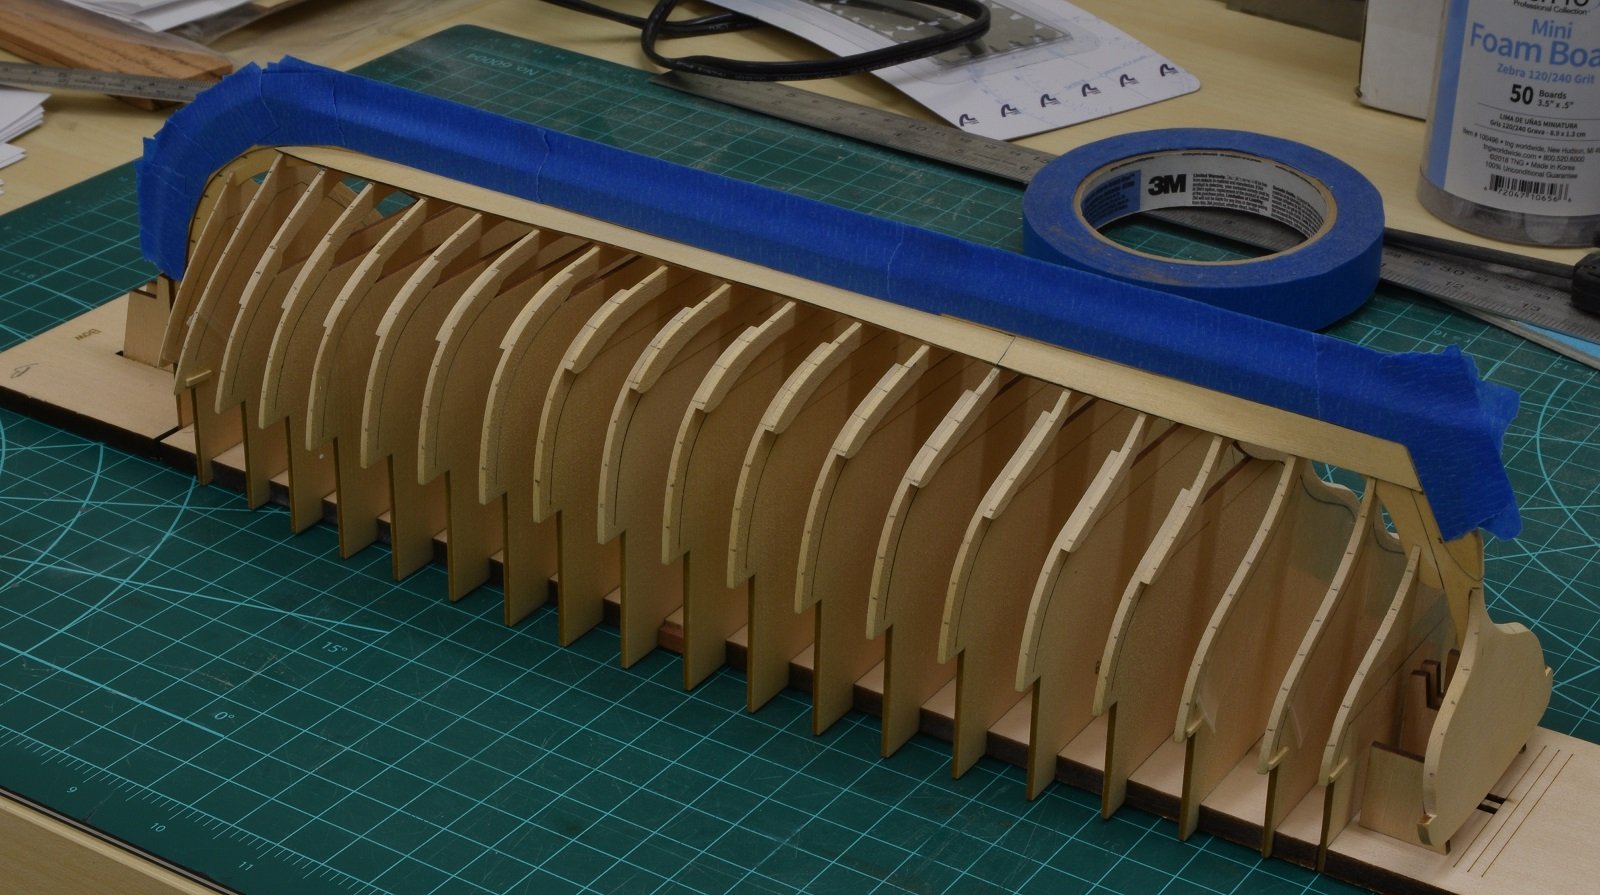
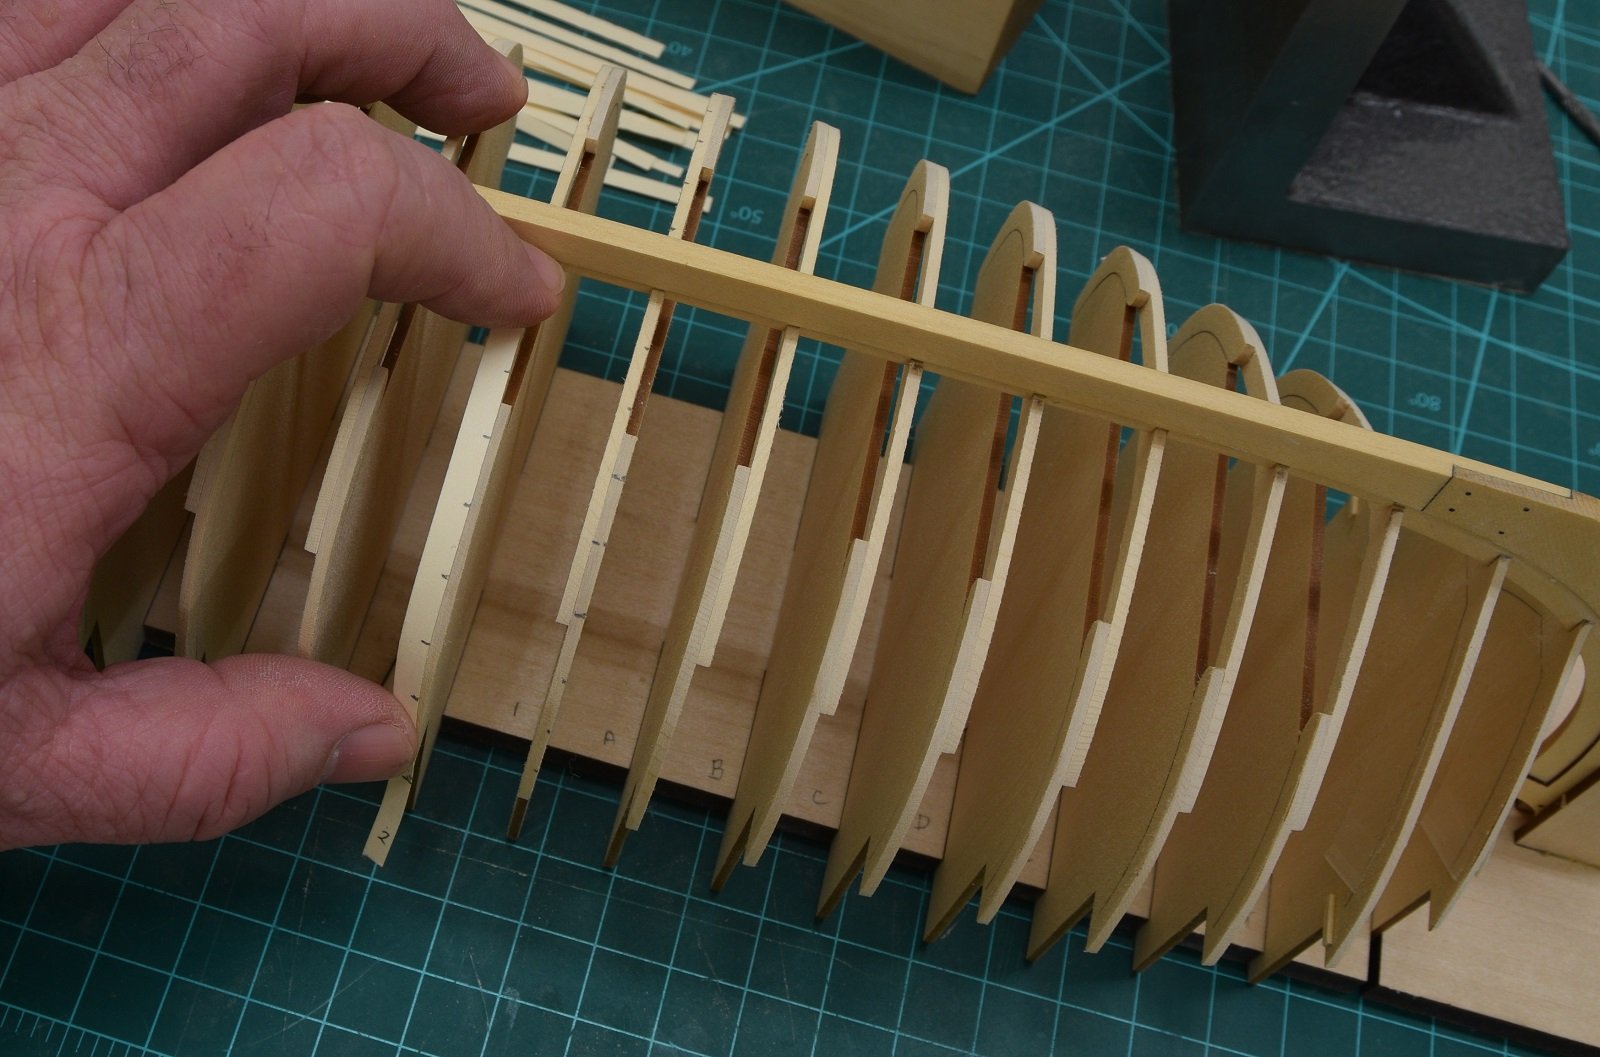
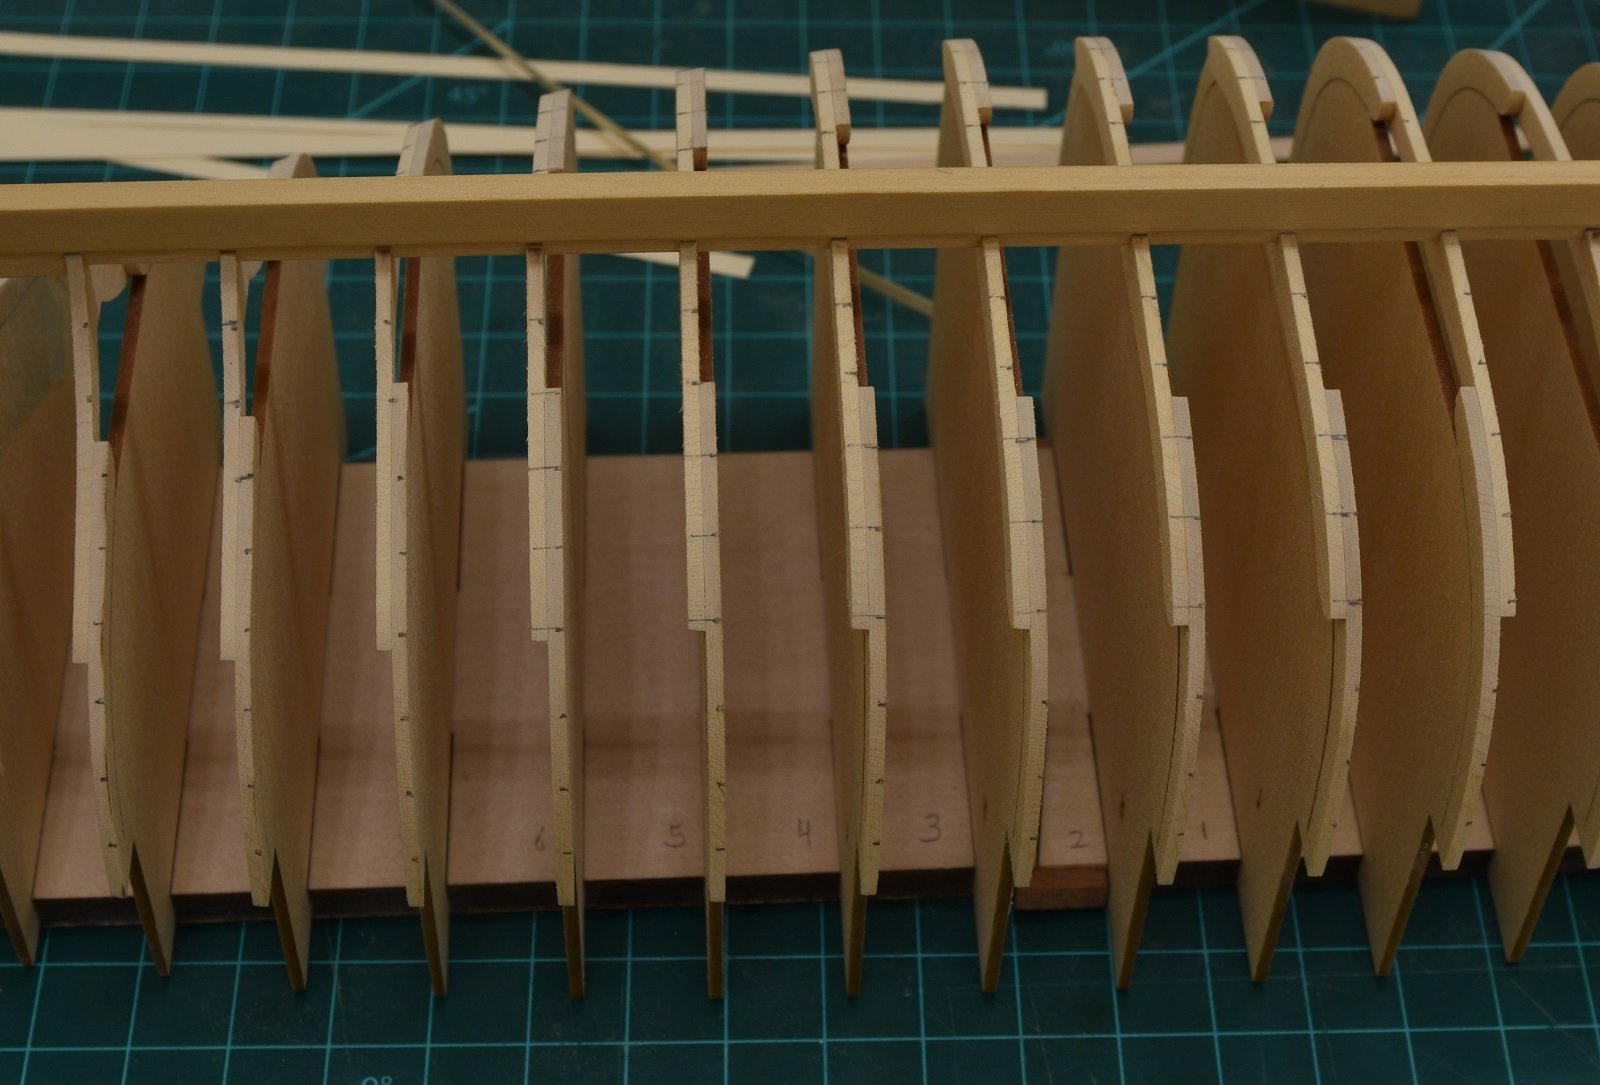
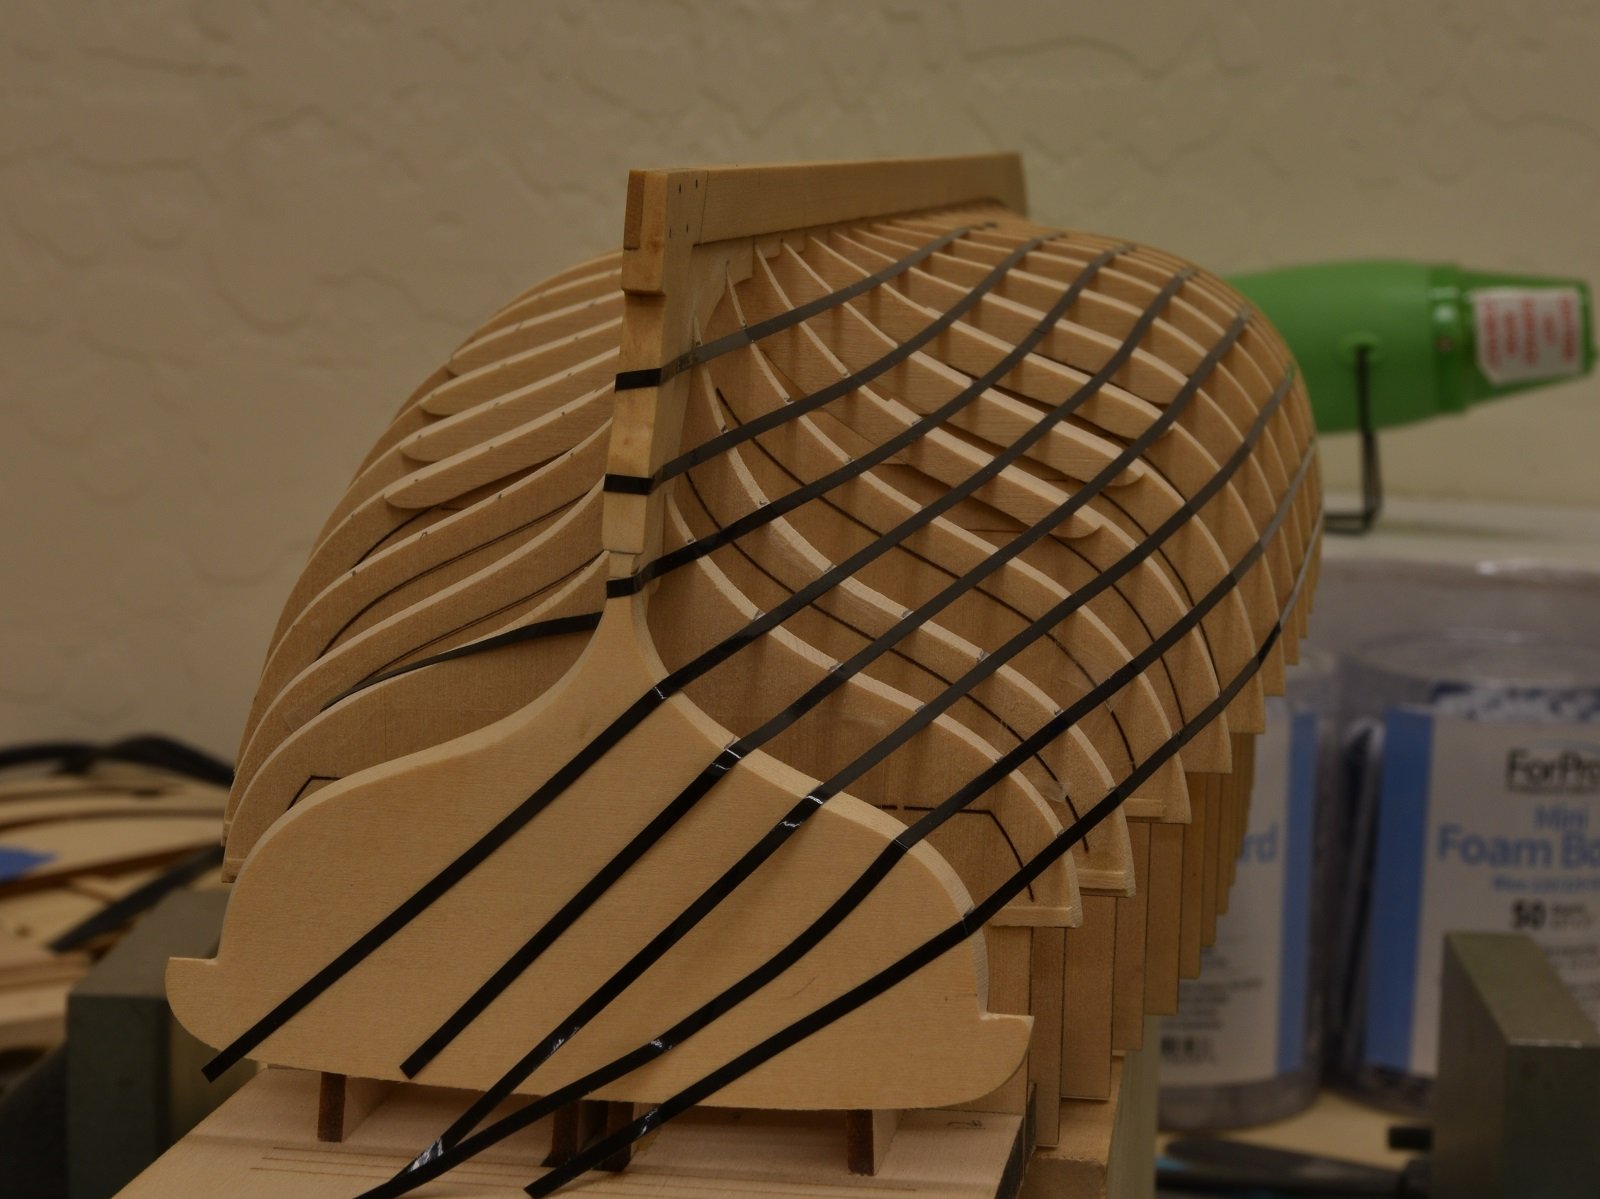
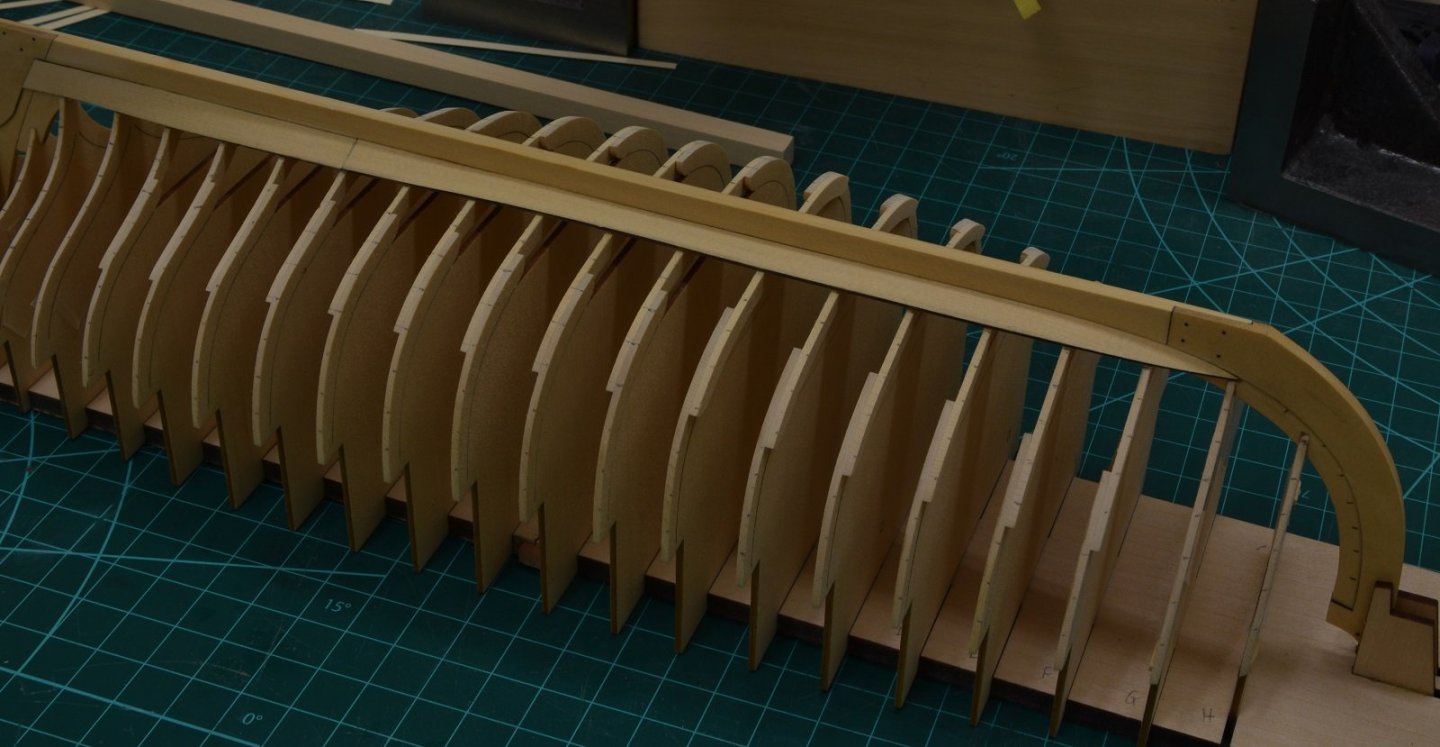
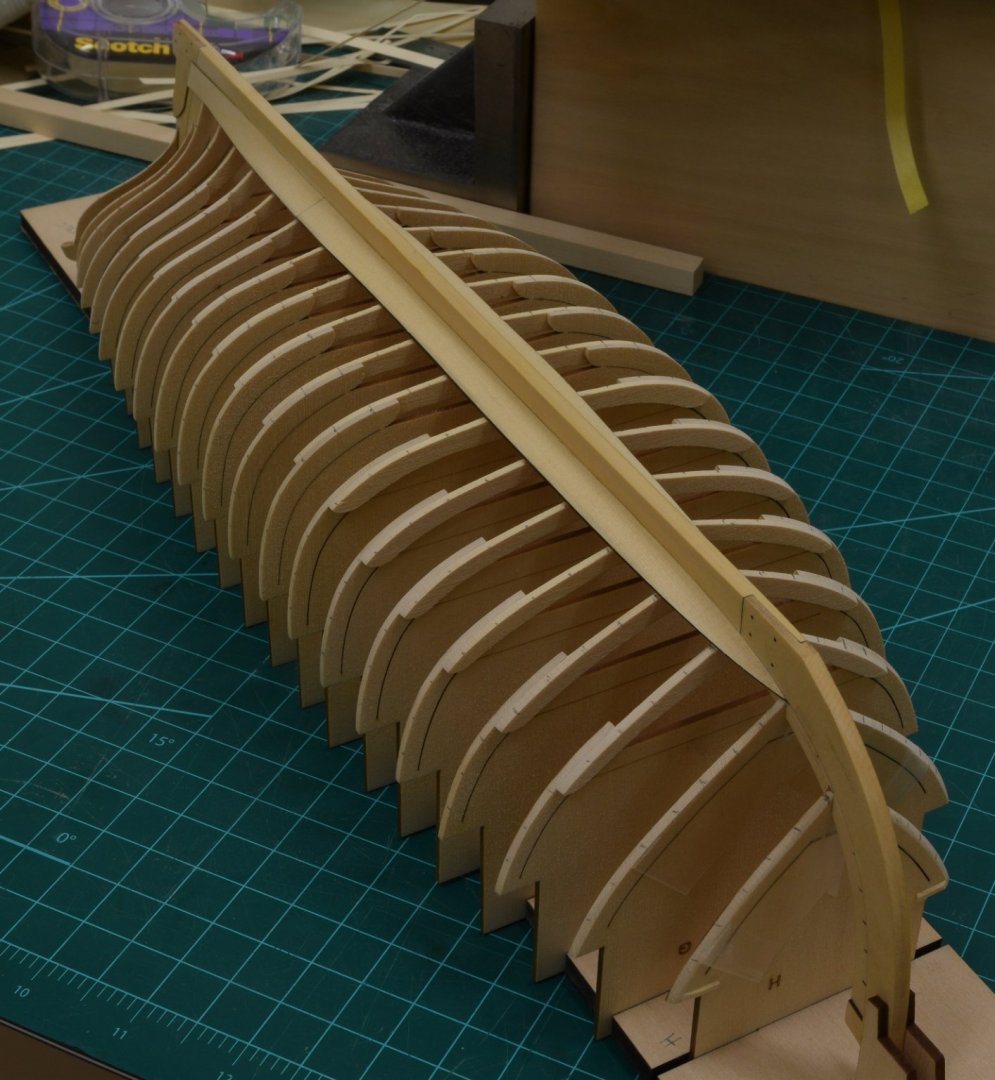
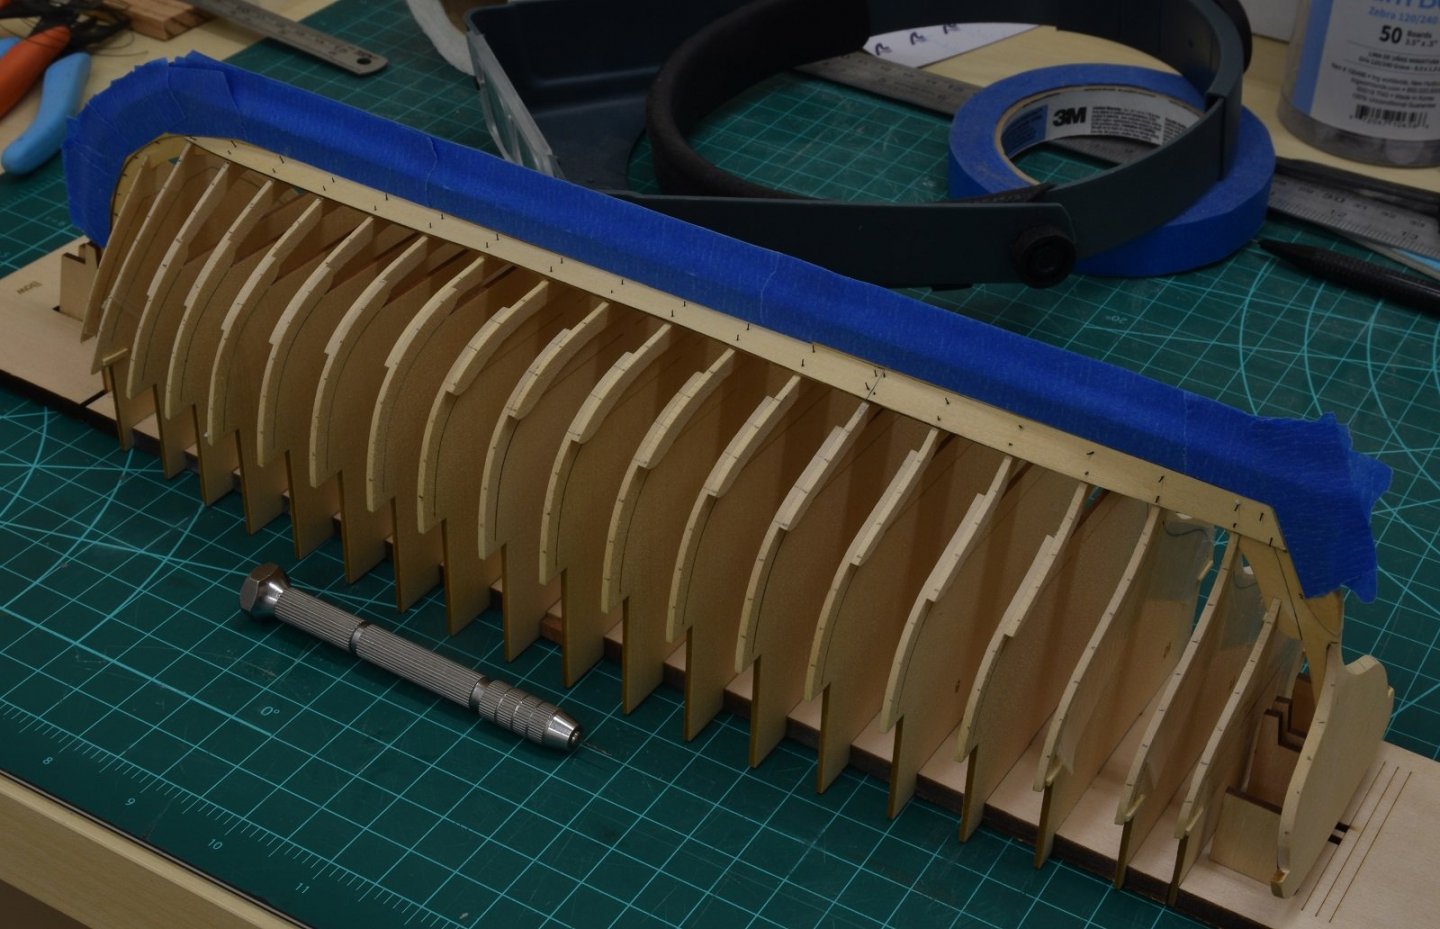
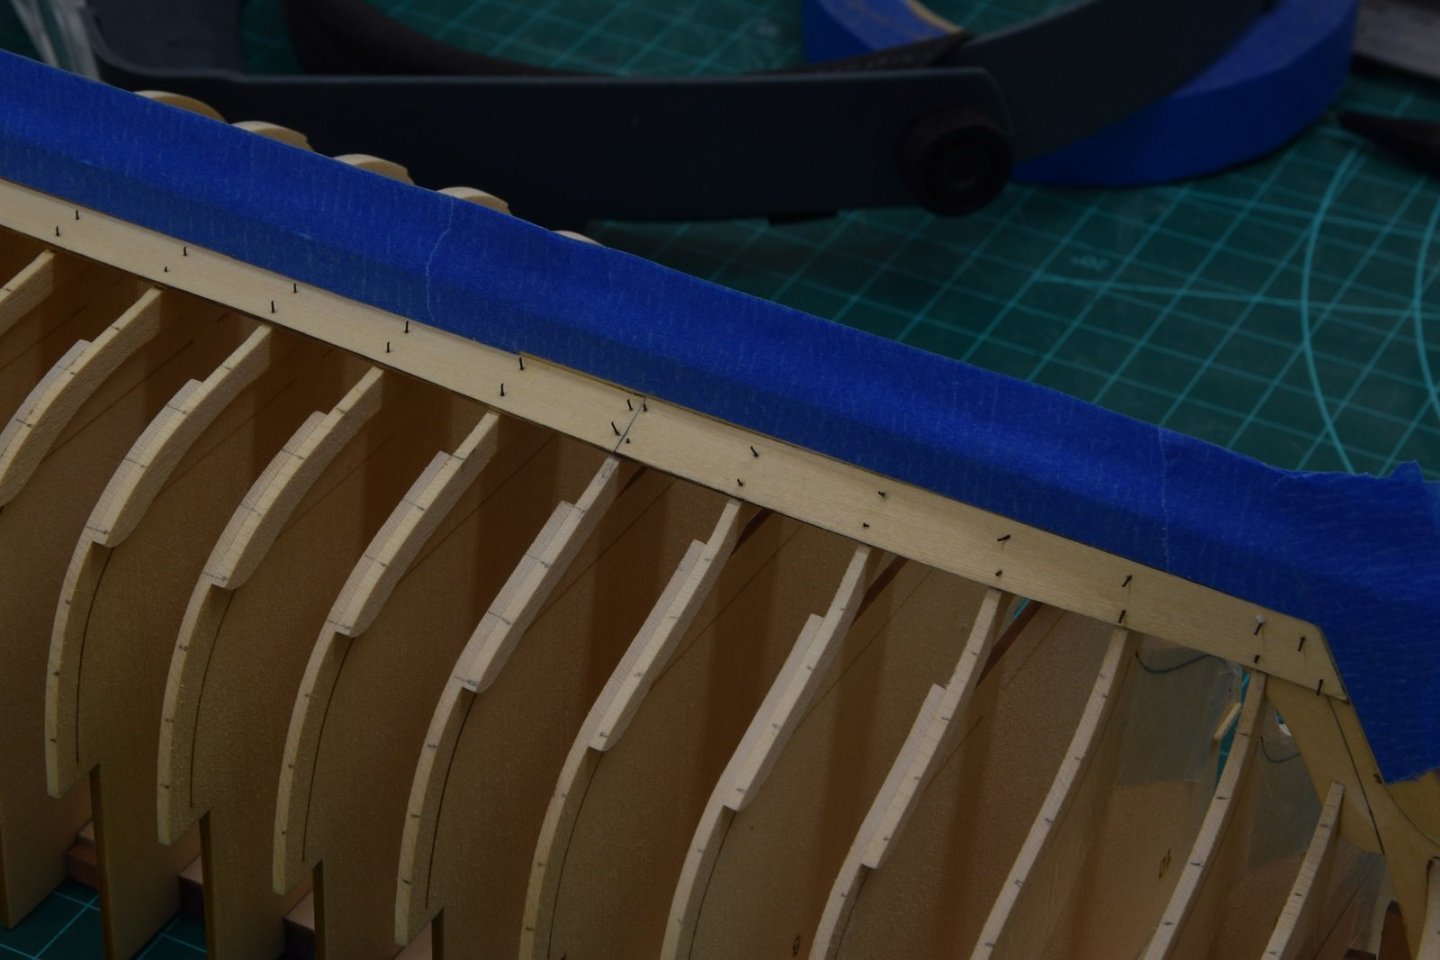
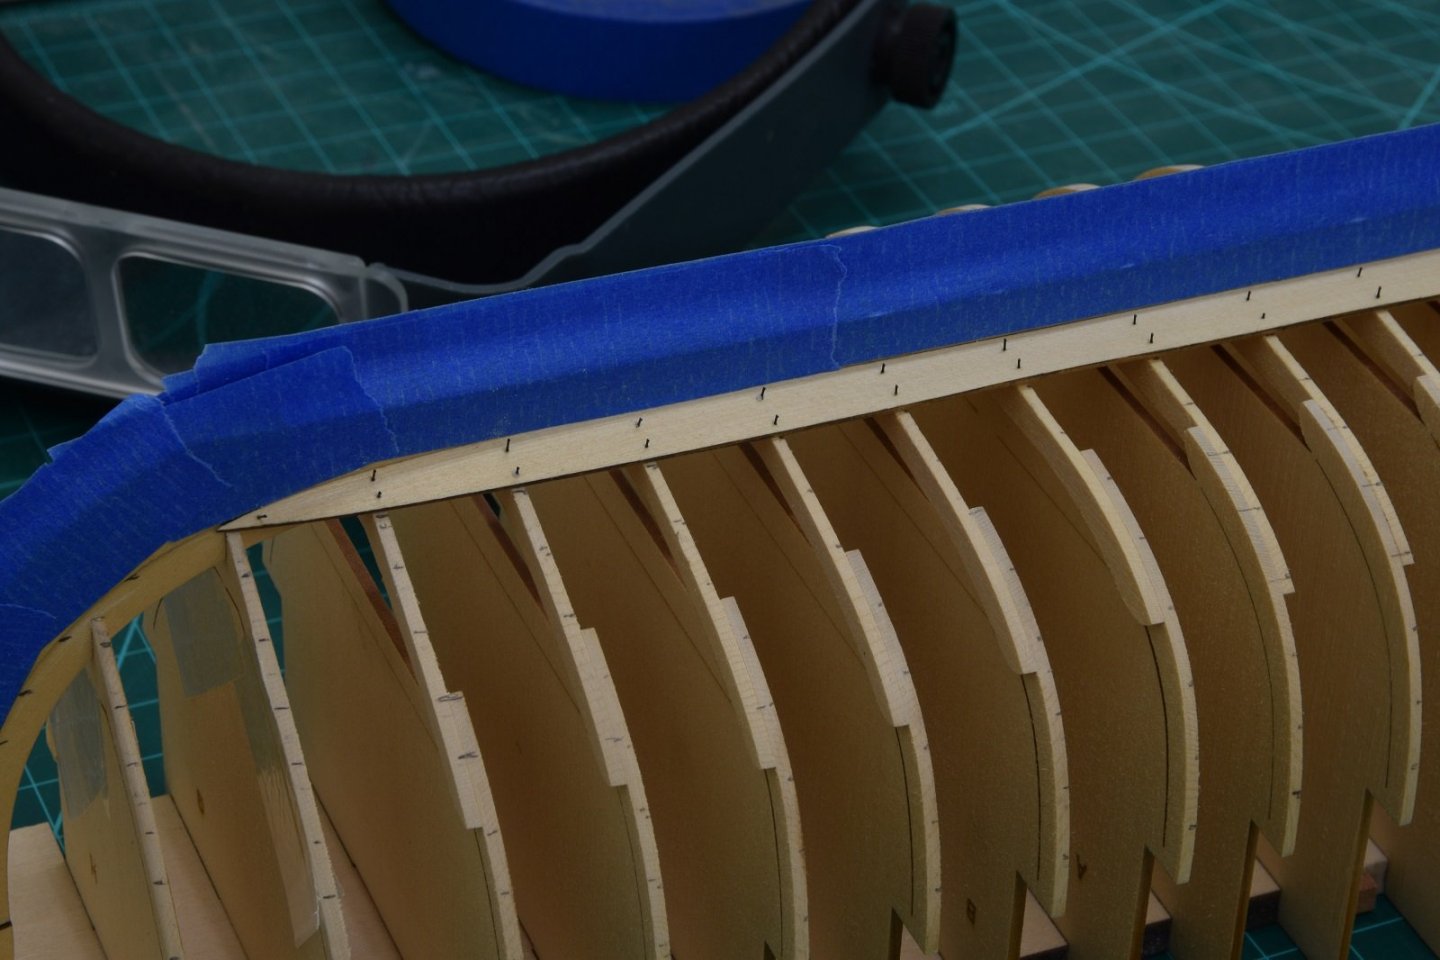
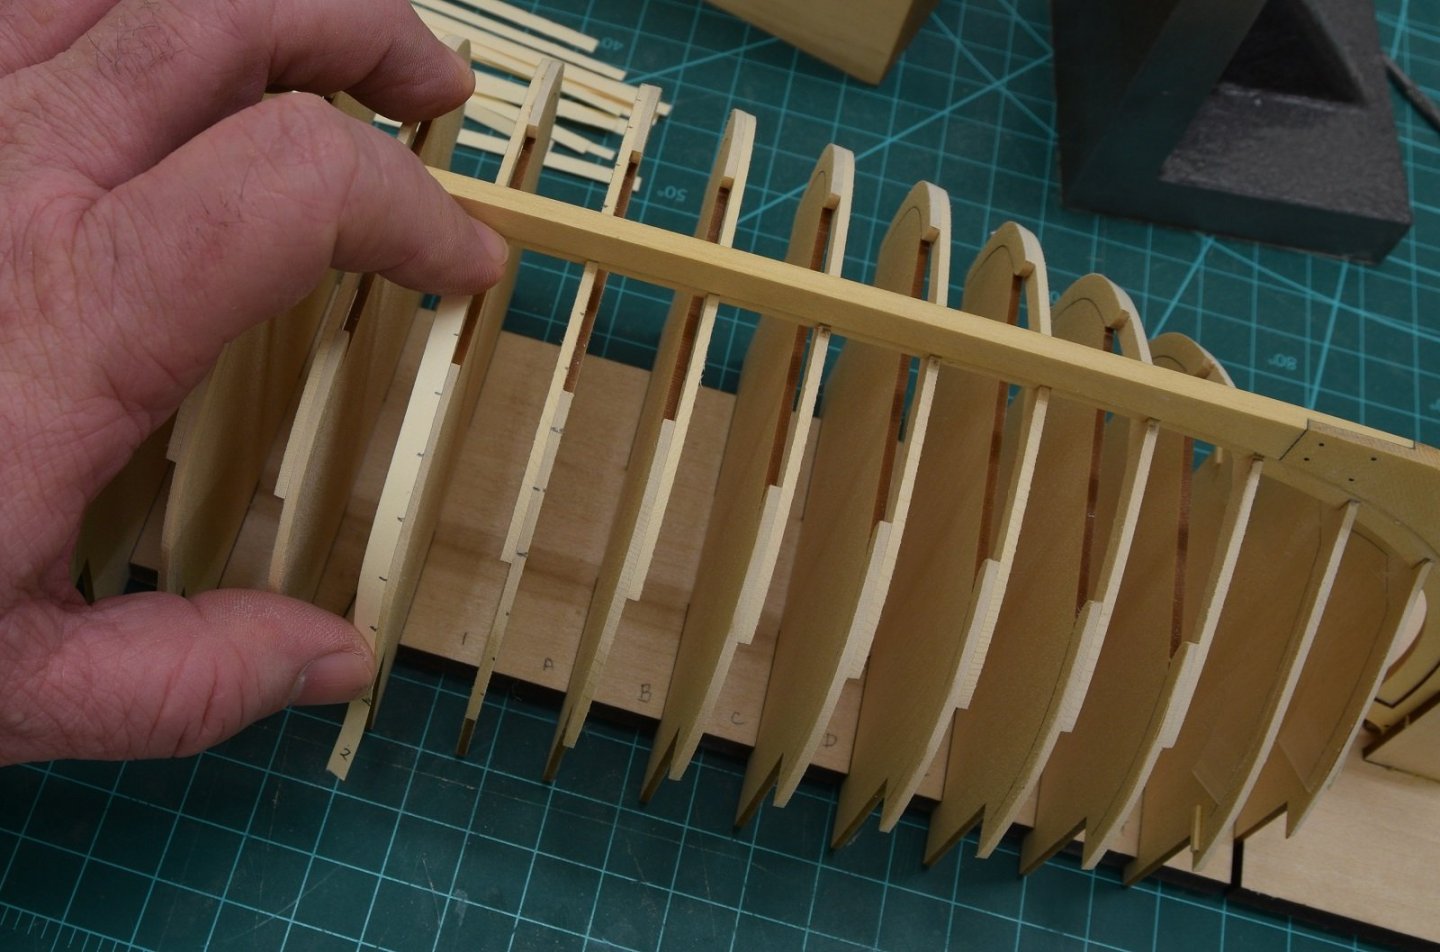
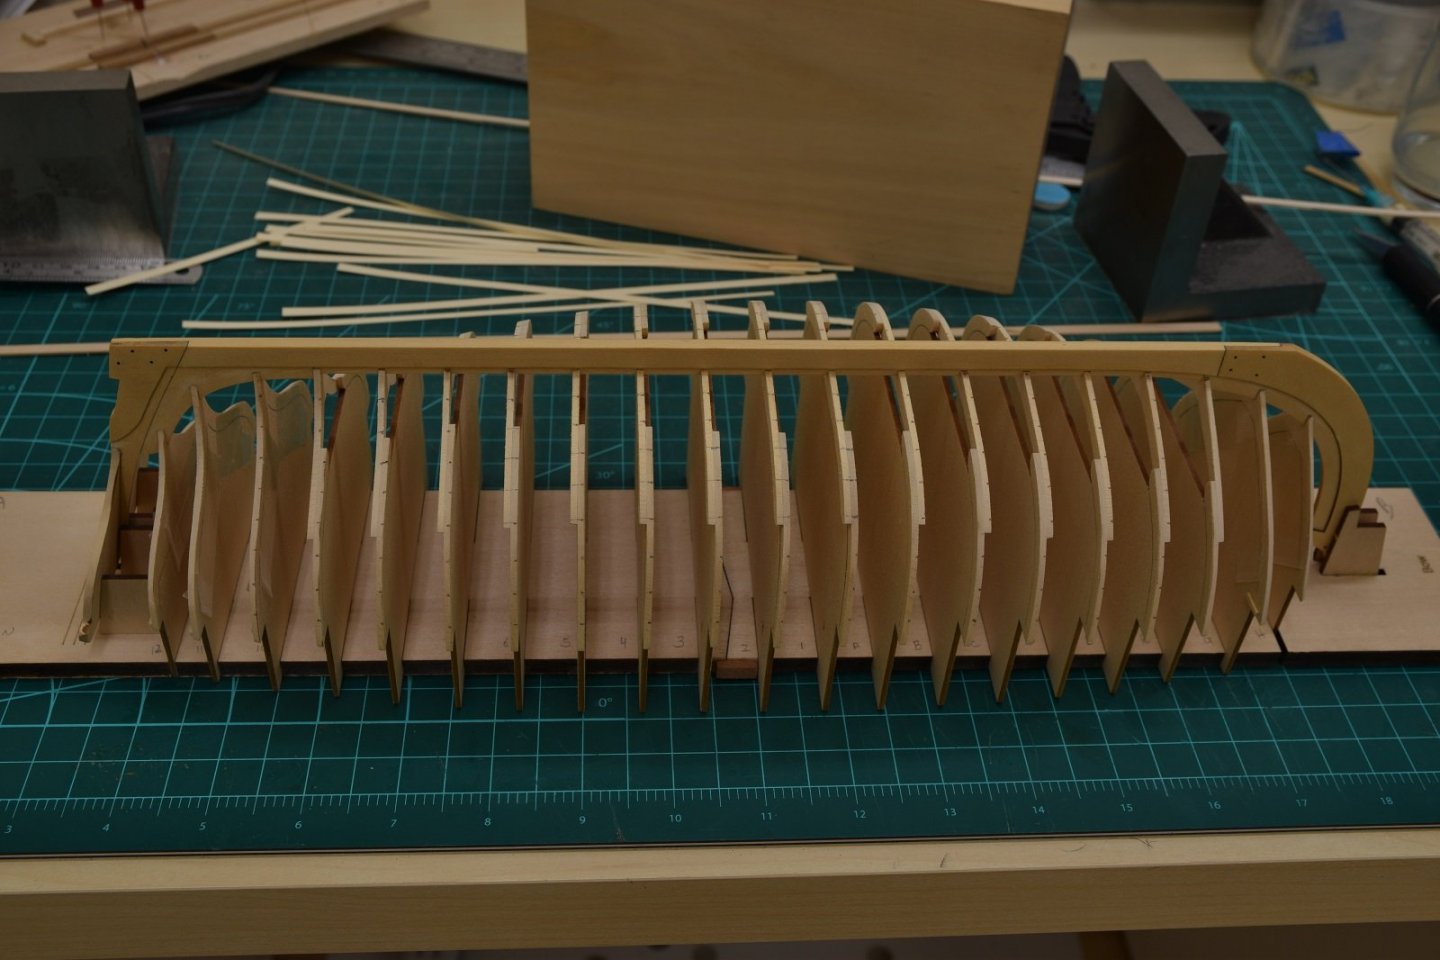
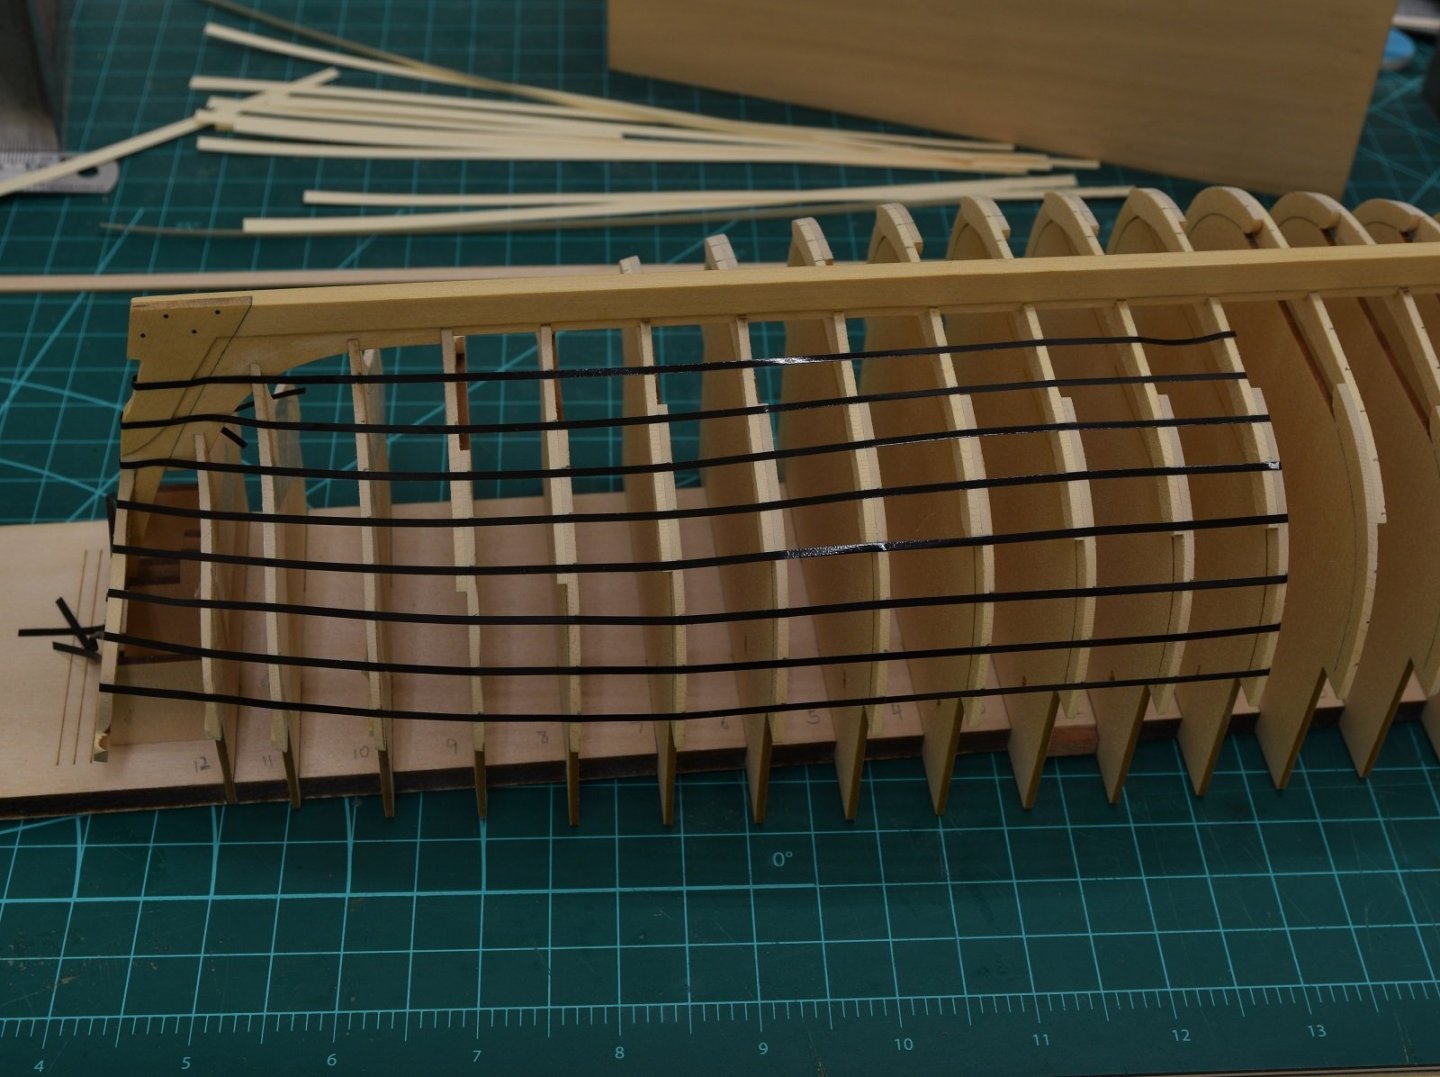
Made a slight bit of visible progress on le' boat. In my last post I had started lining out the hull for planking. I finished lining out the hull on both sides, and after this comes the planking. I only took one more picture of the lining out, as it's pretty much all the same. The planking on this kit is different than any kit I've ever done before. All the planks are pre-spiled, meaning that they are cut to match the shape of the hull already (they aren't just straight boards) and all I need to do is stick them on! Lol.. not really. They are pre-shaped, but they are still flat pieces of wood and the hull is all curvy, so it still takes a lot of heating and bending/twisting of the wood before it will fit into place. I had to do a bit of adjusting at the bottom of the frames where they meet the rabbet, but I expected that. I did struggle a bit with the curve on the first plank, it kept wanting to pull away from the keel in the center and it took a lot of tweaking and time to get it to where I thought I could hold it in place while gluing. The instructions from Chuck suggest using CA glue (superglue) to rapidly secure the planks, but I hate superglue for the smell and how easy it is to stain wood, and I always make a huge mess when I'm trying to use it, so I'm planning to do 100% of the planking using PVA wood glue, hence I need to hold the planks in place with clamps of some sort unless they lay in place perfectly. Since I failed at perfection, I clamped. Garboard plank on the starboard side goes in first, stern piece and then the bow piece. Then I repeat the process on the port side, which went a bit faster. At this point I decided that protecting the nice keel from my stupid clumsy hands was probably a good idea, so I used painters tape to mask it off. The planks on these longboats were secured using copper nails. For this model this is simulated by using 10# black poly fishing line and inserting it into holes drilled with a #77 drill. In the instructions this is done much later after the planking is complete, but I decided to follow the lead of several others who have built this model (I thank them for their build logs!) and drill and place the nails as I go, while it's easier to see the frames and hopefully not miss them with the hole. I decided to just use a hand held pin-vise to hold the drill as the wood is fairly soft and using the Dremel would probably lead to disaster. The poly is dipped into white PVA glue so that it can be cleaned up easily later, and then stuck into the holes and trimmed short with a nipper. After it's dried the lines will be cut off flush with a flush cutter and then sanded smooth. I'll probably do the final sanding smooth after all the planks are on. Currently only the one side has the nails, will complete the other side today before moving to the next planking strake.


-
Some sheets you need to print yourself. Sheet 2 is the Shipway Plan drawing and will be found in the Chapter_04 folder on the CD for the 1/72 scale version. Sheet 8 is the 1/96 scale shipway plans and is also included on the CD and is referenced by EdT in this post in the thread specifically about these books - https://modelshipworld.com/topic/11317-modeling-the-extreme-clipper-young-america-1853/page/2/?tab=comments#comment-687297
-
Good day Glenn, On blackening, I found that when I was cleaning the parts in acid (I used white vinegar) I needed to use a stiff bristle brush and actively 'clean' them while they were doused in the acid. I then rinsed the parts in distilled water twice, again brushing them to remove any captured bubbles or foreign material. Then when blackening I did it in very short time periods (10-15 seconds), rinsing and drying between to allow the blackening to slowly work up to the level I wanted rather than try to get it all in one go. I was using a different product however, from JAX. I also used the brush to ensure full coverage and removal of air bubbles during the blackening process. For seizing, I use a very fine thread, a #50 I believe, it's not 'rope' at all, as any available rope is just going to be too large and out of scale, especially at a smaller scale like yours (I'm building in 1/48 mostly).
- 382 replies
-
- 2
-

-

-
- Vanguard Models
- Duchess of Kingston
- (and 1 more)
-
Very nice. Do you plan to fill the holes with rivets or simulated rivets or just leave it like this since this is all belowdecks?
- 257 replies
-
- 1
-
-
- young america
- Finished
- (and 1 more)
-
Looking great! On your yards/spars, they really shouldn't be touching the mast, but since you've pinned them, your solution is as good as any. You could also try to push them far enough off the mast to cut/remove the pins, but at this point that might cause a lot of grief you don't want should anything go wrong! I made the simulated tie-offs as part of making the rope coils. Here is a link to the post where I show the jig and explain how I make the coils, but the picture of a coil is place is pretty terrible. https://modelshipworld.com/topic/8085-armed-virginia-sloop-by-gunthermt-finished-model-shipways-scale-148/page/24/?tab=comments#comment-352474 Here is a post I made showing rope coils on various ships in San Diego. https://modelshipworld.com/topic/8085-armed-virginia-sloop-by-gunthermt-finished-model-shipways-scale-148/page/25/?tab=comments#comment-352725 And here is a post showing the little jig in full use and some much better pictures of the results on the model. https://modelshipworld.com/topic/8085-armed-virginia-sloop-by-gunthermt-finished-model-shipways-scale-148/page/25/?tab=comments#comment-353600 Hope some of that is helpful!
- 436 replies
-
- 5
-
-
- vanguard models
- alert
- (and 1 more)
-
Nice.. wish I had a shop full of full-sized wood tools like that!
-
Gorgeous work as always. Lovely work on the brass water tanks, what did you use to make the rivet lines in the water tanks? The pictures aren't real clear on that final detail that it appears you added. Thanks,
- 257 replies
-
- 3
-
-
- young america
- Finished
- (and 1 more)
-
Just update it whenever you want, that's what most people do. I've updated build logs a day apart when I made something interesting, and I've waited a week or more between updates depending on what was going on. It's your log, you make the rules.
-
Looking good!
-
Agreed, it's great that Rob has done this for the community. Not sure I'll ever use it since I have my existing system that works fine for me and I'm used to, but this is a wonderful resource for anyone who wants to use it and hasn't already figured out how to accomplish these tasks.
-
As long as you are happy with it, doesn't really matter if the closeups look bad! The one nice thing about paint though, if it really does bother you, a bit of careful masking and some more paint and you can fix it right up! Oh, and other than the waterline where you pointed out the issue, everything looks fantastic. Some great detail and decoration on this model and you've done it very well as far as I can see.
- 382 replies
-
- 2
-
-
-
- Vanguard Models
- Duchess of Kingston
- (and 1 more)
-
Looking nice. It's really difficult to get a good trim result with a scraper on soft wood like basswood.
- 123 replies
-
- 1
-
-
- Model Shipways
- Pinnace
- (and 1 more)
-
I've ordered 5 books from Seawatch at different times, and never failed to have them arrive within about 2-4 weeks. I am however in the US so I imagine that international shipping could take longer.
-
Very nice Rich. Is it in a classroom? Reflection looks like a large room with a bunch of desks or something.
- 1,135 replies
-
- 1
-
-
- model shipways
- syren
- (and 2 more)
-
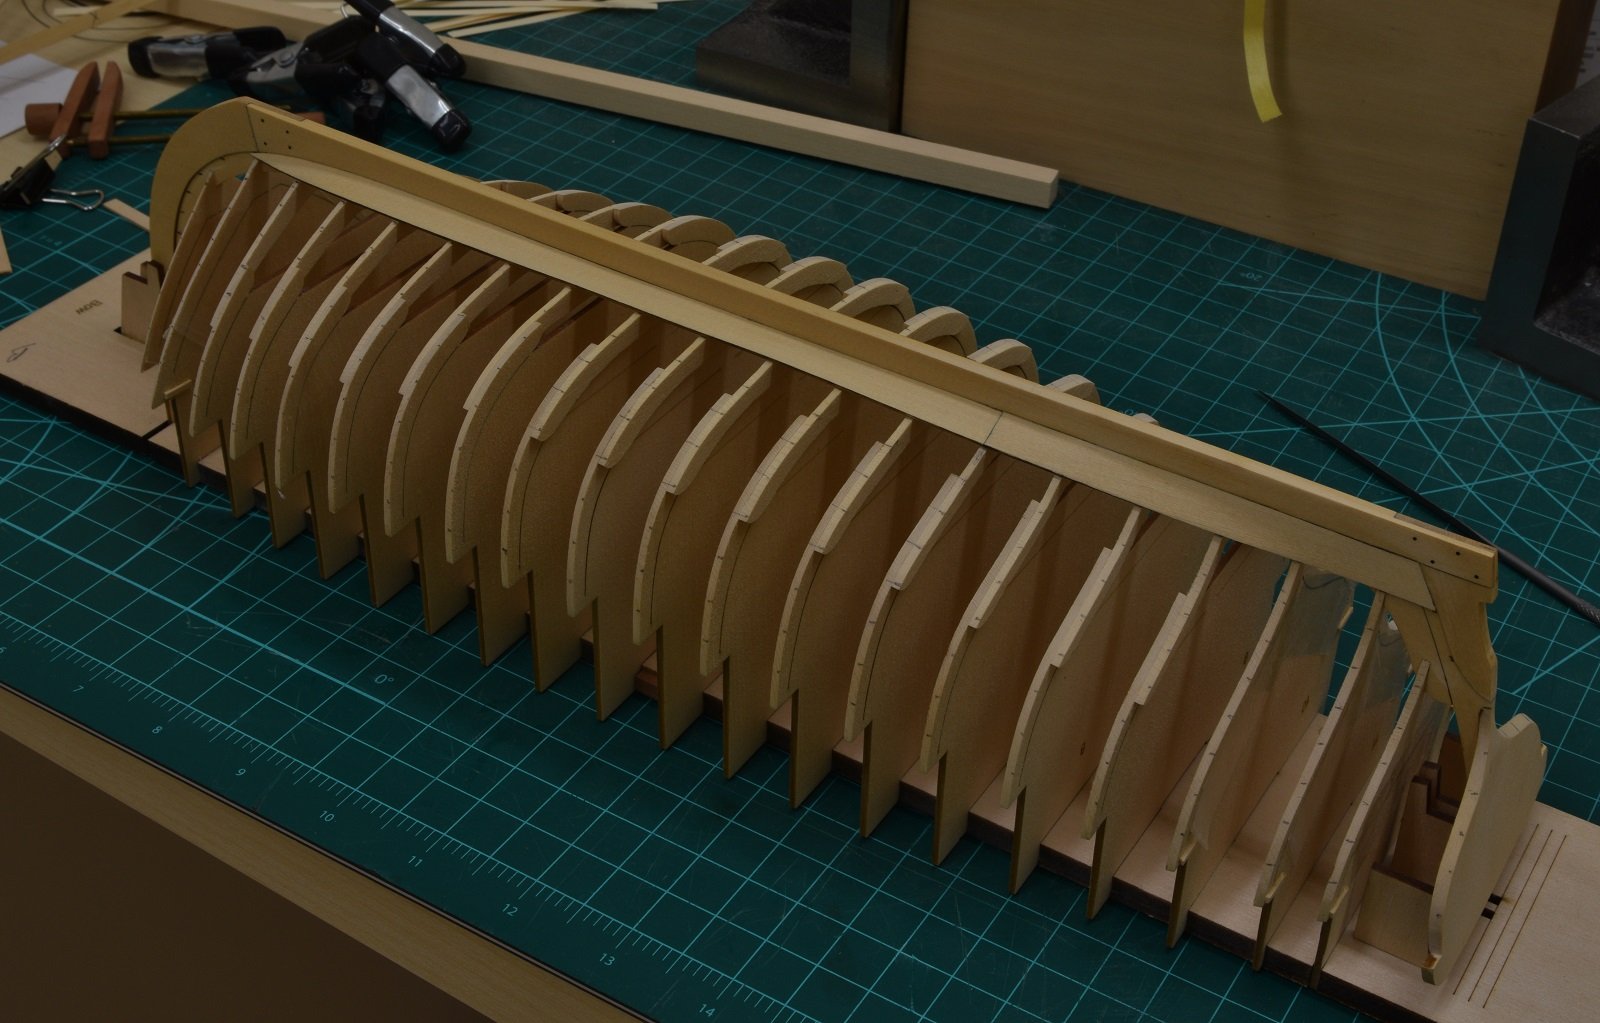
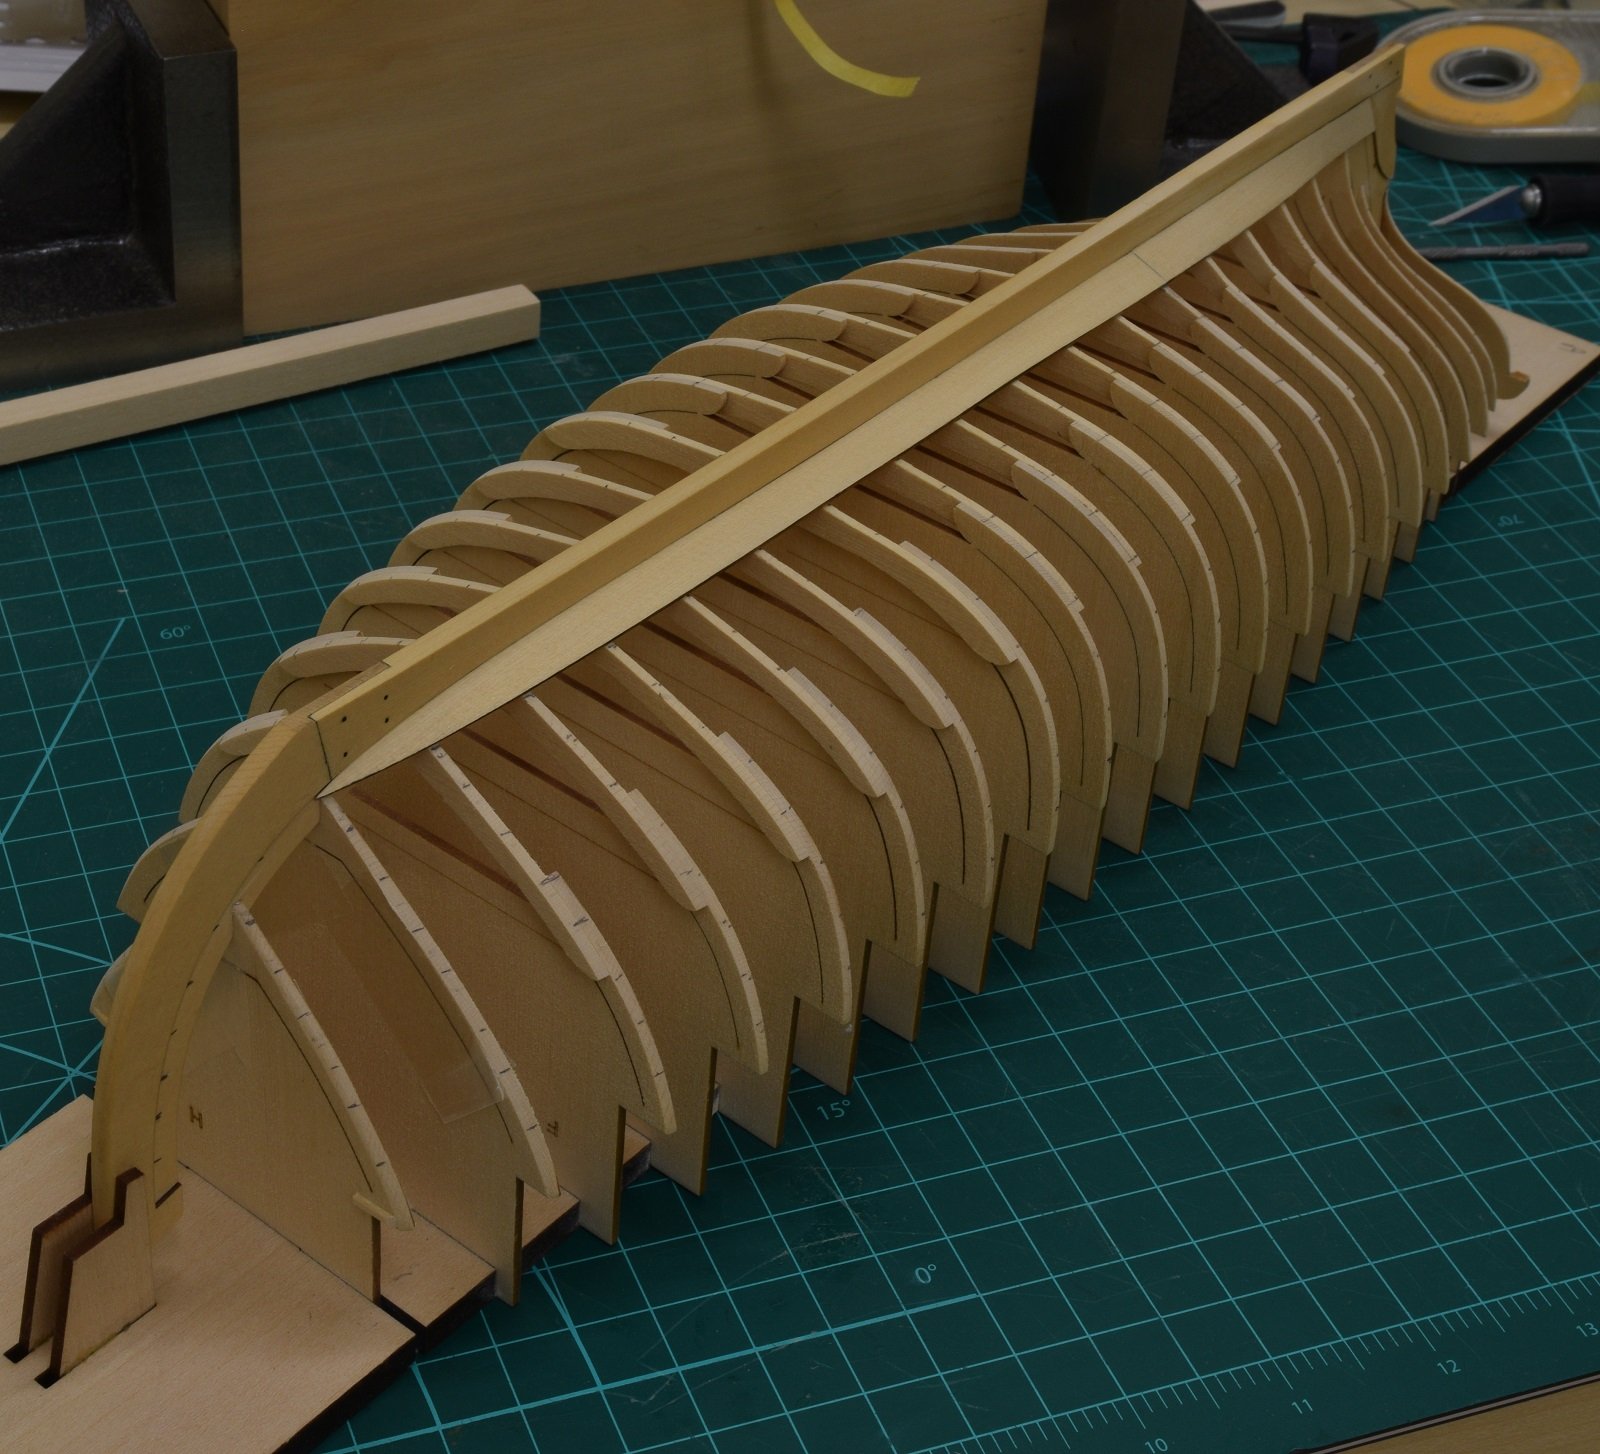
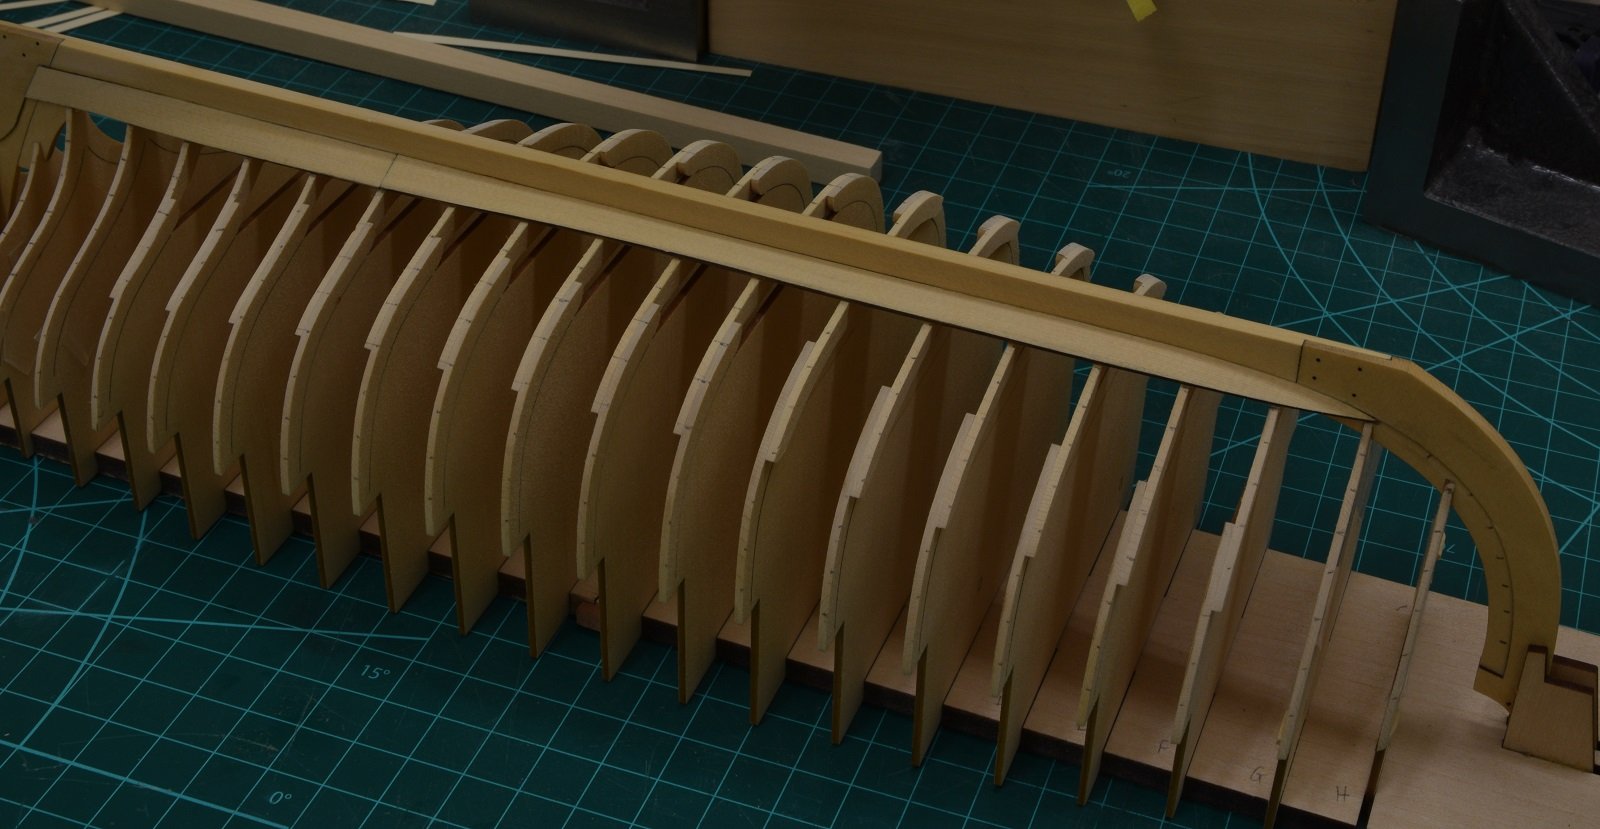
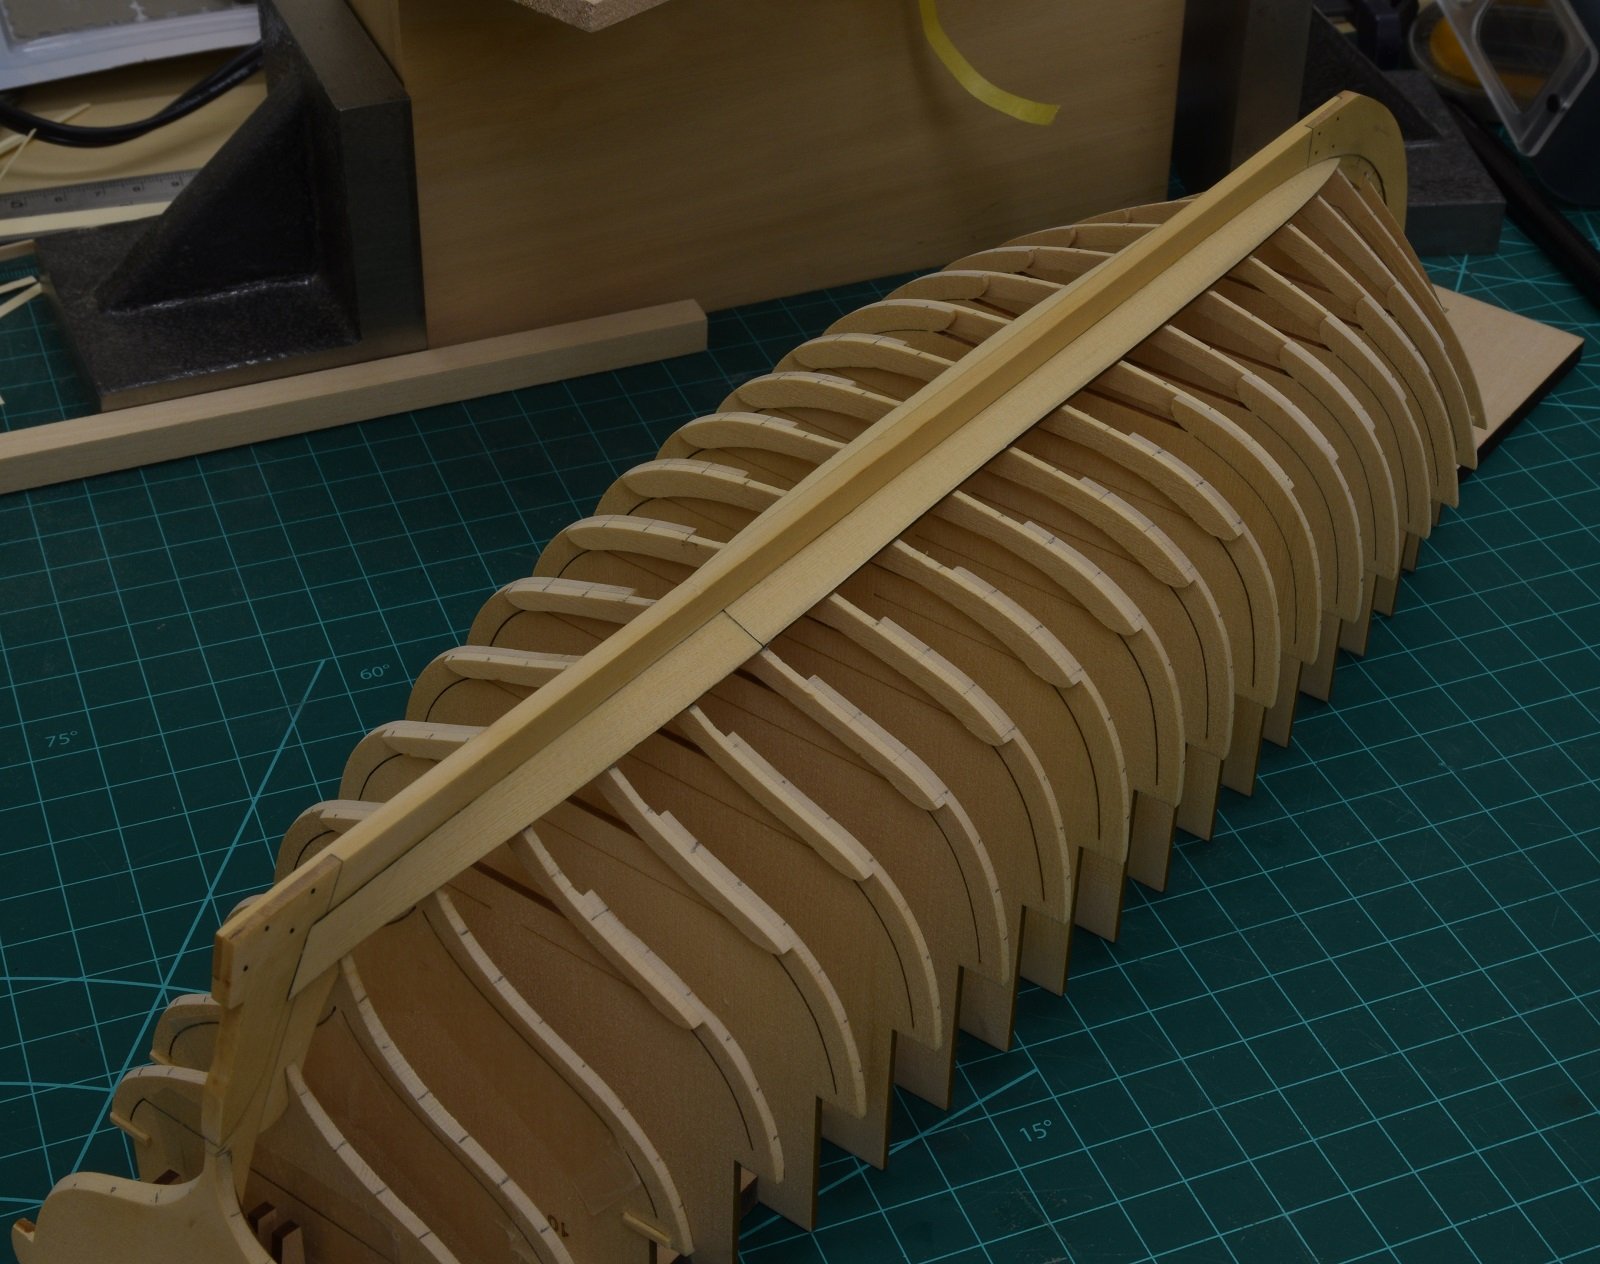
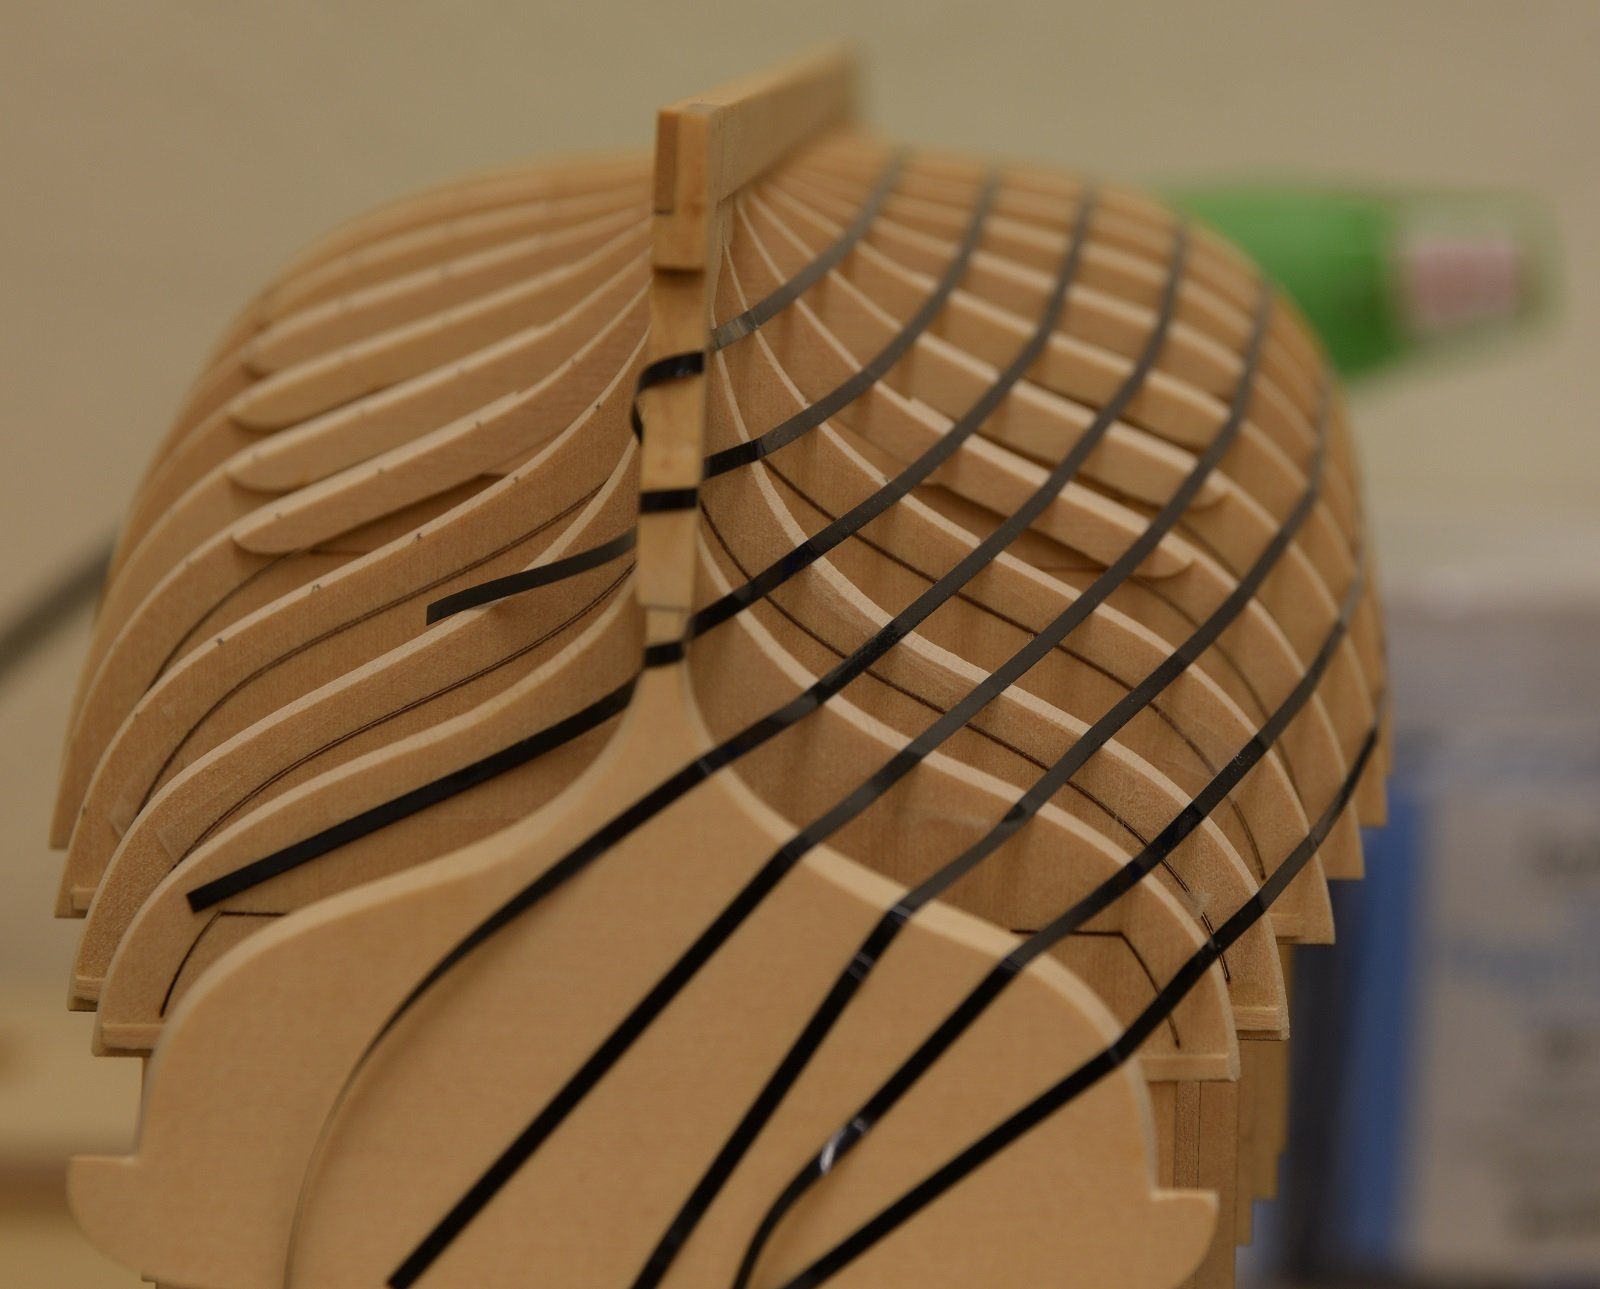
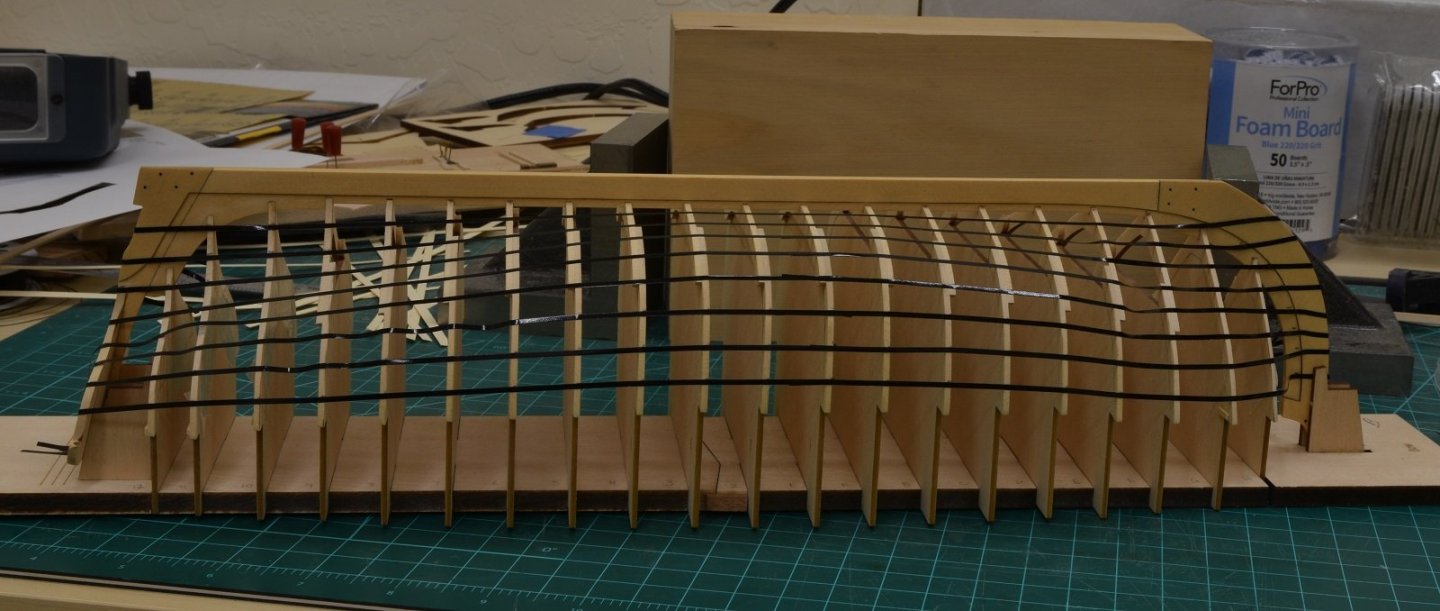
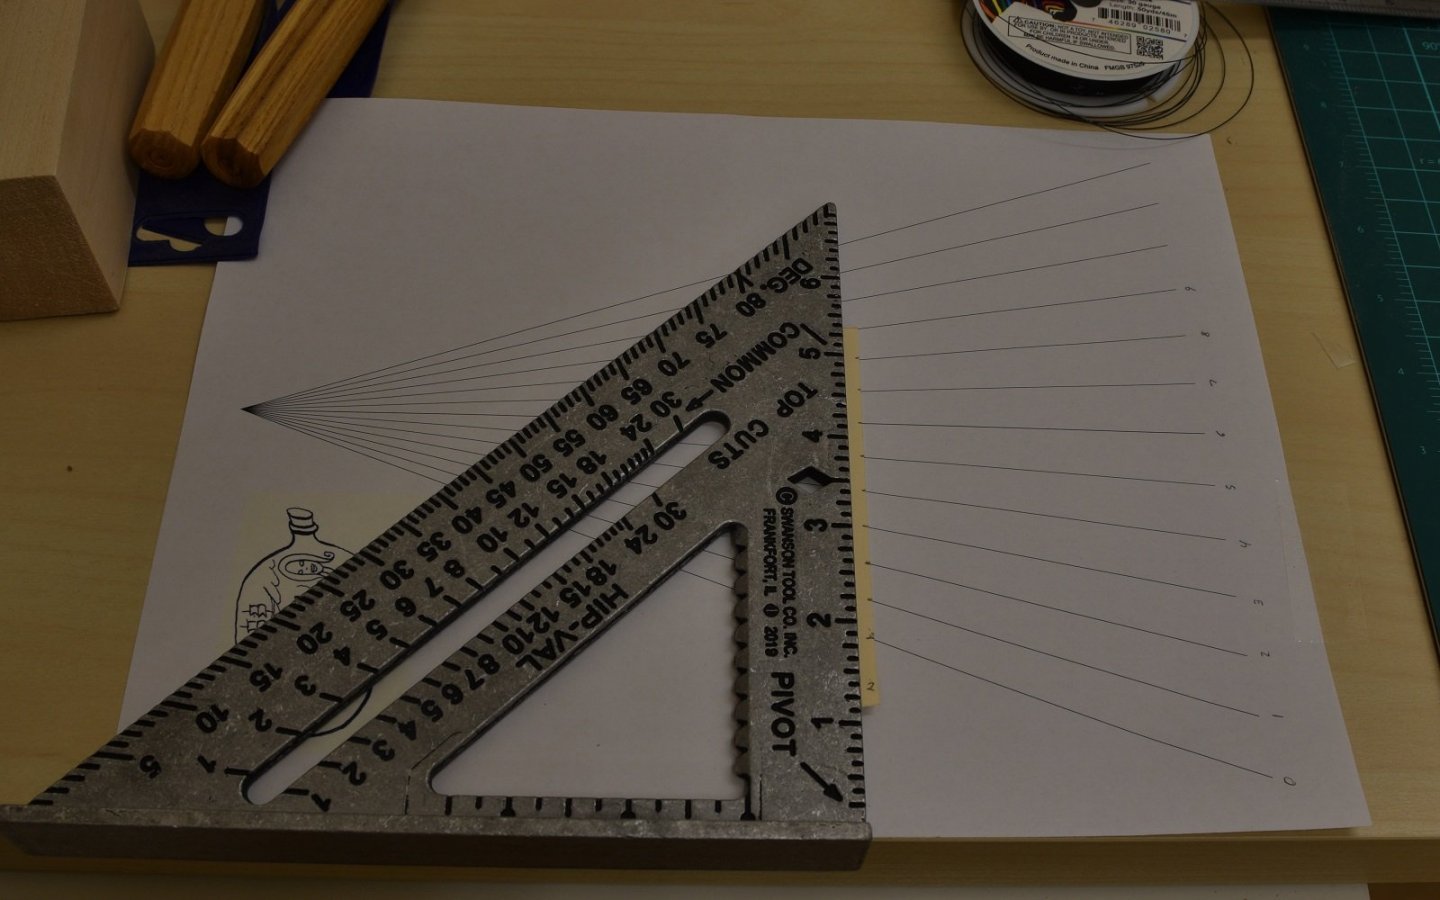
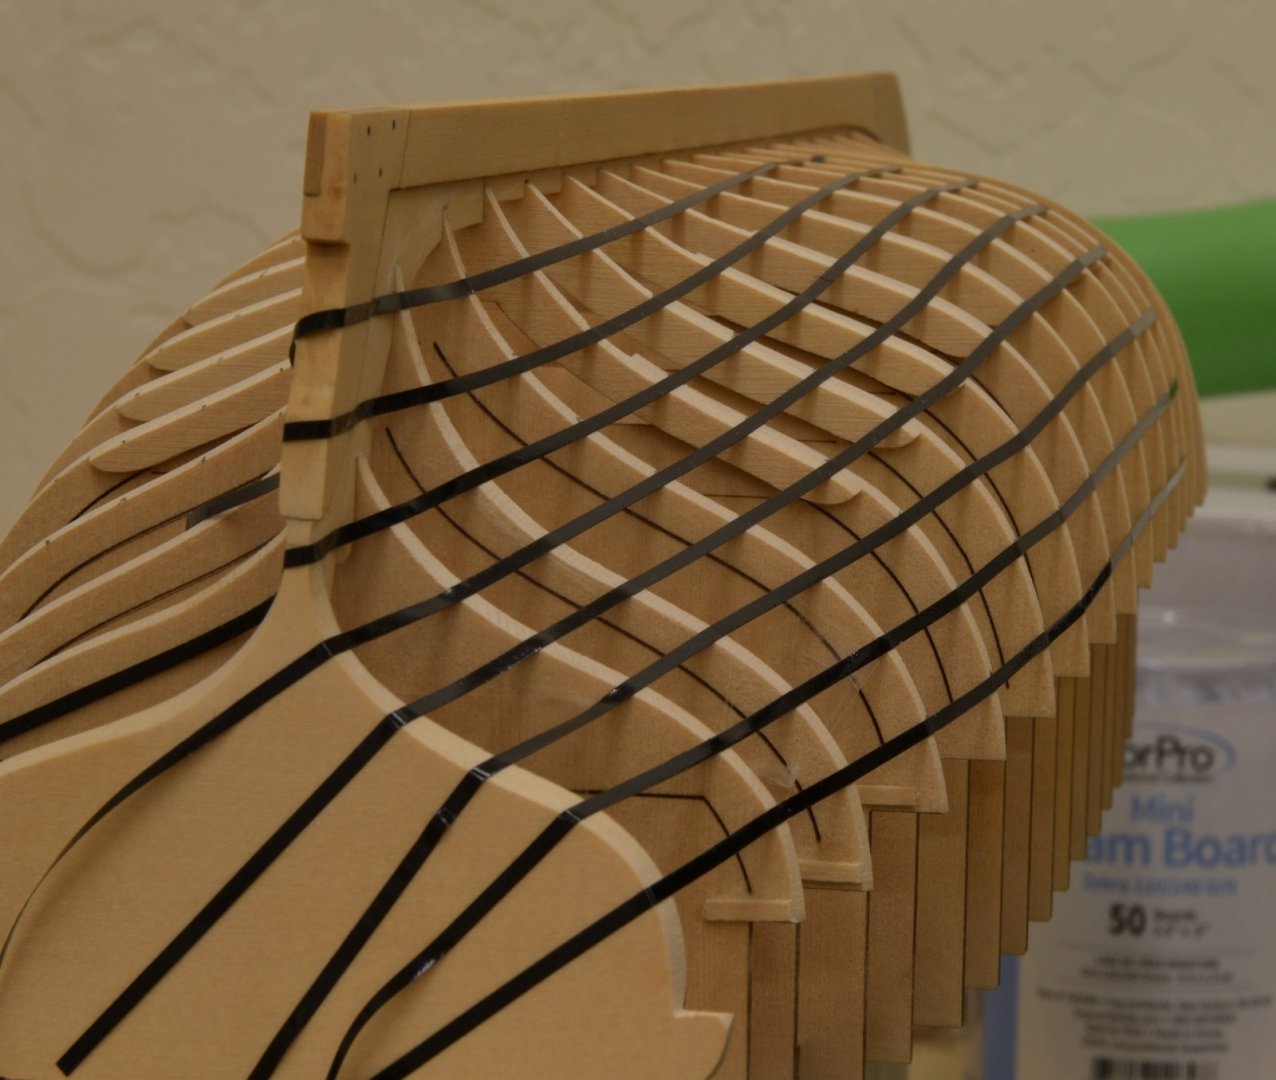
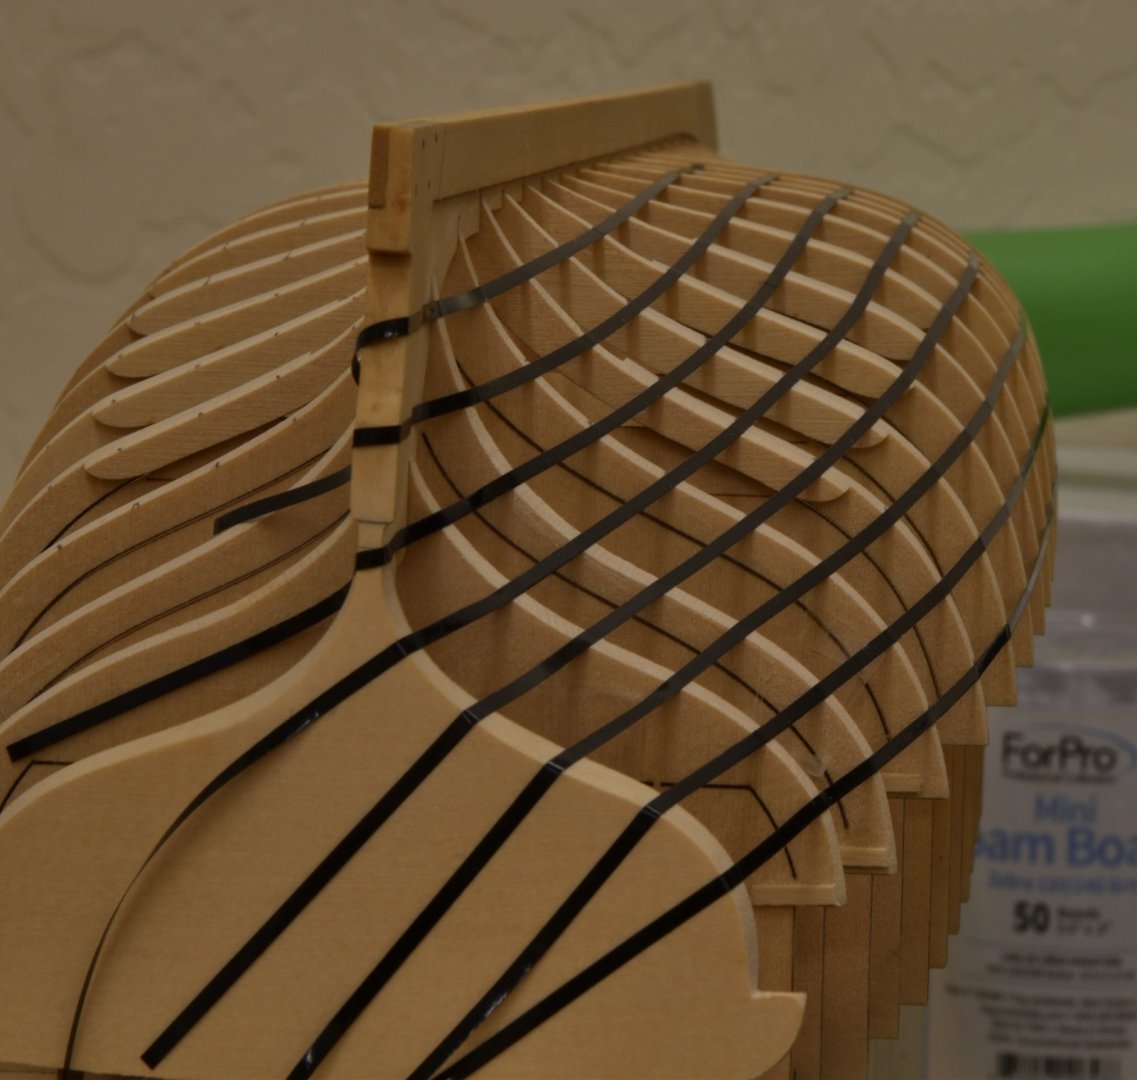
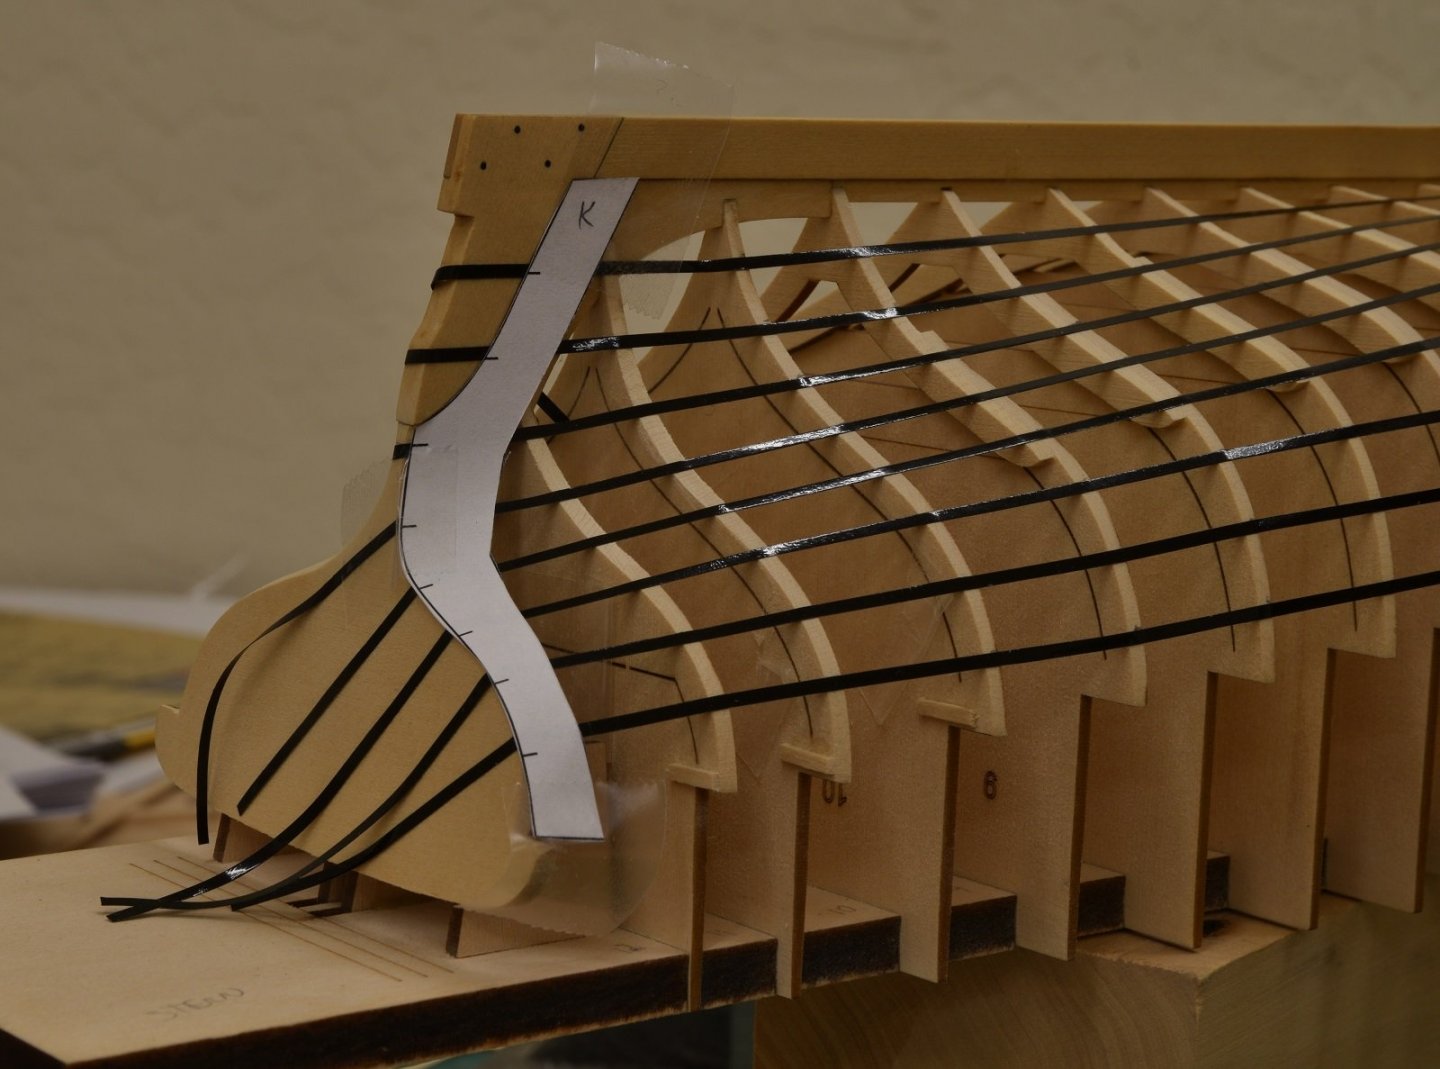
Not going to put in much text on this update, because nothing here is new or different than what everyone else has shown in these group builds. I faired the other side of the hull but didn't take any pictures, because it just looks like the side I already did! Then I use tick strips and the planking fan to transfer marks to the frames, and then I began the lining out process. I missed the marks on the template on most of my runs, but not too terribly badly, and only had to make minor adjustments on one of the marked frames to get the curve to run smoother. Finished the back half on one side. Tape being used is pin-stripe tape. It works, but doesn't stick to the wood very well so easy to have it come loose. Got the last two pictures out of order. The picture above the one with the template is the final adjusted lines I believe.


-
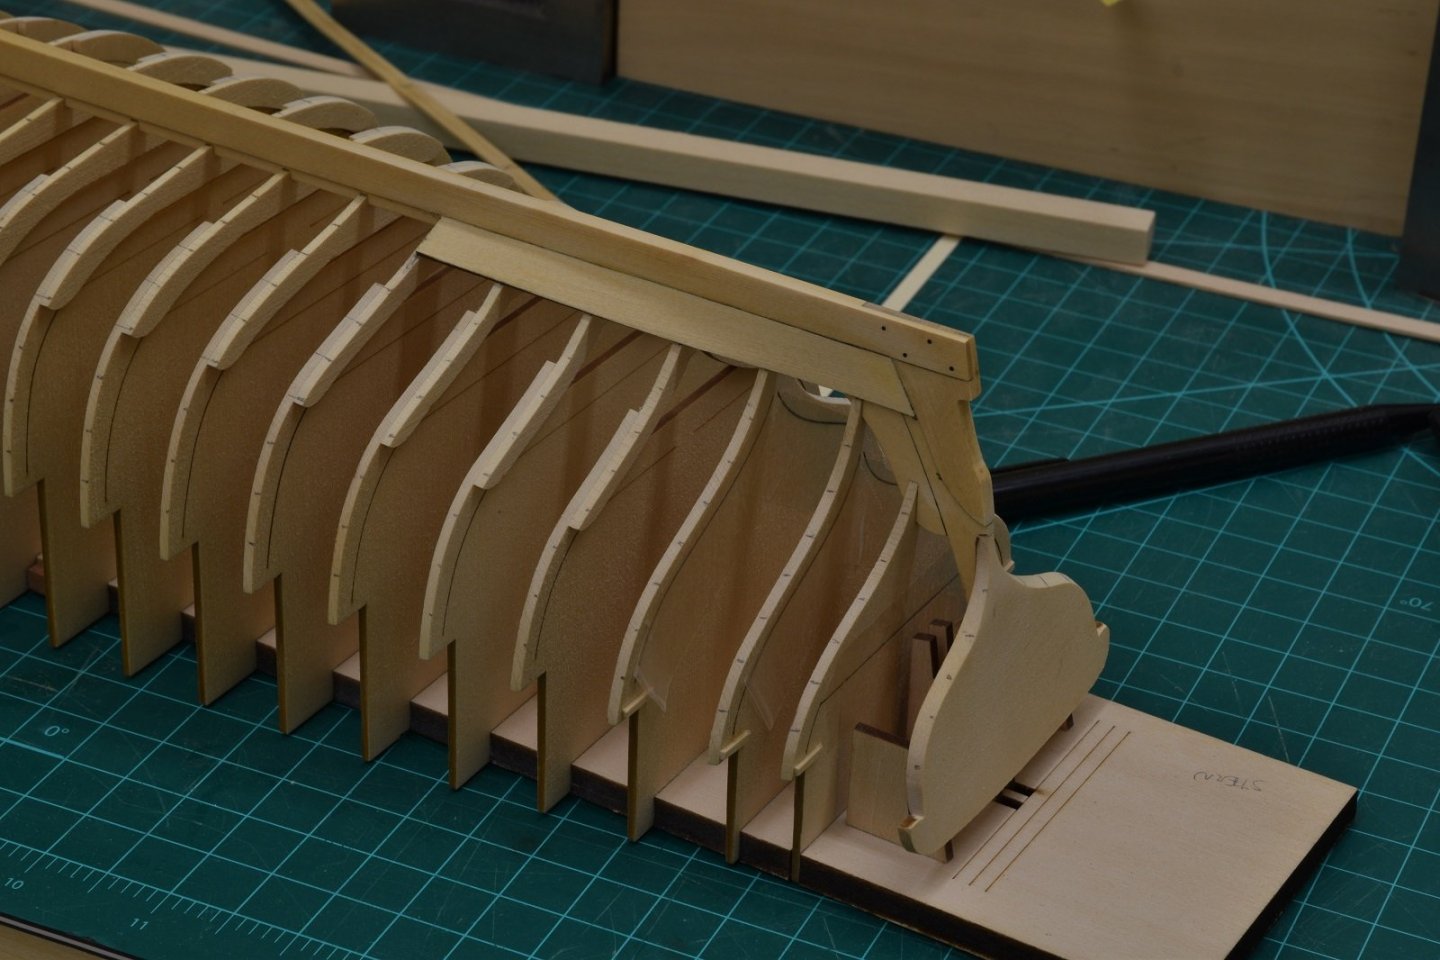
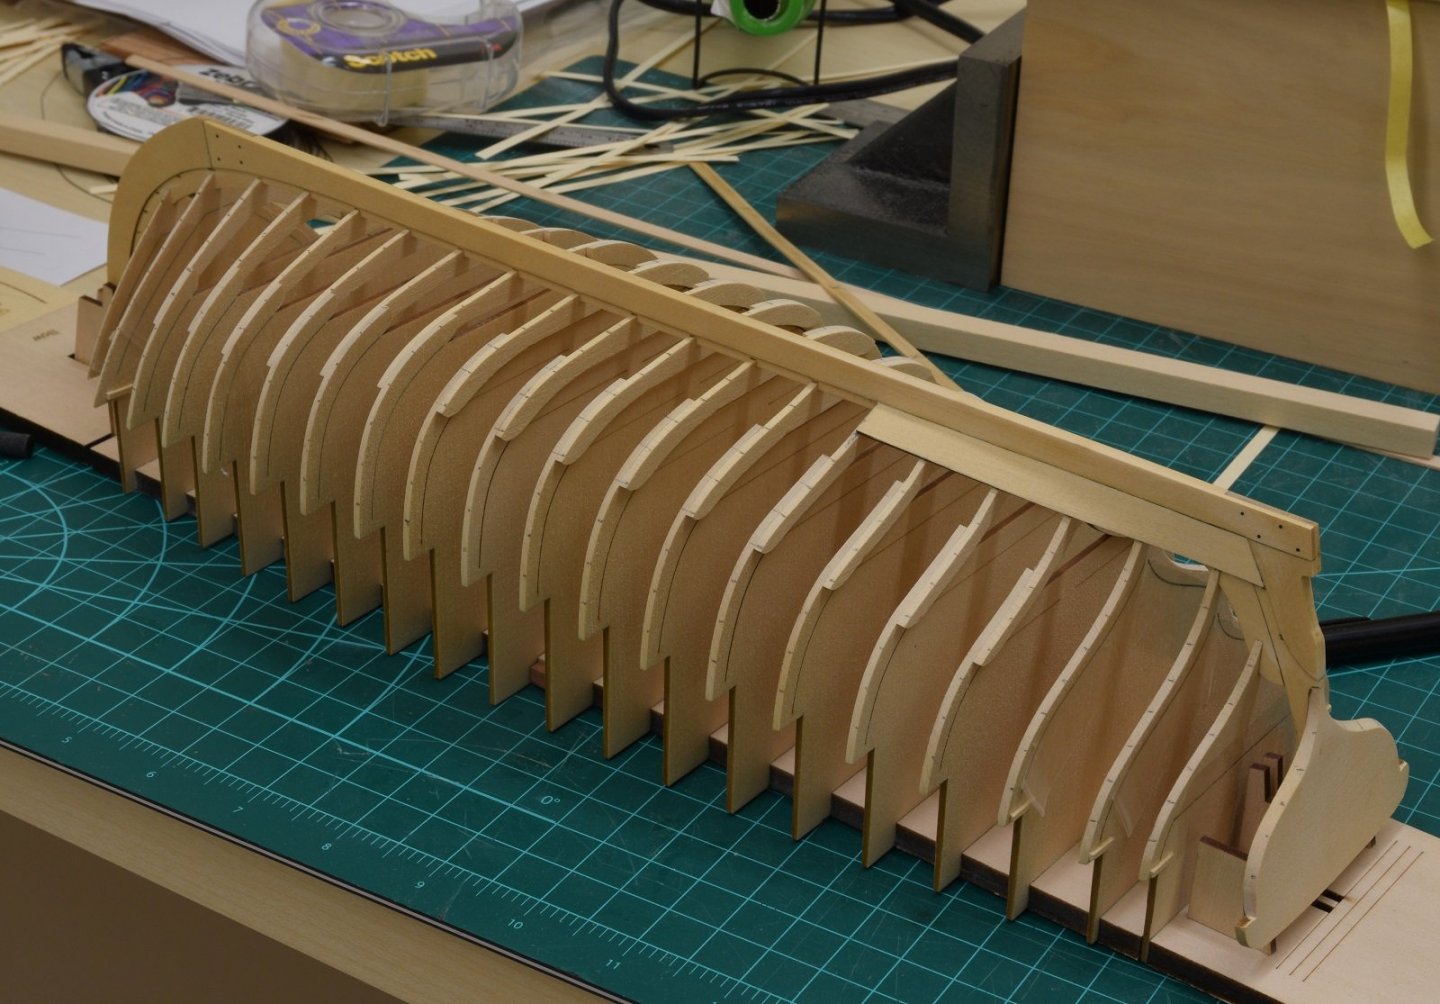
I'm sure everyone has different techniques, I was just winging it. It was easier on my model because the keel wood is much harder than the false keel, so I didn't need to worry much about going past it. For you, since you will be cutting into the same piece, you first want to make what is called a 'stop cut', which is simply a vertical cut into the wood, along the line of the edge of the keel. Then you will use a very sharp chisel or hobby knife and take off very thin slices of wood working into the stop-cut (which functions to 'stop your cut'). Don't try to make the stop-cut full depth the first time, work in small increments. I used a combination of a chisel (or chisels) a small X-acto knife (used the curved blades for this) and sandpaper. If you have a good small V chisel or gouge you might start by cutting the rabbet along the bottom where you don't need to worry about making the shallow angle, and then work on the ends. Edit: Use scrap wood from the parts sheet the keel or bulkheads came out of to practice!
-
It's really hard to show rabbet work in photo's, but hopefully this will better show what I'm talking about. In the above photo, my model has a different wood for a keel, but the rest is the same. The bearding line is the pencil line you see which pretty much follows the bottom of the bulkheads. You will have to define the actual line of the keel for your model based upon the plan drawings (I would transfer that line to the false keel to work from). In the photo, the rabbet is at the depth of both layers of planking combined where it touches the keel, but makes a shallow transition up to the bearding line at the bottom of the bulkheads so that when the planks are placed there is no hard transition, they just bend smoothly along the angle until the butt-ends hit the keel (or the edge of the planks for the bottom strake).