GuntherMT
-
Posts
2,213 -
Joined
-
Last visited
Content Type
Profiles
Forums
Gallery
Events
Everything posted by GuntherMT
-
No reason you can't 'finish' them, but my suggestion is to finish them (and all the other ropes) in a way that allows you to adjust them later if you really decide you need to. All of my rigging was 'fixed' by using the actual methods of tying off to a cleat, and then soaking (using a paintbrush) the rope around the cleat with a 50/50 mixture of white glue and water. When it dries it's completely invisible and the entire mass of rope (including a coil if you have one) will be 'glued' in place, but if you ever need to adjust it, all you have to do is add some water and wait a few minutes and suddenly the rope is free to adjust however you want. My entire rigging is secured this way, and it's been 5 years now and not a single rope has slipped/changed and there is no visible evidence of the water/glue mixture. I forget if you are using Syren rope for your model like I did, but if you are, then this method worked really well for me. No idea if it would work on that nylon rope provided in the kit.
- 164 replies
-
- 3
-

-
- first build
- model shipways
- (and 2 more)
-
Do yourself a huge favor and read through all of the rigging parts of the practicum entirely, at least a couple of times and then try to picture in your head how it will all go together, because I remember that he got sloppy (for lack of a better term) after the rigging started and some things were in an order that wouldn't work at all in practice, or would certainly make things a lot harder. Couple things I remember specifically is the mast construction where the metal bit that holds the topmast on gets placed too early and you are then unable to actually put the topmast in from the top - I had to get mine in from the bottom which wouldn't have worked if I had done it as late in the steps as I think he says. Also go through and look for all the little rigging bits that are anchored into the mast - especially things like eyebolts, and do those early, instead of when you discover you need to add one very late in the rigging process when there is a bunch of stuff in the way. Don't ask me how I know this... lol.. There is a lot of good practical advice in the rigging part of the practicum, but my memory says that you need to re-order a fair number of steps to actually get it done without a lot of pain. My guess is that he did all the rigging and then went back and wrote it down, but not in the proper order, but that's just my guess. He admitted openly on his old forums years ago that he hates rigging so rushes through it and I think that's reflected in his writing of this part.
- 164 replies
-
- 3
-
-
- first build
- model shipways
- (and 2 more)
-
I have their Indian Girl canoe kit, but have no idea how close that manual would be to the Peterboro canoe. I could scan and email that manual to you if you strike out with Midwest or any of the guys who built the actual correct kit.
-
Life seems to take us in unexpected directions sometimes, and I've just been busy and distracted with other things. I've started three shipbuilding projects but none of them have progressed very far and all of them have been untouched for quite a while now. Starting to get the itch to get back in the workshop, but we'll just have to see how it goes! All the projects and the workshop are intact, it's more a matter of time and motivation! Take care.
- 231 replies
-
- 1
-
-
- model shipways
- armed virginia sloop
- (and 1 more)
-
I'm a bit late to your finishing party, but wanted to say fantastic job @captain_hook, she is beautiful and your presentation with that slipway is incredible. Going to be hard for the next guy to top this one! Congratulations on finishing and good luck with your next endeavor.
- 231 replies
-
- 2
-
-
- model shipways
- armed virginia sloop
- (and 1 more)
-
Congratulations on the new addition to the family Mike, and nice continuing work on the ship too!
- 969 replies
-
- 3
-
-
- hahn
- oliver cromwell
- (and 1 more)
-
I've had the exact same experience with ME. No response to my issue and then a few days later a package shows up on the front doorstep with replacement parts. If they could close up their communications gap issue, they would probably never get a complaint of any kind!
-
On whether stuff goes inside or outside of the backstays, I found that if I just checked clearances, everything fell into place. If running it on one side would cause the ropes to interfere with each other, I'd just put it on the other side where it went without any interference. I'm not sure of what specific lines you are working on, but the simple 'common sense' system based on how stuff fit is how I handled it. Your build is coming along beautifully. Sort of wish I'd thought to use hooks like you are using on my build now!
- 231 replies
-
- 2
-
-
- model shipways
- armed virginia sloop
- (and 1 more)
-
Looks pretty straight to me! My method of making sure I could keep the mast straight was that I simply didn't glue it at all. The shrouds and rigging hold it in place, and that way I could adjust it if needed after the shrouds were on before making all the deadeye adjustments mostly permanent (since the rigging is only secured with white glue, a bit of water would loosen them up for adjustment if I really needed to).
- 231 replies
-
- 3
-
-
- model shipways
- armed virginia sloop
- (and 1 more)
-
That's a smoking deal, this kit is $1100 at Ages of Sail! Good luck in finding someone who will give it a good home Rick.
- 10 replies
-
- 1
-
-
- reale de france
- kit
- (and 2 more)
-
Looks to me like the narrowest strips they have are 1/4" wide, which is pretty large for most of the things we use narrow brass strips for. Still, another source for brass stuff at least!
-
Mine was started, but then life has gotten in the way and I haven't done anything in the model room for months. Hope to get back in there soon, but no promises. The start of the longboat was very good though, as seen in my now dormant log.
-
Good to see you are out of the hospital and back home Rich. Take care and I hope you heal up well!
- 1,135 replies
-
- 1
-
-
- model shipways
- syren
- (and 2 more)
-
Some wonderful milling work as always Frank. Thanks for the detailed and informative record of this build.
-
Beautiful model Frank. Thanks for sharing your journey with all of us, and I'm sure you'll nail the dredges to finish her off!
-
Rich - those deadeyes are a kit. Go to the website and find the instructions to assemble them, there are three pieces to each deadeye and when complete they will look great but they do require a little bit of assembly and finish work. You should not be removing the individual bits from the parts sheet until three sheets are glued together.
- 1,135 replies
-
- 1
-
-
- model shipways
- syren
- (and 2 more)
-
Love your scratch stack and the little details. This continues to be a wonderful build.
- 164 replies
-
- 2
-
-
- first build
- model shipways
- (and 2 more)
-
Very good to see you back Frank, and I'm extremely happy that things are turning out well for you. Hope to see her in person one of these days!
-
Looking great. I like your work on the winch and the butte, very nice. Not sure about the cat-head location, but that's probably just because I'm so used to seeing it in a different location on mine! Enjoying watching your progress, thanks for sharing.
- 231 replies
-
- 1
-
-
- model shipways
- armed virginia sloop
- (and 1 more)
-
Another possibility is to use the improvised mill to square off the existing attempt, leaving not enough material, but you just use some of the extra sheet wood in the kit to 'shim' those now squared up areas and then sand down as needed for a good fit. Except looking right at the base of the keel from the bottom, no way to see that it is more pieces of wood than it should be. I almost had to do mine that way.
-
Good luck on the move Rich, hope everything goes well and you are happy in the new place.
- 1,135 replies
-
- 4
-
-
- model shipways
- syren
- (and 2 more)
-
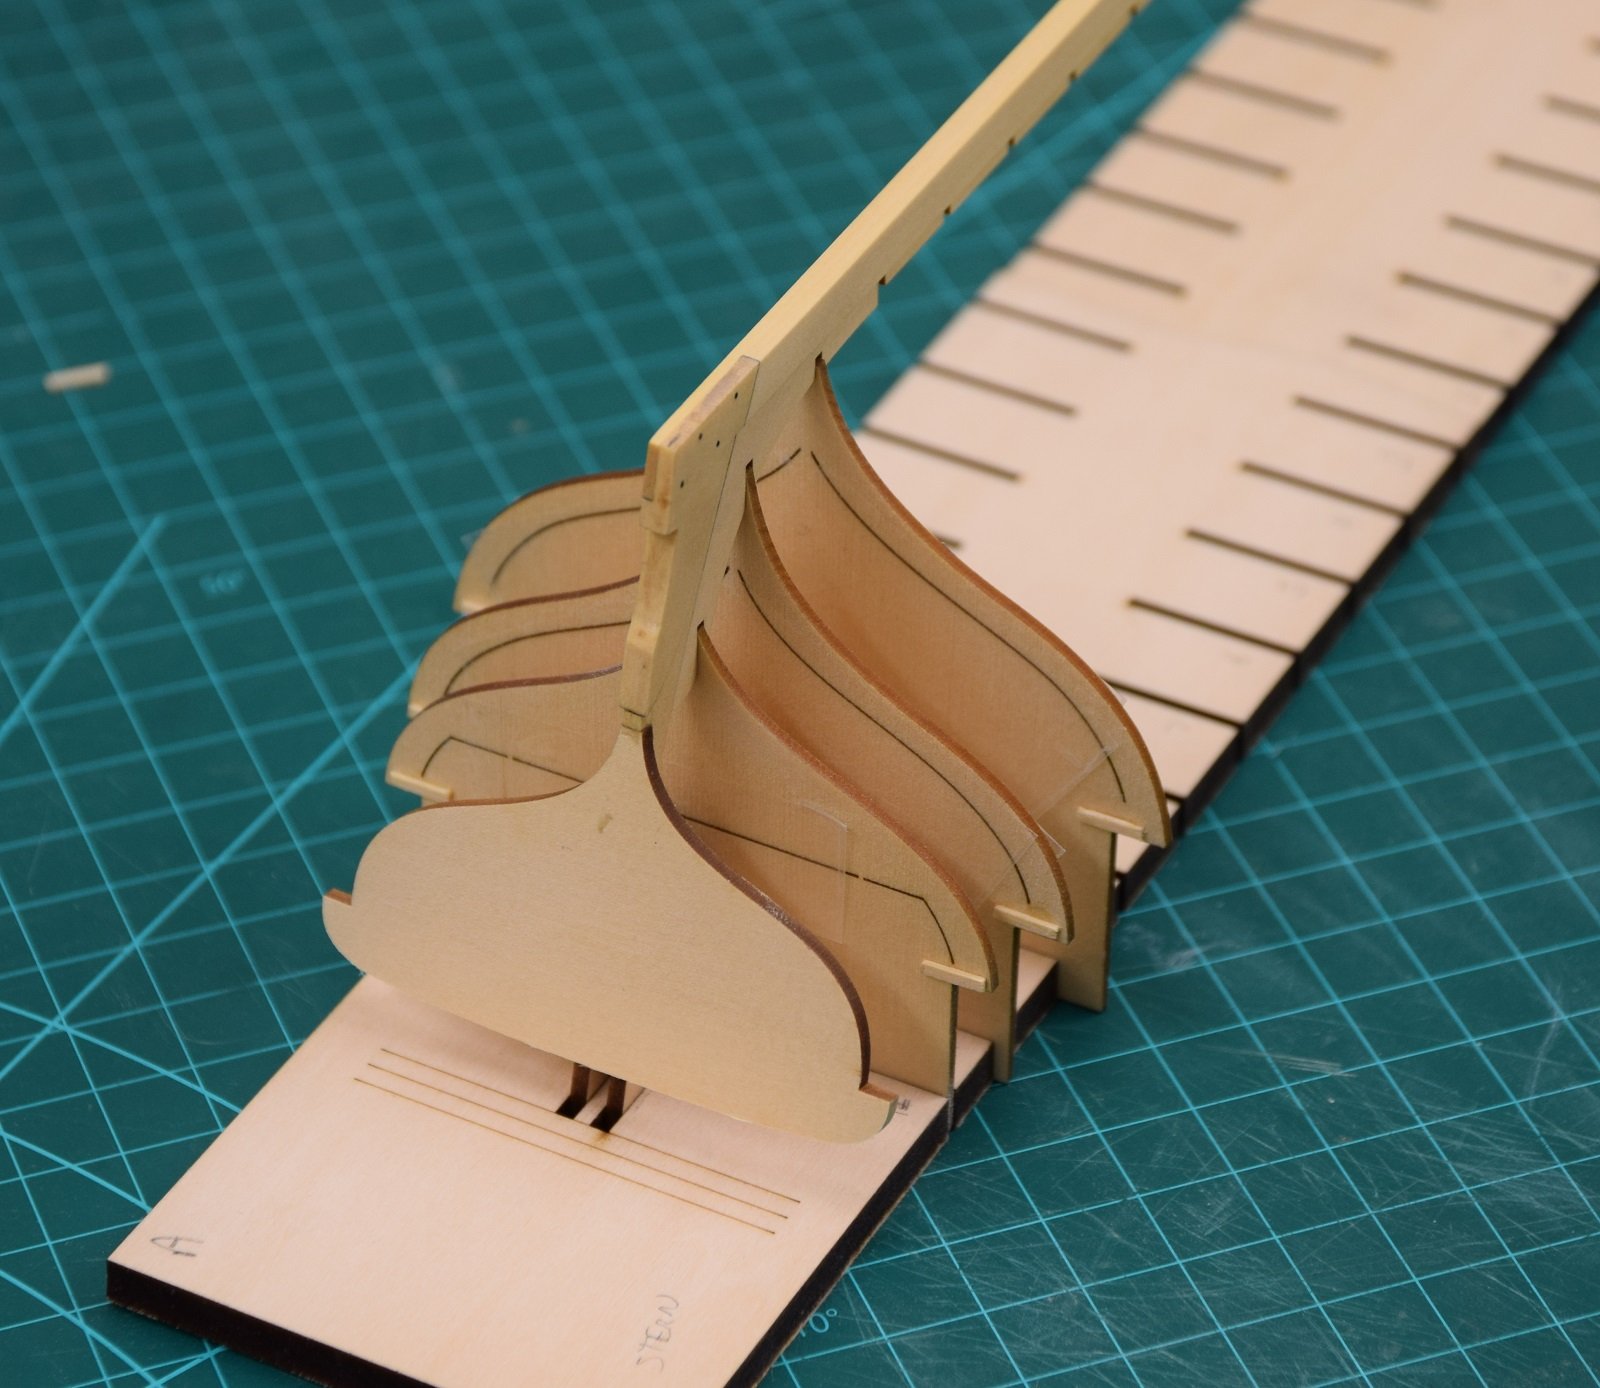
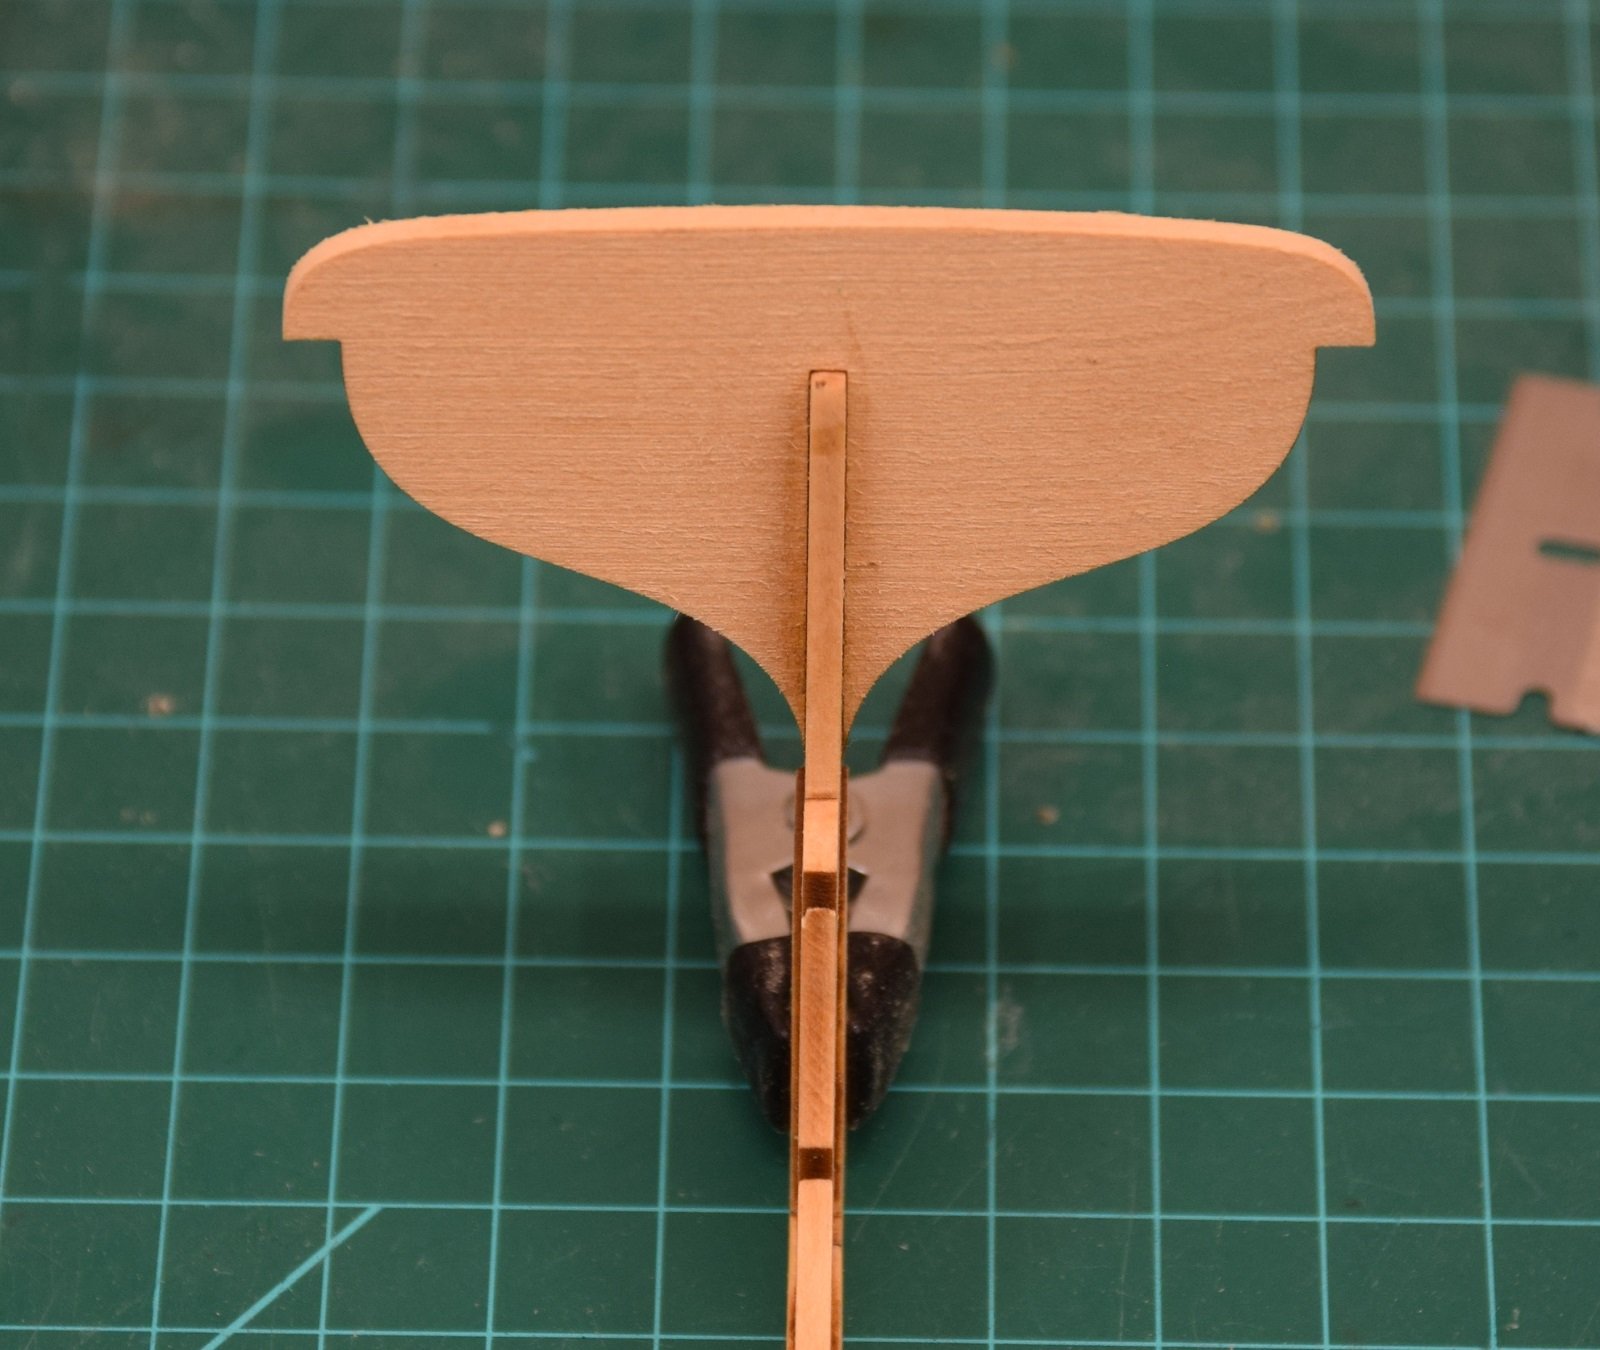
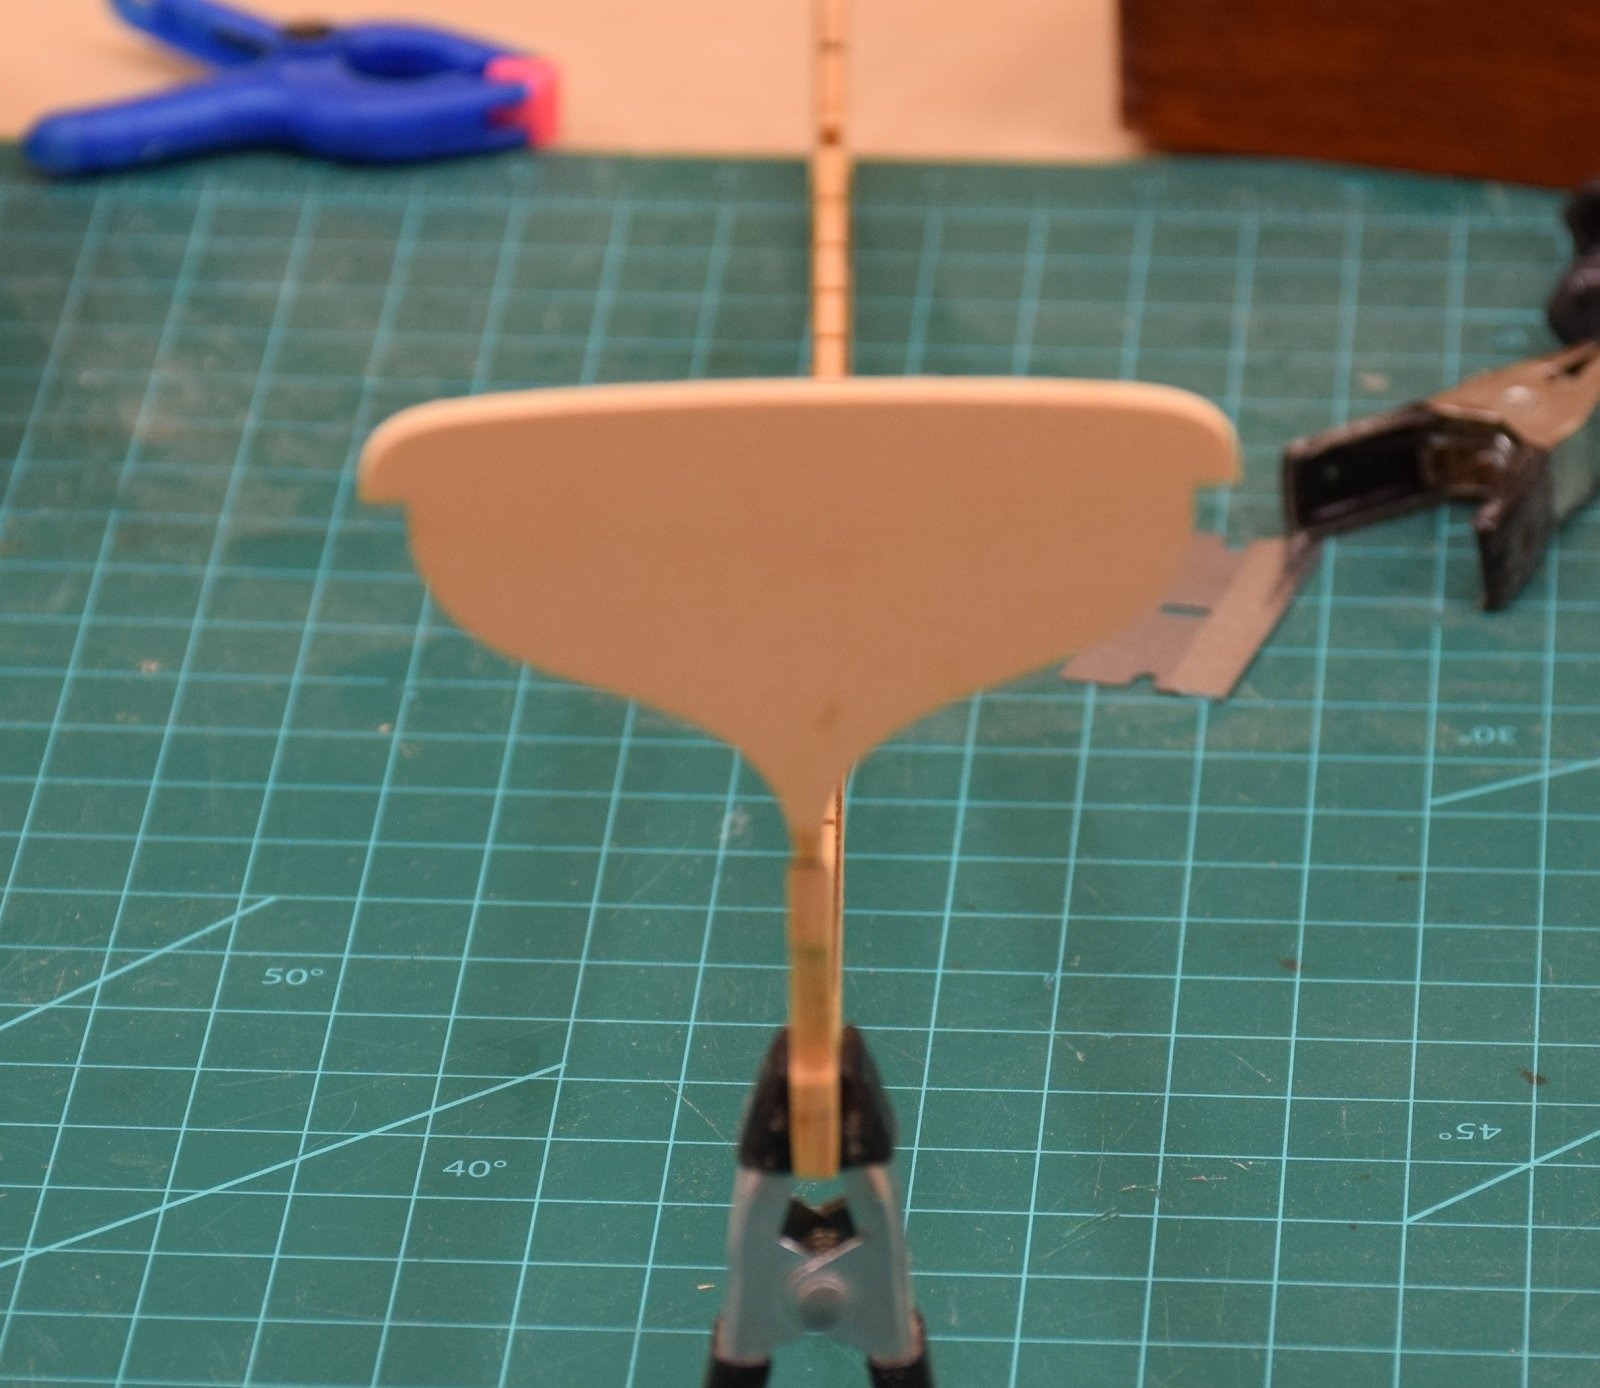
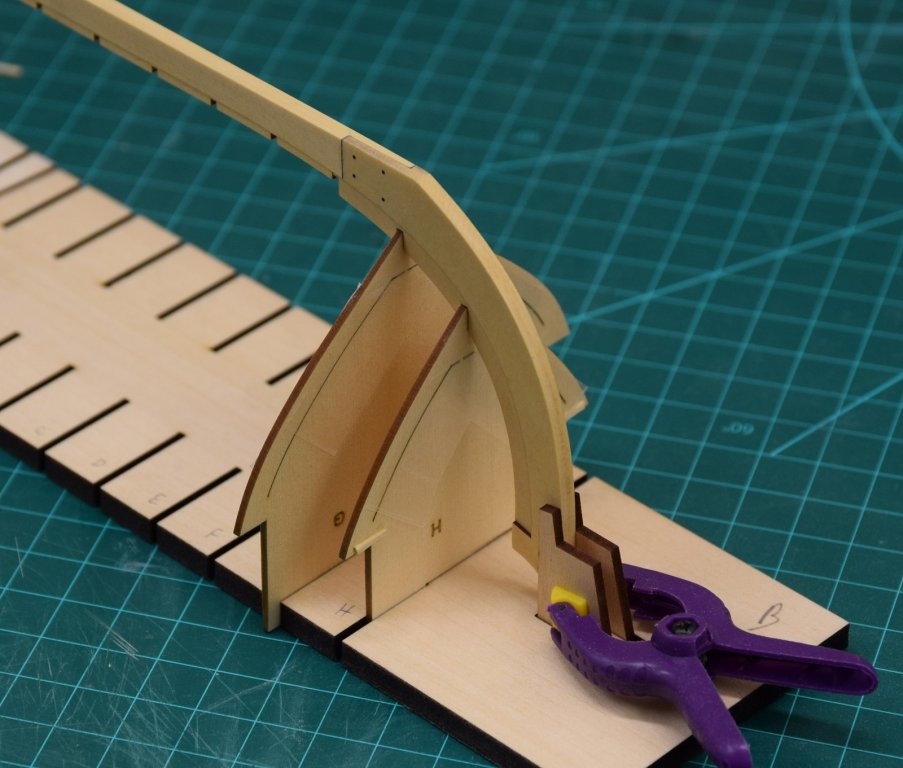
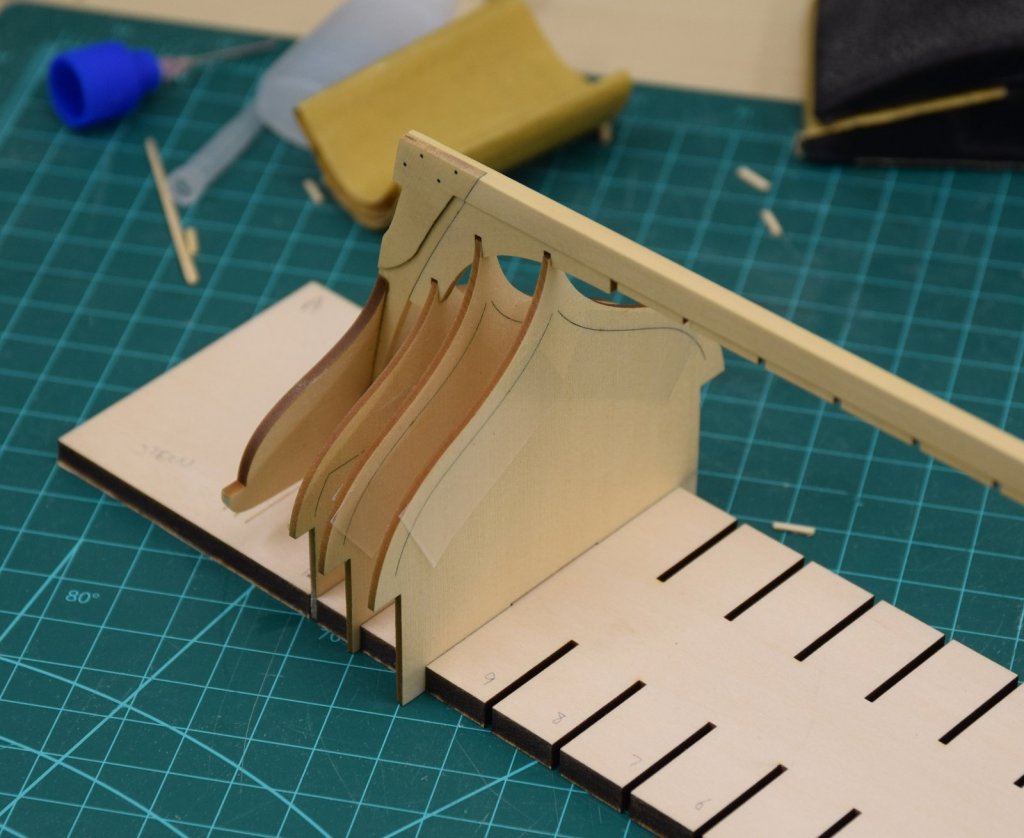
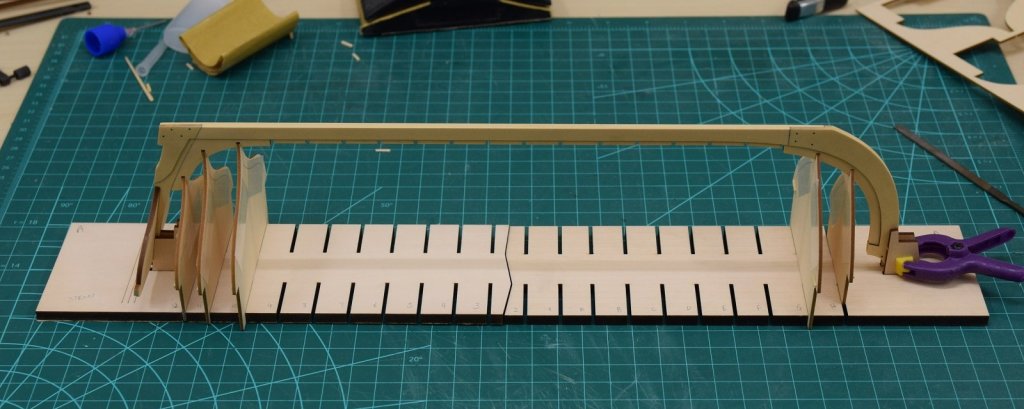
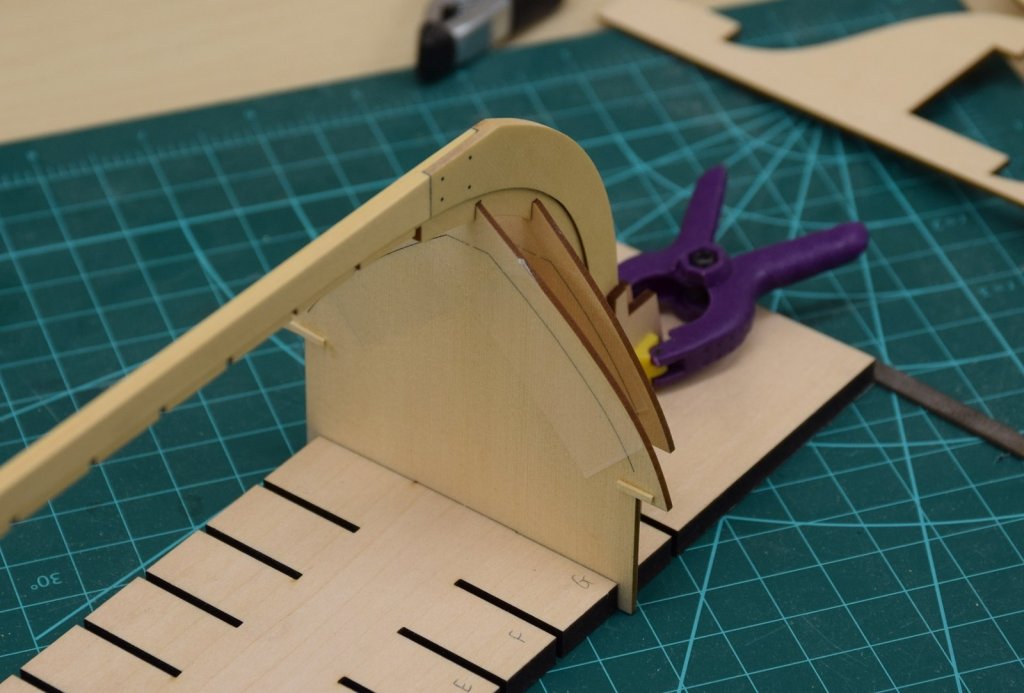
Le' boat continues, albeit slowly as I've been out of the country a bit, and very busy, and then sick. Good times. After finishing the keel, the next step is to attach the transom. There is a lovely laser-cut guide making it very easy to get vertical, but of course it also needs to be at a 90 degree angle to the keel. I think I got it pretty close. After the transom the next step is the frames. This boat has two types of frames (as everyone knows by this point, but typing up the log as if it's a stand alone thing) single piece and 3 piece. We start with the single piece frames, which are the frames at the the ends, both the bow and the stern. Chuck suggests reinforcing these pieces prior to working with them, by placing tape on both sides, and also gluing a small piece of wood in place at the tops, which will later be covered below the cap rail and between planking layers. I did this, but took no photo's of that process, although it can be seen in the pictures if you squint just right. The reinforcement is suggested, because these frames are only 1/32" thick, and will need to be faired later before planking. After reinforcement the frames are removed from the parts sheet, and then test fit into the proper slots in the building board. They are purposely cut just slightly oversized as they need to fit snugly. The process here is simply sand slightly, test fit, sand slightly, test fit.. until they fit snugly, but not so tight that they can't be adjusted. The same process is then used to make the frame pieces fit snugly into the proper slots in the keel. Once all the pieces are test fit individually, they are then all put into the building board, and test fit together with the keel as a single unit. Nothing is glued (including the build board which will remain in 2 parts for a while) in these photo's, this is a dry fit. Next up I start assembling the 3-piece frames, which will then need to be fit into the building board and keel in the same way.


-
Looking great! Wish I could find more time to get into the shop and continue work on mine. It's good to have a busy life, but sort of wish it was less busy at times.
- 152 replies
-
- 1
-
-
- medway longboat
- Syren Ship Model Company
- (and 1 more)