HOLIDAY DONATION DRIVE - SUPPORT MSW - DO YOUR PART TO KEEP THIS GREAT FORUM GOING! (Only 69 donations so far out of 49,000 members - Can we at least get 100? C'mon guys!)
×


GuntherMT
-
Posts
2,213 -
Joined
-
Last visited
Content Type
Profiles
Forums
Gallery
Events
Everything posted by GuntherMT
-
Hi Don, I have never done any resin models, but just wanted to let you know that I am enjoying your posts on this boat, and look forward to seeing it progress.
-
You can upload at least 1200 pixels on the long side, as long as they are under 2mb per picture (and at 1200x800 they'll only be about 250-400k each). That's the only size I ever post in my log. I just love seeing nice pictures of everyone's work, and my eyes are getting too old.
-
And, the starboard side is done. I was hoping to finish both sides this weekend, but I had a fair number of other chores to do around the house, and I discovered that I was only able to tie off about 6 lines before feeling the need to get up and do something else for a bit, so it took a little time. Tomorrow night I'll put lines on the guide for the other side and start the next half. Woo...
- 831 replies
-
- 26
-

-
- Armed Virginia Sloop
- Model Shipways
- (and 1 more)
-
Looks good. Just wish your pictures were bigger!
-
Piet, My MF-70 was purchased used, so I don't have a box for it. The mill itself does not have any country of origin labeling. However, the back page of the instruction booklet that I got along with the mill says: Made in Luxemburg Distributed in the U. S. by Prox-Tech, Inc. My DB-250 lathe, which was purchased new near the end of last year, has the same Made in Luxemburg label on both the box and the instruction booklet.
-
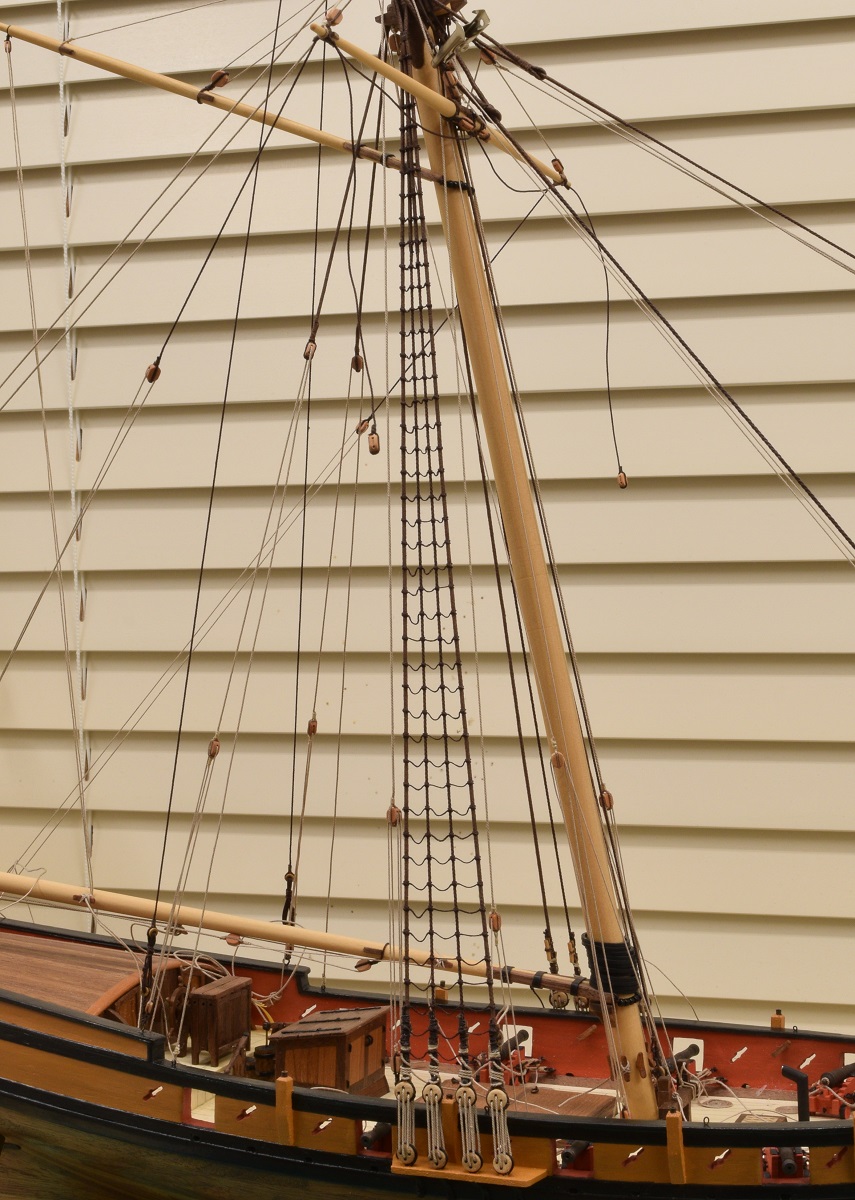
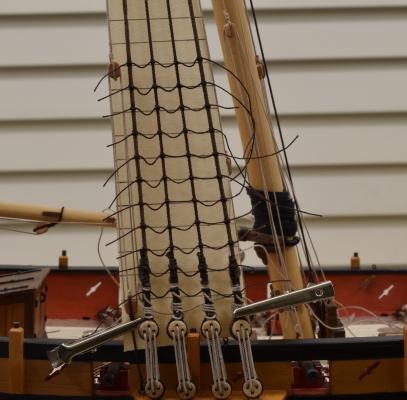
Addendum - After looking at all the pictures I took while I was in San Diego from all the ships that had ratlines, I chose to use the dark brown rope to make the ratlines, even though most of the ships there had tan rope ratlines. The reason is, that in every single picture other than the super close-up shots, the ropes look brown/black from any distance at all. They appear to be the same color as the standing rigging unless you are right up on top of them, for whatever reason. If I could go back in time a few weeks I would probably have ordered the light brown rope to do the ratlines with, because I think that would be perfect, but since I don't have any of that rope in the right size, dark brown is what I'm going to use. I think the tan just stands out too much, and as you move away from the model it doesn't blend in like the tan lines on the real ships do.
- 831 replies
-
- 7
-
-
- Armed Virginia Sloop
- Model Shipways
- (and 1 more)
-
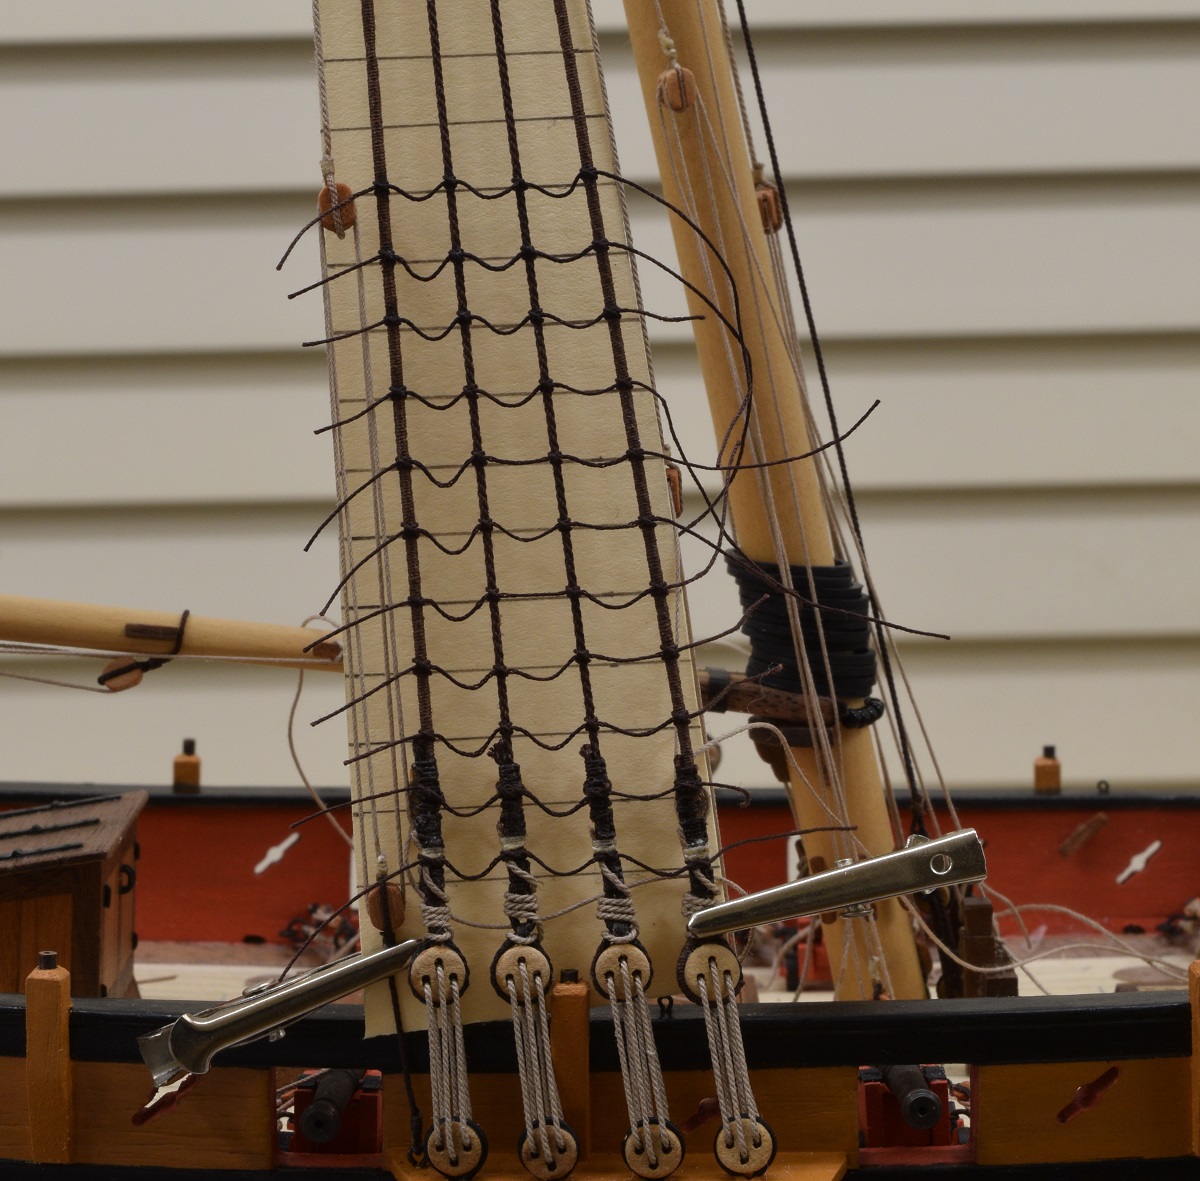
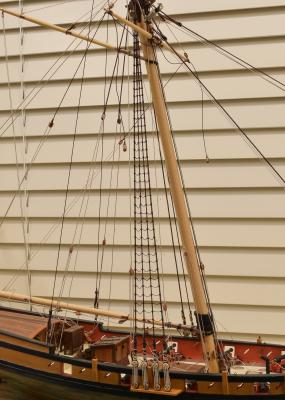
Following the lead of many other build logs, I made a simple guide out of a manila folder that I clipped in behind the shrouds to help me space and align the ratlines. Then, let the clove-hitching begin! If anyone makes comments about how inconsistent my ratlines are, I'm just going to show them this picture, from a real ship, that I took while I was on my San Diego trip. Maybe I'll just mount this picture on the base!


- 831 replies
-
- 23
-
-
- Armed Virginia Sloop
- Model Shipways
- (and 1 more)
-
The combination blessing & curse of macro photography is making itself known to you! She's really coming together Greg, the overall shots after the funnels were added are awesome, and then after the vents, even more so!
-
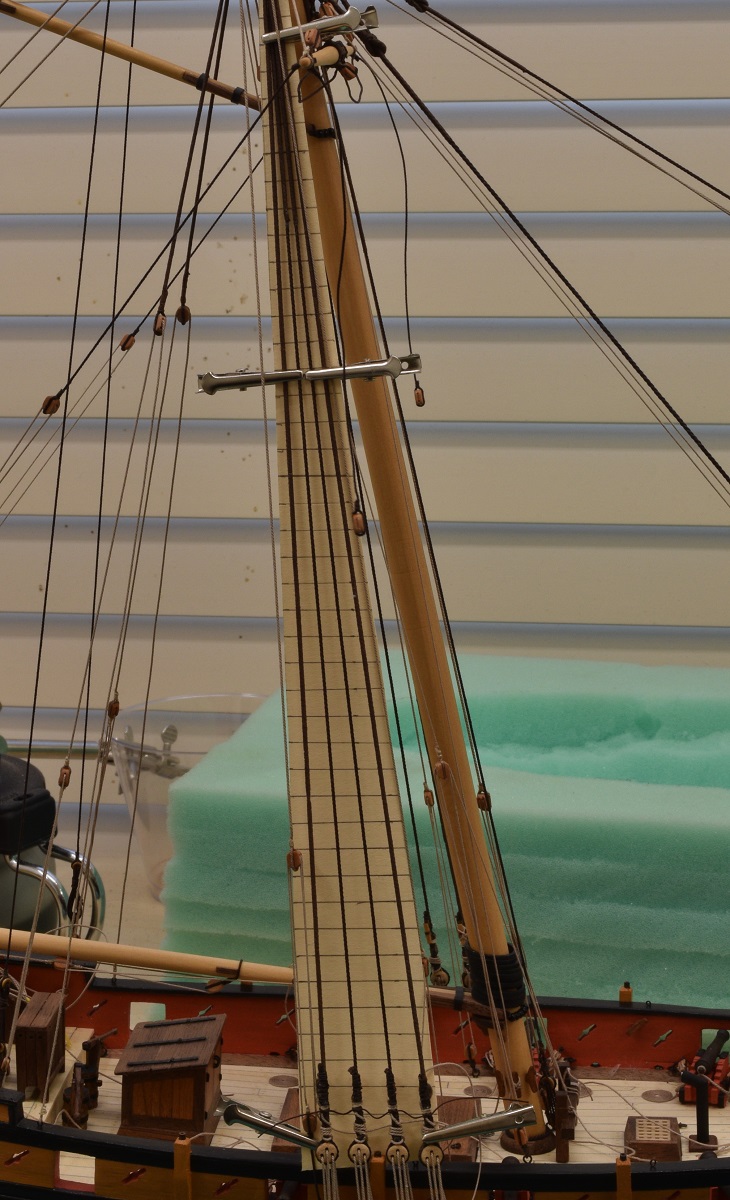
Tonight I got the spreader yard lifts and aft braces rigged. At this point it's pretty obvious that stuff is going to start getting in the way, so I'm going to have to break down and do the ratlines next, so I guess that's the project for this weekend.
- 831 replies
-
- 7
-
-
- Armed Virginia Sloop
- Model Shipways
- (and 1 more)
-
Fantastic rigging work Ken. It amazes me that you chose such a complicated build for your first ship, and not only are you doing a masterful job with it, but you are doing it in an incredibly short time frame. I was hanging my first (of only 2) yard on the AVS last night and thinking about how a full ship rig might make me go insane, and then come here and watch you handle it with aplomb, as your very first build. Great stuff.
- 440 replies
-
- 1
-
-
- niagara
- model shipways
- (and 1 more)
-
Thanks all, and welcome aboard Sawdust Dave. Just in time for the home stretch, although I think that home stretch is a good month or more still with all the rigging yet to do, rope coils, anchors, etc. Good to see you around Alistair, and yea, I really love the effect of the serving, I couldn't be happier with how the serving has come out, and the look is great. Even the spreader yard parrel, which probably nobody else will ever notice when looking at the model (other than me), I think is so much better with the serving, even though doing that bit by hand while one end was attached to the yard was a huge pain in my ****. I've also downsized most of the rigging line, using a rigging plan that I found on modelshipbuilder.com. http://modelshipbuilder.com/page.php?188 Many of the blocks are also downsized (especially the cannon tackle) from the kit sizes. Seizing all of my rope terminations has also done a lot for the overall look I think, but that might just be me thinking it does, since I'm the one that's spent so much time seizing little ropes!
- 831 replies
-
- 7
-
-
- Armed Virginia Sloop
- Model Shipways
- (and 1 more)
-
Lessons are part of life Bob. In the end all that matters is that the results make you happy!
- 47 replies
-
- 2
-
-
- carmen
- constructo
- (and 2 more)
-
Yes, I am using Syren rigging line and blocks.
- 831 replies
-
- 5
-
-
- Armed Virginia Sloop
- Model Shipways
- (and 1 more)
-
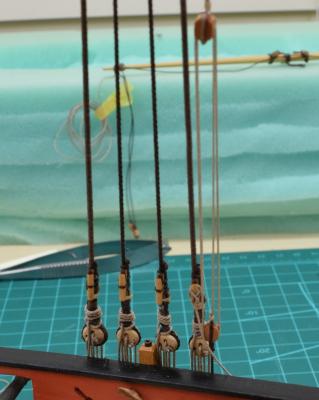
Thanks all. Every time I work on another piece of the rigging in the middle of everything I feel like I'm one twitch or sneeze away from ruining everything. Every time I finish belaying off a line it's like I managed to successfully defuse a bomb (or maybe just a clock, hahaha)*. *Terrible joke/reference to latest stupid news here in the US.

- 831 replies
-
- 9
-
-
- Armed Virginia Sloop
- Model Shipways
- (and 1 more)
-
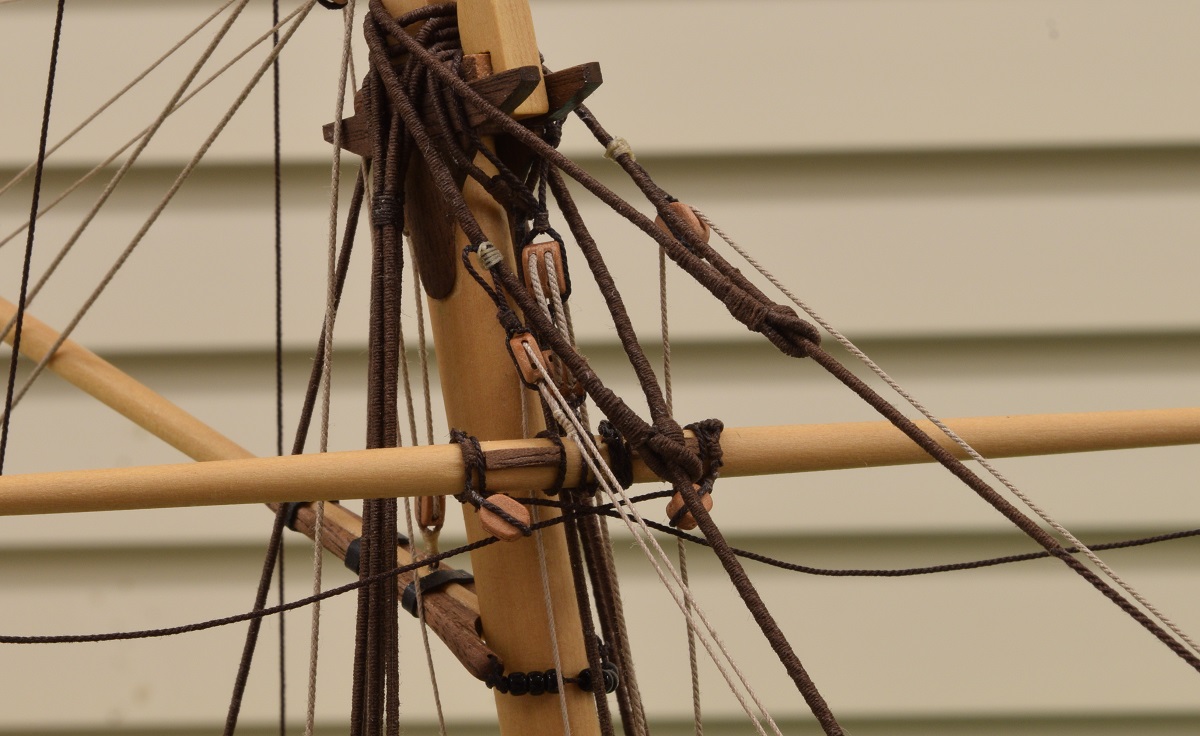
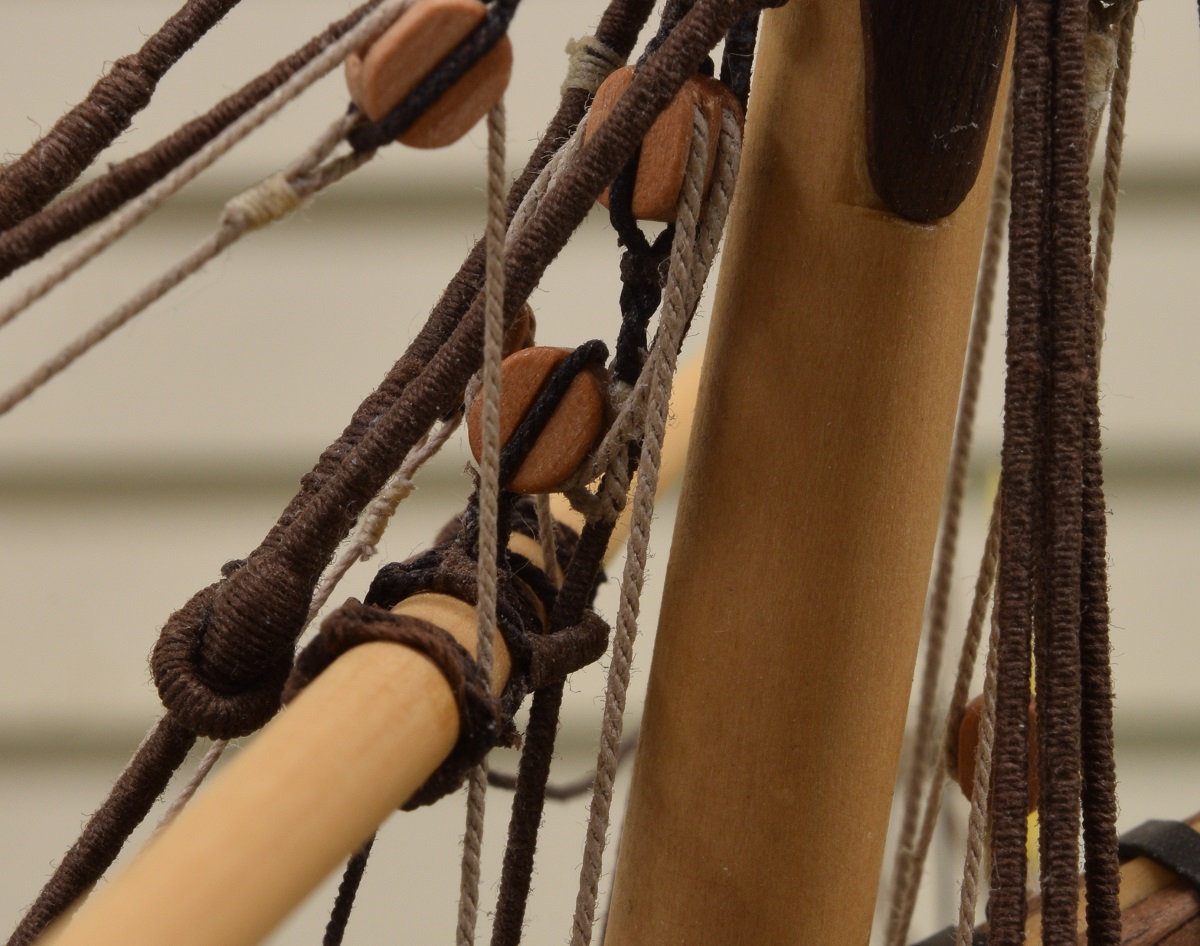
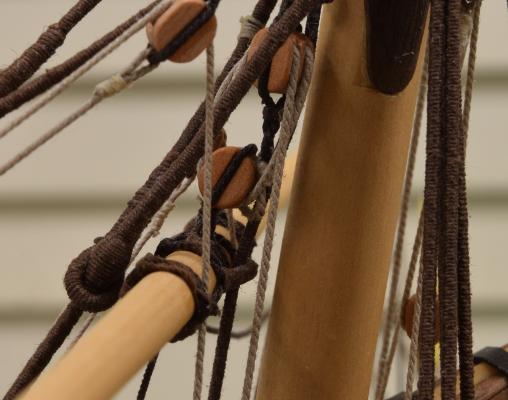
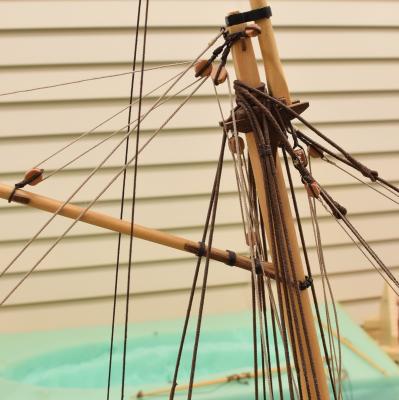
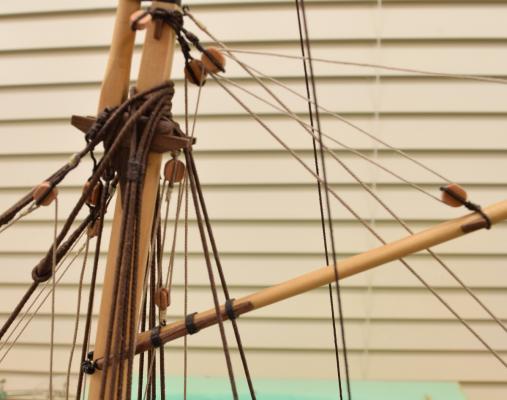
Woop! Jeers tackle. Nothing holding any downward tension yet, so the jeers are sort of loose. Can see the served parrel around the served spreader horse though, now lashed to the yard.


- 831 replies
-
- 25
-
-
- Armed Virginia Sloop
- Model Shipways
- (and 1 more)
-
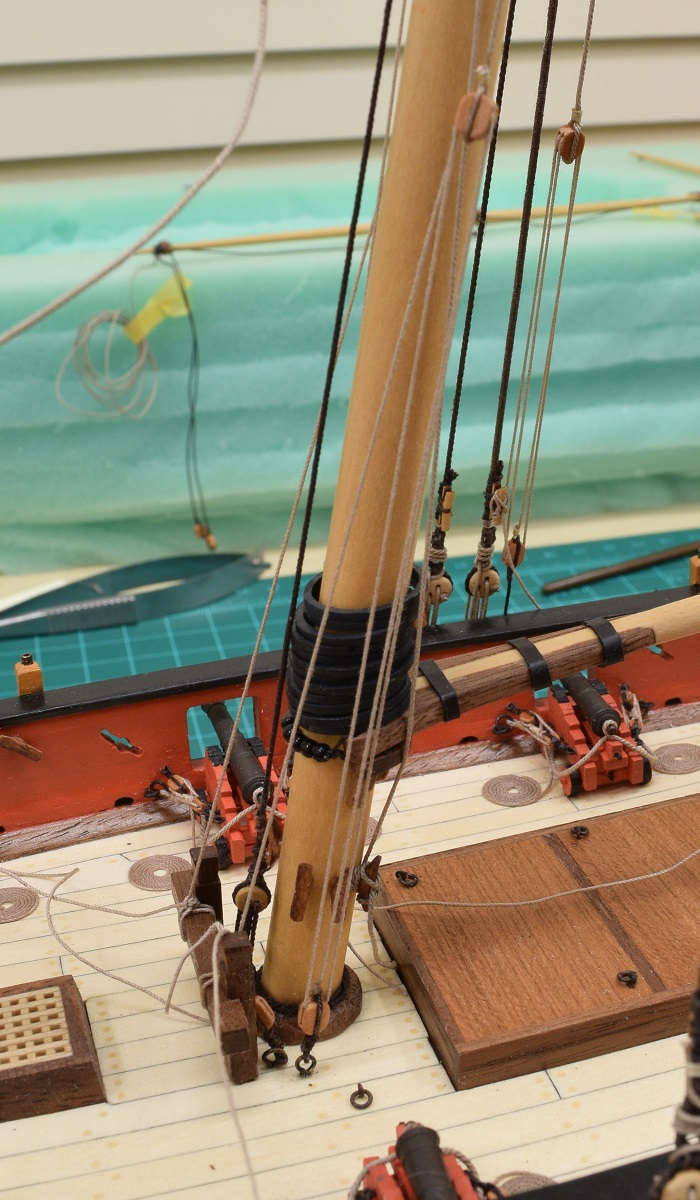
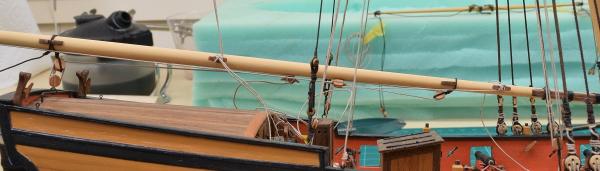
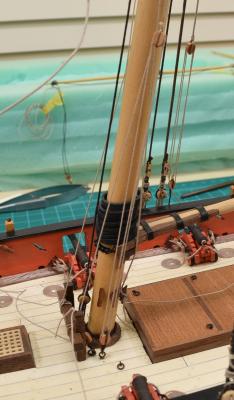
So... many... ropes... I have no idea how people that do full ship rigs, in much smaller scales than this, don't go completely insane. Attached the main outhaul, which just dead-ends at the sheave on the boom since I don't have sails, and the boom lift. Massive mess of ropes and blocks. New to this mess is the boom lift, and the gaff throat halliard. Boom lift tackle. Belaying this off to the cleat on the shroud was.. an interesting experience. Top from the other side with a better view of the gaff throat halliard. Slightly out of focus, sorry about that. Gaff throat halliard tackle and belayed to the Riding Bitt. Cleaning up all the belayed ends, and adding coils is going to be pretty interesting later on.
- 831 replies
-
- 23
-
-
- Armed Virginia Sloop
- Model Shipways
- (and 1 more)
-
Ok, I see what you are saying now. Would it be easier to raise the throat of the gaff, or re-cut the sail? Could you achieve the same effect by taking up some of the height of the sail by relaxing it in the middle as if filled by wind, or by taking small hitches (not really sure how to describe what I'm thinking of here) in the sail using thread along that edge (sort of like tiny reefs in the sail, but only along the edge where the backing is - shortening up the sail by tiny increments all along it instead of one or two larger corrections)?
- 47 replies
-
- 2
-
-
- carmen
- constructo
- (and 2 more)
-
I'm not seeing why the fore needs to be cut down, why do you think so?
- 47 replies
-
- 2
-
-
- carmen
- constructo
- (and 2 more)
-
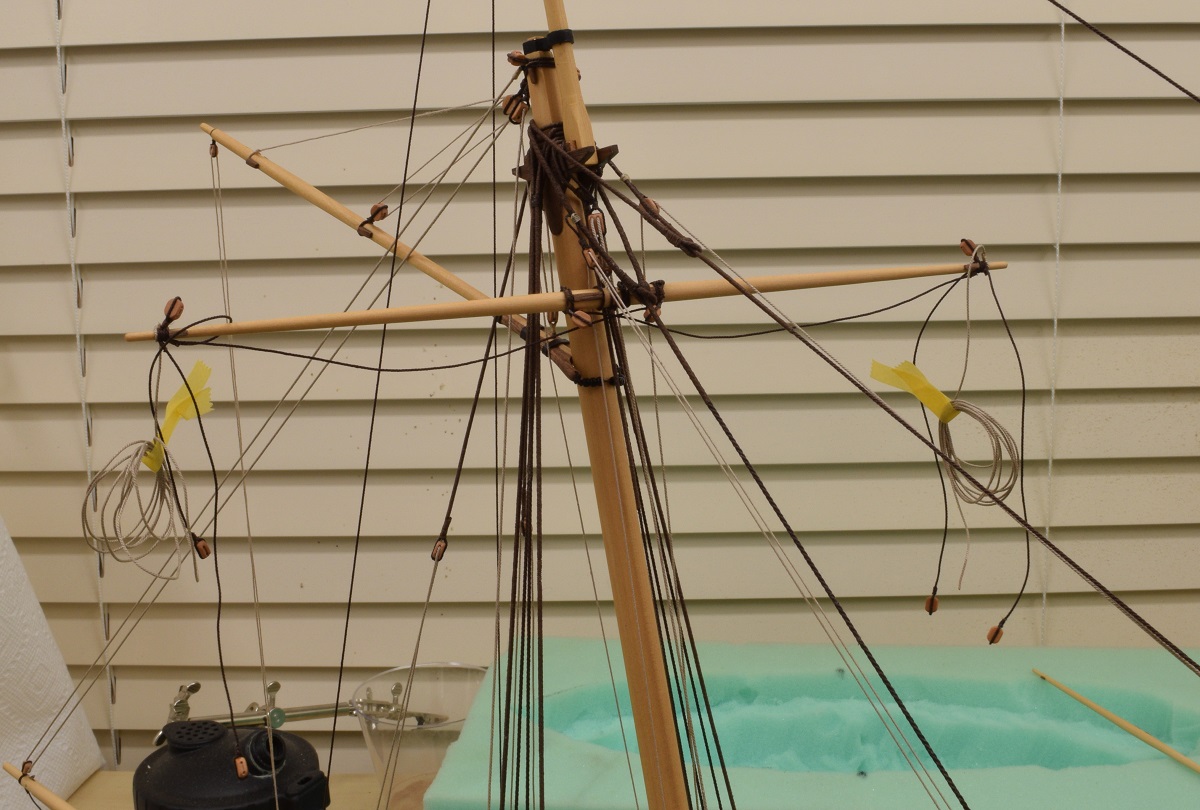
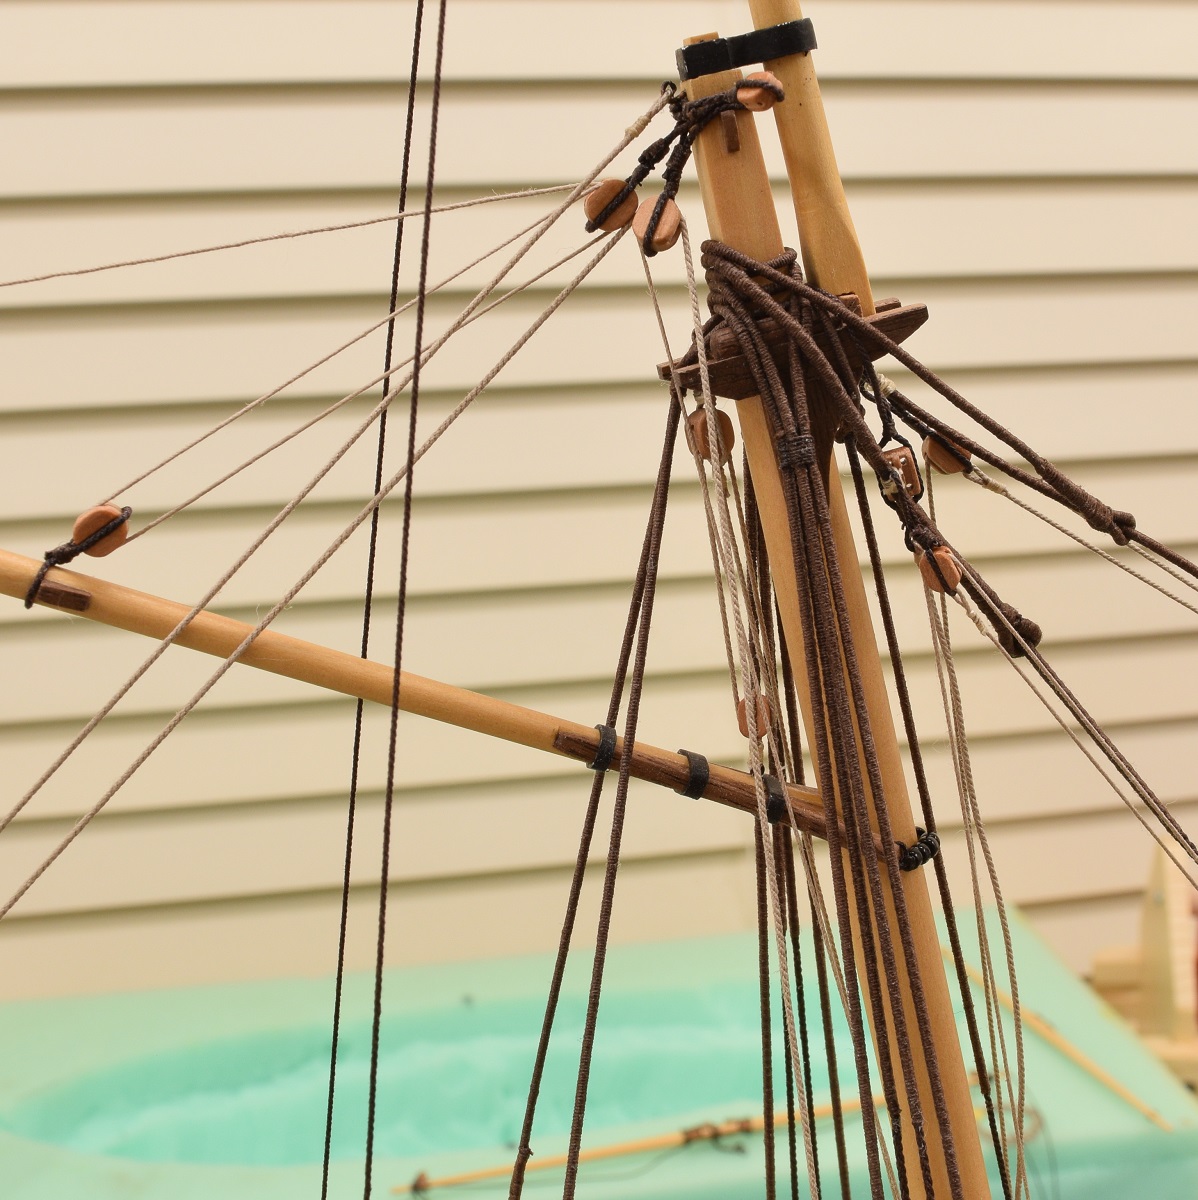
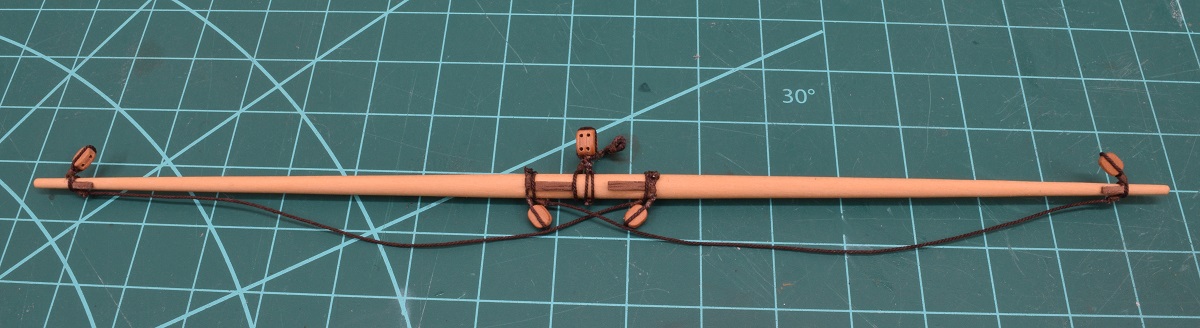
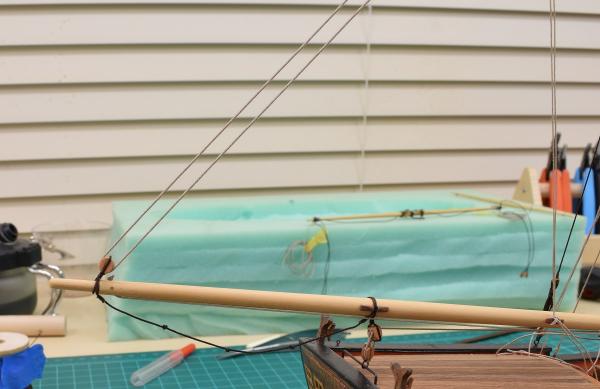
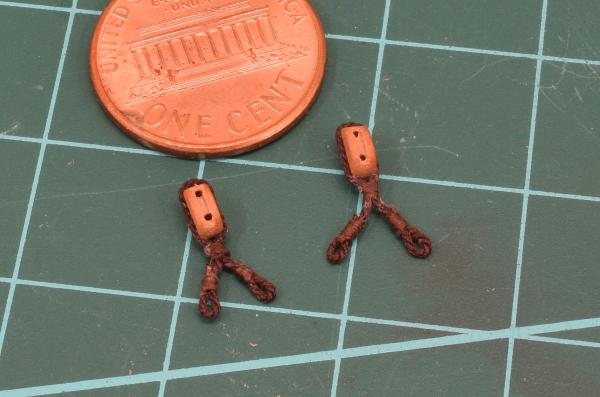
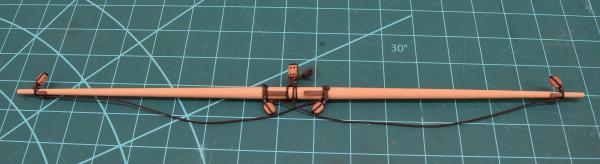
Well Lextin, it was more of a 'why not' really. After almost a year of thinking about it, I never really could settle on a name, and for whatever reason just kept coming back to Serenity. I thought it was sort of a funny name because of the irony of the name as you pointed out, and I really liked Firefly. I don't have a current S.O., so I didn't really want to just use a random woman's name. In any case, just said what the heck, and gave her that name since it just kept coming back in my head. On to an actual update, after two nights of fiddling with little rope and blocks, I managed to complete the rigging of the spreader yard. The inner blocks and the parrel were the biggest pains, since they are lashed, and the parrel has to be served in place. Inner blocks Blocks, foot ropes, parrel and jeers block on the yard. All the outer lines on the yard. In order from inside to outside they are: Foot ropes, block for topsail sheet, after brace pendant, fore brace pendant, lift.
- 831 replies
-
- 22
-
-
- Armed Virginia Sloop
- Model Shipways
- (and 1 more)
-
They aren't snap together, you have to glue them together, then sand/shape them (using a tumbler, or by hand). You can download the instructions on the assembly from his site. My dead-eyes, and the hearts on my forestay are Syren specialty blocks.
- 831 replies
-
- 2
-
-
- Armed Virginia Sloop
- Model Shipways
- (and 1 more)
-
I am using 1/8, 5/32 and 3/16 blocks from Syren.
- 831 replies
-
- 4
-
-
- Armed Virginia Sloop
- Model Shipways
- (and 1 more)
-
Nice job handling that terrible rigging line, Ken.
- 440 replies
-
- 2
-
-
- niagara
- model shipways
- (and 1 more)
-
That little saw actually kind of scares me. No safety equipment and as far as I can tell the blade is not adjustable for height at all. I don't think I'd want that on my work-bench personally, as cutting plank thickness stock with the blade sticking up that high seems a bit scary to me.