HOLIDAY DONATION DRIVE - SUPPORT MSW - DO YOUR PART TO KEEP THIS GREAT FORUM GOING! (Only 13 donations so far - C'mon guys!)
×


GuntherMT
-
Posts
2,213 -
Joined
-
Last visited
Content Type
Profiles
Forums
Gallery
Events
Everything posted by GuntherMT
-
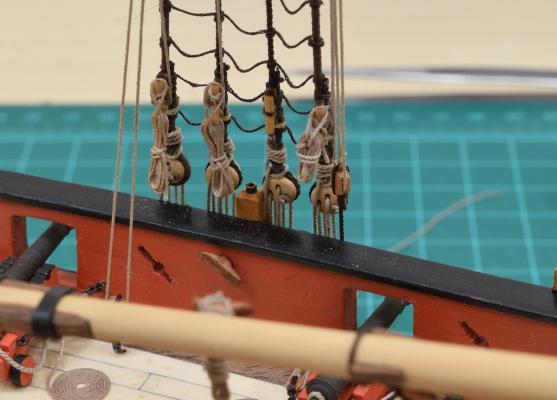
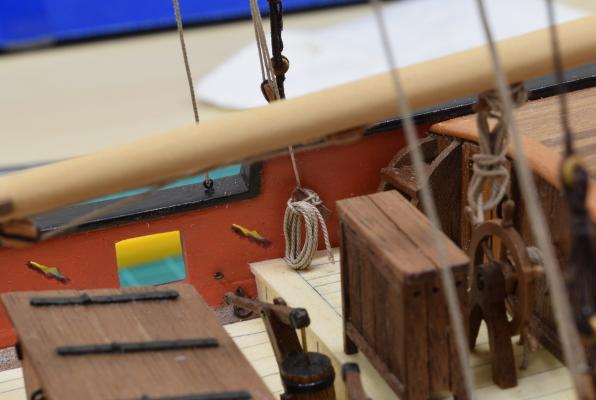
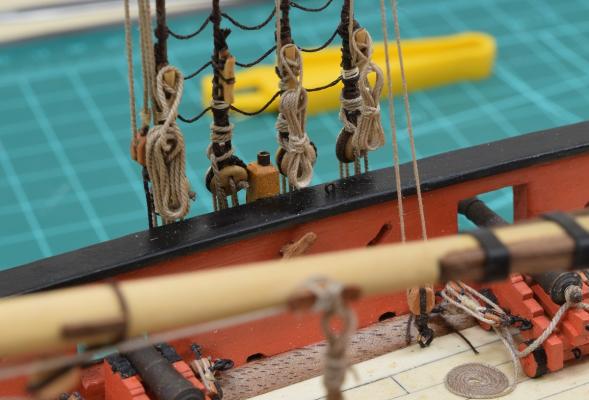
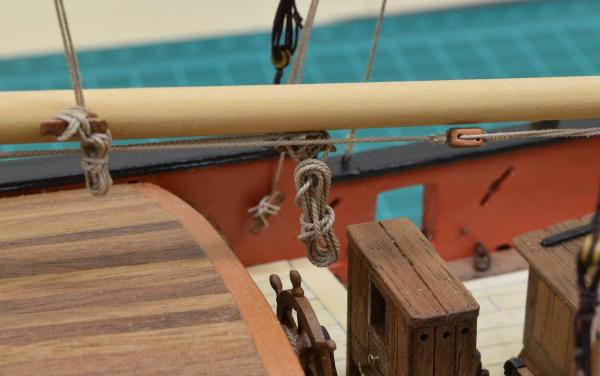
So I haven't made much progress since my last update, and I've discovered that I don't really like rope coils very much. Seems like a great thing to dislike given my subject choices, hahaha.. In any case, I'm working on getting a jig that makes coils I like, and I think I'm getting somewhat close, but still not there. I started working at the stern, and I'm done with the stern, quarter-deck, boom, and shrouds now. The coils are taking much longer than I expected them to, but oh well. Getting a bit better as I go along.
- 831 replies
-
- 38
-

-
- Armed Virginia Sloop
- Model Shipways
- (and 1 more)
-
Thanks all, will get back to working on the final details tomorrow. I've been pretty busy this week since finishing the anchors and haven't done anything since. Today was day one of sailing lessons, and I'm completely exhausted, so probably not a great time to work on the ship!
- 831 replies
-
- 8
-
-
- Armed Virginia Sloop
- Model Shipways
- (and 1 more)
-
Great looking deck Eric. The nibbing came out great.
-
Sitzbank aus Eisen (Bench made of iron)
GuntherMT replied to merchen's topic in Metal Work, Soldering and Metal Fittings
Google translate of the subject: A bench made of iron Google translate of the text: A bench for three persons of iron forged on a scale of 13.47 for the Maerchenschiff. The geschmiedetet iron is burnished. ----------------------------- Beautiful work. -
Most excellent work Dan, the lifeboats came out great!
- 108 replies
-
- 4
-
-
- andrea doria
- ocean liner
- (and 1 more)
-
Even with the Syren blocks I drill them out based upon the size of line that specific block will be getting used with. I guess it's just part of rigging ships!
- 440 replies
-
- 2
-
-
- niagara
- model shipways
- (and 1 more)
-
Thank you hamilton, All of the rigging, ropes, blocks, hearts, dead-eyes, and hooks - everything except for the bullseyes, are from Chuck at Syren Ship Model Company, as are the gun barrels (both swivels and main guns) and the main gun carriages. The deck is holly planking from Hobby Mill, and the masting is all Boxwood from Crown Timberyard. I certainly have no plan to take the log down Philthy, and I'm very happy if it helps anyone with their own build of this kit (or even something else!).
- 831 replies
-
- 5
-
-
- Armed Virginia Sloop
- Model Shipways
- (and 1 more)
-
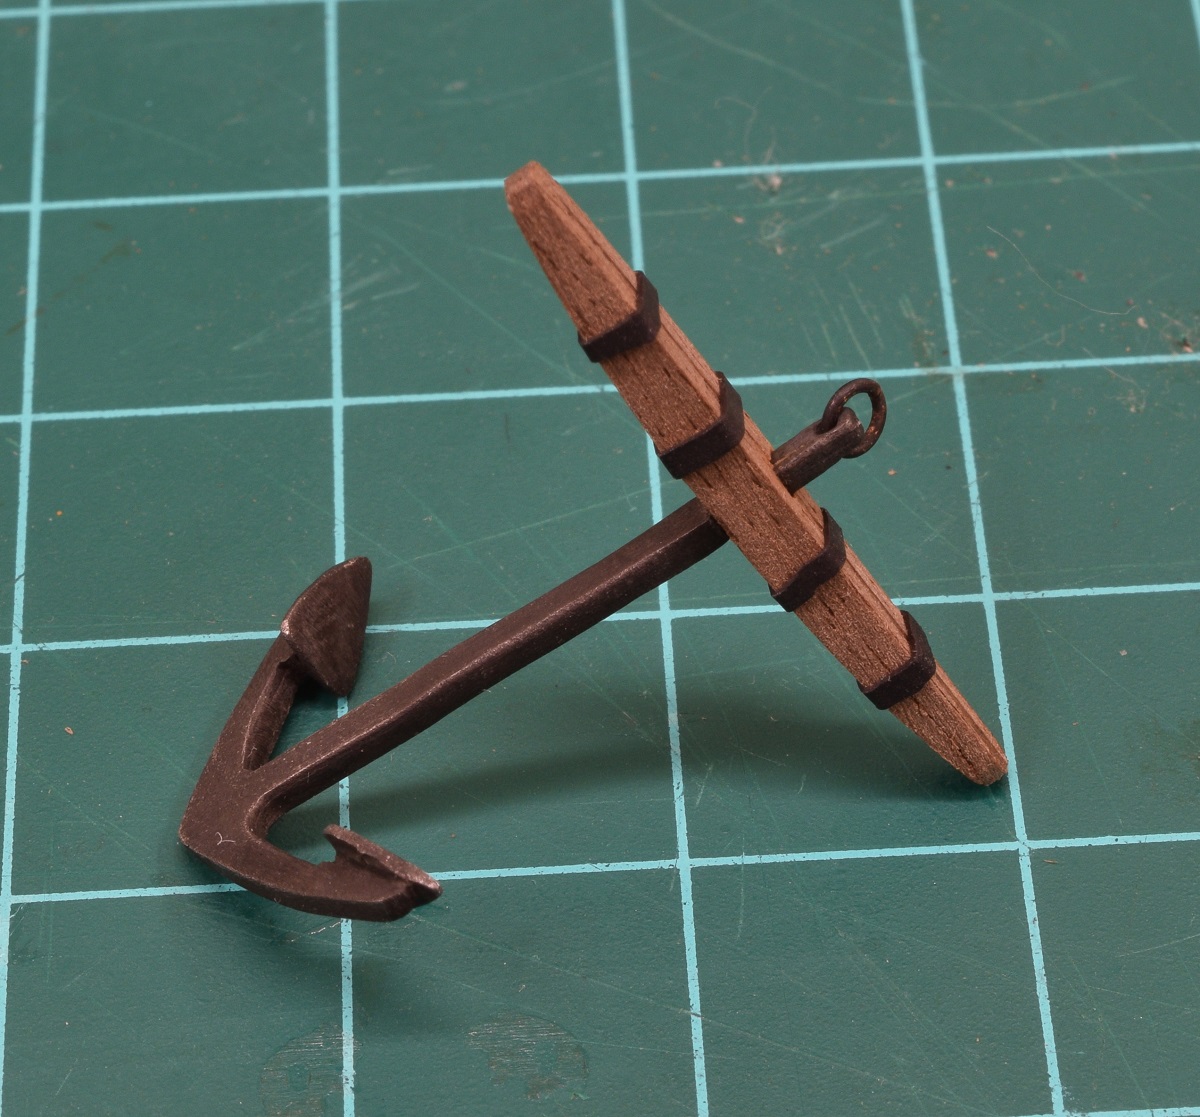
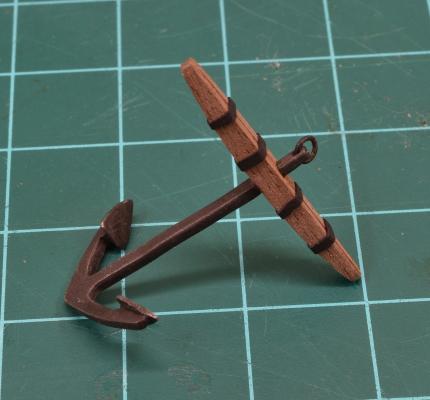
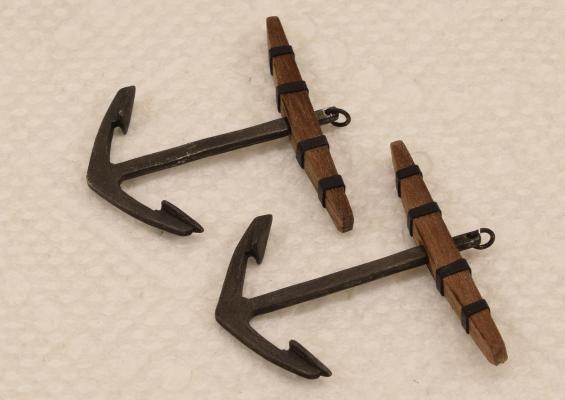
Thanks for all the support and encouragement all. I fixed the anchors. The other one was a bit loose, so it required a longer setting glue, so it didn't make it into the photo.
- 831 replies
-
- 24
-
-
- Armed Virginia Sloop
- Model Shipways
- (and 1 more)
-
You are experiencing the wonders of Model-Expo paint (Hint: It's hot garbage). It works, but it makes you work for it, and the paint is extremely inconsistent from one jar to the next.
-
Awesome, looks like a great time!
-
Fantastic work Ken. You finished two full rigged masts in less time than I did a single mast with only one square sail. I'm impressed. Could not agree with you more on the kit blocks too.
- 440 replies
-
- 3
-
-
- niagara
- model shipways
- (and 1 more)
-
And... the anchor stocks are 90 degrees off from where they should be, so that will be a re-do on the anchors. Oops.
- 831 replies
-
- 13
-
-
- Armed Virginia Sloop
- Model Shipways
- (and 1 more)
-
Appropriate thread for rigging
GuntherMT replied to Captain Al's topic in Masting, rigging and sails
I just use Syren line, so I can't really help you with materials, but I think that kit line is generally oversized, so I've chosen to go 'down' in size when given a choice between slightly smaller or slightly larger. Note that there is exactly zero science behind this system, it's just my opinion based on what kit line normally looks like in my (fairly brief) experience. -
Thank you gentlemen. And now, for a bonus update. I made some anchors!
- 831 replies
-
- 24
-
-
- Armed Virginia Sloop
- Model Shipways
- (and 1 more)
-
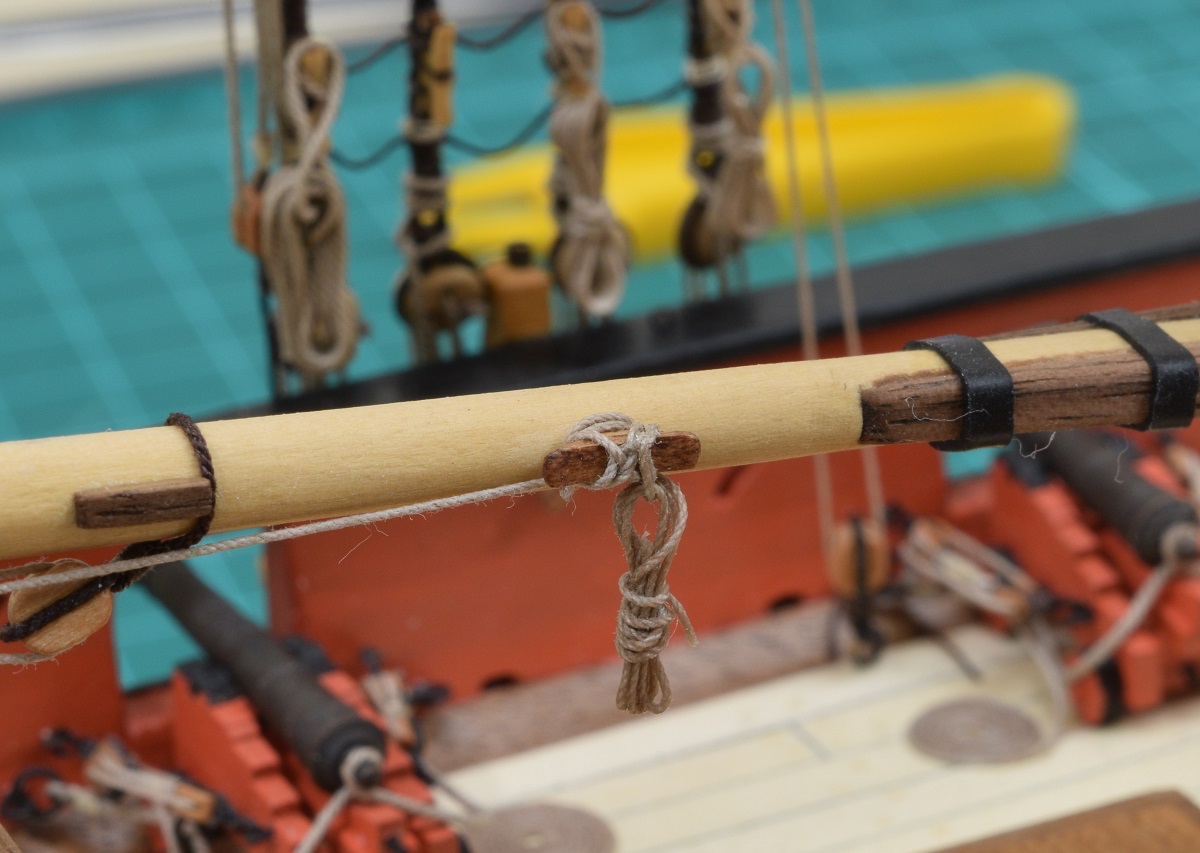
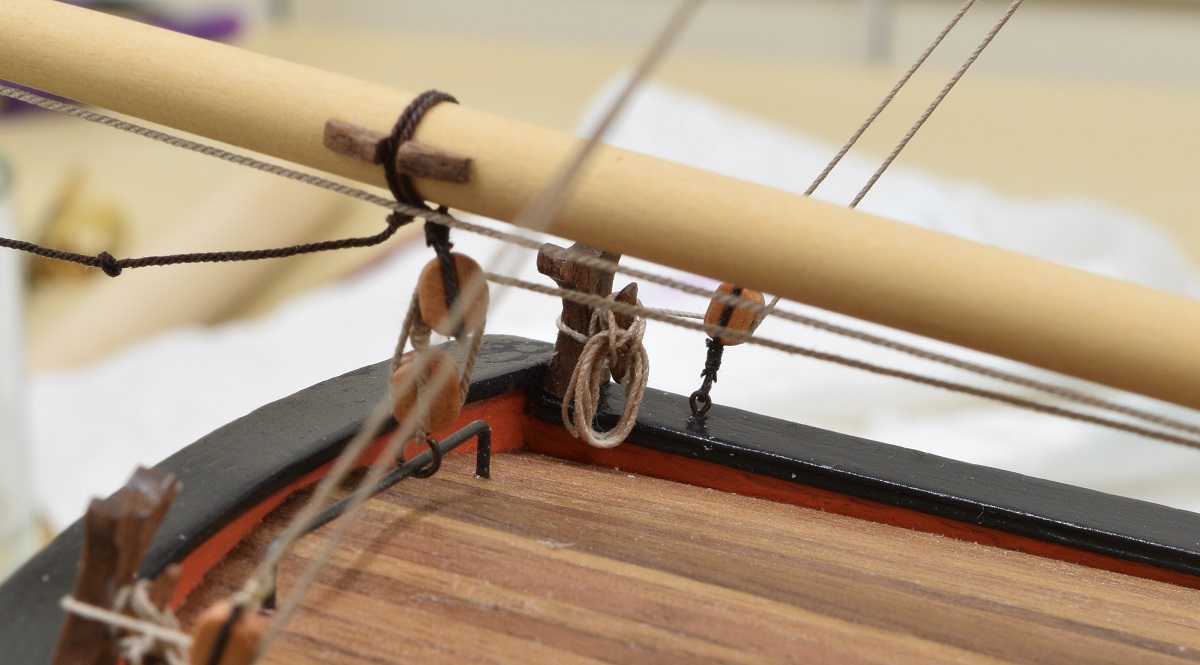
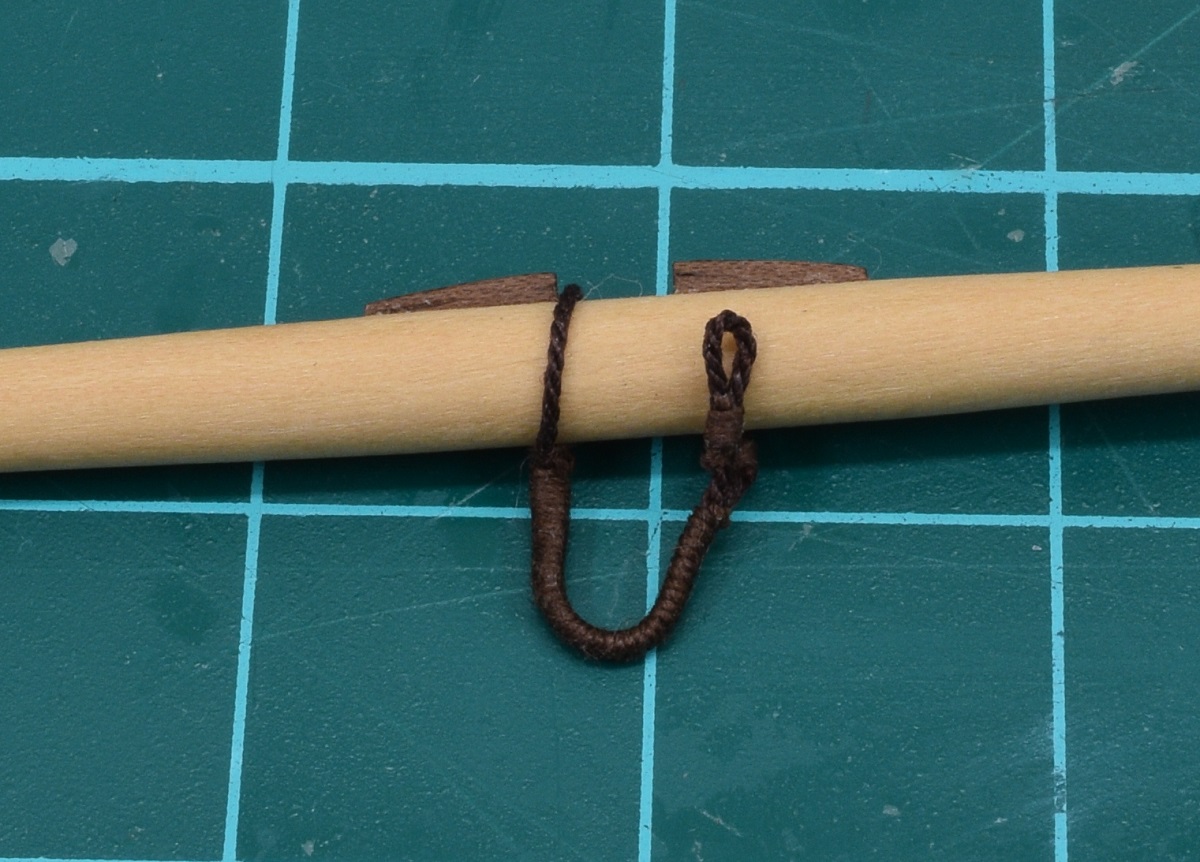
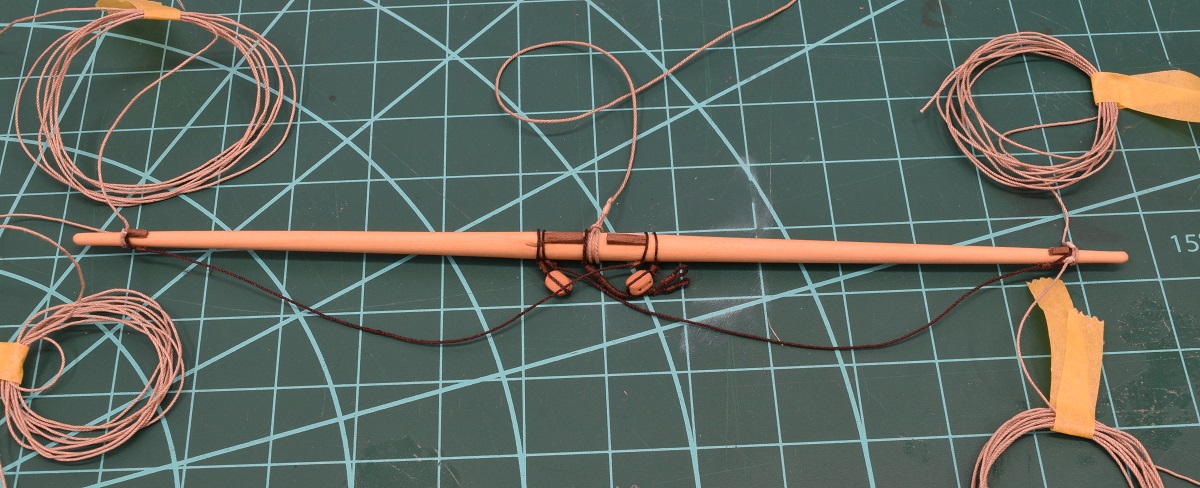
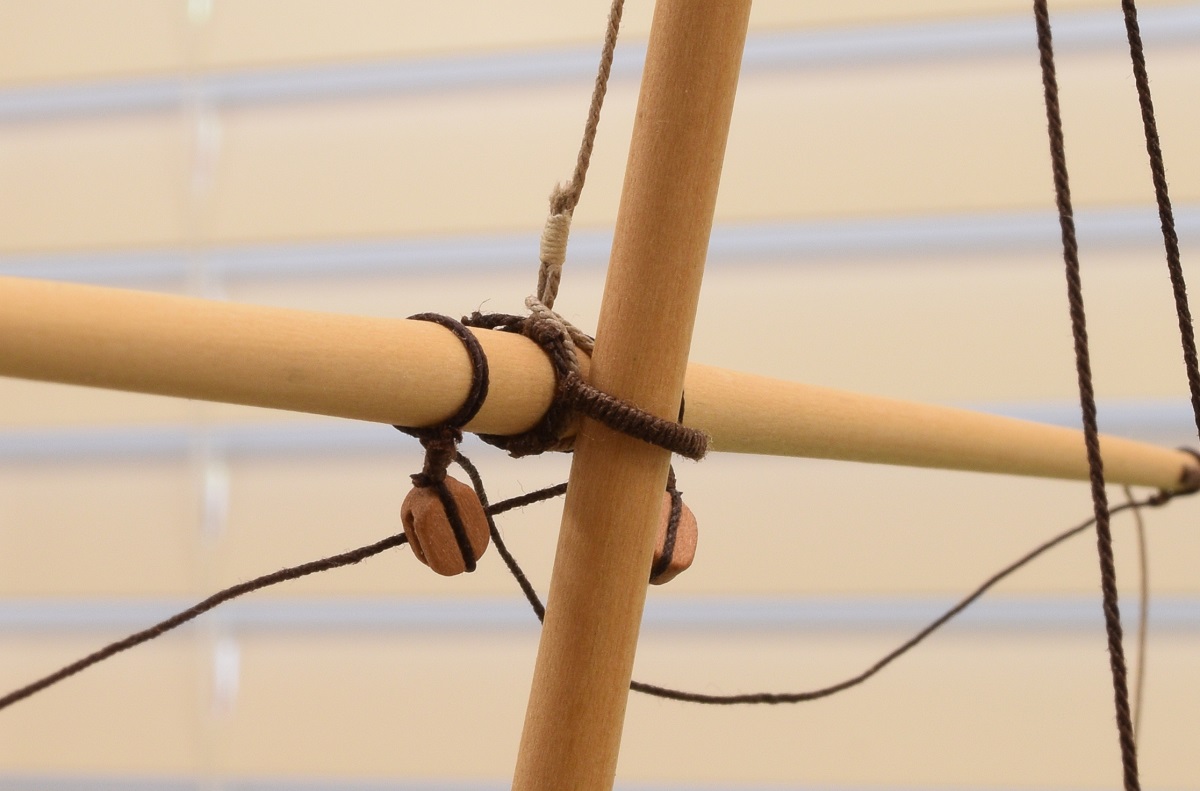
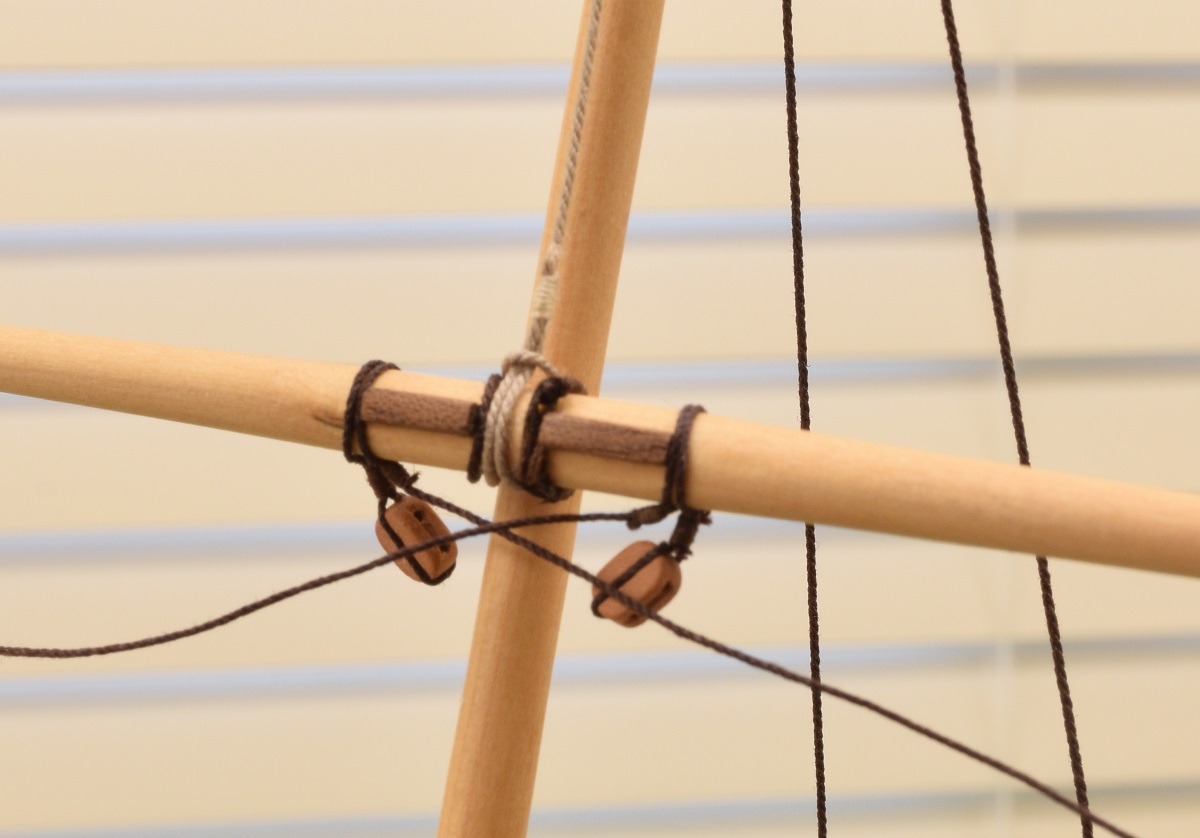
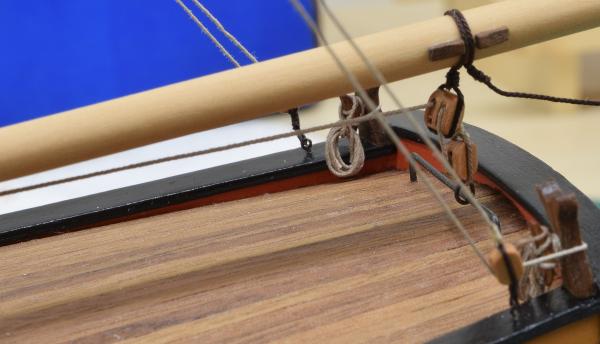
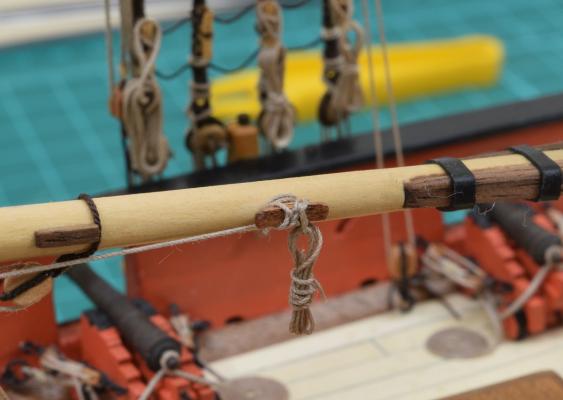
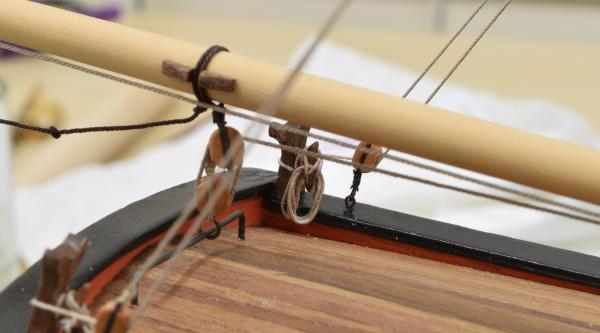
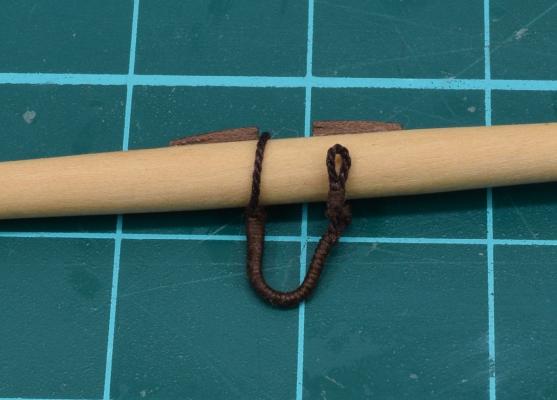
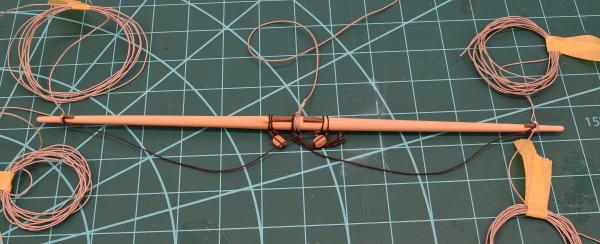
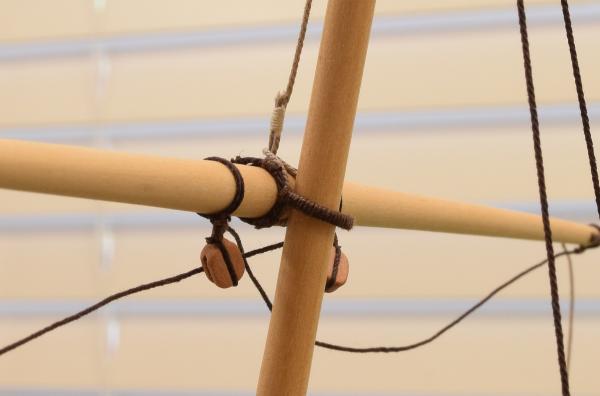
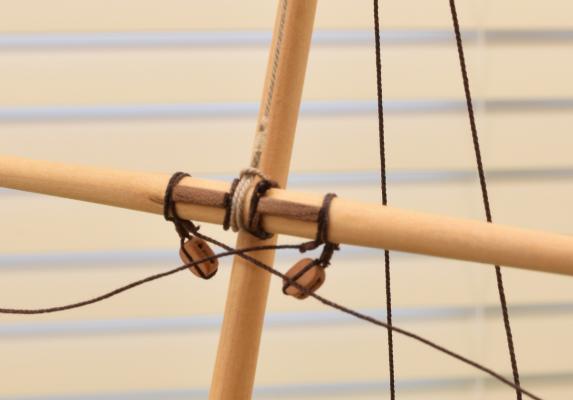
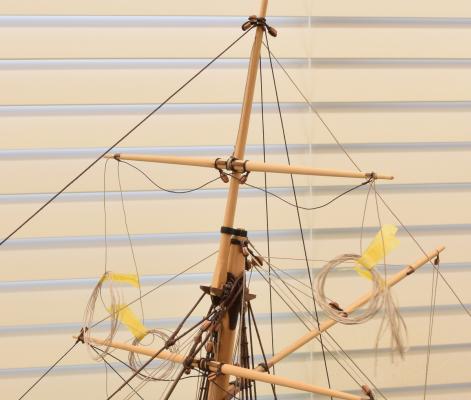
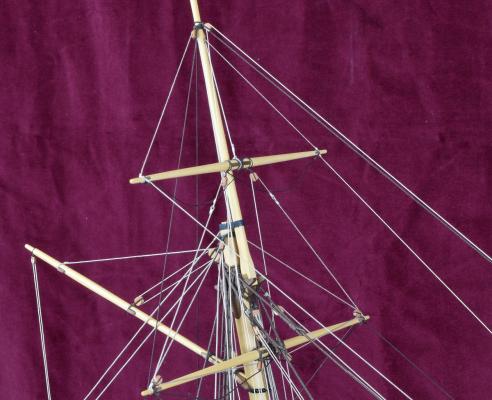
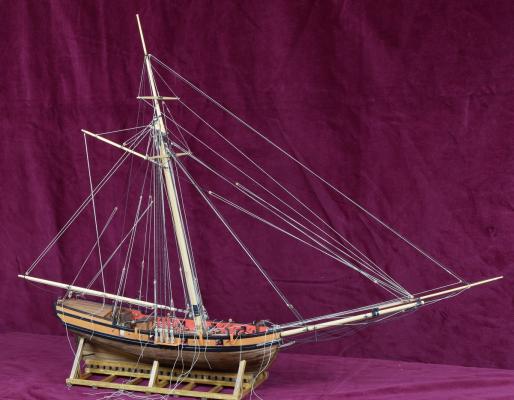
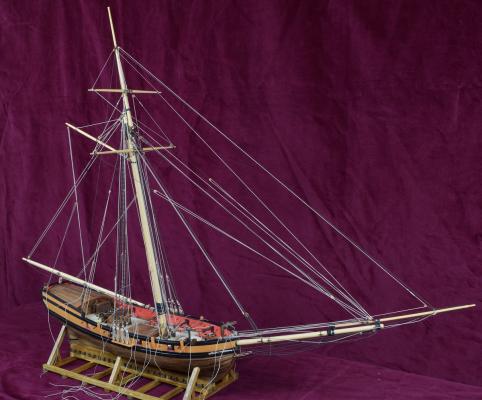
So a big milestone was just reached. All the rigging is now in place! The last big item was the top yard. First thing was to make the parrel that holds it to the top mast. It has one end closed in an eye-splice, and the other end has a pair of eye-splices so that it can be lashed in place after wrapping it around the top mast, and the double rope between is served. Here is the top yard all rigged up and ready to hang. In addition to the parrel, there are a pair of blocks, the foot-ropes, a brace and lift on each end, and the halyard in the center. This shows how the parrel holds the yard to the top mast, and the halyard supports the yard vertically. Also a wider shot prior to rigging everything, with just the halyard holding it up. Jump to the end, I rigged all the lifts (top yard and spreader yard which actually hangs from the two blocks on the top yard), braces, and the flying jib halyard and inhaul. And what it looks like now. All the rigging is still long at the bottom belaying points so that I can adjust things. All the blocks and sheaves work. All the parts are actually held in place by the rigging, and it's all functional, in that I can adjust the rigging however I want. I can raise or lower the yards, and adjust the angle of the yards and boom (the Gaff is pinned in place due to the angle for mounting it, but if I cut the pin, it would also be adjustable). If I had sails, the clew lines, in-hauls, and out-hauls would all function to raise and lower the sails. All that's left now is to make the anchors and bouys and rig them to the catheads, clean up all the ropes on the deck after final adjustments, and then make rope coils for all the ropes at their belaying points. Oh, I also need to re-do a few of the swivel cannons before I mount them, and then do overall touch-ups as needed, and make the base for it to sit on. Still a lot of work left to do, but damn it's great to see it looking pretty much done.

- 831 replies
-
- 35
-
-
- Armed Virginia Sloop
- Model Shipways
- (and 1 more)
-
I highly recommend Chuck's rope (Syren Ship Model Company - http://www.syrenshipmodelcompany.com/miniature-rope.php) It's really great to work with, and I have no interest in making my own.
-
Looking forward to seeing how your modified wood selections work out Dave!
- 306 replies
-
- 2
-
-
- armed virginia sloop
- Patrick Henry
- (and 2 more)
-
ancre Le Fleuron 1729 by rekon54 - 1:24
GuntherMT replied to rekon54's topic in - Build logs for subjects built 1501 - 1750
Your work amazes me every single time I look at it. Thank you again for sharing the photo's of your ship as you go, simply stunning. -
Sure, I sent Jason an email saying that I wanted the following stock (24" long): 2 - 1/2" square. 2 - 3/8" square. 3 - 1/4" square. 2 - 3/16" square. He sent me a reply with the price, I paid him, and got a masting set! I over-ordered so I would have plenty of extra if (when) I screwed something up on my first try!
-
Some of the scratch build logs will take away your productivity for days at a time, they are simply amazing. A couple that totally captured all of my time for days (and I'm sure I've missed many): Dan Vadas "Vulture" build (recently finished) - http://modelshipworld.com/index.php/topic/230-hms-vulture-by-dan-vadas-1776-148-scale-16-gun-swan-class-sloop-from-tffm-plans-completed/ rekon54's Le Fleuron build in 1:24 scale! - http://modelshipworld.com/index.php/topic/178-le-fleuron-by-rekon54-1729-124/
-
Boyd, I gave up on dowels, and I'm only on my 2nd build! A few problems with dowels - they have large grain, making them look poor unless you are planning to paint them, even if they are straight. As you've observed, it's very difficult to get dowels that are straight. On masts/yards that need a square or octagon shape, it's difficult to make that evenly out of a round stick. For my AVS I ordered a 'masting set' from Crown Timberyard out of boxwood, and couldn't be happier with the result. Making the masts/yards out of boxwood eliminated all of the above problems, and there are multiple ways to get your square-stock round for the masts/yards, from my system (a lathe) to Frank's system (check his Paragon build log here - http://modelshipworld.com/index.php/topic/10788-paragon-a-modified-mayflower-by-mahuna/). He has a nice jig he used to help him turn square stock into his masting. Look at post 70 on page 4 of his log.
-
Fantastic fix, and the results look great.
- 452 replies
-
- 3
-
-
- cheerful
- Syren Ship Model Company
- (and 1 more)