GuntherMT
-
Posts
2,213 -
Joined
-
Last visited
Content Type
Profiles
Forums
Gallery
Events
Everything posted by GuntherMT
-
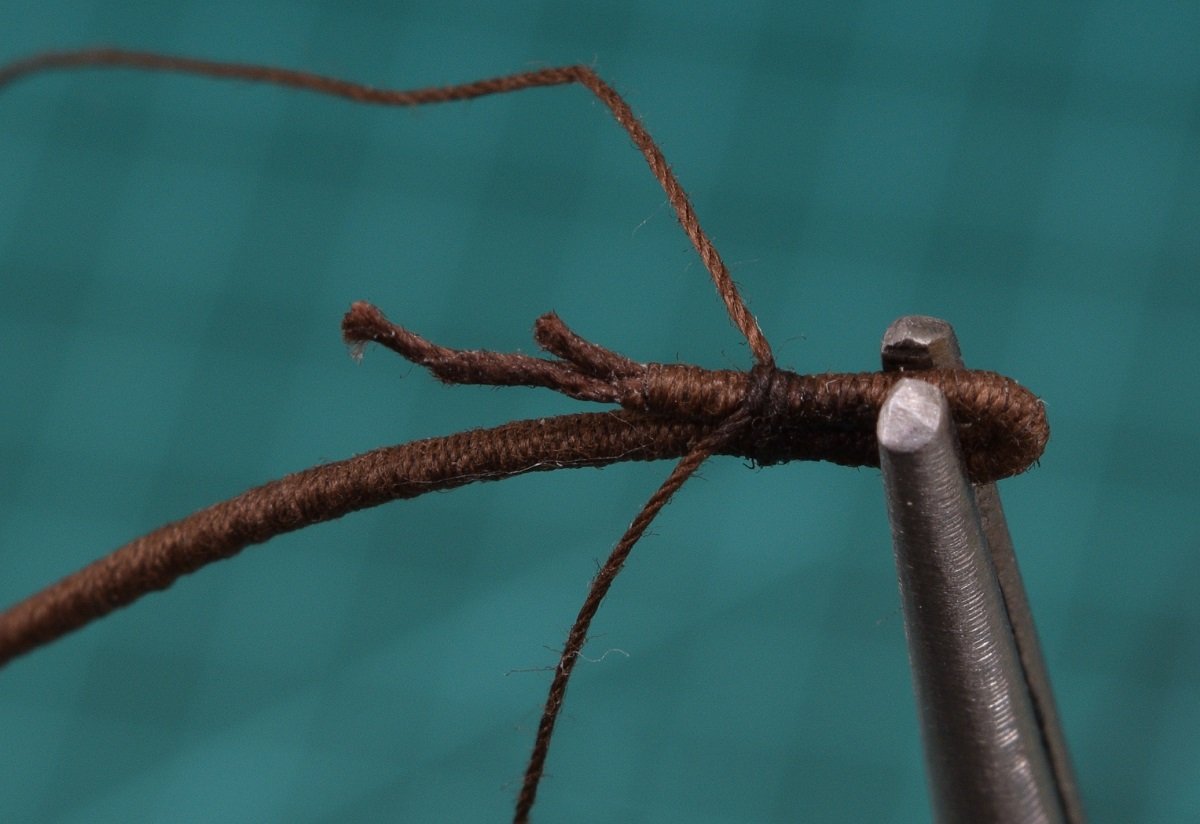
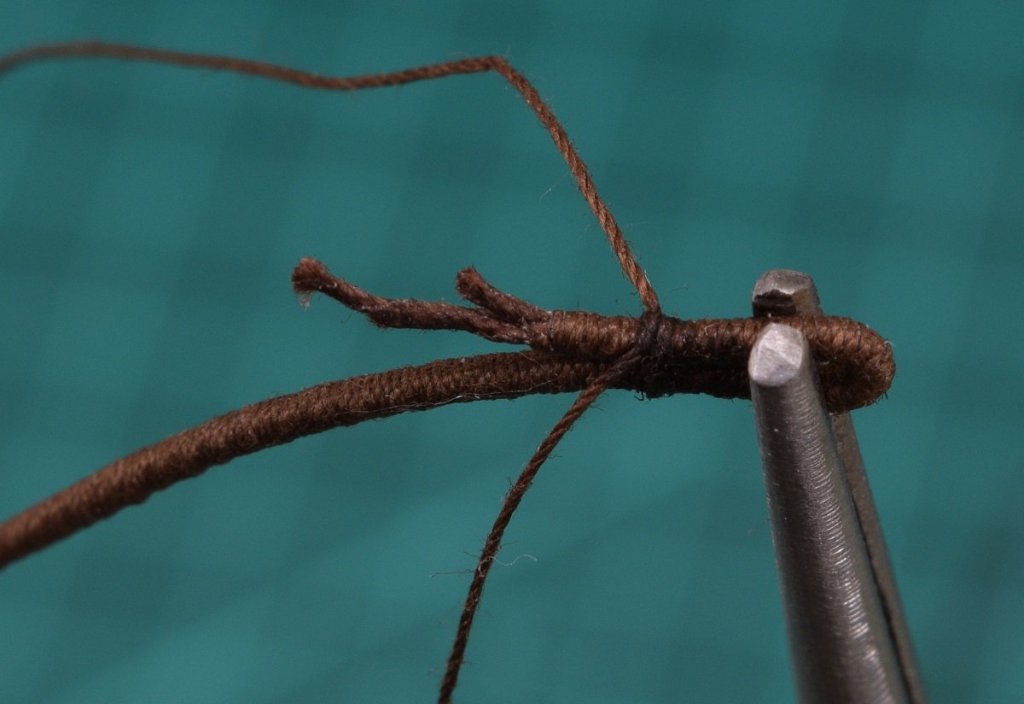
Went digging and found a picture of how I actually made that one. As you can see, what I did was take the end of the rope and unravel it a bit, then cut each strand to a different length past the point where the serving ended, and then the thread is tied around it above the end of the serving (just a simple square knot) and then was wrapped around it until all the rope ends were covered. The thread ends were dabbed with glue to prevent fraying, and then trimmed off. That's it, pretty simple, and works great.
- 245 replies
-
- 5
-

-
- bluenose
- model shipways
- (and 1 more)
-
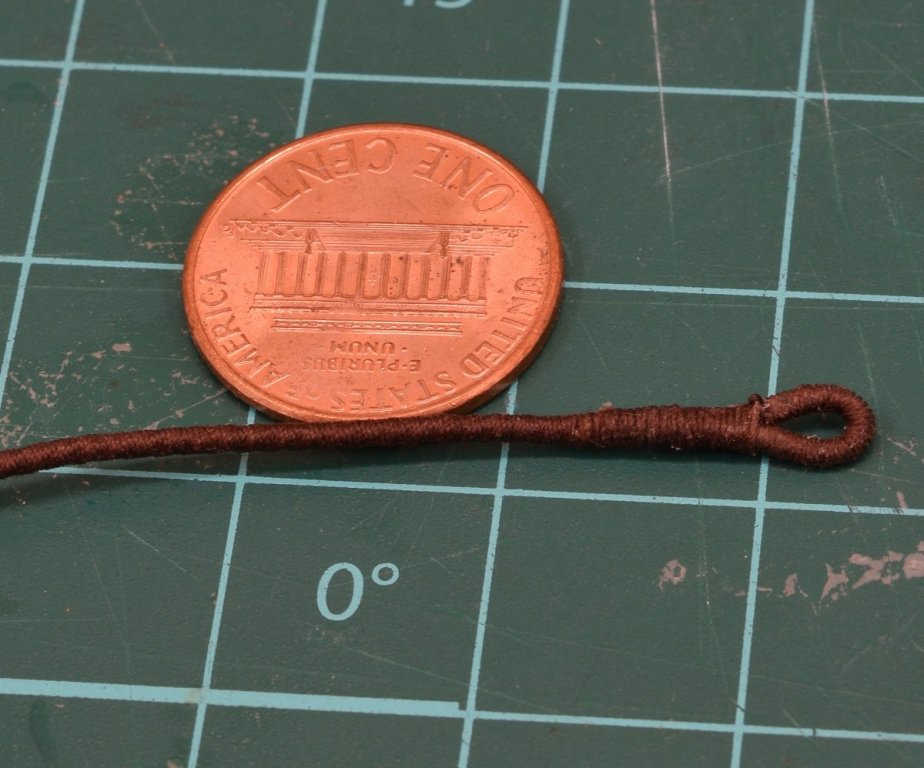
Dave - here is an eye splice that I made the way I described, and how it looked installed on the ship. It was for the forestay on my AVS. For my purposes, this system works perfectly fine and I saw no need to struggle with making an actual eye splice in the tiny rope!

- 245 replies
-
- 7
-
-
- bluenose
- model shipways
- (and 1 more)
-
Dave, at this small scale most just fake eye-splices by gluing the line back to itself and seizing over it. You can make it look better by soaking the end of the line in CA glue first, letting it harden and then use a razor to cut it at an angle where it gets glued back to itself before wrapping it with thread, and it will have the proper tapered appearance.
- 245 replies
-
- 6
-
-
- bluenose
- model shipways
- (and 1 more)
-
Thanks for all the likes and comments. Nope, building it per the plans.
-
Looking good and coming along nicely!
- 164 replies
-
- 1
-
-
- model shipways
- armed virginia sloop
- (and 2 more)
-
Next up after the middle bulkheads/frames was the aft cockpit bulkheads/frames. These all fit fairly loose so had to be aligned as I went in both directions. Wasn't too bad, and I got all of them set fairly quickly. Once the bulkheads were dried, I did the final adjustments to the floor and seat for the aft cockpit and glued them in place. This is in the instructions after the main floor, but it was spending a couple of days under a heavy stack of wood trying to get most of the warping out of it. After about 48 hours of crap stacked on the floor of the main cockpit I figured it was good enough, and I did the final adjustments and glued it in place. Once the deck is in place, the next step is to assemble the coal bunkers. These are the final step to align the frames and make them rigid enough for planking, so next up is to begin the hull planking once all the glue is well dried.
-
Thanks for the heads up. I will look at how best to address that!
-
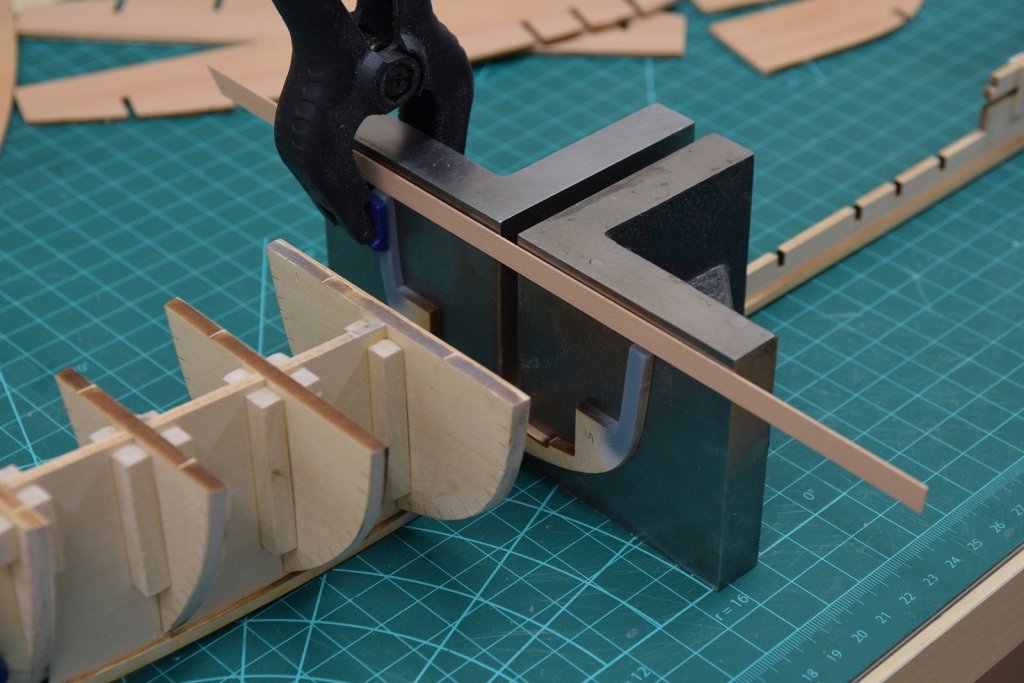
3" tookmakers angle plate. I got them from Micro Mark.
-
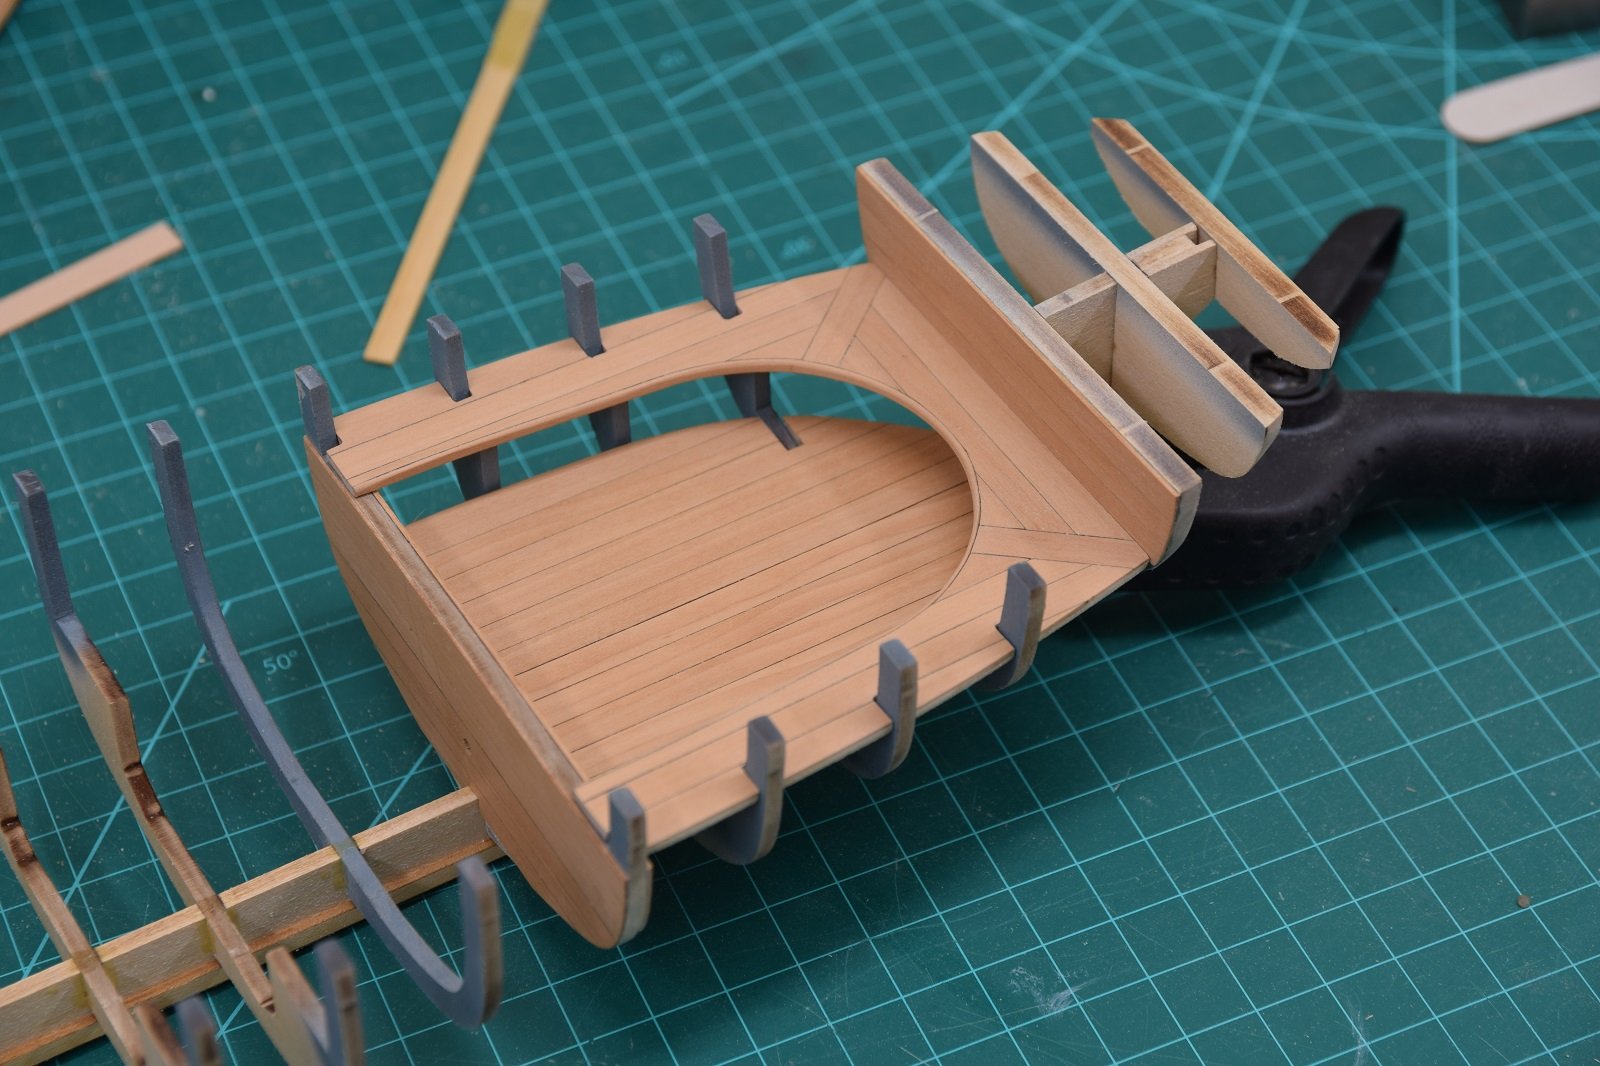
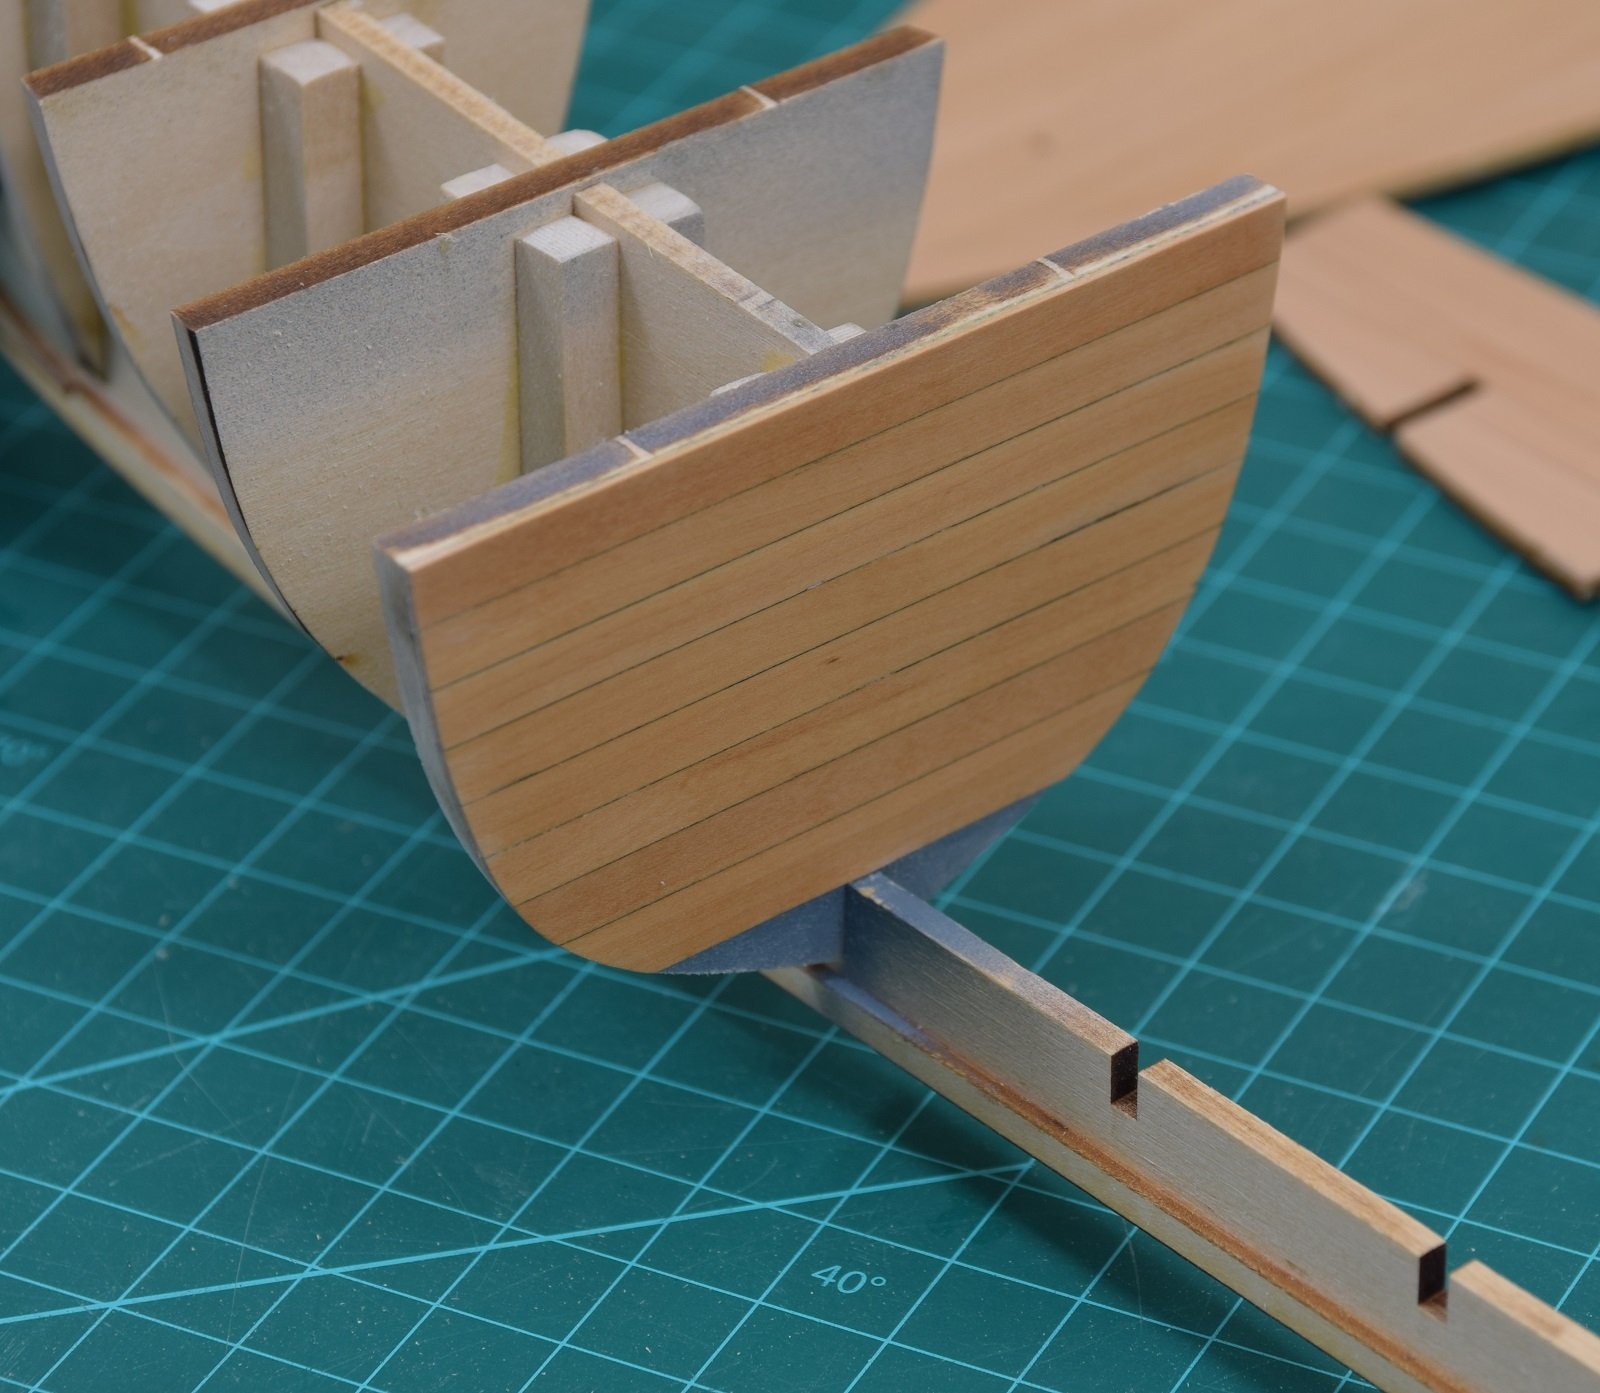
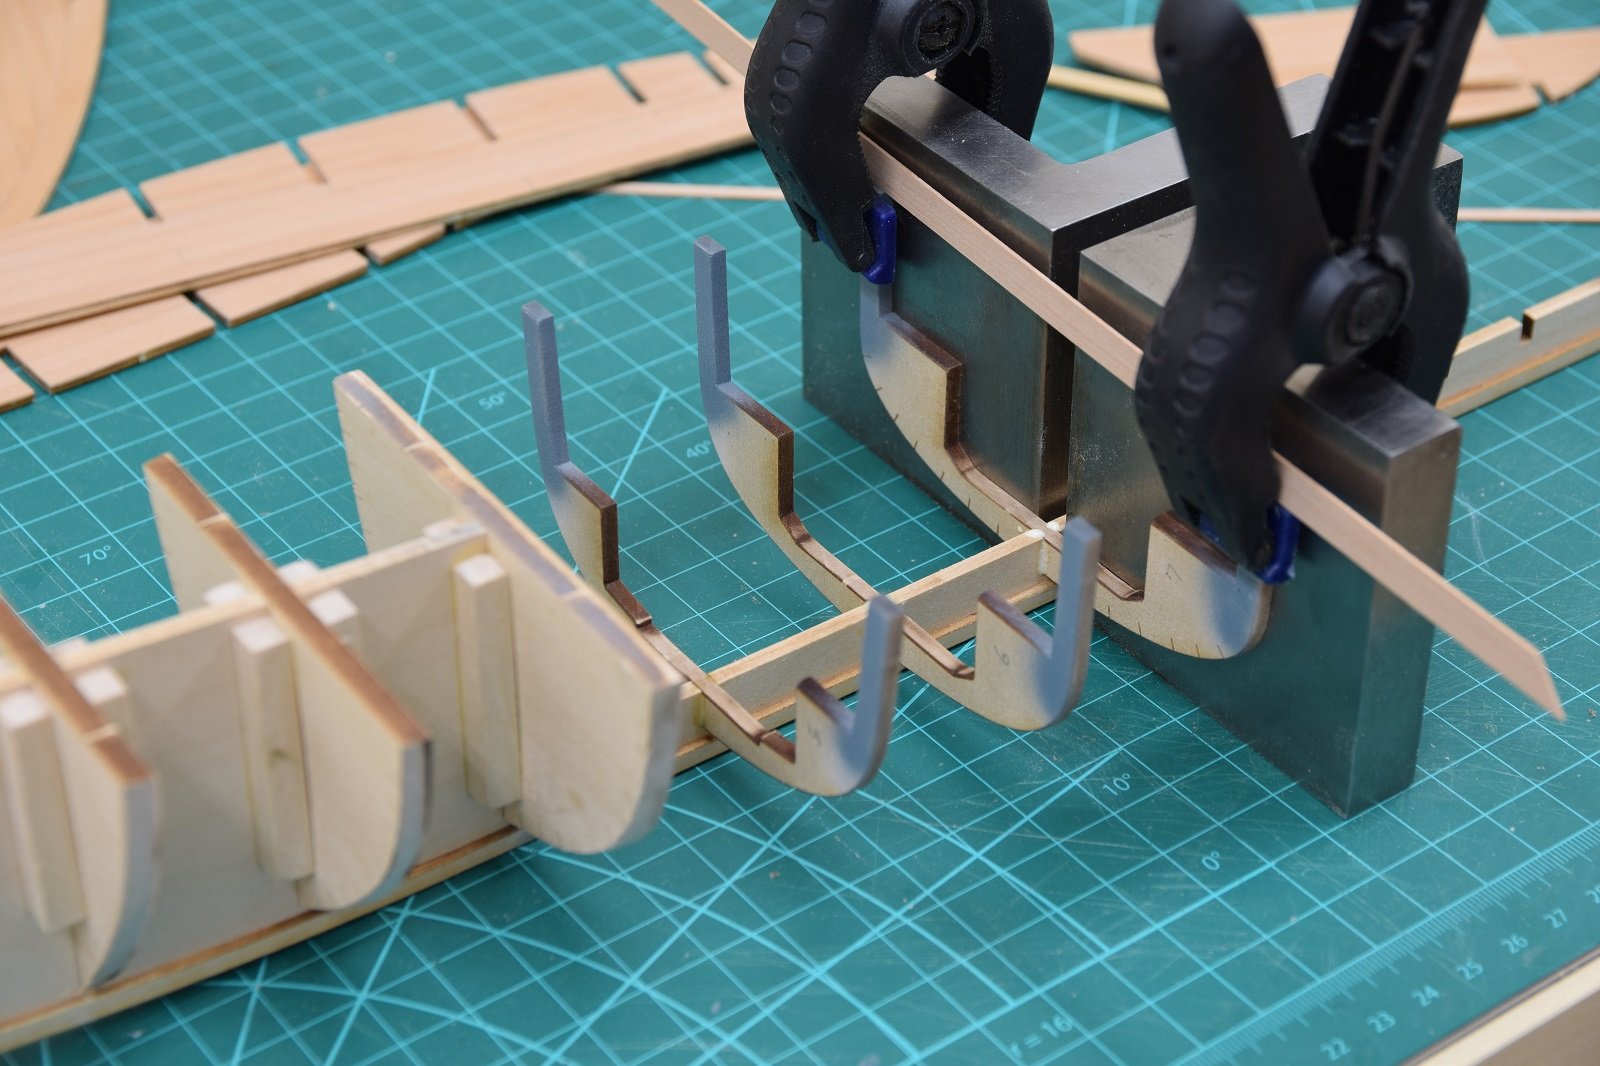
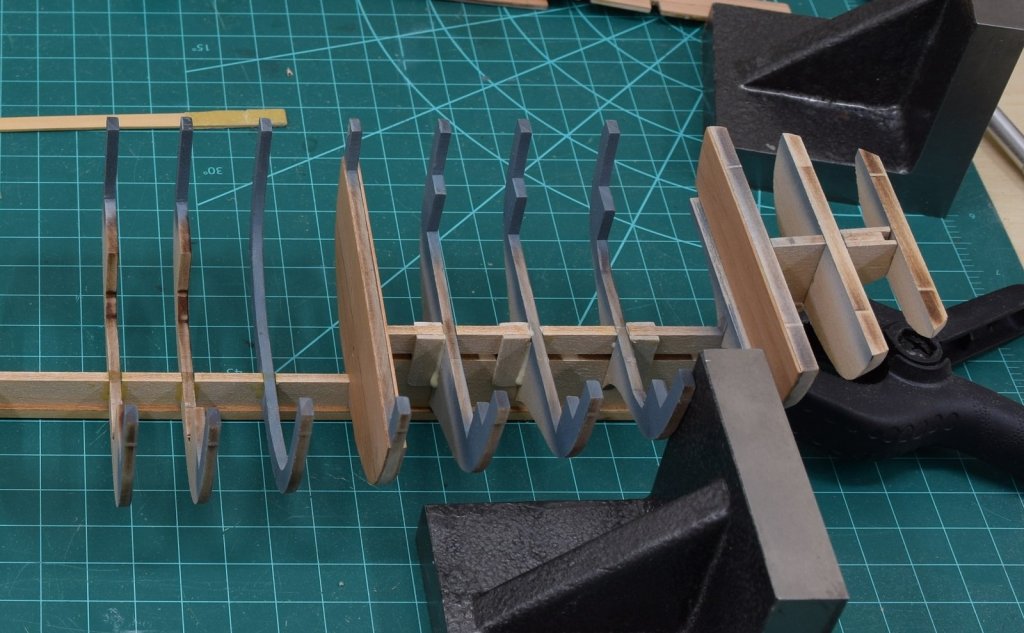
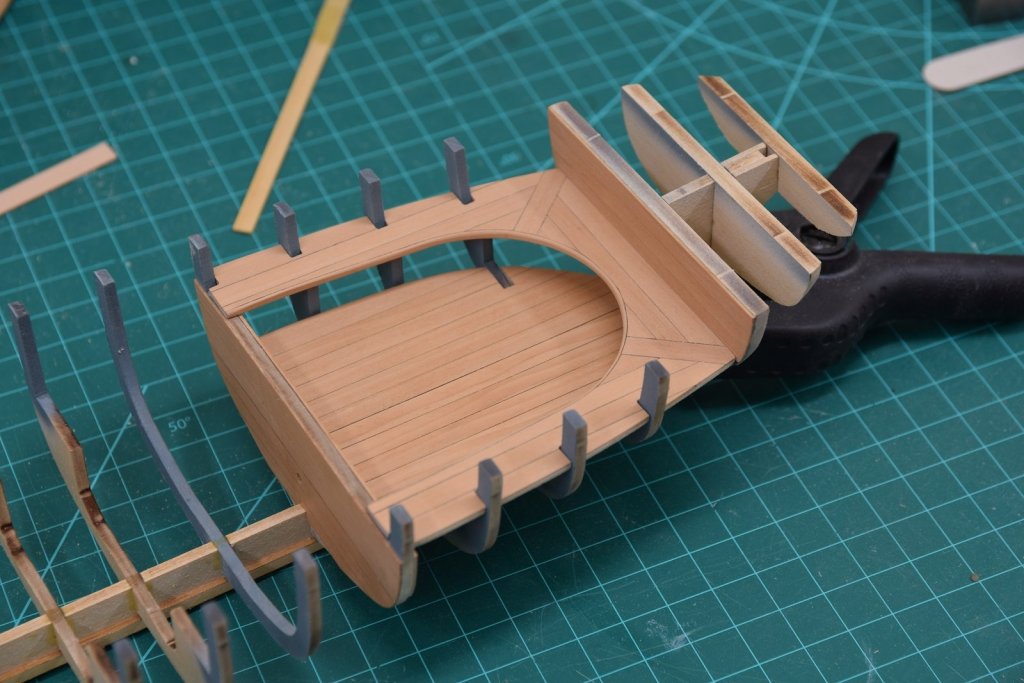
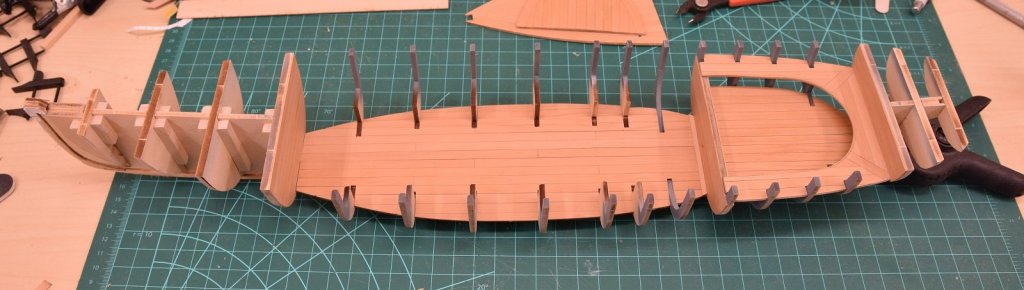
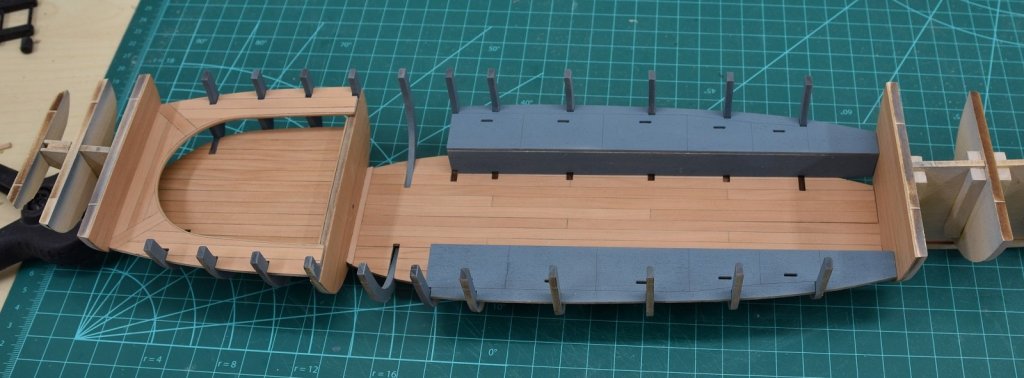
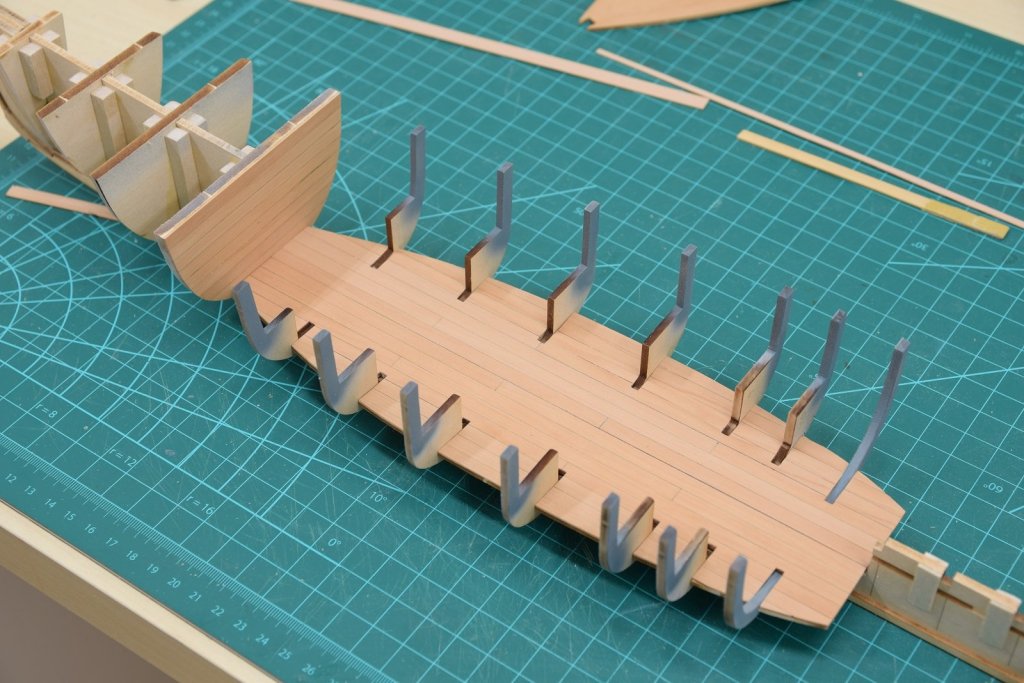
So I know this will be shocking, but I actually did more stuff on the boat! Finally finished planking bulkhead #4 that I already had glued to the keel. Probably would have been easier to unglue it from the keel and then put it back on after planking, but oh well, got it done. Once that was done it was time to begin setting the bulkheads for the center/main cockpit area. A good & meticulous boat builder would have a fancy building board with a frame designed to keep the tops of the bulkheads even side to side. I do it ghetto style with a loose plank across the top of the bulkheads, my eyeballs, and some clamps. Of course I'm a big clumsy oaf so I managed to break a bulkhead while using it to size the bulkhead slots in the planked floor pieces. This is the 2nd bulkhead I've broken, they are extremely fragile at this point. I decided to reinforce this one when I fixed it by drilling a hole in both pieces (1.15mm drill) and inserting a small wooden dowel cut from boxwood with a drawplate. After all the middle bulkheads (but not the main aft bulkhead for the section) are mounted, I dry fit the main cockpit deck, and it required a slight bit of adjustment with an emory board, after which it fits quite nicely. There is not enough room for the main aft bulkhead due to the extra thickness added for the planking on it, so I have to sand about 1/32" off the aft end of the deck pieces before it will fit with the aft bulkhead in place. I reduced the bow end prior to this. Both main floor pieces have developed a slight warp, a curve from side to side, they are straight in the long direction, so I dampened the back basswood and they are currently both sitting under a significant amount of weight on a flat surface to hopefully remove most of the warp. Will take a while to dry in between the surface and the heavy pieces of wood on top.


-
Interesting adjustment to the stern, and it looks just fine in the view from above. My concern with bashing it myself was how to handle the planking, since the drawing I posted in my log shows a curved under transom. I'm interested in seeing how you handled the hull portion.
- 75 replies
-
- 4
-
-
- model shipways
- picket boat
- (and 1 more)
-
That's a beautiful joint, whether it's worth it or not? Totally up to you, I personally am not a fan of display cases at all, but someday I'm sure I'll break down and get tired of keeping the models clean (or stop living alone and have to do it to keep the models safe) and do display cases.
- 969 replies
-
- 3
-
-
- hahn
- oliver cromwell
- (and 1 more)
-
Good question Roger, but I have no idea what the answer is. Even contemporary drawings of the actual event show a square stern, not just drawings of this type of craft. I'm not personally ready to try to design and scratch build a square stern onto the model, so mine will be built as the kit depicts it, even though that's apparently a fairly large inaccuracy.

-
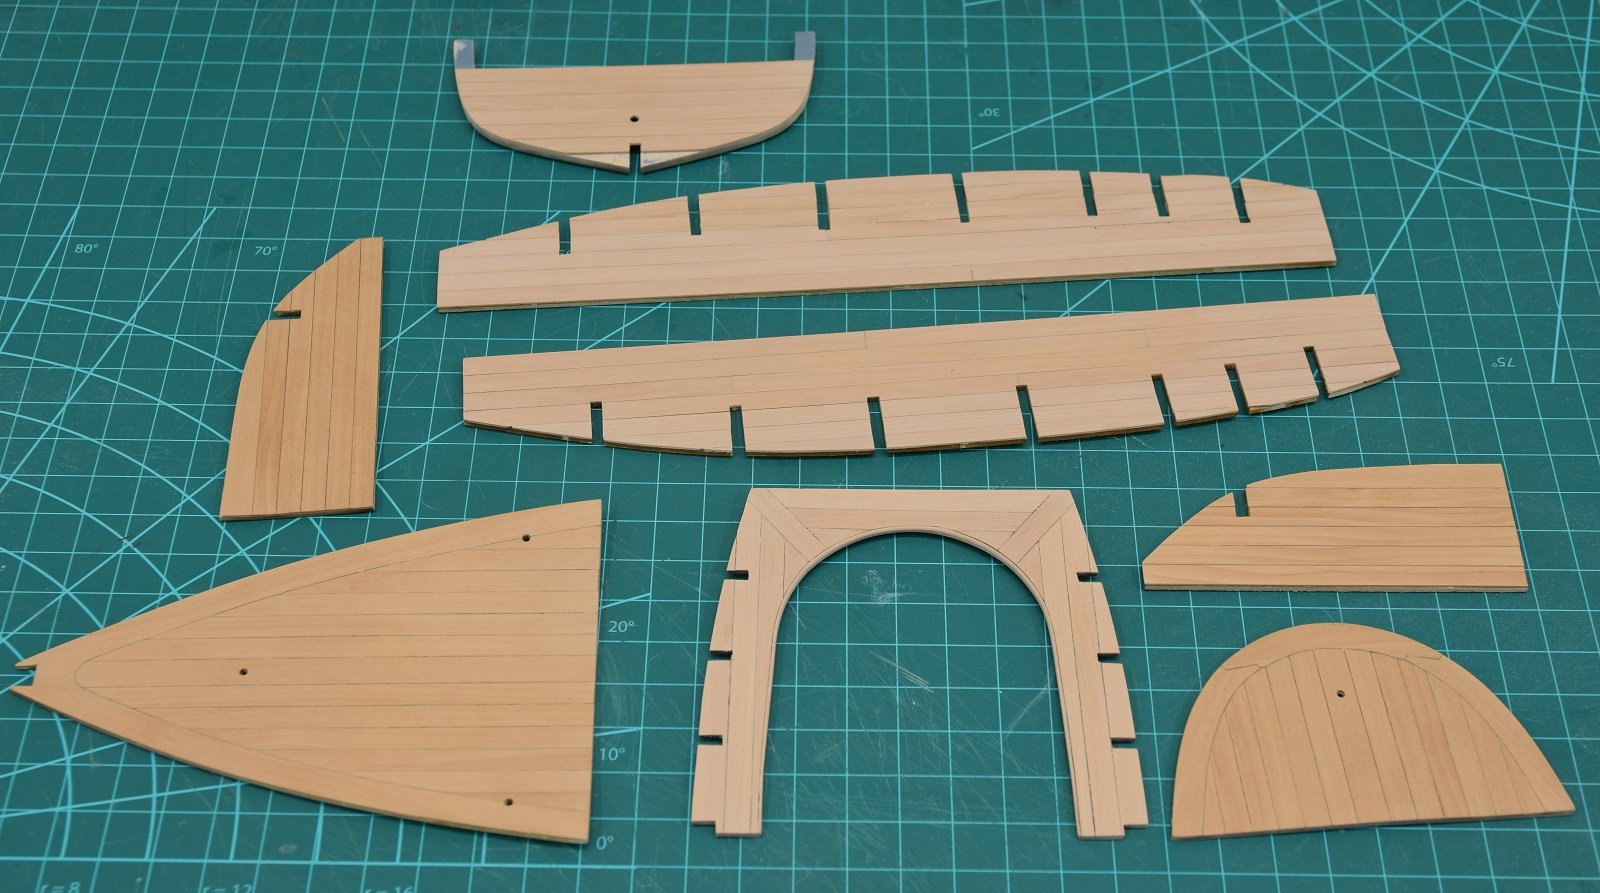
So when this project got set to the side some time ago, there was really only one piece of planking that still needed to be done - the cockpit bench seating which comes in two pieces. For some reason today I decided to finish this rather than work on my new little side project or other stuff I need to get done around here. To begin I added a brace in the form of a piece of basswood planking and joined the two sides together so that I could plank it as a single piece. Then I just started working on it and here's the pattern I ended up using. I should take another picture, managed to get this out of focus a bit. The thin strip around the inside edge was added to cover up the transition from basswood to the pear planking from the edge, I sanded it round, which doesn't really show up in the picture. So here are most of the planked pieces at this point. Next step is to find the instructions and figure out where I was on the assembly and see what comes next I suppose. It should prove interesting as I progress to see how difficult I've made this kit for myself by increasing the thickness of so many parts with 1/32 planking.

-
Dave, Take a look at the build log of the Dunbrody by Mahuna in the scratch-build section. He built a considerably larger cross section (in number of frames, not scale) and did not use a jig at all.
-
If you are on the forum, you are an MSW member. If you haven't sent money to the NRG for dues, you aren't an NRG member.
-
Any name is a fine name. I'm sure you could get someone to laser cut the letters, but I have no leads for you, sorry.
-
I'm working on a small 'get back into the shop' project right now, but holding off on posting it for a bit since then I would have 3 partial build logs instead of just two. Once I have something interesting to show I'll start a log which should be fairly short as I think I can finish this in a couple of months if I can find some reasonable chunks of time to work on it. So no, I'm not dead.
-
Great progress Rich, and the planking is looking good.
- 1,135 replies
-
- 2
-
-
- model shipways
- syren
- (and 2 more)
-
The guy is an artist in metalworking. I don't do any of the stuff he does yet I still watch every one of his videos.
-
Depends on where in Mexico. Mexicali & Tijuana are going to be completely different than Mexico City!
-
Looking great Greg, nice progress!
-
Lovely work Tony, and I really like that simple base.
- 132 replies
-
- 3
-
-
- triton cross-section
- cross-section
- (and 1 more)