HOLIDAY DONATION DRIVE - SUPPORT MSW - DO YOUR PART TO KEEP THIS GREAT FORUM GOING! (Only 36 donations so far out of 49,000 members - C'mon guys!)
×


captain_hook
-
Posts
685 -
Joined
-
Last visited
Content Type
Profiles
Forums
Gallery
Events
Everything posted by captain_hook
-
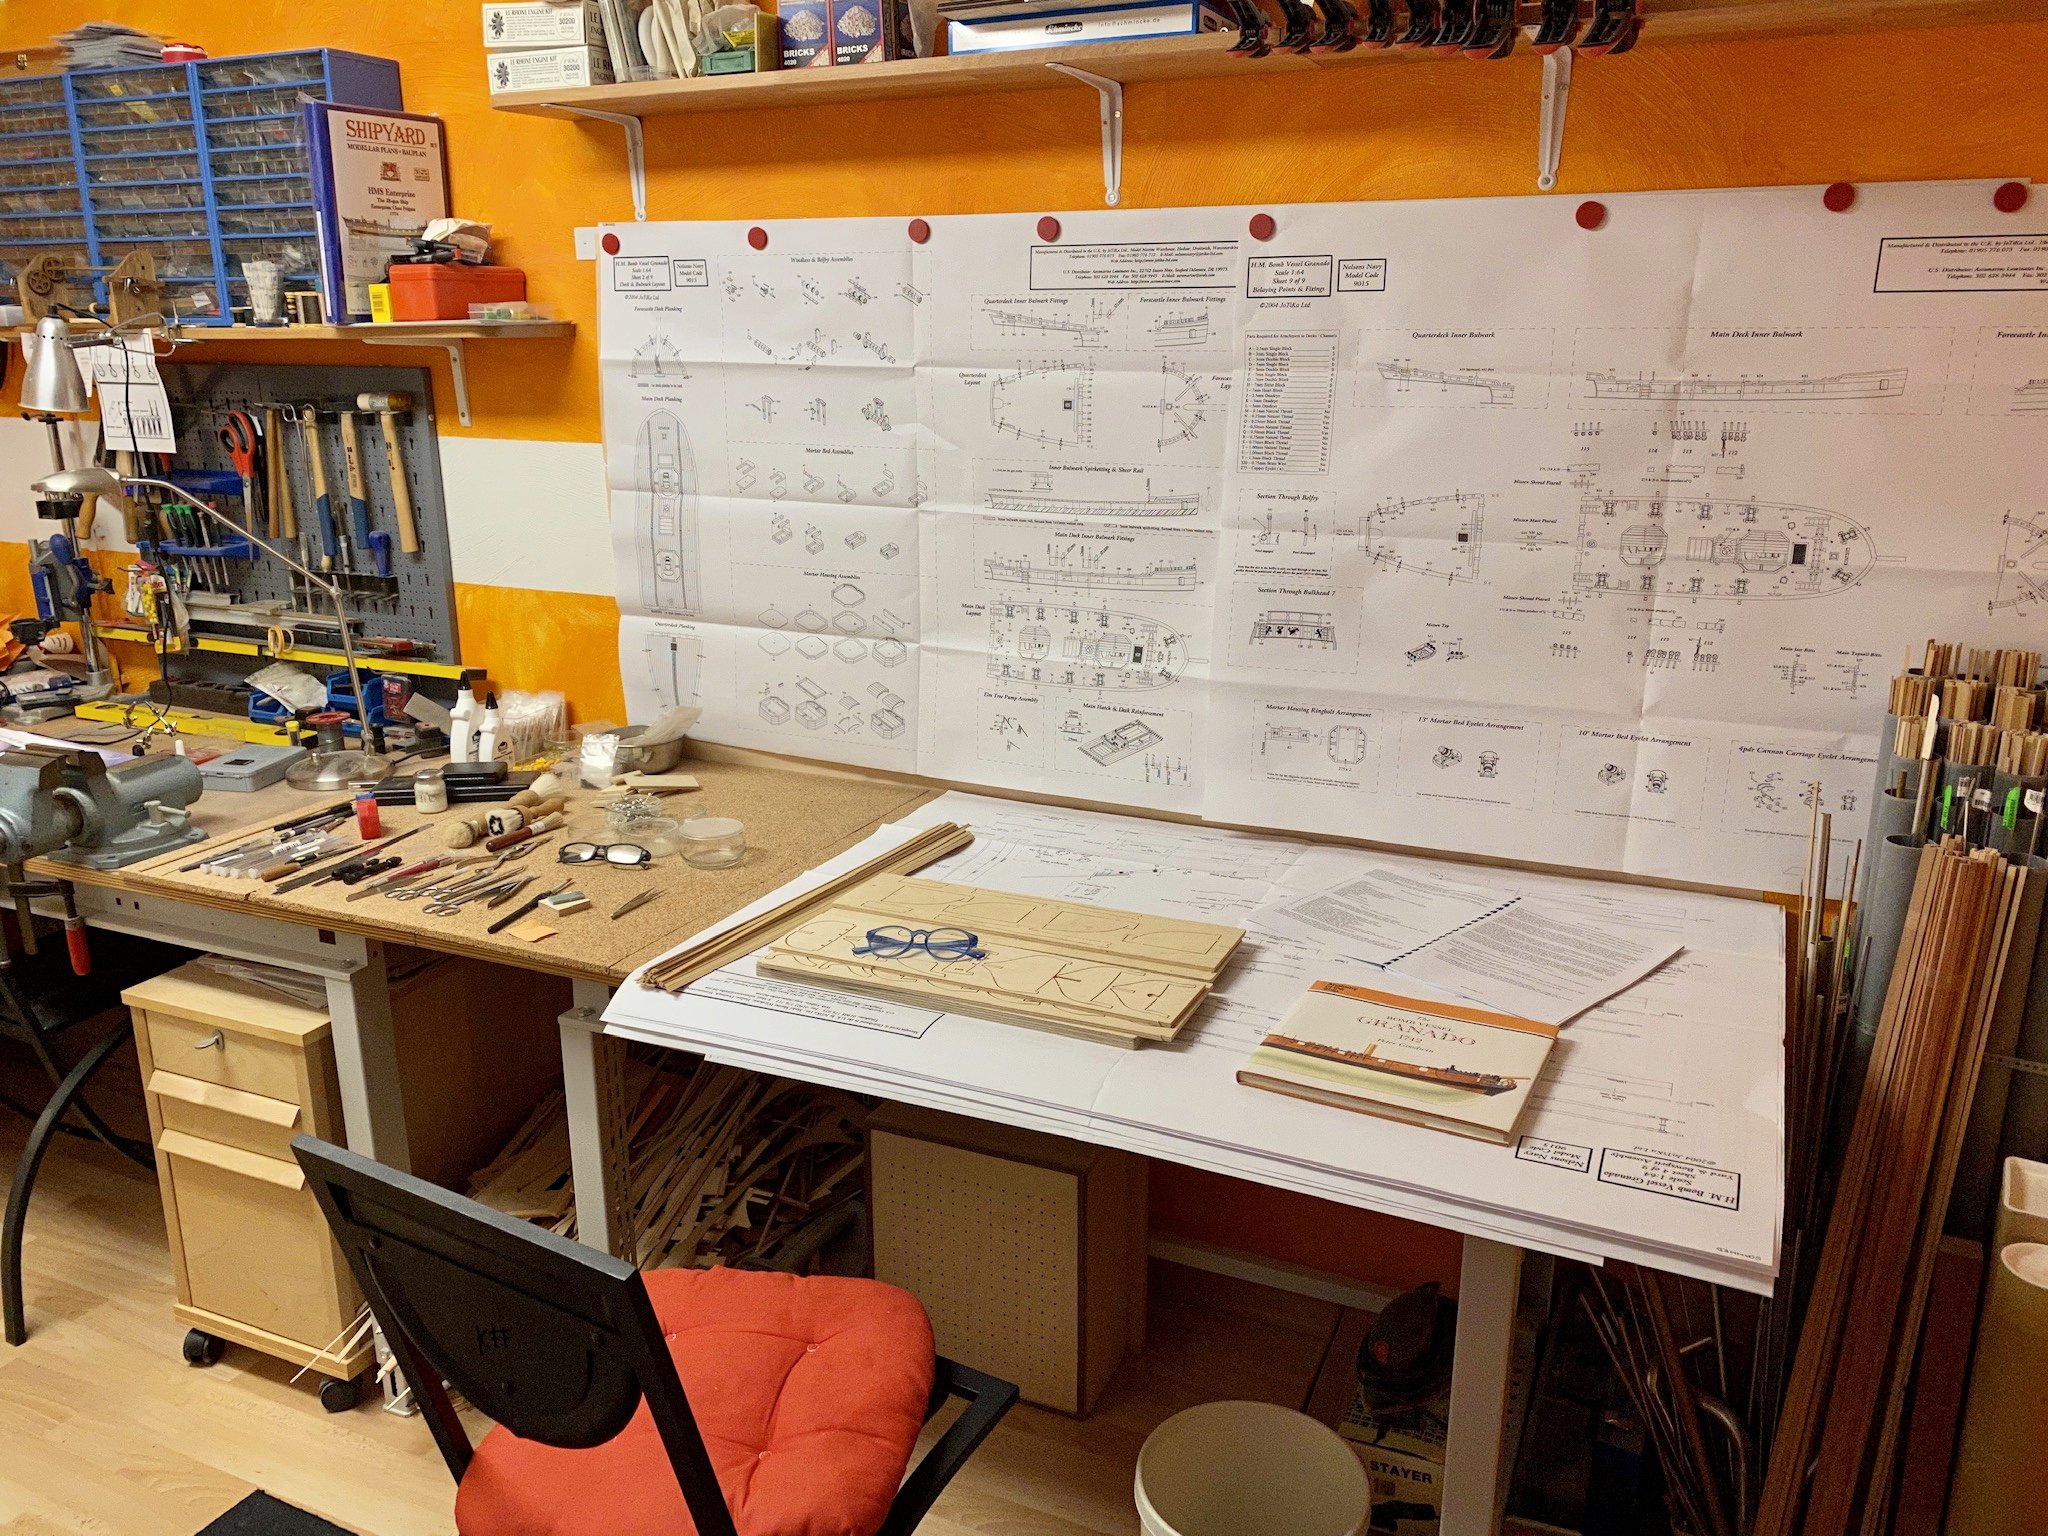
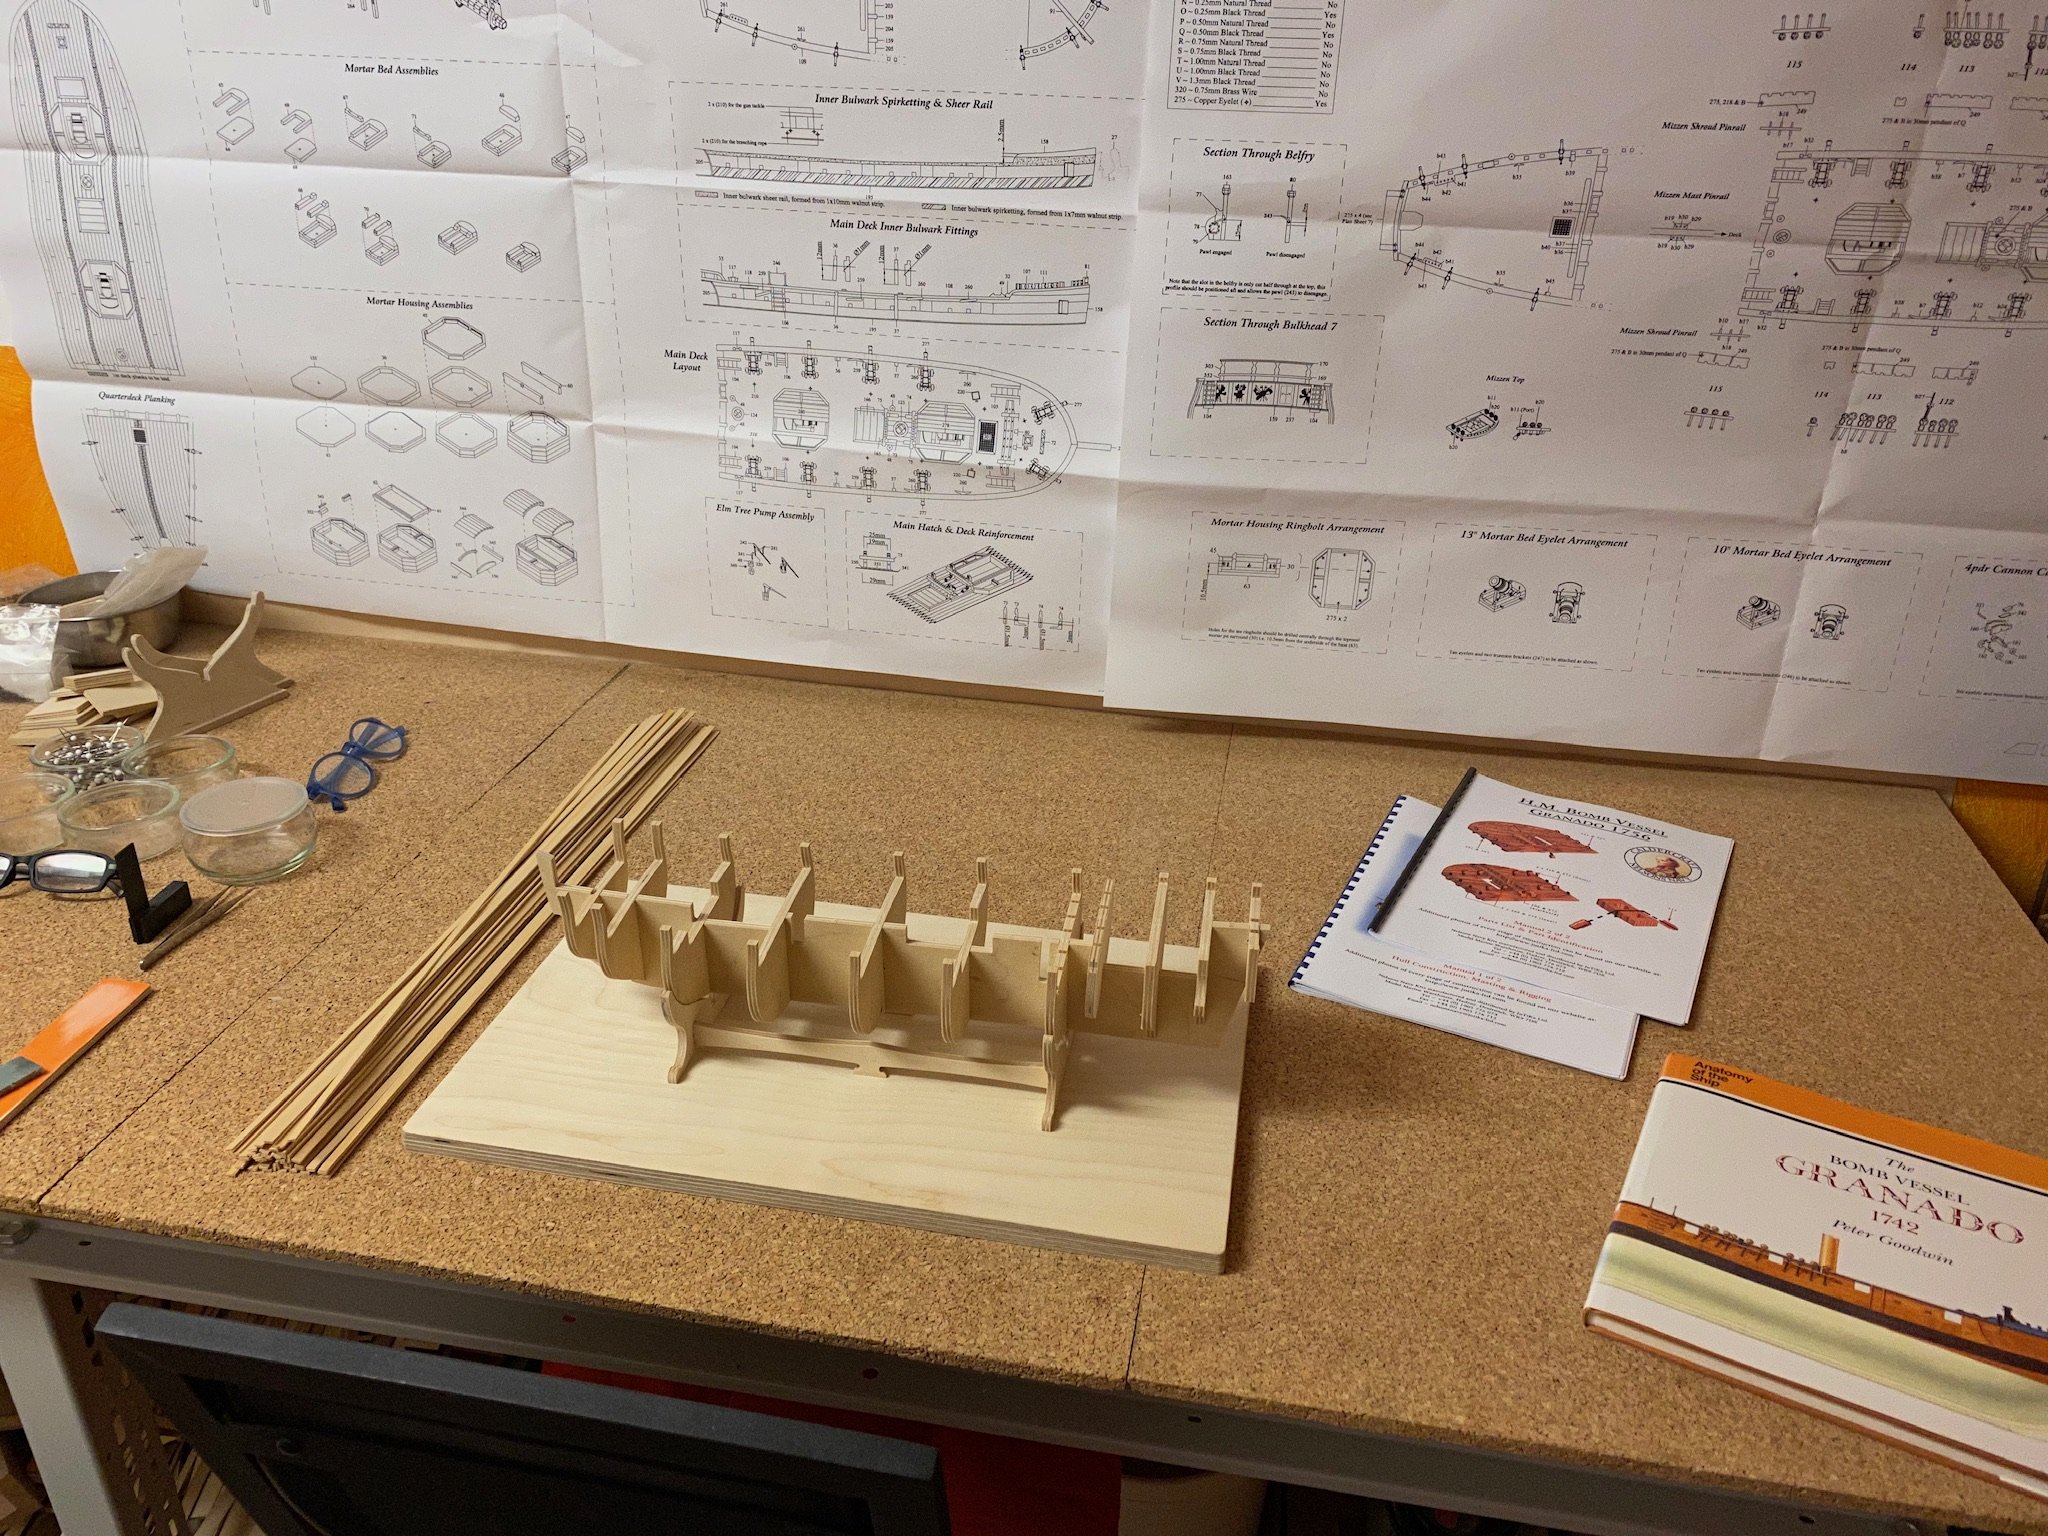
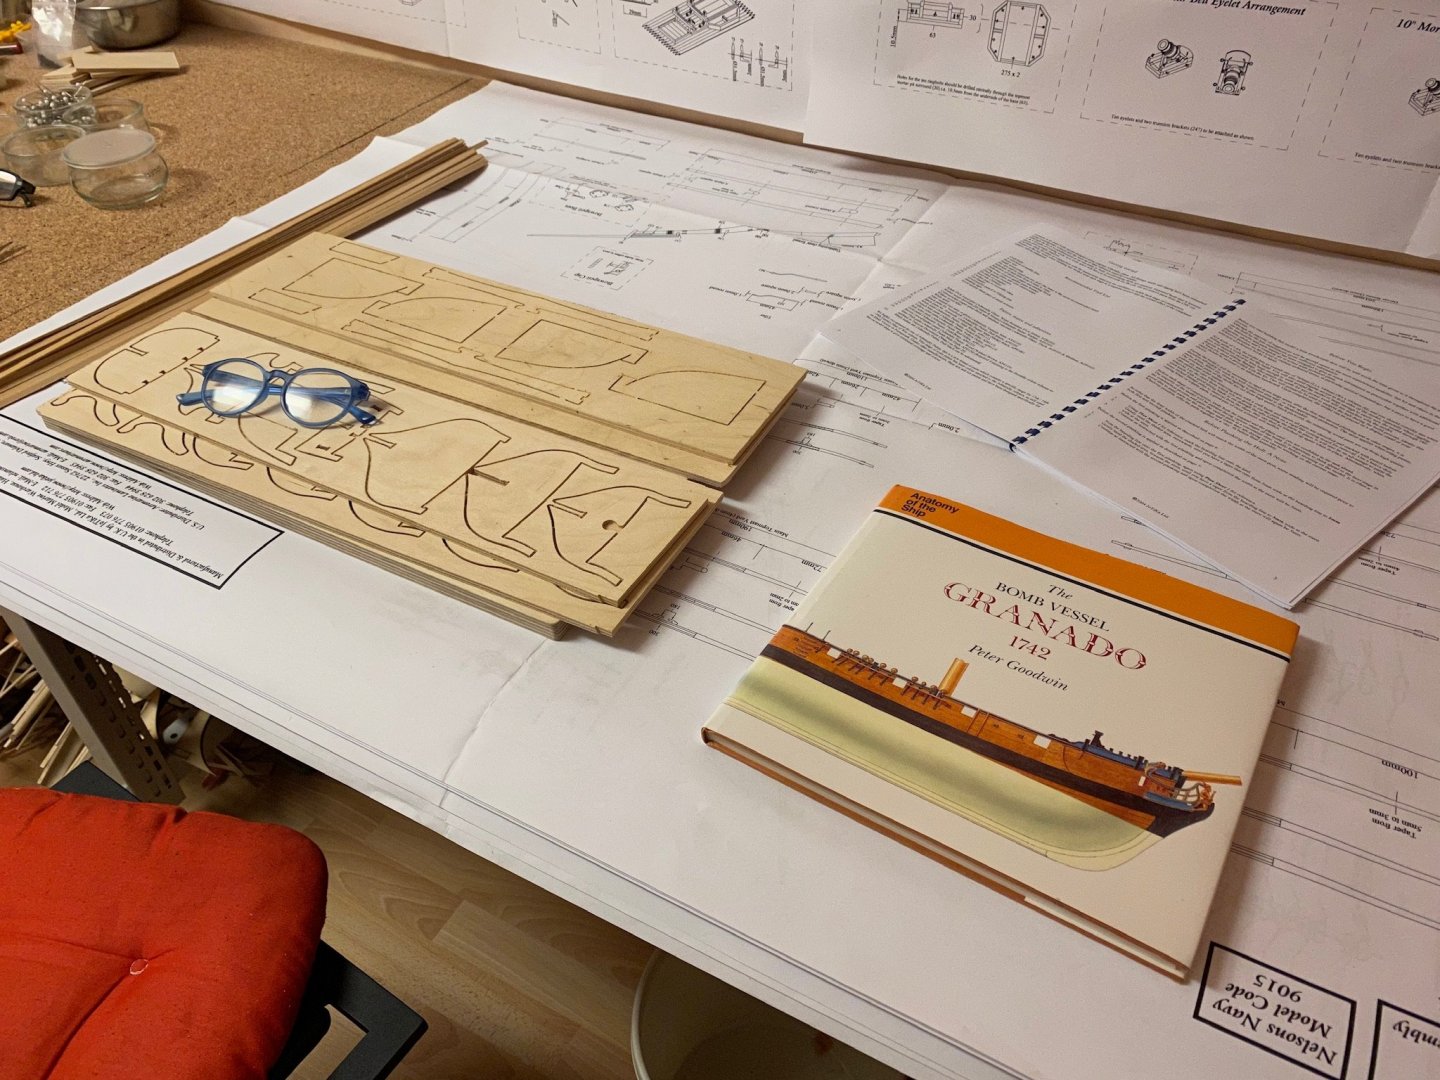
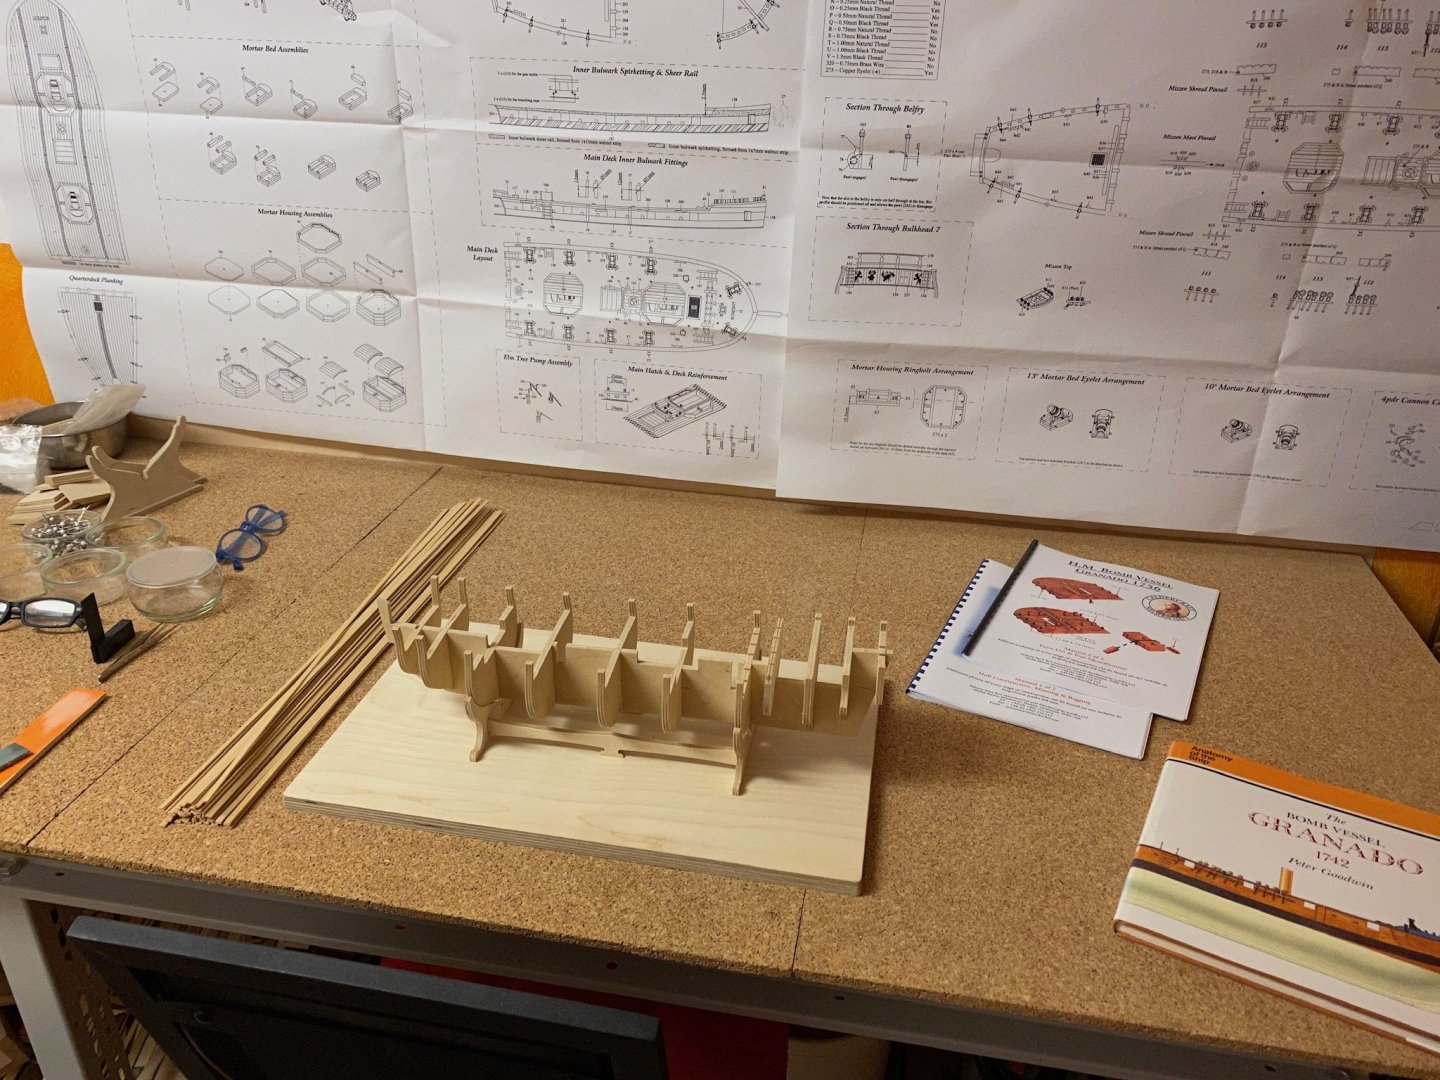
 Hello everyone, this is my forth kit build and my second build-log. I bought this kit on eBay for a very reasonable price some years ago because this model is one of some that forced me into the hobby and I hoped to develope enough skill someday to build it. So let’s give it a try. I wanted to build the Cheerful next but after building the Sherbourne and the AVS I got a little tired about modeling another single-masted ship. So returning to 1/64 scale - seems tiny in comparison to quarter-scale. The kit itself seems to be of good quality - except for the supplied walnut stripes that look awful. So I may replace that wood. I was also able to get an old copy of the AOTS book related to the Granado that might prove very useful for reference. First thing I did was to build the supplied rack to put the model on during the construction. Then I carefully released all the bulkheads to dry-fit on the keel.

-
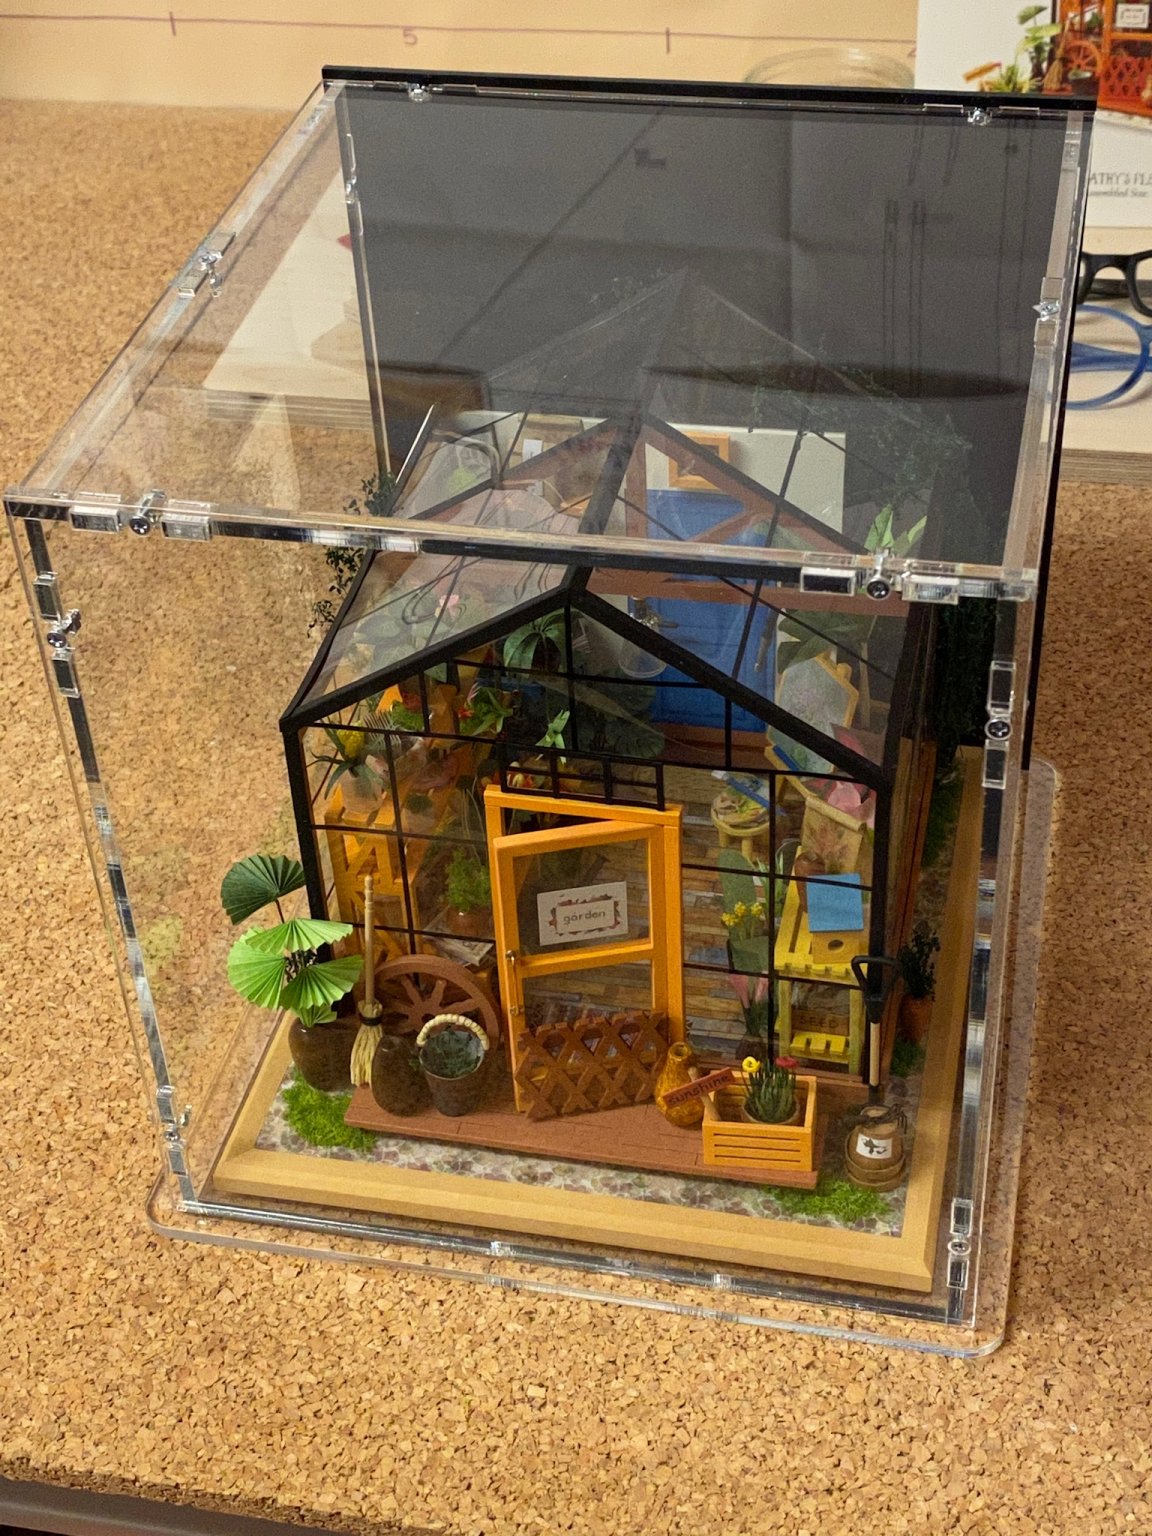
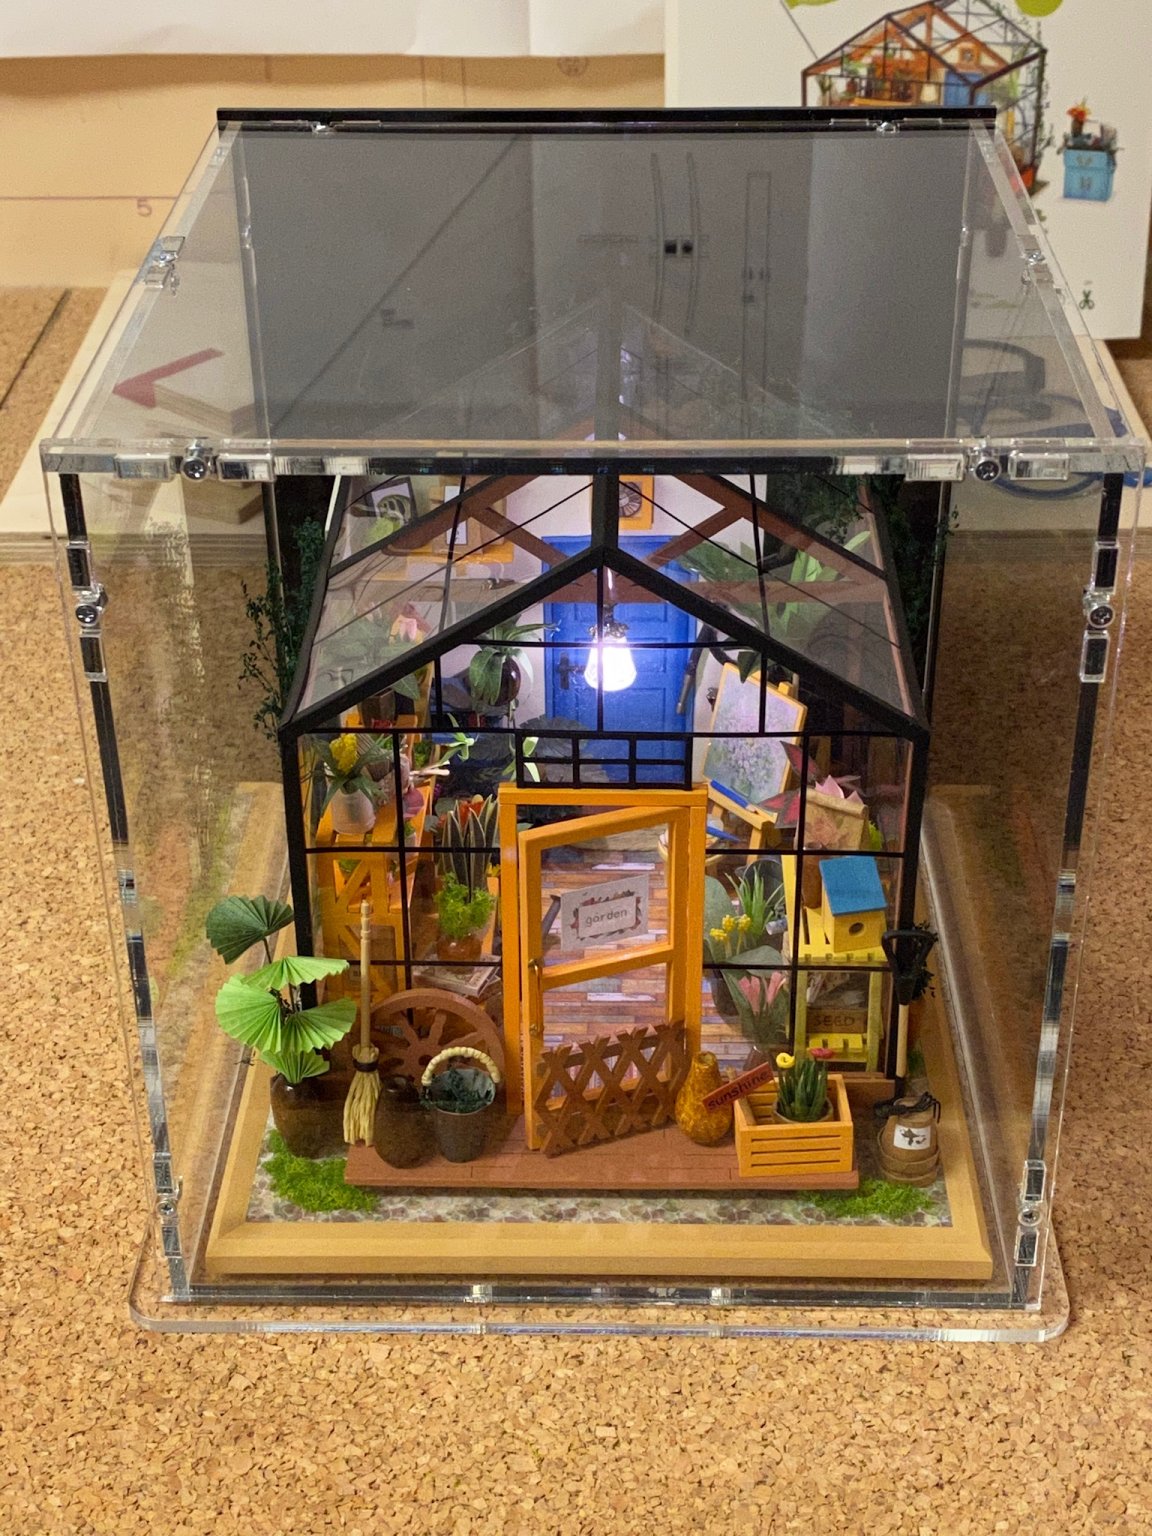
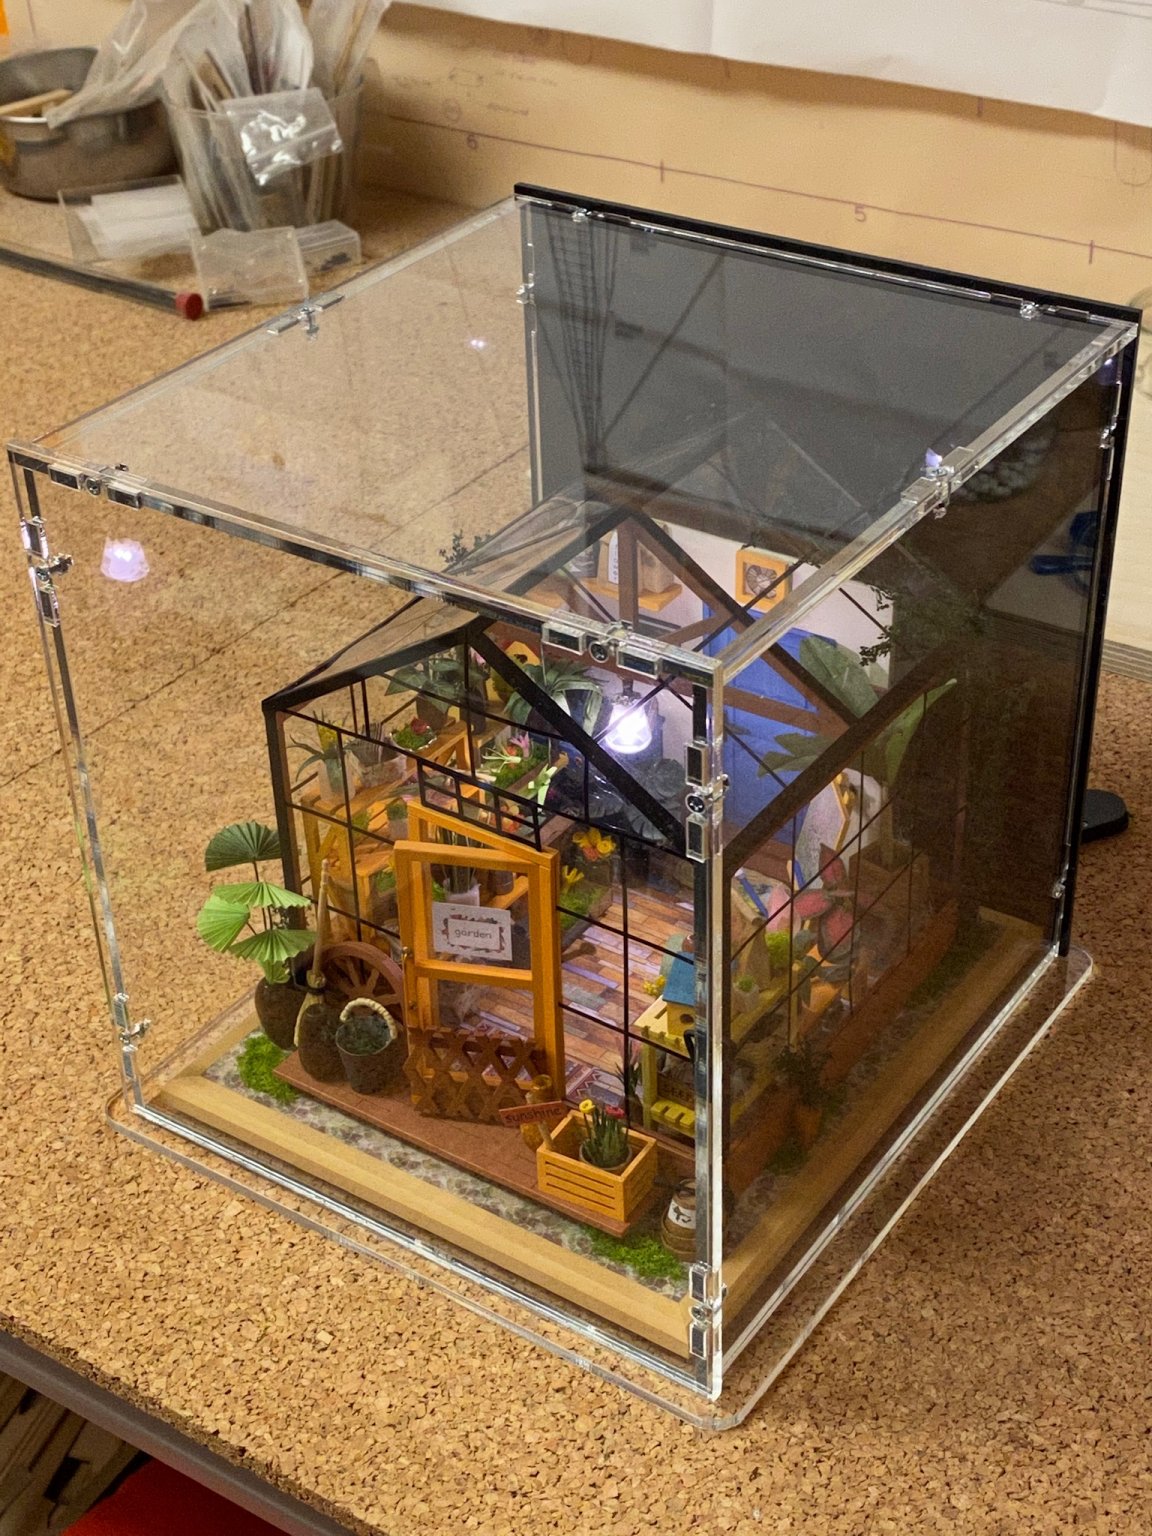
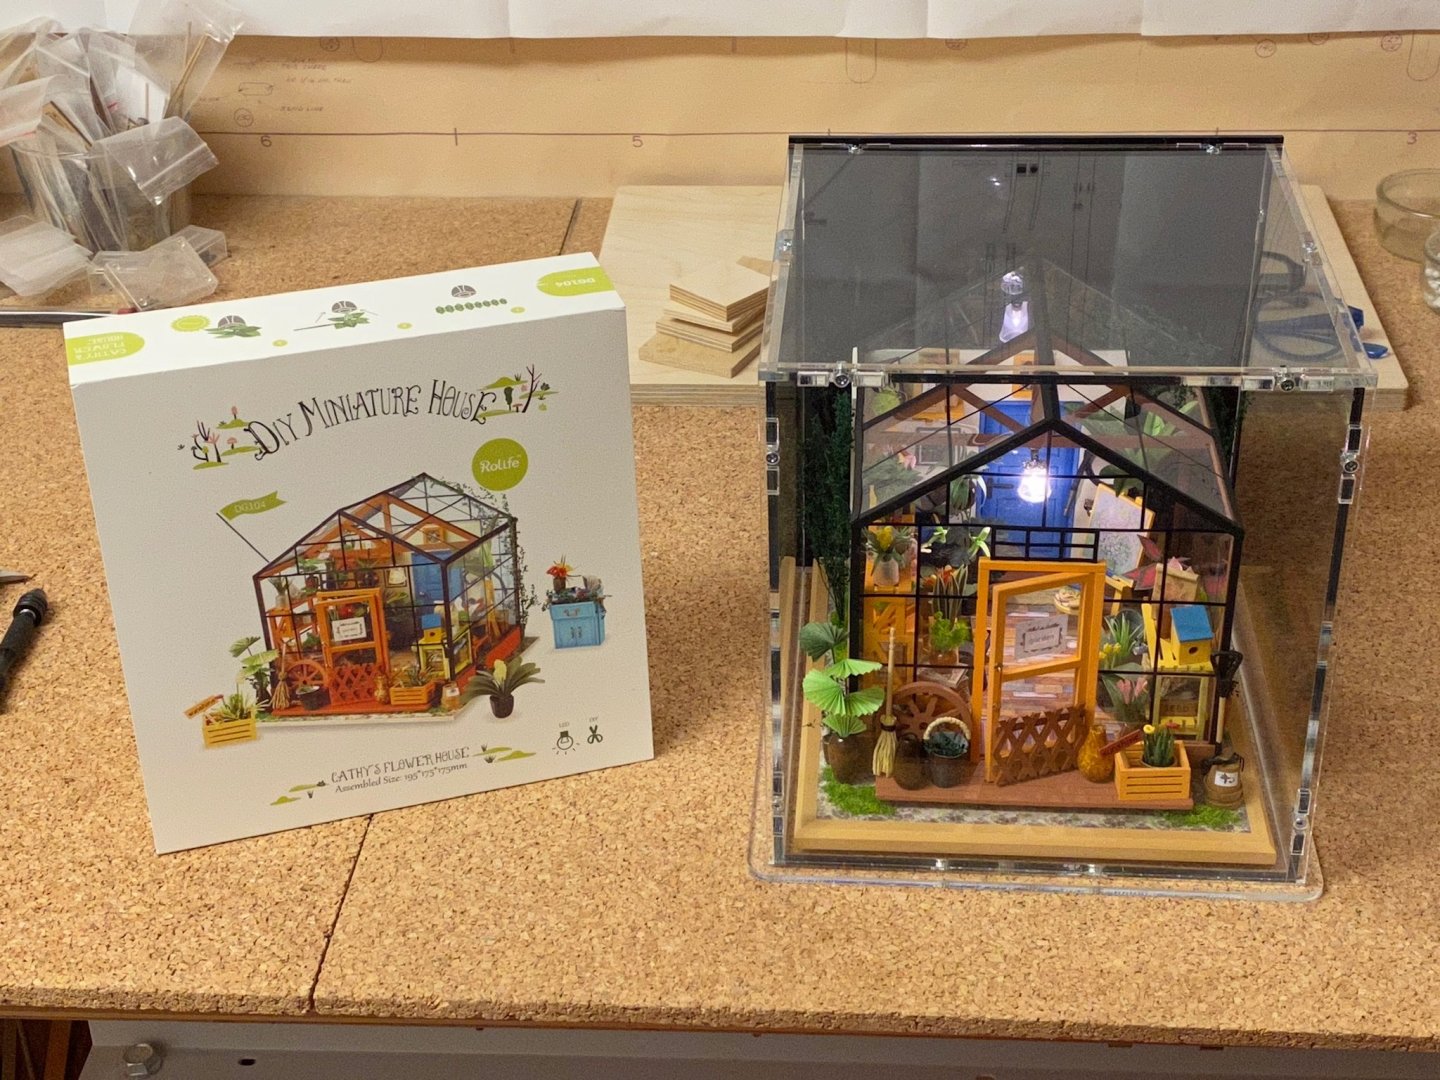
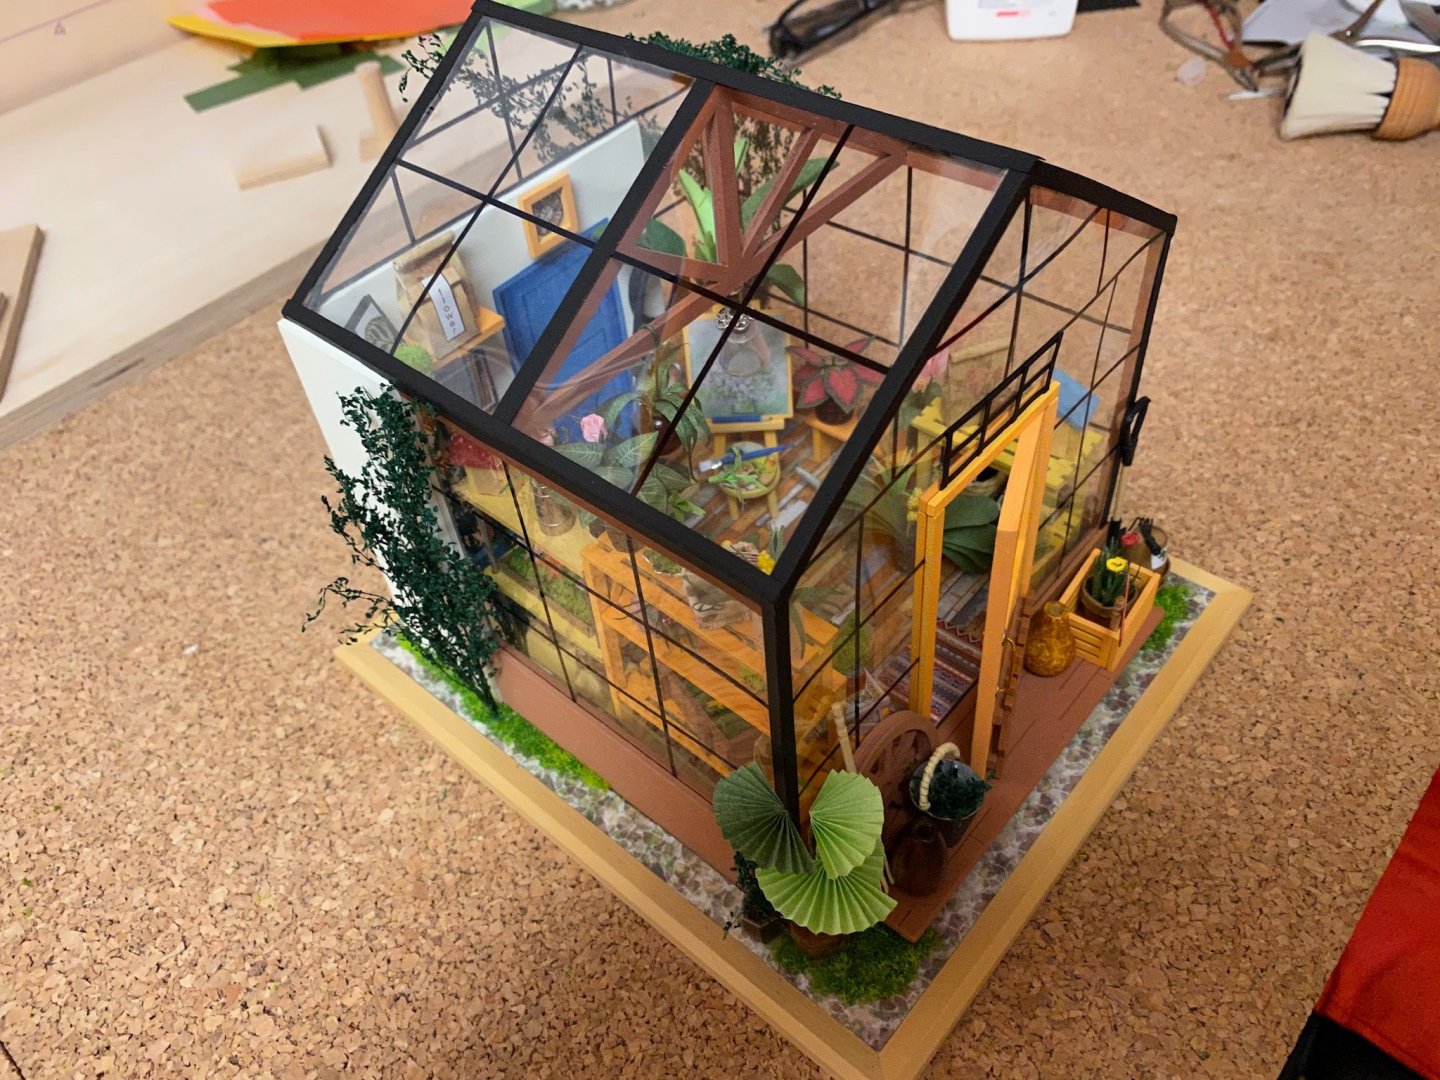
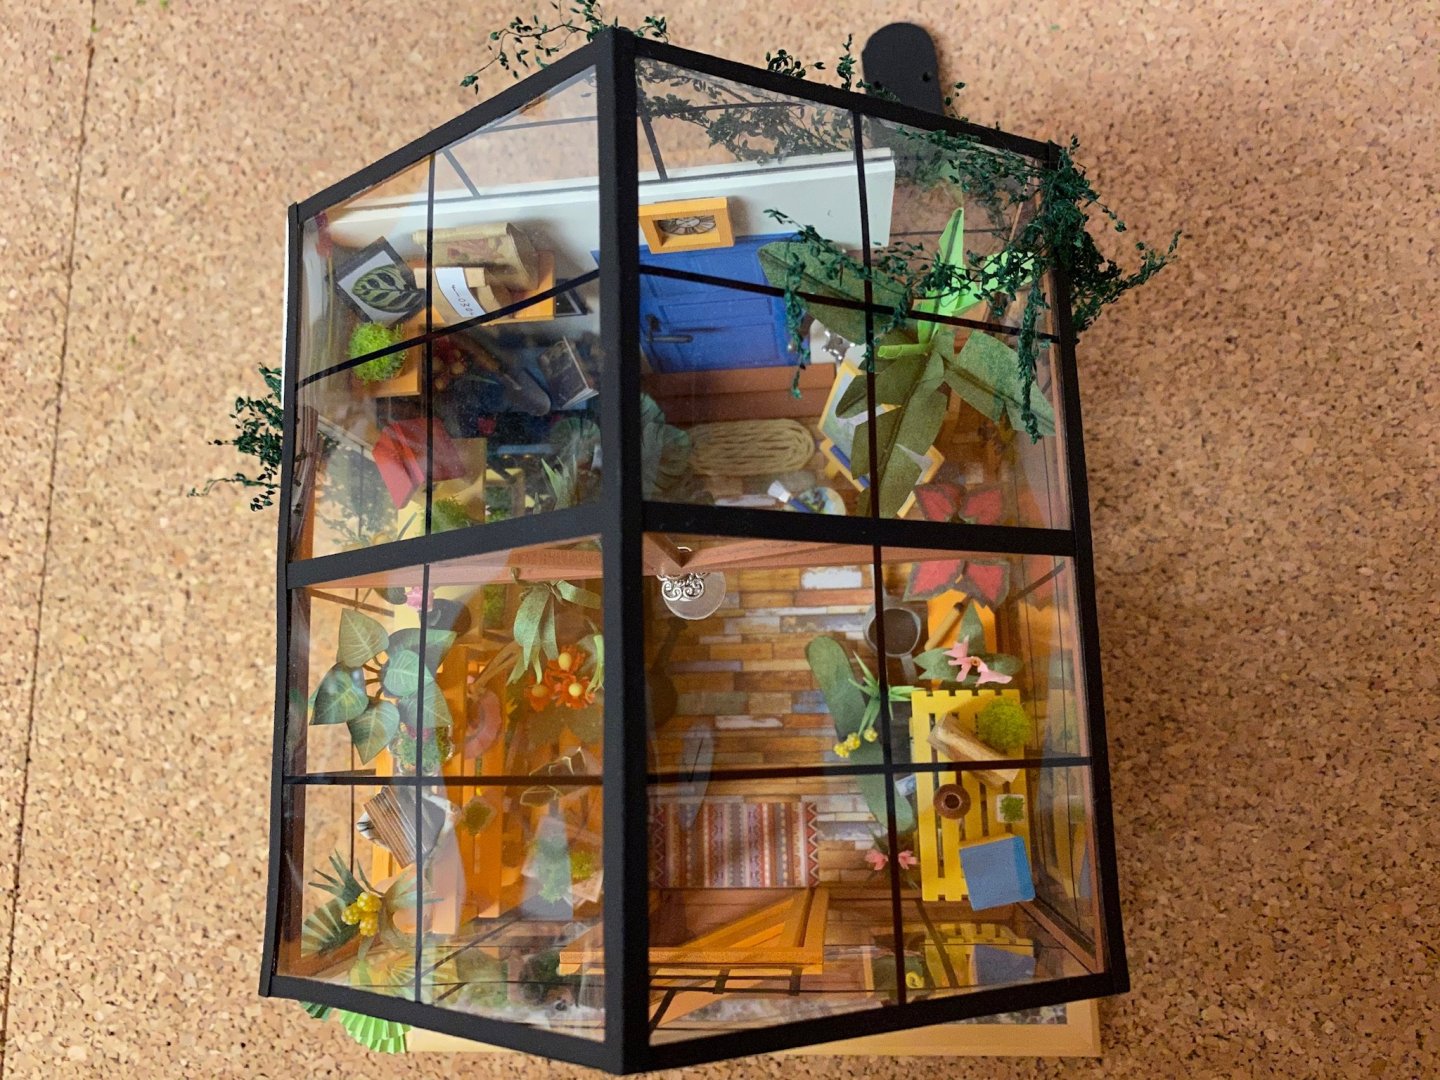
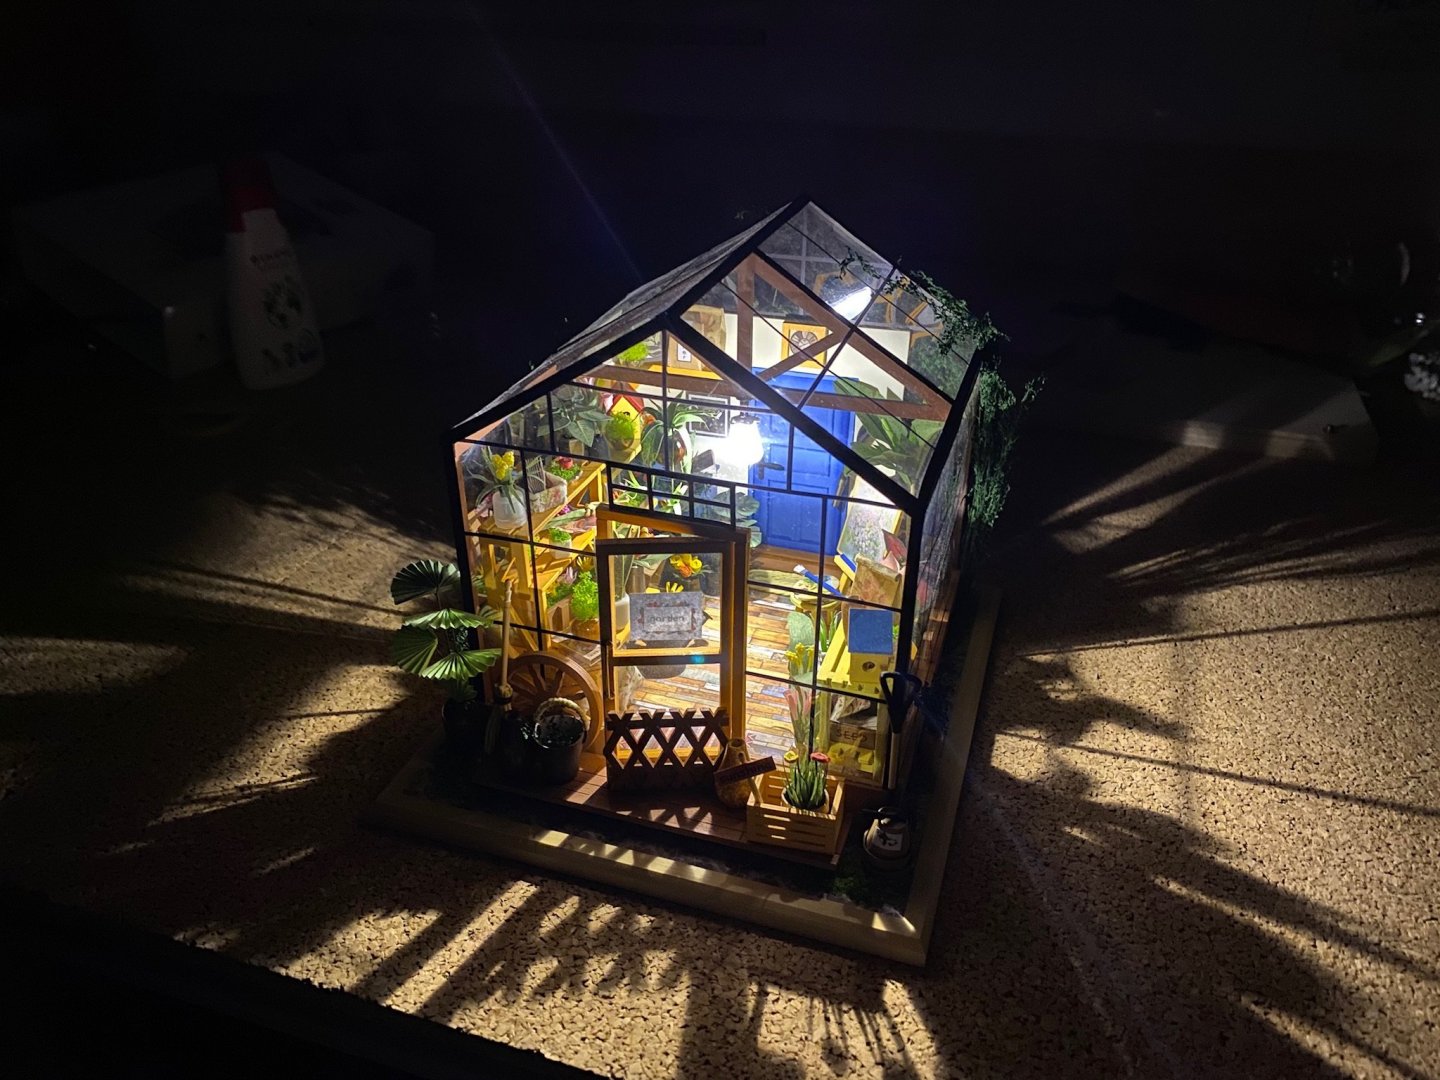
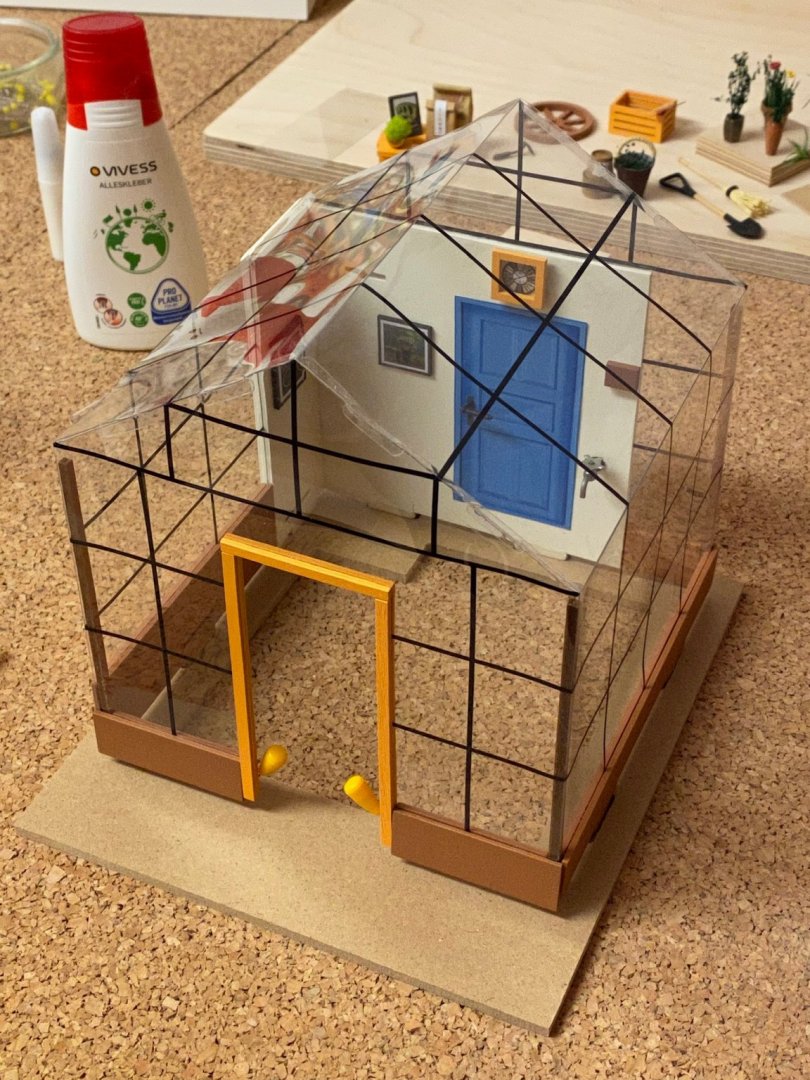
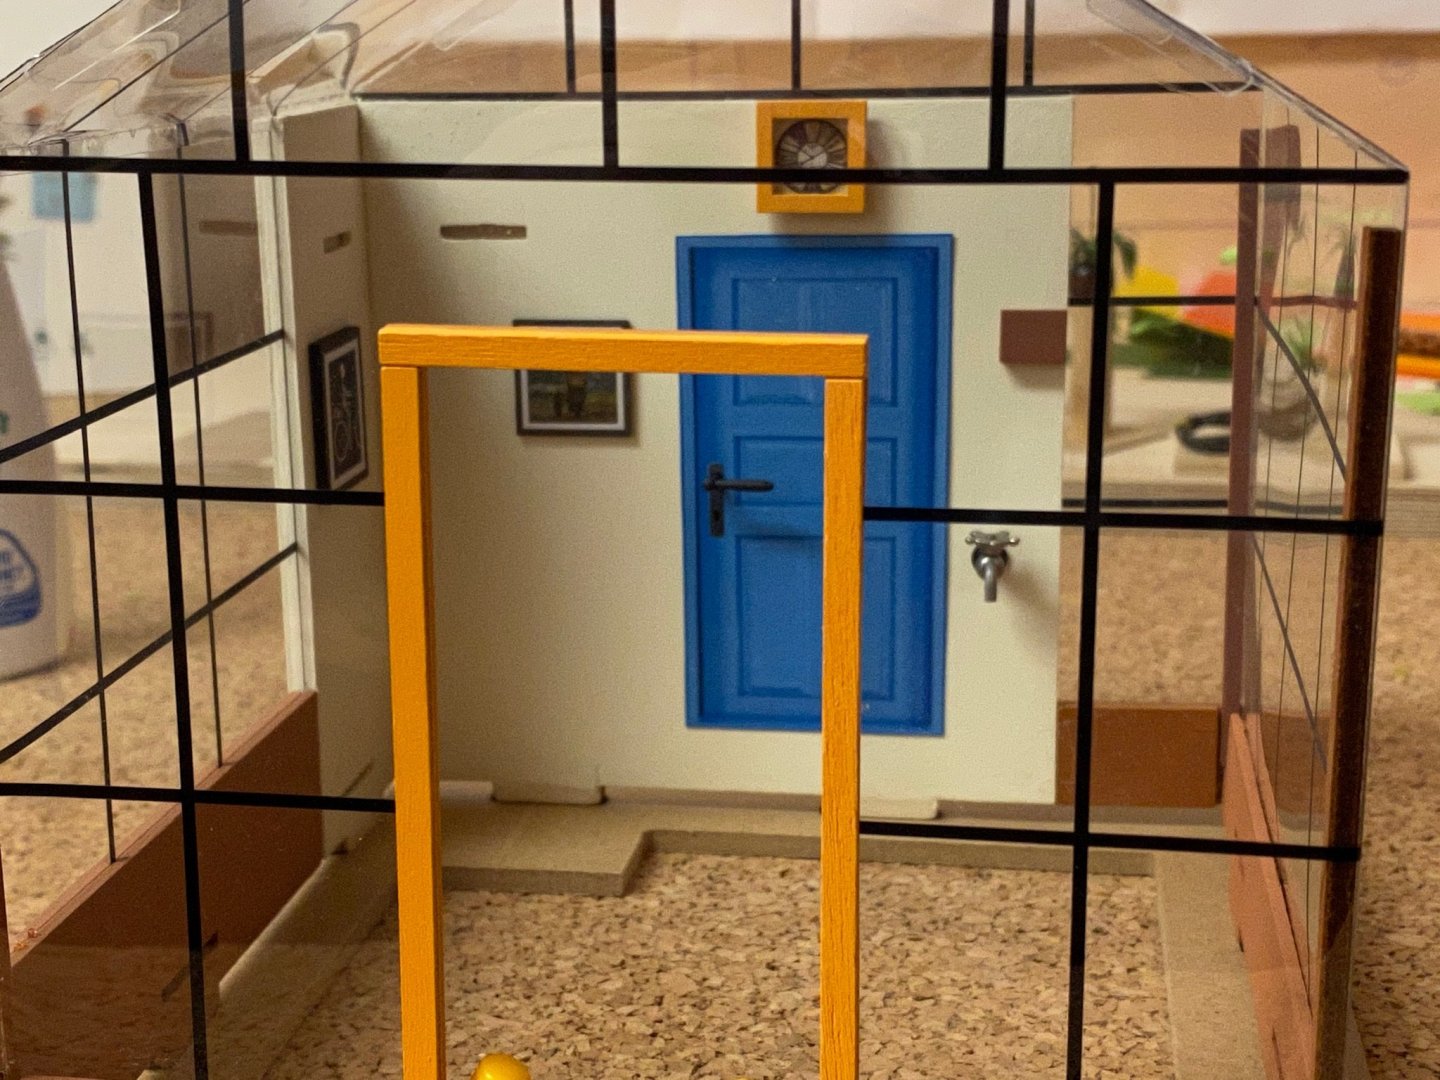
Thank you, Popeye. ☺️ The flowerhouse wasn‘t difficult to build. Almost all parts are supplied. I only used some matte varnish to protect the printed paper from UV-light, made a handle for the backdoor, a handle for the garden hose and a flowerpod out of some scrap wood. The items are arranged as proposed in the manual but can be rearranged as you like. The clear part has a protection layer on it that is almost invisible but has to be removed before assembly - that was not mentioned in the manual. But in the end it was a fun build that can be done in 4 weeks..
-
Thank you very much, Kevin and Mark.
-
Very clean and nice build!
-
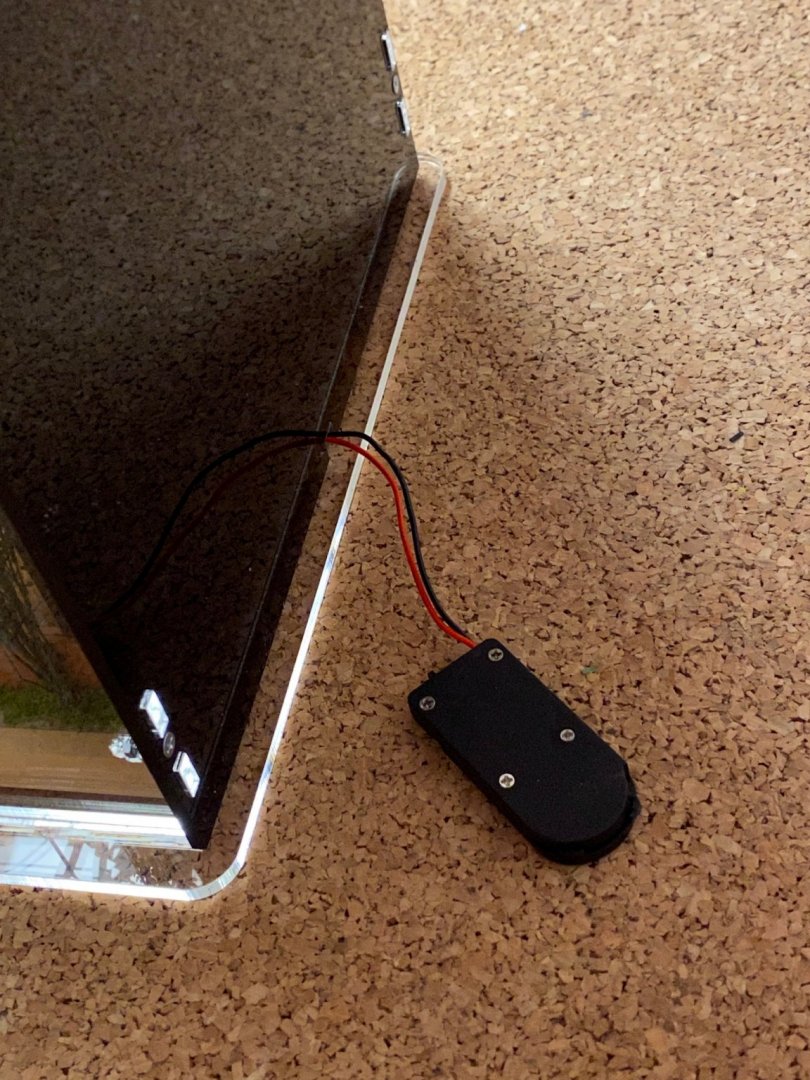
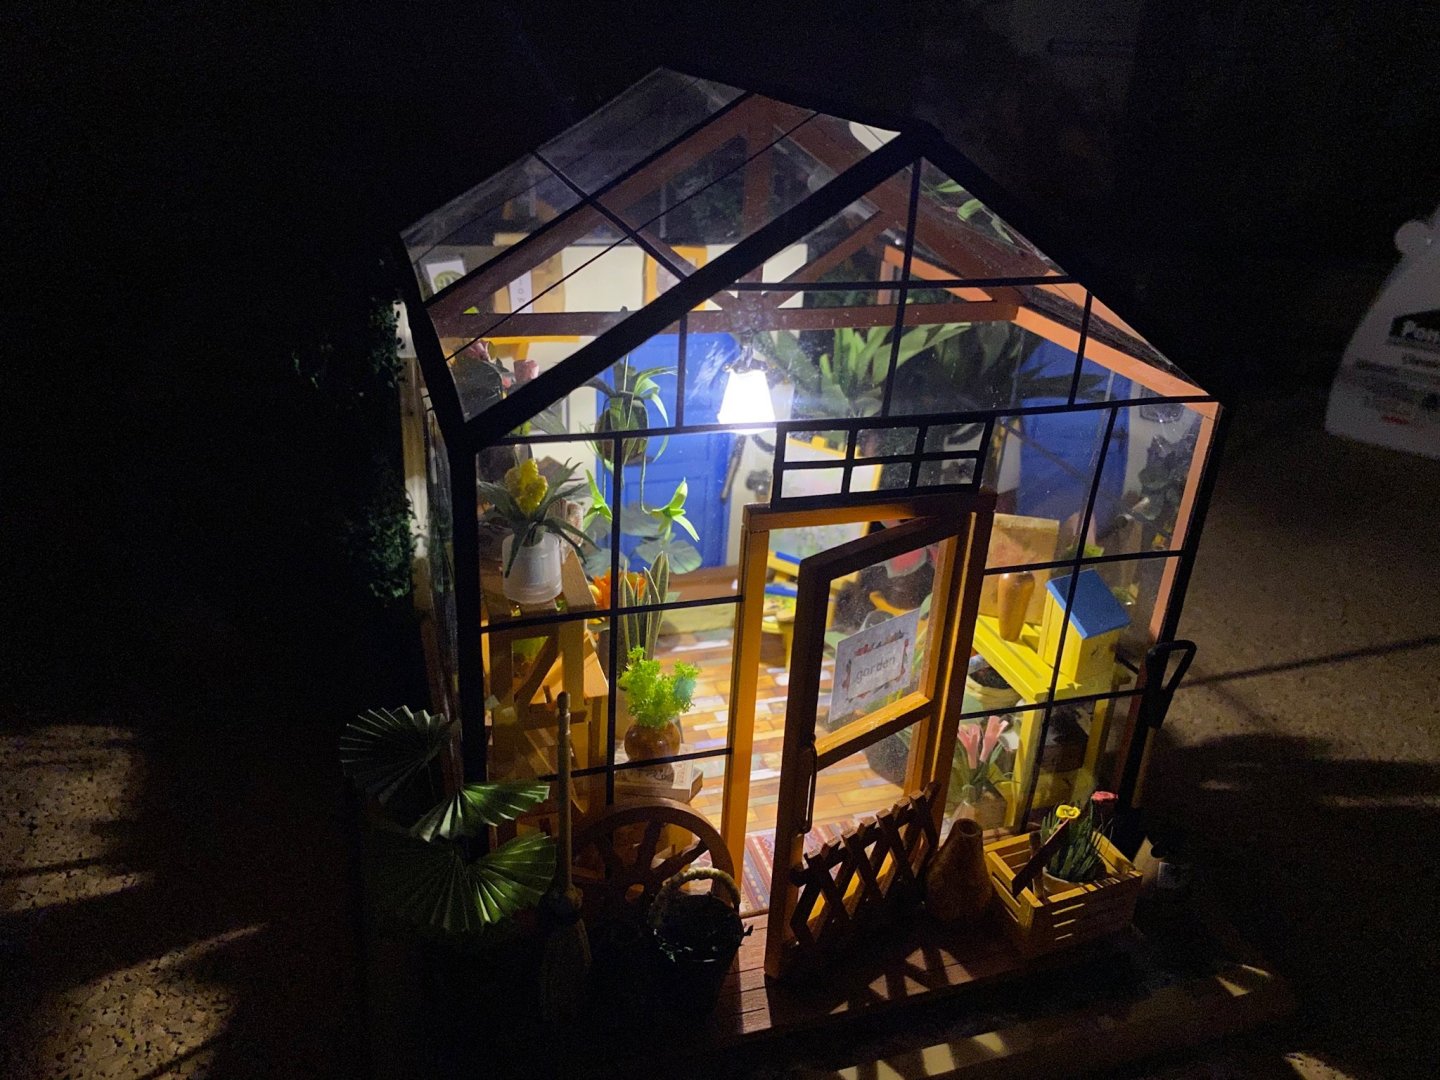
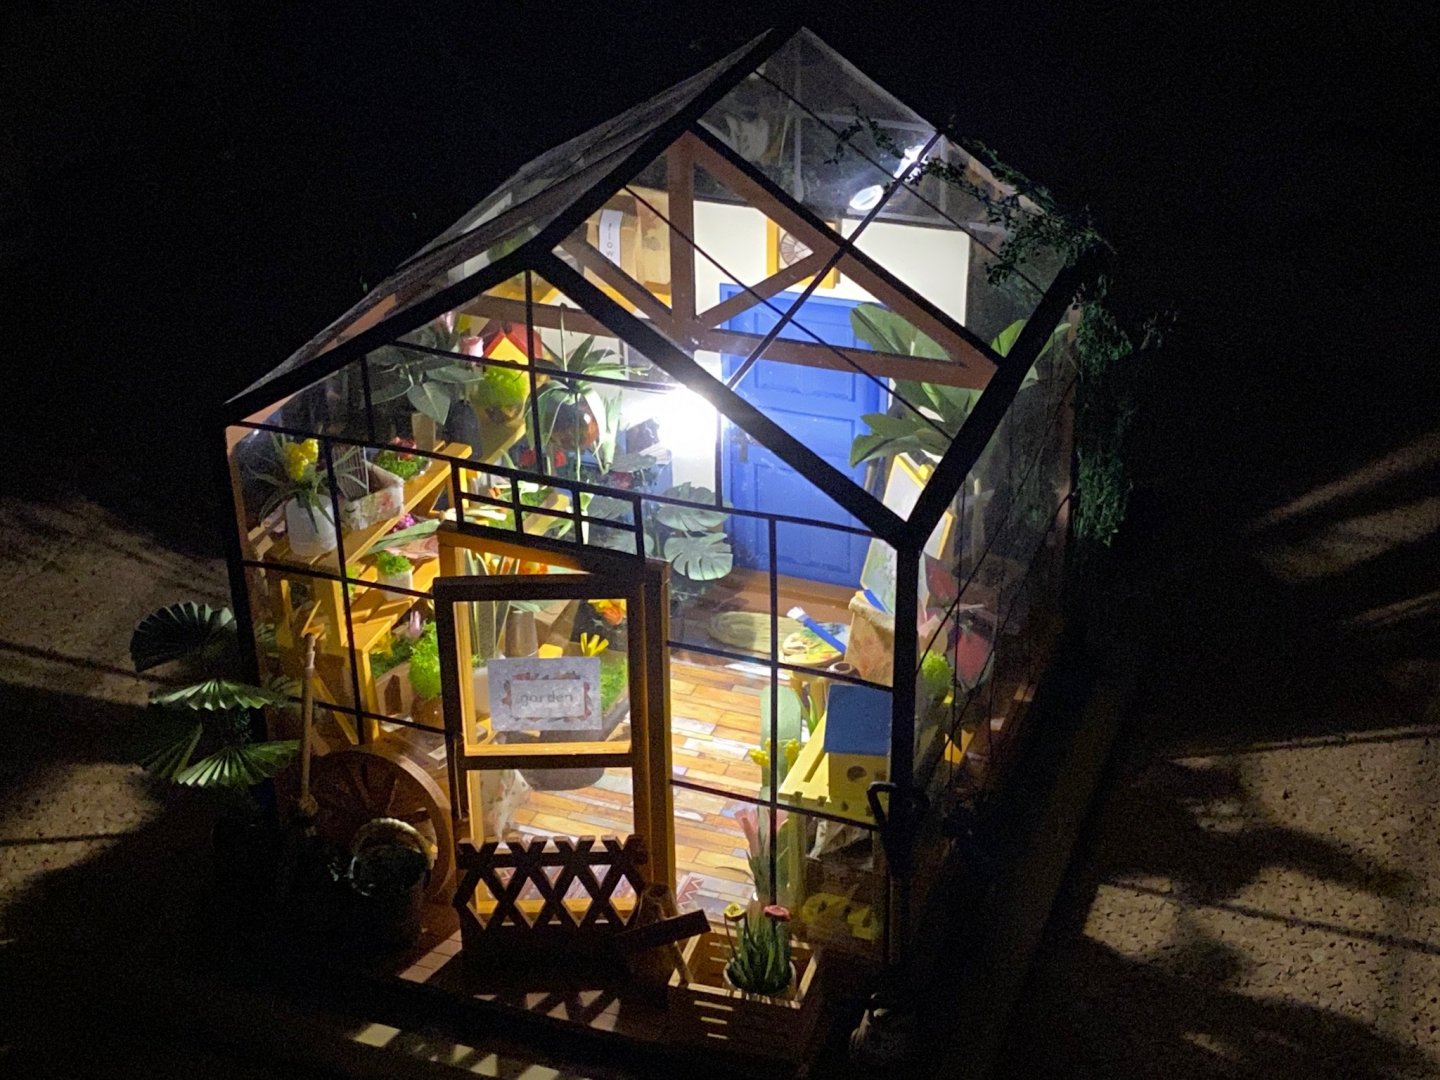
Thank you very much, Ken. My daughter is very pleased, she already looked for a place to keep. I already have a display case with a backside in black. The battery-box is intended to be stored under the base, but that makes it very difficult to put on / off or change the battery. Instead the cable is now leaded through the bottom to the rear and then out of the display case. I will fix the battery box with double adhesive tape to the case. So activating the light is much easier now... THANKS EVERYONE for following the build. Next will be returning to ship-modeling...


- 54 replies
-
- 11
-

-
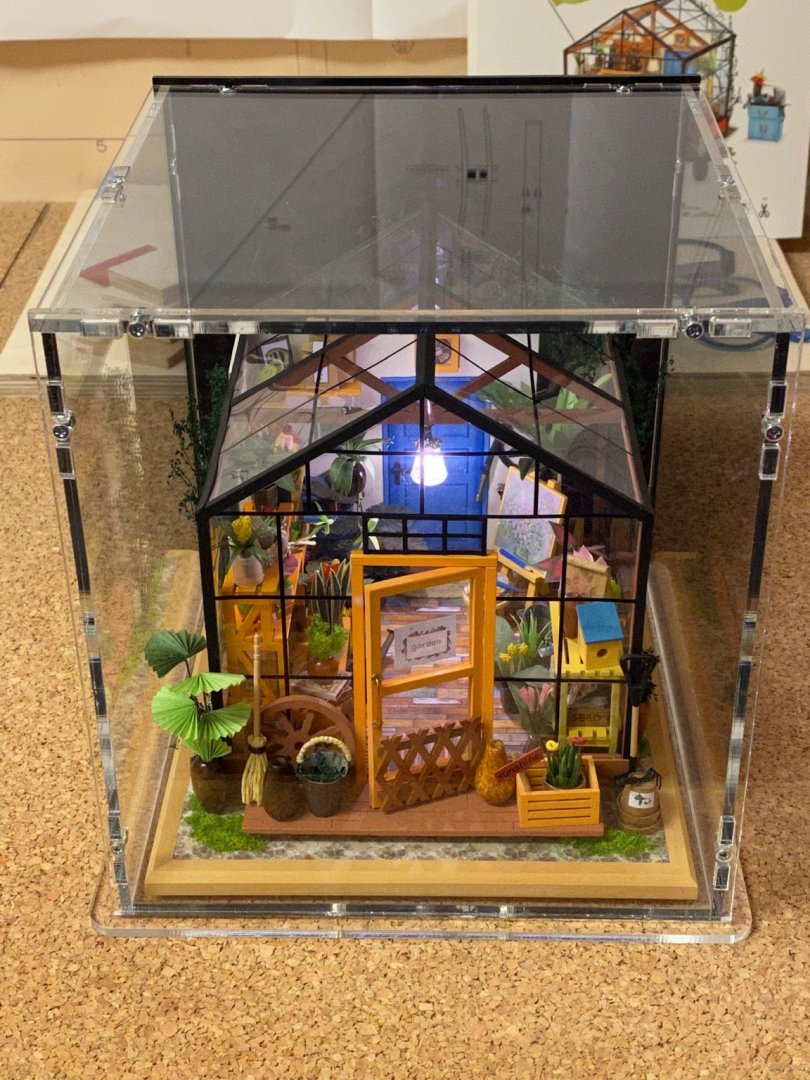
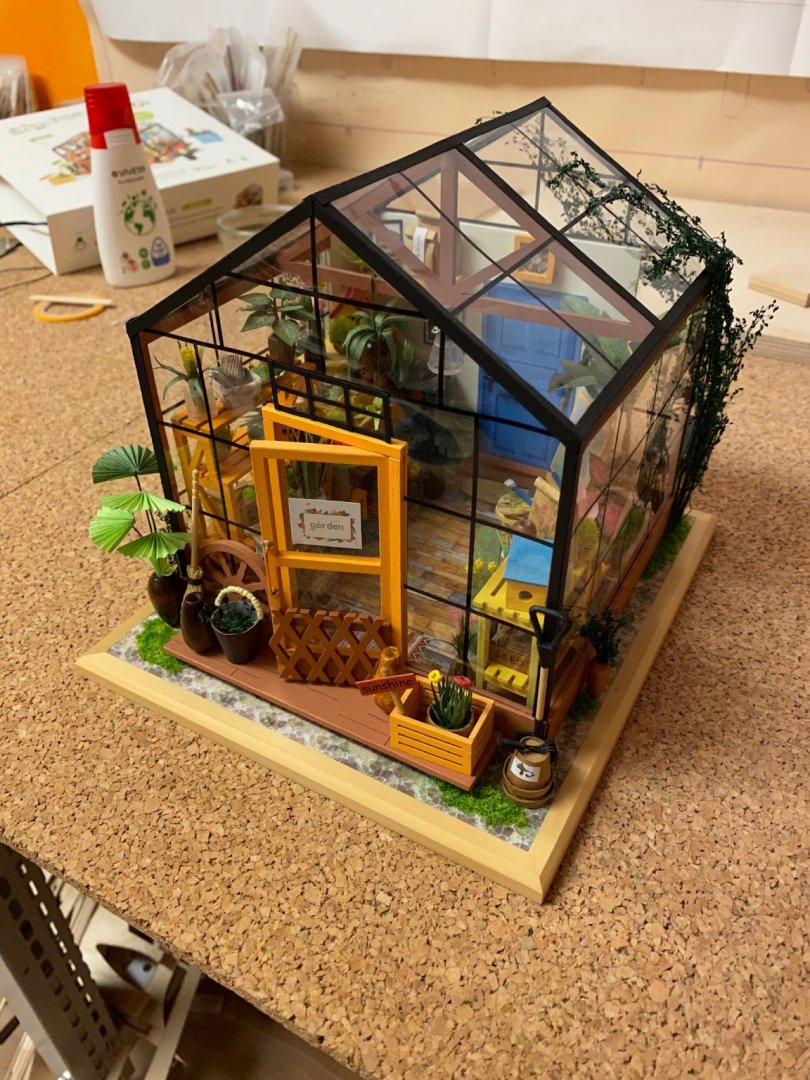
After a marathon session I completed the flowerhouse today. All remaining items were glued on, the cable was attached to the battery-box and some last flower-decoration and some grass powder was glued on the base. FINISHED! 😀 Some pictures from all sides and with the light turned on.
-
Thank you very much, EG.
-
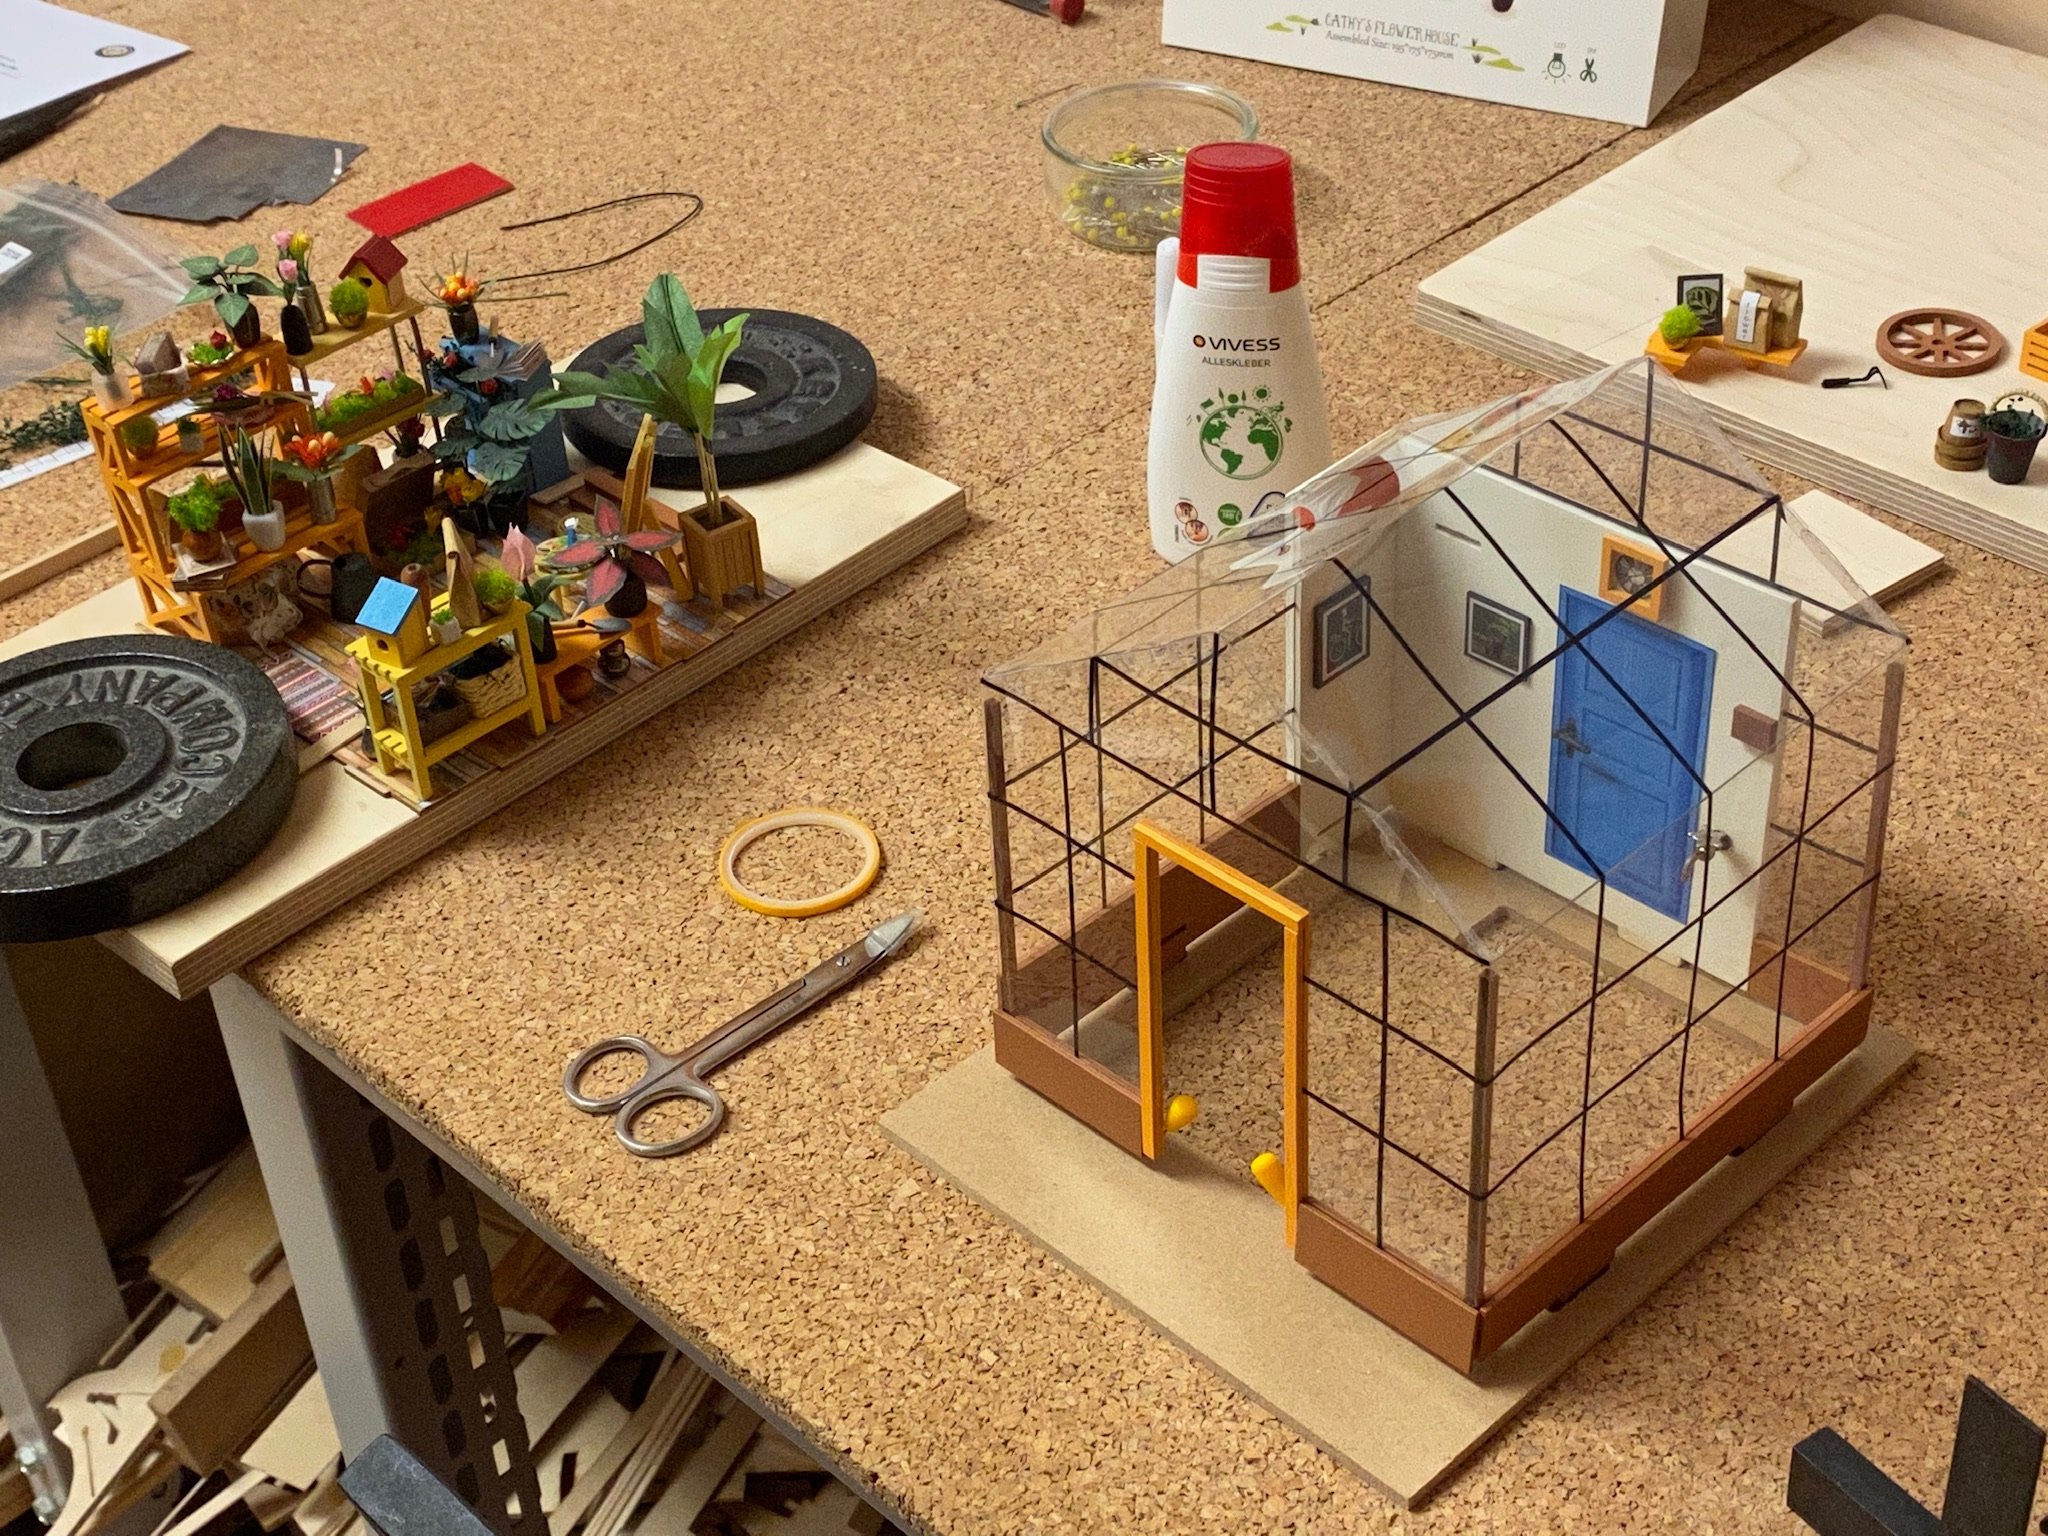
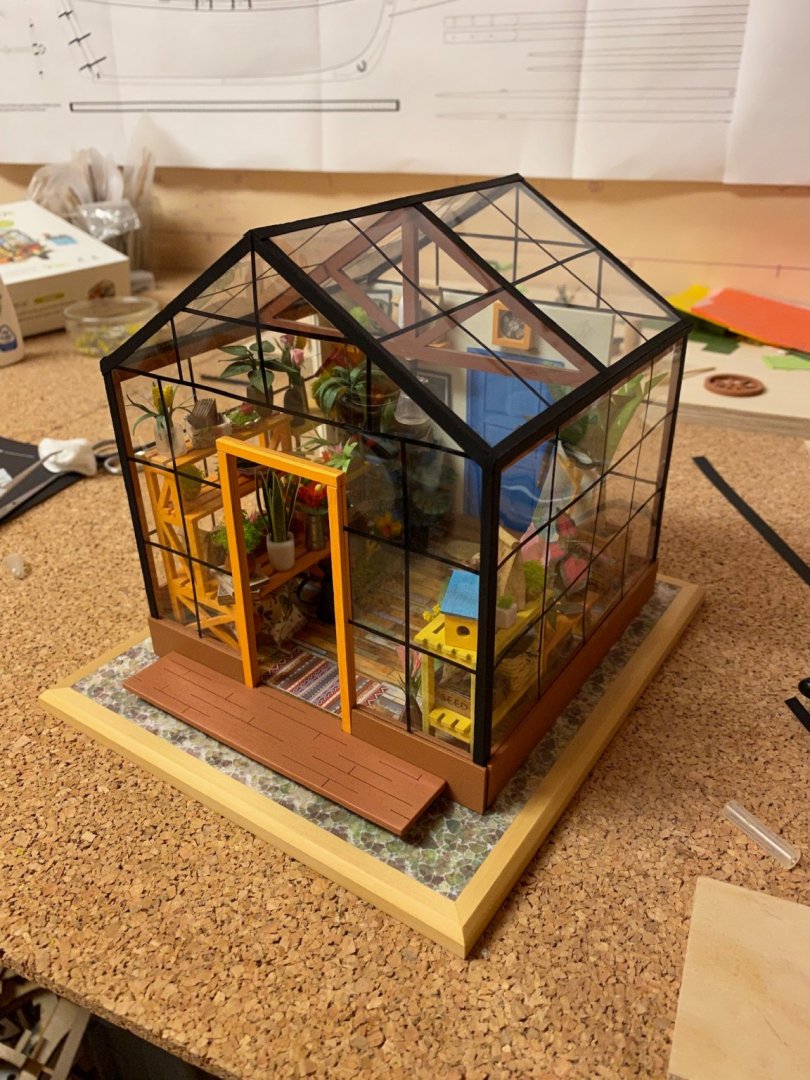
Black cover stripes installed. They are made of black card and cover the plastic connection pins that hold the clear part together.
-
Absolutely stunning!
-
You‘ve made a good job so far.
-
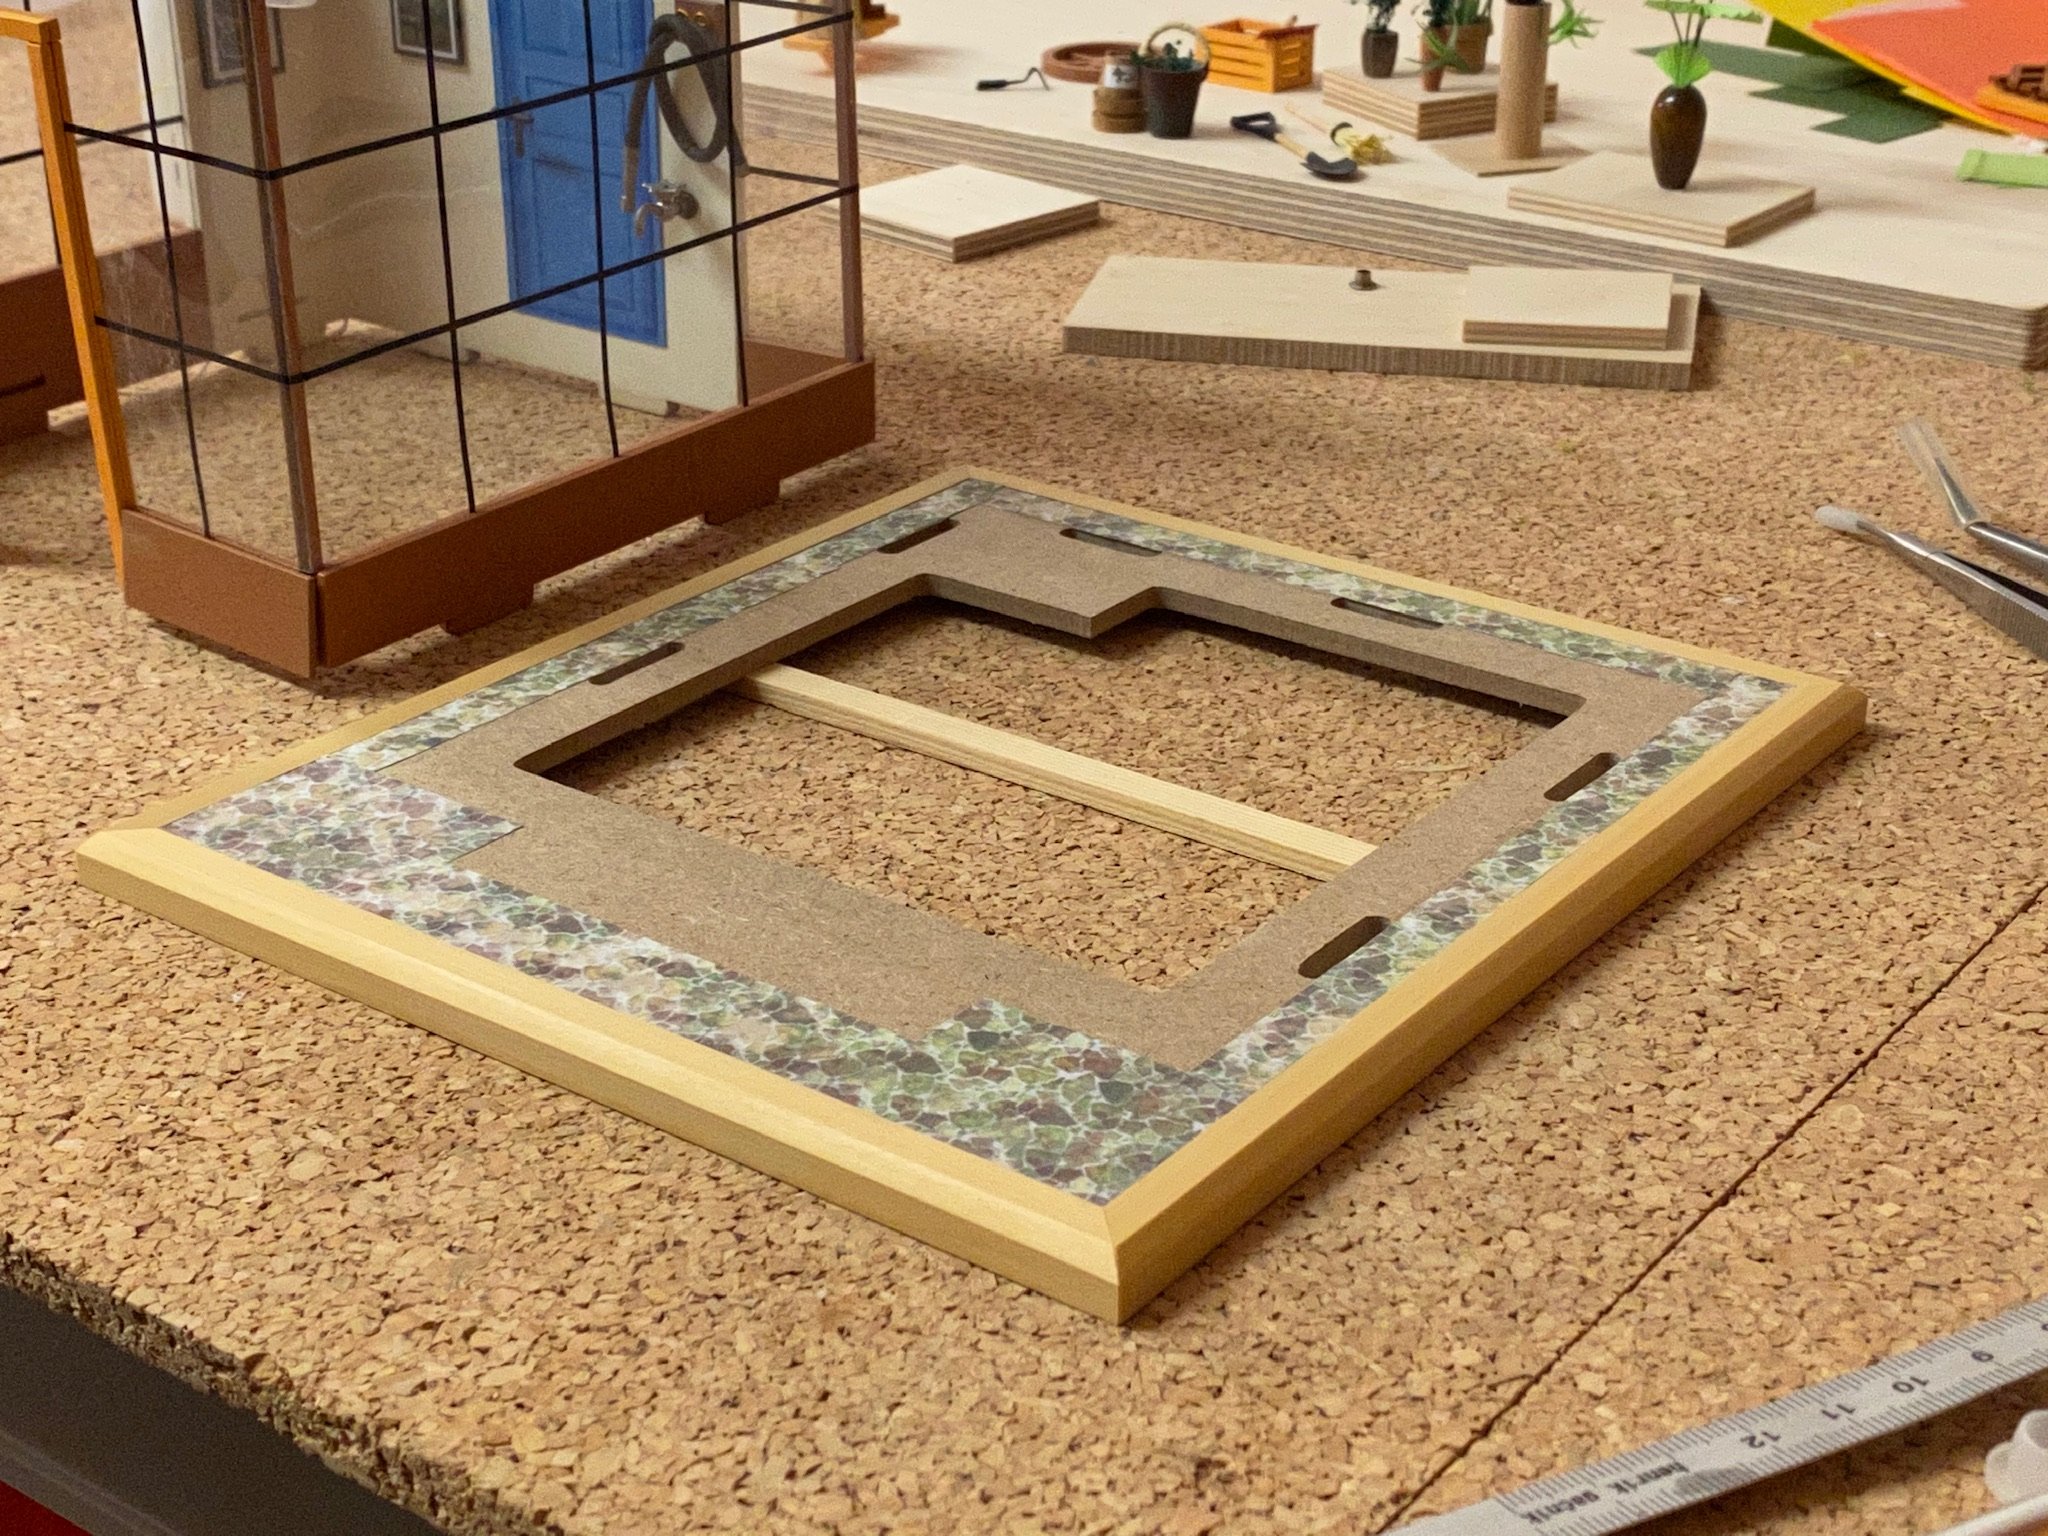
Finished the base.

-
Incredible nice ship! And the lightning gives it a very realistic touch.
- 337 replies
-
- 3
-
-
- finished
- mountfleet models
- (and 1 more)
-
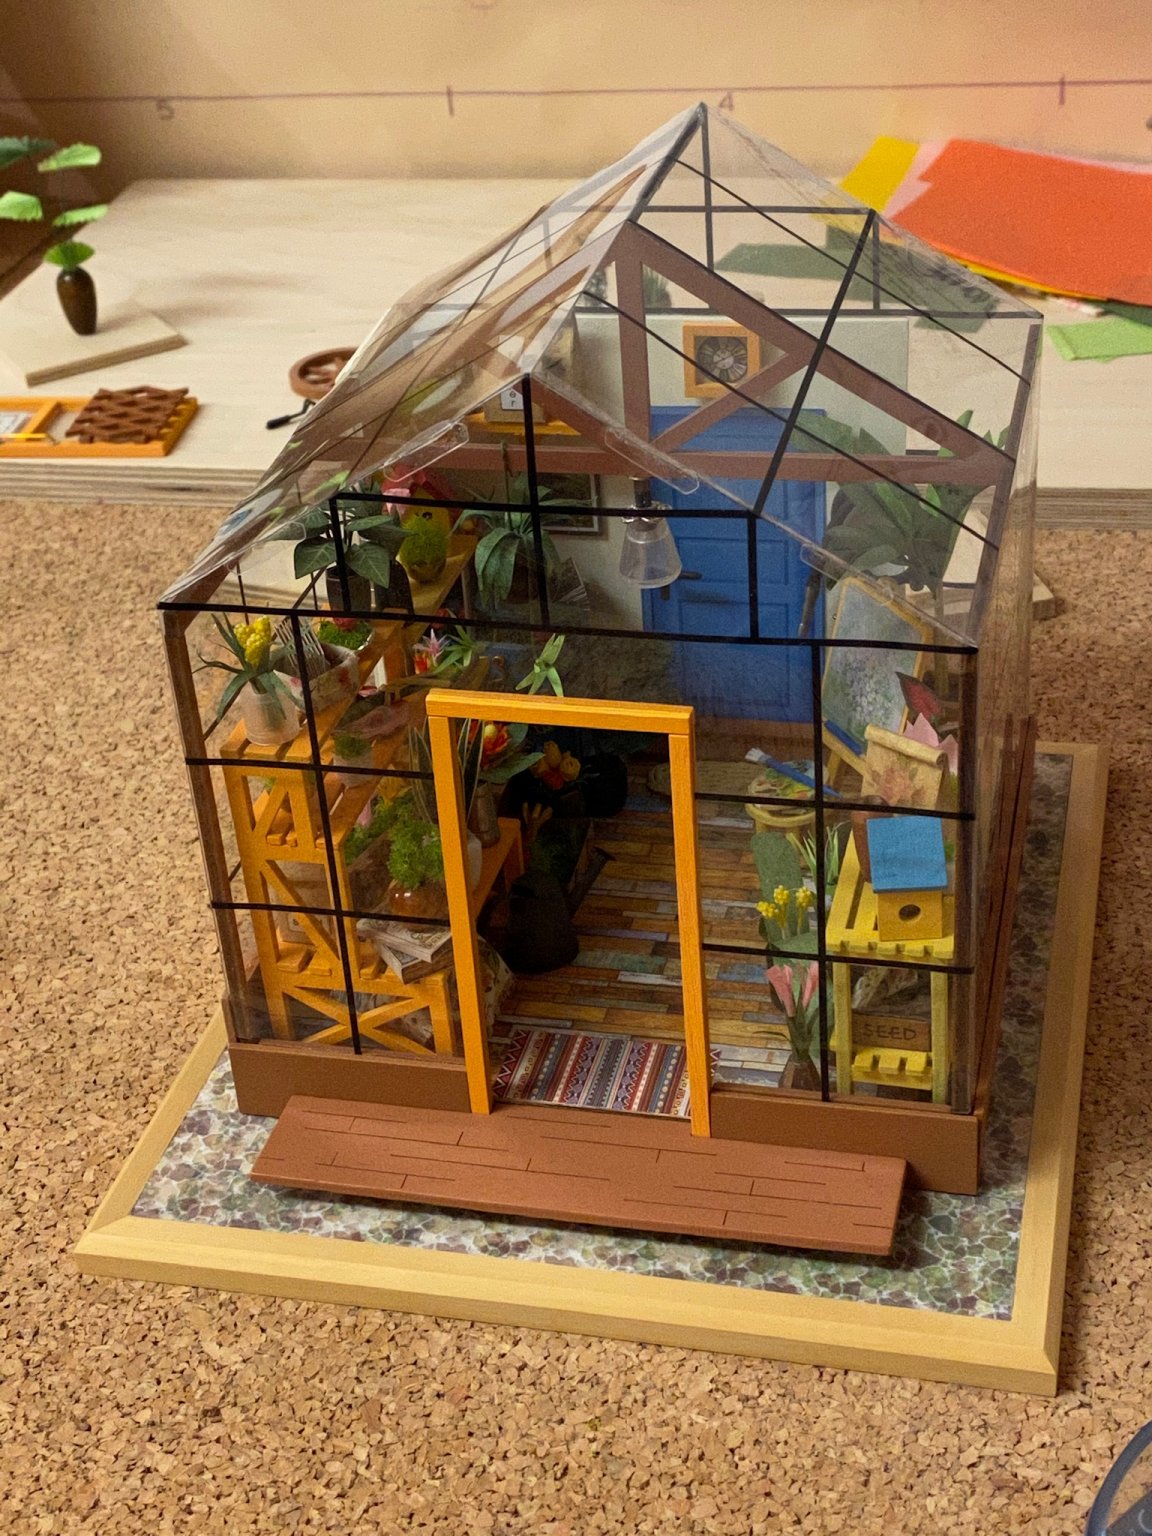
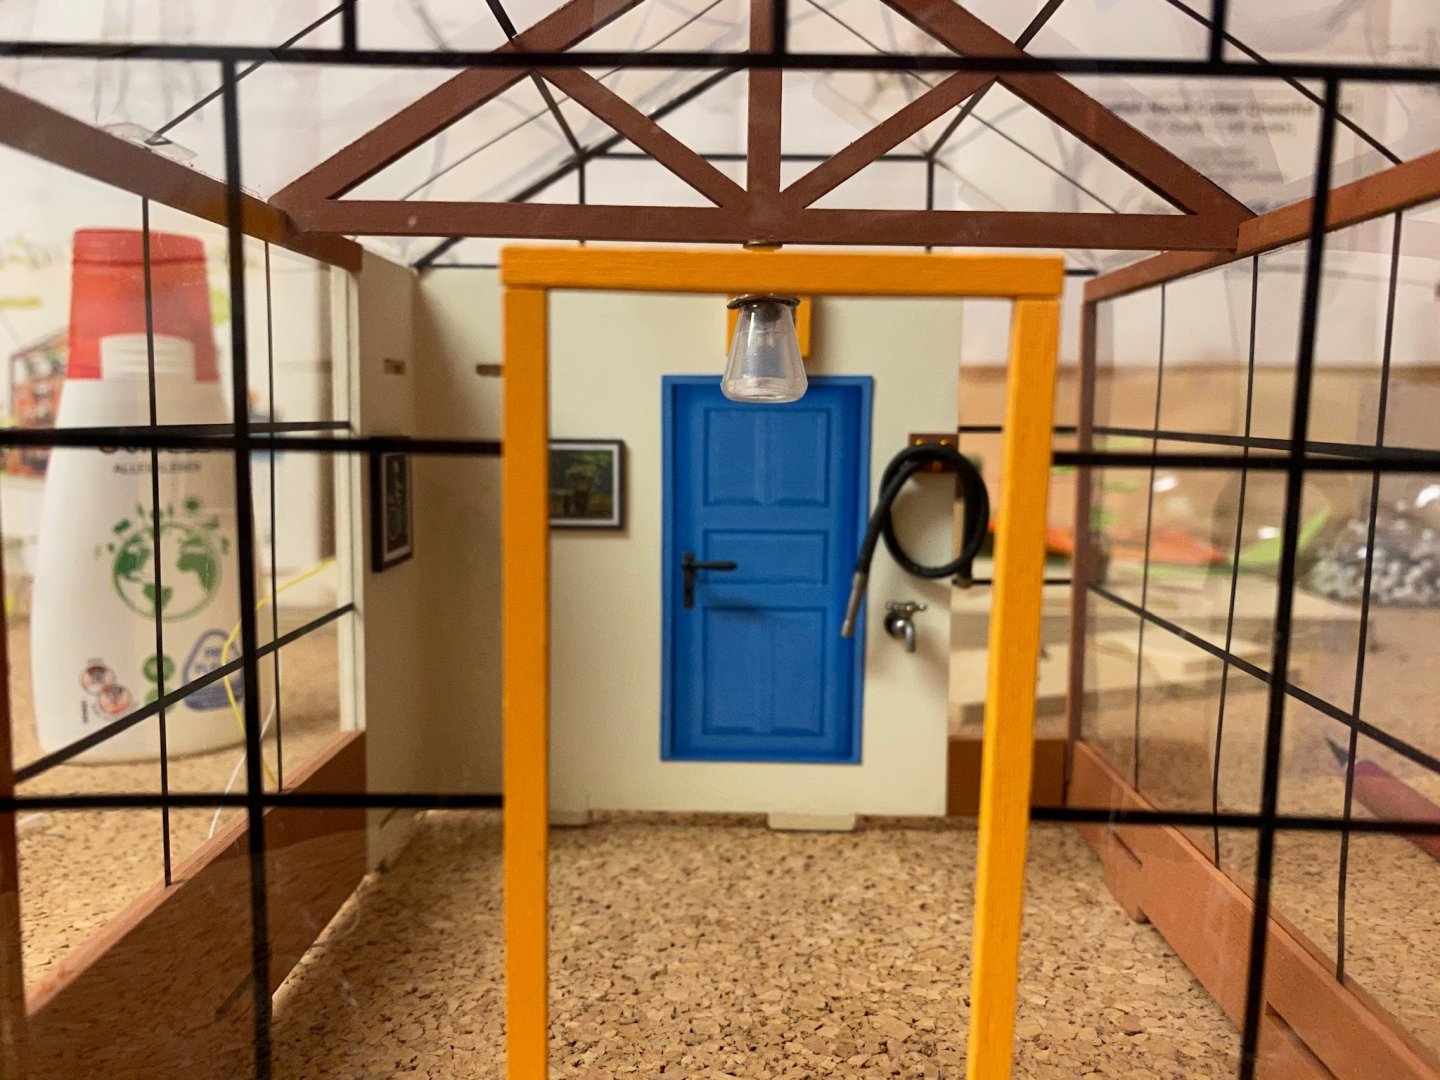
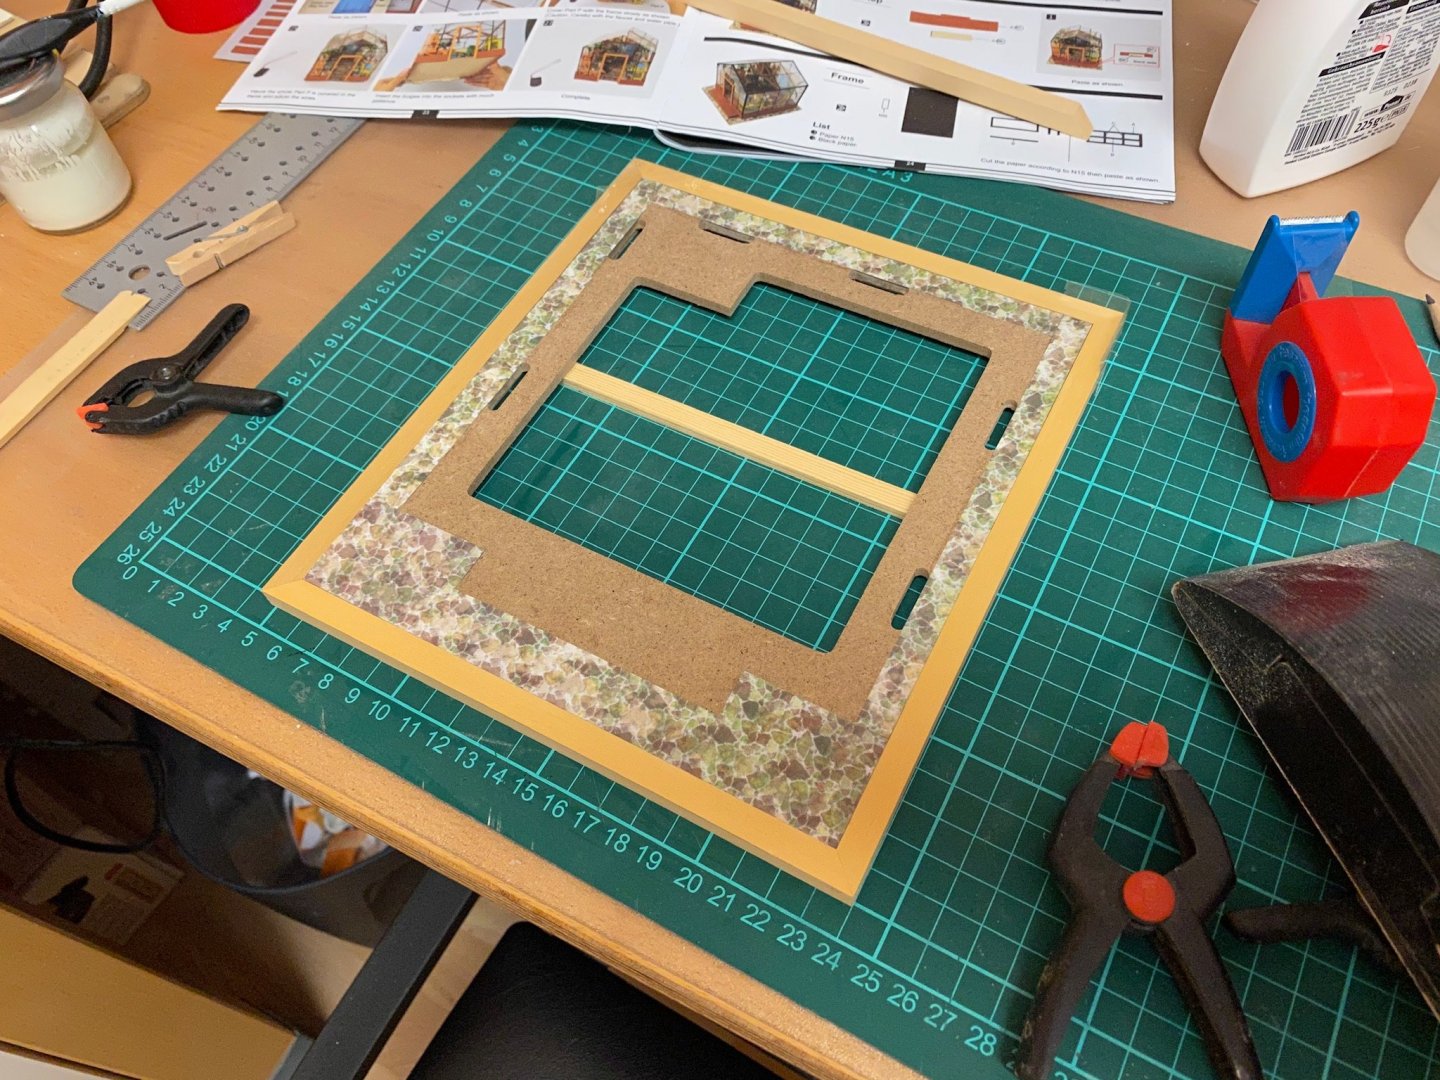
Installed the roof beams and light. The instructions say „keep the transparent sheet clean“ but that is easily said. I have to give the superstructure a nice cleanup before installing that to the base. BTW I have started to prepare that. The stickers are already on and I surrounded the MDF-sheet with boxwood stripes. They were a little warped so difficult to use as a mast or else but forced in position with clamps, glue and tape. I think, I might sand a chamfer surrounding the base.
-
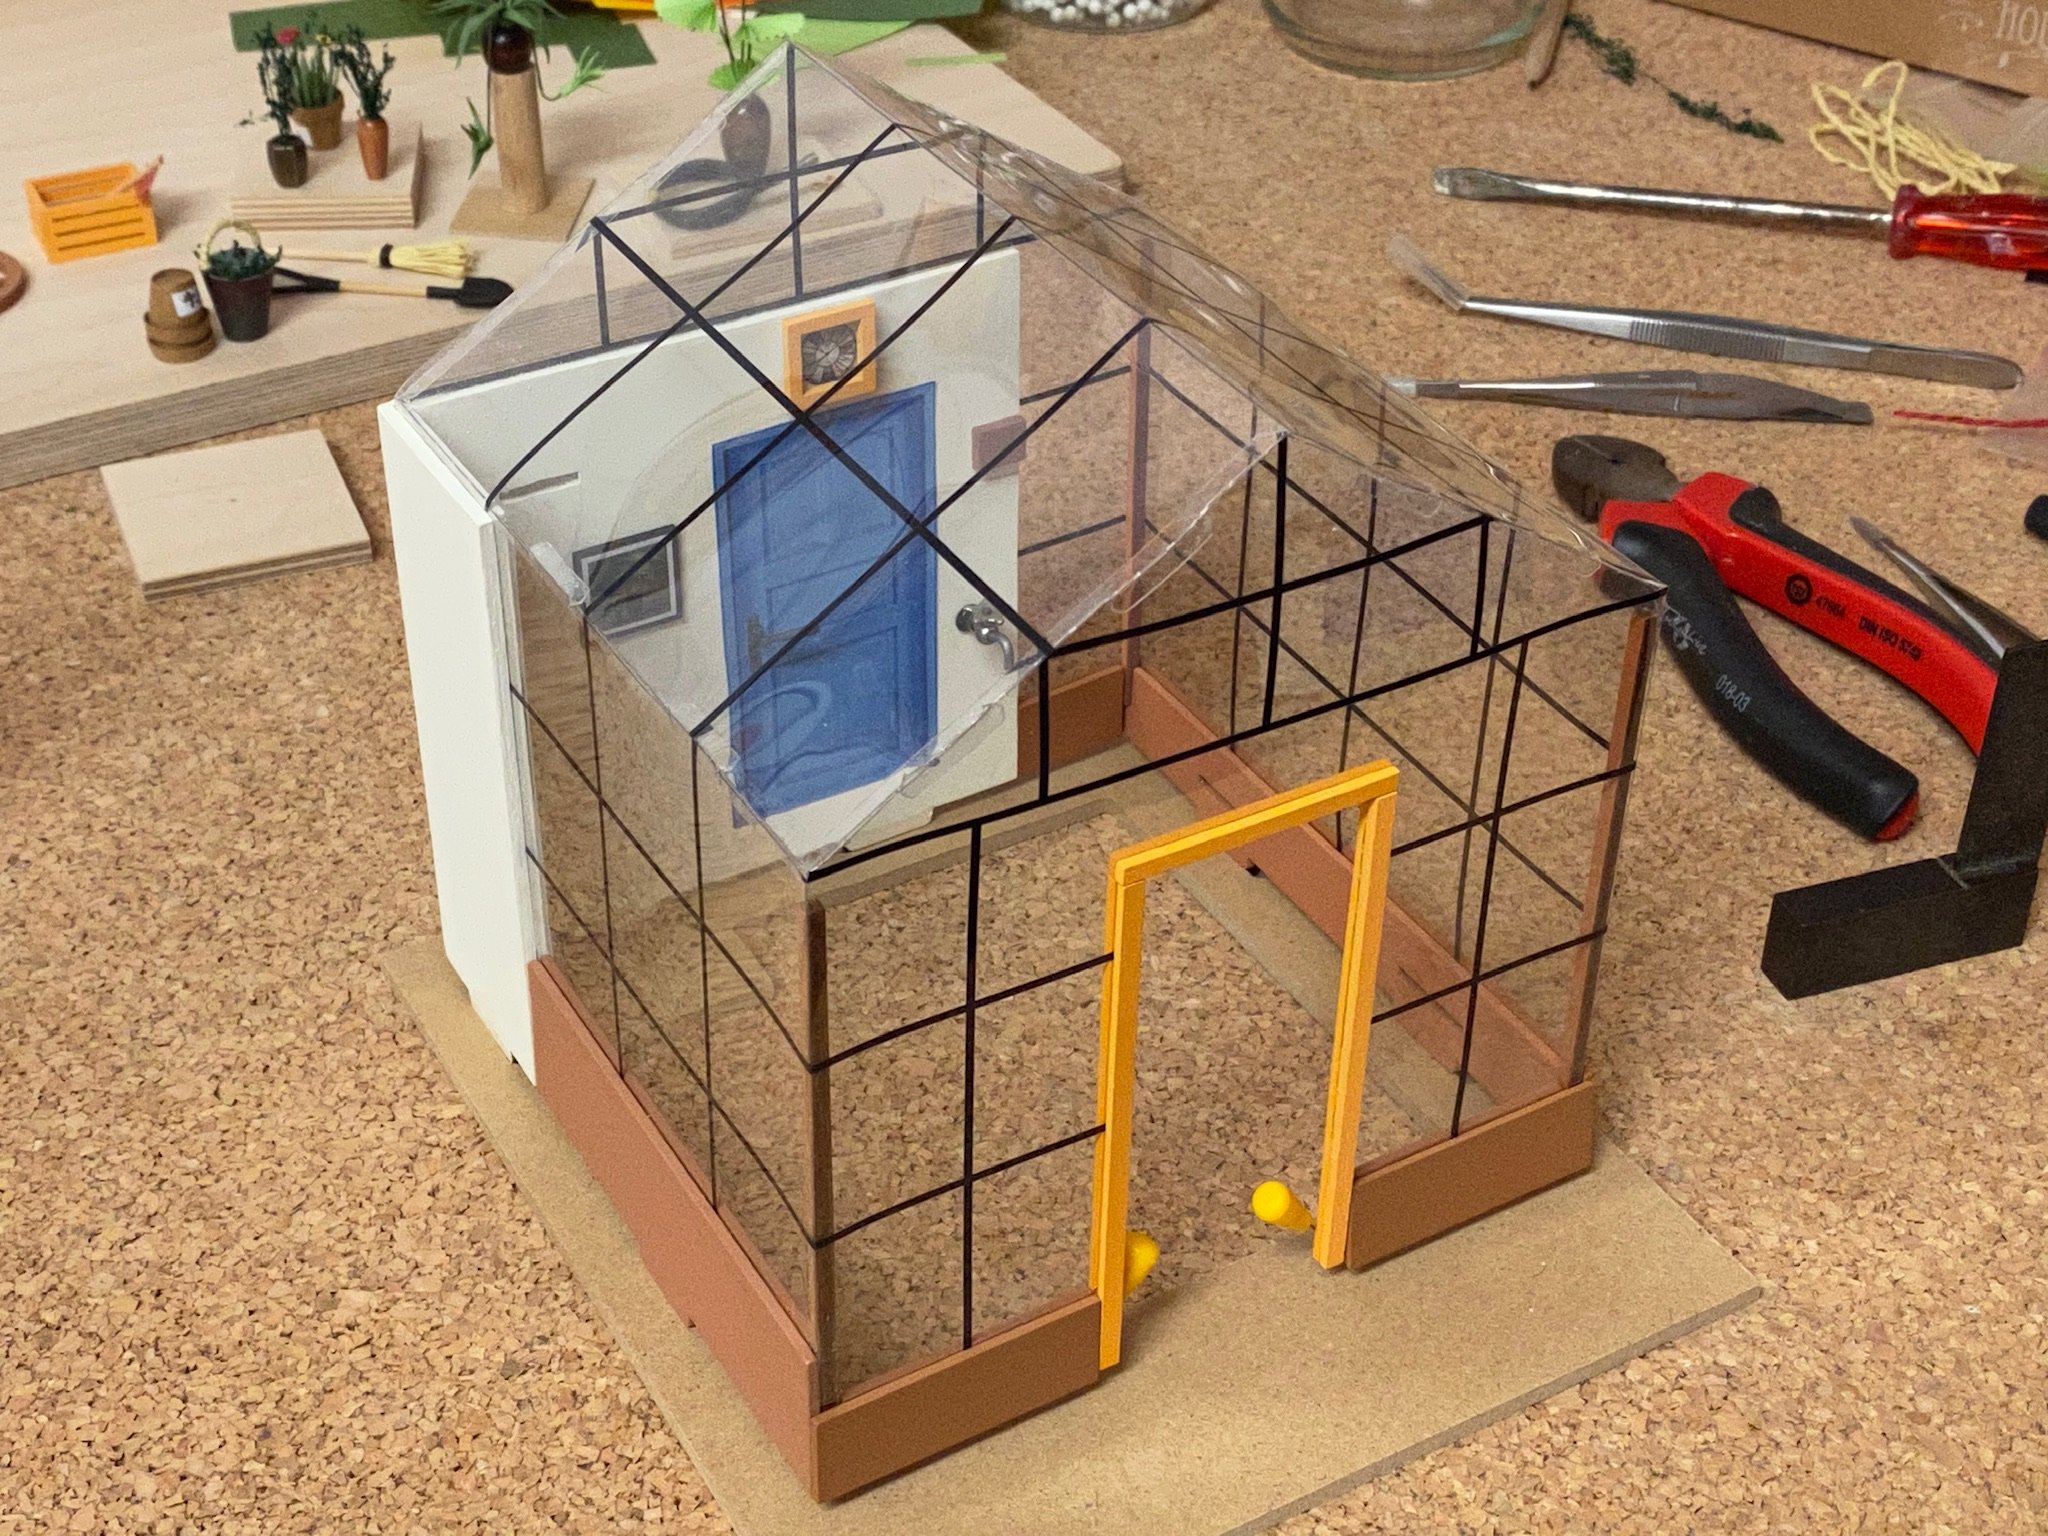
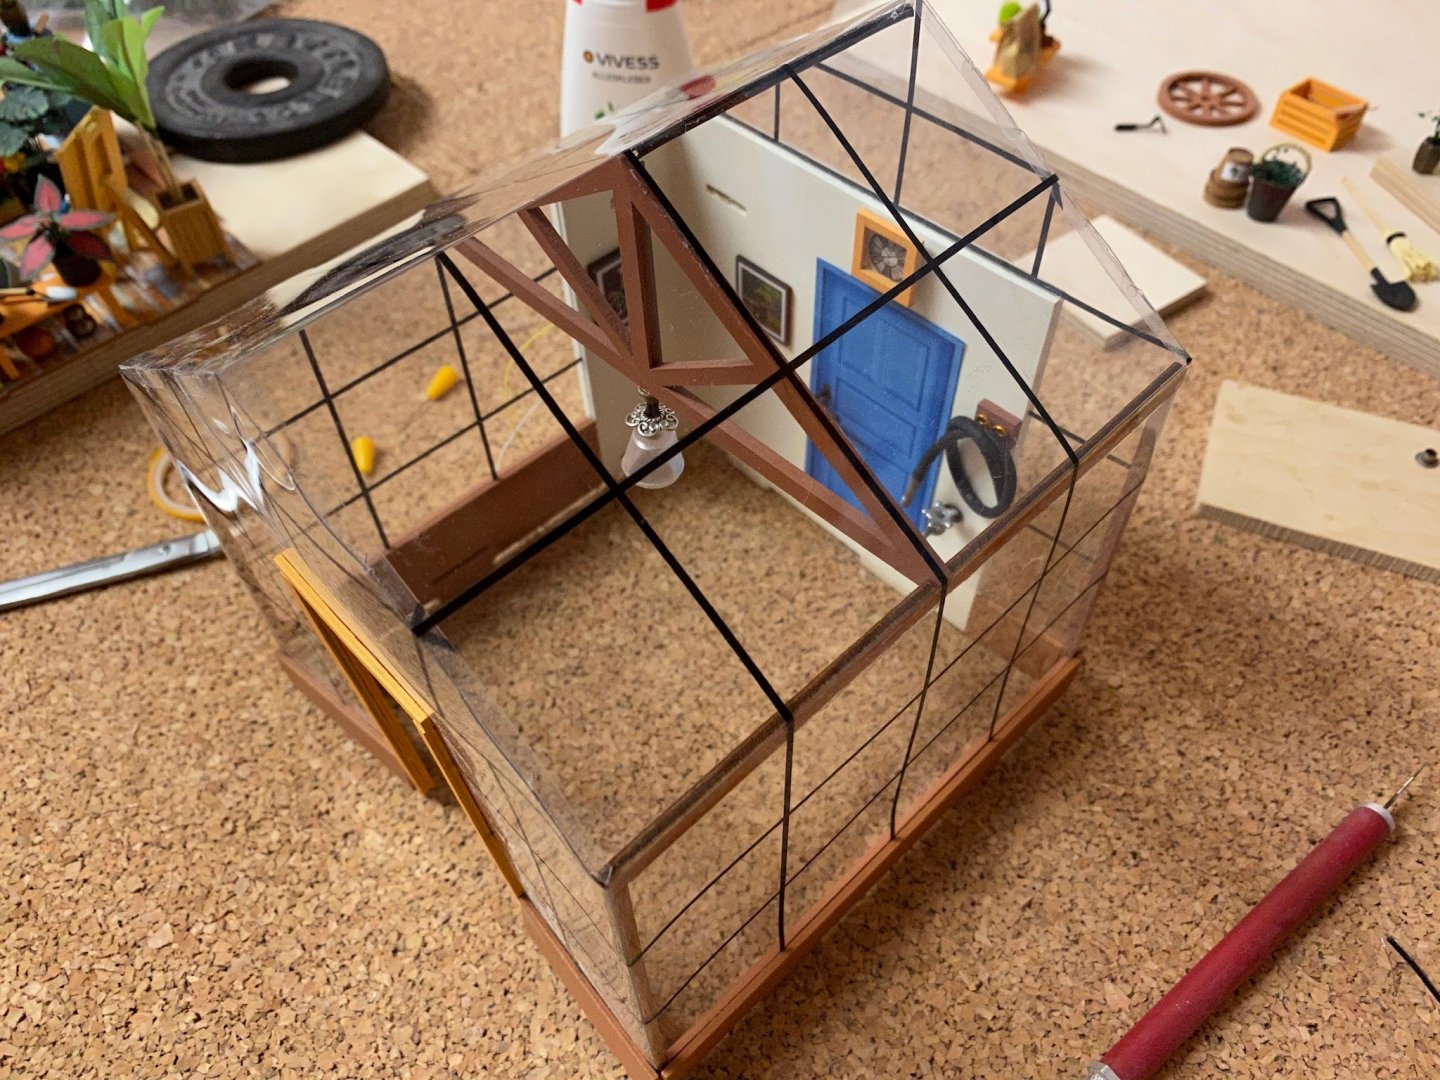
Due to some work at the our house I had to make a 4-weeks break from modelling and now started to build the flowerhouse. This proved to be more difficult than expected. The flowerhouse is a sandwich-design with the clear plastic part enclosed by wooden covers. But the plywood backsides were heavily warped and it was almost impossible to fit them together by only using the supplied glue. So I glued them together and - before the glue had dried - drilled a 1,9mm hole in every corner right through both sides and treenailed them with 2mm birch rod. That forced both sides together and will last for a long time. Added all items to the wall, all were supplied except for the backdoor handle - I made that of some scrap brass. Attached all covers to each side but the paper cover for all the folding edges are still missing so it looks more like a transparent packaging in this stage. Next is attaching the light and the roof parts..


-
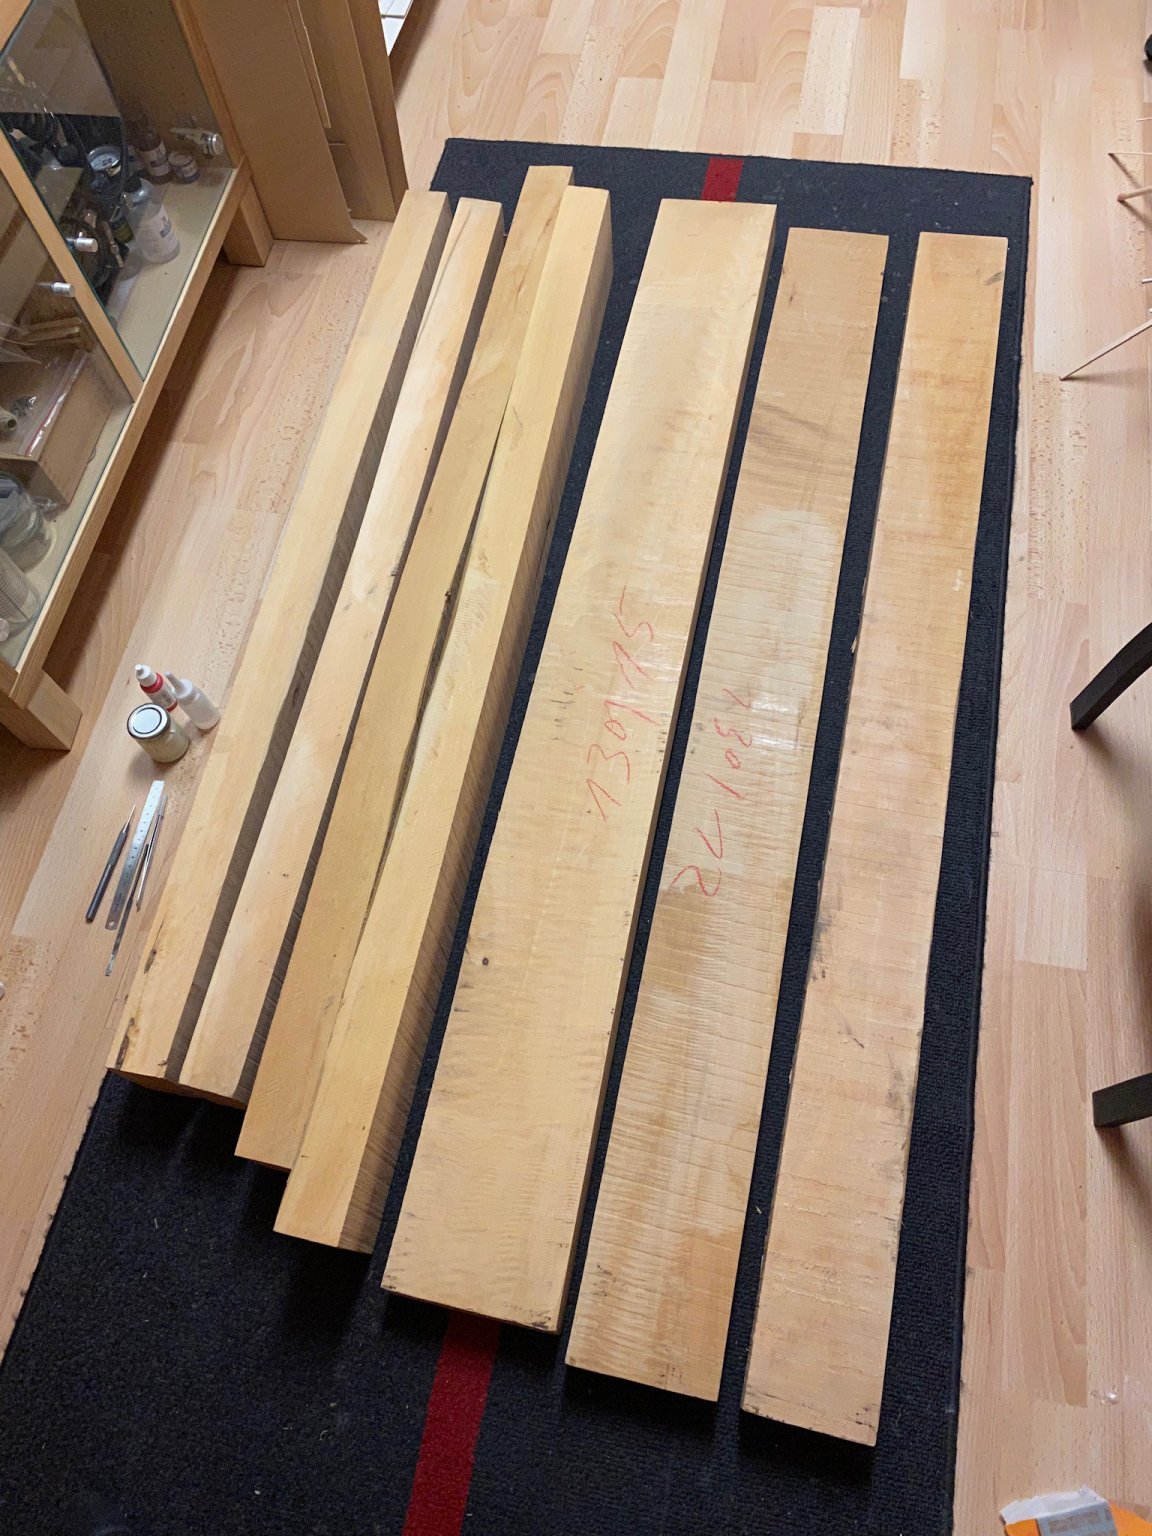
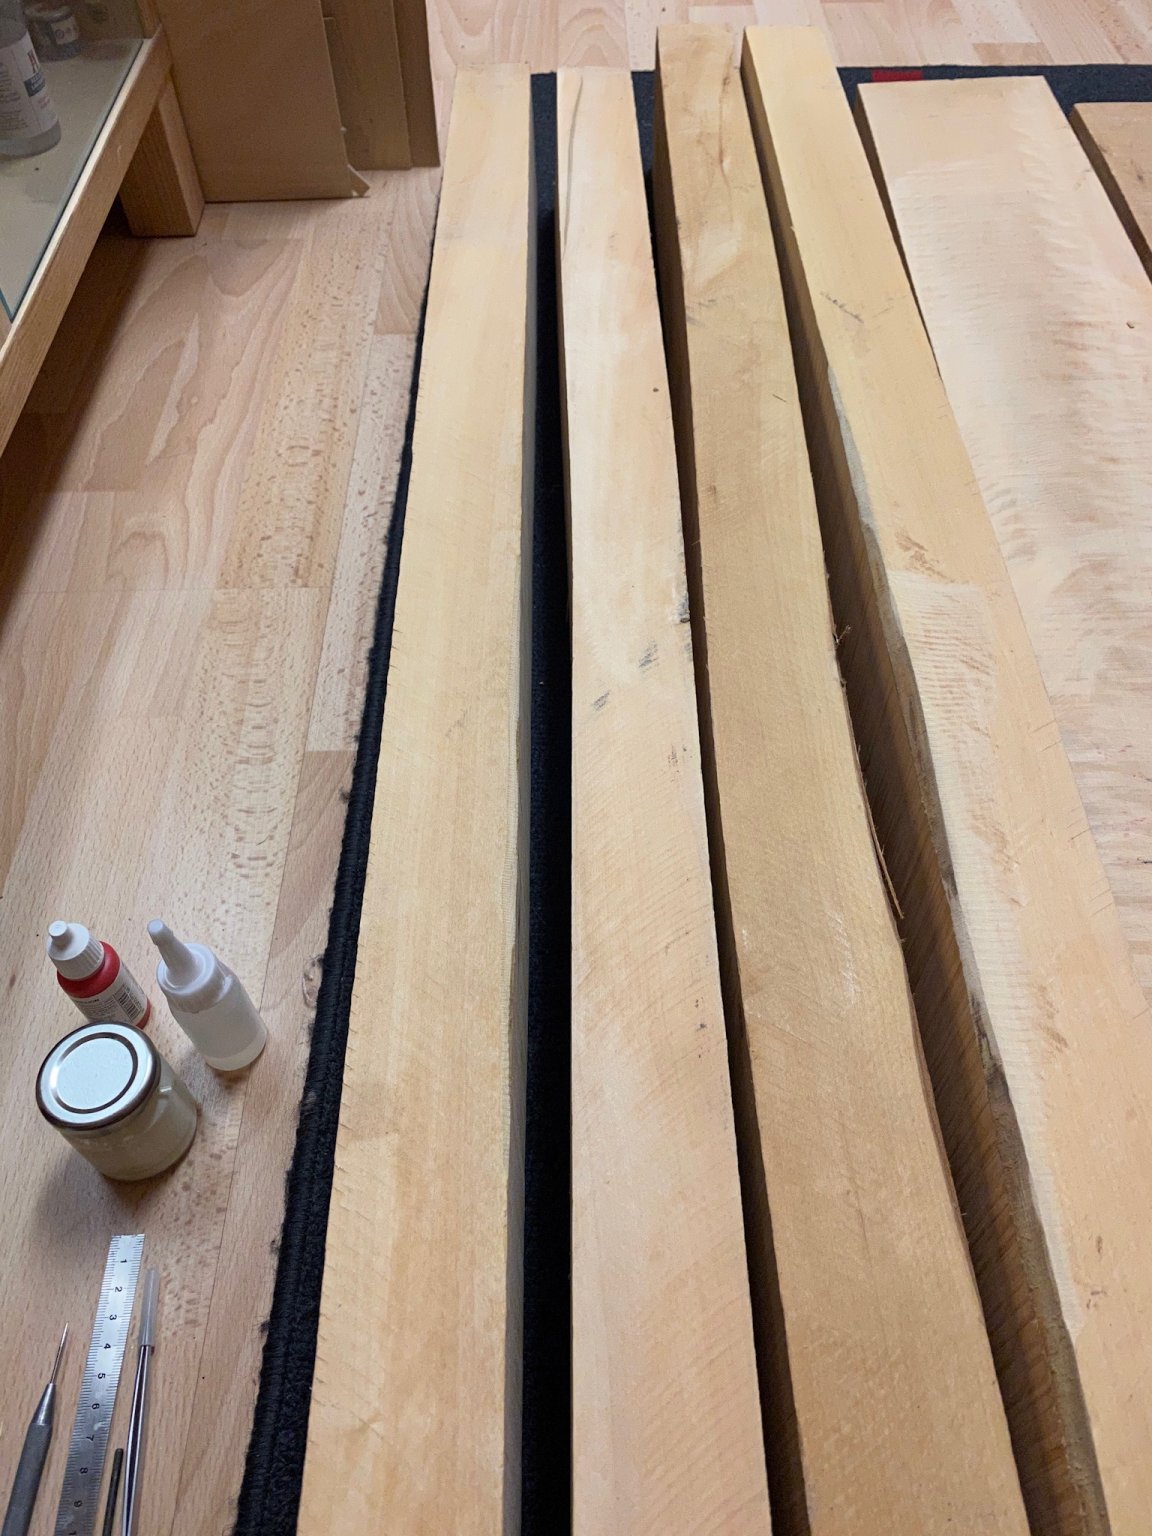
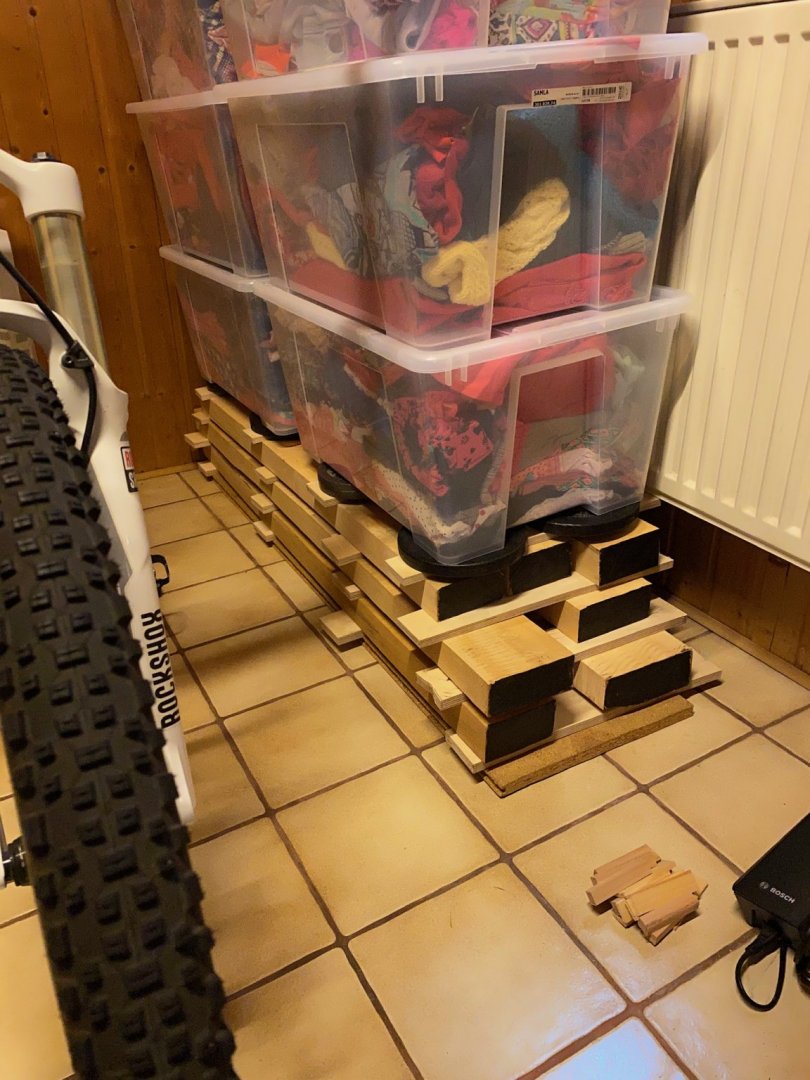
@Jaager:That is only a distant wishful thinking what to do with the wood, but I appreciate your comment. Actually I have to think about the right place to store it. I have sealed the ends with some clear nitrocellulose paint first (so the black paint won’t penetrate the wood) and then some old black paint. I decided to store the wood in the basement. There is a window above for air circulation if needed, the radiator in the back is not used, only little light / UV and no known problems with humility. The billets are separated with 1/2“ stickers and I have put some weight and some boxes on top. What do you think?

-
HMS FLY by cafmodel - 1/48
captain_hook replied to cafmodel's topic in - Build logs for subjects built 1751 - 1800
The boxwood parts are great. It would be great if you decide to make a swan class sloop kit like the fly out of boxwood, it is a pity LSS stopped selling their kingfisher kit some years ago. It was sold for about 2000 dollars if I remember correctly and there are still a lot of people out there searching for some available kits. So if you stay in that price area with all the great details you‘ve shown I‘m sure there would be a lot of people interested to buy one. At least you could sell the figure and decorations - there are a lot of swan class POF builders who don‘t want or can‘t do the carvings on their on yet (like me). -
OCD? You mean Obsessive-Compulsive Disorder? 🤗 Thank you for all the information. One of the billets will definitely become a POF swan class in the future ..
-
I received the Castello today, had to raise my order to 40kg (minimum amount for ordering), seems that I now have enough to build shipmodels out of it for the rest of my life. The colour differs from yellow to light brown. Still have to store the wood for the next two years to get rid of all moisture. Any fungicide protection needed before storage? Best Regards, Andreas


-
Thank you Jaager. I will order a small amount first (maybe 20 - 30 kg) to check if the source is reliable. The seller told me, that the wood is about 9 month old (after cutting down), so a 15% weight loss of drying out the wood should be expected. I have to store the wood then for some time. But it is not needed now, I would like to use it for a first POF project in about 2 years or later.
-
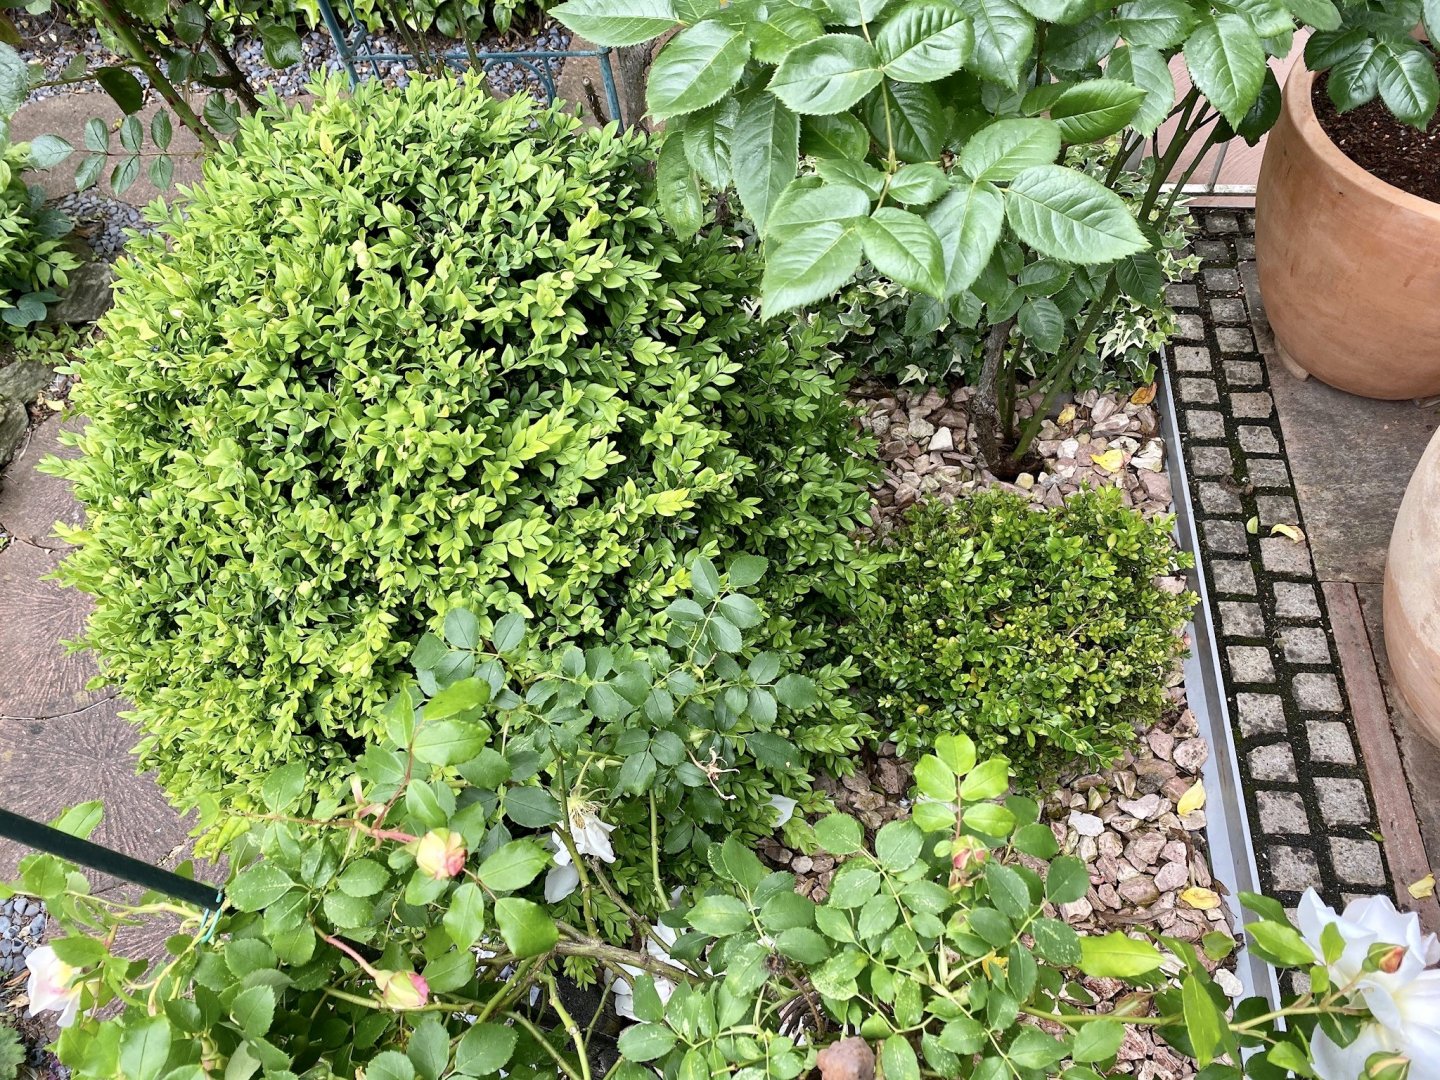
We have some small ones in the garden. If my wife don‘t mind it, I can take one down for you. Wait 2 years and then - you will at least be able to scratchbuild a bottleship out of it. 🤗 About three years ago the boxwood borer - an exotic parasite - started to kill almost all boxwood plants in the neighborhood, so the ones in our garden may be the last ones alive in the street (because in the end I sorted the borers out by hand). Almost all nurseries stopped selling boxwood trees and the people started to substitute them so they are hard to find here these days.