HOLIDAY DONATION DRIVE - SUPPORT MSW - DO YOUR PART TO KEEP THIS GREAT FORUM GOING! (Only 36 donations so far out of 49,000 members - C'mon guys!)
×


captain_hook
-
Posts
685 -
Joined
-
Last visited
Content Type
Profiles
Forums
Gallery
Events
Everything posted by captain_hook
-
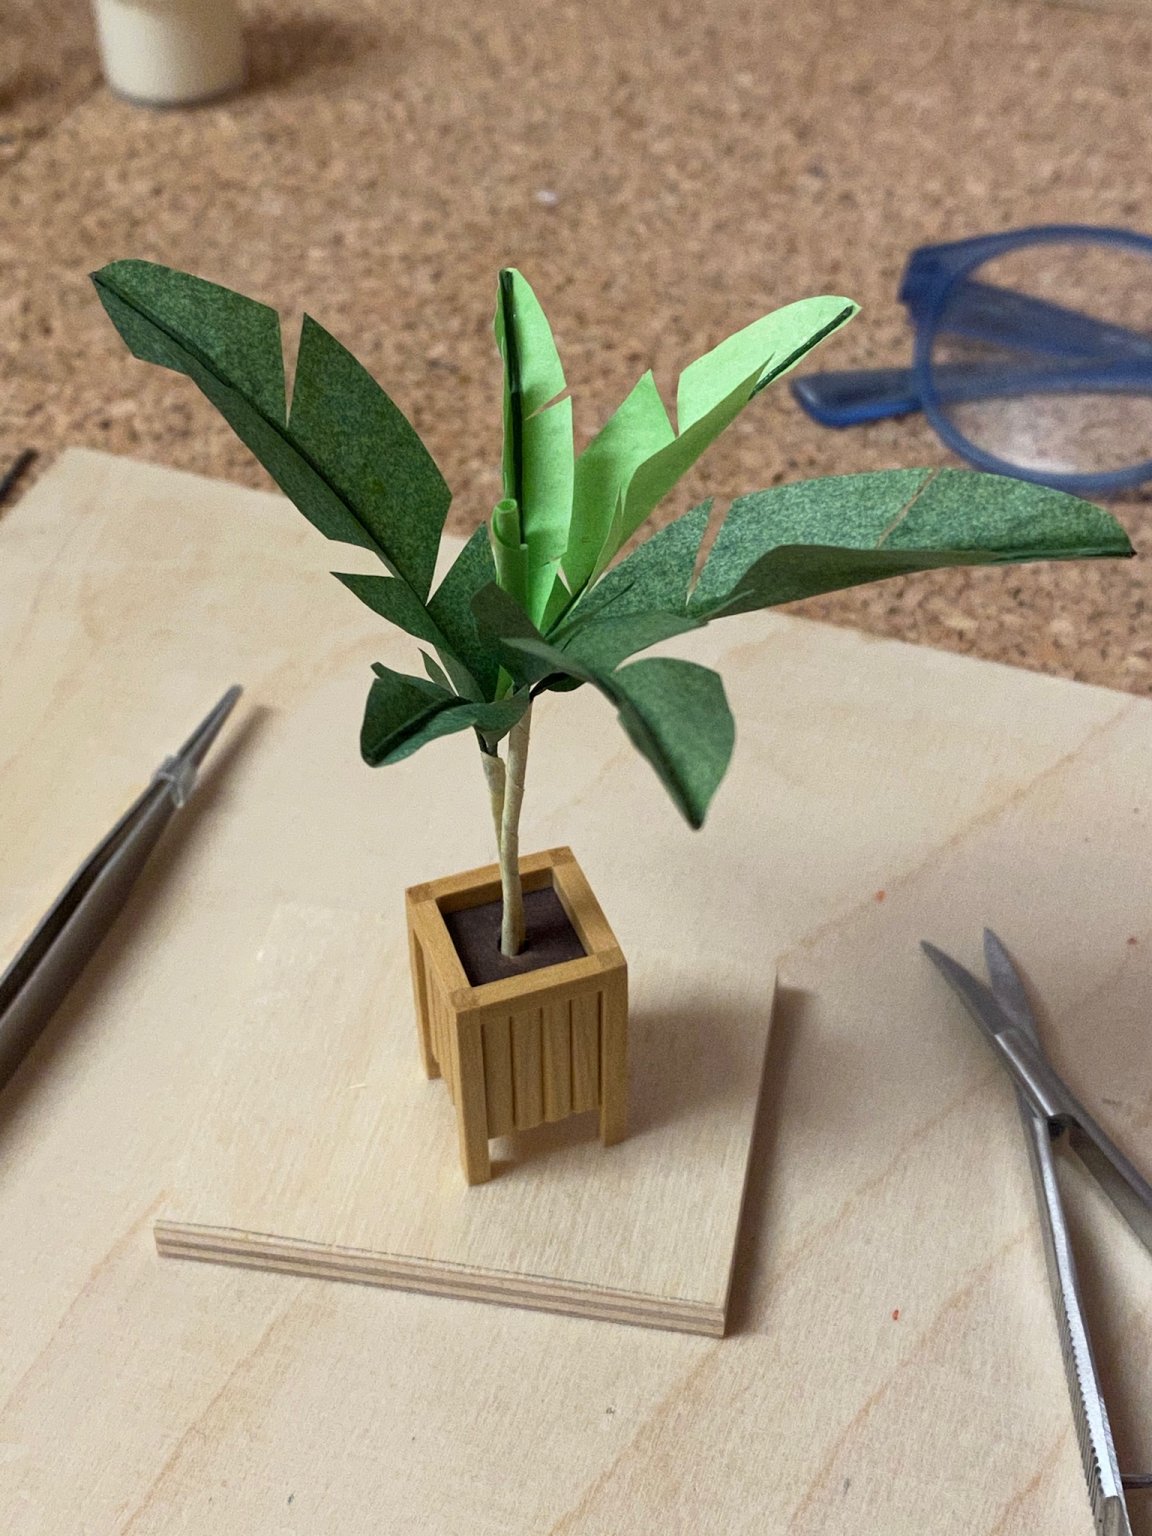
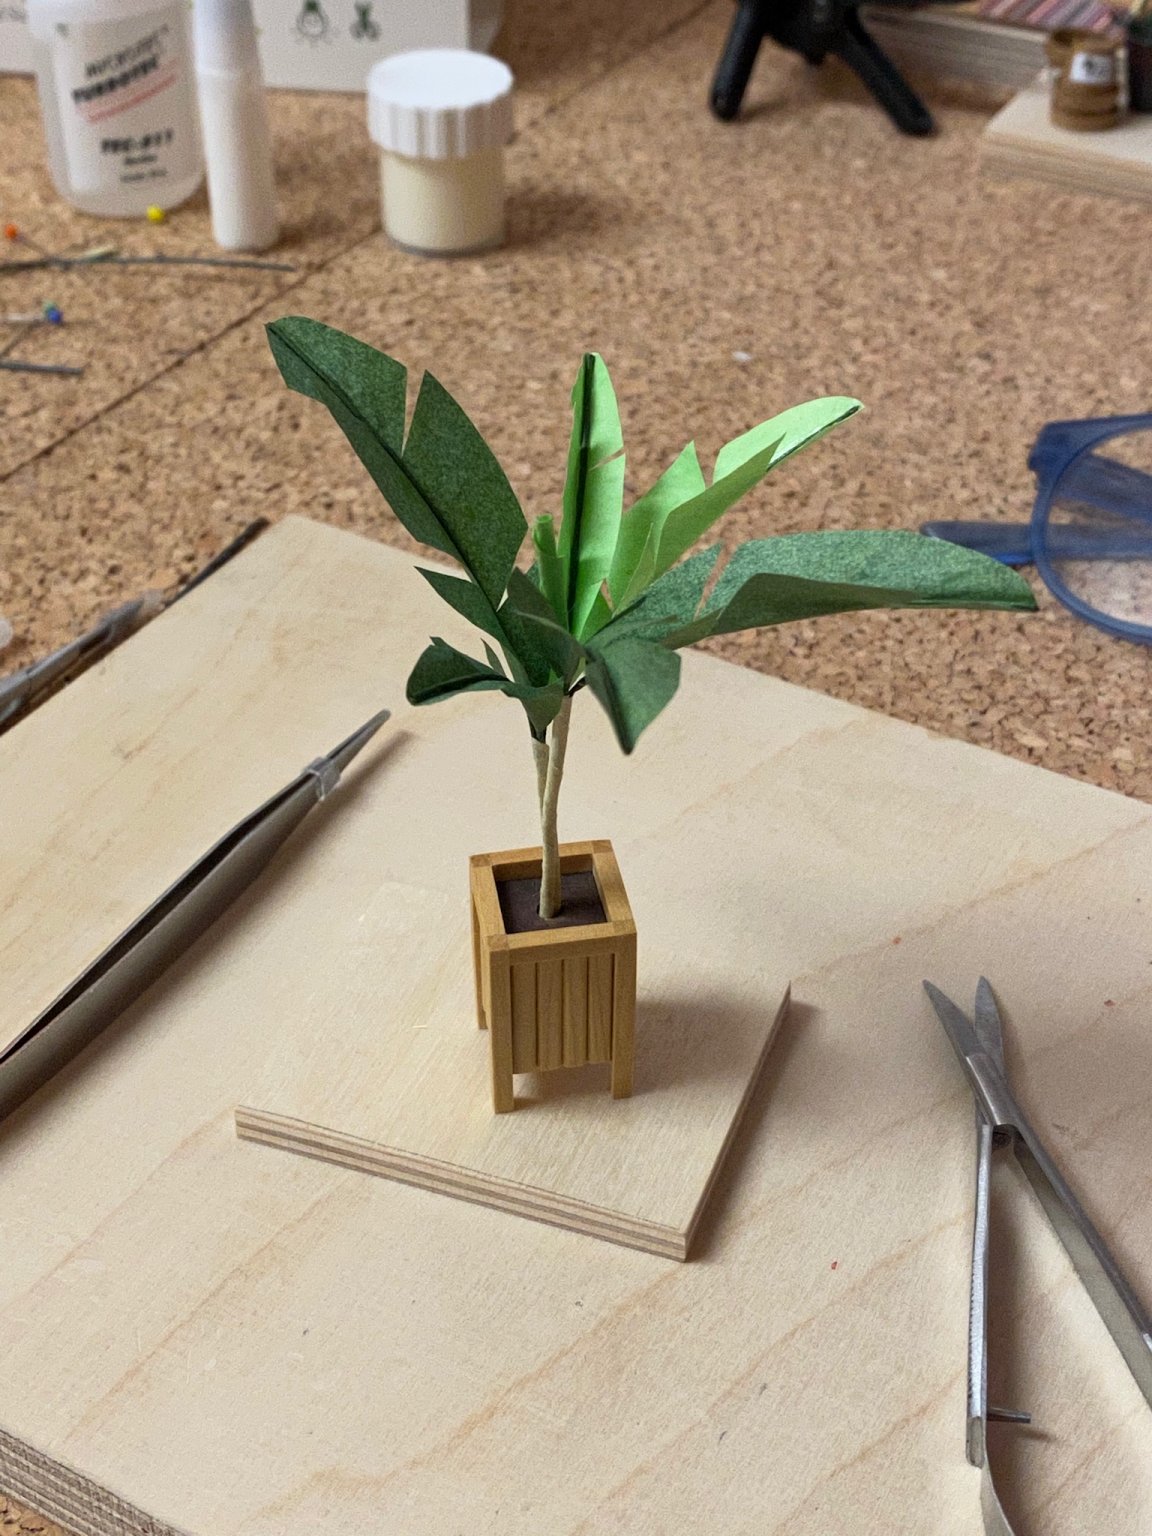
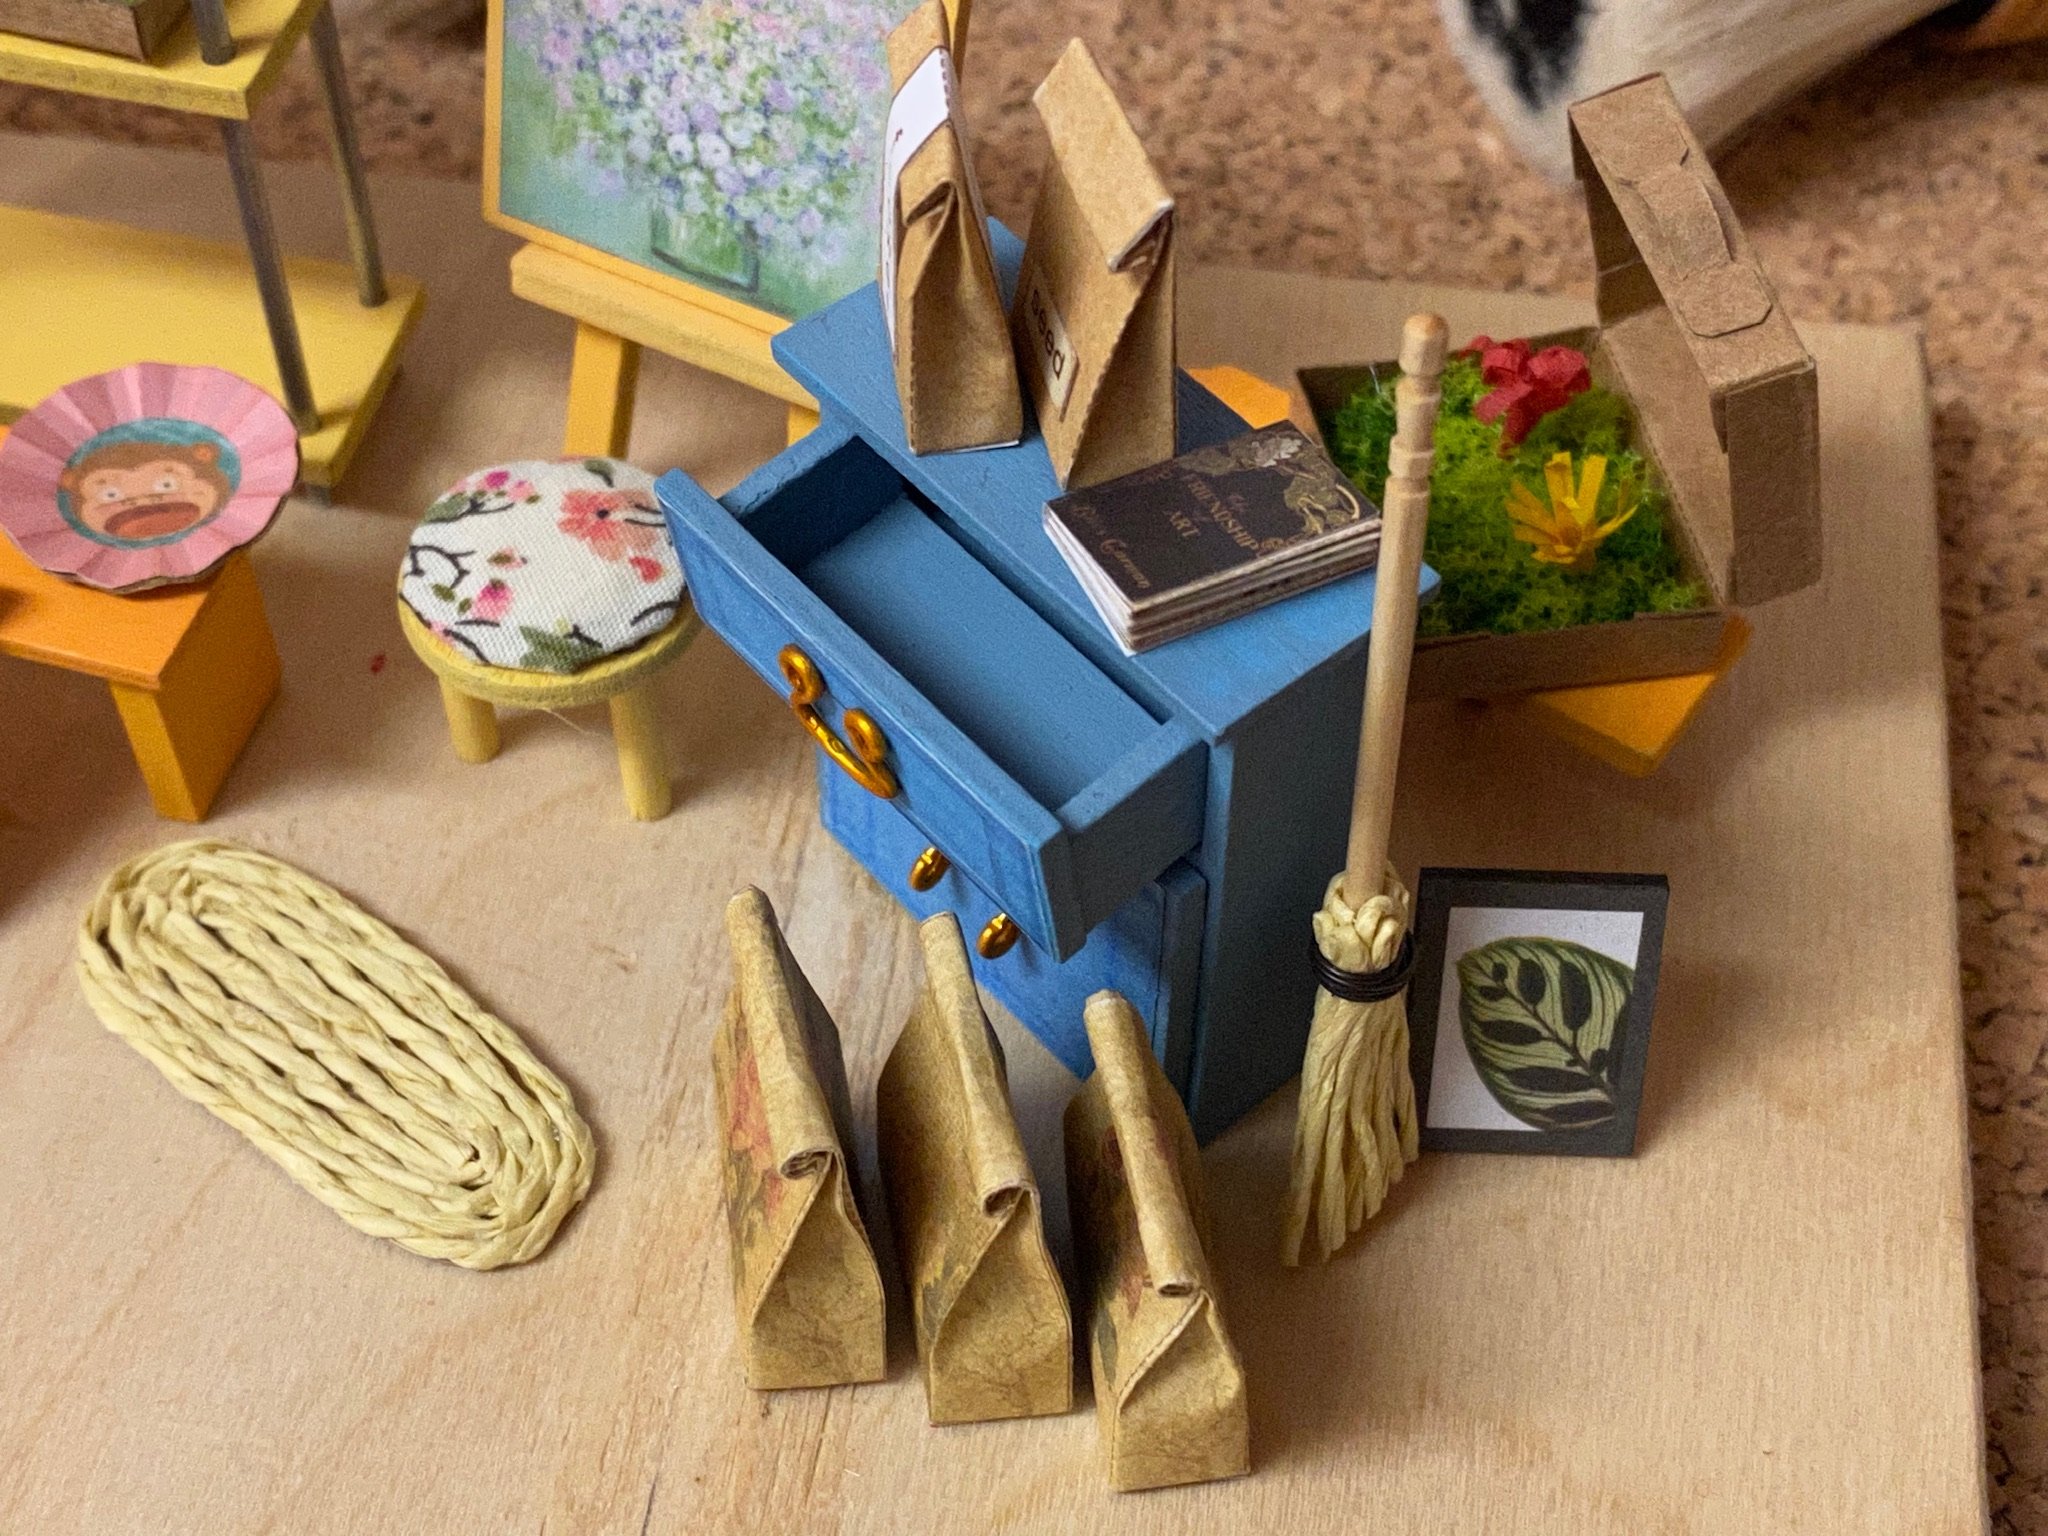
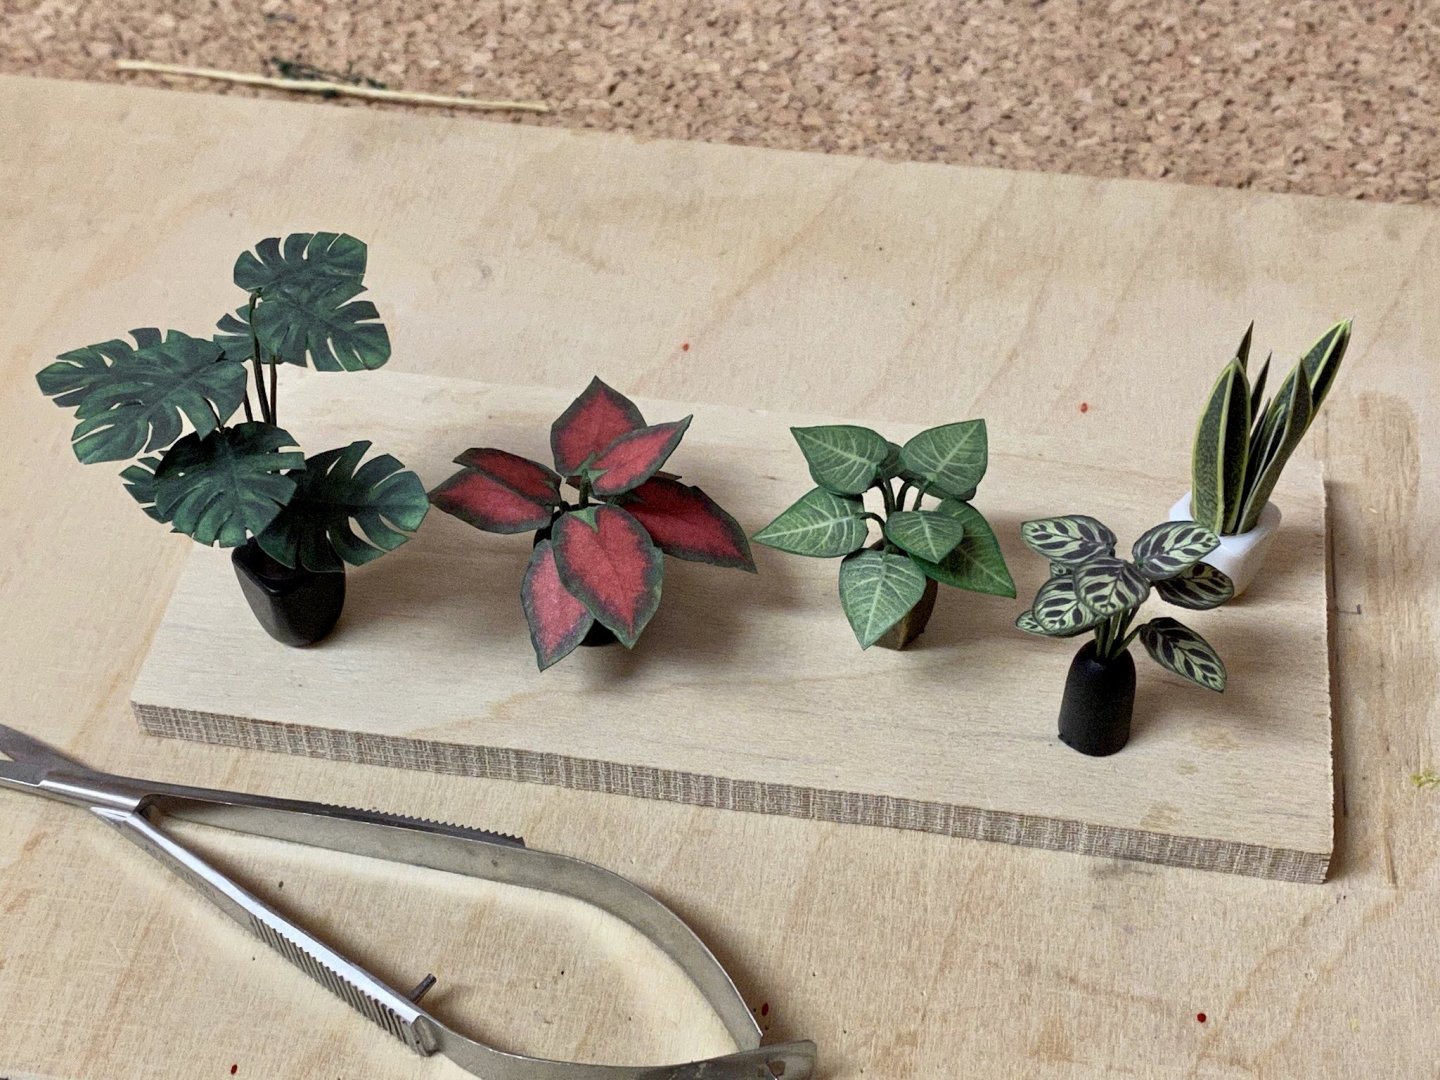
 Thank you Yves. The plants are getting more complicated. The leafs of this one are made of light and dark green paper, are cut by using a paper template and then attached to a piece of paper covered wire. Three leafs are combined together by covering their wires with light brown paper. I didn‘t like the supplied card flowerpot so I made a scratch one out of scrap boxwood parts. 🤗

- 54 replies
-
- 13
-

-
Wow! I might try casting myself. Very nice results! Now I‘m curious about the final ones.
-
Cool!
-
Great progress so far, you‘re doing a fantastic job. It is a pity that the building of the replica in the netherlands stopped years ago due to financial issues.
-
Paul, you may leave the keel and sternpost-parts until the first planking is done and add them after that. The planks at the stern will almost lay flat on the false keel and you will be able to sand the first planking as much down as needed so the second planking will be in line with the keel and the stern post. Best regards, Andreas
-
You may use a thin strip of stainless steel or brass as a guide. Just clamp it in the correct position, roughly shape the port with a file and use a needle file for the last steps. The steel strip will act as a border and is hard to damage with the file, so you can achieve very clean edges this way.
- 136 replies
-
- 5
-
-
- kolderstok
- batavia
- (and 1 more)
-
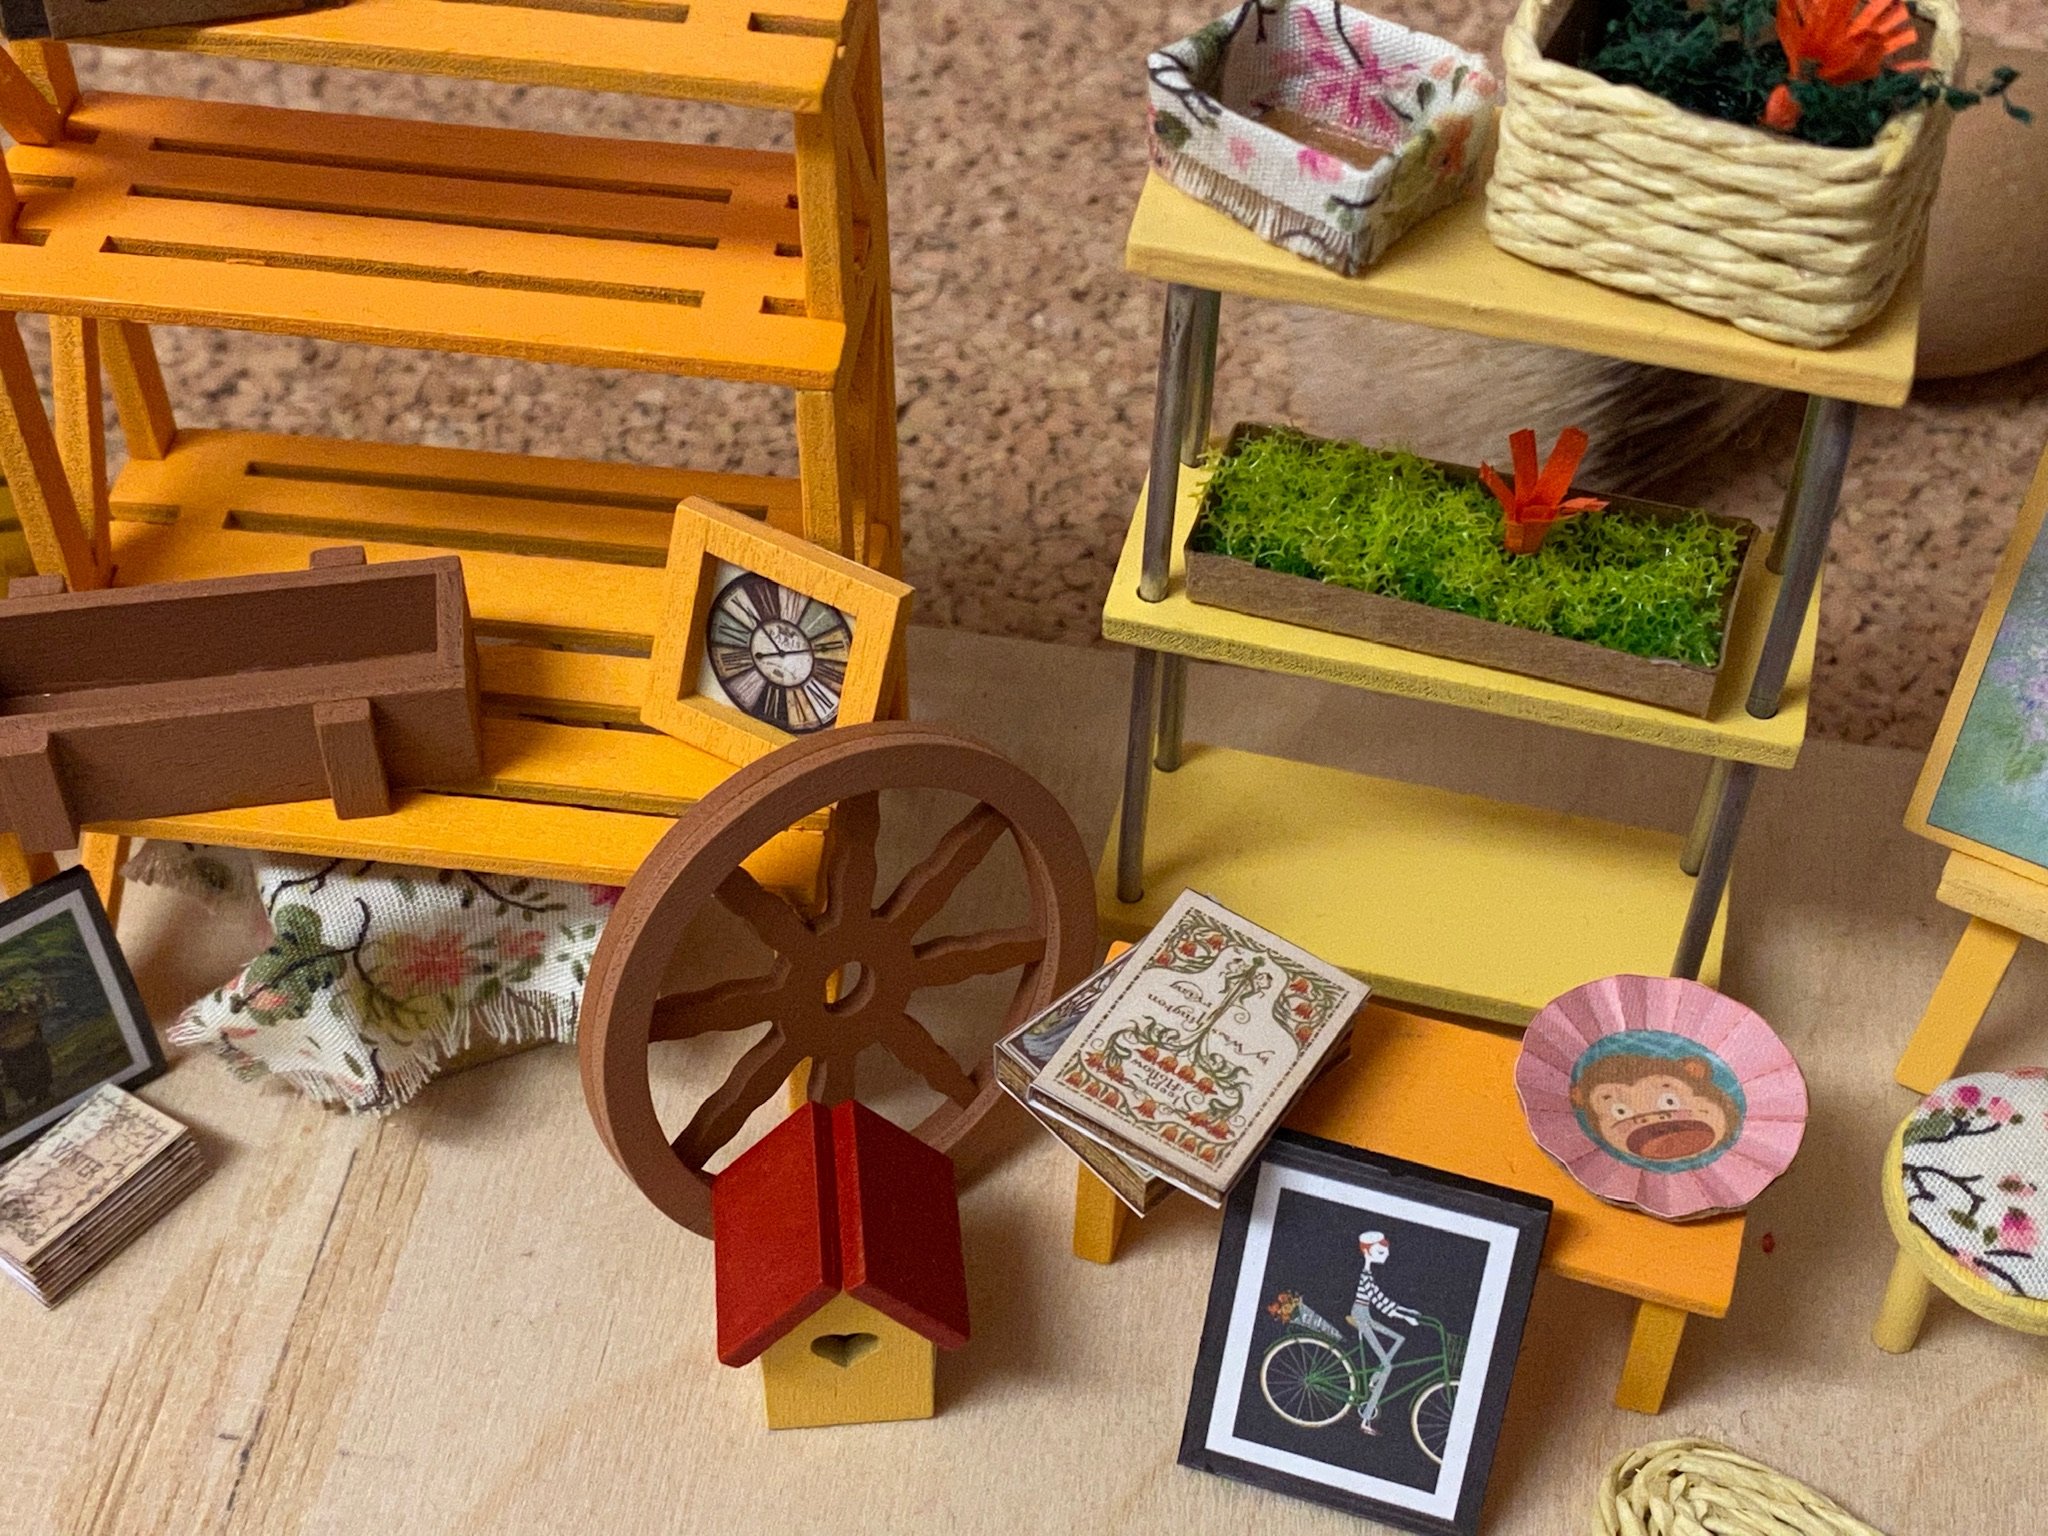
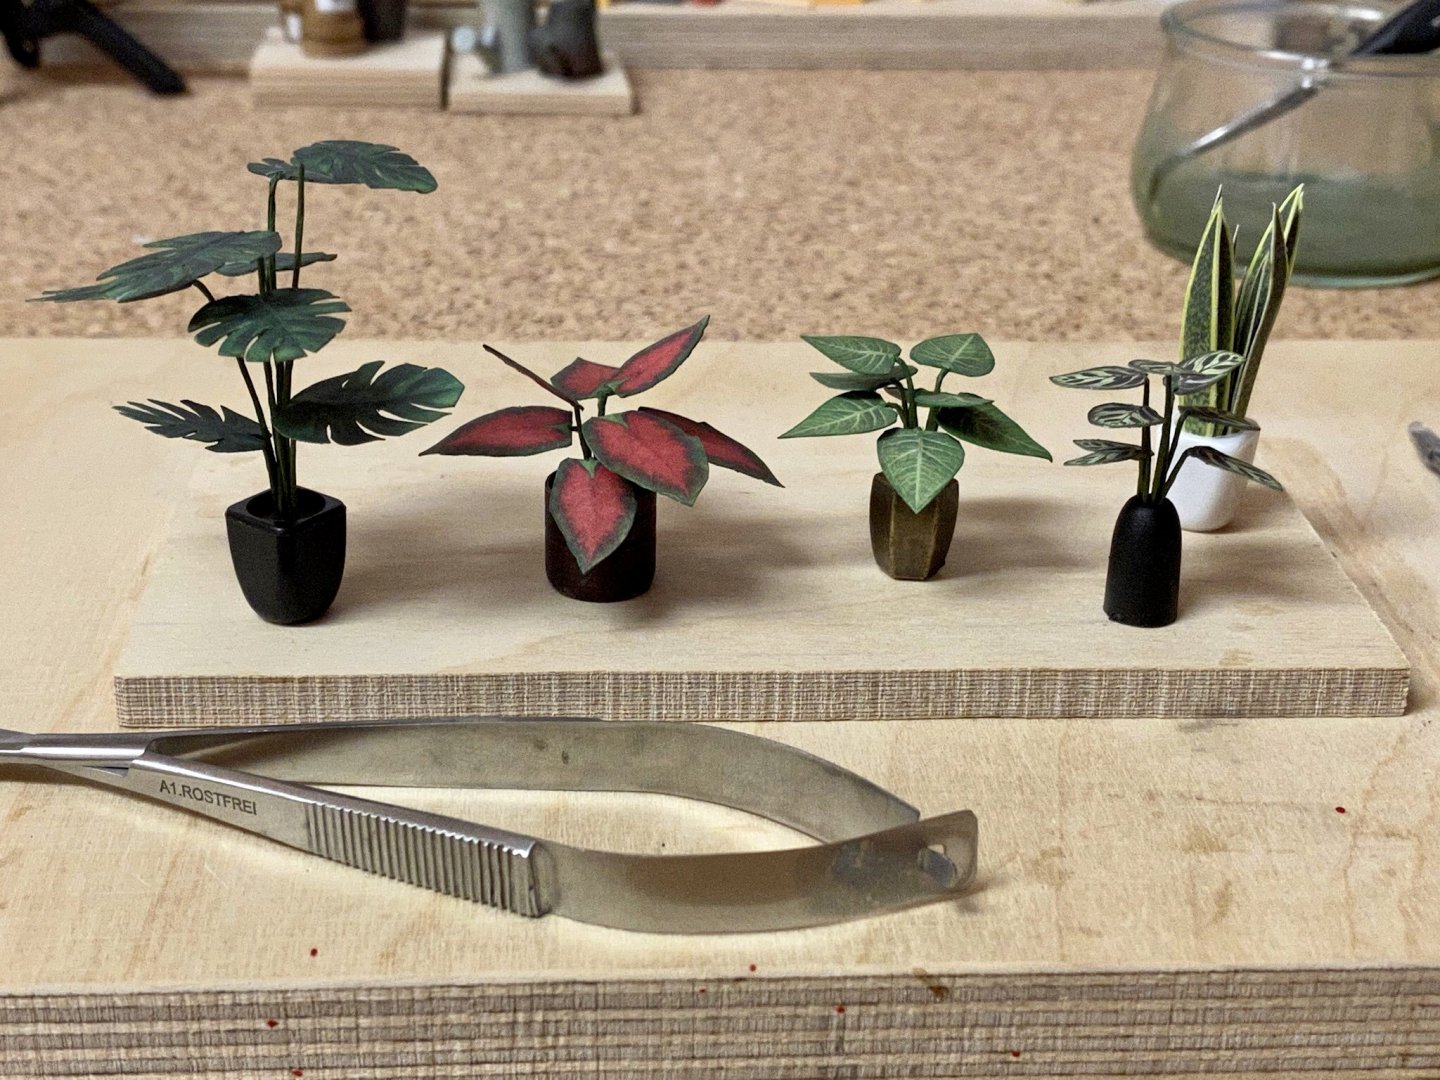
Assembled the first 5 plants. The leafs are made of printed paper that has to be fold and glued together to form a single leaf. Two leafs are connected by a paper covered wire and bend to shape to fit the pots. I also painted the cutting edges with a green acrylic colour that matches the one of the leafs. Painted the hole leaf after with clear vanish.
- 54 replies
-
- 11
-
-
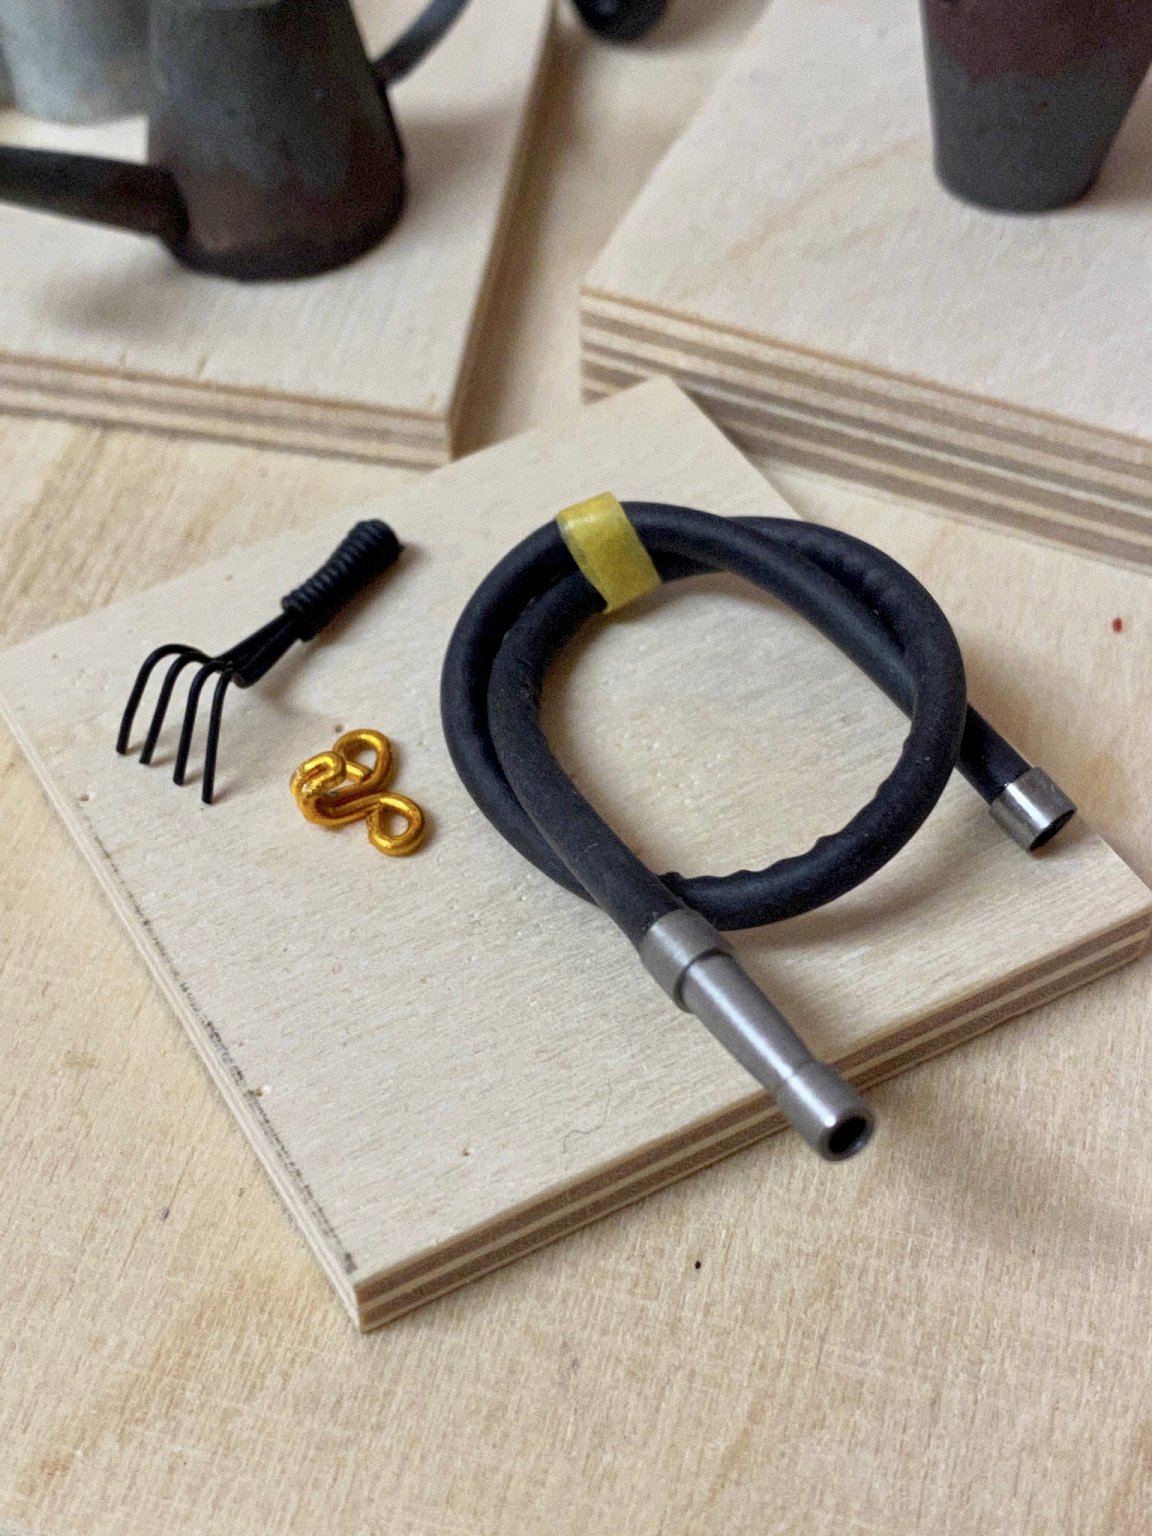
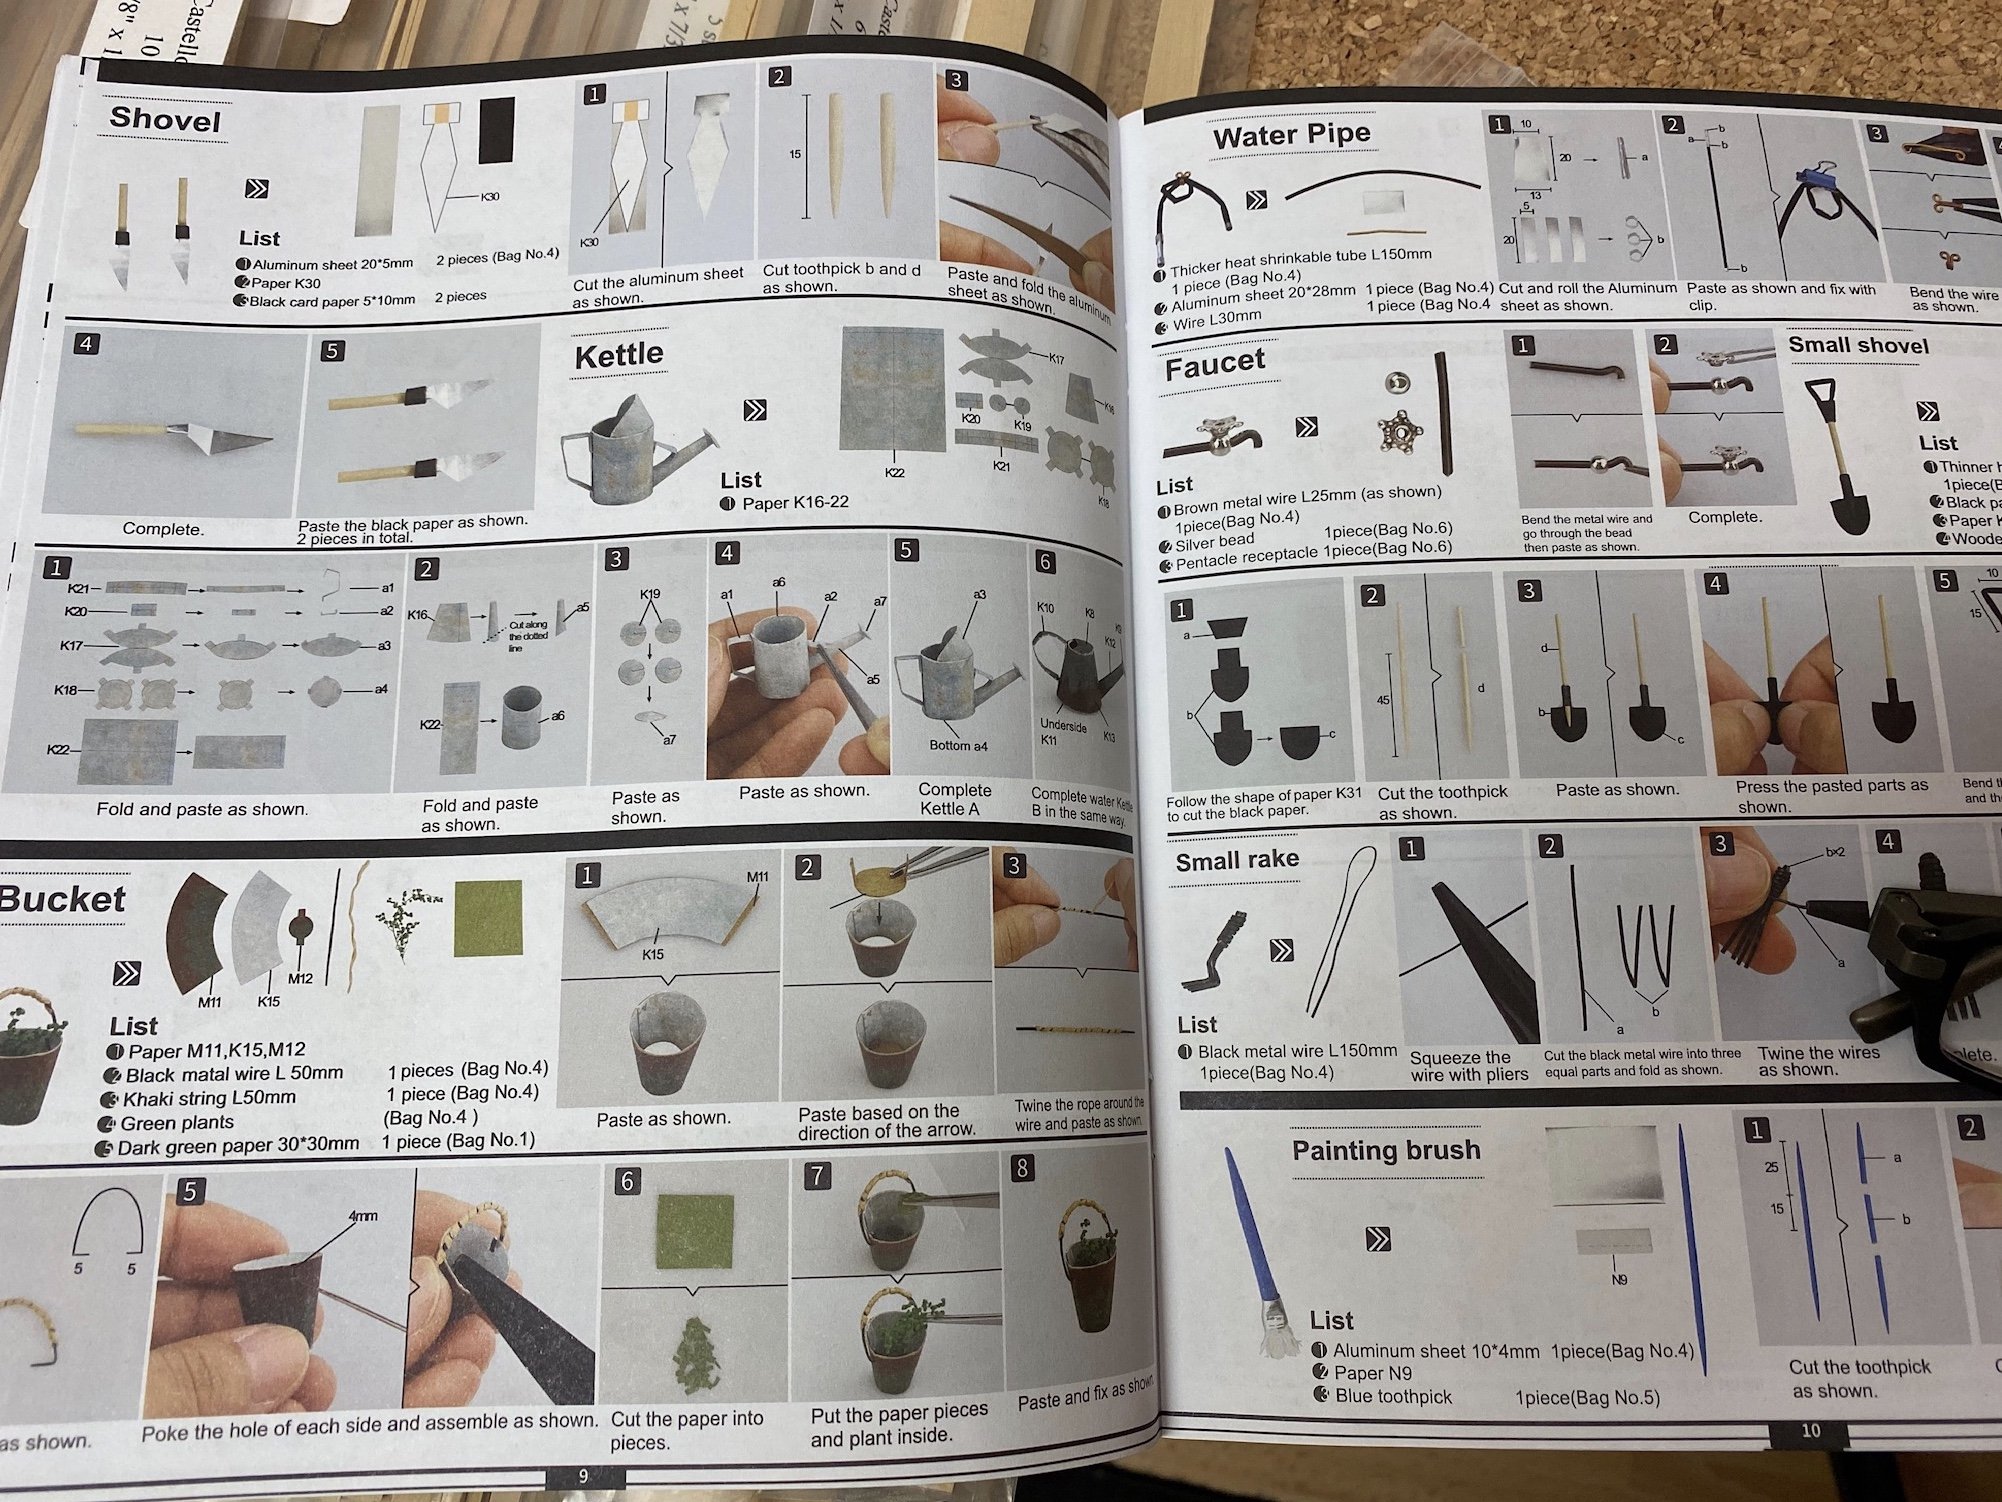
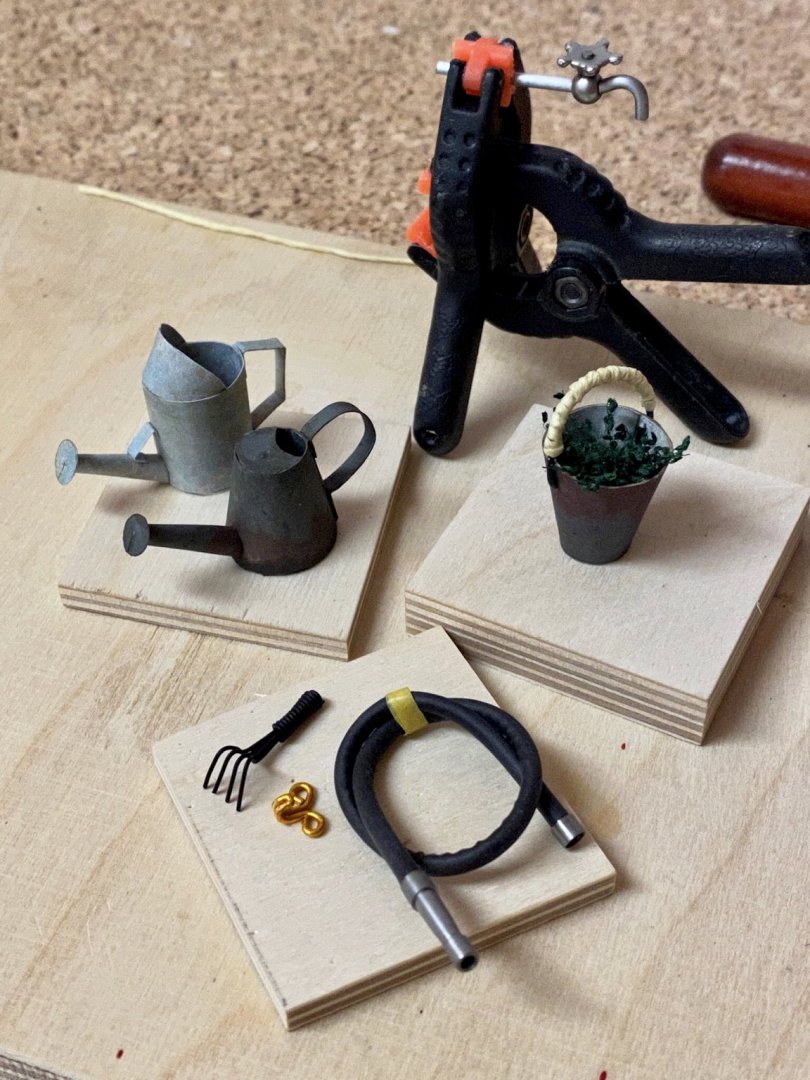
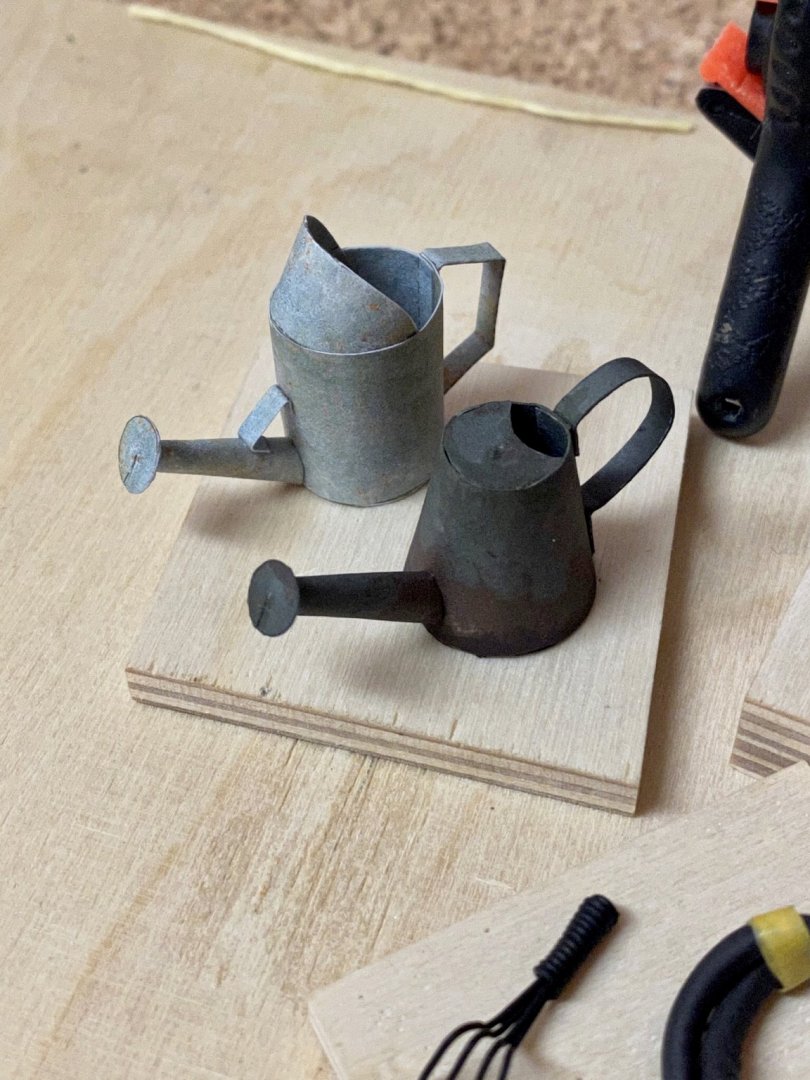
Finished all the tools, two kettles made of paper, a bucket made of card and paper, a water pipe, a faucet and a small rake made of brass wire and blackened. Next items are 21 plants...


- 54 replies
-
- 10
-
-
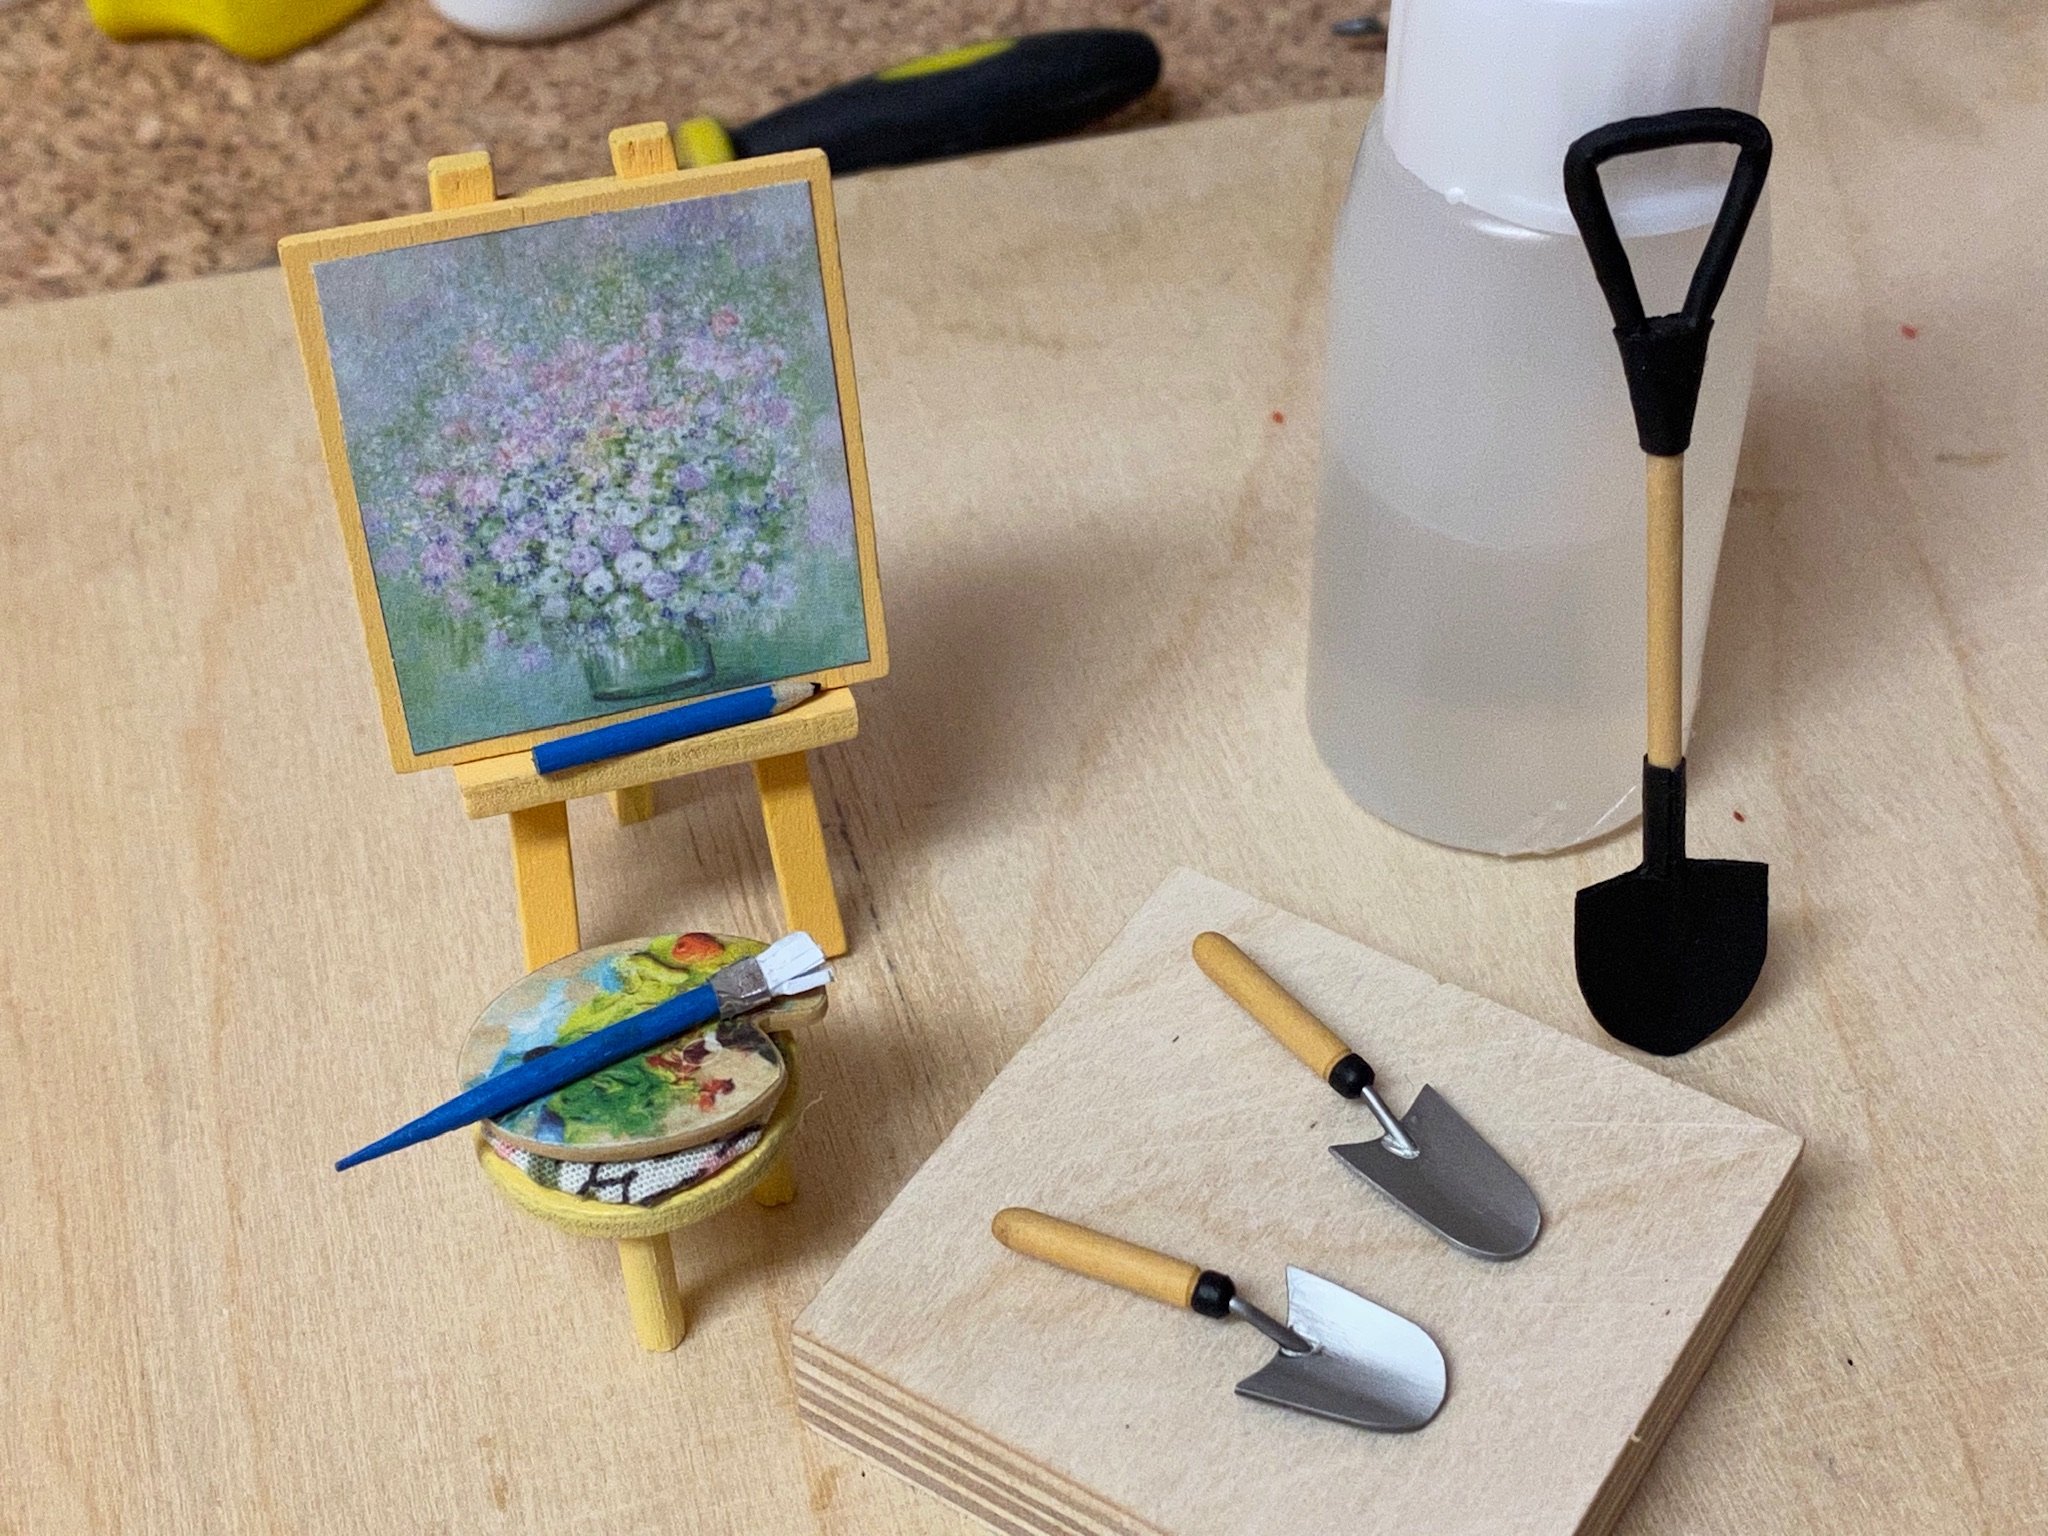
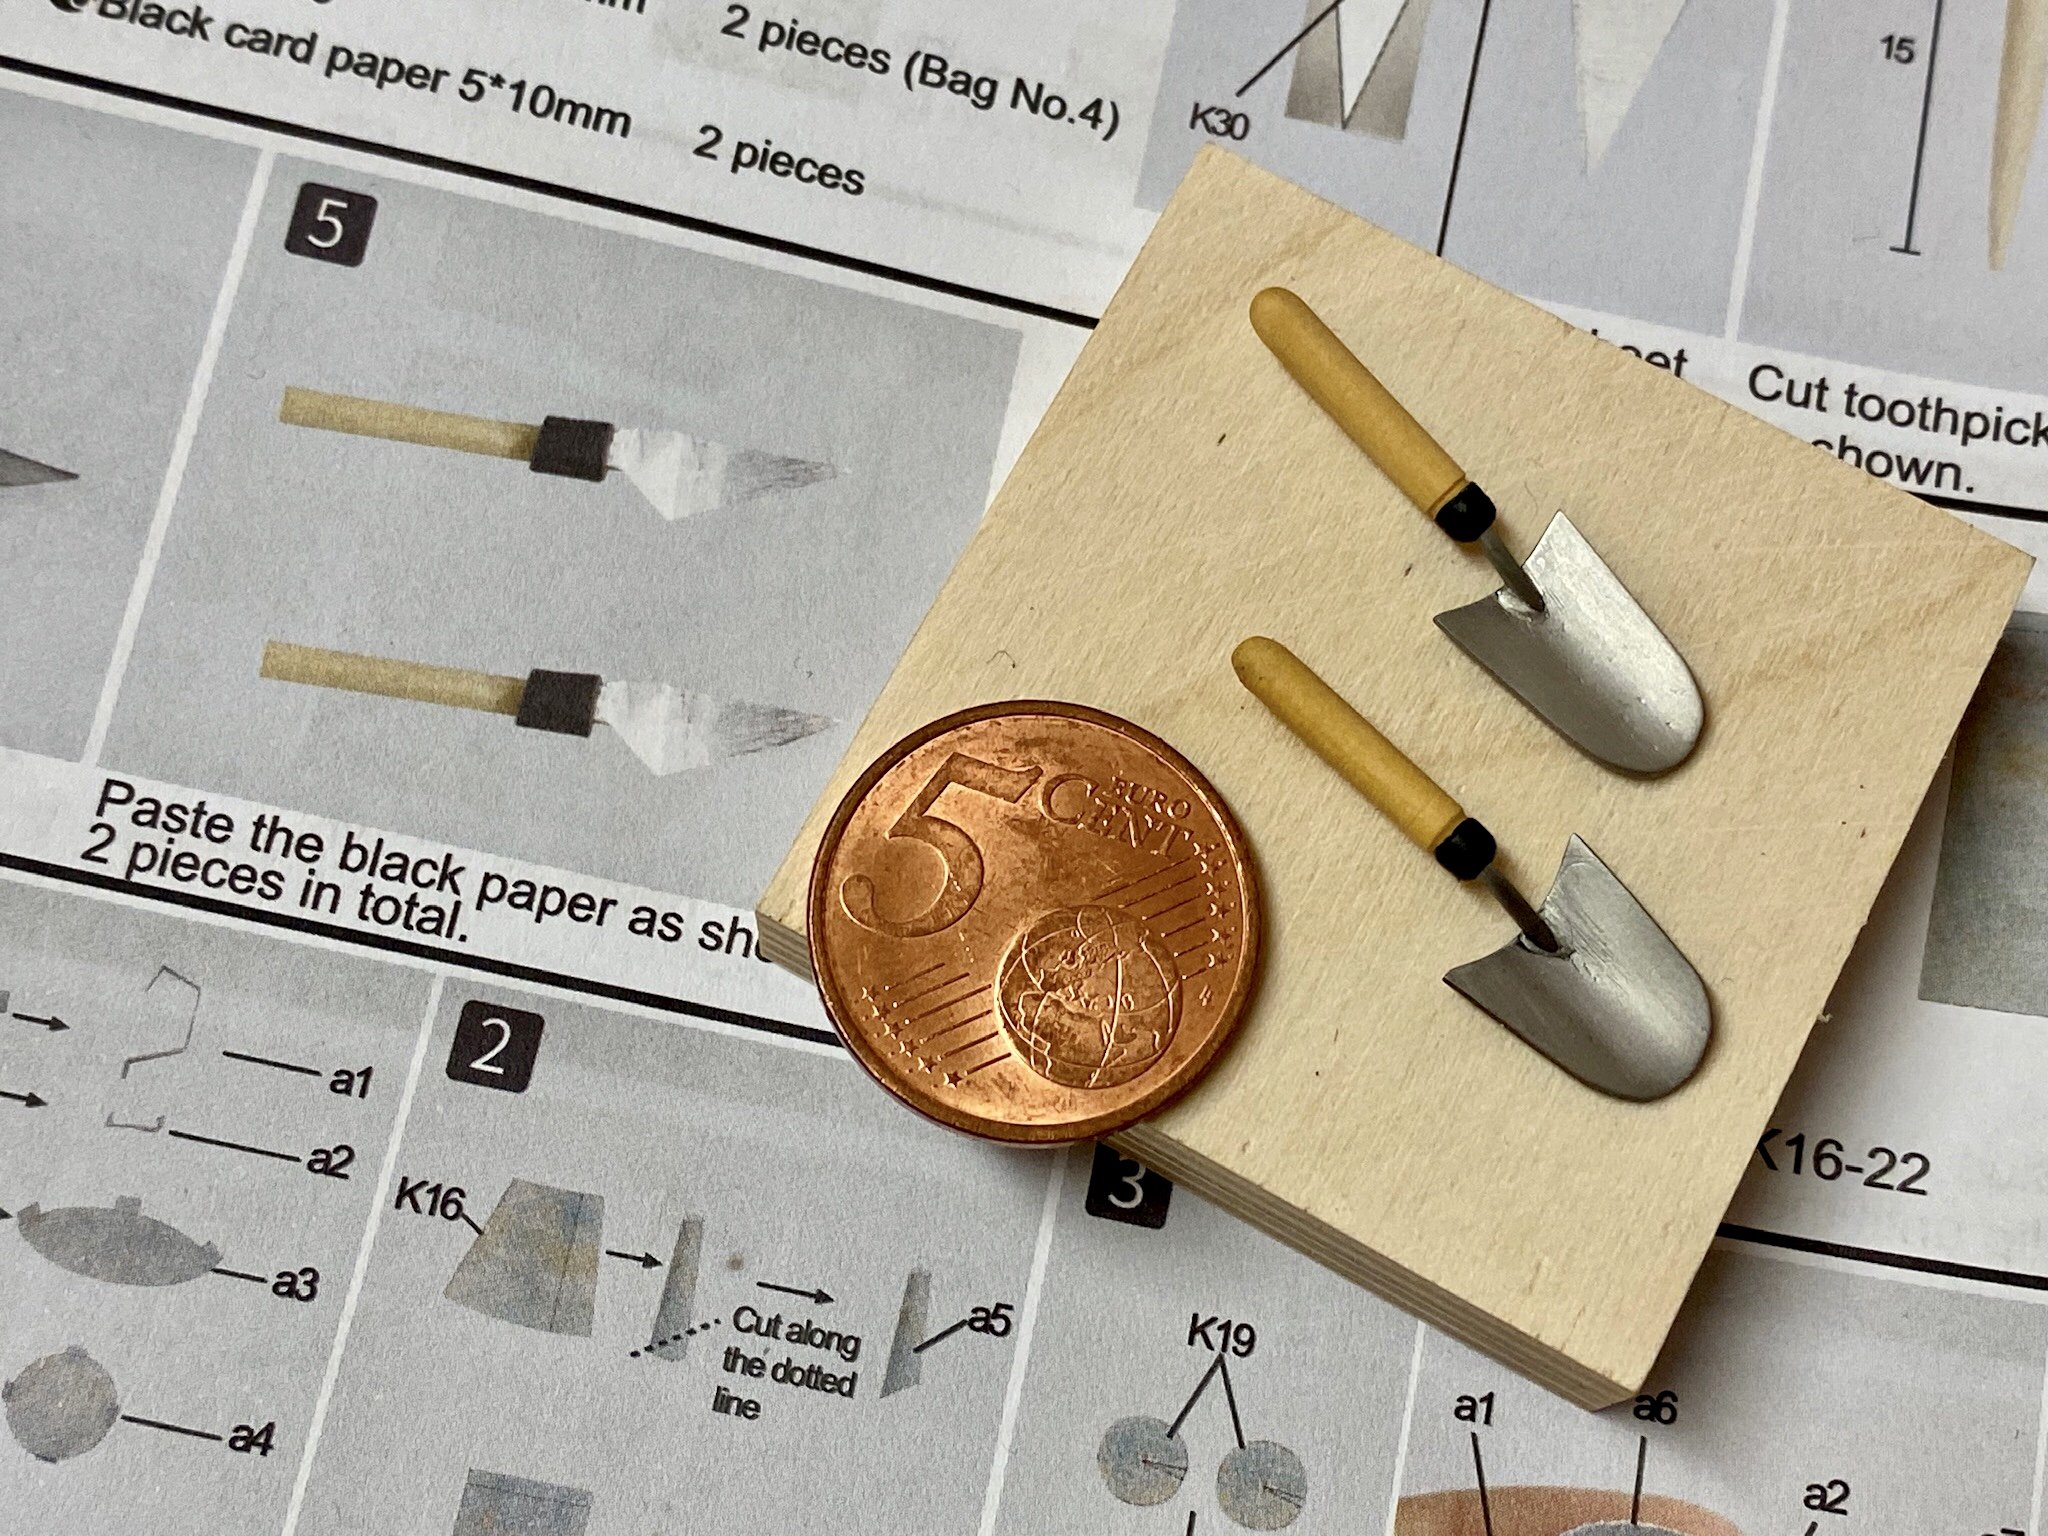
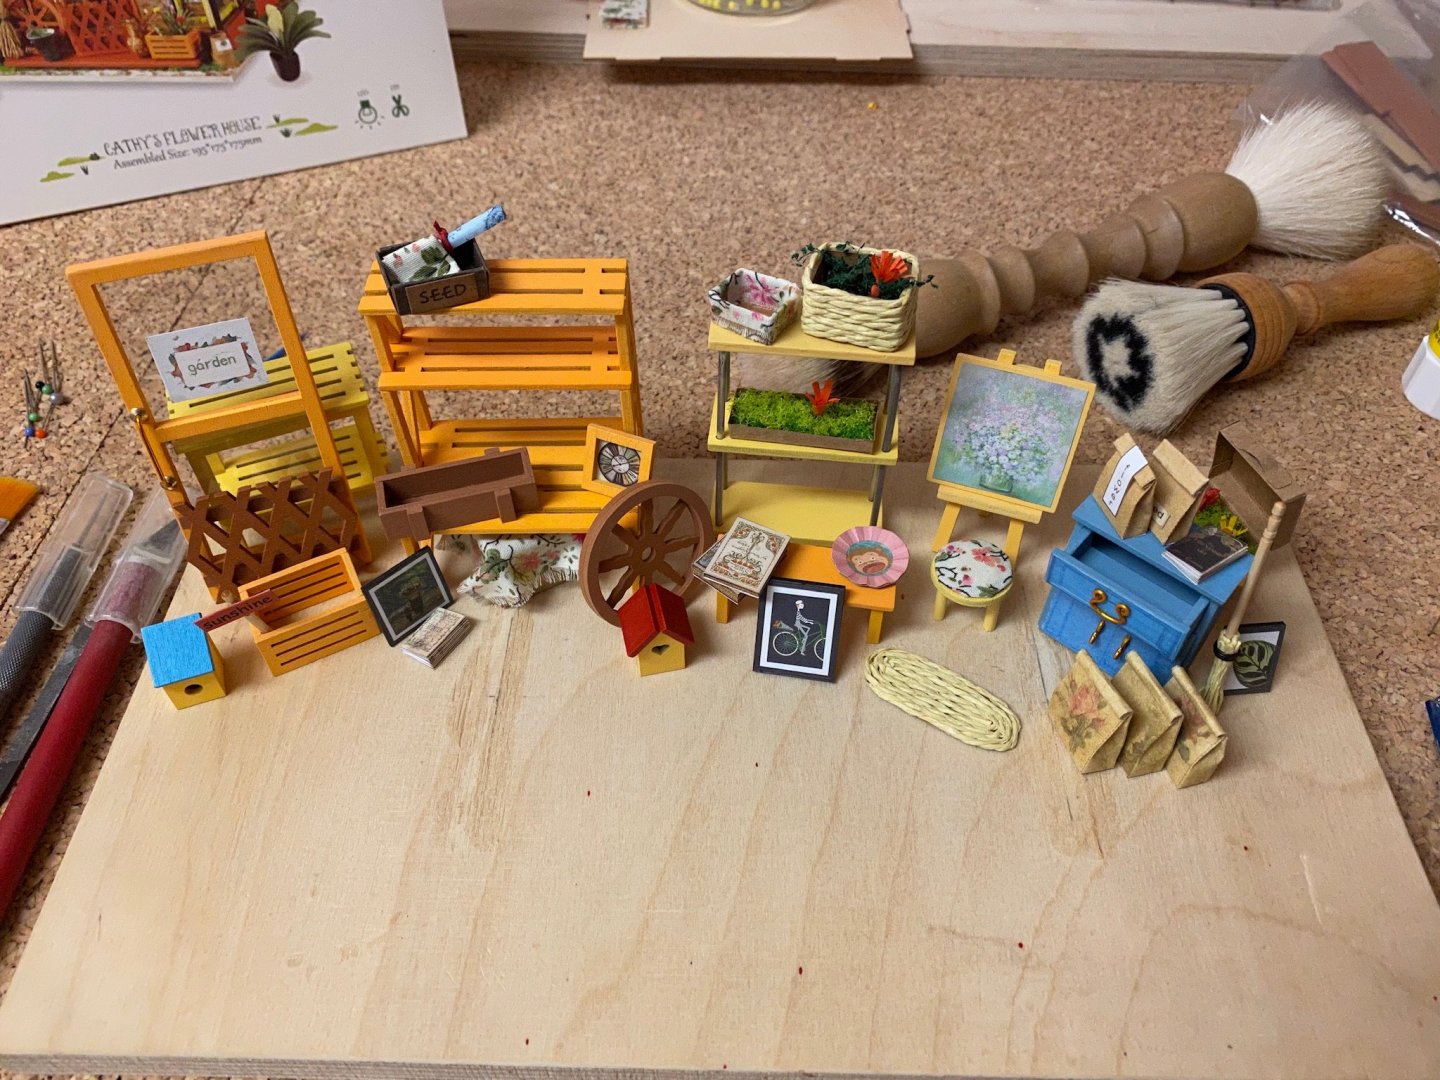
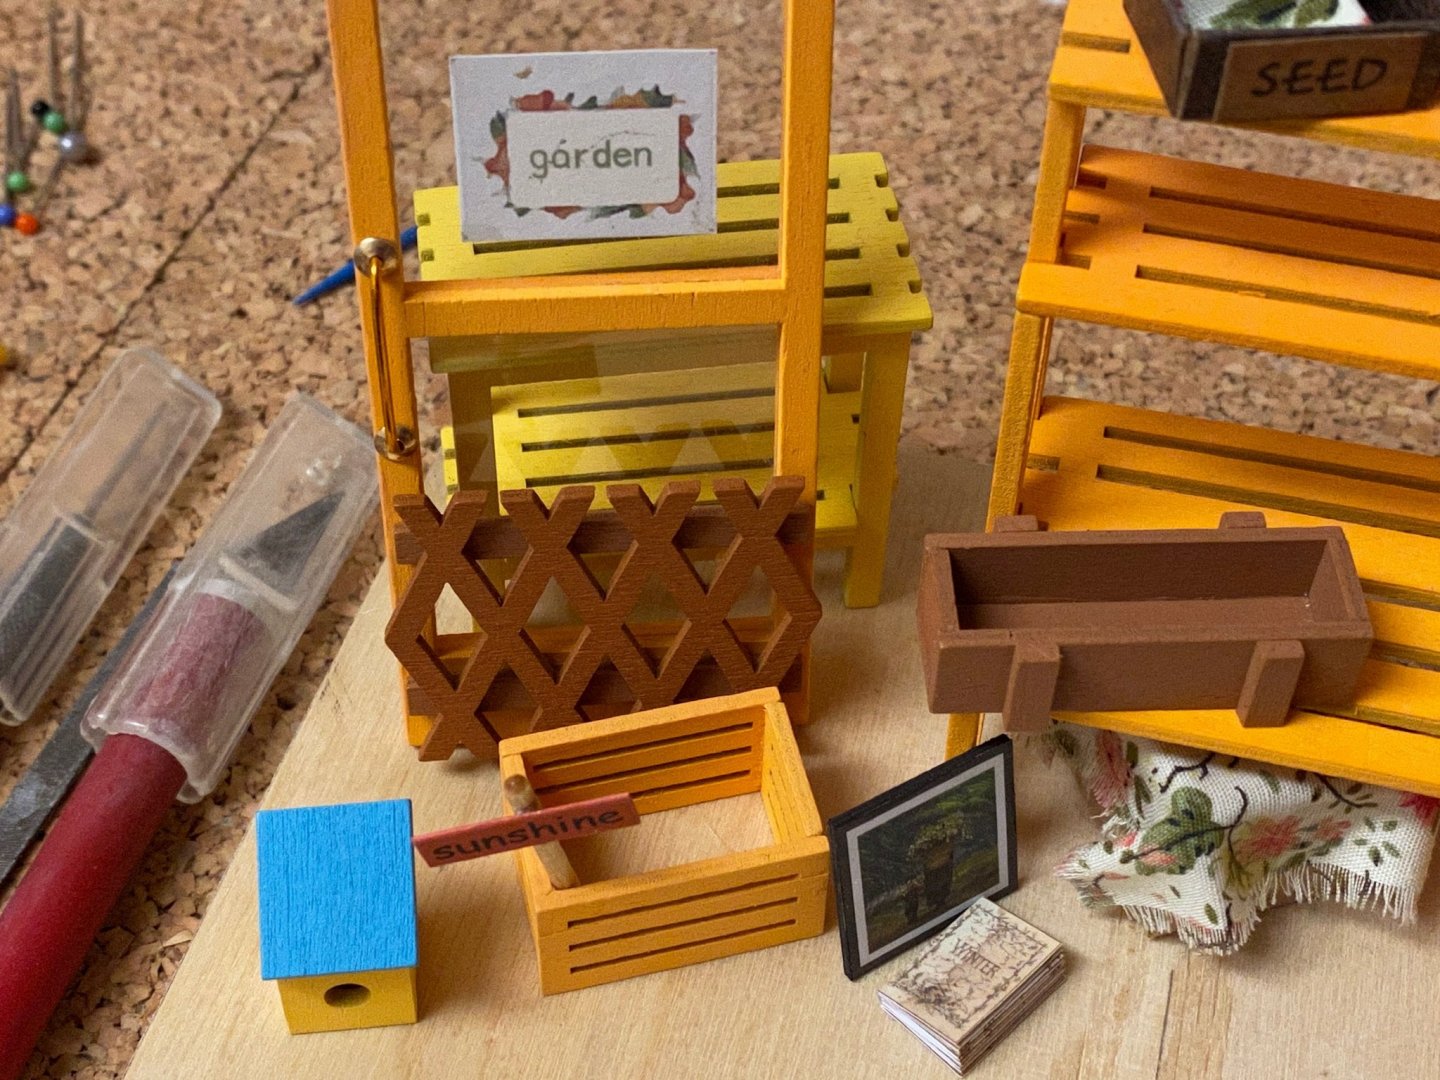
Thank all of you for the nice comments. I finished some more items, a large shovel, a paintbrush, a colour tablet and a pencil. Didn‘t want to kitbash anything of this kit but the little shovels looked awful. Designed two new ones made of 0.5mm stainless steel sheet soldered to a 1mm wire with two handles made of castello I had in stock. Some more tools to build...


- 54 replies
-
- 10
-
-
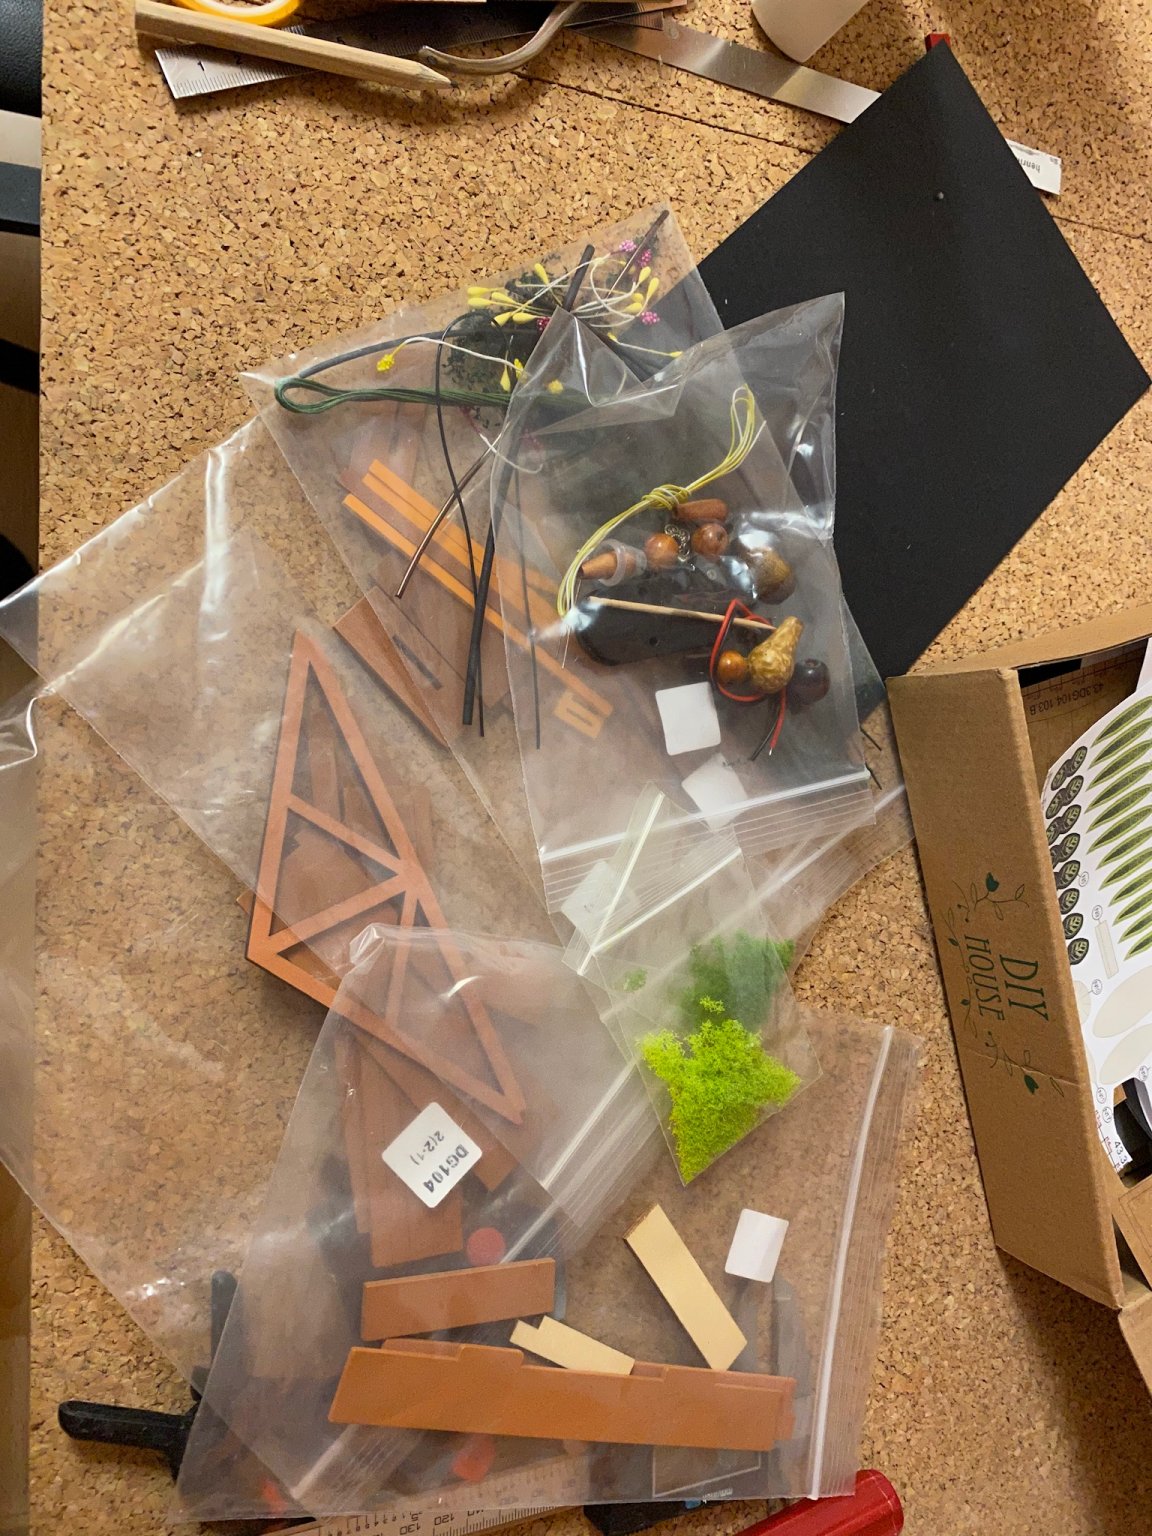
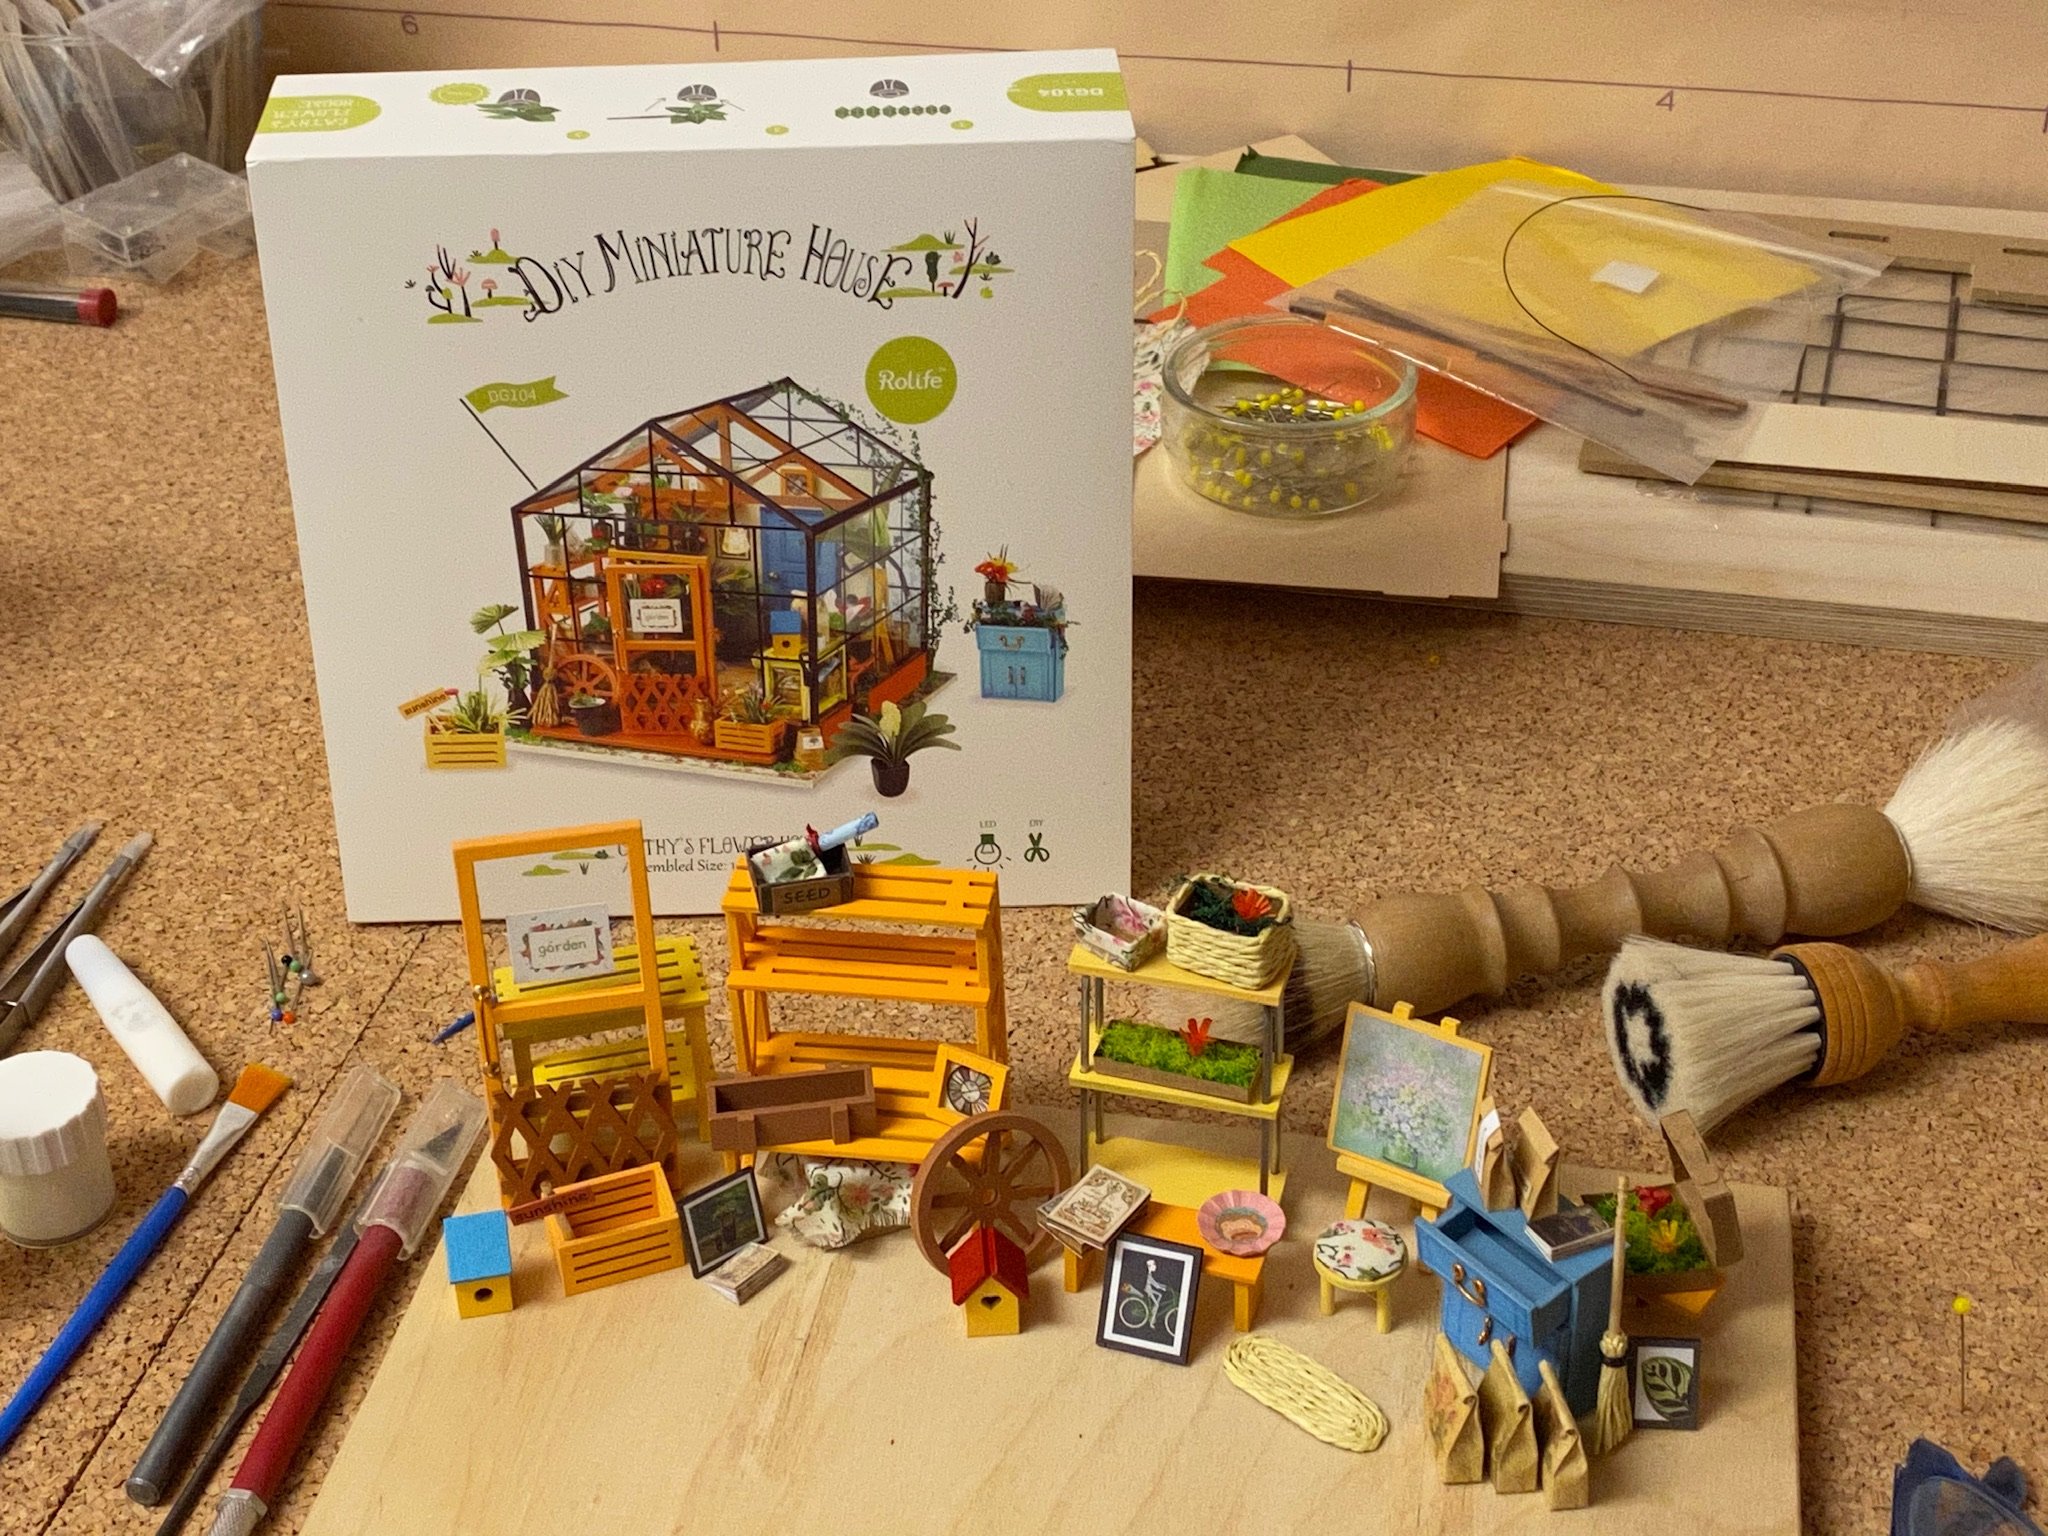
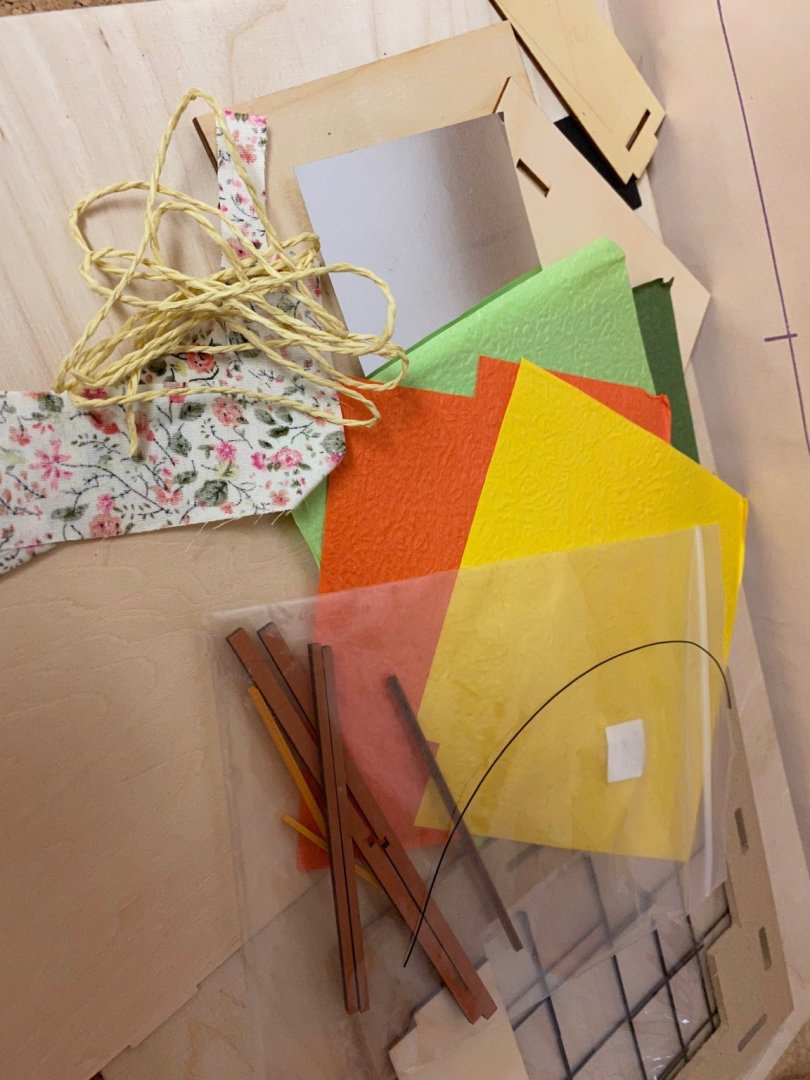
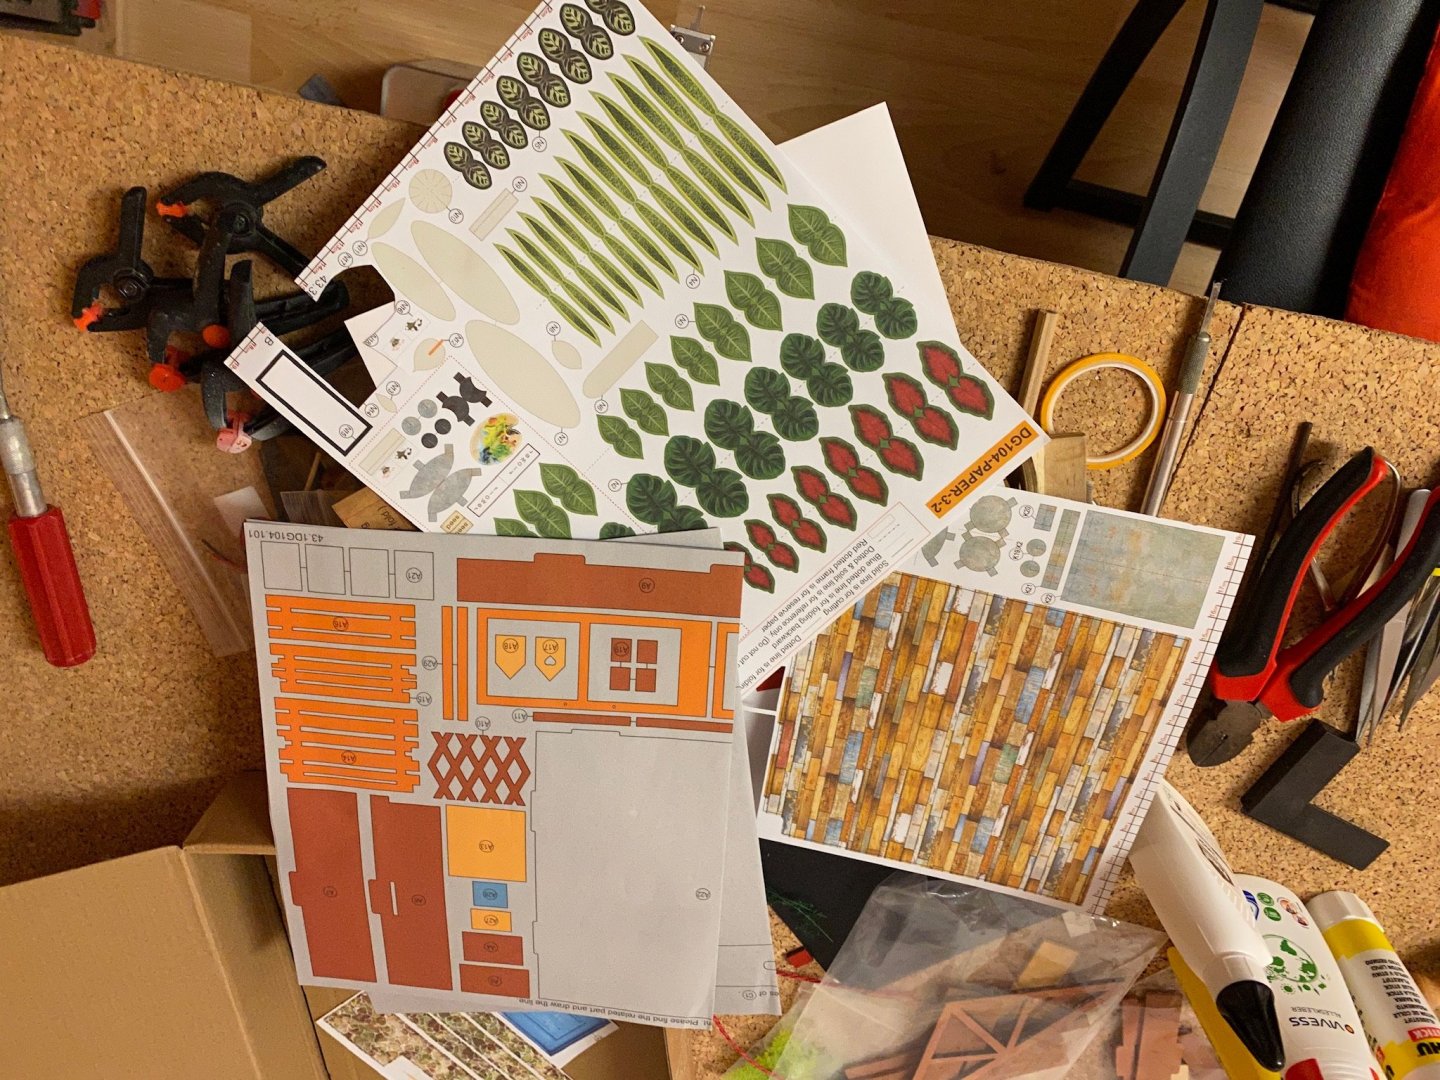
The kit consists of several bags of wooden parts, paper sheets, small parts, even a LED and battery case for illuminating the flower house is part of the kit. A 30-Page manual guides you through the construction. Boy, this will be more stress than building any ship model.


- 54 replies
-
- 12
-
-
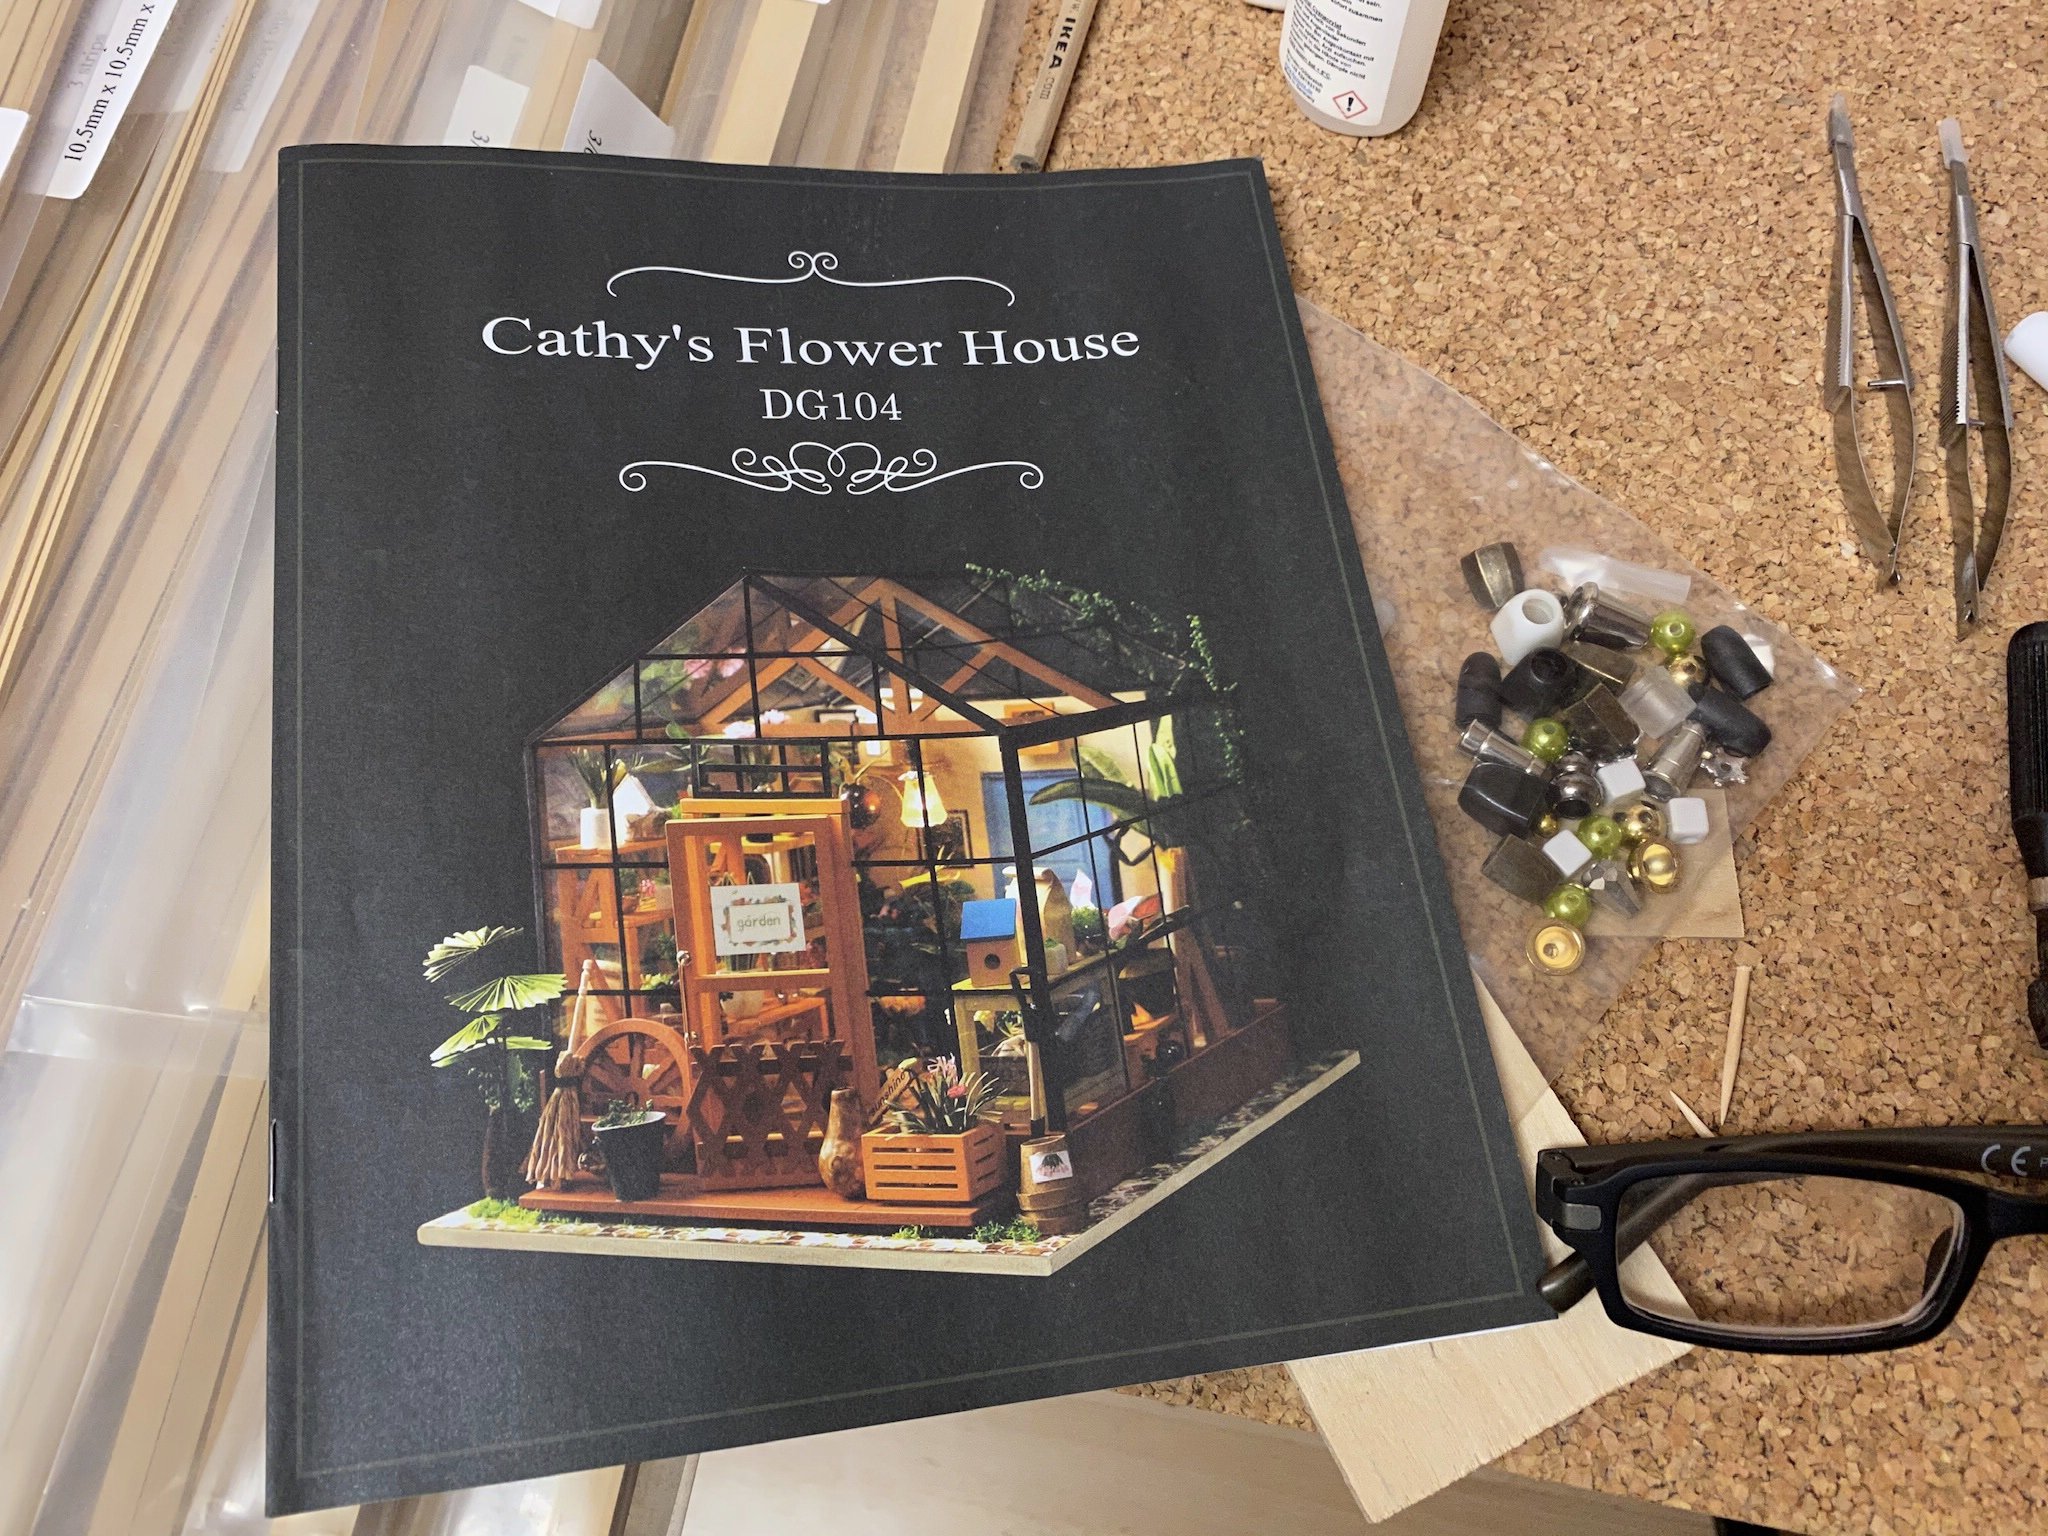
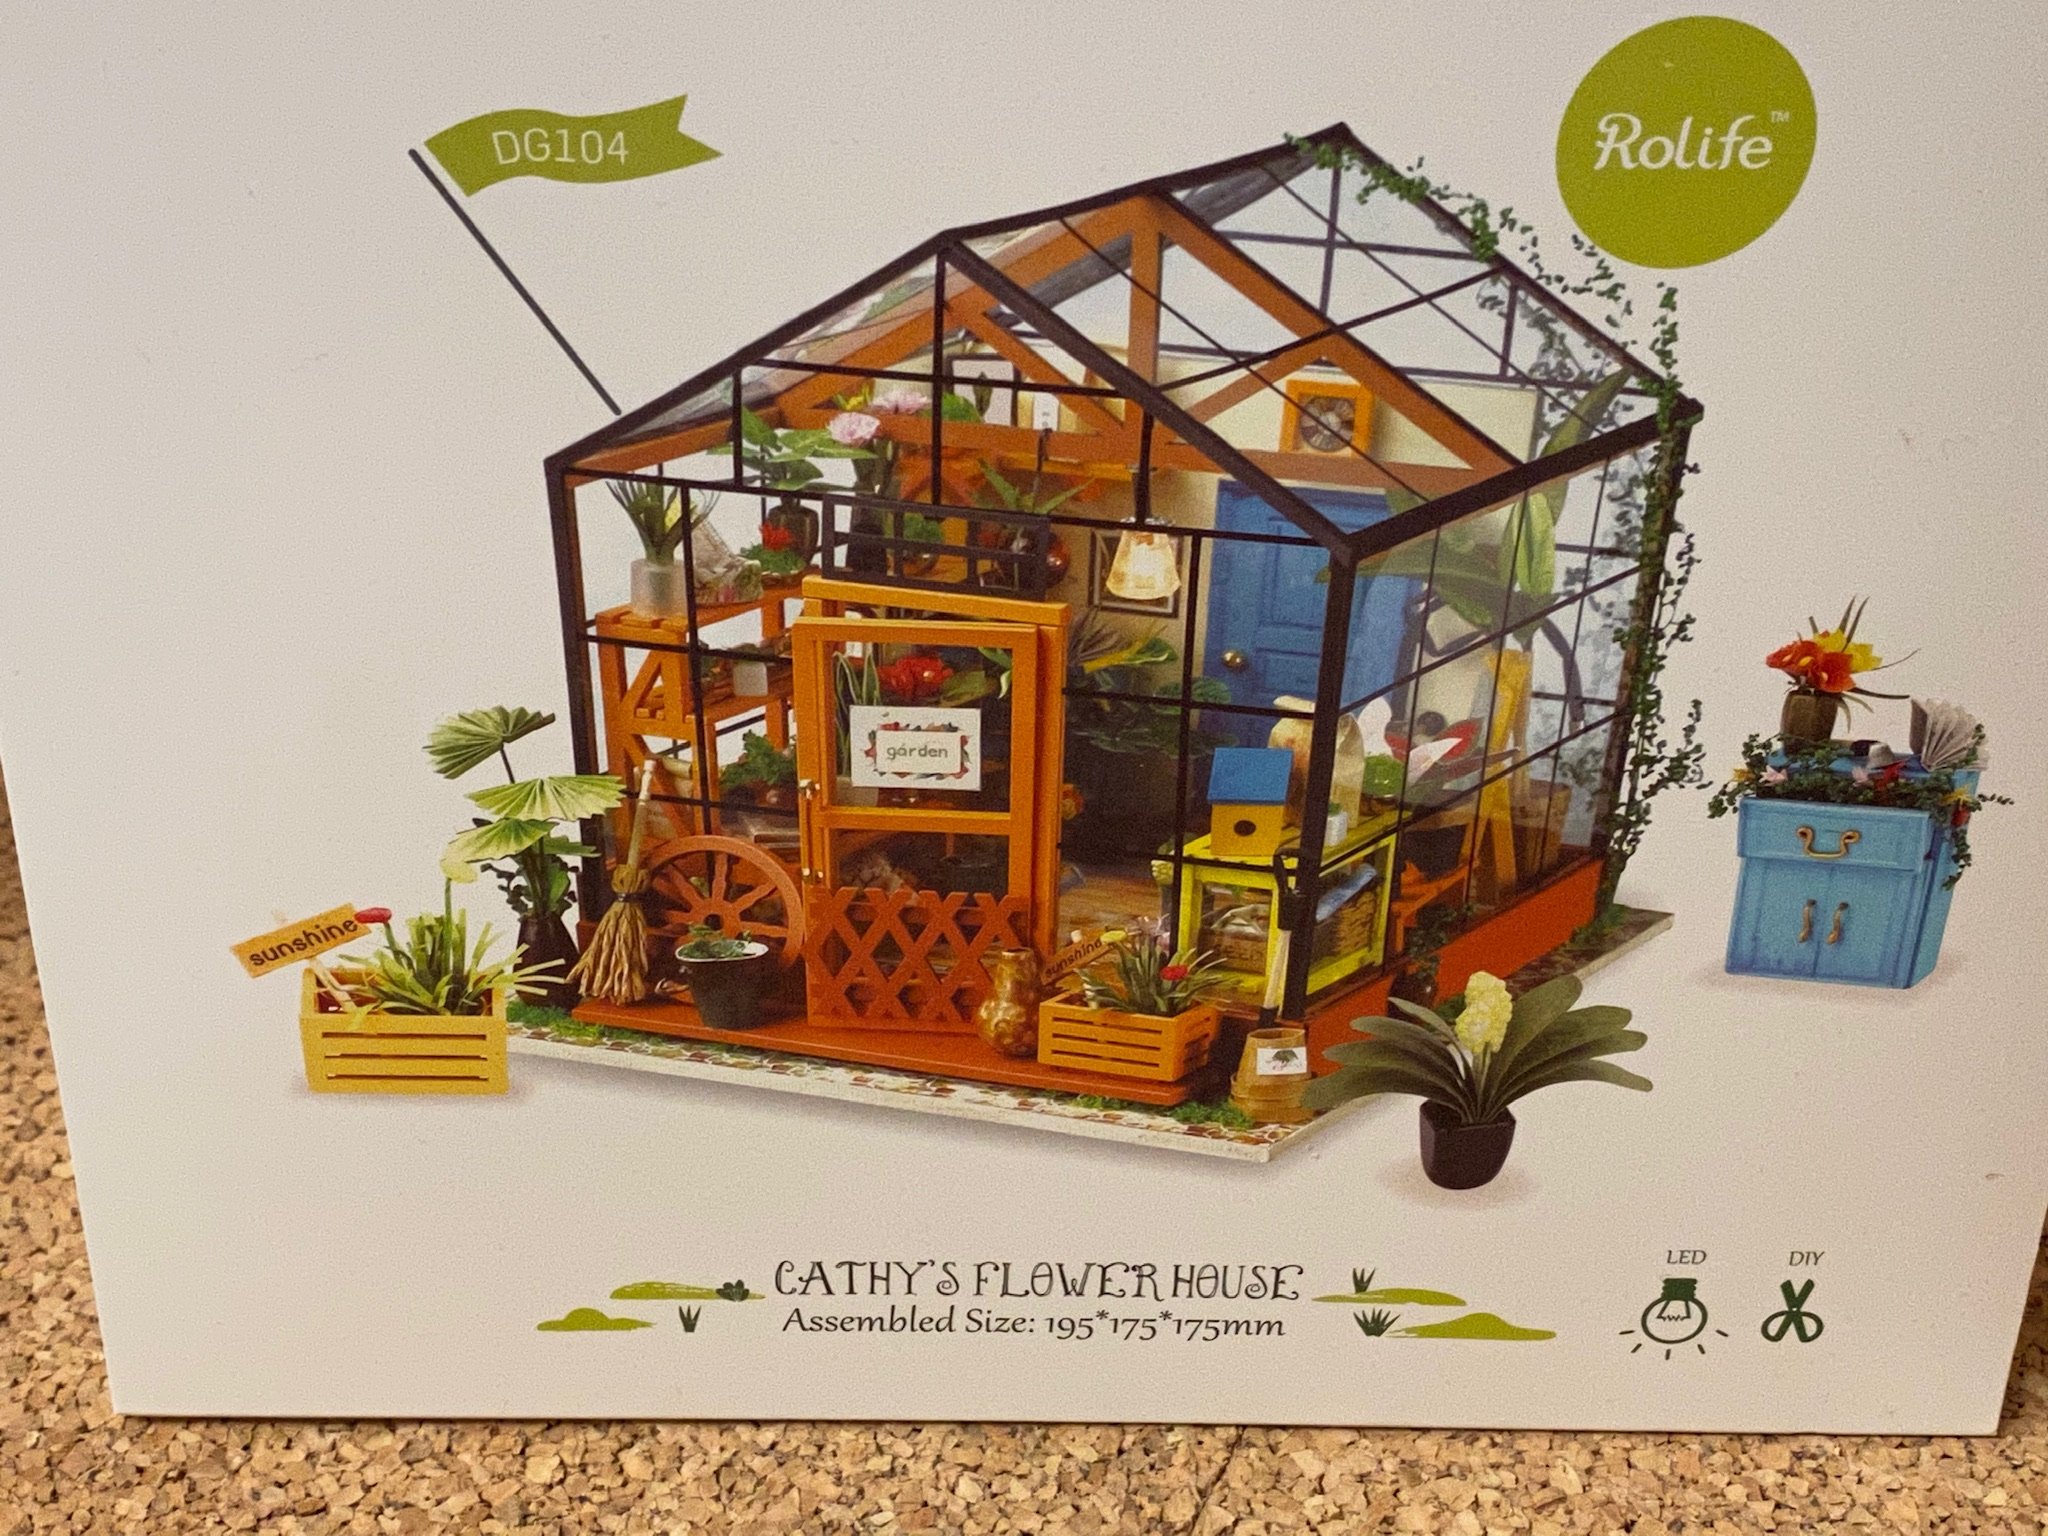
After building the Armed Virginia Sloop I take a little break from ship modelling to build a small kit I promised to do for my daughter. The ‚Cathy’s Flower House’ is a little Flower House stuffed with a lot of tools and furniture and most likely a British flower house (according to the furniture). It‘s a DIY wood/paper/fabric kit which will be approx. 20 x 20 x 20 cm when it is done. Some wooden parts are prefabricated and already painted, but most parts have to be made of basic materials like paper sheets or fabric - even all the flowers. But the manual shows up every step of the construction and all tools for ship modelling come in handy. First all the furniture is to be done, then comes the tools and last but not least a lot of flowers have to be done. The building time should be about a month. I made some progress so far. Almost everything has to be build from scratch. I can‘t wait to get the Cheerful started but a promise has to be kept.


- 54 replies
-
- 12
-
-
At this stage of build the gunports can easily be reshaped. You may use a thin strip of stainless steel as a guide. Just clamp it in the correct position, roughly shape the port and use a needle file for the last steps. The steel strip will act as a border and is hard to damage with the file. You can achieve very clean edges this way.
-
I fear, at 1/64 scale it would be almost impossible to read the numbers even for an elf. But if you already have the decals you may be able to overpaint it with the appropriate colour.
-
I would love to see a Bristol with full (simulated) painted friezes on it, that is why I was asking. That would be the first VM kit for me to buy - if everything else is just fine. Frieze would push kits a lot more in the scale direction and make them unique (as a special reason for buying a VM kit) especially because you don‘t find a lot of kits in the area 1750 - 1780 that have the typical blue / yellow frieze on it. Almost every finished model ship you find is scratch-build. But I only speak for myself.
-
Sorry, I mixed german and english. I mean, that is a very tough action, coppering an almost finished ship. If germans are impressed, they say ‚respect!‘ 🤗
-
Dear Chris, I hope you don't mind me asking a question. The Amati Pegasus and Fly as well as the Vanguard Models Cutter Alert have brass etched frieze parts instead of paper ones. A paper strip with fully coloured frieze would surely add some depth and realism to the models. Is that to difficult to realize in 3/16 scale? Best regards, Andreas
-
That is a truly nice ship. The combination of pear and boxwood is hard to beat. And I wish I had a workspace that huge.
-
Respect! Your're coppering a finished ship! It looks very neat.
-
Nice work!
-
Thank you very much Arjan and Kurt for the nice comments.
-
The sails will be as beautiful as your woodwork! 🤗
-
This is a nice model, I like the way you managed to do the headrails. Andreas