HOLIDAY DONATION DRIVE - SUPPORT MSW - DO YOUR PART TO KEEP THIS GREAT FORUM GOING! (Only 36 donations so far out of 49,000 members - C'mon guys!)
×


captain_hook
-
Posts
685 -
Joined
-
Last visited
Content Type
Profiles
Forums
Gallery
Events
Everything posted by captain_hook
-
Welcome to MSW. Good luck with your project and don’t hesitate to ask any questions if you need some help!
-
 Very nice! Did that ship really had a lion as figurehead or is it some sort of placeholder?
 -
Nice work Jean-Paul, looks very good. The rigging of the AVS I had the most trouble with were the stays (bob-, fore- and backstays) because their tackles are supposed to be seized and fixed. So I ended up doing all them twice because I had to readjust the tension after some time. If I had to do them again I would prepare but not finish them until bowsprit and mast were in place and then adjust to final tension.
-
Very nice painting! I like the way the planking run can still be seen under the paint.
-
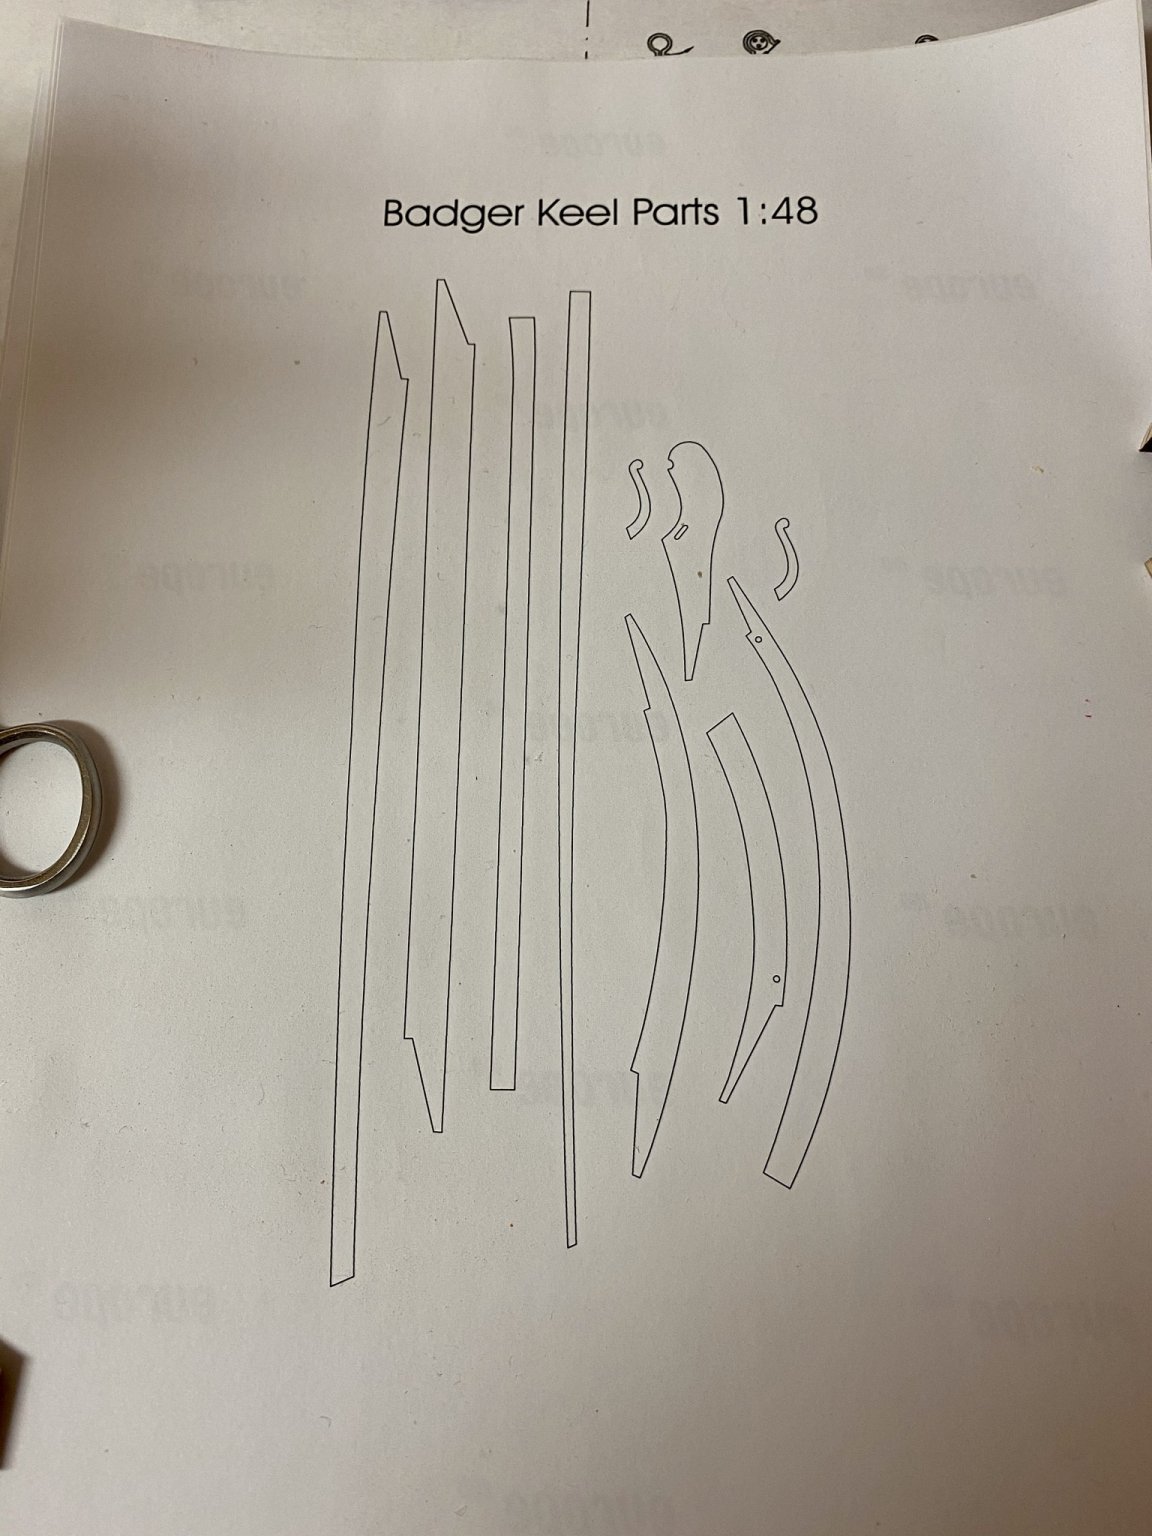
Thank you barkeater. I have sanded the bulkwards to shape at the bow. This project will be a challenge. The gunports are way off compared to the NMM plans so I will ignore the cutouts and cut new ones by hand. Have added the rabbit and drawn the keel parts with Corel Draw. Printed them on adhesive paper to cut them out of boxwood sheet later.

- 64 replies
-
- 8
-

-
- badger
- caldercraft
- (and 1 more)
-
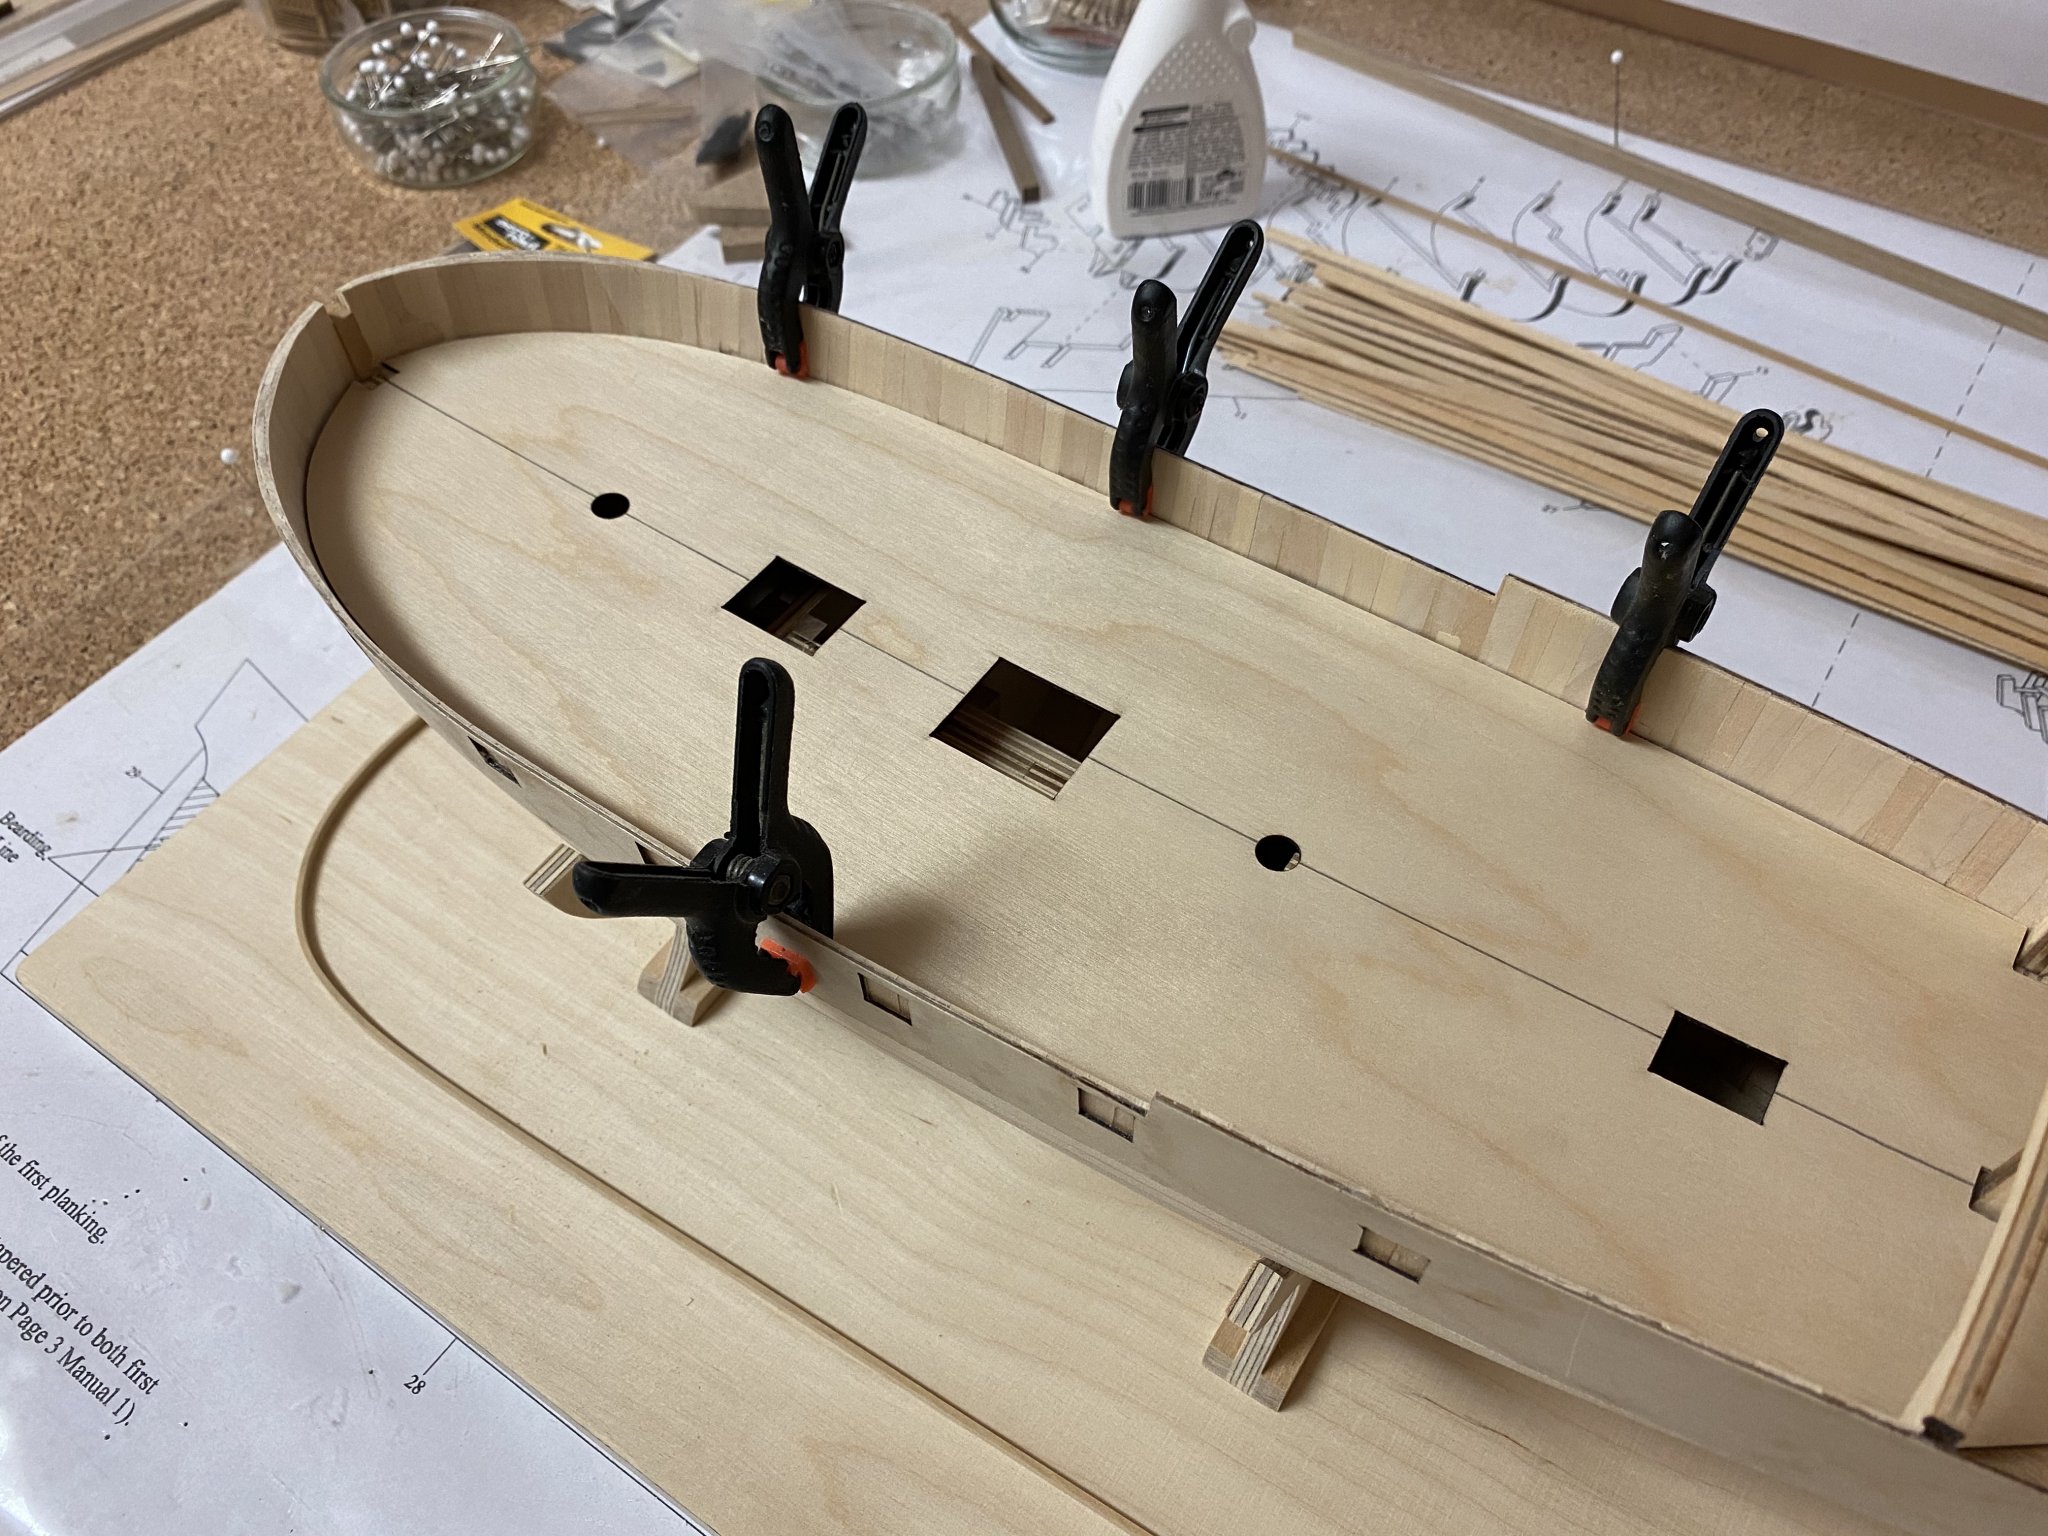
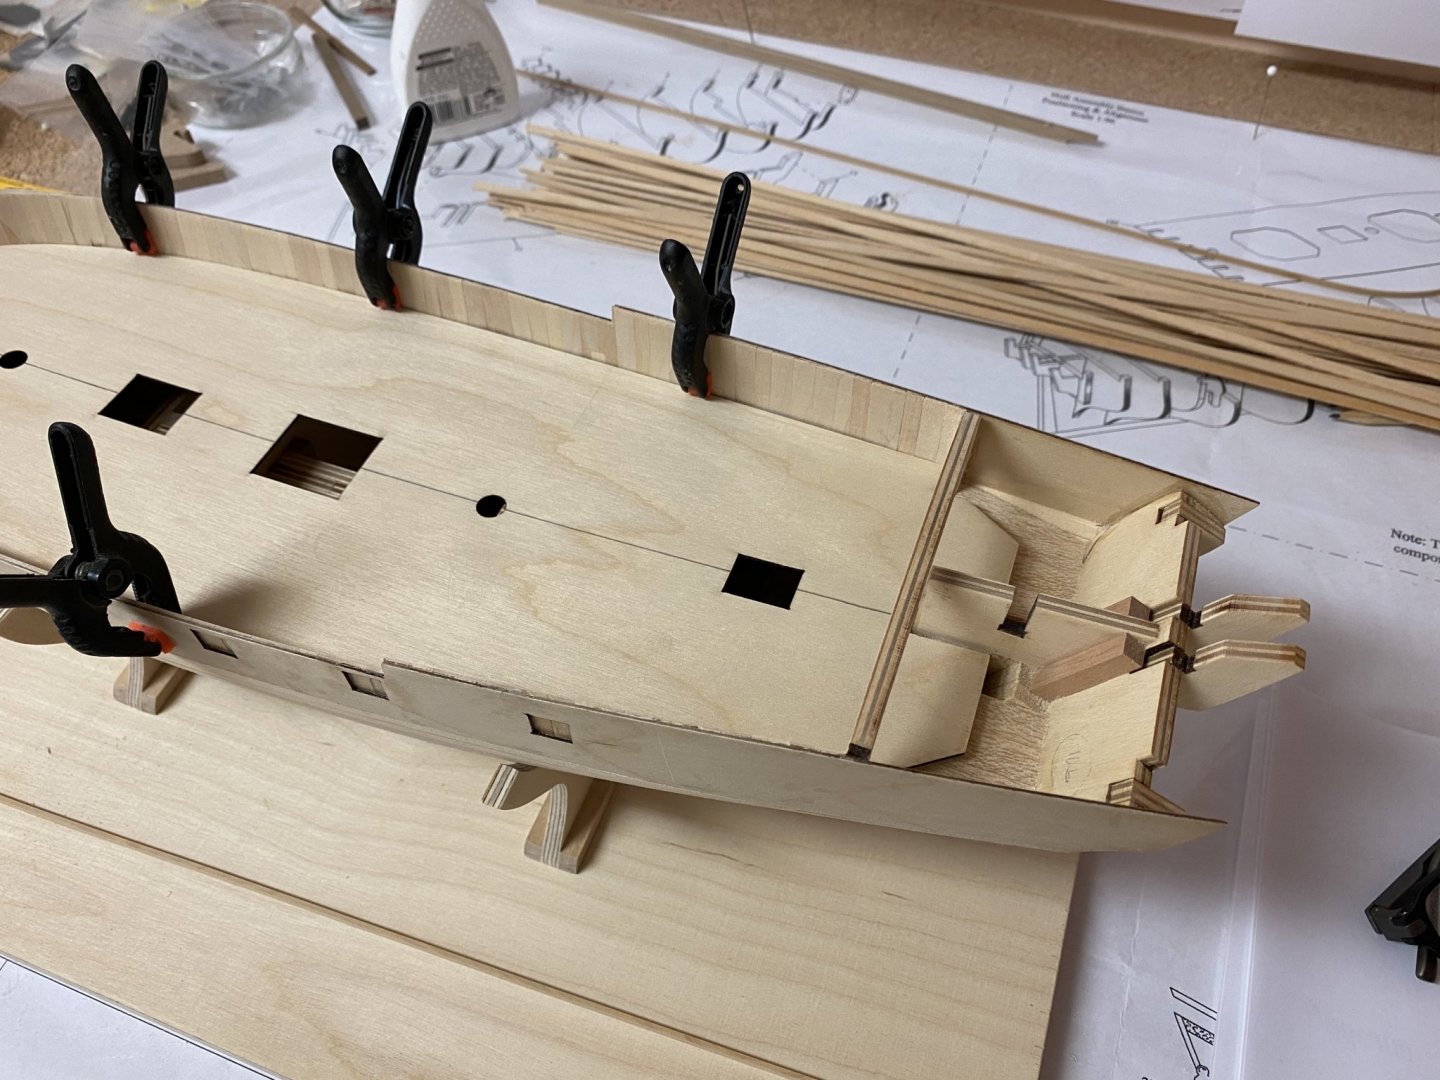
The plywood false deck has been dry-fitted. As it is not glued yet I have to fix it in position with some clamps.

- 64 replies
-
- 6
-
-
- badger
- caldercraft
- (and 1 more)
-
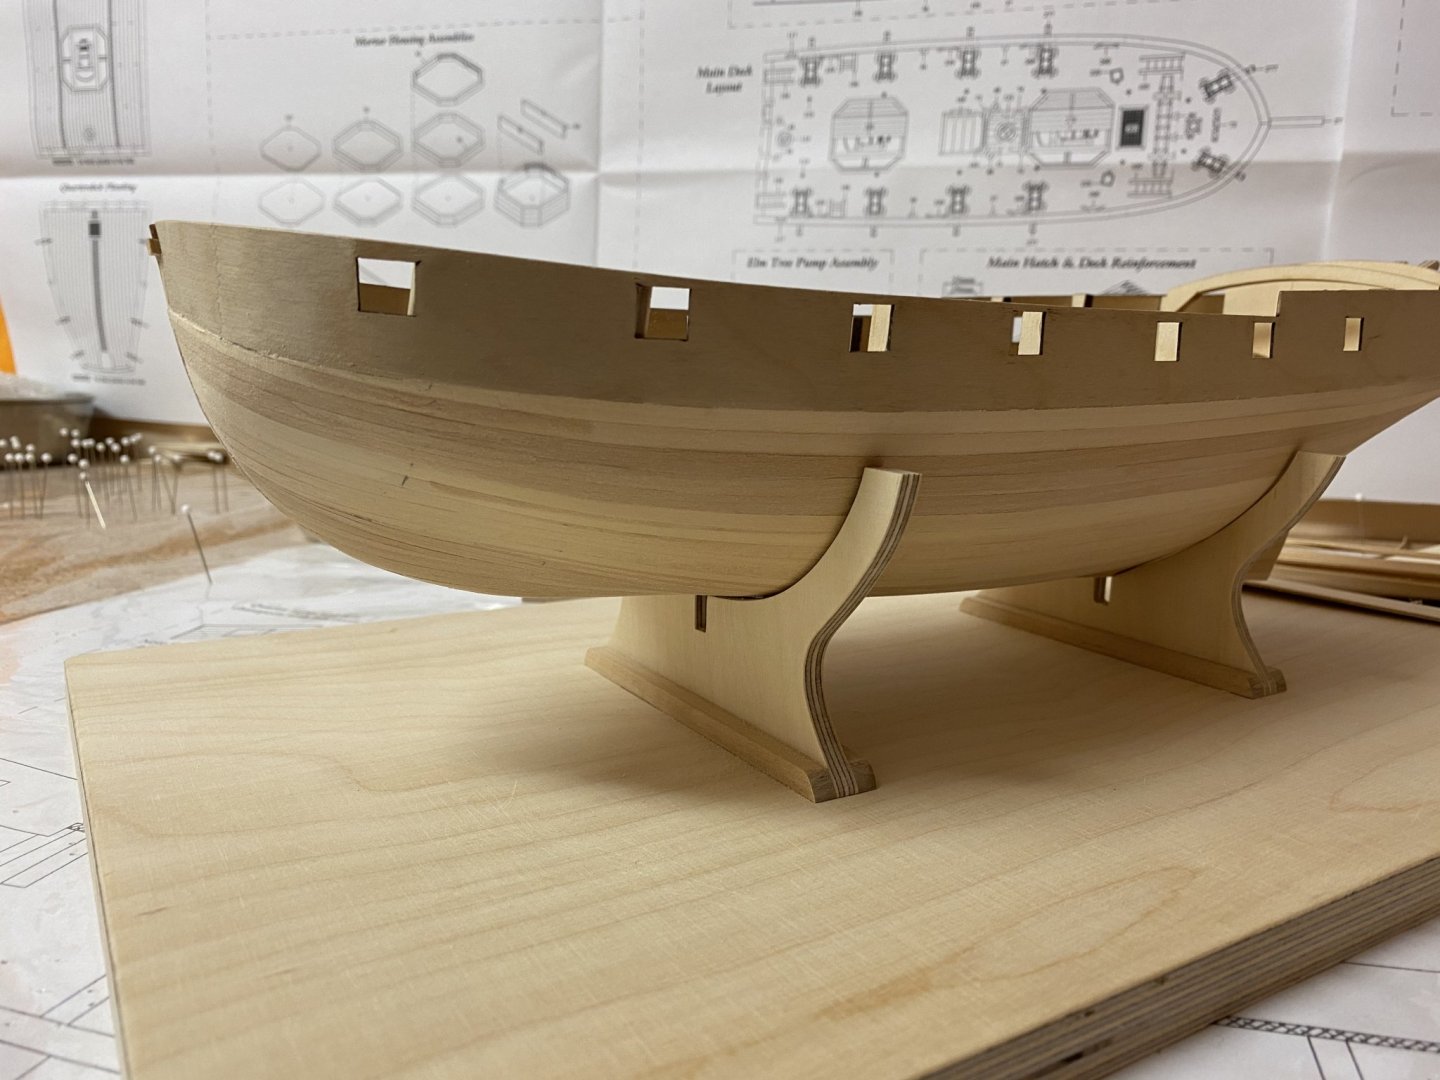
The use of gunport pattern might not have been the best idea. Should have planked that area with basswood stripes instead. As the plywood gunport pattern is more than 2 cm wide and 1,2mm thick it is not very flexible and the upper edge has the tendency to warp towards the outside at the bow when bend around the first two bulkheads. So I had to fill that area with small basswood stripes to compensate. These fillers are beveled so they are 1,5 mm at the top and almost as thin as a hair at the bottom. They are glued inside the plywood to strengthen the plywood and to form a new first planking so I can sand down the plywood without the risk of weakening the structure too much. So the bulkwards at the bow are now almost orthogonal to the deck. The bulkhead extensions have been removed and I reinforced the plywood with 1,2mm basswood stripes so it will hold its shape and to make the bulkwards a little stronger. Sanded them down to 0,8mm. Still have to sand down the outside bow areas.
- 64 replies
-
- 6
-
-
- badger
- caldercraft
- (and 1 more)
-
Translation help needed - Renaissance German
captain_hook replied to Louie da fly's topic in Nautical/Naval History
The picture is a part of the travel report written by a german knight templar named ‚Konrad von Grünenberg’ who went to Jerusalem 1486. During his trip he draw this ship which was a turkish ship (former Ottoman empire) he saw near Modon (Greece). -
Very beautiful model! Congratulations! 🎉
- 103 replies
-
- 3
-
-
- queen anne barge
- Syren Ship Model Company
- (and 1 more)
-
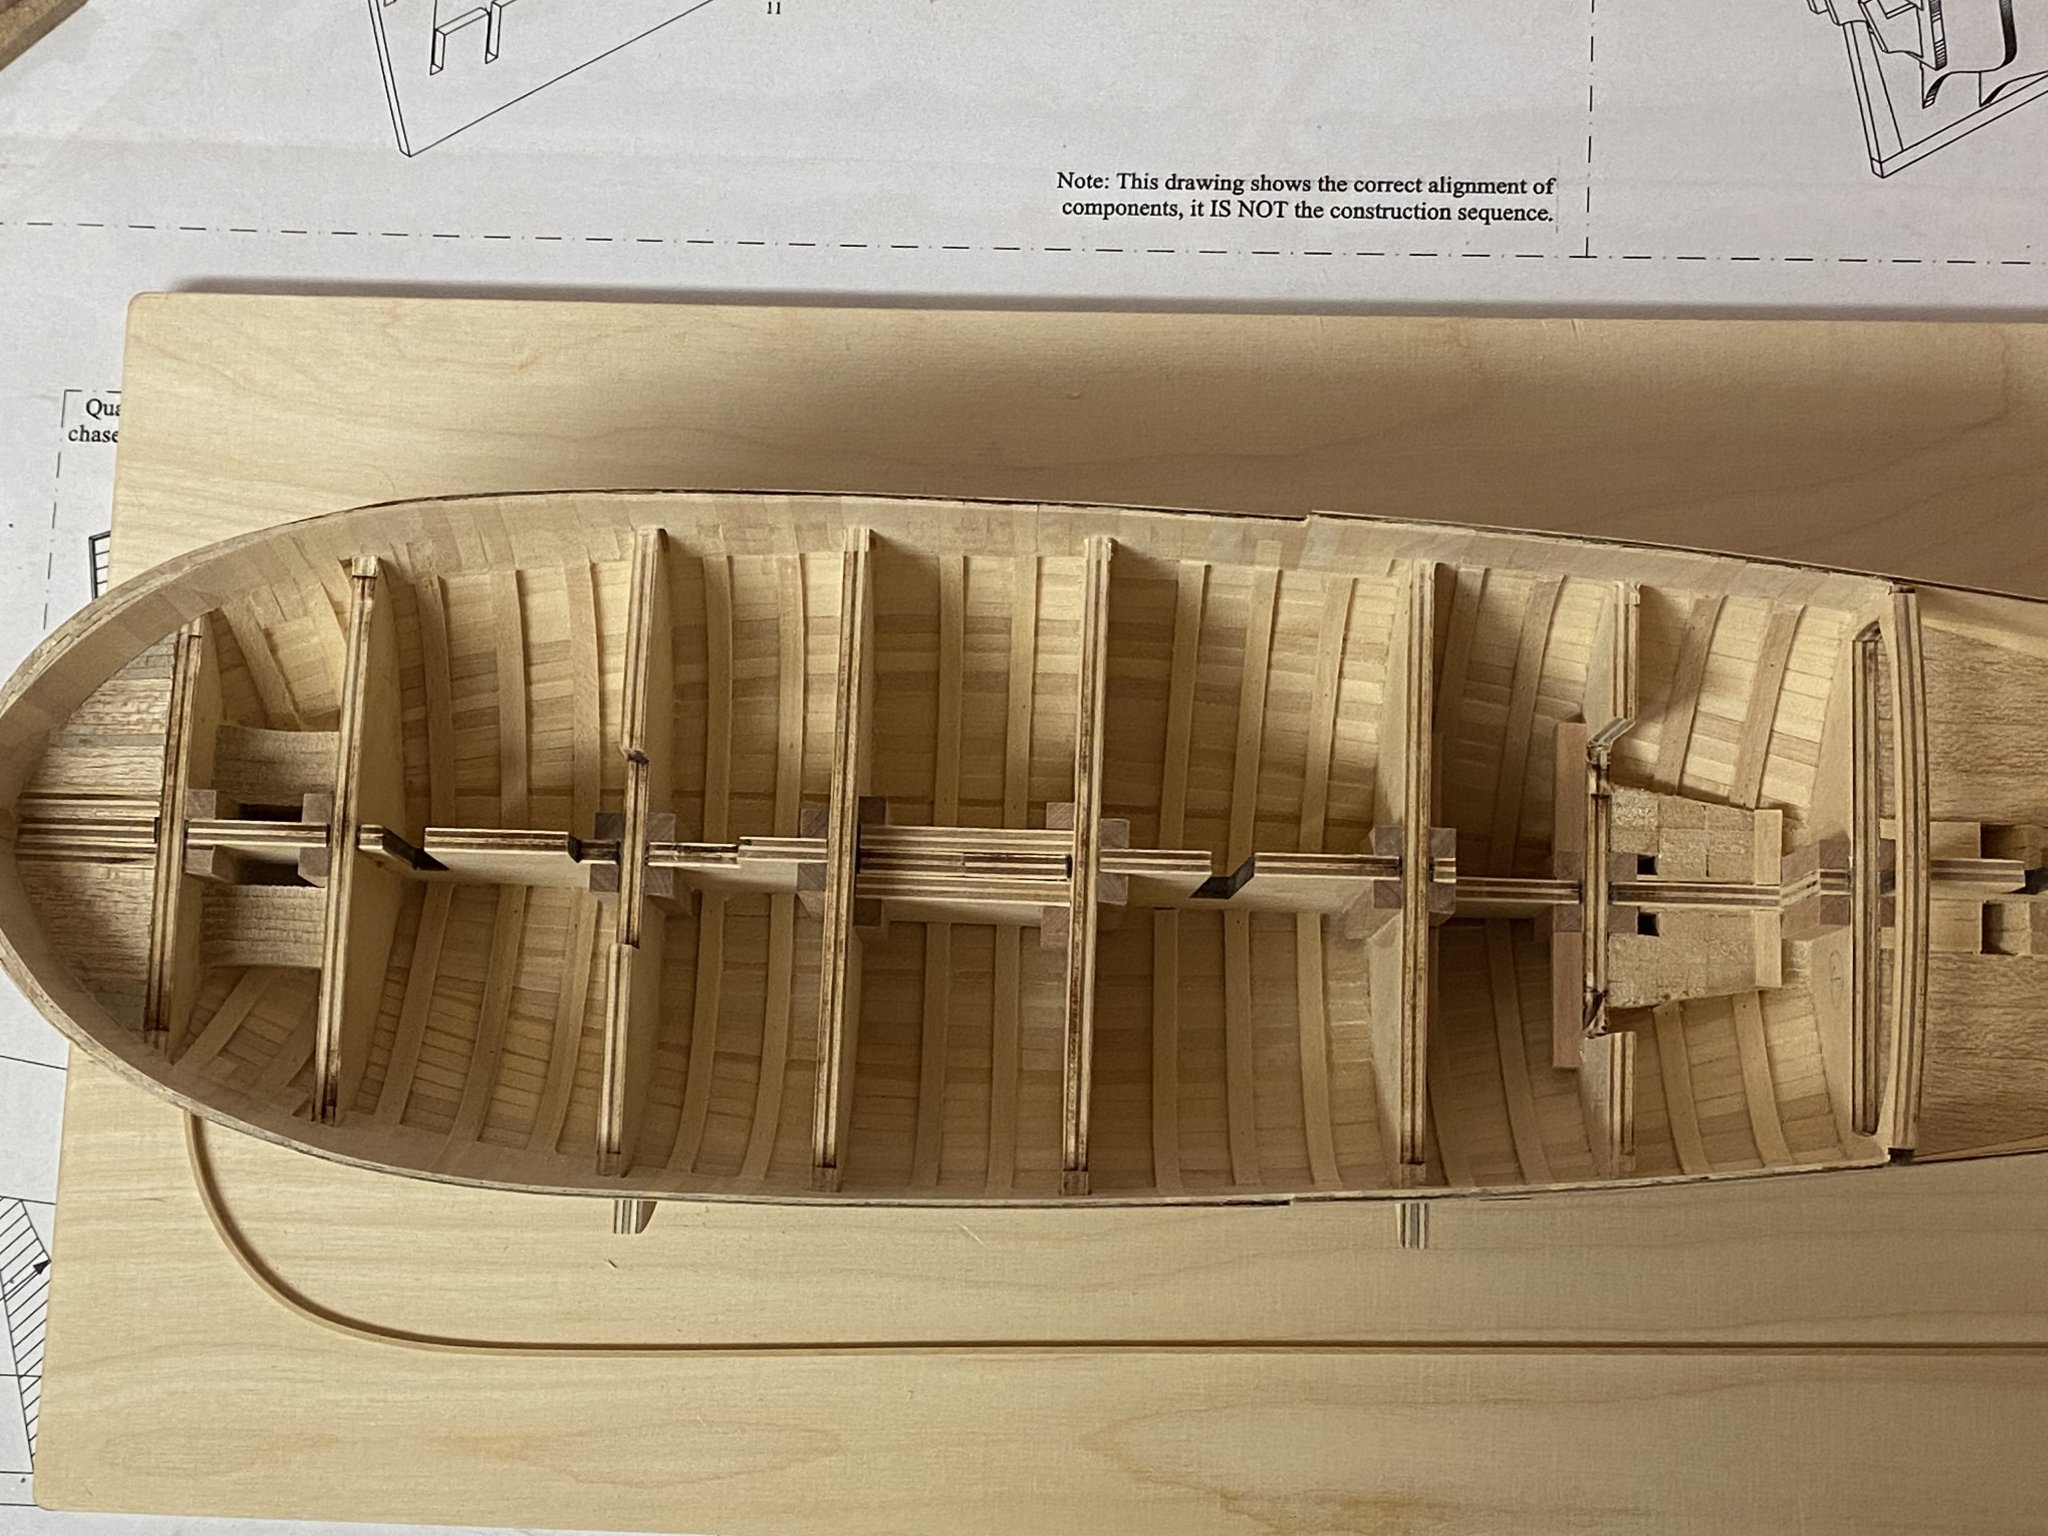
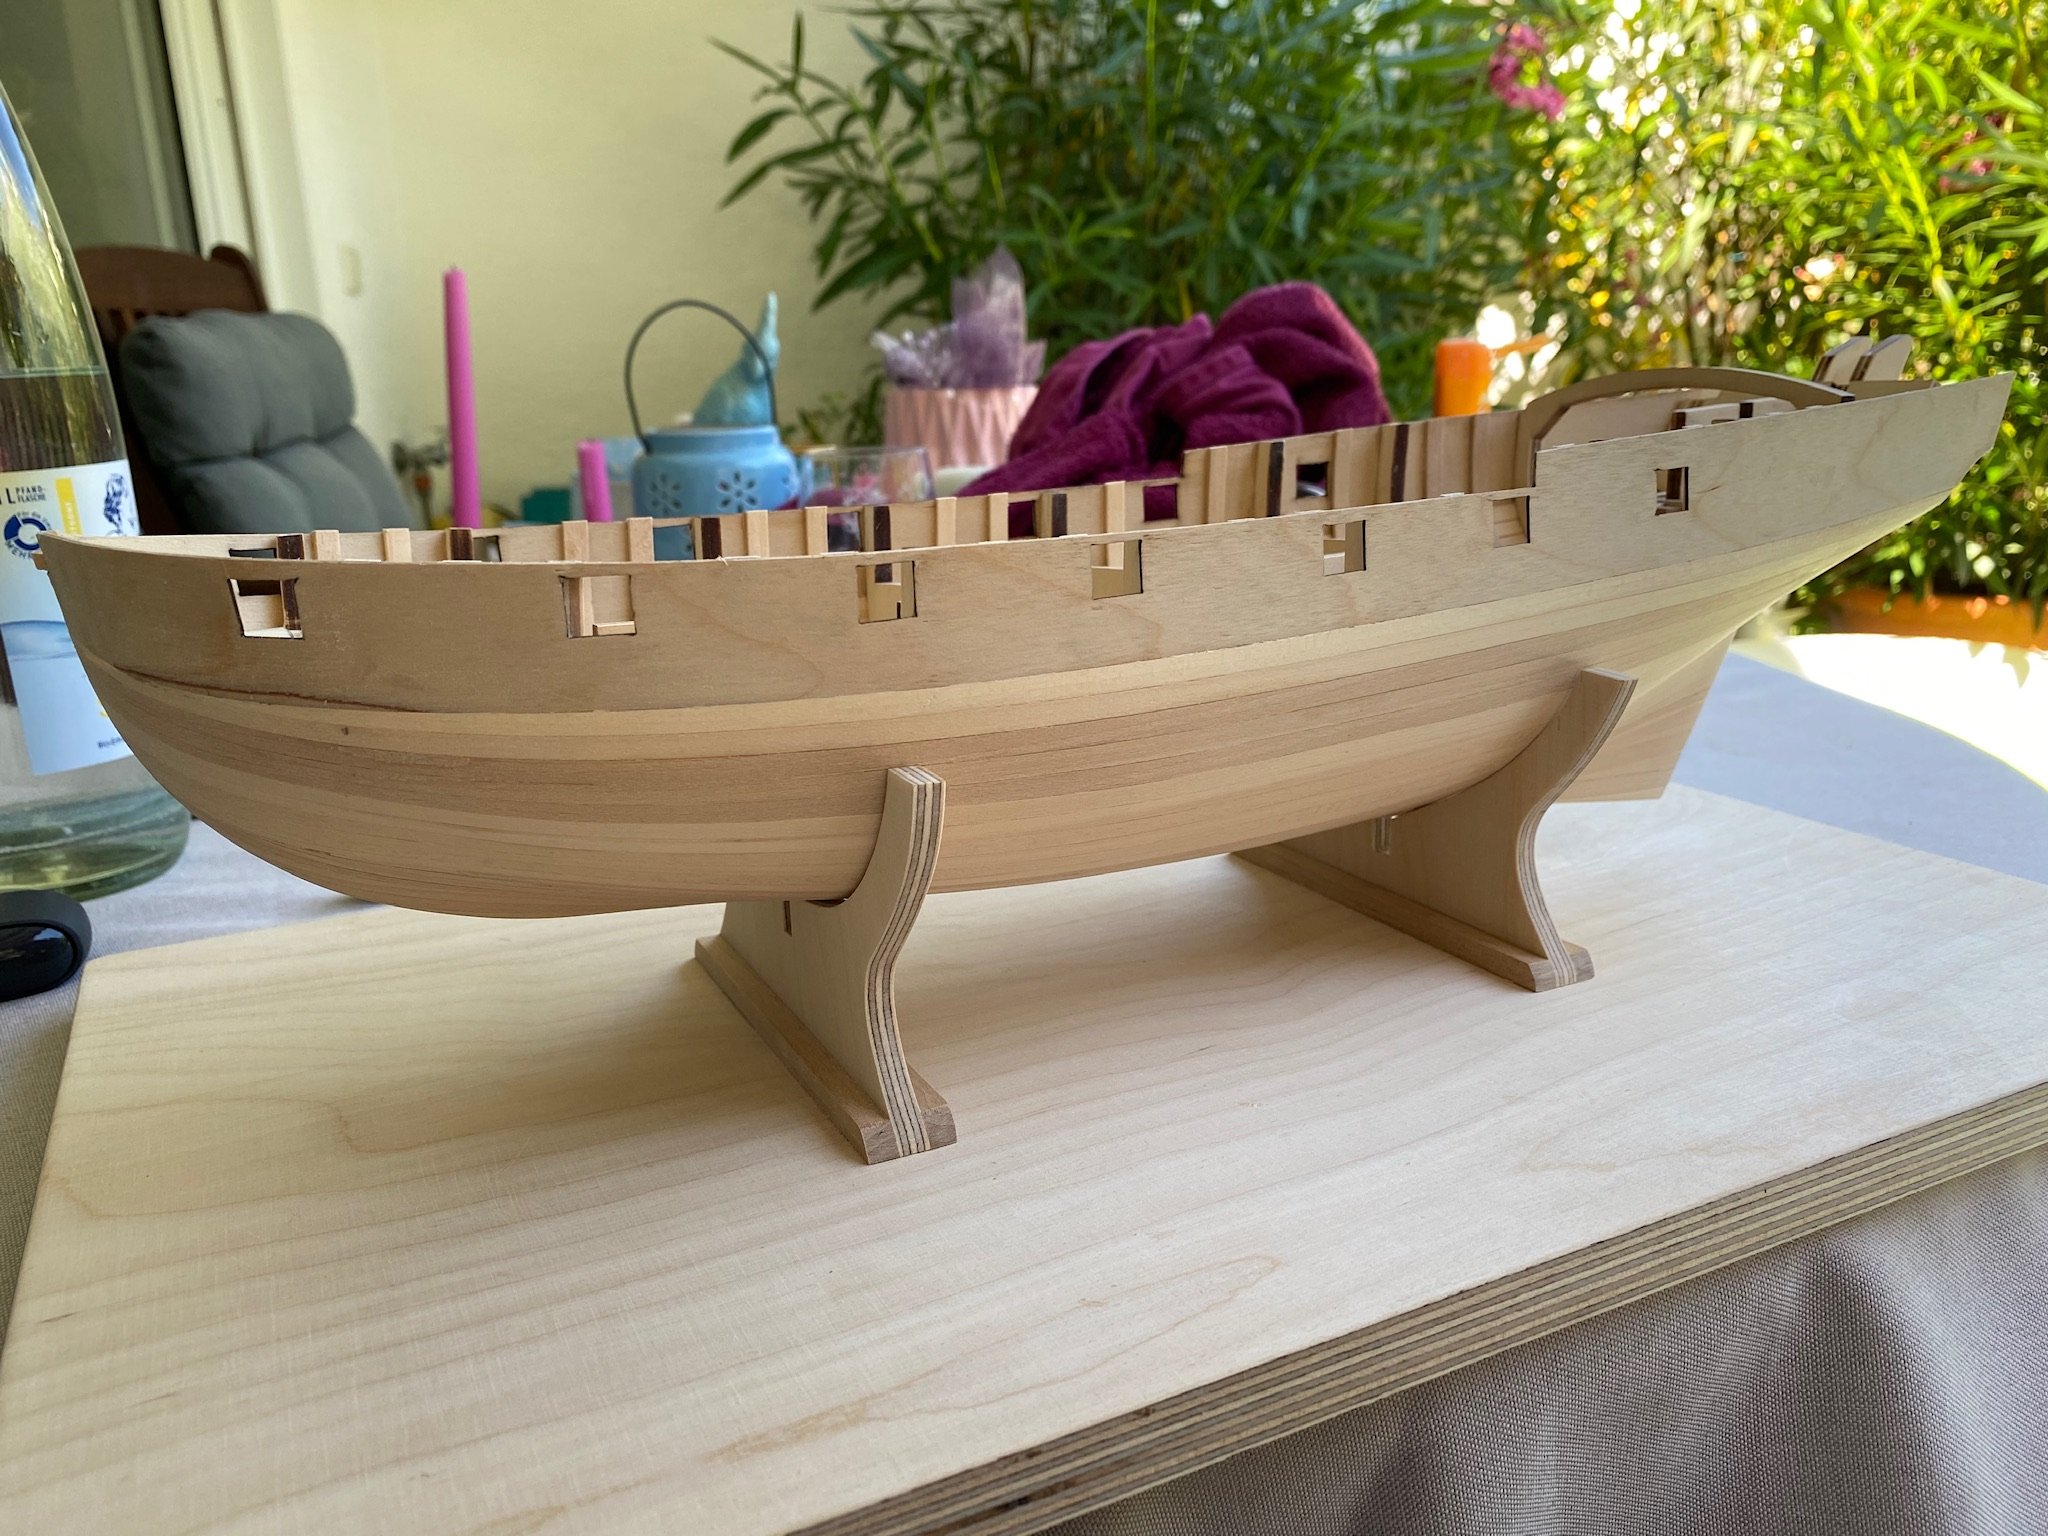
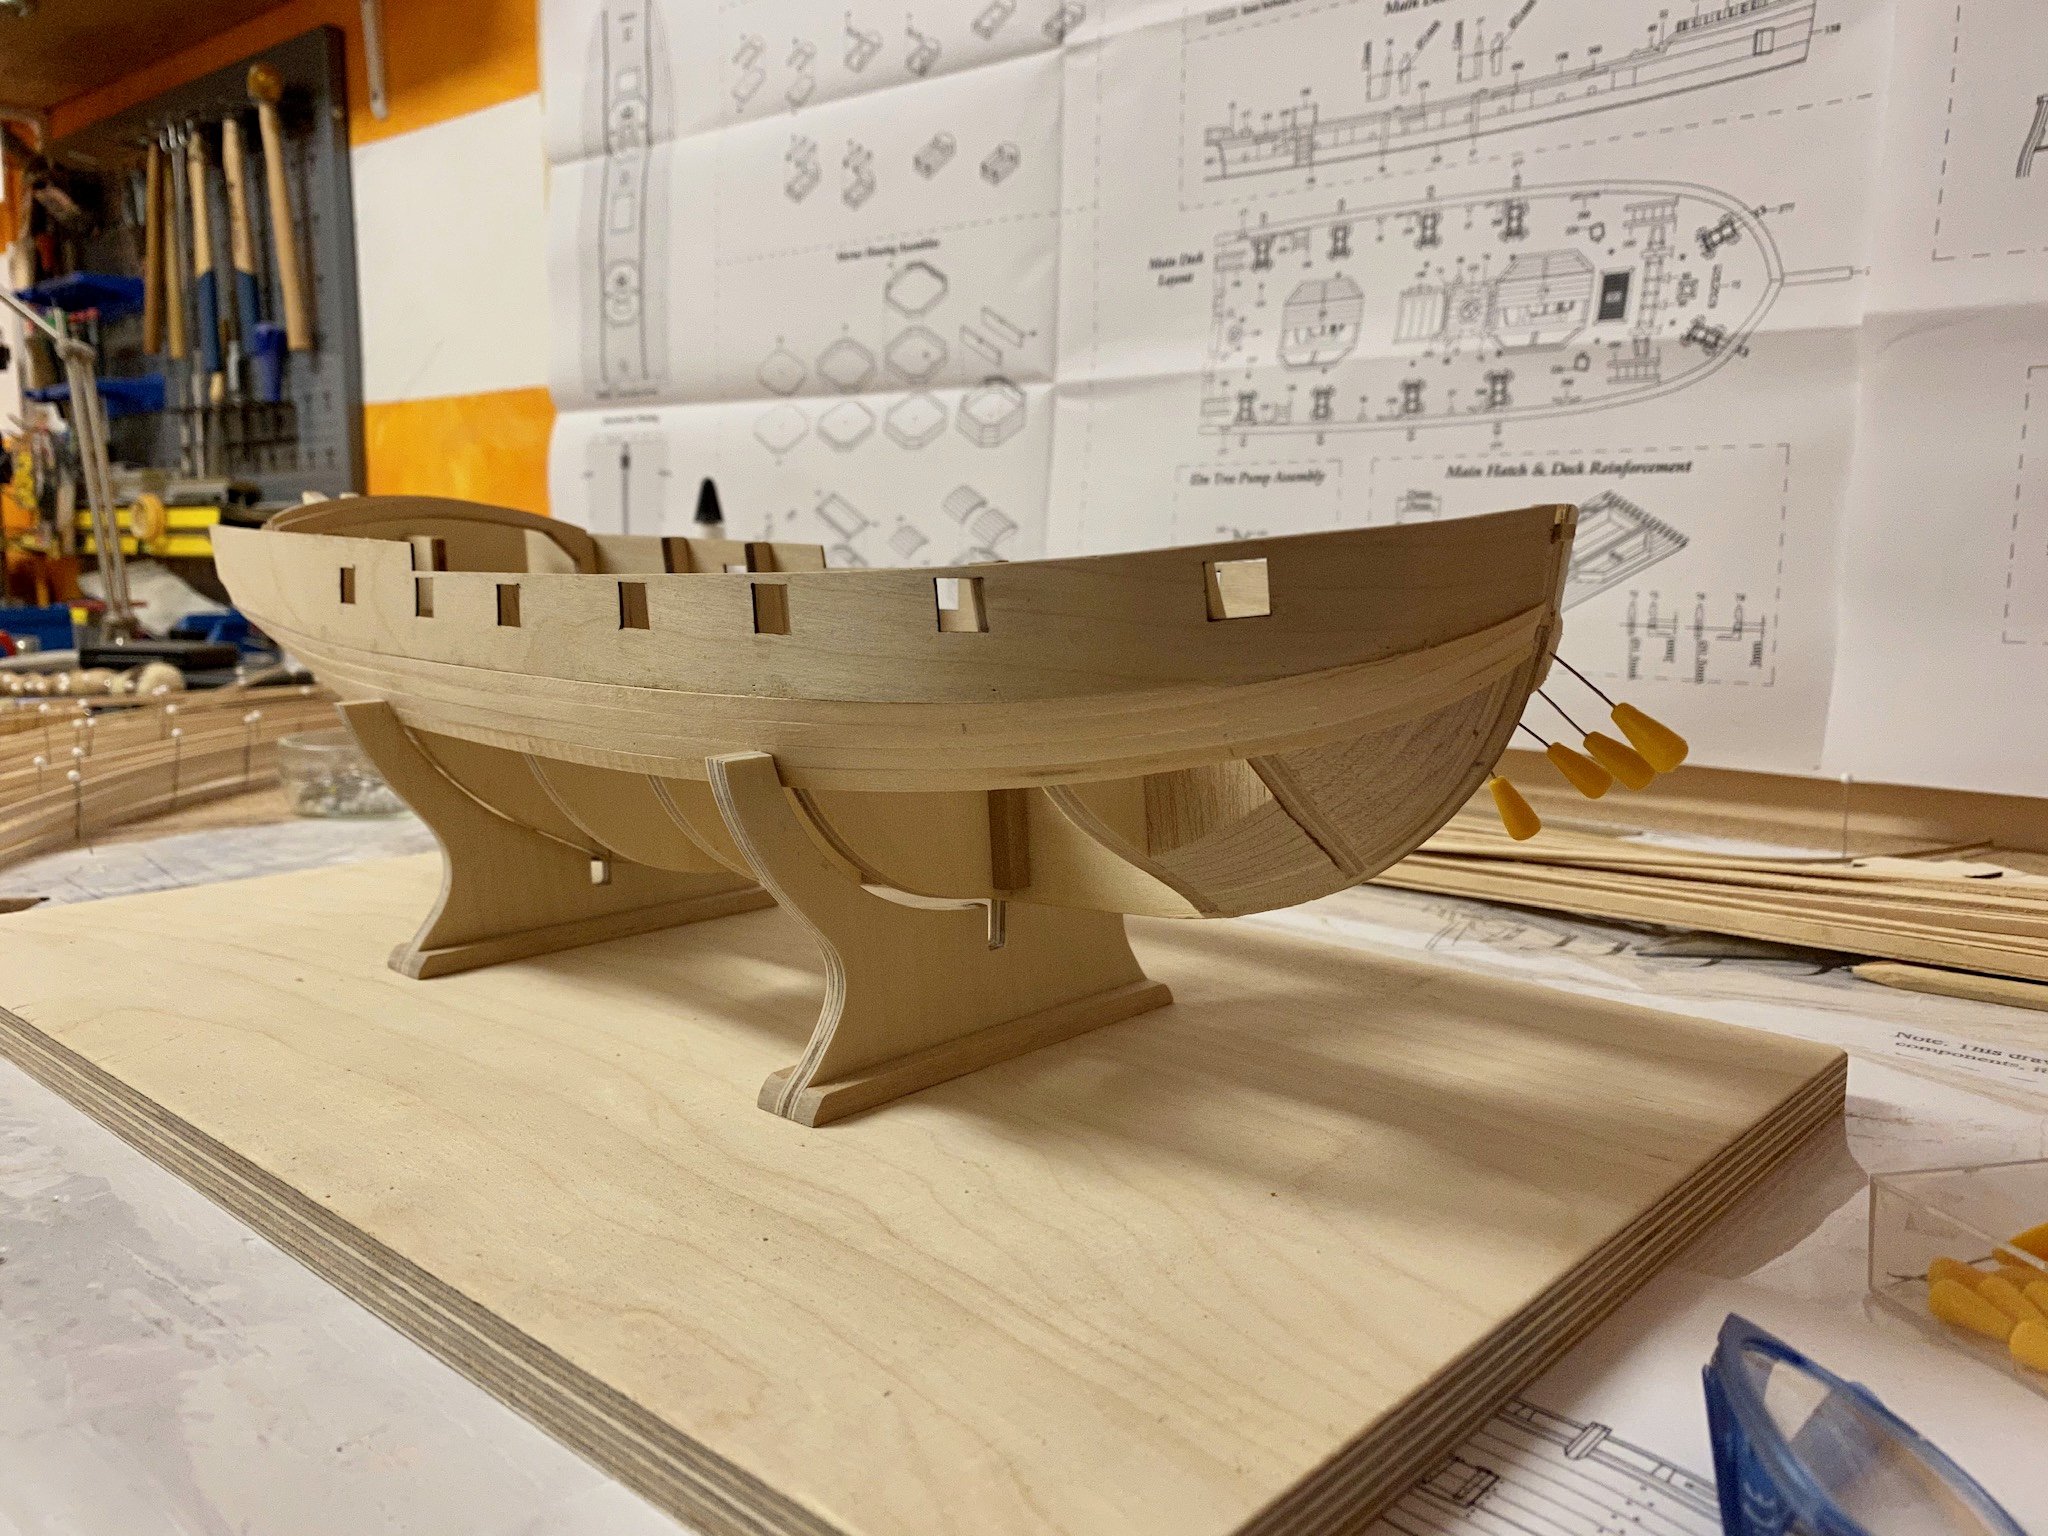
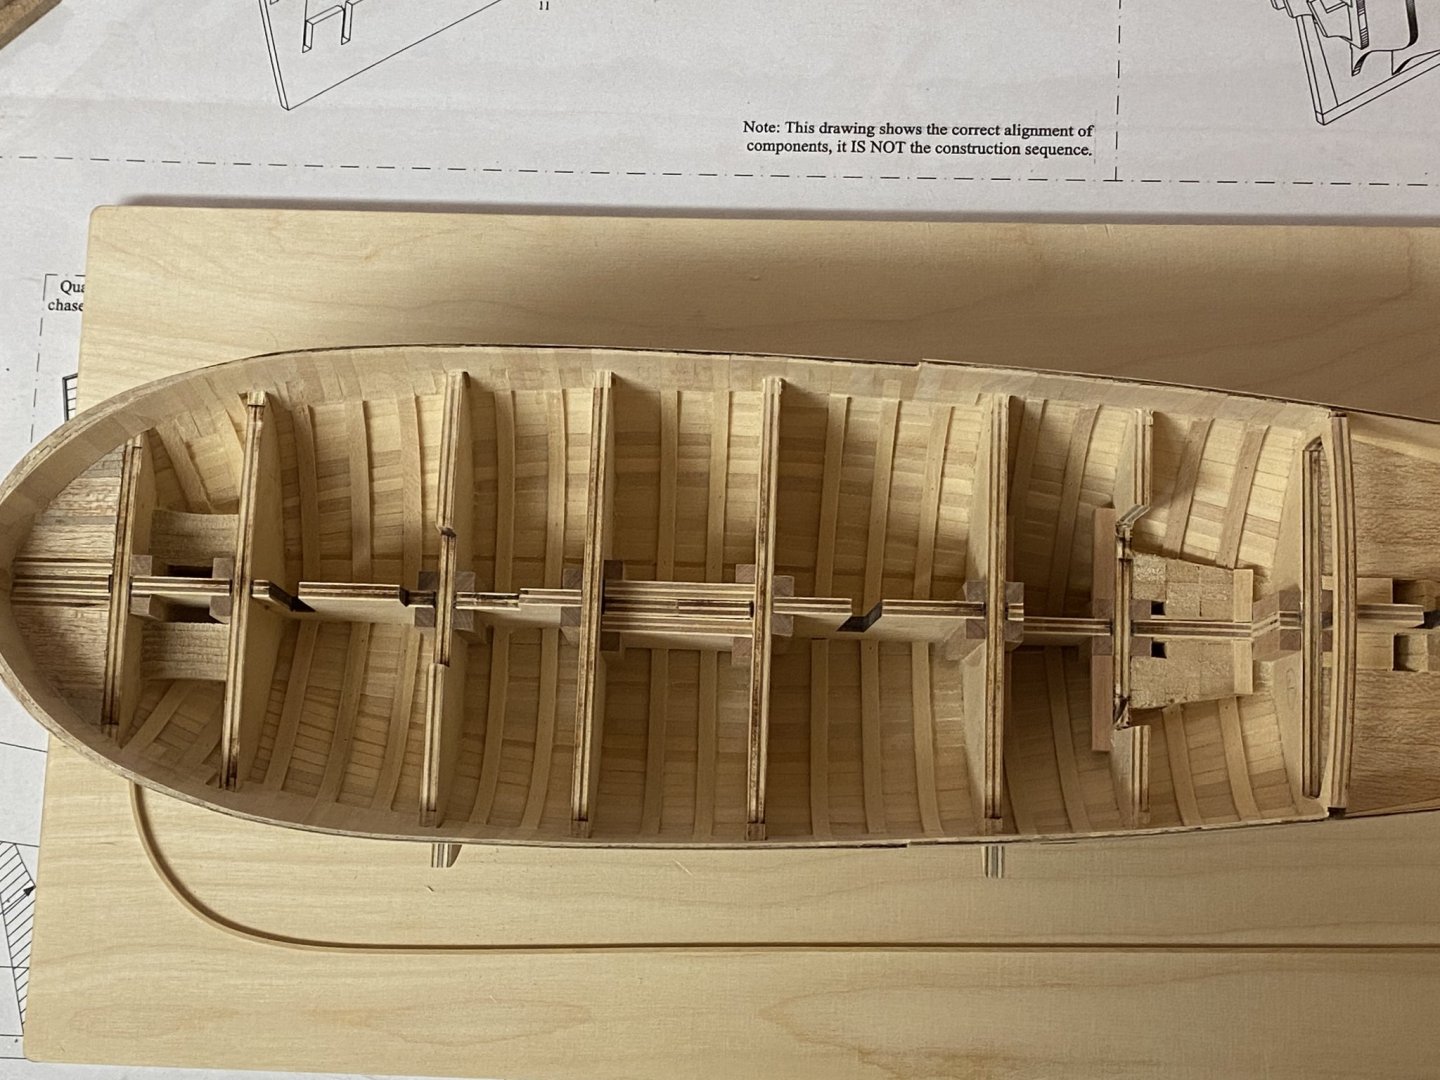
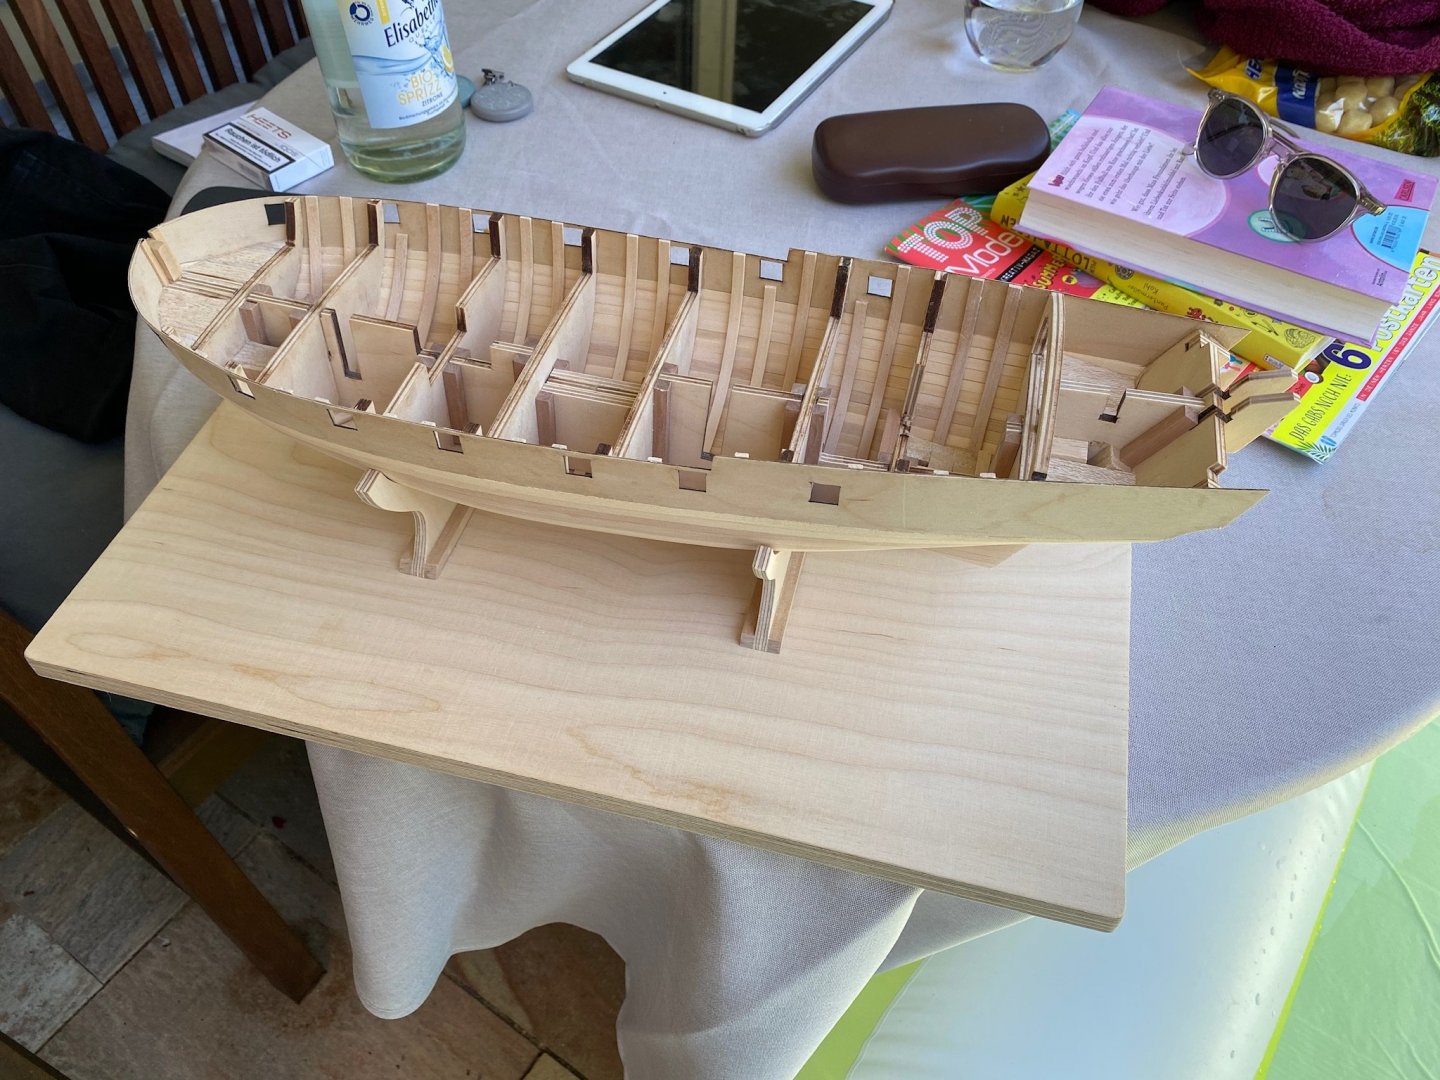
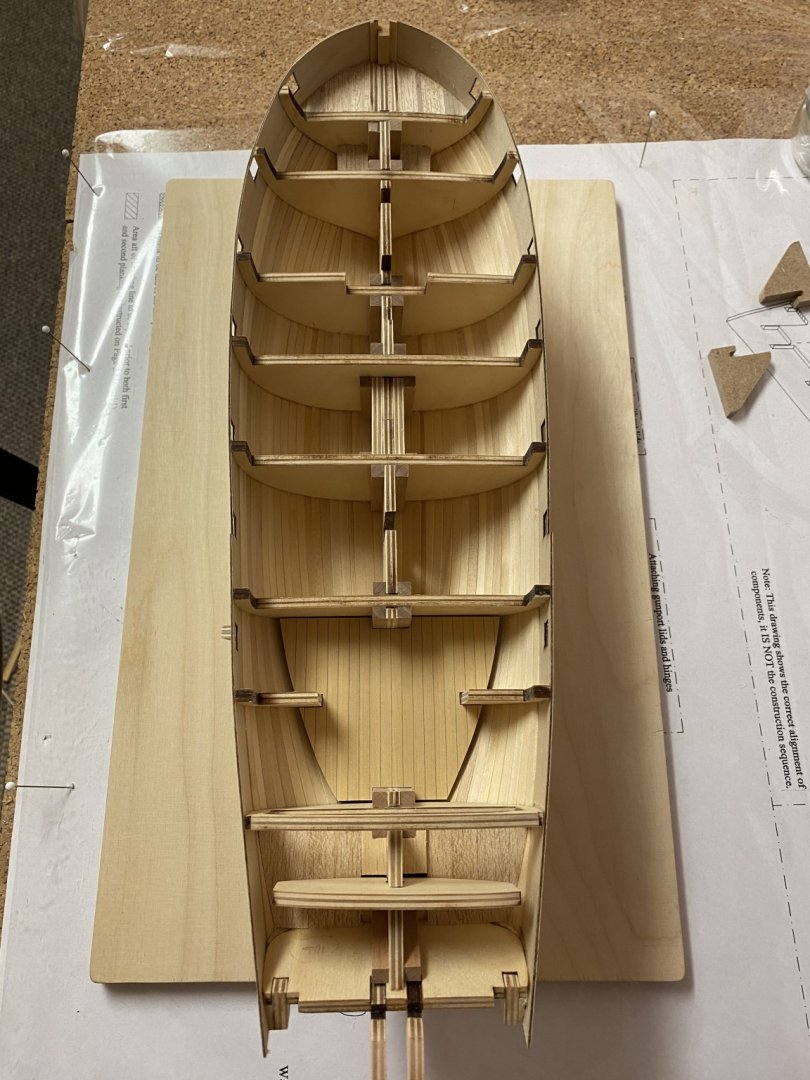
Thank you mugje. After some final sanding the first planking is now complete. I glued some pre-bend basswood stripes inside the hull to strengthen the planking (although the basswood stripes are still solid) and to fix the gunport pattern in place as I’m going to remove the bulkhead extensions next to test fit the false deck. I will plank the inside before the outside to secure both bulkwards are of equal height and the guns will later center the gunports. But first I have to build all keel parts next. As the weather gets better every day - some outside shots this time.


- 64 replies
-
- 11
-
-
- badger
- caldercraft
- (and 1 more)
-
Thank you barkeater for your interest. I have to finish the first planking and then the assembling of the keel comes next.
- 64 replies
-
- 1
-
-
- badger
- caldercraft
- (and 1 more)
-
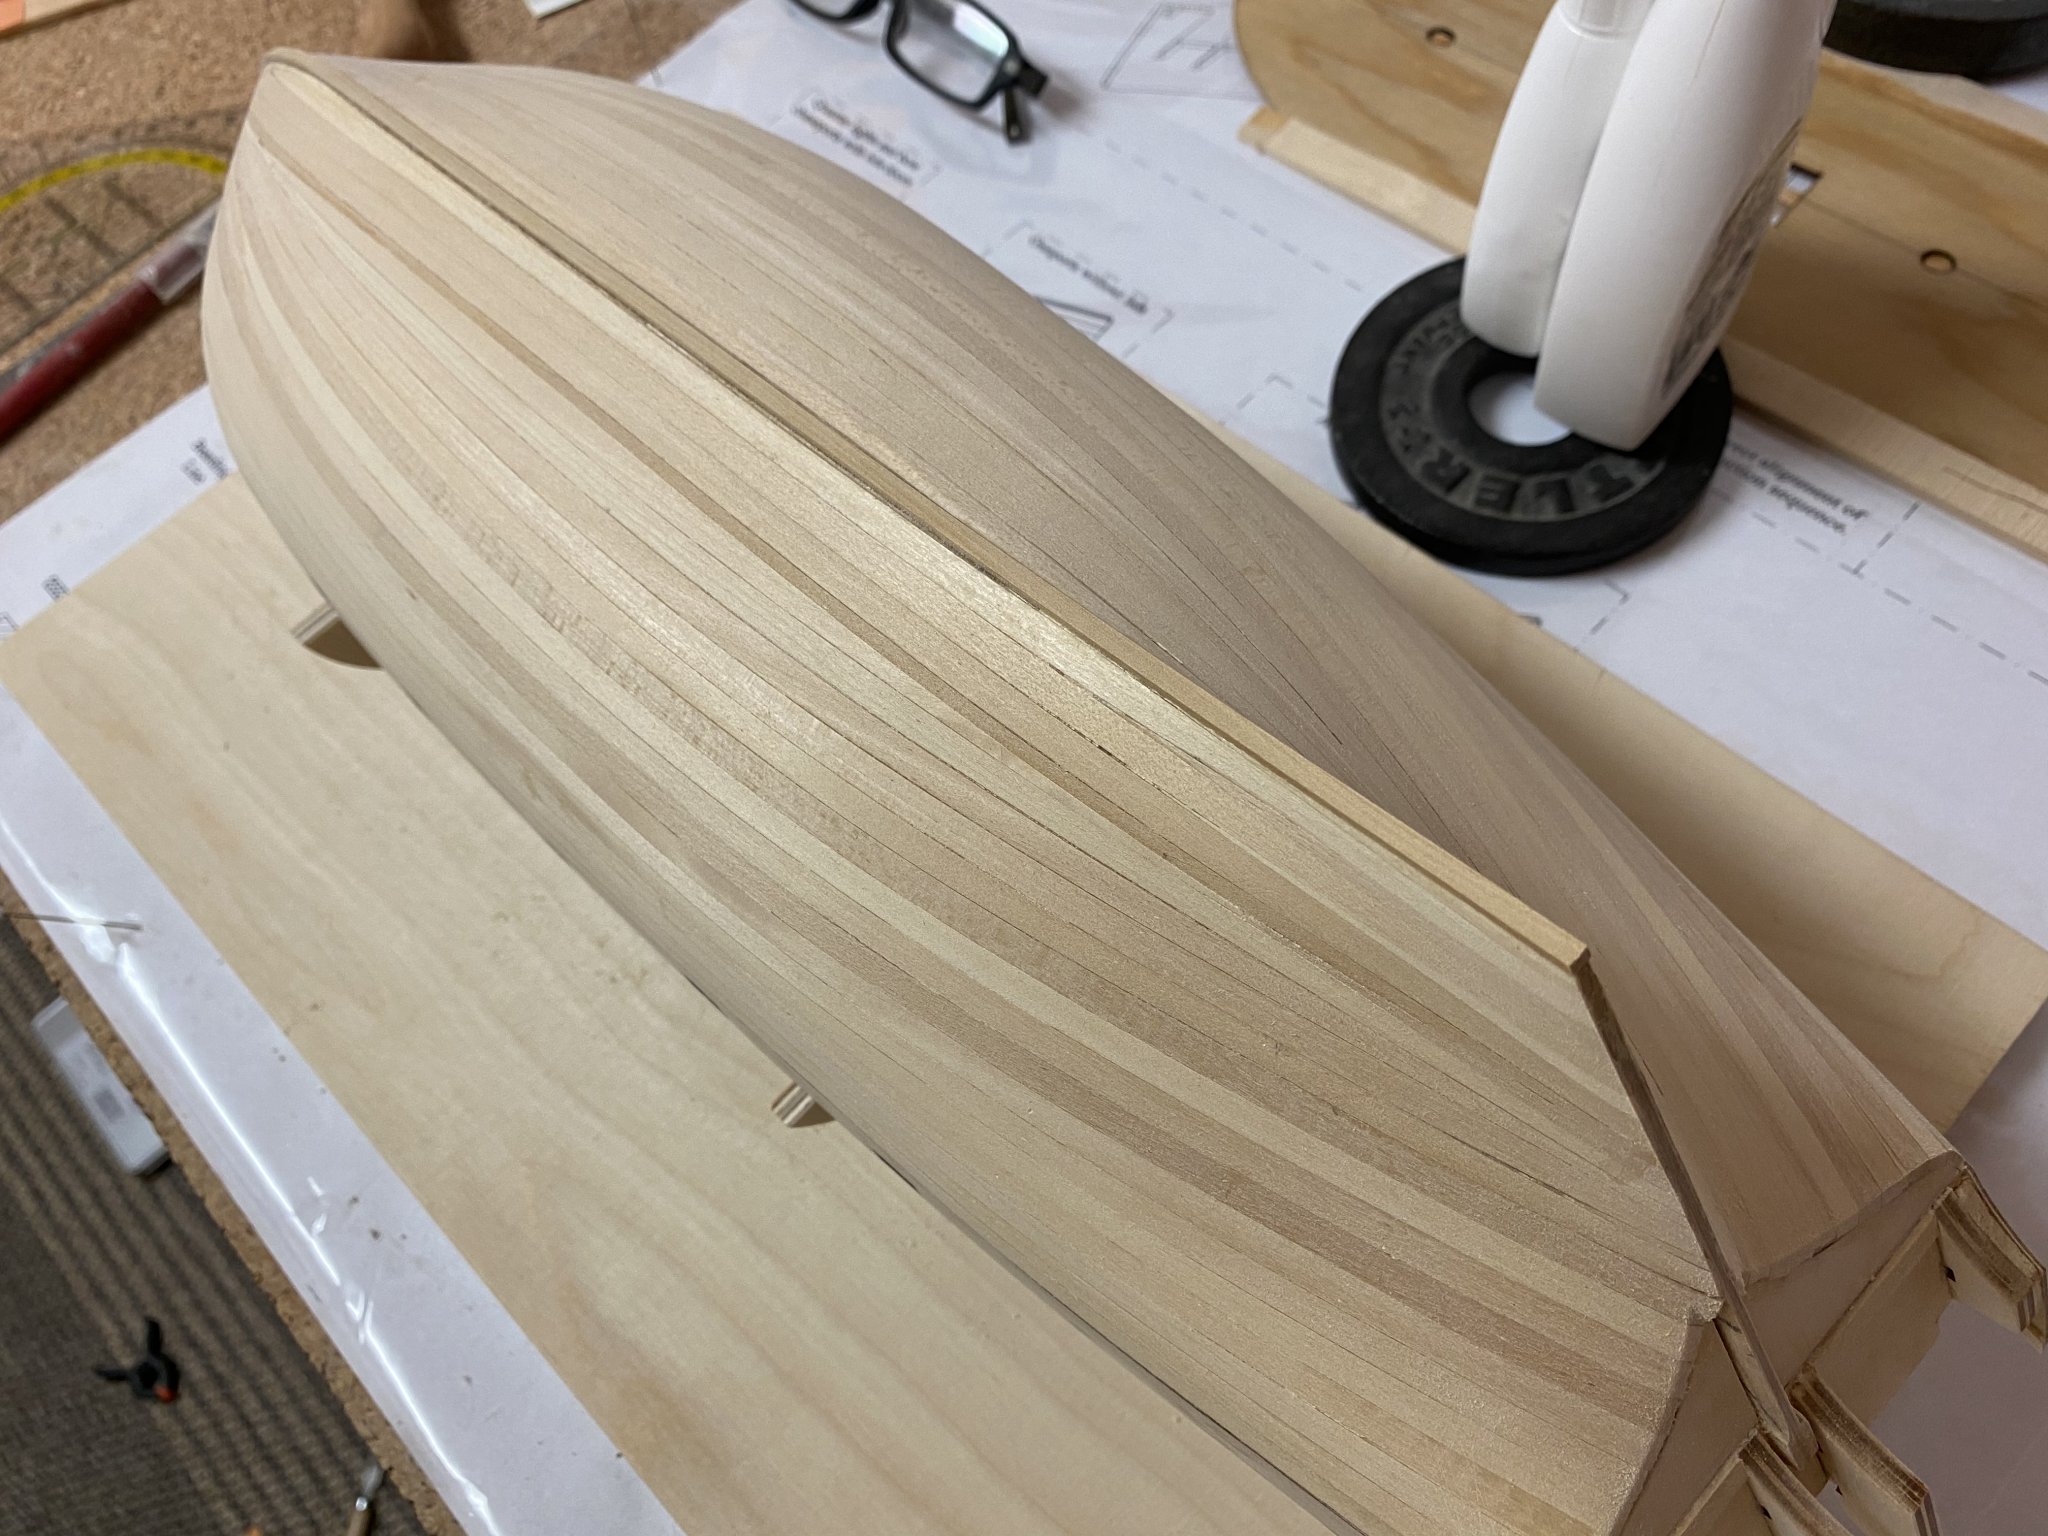
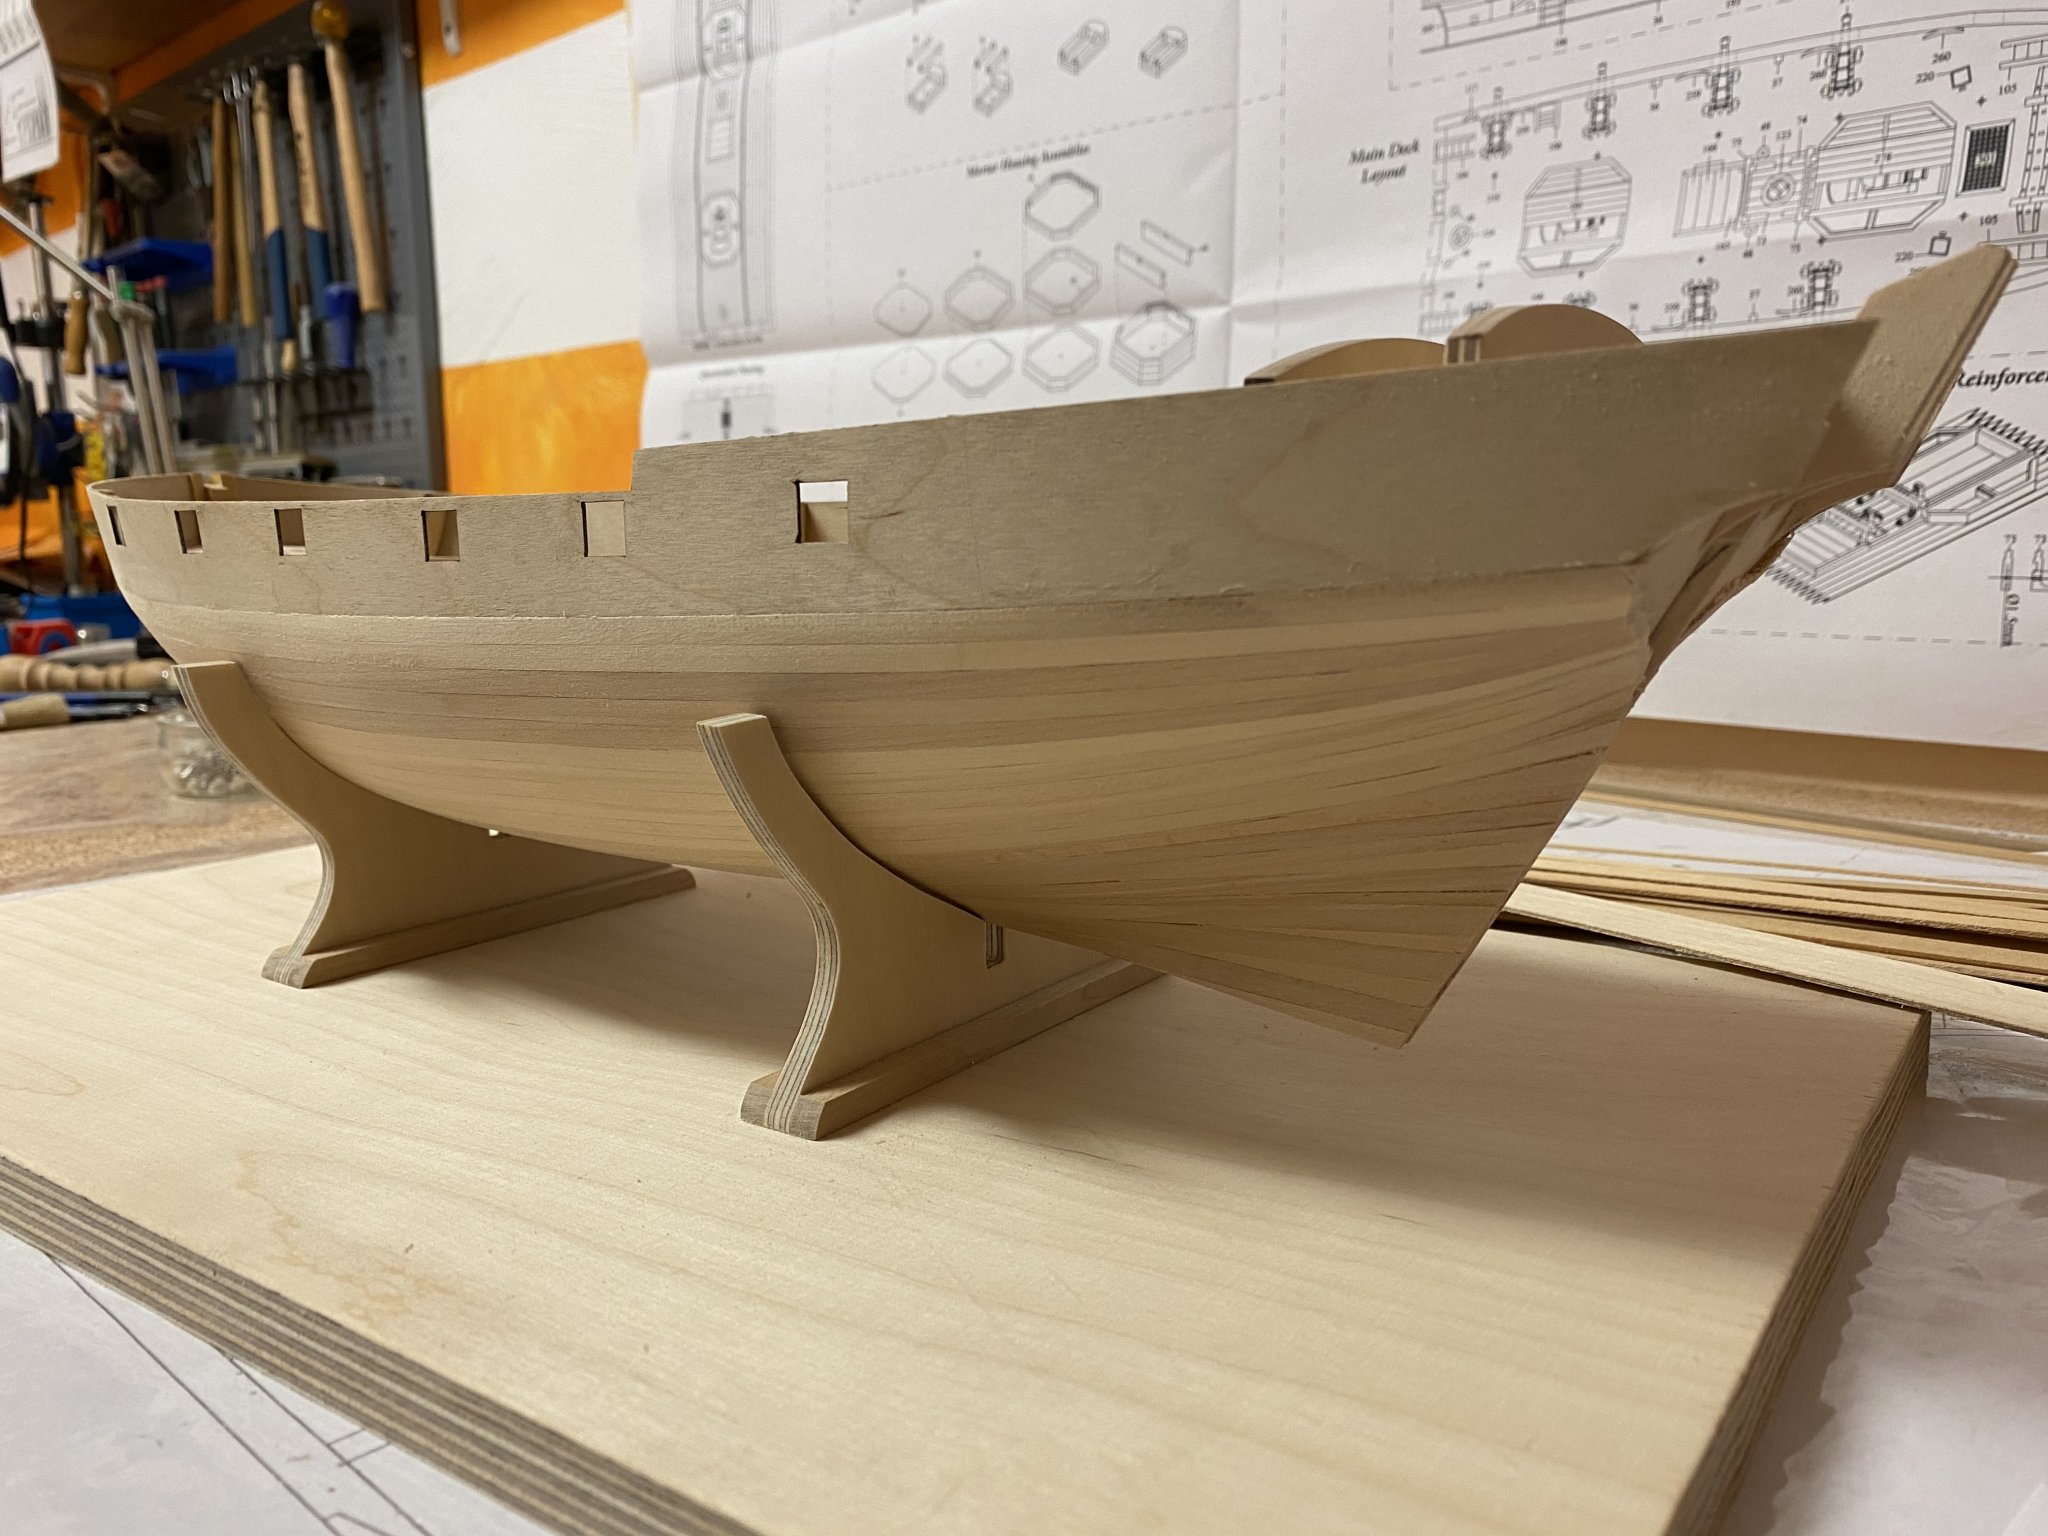
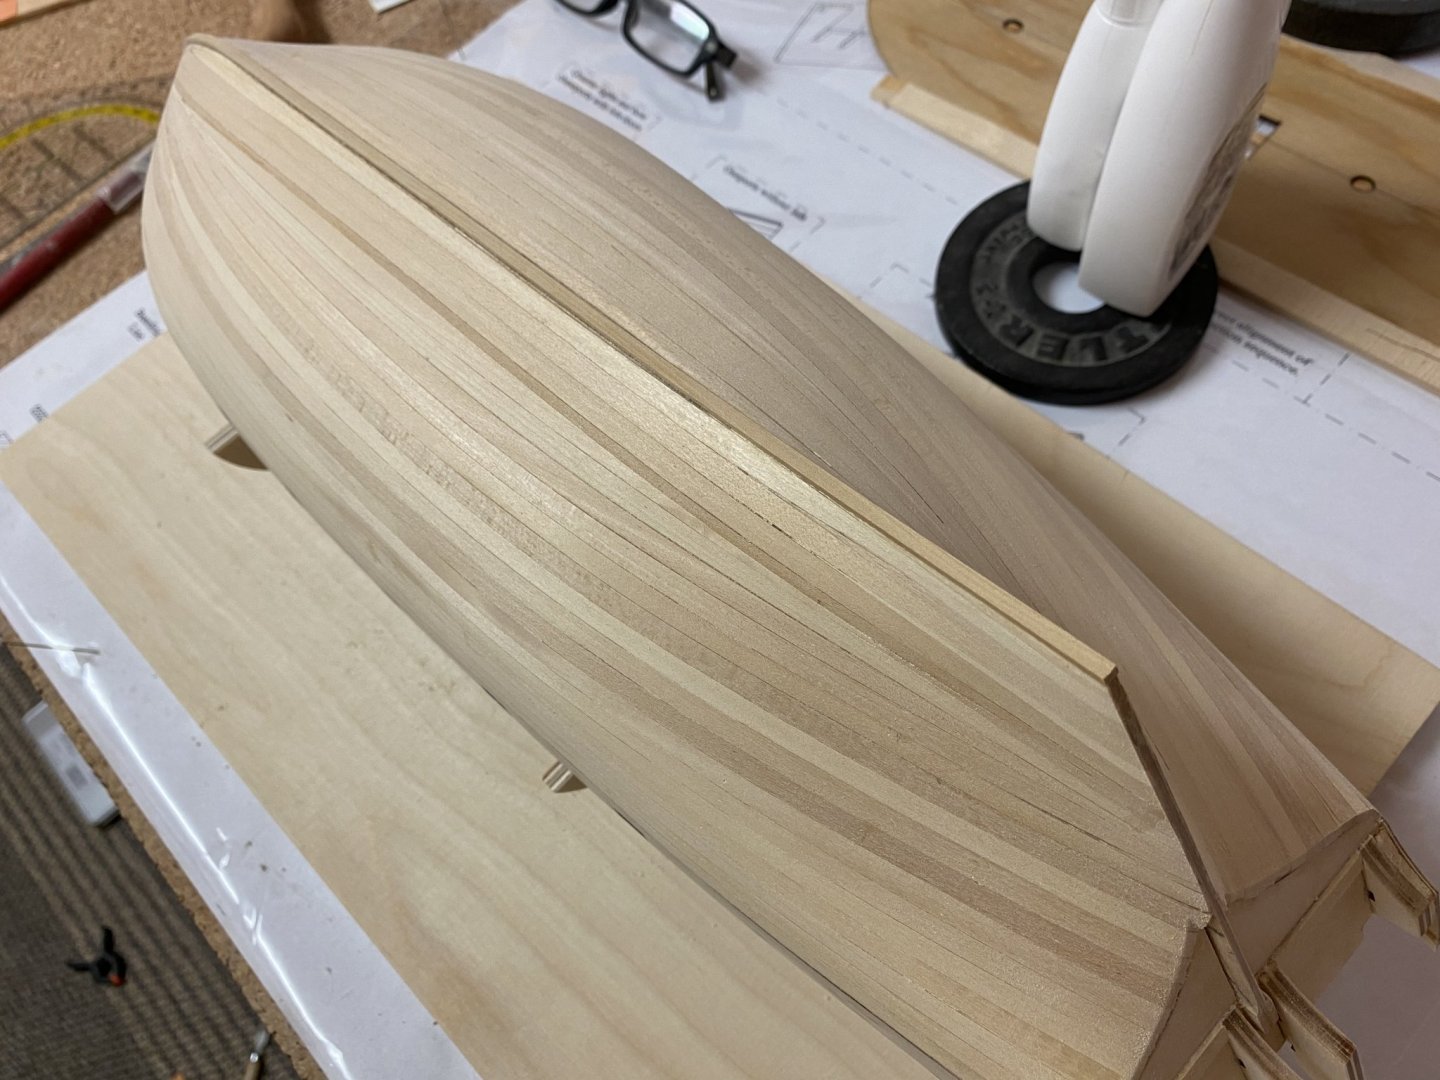
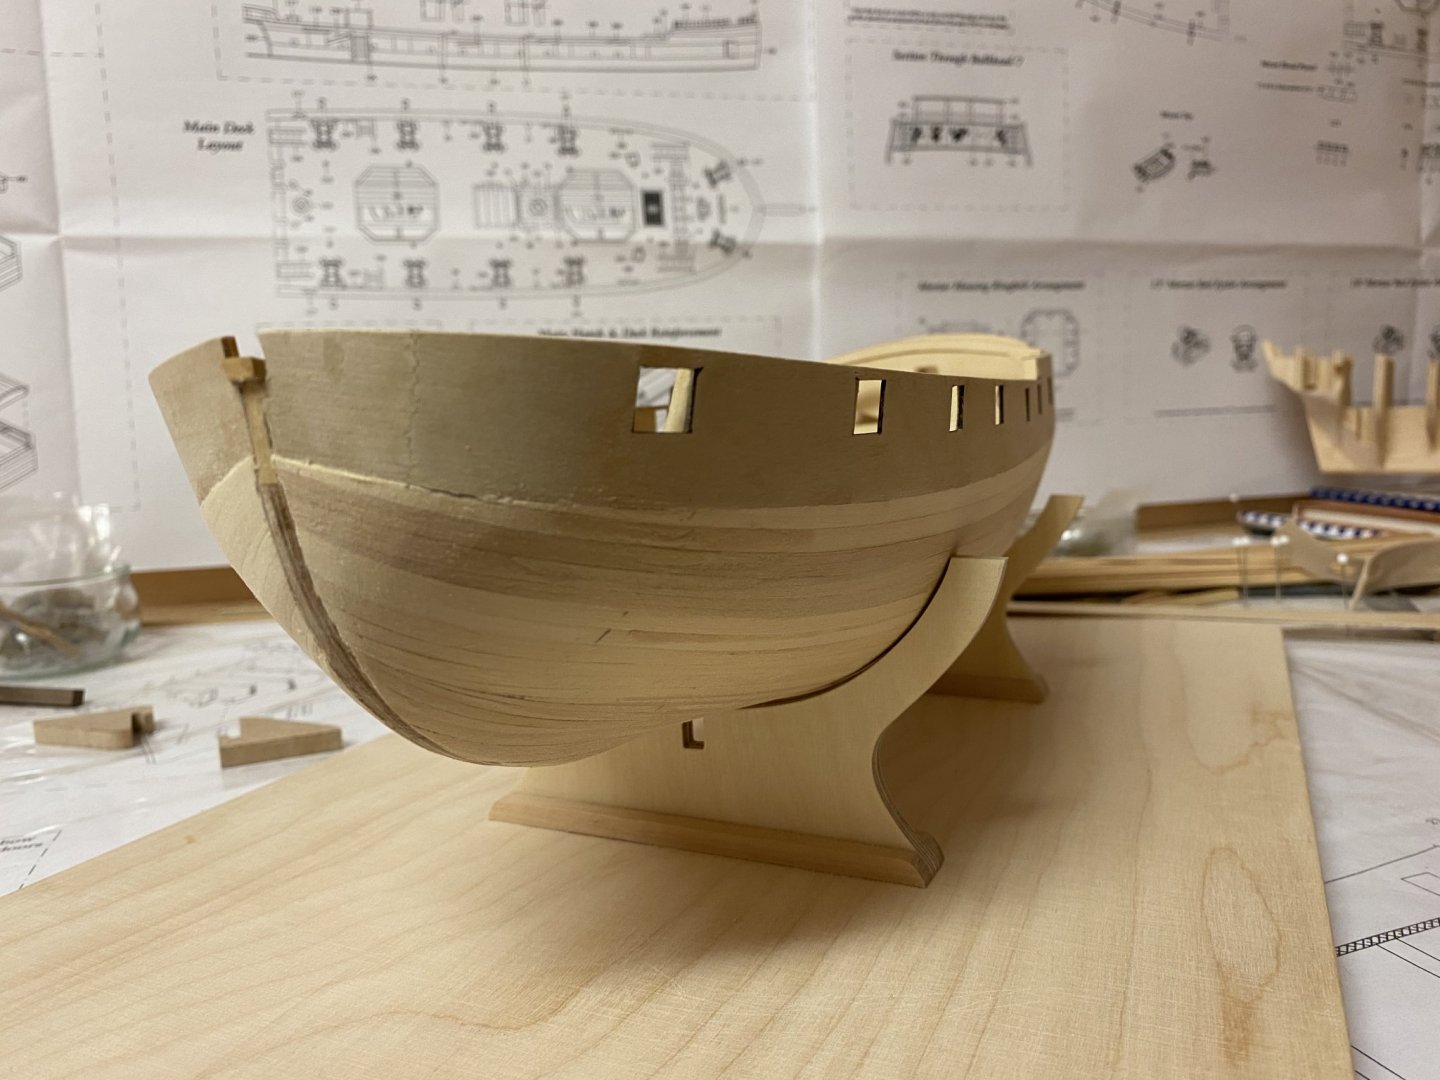
Finished the first planking today. As my stock of basswood stripes depleted during the planking process I had to improvise a little, so the planks vary in colour and size. Already sanded the hull with 80 grit sandpaper. The 1,5mm basswood is thick enough to be sanded to shape without the need of using wood filler and I can glue the second planking directly onto the sanded hull with white glue. Will give it another sanding with finer paper and some tuning of the basswood later and add the rabbit.


- 64 replies
-
- 8
-
-
- badger
- caldercraft
- (and 1 more)
-
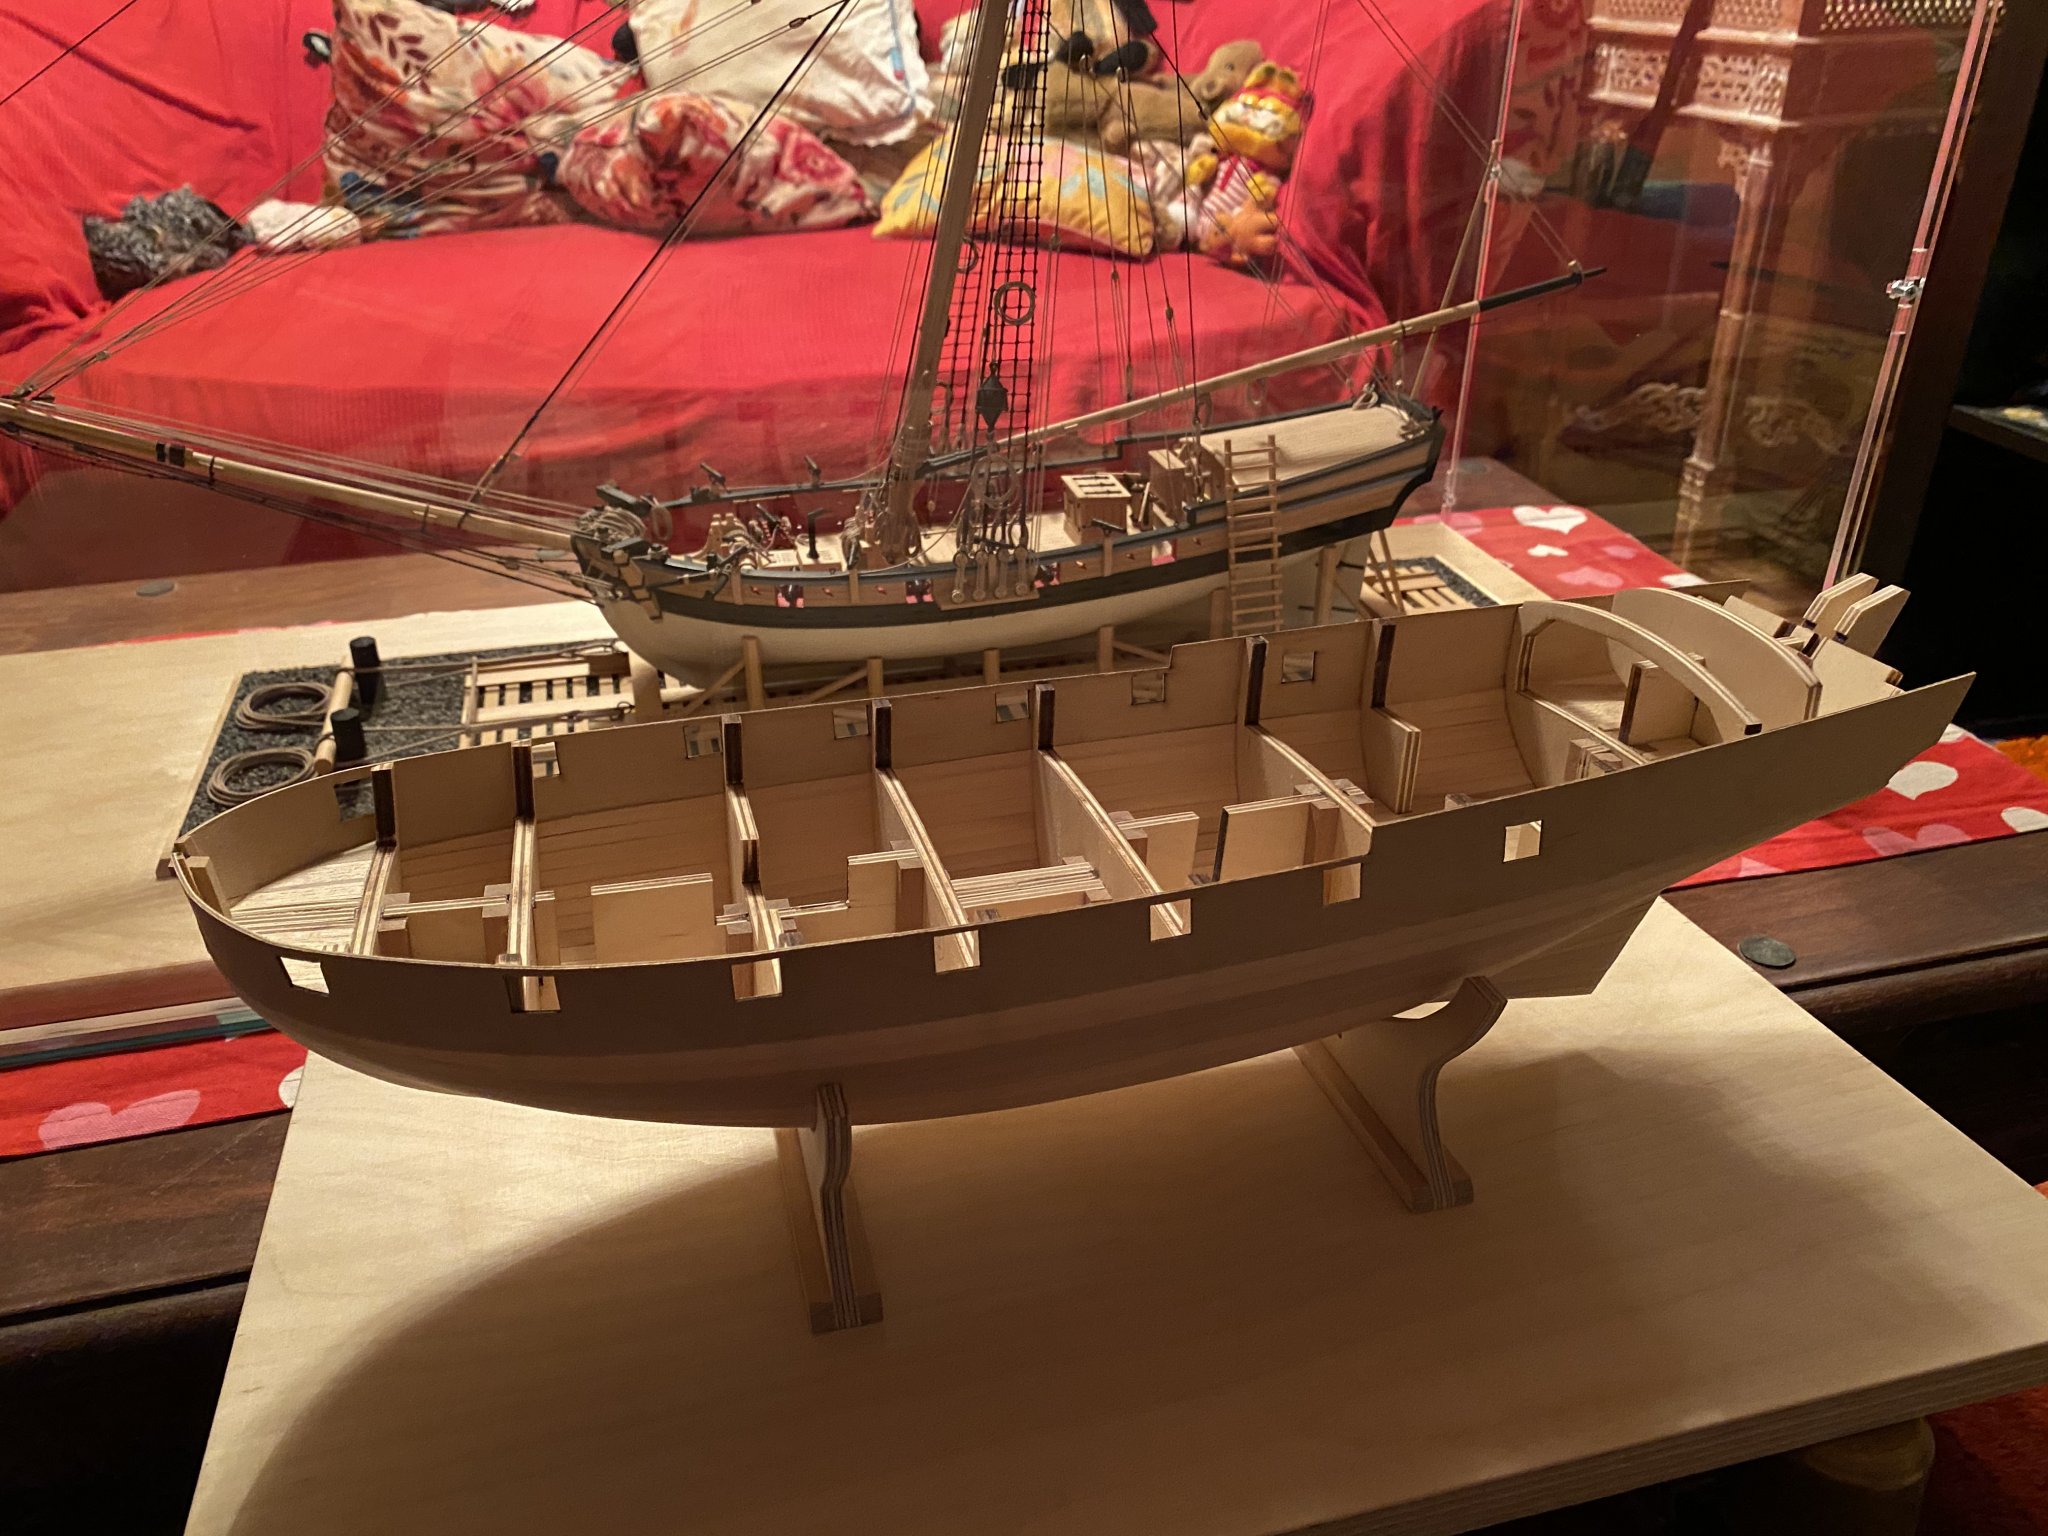
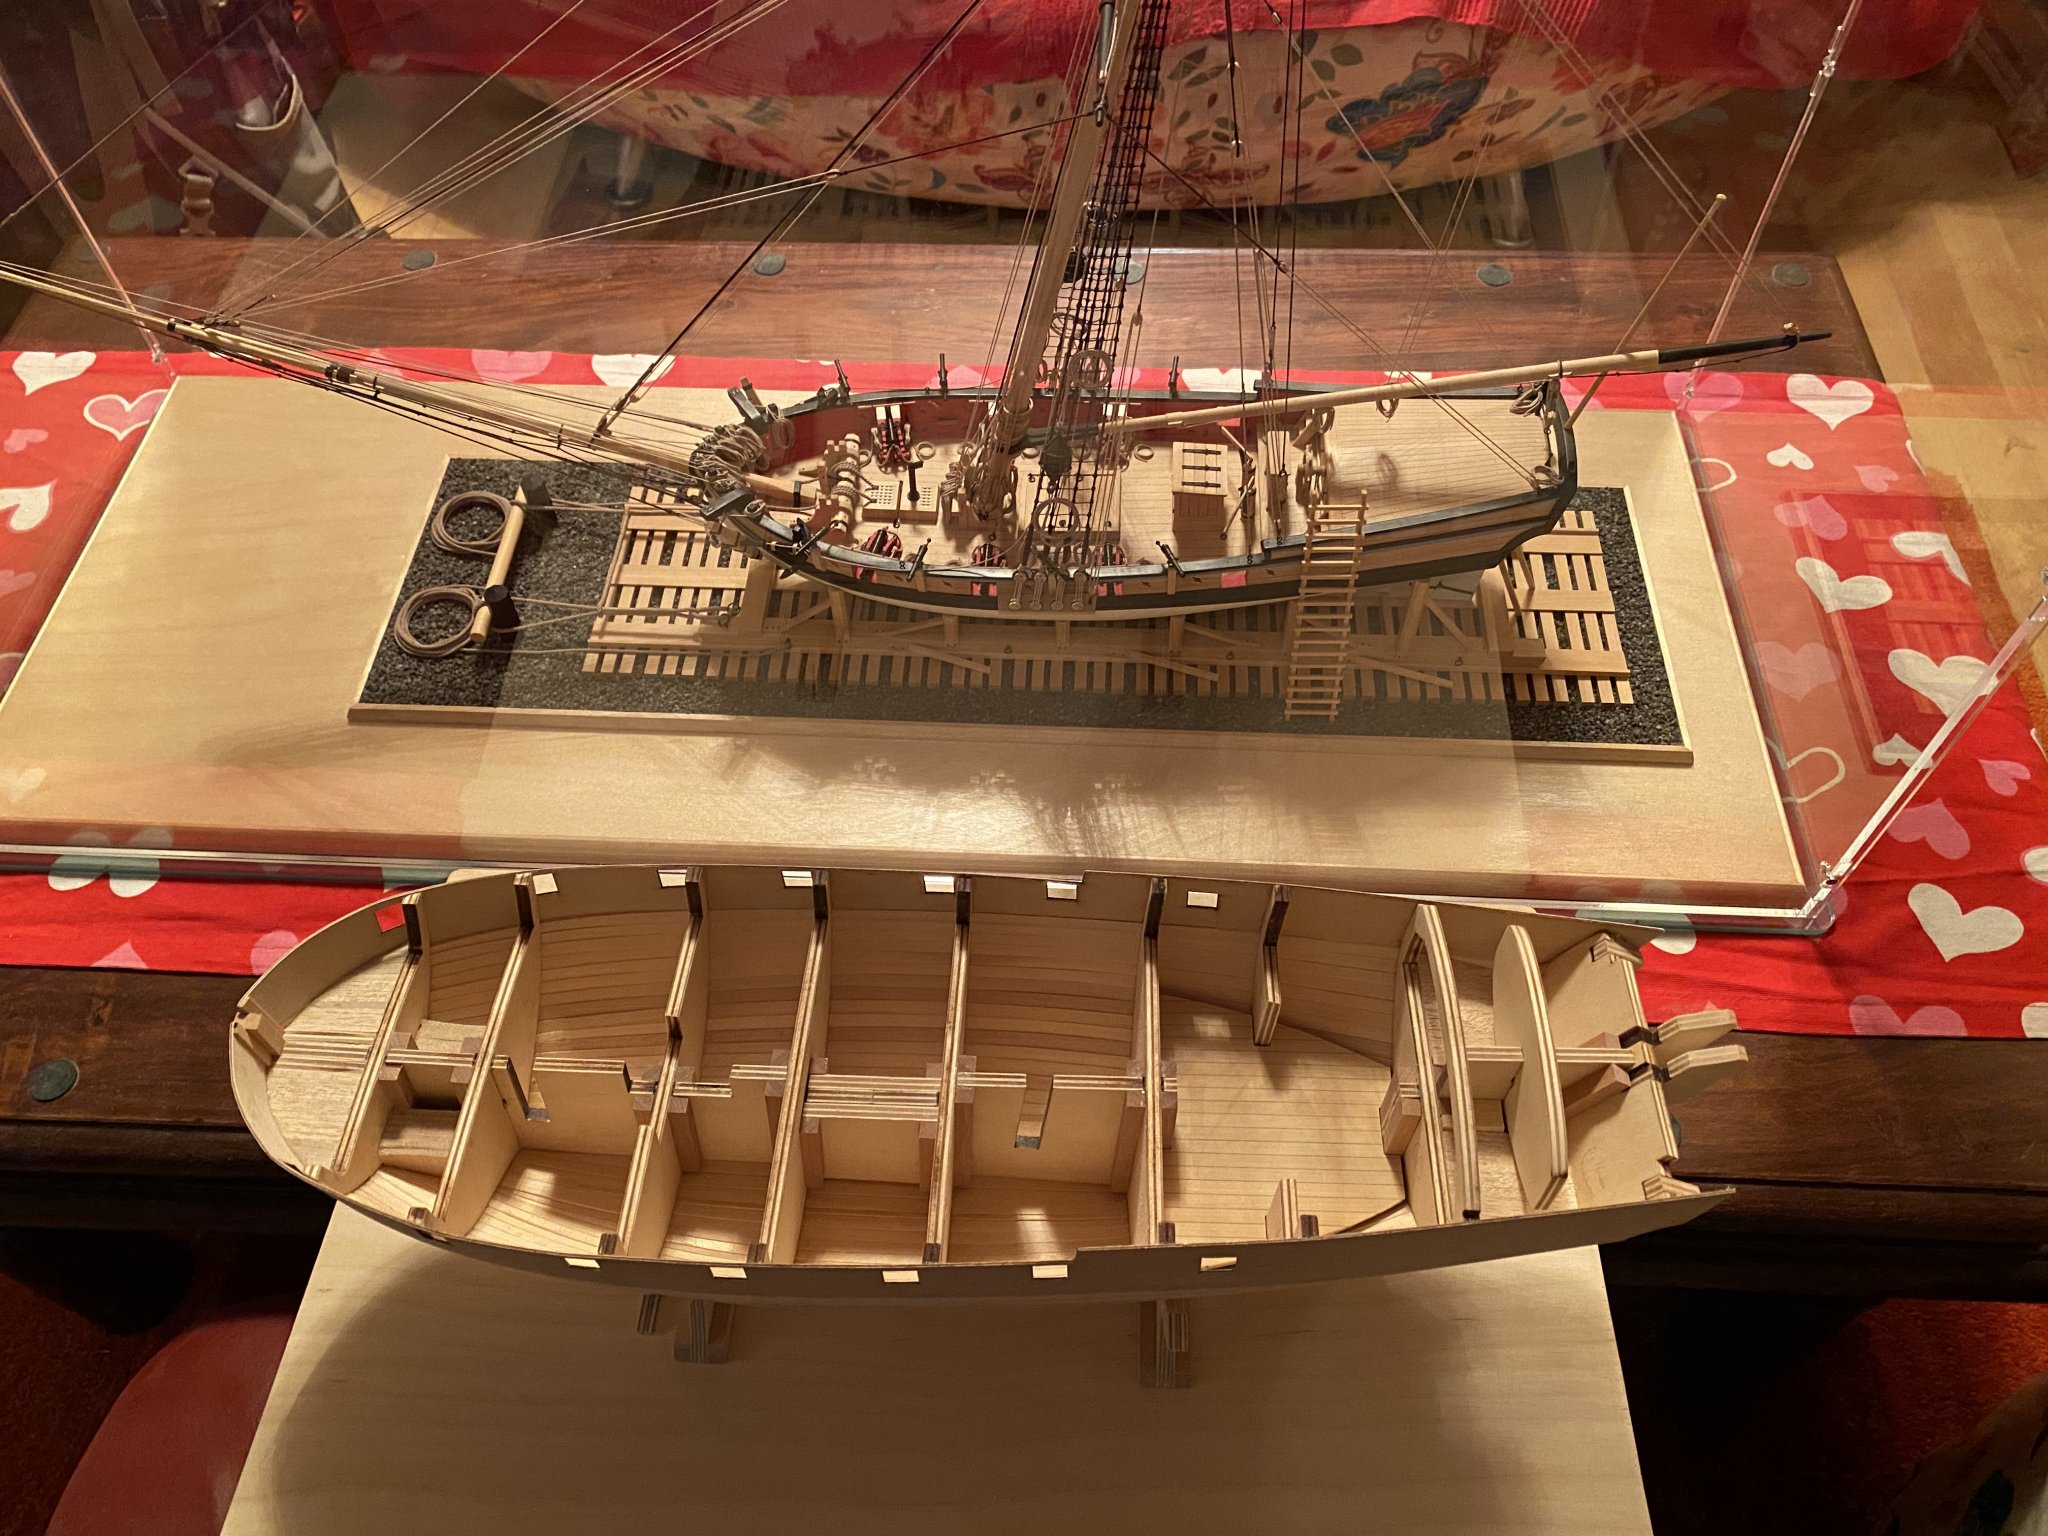
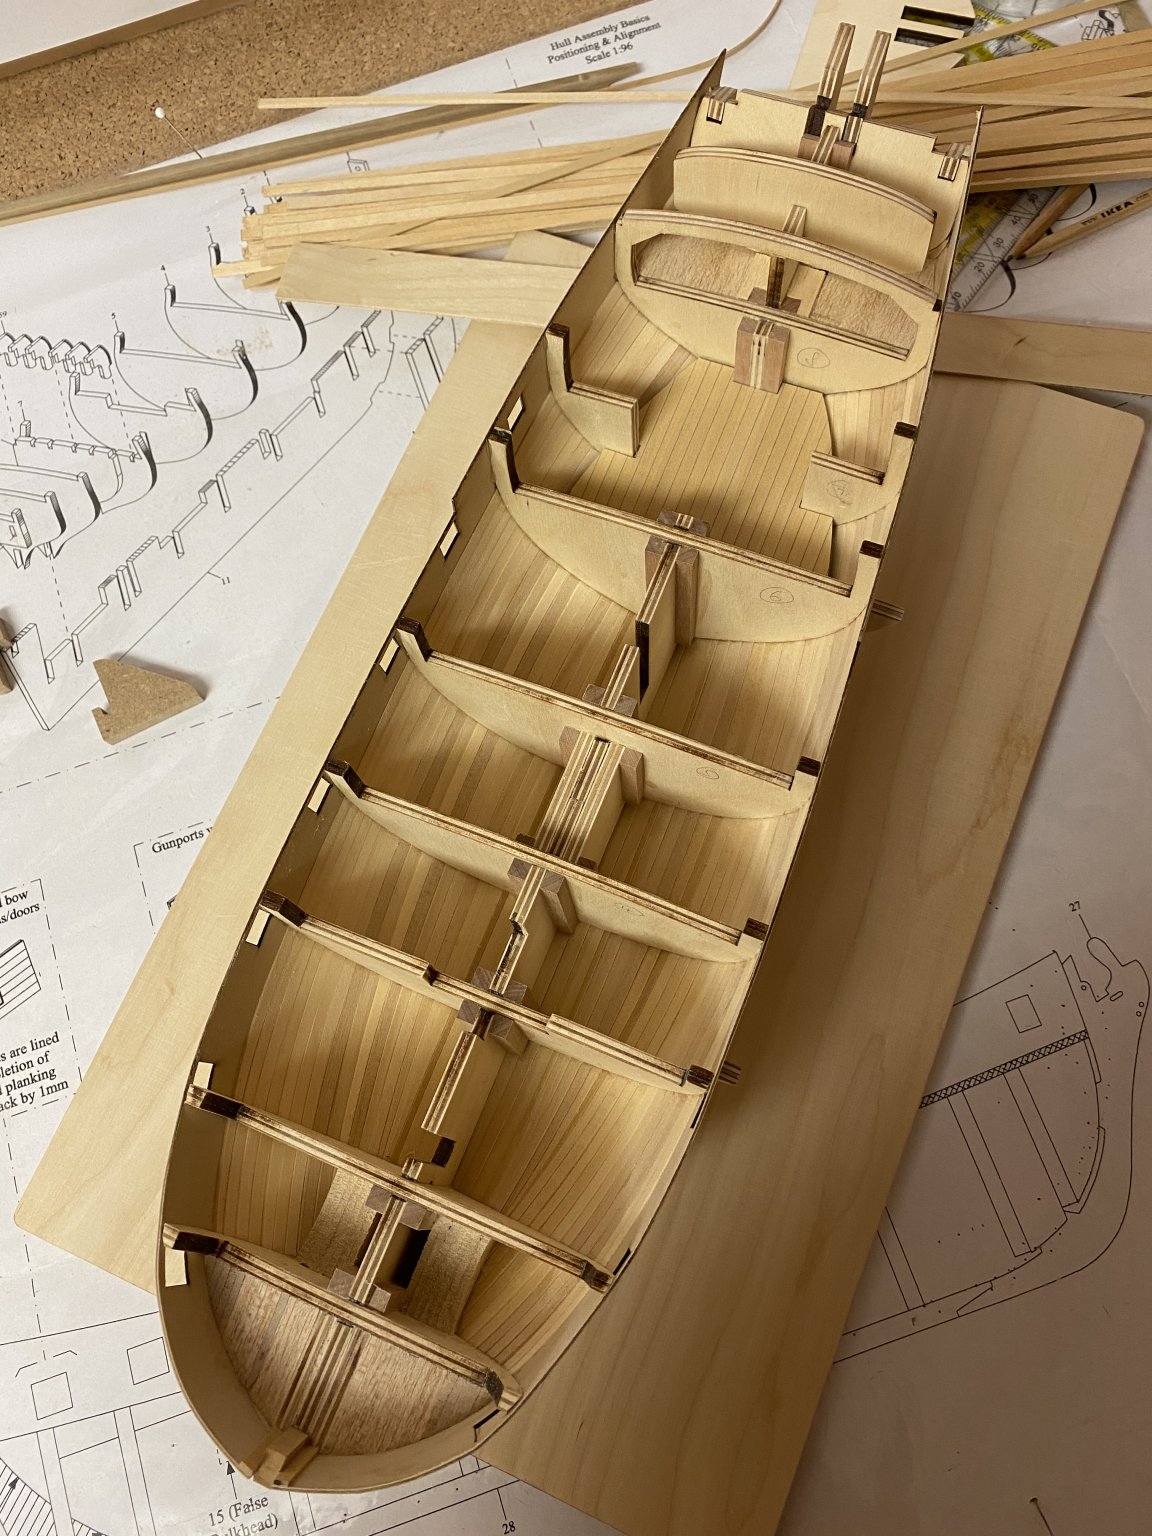
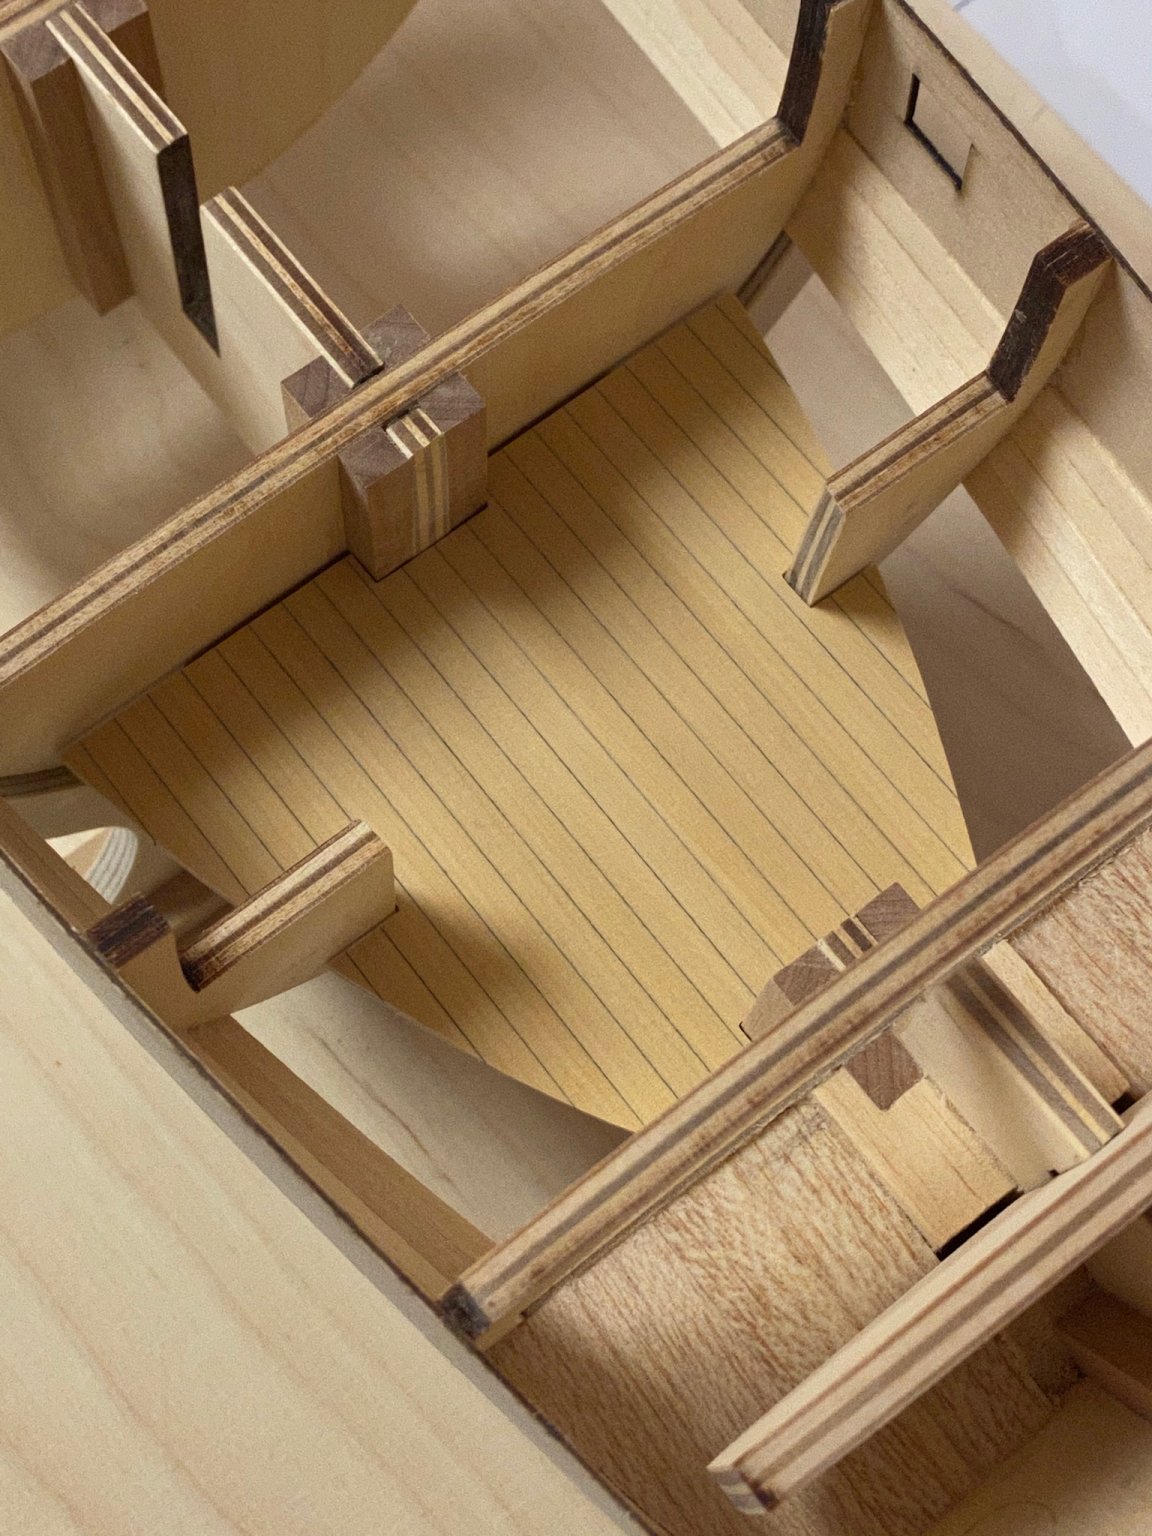
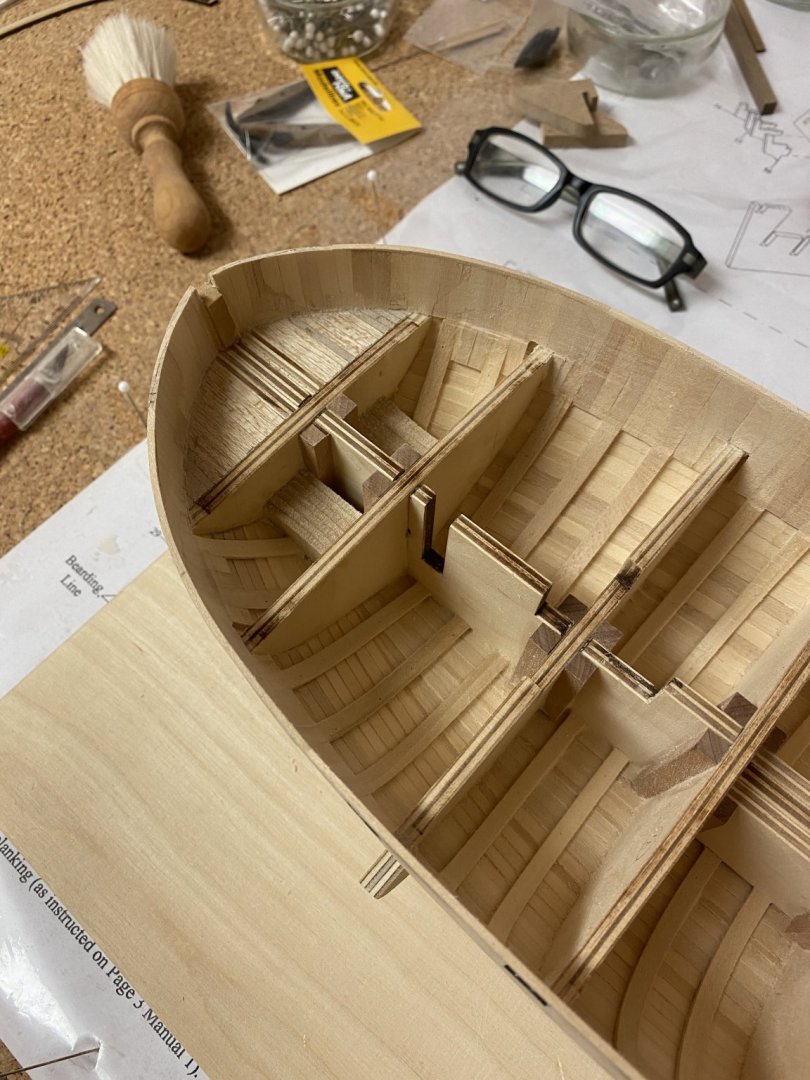
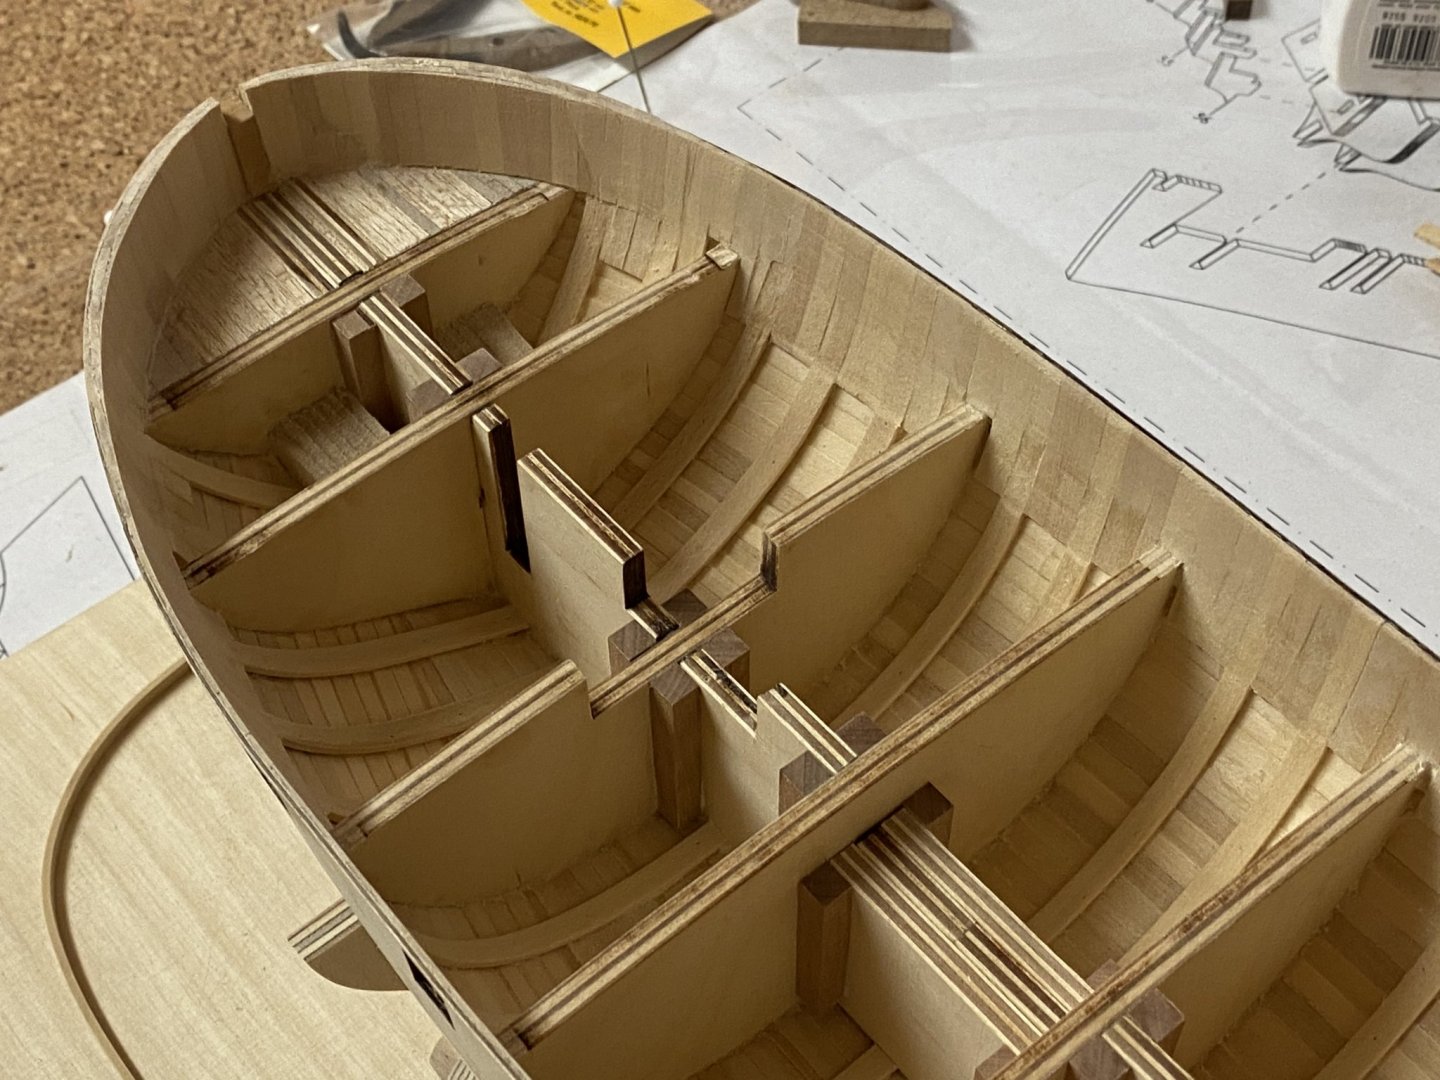
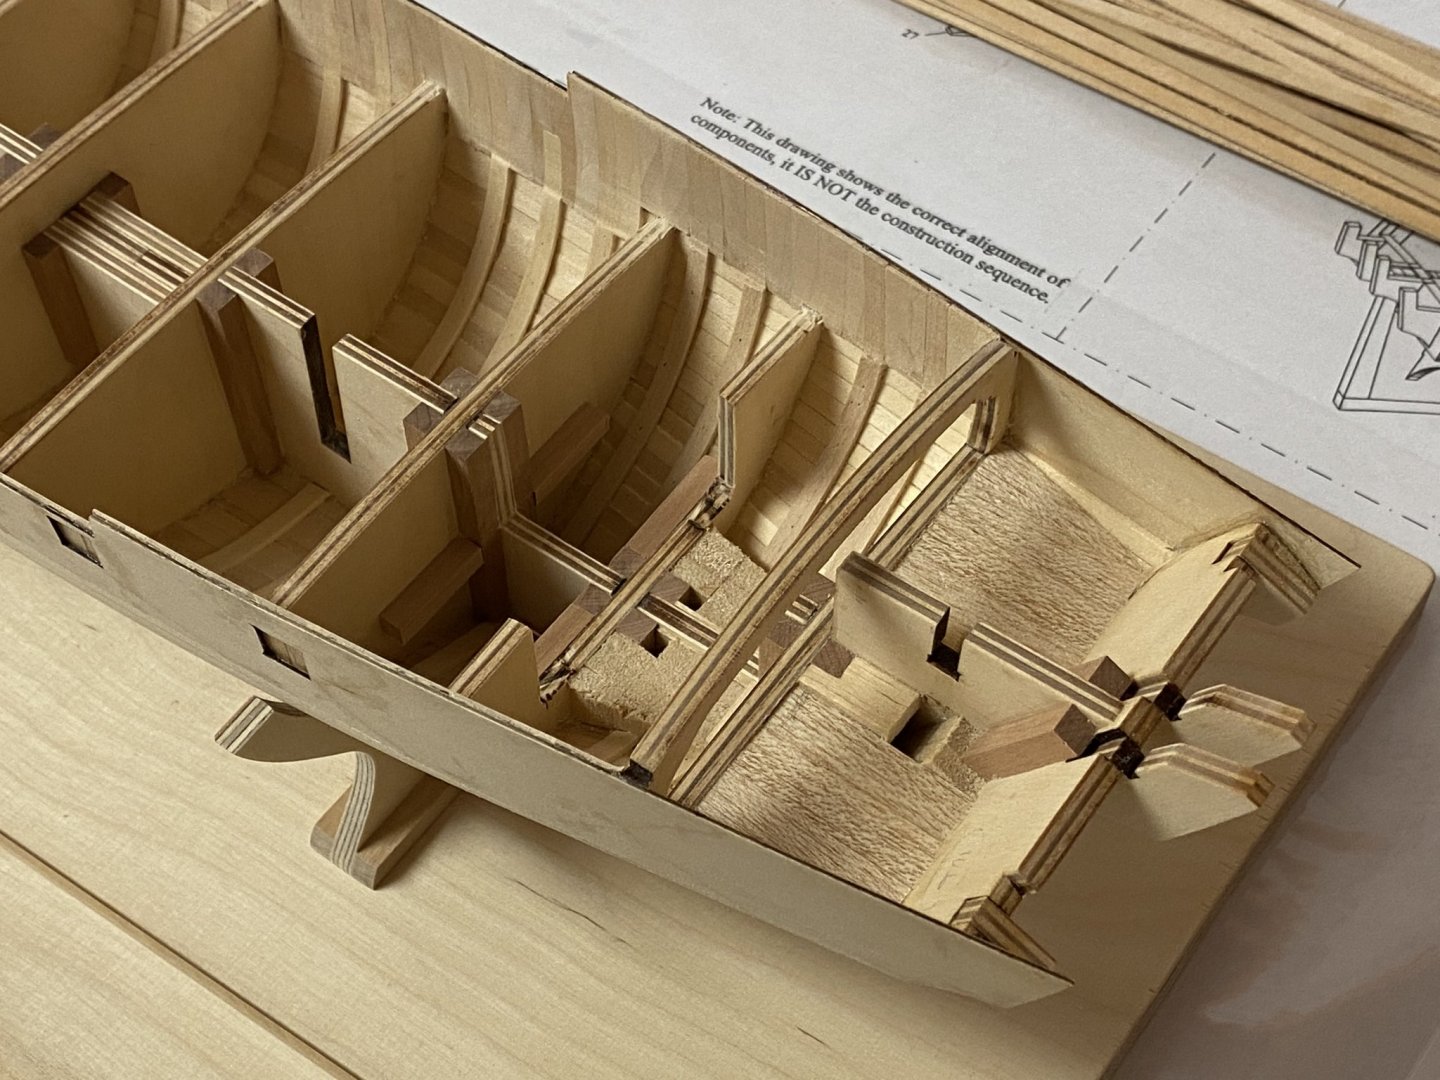
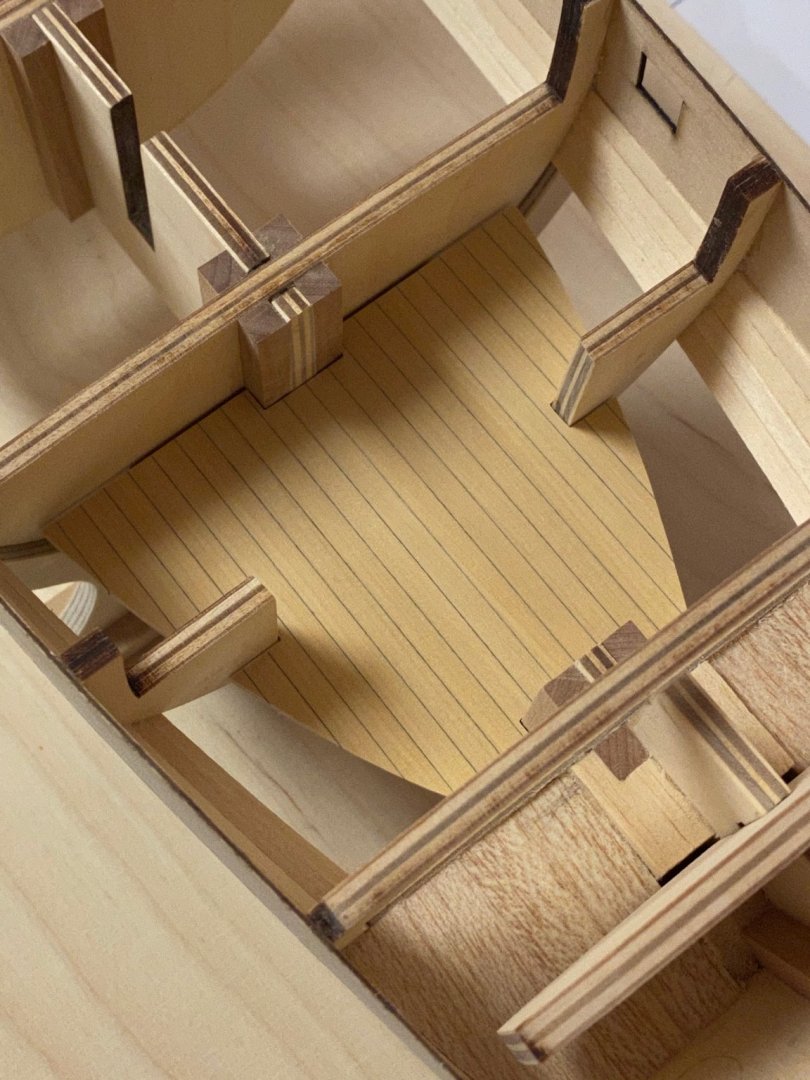
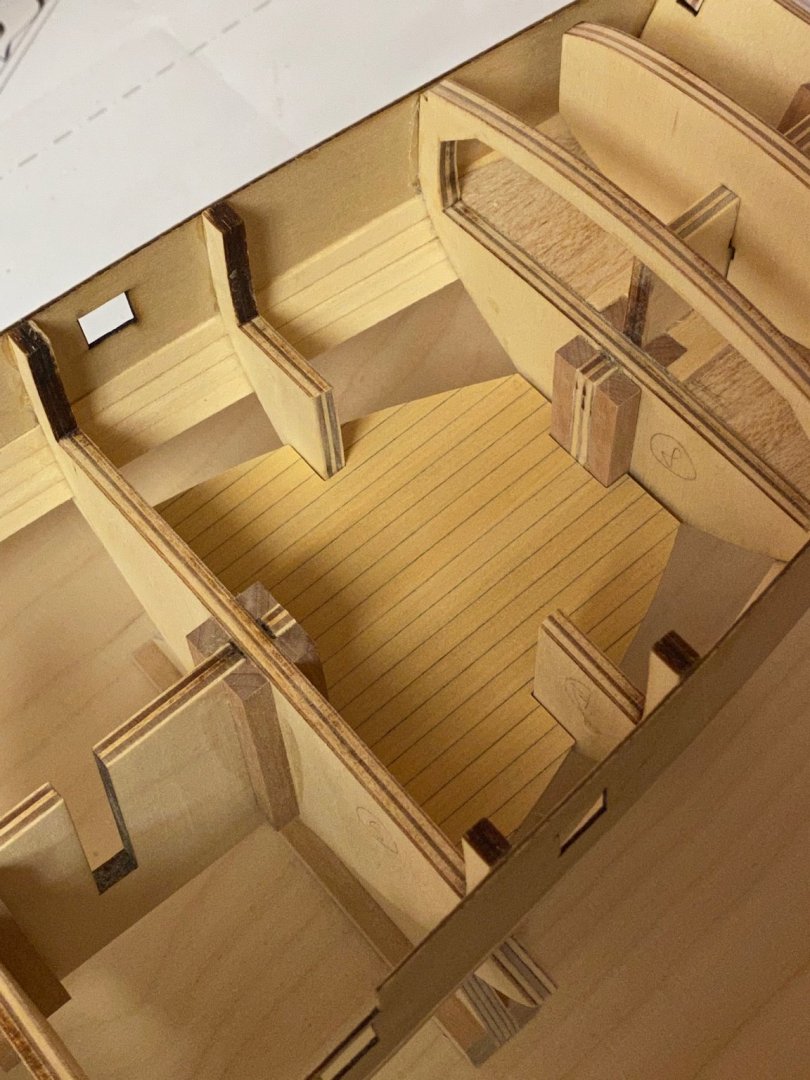
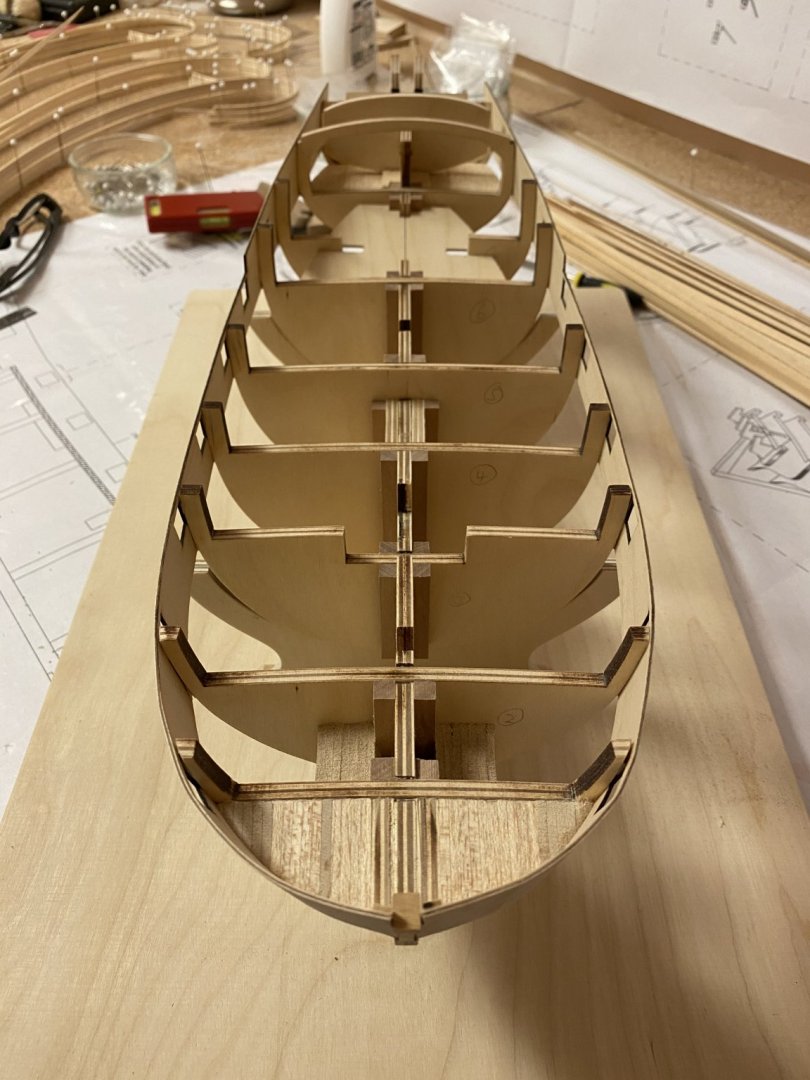
Installed the subdeck, not glued yet. It is planked with 3/16‘‘ boxwood stripes. I think about adding some fake walls to cover the sides of the bulkhead and the filler blocks but they won‘t probably be visible through the hatch. Maybe I will just paint that black before the false deck is attached. I will also skip the treenails on the subdeck because they won‘t be seen there too.
- 64 replies
-
- 7
-
-
- badger
- caldercraft
- (and 1 more)
-
Only small progress. First planking has begun. But I have holiday for the next three weeks so next days I will be busy in my workshop..
- 64 replies
-
- 8
-
-
- badger
- caldercraft
- (and 1 more)
-
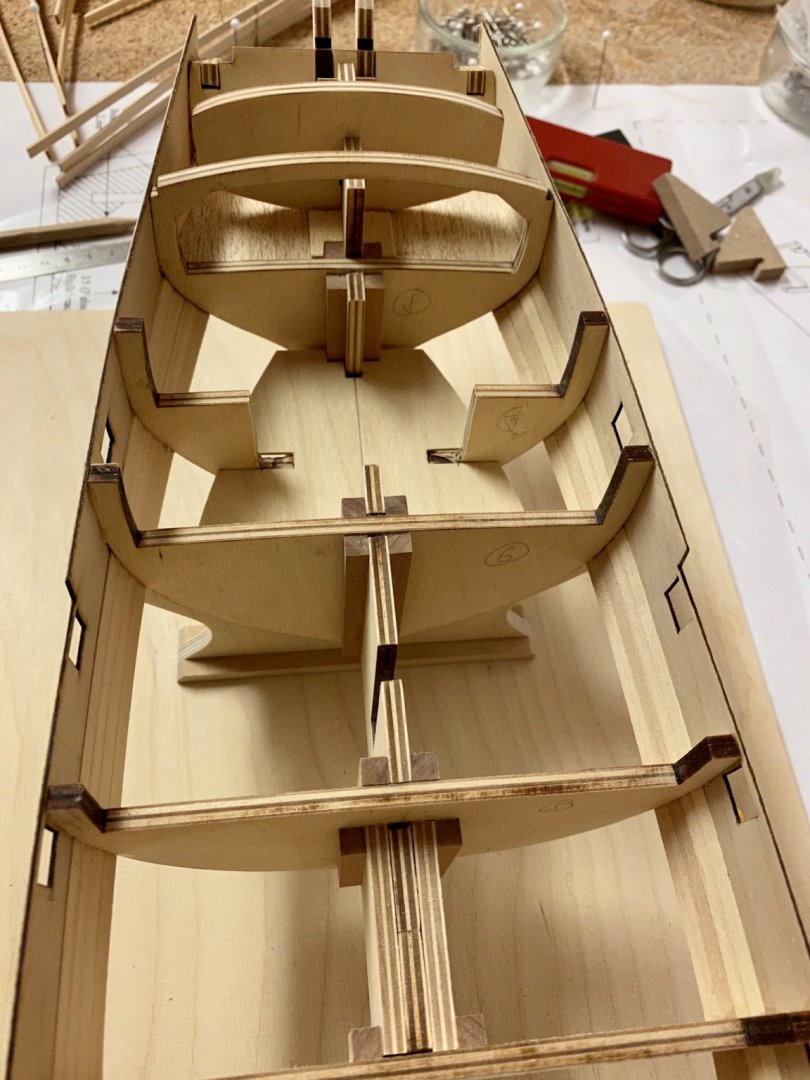
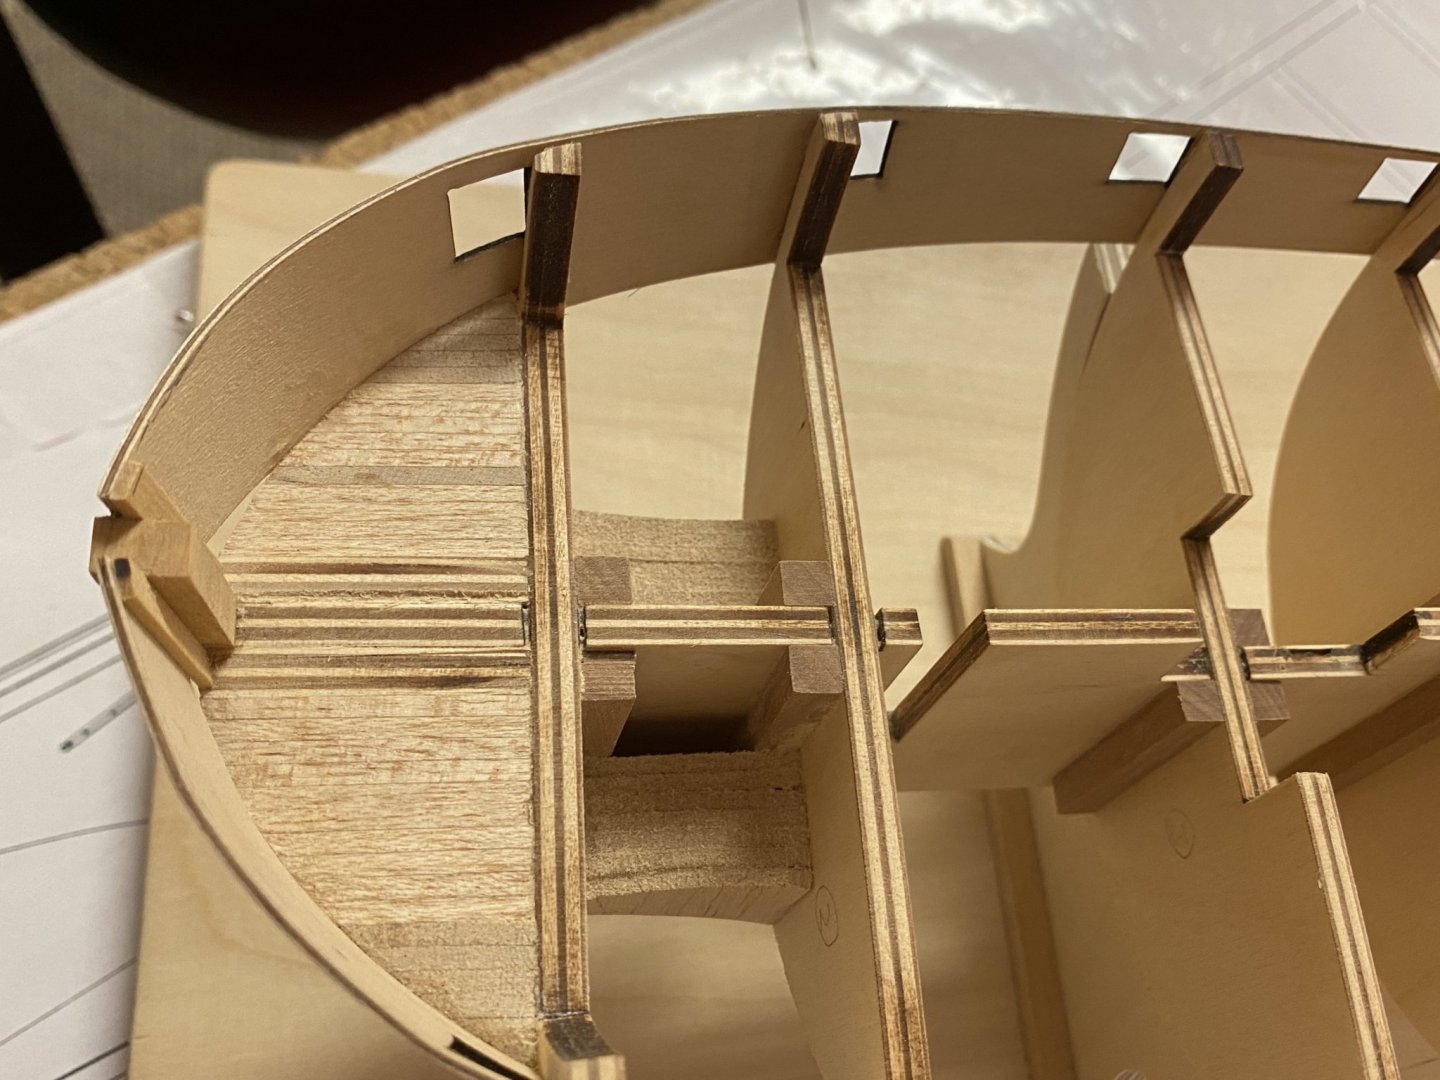
The bulkheads, false keel, deck and gunport pattern are all laser-cut to build the basic structure and to avoid as many errors as possible, which can't be corrected later. From that on it will be mostly scratch-building.
- 64 replies
-
- 2
-
-
- badger
- caldercraft
- (and 1 more)
-
Absolutely gorgeous!
-
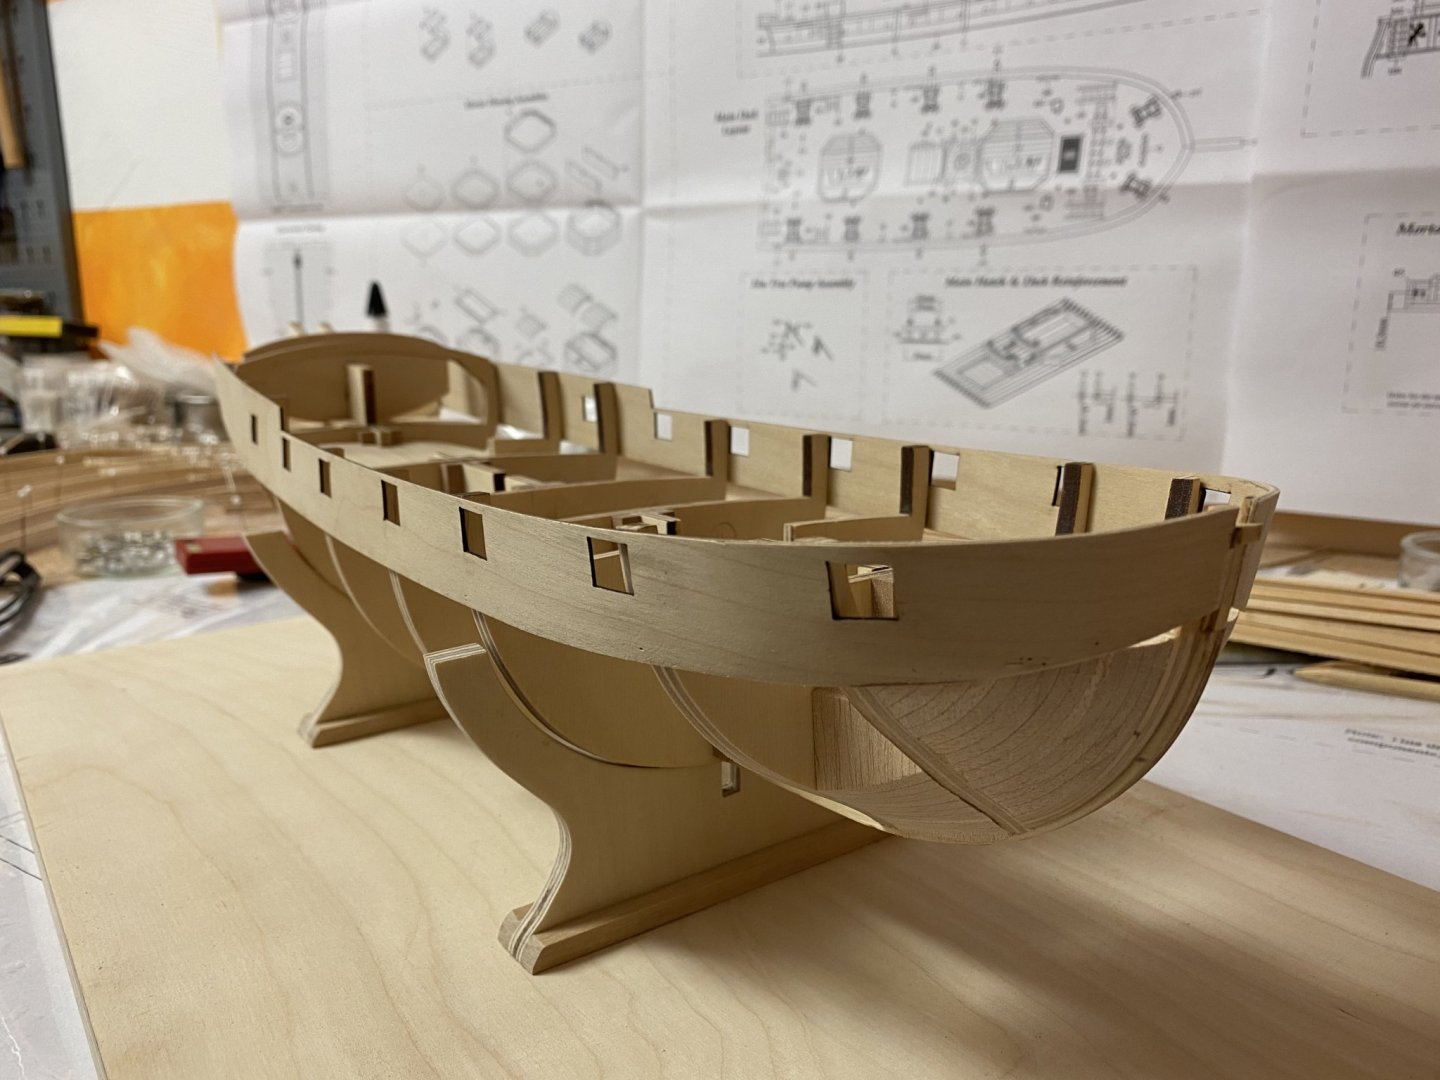
Thank you guys. The gunport-pattern has been installed, it is slightly smaller that the one on the plan. Now I‘m ready for first planking which will be done with 1,5 mm x 5 mm basswood strips. Now the shape of the hull can already be imagined...
- 64 replies
-
- 10
-
-
- badger
- caldercraft
- (and 1 more)
-
Thank you HardeeHarHar for your interest. But I‘m afraid the first planking has to wait until I finished that on my side-project. Stay tuned..
-
Very nice work and a lot of creative ideas. BTW: A laser-cutter is a neat tools that comes in handy.
-
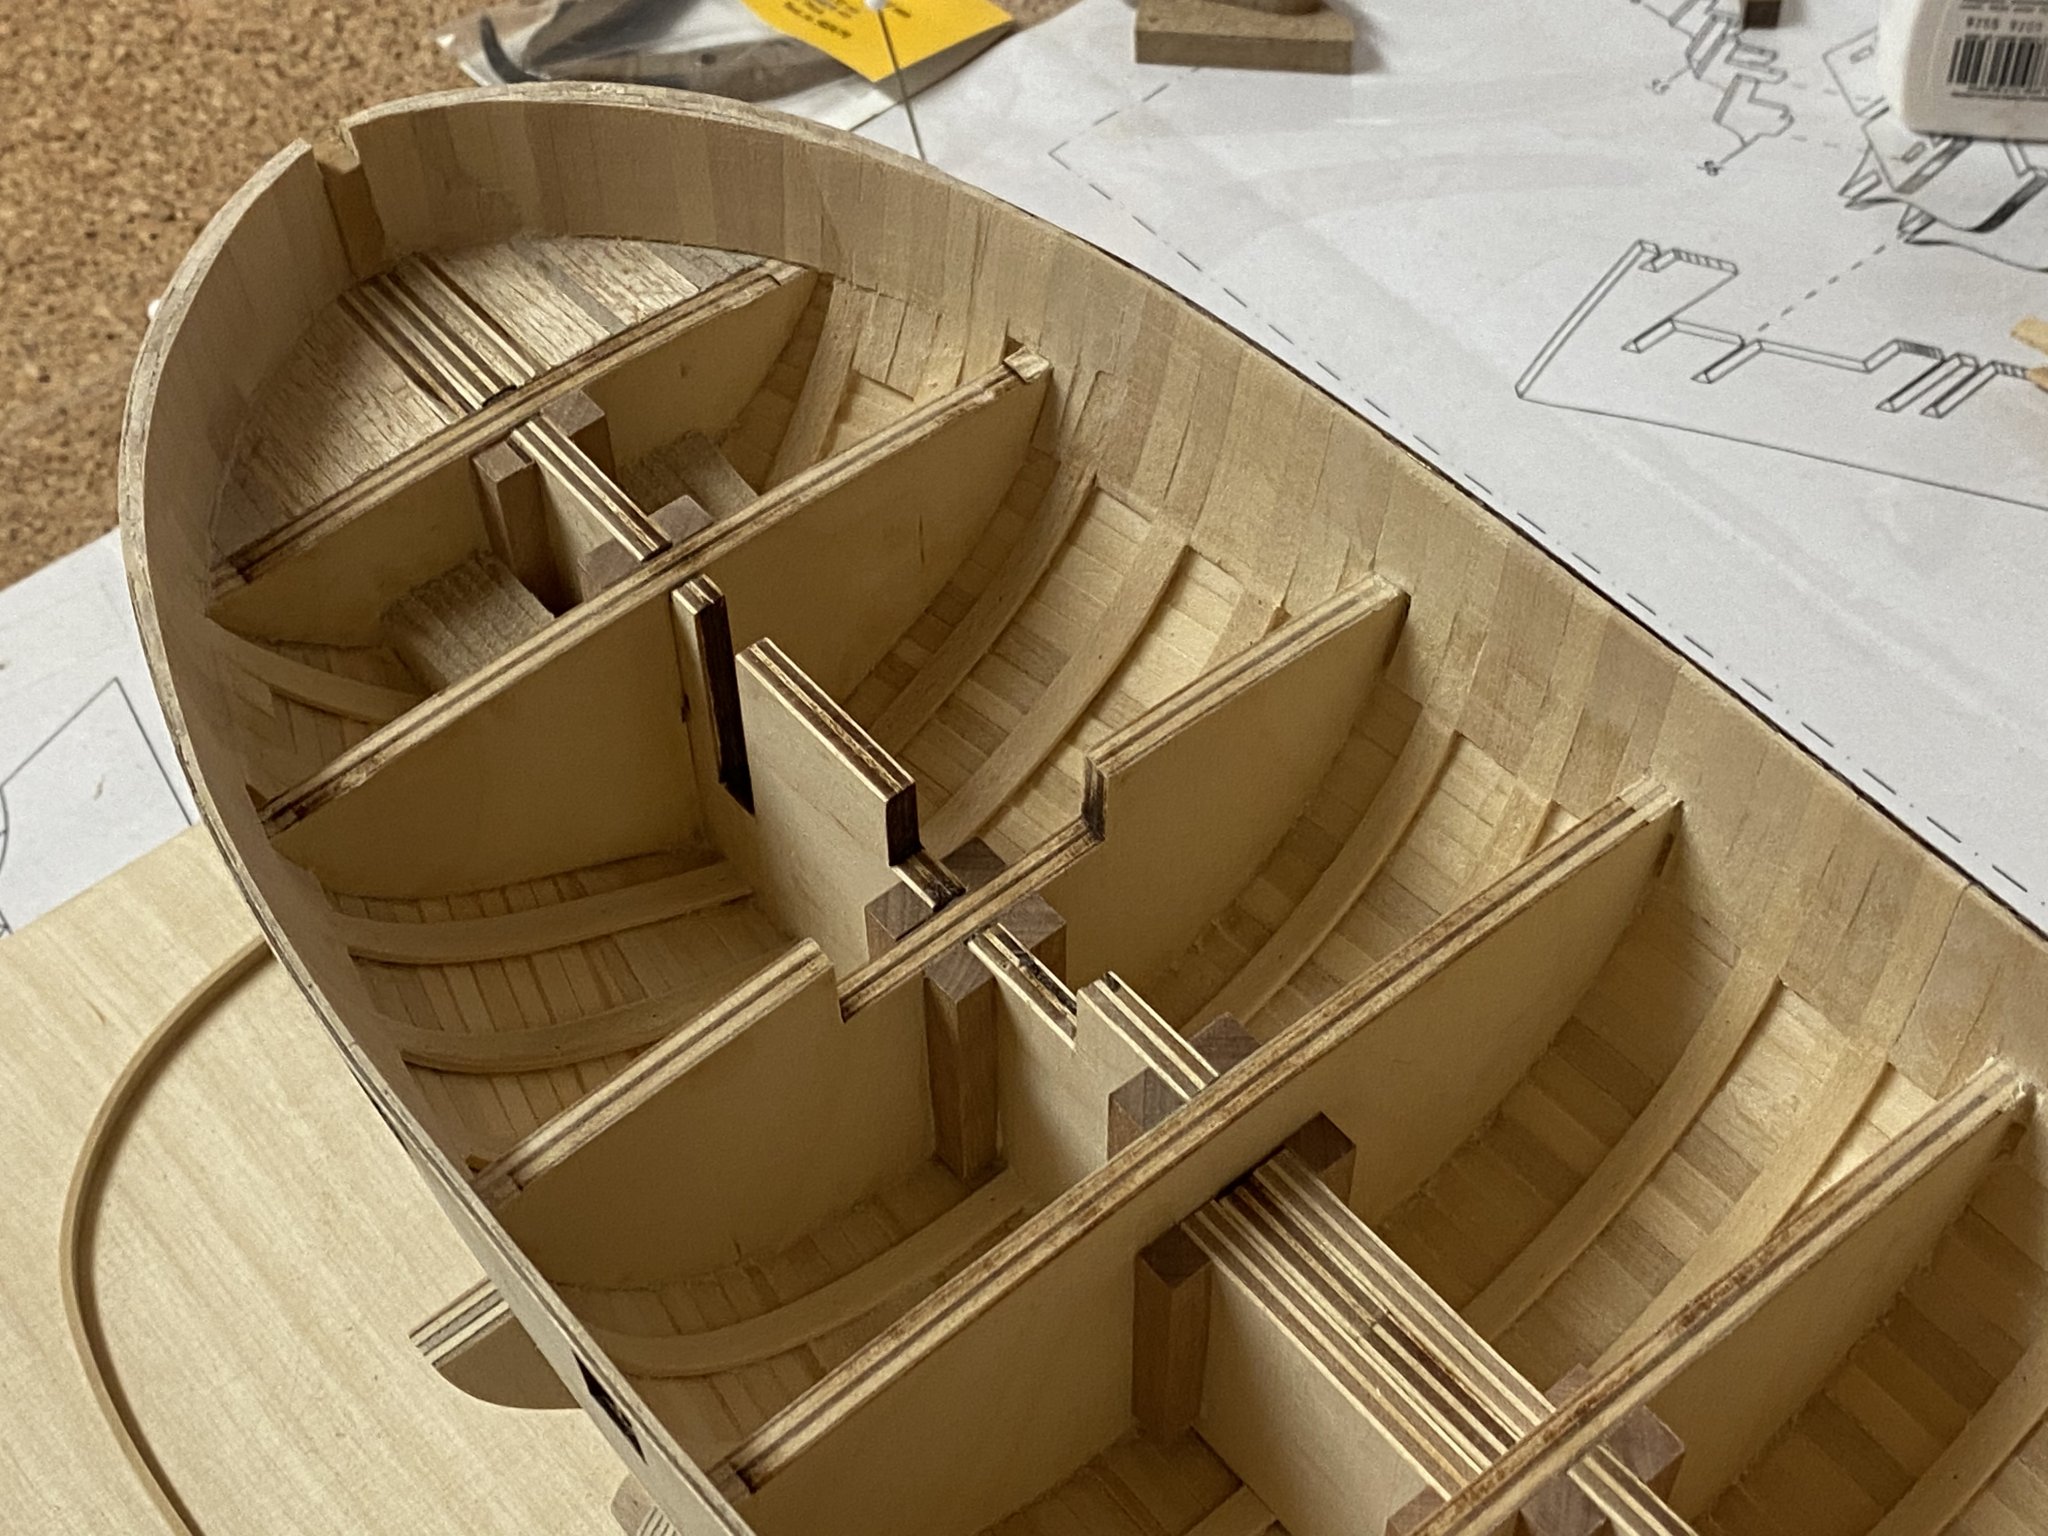
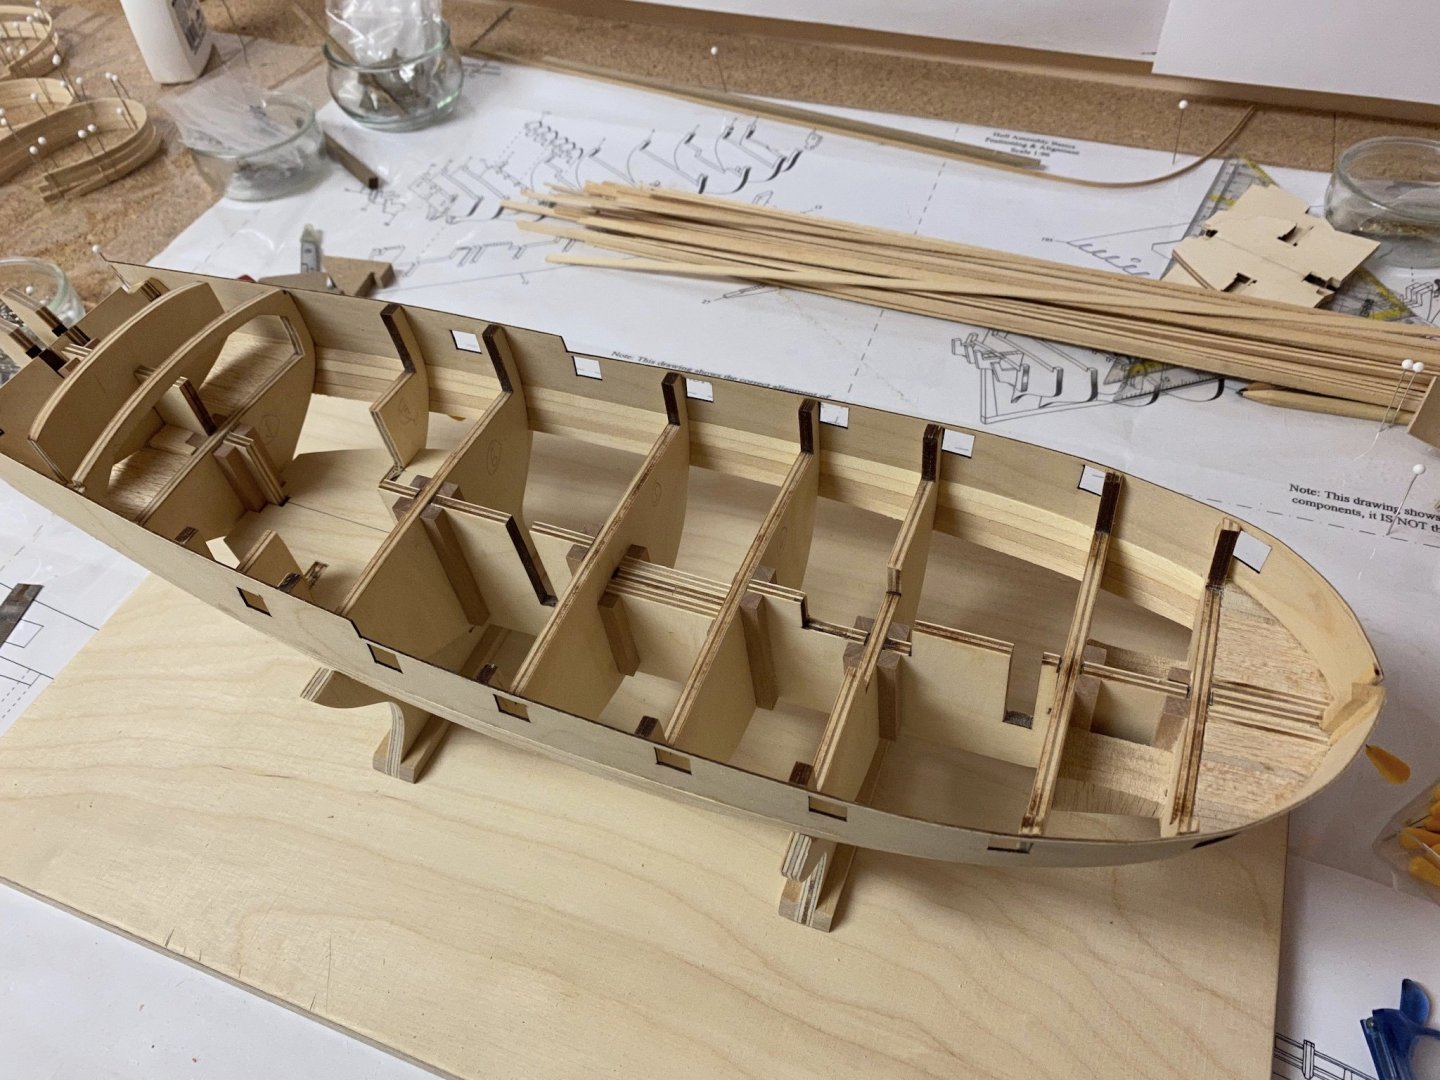
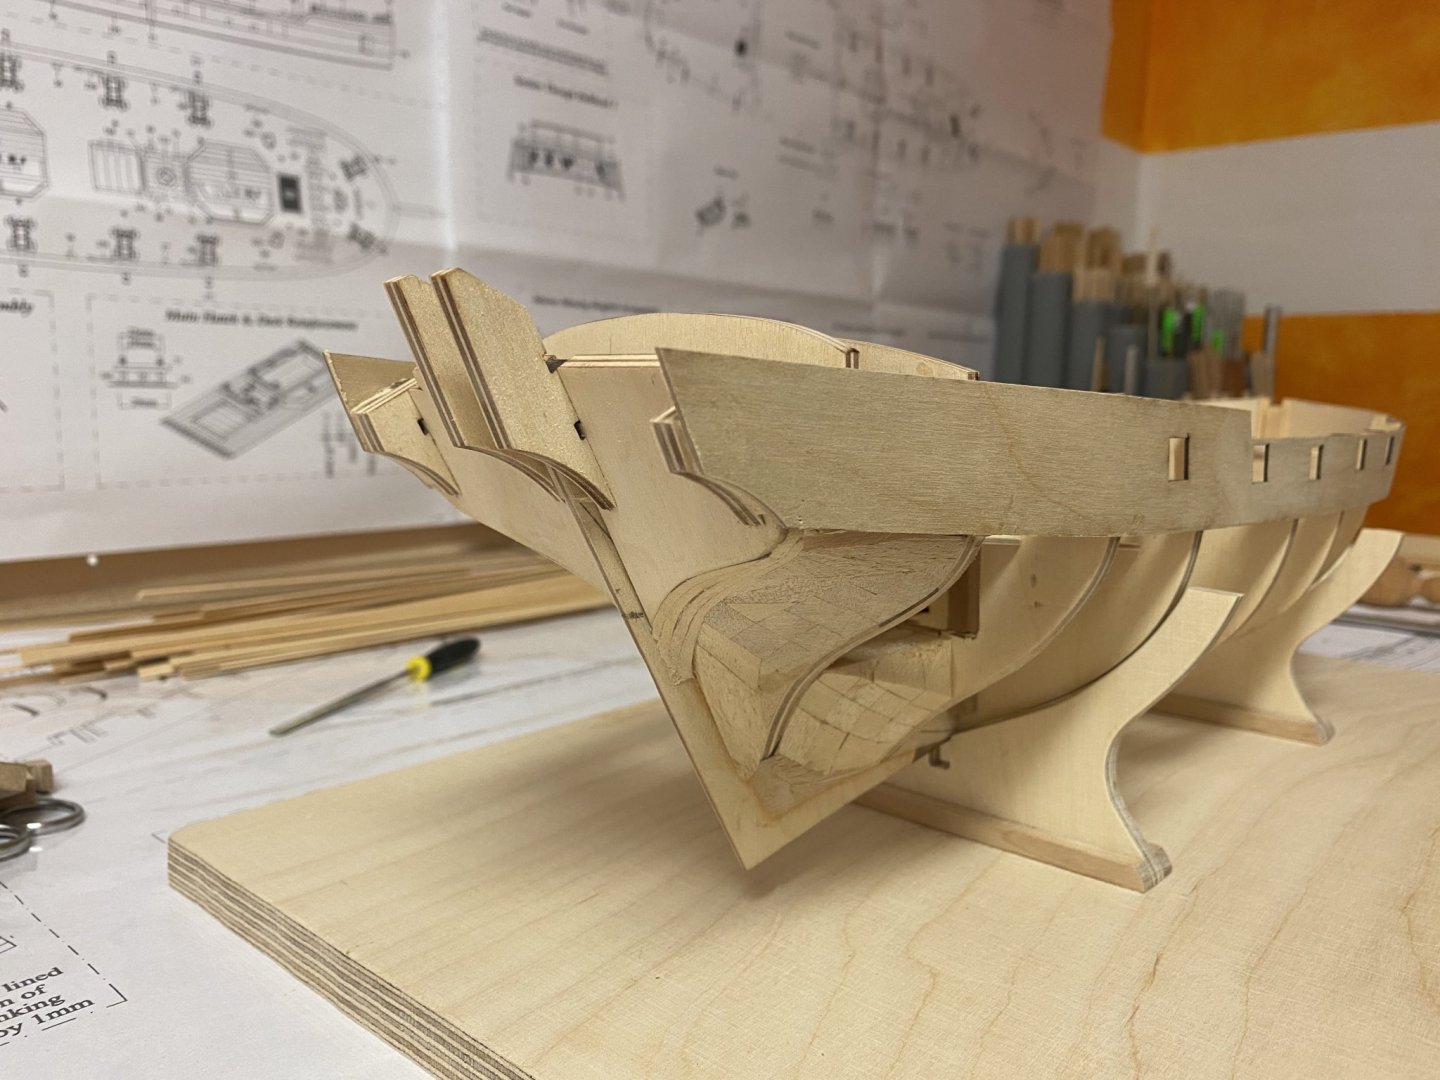
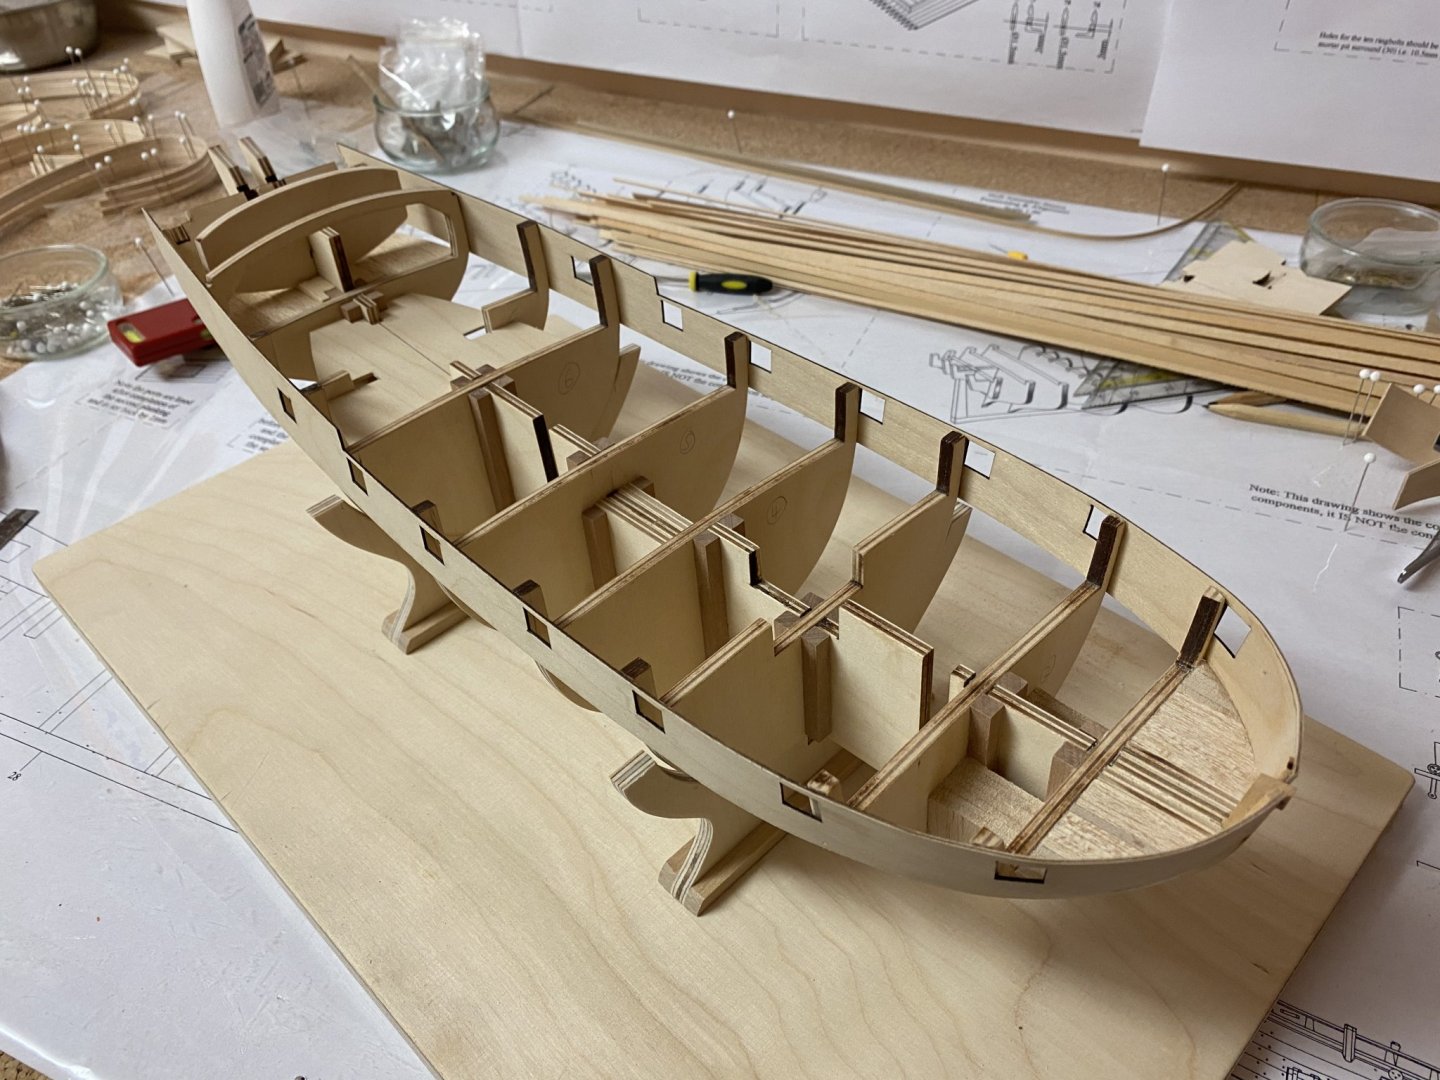
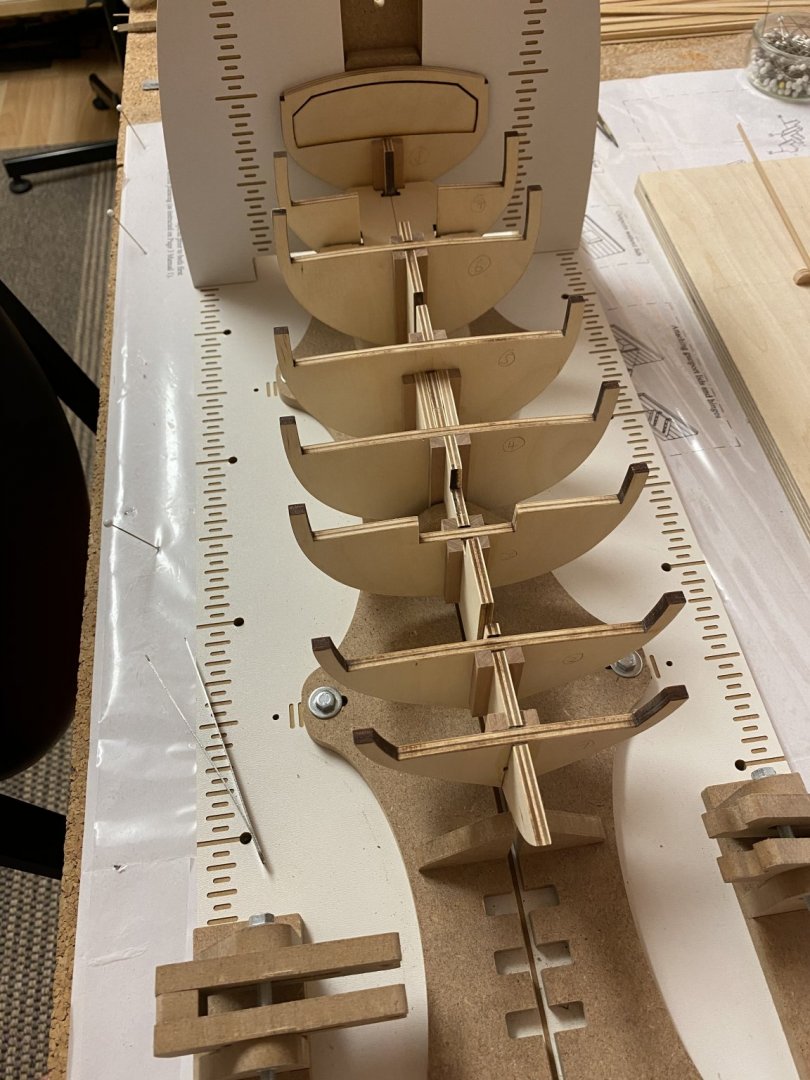
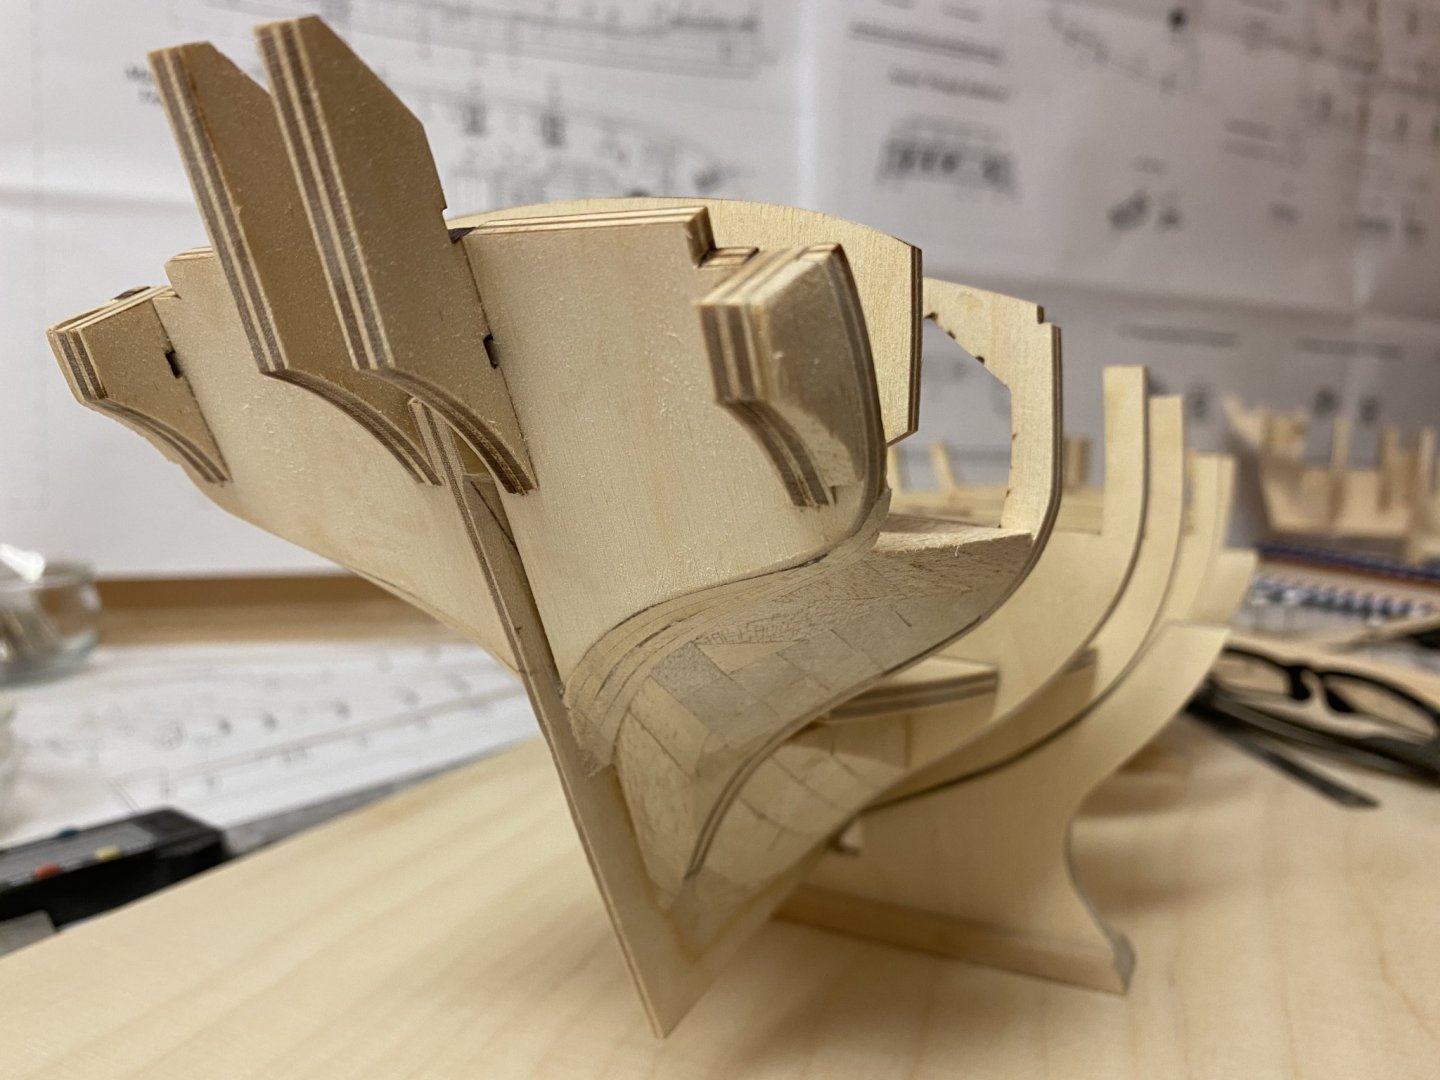
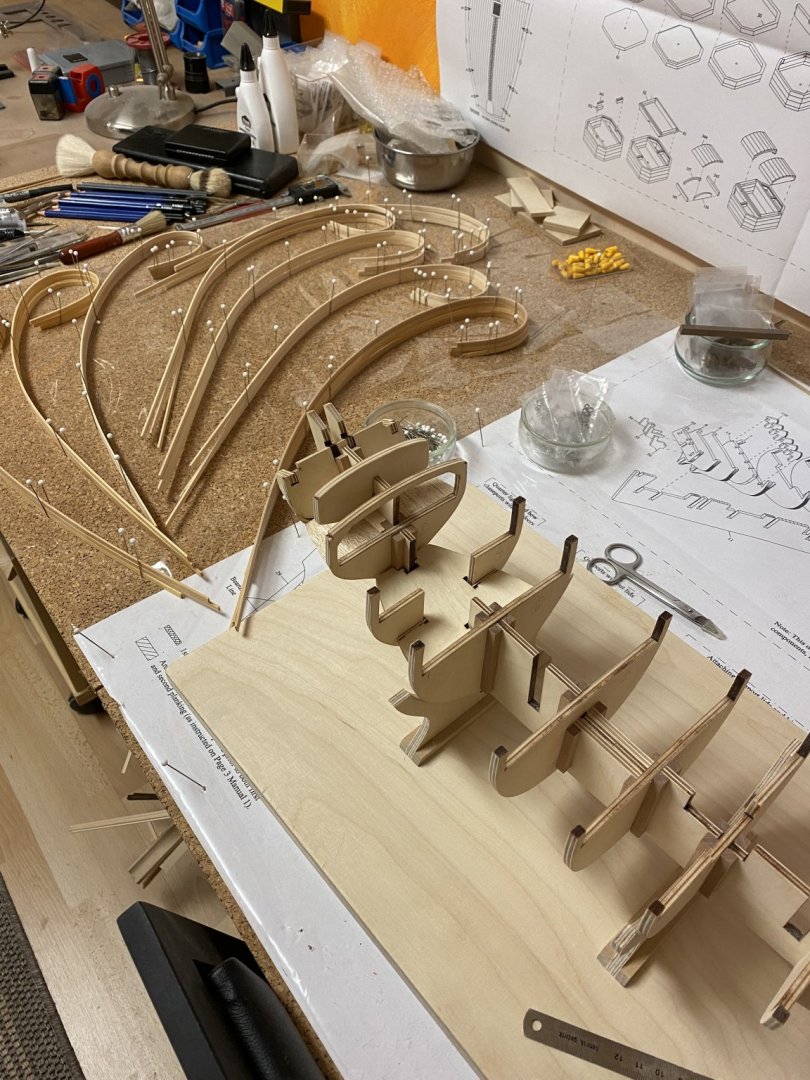
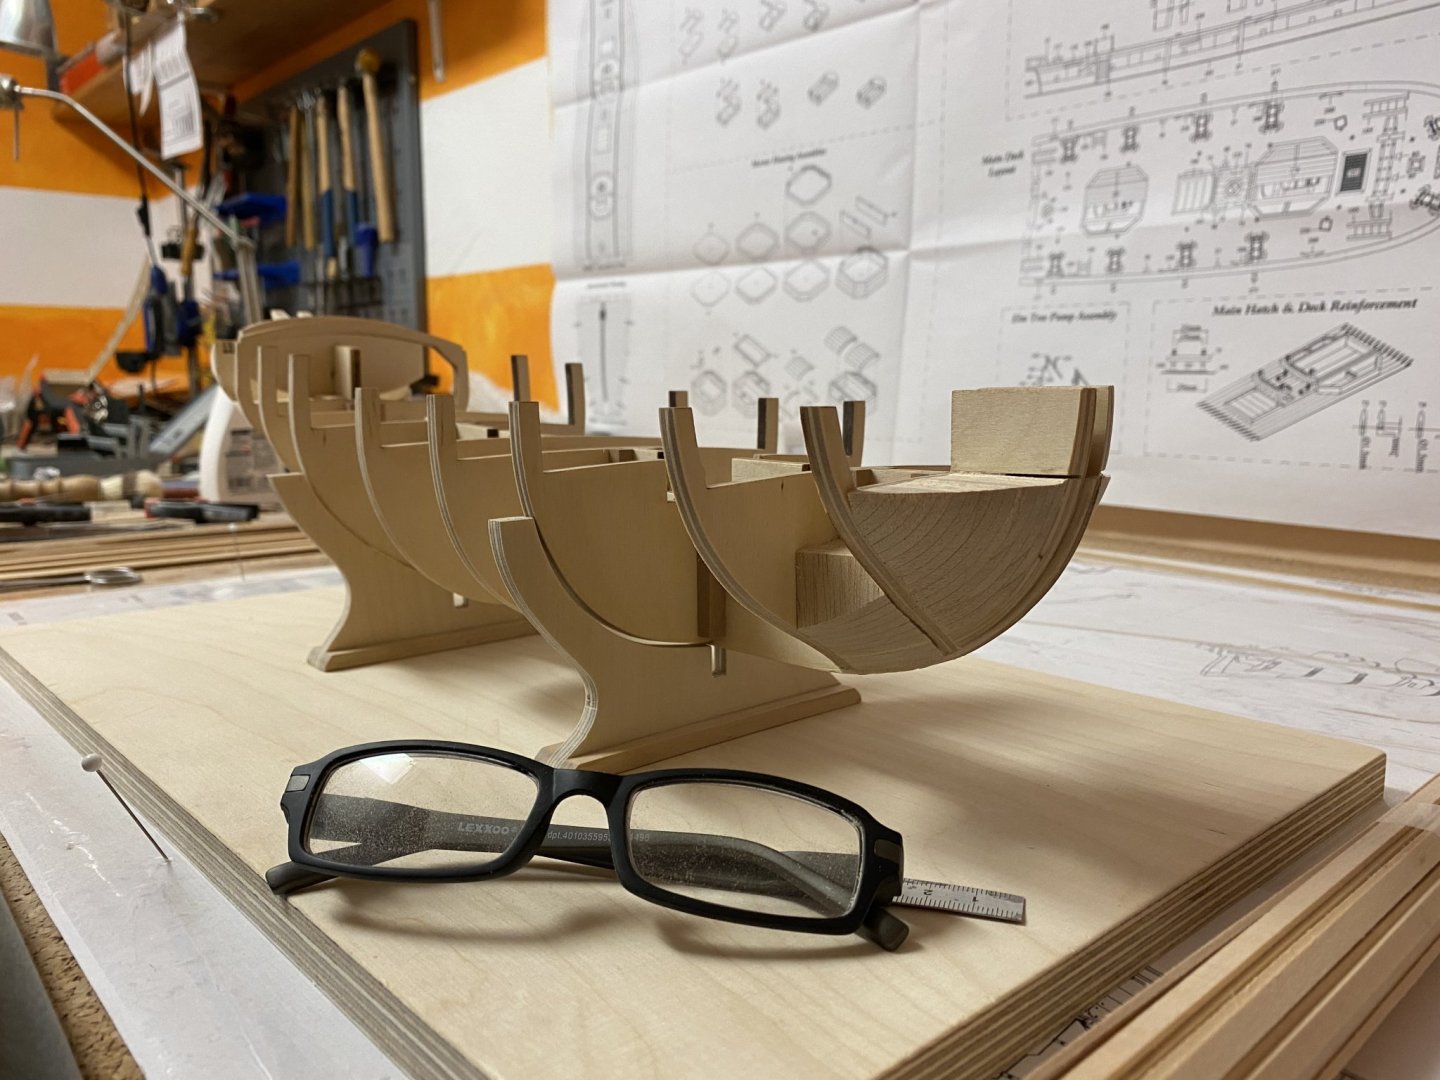
This is my first semi-scratch build and it is more like an experiment, which may possibly end in an epic fail. I bought a Caldercraft Badger and Granado kit from eBay (from a guy who probably gave up this hobby) some years ago for a reasonable price and the Badger had been already started but with some mistakes. I kept both kits in storage and did some easier builds instead. A friend of me had recently bought a simple CNC laser engraving machine (to cut ribs for RC-Planes) and I had the idea to build a bigger version of the Badger instead of fixing the already started kit. I also would like to add some extra details and make some changes to the hull and structure according to the NMM plans. There has been a discussion about this before to prepare that build. I decided to enlarge the plans to 1/48 scale, redraw the bulkheads with Corel Draw to add a rabbit, redesigned the center plywood piece as two parts instead of one (because the machine’s working area is restricted to 30cm x 40cm) and create dxf-files to let him cut the parts. After some trial parts he was able to cut all the bulkheads, the false keel, plywood deck and gun pattern for me. Although the engraving machine was not designed to cut 5mm plywood, the parts are usable. So I started to build a 1:48 version of the Badger, which will be approximately 80 cm long and 70 cm high. I will mainly use the supplied Caldercraft plans but enhance the build with the NMM plans that I will also use for reference. The Badger is a small brig (former US merchant vessel Defence) that allows me to do some custom work and will be a nice addition to the AVS as both ships have a lot of similarities and are build in same scale. Also it allows me to stay with 1/48 scale some more time. I made a start already, building a rack to put the model on during construction, gluing all bulkheads together and adding some balsa fillers to give the first planking more gluing surface. Bevelled all bulkheads, sanded the filler blocks to shape and already prepared the 1,5mm x 5mm basswood strips for the first planking.

- 64 replies
-
- 9
-
-
- badger
- caldercraft
- (and 1 more)
-
Thank you very much Gunther. I wonder where you have been all the time.
-
Nice! At 1:87 scale it is still looking very detailed but not to bad to handle and store. At 1:48 you would need an extra room to store the village. Are you going to put it into a clear case after finishing it?
-
Wow! You can play a whole battle scene with all that armory!