HOLIDAY DONATION DRIVE - SUPPORT MSW - DO YOUR PART TO KEEP THIS GREAT FORUM GOING! (Only 36 donations so far out of 49,000 members - C'mon guys!)
×


Keith_W
-
Posts
1,145 -
Joined
-
Last visited
Content Type
Profiles
Forums
Gallery
Events
Everything posted by Keith_W
-
 Nigel, you fit those pieces of wood together so tightly that i'm sure that your ship would hold a vacuum if you decided to make her airtight.
 -
To fix the gaps on your deck planking, try filling the gaps with thinned down PVA, then sanding the decks down with fine grade sandpaper. The dust will fill in the gaps pretty nicely. As for the gloss finish, I am no expert at applying gloss finishes to wood. I used to be able to get an incredible gloss on my car models - I would paint it with a gloss colour paint, then sand it down until there is absolutely no gloss left (helps pick out any pits and defects in the painting). Then I would spray it again with clear gloss, then sand it back with extremely fine grit paper (up to 10,000 grit, only available in model shops), then finish with a light coat of carnauba car wax.
-
She's coming along beautifully, Jack. Re: the rounded scrolls, it would be possible to sand them until they are rounded, and then carve or scribe back in the detail. The detail on the scrolls don't look too difficult.
-
Custom photoetch resources
Keith_W replied to Keith_W's topic in Metal Work, Soldering and Metal Fittings
Thanks Claire for your comments. A number of us have had to rebuild our build logs following the site's HDD crash. If you could re-upload them it would be really helpful. Also, what do you mean by "cost prohibitive"? A few hundred dollars? A thousand? -
She's beautiful, coming along really nicely. BTW the earlier photos of your build log are missing.
-
Sorry, missed your question. I recommend you treenail after it comes off the building jig. You need to drill out the holes for the treenails. I have seen two methods on MSW to do this. The first is what I did - drill them out from the inside. The problem is that you have to keep your drill perpendicular to the frames at all times - not easy when they are curved like that. The second method is to place your model in front of a light source so that you can see the frames through the hull, and then drill the holes from the outside. I saw this on someone else's build log (might be Alde's?). This might be easier.
- 625 replies
-
- 1
-

-
- bounty launch
- model shipways
- (and 1 more)
-
Capt. Fisher, I think I have spare planks from when I built this boat. Unfortunately, it will be two weeks before I get back home and be able to post it to you. If you haven't managed to source planks by then, I will be more than happy to mail them to you at no cost.
-
I need advice on a rotary tool
Keith_W replied to jdiven's topic in Modeling tools and Workshop Equipment
I have two Dremels, one of them has the flex-shaft adapter. Unfortunately there is no foot control for the Dremel. I understand that if you try to install a foot control, it might burn out the rheostat that controls the speed on the Dremel (is this true?). For this reason I am considering a replacement tool, perhaps a Proxxon or a Foredom. -
Wow Chris, she is beautiful! What scale are you thinking of releasing her in?
-
As far as possible, I try to avoid coming across as a smartass. But this time, I really thought that something interesting was amiss. I knew for sure it was not copper plated, and it was my interest in history that lead me to question him, rather than any desire to show him up. To his credit, he took it really well. All the theories postulated above seem plausible to me, so thank you gents.
-
Batavia by *Hans* - FINISHED
Keith_W replied to *Hans*'s topic in - Build logs for subjects built 1501 - 1750
Hi Hans, I have uploaded my pictures into this thread: http://modelshipworld.com/index.php?/topic/5315-batavia-shipwreck-photos/ -
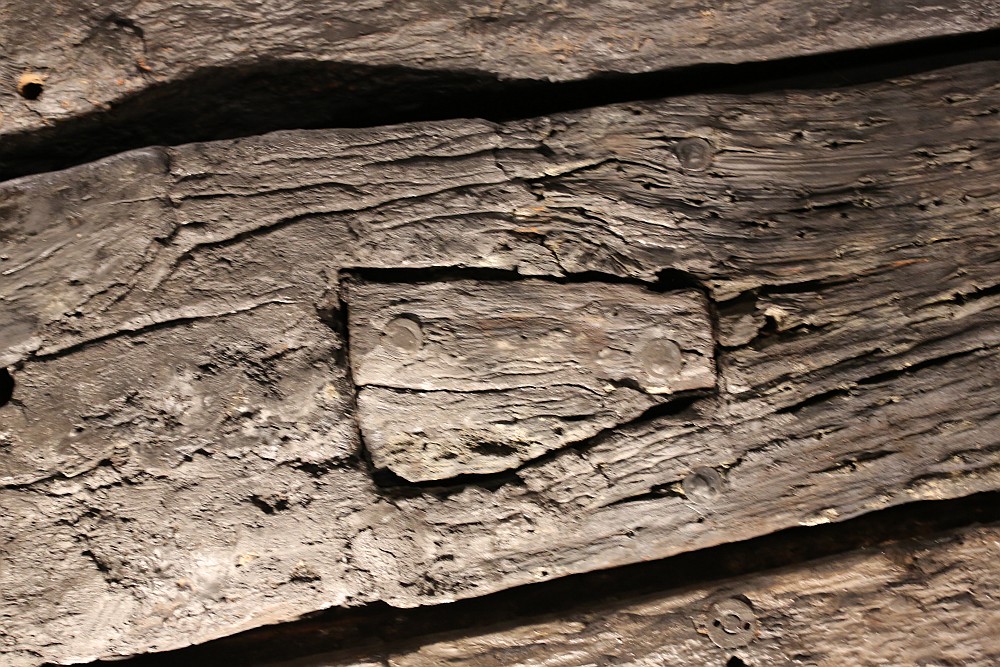
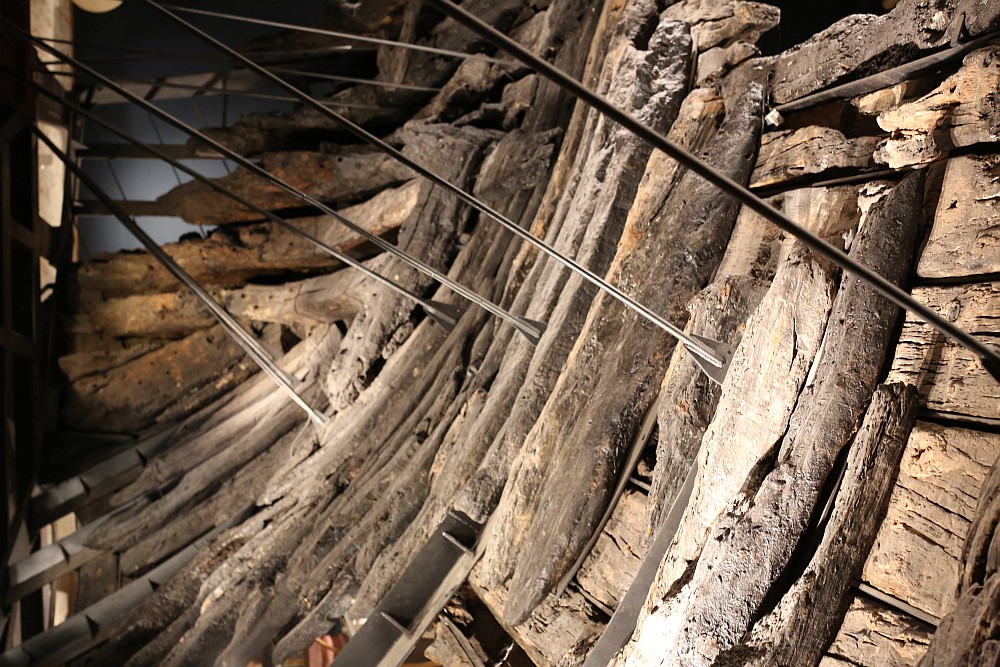
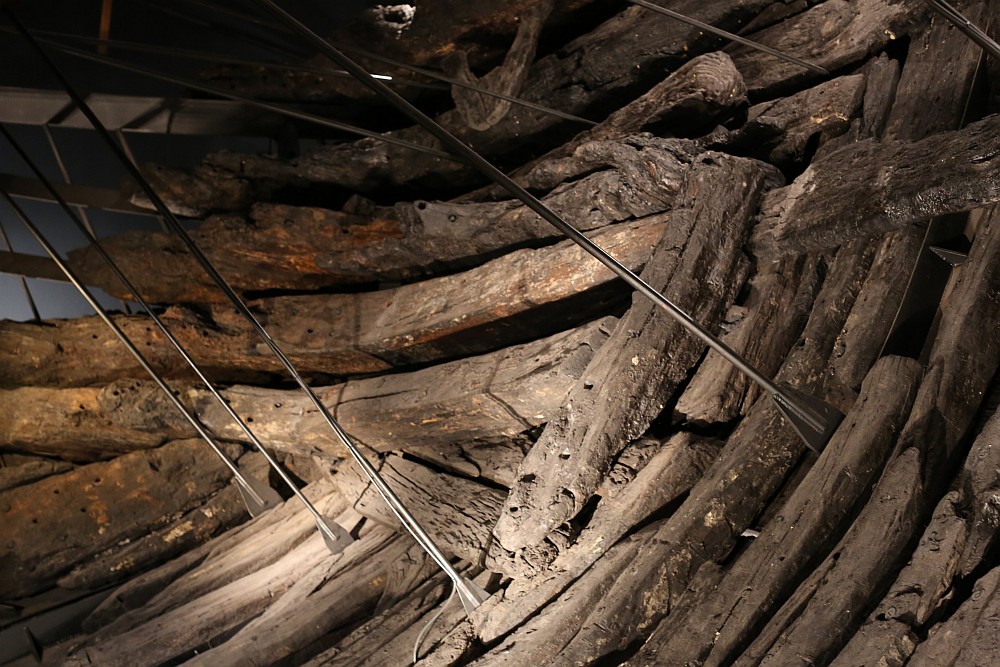
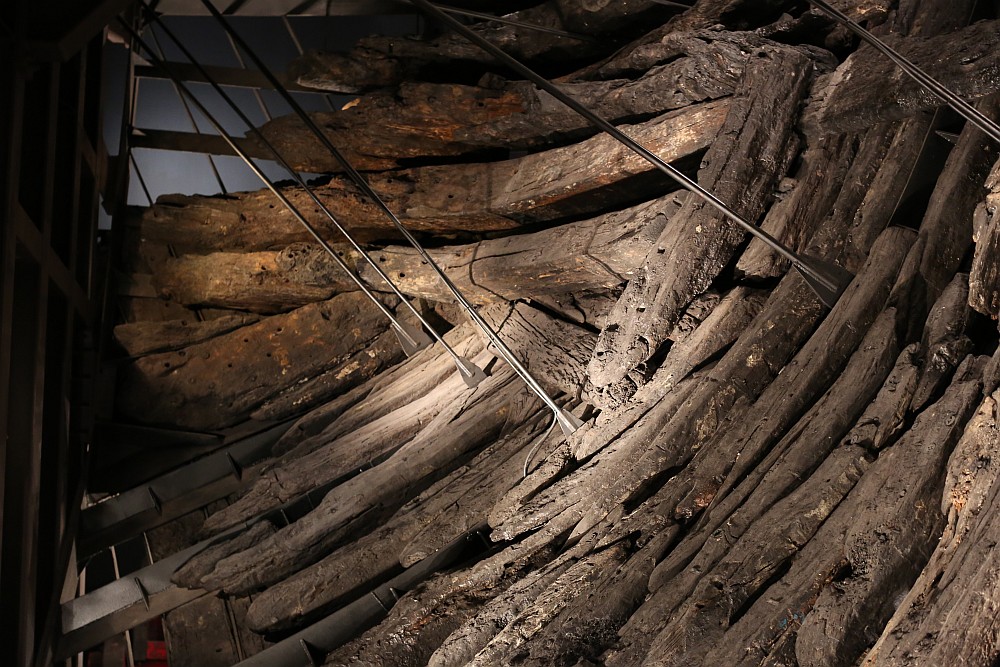
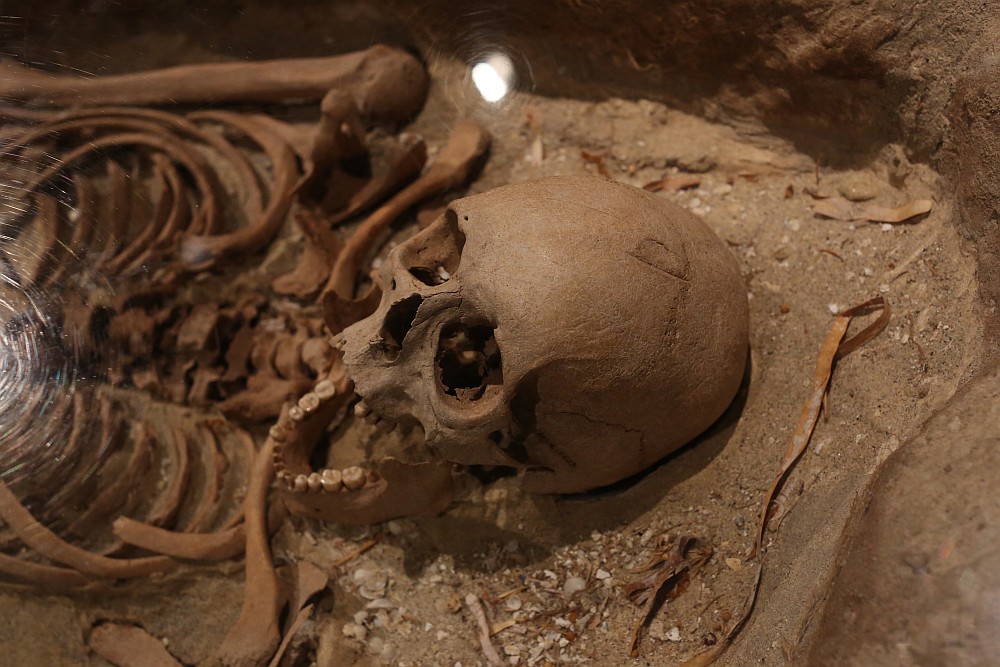
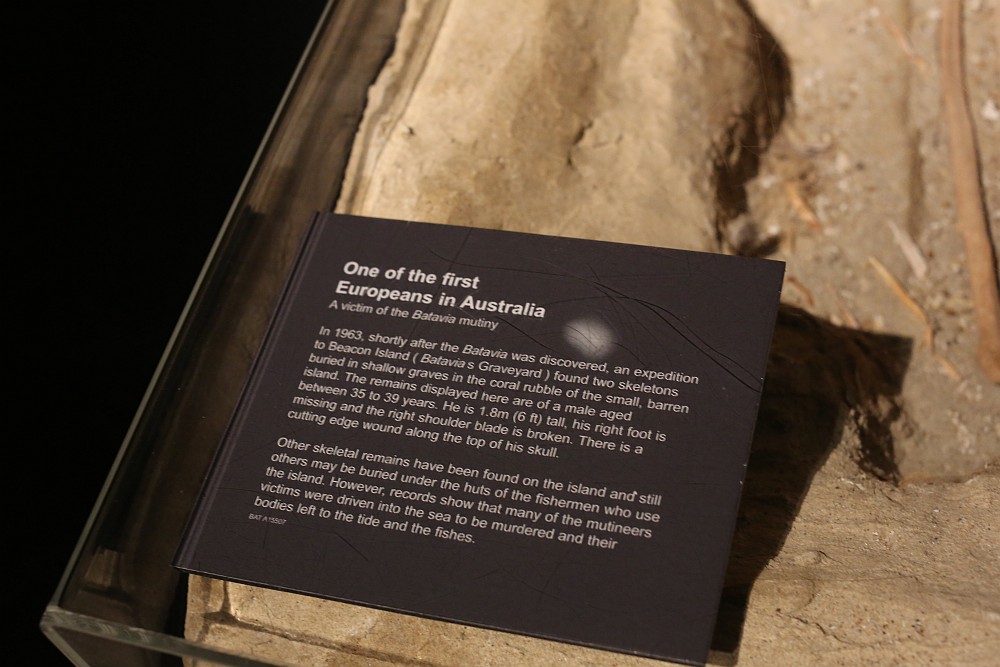
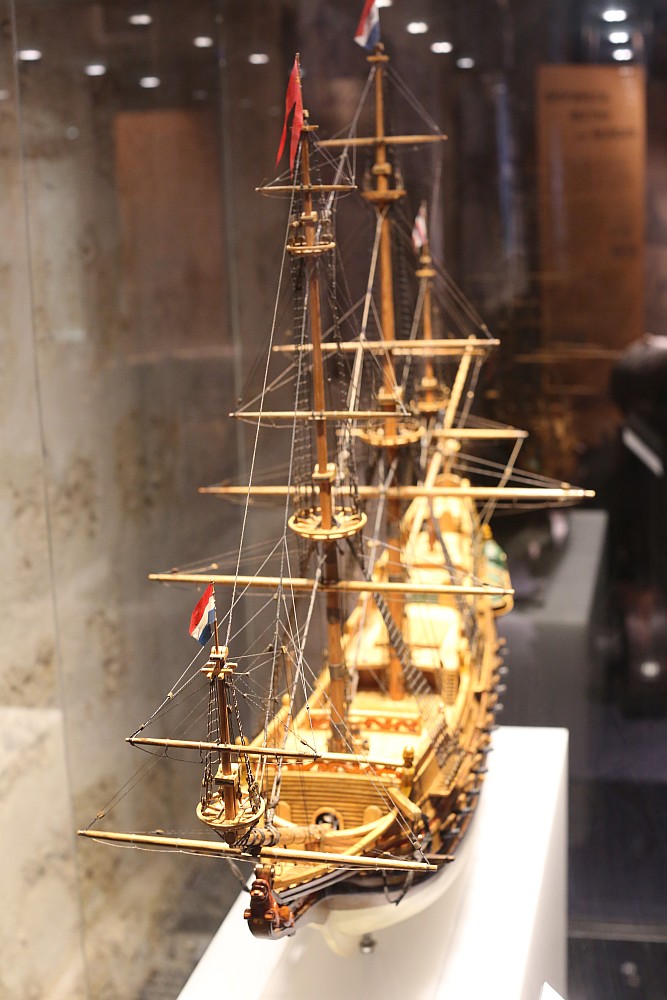
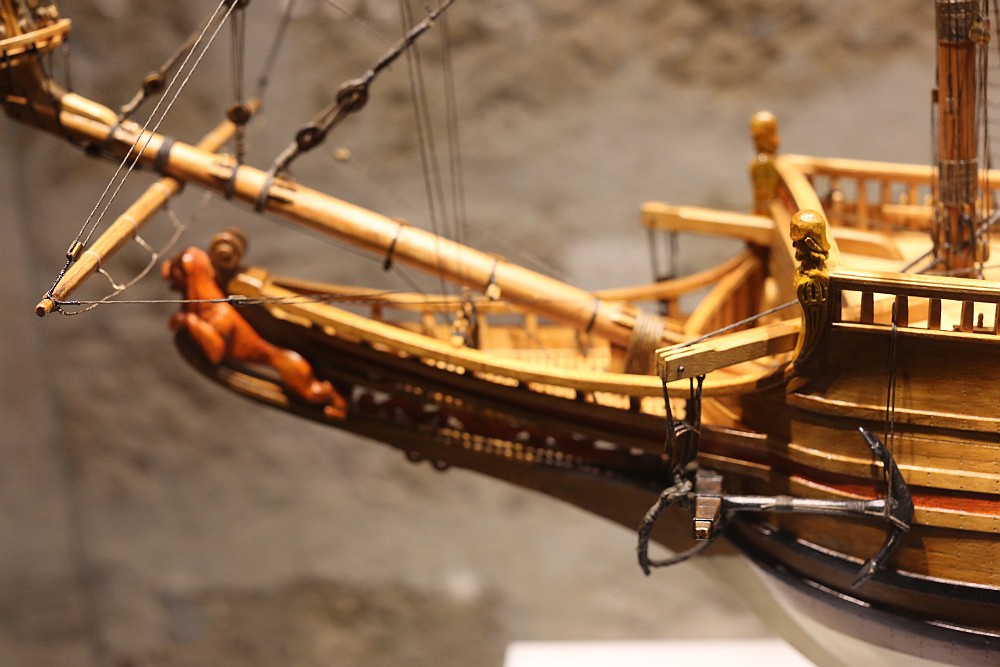
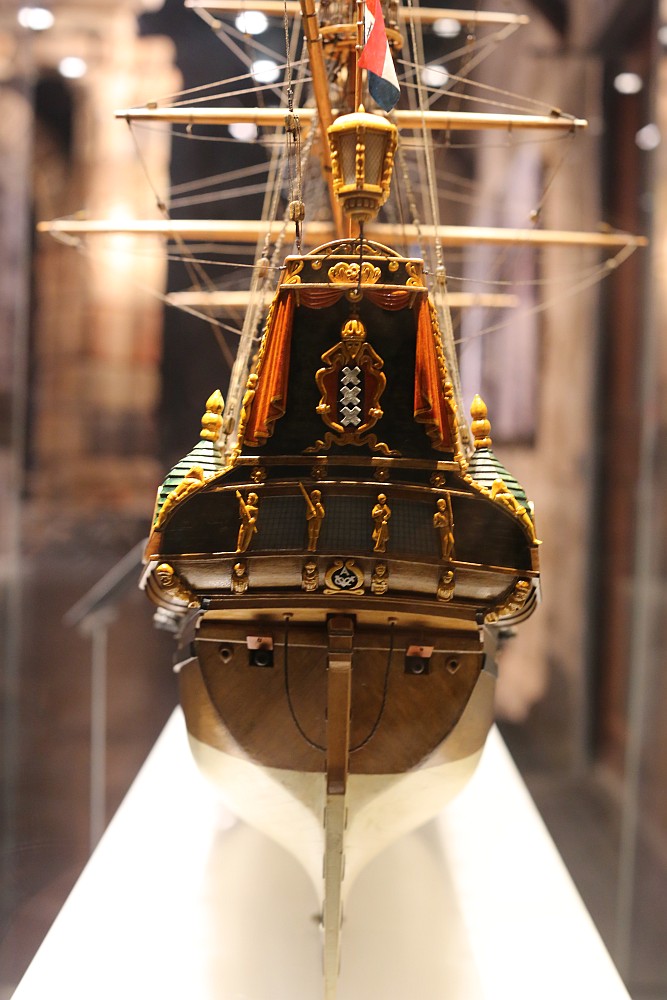
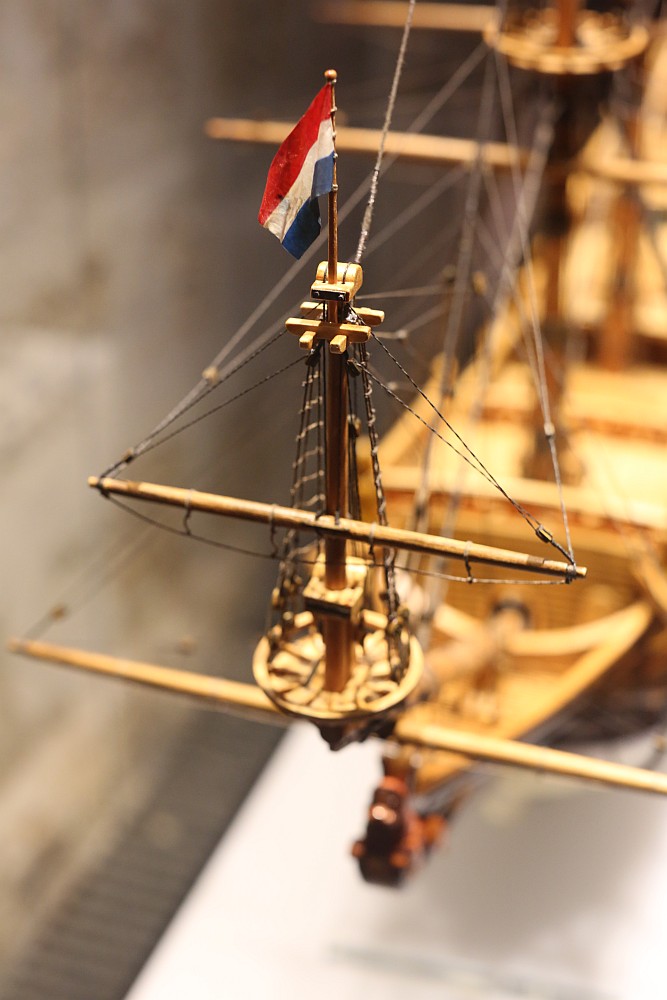
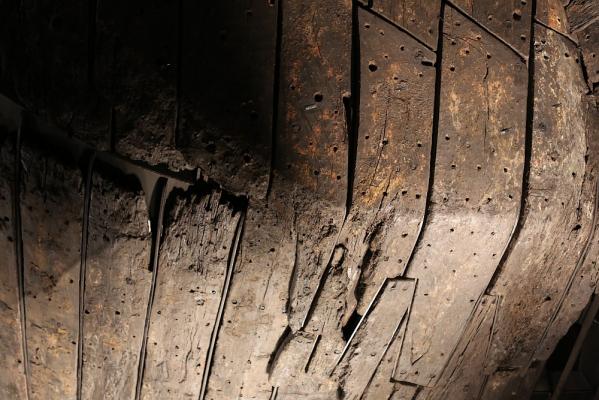
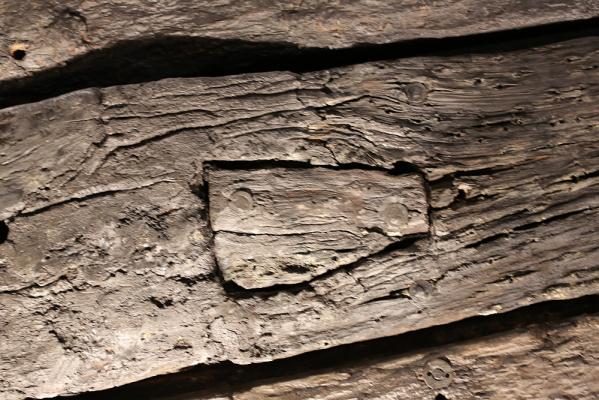
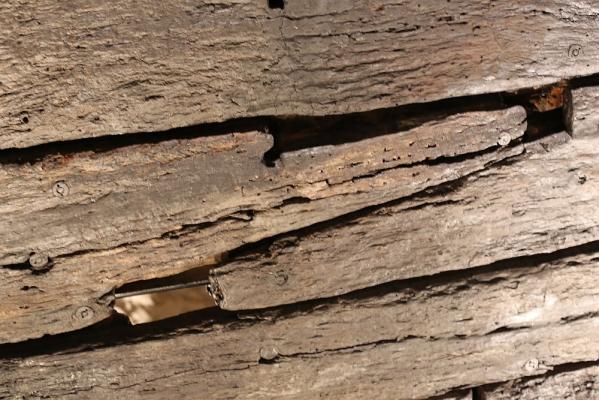
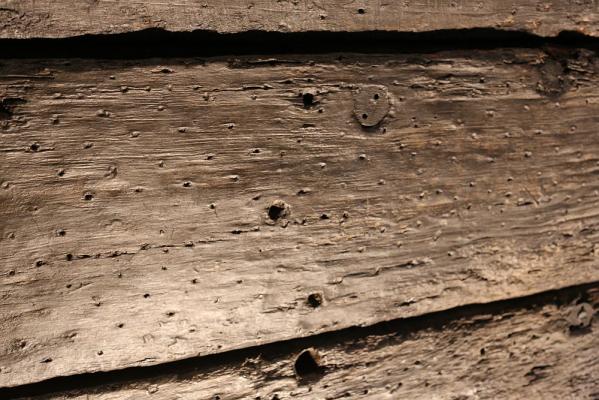
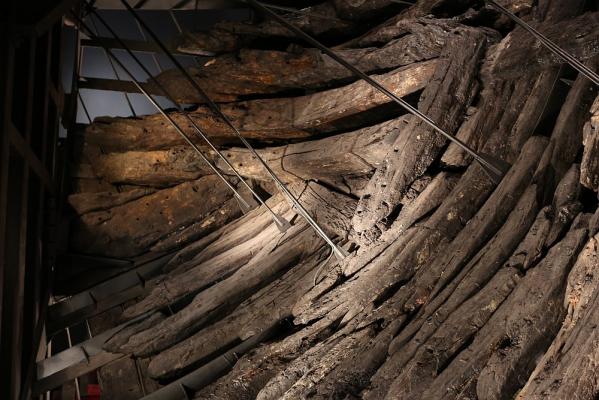
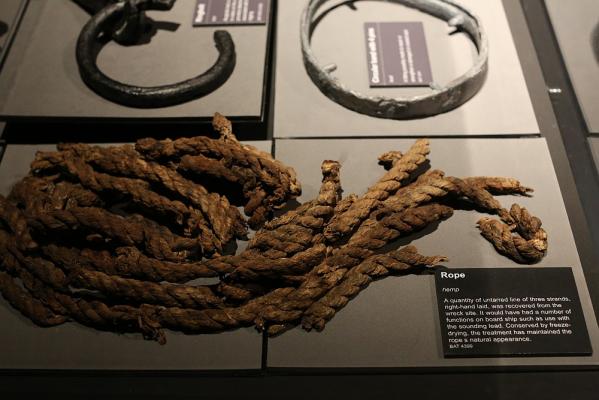
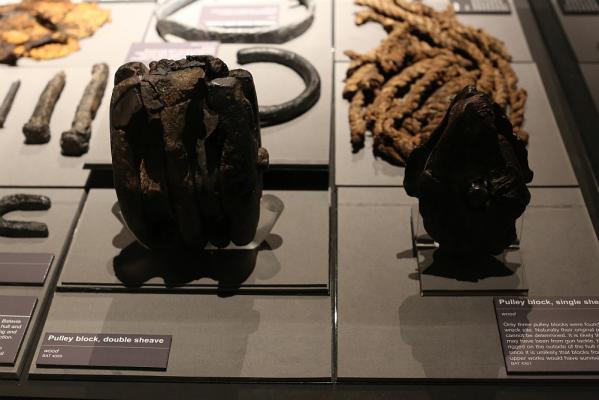
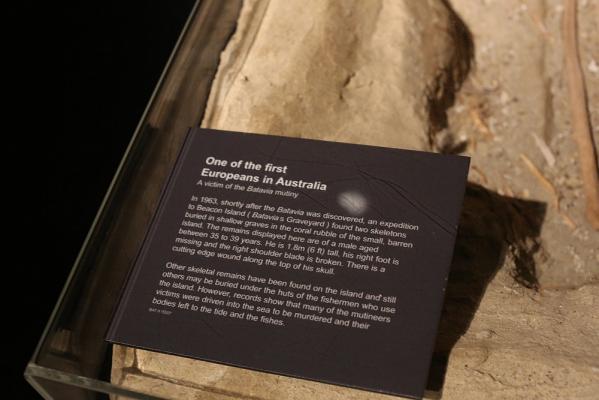
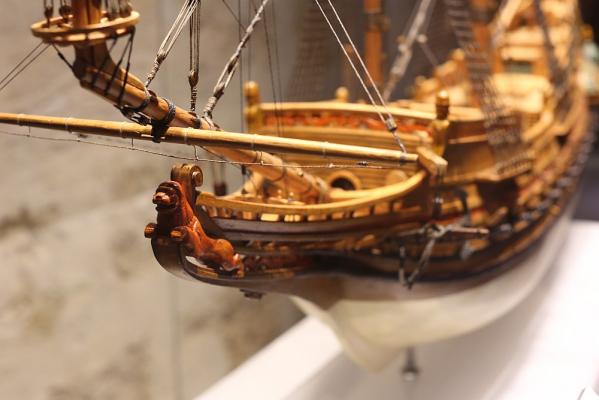
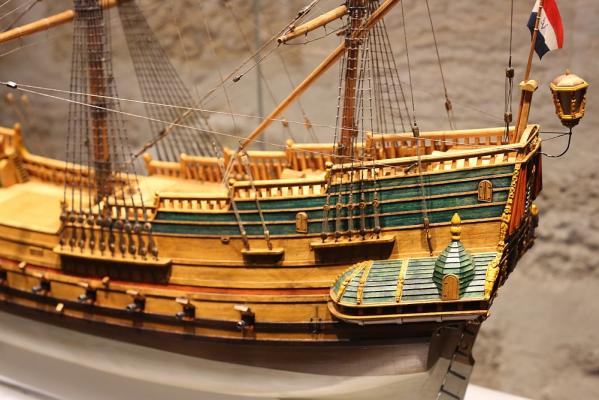
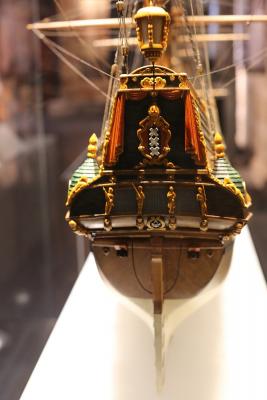
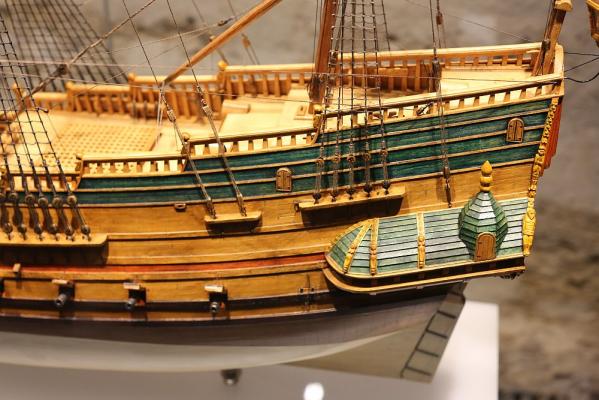
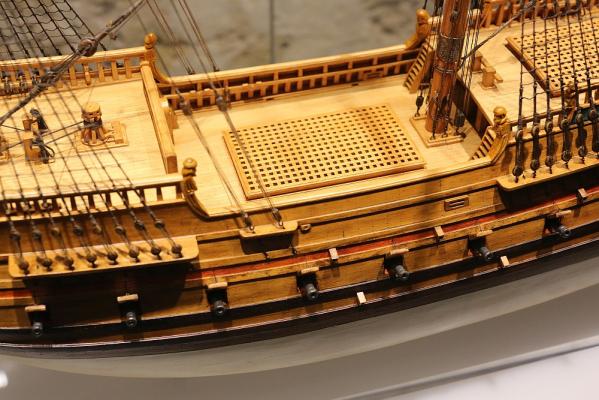
Here are more. View of the curved timbers at the stern. Where toledo worm had eaten holes in the hull, Dutch carpenters mended the damage with patches, as shown here. Scarph joint. I asked the tour guide what these little holes represented. He said that the hull was copper plated. I pointed out that the Batavia was launched in 1629, and that copper plating was only invented in 1750. He said that he will discuss this with the curator. Anybody know what these holes may represent? They seem too regular to be due to marine life. Pictures of the inside of the hull, looking towards the stern. Various artefacts recovered from the ship. A victim of murder. Note the hatchet mark on the skull.


-
I was going to create a new thread when I remembered there was an existing thread on the Batavia, so I decided to upload photos here instead. So here goes.


-
Batavia by *Hans* - FINISHED
Keith_W replied to *Hans*'s topic in - Build logs for subjects built 1501 - 1750
Hi Hans, great progress on your model. It just so happens that unfortunate circumstance brings me to Perth (friend's funeral). While I was here, I decided to visit the Batavia museum yesterday. I took MANY MANY pictures, which I will upload when I get back home to Melbourne later tonight. I am sure you will find these interesting. Re: the painting in your stern galley, may I suggest that it may be easier to print out the design on a colour inkjet printer and attaching the design to the stern of your ship? -
She looks beautiful! I have a suggestion, though. If you are not happy with the silver painted trim pieces, you can use Bare Metal Foil: http://www.bare-metal.com/ I have used their chrome foil when I used to build plastic models, and the result is absolutely convincing. You can apply this on top of your silver trim if you are still unhappy with it.
-
Jim Byrnes Model Machines
Keith_W replied to Mahuna's topic in Modeling tools and Workshop Equipment
My Byrnes disc sander has arrived. I can't believe the size of the motor on this thing. To put it in perspective, my Sherline 4410 lathe arrived at the same time. The motor on the Byrnes is larger than the Sherline! -
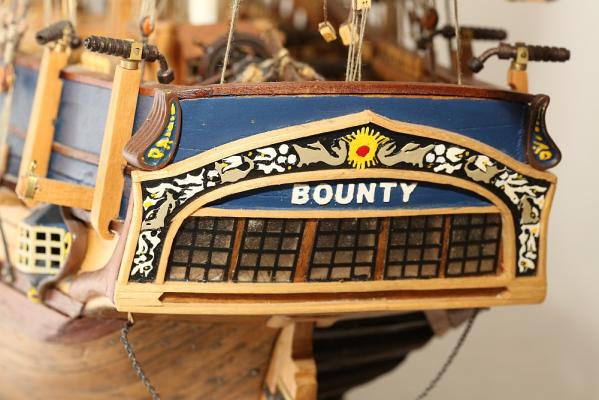
When I built my Bounty, I had to place letters on the stern. BOUNTY has six letters, so I placed U and N in the middle, then O and T, followed by B and Y. As you can see, the spacing is nice and even. For SHERBOURNE (with ten letters) it divides into SHERB and OURNE. I would place S ... B O ... E first and then place HER and URN once I have established correct spacing.
-
She looks great! Re: the missing cannon, can't you order a spare one from Corel? Alternatively, you could pull one cannon out and make a duplicate of it - either on a lathe, or you could mould one using Sculpey. Chuck has a nice tutorial on how to make a push mould using Sculpey in the articles and downloads section. A question if I may - how do you thread the ropes in and maintain tension? It looks as if you drill a hole through the lid, and another hole through the gunport, then feed the thread through the lid, then through the side of the ship, then back out the gunport? How do you get the rope back out again??
-
AL and Billings are almost mirror images of each other. The failings of one is the strength of the other. Accuracy: Billings are often more accurate, AL usually quite inaccurate. Also, many AL ships are vessels which never existed. They are products of the designer's imagination. Quality of wood: AL supplies excellent wood, the wood in Billings is terrible. AL boats look good if left unpainted, whereas Billings definitely need paint or stain. Fittings: AL fittings are cast metal which may be a little coarse, but looks nice. Good use of Photoetched parts. Billings fittings are plastic, they feel cheap, but looks OK when painted. Instructions and plans: nearly indecipherable in AL, decipherable in Billings but too sketchy.
-
Thanks Steve. You would be grumpy too if you were sitting in a crappy boat that I built Bligh was made from Super Sculpey. Read Chuck's instructions on how to use Sculpey here: http://modelshipworldforum.com/ship-model-furniture-and-deck-fittings.php Also look at Doris' Royal Caroline build log. Somewhere in there she has a tutorial (with video) on how to use Sculpey.
- 78 replies
-
- 1
-
-
- model shipways
- bounty launch
- (and 1 more)
-
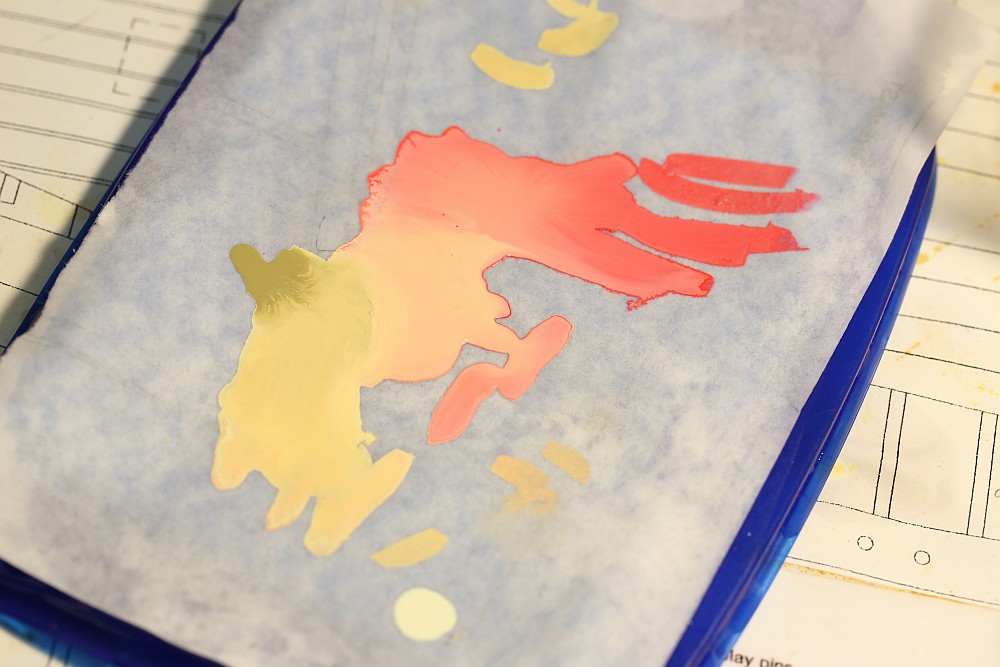
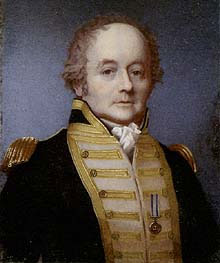
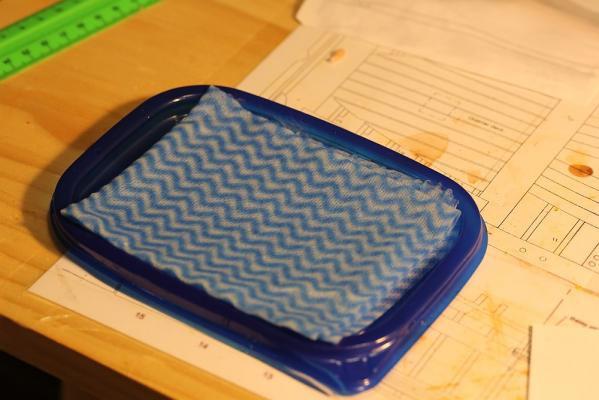
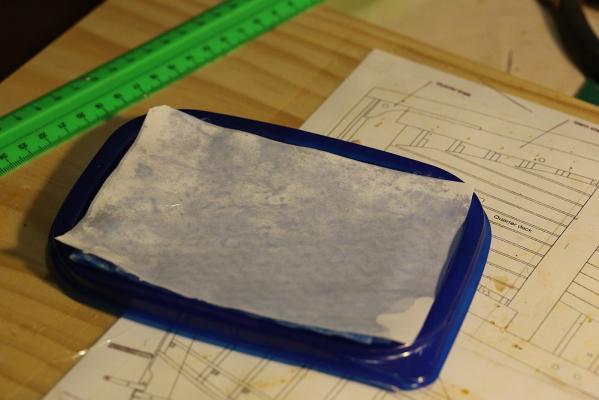
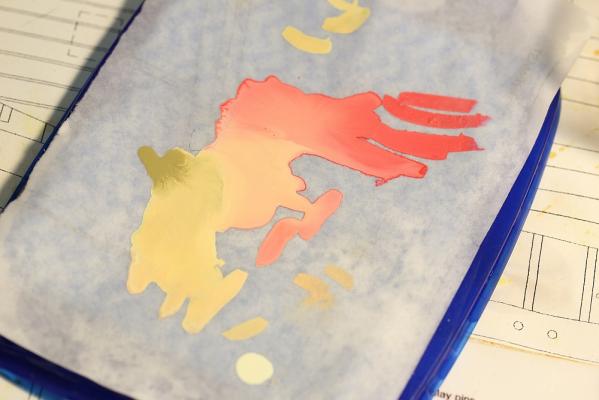
Thanks again everyone. When I get home, all I want to do is go to my little hobby room and do work. It does keep my mind off things. Anyway, I have finished painting the figure of Captain Bligh. This is what he looked like: I tried my best to sculpt a figure in his likeness. I think I have only partially succeeded. For those who are interested in painting technique, this is how I did it: 1. Sculpt the figure and thoroughly sand it. Then clean it in soapy water and dry. 2. Prime the figure using the recommended primer for your brand of paint (I used Mr. Hobby Primer, which works for the Vallejo paints I am using). 3. Apply a uniform base coat - in this case: flesh for face and hair, blue for jacket, ivory white for vest and trousers, leather brown for boots. 4. Use a wet palette to blend colours, then repaint the figure. This is how a wet palette works. Place absorbent material in a container. In this case, I used a disposable plastic lid with disposable kitchen wipe. Fill the palette with water until it is slightly below the level of the folded kitchen wipe, then place plain paper on top (I used typing paper). Add your colours and blend. Here are the three colours I used to paint the face - basic flesh, red, and beige. You can see that the variation in colour is smooth, allowing me to paint different parts of the face in subtly different shades. Using the blended paint, paint your figure. I like Vallejo because the pigments seem to be ground much more finely than other brands, so it is good for detail work. Why use a wet palette instead of a normal (dry) palette? Two reasons: 1) it keeps your paint from drying out. Vallejo acrylics dry VERY FAST. If you use a dry palette, you are racing against time to paint your figure. 2) it helps dilute the paint and makes it flow better. It is now more than 24 hours since I painted my figure, and the paint in the wet palette is still usable even though conditions here in Melbourne are pretty dry and warm at the moment.

- 78 replies
-
- 6
-
-
- model shipways
- bounty launch
- (and 1 more)
-
I did warn you about the short thwarts Anyway she's looking beautiful. So clean, so neat, so sharp. Well done!
-
Thank you for the condolences everyone. If you look at the Viking Ship in my signature, that was made for him. I gave it to him for his 40th birthday, which was not all that long ago. I was going to build a Vasa for him as well. I guess i'll do it for his children. (edit) here is a picture of us. I'm the Asian guy on the left. Daniel, bless him, has left us. I don't know why I am still awake. I better go to bed now

- 78 replies
-
- 2
-
-
- model shipways
- bounty launch
- (and 1 more)
-
No need squeaky track sounds, the tracks are metal and they squeak by themselves. Take a look at some of the other videos