ccoyle
-
Posts
10,354 -
Joined
-
Last visited
Content Type
Profiles
Forums
Gallery
Events
Everything posted by ccoyle
-
 I vote for white interior -- just seems like a more usual color for boats.
 -
Cowling is finished and the intake at the bottom (oil cooler intake, maybe?) and exhaust pipes have been added. A certain amount of guesswork went into the latter two constructions, as there were no close-up diagrams for either of them, and the instructions for this kit are ludicrously terse.
- 80 replies
-
- 18
-

-

-
Imagine the chaos when the ropes were uncoiled and being worked by gun crews in action.
-
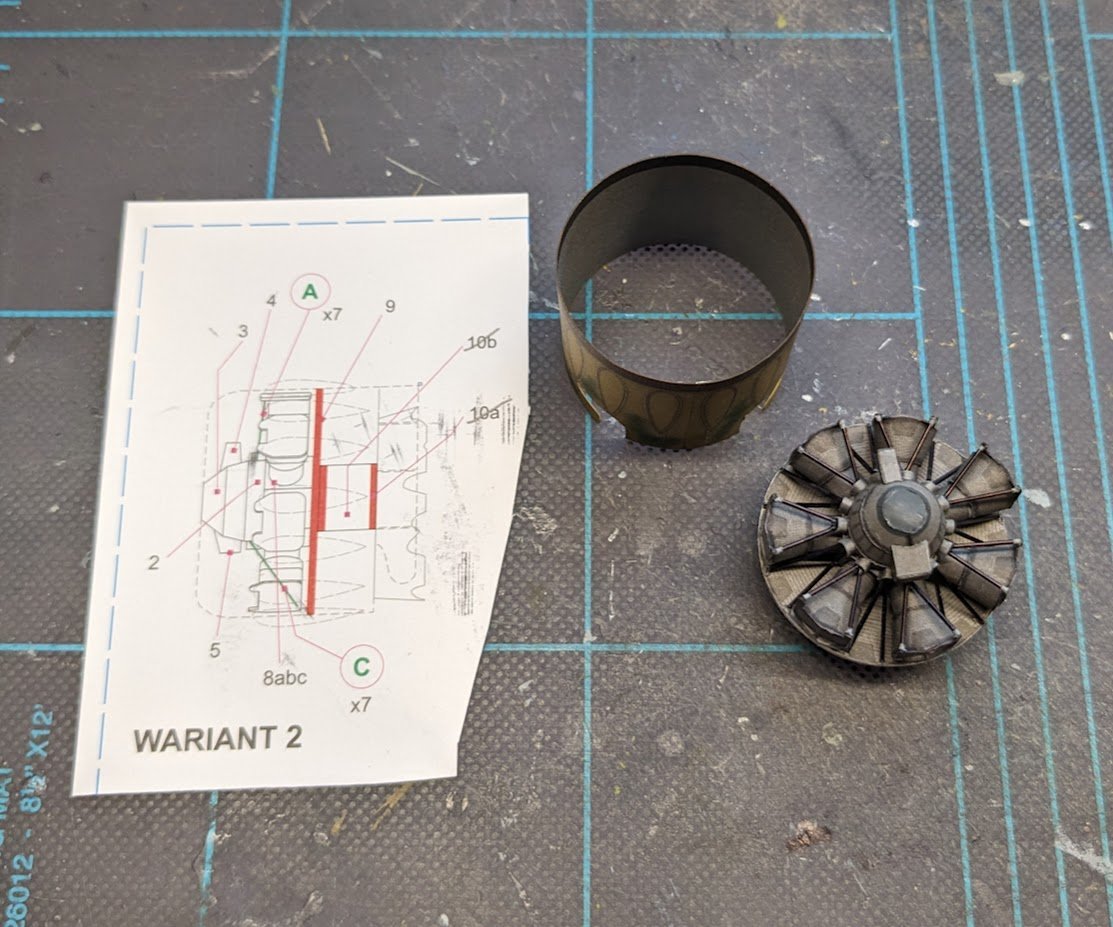
Okay, a little bit of good news, a little bit of not-quite-as-good news. I have the engine completed. As you may recall, I chose the median option, i.e., a printed rear bank of cylinders coupled with a 3D front row. It doesn't look terrible, even considering that I transposed the two box-like doohickeys (parts 4 and 5) on the top and bottom of the case -- oh, well. Since I'm not building a full engine, I'm also not going to attempt any super-detailing like I did for the Wildcat. Don't worry about the funny color on the front of the case -- that will be almost entirely hidden by the propeller eventually. I also made the main cowling ring. The ring just happened to fit precisely around a bottle of craft paint, so by dampening the ring and allowing it to dry while clamped around a bottle, I achieved a very nice circular ring. And now for the mildly annoying part. The printed rear cylinder bank and its laser-cut false bulkhead do not fit inside the cowling. I have already done two rounds of sanding on the bulkhead to get it to fit, but it's still too tight. I will have to work on this some more later this evening. UPDATE: It took five sanding passes in total to get it to fit. That's all for now!
- 80 replies
-
- 15
-
-
I can't speak to the Amati kits without knowing which one's you're thinking about. Billing Boats also offers a number of kits with plastic hulls. And yes, many kits with plastic hulls are aimed at the RC market.
-
Well, I was only five when that one came out, so maybe you guys are dating yourselves. 😉
-
You got that right. I wish I had a dollar for every shared picture I've seen in the last year or so that featured an "amazing" but obviously doctored animal image. 🙄
-
😂 Yep, a pretty homely airplane with an unenviable service career -- but that doesn't mean it can't make a great model. Good luck!
-
It's amazing to think that all of the various Star Wars vessels were built by skilled model makers back in the days before CGI. When I was a kid (I was thirteen when Star Wars hit the big screen -- saw it seven times during its original theatrical run), I built my own 'space vehicle' out of scrap plastic model kit parts. It wasn't much to look at, but I had fun building it. My kids can't really relate to the magnitude of the original Star Wars phenomenon (diminished since then by the proliferation of inferior prequels, sequels, and TV series) -- it marked the absolute demarcation between old sci-fi films and all of the big-budget spectacles that came after. Nothing like it had ever been seen on screen before.
- 86 replies
-
- 10
-
-
I'm not seeing that equipment in other images. Since she has been in service for 36 years now, it's quite likely that her configuration has changed multiple times. You may need to narrow your search to a specific time period.
-
Very handsome!
-
Welcome aboard! That's a very nice first model you have made -- hopefully you were able to repair the damage?
-
Looks great -- and something a little off the beaten path as well!
-
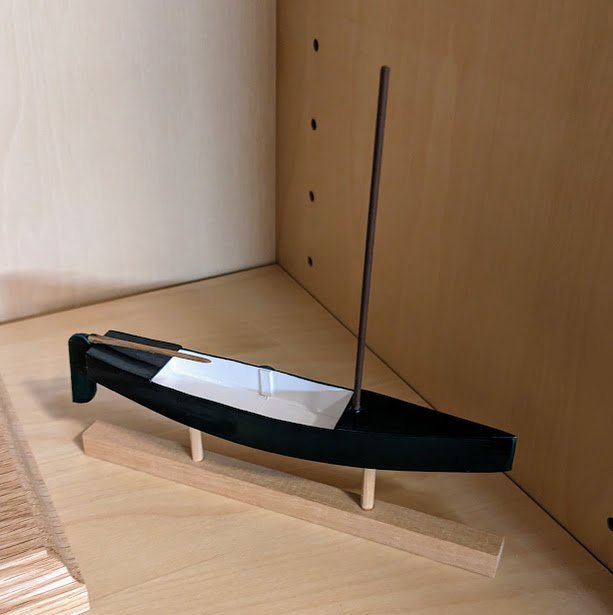
Moin moin, Christian! You can absolutely start out by scratch-building smallcraft, such as skiffs, prams, etc., if that's something that interests you There is a wealth of plans available for such craft both online and in books and magazines. Many of those plans can be had for free. Besides wood, card is also an excellent medium for such models. As just one example of what can be accomplished with card, some plans from a book, and a bit of determination, here's a picture of a Bolger sailing pirogue I built years ago. Good luck with whatever you choose!
-
Please, please, please not another Connie!! 🙄
-
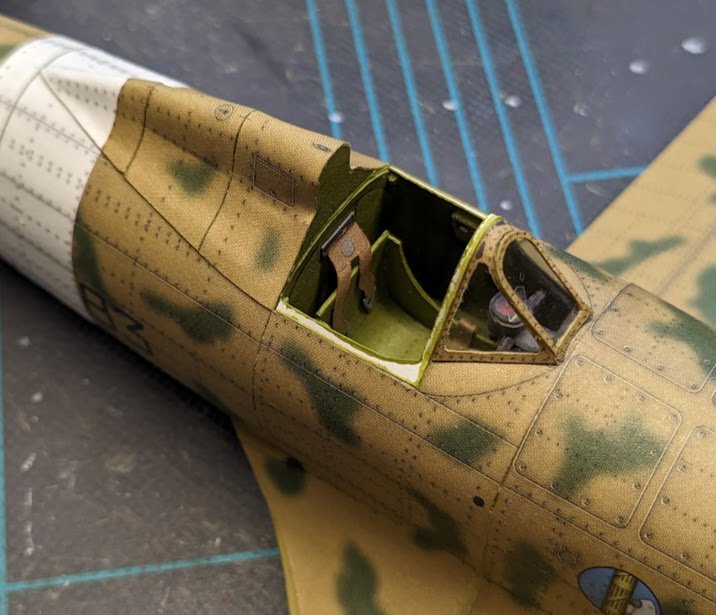
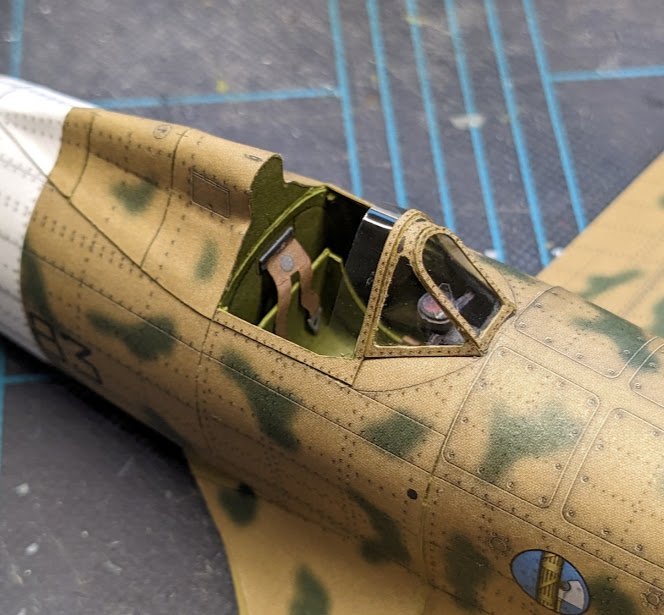
Got a few more bits added today. The kit includes laser-cut gun barrels with cooling jackets. These weren't the easiest tubes to roll, but I managed. After cutting out the recesses for the guns and installing them, I next added the wingtip navigation lights and gunsight reflector, then commenced with the windscreen. The kit didn't come with a pre-molded canopy, so the windscreen had to be built up with separate panels. I still haven't found the perfect clear plastic for making canopies. In the past I have used overhead transparency film, which is too stiff. This time I tried using the transparent sleeve that the laser-cut gun barrels came in. This didn't prove wholly satisfactory, either -- too flimsy, in this case, but I made do with it, because I had no other options on hand. The finished panels are not perfectly flat, and that error shows up when light glints off of them, so the secret is to avoid viewing the model under bright lighting. 😬 This particular aircraft has a very odd "canopy" -- the sliding portion has only a single piece of glazing forward. To make the canopy, I started by adding the internal frame (there was no internal framing included for the windscreen), then layered on the glazing and external frame. The result is not terrible. And that's it for now.

- 80 replies
-
- 15
-
-
-
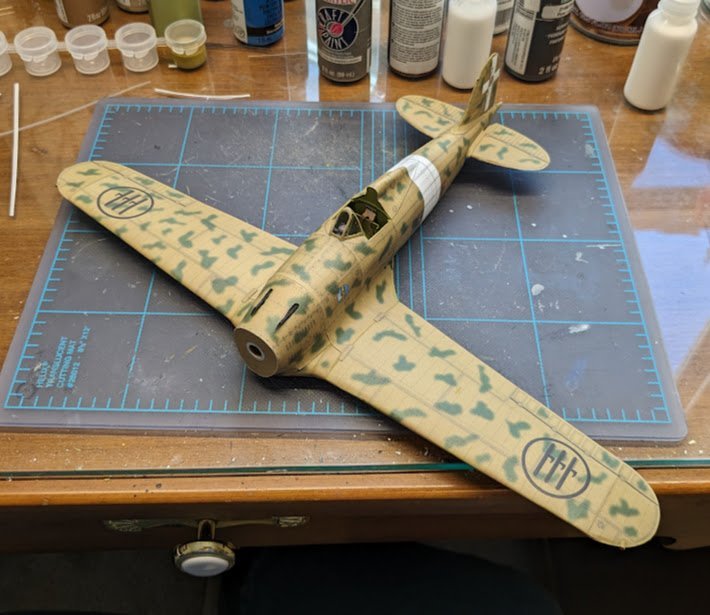
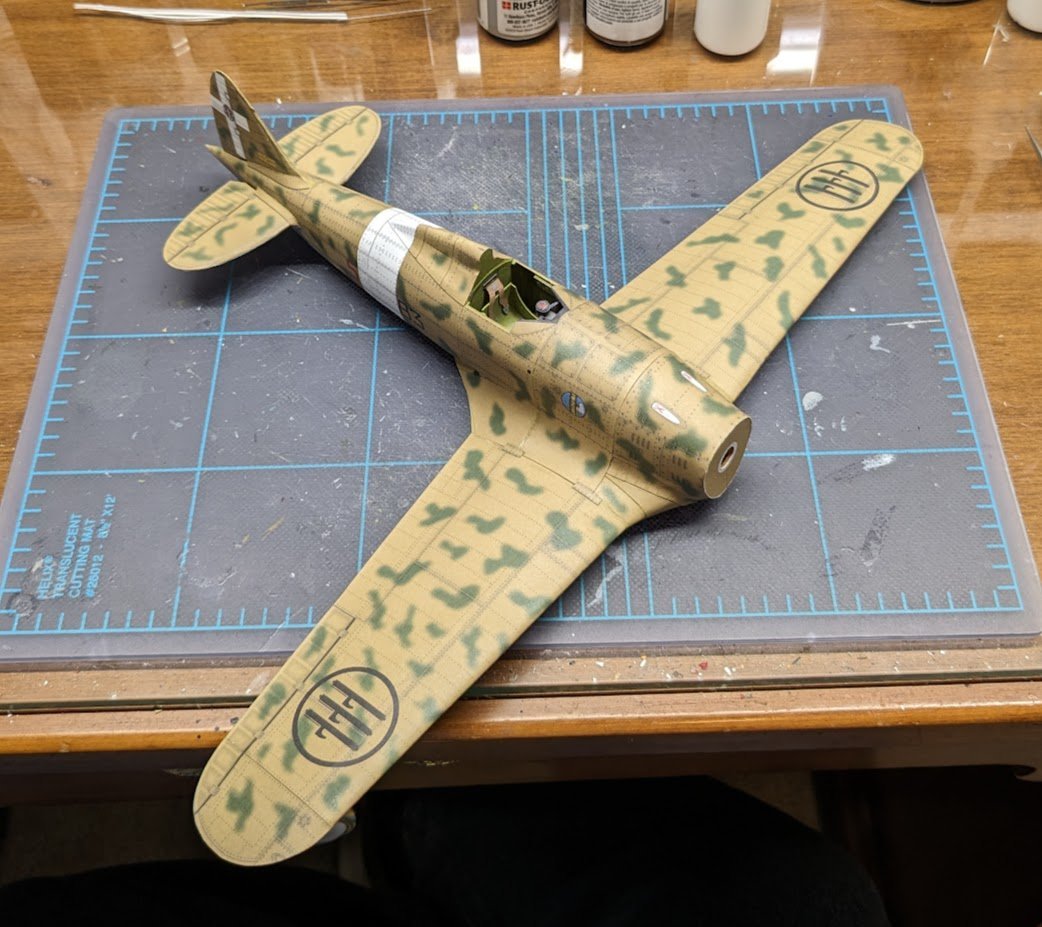
Actually, I was concerned about the near-impossibility of getting the skins of adjacent sections aligned properly with butt joints. I find the seams of butt joints to be problematic at best. Anyways, the wings are on now!
- 80 replies
-
- 17
-
-
-
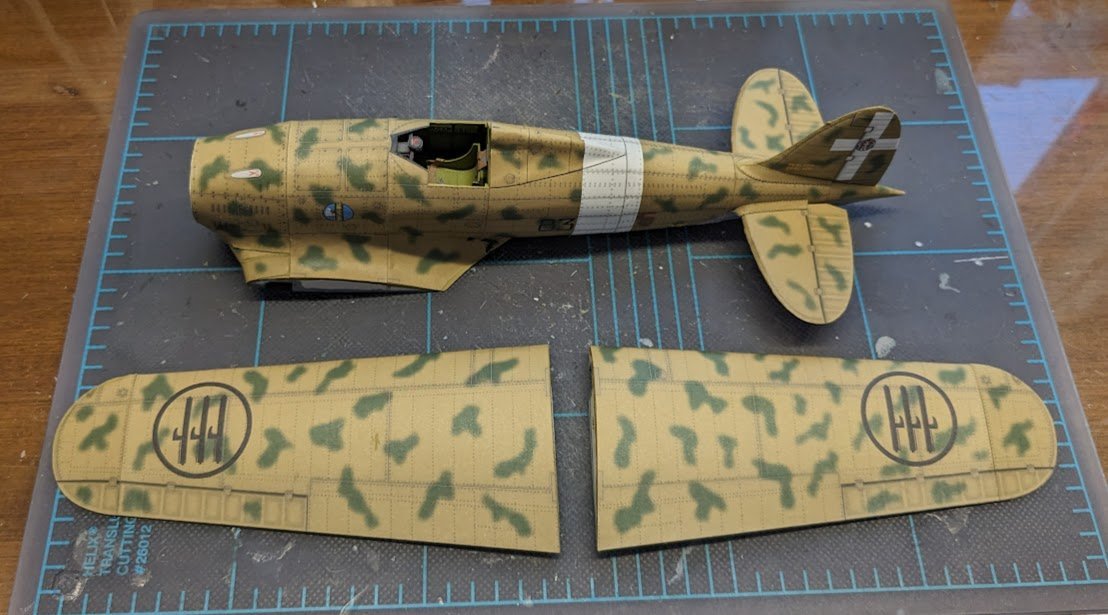
The wings are now skinned and ready to be glued to the fuselage. I added some sheathing to the wing frames to increase the gluing area, and I also sanded both wing roots and the fuselage to make the pending butt joints as tight as possible.
- 80 replies
-
- 14
-
-
-
Welcome aboard!
-
On a side note, I would consider the framing in this kit to be "moderately beefy", that is, better than no framing at all, but not as good as it could potentially be with the addition of a few more pieces. To illustrate what I mean, compare the Saetta framing to that of Halinski's Bf-109E-4 kit. It's a pretty stark contrast.
- 80 replies
-
- 13
-
-
You can try looking here.
-
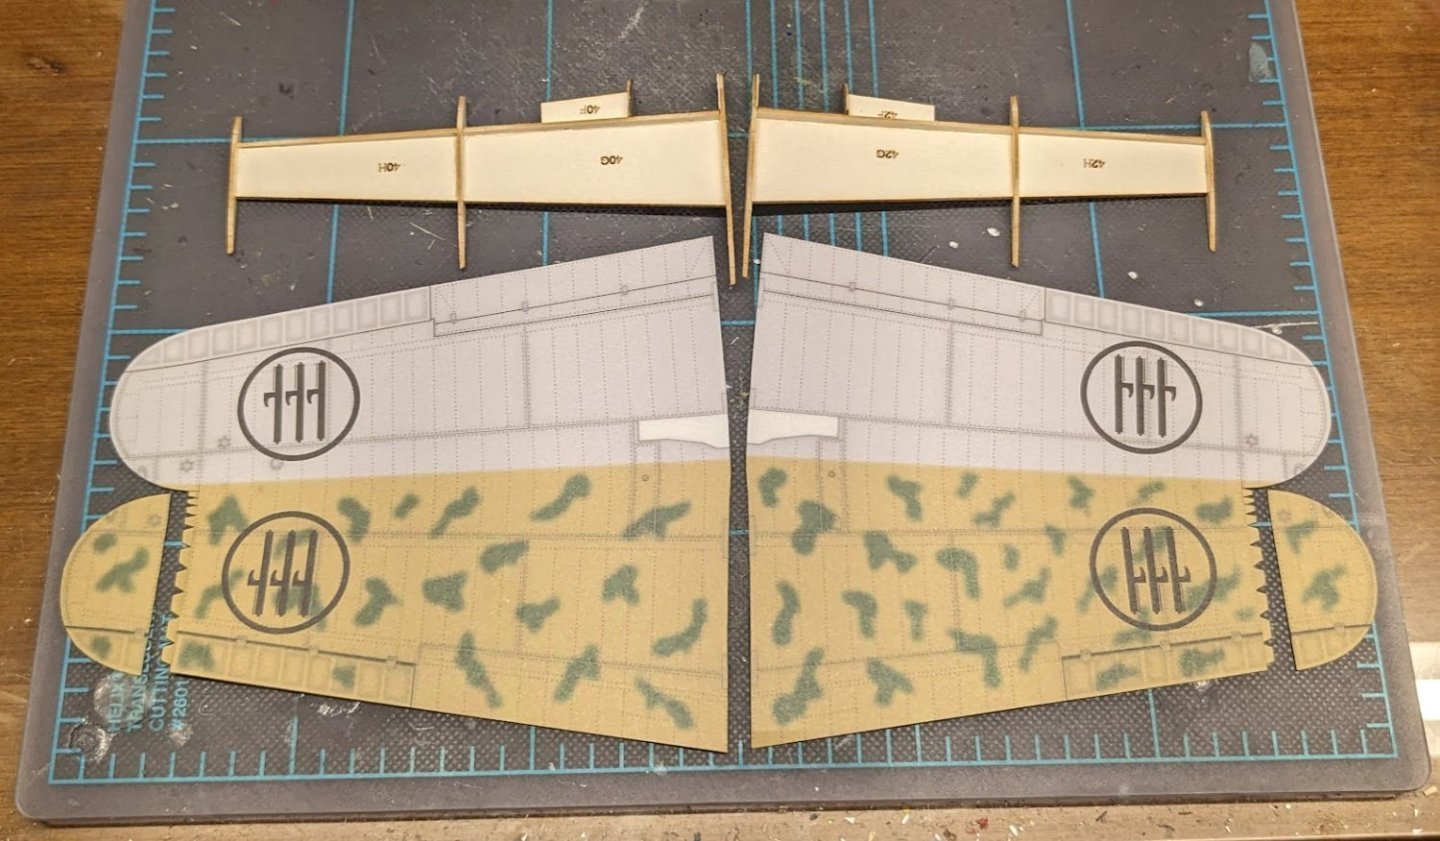
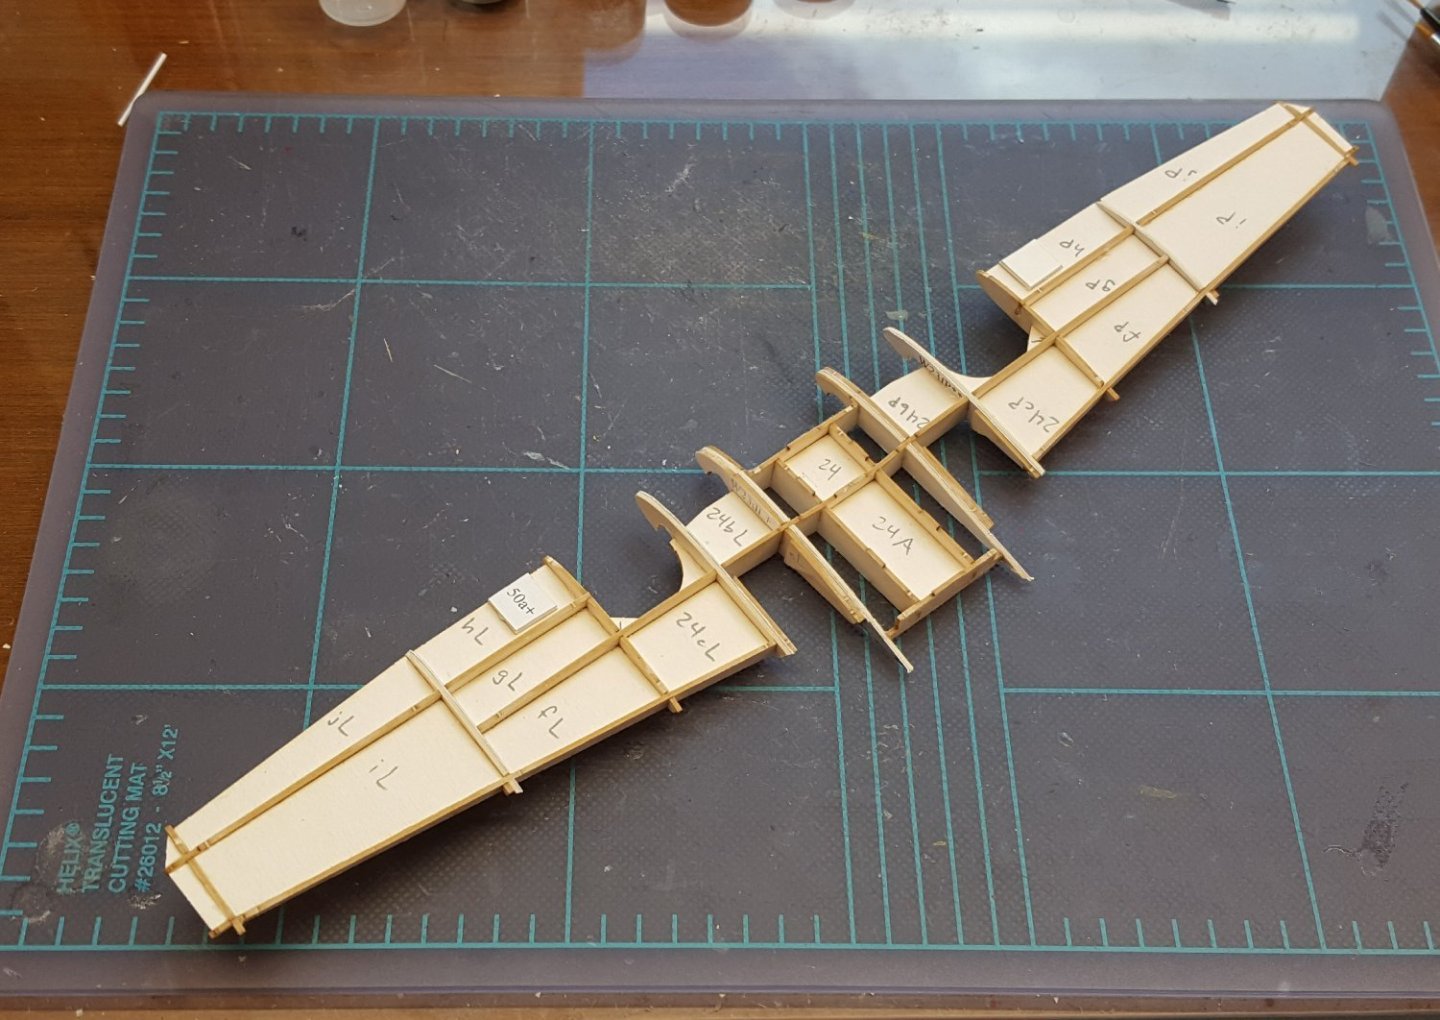
Wing frames completed and skins prepped. You may notice that there are no joiner strips attached to the wing roots -- the wings are meant to be glued to the fuselage with butt joints. Seriously -- who does that? 🙄

- 80 replies
-
- 14
-
-