russ
-
Posts
3,086 -
Joined
-
Last visited
Content Type
Profiles
Forums
Gallery
Events
Everything posted by russ
-
Augie: Thanks for dropping by. The deck house will be painted, as will all deck fittings. Russ
-
It is coming along well. Details are important on a large scale model of a small boat. Yours are looking good. One question. Are you doing the planking details on the seats off the model and then installing the seats as completed units? I ask because the caulking details are bold. If they are good for you, then no problem. If scale is an issue there, you might want to see if you can tone them down. It is your choice though. Russ
- 153 replies
-
- 1
-

-
- musongus bay
- sloop
- (and 1 more)
-
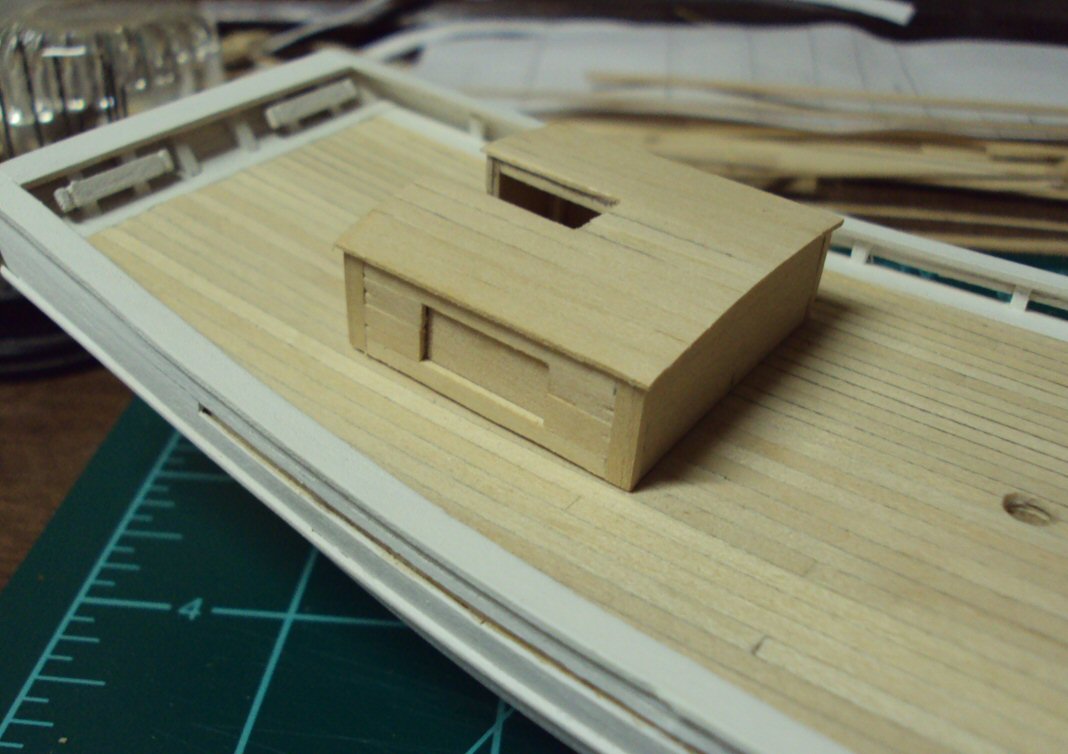
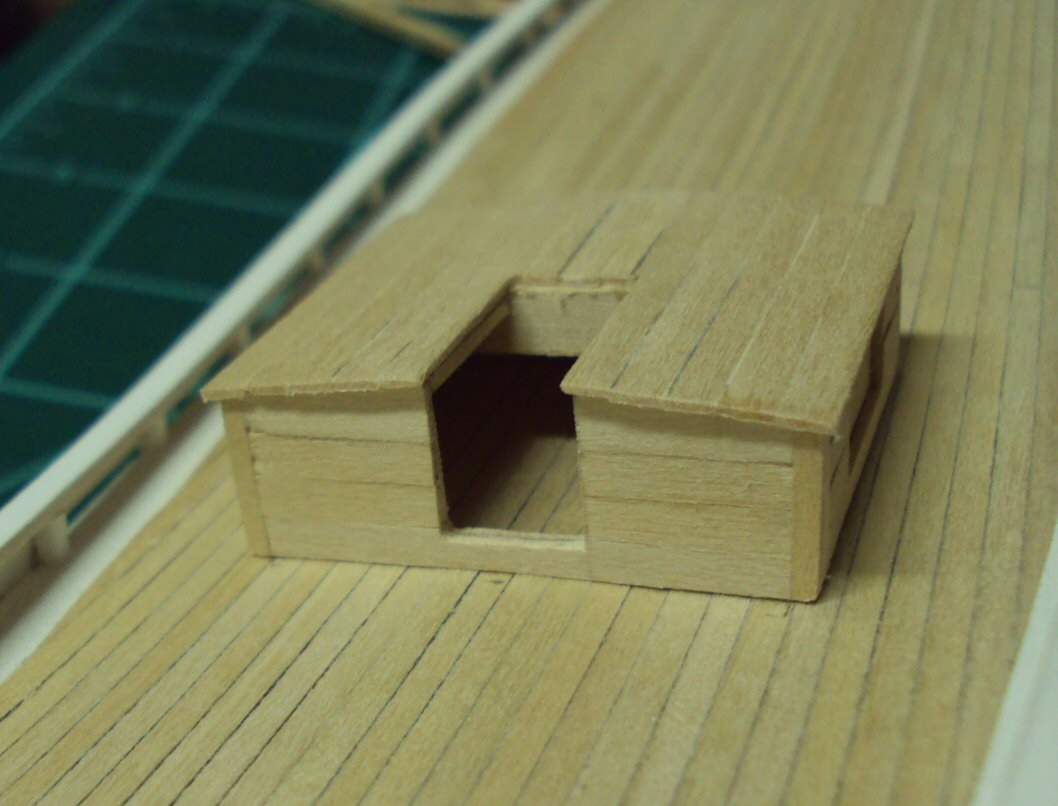
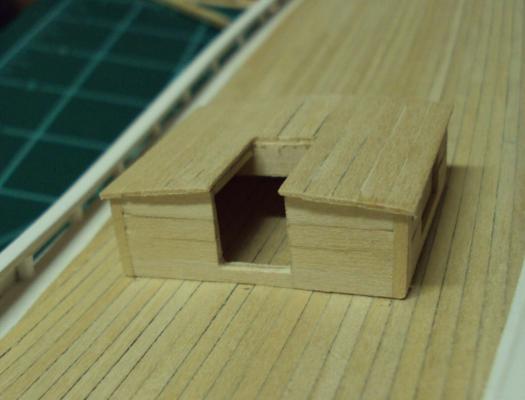
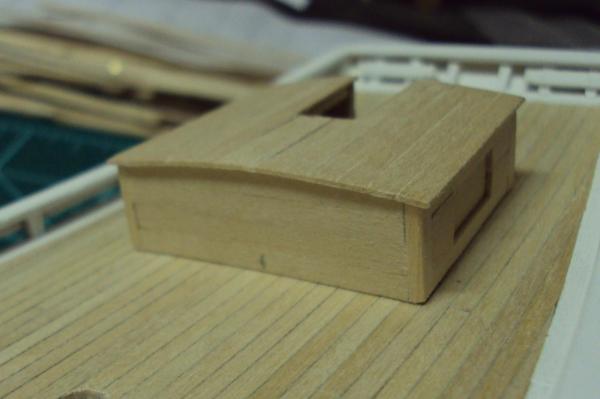
Here is a small update. I have completed the shell of the deck house. It has planked sides and roof with false openings for windows on the sides and an opening for the door and sliding hatch on the aft side. There is still some fitting to do around the bottom edges of the house. Feel free to comment and ask questions. Russ

-
That looks pretty good. It is important that you are creating something for yourself and having fun doing it. Russ
-
The slats (47) were probably fastened to a framework (46) to make up one hatch cover and then they had four separate hatch covers made like that. That would make sense. What would make more sense is to have a single piece of wood for the hatch cover rather than the separate slats attached to the framework. The two holes on either end were hand holds to lift the covers off. Russ
-
Gary: The guns look very good. Great work. I usually make the coils separately. I cut the tackle lines and glue the end to the deck and the glued the coil to the deck on top of the line so it looked like it was all one length of line. Russ
- 206 replies
-
- 1
-
-
- fair american
- model shipways
- (and 1 more)
-
The deck planking and hatch coamings look great. Very nice work on the corner joints. Russ
-
Those look very good. It is always good when you can bring your own enhancements to the kit. Great work. Russ
-
Congratulations on a fine model and build. Excellent work. Russ
- 11 replies
-
- 1
-
-
- sultana
- model shipways
- (and 1 more)
-
Ken: The capstan is something that will catch a lot of attention. I think what you have so far is okay, but it could use a little refinement. Maybe softening the various edges a bit etc. Will you paint it? Russ
-
Good looking hull. The planking shows very nice hull lines and the keel, stem, and sternpost bring the entire thing together very well. Great work. Russ
-
Frank: Thanks for the kind words. Anything I can help with, let me know. Russ
-
Mark: Thanks for looking in and for the very kind words. I have a little more progress and I will post it as soon as I can get some photos. Russ
-
Mark: I would plank the entire deck before putting any deck furniture in place. This makes the deck easier to sand/scrape after planking. However, keep in mind that there would not be any butt ends in the deck planking in the way of the deck furniture. The butt ends occur outside the width of the deck furniture. Russ
-
Those trucks came out very well. Great work. Russ
-
So far the planking looks very good. Russ
-
Sam: My theory is to give it as much strength as you can. Better safe than sorry. If it is glued and pinned, it should be okay. (famous last words) Russ
-
Schooner plank length
russ replied to riverboat's topic in Building, Framing, Planking and plating a ships hull and deck
Frank: For scale length planks, anything in the 15-25 ft range would be okay. Russ -
It looks great so far. The side tackles came out well. Nice work. Russ
-
Very good work. The extra glue surface you get with the joinery will add strength to the piece. Russ
-
Adam: The trim work looks great. Good call on the tone of the colors. Russ
-
Sam: Thanks. Will do. Russ
-
You did a good job with the deck planking, especially given the fit problems. There are a couple of reason to fit the deck planking before the hatches. One, if you lay the deck first, you can sand/scrape the deck smooth first without anything being in the way. It is easier to make a good job of the sanding/scraping that way. The second is what you encountered. It is easier to make the hatches fit the plank widths than the other way round. Russ
- 264 replies
-
- 2
-
-
- rattlesnake
- model shipways
- (and 1 more)