KeithAug
-
Posts
3,986 -
Joined
-
Last visited
Content Type
Profiles
Forums
Gallery
Events
Everything posted by KeithAug
-
 Keith - the soft jaws on the vice plus only light clamping pressure preserved the shape. Druxey, Pat, Michael, Bedford - glad you liked it, sometimes the simple solutions take the most thought.
 -
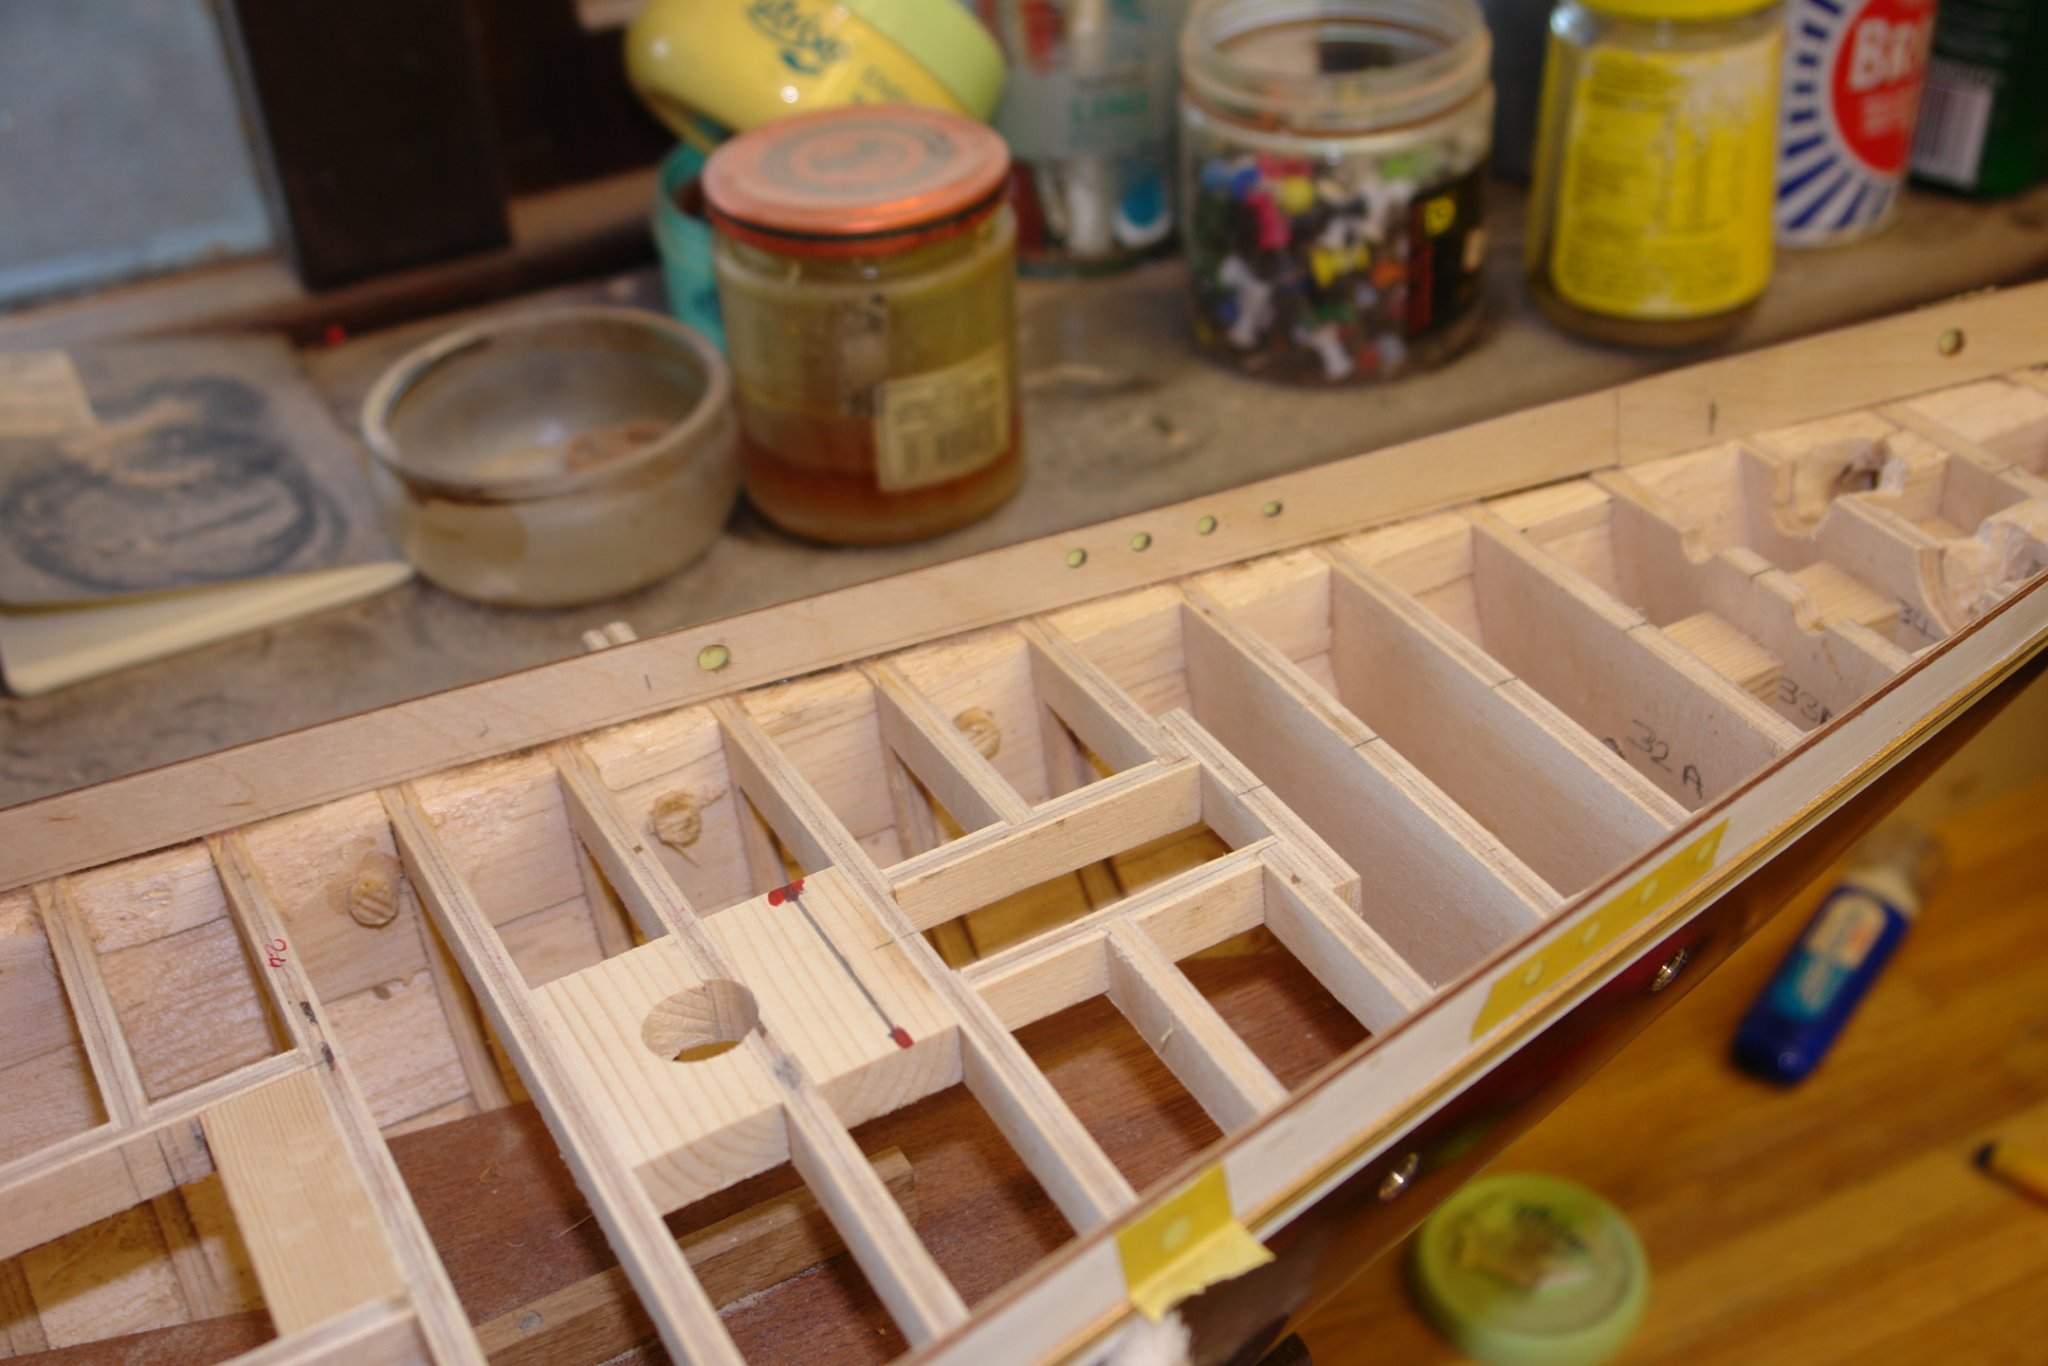
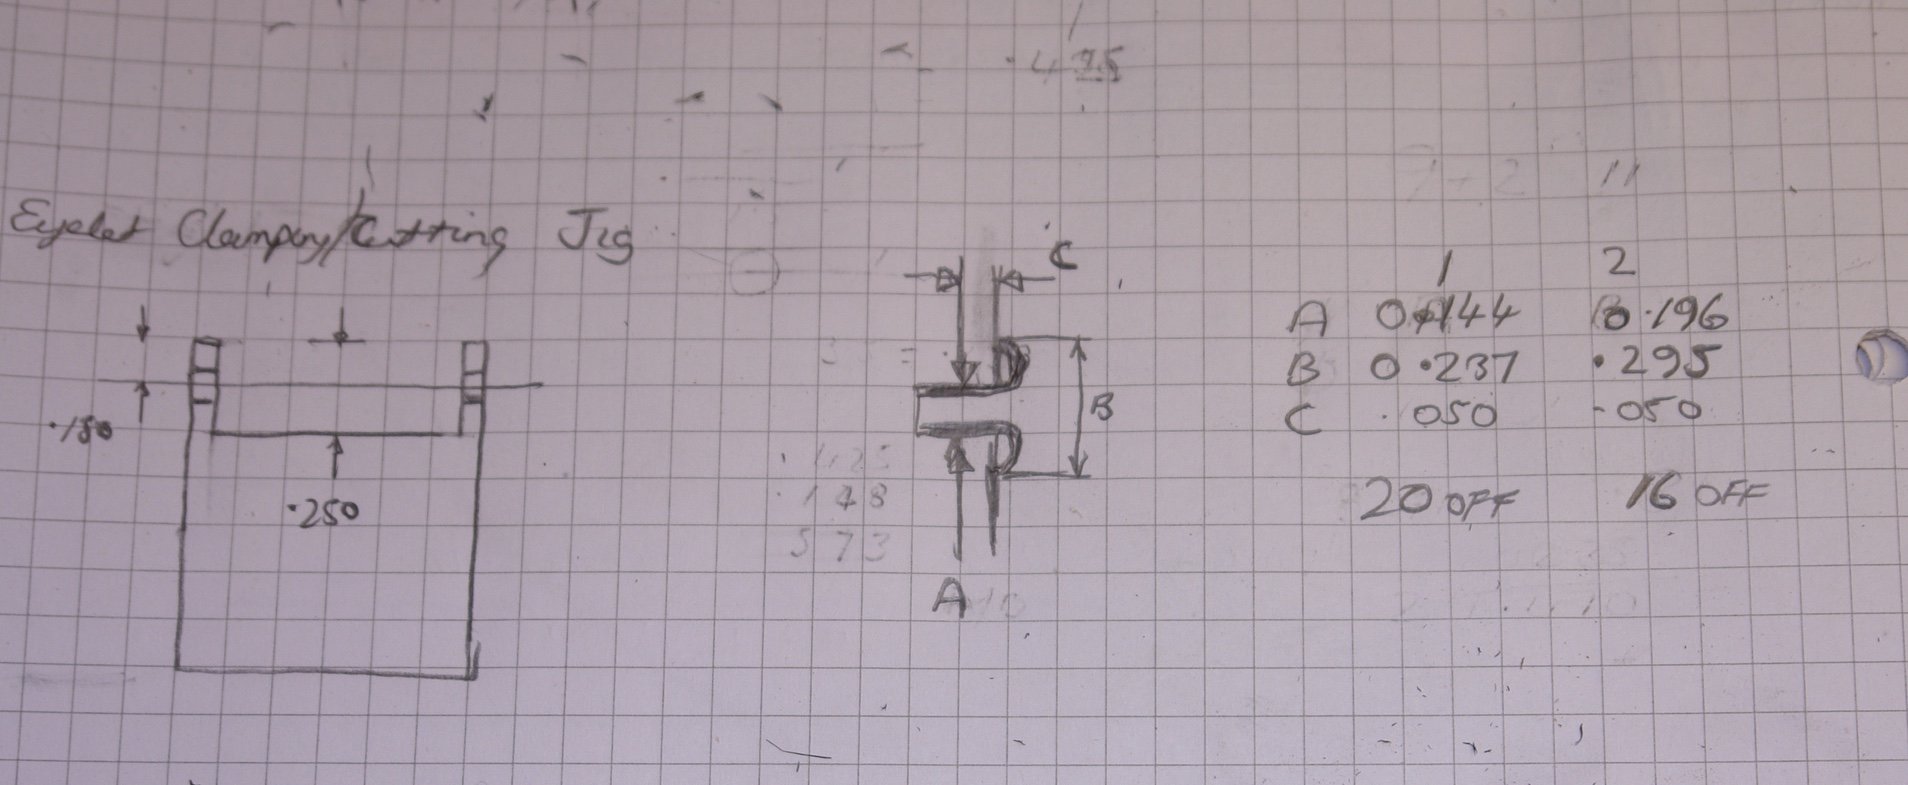
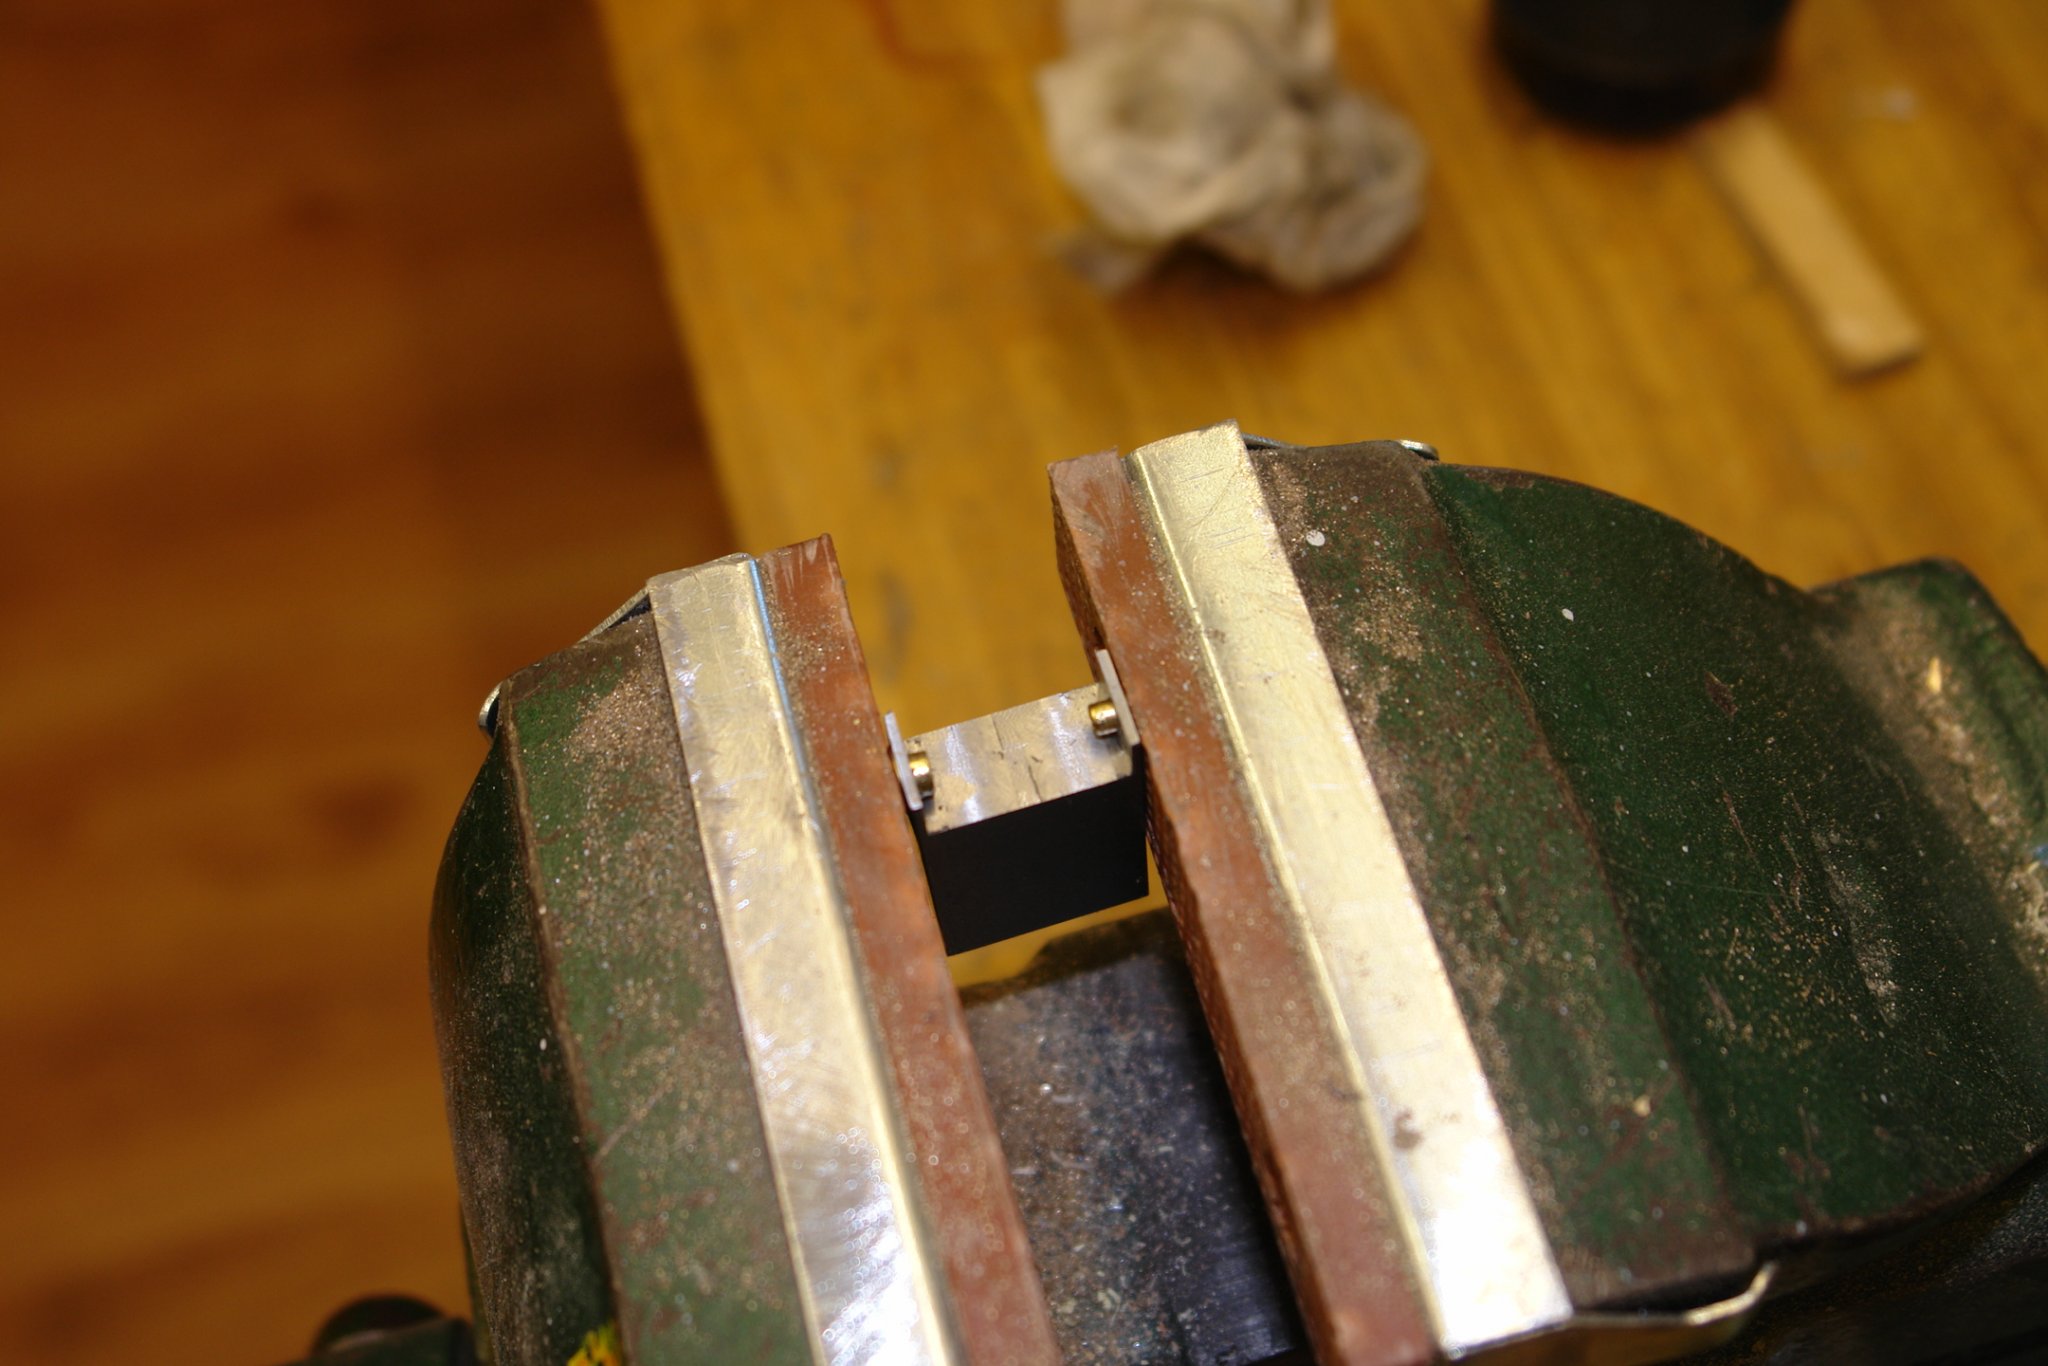
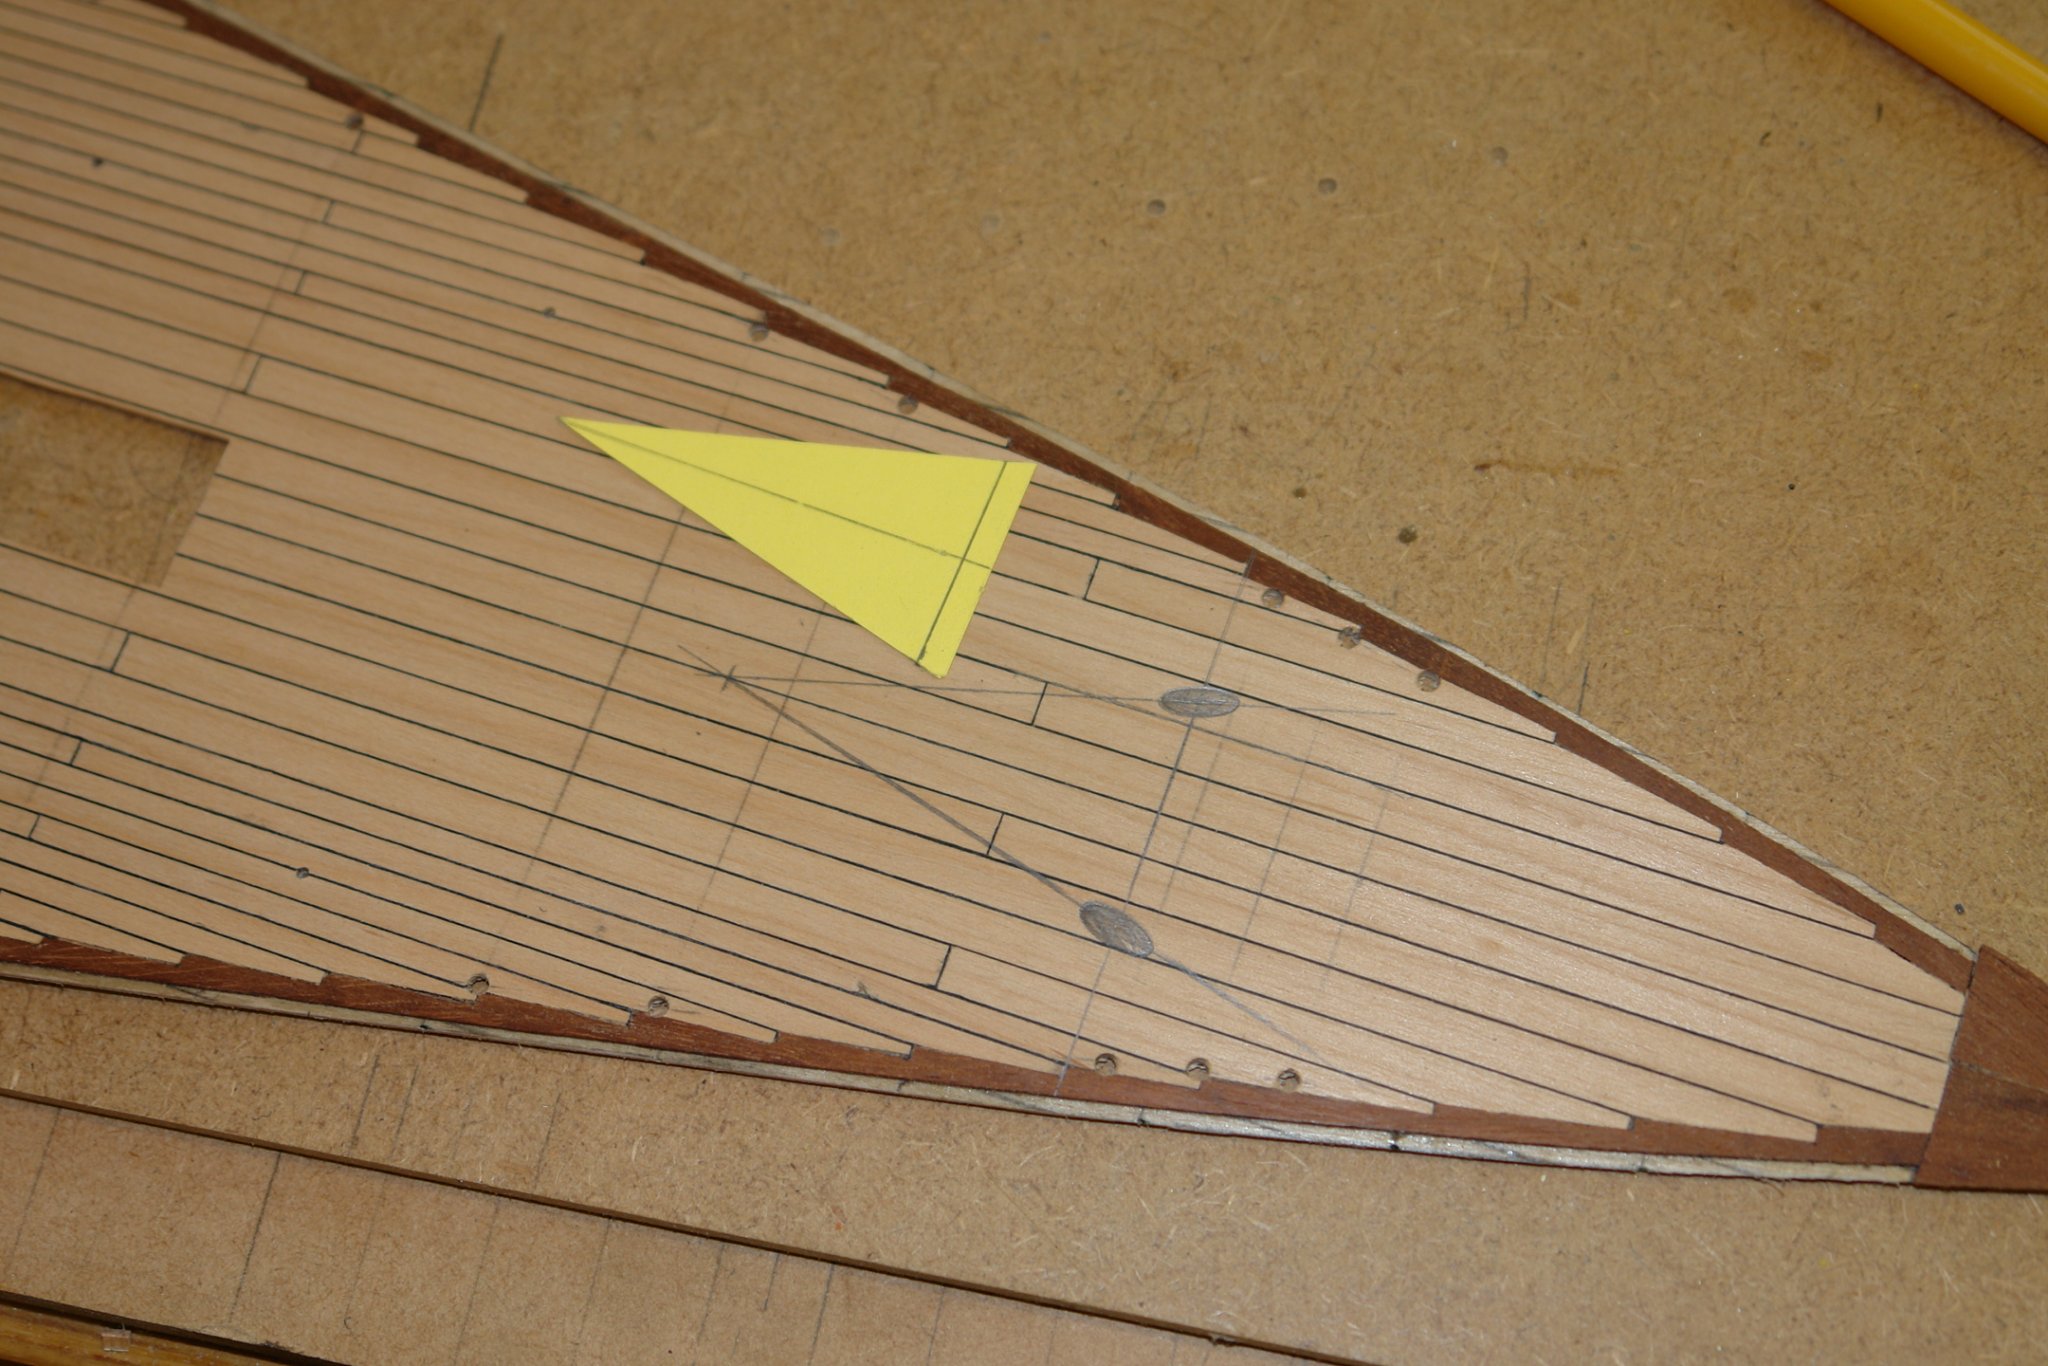
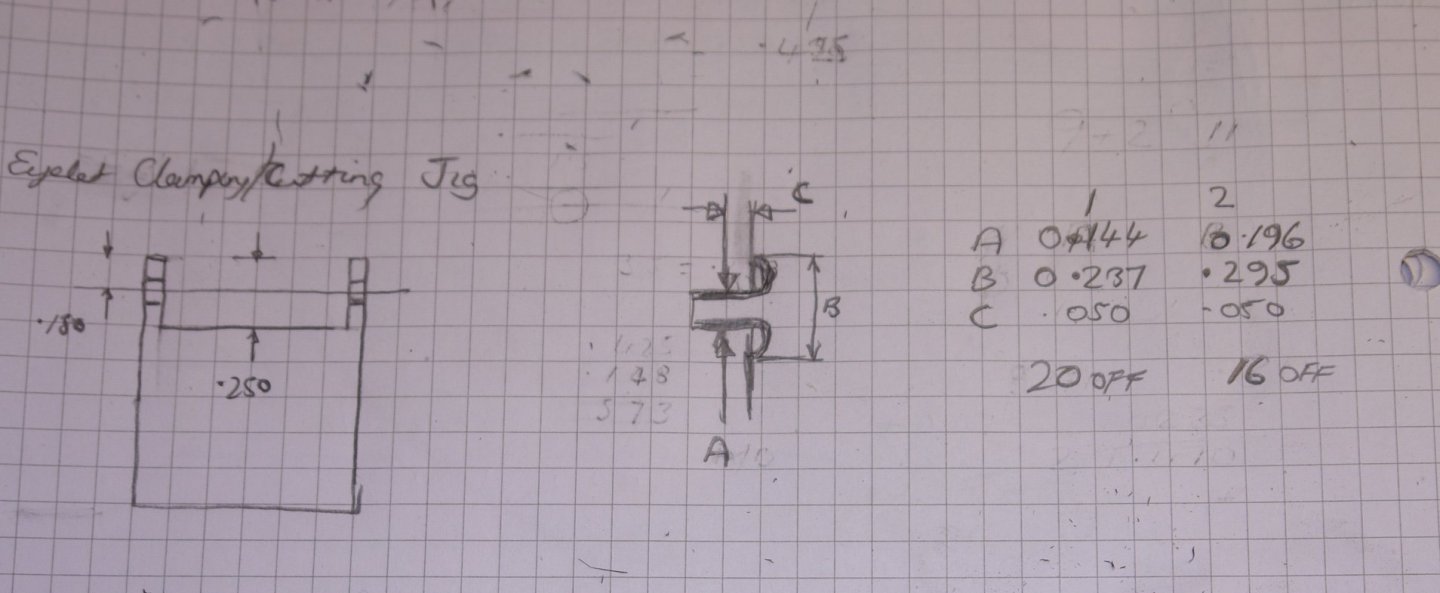
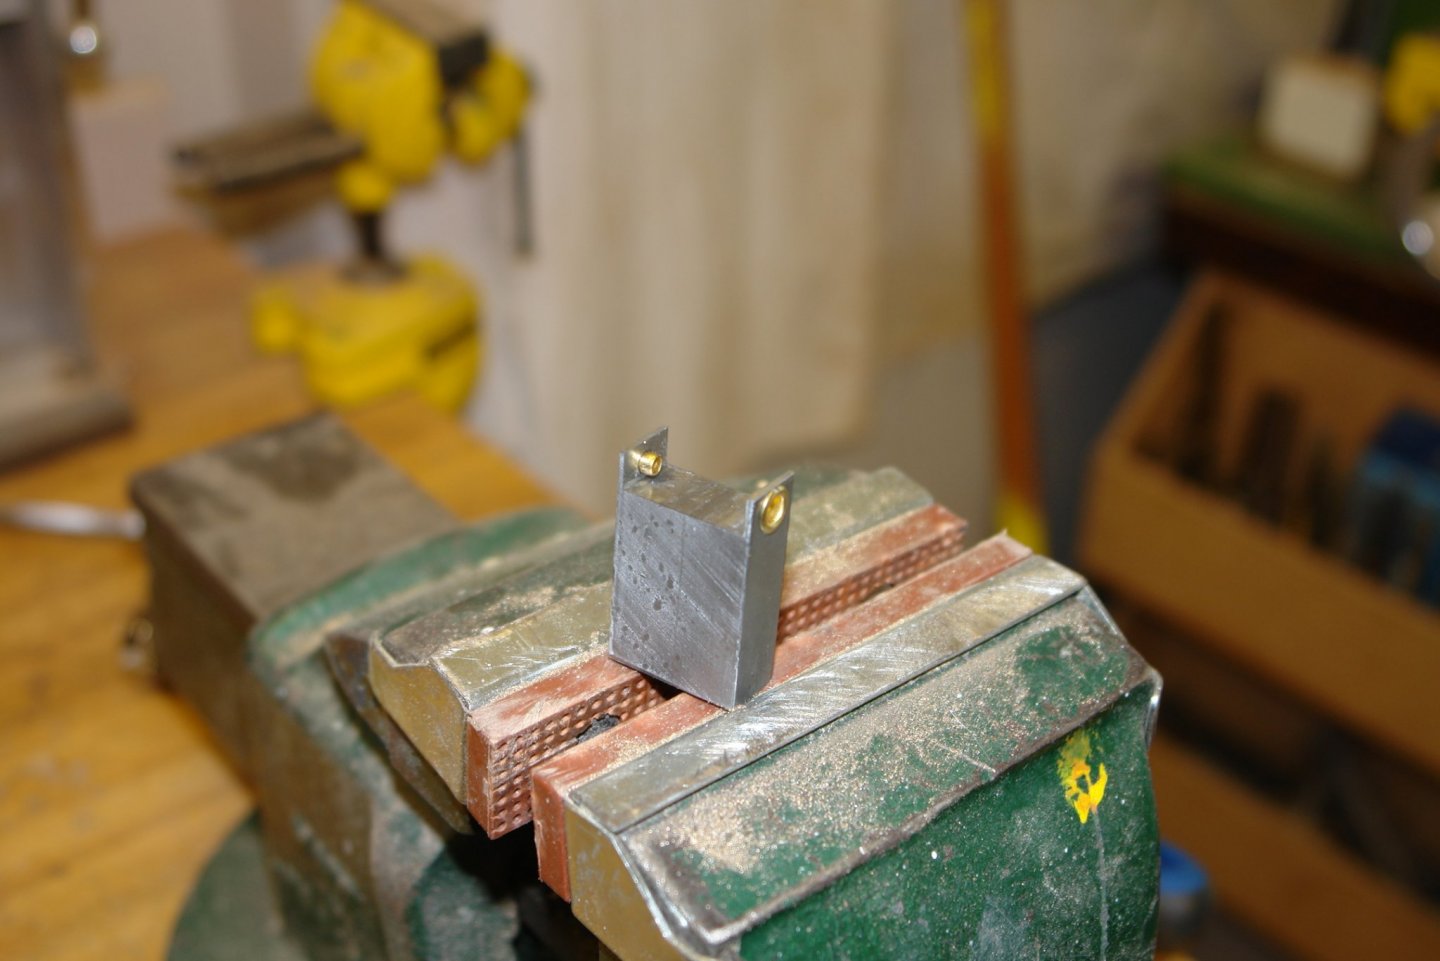
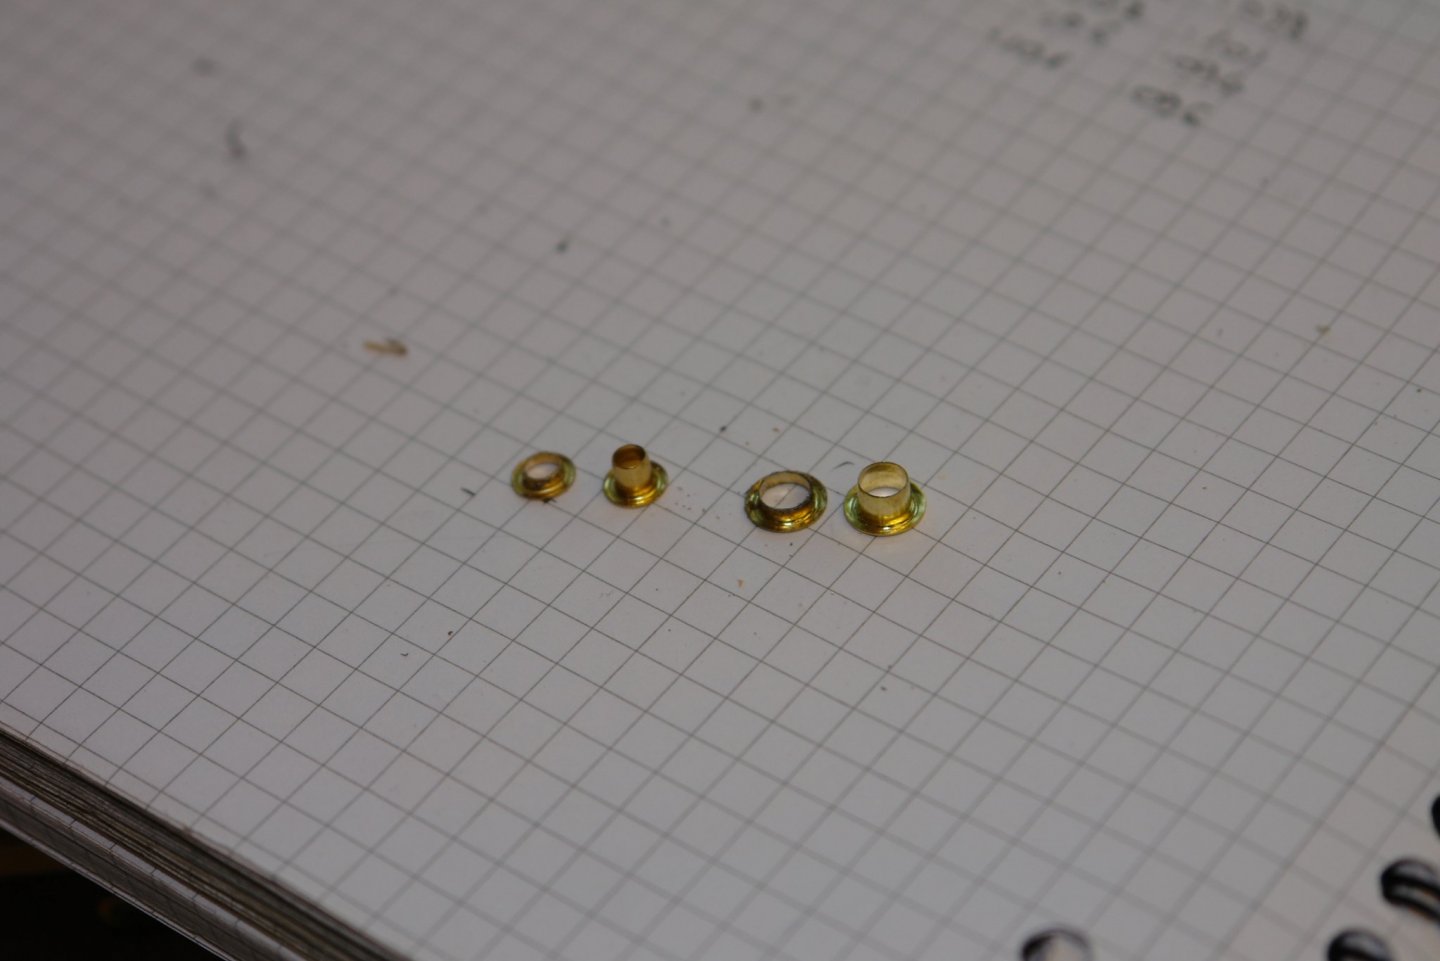
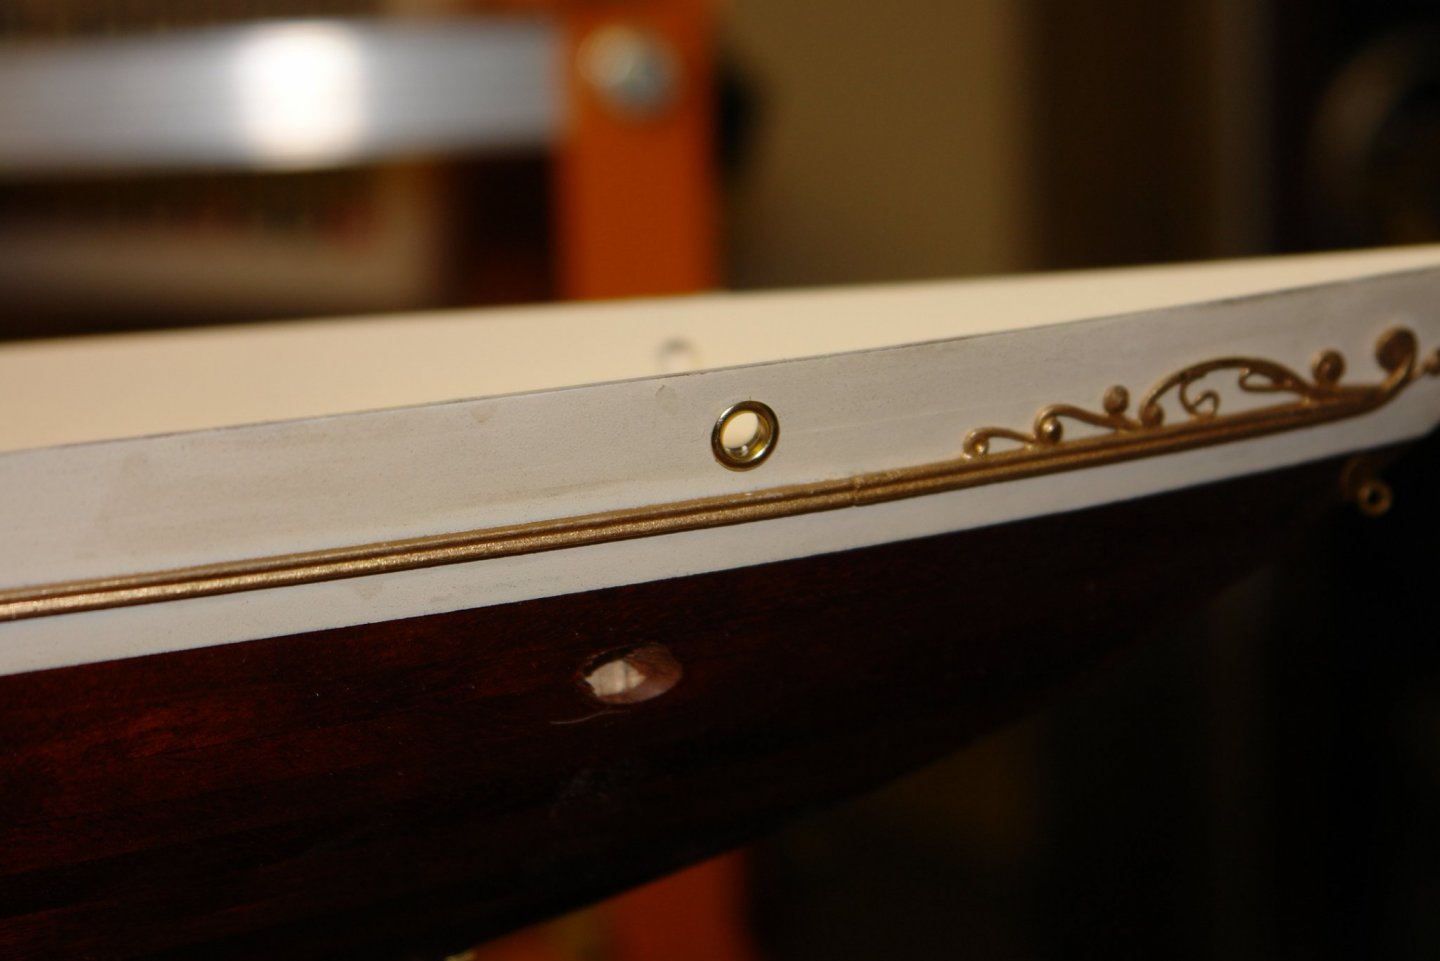
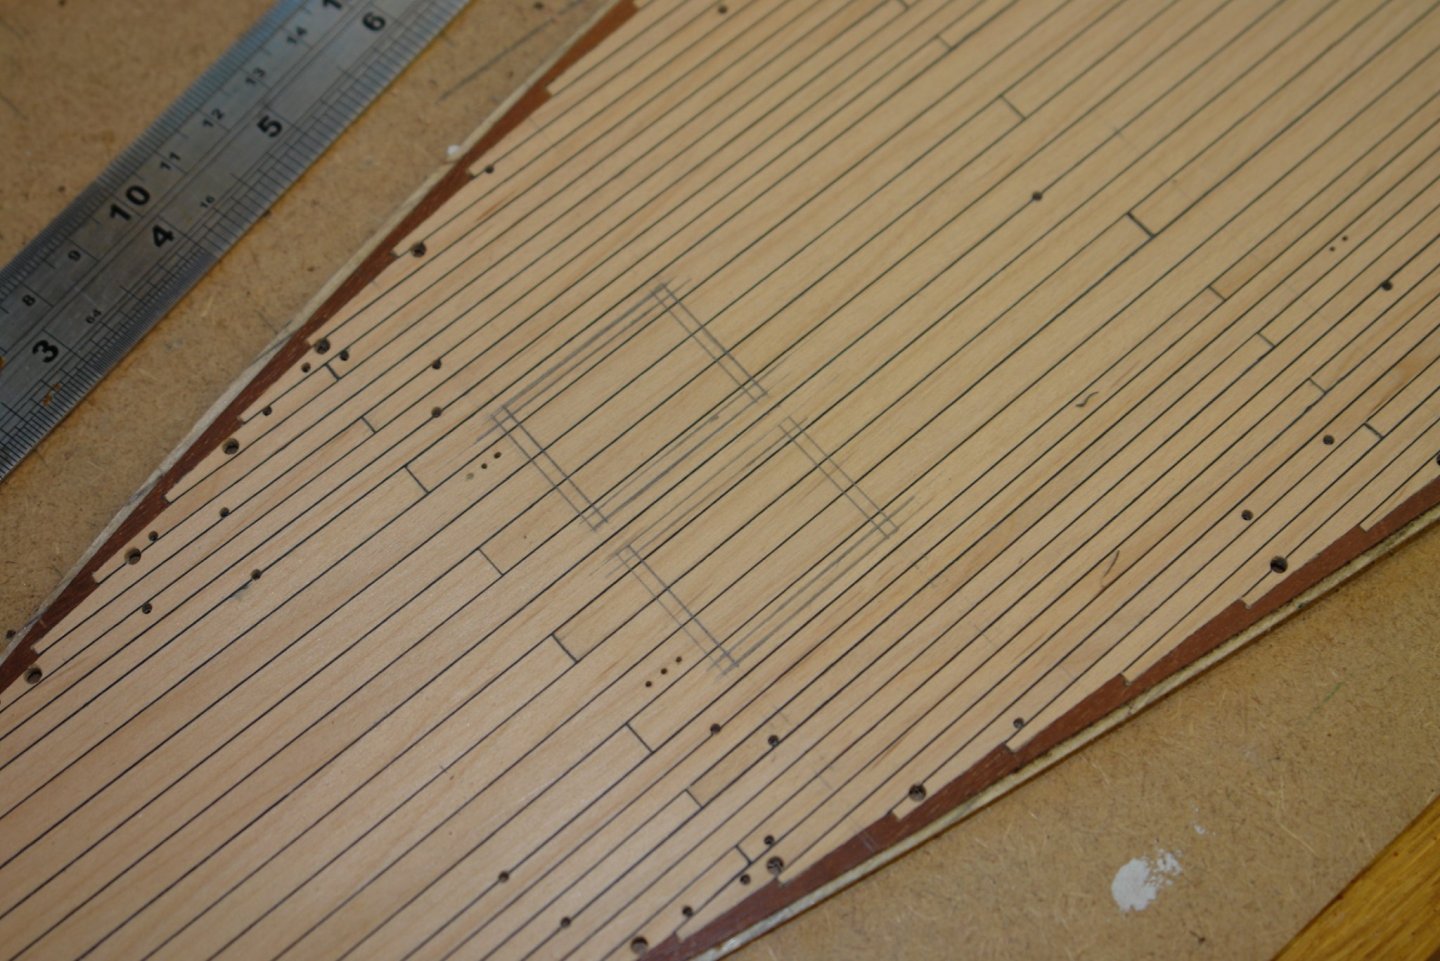
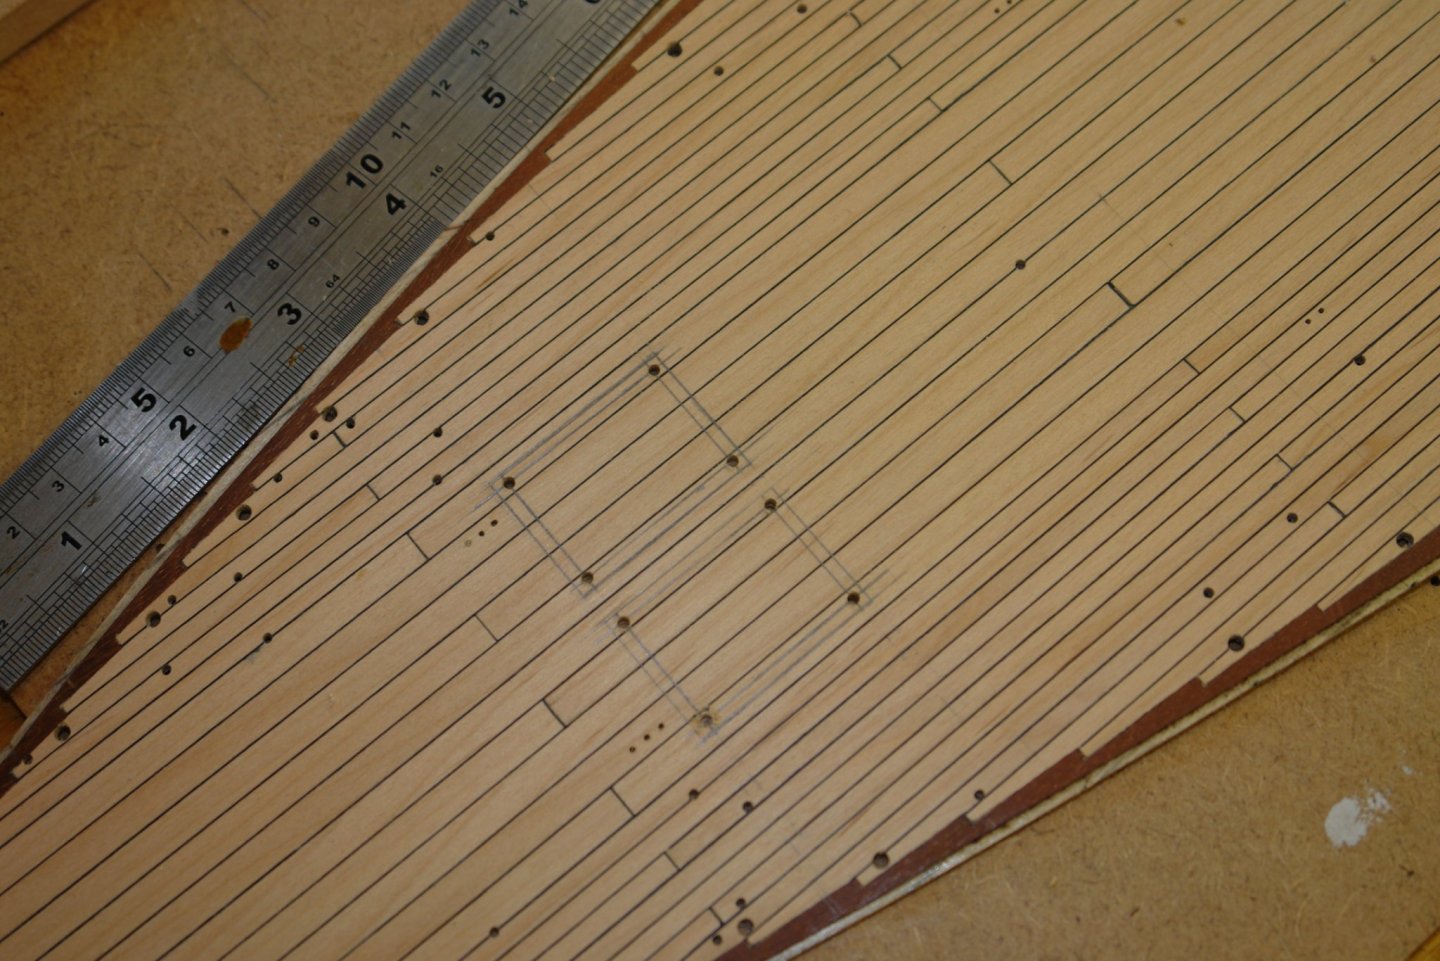
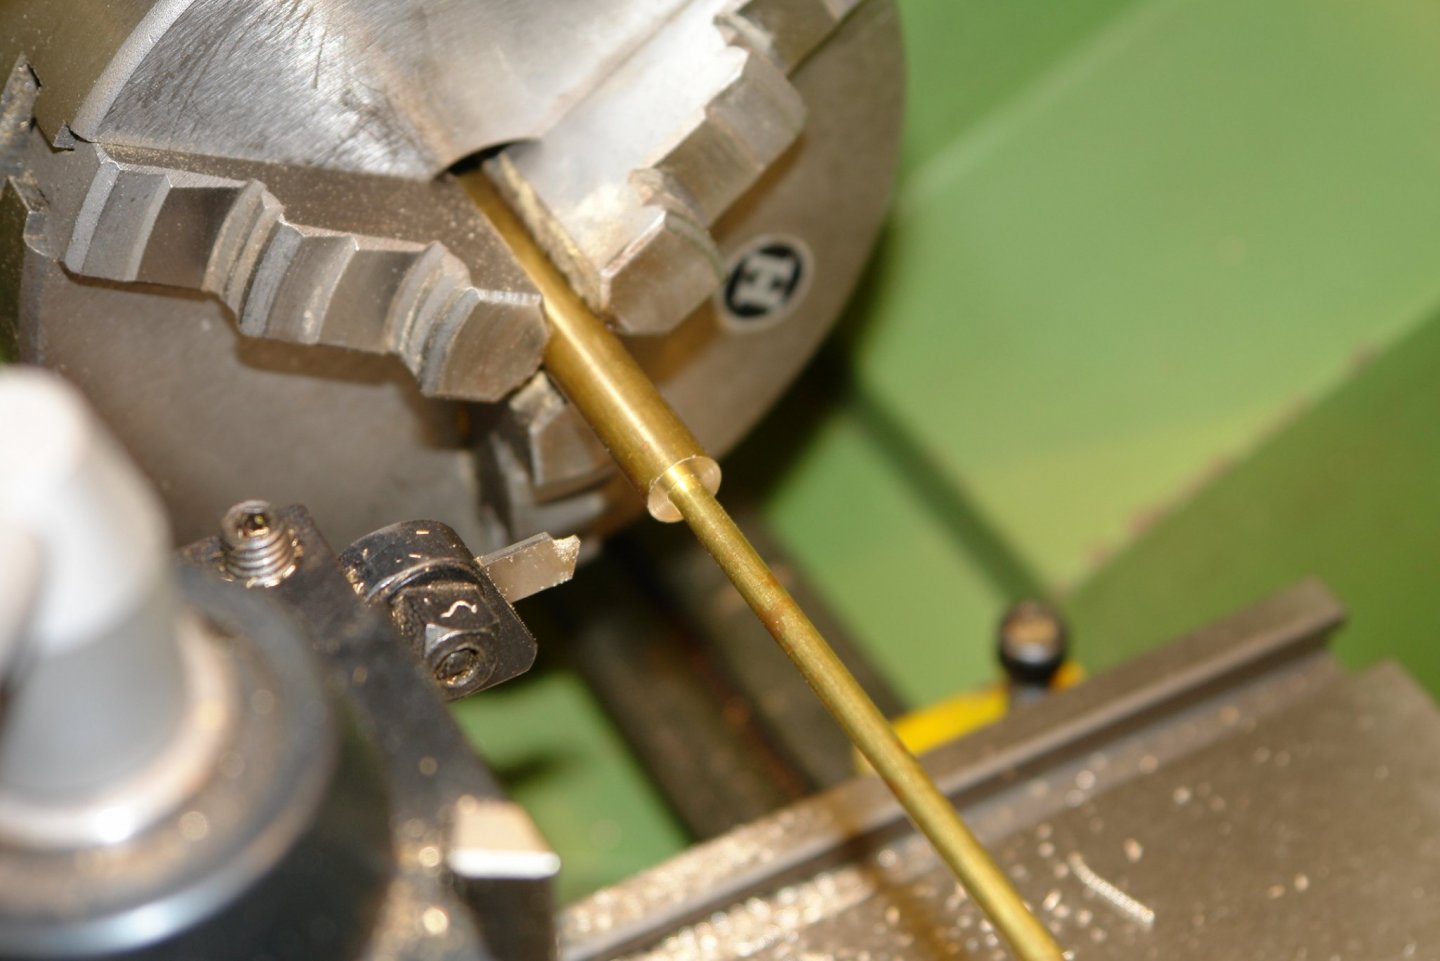
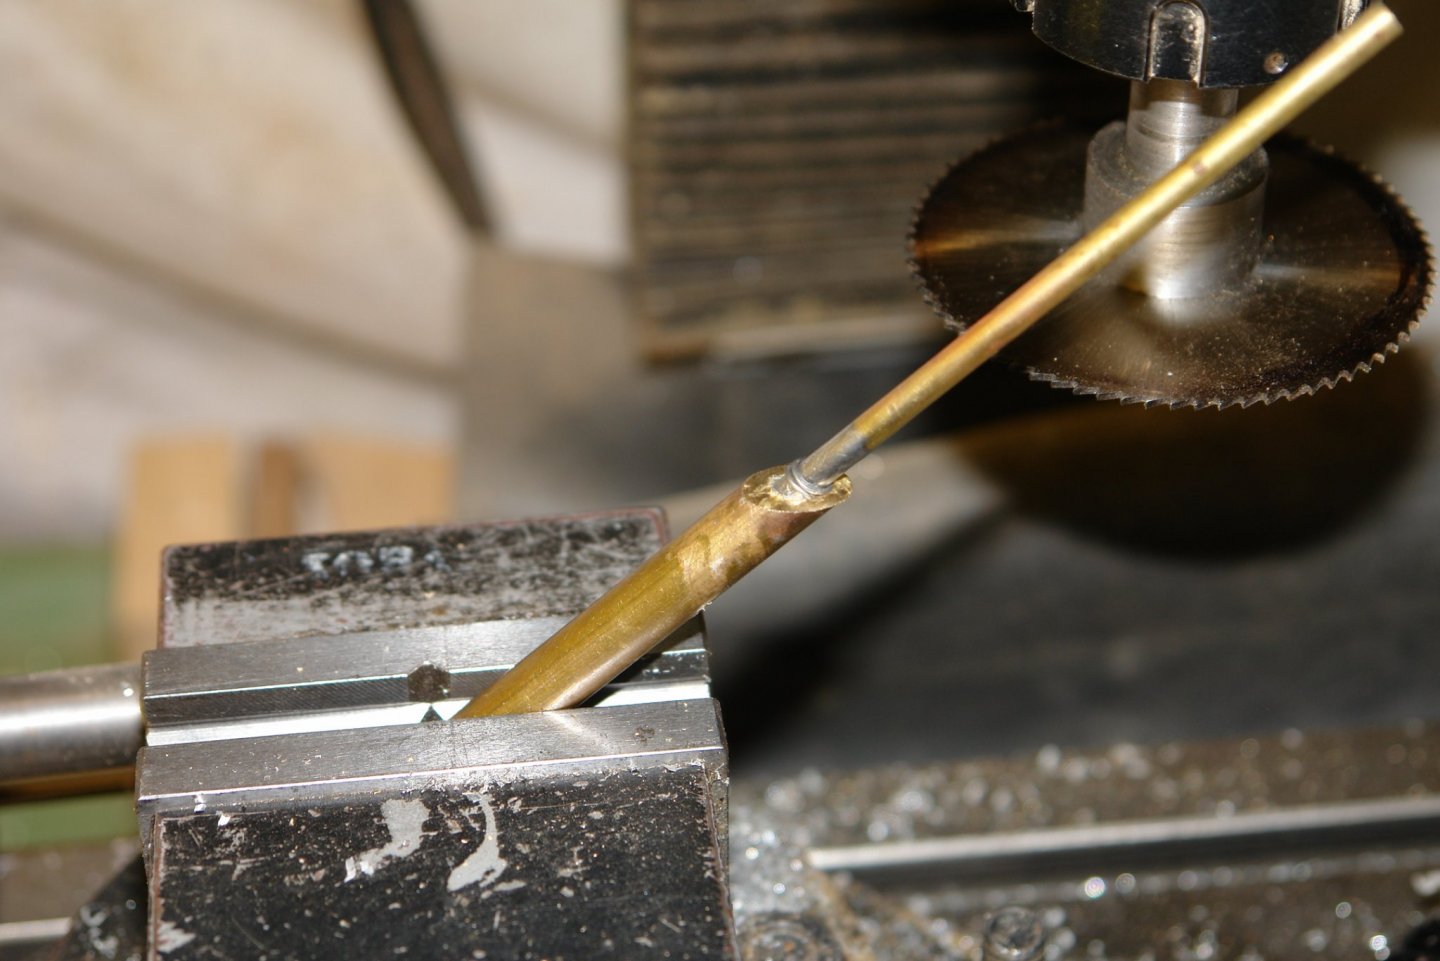
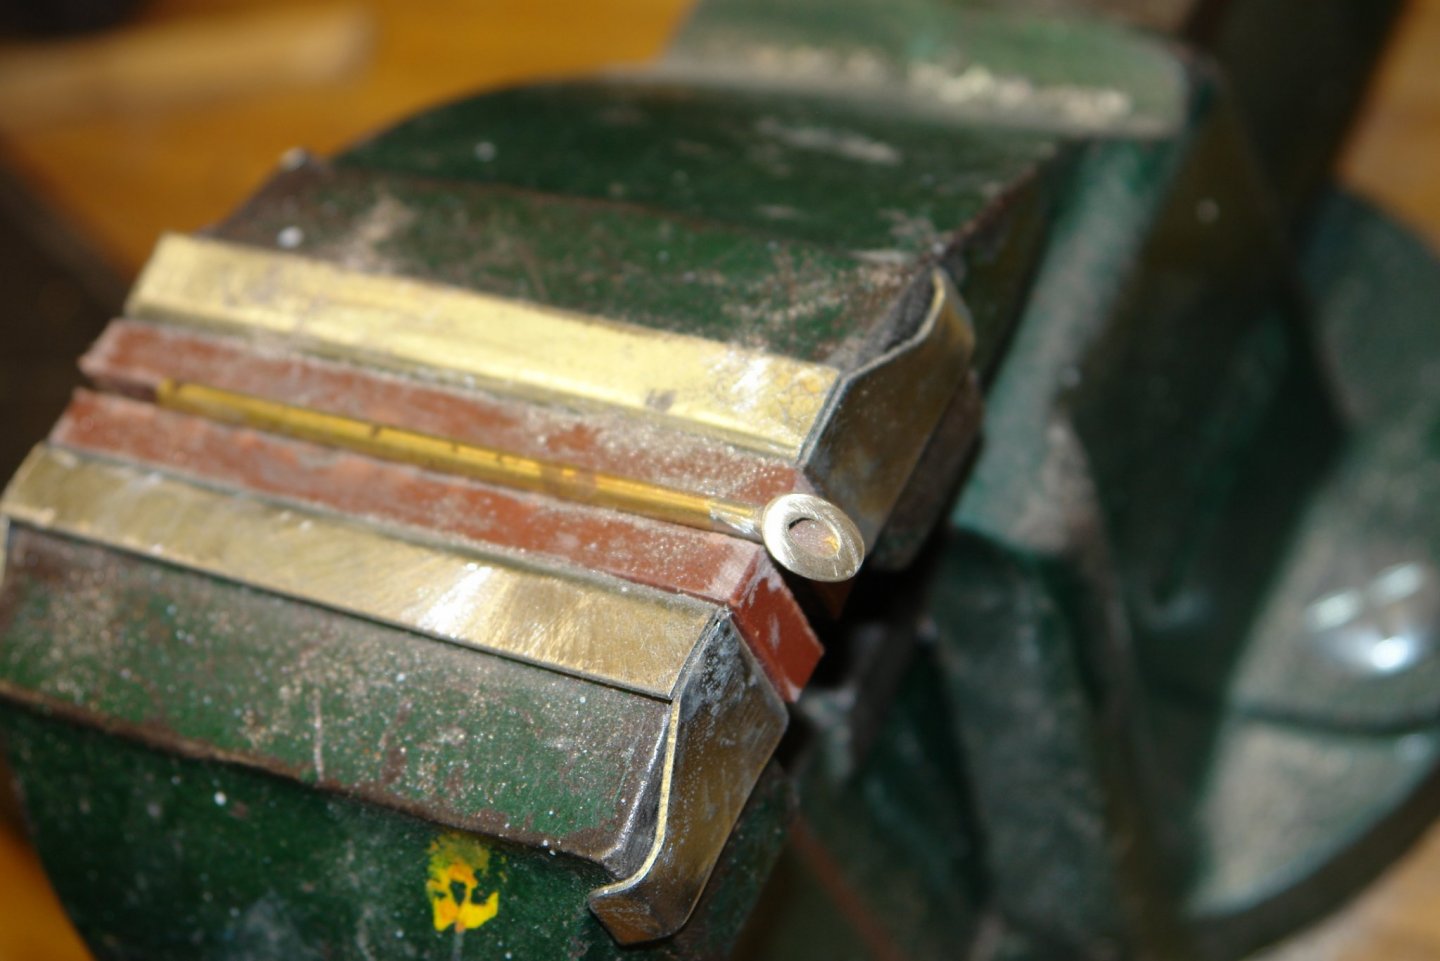
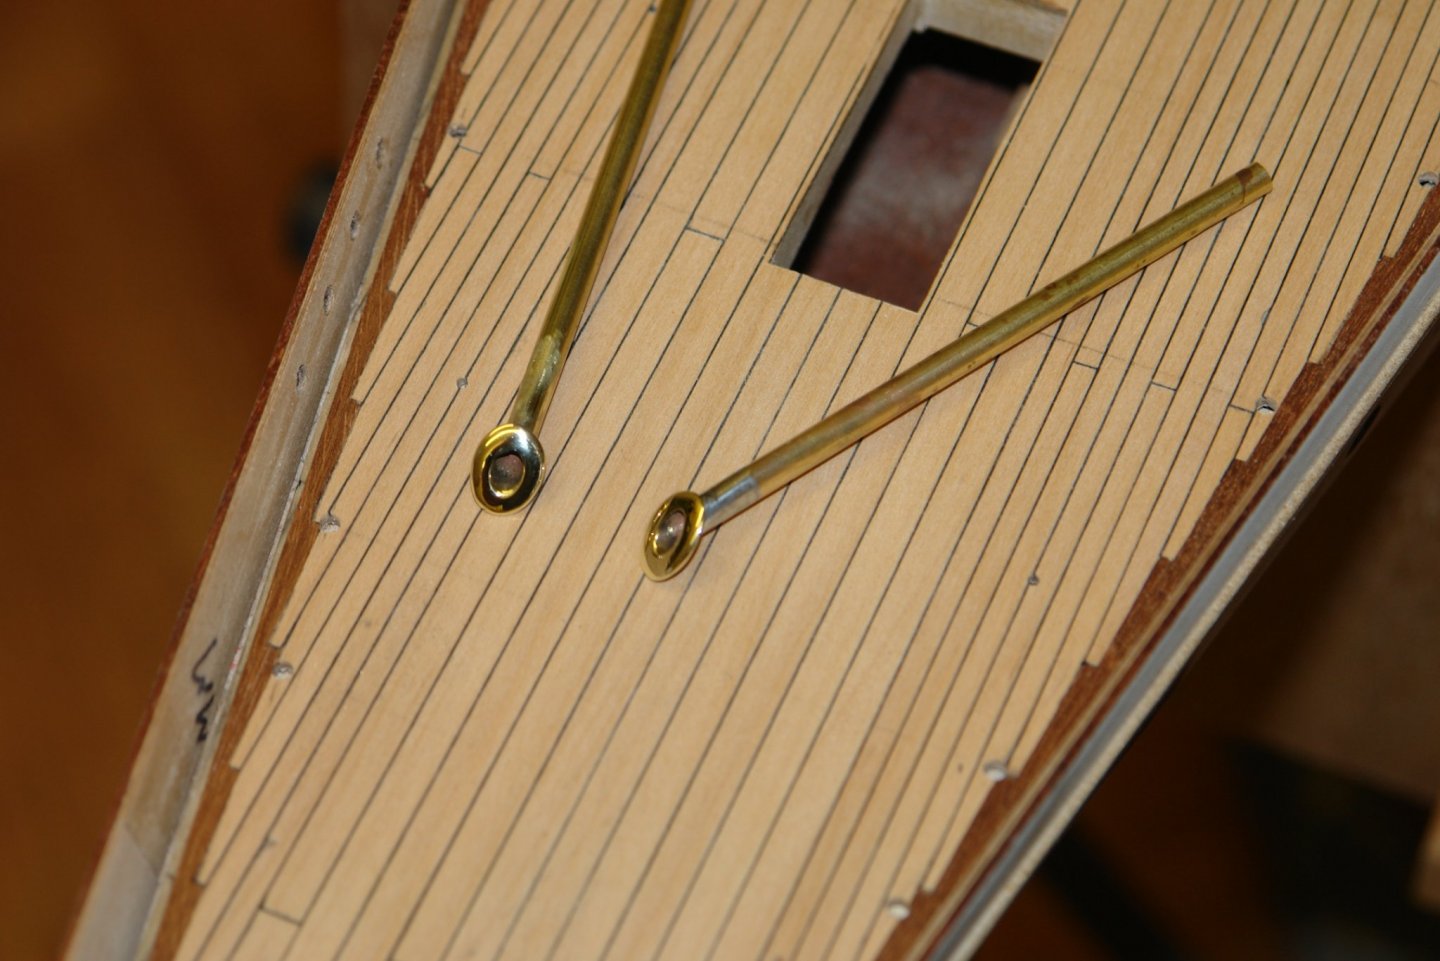
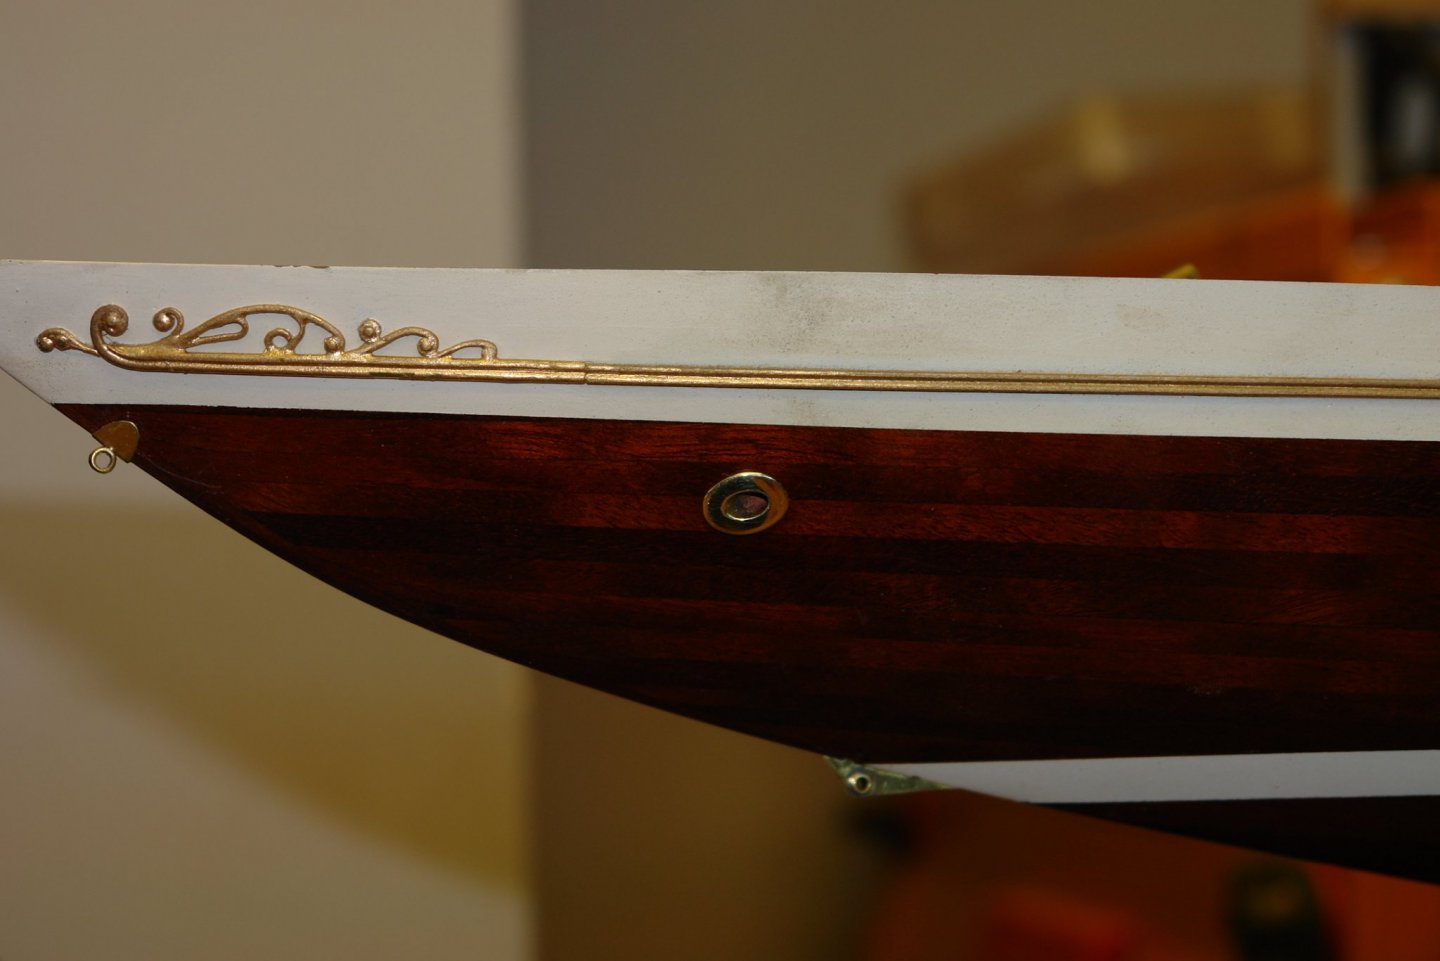
I'm still doing holes - this time various penetrations in the bulwarks. You may recall that I had predrilled the plywood backing to the bulwarks so all I needed to do was extend the penetration trough the mahogany planks. Mindful of the possibility of splintering I drilled small holes from the plywood (inboard) side and then opened the holes with a file from the outboard side. The tape on the outboard side is in preparation for painting the inner bulwarks white. The bulwark penetrations on Germania have reinforcing (anti chafing) rings around the edges. These rings look identical when viewed from both inboard and outboard. I scaled the rings (2 sizes) from a combination of plan detail and photographs and then had a root through my "bits stock" until I found some eyelets which were pretty much spot on. My plan was to remove much of the neck of the eyelets and inset the shortened rolled over ends from both sides of the bulwarks. The neck needed to be shortened by more than half - to a length of .050". I needed to do this accurately and also needed to clamp the eyelets while cutting. The following sketch shows the cutting jig / clamp I made. I cut the jig out of a piece of .5" x 1" bar. The webs are .050" thick one each for the smaller and larger eyelets. With the eyelets in place the jig is held in the vice clamping the eyelets and allowing them to be cut and filed to length. I test installed the eyelets which turned out both neat and realistic, the butt joint being virtually invisible. I now have all the eyelets cut awaiting installation later.


-
Pete - RYA Knots, Splices and Ropework Handbook (G63) - plenty usually available 2nd hand at reduced price.
-
Pete - I am sorry to have found your Bluenose build just as you abandoned it. As a fan of schooners I was just about to get excited. You were right to be concerned about the sailing characteristics of scale yachts. Simplistically displacement varies as a cube of length (volume) - while sail area varies as a square of length (area). This means as the scale is reduced the sails become proportionately too large in relation to the hull. When sailed this results in the boat lacking stiffness (easily knocked over by modest breezes). This is why extended keels with heavy bulbs are often fitted to scale versions of yachts. The problem however is that the extra weight can mean that the yacht sits lower in the water than might be desired. Scale working yachts are therefore somewhat of a compromise. If you are looking for a challenge Plans for the Schooner Altair can be bought and made up not either a static or RC working model.
-
John - thank you. Also thank you to everyone who has visited and liked. Phil - thank you for your very informative comments. It is difficult to know what they did on Germania but your explanation seems eminently sensible. Pat - I think we all learn from one another - MSW really is a special place isn't it.
-
Not sure about that Michael - I'm ok with straight lines but all those fancy curves are a bit too taxing. Thank you Druxey.
-
Eberhard is correct.
-
Bedford - Nice work on the rowlocks. I find ER collect blocks make the job much easier when you need to flip work over and mill from both sides - you might want to consider.
-
HMCSS Victoria 1855 by BANYAN - 1:72
KeithAug replied to BANYAN's topic in - Build logs for subjects built 1851 - 1900
Nice work on the guns Pat. I took the opportunity to re-look through the earlier parts of the build and remind myself how nicely made your small parts are. A good way to spend an hour.- 1,013 replies
-
- 5
-

-
- gun dispatch vessel
- victoria
- (and 2 more)
-
Nice work on the rowlocks - particularly given your lack of machine tools, fine work indeed.
-
A lot of progress since i last looked in Gary- well done. I keep thinking I need a laser level for marking water lines but when it comes to it I baulk at the cost or get put off by some of the Amazon reviews - your example is making me think i should take the plunge. One good source of sail tracks/runners is the rails from model railway tracks - quite cost effective when compared with specialist model making channel sections. I have also seen others use guitar frets which can also be quite cost effective.
-
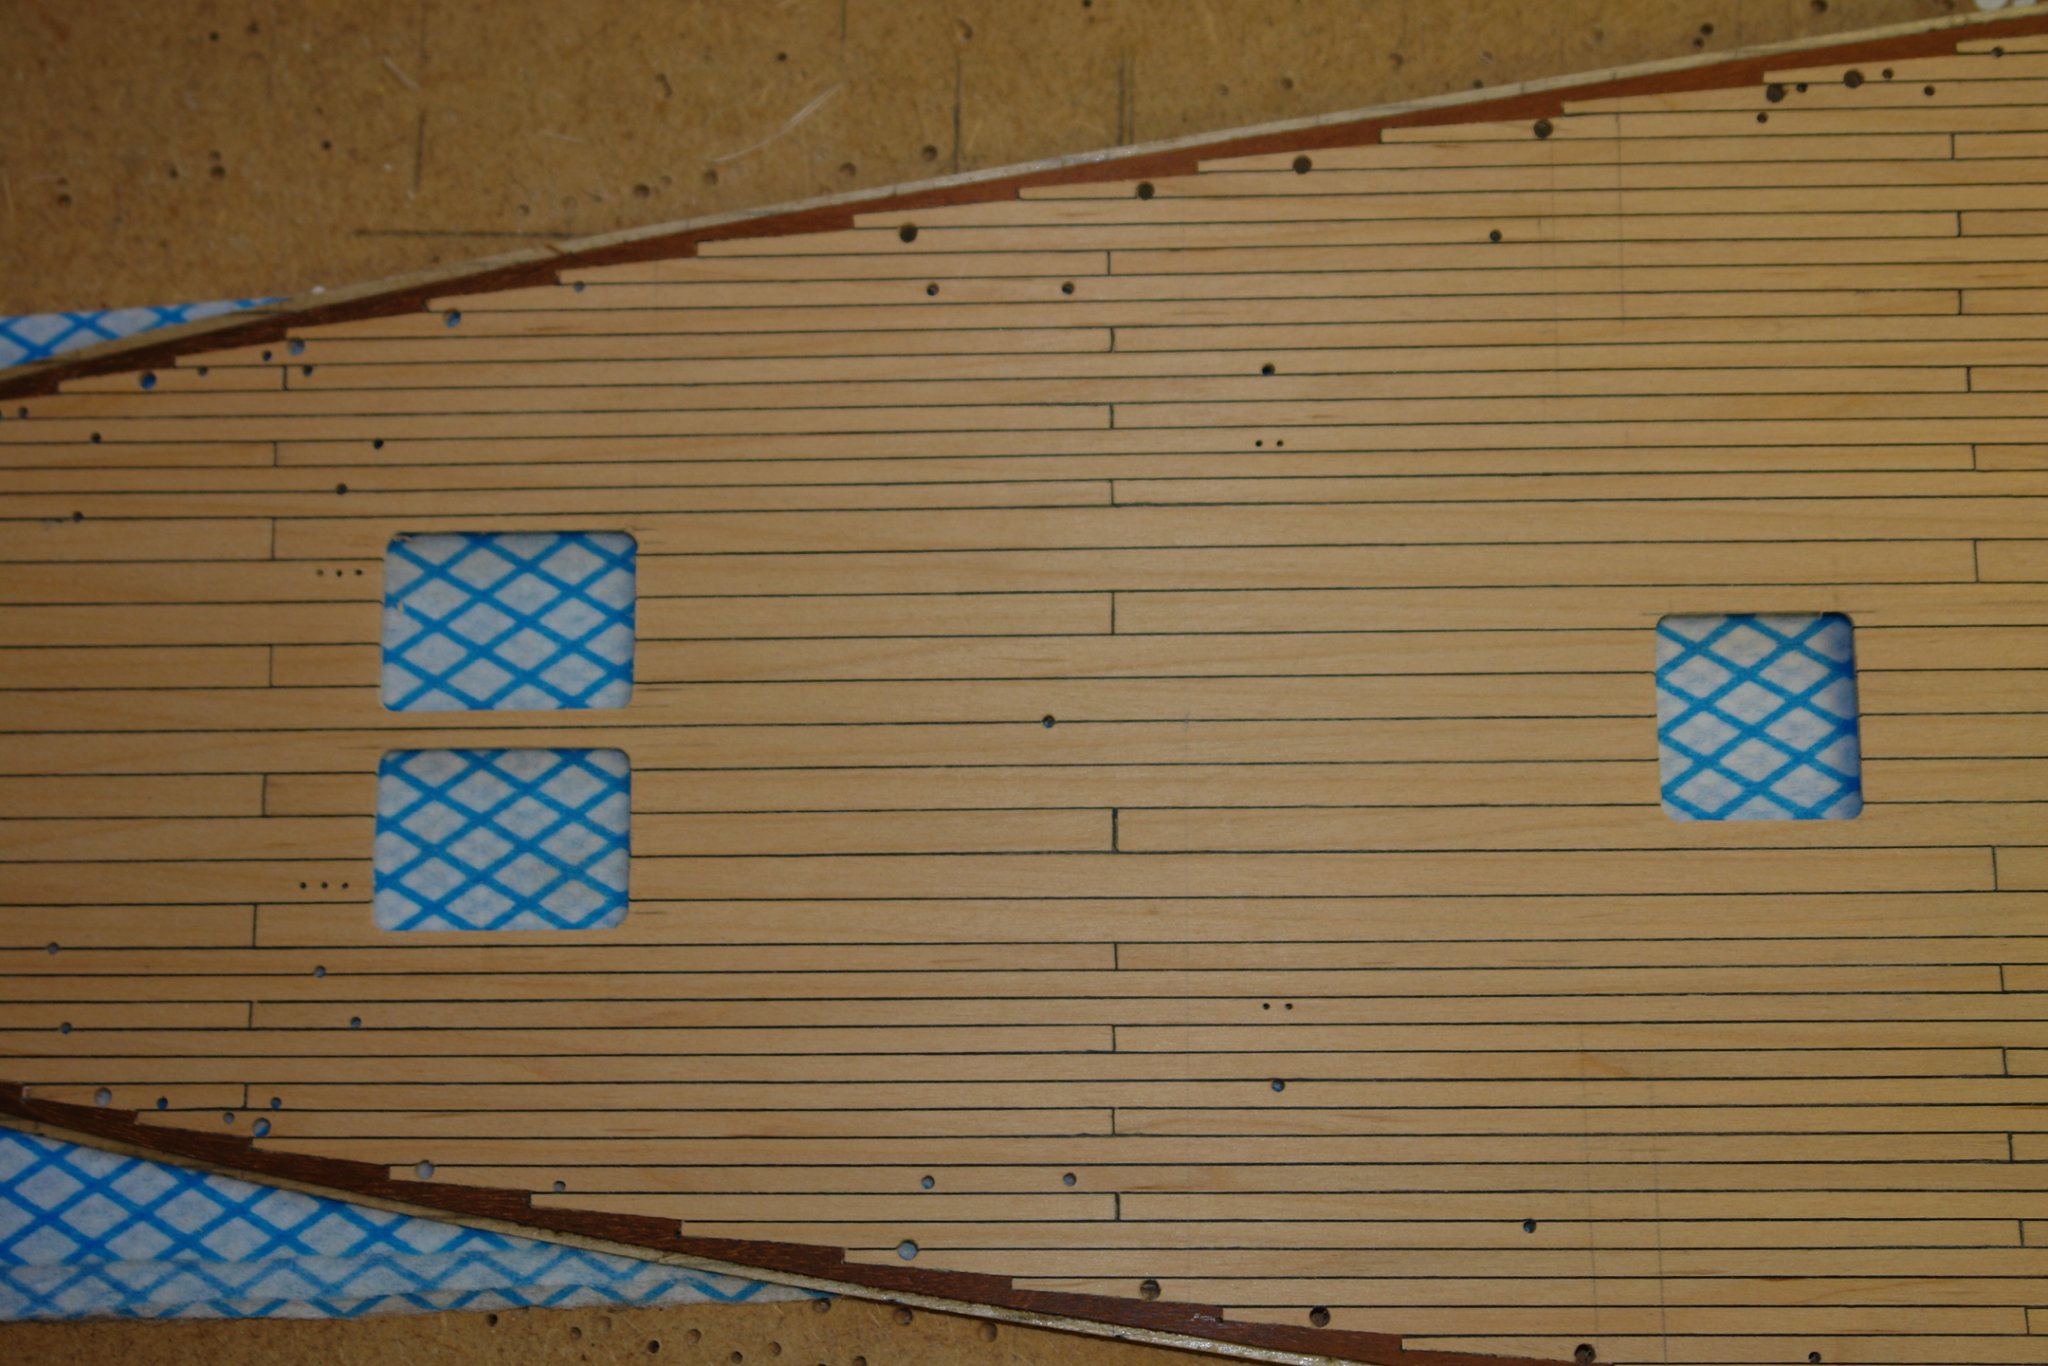
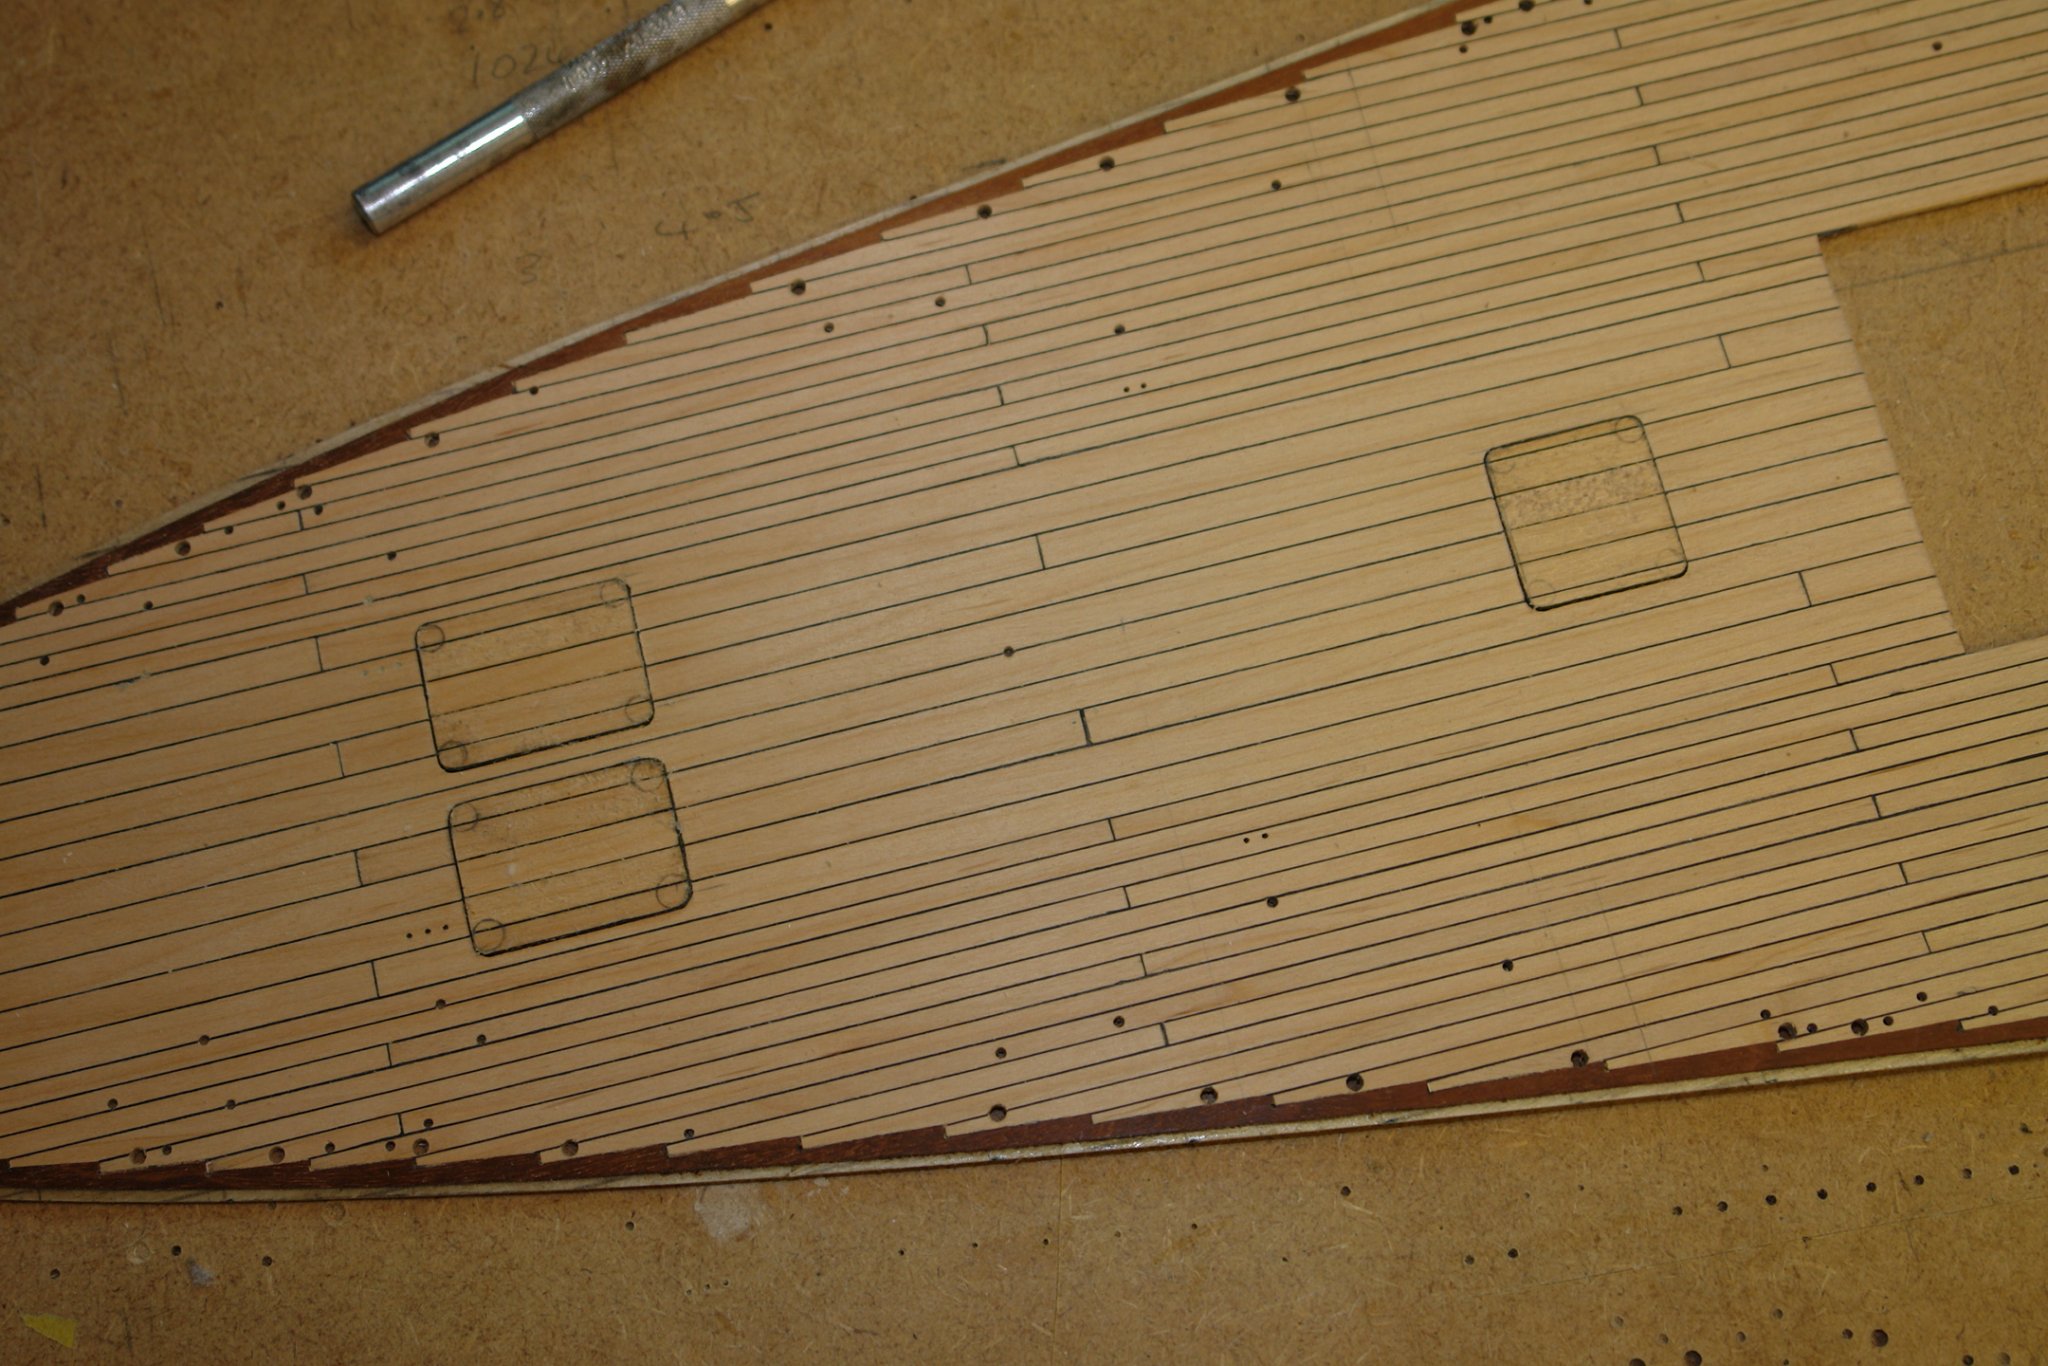
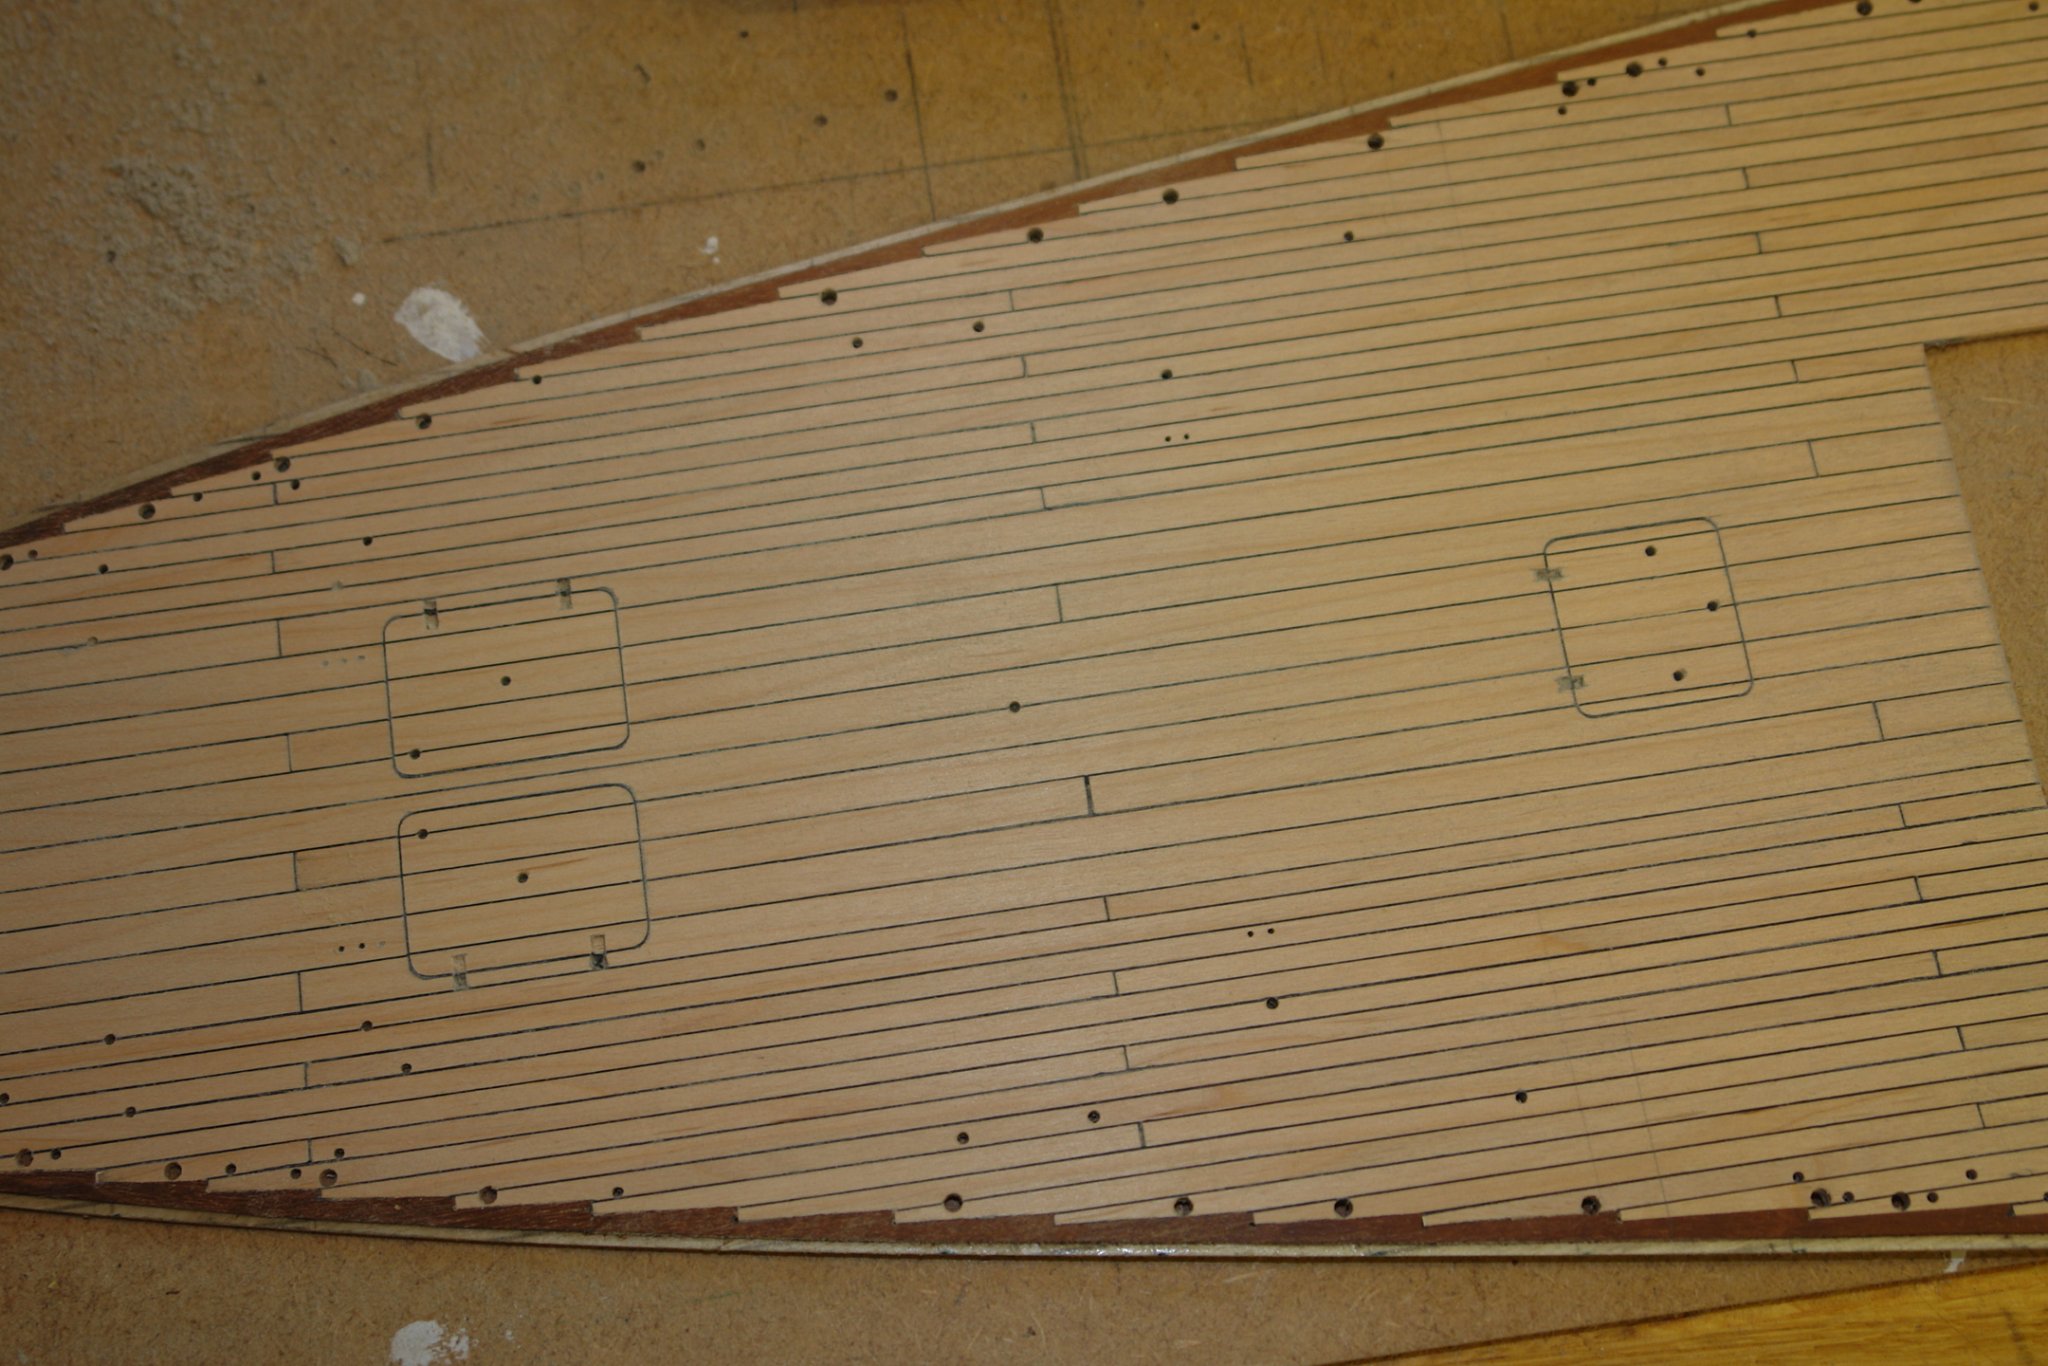
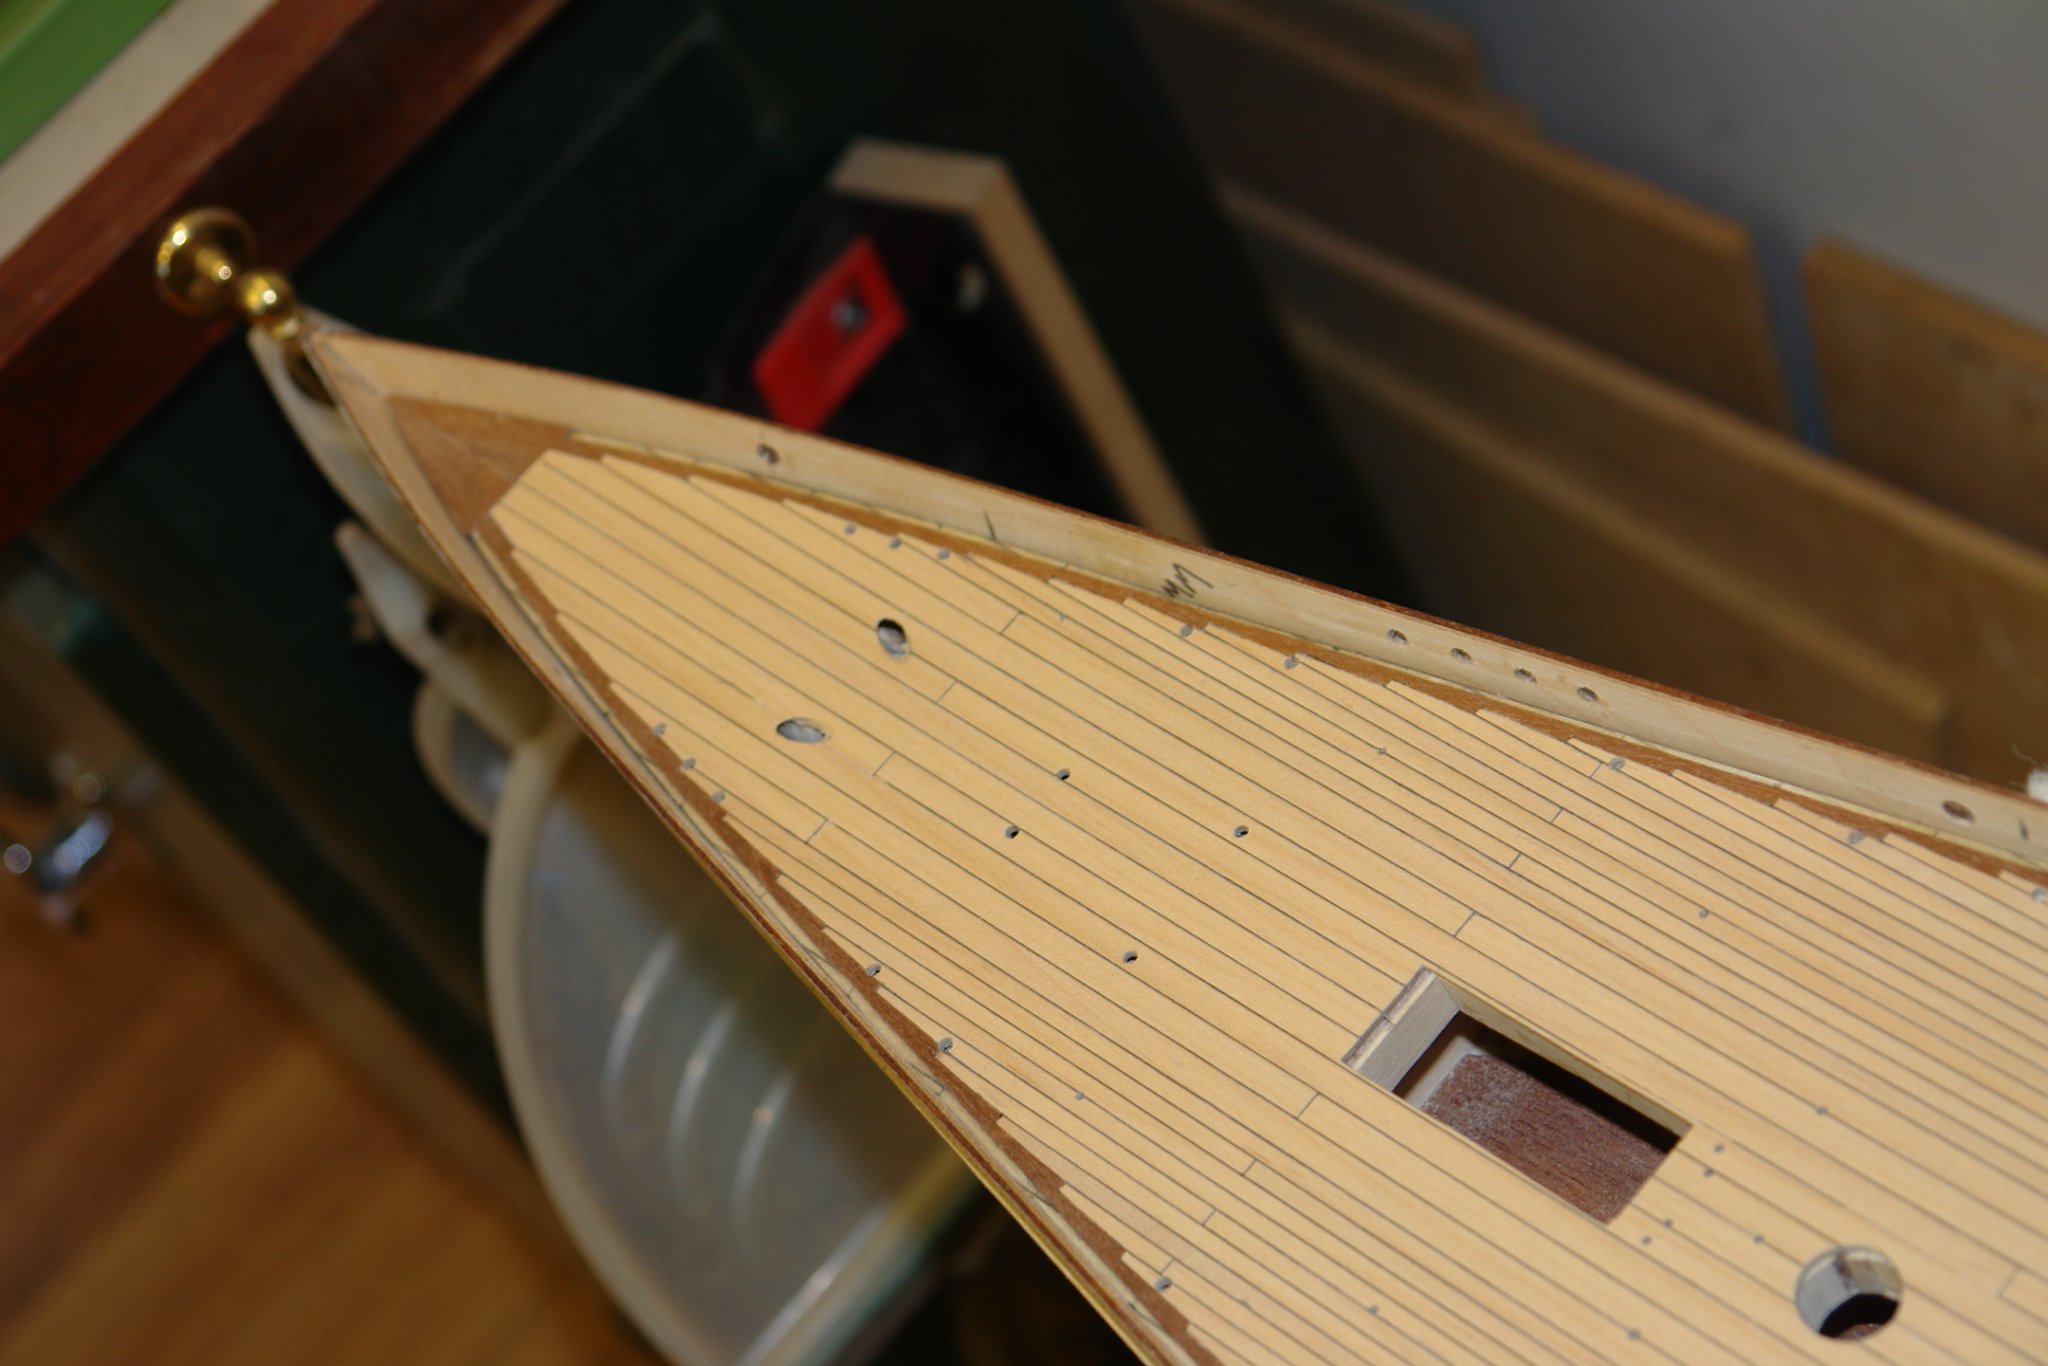
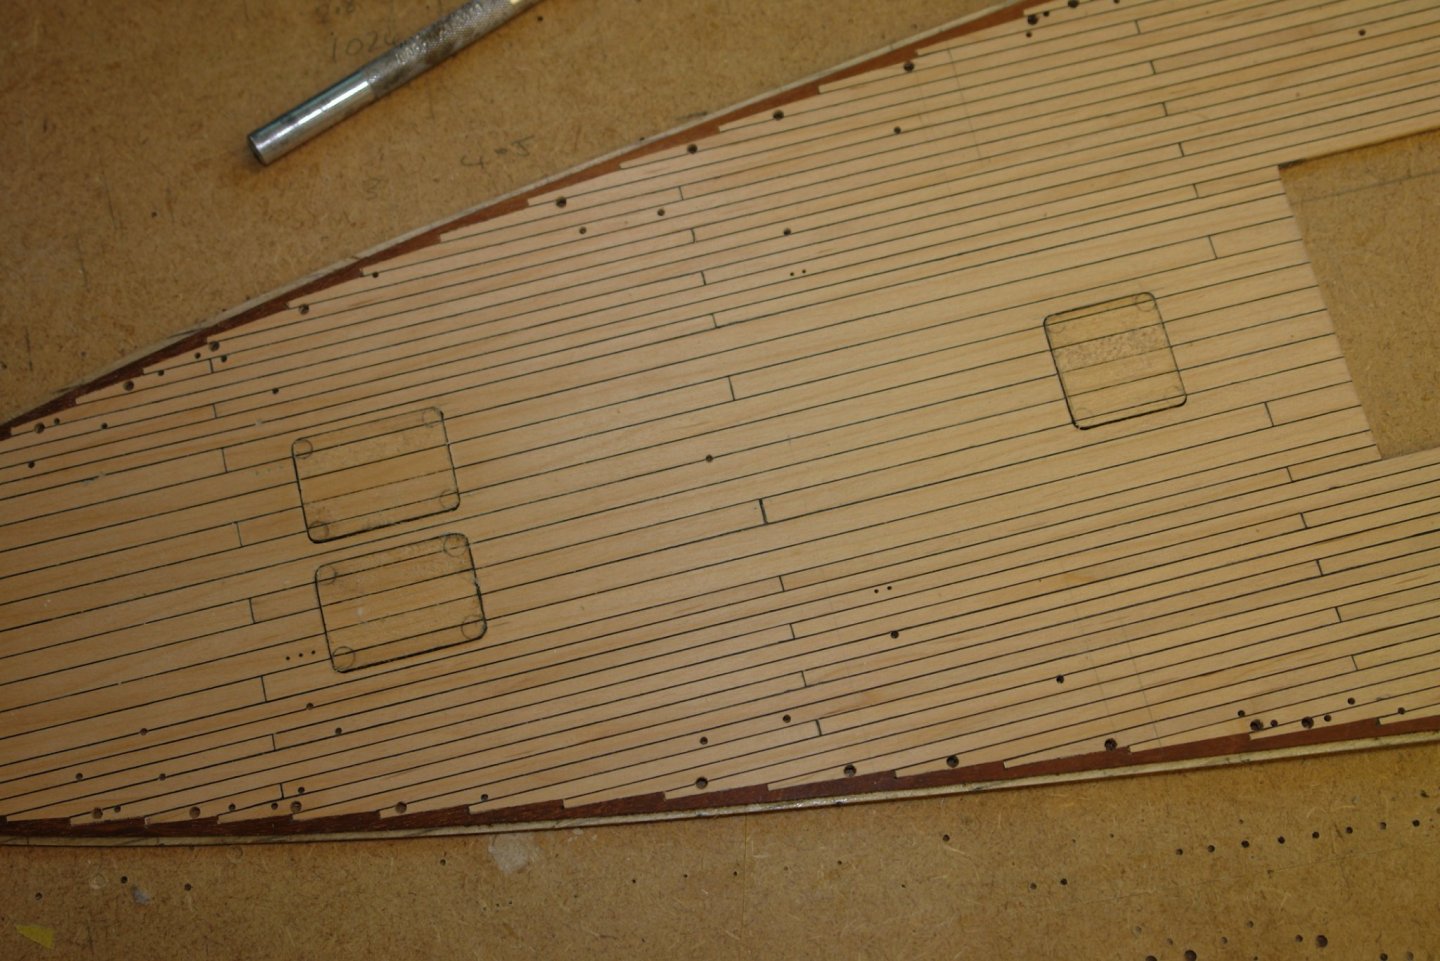
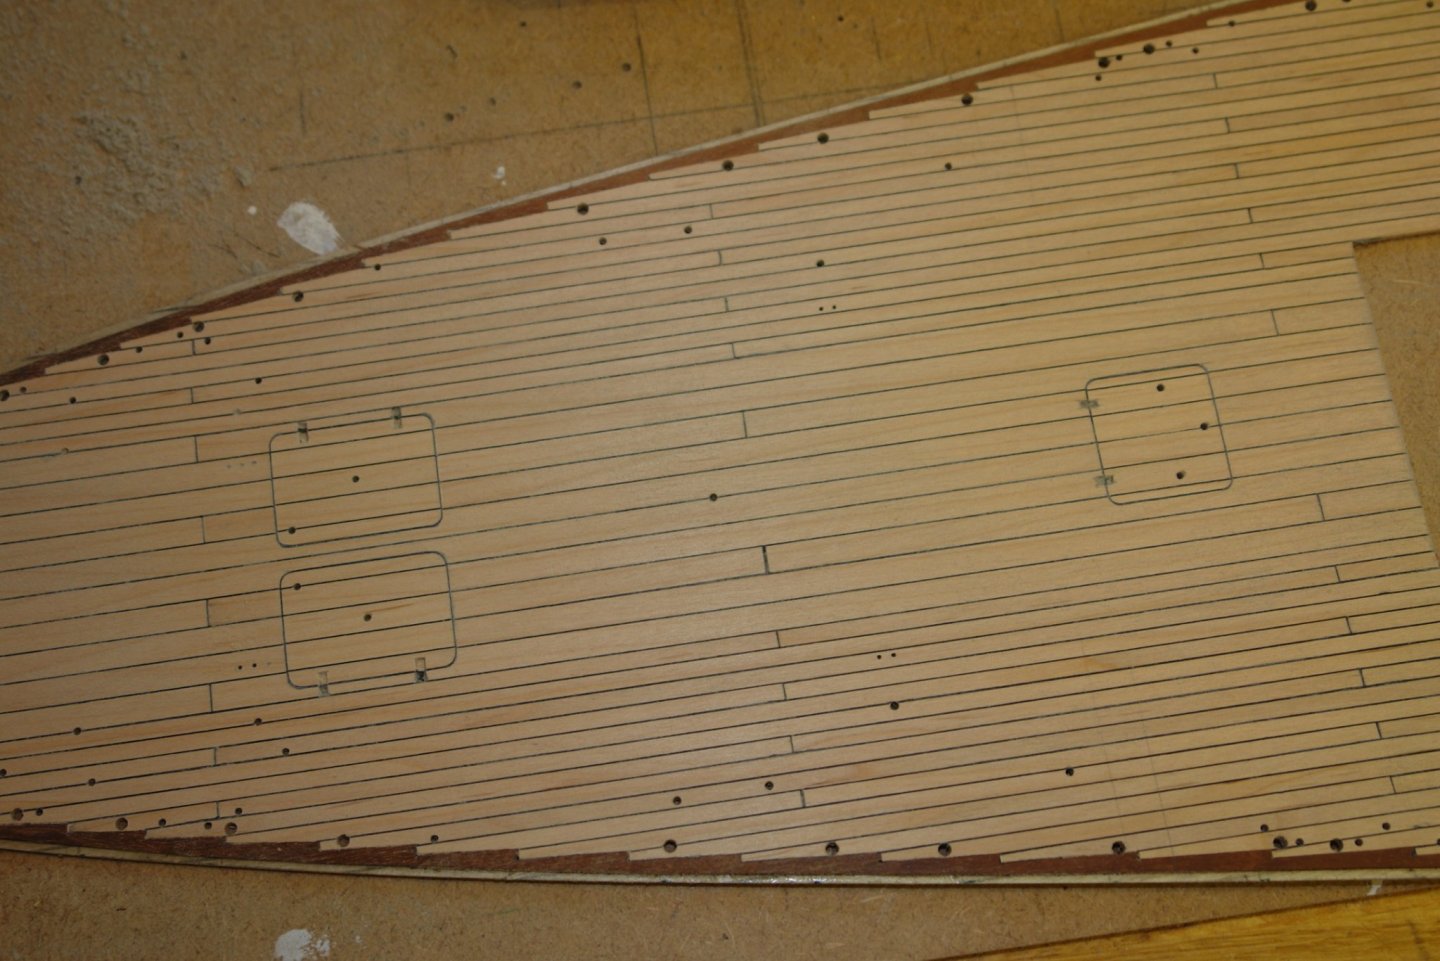
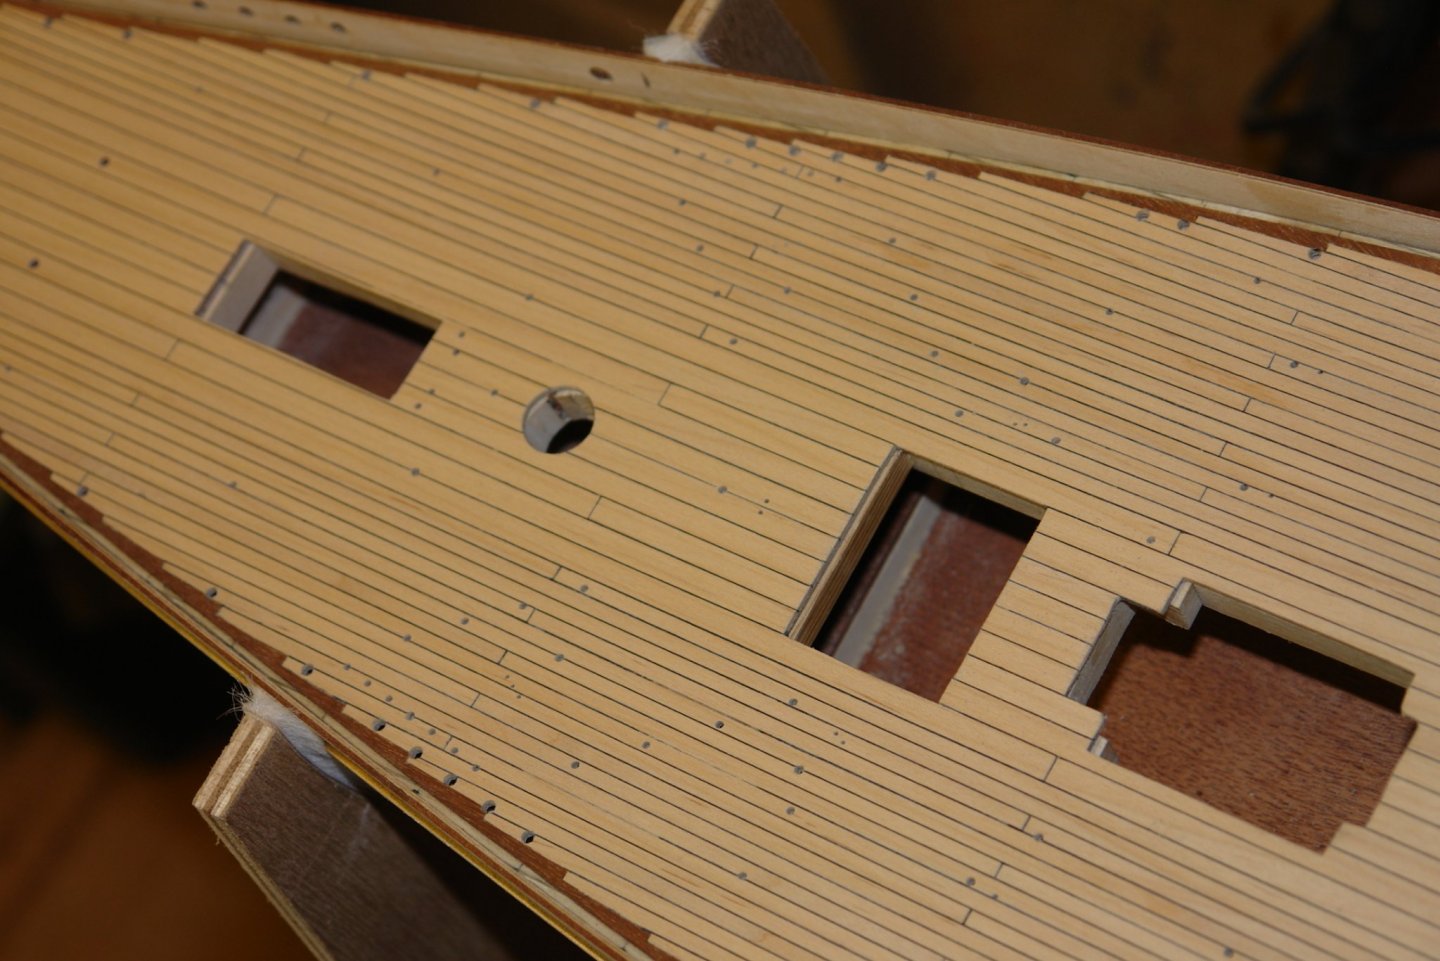
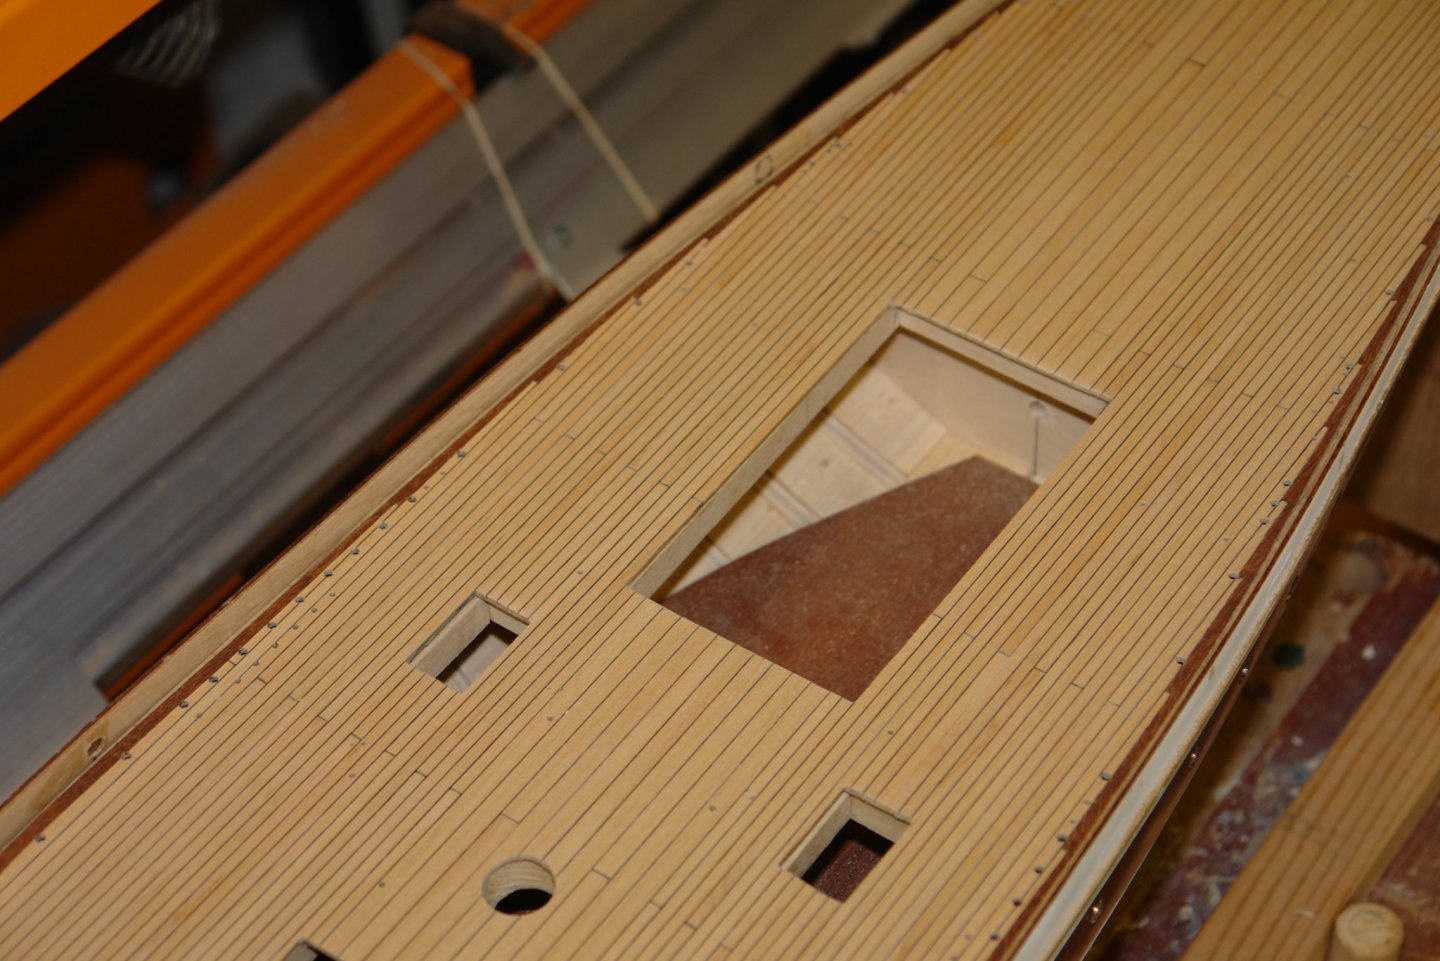
Yes Eberhard - you have to have done it to know how something as simple as a hawser pipe can turn out so tricky. All those compound angles make ones head ache. Hopefully so John. I wanted to get away from holes and I ended up doing even bigger ones. On the rear deck are 3 hatches. When I built Altair I somehow missed the deck hatches and when I realised it was too late to rectify. I carefully marked out the locations after establishing the positions from photographs. It took a bit of interpretation but I'm fairly sure about the result. Having marked the positions I drilled holes at the corners and widened these with a round file - the corners of the hatches have a circular profile. I then cut the sides carefully with a craft knife (supressing the worry that I would slip and wreck the deck). I then laid up planks on a ply base and cut this up to form hatches. To create the definition at the edges of the hatches I glued black paper strips around the edge before insertion. The hatches are inserted in the next photo but not glued. I then cut the notches to take the simulated hinges - to be installed at a later date. I then glued the hatches in place and sanded them back flush with the deck. There are two further small hatches at the bow but I have only scant information on their shape and size. Only fragments of them appear on my photos. I think I will leave them out.

-
it is coming together very well Mark. Really impressed with how well your laser cutter produces your frames.
-
Bedford - The finish is absolutely exquisite - wonderful job.
-
A very nice model particularly when considering how difficult oak is to work with at small scale. Well done.
-
I enjoyed catching up Paul. Coming along nicely. Deadeyes and chain looking very authentic. Pity winter is coming!!!
-
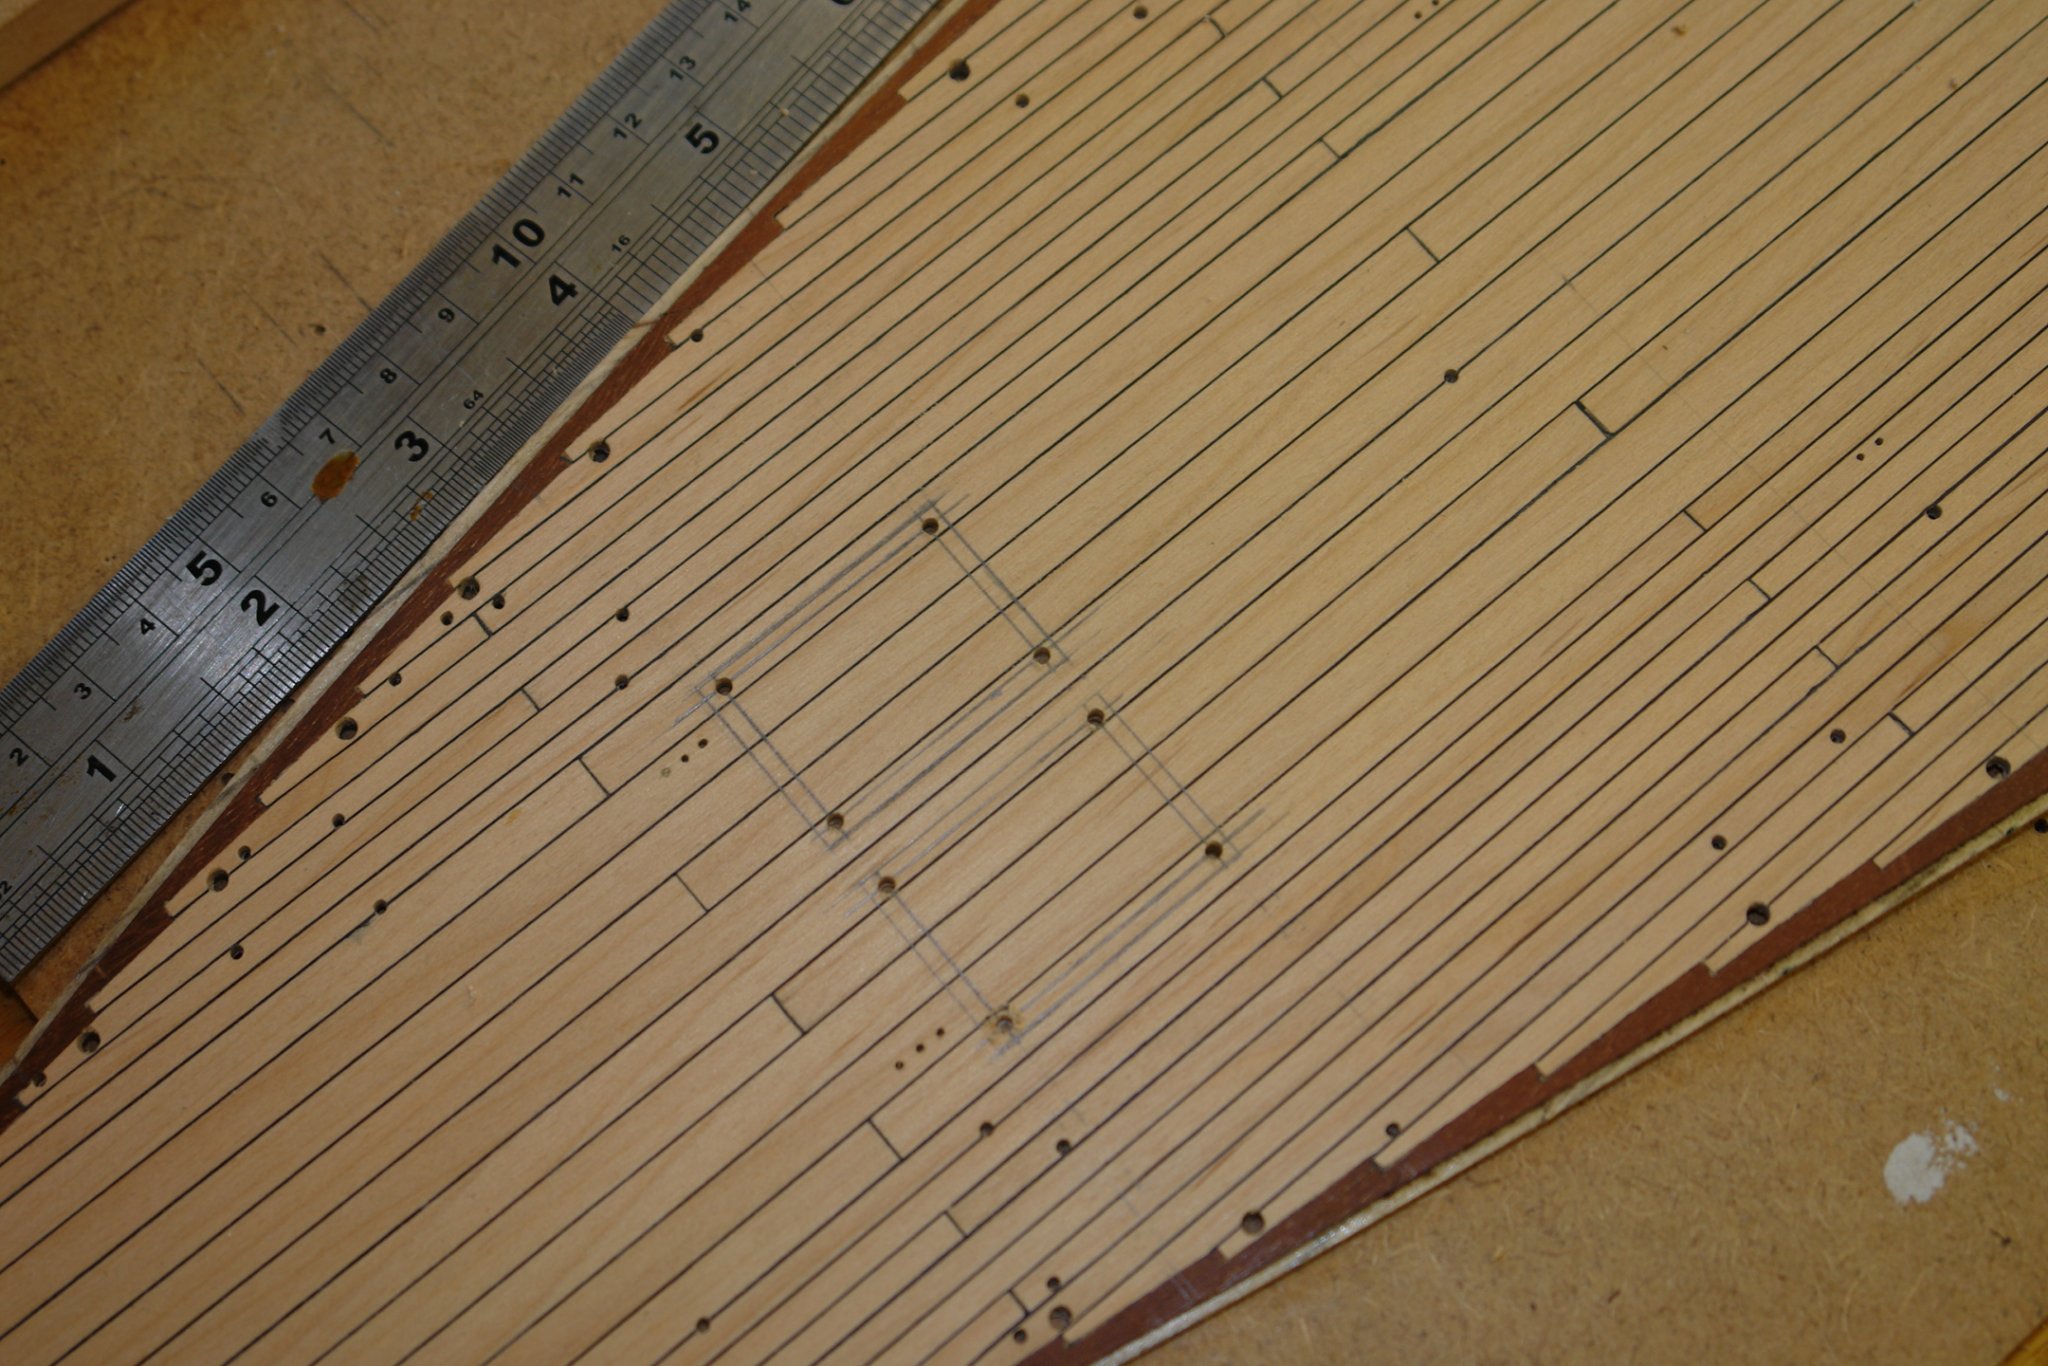
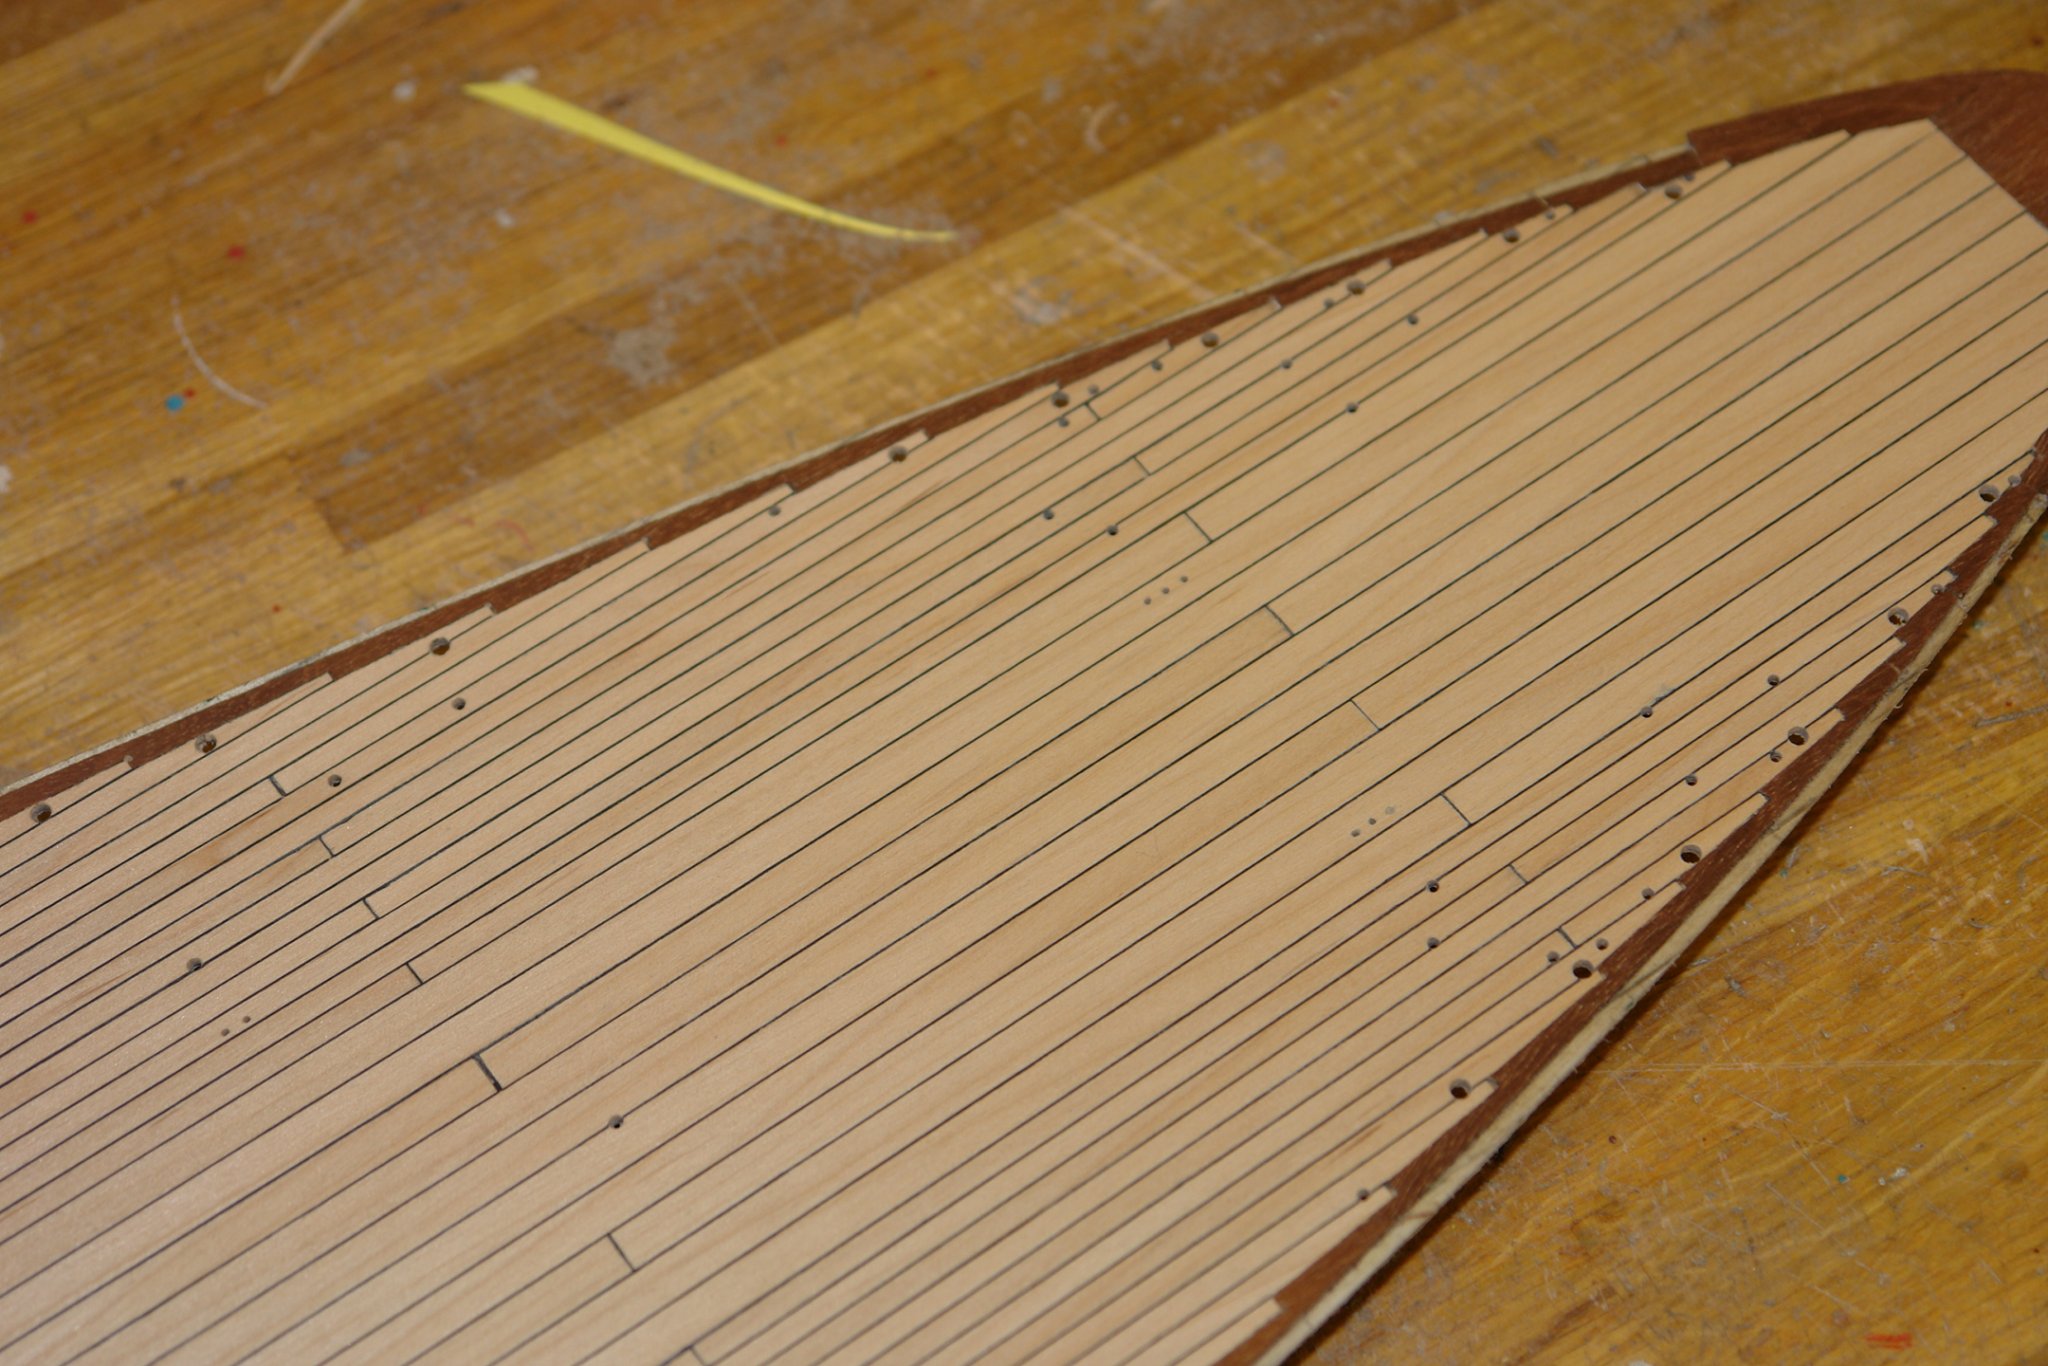
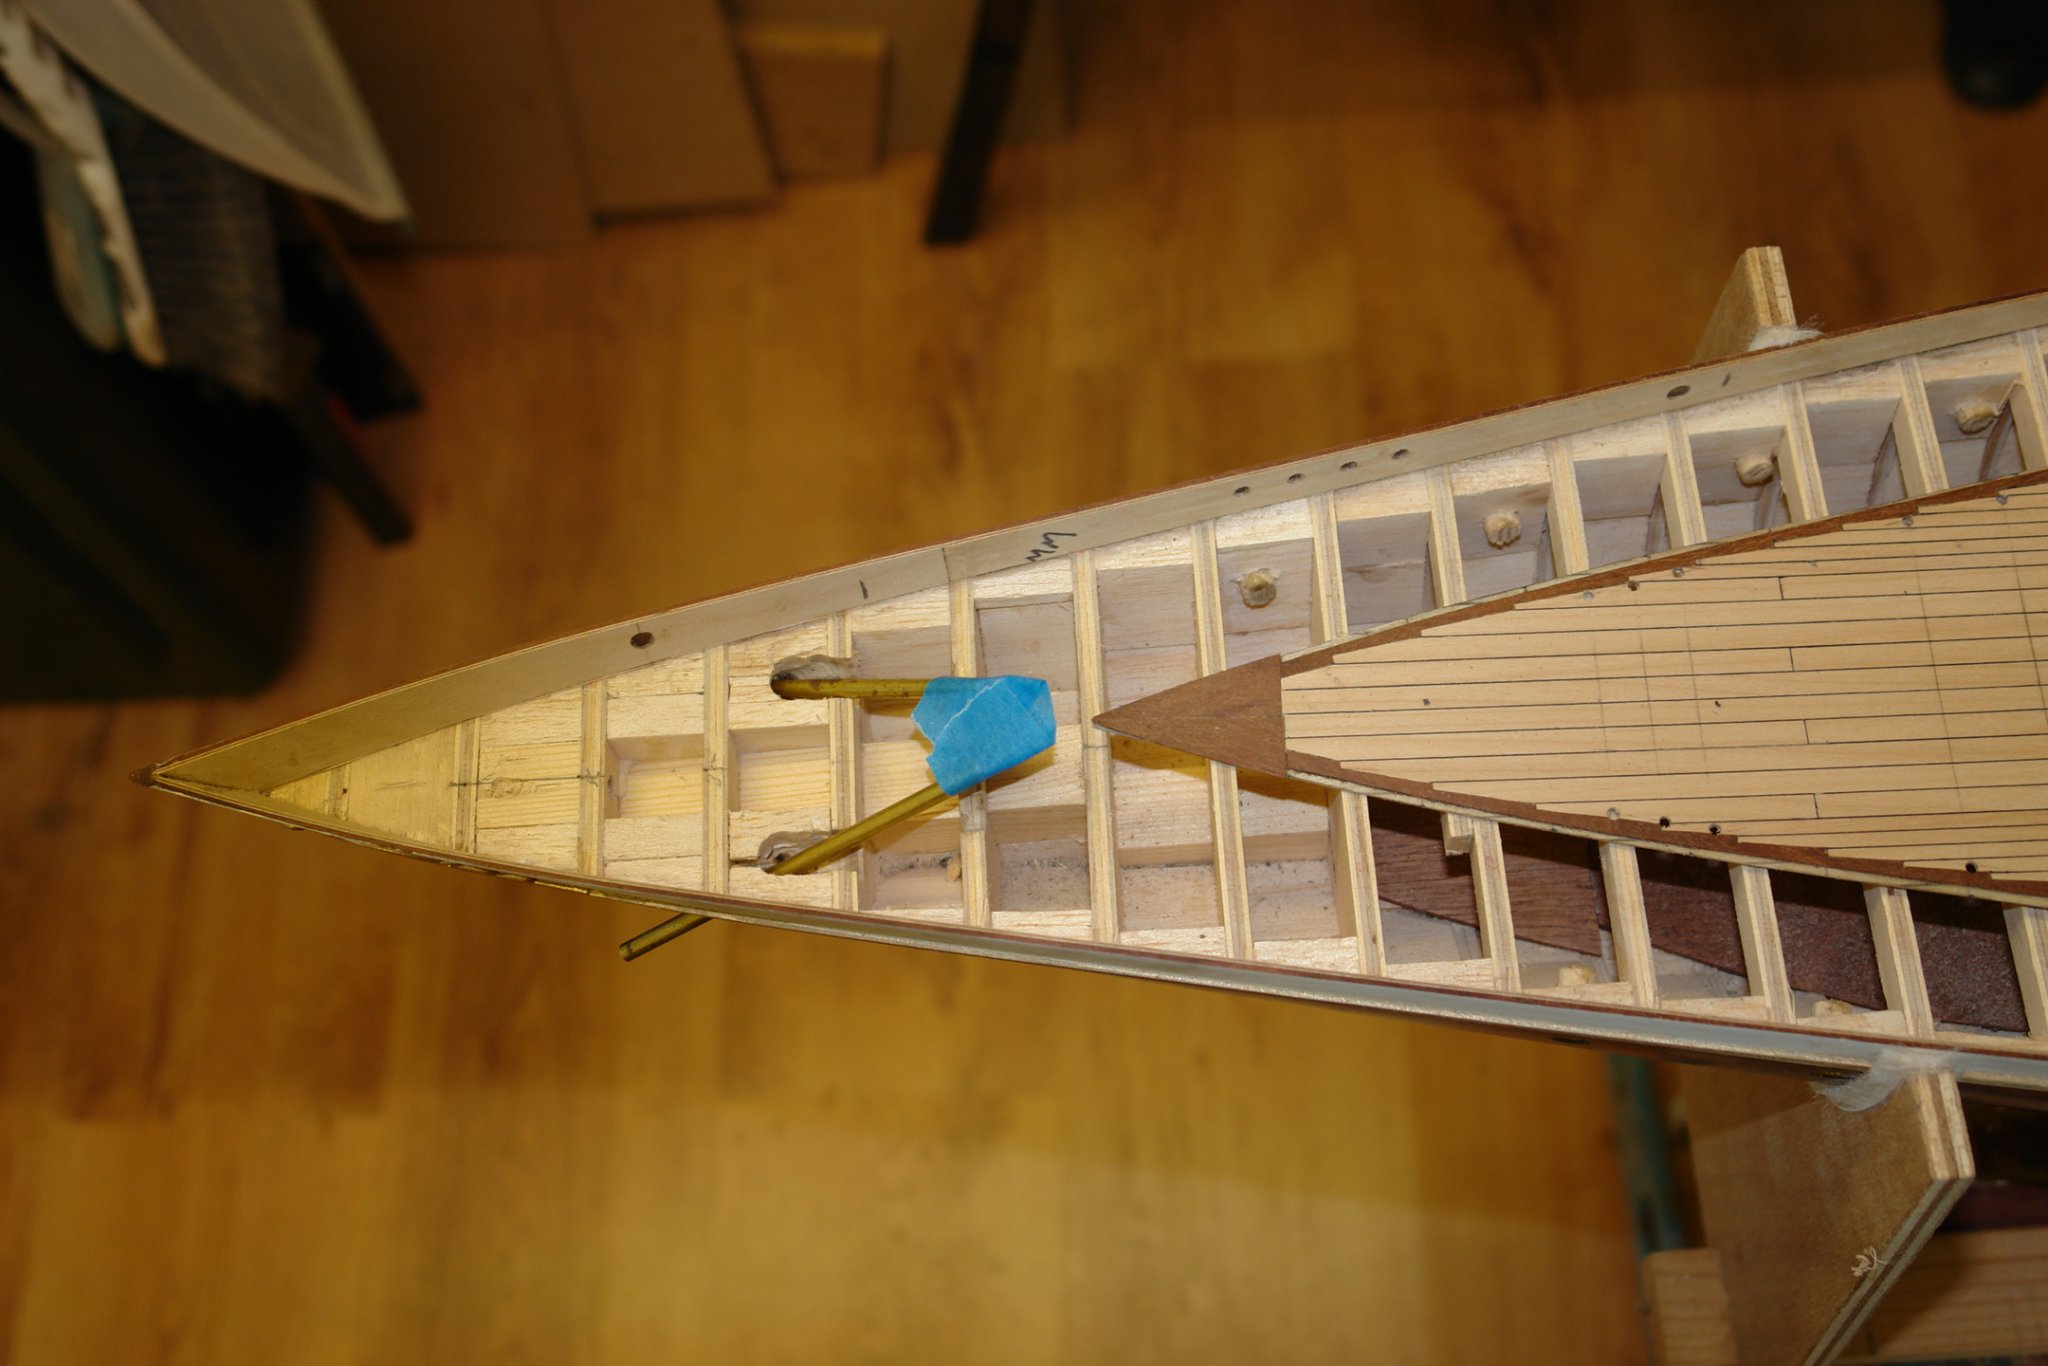
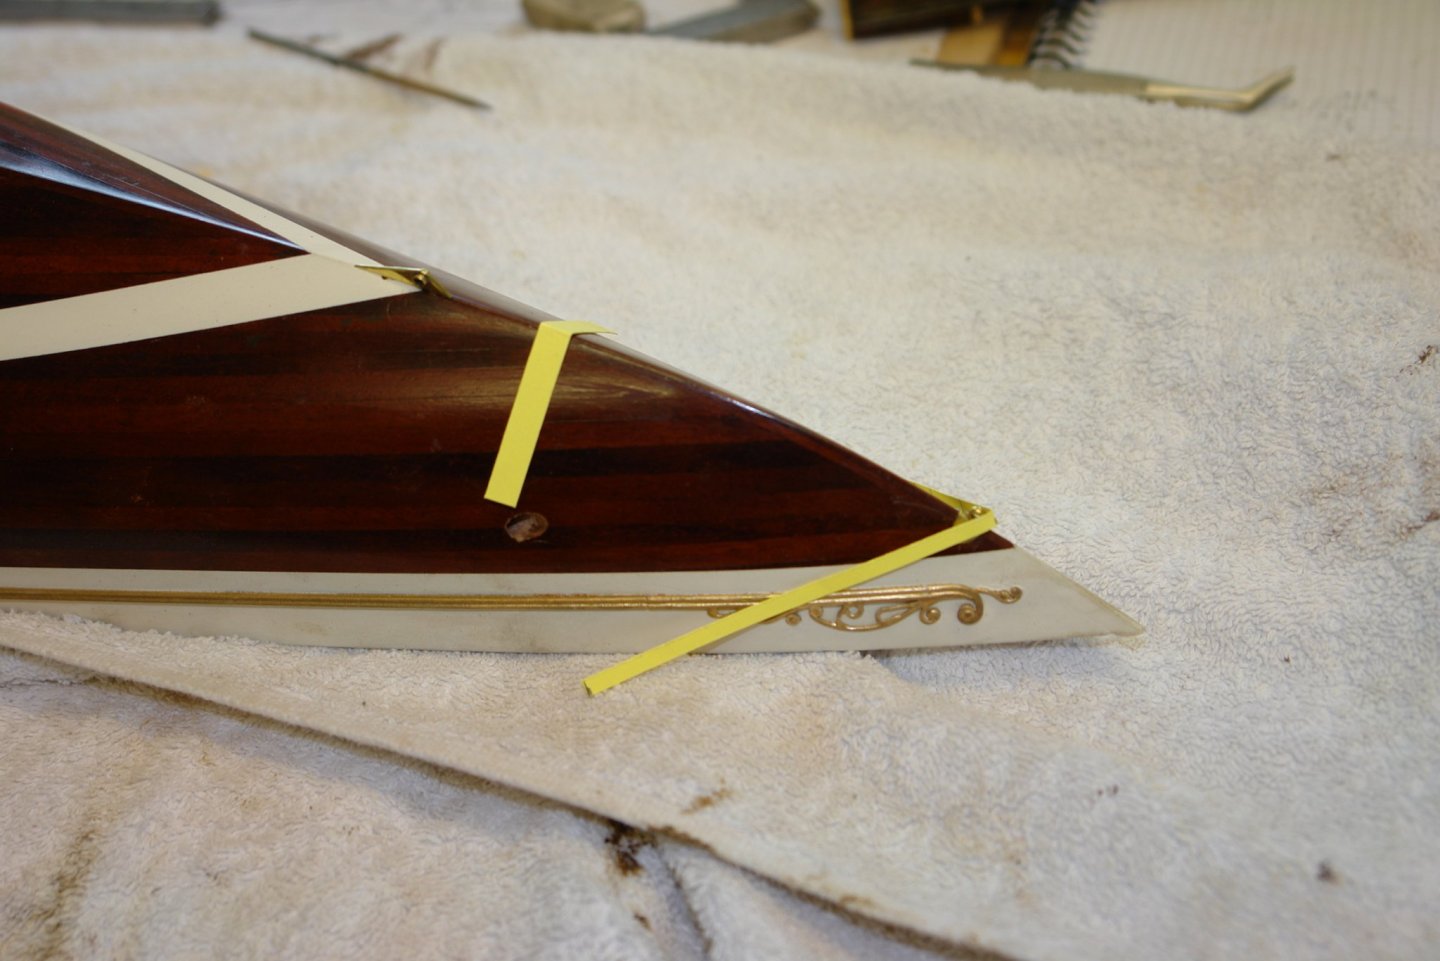
Thank you all for your comments, I have done the hawser pipe trick in previous builds and am sure to use it again - probably at the deck end of the pipe. I have spent a lot of time validating and marking out the deck fitting holes - currently about 80% done. The deck is now looking like it has a bad case of woodworm. I can see that I am going to be very carful about inserting the correct fitting in the correct hole. By far the most difficult holes to position were the aforementioned holes for the deck end of the hawser pipes. I used the hawser pipes mounted in the hull without the deck fitted to make a template and used this to mark put the position. I drilled holes at both ends of the ellipse and opened these out and connected them with a needle file. I am getting fed up with holes so may move on to something else for a break. I hope to catch up with all your builds over the next few days.


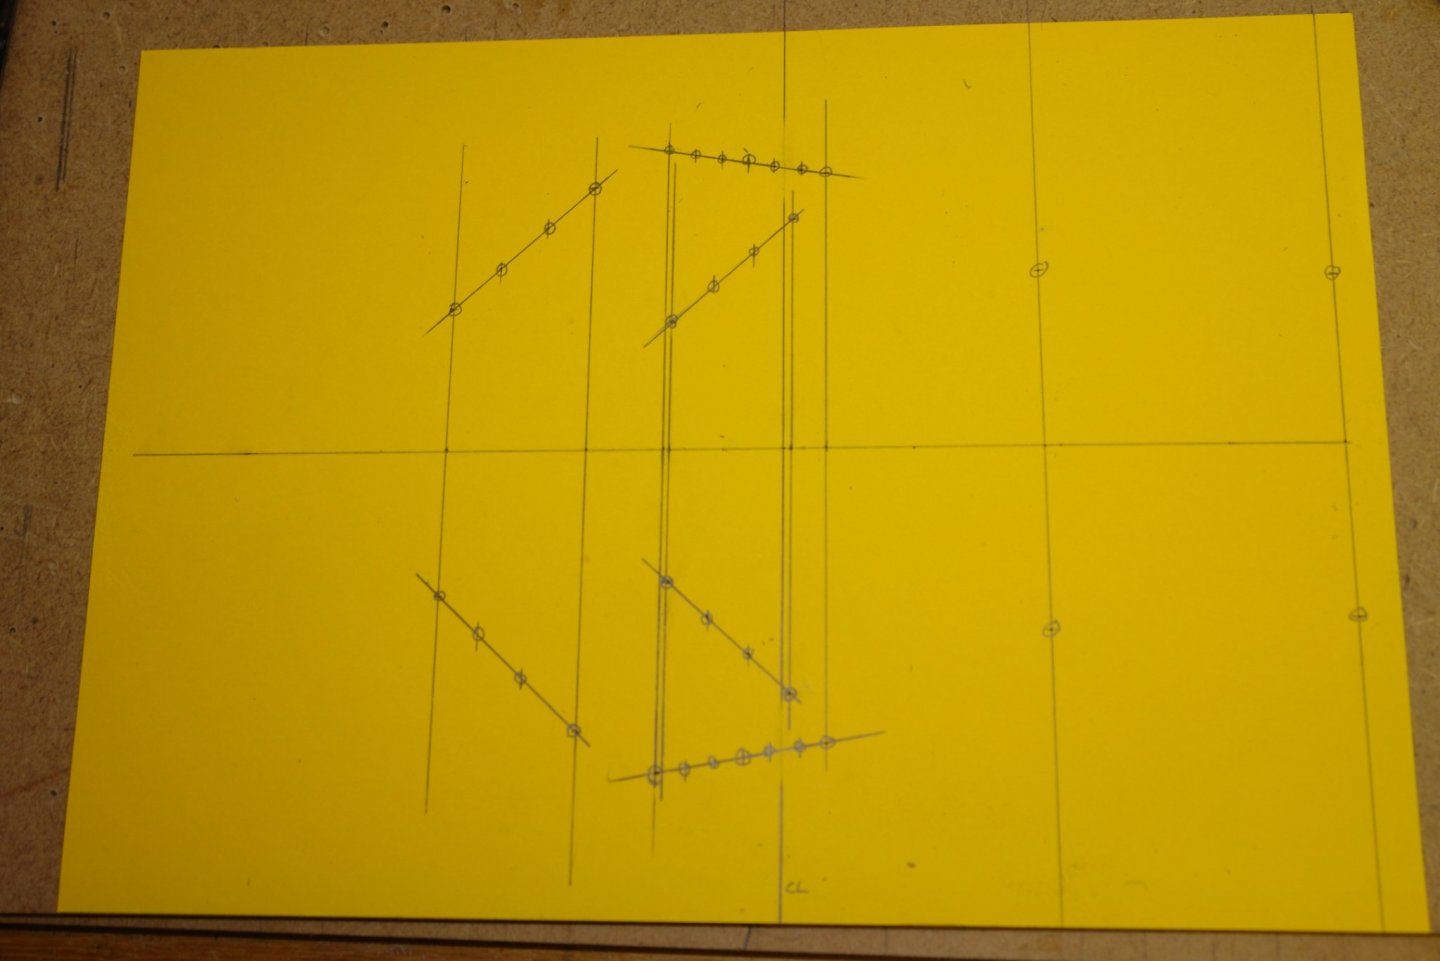
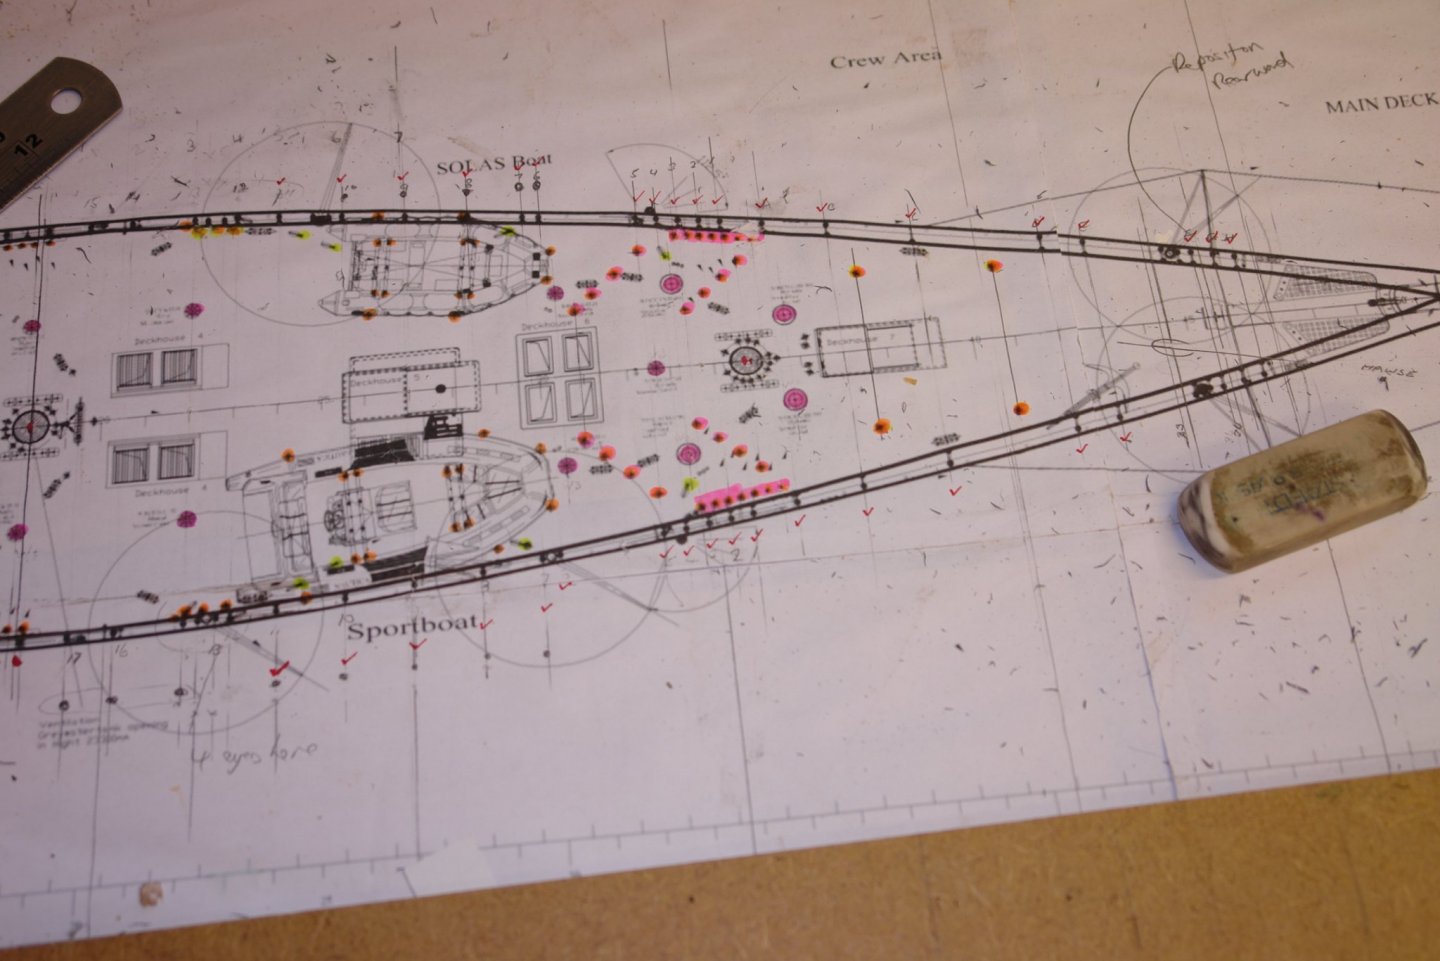
-
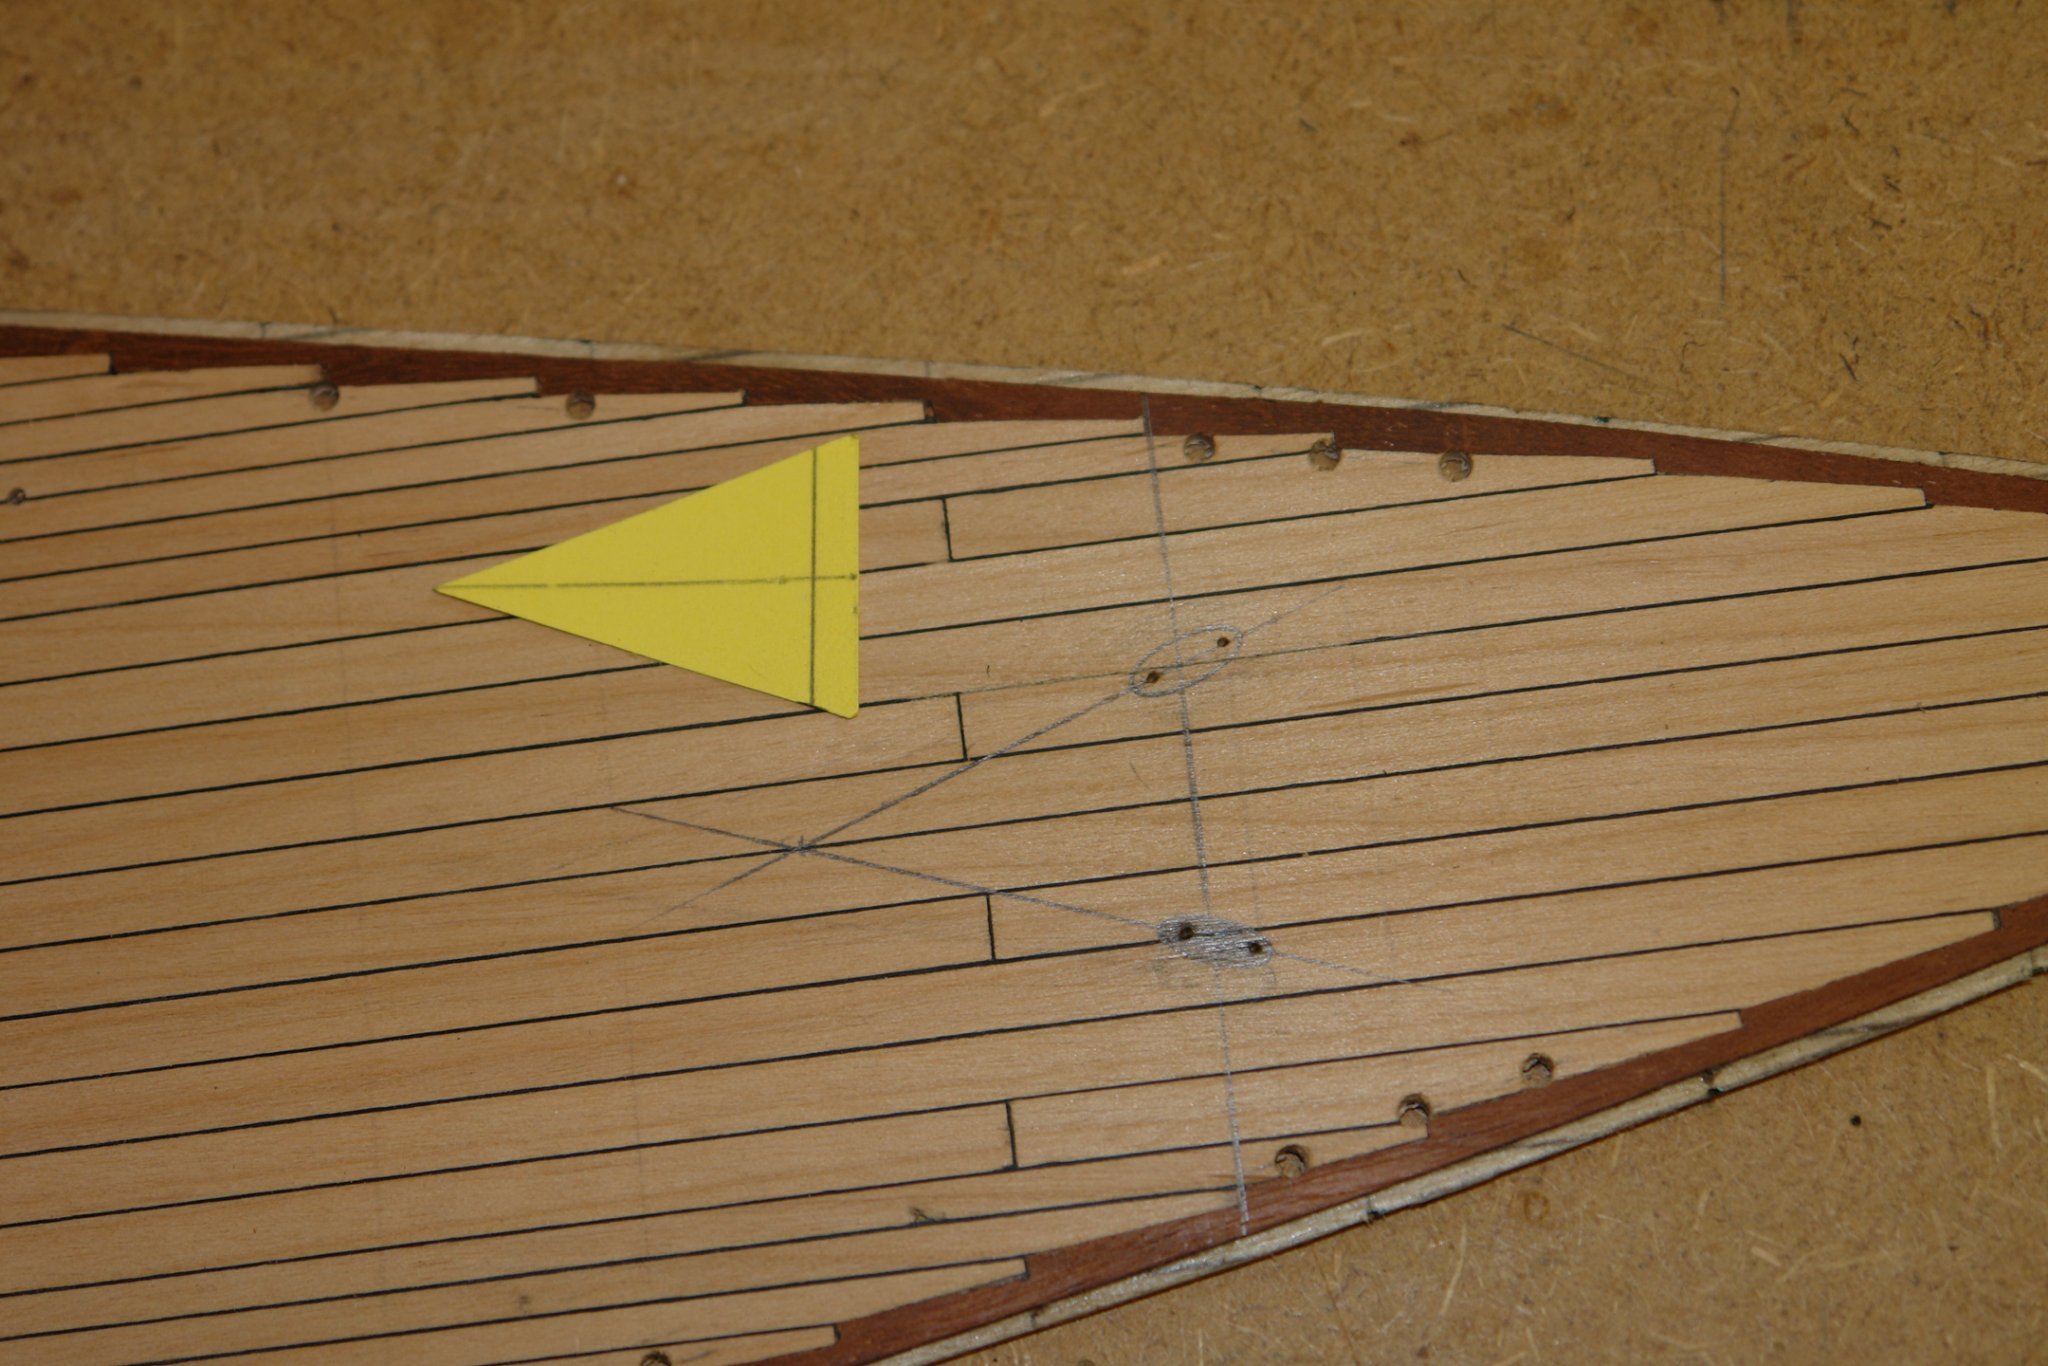
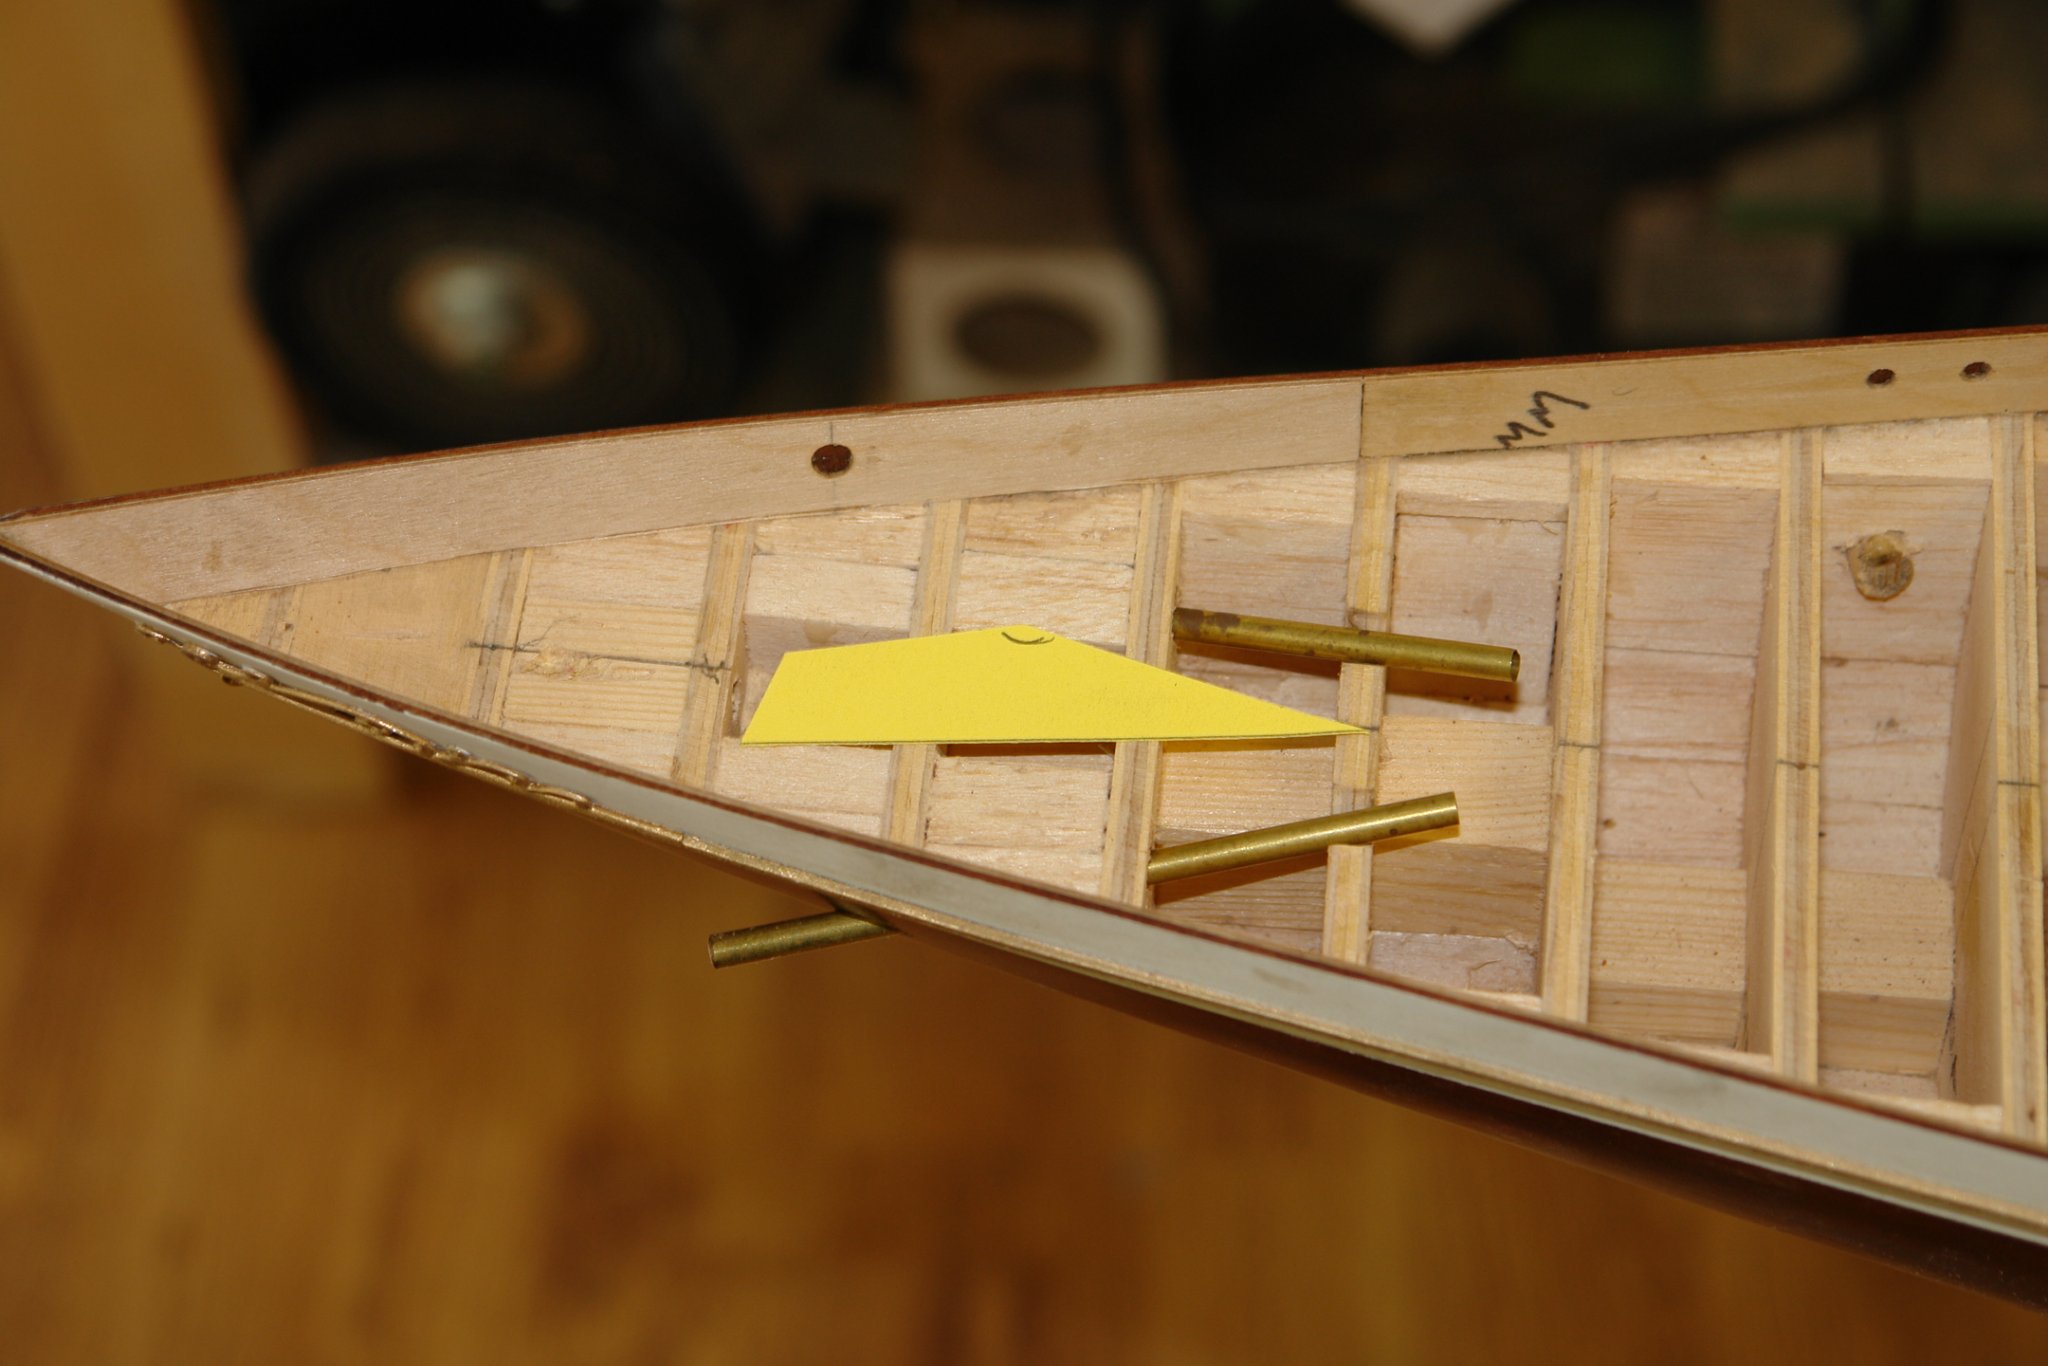
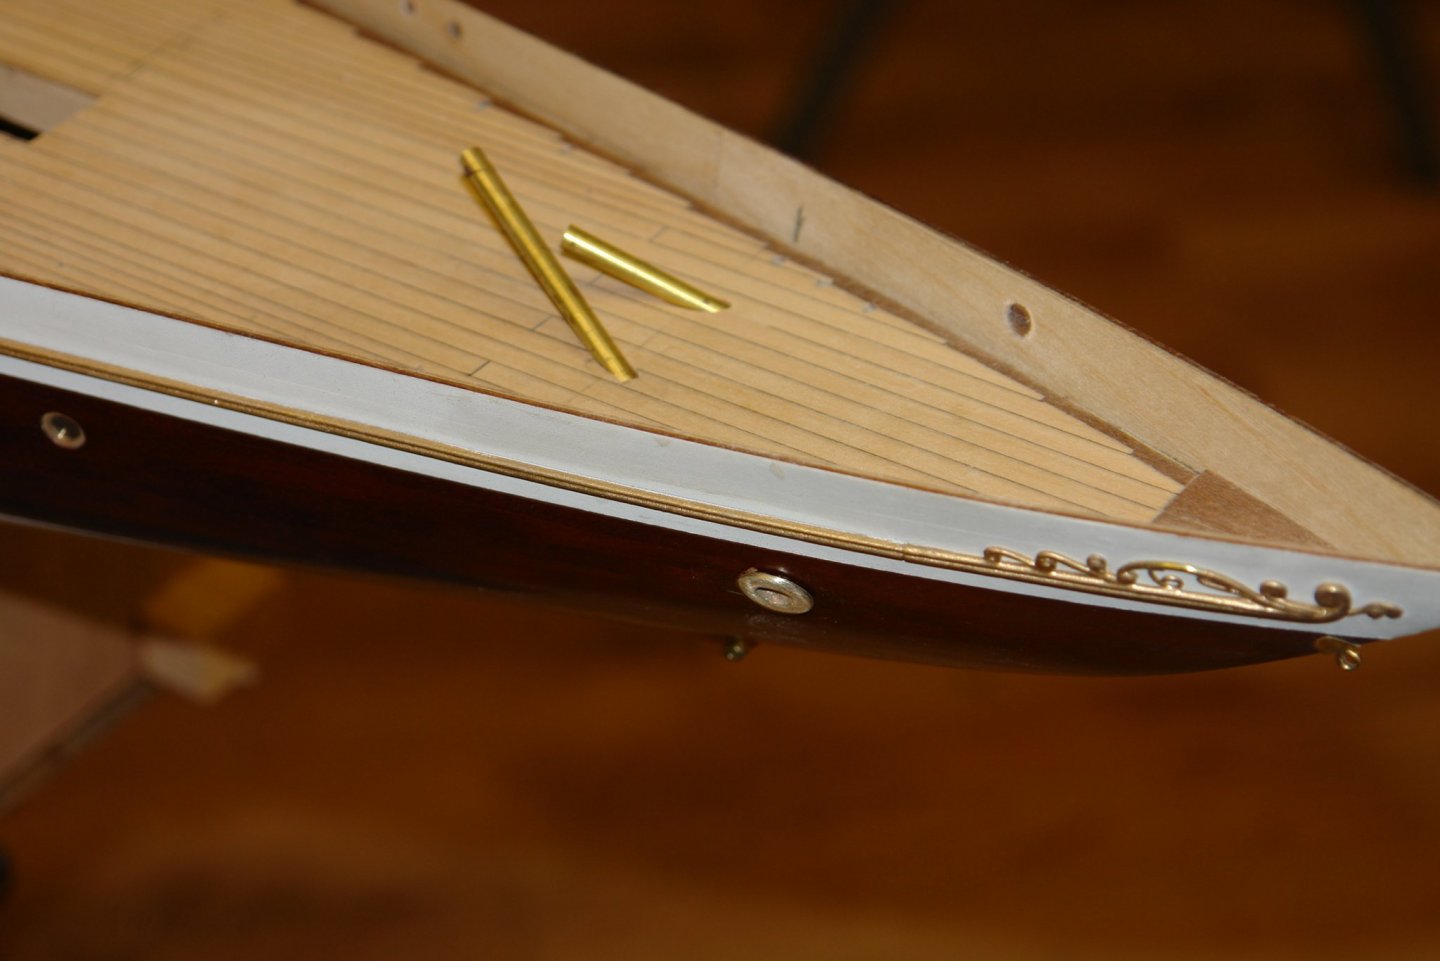
Thank you all for your congratulations. I did finally get a bit of time in the workshop today. I made a concerted effort to get a lot of the deck fitting positions established - I prefer to mark the positions on templates and then to transfer the positions to the deck by pricking through. As previously discussed I did a lot of checking of the positions using photographs. The deck has several hundred fittings which have to be checked and marked out. I colour them in on the plan as I go. The most difficult holes to position are those for the hawser pipes. You may remember that I pre-cut holes in the frames to take these pipes. Holes were cut in the hull and deck to align with these pipes. I checked the hull hole positions using folded card to make sure both sides were identical. I cut out a card template to show the angle the hawsers make with the hull as a precursor to making the hawser pipes / flanges. The hawser pipe is made from tube and a .315" (8mm) bar is turned to take this tube. The bar is then set in the mill at the angle of the template pre-determined earlier. The end of the bar is cut off at this angle using a slitting saw. The hawser pipe is then soldered in position. The slitting saw was then used to slit off a flange .050" thick. This was finally shaped with a file. The fitting against the hull was then checked before polishing and final checking.


-
Nice job on nails Paul. What saw did you buy.