KeithAug
-
Posts
3,986 -
Joined
-
Last visited
Content Type
Profiles
Forums
Gallery
Events
Everything posted by KeithAug
-
 Lovely job Hakan. Your build rate is pretty typical as far as I can tell but some seem to build at an unbelievably rapid rate. I prefer a more relaxed approach - its my age you know. .
 -
Gary - Good tip. Now where did I park my time machine? Perhaps just better to remember it next time.
-
Gary - beautiful job on the frames ----------------------------- pity about the rivets😀.
-
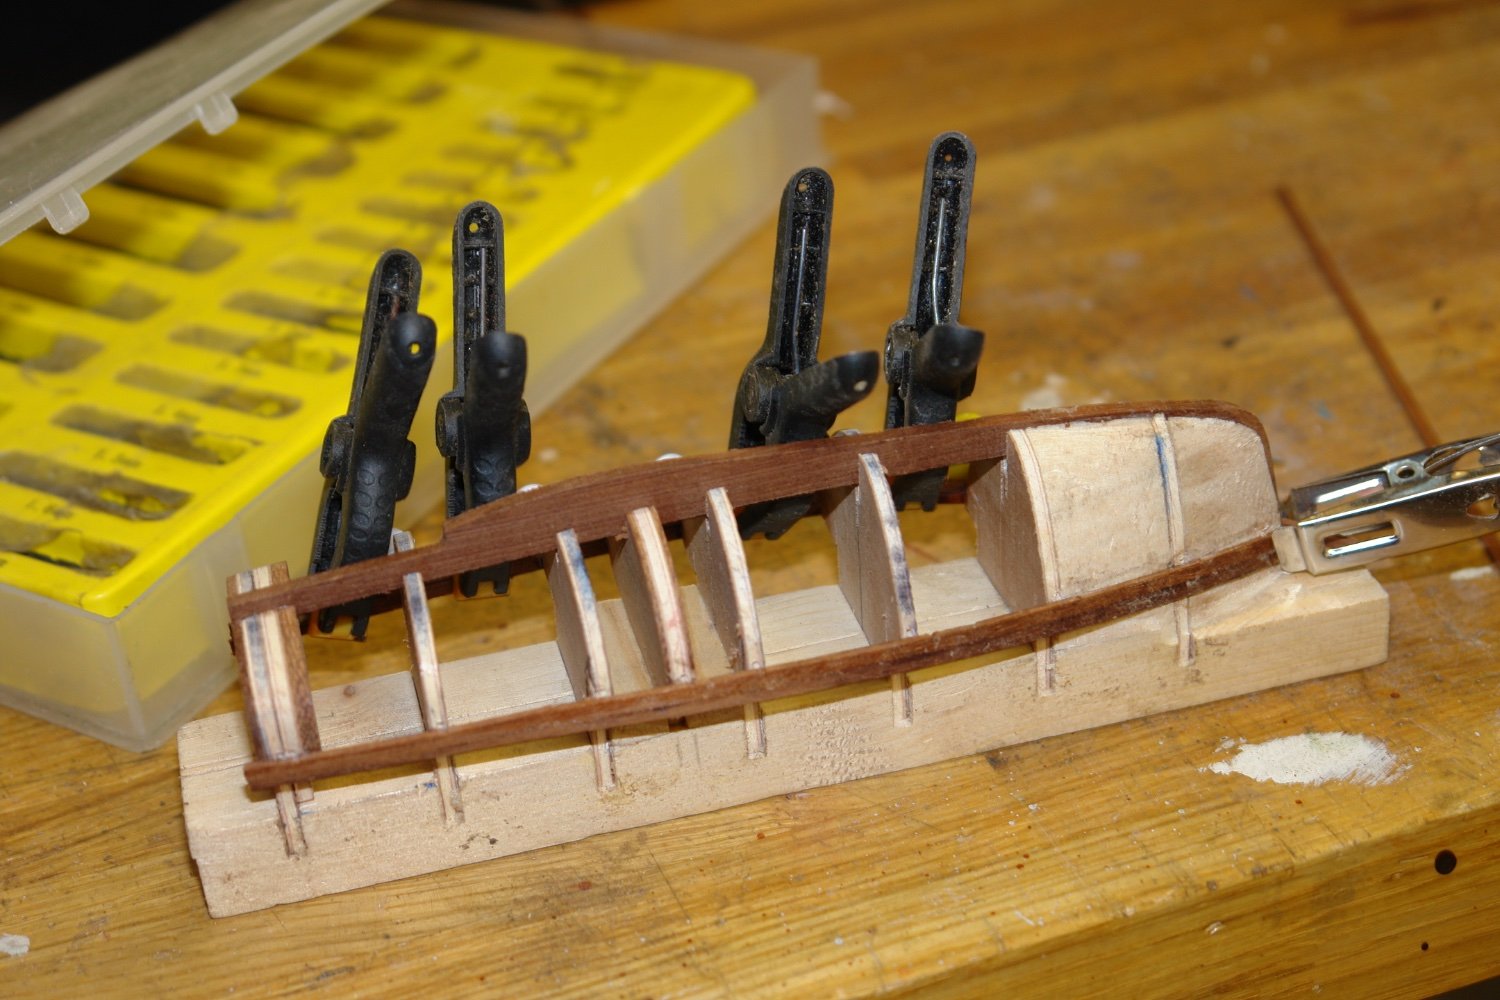
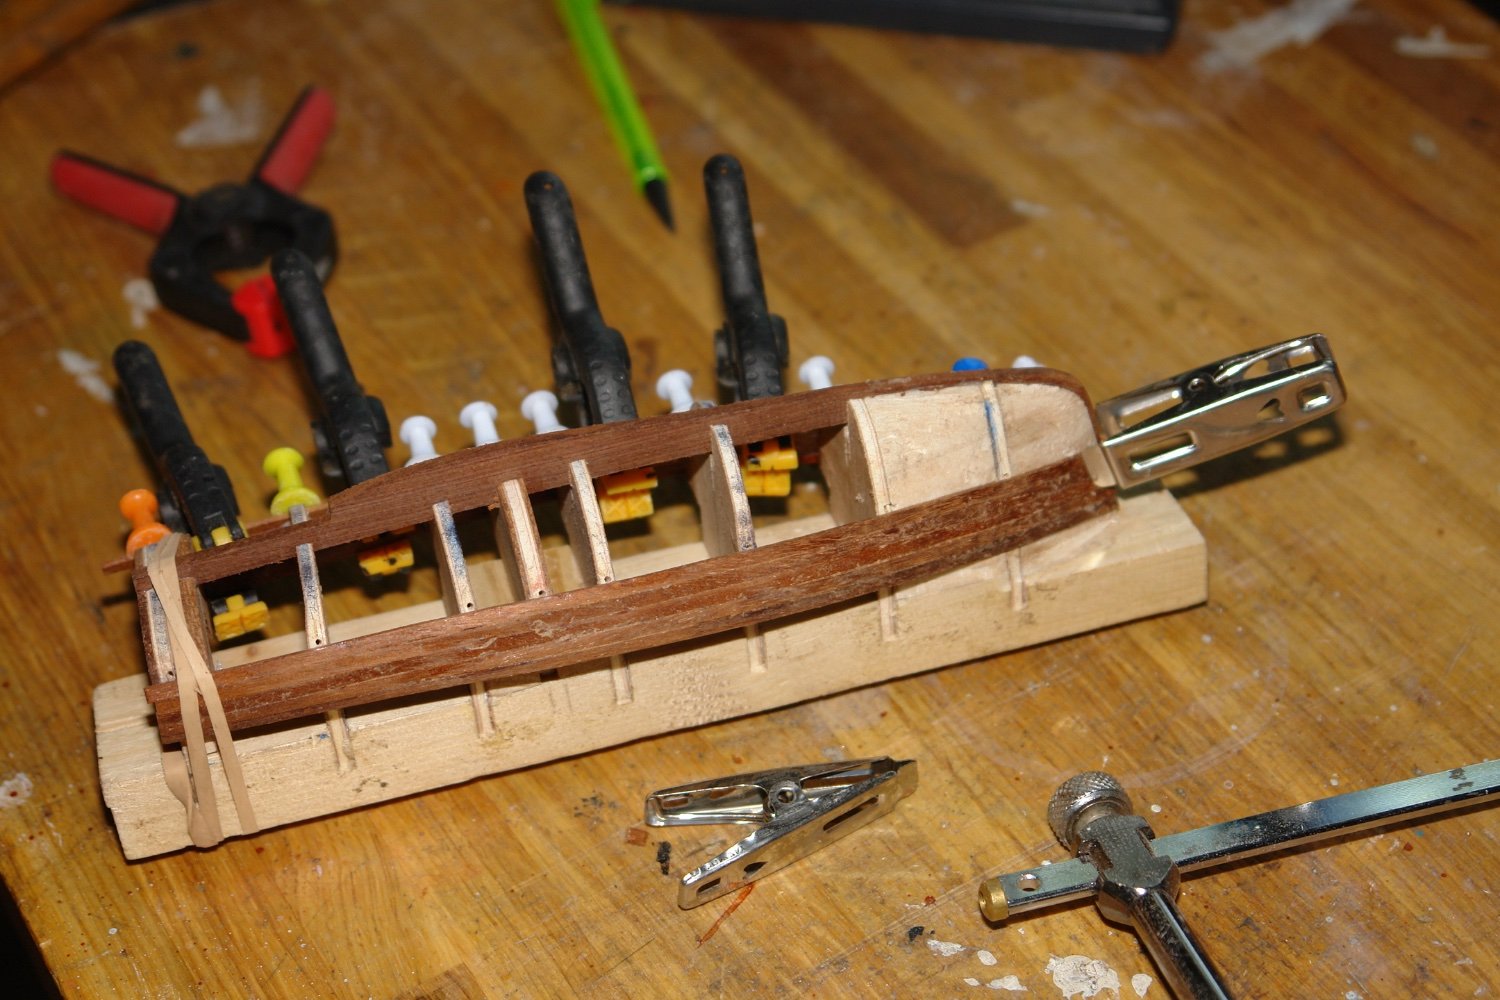
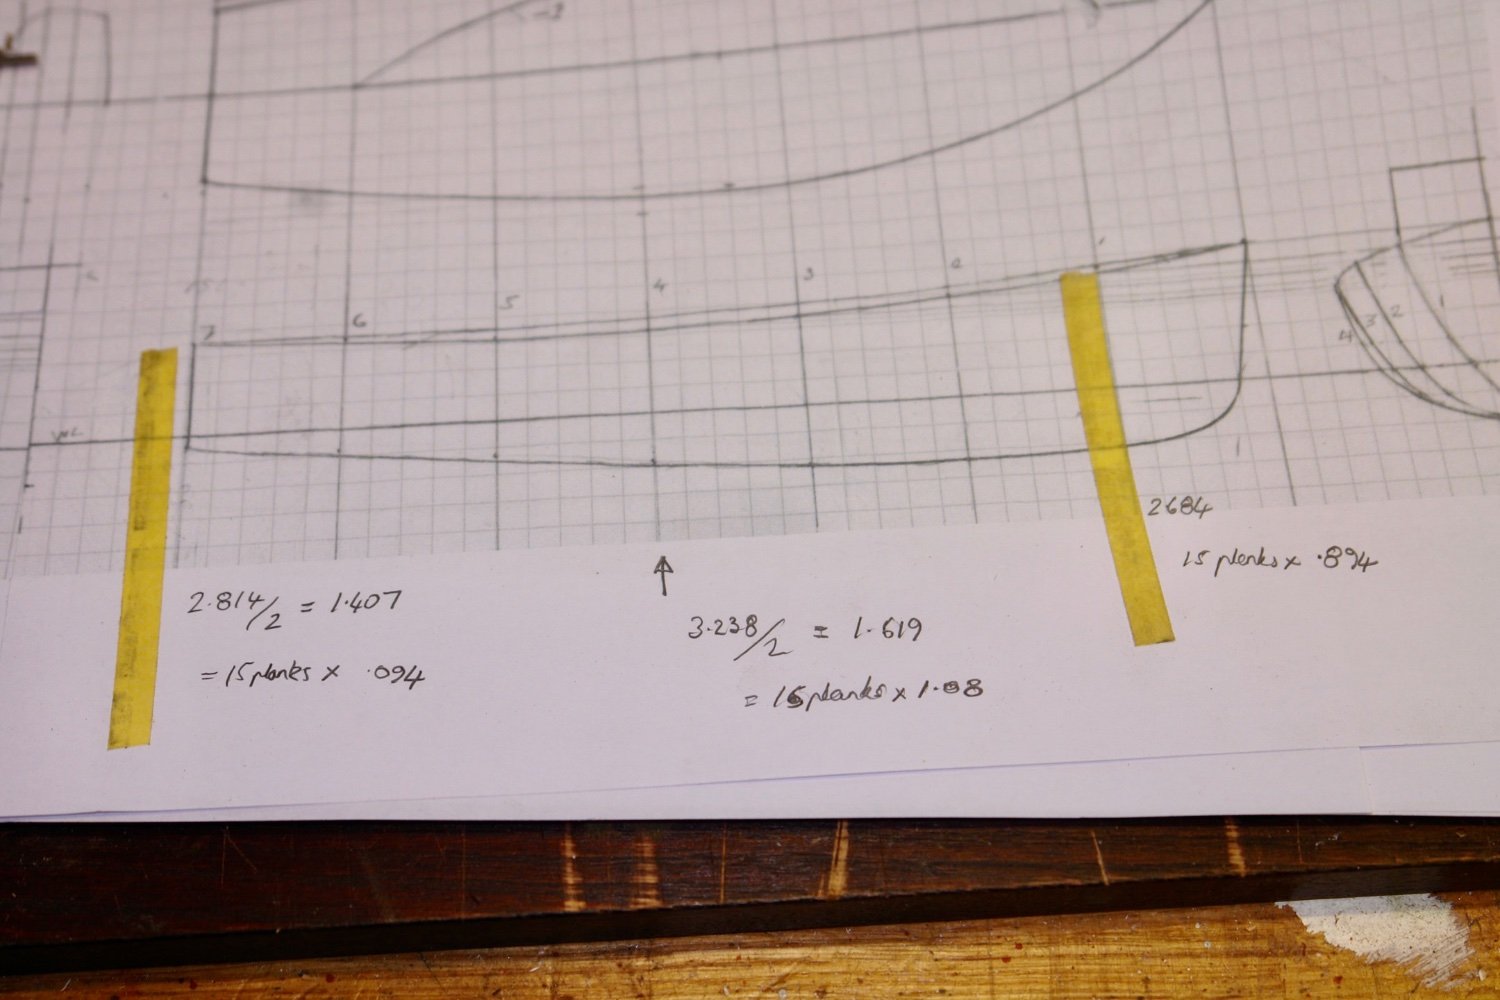
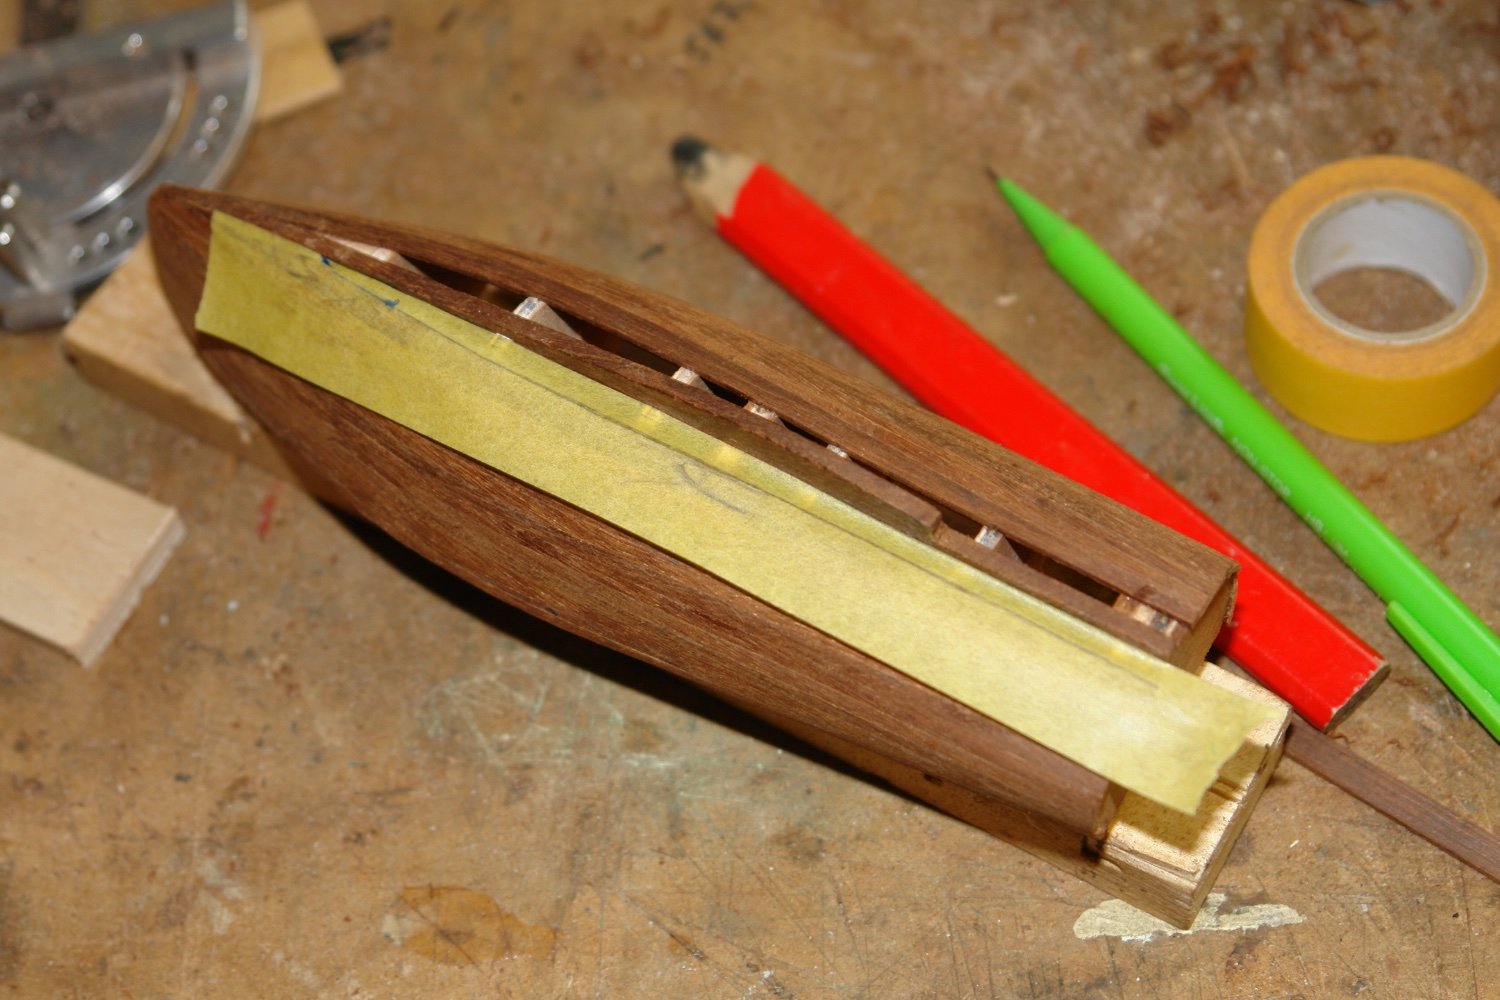
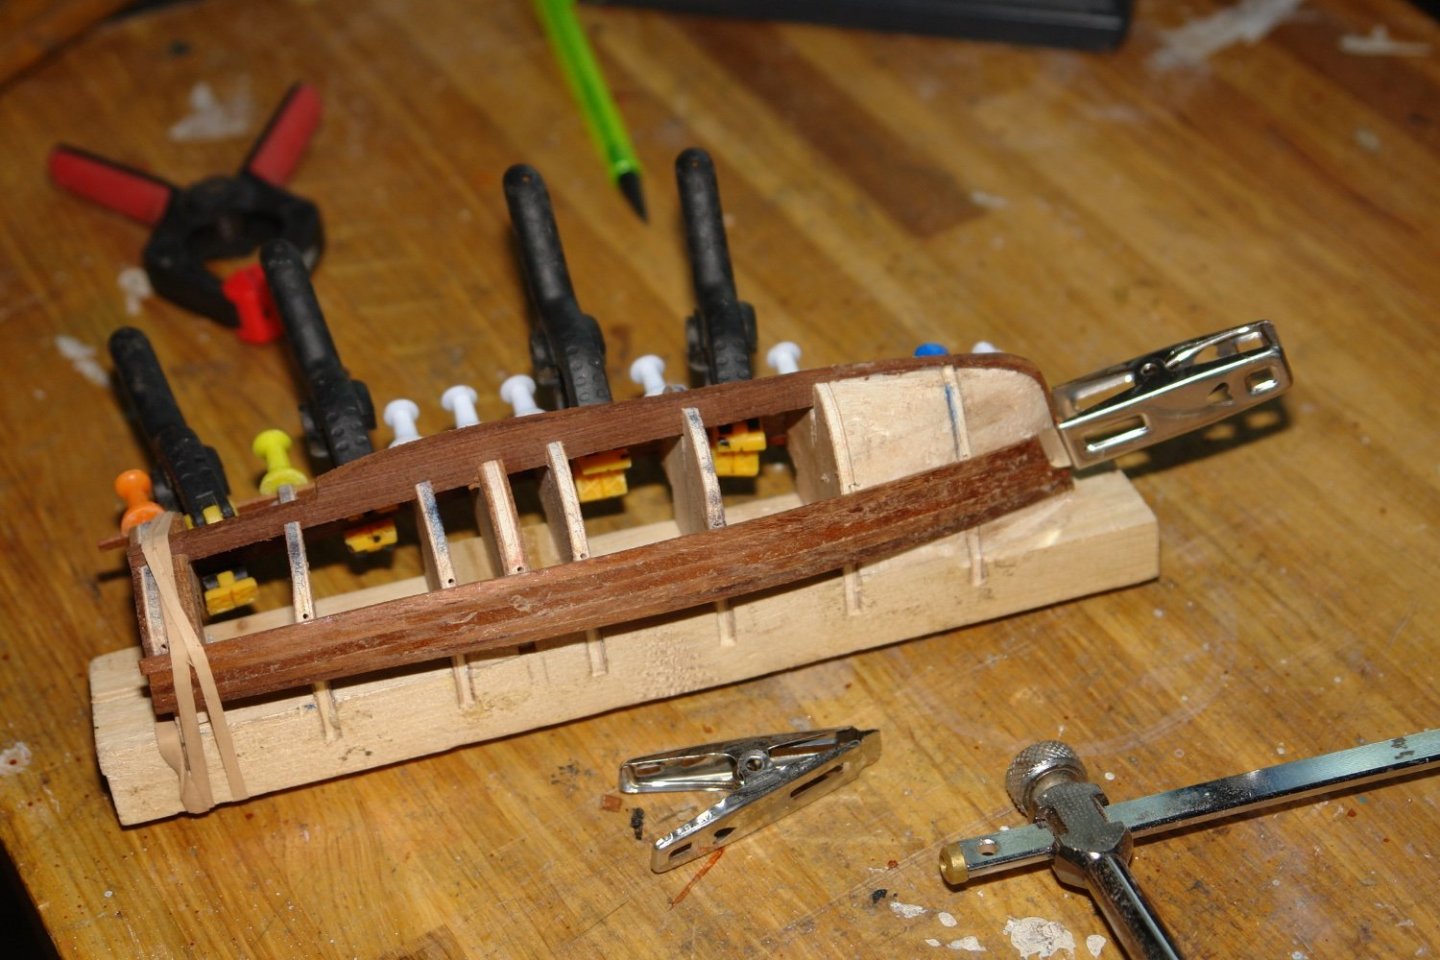
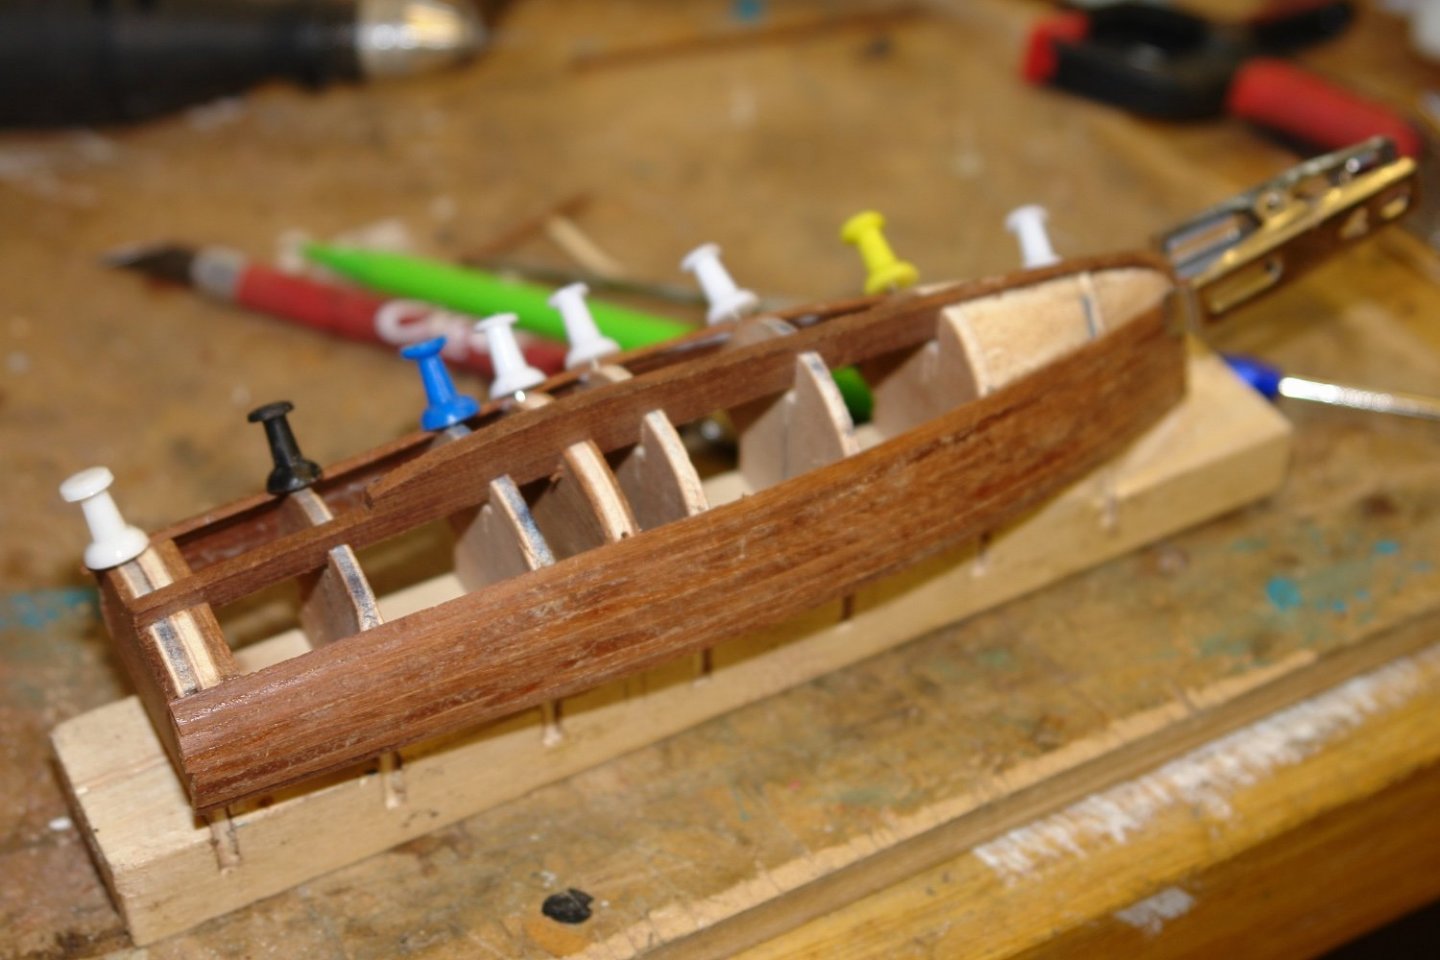
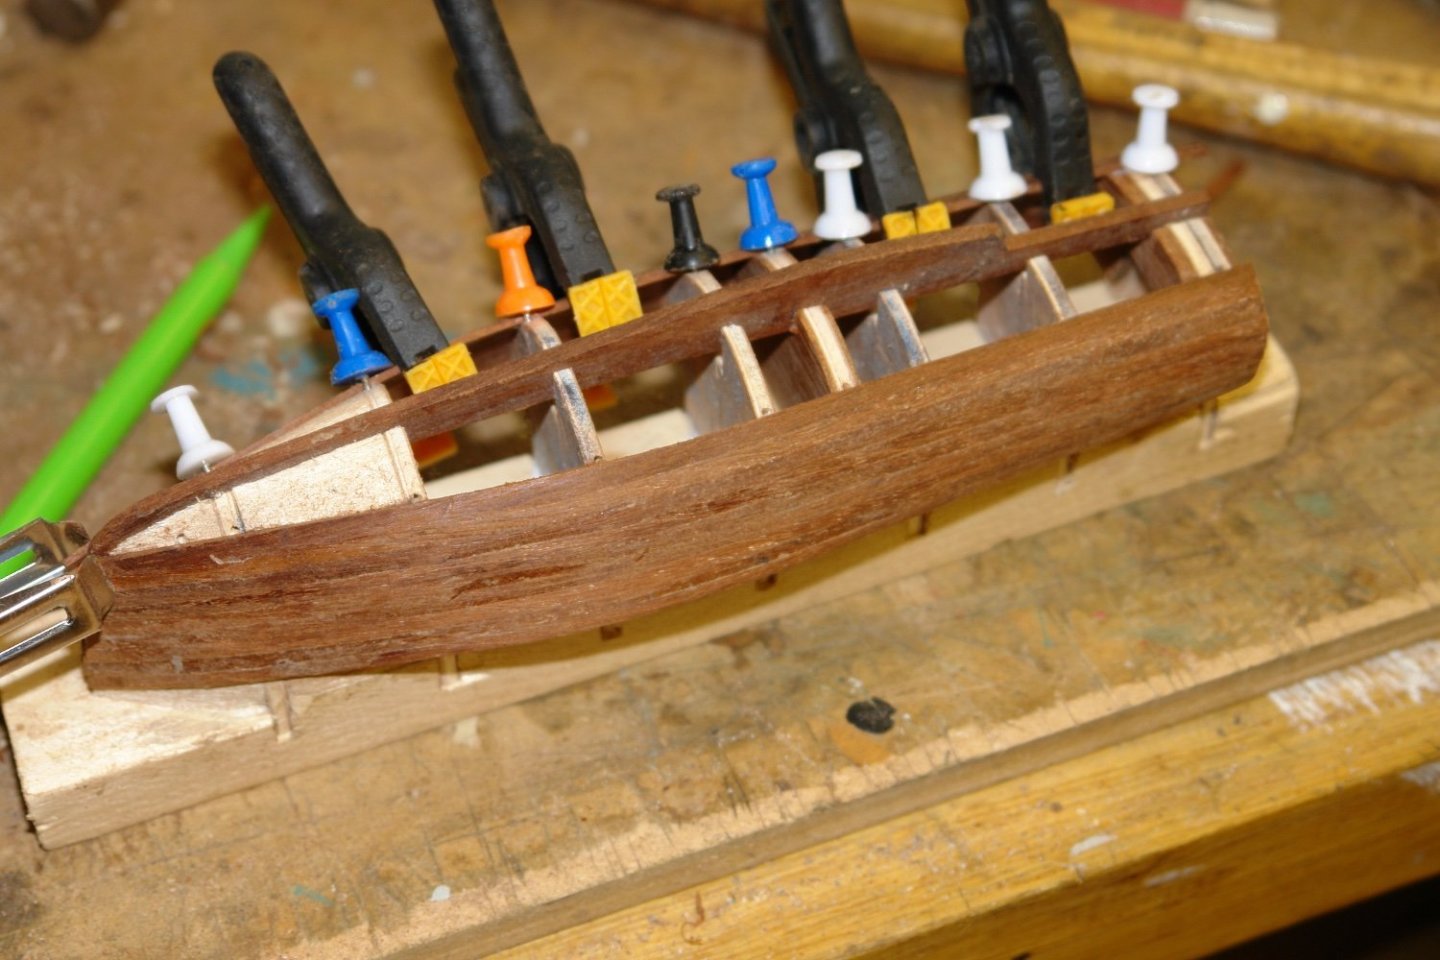
Thank you Pat and thanks to everyone for the likes. I resolved to plank the hull using a professional modeller approach. I used masking tape to measure the hull in 3 positions. The measurements were taken from bow to stern at frames 1, 4 and 7 respectively. I was aiming for a plank width of about 0.1" or 3.6" at full scale. The respective half hull measurements were 1.343", 1.619" and 1.407 inch. I decided to use 15 planks which gave the following plank widths:- Frame 1 - Bow = .089" Frame 4 - Mid = 1.08" Frame 7 - stern = .094" The observant of you will be looking at the sketch and thinking - "He was having a bad decimal point day". I decided on a plank thickness of .030" with the expectation that this would give me a sanding margin to smooth the hull. I dutifully shaped the first plank to the required widths and applied it to the hull using PVA wood glue. I tried to keep the glue off those frames that would be removed later. I also dutifully shaped the second plank but decided it didn't look right - "After all, a plank needs to go where a plank wants to go"! So that was the end of the scientific approach and I subsequently shaped the planks just as the hull instructed me. Progress was slow and sure - in the main dictated by the drying time for the glue. A liberal use of clamps, notice board pins, clothes pegs and elastic bands eased the process. Planking got trickier as I approached the keel as the degree of plank twist increased. Getting glue on to the .030" plank edges without spreading it on the removable frames was somewhat tricky and my guess is i didn't always get it right - a problem waiting for future resolution. Fitting the last plank look a deal of time. I used masking tape over the hole and traced the shape using a flat sided pencil. The making tape was then cut and the profile transferred to a plank. The plank was then cut out and transferred to hull - job done. A bit of light sanding followed, taking care not to sand through the planks. I still need to do more sanding but I am nervous😫. So that it, another week gone and only a partially complete 7' hull to show for it. I have a rather distracting few days ahead so I'm expecting building activity to be a bit curtailed. Hopefully normal service will be resumed thereafter.


-
looking excellent, especially noting the difficult construction material.
-
HMCSS Victoria 1855 by BANYAN - 1:72
KeithAug replied to BANYAN's topic in - Build logs for subjects built 1851 - 1900
Excellent Pat. Not sure how it is possible to clean a workshop in a few days. Certainly mine would be more of a project.- 1,021 replies
-
- 2
-

-
- gun dispatch vessel
- victoria
- (and 2 more)
-
Thank you for clarifying. I asked because it wasn't unusual to plate over this type of gun emplacement as generally they were of very little use in anything other than calm weather.
-
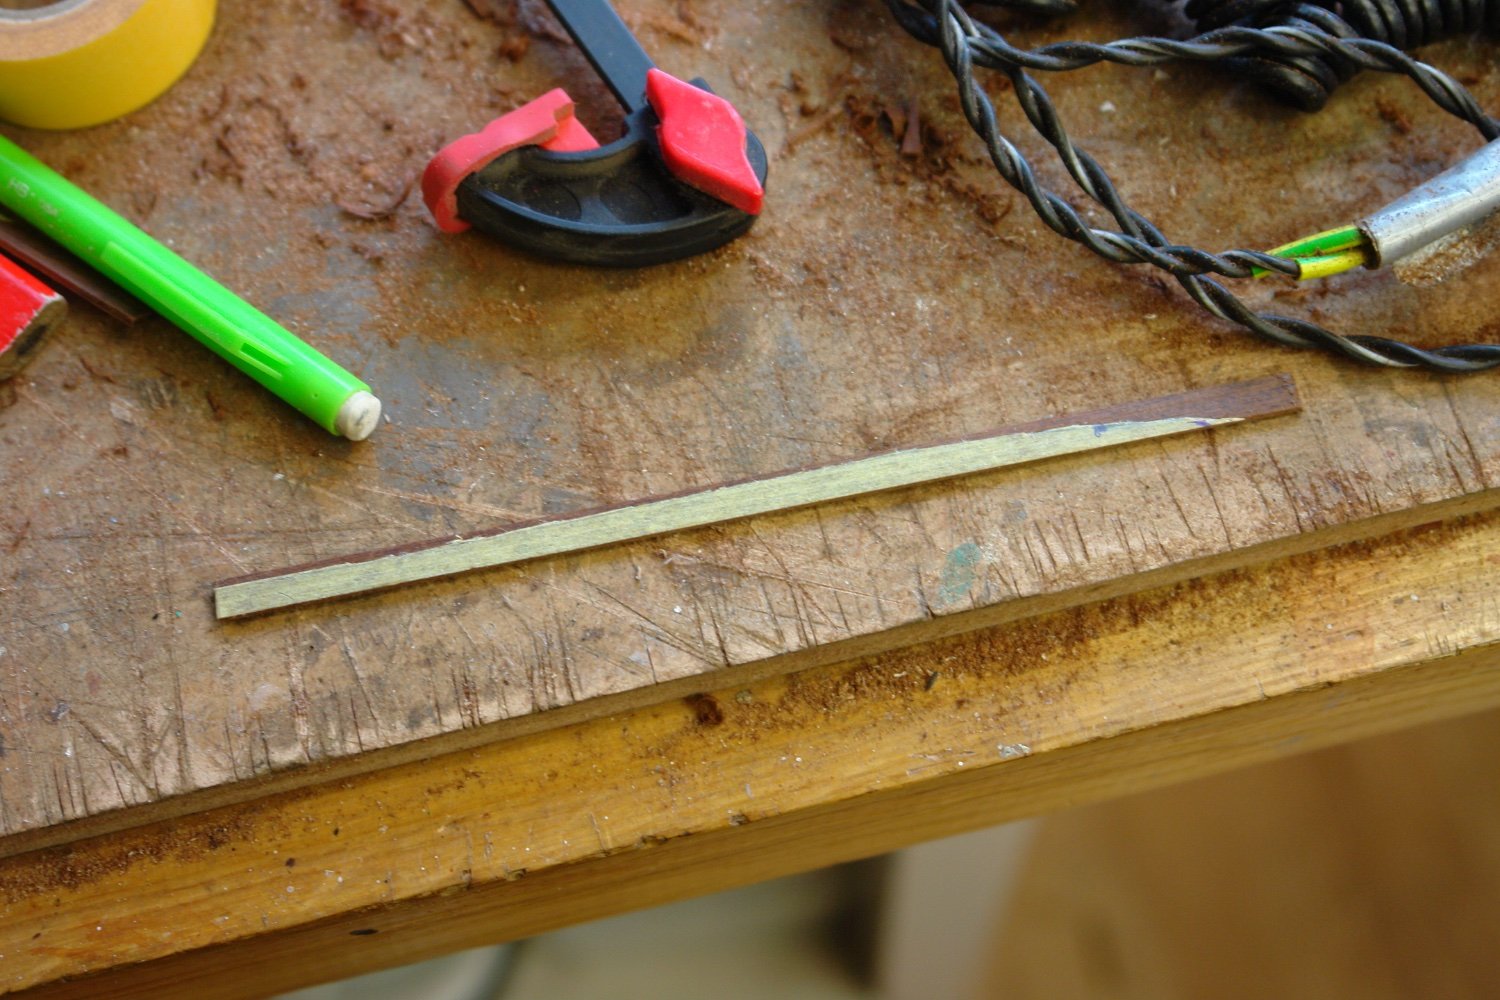
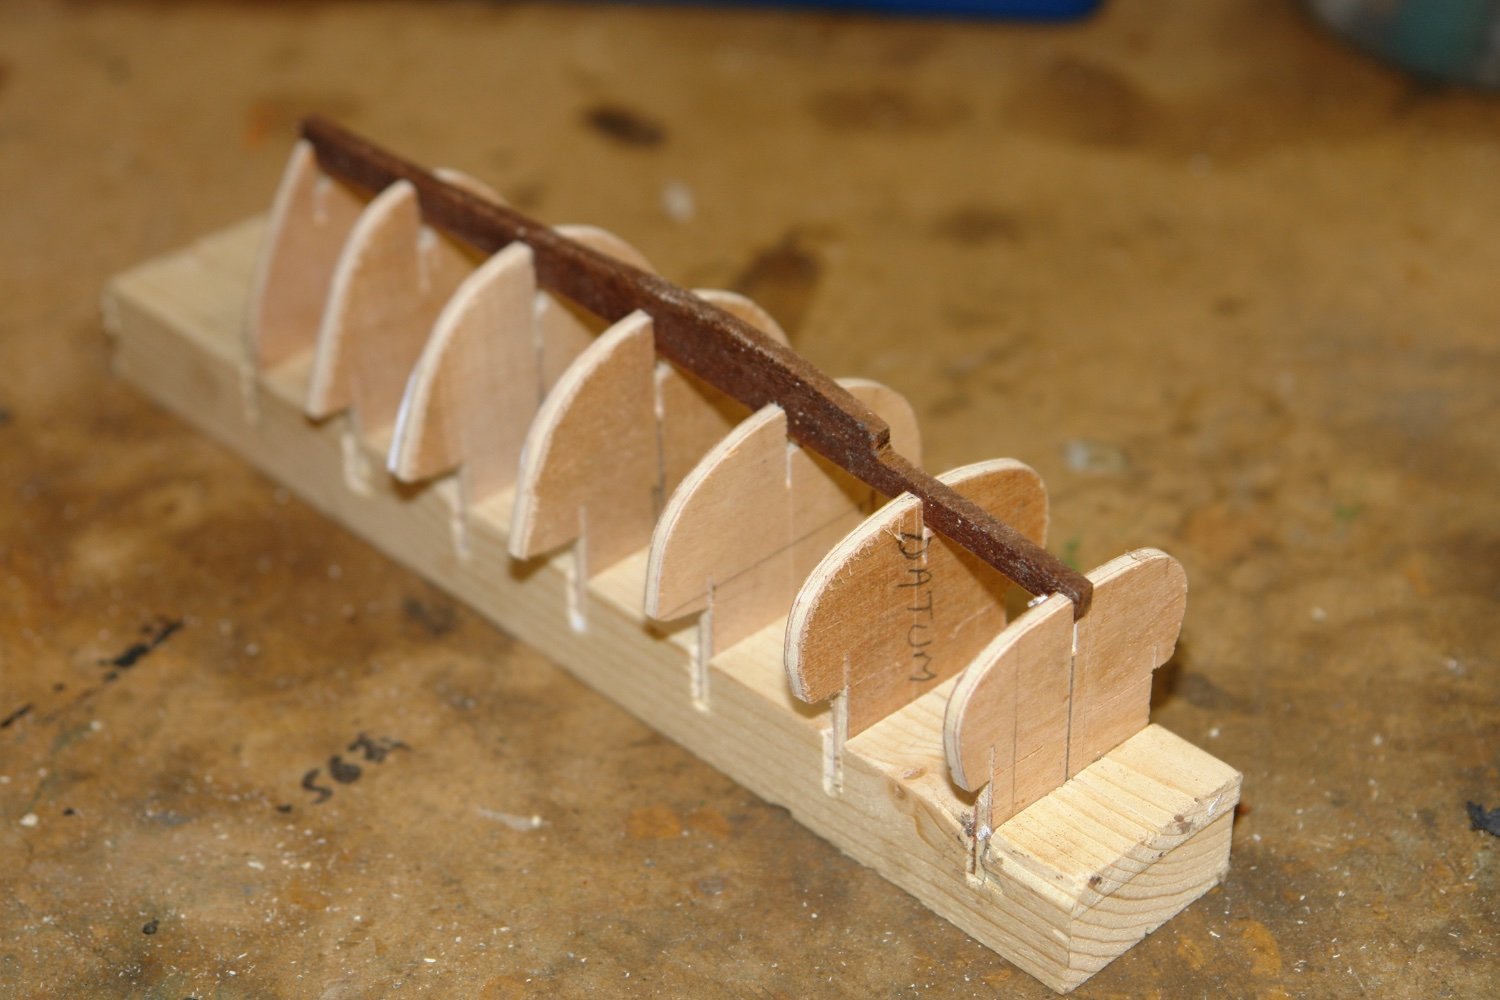
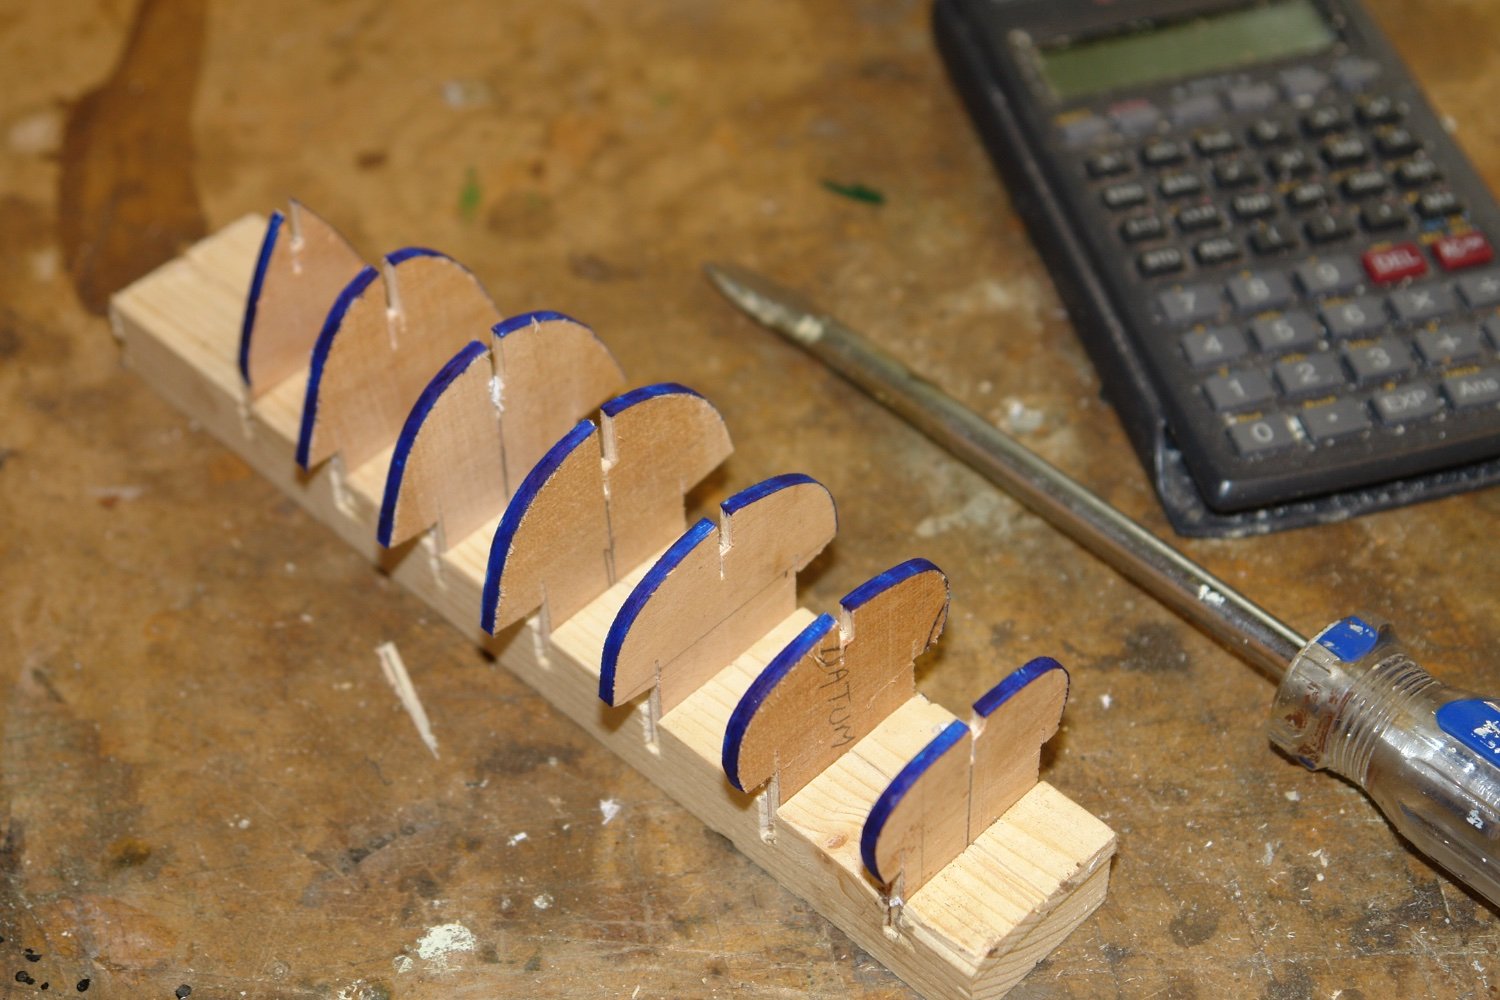
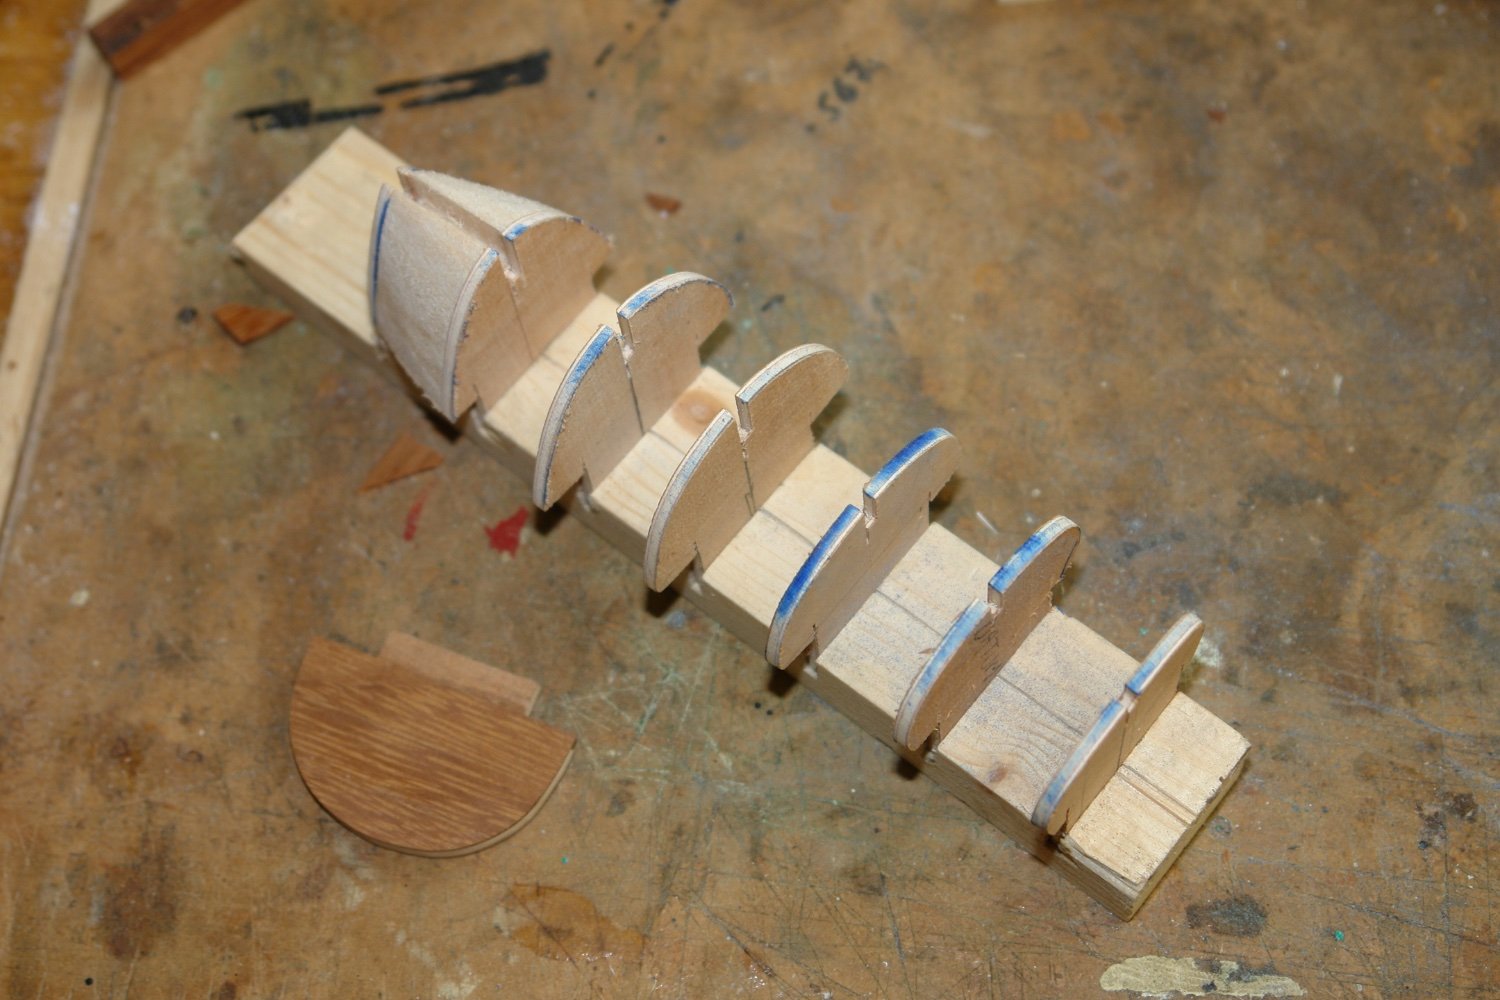
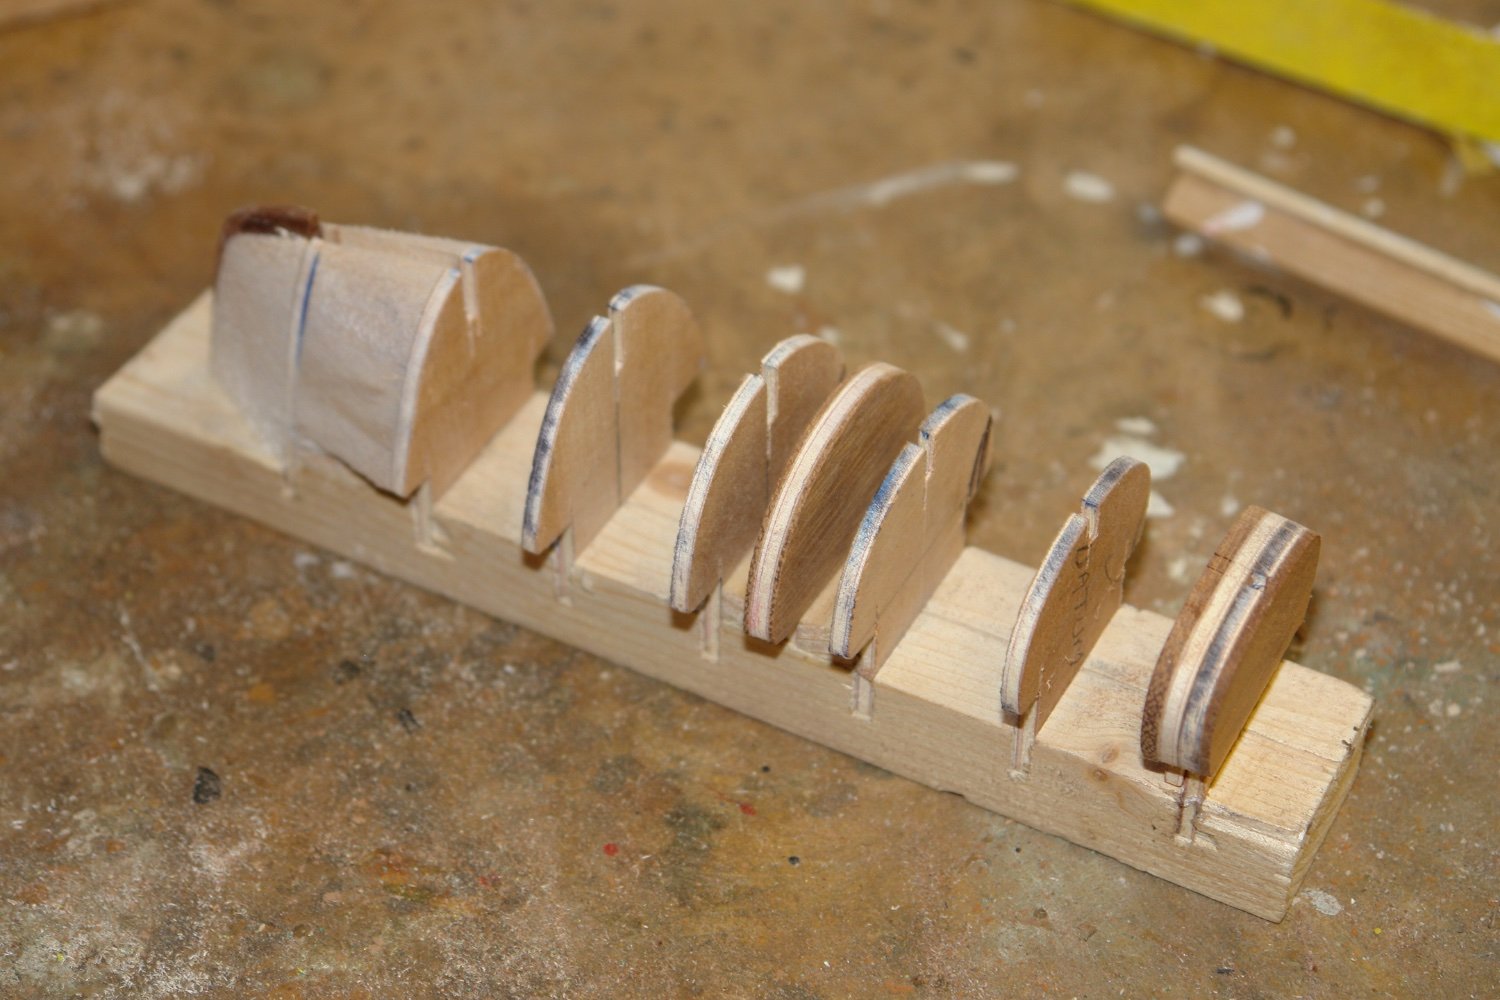
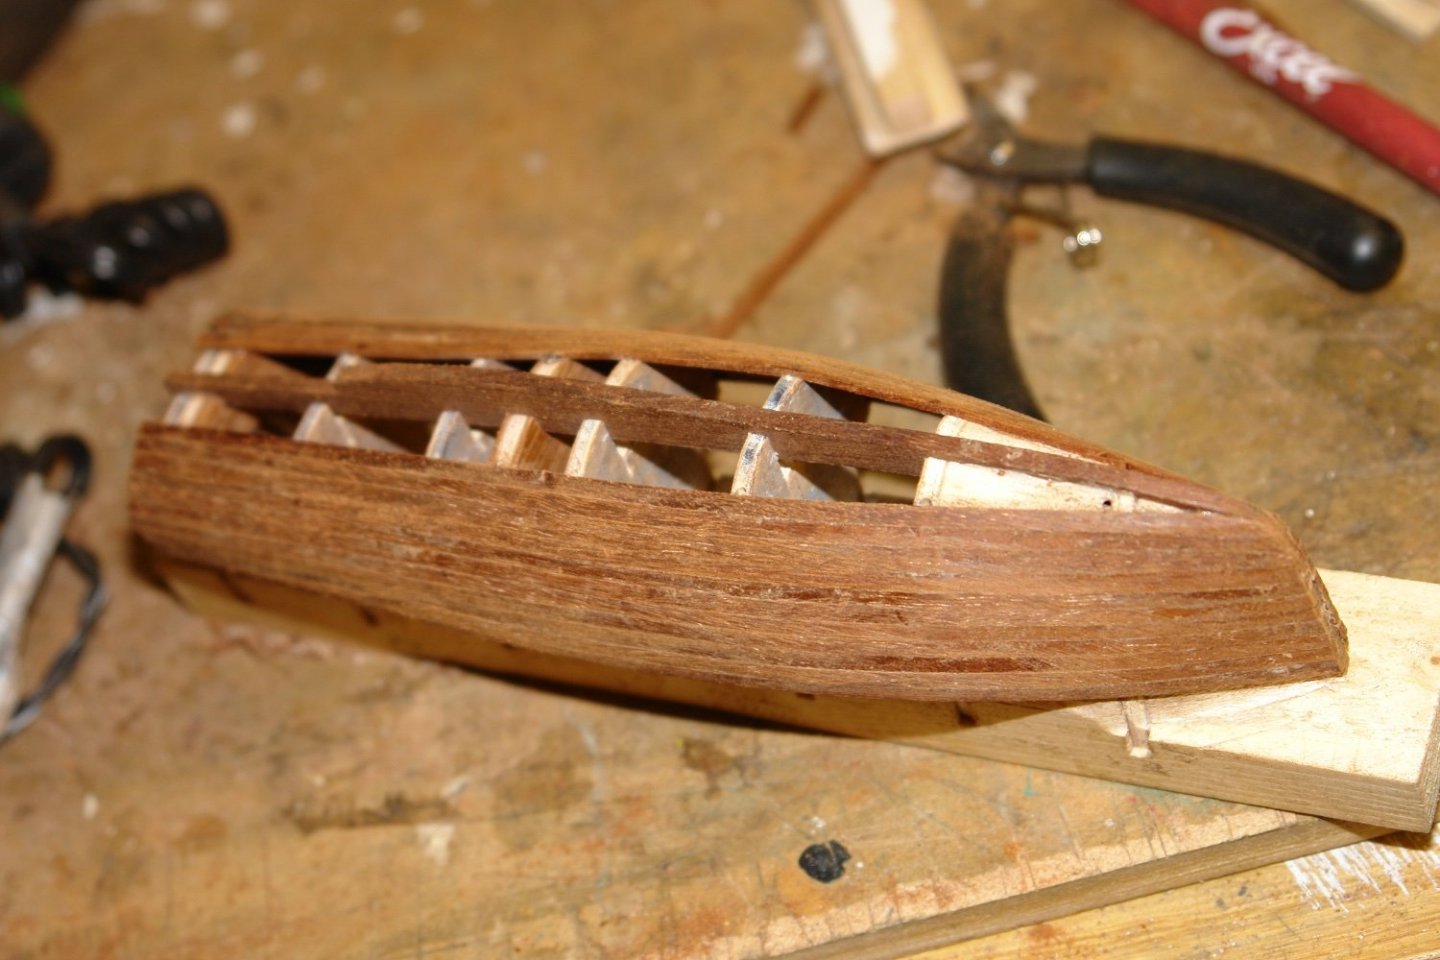
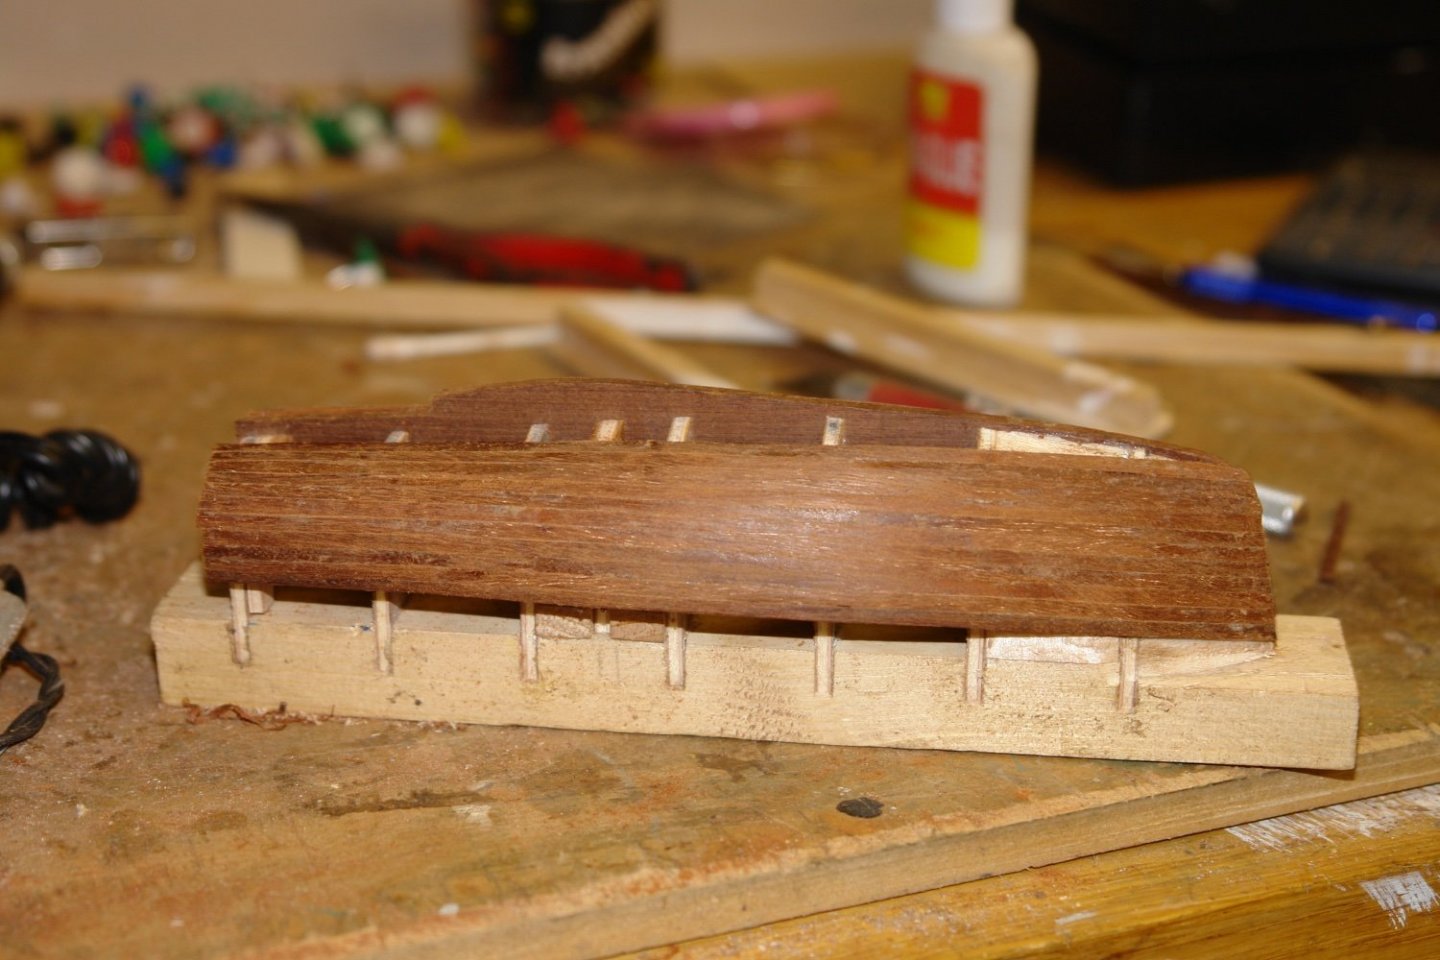
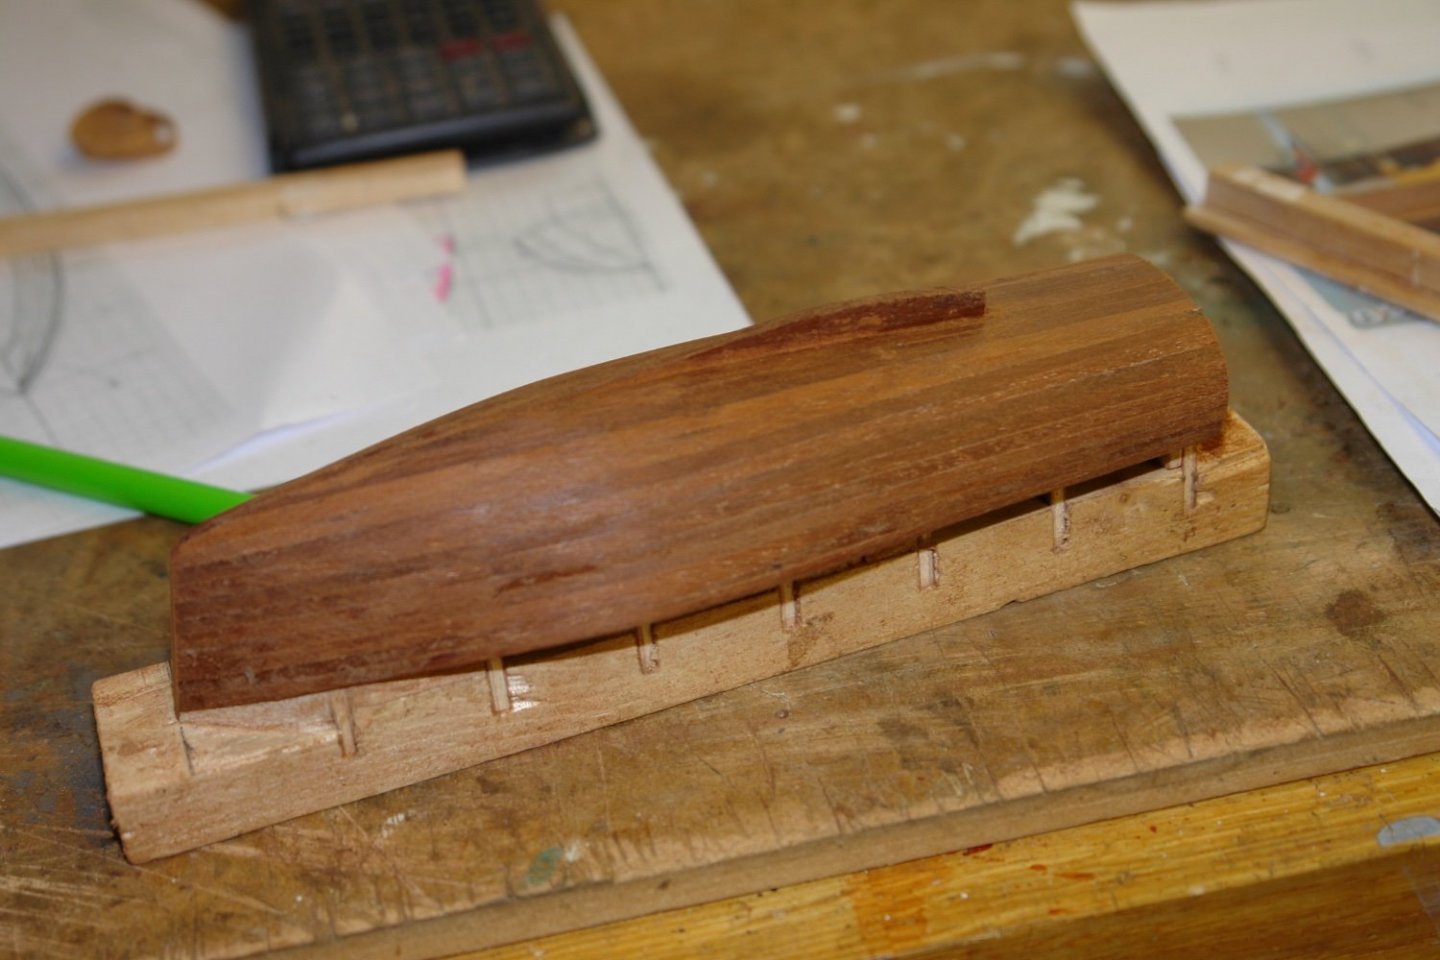
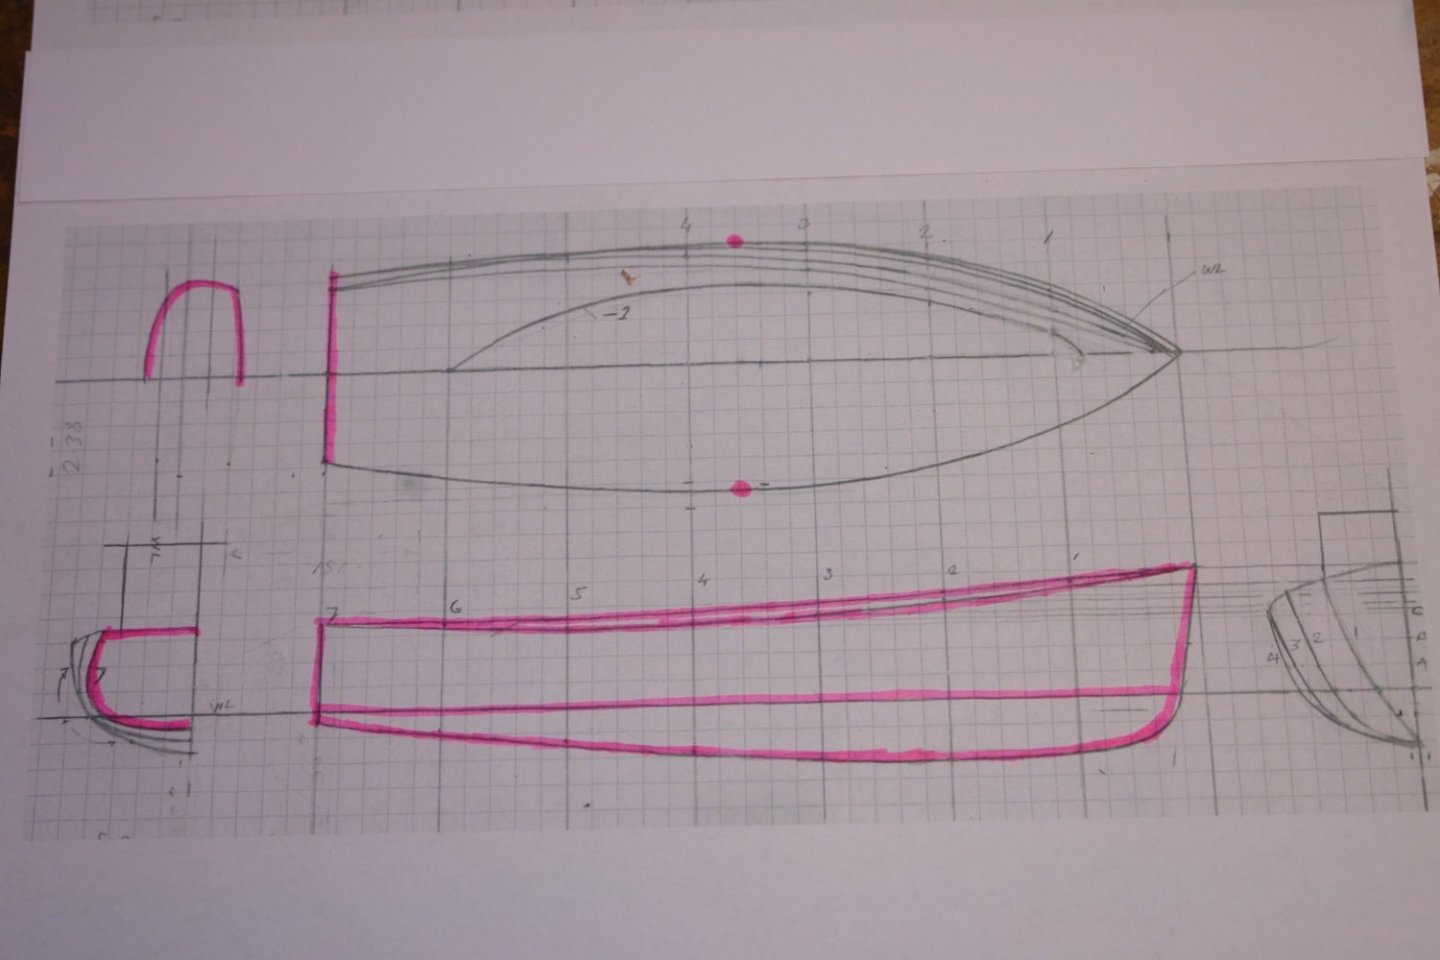
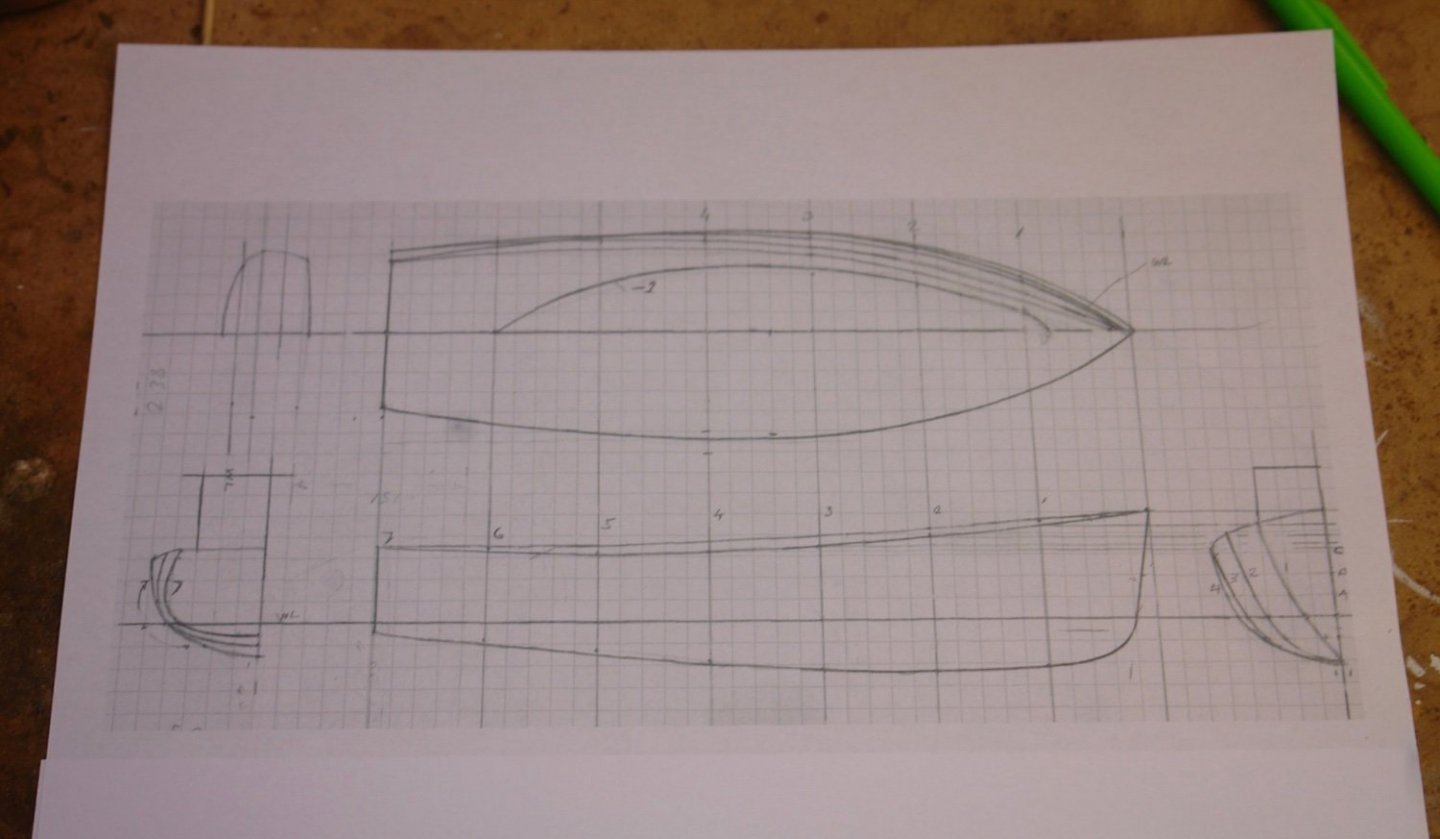
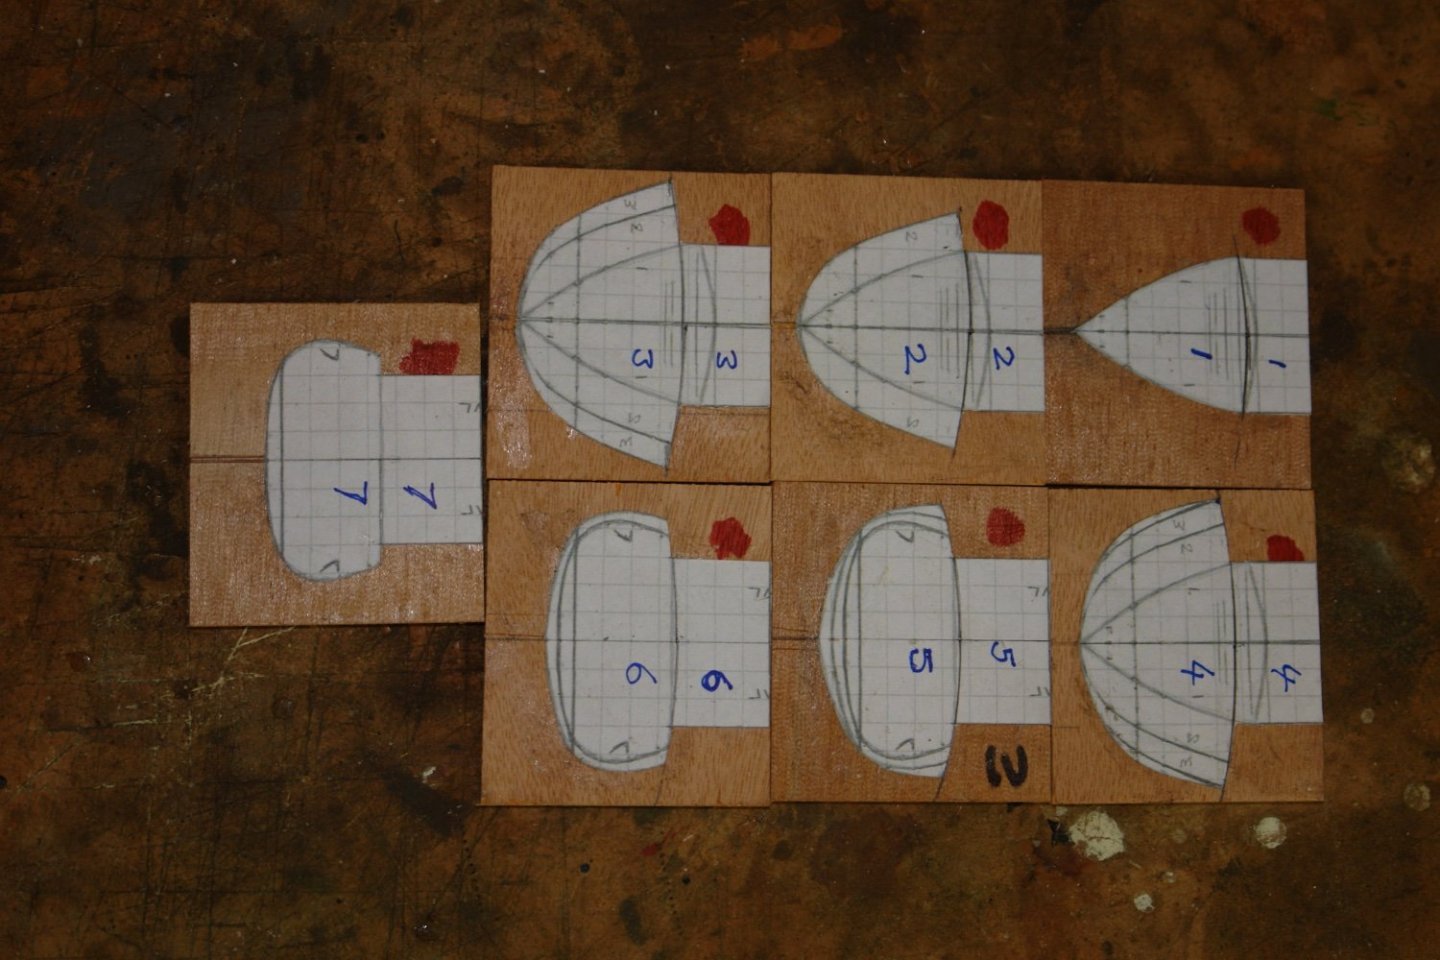
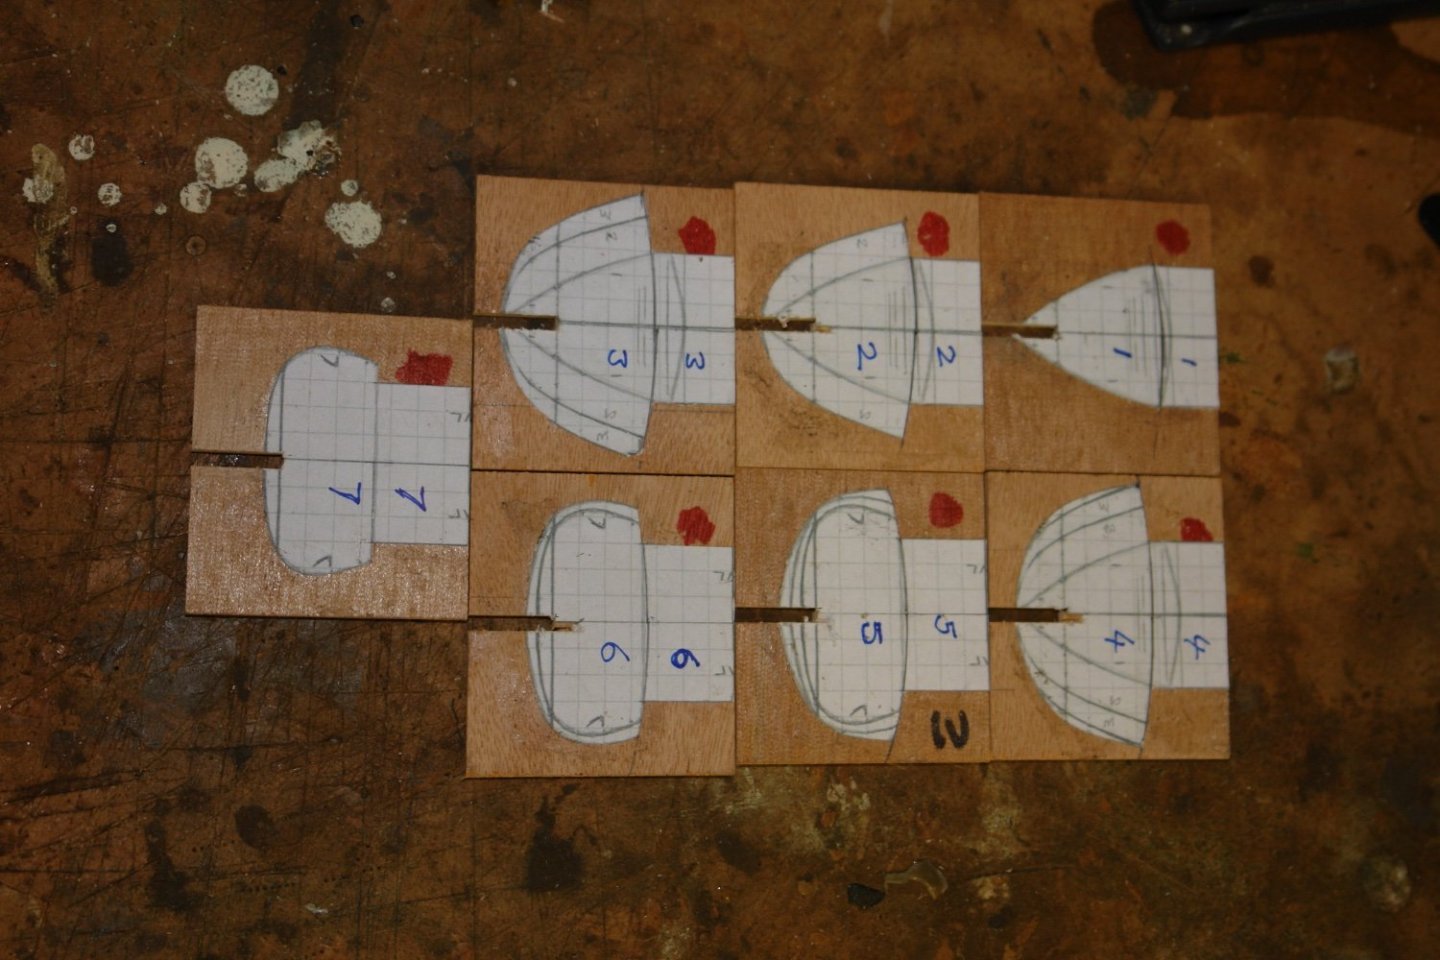
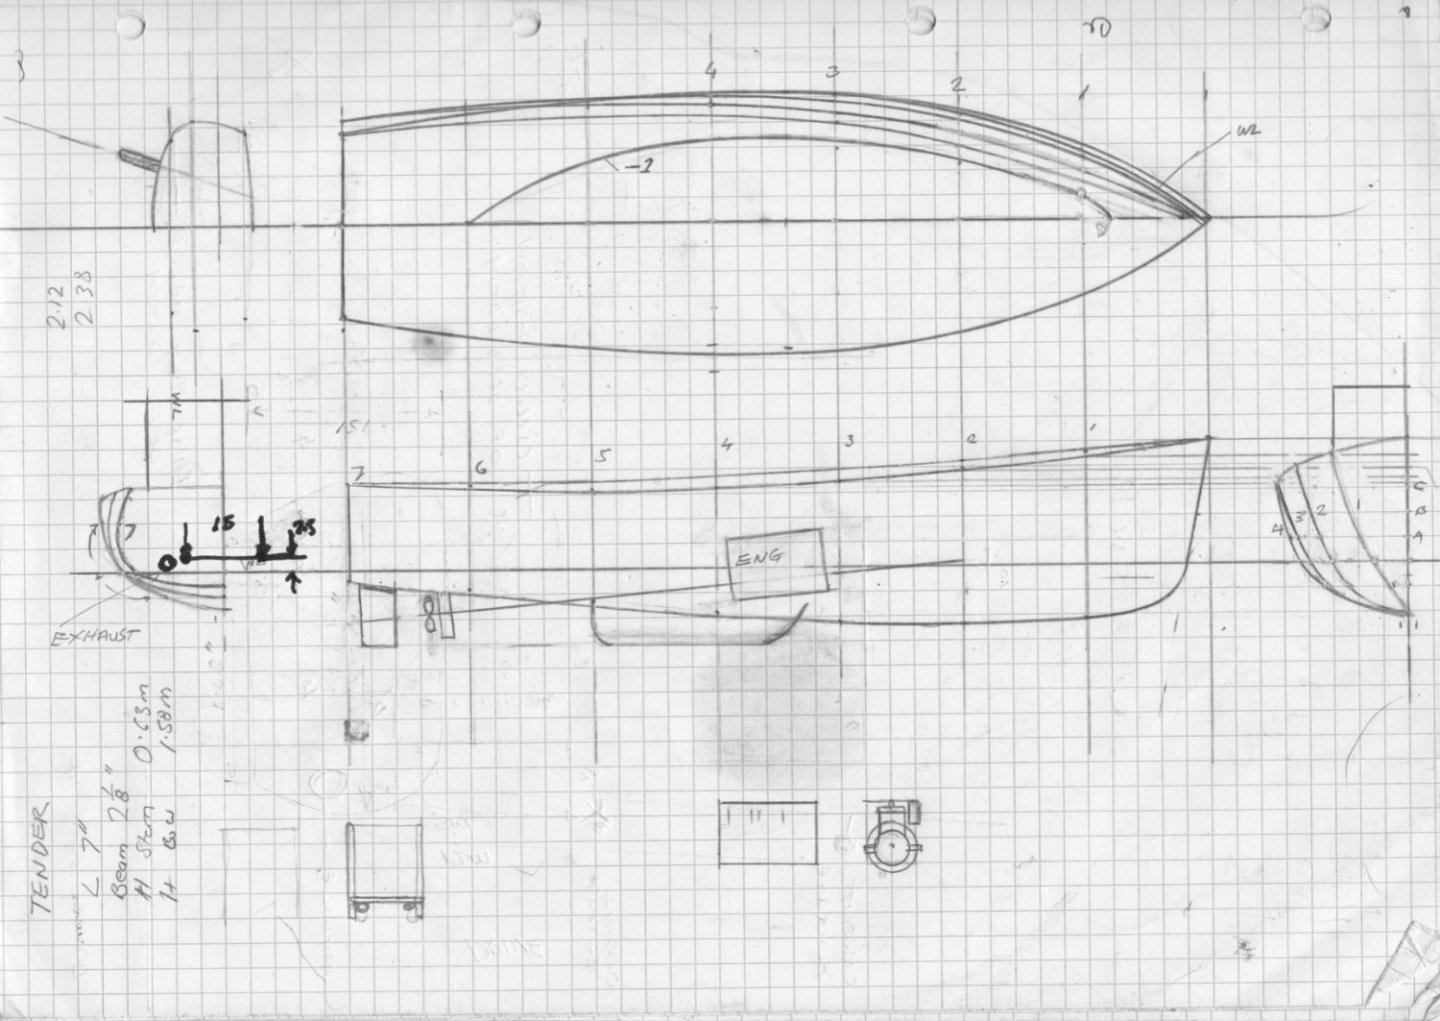
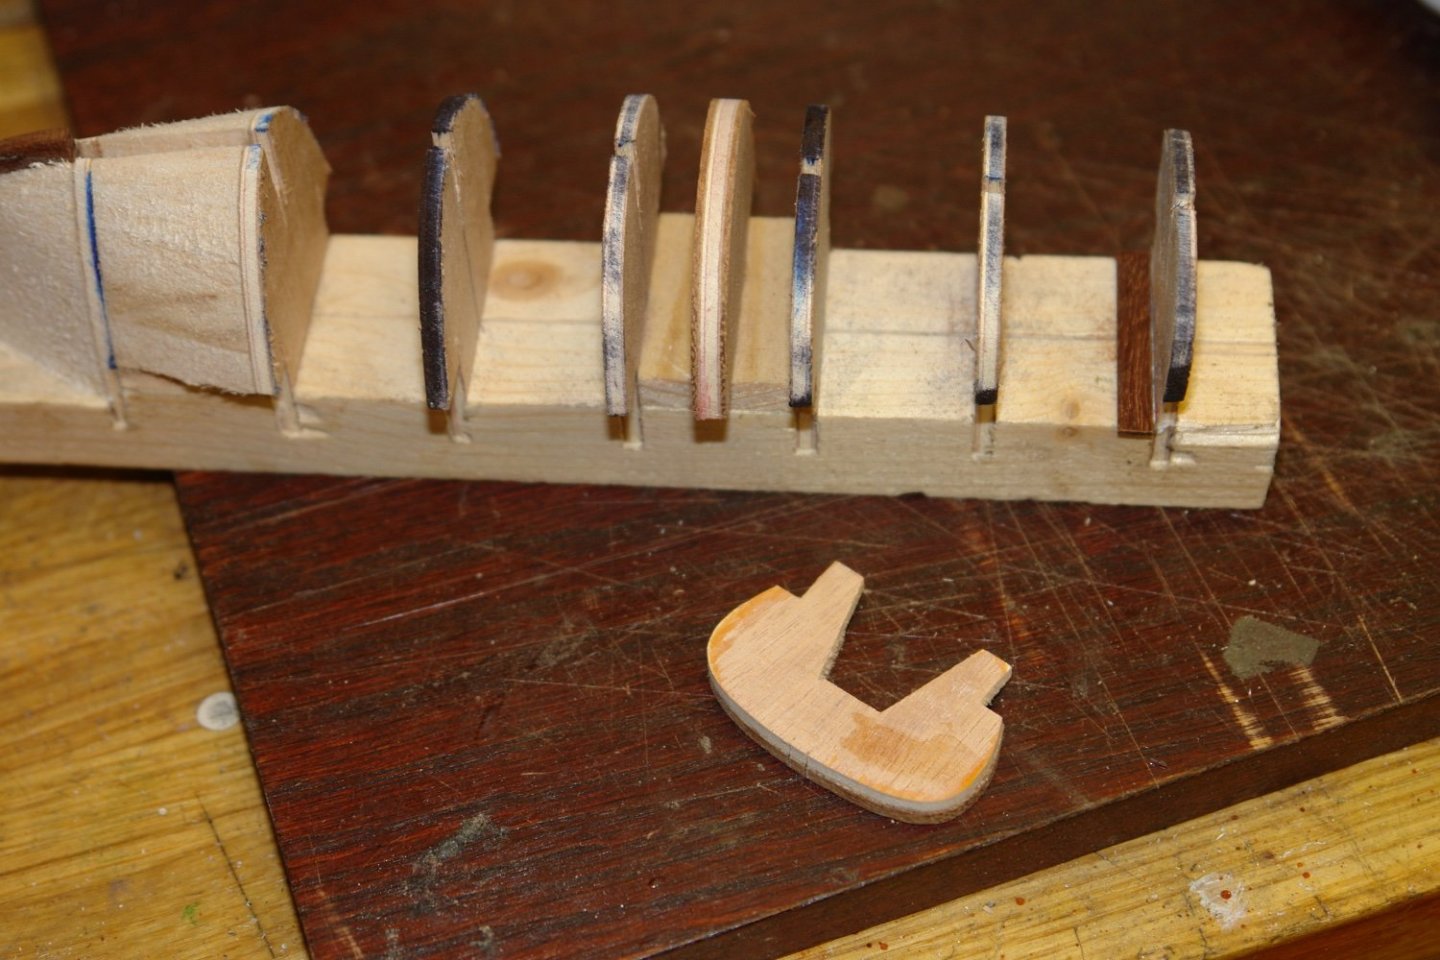
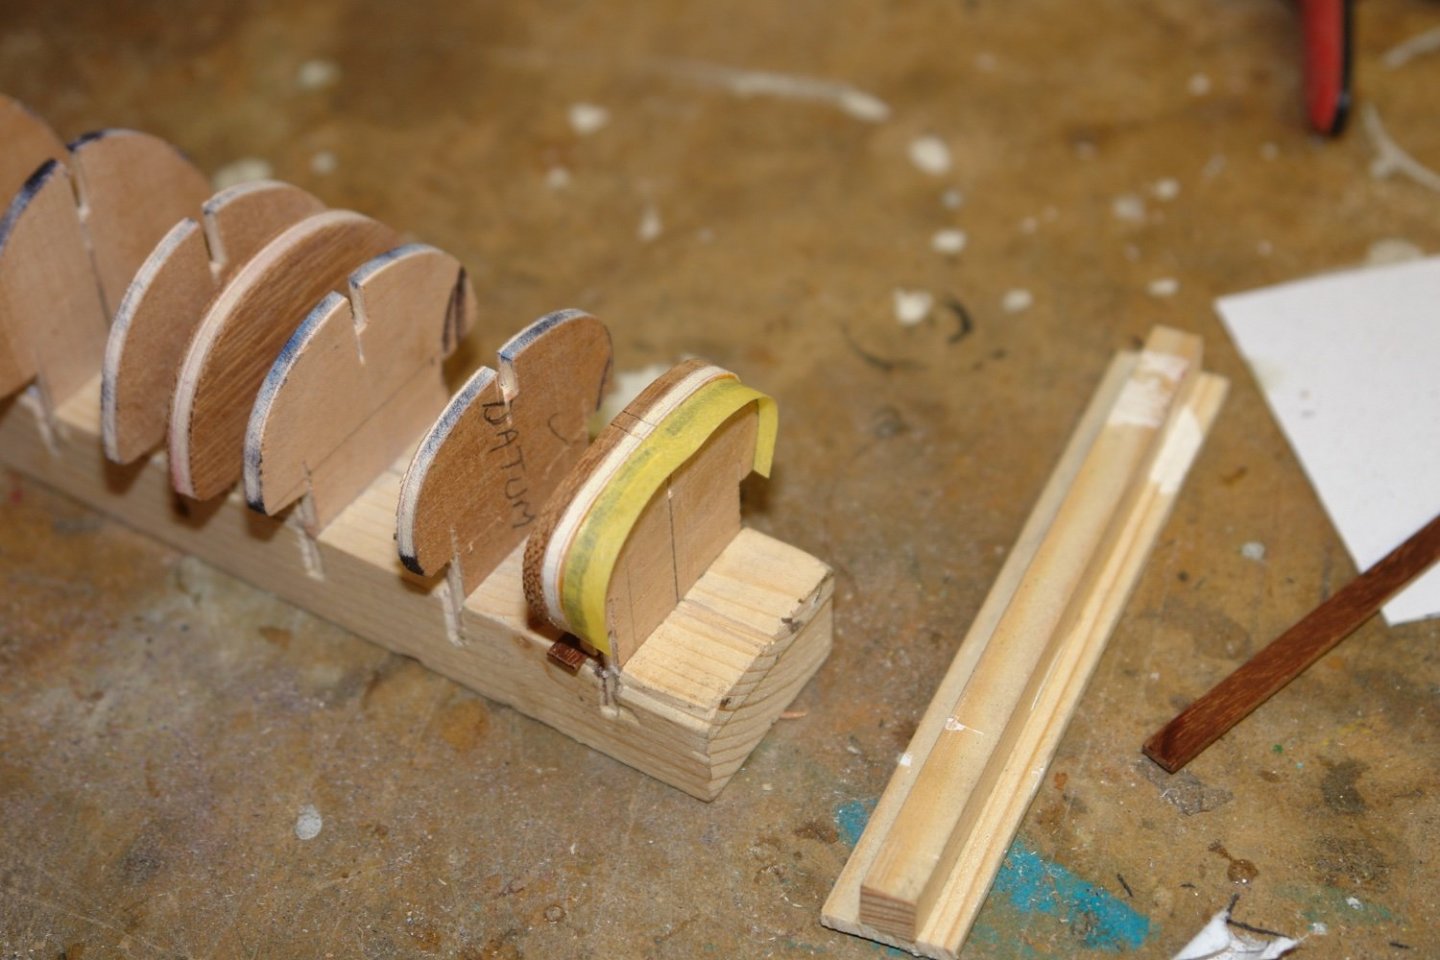
I made a start on the launch. I don't have the section lines for the hull so i needed to create these. In the following photo I have coloured in the points / lines that I could deduce from various photographs. I had a fairly good side view from which I could take the keel, waterline, and deck lines. I also had a fairly good picture of the stern and I had a dimension for the maximum beam. From this information i made a guess at the vertical section lines and then plotted the horizontal section lines. I then drew best fit curves to form the horizontal sections and transferred these back on to the vertical sections. I then smoothed the vertical section lines and plotted these back on to the horizontal sections. I iterated around several times until both horizontal and vertical section lines formed smooth curves. I then cut 1/8" plywood frames and glued on the section drawings. I then cut slots in each of the frames to take the keel. All of the frame blanks had been cut accurately to exactly the same size thus facilitating accurate cutting of the slots on the table saw. The frames were then cut out using a scroll saw. A piece of scrap wood was then slotted to take the frames and the frames were glued in pace with a keel piece maintaining alignment. Prior to fairing the frame edges were highlighted with a permanent marker. Balsa blocks were then glued in at the bow and the fairing was done with a sanding block. The position of the engine was then determined by plotting the line of the prop shaft. The bulkhead for the transverse seat position was then installed (1 frame rearward of the actual position). The stern bulkhead on the launch is quite thick so the aft most bulkhead was widened to reflect this. Finally these additional bulkheads were sanded to match the fairing of the other frames. Small hulls are much quicker to make than big ones. I must remember this thought.


-
Wonderfully precise and technically competent clinker planking job Gary. Beats my usual suck it and see approach hands down.
-
You really do crack on. Amazing speed and quality as well.
- 180 replies
-
- 1
-

-
- pilot boat
- Elbe 5
- (and 3 more)
-
Eberhard - yes I found them - very nice but I don't think mine will be that complex.
-
Druxey - not quite sure what you mean but it is definitely the boats wheel. Hakan - I think my preference would be to invest in a couple of extra pulleys. Eberhard - I have not seen the 3 D printed engines - must look them up.
-
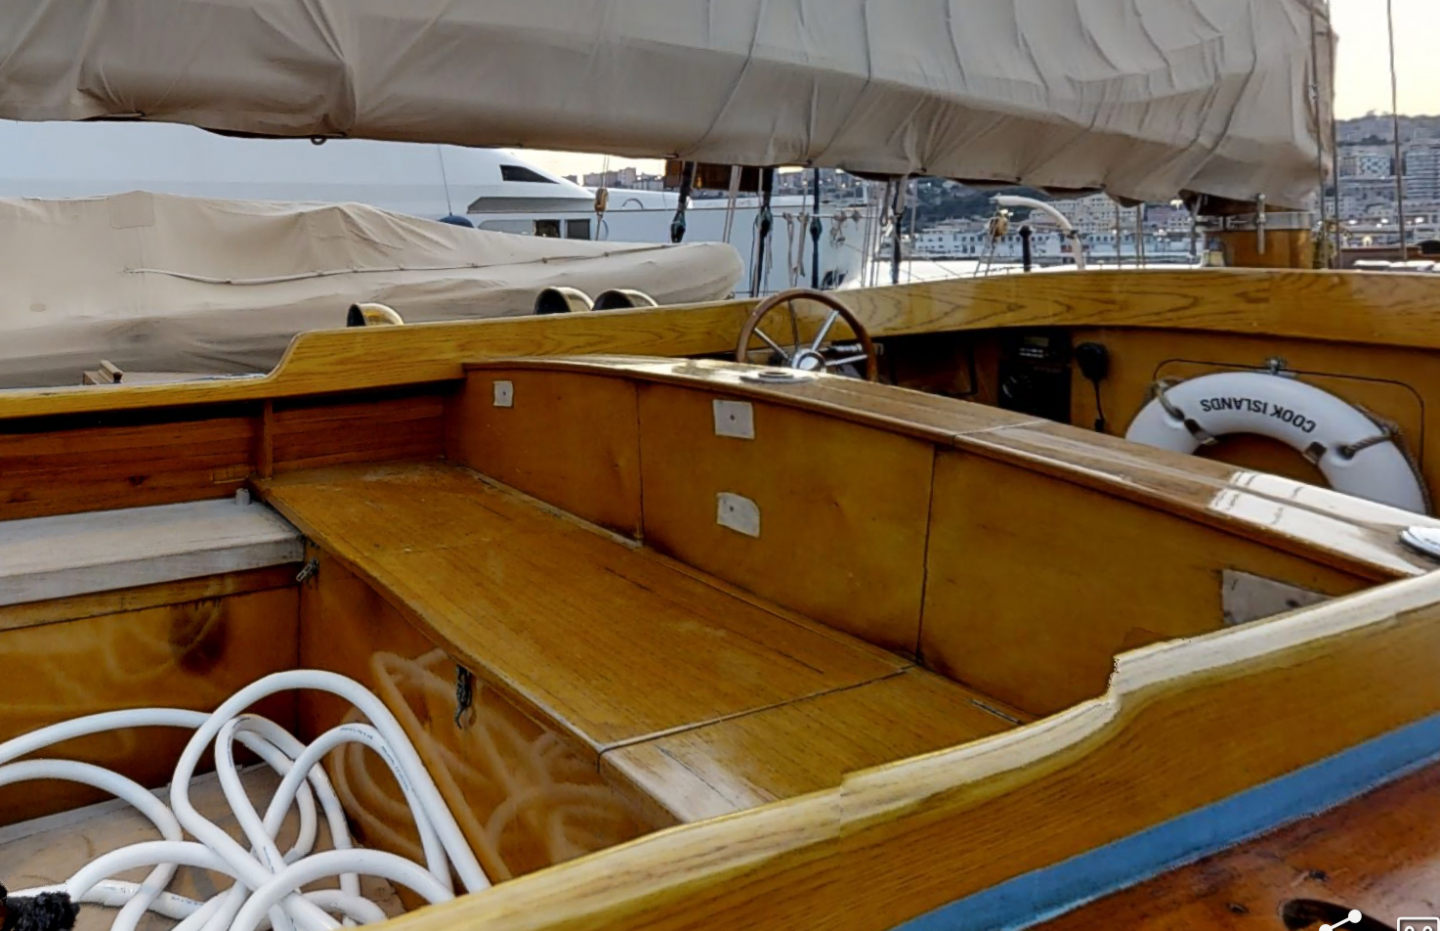
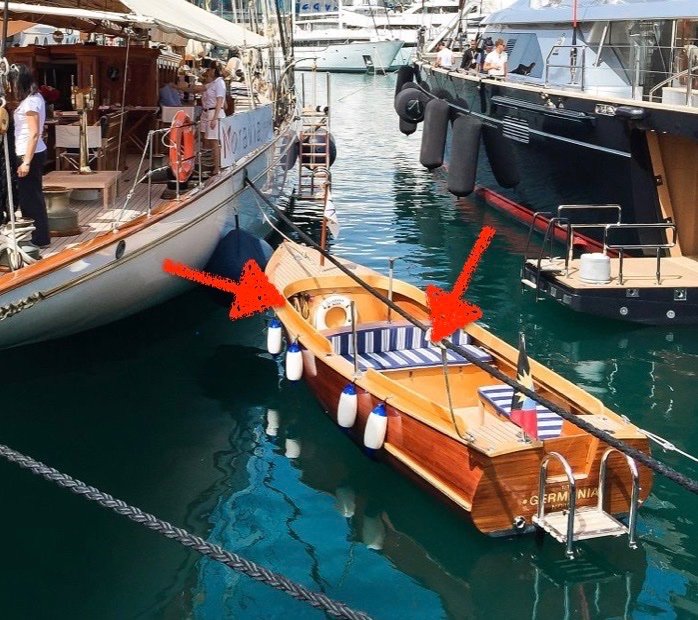
Thank you Gary. I am planning to cheat a little. The left hand arrow is pointing at the boats wheel. This is actually aligned fore and aft which I can't really get my head round. I suppose the crew get used to it but to me it is daft (never seen one on a car for instance). I think I am going to have to mount it on the bulkhead just in front of it. The right hand arrow is pointing the the seat under which the engine is mounted. Every time I see you guys building engines I get jealous so I am going to move this seat rearward and put an exposed engine in the launch. I know the launch should have a modern Volvo Penta but I think the owner has manage to source a 1920's twin pot petrol engine, that i think is more in keeping. I hope that going a bit of piste won't get me banned from MSW.
-
Good to hear Hakan, hopefully it is all improvement from here, fingers crossed that you see a rapid return to good health.