


UpstateNY
-
Posts
466 -
Joined
-
Last visited
Content Type
Profiles
Forums
Gallery
Events
Posts posted by UpstateNY
-
-
-
Thanks for stopping by Udo and for the kind words! Replacing the kit wood w Swiss Pear or Castello boxwood will make for a wonderful looking model.
I am going to try and make the kit wood work given the replacement cost for such a large model would be rather high. I recently learned that the direction of sanding and cutting makes a huge difference on basswood and how clean it can look. Will require care on my part to make sure I know how the grain is running for each plank so we will see how successful I am!!
Link below allows you to find the interesting article by Dave Stevens from the Lumberyard in case you find it useful.
http://modelshipworld.com/index.php/topic/13061-spring-2016-issue-of-the-msb-journal/
Cheers,
Nigel.
-
Thank you very much John and of course..welcome aboard!
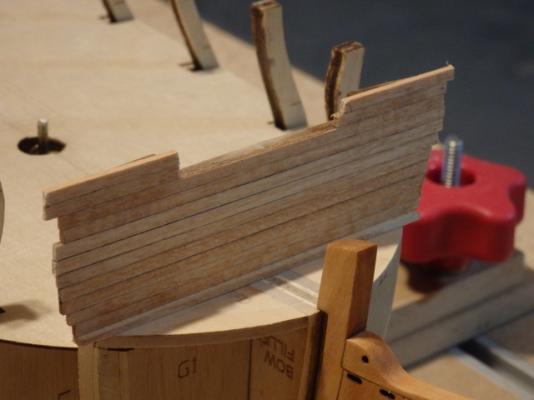
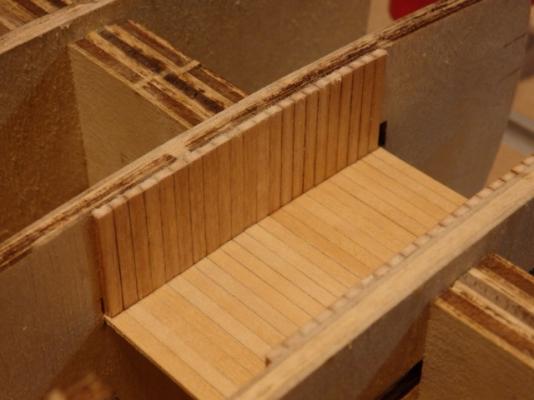
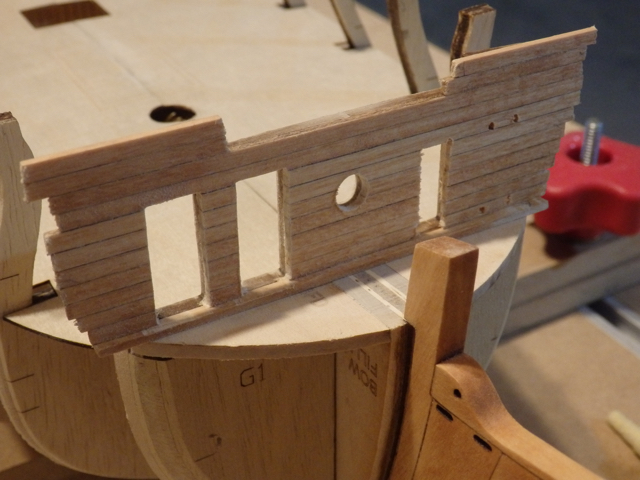
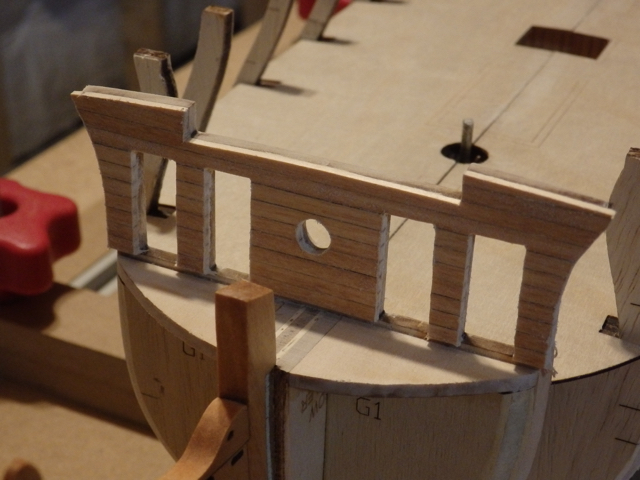
First step in chapter 4 is to plank the beakhead bulkhead which is taking more time than I expected!
To ensure the plank edges lined up across the bulkhead, I glued prestained strips across the full length of the bulkhead. A pencil was used on one edge as usual to simulate the caulking. I used a piece of scrap planking on the deck to act as a spacer so I can slide the deck planking under the bulkhead planking and so get a clean edge.
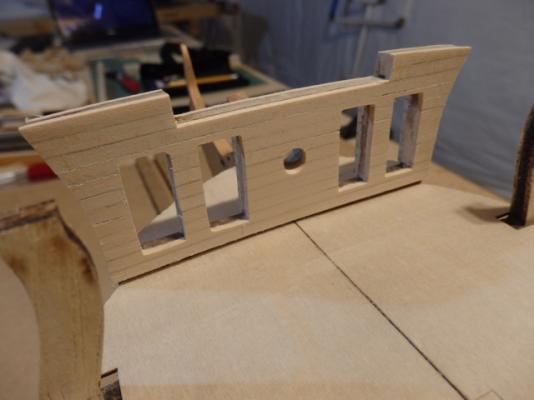
Doors frames were cut out by drilling small holes at each corner before using a keyhole Xacto saw to rough out the door openings in the bulkheads and then filing to finish. The bowsprit hole was also drilled out before filing it to shape. The outer plank edges were faired in to match the bulkhead fairing except I left an extra ~1/8in on each side at the top. I did this to correct a fairing mistake as I found I'd rounded off the top edges of the beakhead bulkhead. A light sanding was then done w 320 grit paper which showed how variable my initial staining depth was!
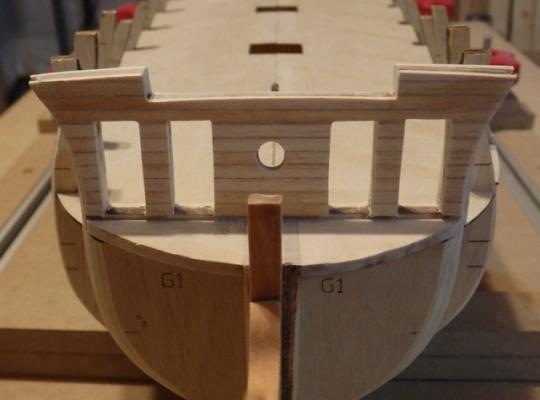
Same steps were repeated to plank the inside of the bulkhead, except unstained planks were used given these planks will be painted crimson. Next steps are to add in the door jambs and frames, deck planking, treenails and of course restain the bulkhead planking!
Thanks as always for the likes and a few photos are below!
Cheers,
Nigel.


-
Hi John,
Yes, the Proxxon KT70 x/y table should fit your stand if it is a Micromot MB140 or MB200 model. See link below (pg 41) provided by our MSW sponsor below. Hope this helps.
http://www.proxxontoolsdiscount.com/proxxon-catalog.html
Build is looking great..hull is coming together really well. Very neat work!
Thanks,
Nigel.
-
-
Great work...looks wonderful.
Cheers,
Nigel.
- CaptainSteve, GLakie, Omega1234 and 4 others
-
 7
7
-
-
Looks gorgeous Rusty...I really like the subdued look of the treenails.
Cheers,
Nigel.
- Ryland Craze, Rustyj, Canute and 1 other
-
4
-
Just fabulous!...how you keep everything straight with so many builds, I have no idea, but love following along as the story unfolds!
Cheers,
Nigel.
-
Good morning All!
Firstly, thanks Elijah...always great to have extra eyes checking things are OK. And of course my thanks to all for the kind comments and the "likes"..always appreciated!
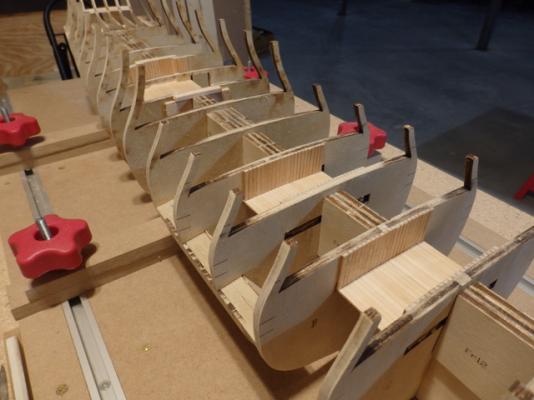
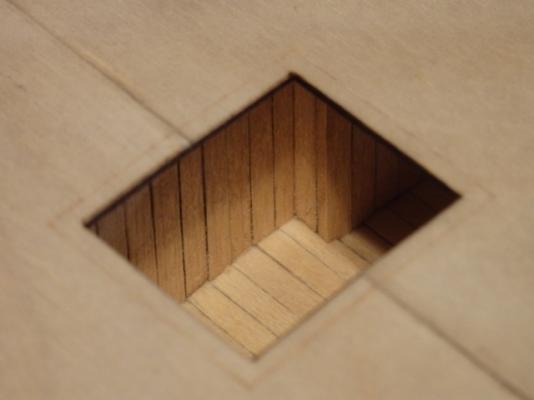
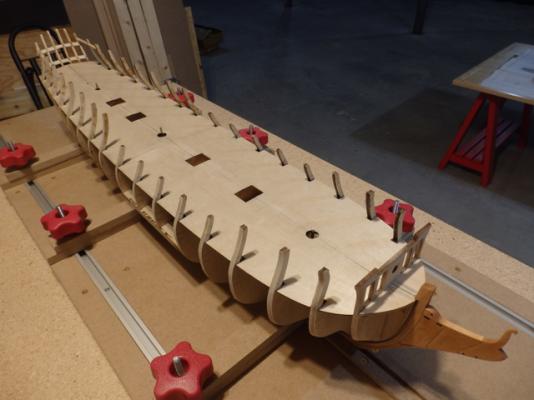
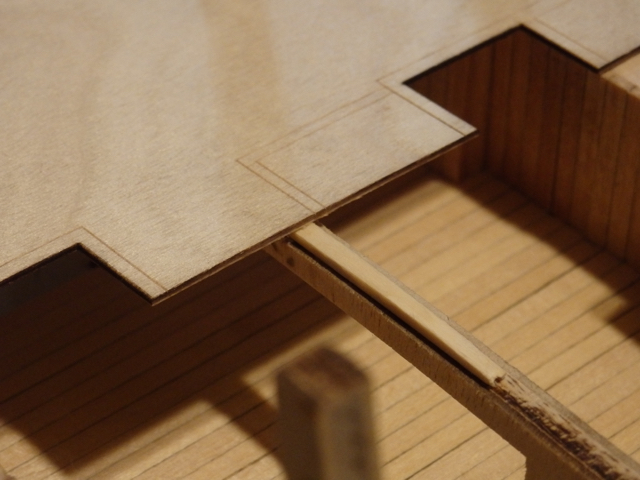
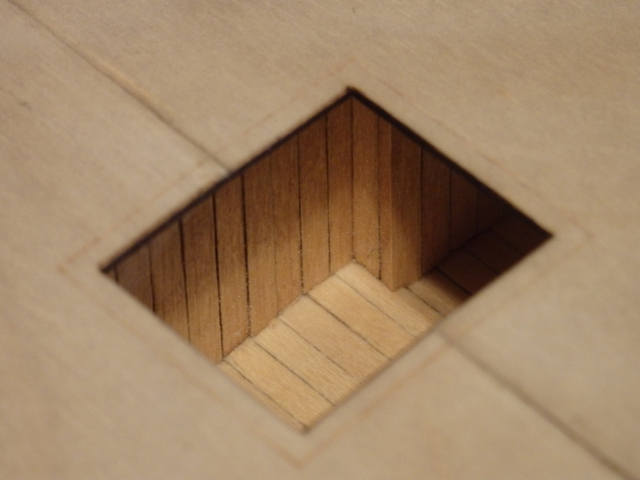
This week has been spent getting the deck completed. First up was I decided to plank the bulkheads by the false platforms. Hardly any of this work will be visible in the end, but I expect a couple of viewing angles could show the plywood frames so I went ahead and did this. It also gave me a chance to practice staining the basswood strips and matching up their colors. This planking ended up being more work than I expected, but I am glad I did it.
Attaching the false deck was the next step...as Chuck warns in his instructions, some filing of the slots was needed to get the decking to line up correctly along the center of the bulkhead former. I also had to make some shims as a couple of bulkheads were lower than all the others. I didn't want to push the deck down and end up with a low spot. Looks like I should have used a batten when setting the bulkheads to make sure their top surfaces were even...learning for the next build!
Final item was to compete the mast support holes. I'd already added some extra fillers by the masts for more support and the kit interestingly provides these! I then drilled out the holes to a 1in depth using progressively larger drills. A bit nerve wracking as I needed a 7/16th drill for the main and foremasts, but all went well! Final step was to cut the heads off some long 3in nails and drill some deeper holes to add additional support. I will use these to help set the mast rakes per the Crothers plans of 1/8 per foot for the mizzen and main masts while the foremast is vertical.
Thanks as always for reading...images below. Next up is Chapter 4 and gun port framing!
Cheers,
Nigel.


- CaptainSteve, Chuck, xken and 18 others
-
21
-
-
Just lovely work Mark. The whole stern has come together beautifully.
Cheers,
Nigel.
- CaptainSteve, Piet, Canute and 4 others
-
7
-
-
-
-
Bow looks great Denis. I like the shape of those stanchions as well...seem to fit really well with this type of ship.
Cheers,
Nigel.
- mtaylor, popeye the sailor, Piet and 1 other
-
4
-
Thanks for stopping by and for the kind words Elijah and Greg! Thanks as always to all for the likes
 .
.Carl, I can only say after getting inkjet ink all over my hands as I picked up the print out, I rather wish I had a laser jet as well! I am lucky as my local Kinko's is pretty close!
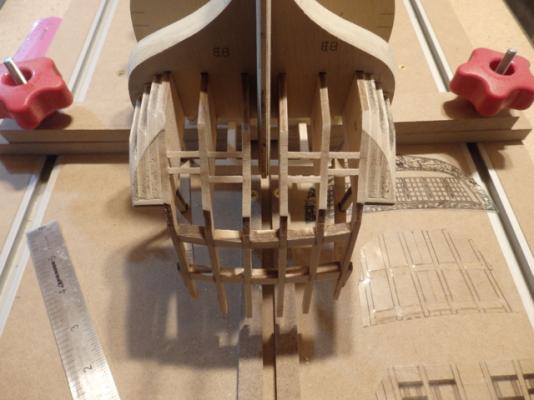
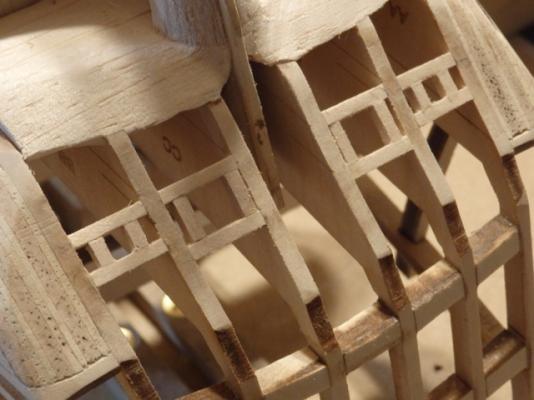
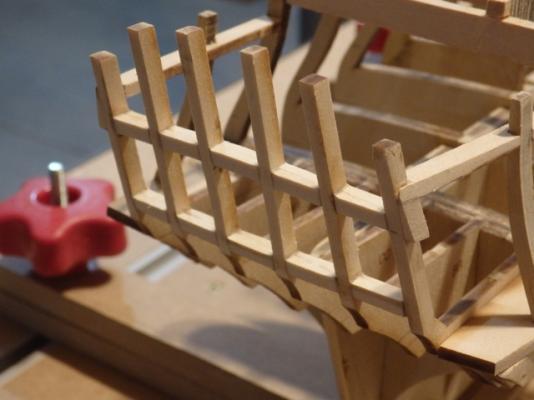
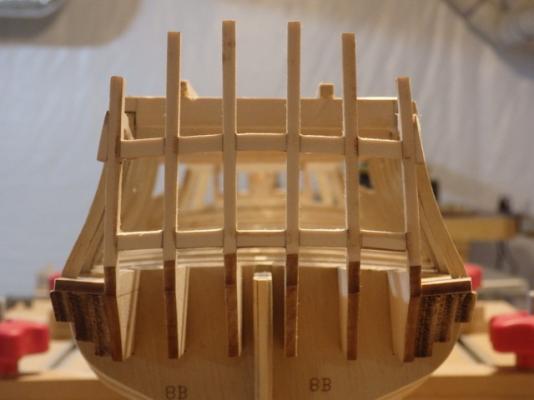
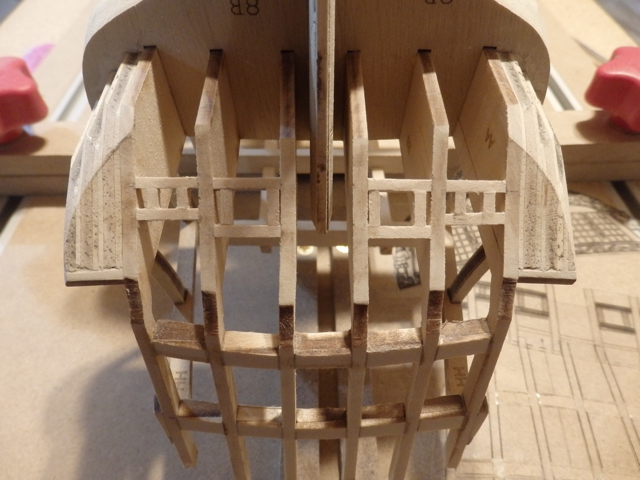
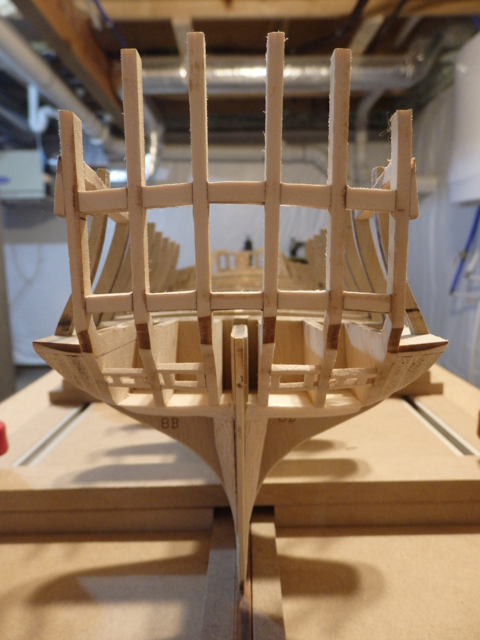
So, a little more progress this week as the stern framing is now completed. Framing the four ports was an exercise in patience. Even with the transparent template to help me, keeping the sills and lintels completely level was hard due to the complex transom curves so I had a couple of redos on this bit! Adding the vertical frames for the ports once the sills and lintels were in was a matter of just using the template as the stern timbers are not vertical so aren't a good reference.
Fairing was done while the framing of the ports was in progress and you can see the fairing edge hitting the pencil line I drew using the template in one shot. Last job was to add and fair in some balsa wood blocks under the counter and along the stern post to add gluing area for the planking to come. Hopefully things are OK, but as always, I'd appreciate any help if something looks off.
Next up will be adding the false deck, but as I will fully rig her, I have to drill holes into the bulkhead former to support the masts first. There are no slots already pre-cut of course as the model is designed with stump masts. So...time to dig out the Crothers plans and the protractor to make sure I get the mast angles correct.
Cheers,
Nigel.


- KenW, CaptMorgan, FatFingers and 10 others
-
13
-
Hi Nils,
Hope all goes well with the scans and treatment so you are soon back to 100%. Take care of yourself.
Build is of course looking fantastic as so many have already said. Those longer shots show her off beautifully as all the details come together.
Cheers,
Nigel.
- Omega1234, mtaylor, Mirabell61 and 1 other
-
4
-
Hi Alde,
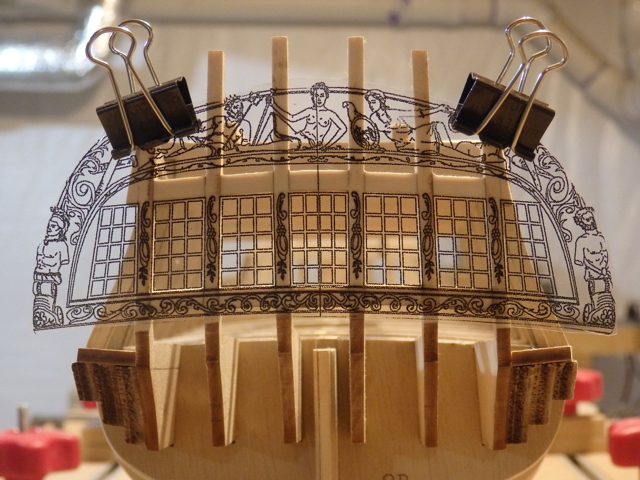
The transparency film is working well for me so far...we will see how well it works for the many gun and sweep ports still to come! I find the fact it is so much more rigid than paper very helpful.
Hi Chuck,
I tried my inkjet printer, but the ink didn't adhere to the transparency. You may have more luck depending on the transparency and ink combo in your setup. In the end, I just made a 100% copy of the small section of the plans I needed on my inkjet printer and then took that sheet to Kinko's to print out on their slides with a laser printer. I just had to be careful there was no scaling change as Chuck warns in his instructions. Hope this helps.
My thanks of course to everyone for the "likes" as well...really appreciated!
Cheers,
Nigel.
- cog, mrshanks, Chuck Seiler and 5 others
-
8
-
-
-
Thanks Alde, John (yep, this build is a lot of fun!) and "the other" Nigel (
 ) for all the very kind words and of course to everyone who hit the like button. Really great to have you all along...really encouraging.
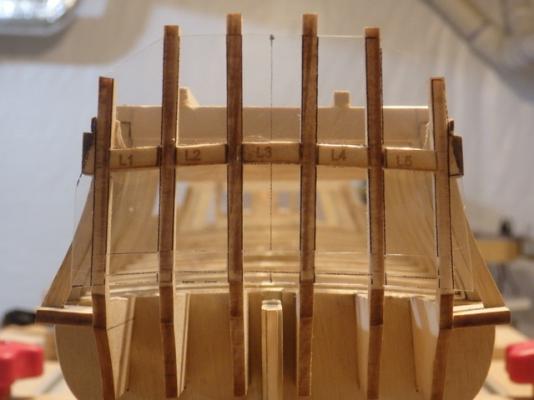
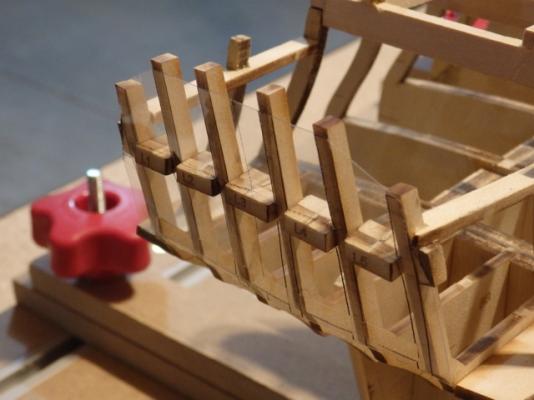
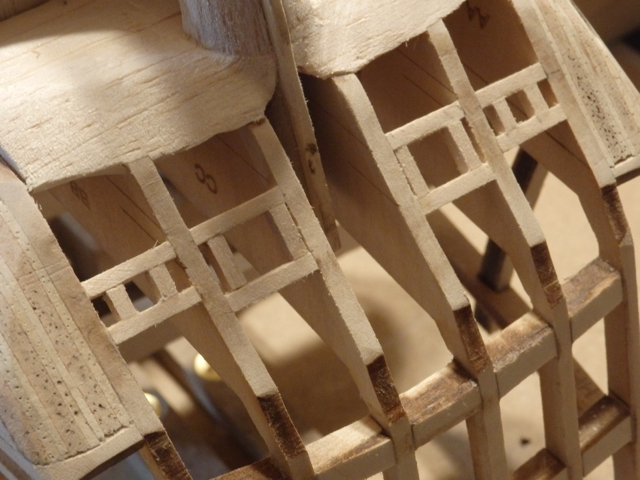
 This week I've been working on the stern window framing...not many pieces really but it sure took some time.
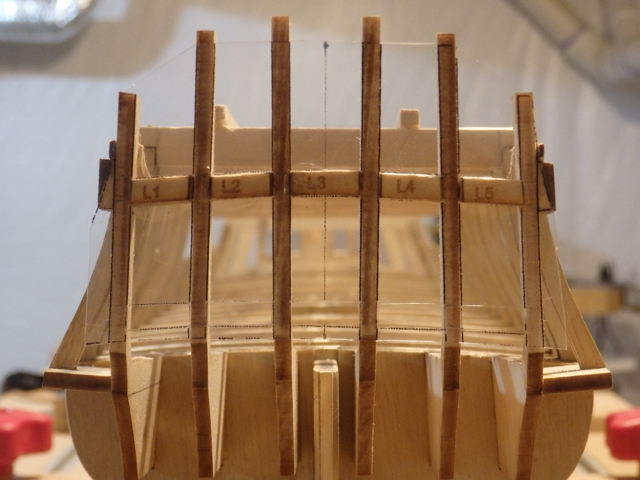
First up was to make the sills and lintels by gluing 2 laser cut pieces together. The lintels were first glued into place making sure they protruded from both sides of the stern timbers per the instructions so they could be faired in from both sides. I used my sturdy, transparent templates again but this time I cut out the locations for the lintels so the template itself helped to support the lintels as the glue dried. After carefully fairing in the lintels and also the sills for the upper gun ports, the window sills were added and then faired in. The fairing took a lot of time to make sure I didn't change the curves of the stern timbers. After another check using the window template that the frame positions looked OK, the three stern filler pieces were added on each side to support the planking to come. These fillers will also need fairing in to allow the planking to run true.
A few images are below and again, please shout out if you see anything that doesn't look right! Easy to redo right now if needed!
Cheers,
Nigel.

- rafine, KenW, FatFingers and 15 others
-
18
-
-


USF Confederacy by UpstateNY - Model Shipways - Scale 1:64
in - Kit build logs for subjects built from 1751 - 1800
Posted
Elijah,..welcome back.. I was glad to read in your log that you had a great vacation!
Kevin..Many thanks...I am looking forward to you seeing you start your Confederacy as well...that way I can enjoy from afar!
Tuciship, Welcome and thank you the kind words! Hope you enjoy following along.
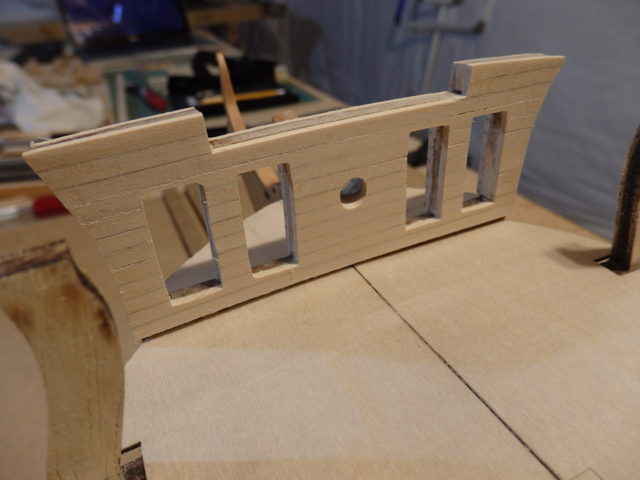
Currently working on gluing up the beakhead doors...about ready to breakout the paint so we will see how close I can get to a decent finish. I will be trying Chuck's technique of applying many (20?) thin coats...should be fun!
Cheers,
Nigel.