
HOLIDAY DONATION DRIVE - SUPPORT MSW - DO YOUR PART TO KEEP THIS GREAT FORUM GOING! (Only 72 donations so far out of 49,000 members - Can we at least get 100? C'mon guys!)
×


amateur
-
Posts
3,521 -
Joined
-
Last visited
Content Type
Profiles
Forums
Gallery
Events
Everything posted by amateur
-
Fantastic work on this little large gun. If you remove that little coin, nobody would ever guess the gun is this small. just a question: is it my screen, or is e cent not round in the pictures. To me it looks as if the foto' have been resized in a wrong length-width ratio. Jan
-
Bluethroat by amateur -FINISHED - Scherft - 1:1 - CARD
amateur replied to amateur's topic in Non-ship/categorised builds
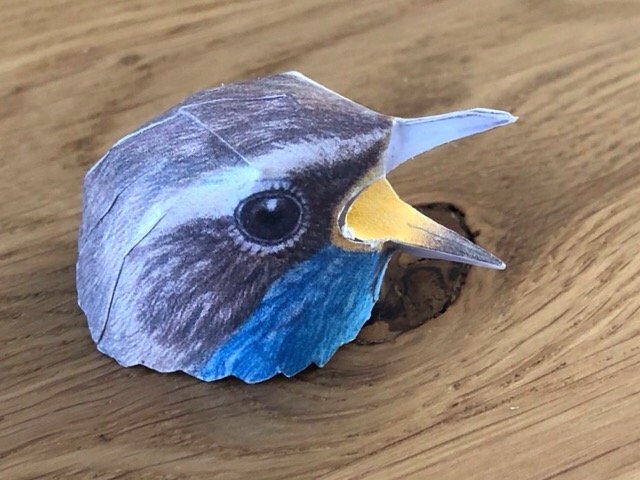
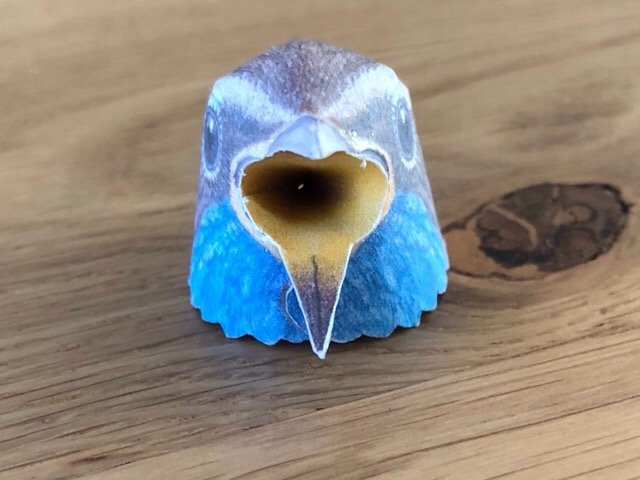
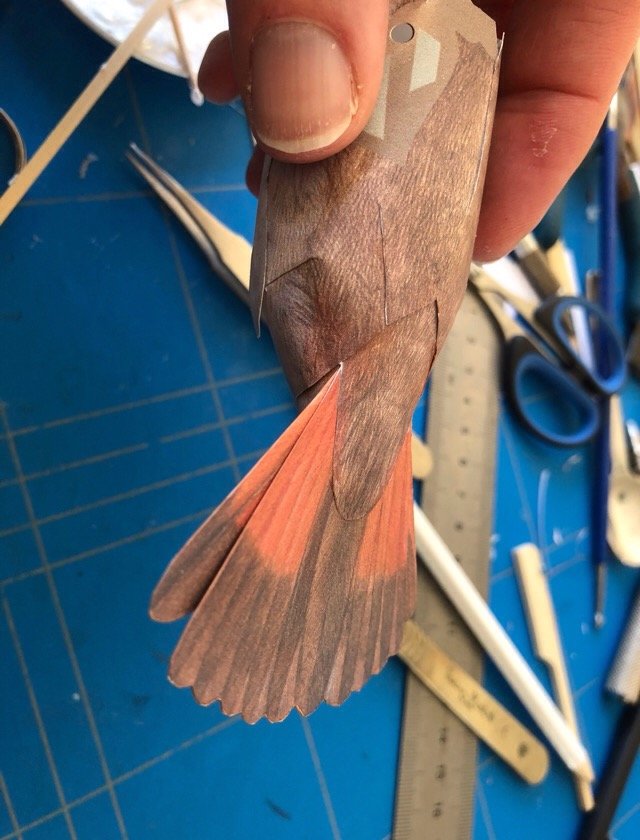
Yesterday my mobile's battery went flat. So, no pics of separate pieces, blobs of glue, just the result of an evenings work. wings are on and here is the birds head, with an open (still unpainted) beak the beak is a cleverly shaped cone, placed inside the template shown in the previous post: the outside of the beak is build up using a couple of layers of glue (took me some time to realize that PVA worked better than normal paper glue: PVA has gap-filling properties. Paper glue has not. Also the sides of the beak have been filled using PVA. Some paint nedded to get the thing in the correct colour. Gluing the head to the body, two legs to be added, and two flaps to hide the gluing tabs on the wings. Should be possible to show you the flying thing tomorrow. Jan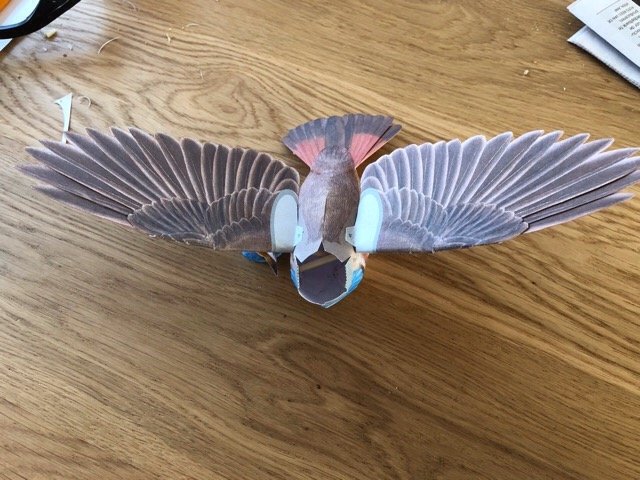
-
A coupleof months ago you showed another one that looked promising to me. Any news on this one? jan
-
Given the level of detail you are adding, including the actual food is almost a must..... Jan
-
The others already told: nice to see a couple of new ones. Jan
-
Even if we have shut down, work will continue.... No additional time to read or build Jan
-
Bluethroat by amateur -FINISHED - Scherft - 1:1 - CARD
amateur replied to amateur's topic in Non-ship/categorised builds
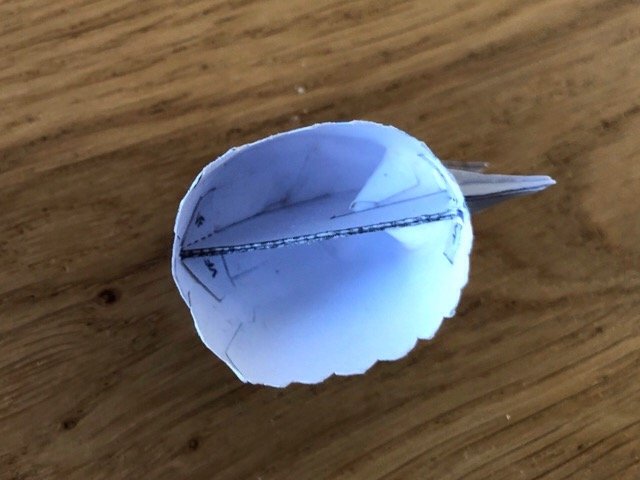
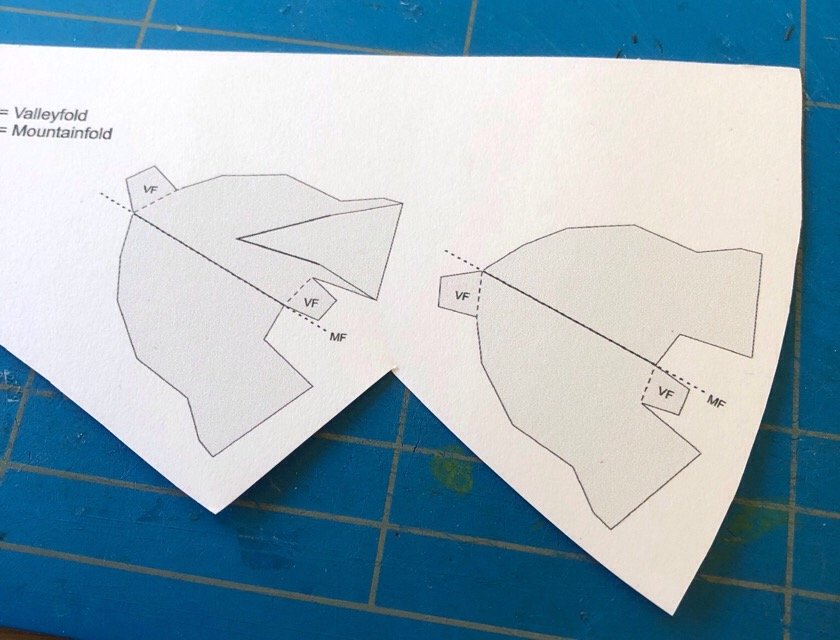
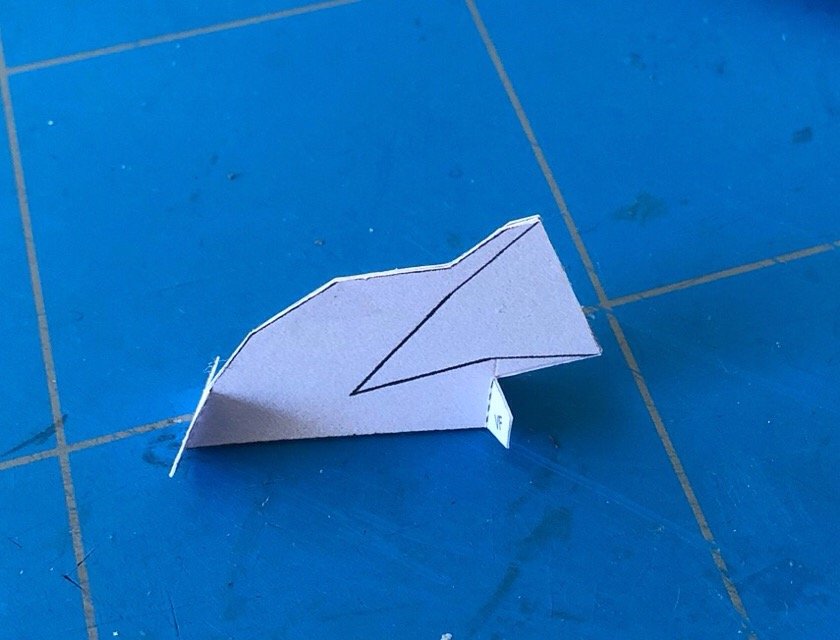
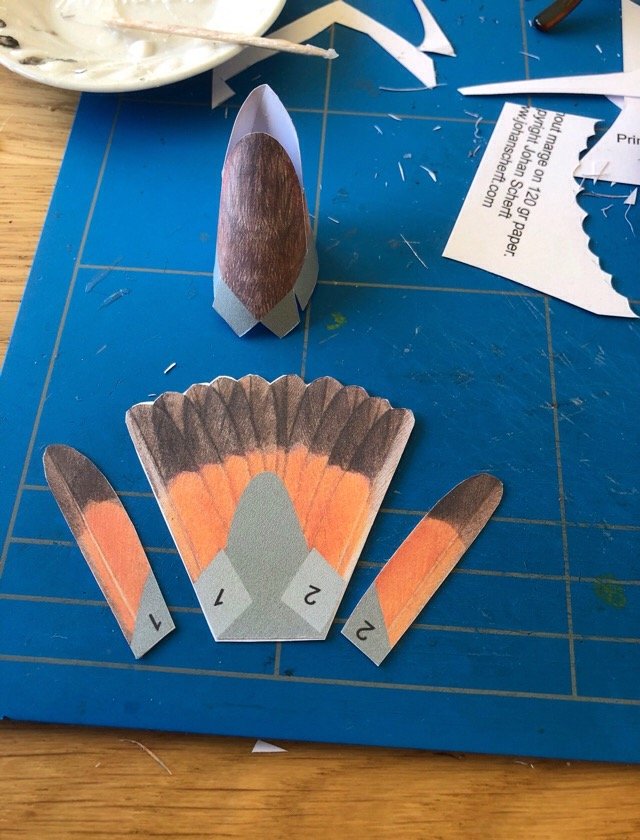
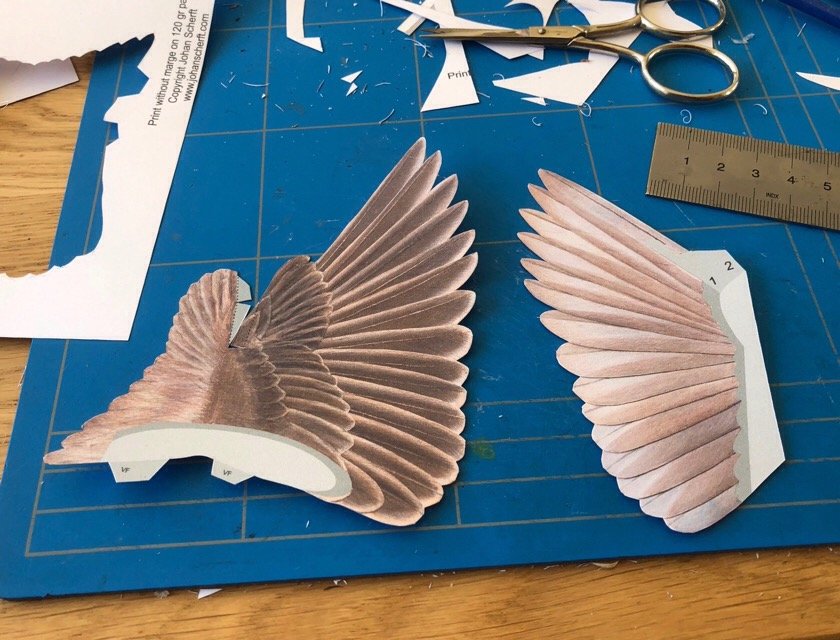
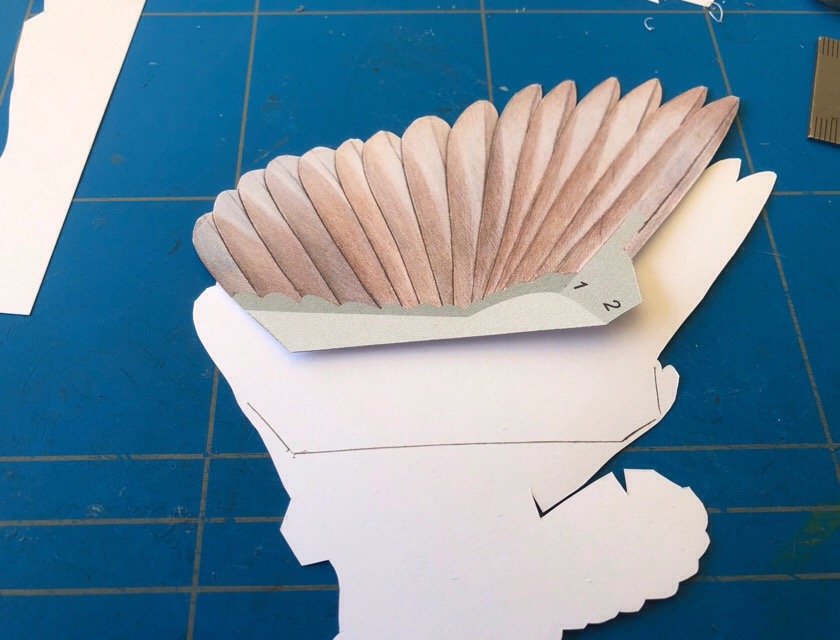
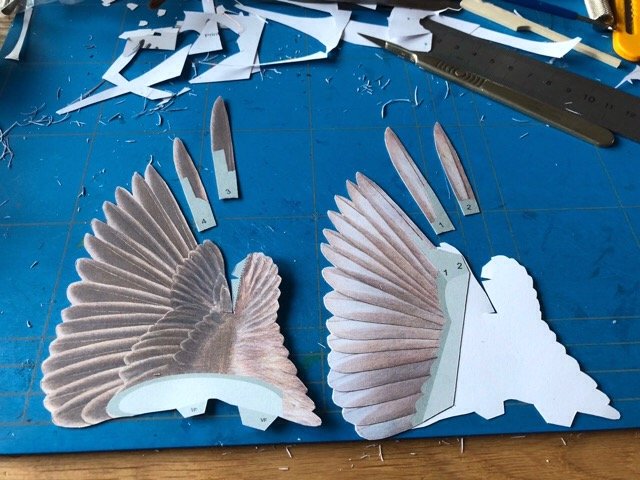
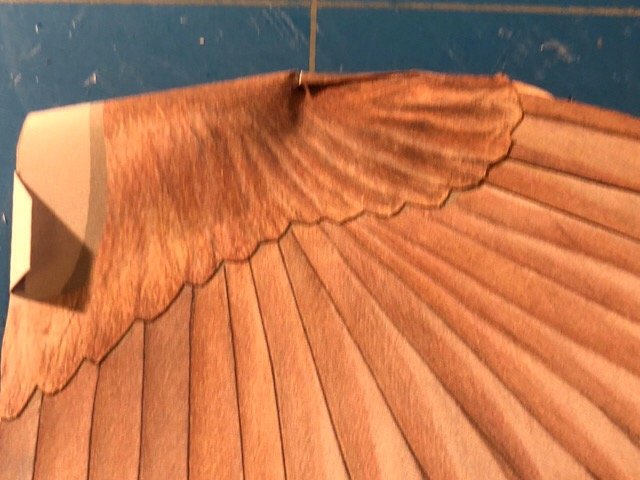
But as in the german cardforum guys started their corona-trigered spring-building, I couldn’t resist..... First the flat paper: Resulting in a nice curved body. Closing was a bit fiddly, but worked out OK Next came the tail section. Getting it properly inside the body proved to be a bit difficult. IN the end the section matches up with the tabs, but the tail is not completely level with the body.... And the preparations for the wings: the downloadkit does not provide the skewer, but the skewer is needed to get the wings in the prober angle, and to give them some firmness, preventing them to get loose. The wings itself were rather straightforward, although in the end not without a small problem: Upper and underside As the surface is quite large, and need to be glued, I placed a line to help me align both parts without having the need to adjust two quite soft, sticky surfaces. And all parts together: the two outmost feathers are modelled as separate parts. And there the small problem arose: bending over the underside of the wing turned out problematic: at the elbow the card tended to kink: no way to get the underside aligned with the indicated gluing area, getting the front side at the right angle and the card flat. Ah well, perhaps I wil do it again. Next the first part of the head: Clever construction: as the bird is singing, you need a way of aligning its beak (inside and outside). This rather stiff, four-layered card is a template: it has to be glued inside the head, then the beak is cut out, its throat glued in place, and the outside modelled, building it up to the desired thickness using layers of glue. Will see how that works out. Jan (to be continued)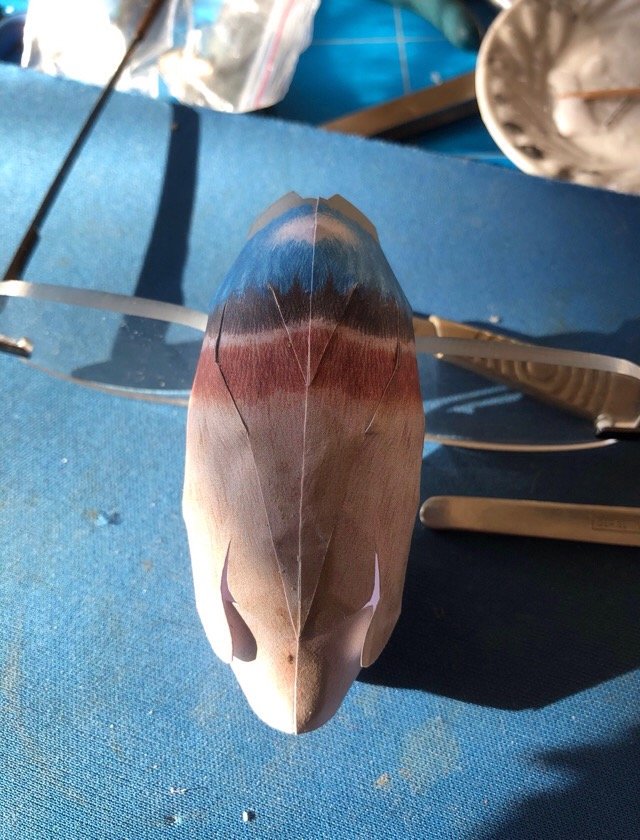

-
A small Crewe workhorse called Pet
amateur replied to michael mott's topic in Non-ship/categorised builds
I already found the answer to my question. Pet is on the internet (wiki-page crew works railway). So much to read and learn Jan -
A small Crewe workhorse called Pet
amateur replied to michael mott's topic in Non-ship/categorised builds
You mean there is something technical you don't know about? Now that is a surprise Your little machine is coming along nicely. What was its original duty? Was it tram-loco, or some kind of industrial loco (or one of those coal or peat transporters?) Jan -
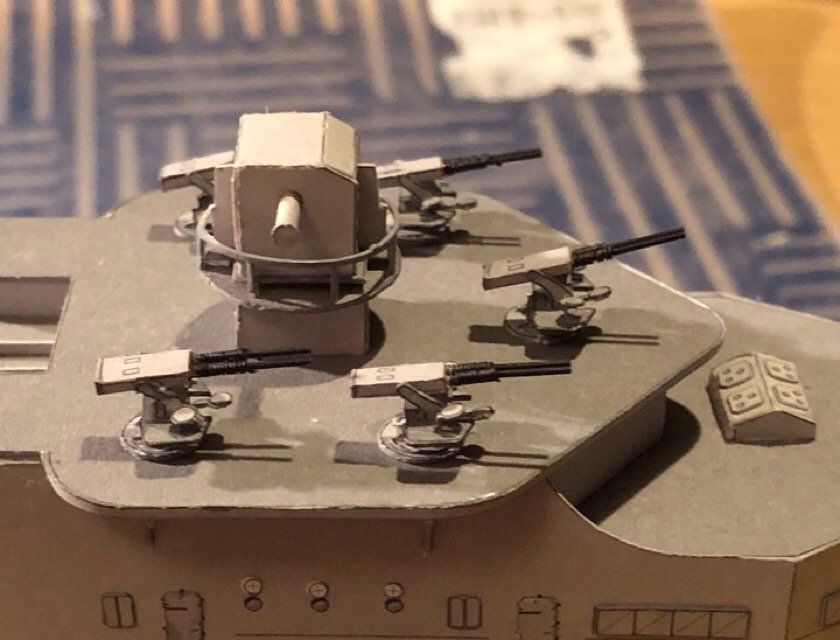
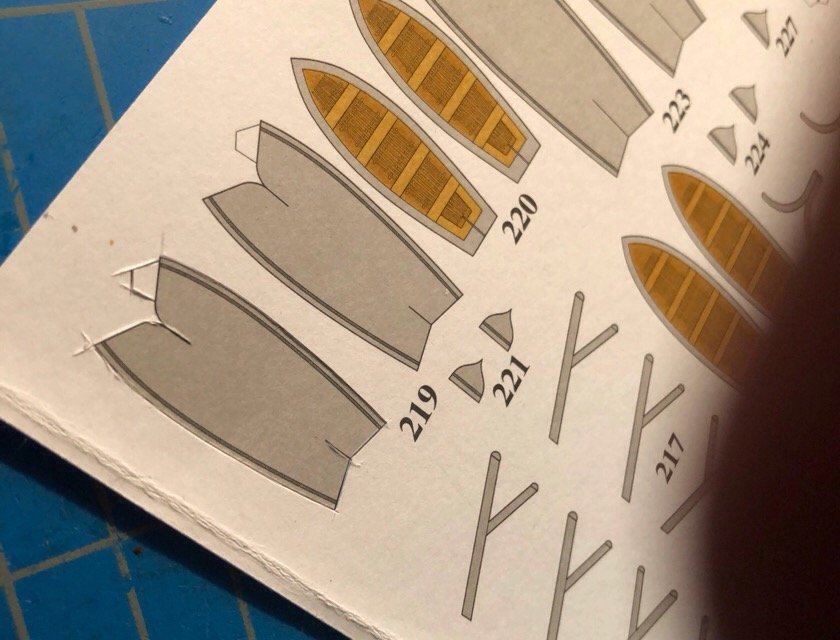
Almost a year ahead. It was not rainy today, but Idid the bofors. The pics are a bit lousy, but the result is more or less as it should be. The Scaldis/JSC card has the tendency to delaminate when sharply folded: the small seats therefore were a bit of a problem and I made a small start on the ships boats. I decided to do those 'as printed', and not by replicating part 220 and adding the boats interior. See you next year Jan

-
I also came across nickel silver, that is quite often usedby the German cardbuilders. Somewhat easier to find here. However: sellers should package it in mixed packages in stead of 10 lengths per diameter Jan
- 64 replies
-
- 2
-

-
- v108
- digital navy
- (and 2 more)
-
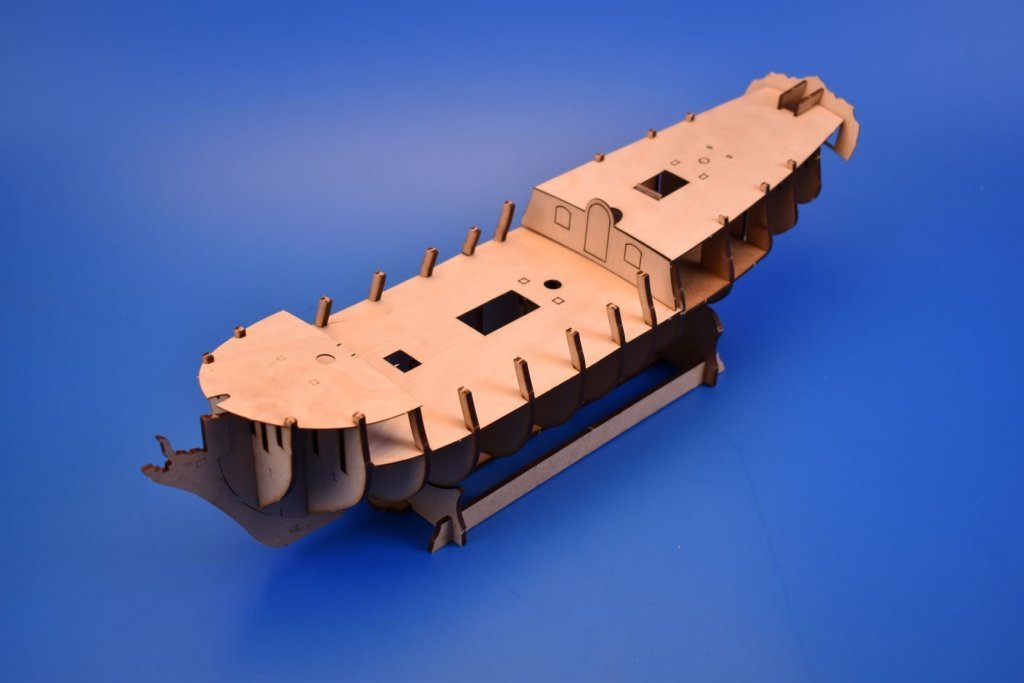
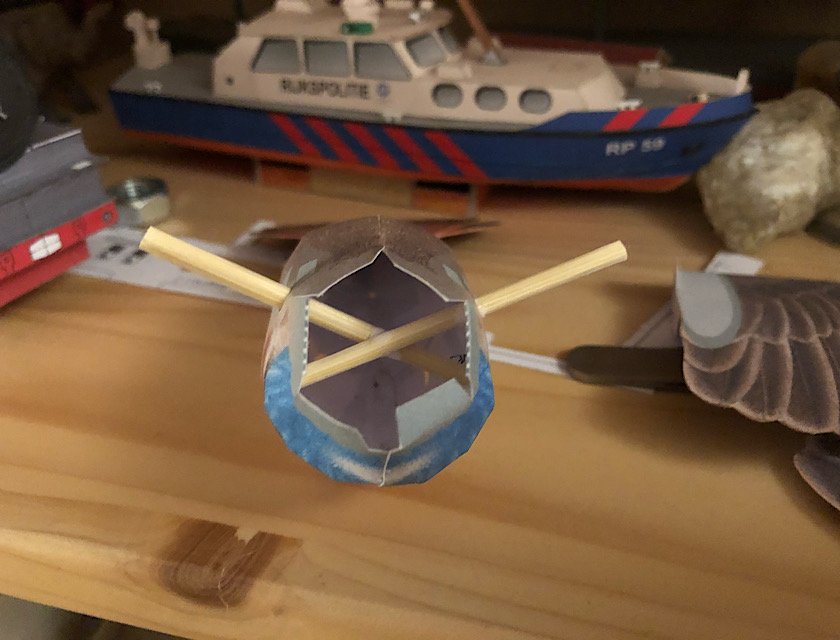
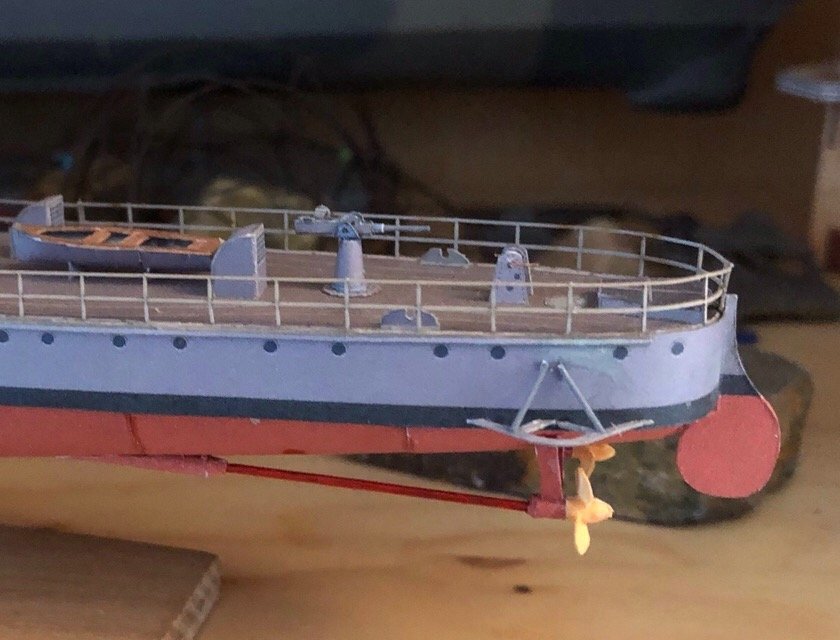
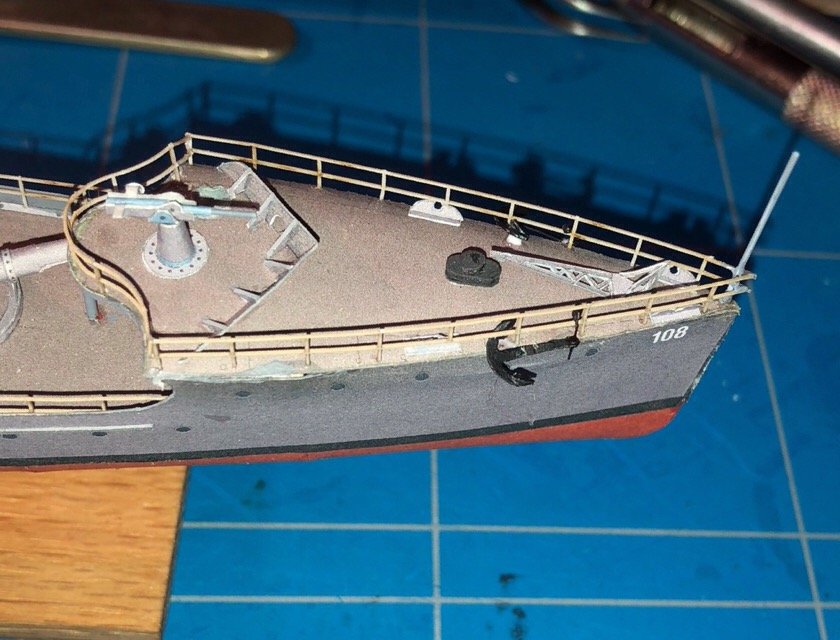
I don't know whether this counts as progress : all (but three) pieces have been used, the evergreen been painted (yes, I know, thee colours are off, but not as far as these pics suggest). Remaining work is masts and rigging. I tried myevergreen rods, but they are not stiff enough. So, I have to find some steel or brass inthe correct thickness, and delivered by a webshop with decent postage-costs. I hate ordering little thingies costing under 5 euro's and paying four times as much due to the stamp that is on it. ) Today's pics Knowing myself, it will remai. In this state quite a long time. I have now three or four models in this 'almost done' category, some for over a decade Jan
- 64 replies
-
- 7
-
-
- v108
- digital navy
- (and 2 more)
-
When have you actually passed the halfwaypoint in building a kit?
amateur replied to Vane's topic in Wood ship model kits
Nope: build the hull took me three years. Rigging still hasn't finished in almost 7 years. I guess the halfway point measured in parts is something different han halfway measured in time (not to speak in terms of motivation ) But why bother over the half-way point? Two things count (at least to me): the fisished product and the fun while working on it. No fun: no work and some longer time till the finished product. So what? put it aside when the fun is over, take it up again when you feel apt for building. As long as it is not your primary source of living, counting hours and parts isn't that important, or is it? Jan -
Nobody believes that.... That sounds so simple, so it can't be true. madness is setting in here too. Meetings cancelled, people forced to work at home, schools closing at first cough. Interseting chain reactions: scholl closing, kids at home, parents not being able to go to work (or asked to stay at home when the kids feeling not completely well) On the bright side: plenty of space in the commuters train Jan
-
Did Zara ever had a camouflage pattern, or will she just be plain (ah well, we know what you do with plain ) grey? Jan
-
PS: third question: what are the blocks made of? They look quite smart Jan
- 40 replies
-
- 2
-
-
- la tartane
- heller
- (and 1 more)
-
What a nice model you made out of that Heller kit! Two questions: what did youuse for the sails? The material looks quite good (both in colour and in texture) and the second one: did you paint the lines between the hull planks just freehand?? I see no belading, runnin gor other issues in the paint.... I can't even paint a full size door without my paint running in all directions Jan
- 40 replies
-
- 2
-
-
- la tartane
- heller
- (and 1 more)
-
Did the bBul ever reach his destinatiion? Jan
-
You label it 'thr second ull', but counting, I come to the conclusion that it is at least number four.... How much is going on in your shop? Jan
-
The sailplan shown in the previous post is already an interpretation of the rig shown by Chapman. I checked my edition, and rhis is all there is regarding the sailplan/rig
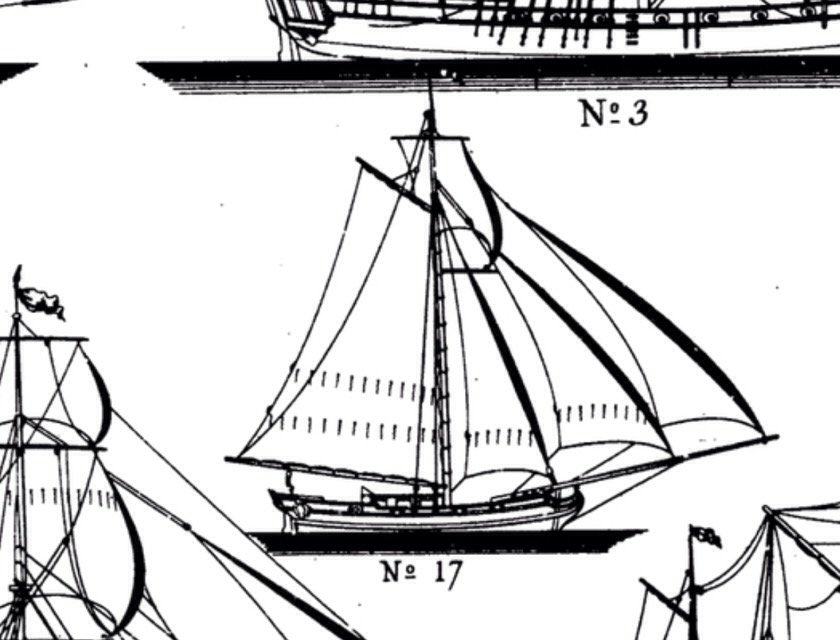
-
Chapmans rigs for the small vessels are not always correct (too much sail) the square topsail looks too heavily rigged: normal Dutch habit (even on the larger yachts), was to have the topsail 'flying' without lifts on the yards, and without clewlines). I don't think gretel was a Dutch yacht: there are no leeboards. Compared to the ships inthis drawing, the square sail is too heavily rigged, and the gaf is set too high: as the stay is around the mast, the gaff should not be higher than the eye of the stay. apart from that, I should say that the rig is fairly standard for the time and the region. Jan
-
Next few months? The last months your building speed was higher (or is Zara a super-super detailed kit?) Your torpedoboot came out very nice! Jan
- 45 replies
-
- 2
-
-
- orp ślązak
- mirage hobby
- (and 2 more)
-
Bluethroat by amateur -FINISHED - Scherft - 1:1 - CARD
amateur replied to amateur's topic in Non-ship/categorised builds
I know what you're after, but I have a couple of things to do (work amongst others ), and a couple of models in variousstages of completion. there is a wooden Prins Willem, three paper ships (evertsen, de ruyter, v108), a small steam loco. I will not start this bird before I finish at least one of these models. The loco is not without a build-log, but that log is not at modelSHIPworld, but at a german forum ( die kartonmodellbauer: http://www.die-kartonmodellbauer.de/index.php?thread/9468-preussische-t13-pirling-1-55/). I will not start a log here (I think) Jan -
Perhaps facebook is the preferred thing, but their facebookpage is quite dead. Last update a year ago. Jan