Seventynet
-
Posts
797 -
Joined
-
Last visited
Content Type
Profiles
Forums
Gallery
Events
Everything posted by Seventynet
-
 Hi Joe, I very much appreciate your kind comments and the likes. The rigging seems so far off I haven't even given it a thought but I like your assurances. Best, Ian
- 191 replies
-
- 2
-

-
- victory
- caldercraft
- (and 1 more)
-
I'm loving it Chris. The poly is going to make it look spectacular! Ian
-
Thanks Aviaamator, Sjors and Chris for looking in and the encouragement and others for the likes. It really keeps me going. Ha Chris, no such hidden experience believe me. I must not be showing enough of my screw ups. You know Chris after experimenting with some scrap I'm not sure I like the look of the black stain on the walnut. I'm going to think on it for a while. I have an idea for another way to contrast the wales. We'll see. Best, Ian
- 191 replies
-
- 3
-
-
- victory
- caldercraft
- (and 1 more)
-
Hi Harvey, I can't believe I hadn't seen this Victory build before. What a nice surprise! It will be a long time before I catch up but I shall follow along from now on. Thanks for sharing. Best, Ian
-
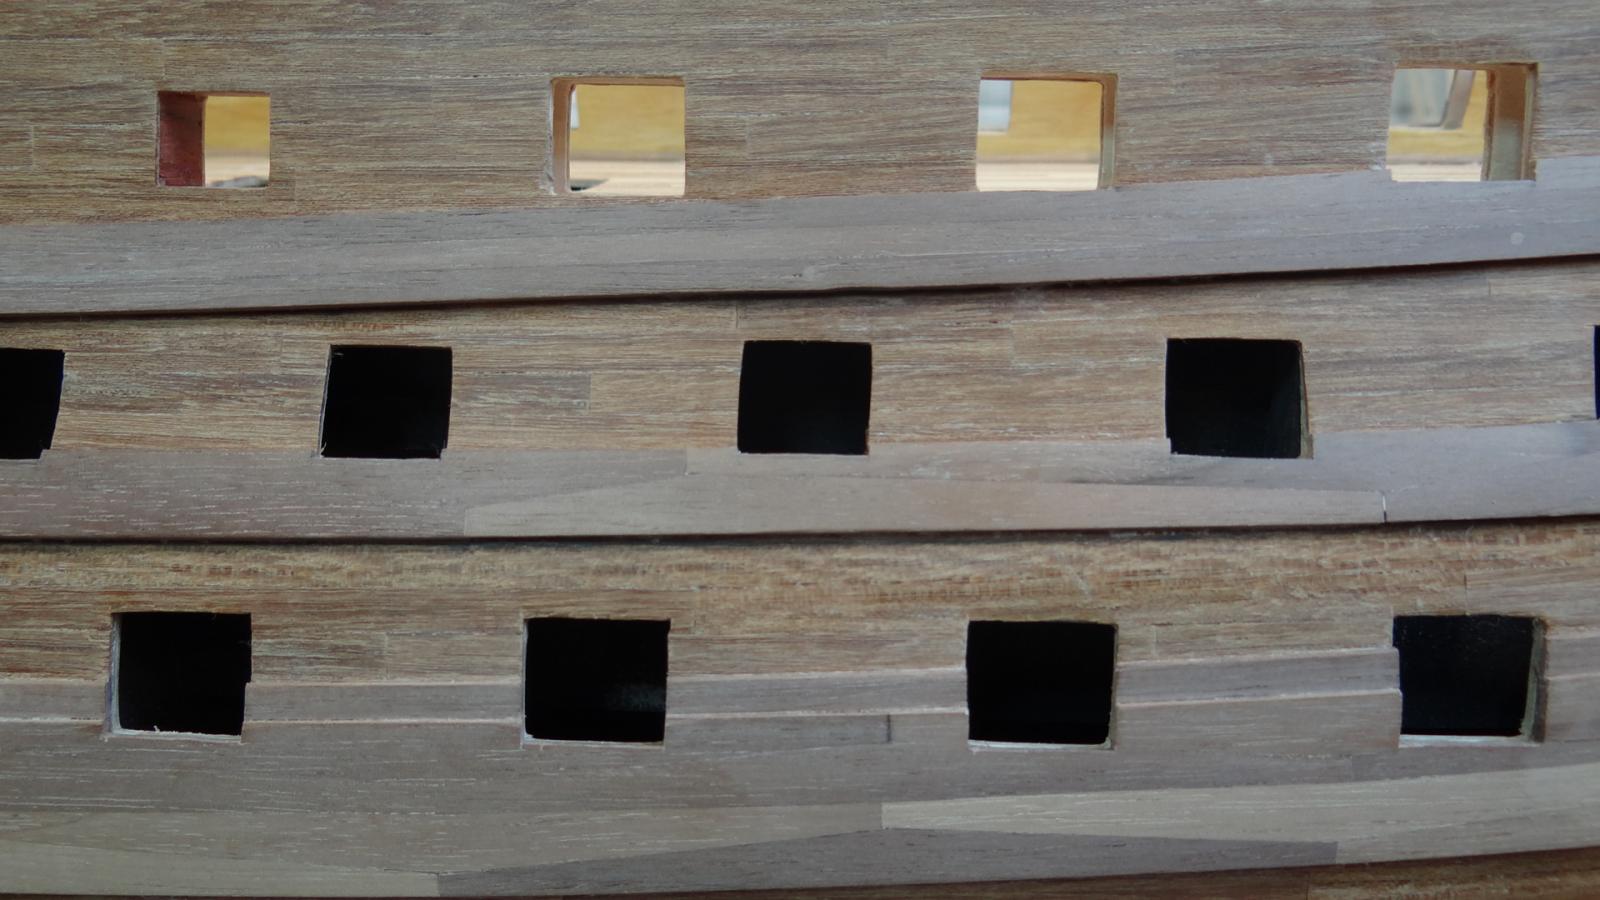
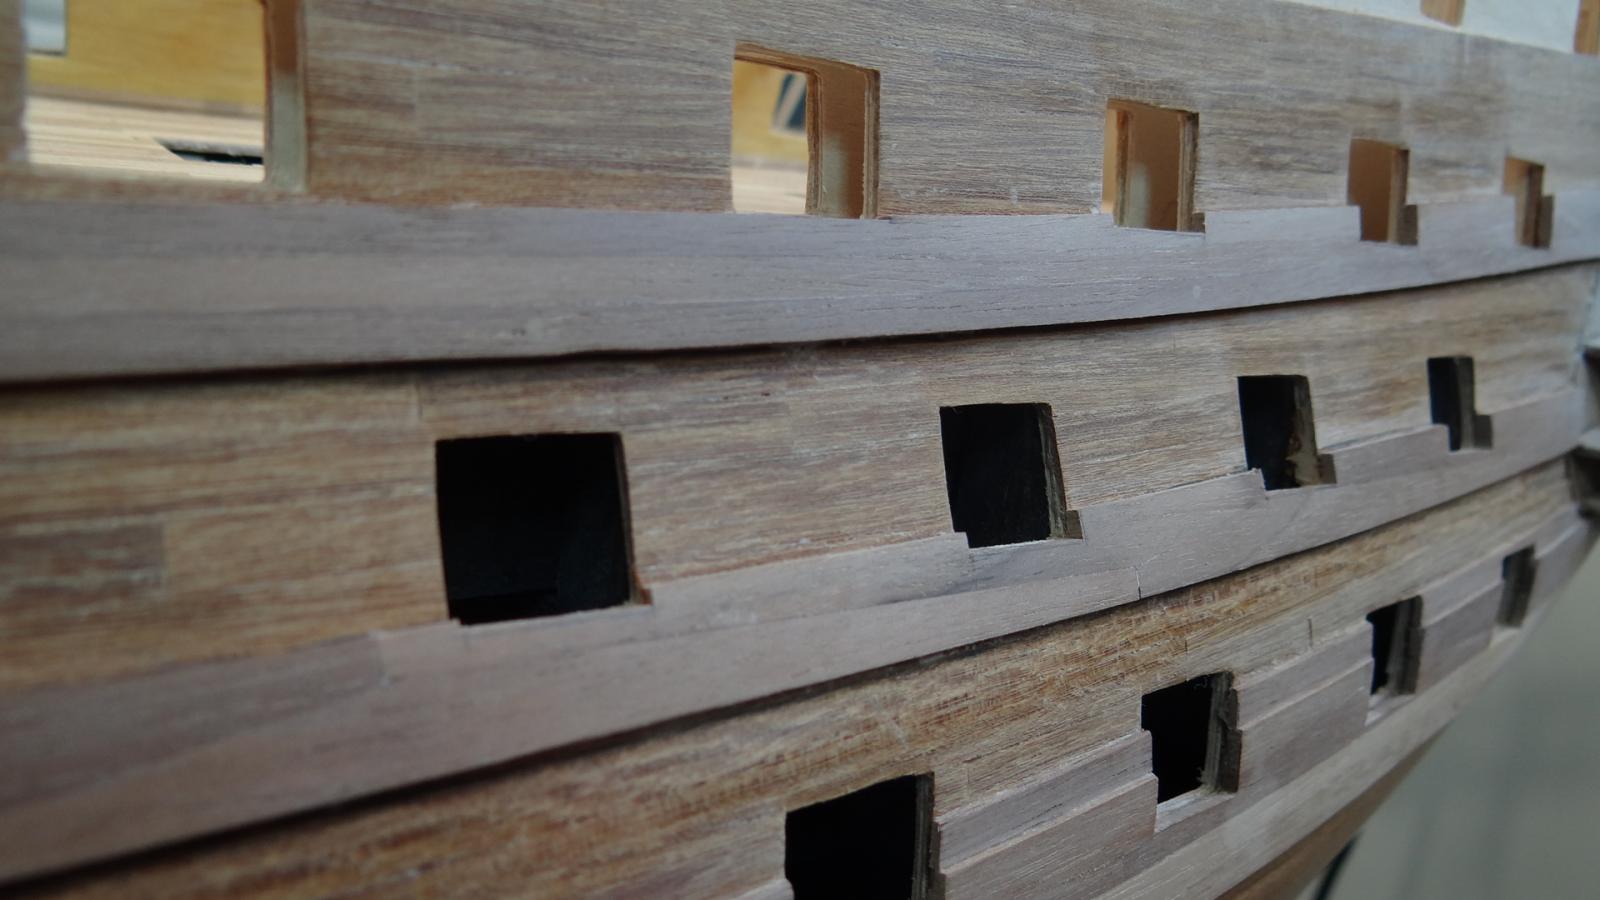
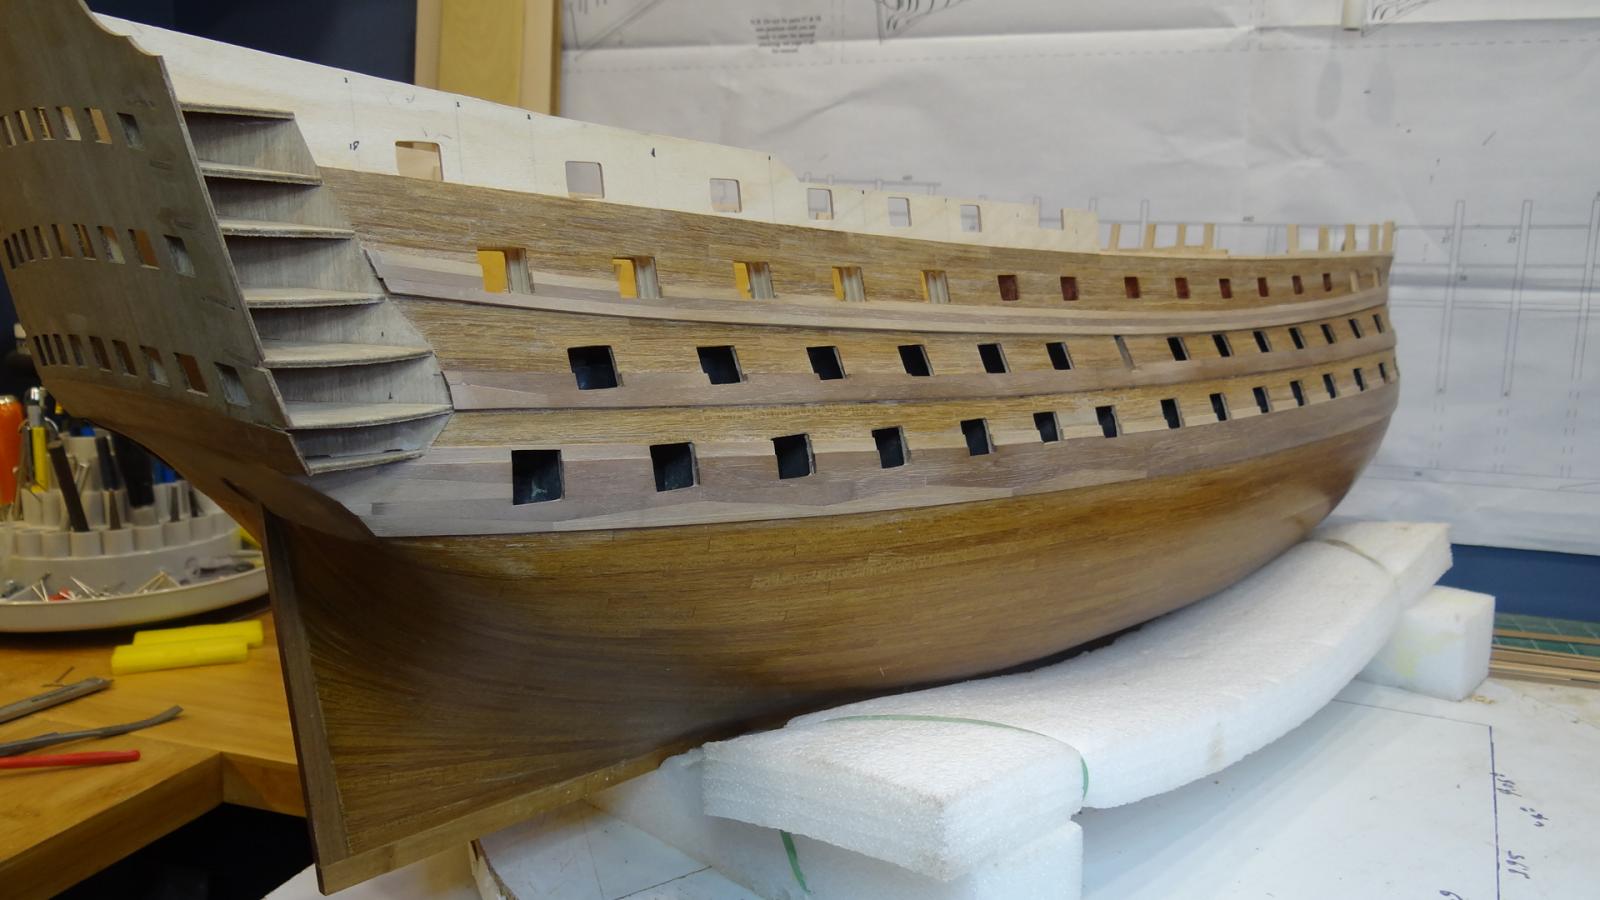
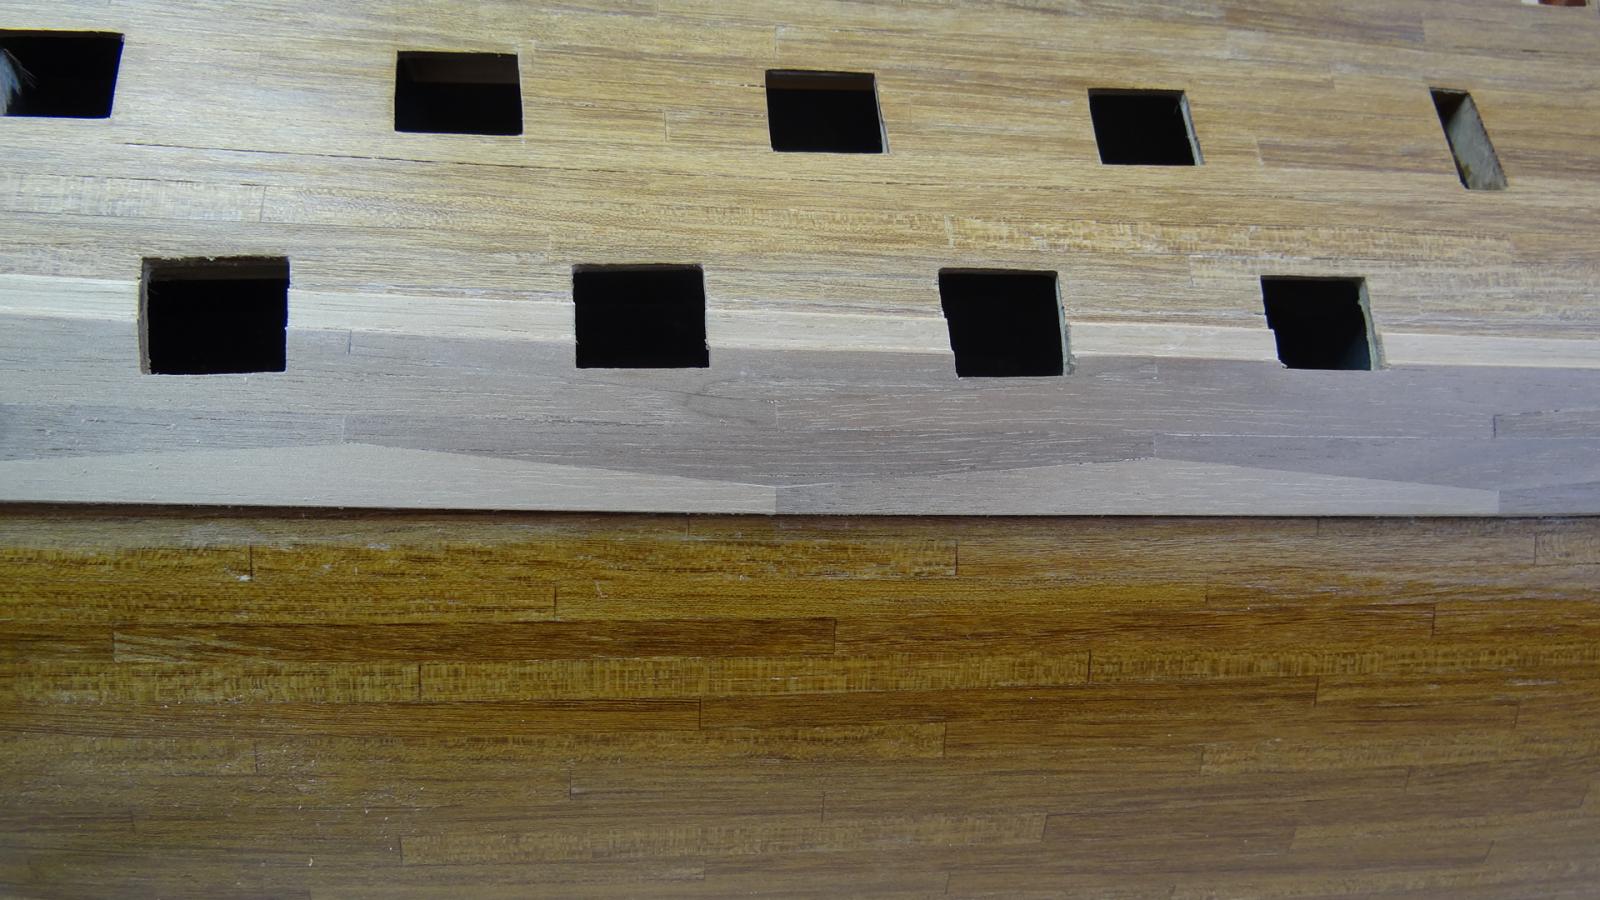
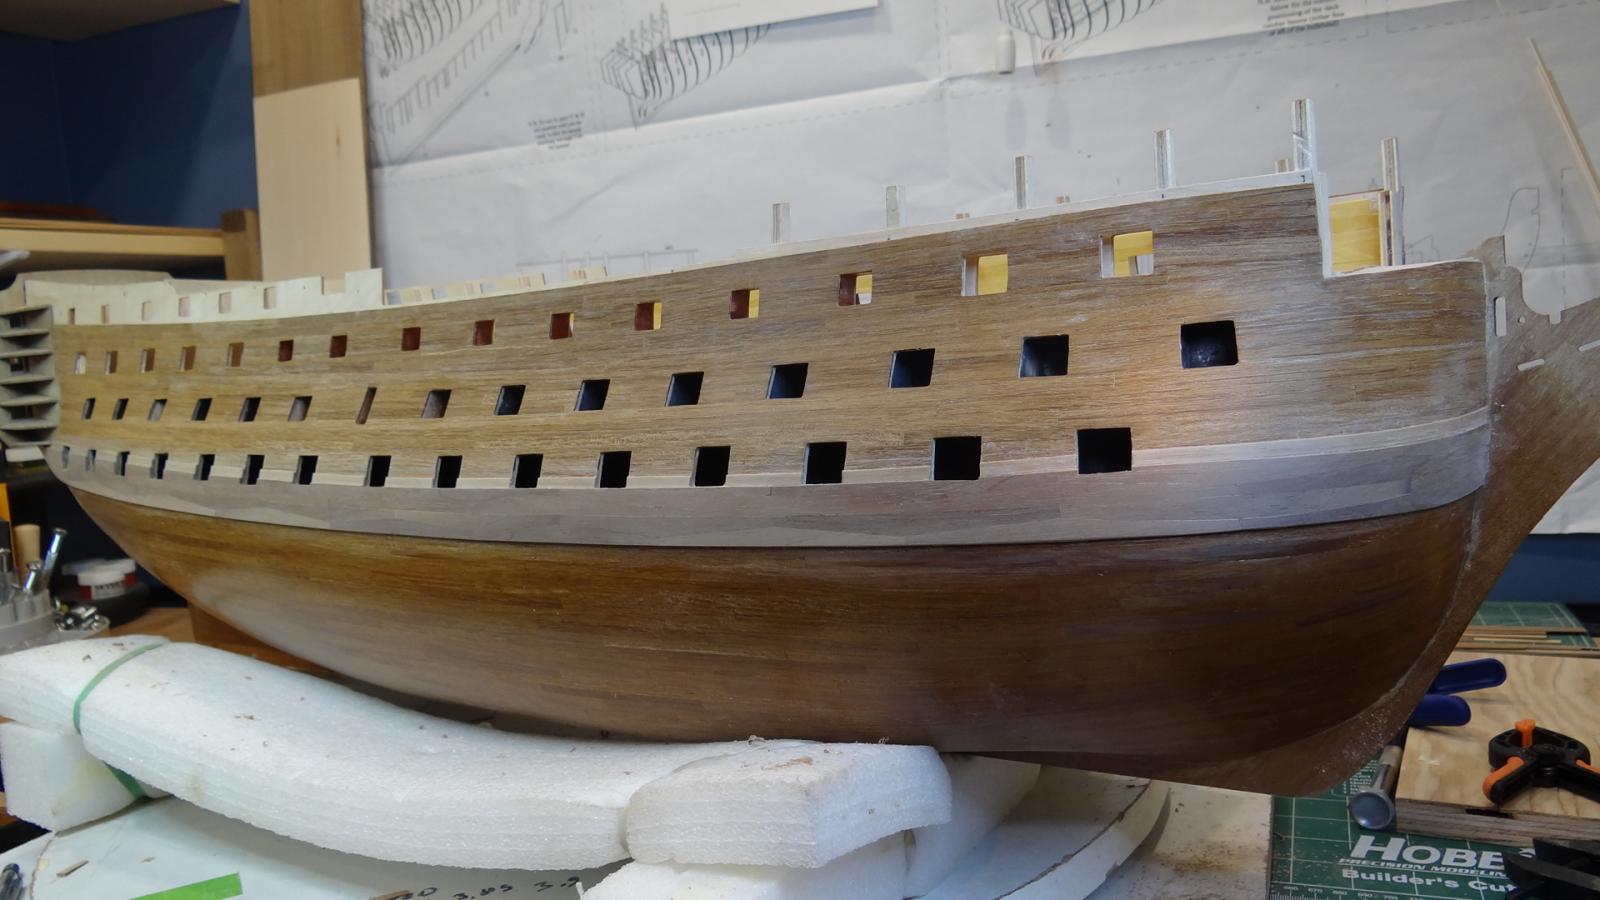
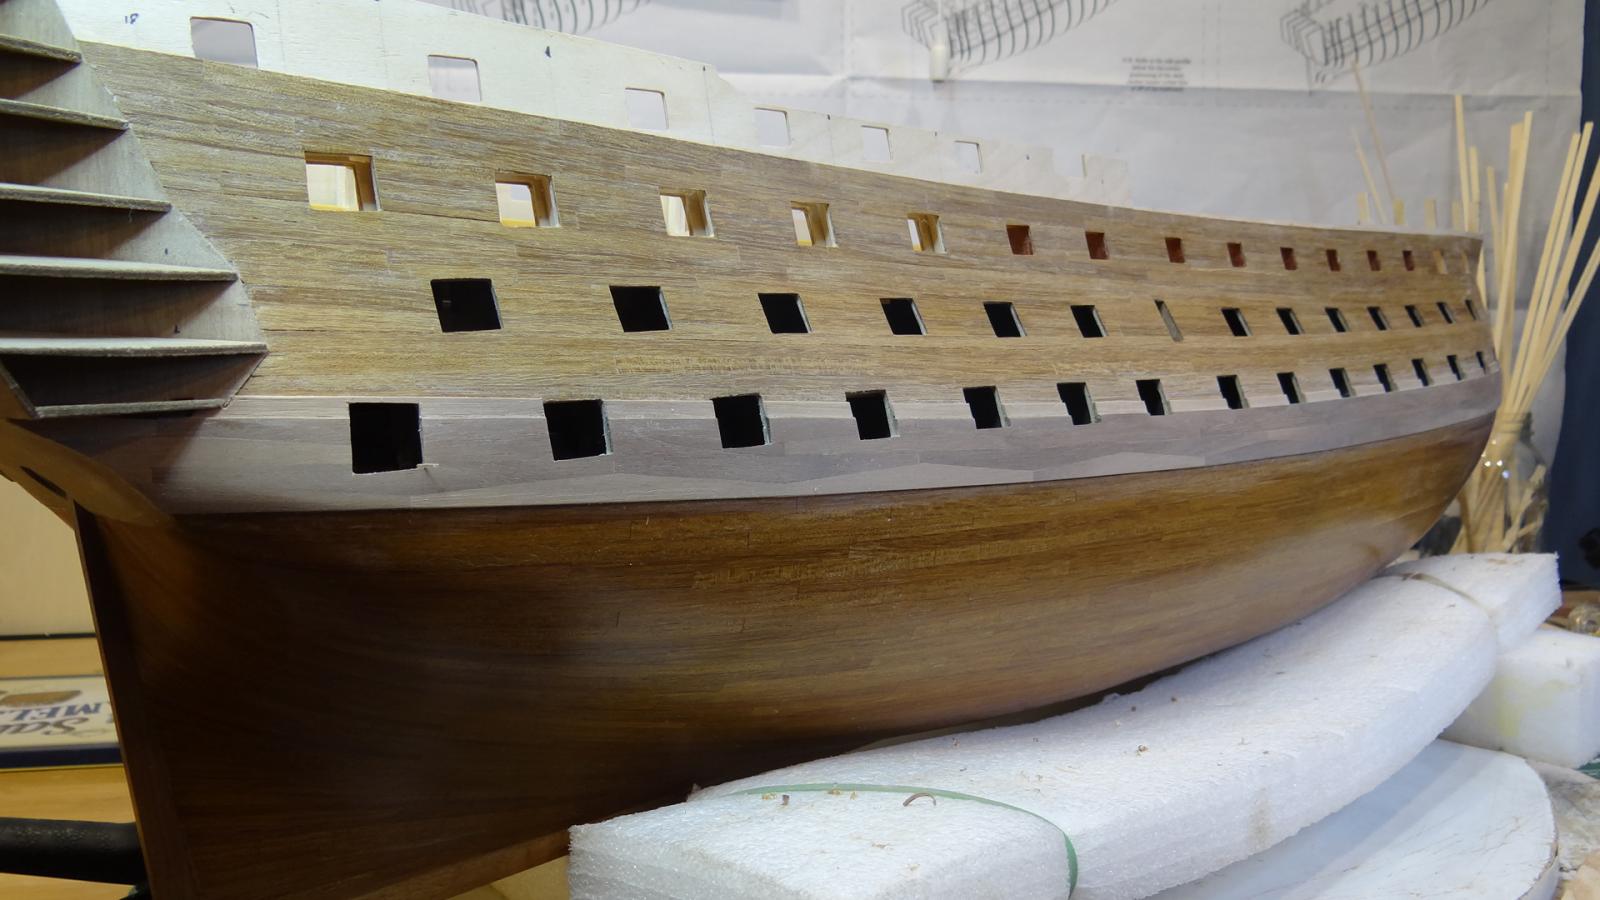
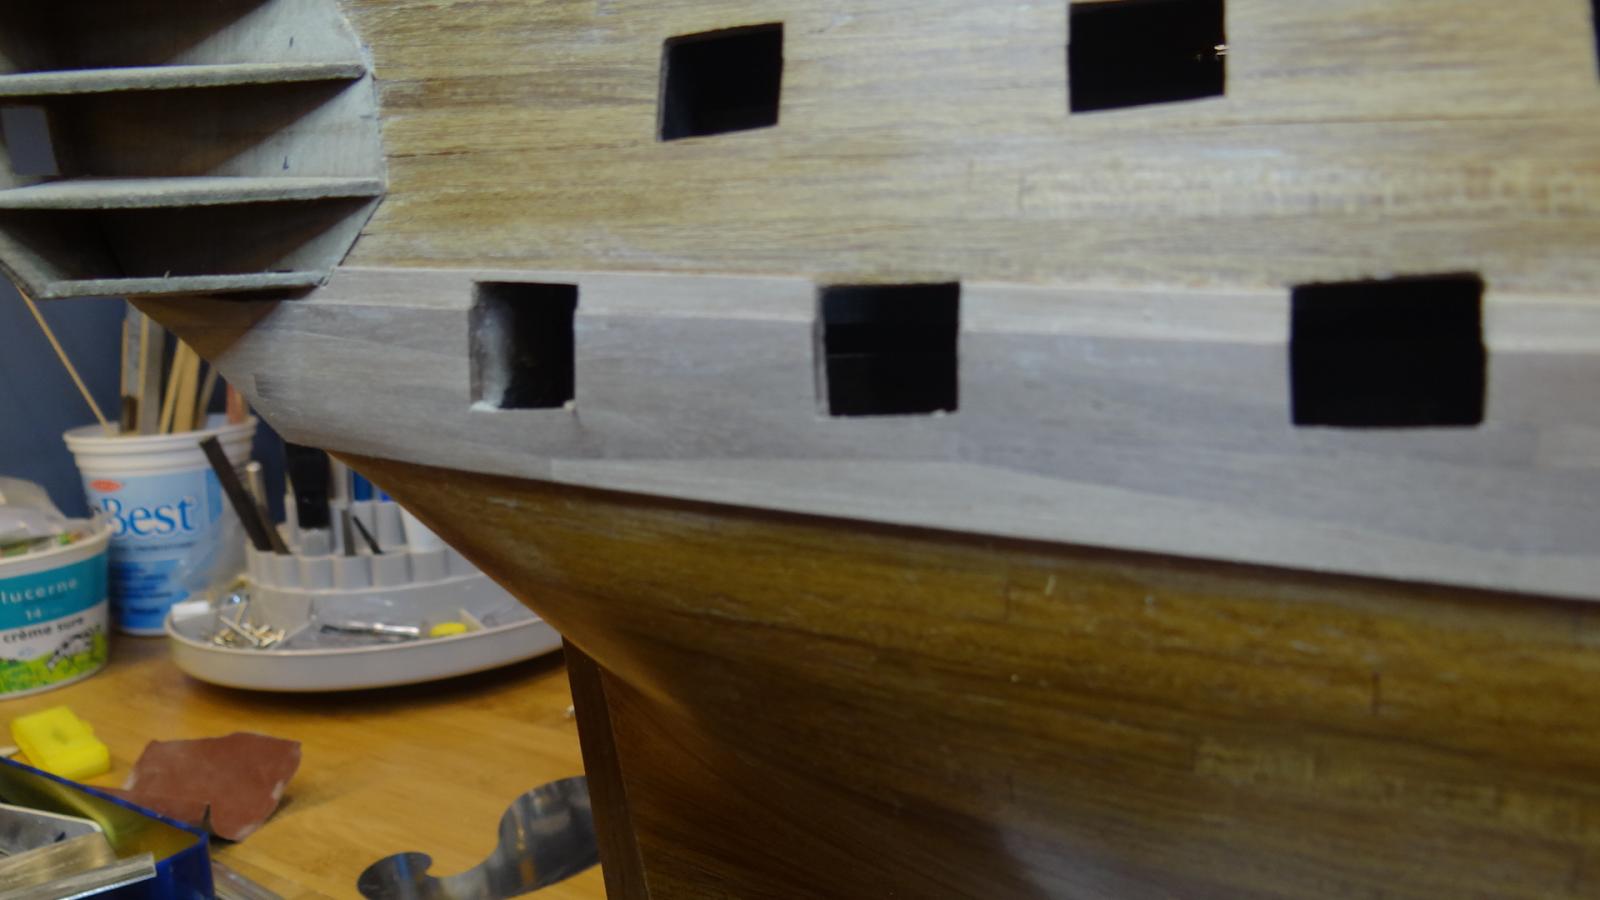
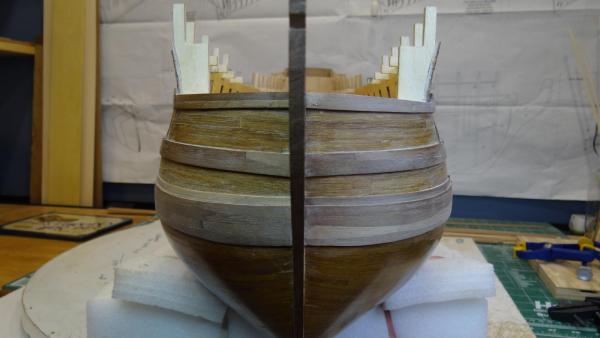
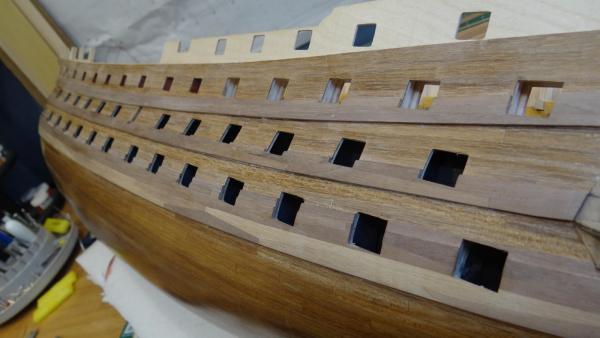
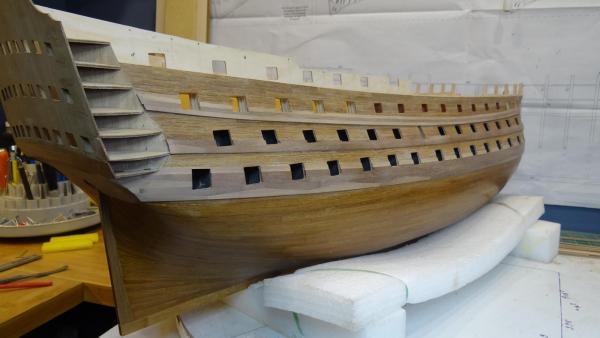
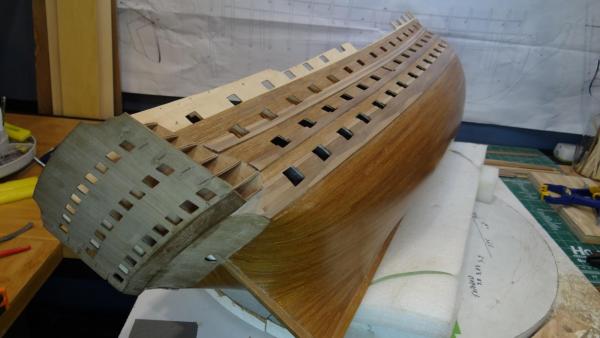
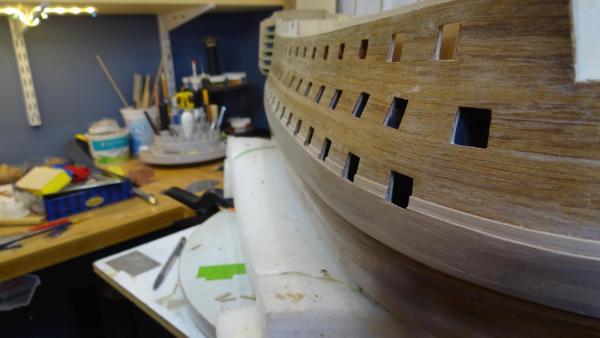
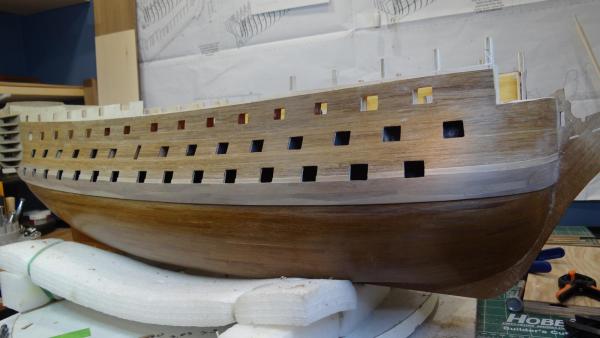
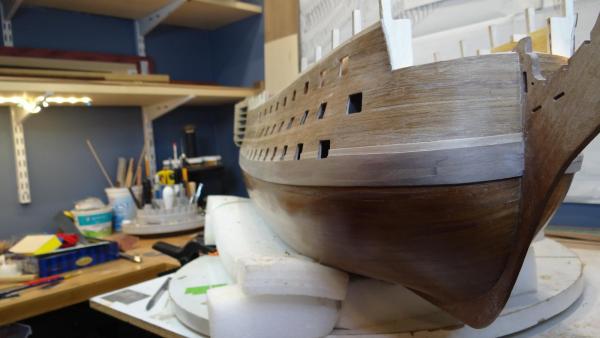
Good Day Shipmates, Thank you Robert and others for the likes and following my build efforts. It is greatly appreciated. Please let me know if there are areas you think I've missed or can improve on. This update shows the three wales completed. Anchor stock for the main wales, top and butt for the middle wales and 3 straight planks (3.5 mm each) for the upper wales. I have deviated from Longridge by using wider stock for the middle wales but the total width is the same (10.5 mm as in CC manual). Anyone thinking they might want to attempt the anchor and top and butt approach should know there is a bit of controversy about which wale is anchor stock and which is top and butt - and you may want to settle it to your own satisfaction before you proceed (Edit: link to literature that supports anchor stock: here). It would be good if someone in the know advises us. A last note, as you may recall I milled my own [thicker] walnut for the wales. I have a plan that will be revealed sometime in the future. Lots of gun port fussing ahead. Best, Ian


- 191 replies
-
- 16
-
-
- victory
- caldercraft
- (and 1 more)
-
Paul, thanks so much for the speedy reply. So this is good news for me, it appears maybe there is no precise answer! I see Alexandru has adopted the approach you have followed as has Heinz, at least partially. At the end of the day all that really matters is that we are happy with our model. I have pulled up a chair to your build as I know I'll be borrowing some of your ideas and expertise. Best Ian
-
Hi Paul, Lovely work. You sure seem to be motoring along nicely. I want to ask you a question regarding your wales, not that I have the option of changing mine at this stage...but it is a somewhat confusing area. I can't help but think that I have been working with old information that has since changed. Both Longridge and Ed Tosti used anchor stock for their lower (main) wales and top and butt for their middle wales. You have switched that order, as I see others have also done, but I cannot fiind any sources that discuss this change. Can you tell me what your reference is? McKay? Thanks, Ian
-
Job well done! Sit back and admire your hard work. Can I suggest that you leave your options open with respect to coppering? To do so you only have to do as great a job as you did with your first planking - and, I suggest, use defined plank lengths. I think you will find that a plank length of say 85 mm (20 feet) or 100 mm will allow you to adequately edge bend and pseudo-spile around the bow. Best, Ian
- 527 replies
-
- 1
-
-
- caldercraft
- victory
- (and 1 more)
-
Kevin, you have nothing to regret about your beautiful Victory, especially the masterful rigging job you are doing. I'll be turning to your build many times (I have already been) when I get to that stage. Sjors, no I do not plan to copper the hull. The wood just looks too good to cover up. Plus it looks like a major operation I can skip. . I hear what you're saying about the Chris Watton Victory. That thing will be magnificent. Best, Ian
- 191 replies
-
- 6
-
-
- victory
- caldercraft
- (and 1 more)
-
Wow! Thanks for the compliments Heinz, Sjors, Waspy and Kevin, although overly generous. Kevin, my plan, get ready for it, is to stain them with ebony minwax. I want the colour but I want the grain too. I haven't done a test piece yet so that may change. My plan is to allow the wales to define what would otherwise be the black strips that straddle the gun ports. Kind of like Heinz's but without the nice contrasting wood in between the wales that he has. Please comment if you think something else would look better. Ian
- 191 replies
-
- 3
-
-
- victory
- caldercraft
- (and 1 more)
-
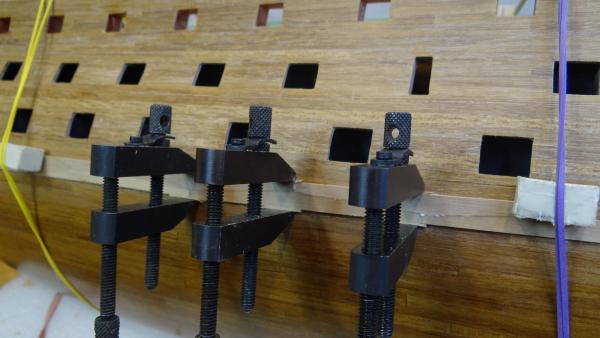
Thank you so much for the encouragement Sjors. It will be an honour to have you follow my build. Indeed I wish I had done 20 ships because I am not sure whether this one will ever end! But this has to be the most relaxing thing to do in the world. Thanks to you as well Heinz my friend and for the likes Mark and Cabbie and others. I just a short update. I've finished the main wale on the starboard side and half through the main wale on the port side which I will now revisit. I will finish up the anchor stock on the main wale then make another jig for the top and butt planks (tail is three times as long as head in triangle) for the middle wales - as Longridge calls for. Heinz, the jig actually worked out quite well, that's not to say I didn't have to do a little modifying here and there but all told, I think worthwhile. Best, Ian


- 191 replies
-
- 13
-
-
- victory
- caldercraft
- (and 1 more)
-
Thanks Robert. Judging by the job you are doing on the first planking your second planking will be spectacular. I can't wait to see it. Best, Ian
- 527 replies
-
- 1
-
-
- caldercraft
- victory
- (and 1 more)
-
Thanks for sharing this Sunday morning fix with mere mortals. I'm still struggling with how to drive a nail properly. Best, Ian
-
Hi Heinz, That looks very, very good. Nice clean, precise joints on the gratings. I love the wood too. I notice that you have a floor board below and a ceiling board just above the gun ports. I think I'll rip my waterways out and replace it with planks like you have and that I've seen others use (the kit instructions do not make mention of these that I am aware). The cannons look great as well. Will you be blackening the barrels or leave them as is? Best, Ian
-
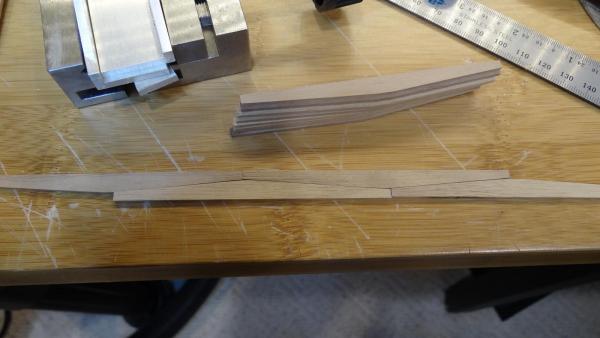
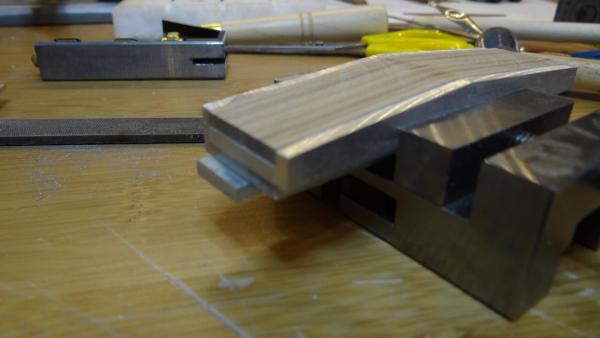
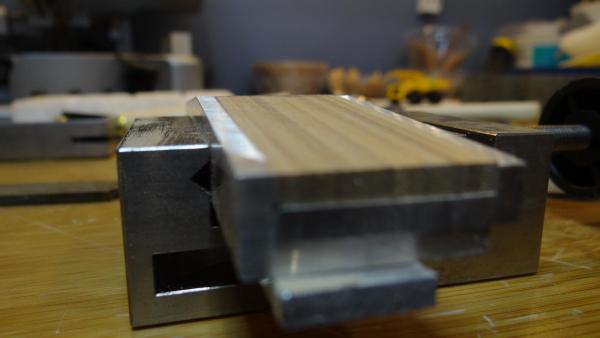
Thanks for the compliment aviaamater and for the likes everyone else. Heinz I thought I'd post a couple of pictures to show you more clearly what I mean by sanding the bottom ends and by clamping the pieces together. Best, Ian

- 191 replies
-
- 14
-
-
- victory
- caldercraft
- (and 1 more)
-
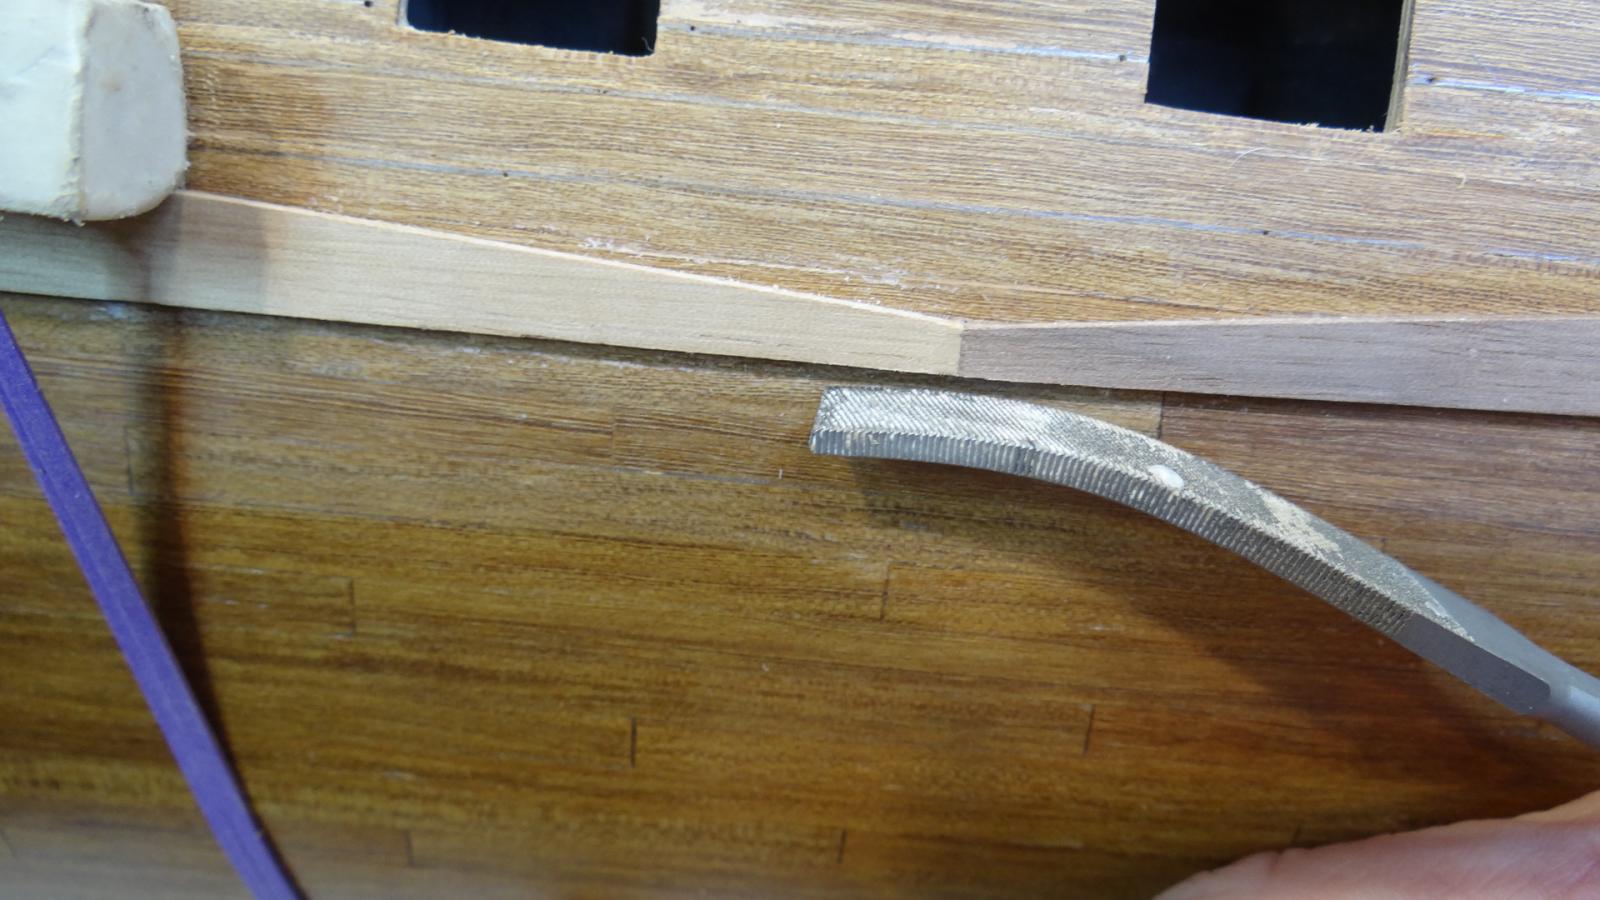
Hi Heinz, Yes indeed Longridge is where I got the idea! So what you are saying is that you lured me to the dark side? Ha, just kidding. I actually like my jig better. It is simpler, easier to make and will clench the wood stack better. As far as it being the right way to go, I would say your method is superior but takes more skill with the blade. I knew going in that the curve of the wales would present a challenge. How I am addressing that is I use relatively short pieces, 100 mm, and lightly sand the bottom wale joints to take the obvious angle that results from the curve of the wale and the straight anchor stock piece. Also I used thick enough wood that I can get a machinist clamp on the edges to mate the overlying piece quite nicely. So far so good. I look forward to seeing your post soon. Best, Ian
- 191 replies
-
- 3
-
-
- victory
- caldercraft
- (and 1 more)
-
Robert I am quite sure that wood is Mansonia, aka African Walnut (which so far as I know is not part of the walnut family). I should say that Don Robinson alerted me to this fact. In any case the main problem with my wood is that a large percentage is dried up, speckled junk, most of which I had to reject and some of which I inadvertently used. What I mean is if I sight along the surface of the wood I can see dips and shallows up to one third of its thickness. It's not hard to imagine sanding right through wood like that. It also cracks readily. I will not have enough of the kit wood to finish so I was fortunate enough to track down a board locally - their last piece. I can't tell from the pictures whether your wood may have the same problems. Quite possibly not, in which case go forth without any regret. Again, the wood looks pretty good polished up.
-
Kevin you have done a masterful job. Stunning representation of the Vic. Best, Ian
- 1,319 replies
-
- 4
-
-
- caldercraft
- Victory
- (and 1 more)
-
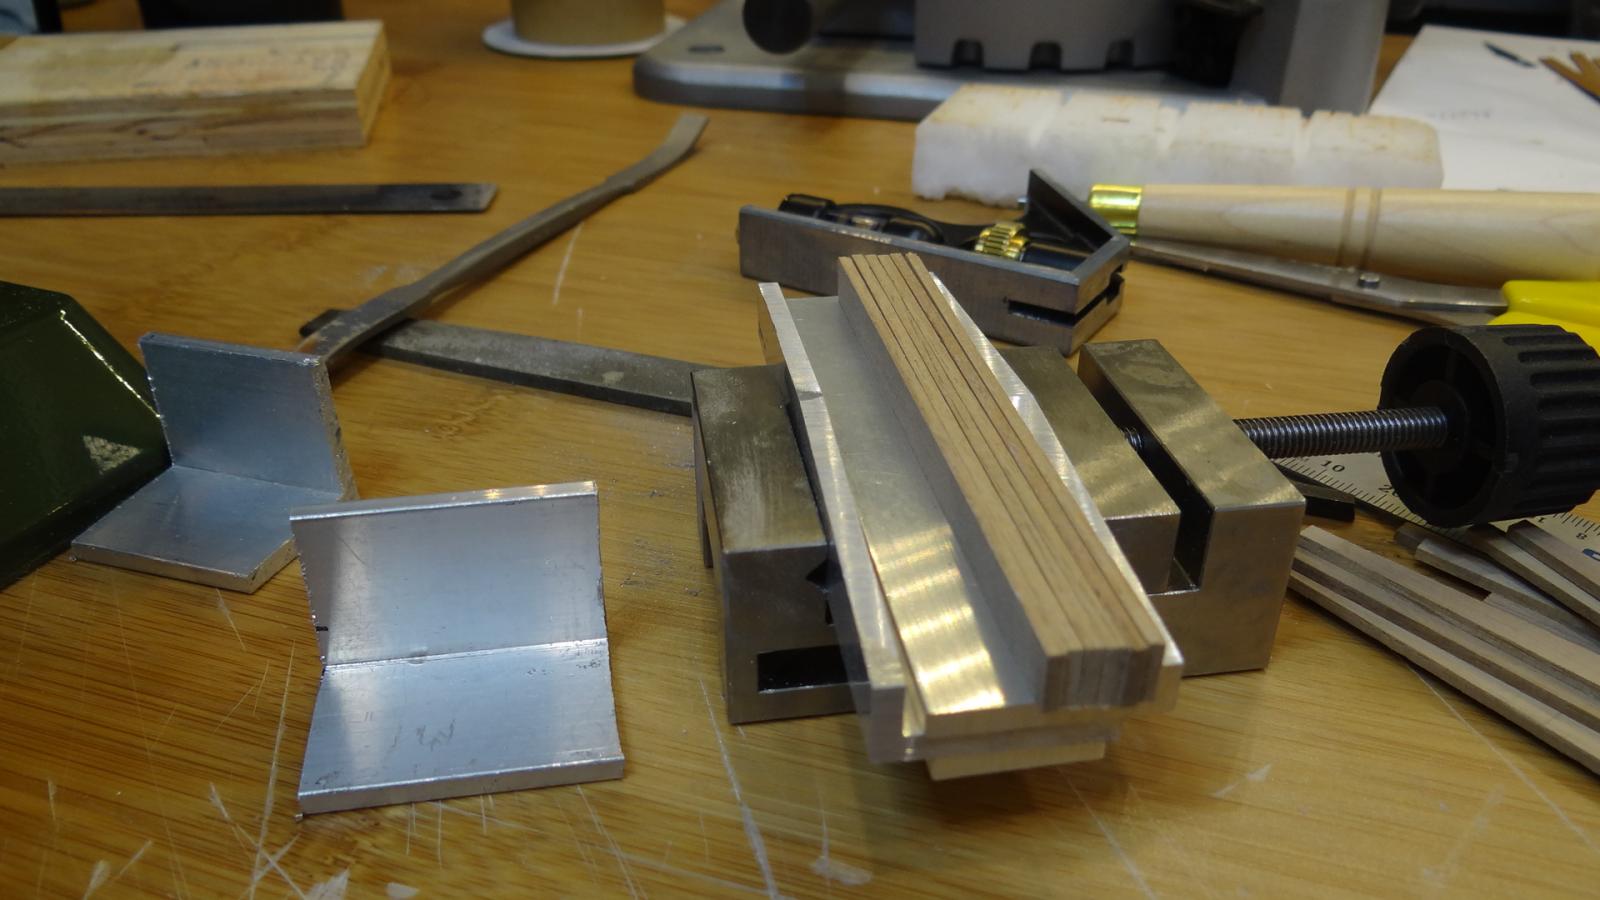
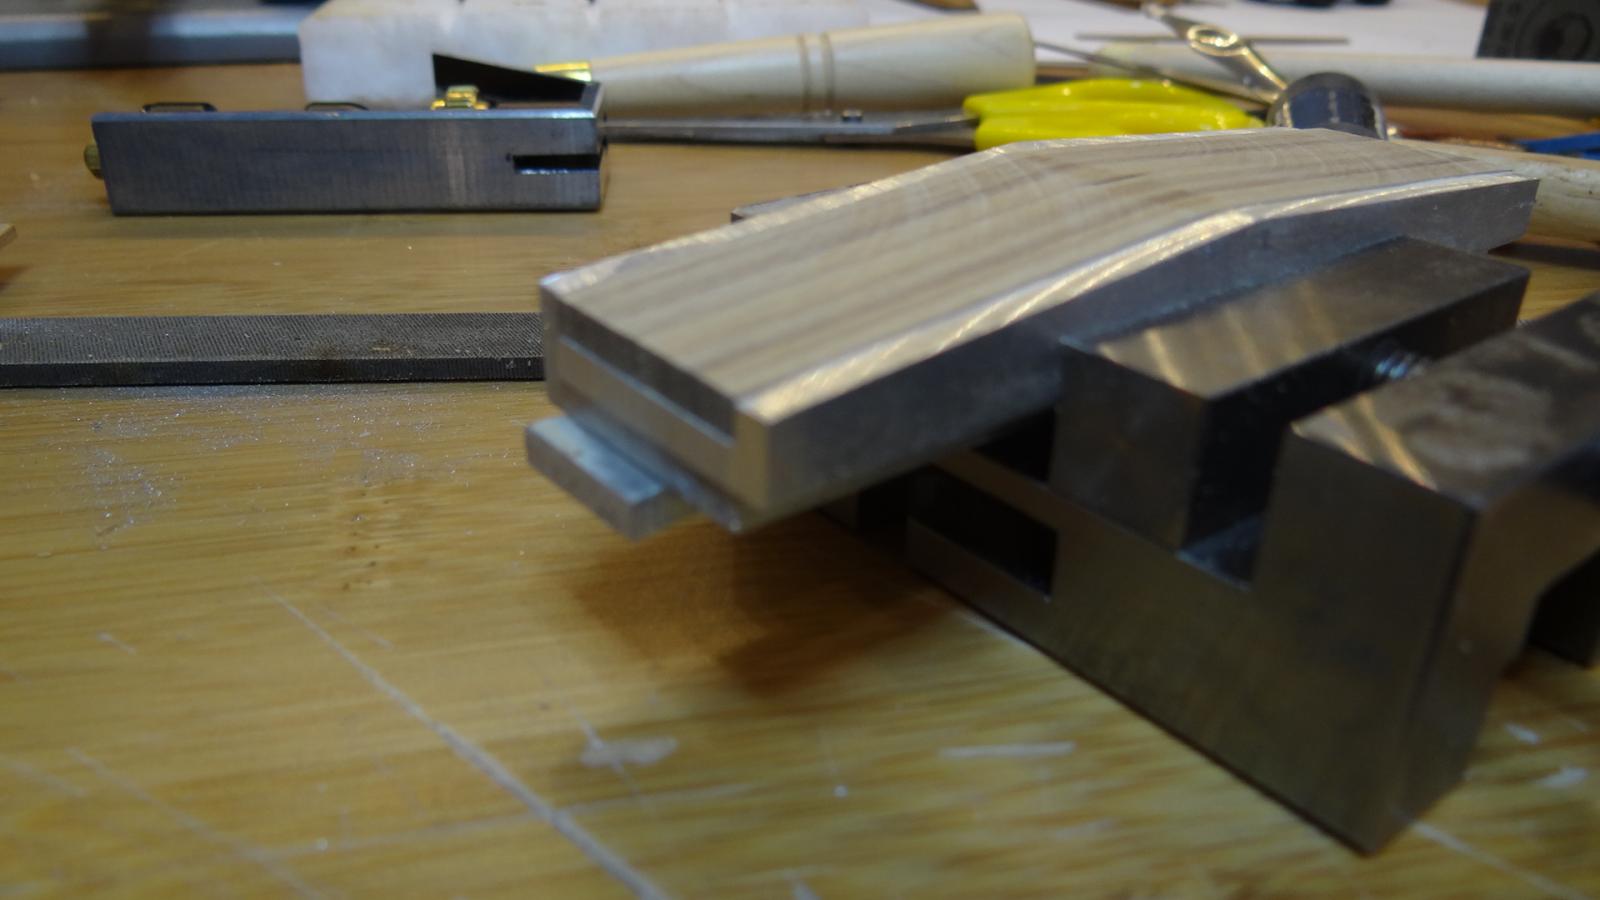
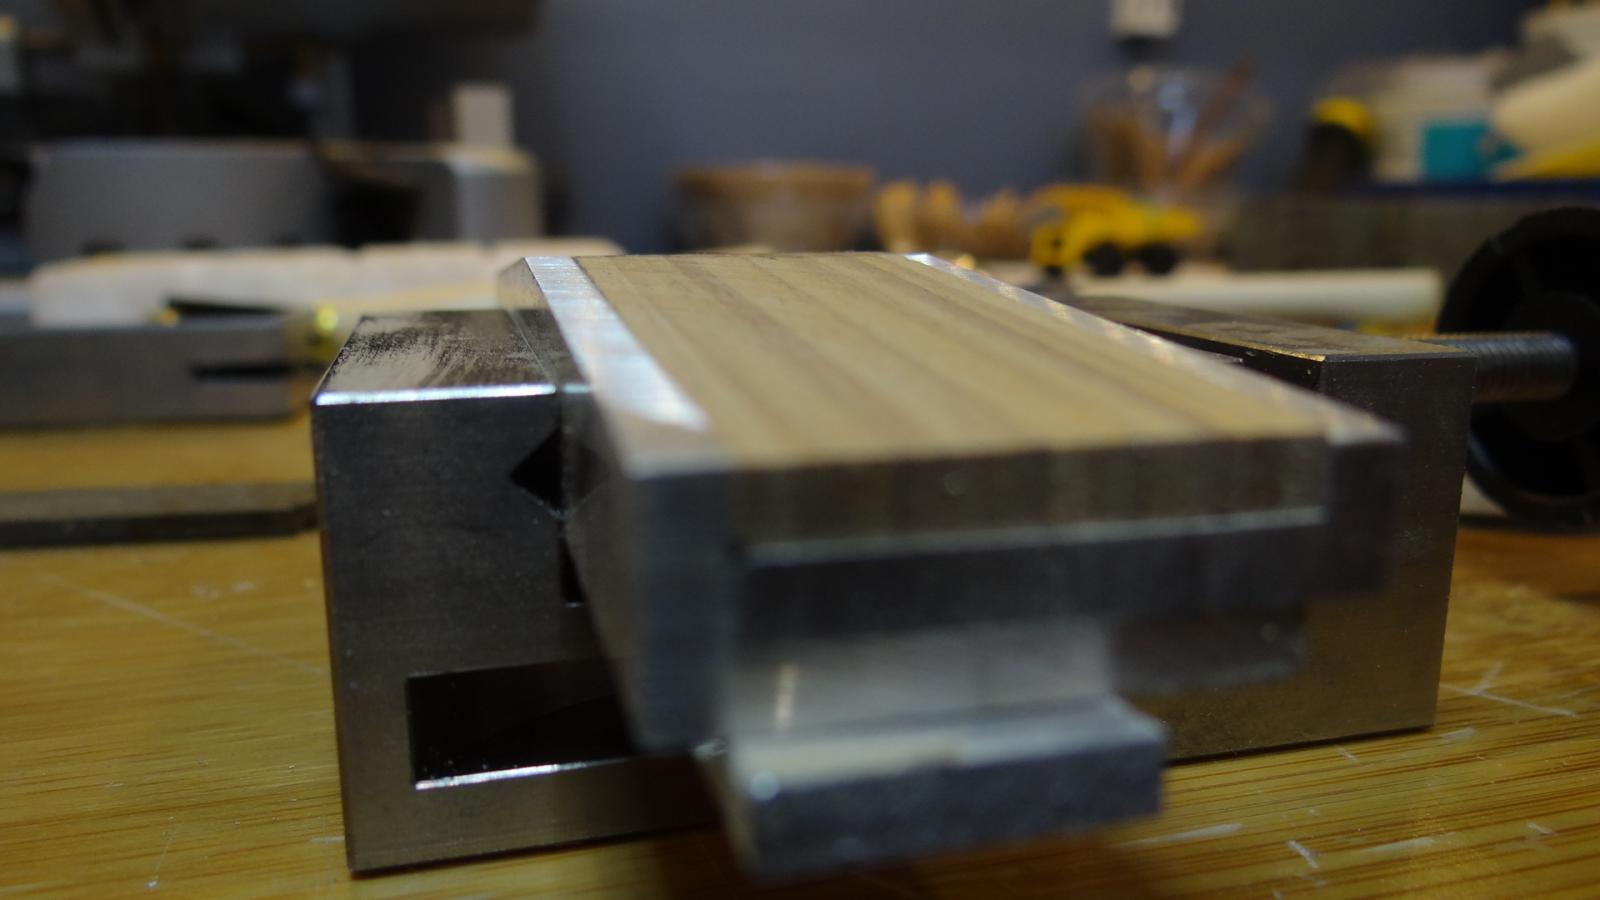
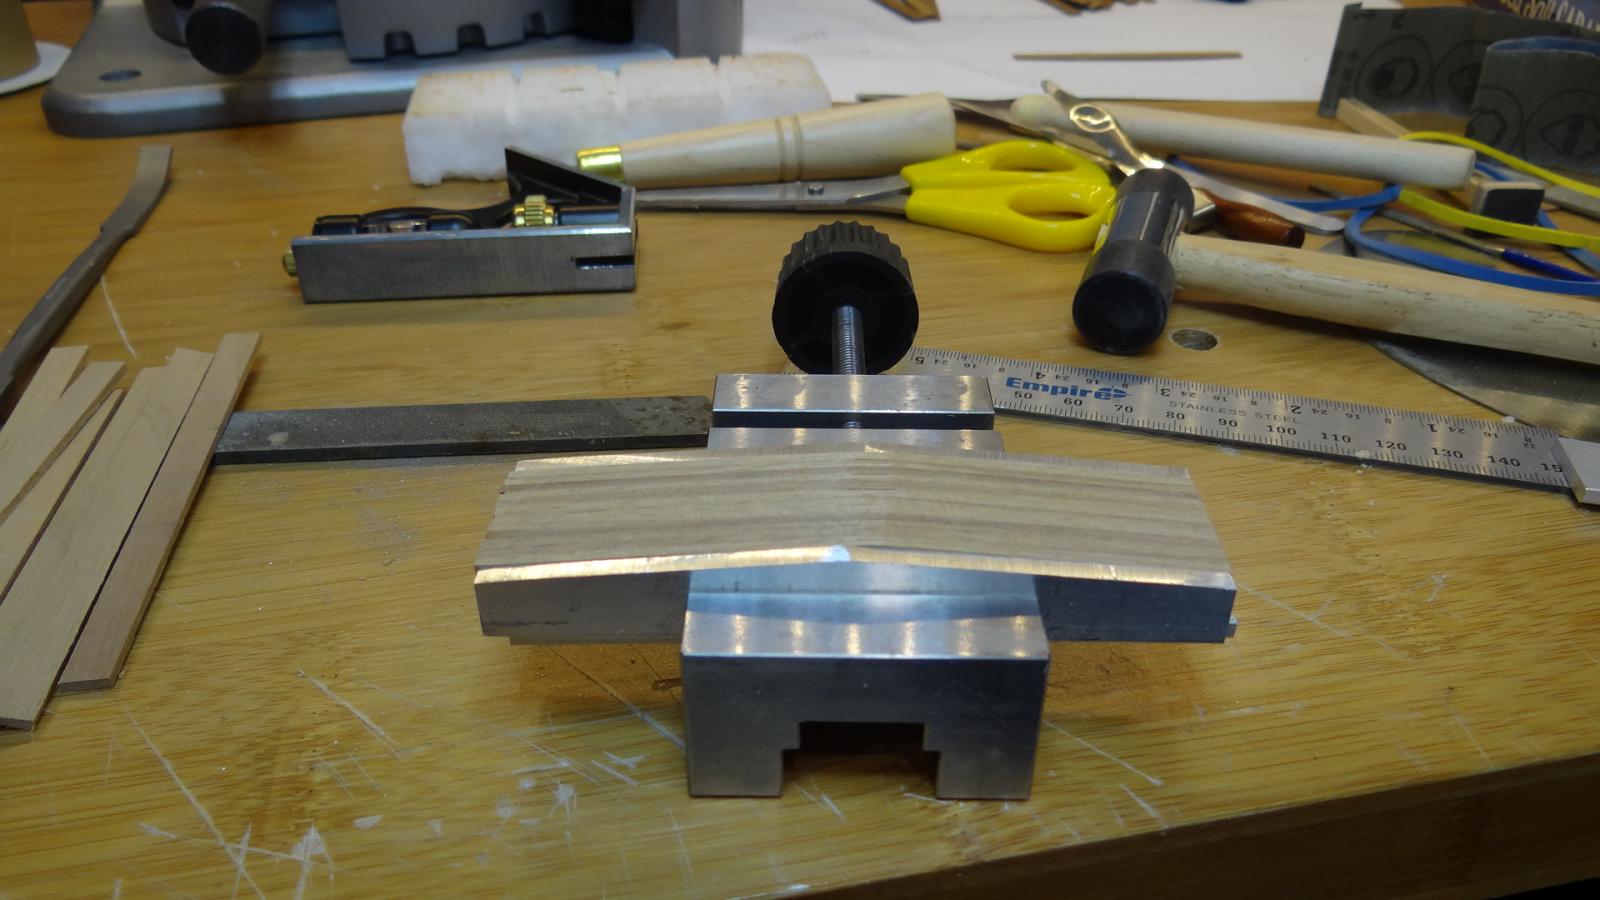
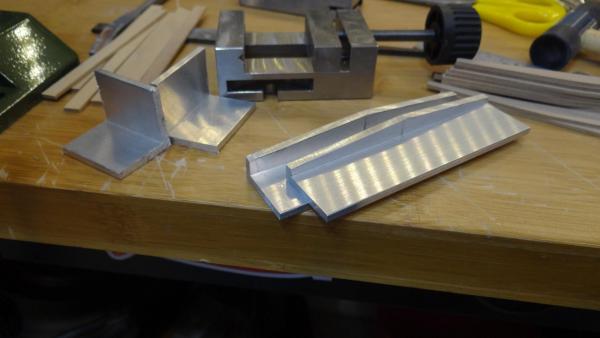
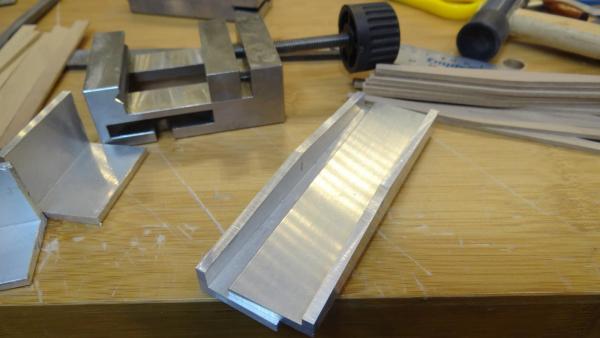
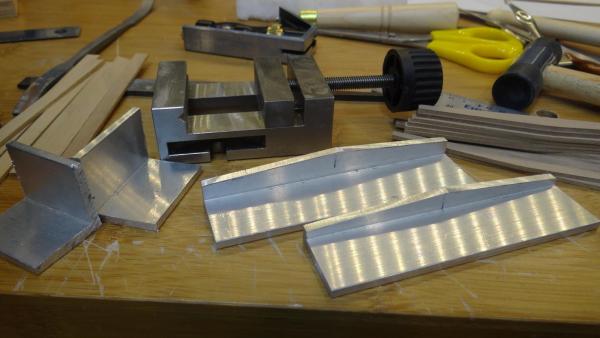
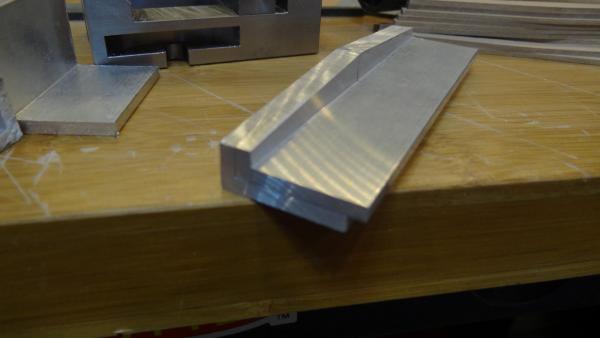
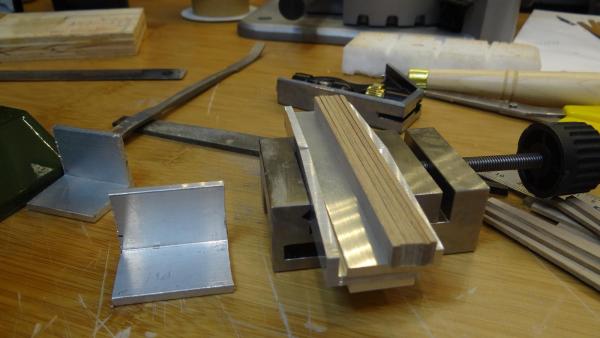
Thanks Don and everyone for the likes. Don please do make that change once you have made rear admiral. I am working with black walnut for the wales right now. What a beautiful wood it has turned out to be. Arthur, forgive me for not thanking you for the helpful tutorial for the gun port liners. I didn't elect to go with the channels for the upper gun deck mainly because I found very slight discrepancies in the gun ports. Possibly I could have spent more time shaping them but I got fairly proficient at placing the frames. But I may yet use your technique for other ports when I get around to them. Your other methods (patents pending ) will almost certainly be copied. In the meantime I wanted to share some pictures of the little jig I made to make anchor stock for the wales. I apologize the pictures are in no order. I used aluminium angle iron which I shaped to the exact size of the stock I wanted to form. Once the planks are placed in the bed I fitted the jig into my Proxxon vice which allowed me to use my disc sander since everything was nice and square. Anyway if anyone wants more details please ask. Best, Ian

- 191 replies
-
- 9
-
-
- victory
- caldercraft
- (and 1 more)
-
Lovely job on the wales Robert. I hope to start mine this weekend. Keep up the great work. Best, Ian
-
Gil, thanks for showing me what my Victory will [might] look like some day - years from now, I hope. Lovely model and beautiful case. Best, Ian
- 755 replies
-
- 4
-
-
- finished
- caldercraft
- (and 1 more)
-
Sorry Robert, I have no idea where you might source walnut in your location; would the ones advertised on this site be feasible? Not for me with the American dollar where it is these days. One might think that black walnut is quite dark but in fact most of the black walnut I have and have seen (which I found locally) is typically lighter than or certainly no darker (at least after it has faded) than the mansonia. Given the variation in the mansonia that may not be a very useful comparison. However, some of the mansonia is actually quite nice. I don't mind the variation of colour at all - it looks rather nice polished up (especially scraped and covered with poly). I had to reject somewhere between 10 and 15% of the mansonia (pretty much dried up worthless junk). If you have to use it I think you can make it look pretty nice - but if you do have an option to use cherry or black walnut (or brown?) I would not hesitate to go for it. Both the mansonia and walnut bend quite readily. Best, Ian
-
Robert, as I sit here with my morning coffee I am struggling to find words that express my admiration for the job you are doing. The precision you have reached is incredible. Why don't you consider getting some good black walnut or other good quality wood for your second planking? The kit supplied Mansonia leaves a lot to be desired. That is if you aren't going to copper. Best, Ian
- 527 replies
-
- 2
-
-
- caldercraft
- victory
- (and 1 more)
-
Thank you for giving me my model ship fix for the day Alexandru. Remarkable craftsmanship. Best, Ian
-
Looking very good Waspy! Nice work. Best, Ian