Chuck
-
Posts
9,701 -
Joined
-
Last visited
Content Type
Profiles
Forums
Gallery
Events
Everything posted by Chuck
-
 Yes indeed...But its soft stuff. Just drill it out or use the awl to pulverize it. There are a few #78 drill bits stuck in that hull also. What are you gonna do, it happens. Chuck
- 1,051 replies
-
- 5
-

-
- cheerful
- Syren Ship Model Company
- (and 1 more)
-
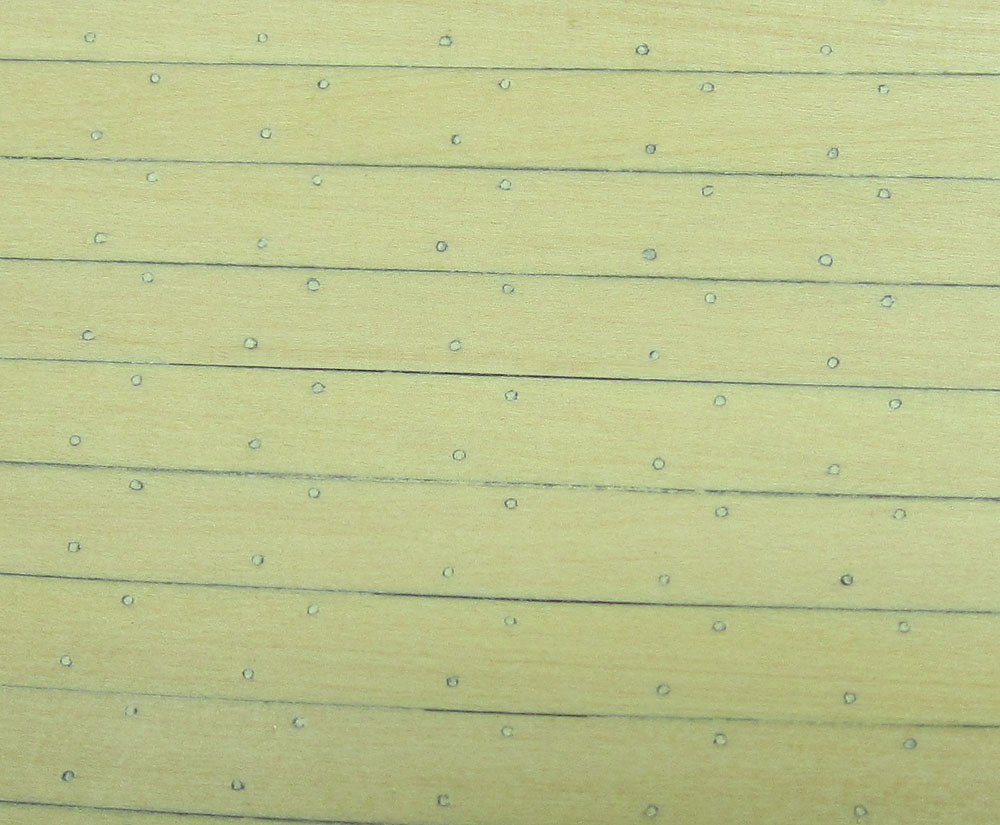
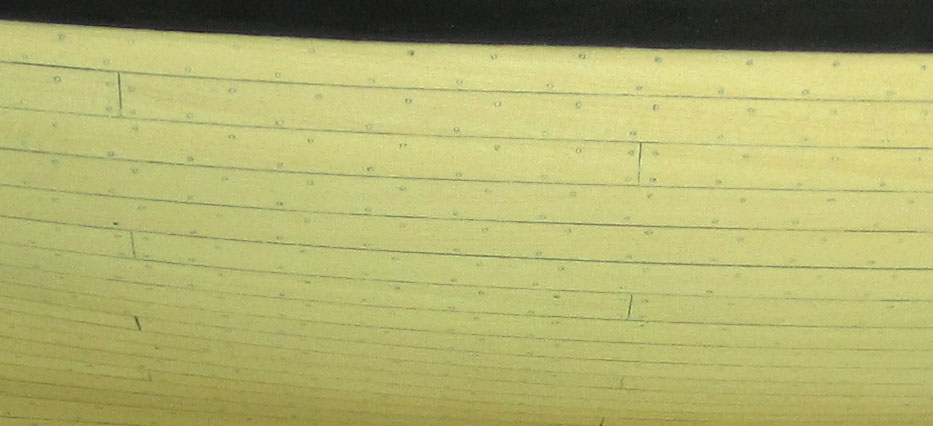
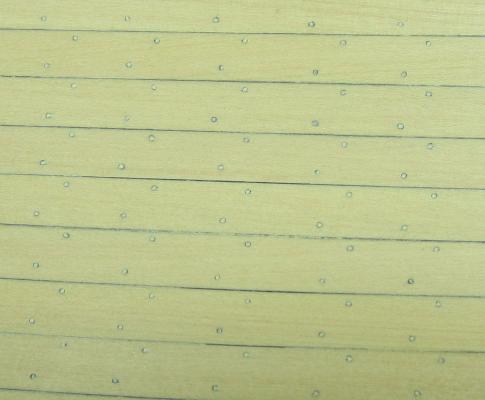
Thank you very much. I finally finished treenailing this side. I am glad that is over. I tried my best to take pictures of the treenails really close. I had to mess with the settings of the camera to get the best shot. But at least you can see the shape and detail. They are not perfect by any stretch of the imagination. But it does the trick. Remember these are #78 holes. Interesting though...the last two photos are identical shots except I changed the settings. On my camera I changed from Fluorescent to outdoor....on a setting and look at the color difference. Freaky. I could swear that both are representative as well. Its funny the tricks your eyes play on you. Only after seeing them side by side does it get so clearly different. I couldnt even tell you which is better. After looking at both for so long it all just blends together and gets confusing. I think I like the third one down the best and wont change the settings again until my kids steel the camera and screw up how I set it up. Then I have to start all over again. I hope this helps. Chuck

- 1,051 replies
-
- 26
-
-
- cheerful
- Syren Ship Model Company
- (and 1 more)
-
That Liverpool life boat is insane. Spectacular work.
-
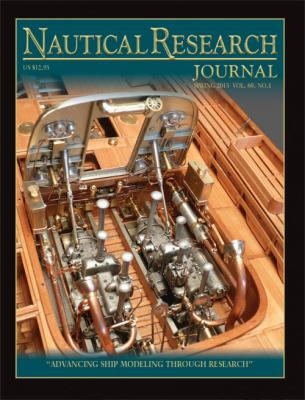
Nautical Research Guild Spring Issue is completed. Become a member and get it delivered to your front door every 3 months. Here are some highlights including the table of contents. Modeling a Third-Century A.D. Roman Merchantman by Charles Cozewith Introducing a Novice to the History of the Ship: Six Books Revisited That Guided My Study by Phillip Roach EZ Line for Rigging Small-Scale Models by Mark N. Lardas The First Western Warship in the Hawaiian Islands Navy of Kamehameha the Great: Yet Another Fair American! by Clayton A. Feldman Liverpool-Class Lifeboat, A RNLI 1945 lifeboat at 1:18 scale: A Call for Updating the Dockyard-Style of Modeling by Hubert Mallet Jon Michel: A Gentleman’s Tugboat by John De Broske An English Bomb Vessel, circa 1690 by Gary Krempien COLUMNS SHOP NOTES Using a Lathe to Make Ship’s Masts and Yards by Andy Blokmanis MODELERS’ REVIEWS Combrig’s 1/700 Scale Battleship HMS Victoria, 1890 by Mark Myers Click here to read one of the articles.... Read this months Editorial by Paul Fontenoy For more info on the Journal and the NRG please visit the website.

-
Wonderful work on the stern carvings and drop. I especially like your version of the drop. The castings look very good and well painted.
-
Nope....You guys have to cut some stuff!!! LOL Its just the plywood stuff which is basically to save some time. No kits, at that point I might as well cut everything, that would take the fun and spirit out of the project. Its a very easy scratch project to build. I am sure you guys will fun making those few pieces. But if you guys really want other parts, I would be happy to custom laser cut them for you, but they wont be part of my stock items at all. Chuck
- 1,051 replies
-
- 2
-
-
- cheerful
- Syren Ship Model Company
- (and 1 more)
-
Thanks John I will try to take a close up image of the treenails so folks can see them....but I am sure they will be pretty ugly that close up.
-
US Brig Syren by Gahm - Model Shipways
Chuck replied to Gahm's topic in - Kit build logs for subjects built from 1801 - 1850
Excellent work ...its looking great With regard to the cannon balls, that detail was taken from two contemporary models (english) of the same time period. They were both cruiser class brigs. On one of them, the shot racks were wrapped completely around all four sides of the coaming. I thought that was a bit too much so I used the example where they were just on the sides. Its hard to see in the photo but this is the version where they are shown on all four sides.
-
The holes are not too deep at all. But I wouldnt use the bit for lightly reaming. Its too brittle. Best to use a sharp pointed awl. Chuck
- 1,051 replies
-
- 1
-
-
- cheerful
- Syren Ship Model Company
- (and 1 more)
-
A # 78 hole is really small, but what I did was after drilling the holes for a small area about 2" x 4". - sand the area smooth - use a sharp awl and GENTLY insert into each. Dont push it too hard or you will distort the hole shape. - Take a very , very , very sharp #2 pencil. Insert point into each hole and twist lightly. You must keep a sharp point and sharpen the pencil every ten or so holes. Use one of those cheap kids pencil sharpeners. - Then fill each hole with Elmer's wood filler. Scrape off excess with a piece of wood. - Sand it smooth to get a nice surface. - Then aply some wipe-on-poly.
- 1,051 replies
-
- 10
-
-
- cheerful
- Syren Ship Model Company
- (and 1 more)
-
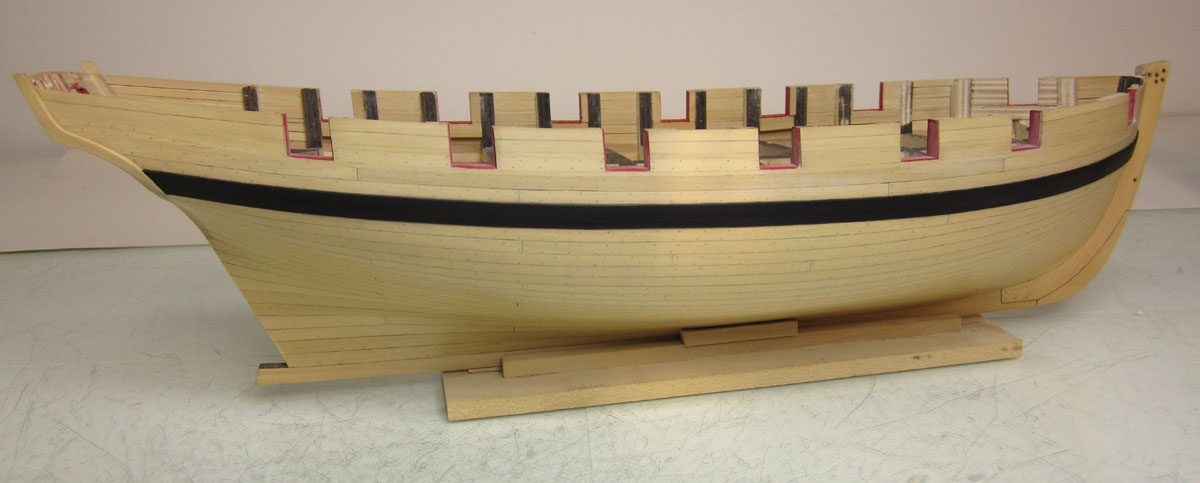
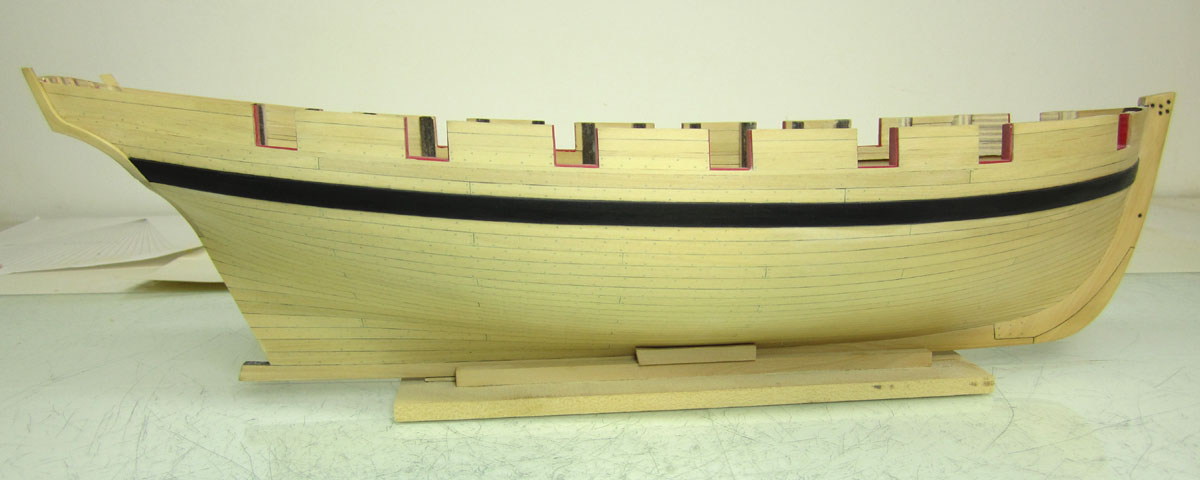
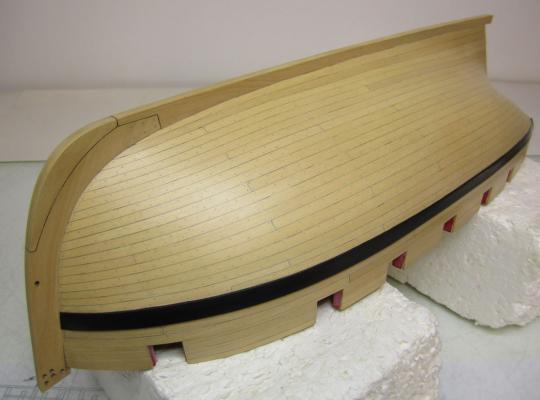
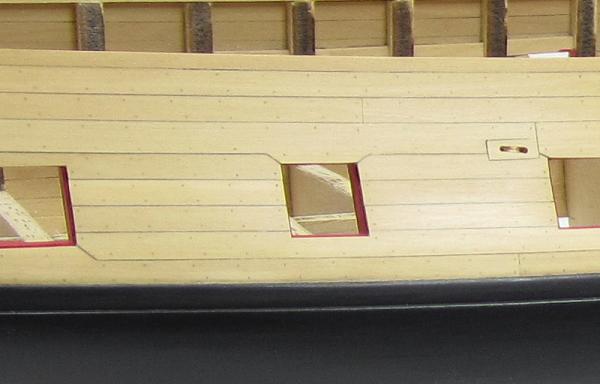
Spent the day treenailing...woo-hoo!!! Managed to get half of the starboard side done. I am using a #78 drill bit for the size. They are subtle which I like. In fact here is a close up as it may be hard to see in the full profile image. But it ads the nice texture I like without looking to measle like. Clicking on the two bottom pictures might give you just a hint of treenails although it may also be my photography skills. Chuck


- 1,051 replies
-
- 27
-
-
- cheerful
- Syren Ship Model Company
- (and 1 more)
-
Maybe in the next few weeks Crown will be open for business. Look for an announcement but you can follow this topic for updates. http://modelshipworld.com/index.php/topic/9119-introducing-crown-timberyard/ Jason is actually shipping me a wood package for my Cheerful project which will be made available to support the site for a donation. I will be sure to post some pictures for everyone to see when it arrives. I am sure the quality of the wood will be superb. Chuck
-
I will be offering the bulkheads pretty soon. But thats it. It will never be a complete kit . Only a few items to help the scratch builder.
- 1,051 replies
-
- 6
-
-
- cheerful
- Syren Ship Model Company
- (and 1 more)
-
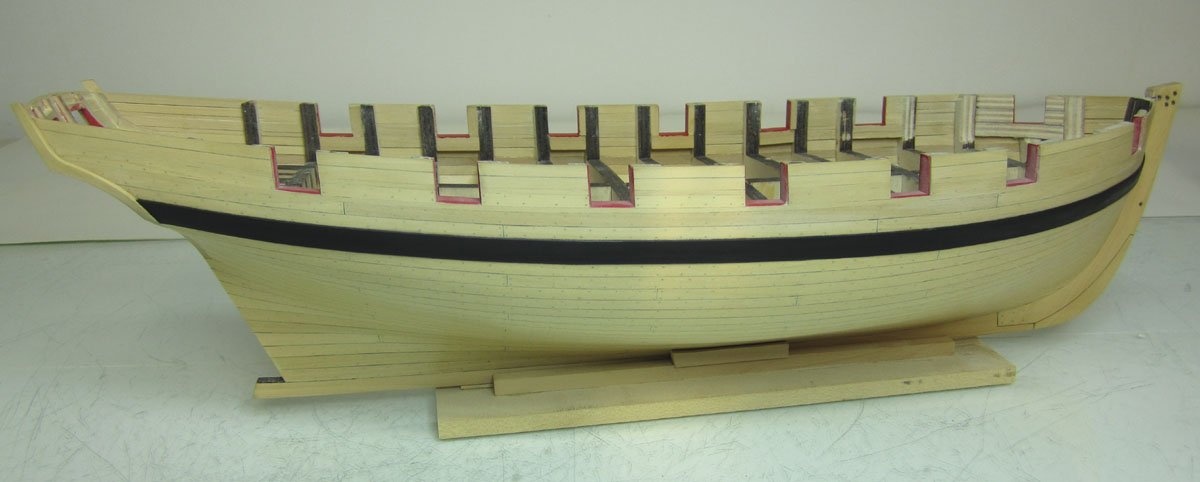
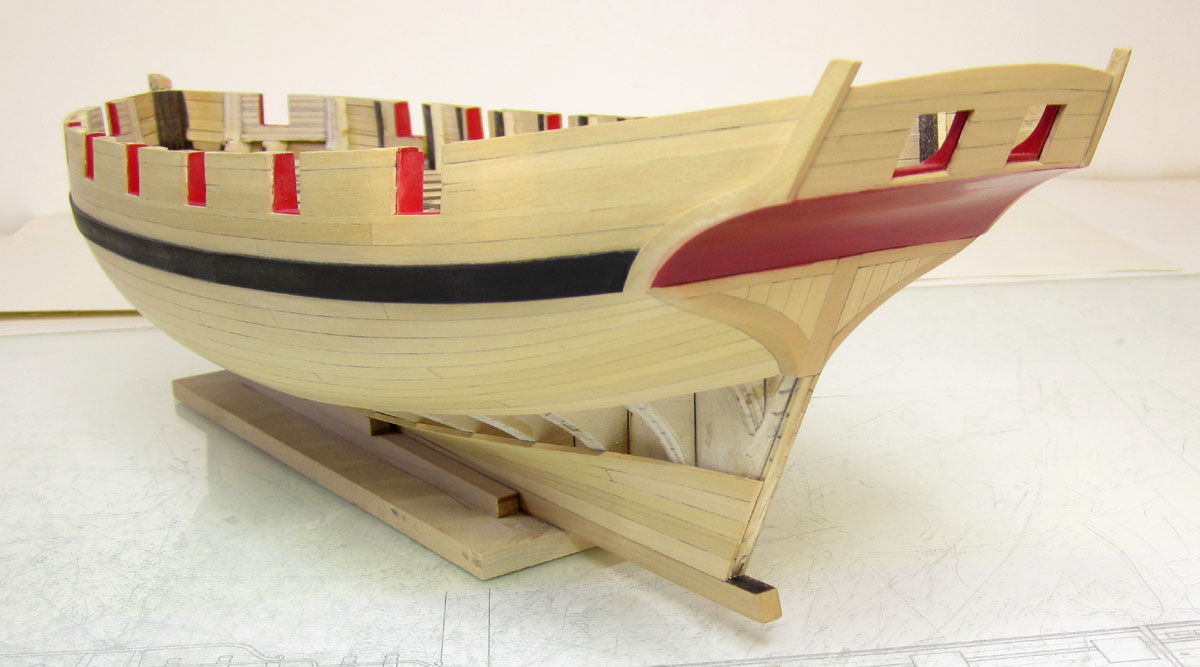
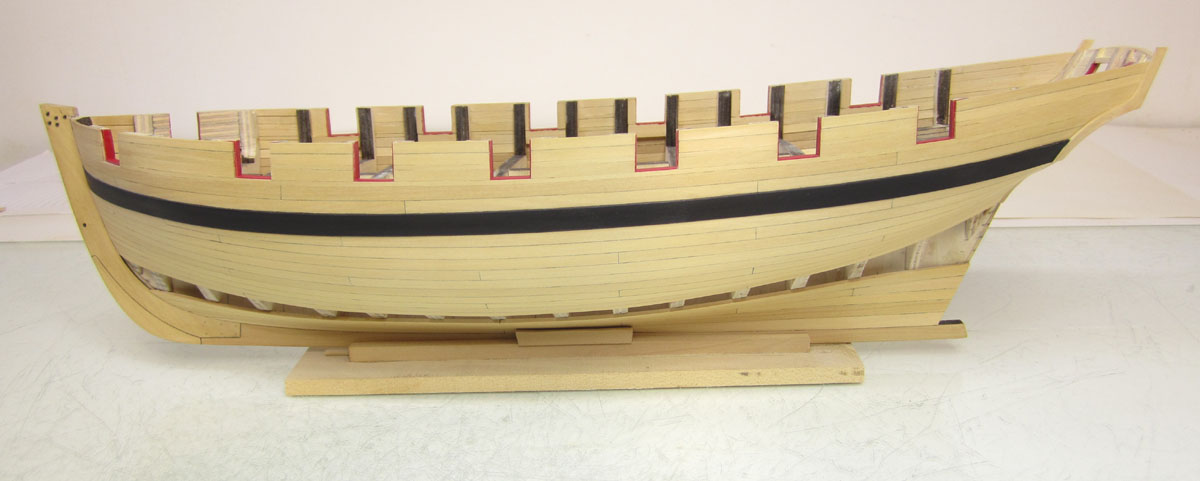
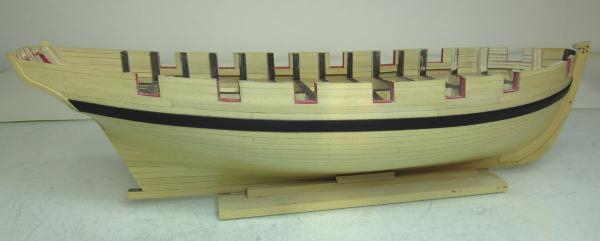
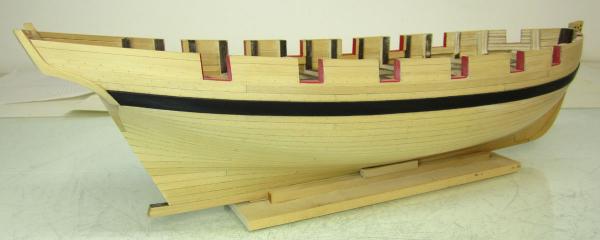
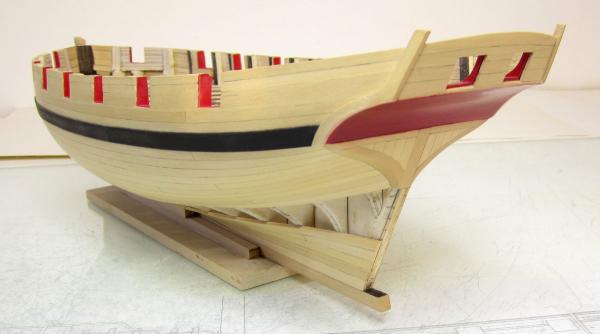
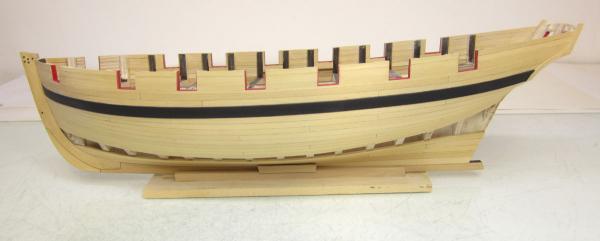
I have been working on both models and wanted to show the finished square tuck and Cheerful. I am just about done with the planking but will be doing a tech session next Tuesday night at my club meeting. So until then I wont be getting more done. I may however move ahead and start treenailing. I have only five strakes left as you can see and its killing me that I cant just finish it up. But a week will go by really quick. Chuck
- 1,051 replies
-
- 30
-
-
- cheerful
- Syren Ship Model Company
- (and 1 more)
-
I just bevel one edge on the plank yet to be secured. I dont get crazy about matching it perfectly. It usually works out fine. I bevel a little and then test it. If its a tight seem...then great. If not, then I bevel a bit more. Then I use a number 2 pencil to darken that edge to simulate the caulking. Just that one edge. Chuck
-
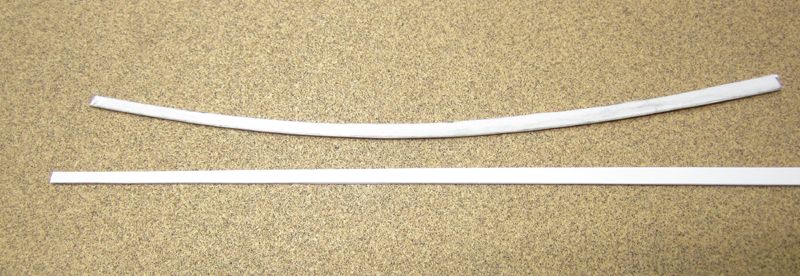
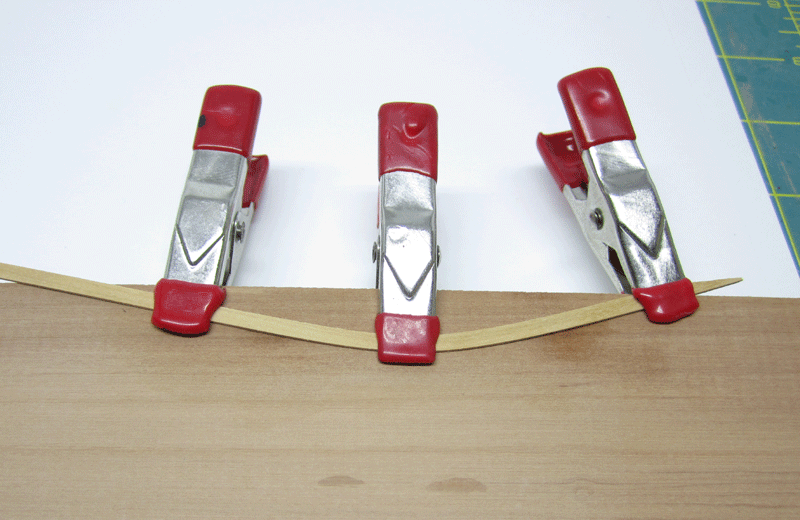
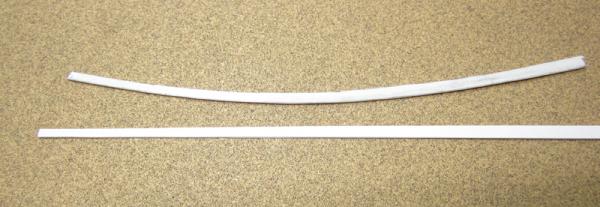
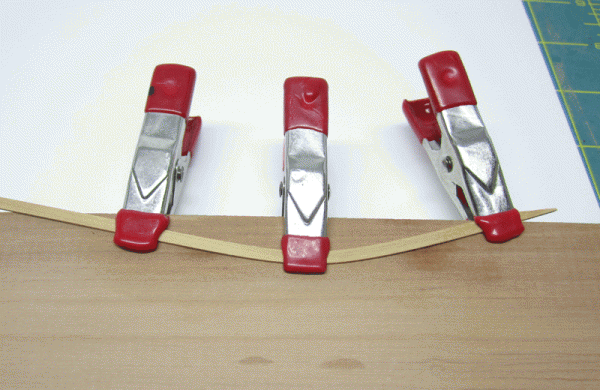
I dont use wider stock 90% of the time. I usually bend my strips to the desired curve as shown below. Only with the tightest and most extreme bends do I pre shape from a wider piece. I have almost completed teh planking of the Cheerful hull but have five strakes to go. These were left off because I am actually doing a tech session at this months club meeting. It will be a step by step on how to spile and physically shape a strip so it fits perfectly against the hull. Beveling the plank is must as well so it fits tight against the last one you placed on the hull. It really helps...another must do...would be to line out the hull before you begin planking planking. See the tutorials on this site. There will be some spring back bending like this so its important to go a bit more... Chuck
- 7 replies
-
- 11
-
-
Thank you for the kind words.....it is best to use a hard wood. Any wood that is too soft will get very fragile for blocks that size. The harder the wood the better. Hard maple for example would work...yellowheart...boxwood of course or most fruitwoods. Although some fruitwood is pretty soft. Chuck
-
Nice to see you joining the project....looking good so far
- 33 replies
-
- 2
-
-
- model shipways
- 18th century longboat
- (and 1 more)
-
Looks great...JUST MAKE SURE...That you lined up those templates port and starboard at the stern. This is crucial. The moldongs wrap around the stern and if the templates arent lined up you will have serious problems later on.
-
Augie, That looks lovely!!! And a nice way to think ahead on enlarging that hole now. Very nice. As far as a stern lantern goes. I would say it is very plausible that this frigate had one. Just one in the center.... but because the Confederacy was never ever modeled that way, I did not add one to the prototype. I would say it is fine either way but would indeed be very interesting to see a model with it. It would however make it impossible to see that center figure on the stern. It would cover it up. Based on its location you might have to drill the hole for the main iron bracket right through the bottom of her torso or near-abouts. Something I didnt want to to do. Chuck
- 2,191 replies
-
- 6
-
-
- confederacy
- Model Shipways
- (and 1 more)
-
Measure the scale bar on teh plan as most likely the plan was printed too small. The sections of the scale bar should be 1/4" long. It is so weird that they could screw up such a small kit having so few pieces. If the plan is OK and the parts are too big...hopefully you can adjust them by sanding the laser char off and making them the correct size. Chuck
- 55 replies
-
- 1
-
-
- 18th century longboat
- model shipways
- (and 1 more)
-
Beautiful!! Well done and the perfect size.
-
Yes I agree with that...Half of its original width at the butt end. If it was thinner it would defeat the purpose of doing it that way. Primary sources are key including contemporary models. Its like the outboard planking around the ports... You rarely see it illustrated and talked about in books like Robert's or Mondfeld. But the methods are shown on contemporary drafts and texts and building contracts.... Like this detail outboard of the planking on top of and below the ports...you will never find it in Monfeld If you want raise the level of accuracy always try and get your hands on some primary sources.
-
Uh...not exactly From the same Goodwin book. It just wasnt illustrated. There is a whole section about the margin plank. The bottom drawing does show and list the margin plank but only the later nibbed variety. In actual practice this is how it was done back then. Here is an excerpt... " Parallel to the ships side and fayed to the waterway was a strake of planking known as the margin plank. The function of this was to prevent the normal straight deck planking from being tapered to a fine angle where it met the curvature of the ship's side at the fore and after ends. The margin plank was thus fashioned to receive the butts of those planks. It was stipulated that no plank was to be 'joggled" into the margin plank unless the length of its tapered edge was more than twice the width of the plank, and that the plank was only to be tapered or "snaped" to half its width at the butt end. The margin plank was the same thickness as the deck plank, but one and a half times as wide." This describes very late 18th century nibbing practice and early 19th. Prior to this, 1760's... rather than nib into the margin or waterway, they hooked the planks as shown in the contemporary models I posted which is as primary a source as you can get. The "hooked" planks instead sitting against and alongside the margin. They were also tapered and curved a bit at the fore and aft ends of the deck. This was done to keep the margin/waterway in tact among other reasons. The rules are out there..you just have to find them. Primary sources are the key. Secondary sources are all over the map with omissions and simplifications. Goodwin is an excellent source. Sadly Mondfeld is not held in the same way. Although I wish that it was indeed the way Roberts described..it would be much less hassle. To further complicate about actual deck planking practices from this time, other details are rarely illustrated but can be seen on contemporary models and described in primary texts. Those include the anchor style deck planks that sometimes ran along the bulwarks a couple of strakes inboard. Also from Goodwin.. " fitted two strakes of either top and butt or anchor stock 4ft from each side of the ship. The function of this was to resist any athwartships compression that occurred when the vessel was in heavy seas." One other rule....not often illustrated "no plank butts between the hatches and comings" A single length of deck plank was laid between the hatches with no need for butt seams even though this may have disrupted the normal three or four butt shift pattern. Depending on how historically accurate you want to get with the details,there are many rules like this and no one source really contains them all. But once again, luckily for us... most have been compiled in the fully framed series. Makes our lives much easier. This secondary source contains more of these rules in one place than any other. So unless you want to poke around and gather the many many other resources...both primary and secondary for these individual nuggets, I highly recommend the series.