HOLIDAY DONATION DRIVE - SUPPORT MSW - DO YOUR PART TO KEEP THIS GREAT FORUM GOING! (Only 24 donations so far out of 49,000 members - C'mon guys!)
×


Chuck
-
Posts
9,660 -
Joined
-
Last visited
Content Type
Profiles
Forums
Gallery
Events
Everything posted by Chuck
-
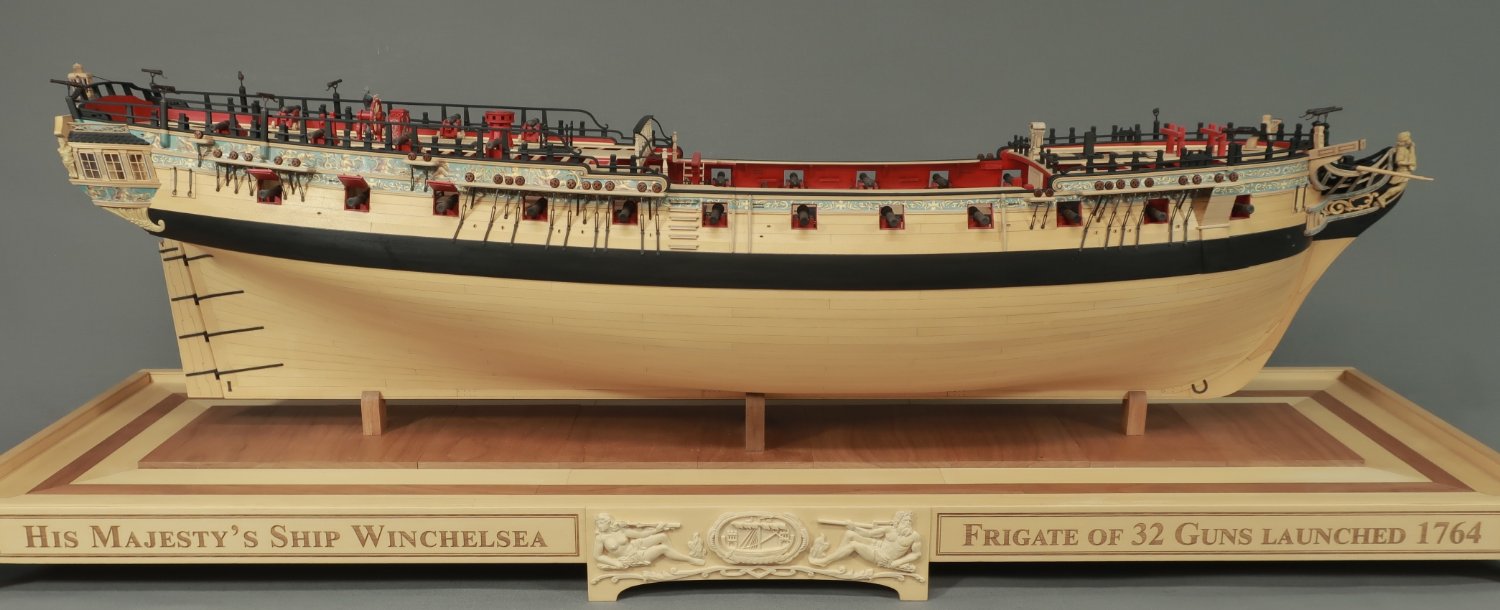
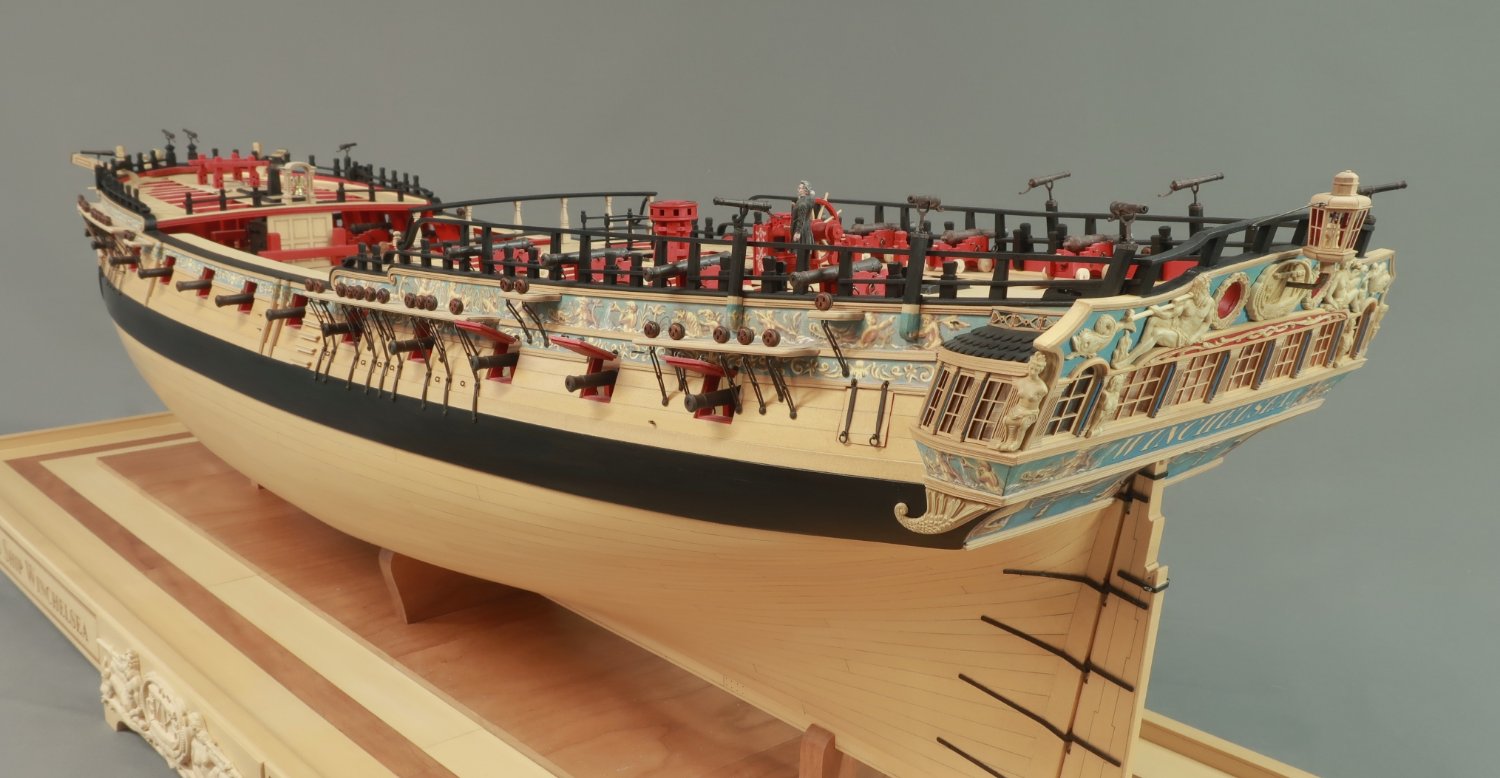
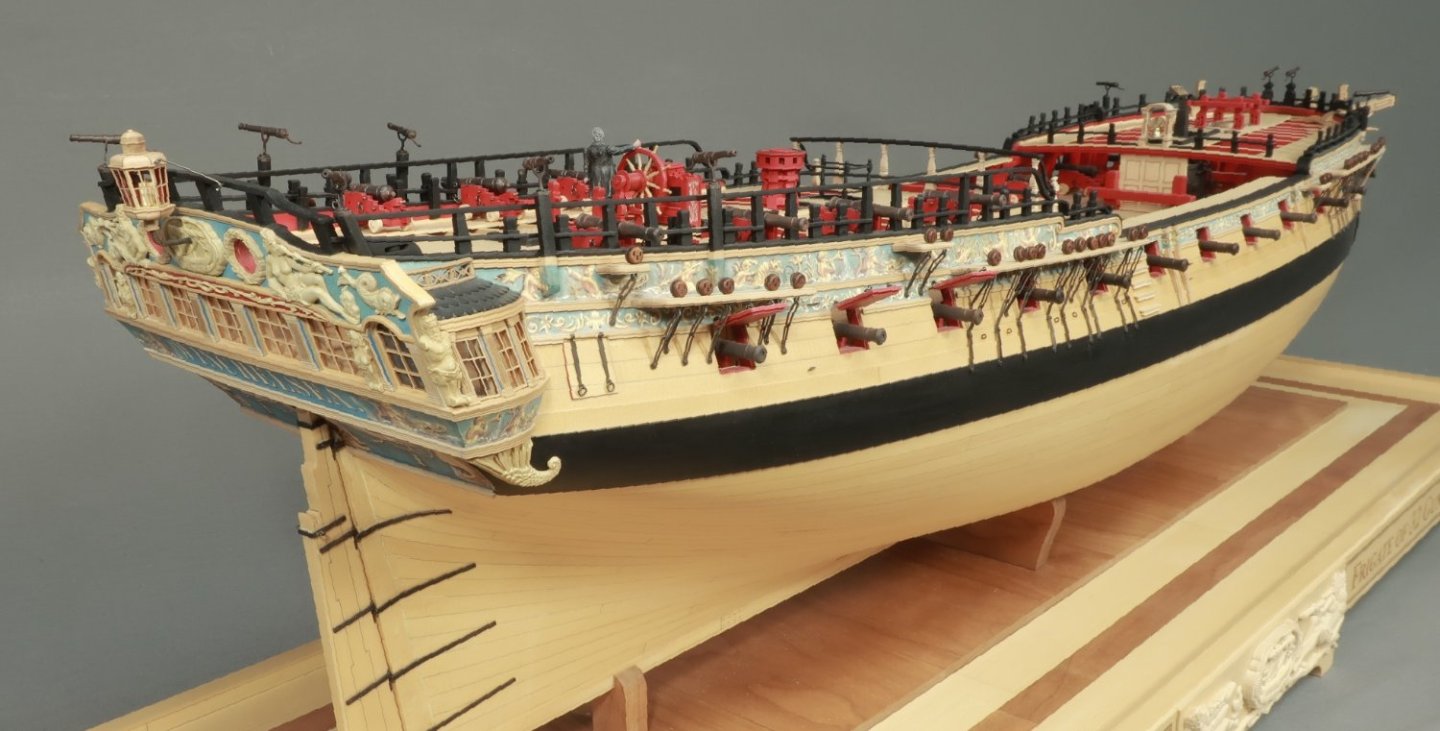
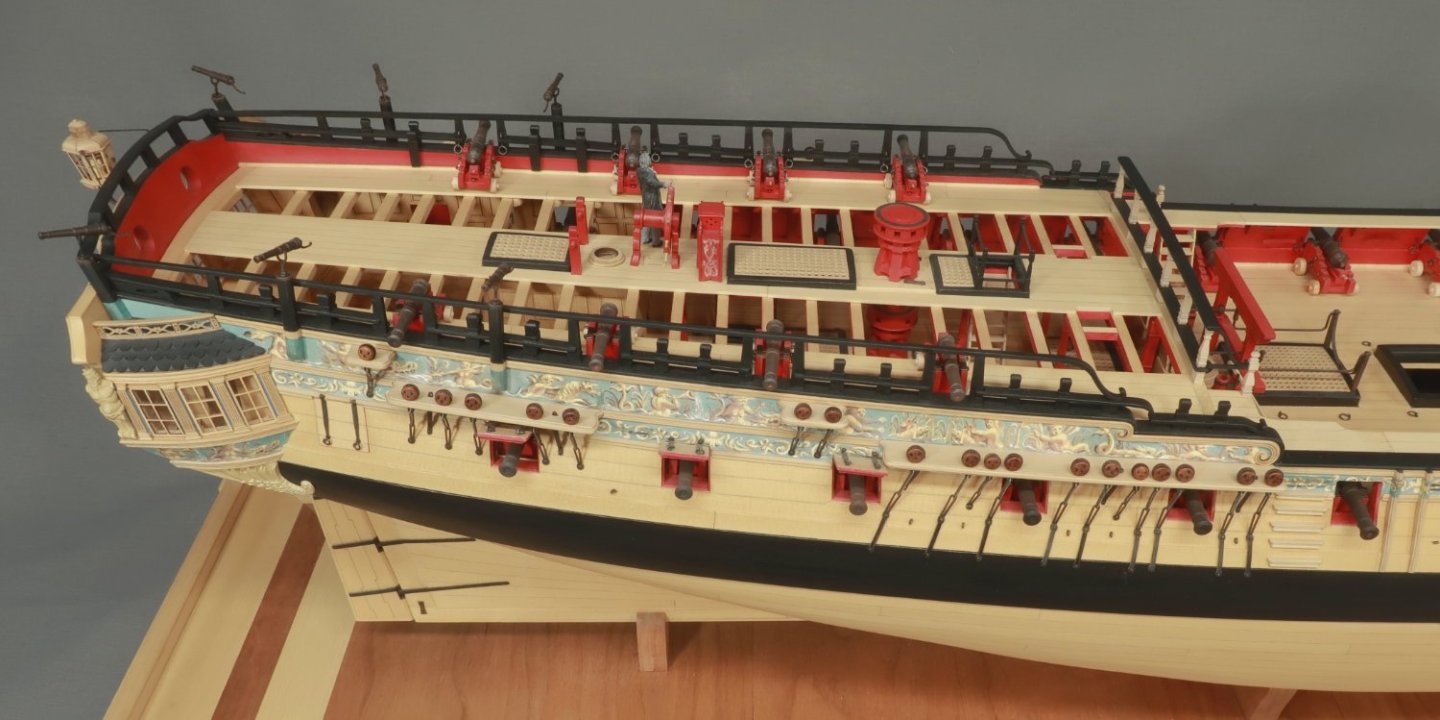
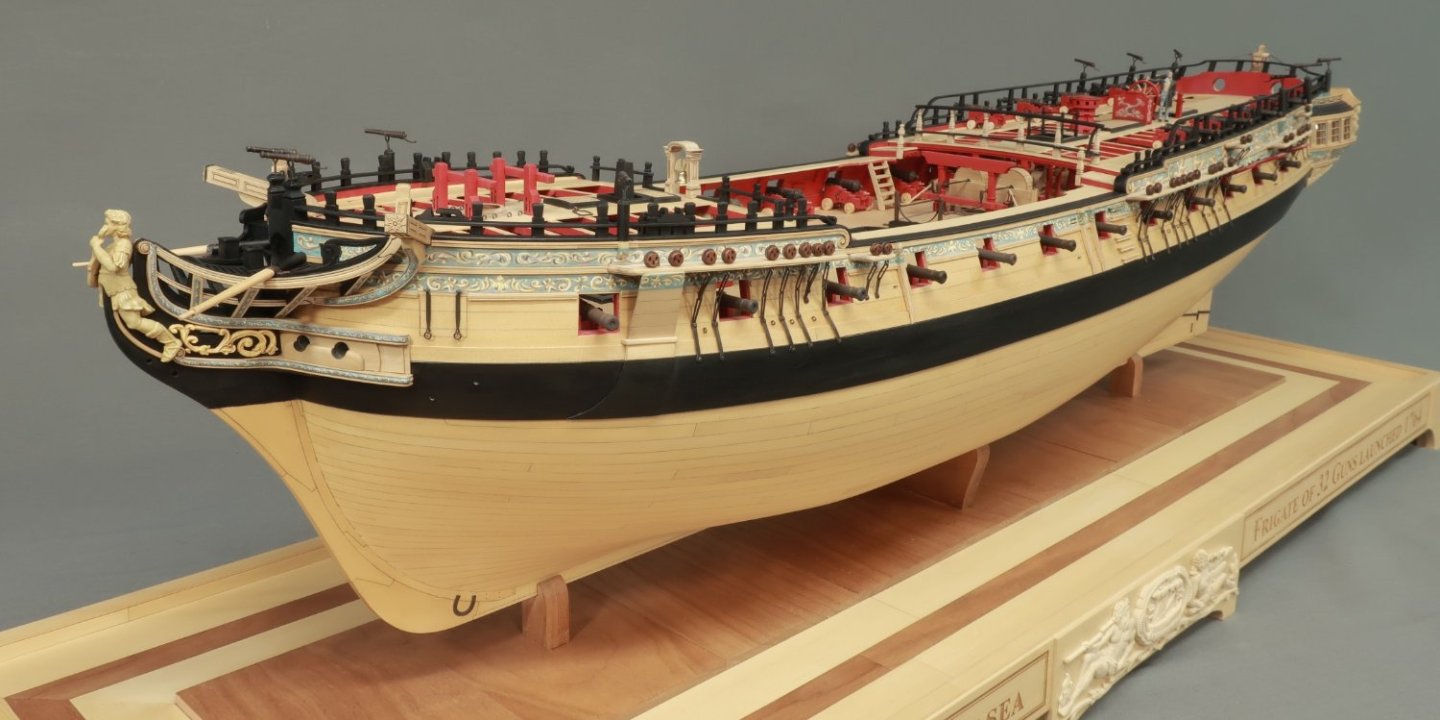
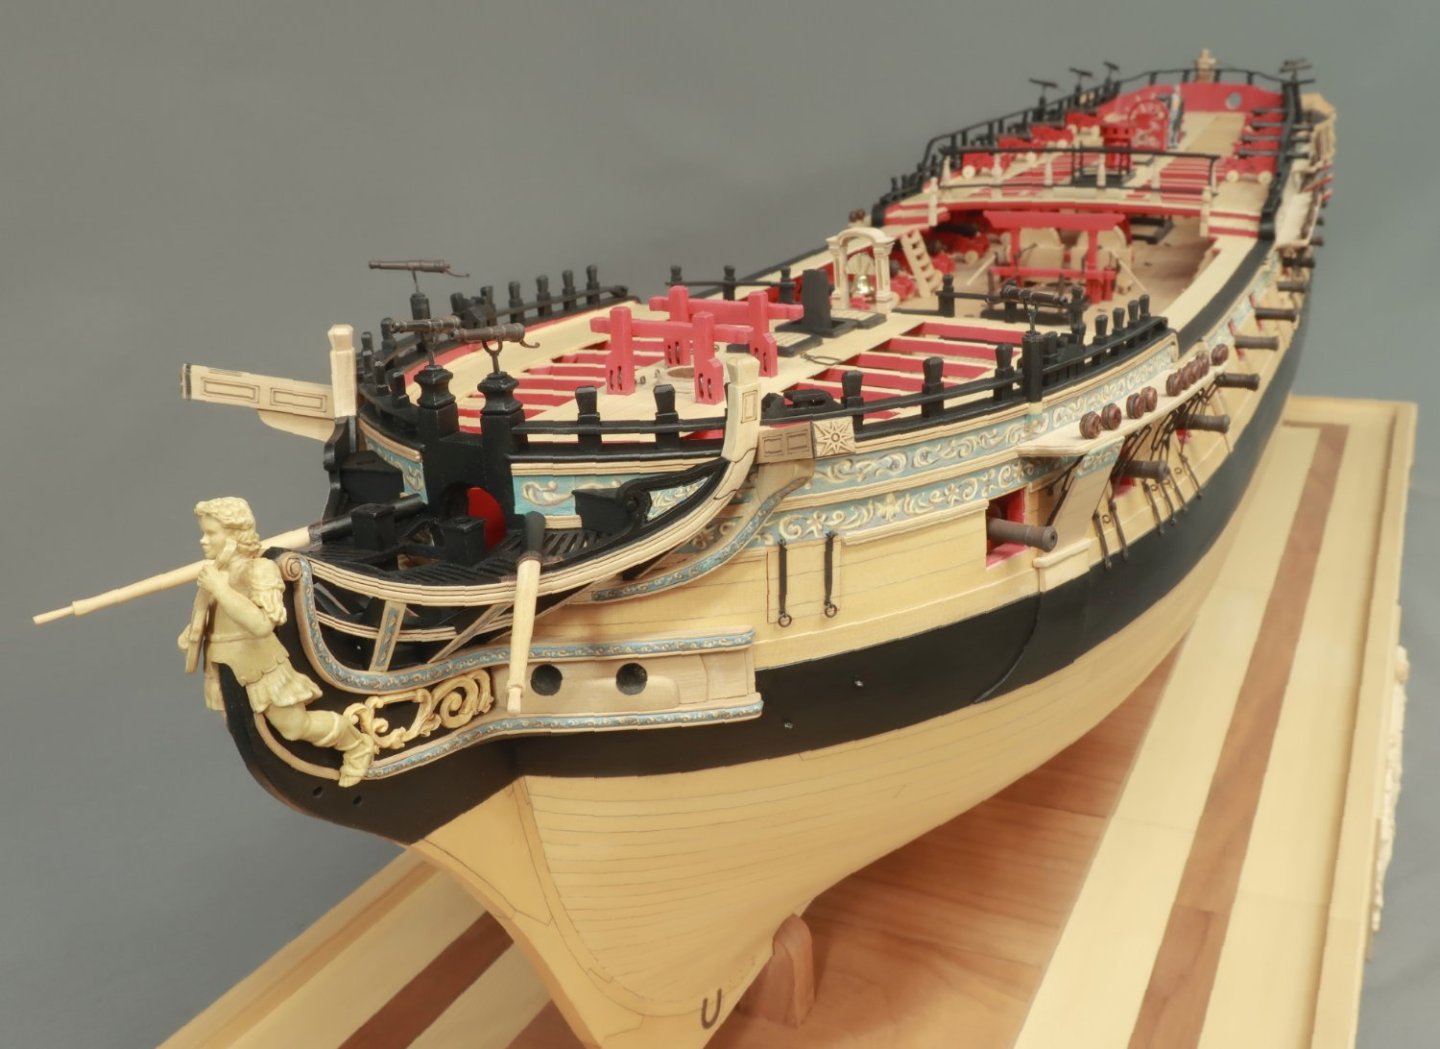
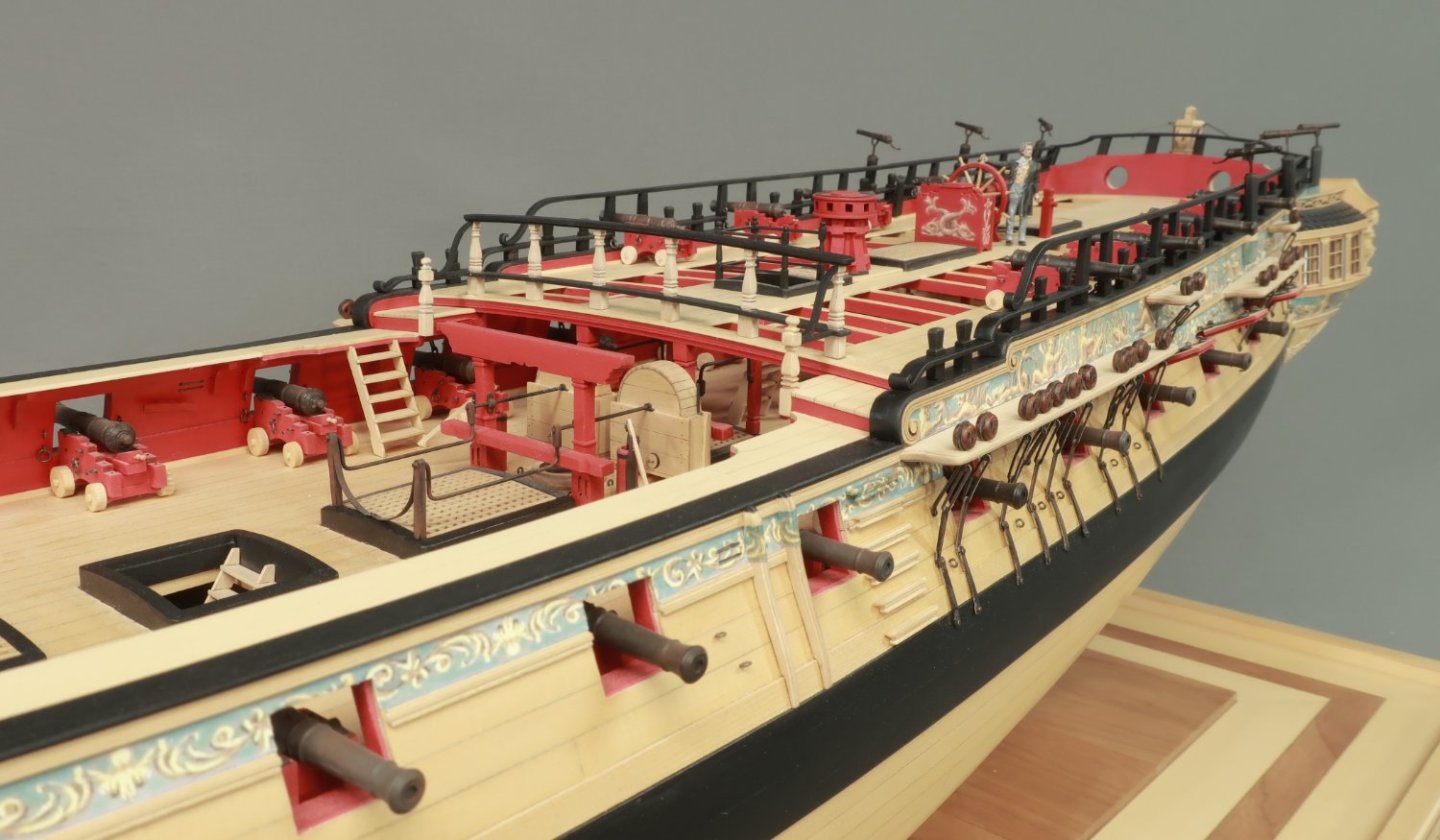
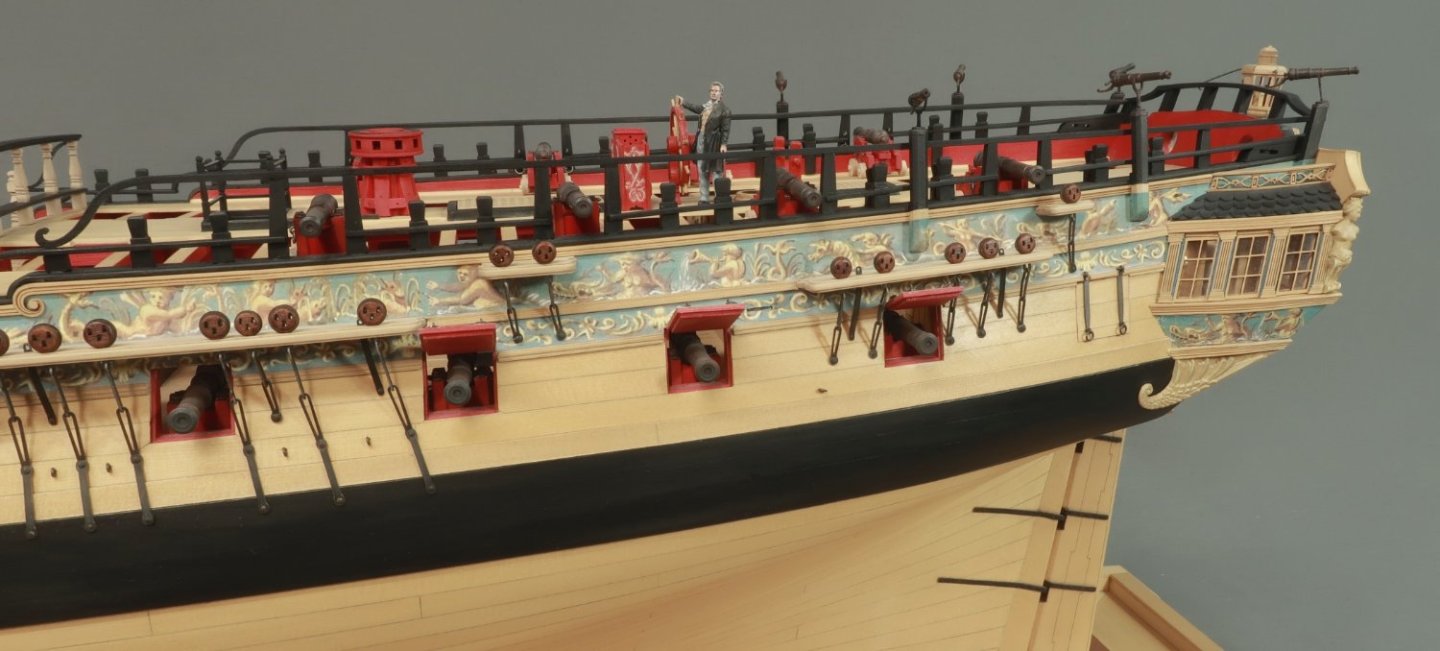
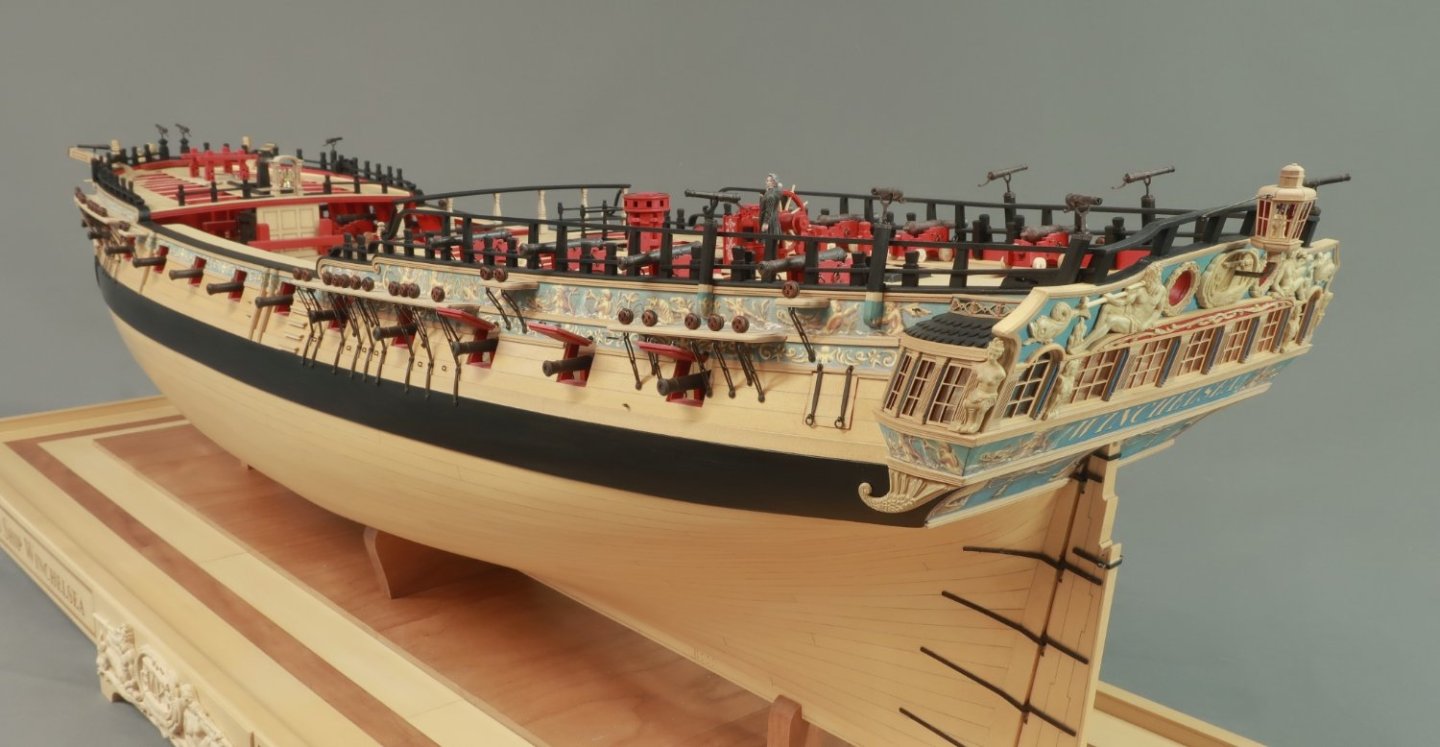
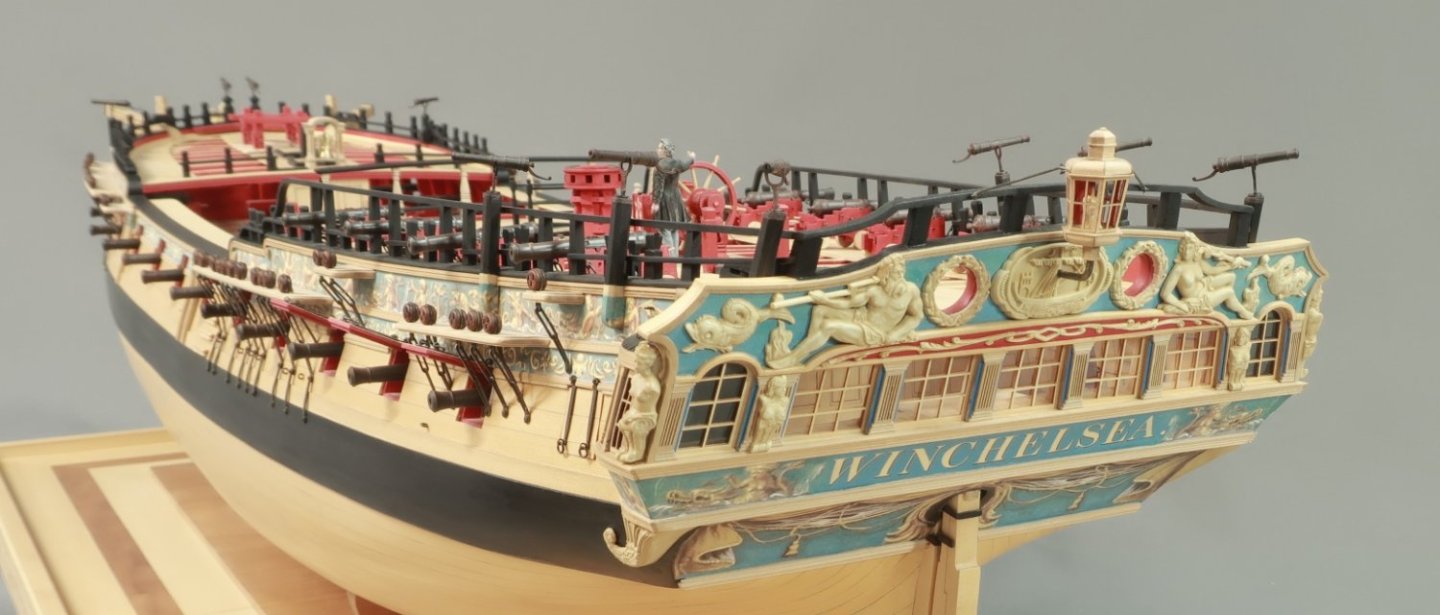
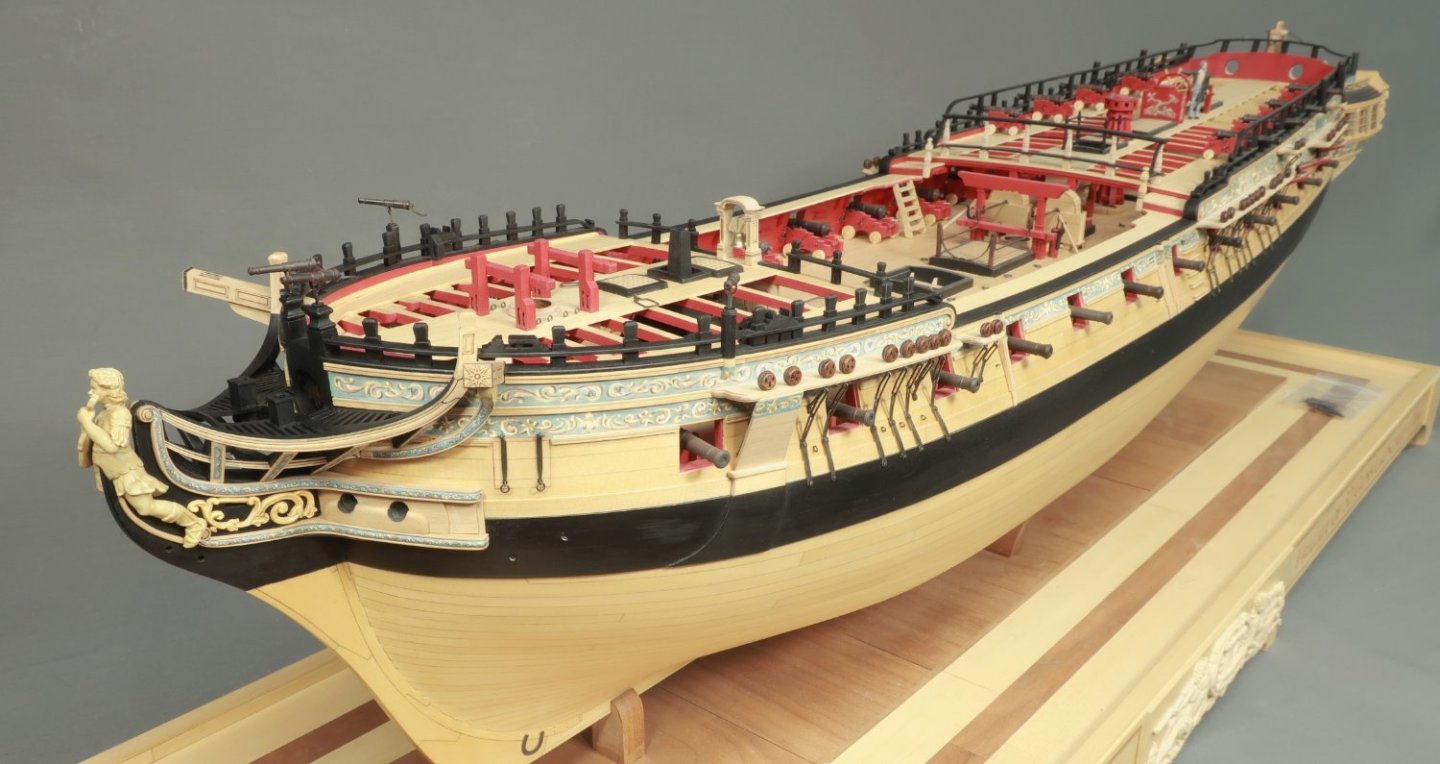
 Almost 5 years to the day....she is finally finished. Always a bit anti climactic. Thank you all for following along all these many years. For those of you building her, I hope you are having as much fun with it as I did. Well here goes the final pics. The top picture is of course of the Winnie contemporary model which inspired me as well as the Amazon. I hope I did them justice. Everyone should build a Georgian style model of an English frigate at least once in their lifetime.
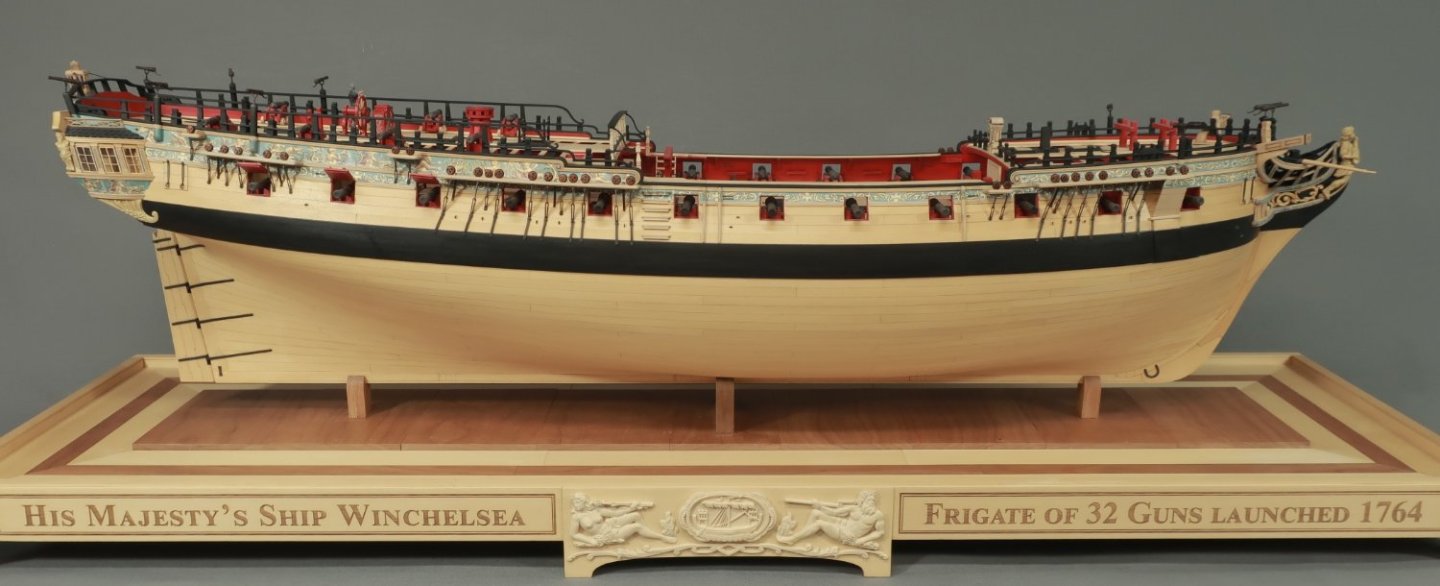


- 1,784 replies
-
- 64
-

-

-

-
- winchelsea
- Syren Ship Model Company
- (and 1 more)
-
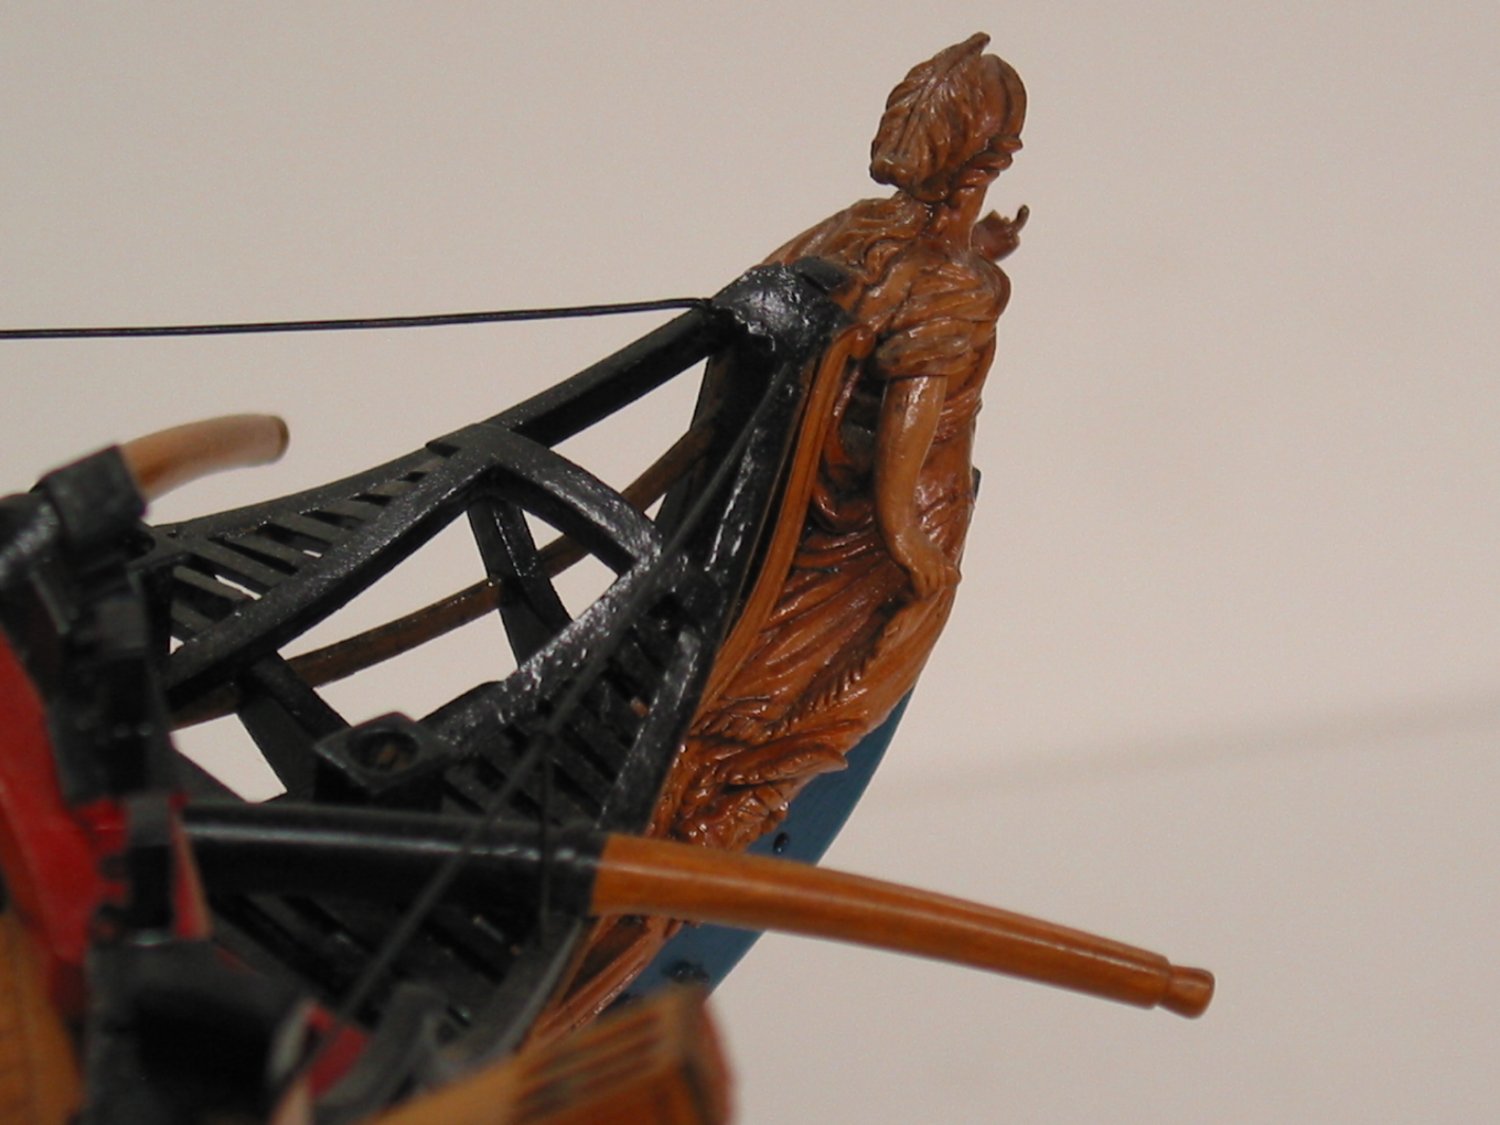
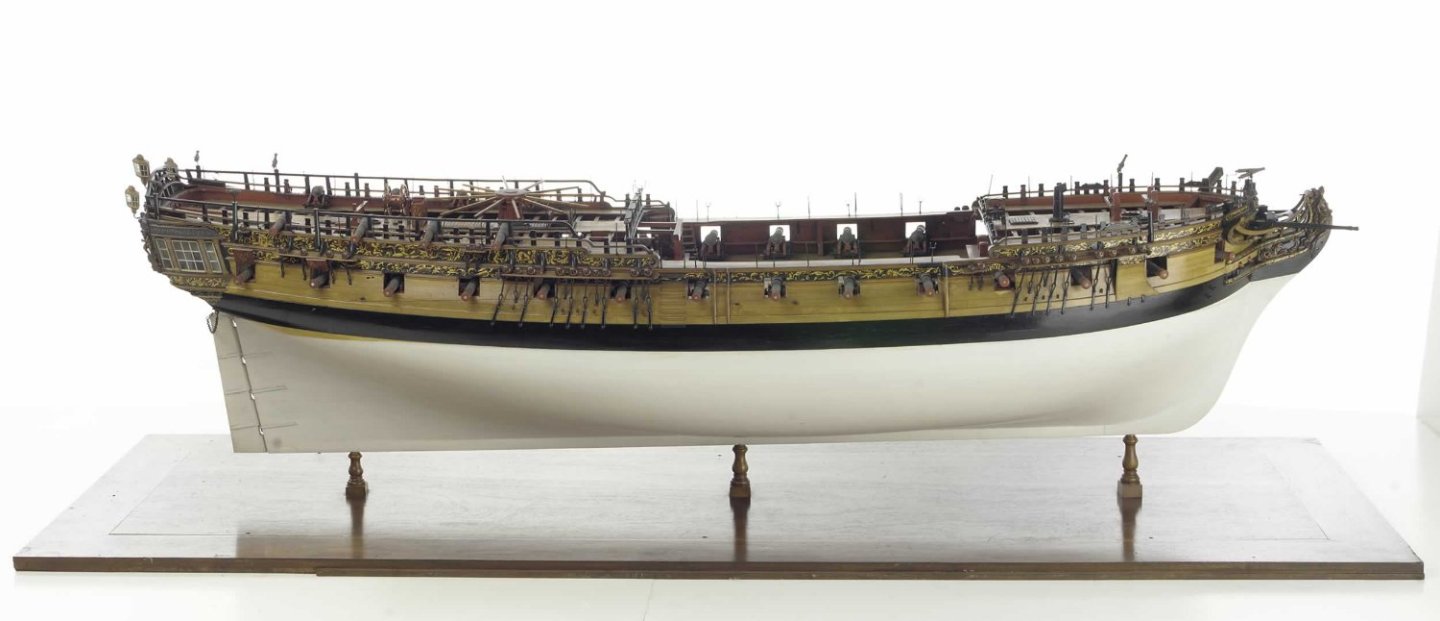
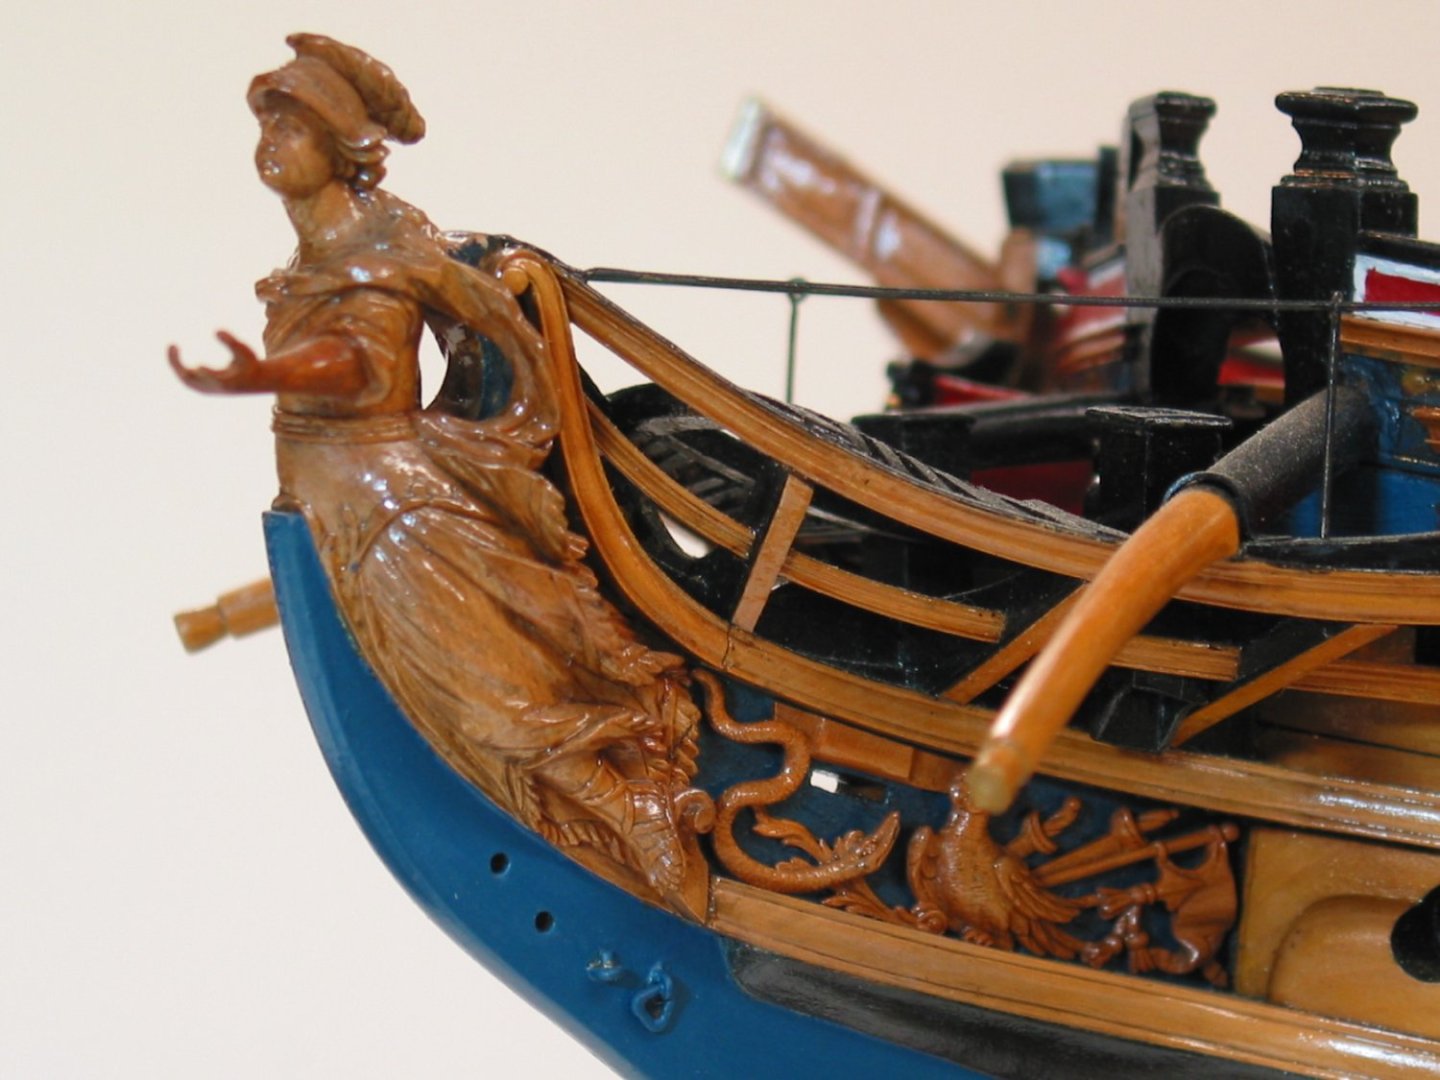
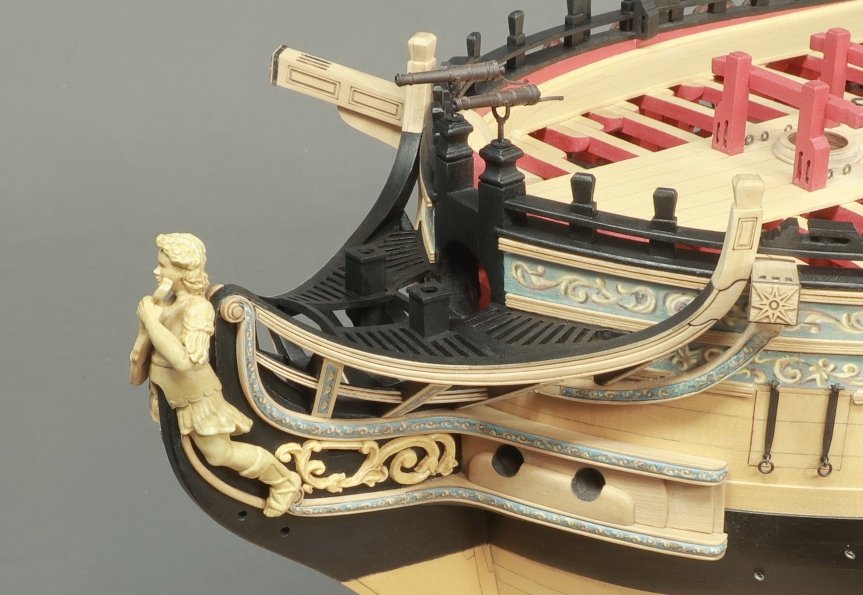
The bumpkins will be laser cut for you. They will be square. You will first need to sand the same tapered shape into it while keeping it square. It is cut from 1/8" stock and the forward end tapers much smaller. So first just match that taper as a square shape. Then round it off. BUT...you cant place them in a drill or lathe. They also have a slight downward curve to them. See this image of Amazon. Heres an image of the Minerva model. And the Winnie model which has the straight bumpkins....But I dont like that as much. I am going with the curved bumpkins like those on Minerva. You guys can go with straight if you like. Just use a 1/8 x 1/8 strip of boxwood or cherry. I am also going to leave the outboard end natural as shown on Minerva rather than paint them all black. Note the solid black false rail on Minerva above with no friezes. You may like that as well....so many possibilities. I also want to point out the wire rail shown on Minerva above. The Amazon doesnt show it and neither does the Winnie model. I am leaning toward not adding it. The run of this rail when viewed from the side sometimes doesnt follow the shear. It ruins the night smooth run and curve of the shear when you look at the model. I suspect it did have the rail but since I am not kitchen sinking this model it is optional. Many contemporary models dont show this feature as you can see. I also suspect they they left it off the models for the same reason that I am. But These pictures of the contemporary model of Minerva should be more than enough to guide you should you want to add them. The next pictures you see of my model will be of her all finished.....I am guessing by about noon tomorrow if I can get out of bed early enough.


- 1,784 replies
-
- 17
-
-
- winchelsea
- Syren Ship Model Company
- (and 1 more)
-
Before I forget. Friezes for head timbers and head rails...I will also put in downloads area. It has the templates for shaping the cathead supports as well. headtimberfriezes.pdf
- 1,784 replies
-
- 3
-
-
- winchelsea
- Syren Ship Model Company
- (and 1 more)
-
No not at all. I have only ever seen one contemporary model with those. Most didnt have anything. Its just as I have shown it. That is a more modern convention of showing it. But you could if you want to.
- 1,784 replies
-
- 3
-
-
- winchelsea
- Syren Ship Model Company
- (and 1 more)
-
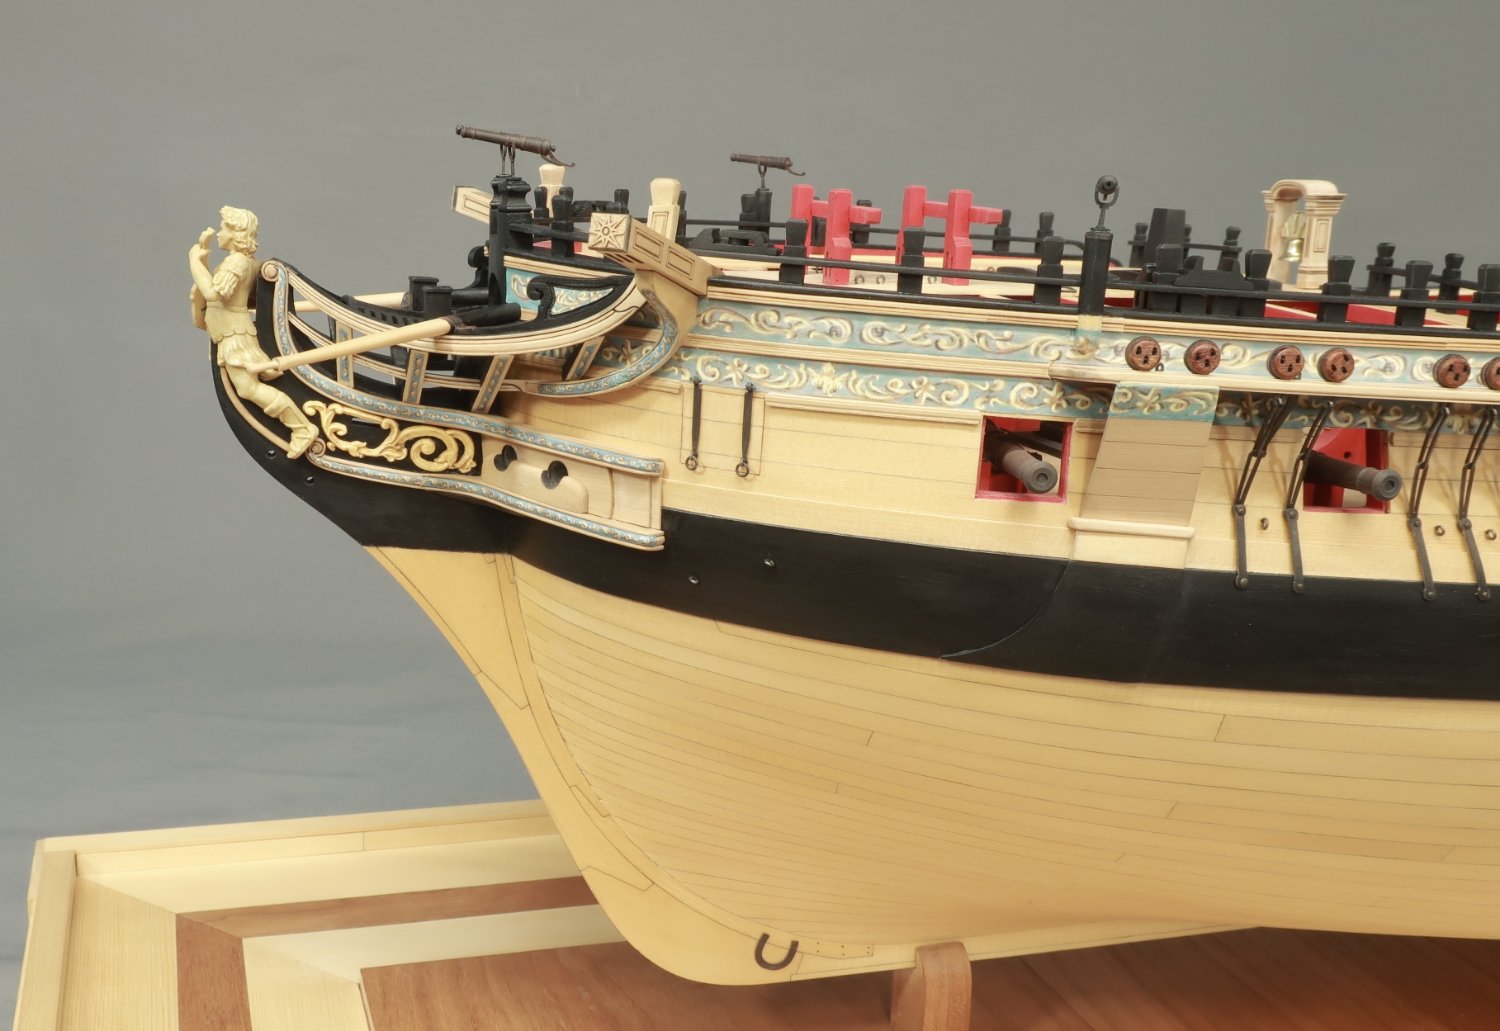
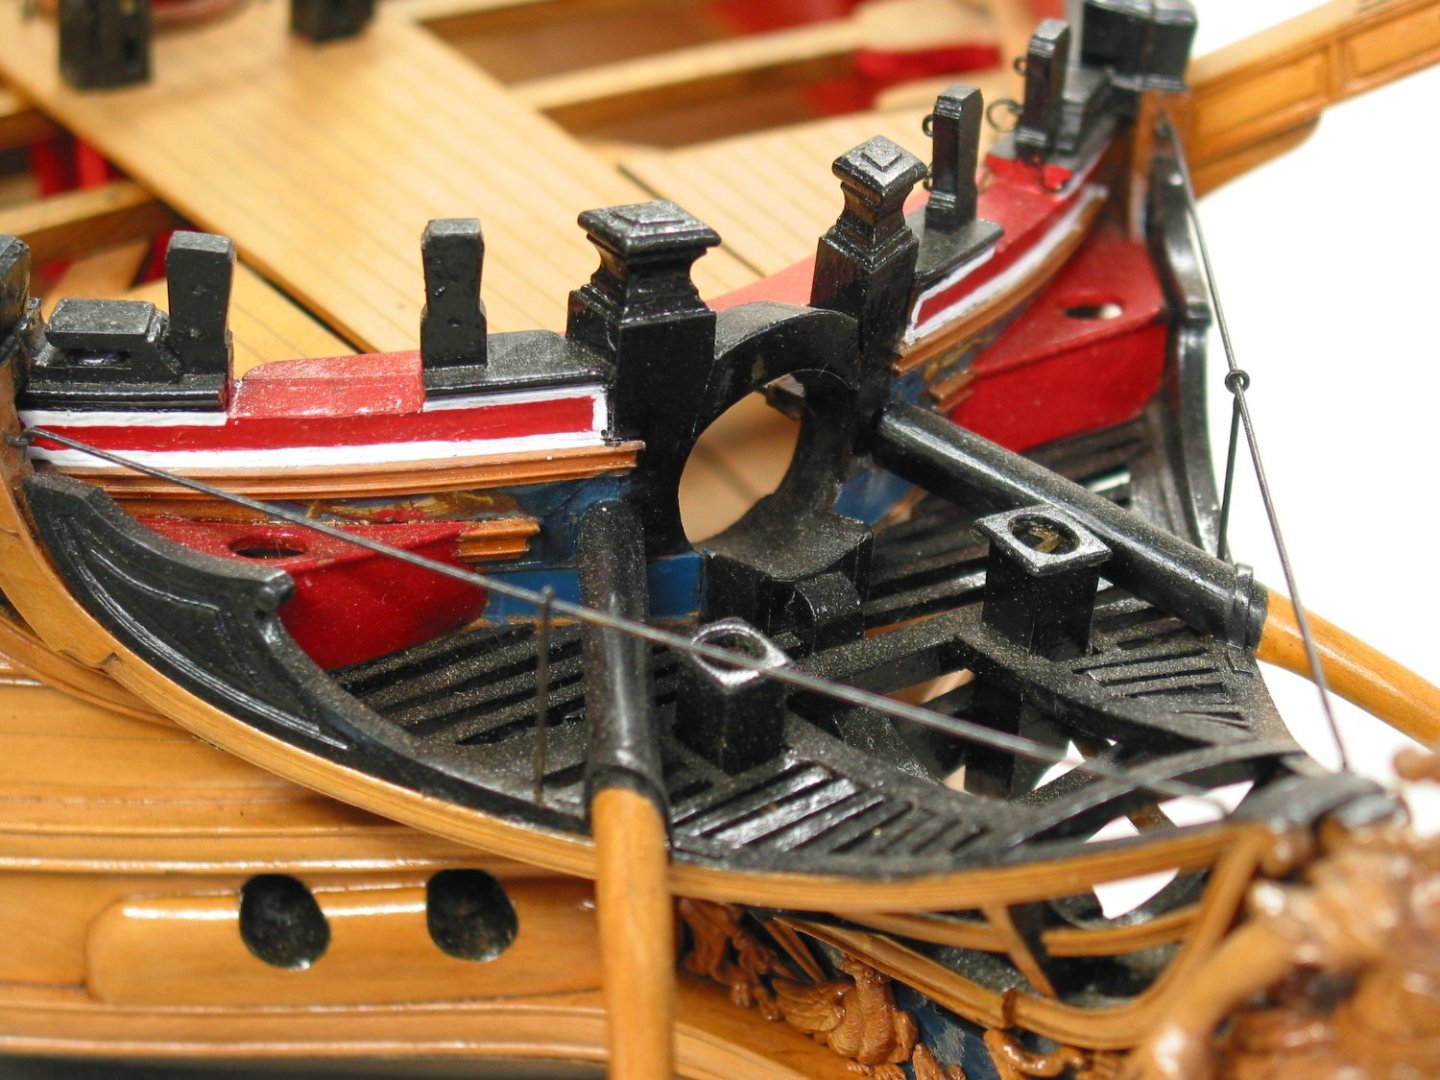
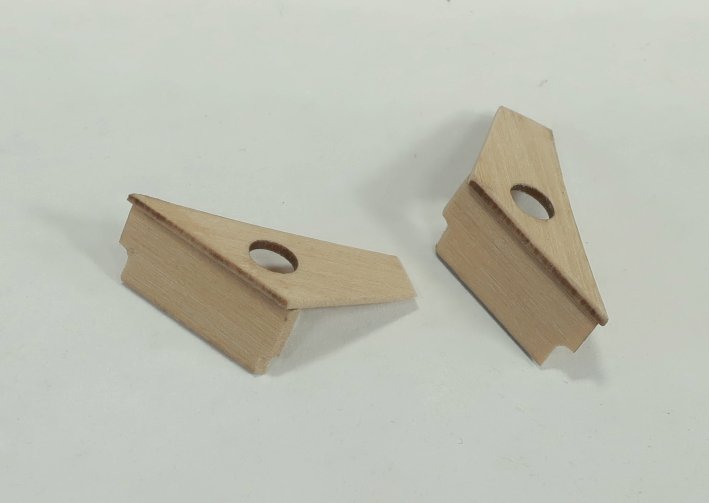
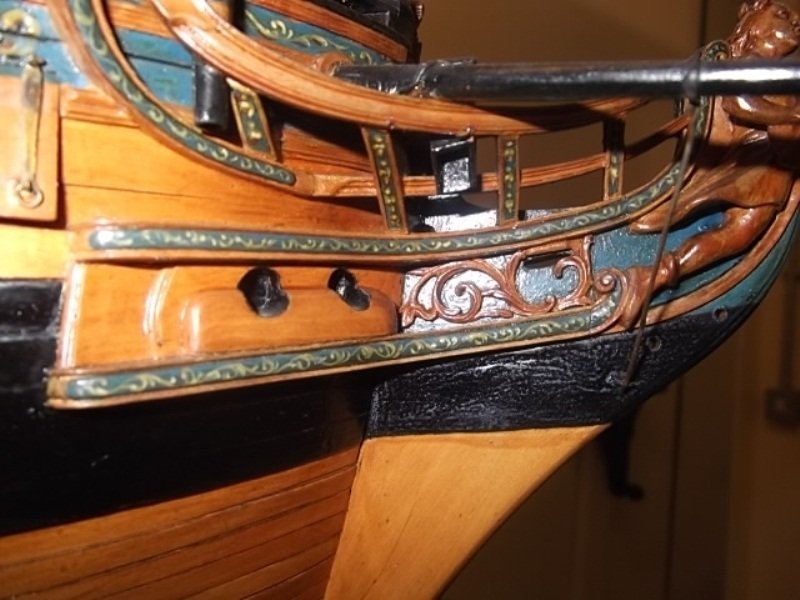
Thank you guys Moving along... Next up I made the false rails. These are pretty easy to make. Just sand them a bit to prep for painting. Test the fit on top of the main rail. There is a small circle or disc laser cut on the veneer sheet you will get. That is the tiny button for the scroll on the false rail. Paint it all black (or not) and add the freeze. Glue it into position. You can paint it black or keep it natural. That is up to you. There are many color combinations seen on contemporary models. You may also opt NOT to use the frieze here and just paint it all black. Its all about what you like best. Then it was time to assemble and add the aft seats. Those are the pair of seats in the corners between the false rail and hull. These can be tricky and I suspect everyone will have their own best way to make and position these. Here is what I did. I assembled them first and then painted them black before gluing them into position....BUT It was important to first test the fit of the top of these seats on the model so I could finalize its shape. Once I knew it would fit between the false rail and hull, I could tell how long to make the front face of the seat. These parts are laser cut but you will no doubt have to tweak them to fit your model. Then I glue the front face on the seat leaving the top with an ever so slight overhang. Note the filed out area where the molding would be and the main rail. This was all filed into the front face while off the model. I kept testing and tweaking for a good fit. Then I painted them black and glued them into position. I was careful to line them up so they looked even port and starboard. Dry fit both in position before gluing. ALL THAT REMAINS....is to do the bumpkins at this point and the model is all done. At least I think it will be, always feels like I am forgetting something. Anyway...by tomorrow it should all be completed. Any questions???
- 1,784 replies
-
- 23
-
-
-
- winchelsea
- Syren Ship Model Company
- (and 1 more)
-
Thats a challenging little fitting to make. But really rewarding. You did an excellent job.
- 642 replies
-
- 1
-
-
- winchelsea
- Syren Ship Model Company
- (and 1 more)
-
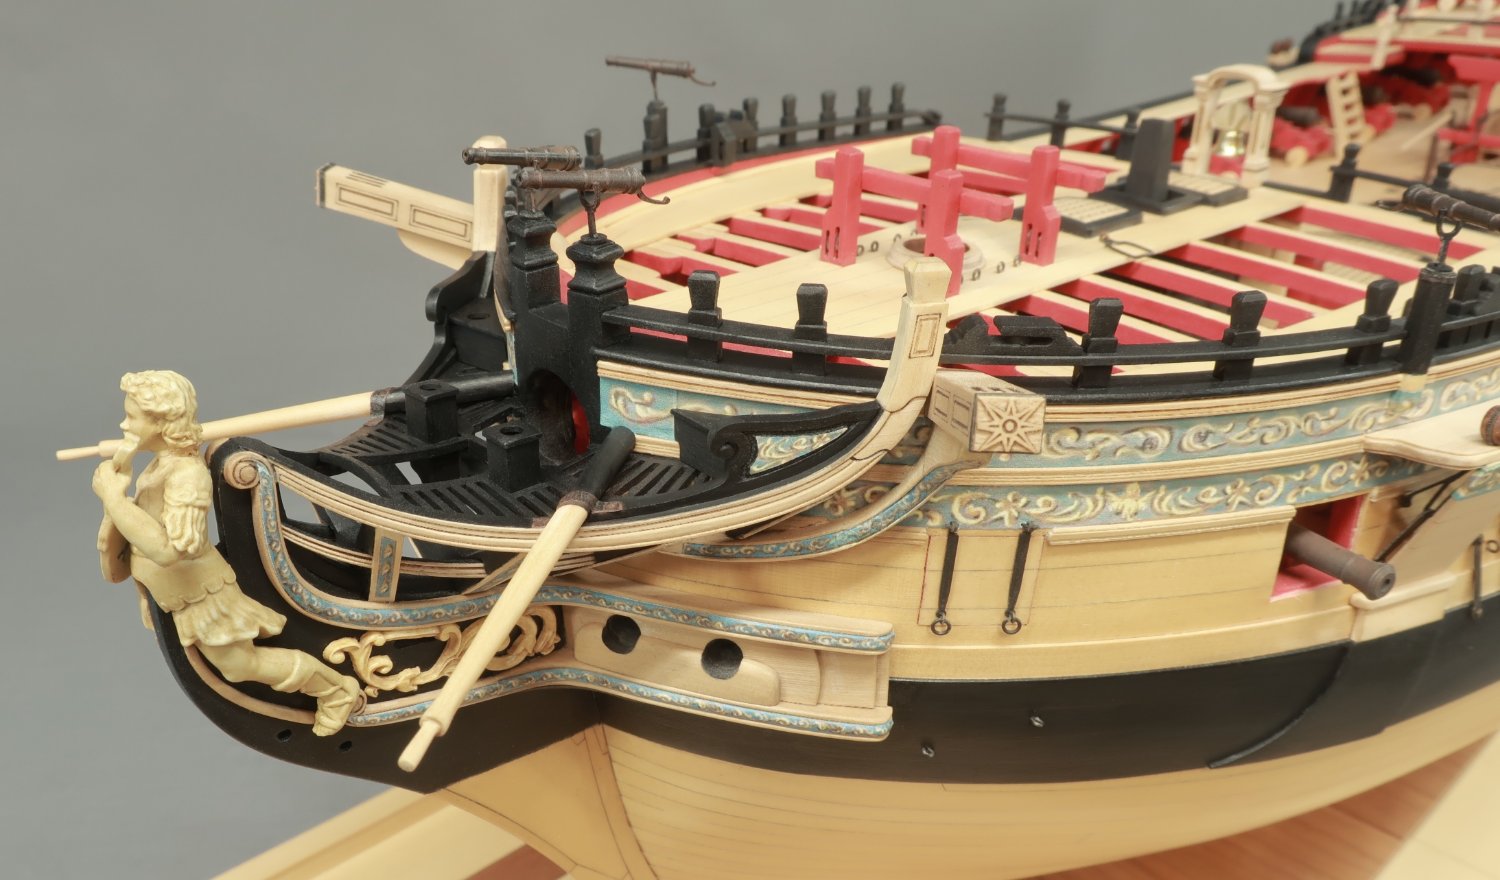
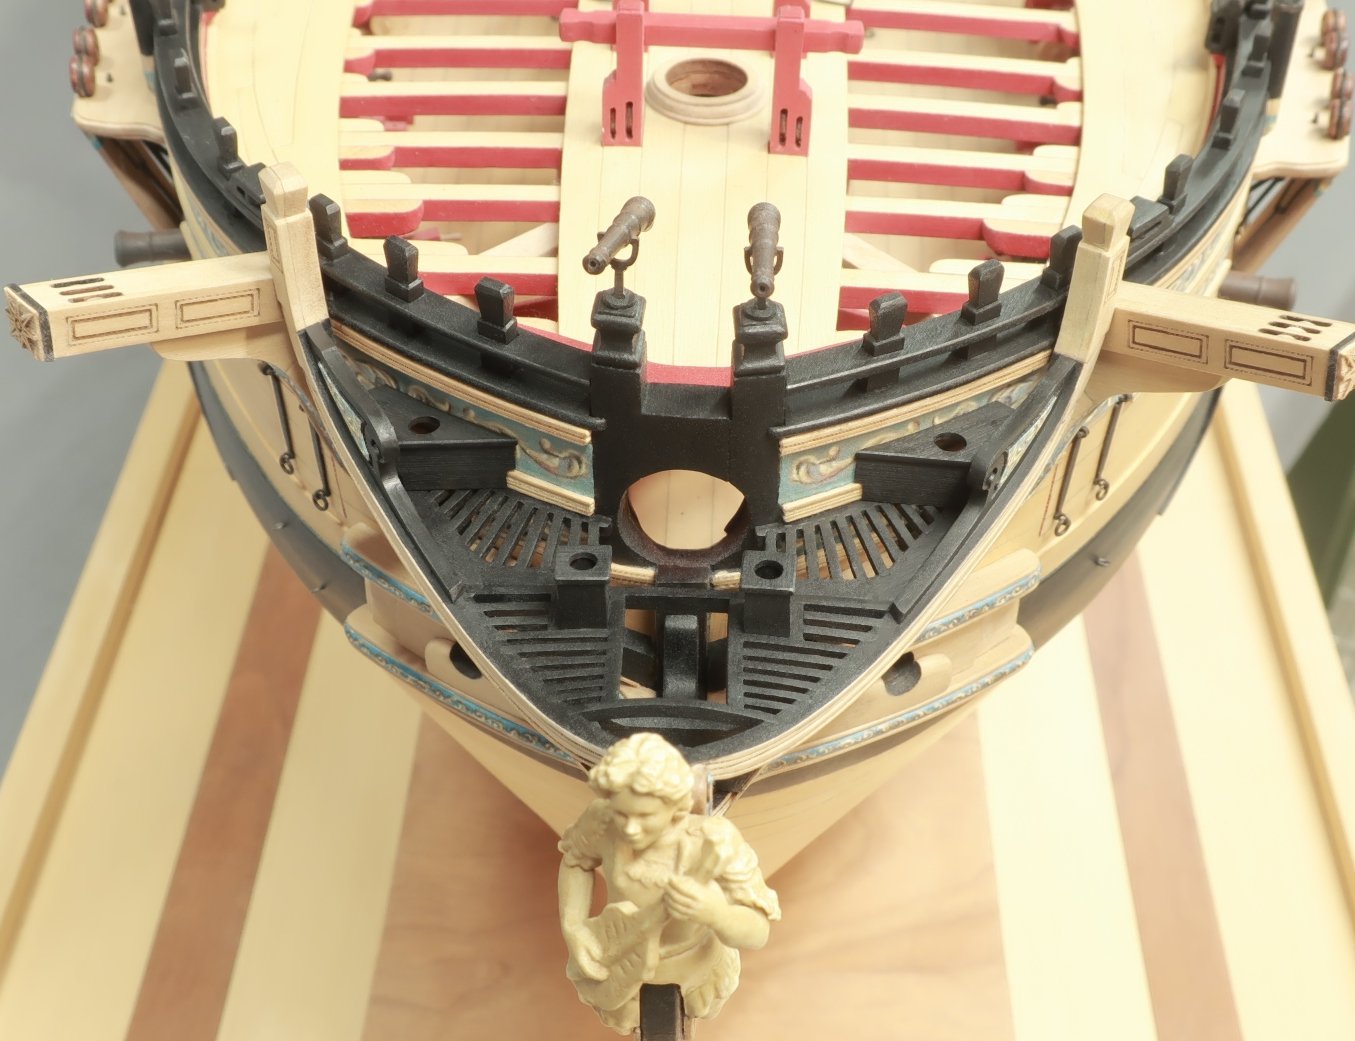
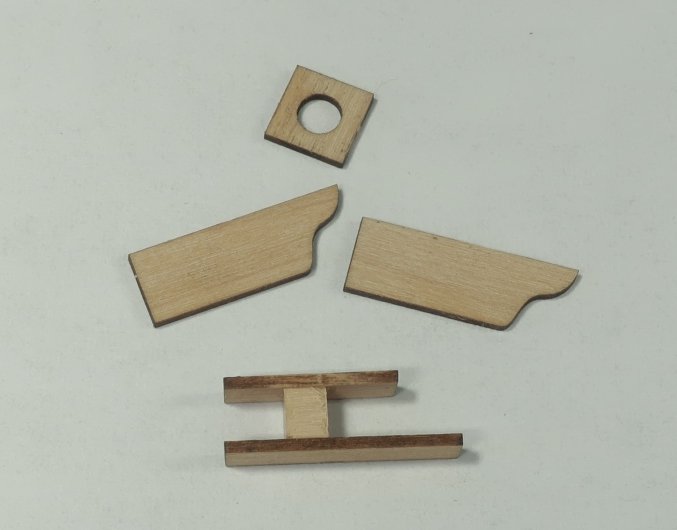
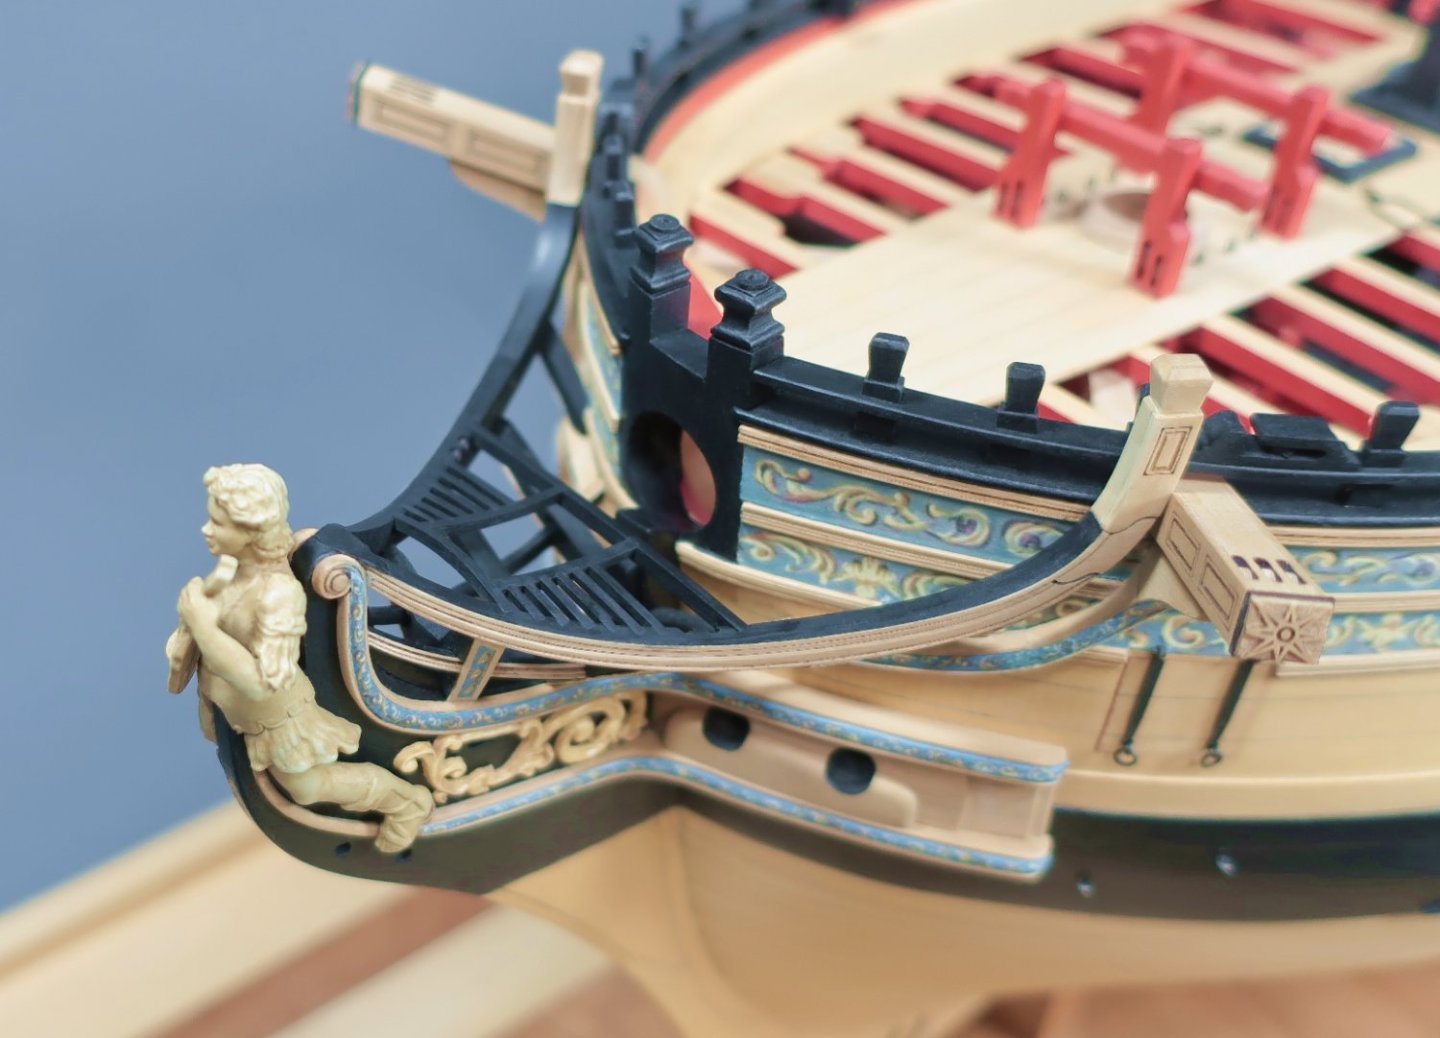
The forward seats... Here is a look at some contemporary models. On the Winnie model, note the poop shoot. It has slipped down over the years and hasn't been repaired. But its a nice feature usually never shown on a model kit. On Minerva you can see the two seats from above The top of the seat should be about 14" high off the grating. Thats about 5/16" so remember that. Maybe slightly less but not much. To make the seats its real easy. Cut a very small length of scrap wood strip. A 1/8" x 1/8" strip. Cut it very very short...maybe just 1/8" long. Its just to use so you can keep the seats squared up. Glue the two thinner sides onto this small 1/8" square as shown. Note how on one side the tops are flush. This will be the top of the seats. Then glue the other sides on. Easy peasy!!! At this stage paint the tube inside and out black and then glue on the top. Glue it onto the model. Make sure you face it the correct way. Look at those contemporary model pictures again of the poop shoot. Remember to keep the top of the seats about 5/16" above the gratings. Get them both to match. Also note that in that same photo I added a 3/64 x 3/64" strip against the outside face of the seat. This helps hold it into position. Dont worry about the dust at this stage. Sand any rough spots and touch up the paint. Then add those final two battens on each side. Use the curved ones that we used earlier. You should have plenty left over. At this stage start to clean everything up and repaint. Keep it neat and tidy. Here is an overall shot since these close ups are brutal. I have lots of cleaning and dusting and repainting to do once its all done. Next up the false rails and aft seats on the head gratings!!! Getting close now.
- 1,784 replies
-
- 30
-
-
-
- winchelsea
- Syren Ship Model Company
- (and 1 more)
-
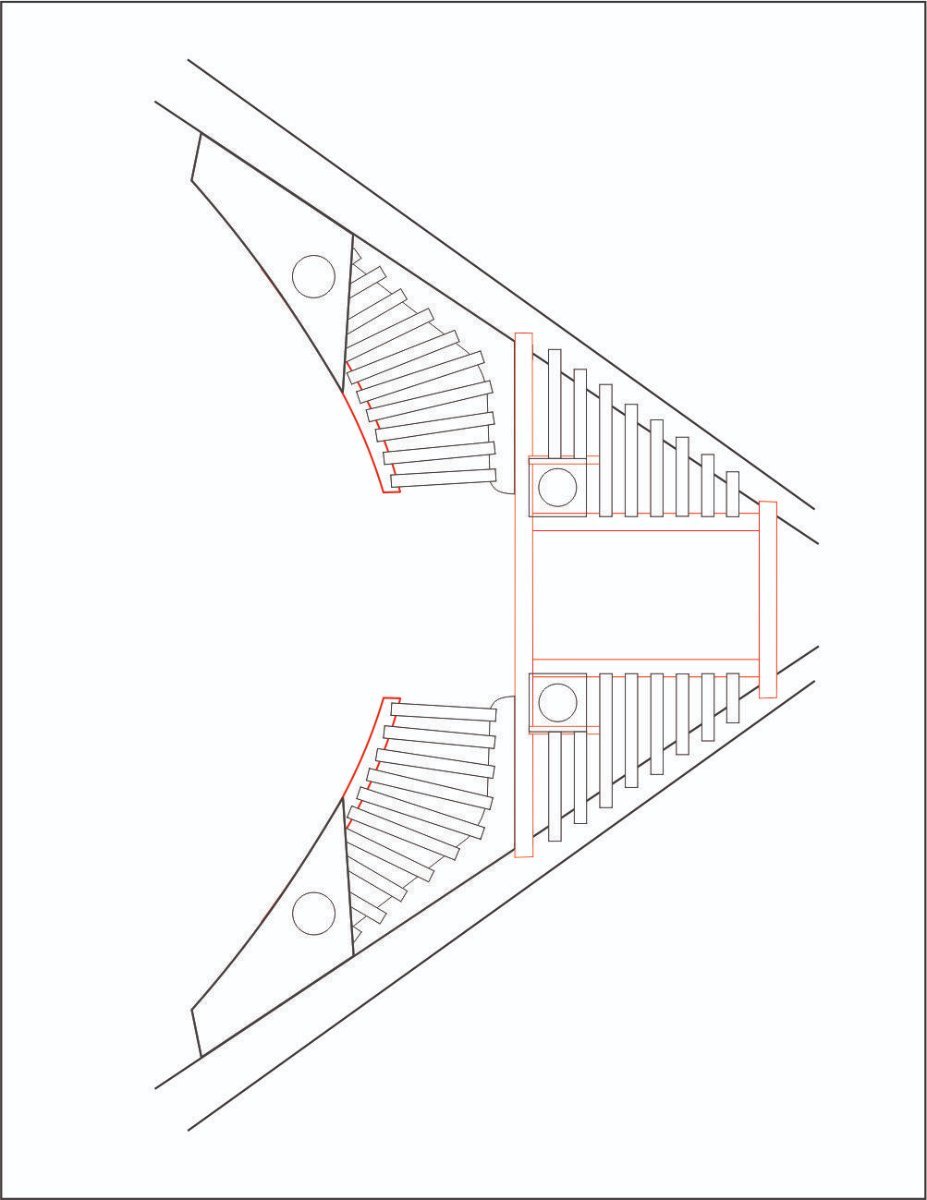
Head grating layout... headgratinglayout.pdf headtimberfriezes.pdf
-
By the way ....here is a PDF of the head grating layout. 8.5 x 11. headgratinglayout.pdf
- 1,784 replies
-
- 3
-
-
- winchelsea
- Syren Ship Model Company
- (and 1 more)
-
The head grating battens are complete for now. I added them all between the knees and the hull. These were just 3/64" x 3/64" strips. They were painted black ahead of time and cut to length. Then glued into position with the slots. I sanded them gently with 600 grit sandpaper and touched up the paint. Next will be the forward pair seats. Once these are done I can add the false rail and the two remaining seats of ease. Its hard to photograph all these pieces painted black but I am trying my best.
- 1,784 replies
-
- 23
-
-
-
- winchelsea
- Syren Ship Model Company
- (and 1 more)
-
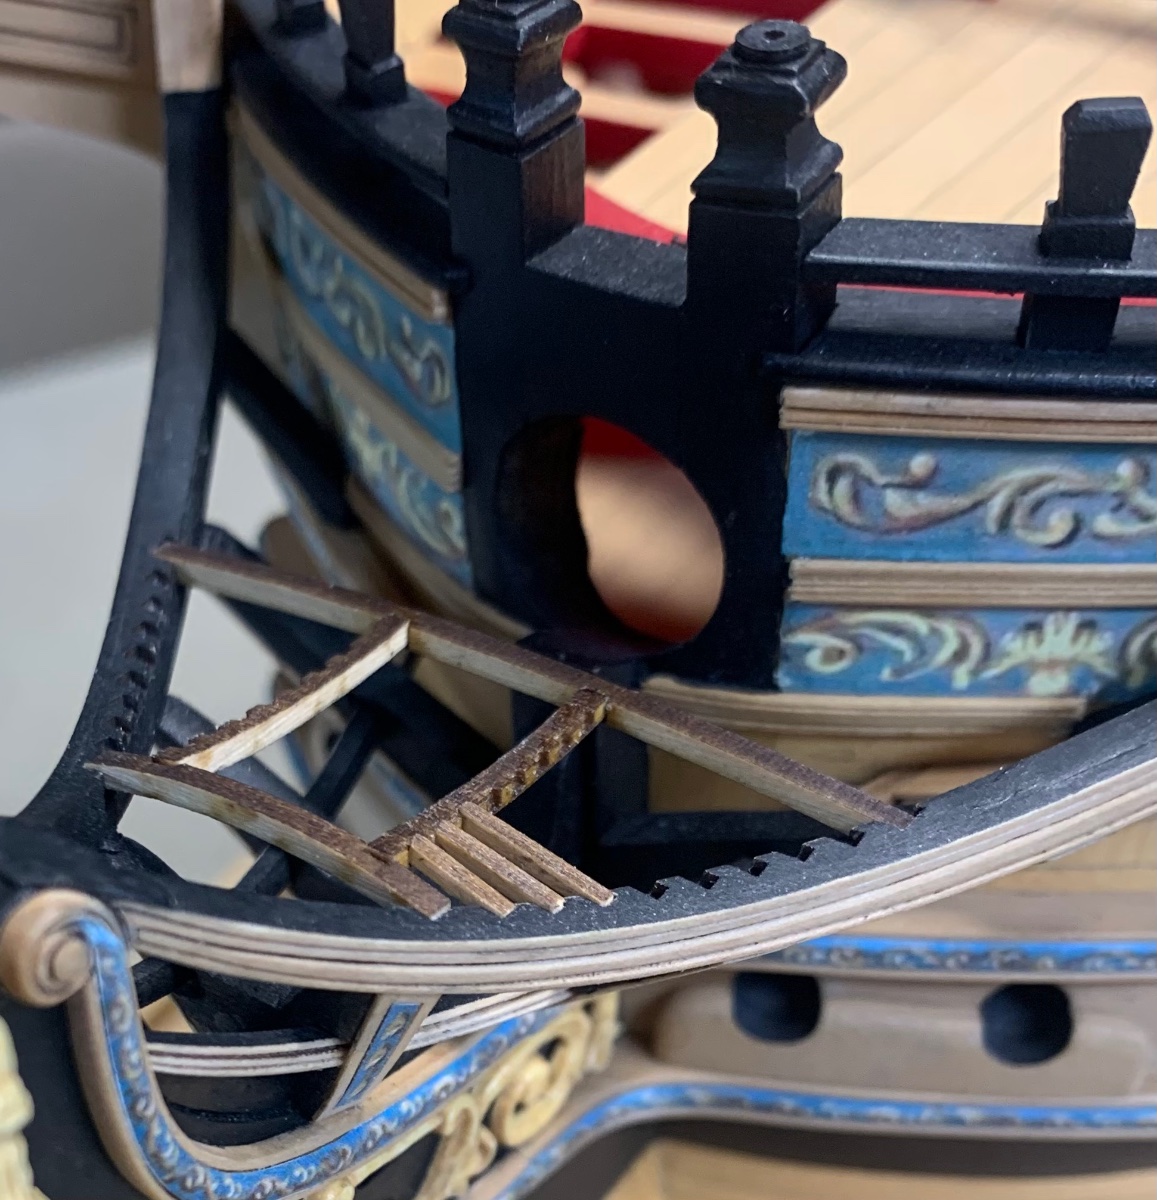
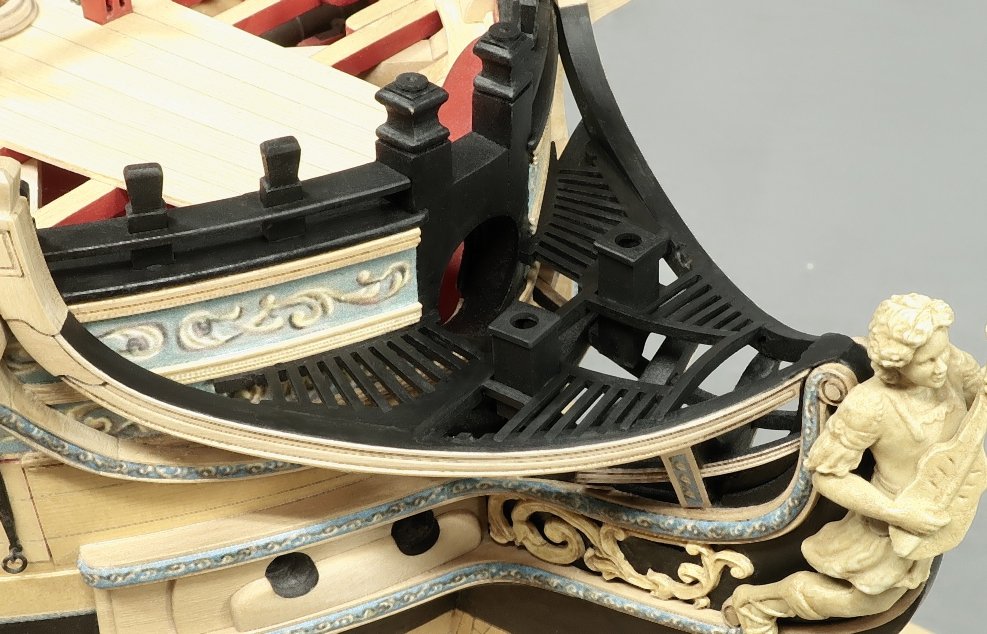
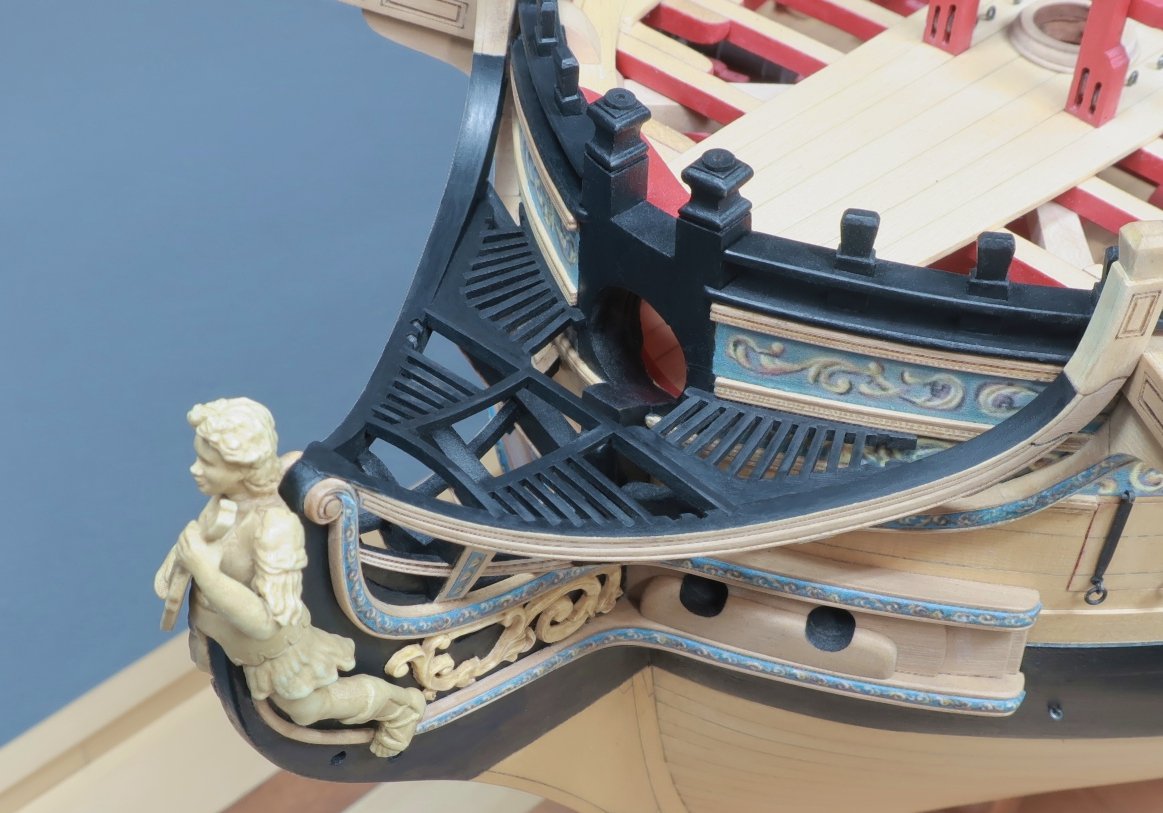
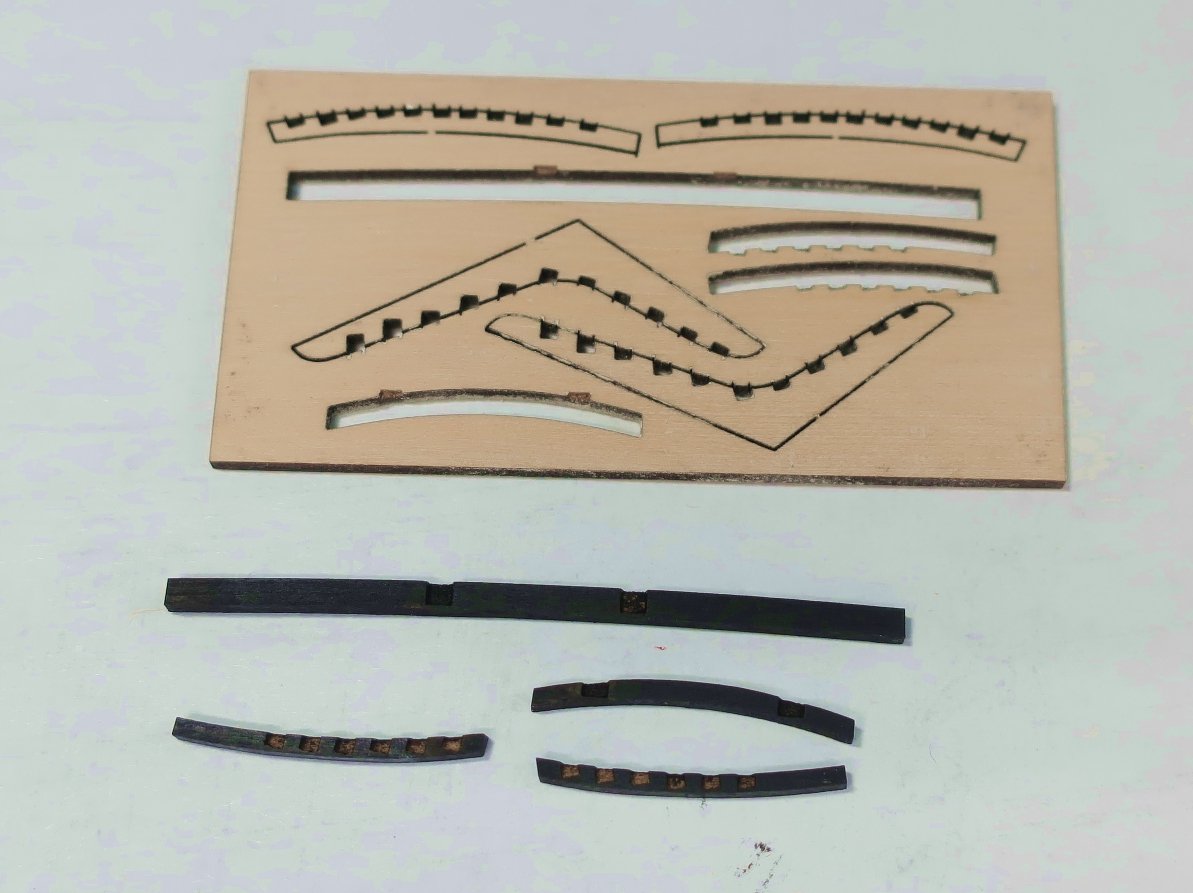
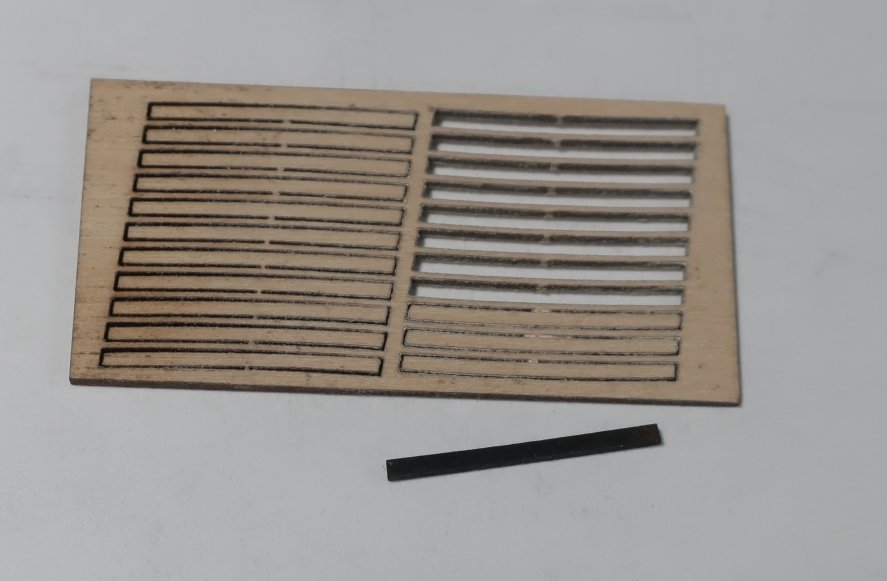
For the head gratings, you have to be methodical. I started by lightly sanding the initial for pieces and painting them black. These are 1/16" thick. Each of these pieces is laser cut slightly longer than you will need because everyone's model will vary a bit. The first two pieces are the two cross beams with a camber or roundup on them. These are the two that run port and starboard. Sand them to length a little at a time taking equal amounts off both sides until they fit snug in the notches of the main headrail. Dont make it so tight that it spreads your rails apart. Make it fit just right. Then the two pieces that run fore and aft can be added next. I recommend a dry fit of these four pieces before you glue them in permanently. Make sure you have the notches facing the correct way. Study these photos. Because next we will be adding the smaller gratings pieces. When you have these last two pieces in dry-fit only. Examine them to see if they are running straight with the center line of the hull and that they are both centered. Dont worry about the dust...you will be screwing up the paint job. Once you glue them in permanently you can give the top a light sanding with 600 grit sandpaper. Then touch up the paint. But dont worry about it being perfect yet because you will be sanding and painting more with each step. Next up are the smaller 3/64" thick battens which are also laser cut for you. These are laser cut really long because you have to cut them to fit your model exactly. I painted them black first. They have a slight curve as you can see. I inserted one end into a notch in the head gratings and then marked the length I needed as it spanned across to the other side. You will only be added the first six on each side at this point. Those last two wont be added until after we put the seats in position later. Carefully measure and cut all six grating battens and dry fit them first. Then glue them in with yellow glue or tite-bond. Brush away any excess glue to keep it neat. Once dry you can lightly sand the joints and paint. It should look like this at this current stage. Then go back to the 1/16" sheet and remove the two knees with all the notches in them. And also remove the long curved pieces with notches. These can be painted black ahead of time as well. Yes, even the bottom side. The knees will be put in position first. The longer leg of the knee sits along the main headrail. You will no-doubt have to adjust the angle of the knee so it fits your model properly. Both legs should sit firmly against the inside of the main rail and also the cross piece of the head. Note how it sits against the inside edge of the main rail. Do you see how it slopes down rather than sit flush with the top of the main rail. THIS is very important. You see, there is the other curved piece with notches that will sit against the hull. Those notches will have more battens running from them to its corresponding notch in the knee. You want the platform created by these battens to have a nice flow into the hull. You dont want them slopped up or down. Remember this when you place the curved piece against the hull. As designed, I intended for this piece to fit directly under the fancy molding as shown in the photos. Does this make sense? Its real important but may vary on your model. You may have to place it lower...every model will vary slightly. In that same photo you can see that I started added the battens between it and the knee. I did the first two. The inner two lengths. I added these first because I wanted to show you guys that these two battens will/should run parallel to the center line. This is yet another important piece of the puzzle and when you add the notched curved section along the hull be conscious of this. You want that first notch to line up directly across from the one on the knee so those first two battens are straight with the center line. Makes sense??? Plan the placement of those curved and notched pieces against the hull carefully. One end of this curved and notched piece is longer than the other. I did this purposely so you would know which side should be the aft end closest to the catheads. The longer end is towards the cathead. Tomorrow I will continue adding the remaining battens. Then its onto the seats of ease. Speaking of seats of ease.....until tomorrow then. You should ask questions if you have them when doing this part. There are lots of little details to remember about the placement of these pieces. Read through the instructions a few times.

- 1,784 replies
-
- 33
-
-
-
- winchelsea
- Syren Ship Model Company
- (and 1 more)
-
Very nice. Good to see you back at it.
-
Really nice work!!! 😊
-
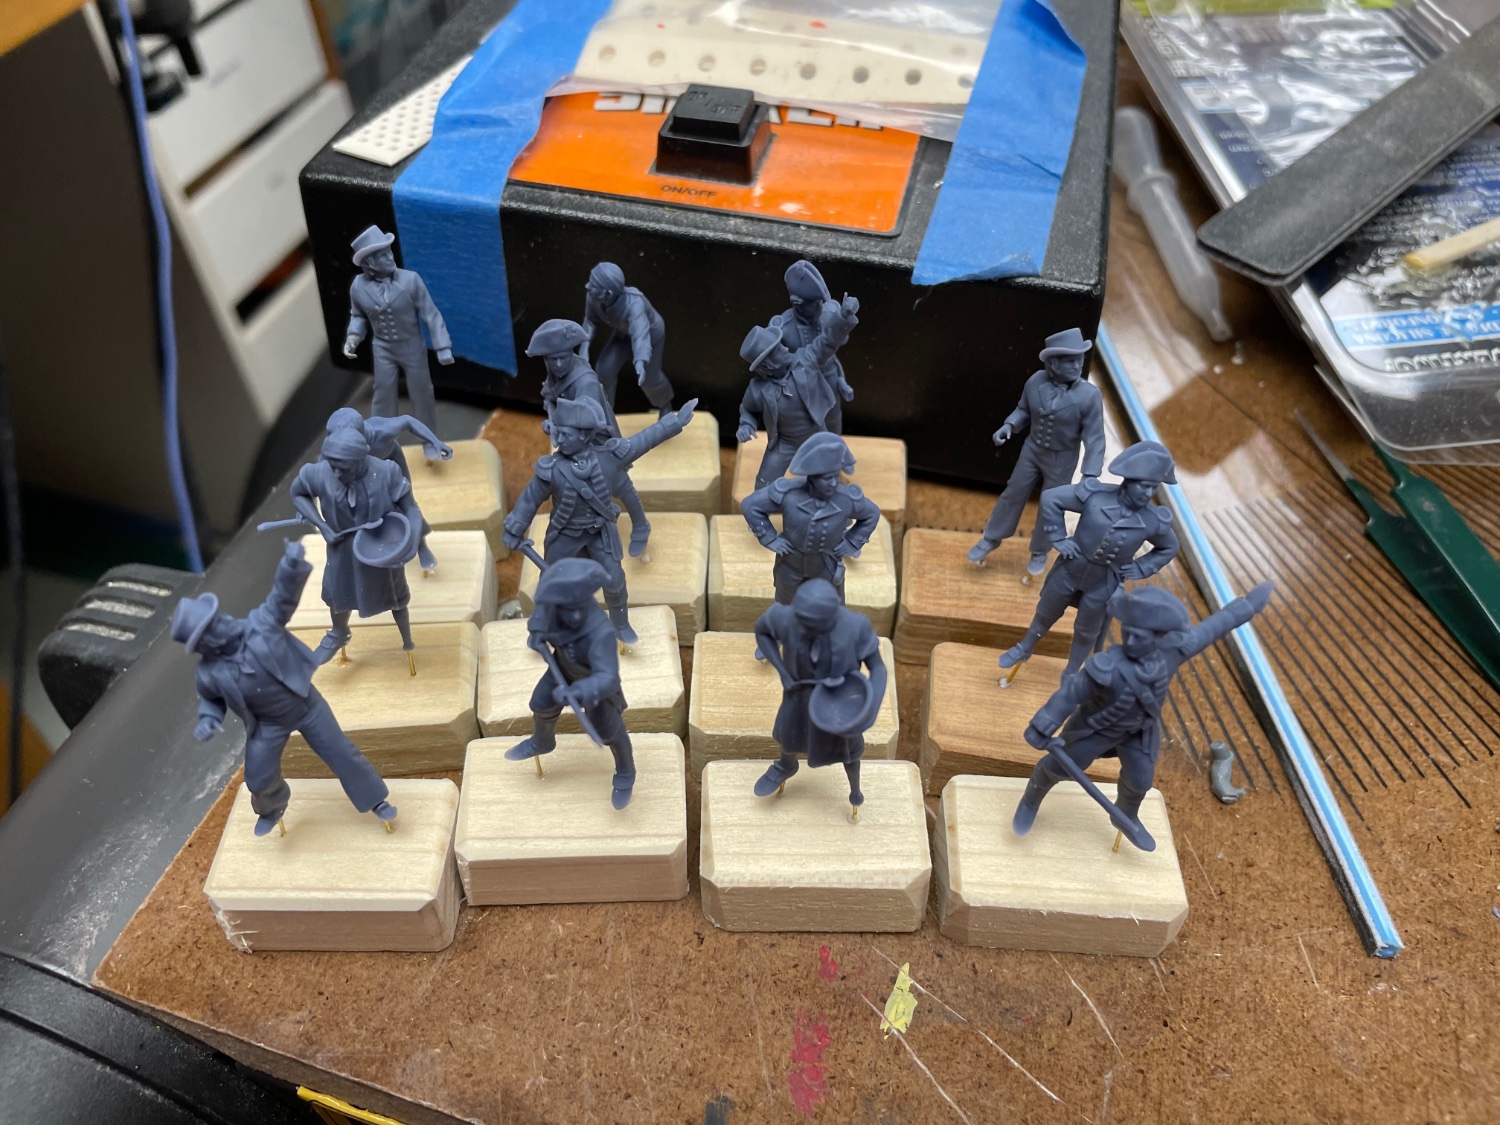
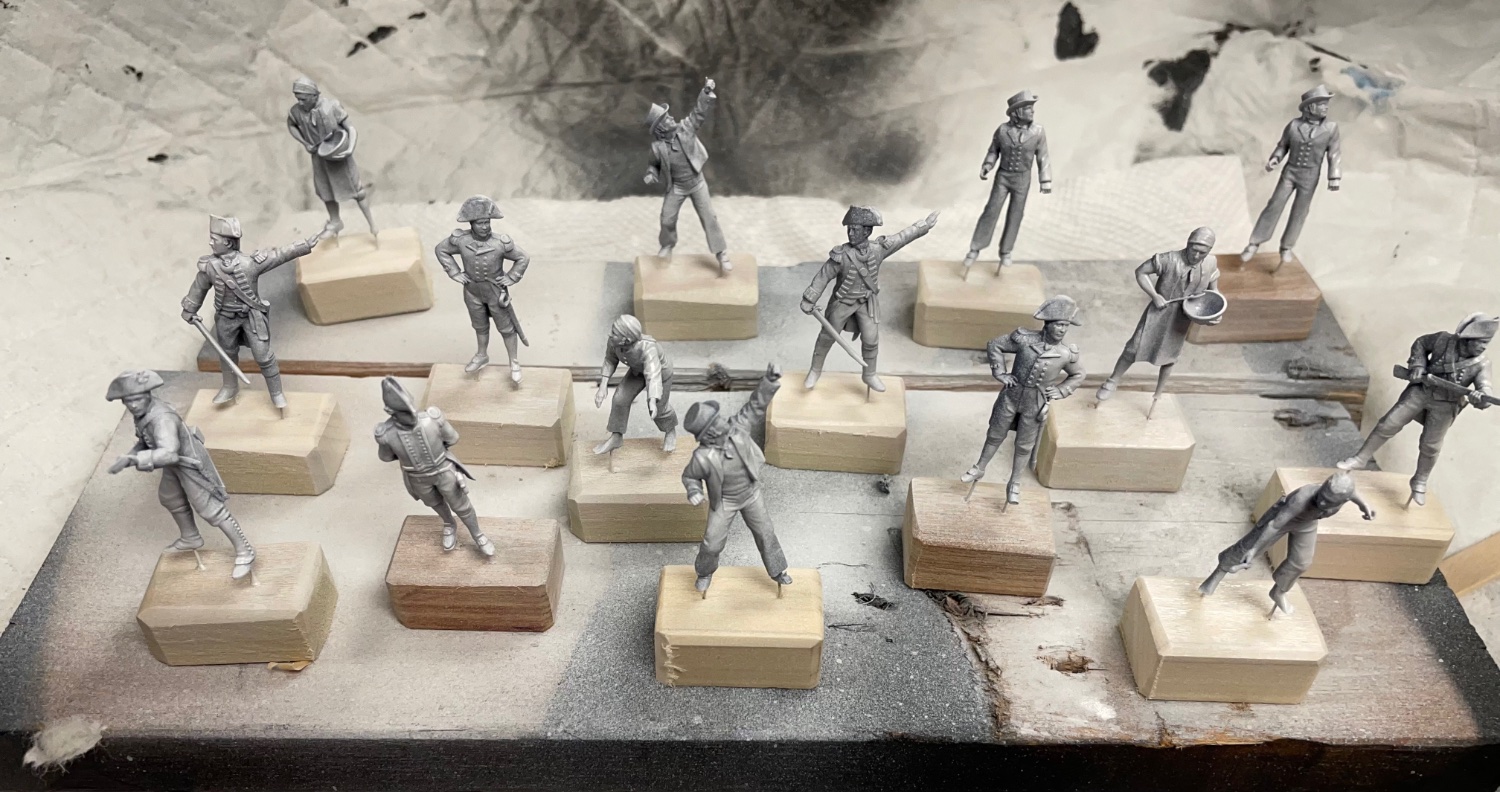
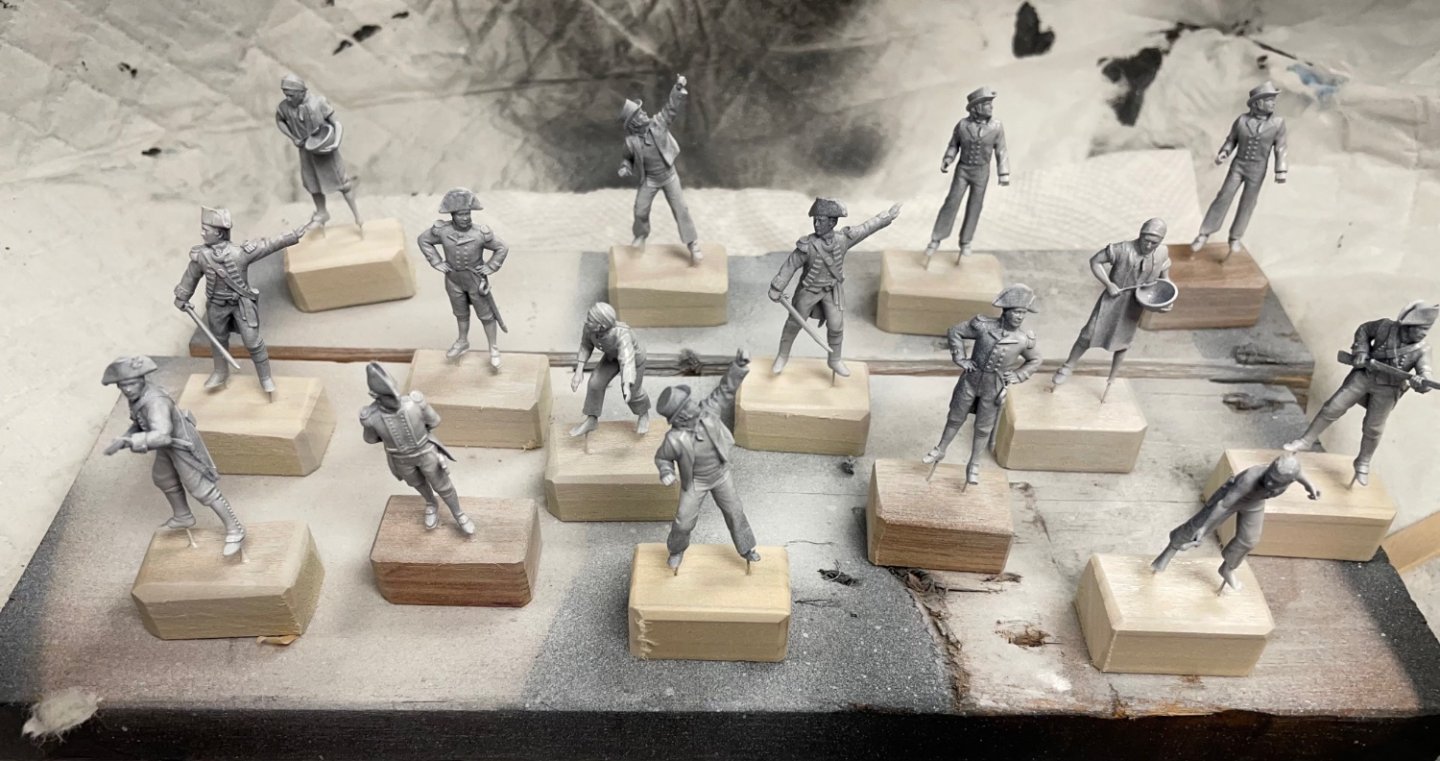
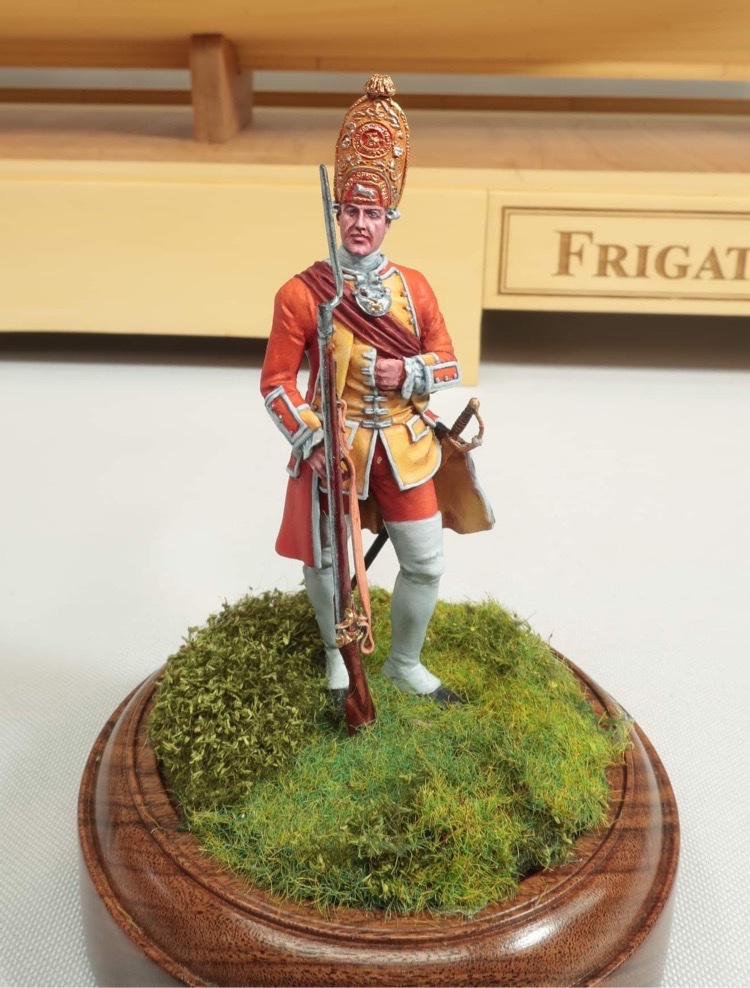
Larry uses a disc sander to gently remove the bases. Once they get down to the feet the bases just fall off. I am trying to get Larry to do a build log or even an article for the nrjournal on this batch. Either way I will post updates to his progress.
-
Chris’ wonderful figures being prepared for painting by a good friend of mine and master miniature painter Larry Friedlander. I am so excited about this. Thank you Chris for the best scale figures I have ever seen. It is so good not have a mini that looks like a cartoon. These are so realistic. bases are removed so they can be used on a model or diorama. then primed and ready for paint. This guys work is amazing and you will love it. I will try and keep you guys posted. One of Larry’s figures below to show you the kind of work he does.

-
No dont do that!!! Its the fantastic scratch work I see done by folks like yourself that inspires me to kick it up a notch. The Winnie project would not exist had it not been for all those inspiring scratch projects. Cheers!!!
- 1,784 replies
-
- 15
-
-
-
- winchelsea
- Syren Ship Model Company
- (and 1 more)
-
Beginning to prototype the parts for the head gratings. Absolutely no glue yet. Just a dry fit of all parts. So far so good. Lots of curves and lots of notches. All are lining up well. I think you guys are up to the challenge and its actually good fun. Compare with other kits…even the newer ones. Its well worth the extra effort. Once all the parts are cut and tested , I will do the step by step because the build sequence will be important. But I wanted to give you a sneak peek. So far I am thrilled with the results.


- 1,784 replies
-
- 25
-
-
-
- winchelsea
- Syren Ship Model Company
- (and 1 more)
-
Nicely done!! I said the same thing when I finished mine.
- 399 replies
-
- 5
-
-
- winchelsea
- Syren Ship Model Company
- (and 1 more)
-
Its too large a list to copy into a post so please work off the PDF and Geraldine will let you know what titles are still available after you contact her. Chuck
-
A collection of modeling and nautical history books is available from the estate of John Curry. John was a long-time NRG member and before being transferred to Kansas City (KS) had been a member of the Nautical Research & Model Ship Society of Chicago. John passed away a couple of years ago and would have wanted his books to go to modelers instead of donated to someplace that might have just dumped them. John’s widow Gerry has compiled a very detailed list of the books. The books are available only to US members due to foreign shipping prices, customs forms, etc. The books are available for $5.00 each + $5.00 each shipping except for some books that are clearly marked as a different price, but they include the shipping. 5 books or more and shipping will be discounted. There are some great books in this collection!!! Payments accepted: Personal check or money order payable to Geraldine S. Curry. PayPal also accepted. Contact information and to check for availability is: gscurry@hotmail.com Phone or text = (913) 375-3762 I have uploaded the list and it is attached. I will also try later to simply post the list within the topic itself. Its an extensive list. Click here for the PDF 1-Publish Book List JOHN CURRY BOOKS.pdf
-
Really nice...paying that kind of attention on placement will be very helpful.
-
Thats perfect. Thats also the way everyone should approach building. These arent plastic models and you will always need to adjust and tweak. You did that perfectly. Good practice for when you tackle the headrails.
- 642 replies
-
- 3
-
-
- winchelsea
- Syren Ship Model Company
- (and 1 more)
-
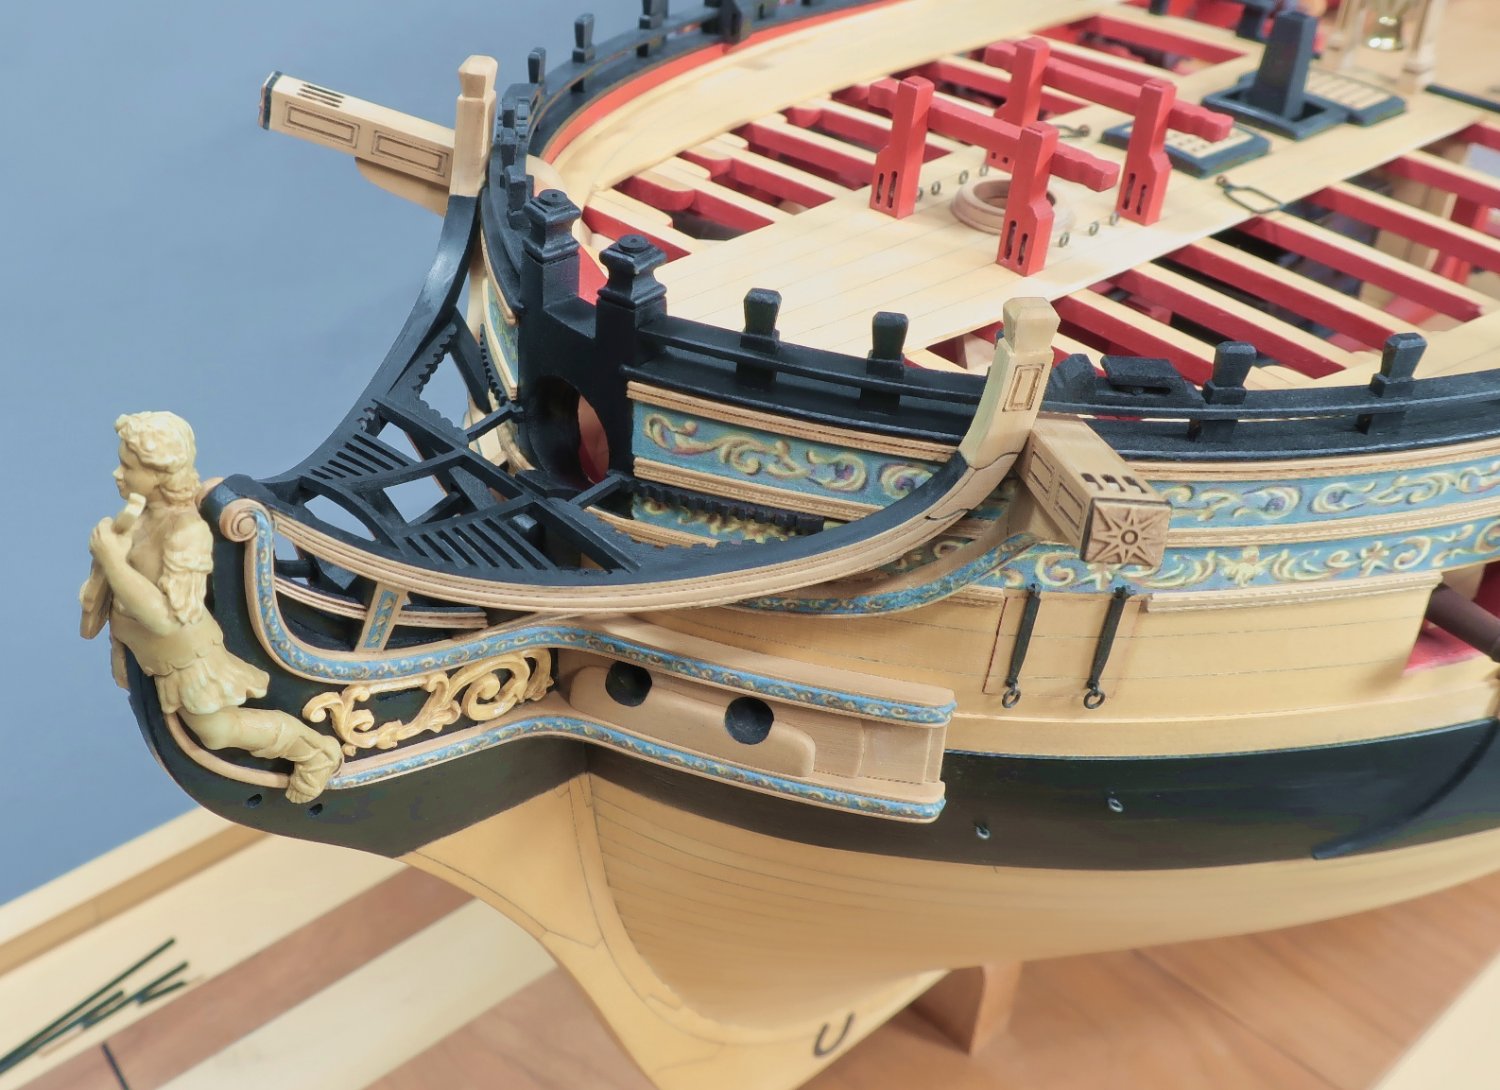
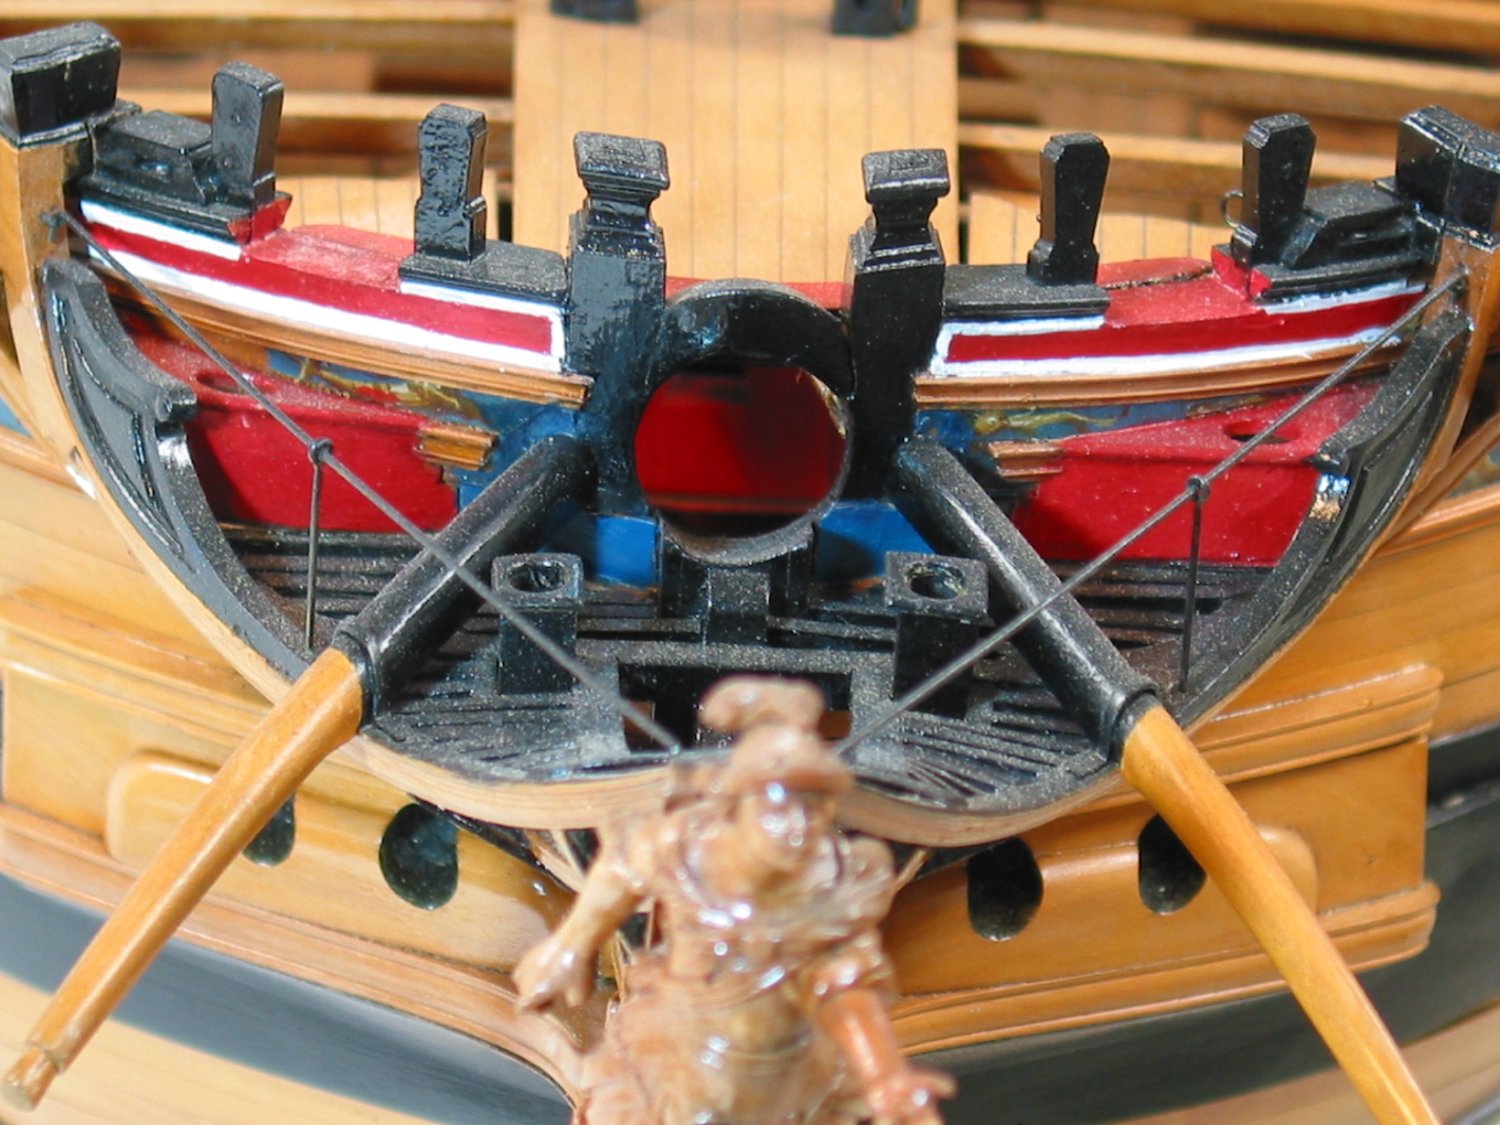
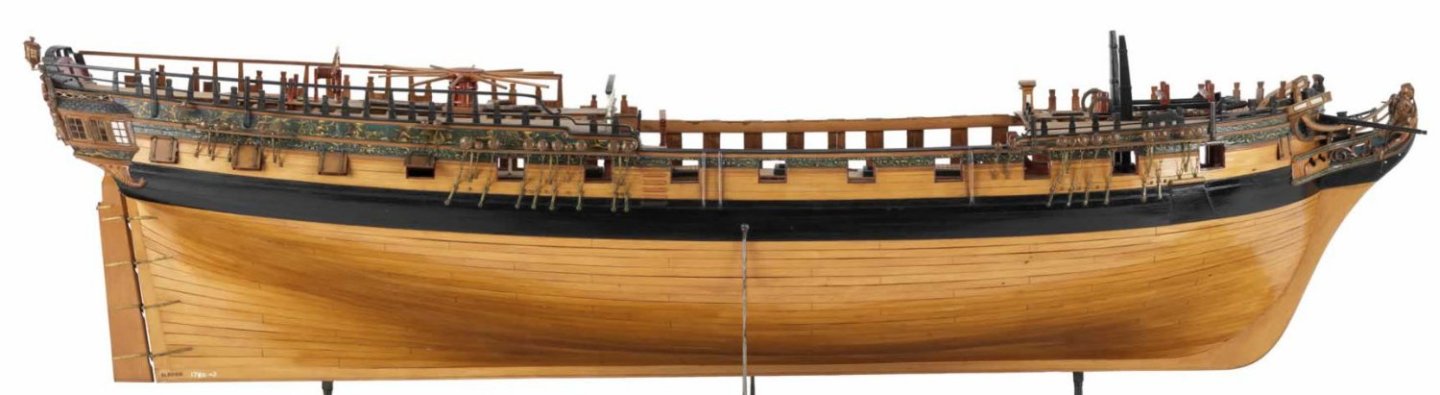
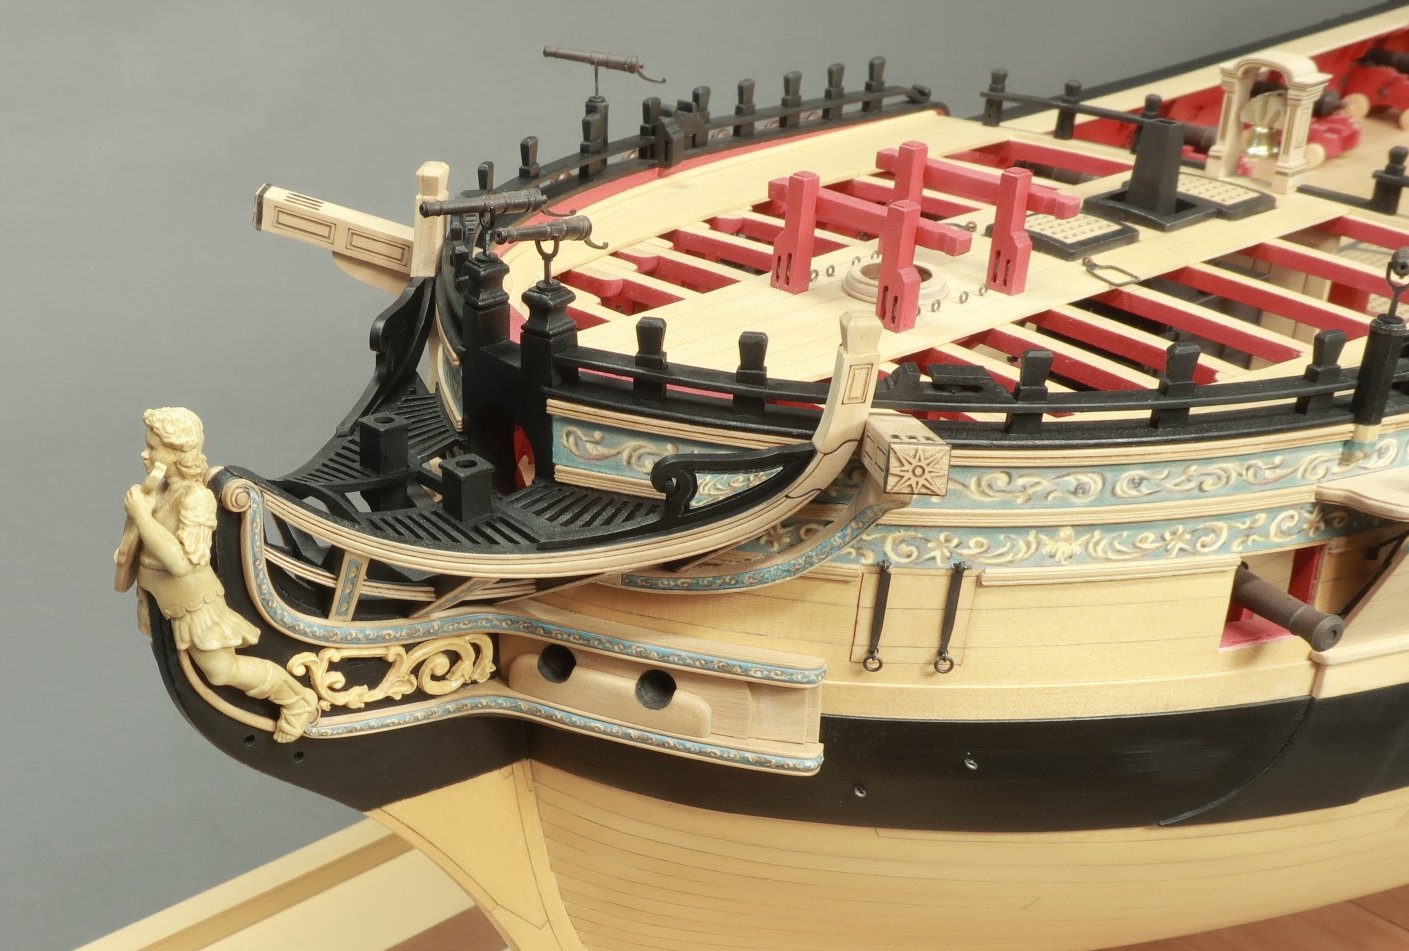
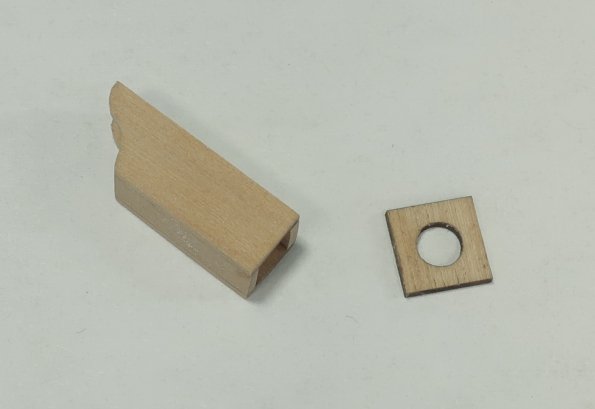
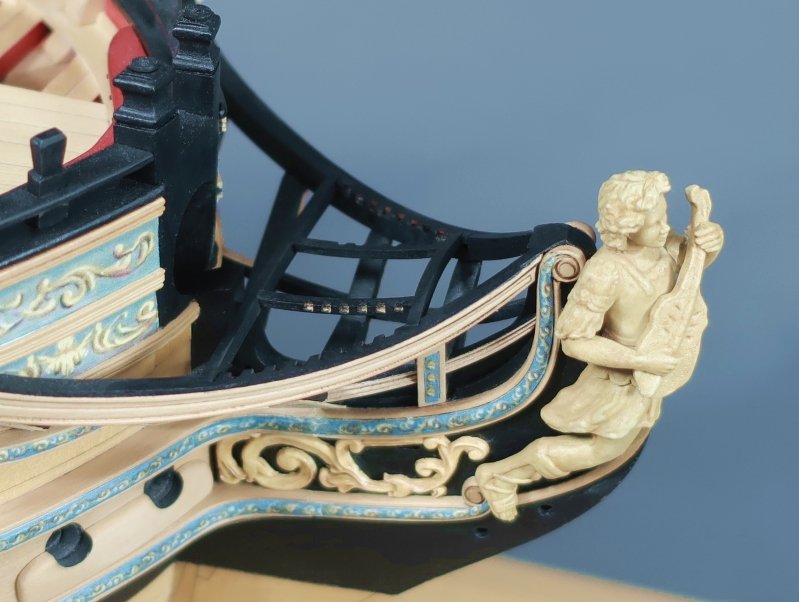
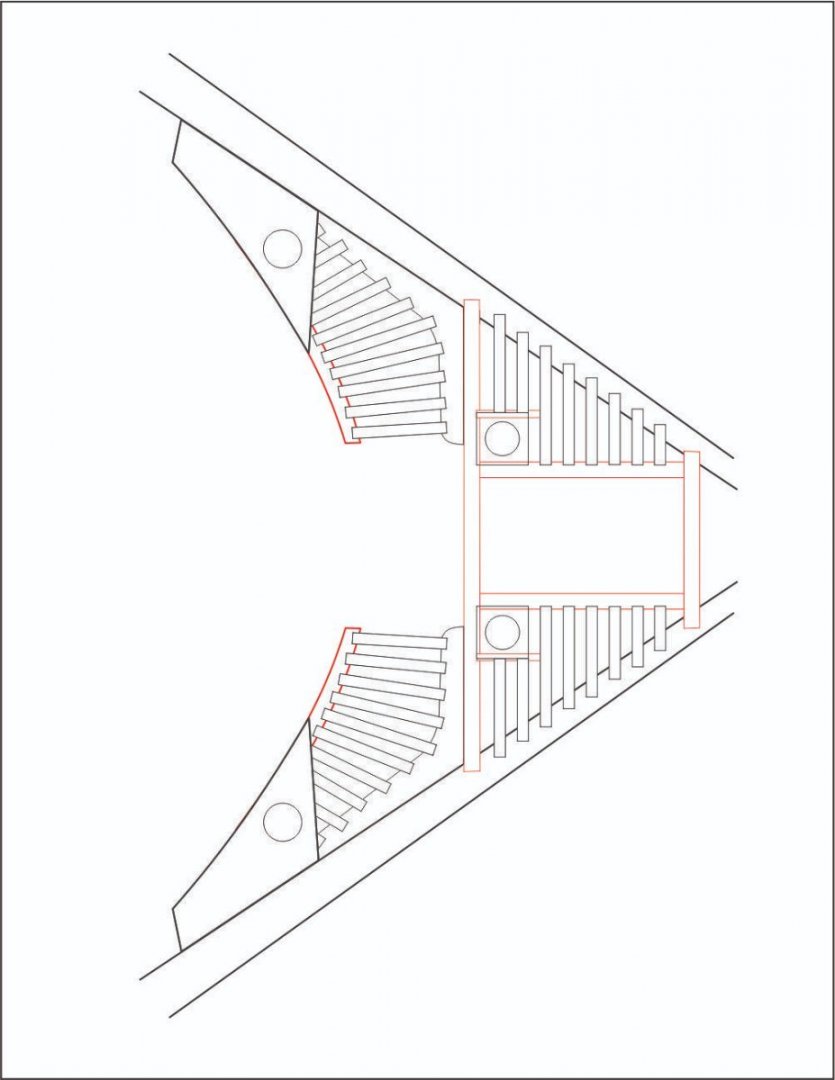
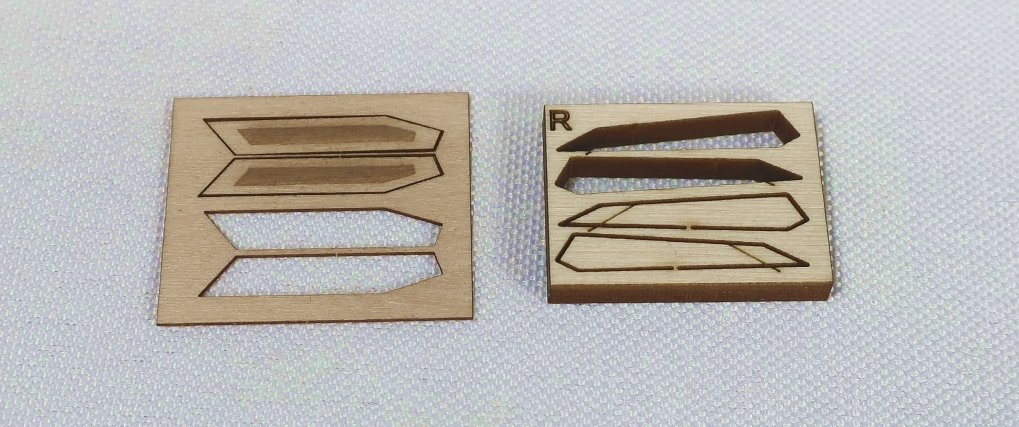
Just a small update.... We finished the 3 vertical head timbers earlier. But now that the cathead support is completed, you can add the fourth "half" head timber. I rarely if ever see this on any kit which is strange. You can see the half head timber on the contemporary model below. Its the aft most head timber. It sits between the main headrail and middle rail against the hull. This (like all of the head rail parts) is a part that needs careful tweaking. It is laser cut for you but left just a bit long. The top edge should be angled on a curve to sit flush with the underside if the main headrail. The bottom needs the same treatment but also must sit against the hull neatly. Here are the laser cut pieces. I will supply two sets just for practice purposes. Shape the pieces on sheet "R" first to fit and make sure this half timber is spaced equally from its "full partner" just forward of it. All of the head timbers are equl distance apart so its easy enough to measure. Once you have a good fit, you can add the cover board (also laser cut) and the frieze. Then it can be glued into position. Keep tweaking it ever so slightly for a really neat fit. Remember to match its angle and placement on the other side. Darn it!!! Yes you have two of these to do. Also note that I had removed the fancy molding where this half head timber will sit against the hull. Then I added it back after it was glued into position. I dont know if this made it easier but I thought I would let you know. We are in the home stretch now!!!!! Finally. The only things remaining on the model to do are - The head gratings which will be next. -The False Rail -The seats -Lastly the bumpkins Thats it really.... Here is a wonderful photo of the Minerva showing the head gratings and seats and bumpkin. Also the false rail. Note how the head gratings are curved or have a roundup. This is yet another feature that is never shown on commercial kits no matter how well done they are. We will be emulating this. No one-piece laser cut head gratings that never fit for this project. We will be assembling them just like you see it below. It will be so much fun! Our head grating will have slight differences but I wanted to show you whats next using these insane photos. Study them. The plan we will be using is below as well. And a shot of another contemporary model showing the head gratings as well. The gratings here are closer to what we will be doing. Although from a larger ship. Interestingly they are painted white on the underside....we wont be doing that. But a nice view none the less. Note the poop shoot!!!


- 1,784 replies
-
- 25
-
-
- winchelsea
- Syren Ship Model Company
- (and 1 more)
-
Really nice holly in the USA can be found that is really really white. But eventually it will mellow and possibly darken a bit. But I have pieces that are years old and still remarkable bright white. As you can see. Its hard to find and expensive. This is a 1 7/8" thick by 5" wide and 15.5" long brick of very nice holly. It cost me around $50 years ago.
-
The issue is its not easy to find boards that clean and clear. If you look at that wood on many sites it can get very grainy. So unless you can go in person and pick out some nice clear and color correct boards you may end up tossing a lot of it. I buy my woods in bulk and you have no idea how much of it turns out to be not useable for our purposes. It just ends up as firewood. If you arent in the business of making thousands of parts commercially your best bet is to just stick to the classics and buy a little at a time. Just stockpile it over time so its not a big one time expense. Hold out for the best holly too. Nice white pieces. I know Joe at Modelers sawmill just picked up a batch of really nice holly. It was a small batch but when you see nice stuff you should grab it. Chuck