HOLIDAY DONATION DRIVE - SUPPORT MSW - DO YOUR PART TO KEEP THIS GREAT FORUM GOING! (Only 75 donations so far out of 49,000 members - C'mon guys!)
×


Chuck
-
Posts
9,673 -
Joined
-
Last visited
Content Type
Profiles
Forums
Gallery
Events
Everything posted by Chuck
-
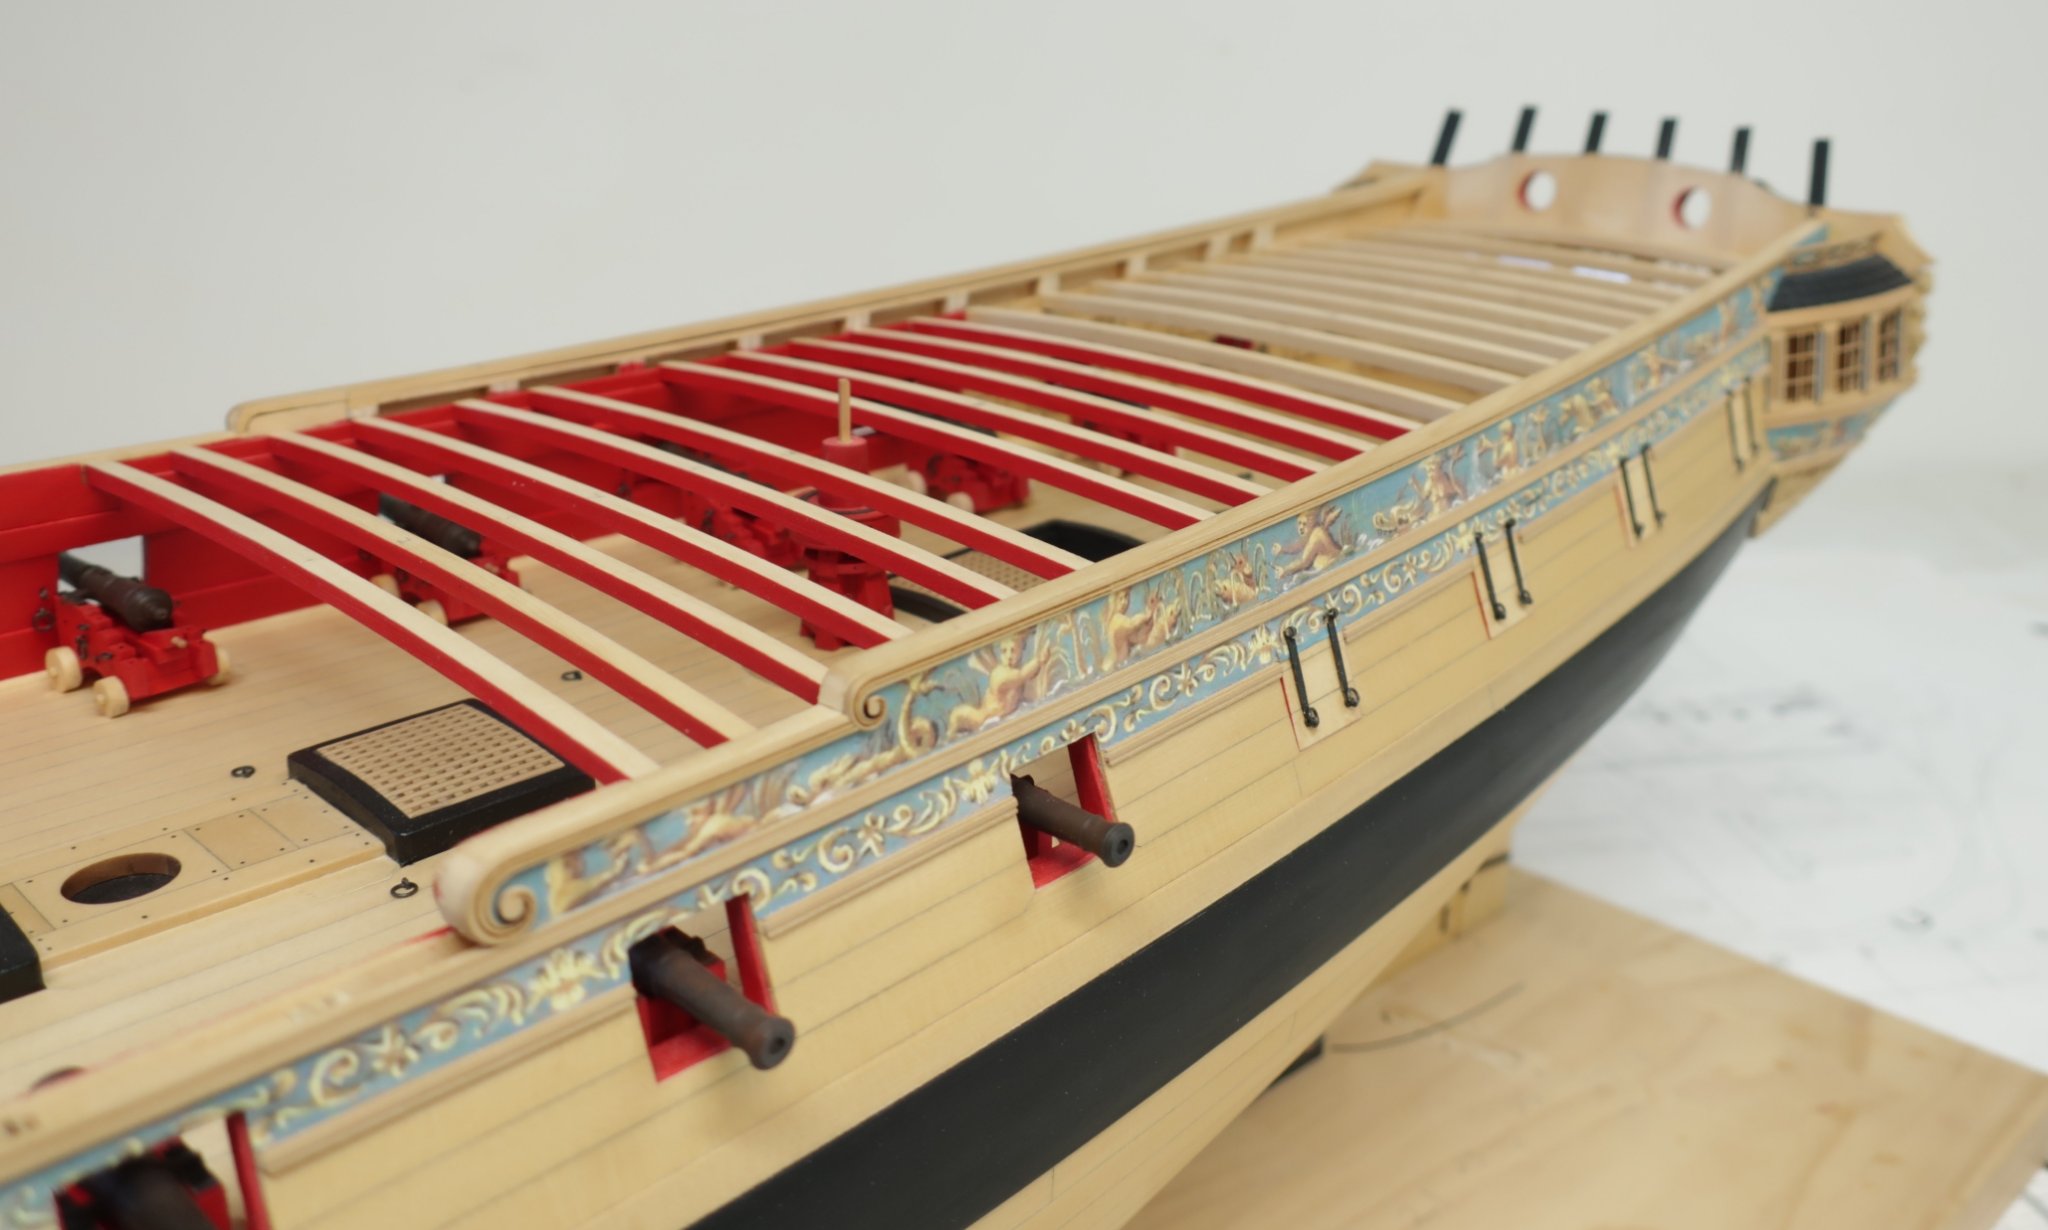
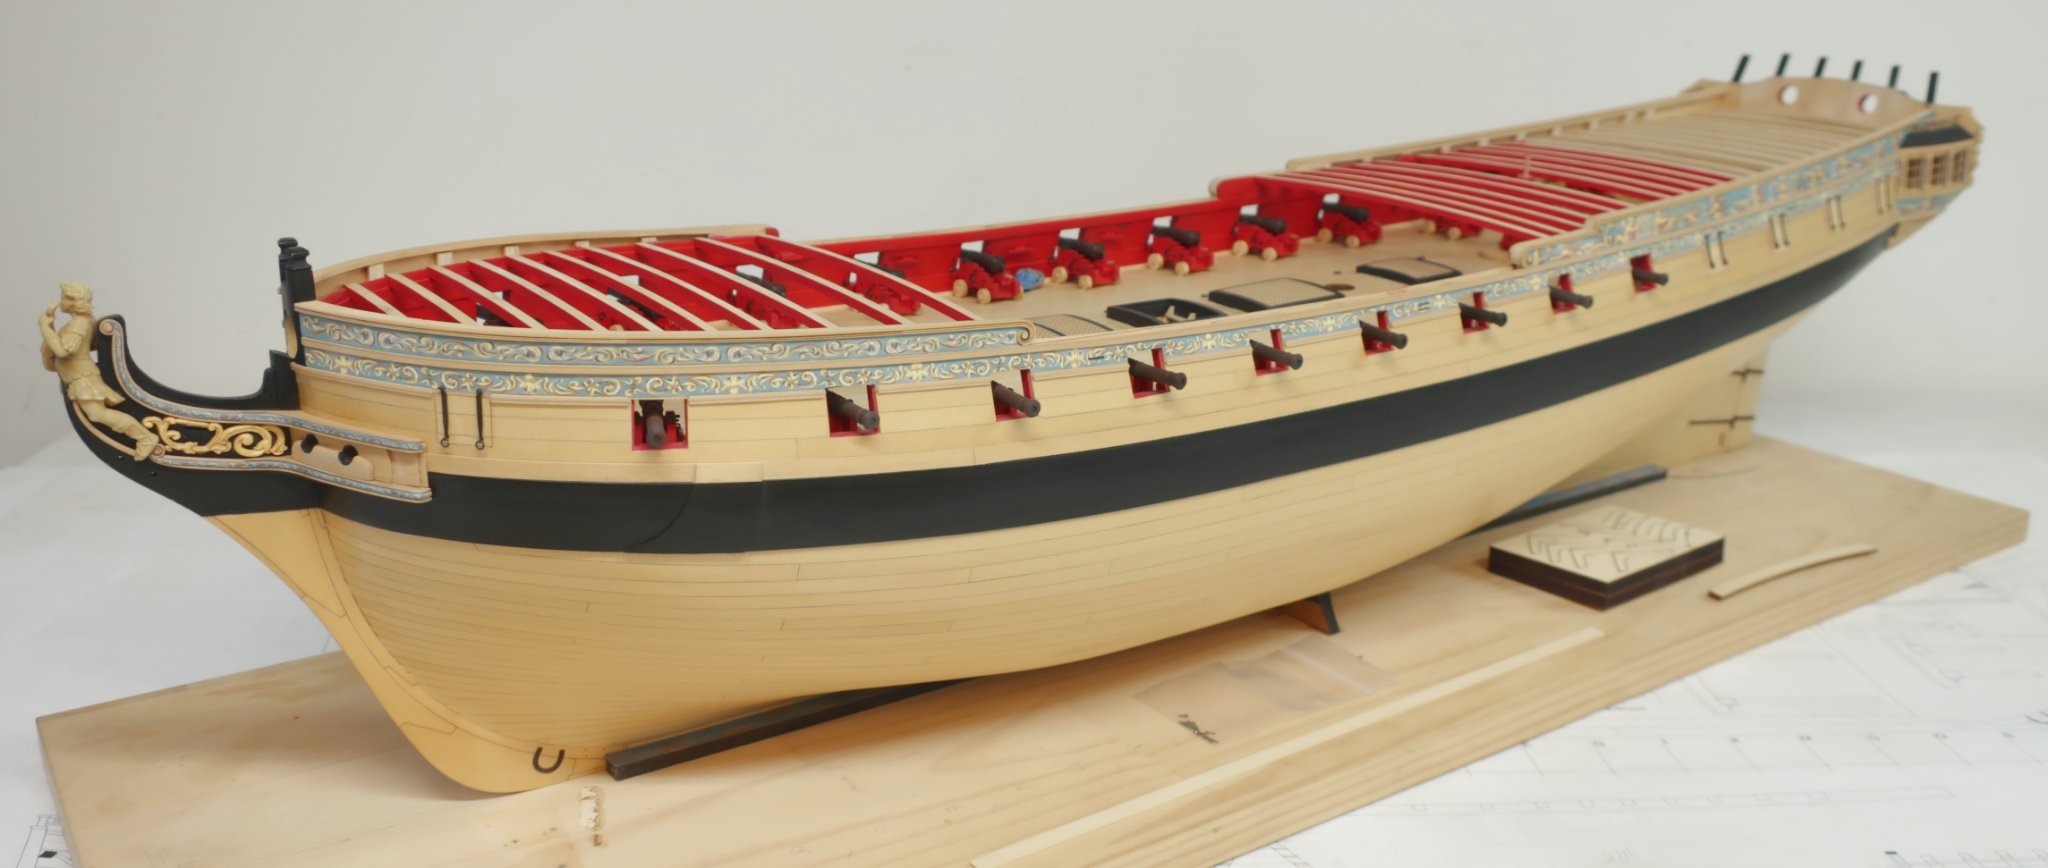
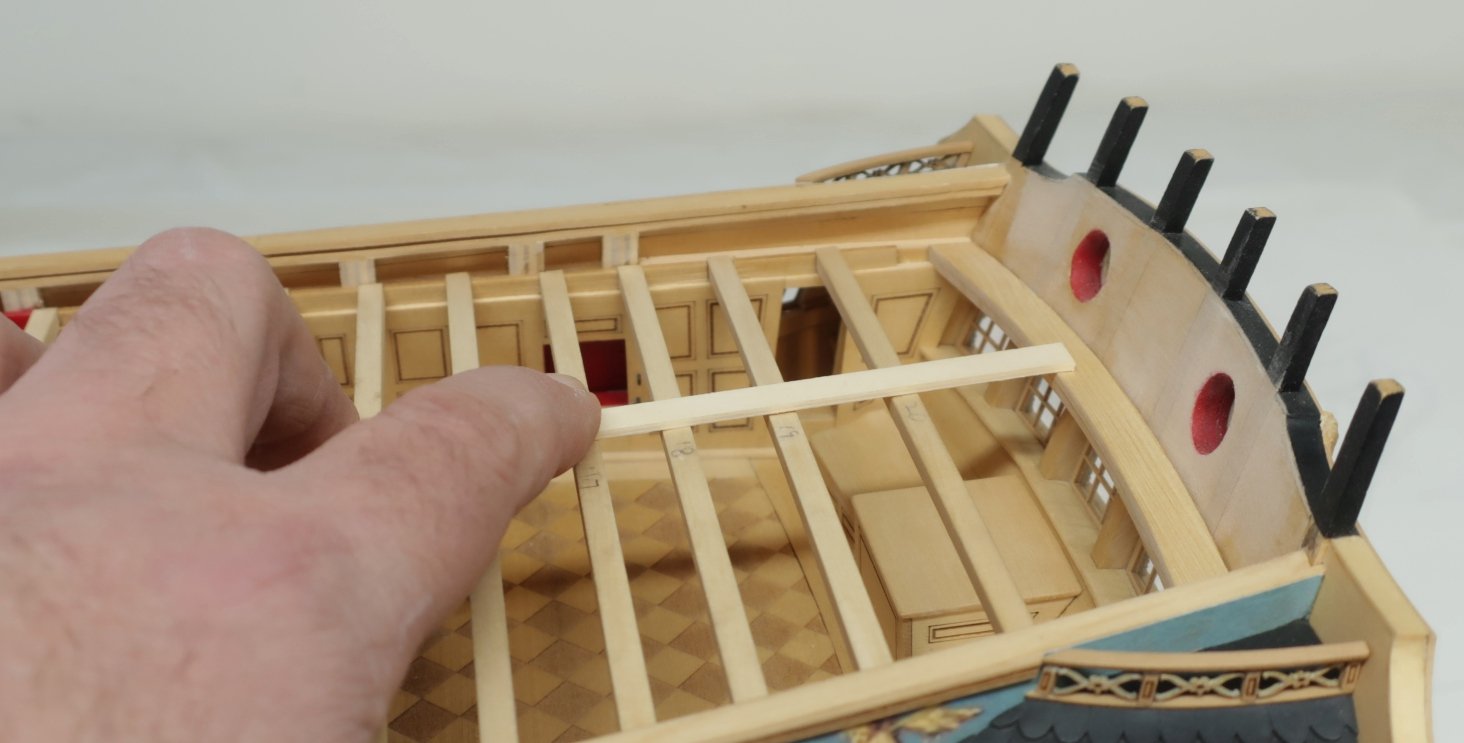
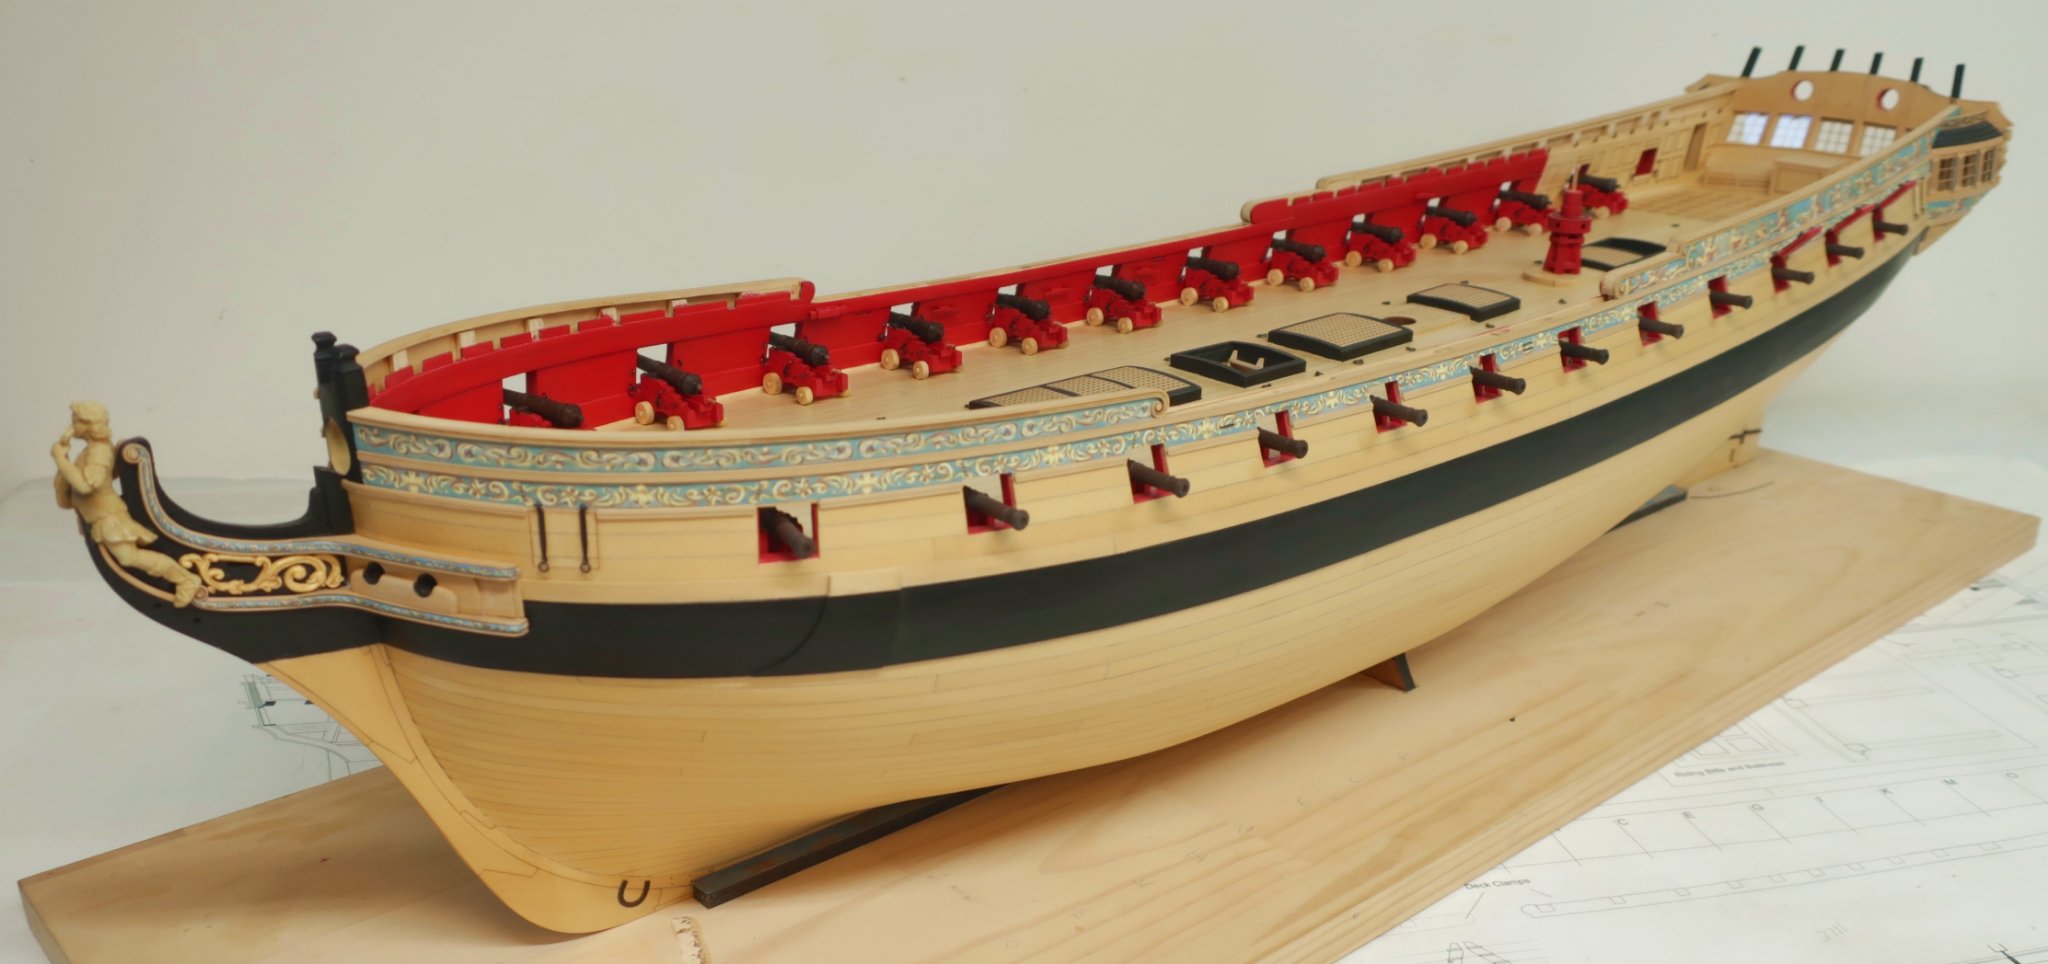
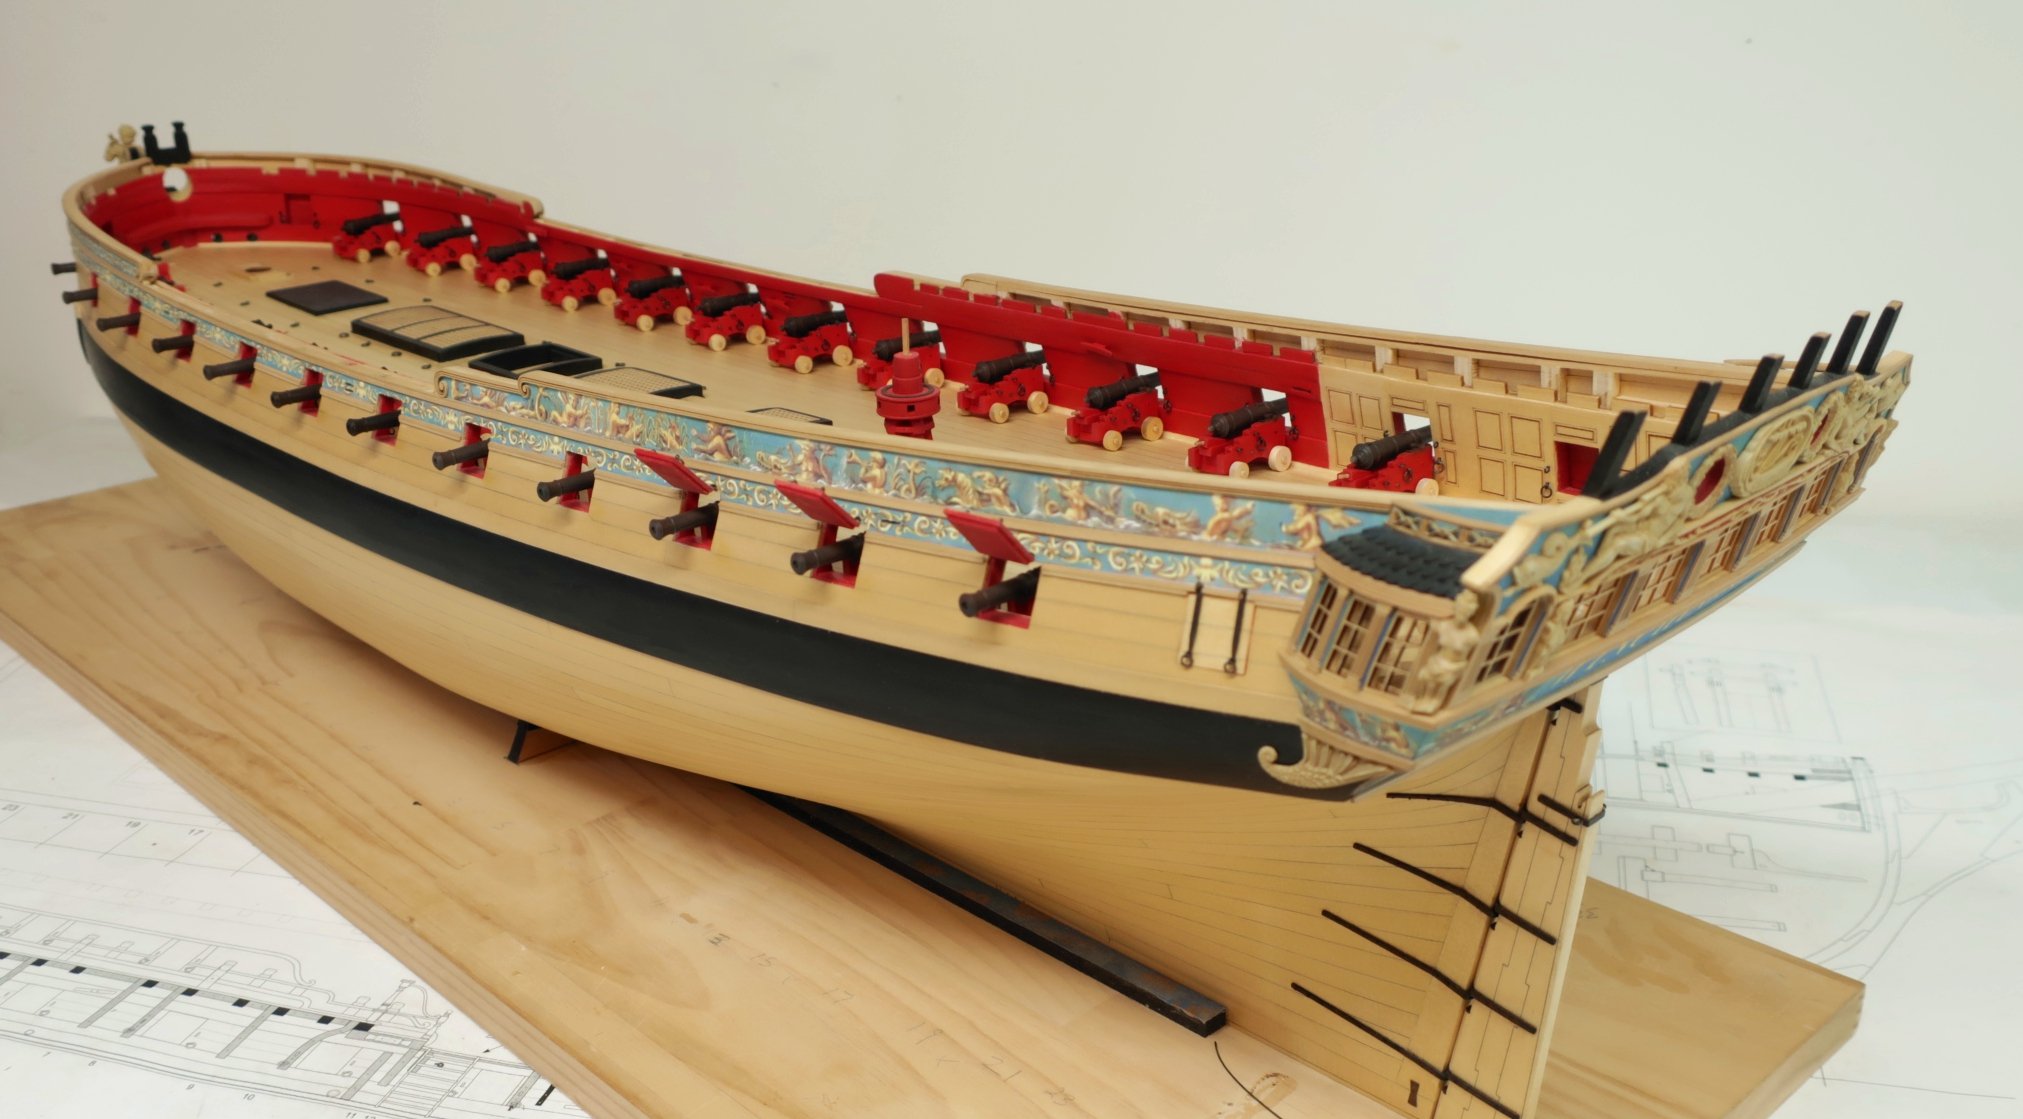
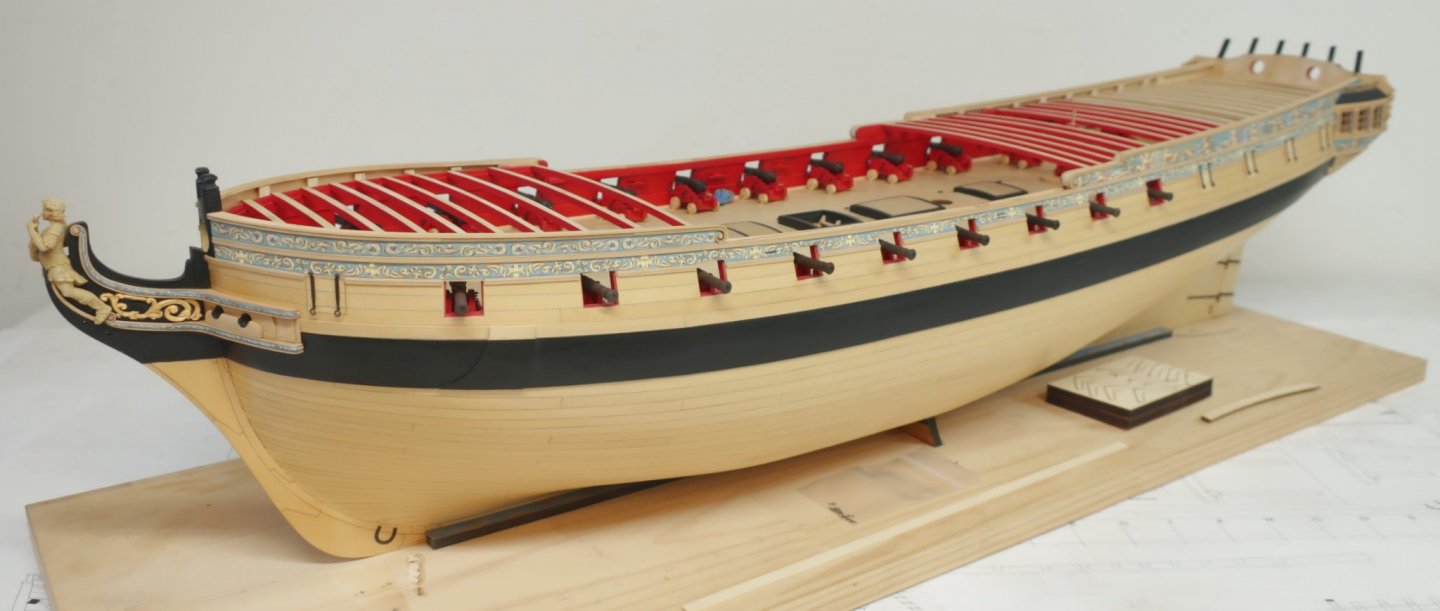
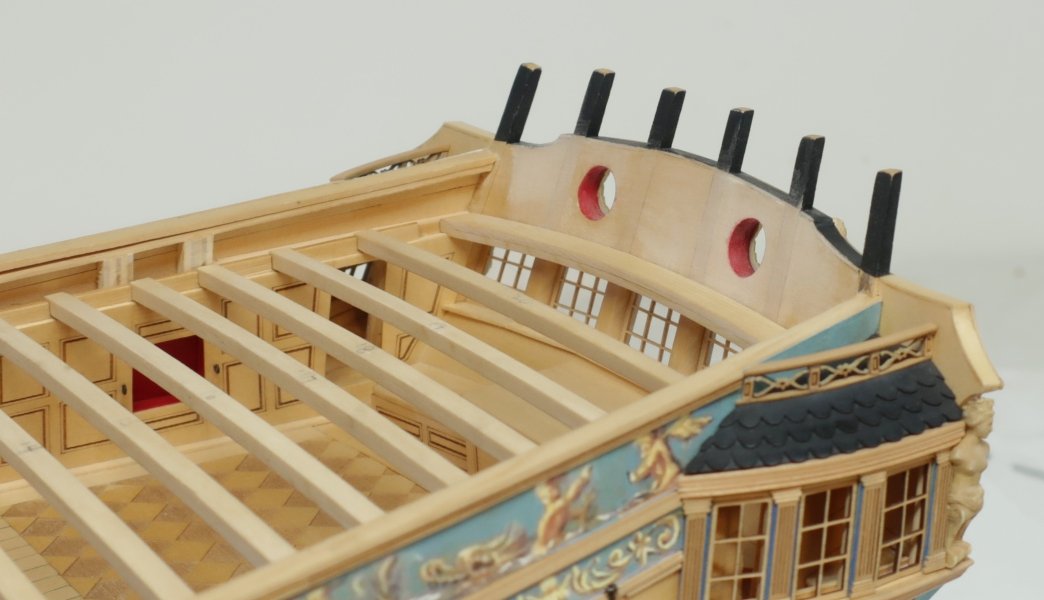
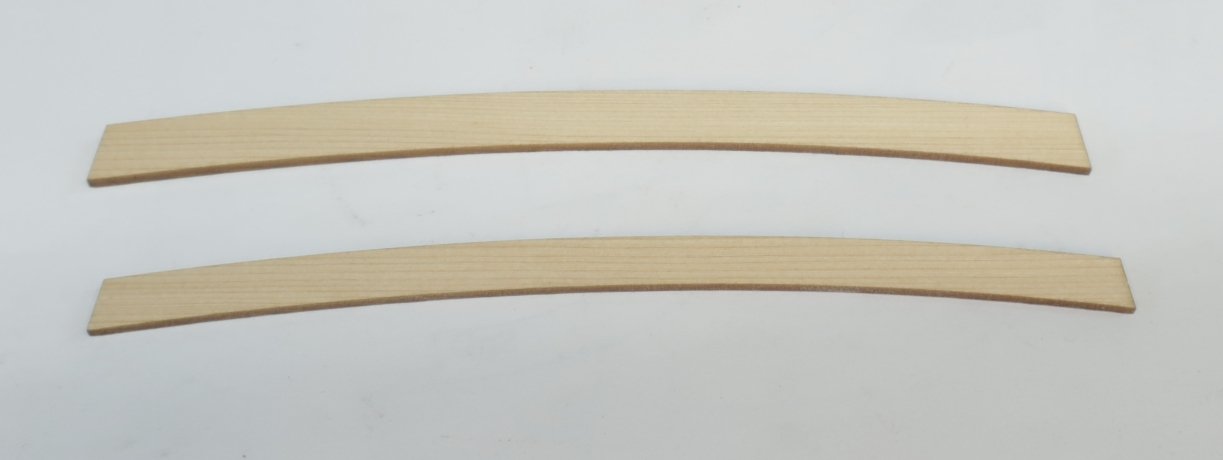
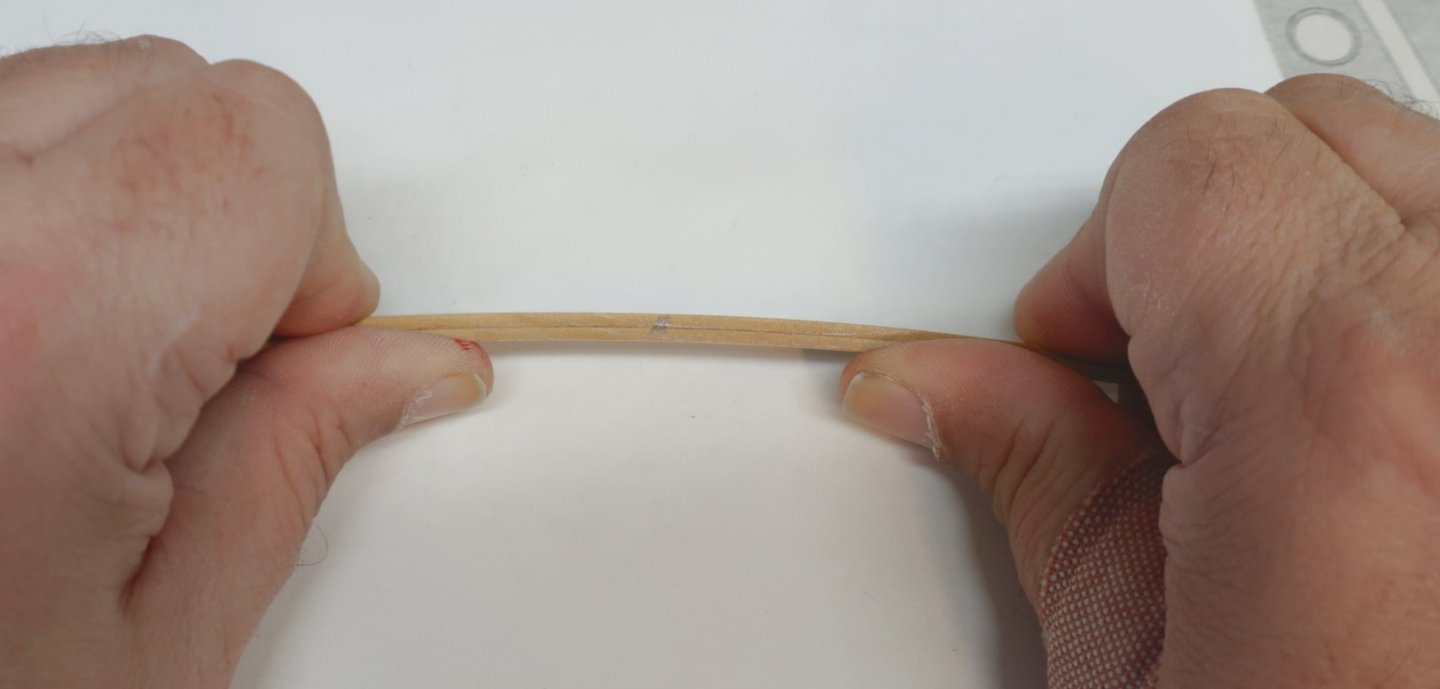
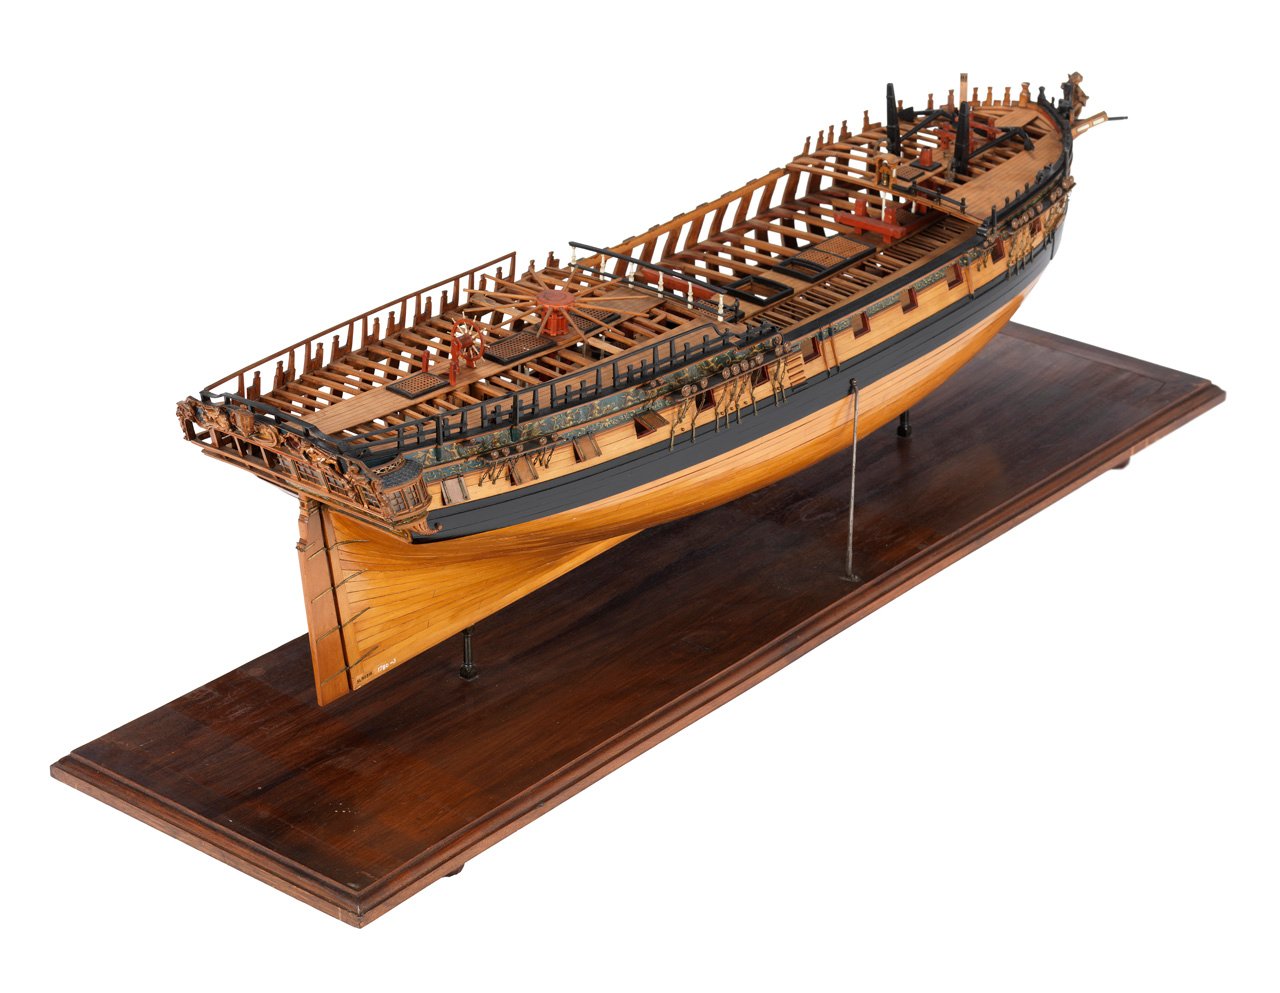
 Thank You guys... I didnt feel like rigging that one gun today but maybe this weekend. So I jumped right into chapter seven instead. I posted this picture earlier as a test for the deck beams. Thats the first step of this chapter. Sand the laser char off the tops of every beam. You dont even have to touch the bottoms of the beams because they will never be seen. You dont want to risk making them too thin. But this pic shows them all in place and left natural. I started at the waist and worked aft and did the same for the fcastle beams. I did this because if I cut one beam too short I could still use it further aft. So work the longest beams first. Cut them to length and test them in their respective slots. Number them as we wont be permanently positioning these for a while. In fact we will be removing them and testing them quite a lot depending on what fittings we are working on at that moment later. Here is an image of the same beams with the front and side faces painted red. This was common practice on those contemporary models. Its up to you. But this will allow you to paint the knees red as well. It will tie everything together nicely. Close up pf the qdeck beams. Notice how I left the beams with the cabin areas bright and natural which was also common practice. One of the benefits of not rigging the guns is they wont get in the way when you start doing other stuff. None of them are glued in yet so I can remove them and also close the port lids so I dont damage them. I want to get that last deck beam in that is up against the transom at the stern. This beam has the round up of the others but also conforms to the curvature of the transom. Its a tricky beam to make. The margin plank will sit on this leaving a rabbet at along the front edge to seat the deck planks in. It is laminated in two layers of laser cut parts. Here are the parts.....or layers. Note that one layer is narrower. This is the bottom layer. These layers were glued together and pre bent at the same time before the glue dried. I used thick slow setting CA for this. Hold the two layers together with the narrow one on the bottom. The forward edge of both layers is flush together. If you bend them slightly to match the round up or camber of the other deck beams ...while the glue sets, it will hold that shape with the camber once dry. It only takes a few seconds so work quickly. You dont have to bend them too much either. There is only a slight round up to these beams. You should do a dry run without glue to see how much pressure to apply to bend them while together. You wont have to apply too much pressure. I applied the CA and while both layers were together....I worked quickly to bend them to the same curve as the other deck beams. Once dry it was tested on the model. Also not that I did carve the notch really wide in the deck clamp because it made testing the beam easier. No worries on the gap you see because that will be covered up in the next step. You can see that I nailed the proper round up needed which can be tested by using a planking strip. Use this across the beams to test how well the plank sits on all of the beams including this last one. If you bent too much its OK....you will be able to bend the other way to lessen the round up. But try not to over bend it so that wont be necessary. Slide that planking strip port to starboard to see how well you did. The aft edge of this beam was also beveled to fit snug against the transom as you can see. This beam isnt glued in permanently yet but it will be very soon. and some pics of Amazon to show you guys again what I am shooting for......or similar.
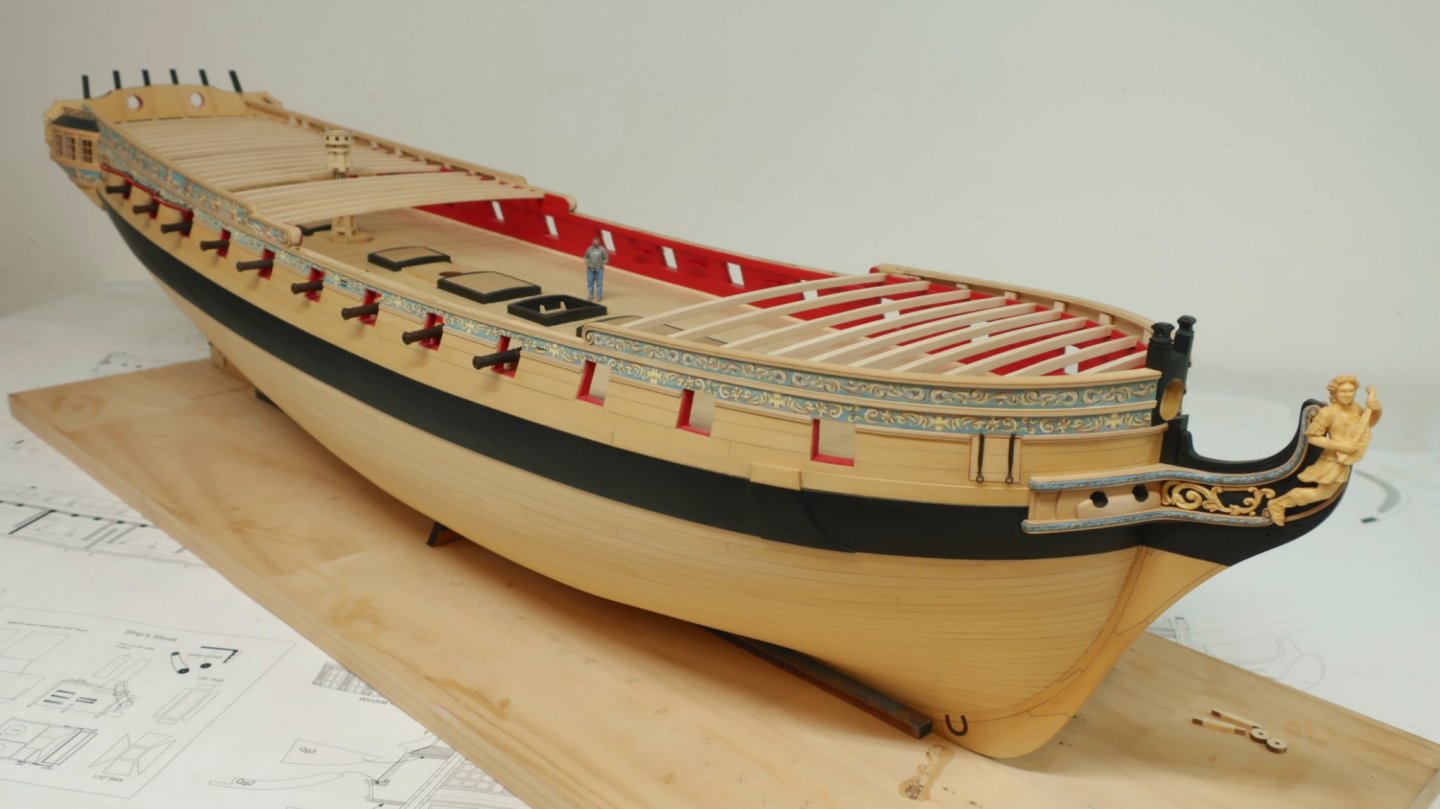


- 1,784 replies
-
- 26
-

-
- winchelsea
- Syren Ship Model Company
- (and 1 more)
-
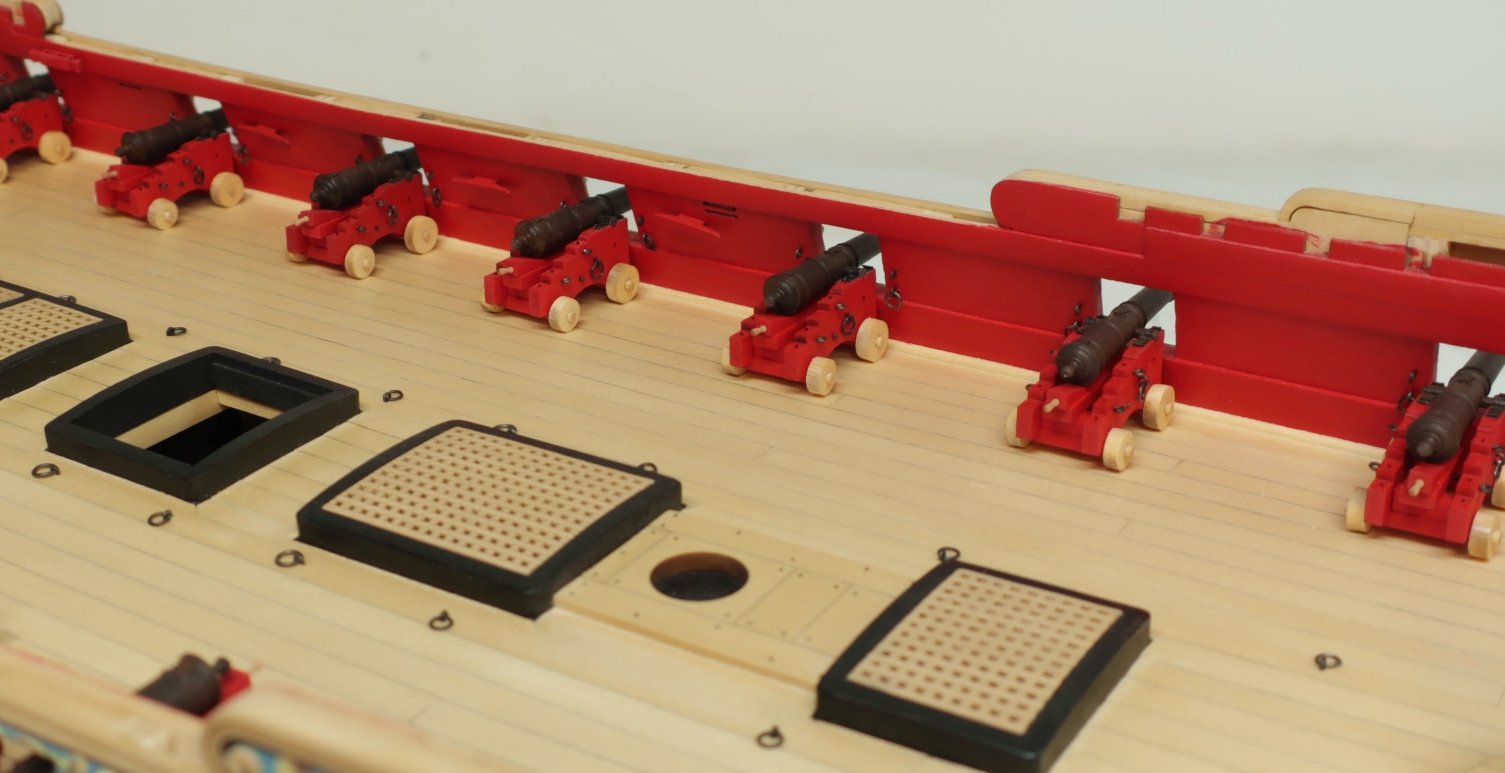
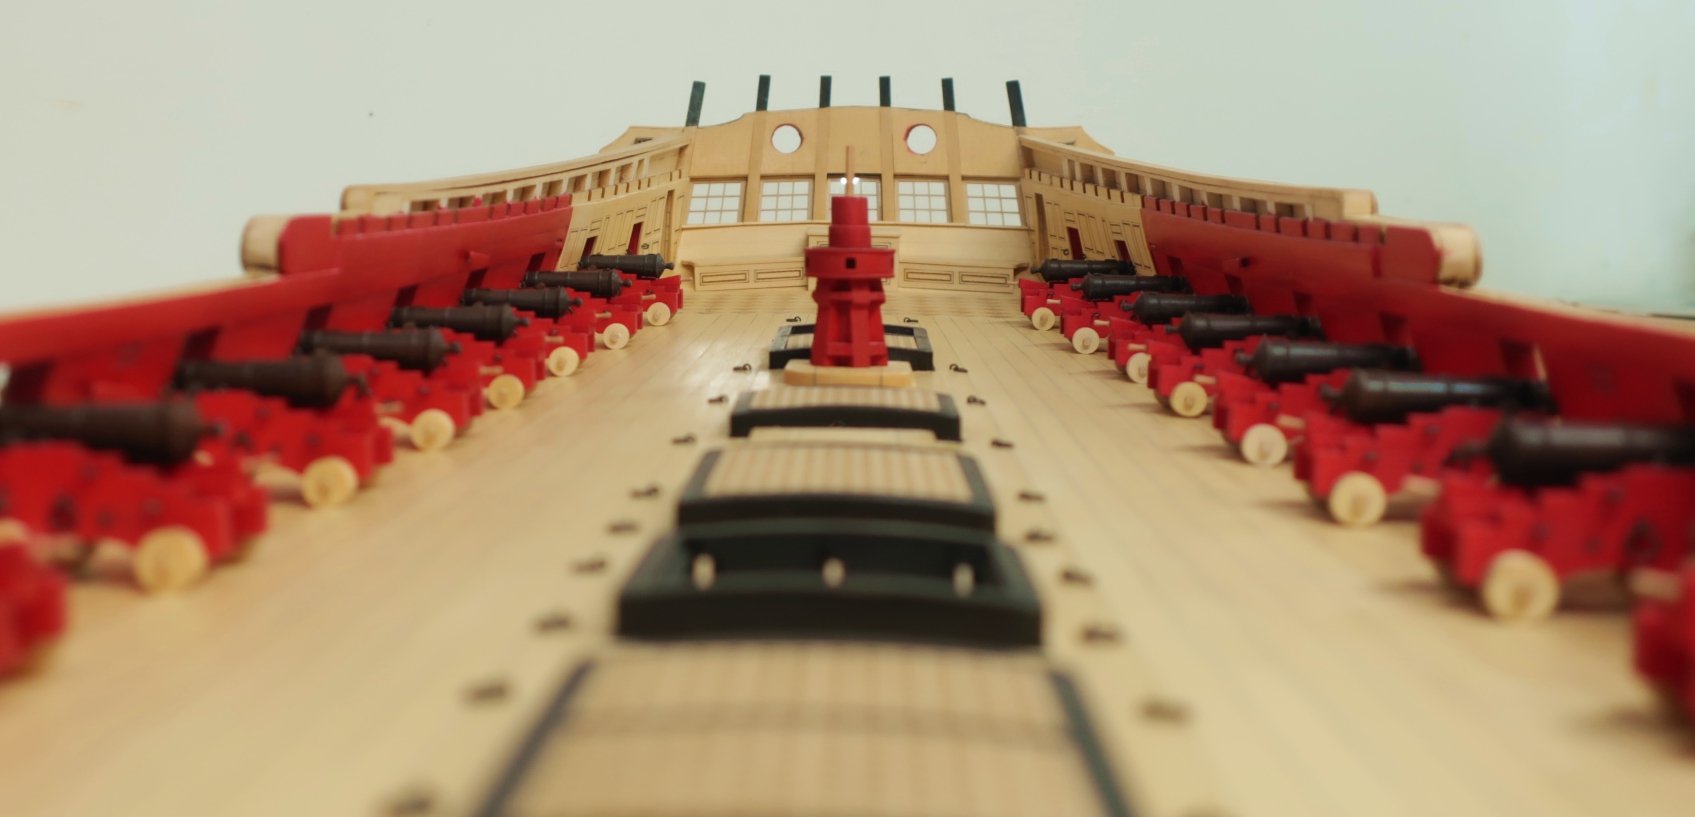
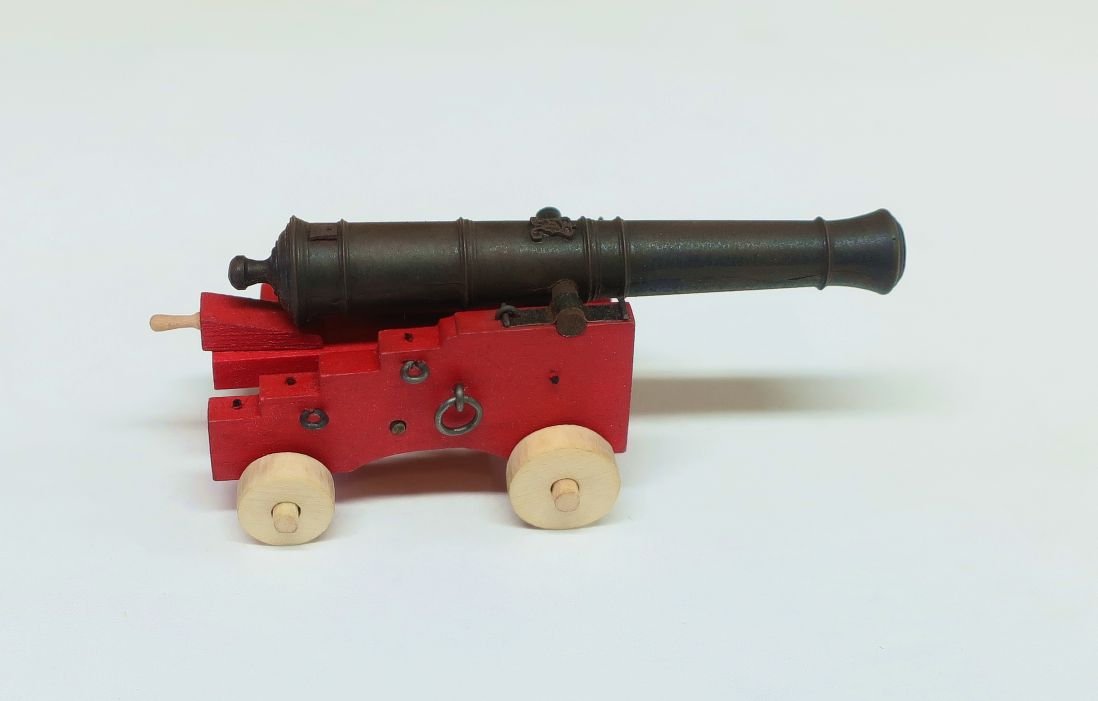
OK finally the guns are all done.....I just have to make one more eyebolt per gun carriage....for the inhaul. I always forget those until I take pictures. The corresponding eyebolts and split rings were added to the bulwarks. They were made the same as those for the gun carriages. I used 24 gauge black wire. The split rings were the same also using a 41 drill bit to make them. There are also eyebolts/split rings on deck for the carriages which were also made the same. BUT, if you examine the plans there are also 8 larger rings which need to be added. I added those at this time also. Those were made from 22 gauge wire using a #31 drill bit. You can see I forgot the one eyebolt on the back of each carriage....so I will add those at some point. Man that was a lot of eyebolts and split rings to make....sheesh!! Remember that I wont be rigging them so they will look just as you see them here. But the beauty of not rigging them means that I dont have to glue them into position permanently yet. I will wait in case removing them makes it easier to work on the other fittings in the next chapter. But if you are going to rig them....this would be the time. I will rig one just to explain how I do it but then I will take it all apart... Also remember that you wont be able to rig 4 of the guns yet because the eyebolts are actually located in the hanging knees. Those will be added early in the next chapter. So no worries there. Check the plans for those.... And the proverbial pic leaving the camera on deck facing aft showing all the guns....Next up I will rig that one cannon for you folks and start on chapter seven.


- 1,784 replies
-
- 45
-
-

-
- winchelsea
- Syren Ship Model Company
- (and 1 more)
-
Thank you...... A quick tip....try more twists and get it a bit tighter lay. Both with the initial twisting and final twisting.
-
Very nicely done!! 😀
-
Hows it going with your winnie? Any progress?
-
Set the print setup to “no scale” that will print them at 100% very strange indeed. I would see if someone else can print one out at a friends house or like was mentioned go to staples or something like that. Your printer seems screwed up a lot.
-
It was usually a canvas floor cover like a rug. But made from canvas like a heavy tarp. That looks great. I also want to know how you painted that so cleanly. chuck
-
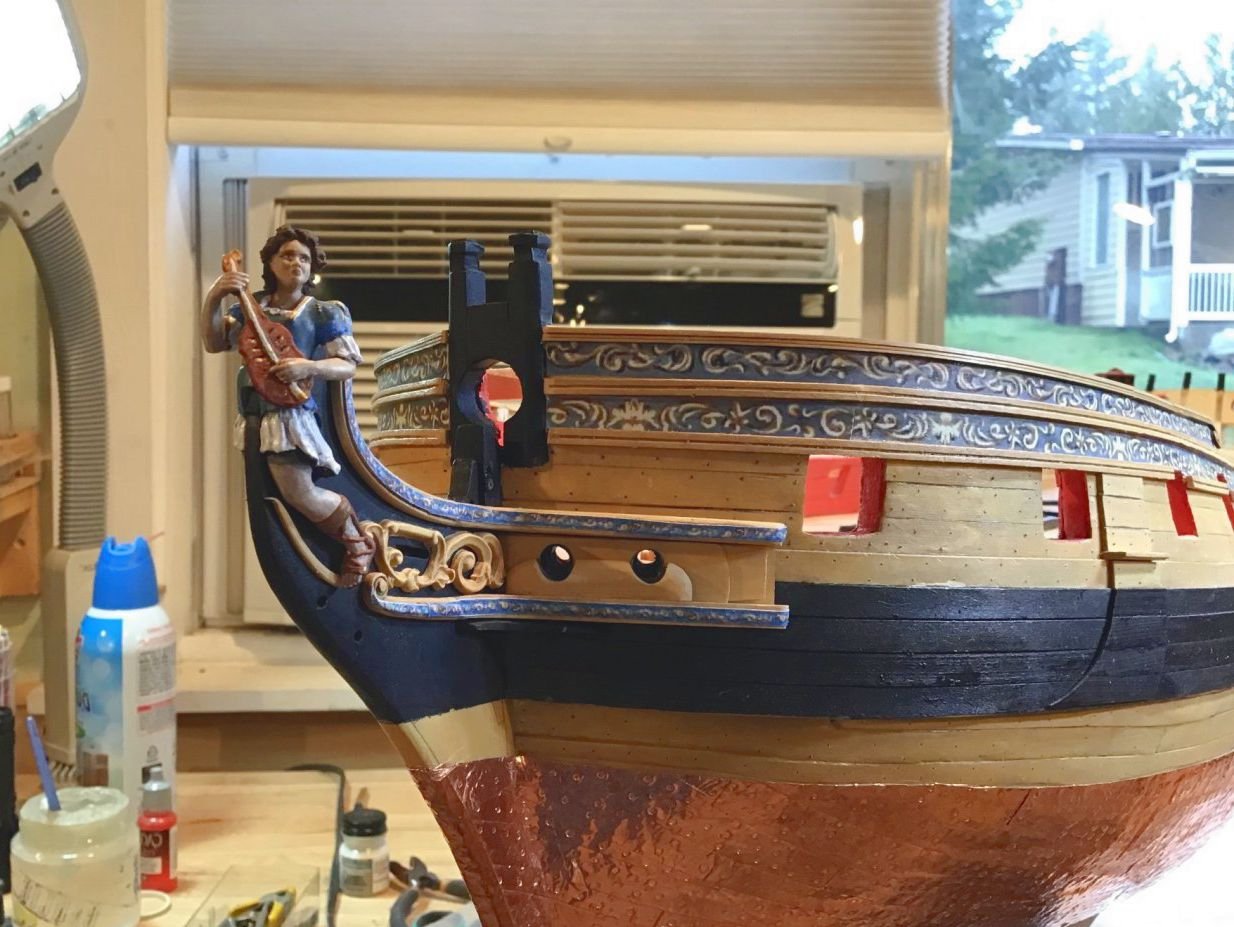
That looks great Jack.....wonderful work on the figureheads.
-
Carriage parts are now available in CHERRY to buy....... Just an FYI I am also happy to report I am part way through making my last batch of guns for my model. Yippie.
-
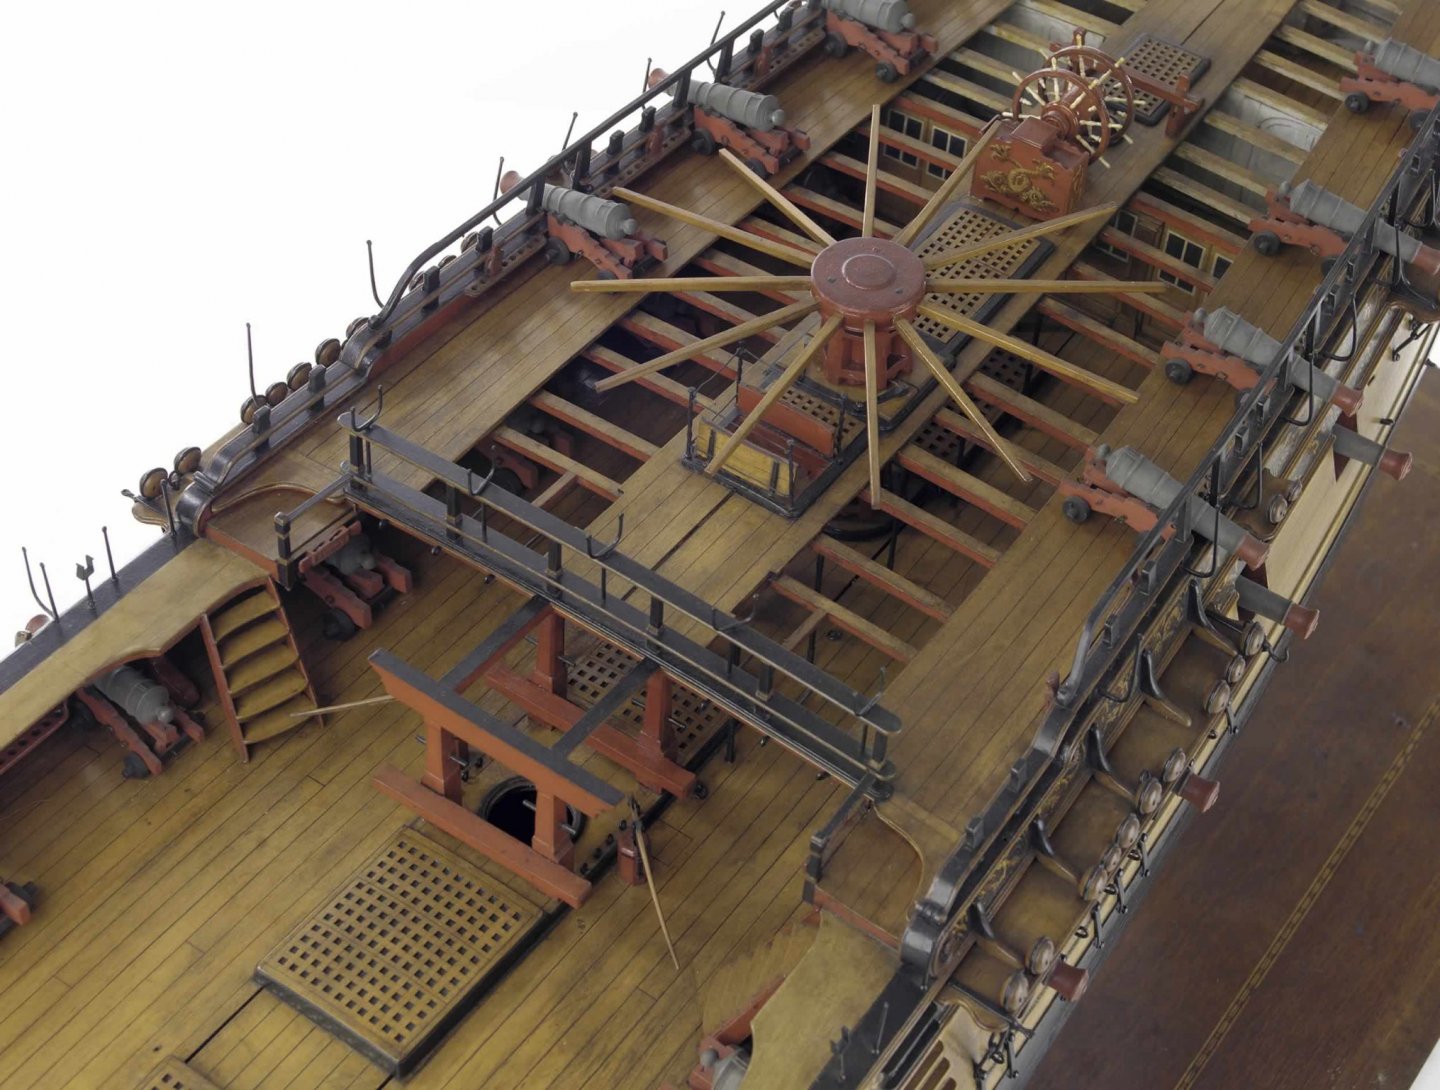
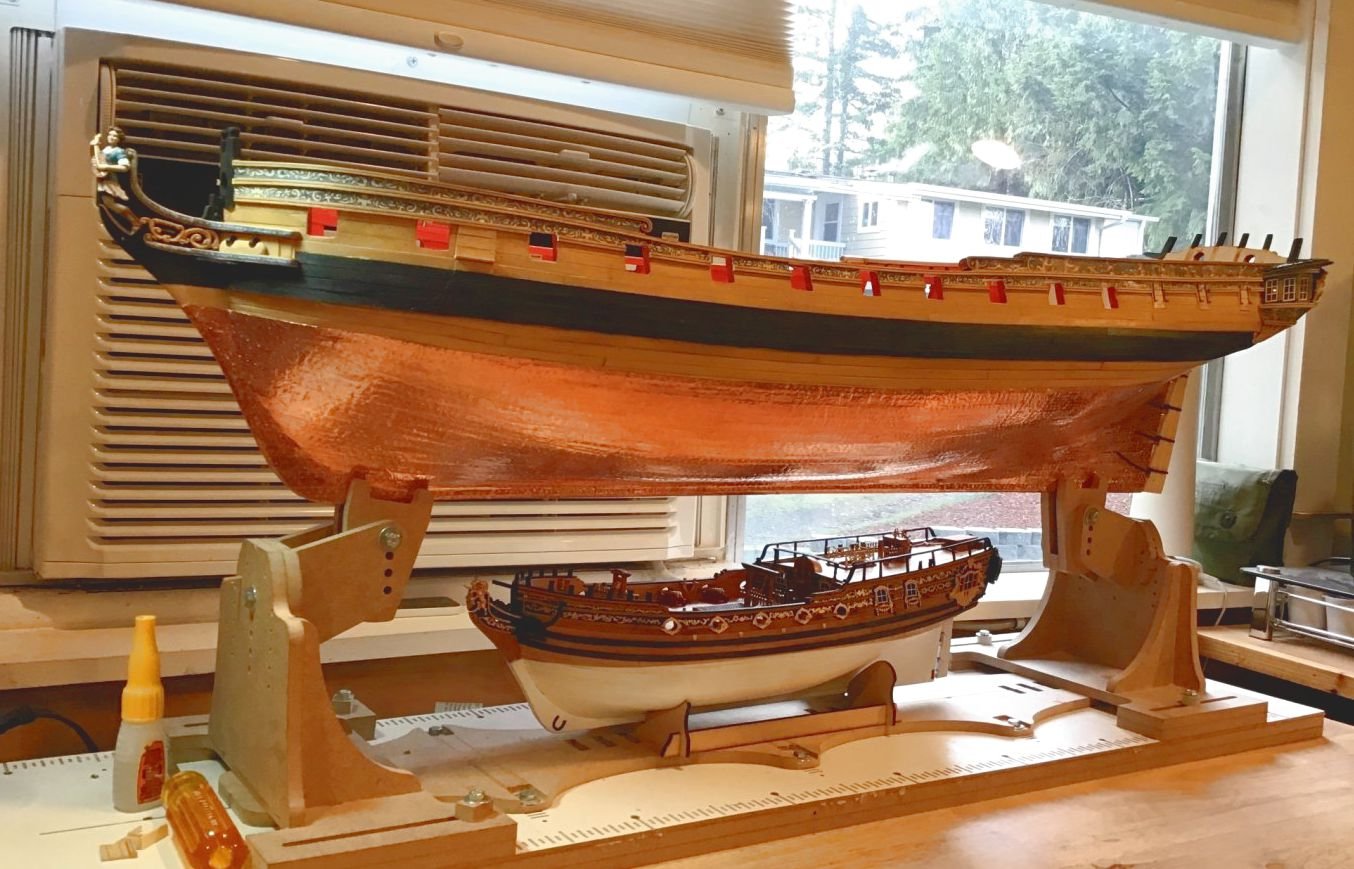
I dont believe so. Those deck beams were not as long and there wasnt a great weight on that deck with just a few guns and they were small guns also. I have looked and looked for so many contemporary sources. Here is another model where you can clearly see there are no knees back there. Chuck
- 1,784 replies
-
- 12
-
-
- winchelsea
- Syren Ship Model Company
- (and 1 more)
-
Is there any person building the Winnie that wont add the knees? As you can see above they wont be seen if you plank the upper decks with the two open "runs" like this below. But if as I suspect most if not all of you will add them anyway, I will bundle the laser cut parts for the deck beams with the knees and sell them together. If a decent number dont wish to add the knees then I will offer them separately so those folks wont have to pay the extra $$$ for the bundle and not use them. I will say however that it will be much easier for me to bundle these two items from a MFG standpoint. Cann all of those in the group who DO NOT wish to add the knees please speak up. If everyone does I will bundle them up.

-
Just an FYI Some of you may have noticed that some of the eye bolts on the bulwarks for the gun tackles are in fact secured to a hanging knee. Rather than being secured into the bulwarks. SO.....for chapter six, when we are installing the guns, we will also need to install some of the hanging knees. In order to do this I must prepare the laser cut parts for the deck beams and knees so that you guys can add them. I am working on that now. While waiting for these parts, I must also point out an error I made for the number of hanging knees and lodging knees on the Qdeck. Those many years ago I added hanging knees and lodging knees to all deck beams in the great cabin. This is not correct based on the contemporary model for the Winnie and other primary sources. Its a wonderful thing to have such a detailed example with the Winnie contemporary model. It actually shows all lodging knees..... So I have redrawn and corrected the knee and beam placements. You wont have to print this and could easily use this PDF as a guide for placement of all the knees. See this PDF attached. Its a nice handy reference guide with all knees identified and labeled which will correspond to the laser cut parts when I get them done. I have also added this to the downloads page. beams and knees.pdf Remember these knees are optional.....if you plank the qdeck like this below you wont see any of the knees.....so these laser cut parts will be made available separately along with the deck beams.... This way those who dont want to add them can save a few bucks. Also note the sides of the deck beams painted red....but not all of them. In the partitioned cabins they remain bright.
- 1,784 replies
-
- 13
-
-
- winchelsea
- Syren Ship Model Company
- (and 1 more)
-
Coming along nicely. Coamings are fine natural. They look good. The stove base is a bit of outlier though. That wasnt the practice at that time as far as I can tell. But it does look nice. Usually black slate or a metal slab for English ships. you will be so happy when the deck is planked. Its like making the guns...you just cant wait til its over.
-
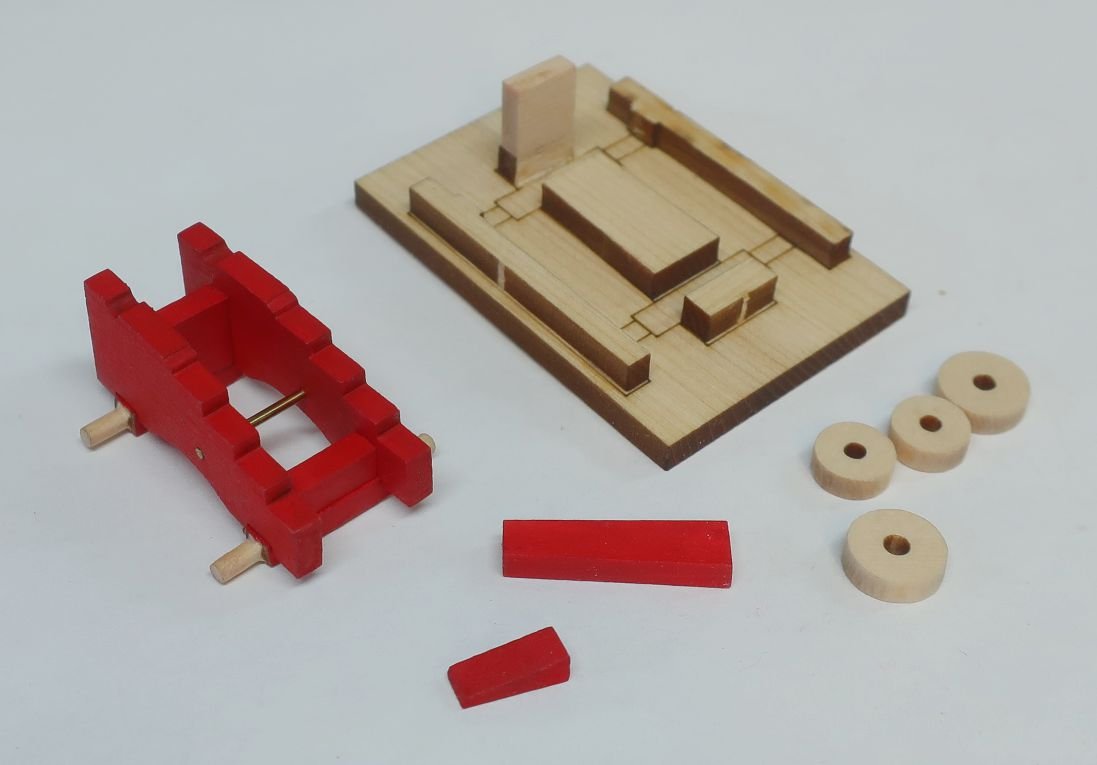
Just an FYI Cannon carriages for the gun deck are now available. These are the 1 15/16" carriages. They are sold 4 per pack. You will need 24 of them. The Cedar versions are now available. The resin cannon are also available. Chapter 6 will be just this....making and installing the gun deck cannon. This will take a while for everyone to do neatly. IMPORTANT: I will add the carriage jig for free when you buy these. But you must remind me by writing in the comments section of your order that you are a Winnie builder. Otherwise I wont know to add it to your package. I wont ship the jig by itself later so please dont forget to mention it in your order before check out. You will still need to get your own 28 and 24 gauge wire.....as well as 1mm brass rod to make these. You are buying the laser cut wood parts...... They are listed on my Winnie store page. Chuck
-
Polar is the way to go. You will be cursing birch when its time to sand.
-
It holds a real sharp edge when you need it to. Alaskan Yellow Cedar works very well for our purposes.
-
Very nice work.....its looking great. Just remember that the wood is soft so be careful not to dent and scratch it. You can protect the finished stem when its all done with some painters tape.
-
Indeed taking your time and sanding carefully is the trick. Rushing will never produce a tight fit with those pieces. But regardless your capstan looks really good. Use of machines to sand and prep those parts is definitely overkill. Just take your time and try to not let impatience take hold of you. Just a light sanding by hand to remove the char with a sanding stick will ensure no over-sanding. Chuck
- 8 replies
-
- 5
-
-
- syren chuck
- winchelsea
- (and 1 more)
-
Wonderful.....yes you will have to flip and resave those images... You did a great job on the cheeks and head. That looks great. So much better than any kit project on the market.
- 105 replies
-
- 8
-
-
- winchelsea
- Syren Ship Model Company
- (and 1 more)
-
Looking really good...you are making quick work of this little kit. Well done. 😃
- 185 replies
-
- 2
-
-
- queen anne barge
- Syren Ship Model Company
- (and 1 more)
-
Yes.....that is how it will work. Just one hole.....
- 1,784 replies
-
- 5
-
-
- winchelsea
- Syren Ship Model Company
- (and 1 more)
-
Thats not my thing.....but you could. The ring would have been just bolted to the drum. Chuck
- 8 replies
-
- 1
-
-
- syren chuck
- winchelsea
- (and 1 more)