HOLIDAY DONATION DRIVE - SUPPORT MSW - DO YOUR PART TO KEEP THIS GREAT FORUM GOING! (Only 75 donations so far out of 49,000 members - C'mon guys!)
×


Chuck
-
Posts
9,673 -
Joined
-
Last visited
Content Type
Profiles
Forums
Gallery
Events
Everything posted by Chuck
-
 Under the quarter deck there are six per side including one that is curved or shifted around a gun port.
- 1,784 replies
-
- 2
-

-
- winchelsea
- Syren Ship Model Company
- (and 1 more)
-
Thats up to you...they wont be seen at all so its a bit of a waste of time for my needs. But I see folks adding bolts for everything. I am not sure if the beams were bolted themselves or if the knees are bolted and thus keep the deck beams in position. That is something I would read up on in the Full Framed Model books if I were to add those details. Chuck
- 1,784 replies
-
- 4
-
-
- winchelsea
- Syren Ship Model Company
- (and 1 more)
-
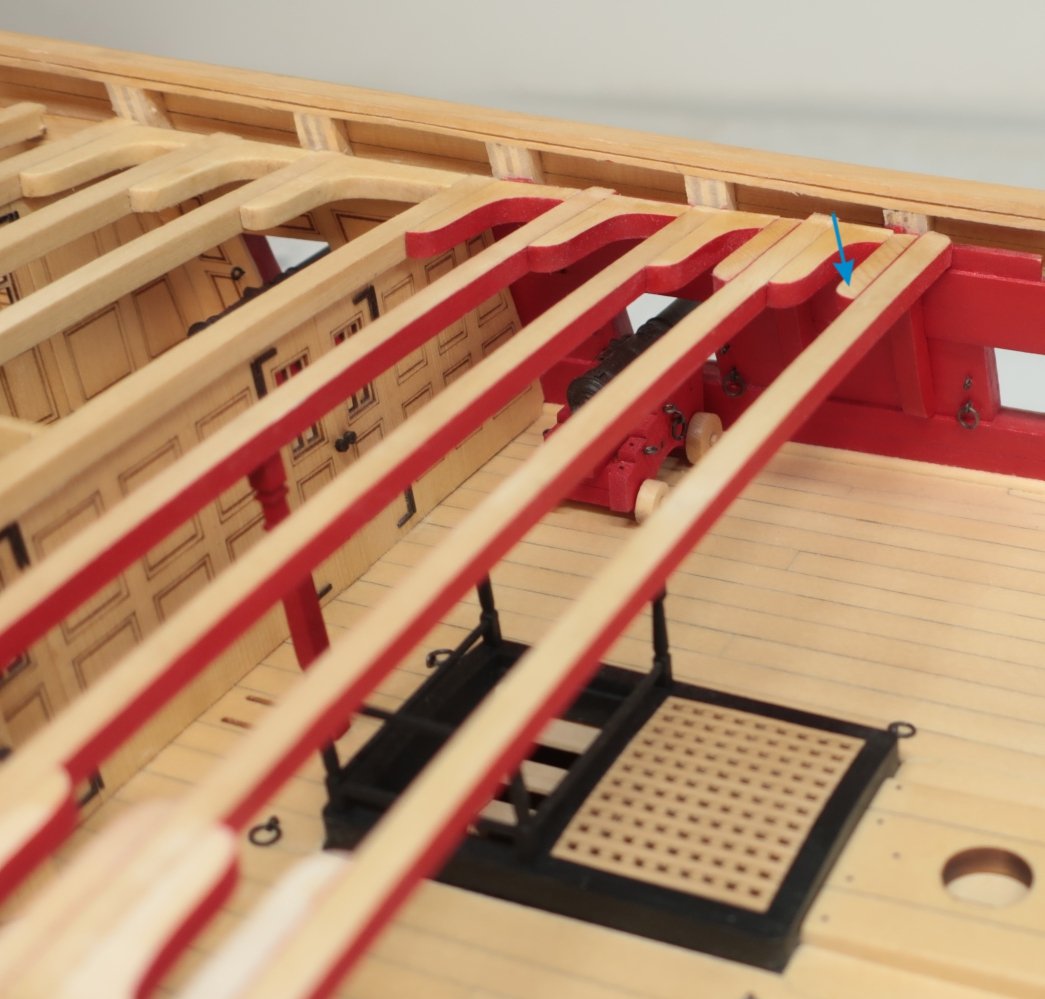
Thank You... The hanging knees are laser cut just like the lodging knees. BUT you have considerably more shaping to do. Yes you must tweak it to fit snug against the bulwarks while siting against the deck beam. But there is more to it. Everyone has the deck clamp along the bulwarks but it may be a different height or even width on everyone's model. So the knee is laser cut without any notch for the deck clamp. You must temporarily place the deck beam in position so you can hold the knee in place to test its fit. Then mark where the deck clamp should be so you can file the notch in the hanging knee. This will allow the knee to sit flush against the bulwarks. The pic below shows the next two hanging knees for this deck beam. I filed those notched to fit around the deck clamp. This required a lot of frequent testing and re-testing for a tight fit. Then I painted it red but kept the top natural with a clean unpainted area. NOTE: You also have to round off the inboard end which you can see as indicated by the blue arrow in the last photo. Do this ahead of time as well. You can add bolts if you want before gluing the knees in position but they will hardly be seen at all. The hanging knee is glued against the aft side of the beam as you can see. I added two on each side so far. The deck beam was only glued in position just before adding these pre-shaped knees. You can see the lodging knee sitting on the deck beams ready to be glued into position next. Note that blue arrow which shows how you should round off the end of the hanging knee so it mirrors the end of the lodging knee I just place behind it. I hope that makes sense. I will now move forward and place another deck beam and shape the lodging or hanging knees for it. I proceed to work one beam at a time after the deck fittings are finished below them. Slowly I am working may way forward to complete the quarter deck framing. Any questions on the knees.


- 1,784 replies
-
- 26
-
-
- winchelsea
- Syren Ship Model Company
- (and 1 more)
-
Looks good. Dont use a stealer. Use a wider strip. Cut it from a 3/64” x 4” sheet if you have to. That would ruin the look of an outstanding planking job.
-
Where did you get those oarsman? They look like a pretty perfect fit for the model. All you would need is a queen and helmsman. I looked all over for those when I built it. Chuck
-
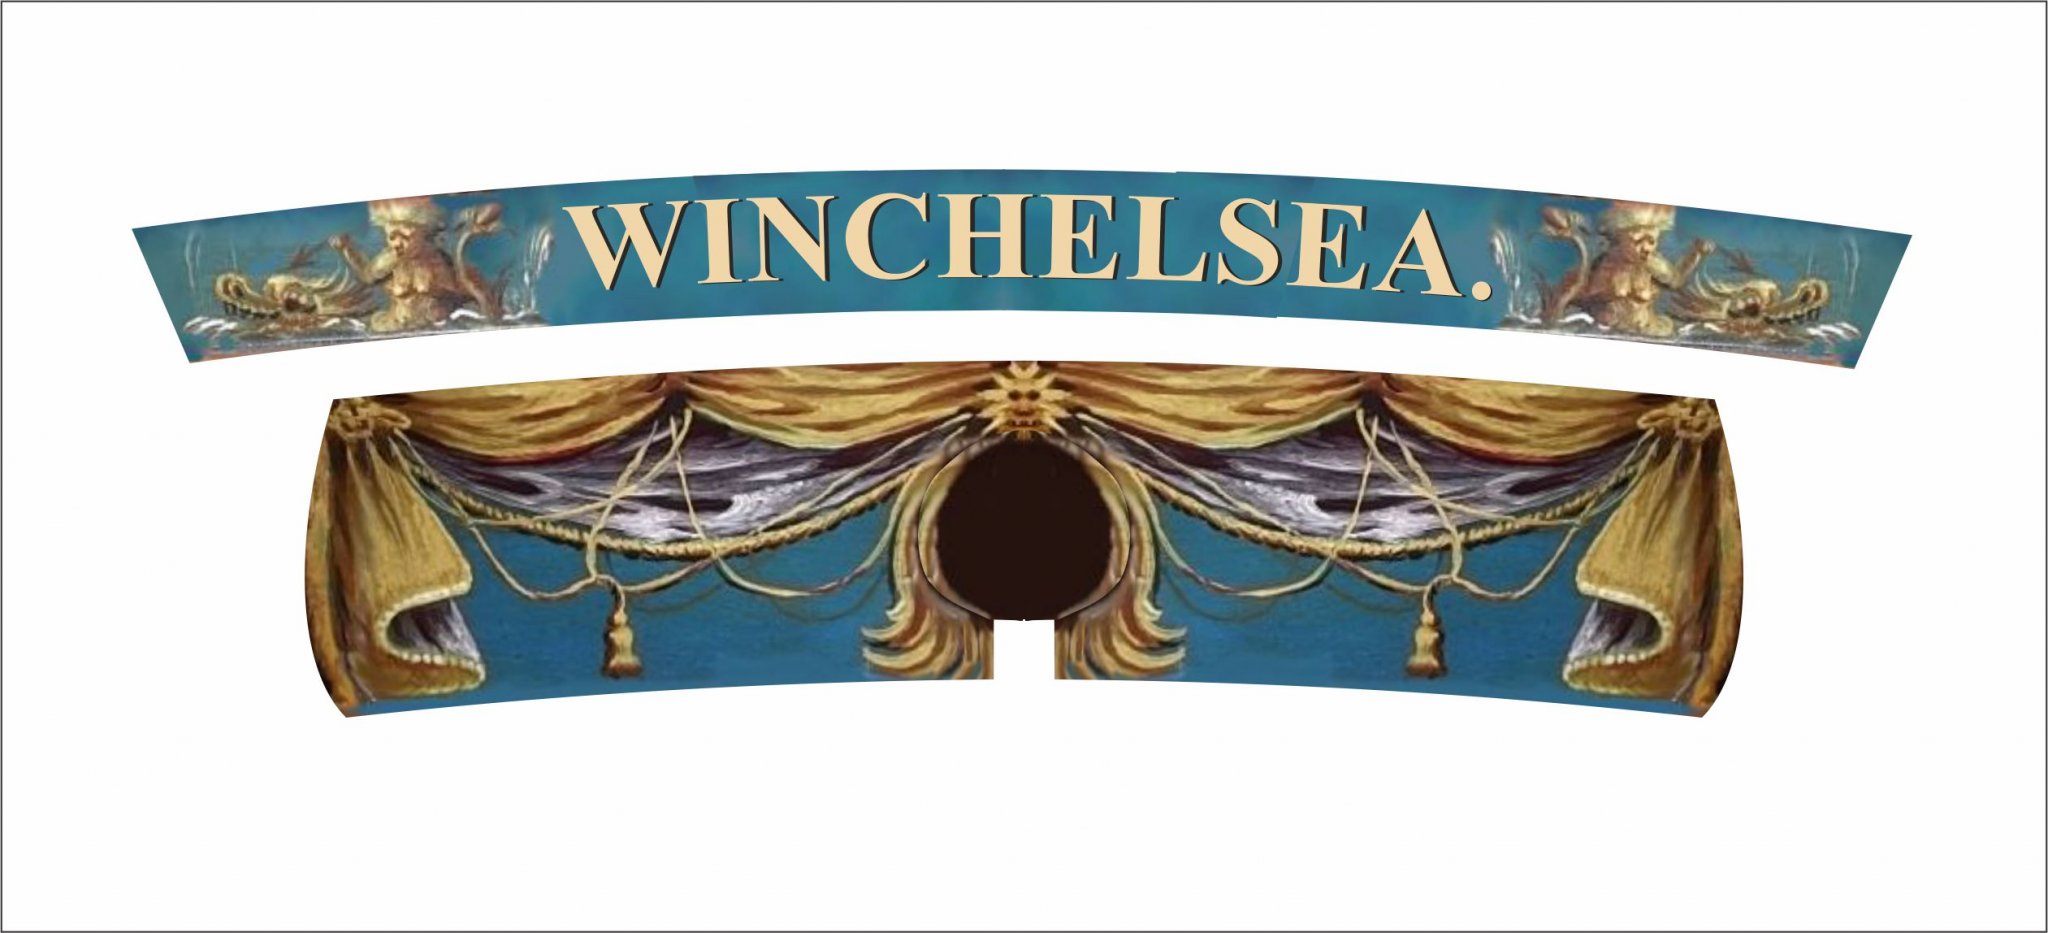
Frieze painting techniques
Chuck replied to allanyed's topic in Building, Framing, Planking and plating a ships hull and deck
For me....the best way to go is to paint and print. Paint and prepare the frieze off the model on any paper. Then scan it and make adjustments in photoshop. If a pattern repeats this is very easy to cut and paste. Inkjet printing inks have gotten very sophisticated. But all claims aside only time will tell. But many of the larger and more advanced photo printing services claim to UV protecting dyes they use to print their photos and do so on archival paper. You can recreate this in your home but its far cheaper to just upload your frieze and have these services peint them on archival paper. In addition, for a second layer of protection, spray the print with UV protective fixative. Many are now made specifically for photo prints to prevent fading. Lastly....when you case up your model, use UV protective glass. With these three layers of protection, some photographers claim your prints will last 100 years and remain vibrant like the day they were first printed. And finally, dont display your model in full sun or in front of a window. Using paper off the model and printing is great but their is no substitute for seeing the brush work from the original painting on a model if done neatly. Therefore after spraying with a fixative, one can actually repaint some areas of the printout to give the feel of an original painting. Sort of like a paint by numbers after printing it. You have to do the work twice but painting over a printout that is scaled and printed to fit perfectly makes life a lot easier.....on archival paper. and printed and glued on the model.... The contemporary model it was inspired by...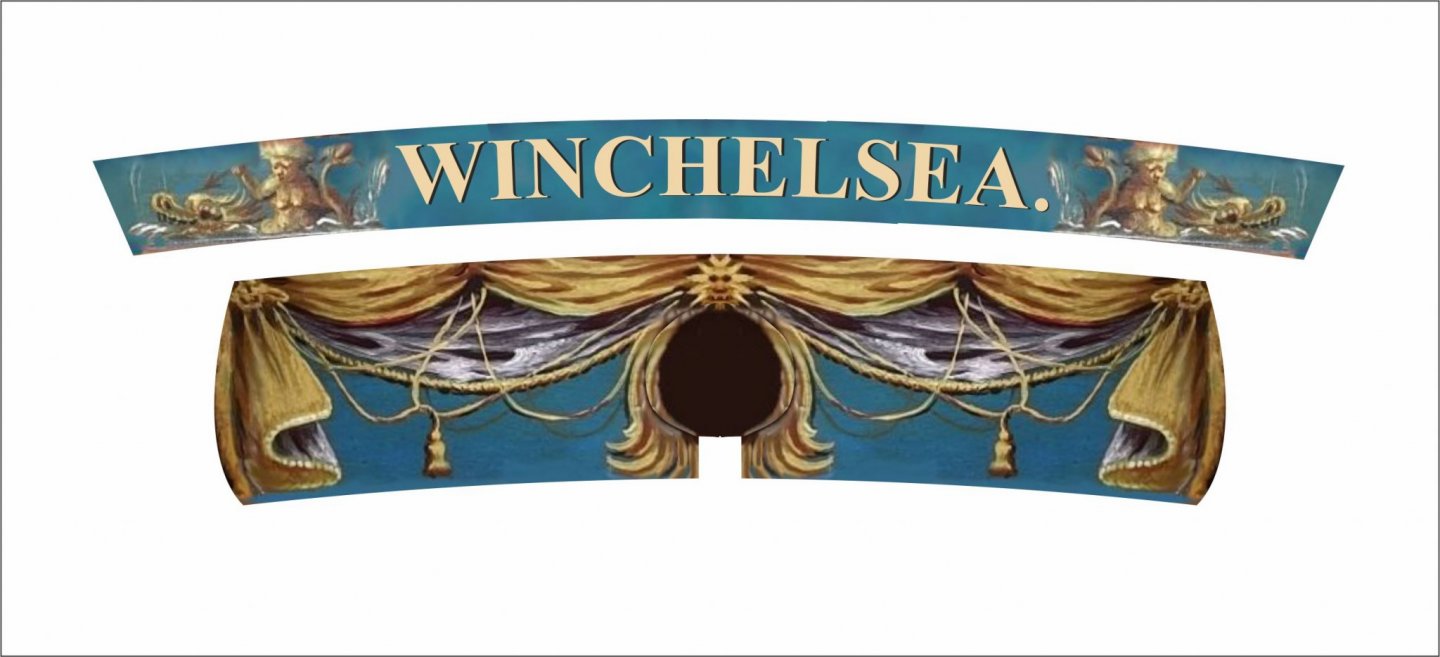
- 18 replies
-
- 15
-
-
Beautiful work and glad to see their will be no more anxious moments on this project. 😉
- 433 replies
-
- 5
-
-
- open boat
- small boat
- (and 1 more)
-
The Ontario is just $500 if you buy direct from the MFG. Shipping wont cost you $400. It all depends on how much the kit is marked up by a distributor and what the wholesale cost it. Remember too that the Cheerful isnt a kit. You will need a table saw to rip your own planks which reduces the cost of parts. All told about $500 rigged for Cheerful also. In addition you need to look at the wood types. Niagara is all basswood which is very cheap wood. Better woods like Yellow cedar and boxwood used for Cheerful will add costs. Lots of it.... Shop around for prices.....and consider the quality of the contents. Also check the build logs here for those kits to see if it is well designed and made of good materials. What are castings like? Good quality resin castings.....brass turned guns or awful white metal castings. Lots to consider beyond size. Chuck
- 34 replies
-
- 14
-
-
Third time is a charm. I redid them a few times to add a whole bunch of detail filks would need. I think they are good to go now. Hours can easily be spent in prep work like this before and sawdust starts being made again.
- 1,784 replies
-
- 7
-
-
- winchelsea
- Syren Ship Model Company
- (and 1 more)
-
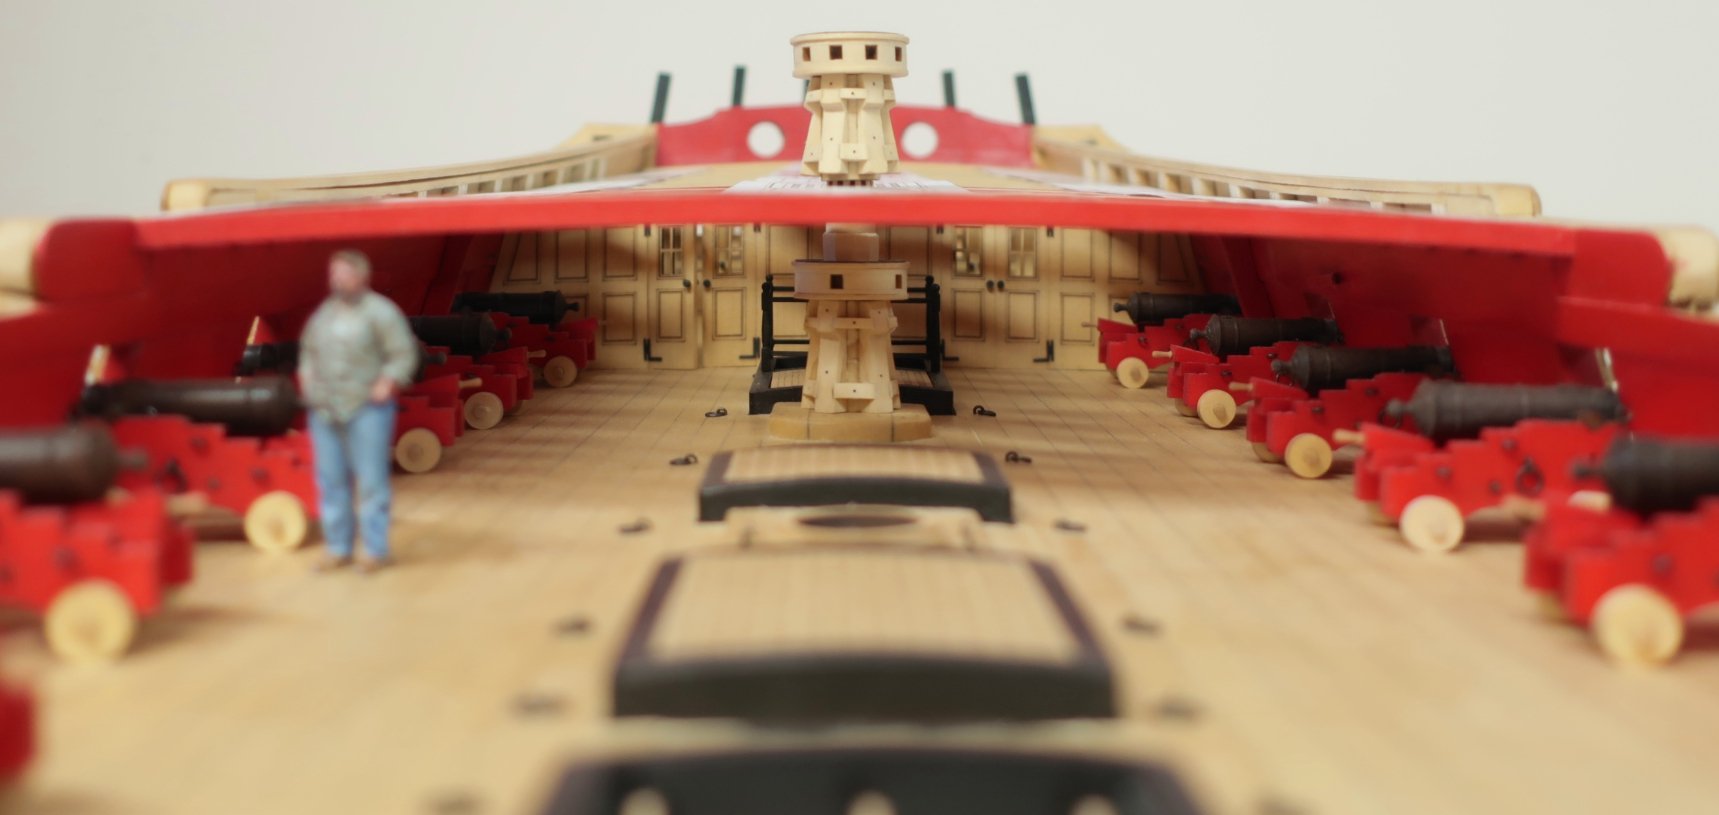
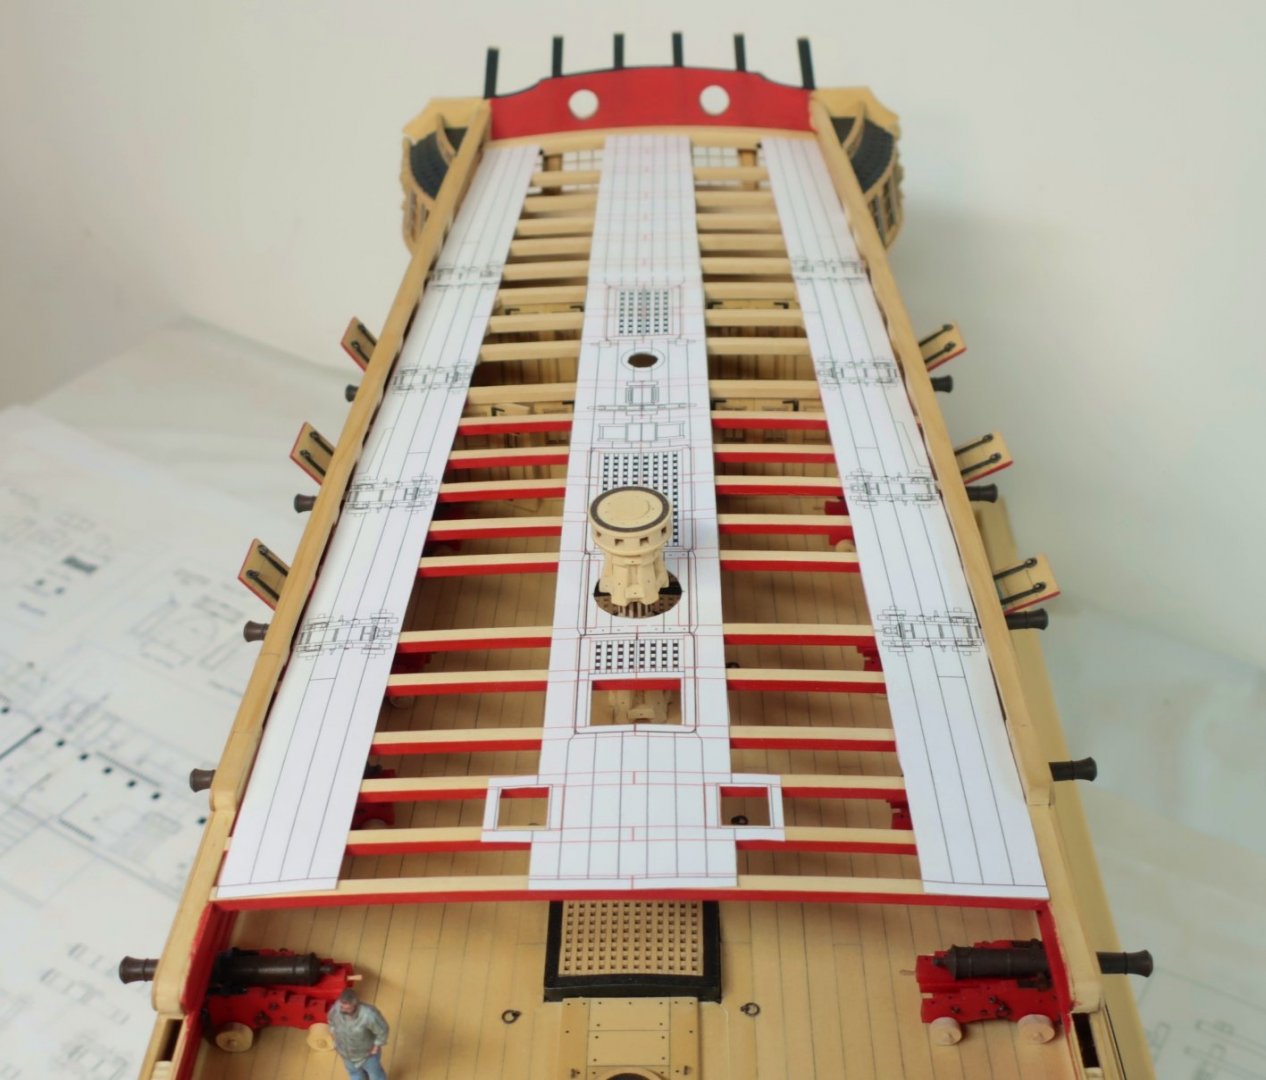
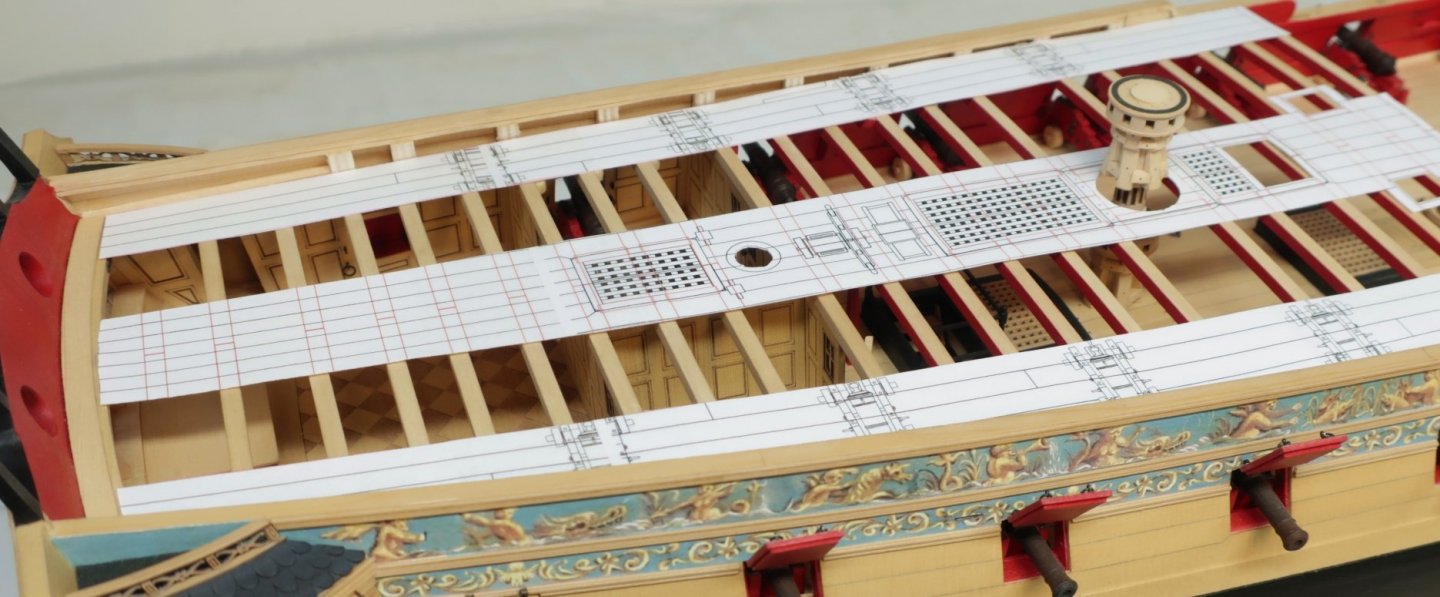
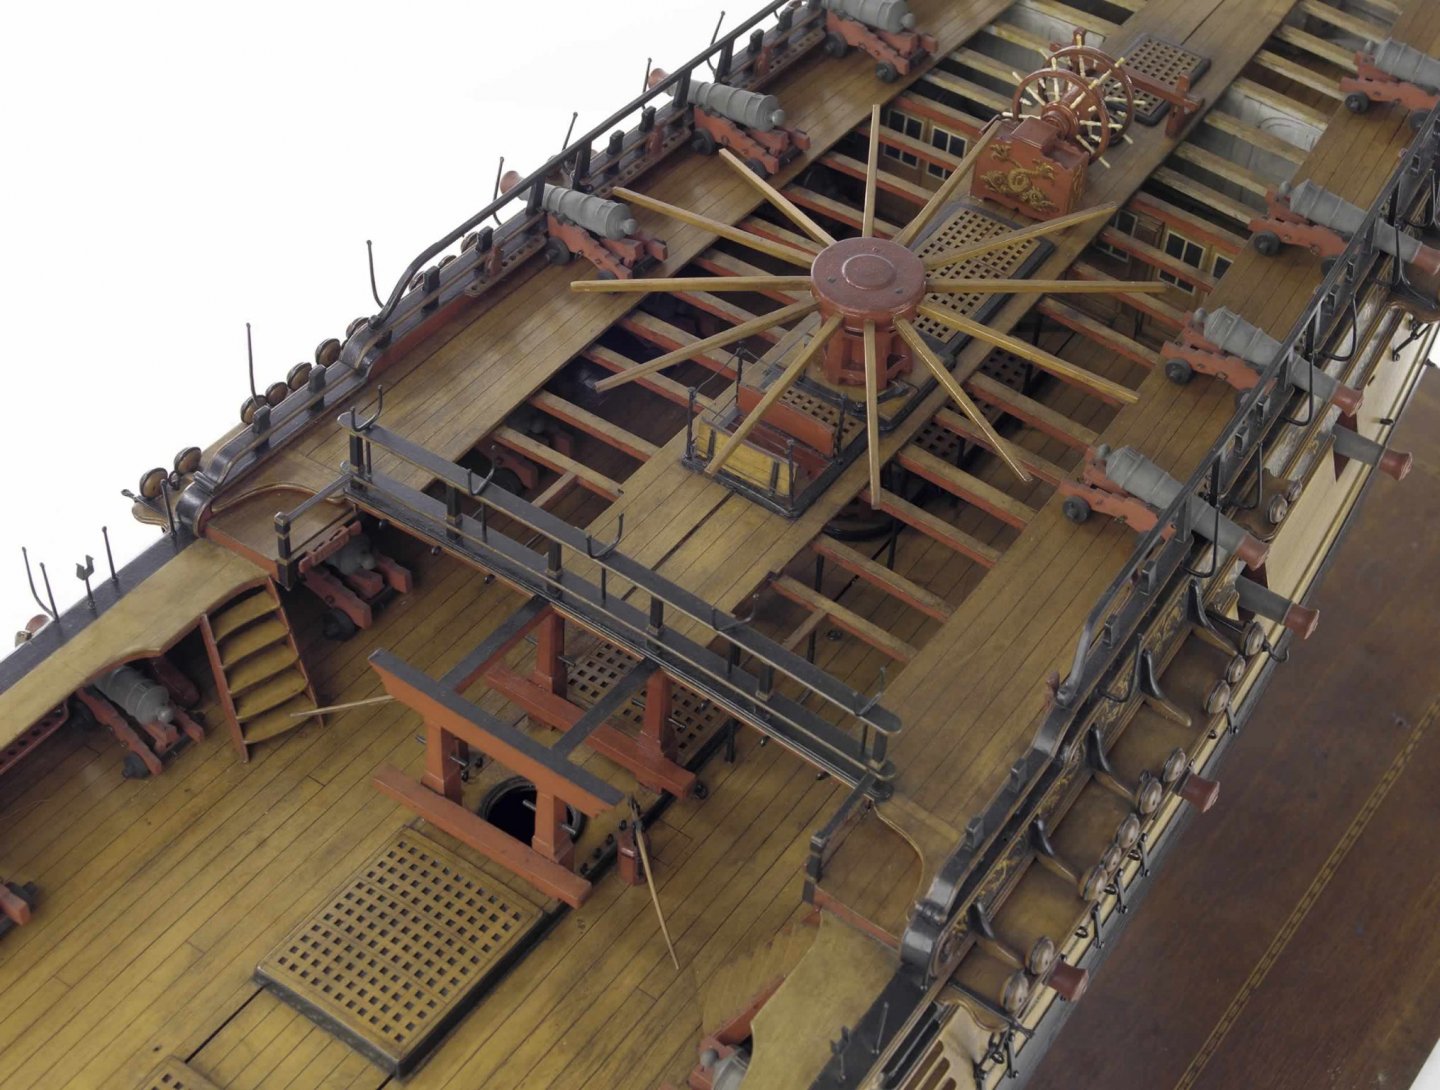
I havent done much more work on the deck fittings but I did manage to complete the base for the case...you probably saw that in the other topic. But in addition to that and catching up with making blocks I managed to complete the templates for the quarter deck. I am thinking and planning way far ahead. I thought I would share them with you. You guys know that I will be planking the quarter deck like the Amazon contemporary model. These templates will make the job much easier. They contain all of the reference marks and locations for the Qdeck fittings, and even the deck planking. You wont have to line off the qdeck or f'castle. The deck planks are all worked out with the appropriate taper. The deck beams are shown so all you have to do is fold the template along any deck beam and you have an instant tick strip to transfer to each deck beam. In addition, the carlings are all added in red so they can be added etc. Its really a cheat sheet for positioning everything when we work on the Qdeck. But thats not why I posted the pictures. These will hopefully give you a really good idea well ahead of time of how much of the lower deck can be seen by going with this set-up. There are only the bare minimum of qdeck planks added to accommodate the guns and deck fittings down the center. This leaves very wide "runways" which are open and give you a really good look at the lower deck. Its also much more balanced than planking half the qdeck in its entirety. Note how we can leave the open area the entire length of the qdeck unlike other "lesser" kits that havent properly details the great cabin windows, etc. The same will be true at the bow and f'castle as most commercial POB kits dont ever model the gun deck all the way up to the stem. They usually have an ugly bulkhead that blocks most of the forward part of the gundeck and manger area. This makes our Winnie project look a lot more correct and similar to an actual POF or contemporary admiralty model. And one last fun photo under the qdeck......with so much open on the qdeck planking there is enough light getting down to the gundeck so you can see everything clearly. I am also testing the height of that capstan which fits perfectly.....😄


- 1,784 replies
-
- 48
-
-
- winchelsea
- Syren Ship Model Company
- (and 1 more)
-
That looks great. I would however think again about leaving the seat edges gold. Before I read your post I thought you hadnt finished it yet. It looks like you forgot to paint it rather than add a gold detail on purpose. But its all coming together lovely. Chuck
- 185 replies
-
- 2
-
-
- queen anne barge
- Syren Ship Model Company
- (and 1 more)
-
That is quite nice. Well done.
-
Nicely done!!
-
Beautiful Rusty. I love the color and how the golden parts of the frieze pucks up the color of the carved elements . It all came together well.
- 642 replies
-
- 2
-
-
- winchelsea
- Syren Ship Model Company
- (and 1 more)
-
Nicely done on the ropewalk. Yea you should open up the eyes so they are hooks. Just a little so you can tie the thread on one end. Then instead of four lengths of rope to be tied you can jst walk back and forth with the one length to put as many strands in as you want. Then tie iff the end. It works so much quicker. Try making 100 lengths of rope per day. Not as much fun but the results are quite consistent. Well done.
-
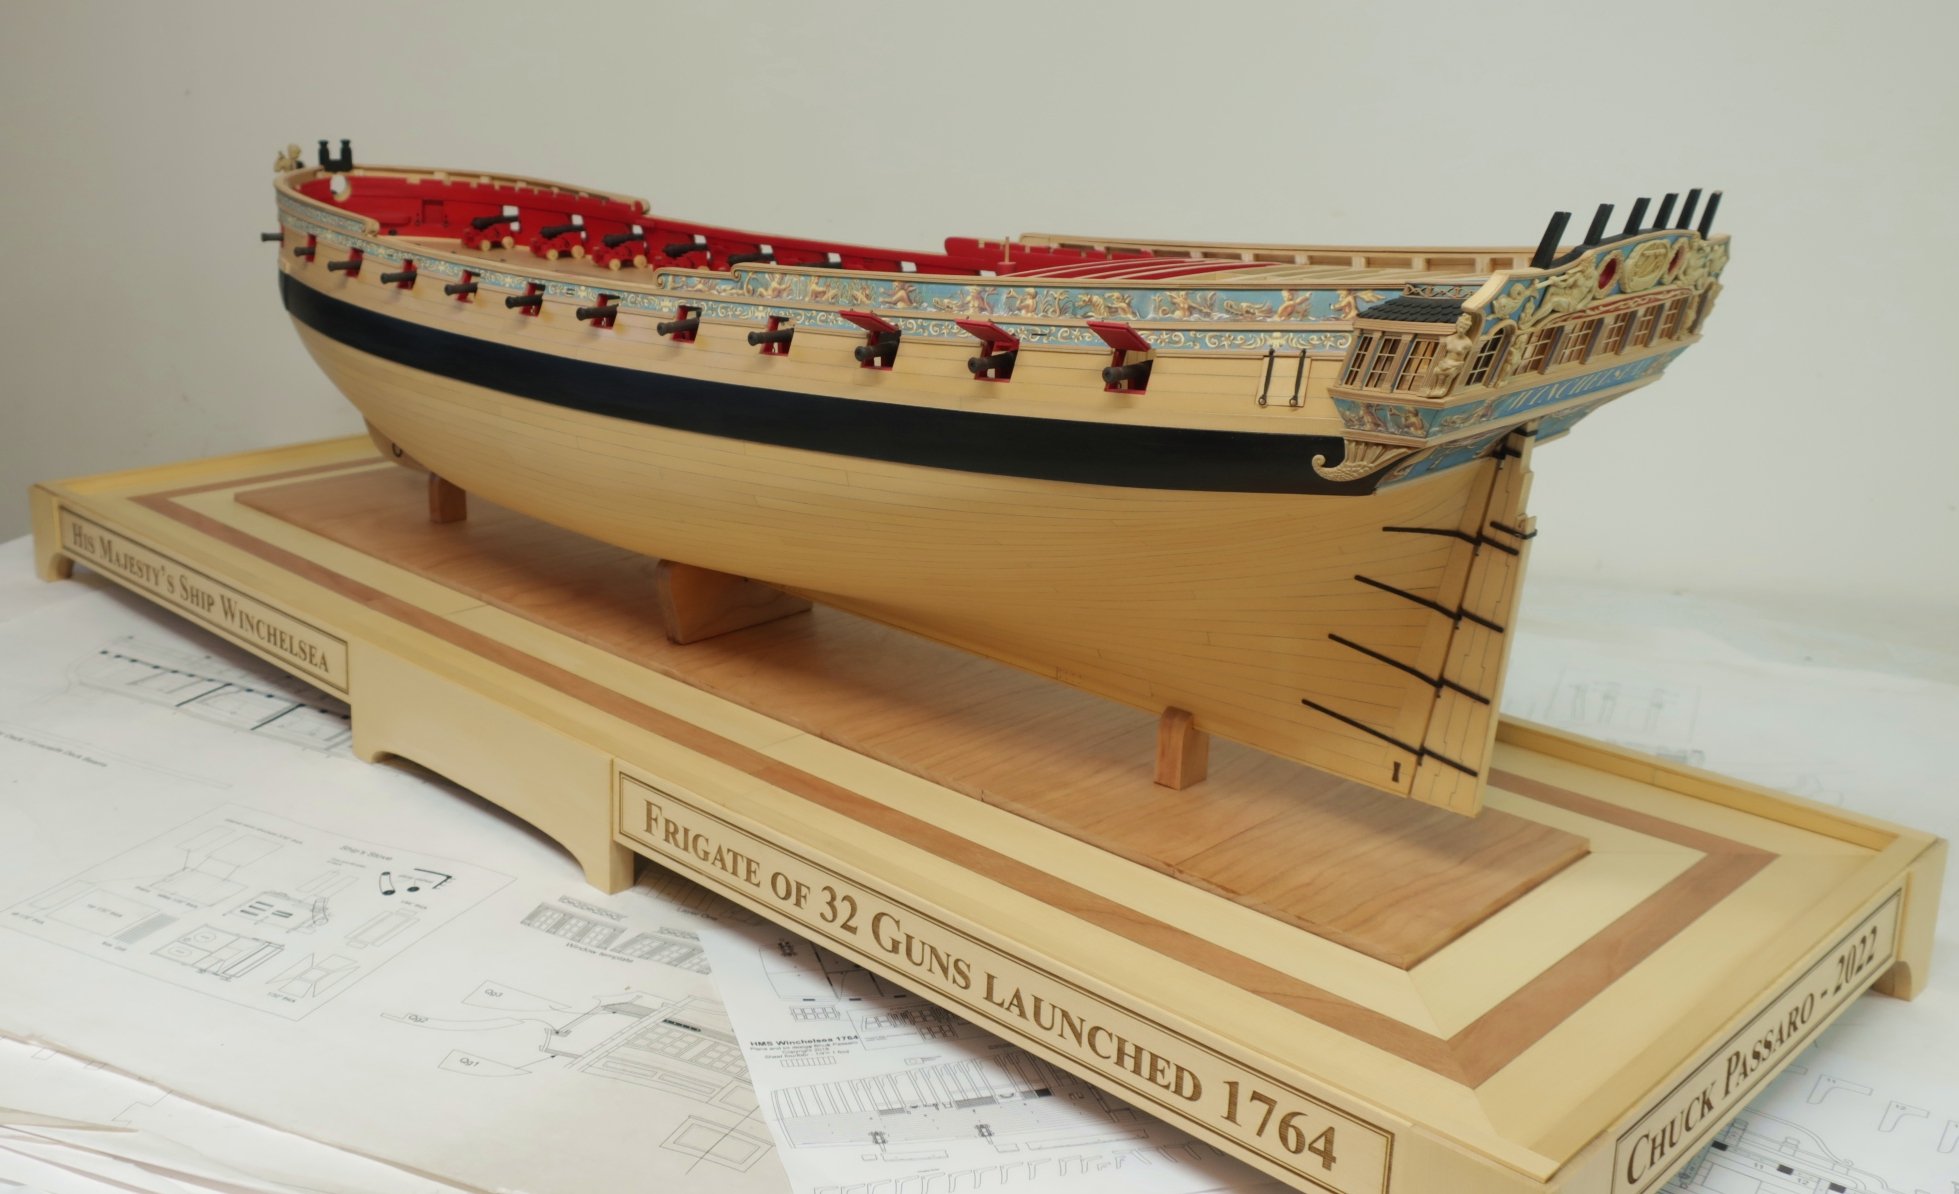
HMS Winchelsea (1764) 32 gun frigate GROUP PROJECT INFO
Chuck replied to Chuck's topic in Group Projects on Model Ship World
Probably pretty difficult. If you dont buy any laser cut parts you will need everything... Scroll saw, Table saw, just to name a few. If you buy the laser parts for each chapter then you will only need to mill planks from wider sheets. So a table saw like the Byrnes saw is an absolute must have. -
Nicely Done. The capstan looks great. I still go back and forth about painting it. I see you chose not to simulate the caulked seems between the deck planking. its really coming together.
-
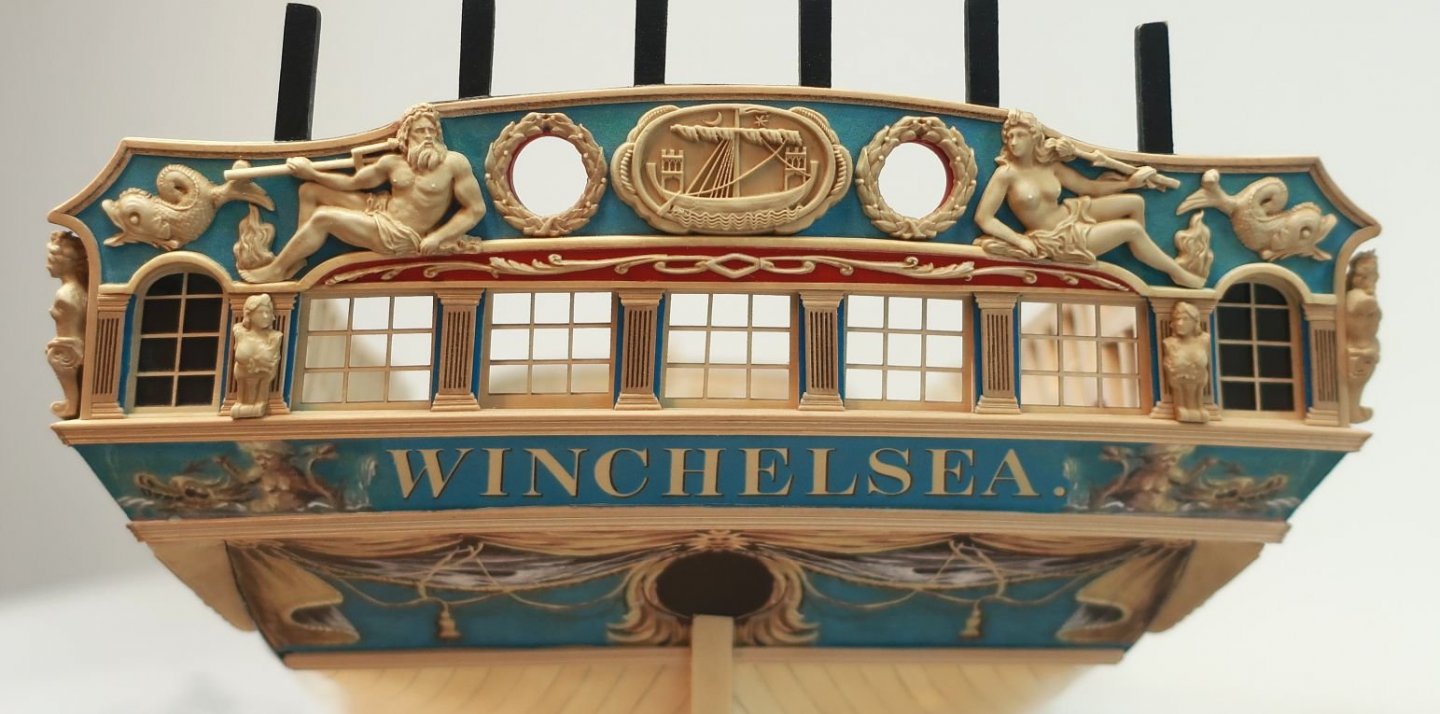
Nice work on the cheeks and hair brackets. Have you ever modeled those before? They are tricky and you pulled it off well. These are just like on the contemporary model. Nothing was simplified which is why you should be very happy with those results. chuck
- 144 replies
-
- 3
-
-
- winchelsea
- Syren Ship Model Company
- (and 1 more)
-
That looks beautiful....Exceptional detail on that prototype. I wish you the best of luck with these kits. Chuck
-
Beautiful!!!
-
Looking great...the last plank is no different other than it feels really good when its done.
-
Great news!!! Just dont go too hot or bake it too long. It will melt your rope into a sloppy liquid goop. it works great and its actually how polyester thread is made and fixed. But on a huge industrial scale of course.
-
That looks very good indeed. Well done.
-
I think you should make one and find out....Thanks for the kind words. 😀
- 1,784 replies
-
- 4
-
-
- winchelsea
- Syren Ship Model Company
- (and 1 more)