Chuck
-
Posts
9,700 -
Joined
-
Last visited
Content Type
Profiles
Forums
Gallery
Events
Everything posted by Chuck
-
 Nicely done....real interested in seeing those sails on her!!!
 -
Yes probably.....making 24 of these is not fun so I will offer it as well. It makes life so much easier. Chuck
- 1,784 replies
-
- 6
-

-

-
- winchelsea
- Syren Ship Model Company
- (and 1 more)
-
You shouldnt need to clamp each plank at all. Too risky. A small drop of CA will do the trick if you have pre-bent the plank properly. No clamping is needed. Just glue the plank on a few frames at a time slowly working from the bow to mid ship. But dont forget to measure the length of that plank and cut the aft end so it falls on the frame center first ....before you start gluing it on. Your new planks will ship out this morning.
-
Very nice...interesting stuff. I never even knew that partnership in Nj existed.
-
It depends on the use on the model. I use different gauges. For the gun carriages I am going with 24 gauge wire for these. But the smaller gun carriages on the qdeck and fcastle....I will probably go with 28 gauge. for the rung size i usually go with whatever my source plan indicates. Certainly go smaller than larger. It is yet another item that will cary and research is in order which most wont do. Its a pain to do it but it makes a big difference. My eyebolts on any given model will vary quite a bit depending on location and use.
- 1,784 replies
-
- 9
-
-
- winchelsea
- Syren Ship Model Company
- (and 1 more)
-
Im not sure how I can do that. Its really hard to explain. I just use a good set of needle nose pliers and nippers. I am not sure ...let me think on this. Chuck
- 1,784 replies
-
- 3
-
-
- winchelsea
- Syren Ship Model Company
- (and 1 more)
-
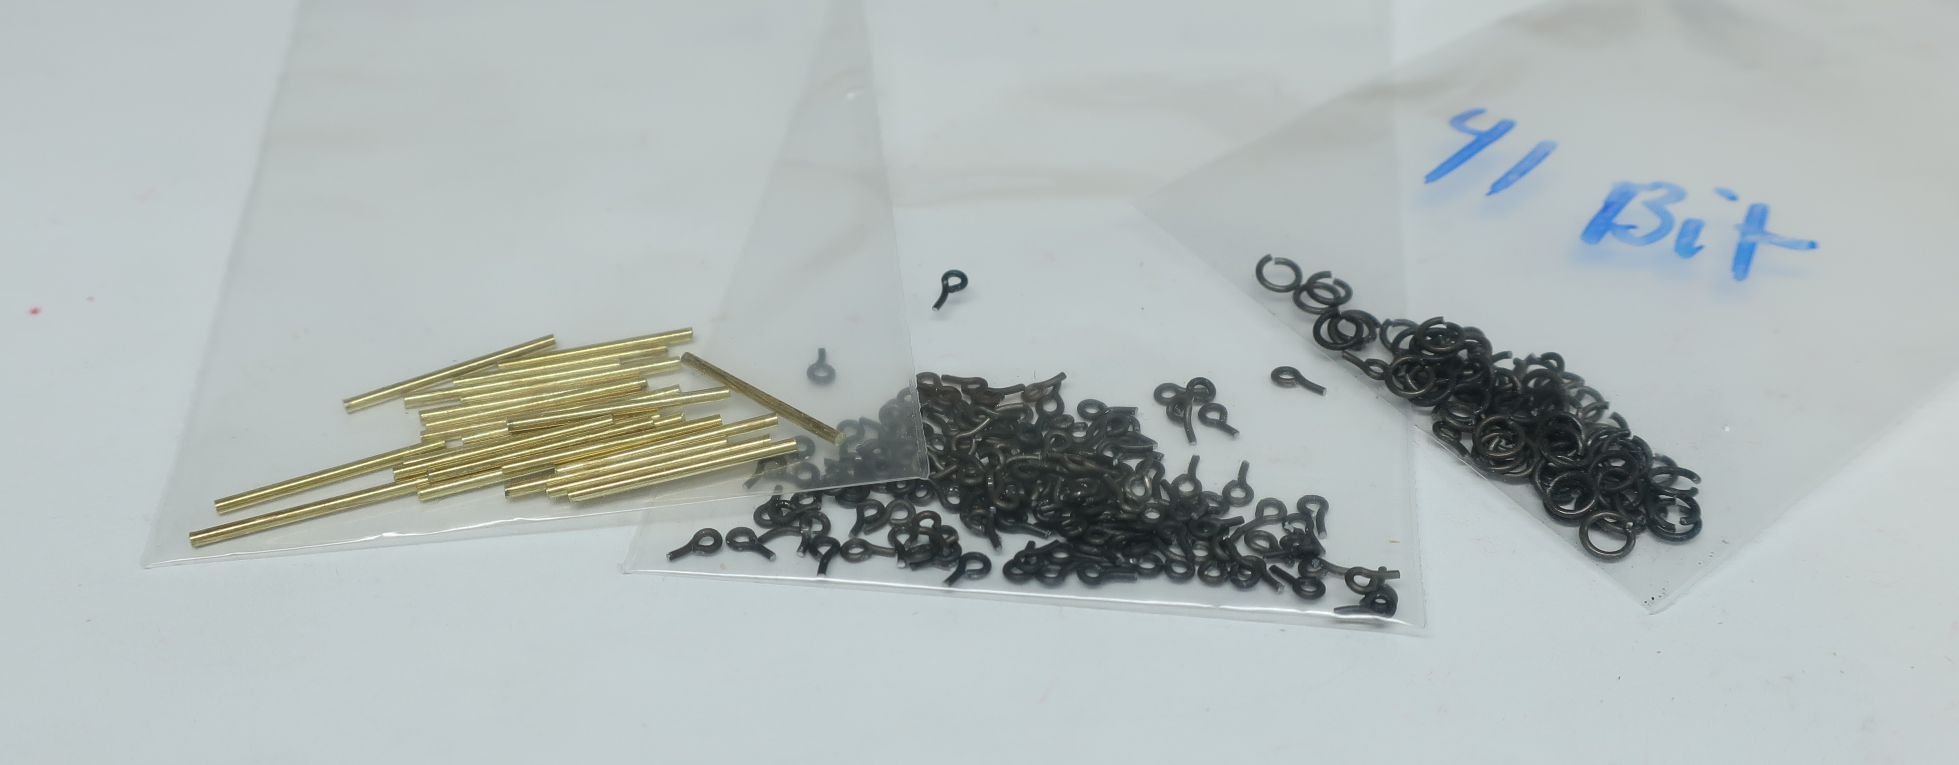
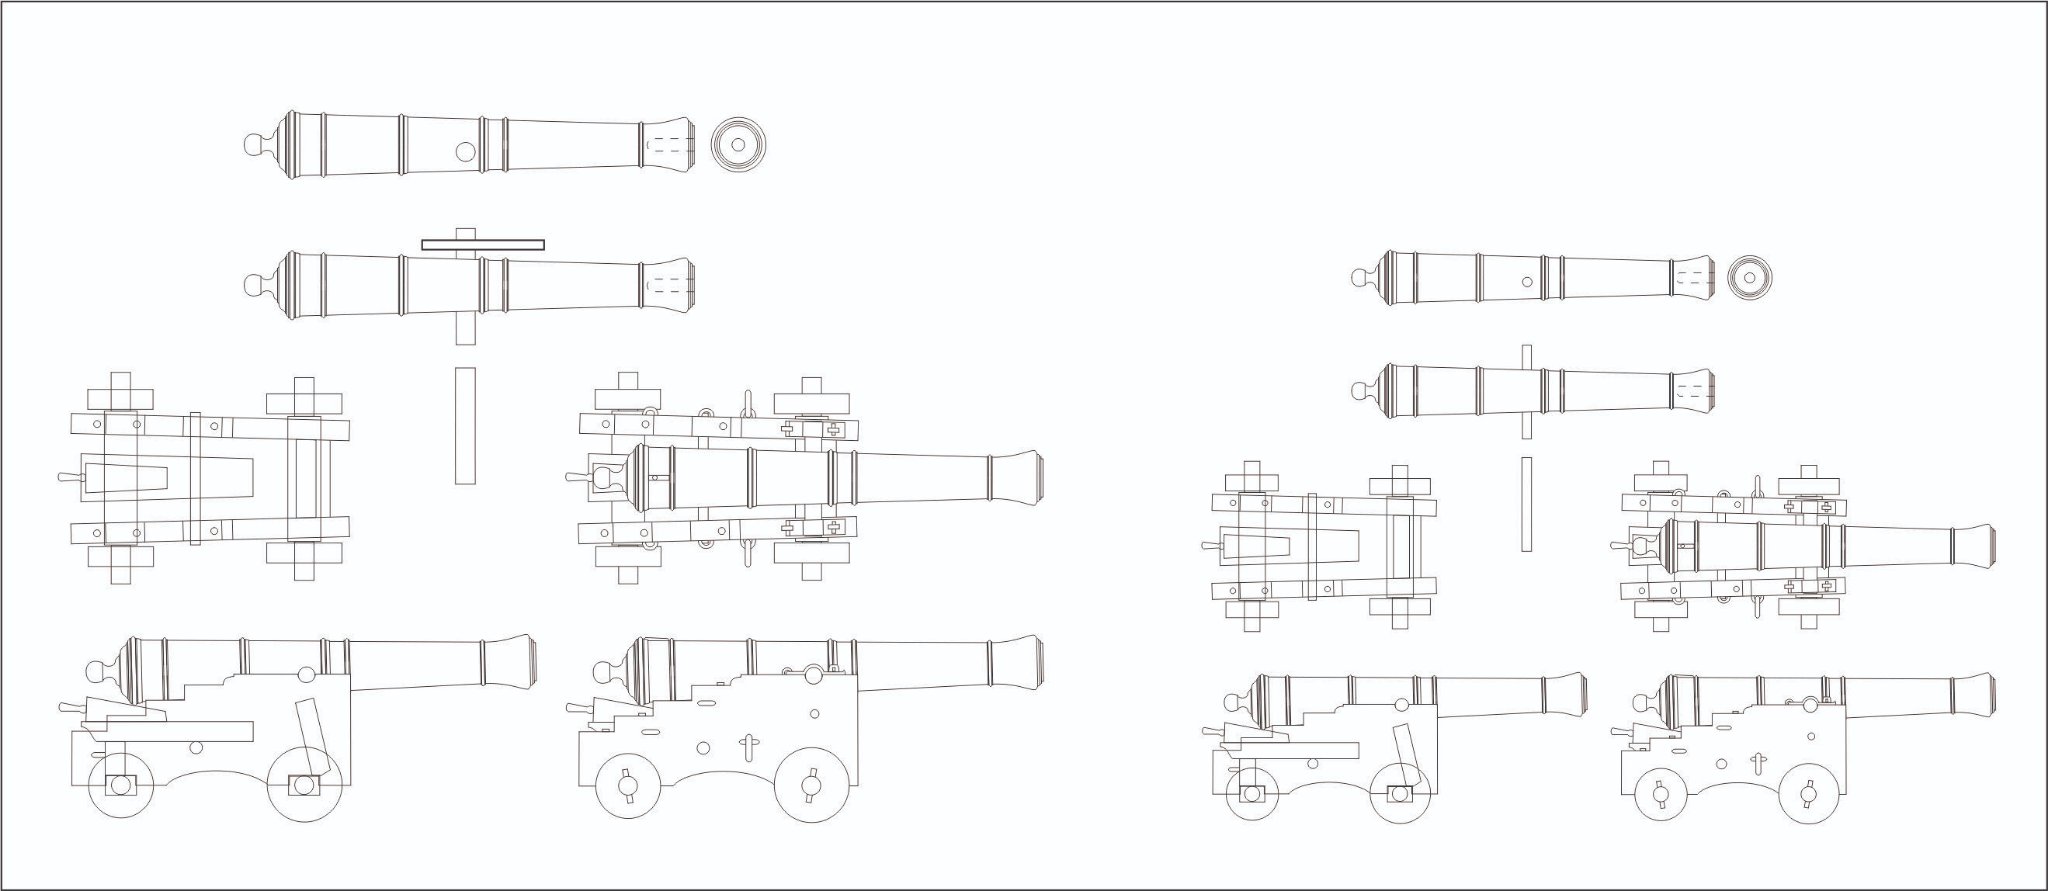
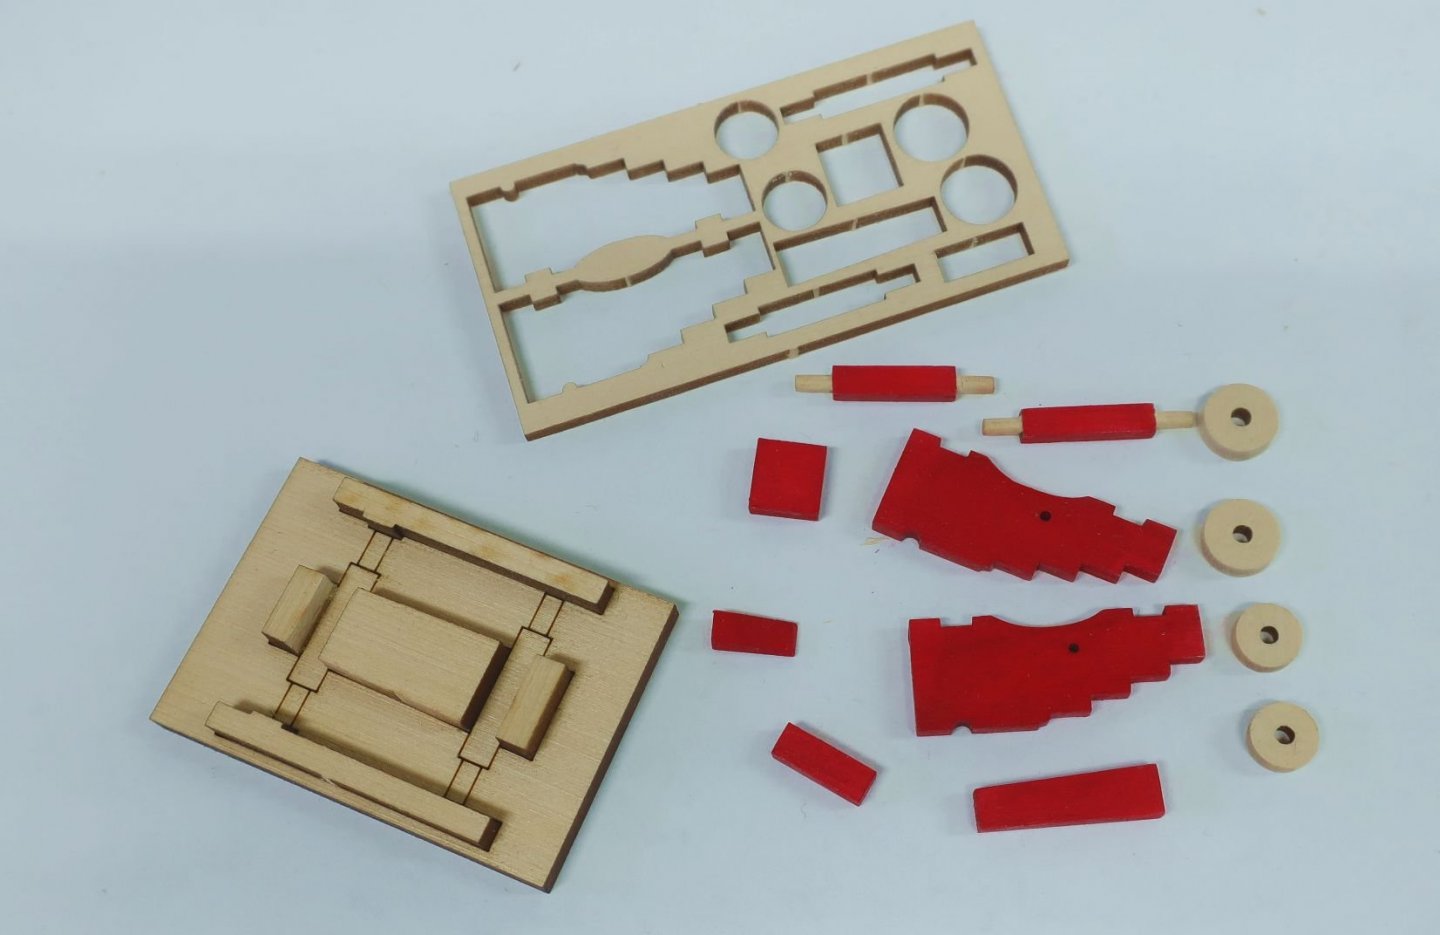
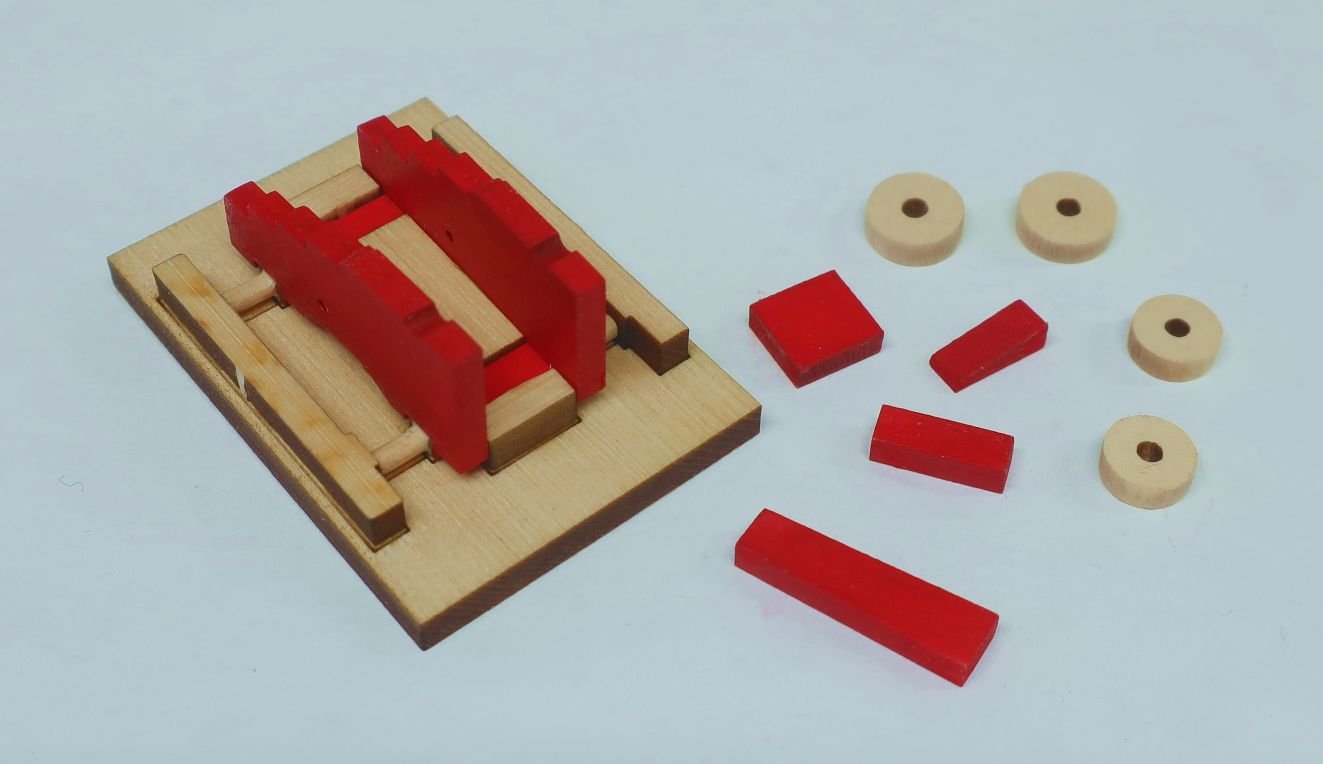
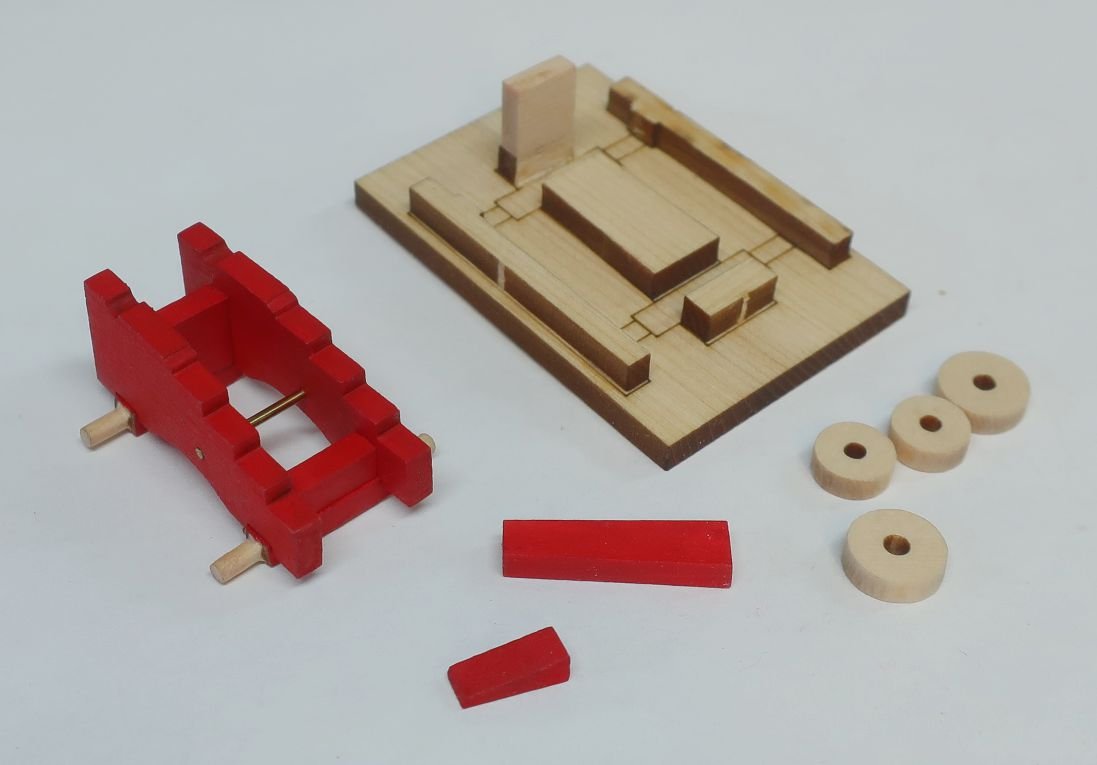
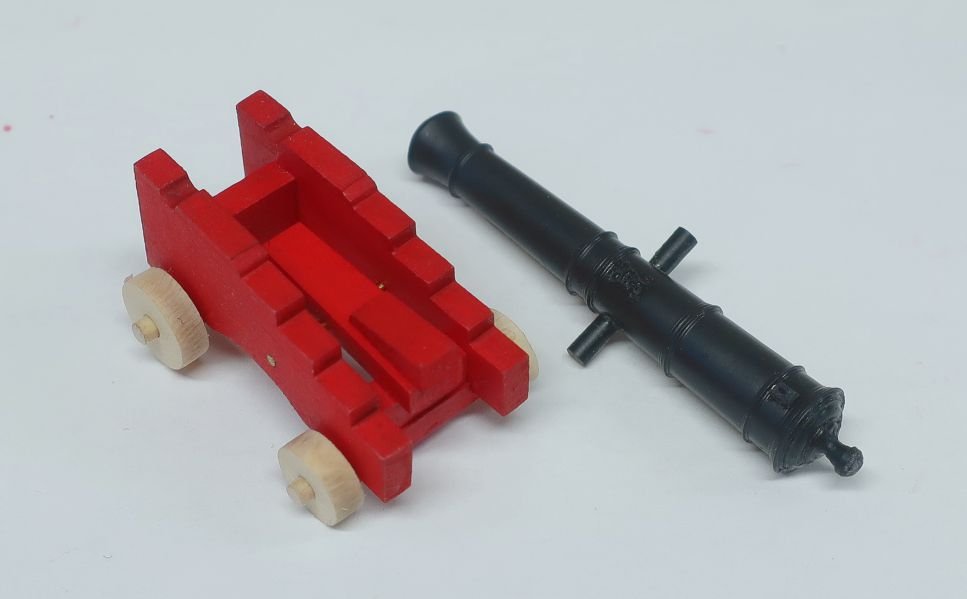
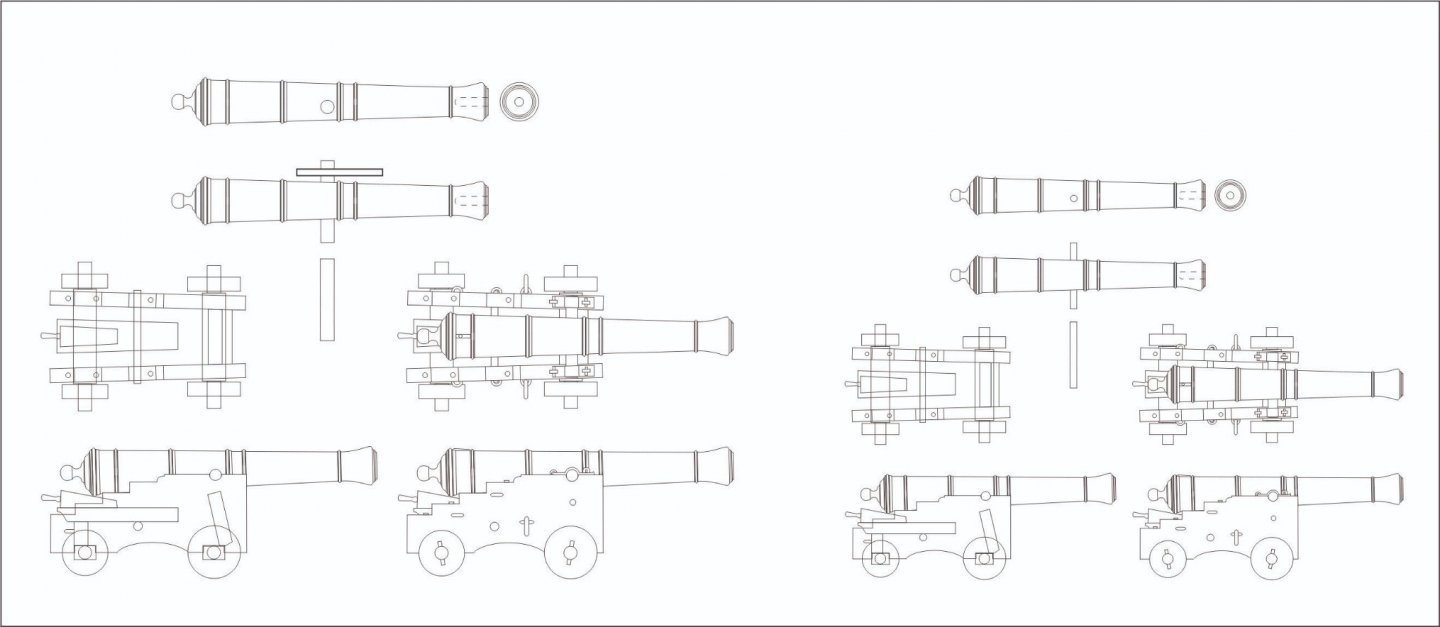
Just a start on the gun carriages....You can paint them as I have or leave them natural. I first sanded both sides of the sheet before I removed the parts....then I sanded the char lightly from the edges. I prefer to paint all parts first before assembly. But I know everyone has their preference. Note the wheels/trucks were left natural. In addition, the ends of the axels were rounded off and also left natural. I removed only the smallest amount of laser char before painting these. You dont want to reduce the size of the parts too much because they need to fit into the jig which I will make available to everyone....also pictured. The jig parts are all laser cut. Then the axels are placed in the jig...hopefully they fit snug. One tip is to build the jig around the actual axel parts to ensure a tight fit. Then add the sides and glue in place. When dry...remove from the jig. Dont glue it to the jig. Next I added the two other wood parts on the front and back ends of the carriage. These parts are slightly longer so you have to sand them for a nice fit. Finally I also added a 1mm round bar across the center. It goes through the hole in the sides of the carriages...see below. At this stage you can either start adding the metal work...eyebolts or finish building the carriages. Its up to you. I added the carriage bed and quoin at this stage....below. By the way please do follow the plan for these which is available on the large sheets you printed. I may copy them to 8 1/2X11 sheets for you guys to make it easier to print and have next to you. The metal work is straight forward... eye bolts and split rings. These were made from 24 gauge black wire. The split rings were made using a #41 drill bit. The other bolts were just simulated using 25 pound black fishing line. They were left standing proud of the surface a bit after slicing off the excess. If you will rig each cannon dont insert the eye bolt with split rings yet. This is easier done later by placing them onto your breech rope. More on that later. I havent made the quoin handle yet. That is next. Then I will add the cannon and trunnion caps. Stay tuned. So far I have only made this one carriage today to show you guys the process. This will take a while to make all 24 carriages. To begin I made all of the eye bolts and split rings and cut the brass 1mm rods to length. Its a lot of work.... Each carriage has 7 eye bolts...or a total of 168 2 split rings....48 and 24 bras rods cut to length and blackened. ONE IMPORTANT NOTE: its no fun to make this many eye bolts or hooks...which you will need for the carriages including another 125 eyebolts for the bulwarks. BUT there is nothing that wrecks a model more than gun carriages with commercial eye bolts that are way too large and made from wire that is way too thin. That is why I make my own. It just looks really bad. So take your time. Also note the eye bolts in that picture above. Each one is sunk into the carriage sides a bit because that is how it was done. This prevents them from twisting. The cedar is great for this as it is soft and you can just push them in a bit to sink them. Use the plans for the size and shape of the eyebolts. I will update this when I make the quoin handle and start on the cap squares... PDF download of gun carriages... winnie gun carriages.pdf


- 1,784 replies
-
- 23
-
-
-
- winchelsea
- Syren Ship Model Company
- (and 1 more)
-
Not a big fan of that style.....It looks to angular and over thought out. Cant show any guns on upper deck either. Chuck
-
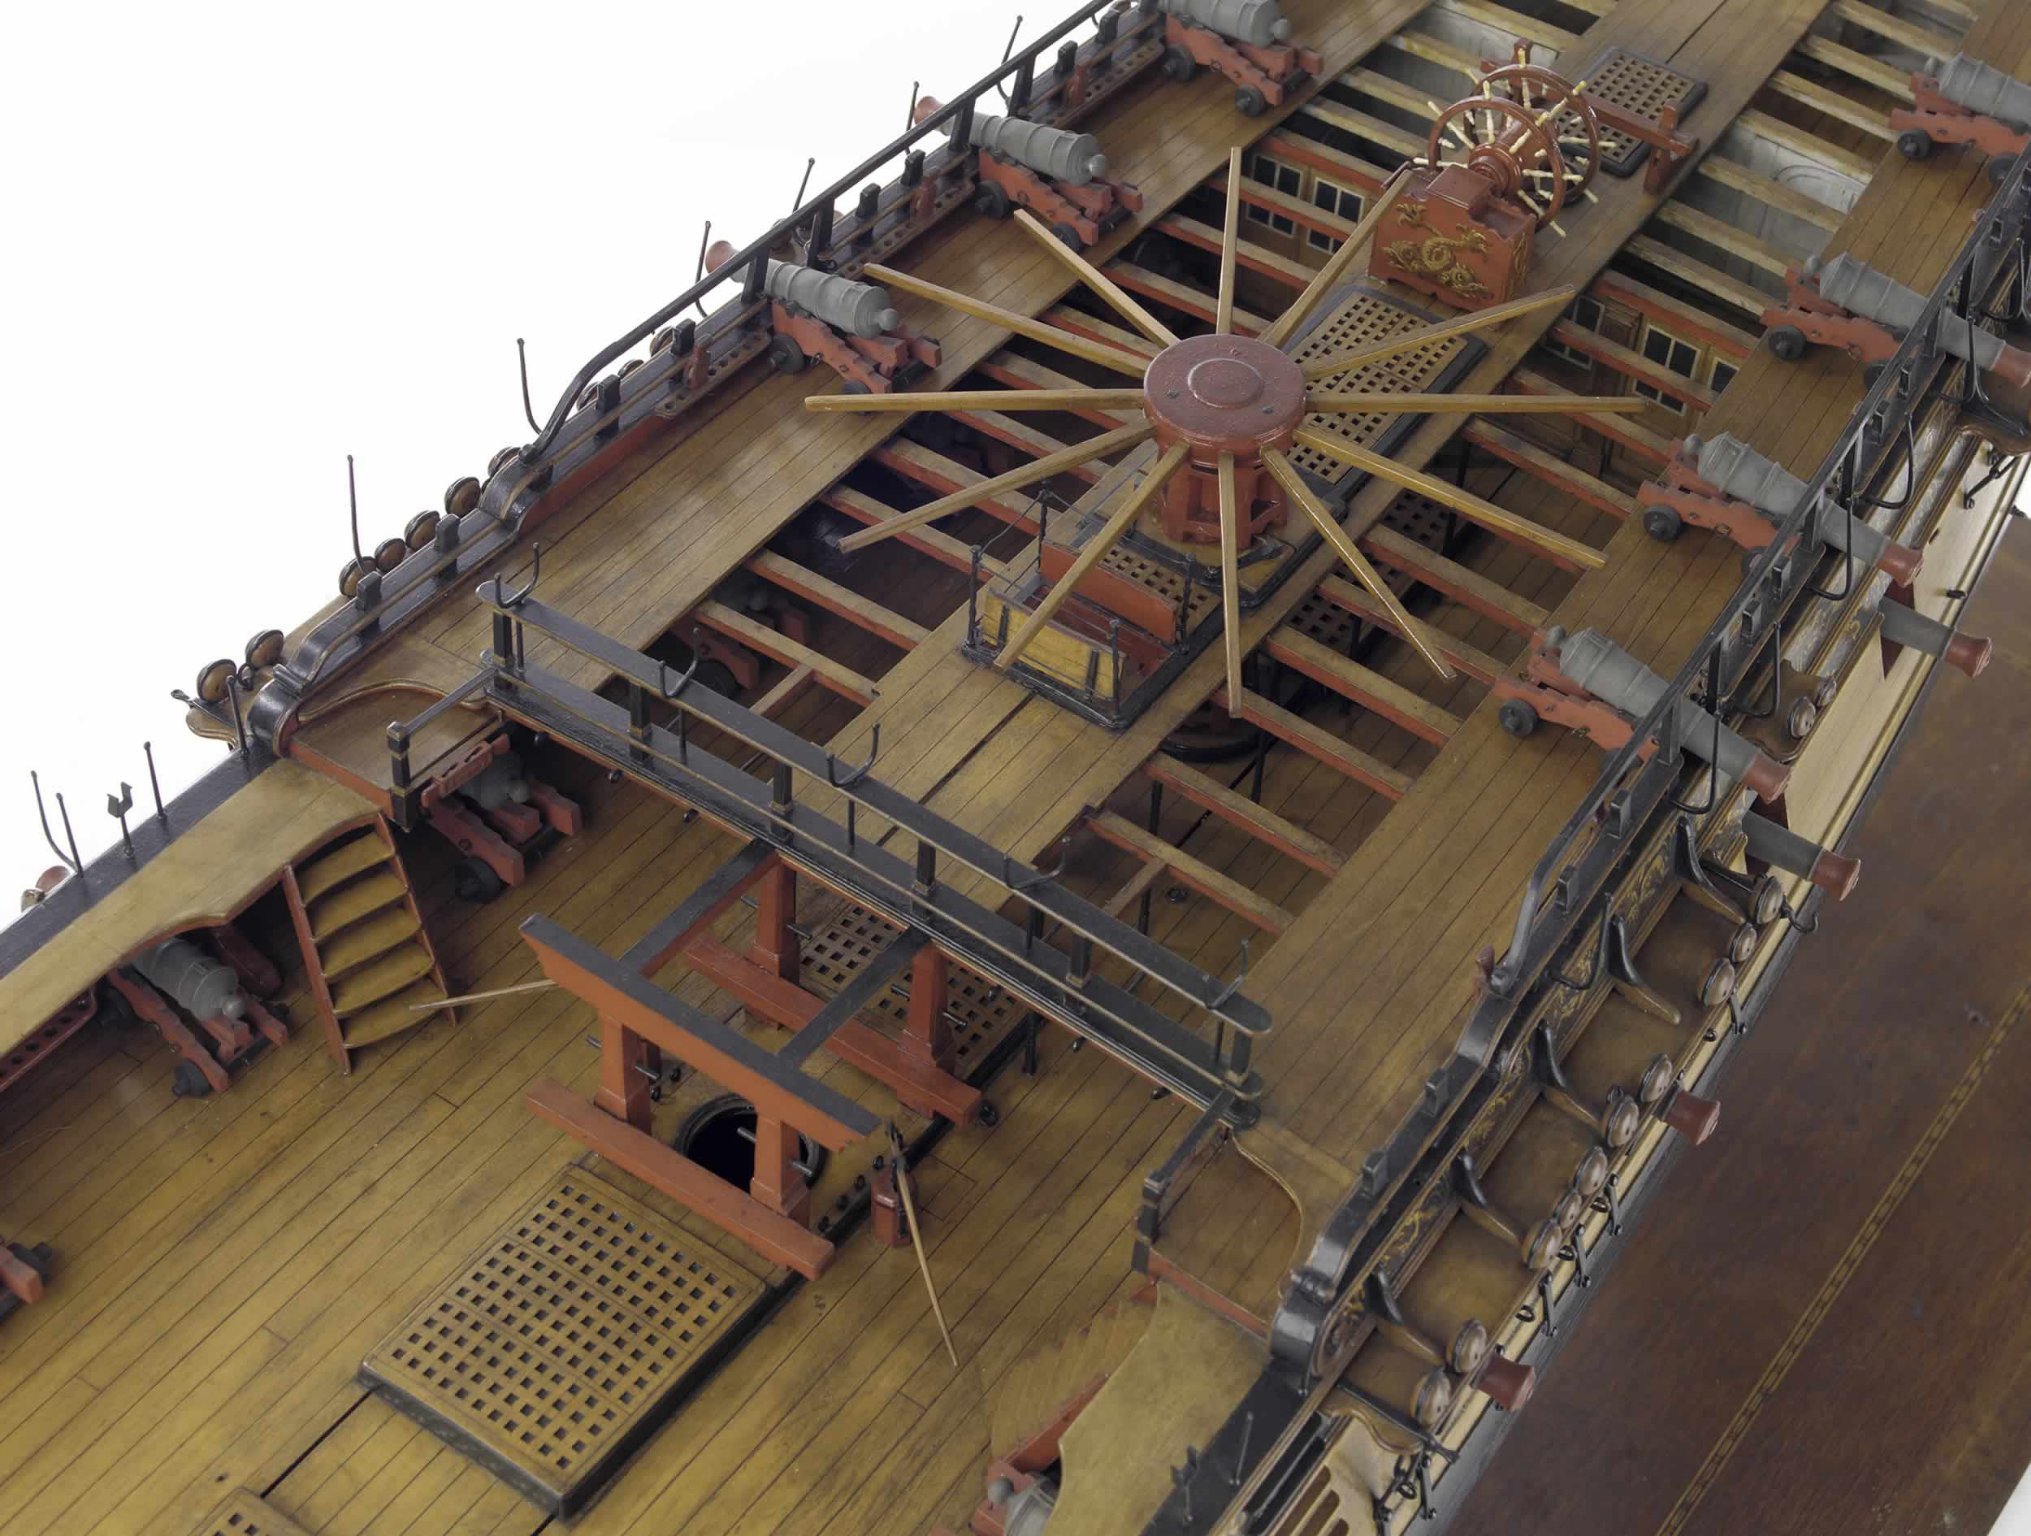
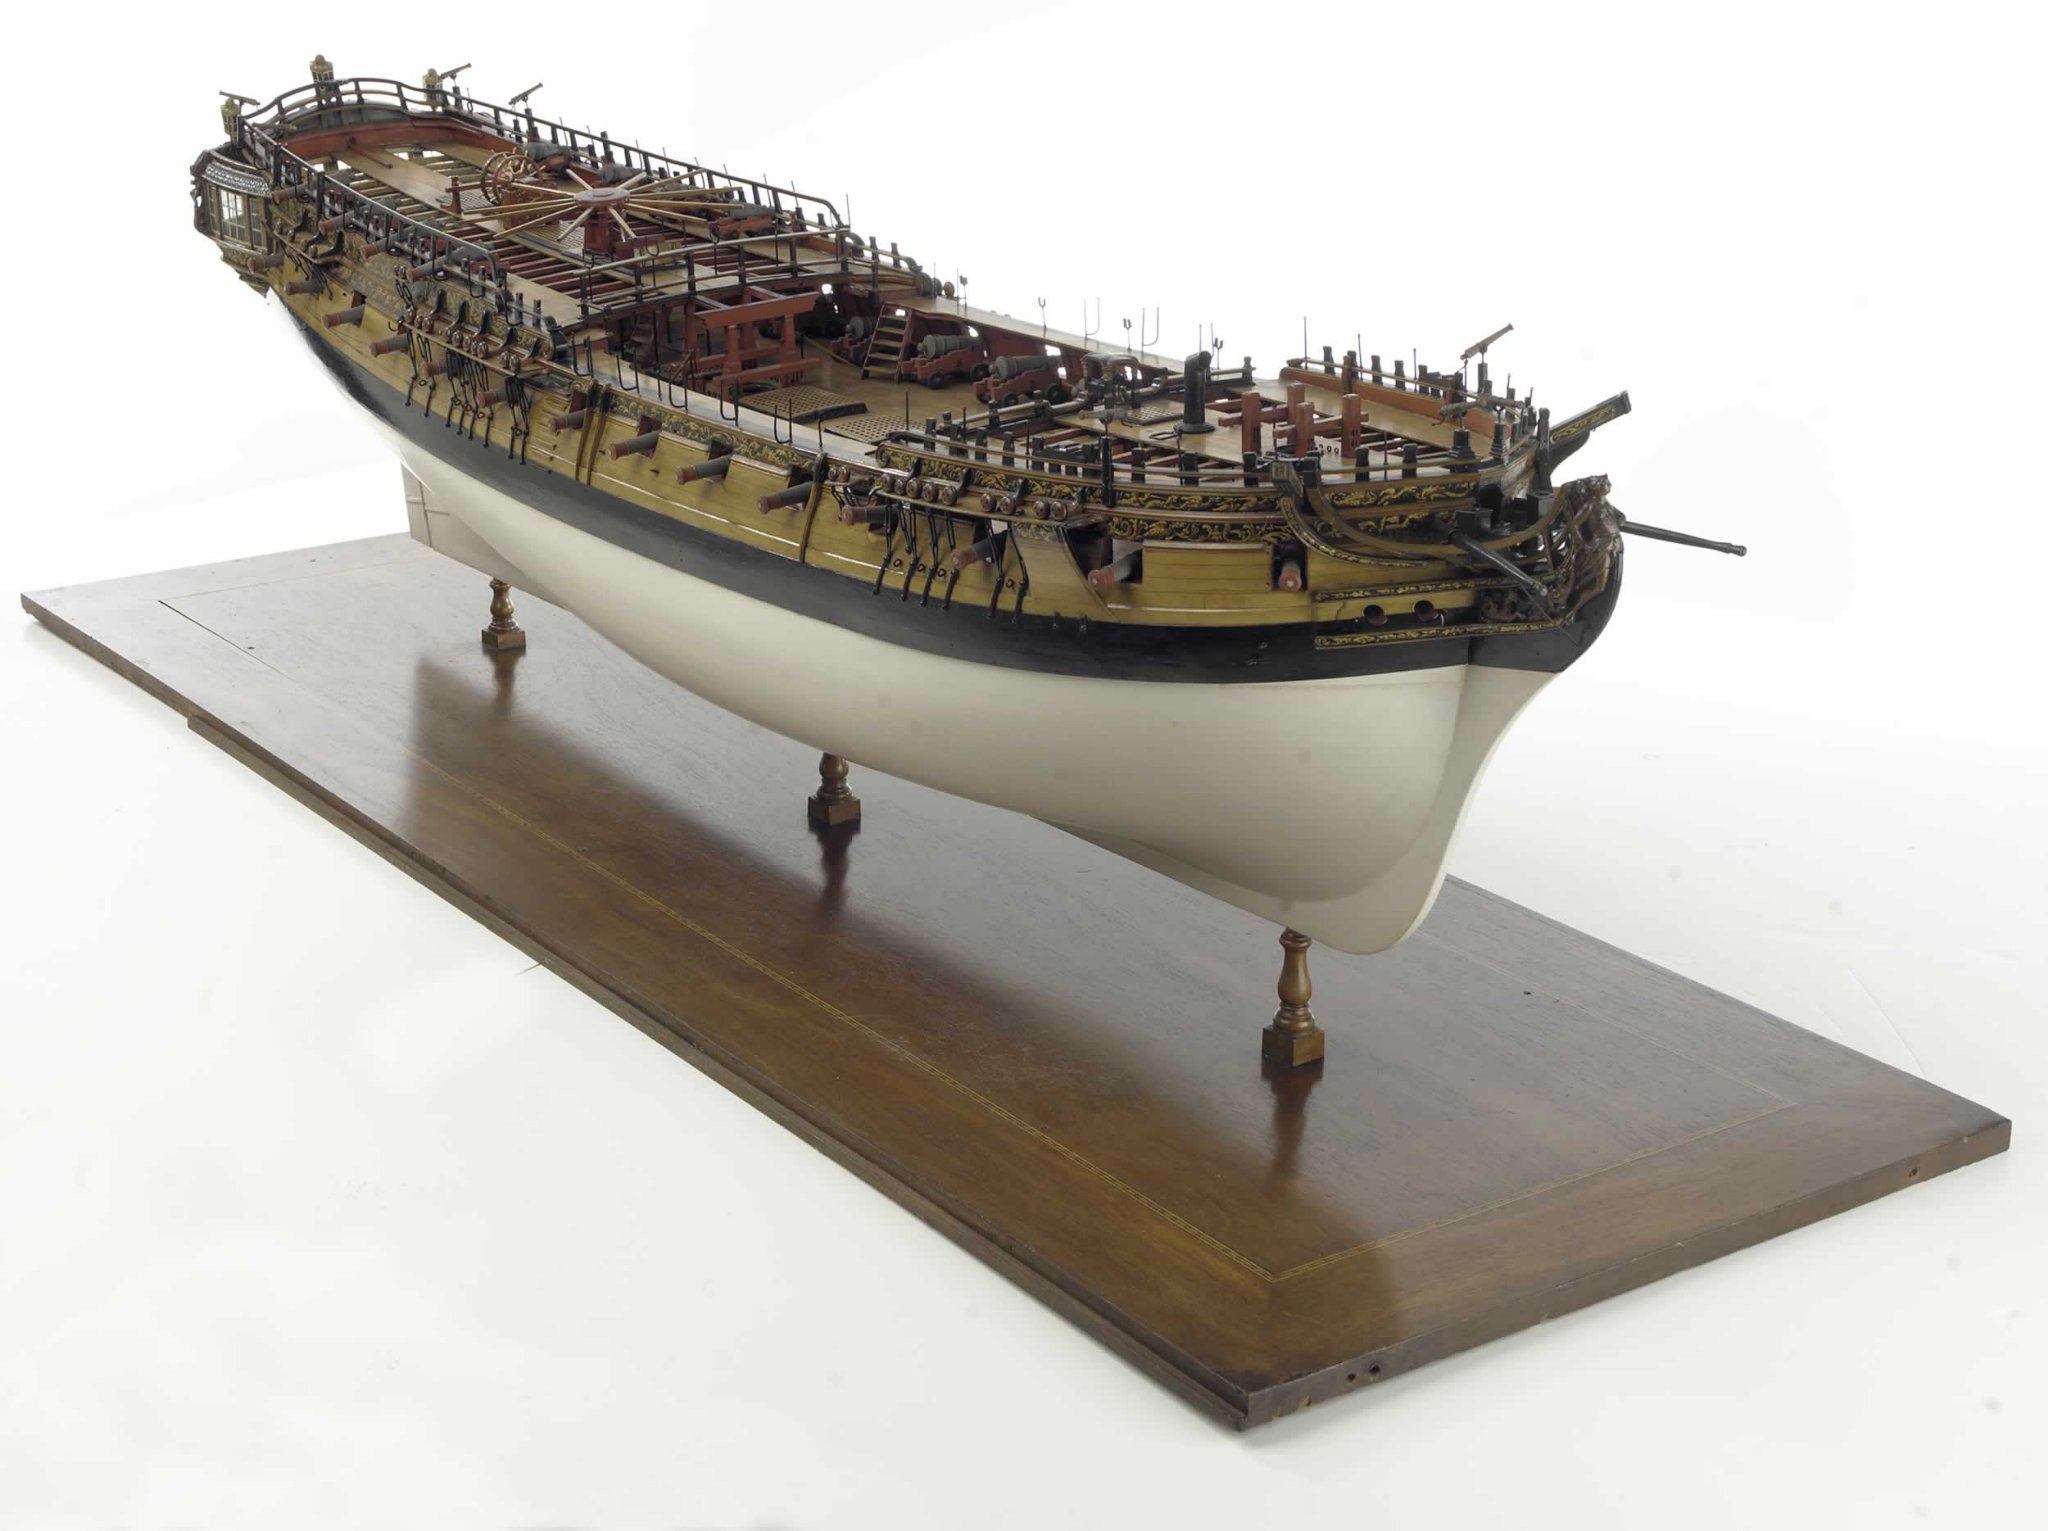
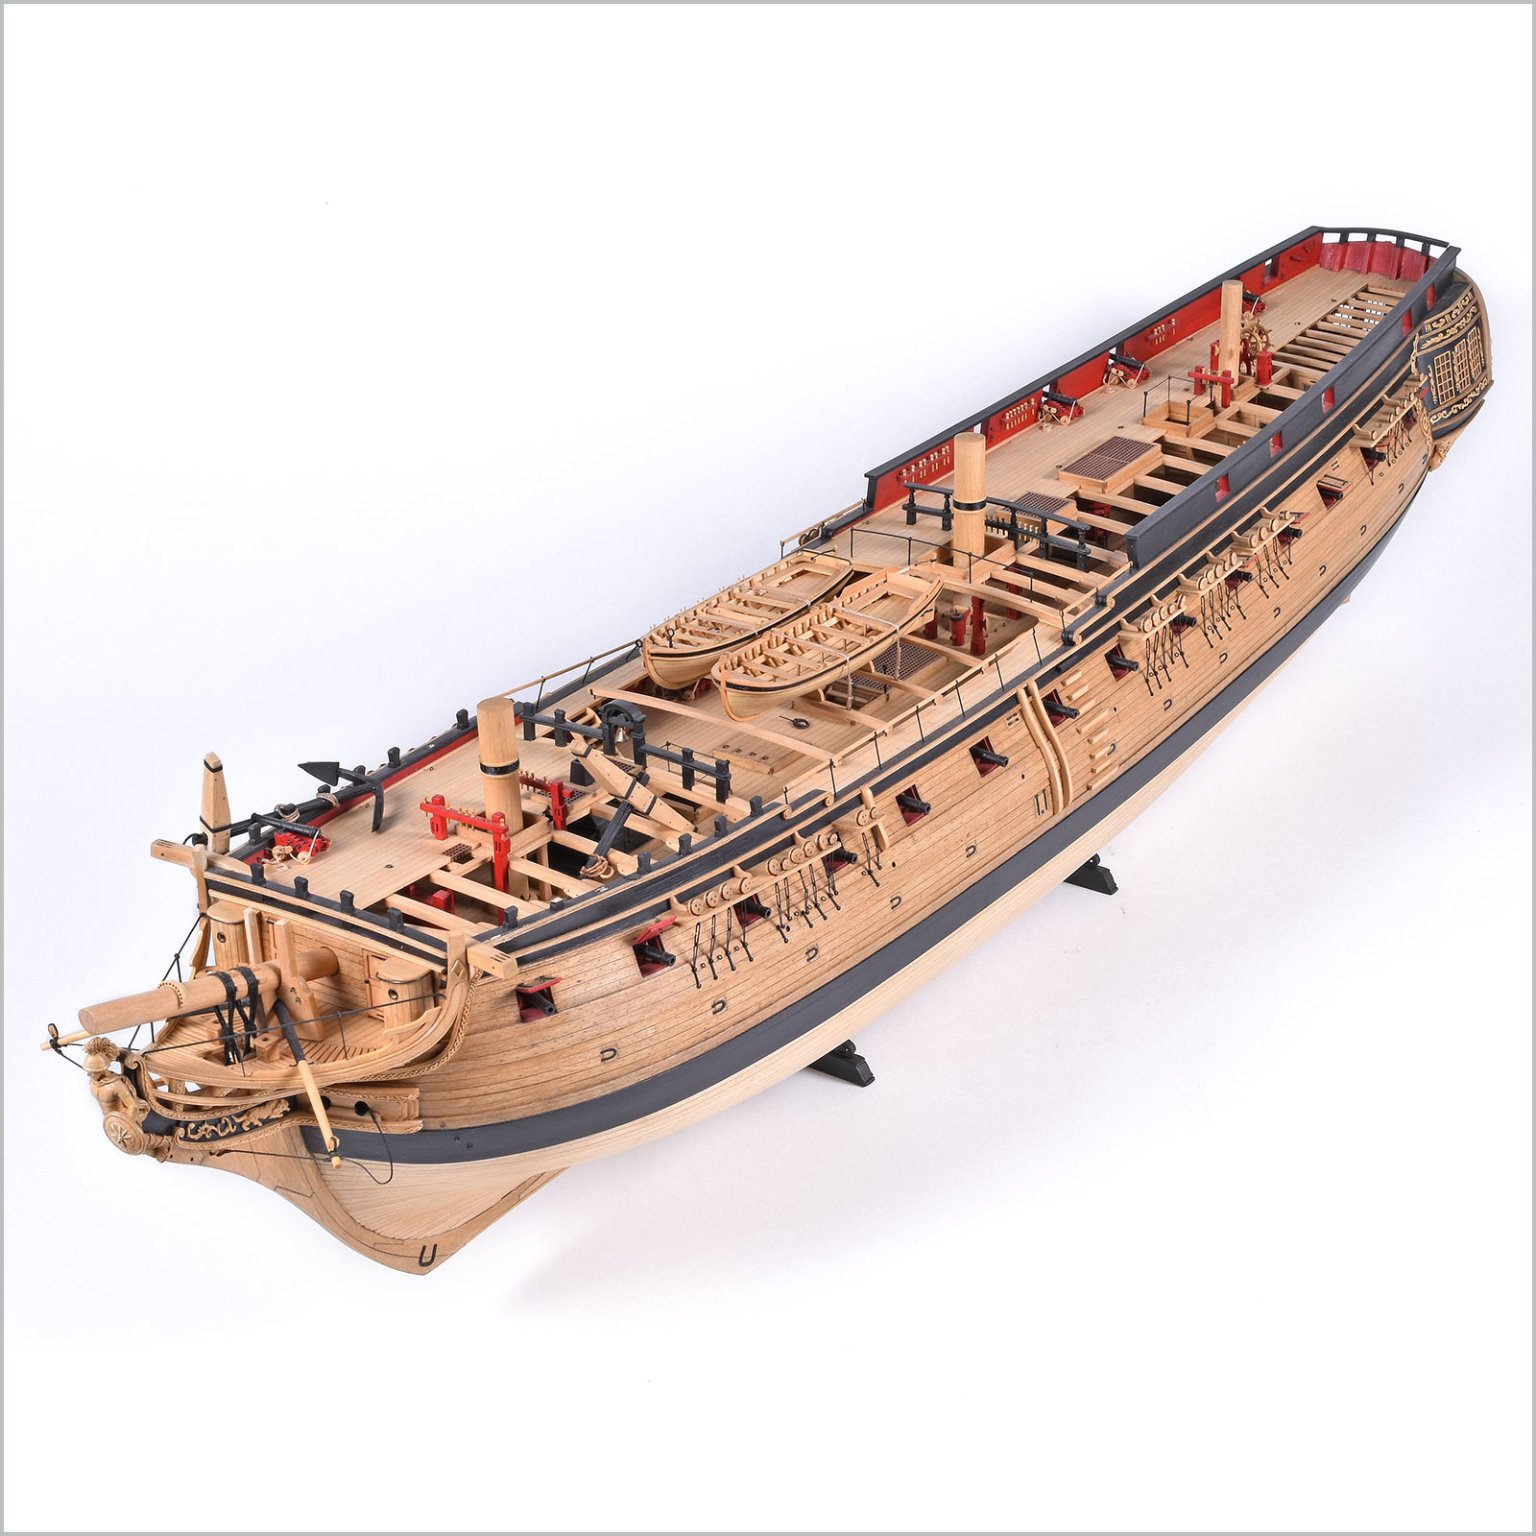
As I plan ahead for the future parts of the Winnie I thought I would start a discussion about different ways you can plank the Qdeck and Fcastle.... You can plank only half the deck like I did on my Confederacy model. This gives you a different look and more access to view the gun deck details below. It will also show the various knees on those deck beams. See below. And yes Model Expo broke this model as you can see.....the Anchor and timberheads are now broken on the Port side. An easy fix that they should really do.... OR...You can plank like many of the contemporary models out there. Here for example is how this is done with two running open areas down the Qdeck and Fcastle. Since I already did the half open thing with Confederacy I may go this route with my Winnie. Its more traditional. Its entirely up to you and will help make the model more unique to your personal tastes. Going with the version below will allow you to omit most of the knees all together because they wont be seen. Also note how the fore and aft edges of the deck beams are painted red. This is a typical way that they are shown on contemporary models.


-
Yes it is but he used a 50/50 mixture of shellac and mineral spirits on the cherry. It gives it a really nice look.
- 185 replies
-
- 1
-
-
- queen anne barge
- Syren Ship Model Company
- (and 1 more)
-
I would say that looks pretty darn good. 😃
-
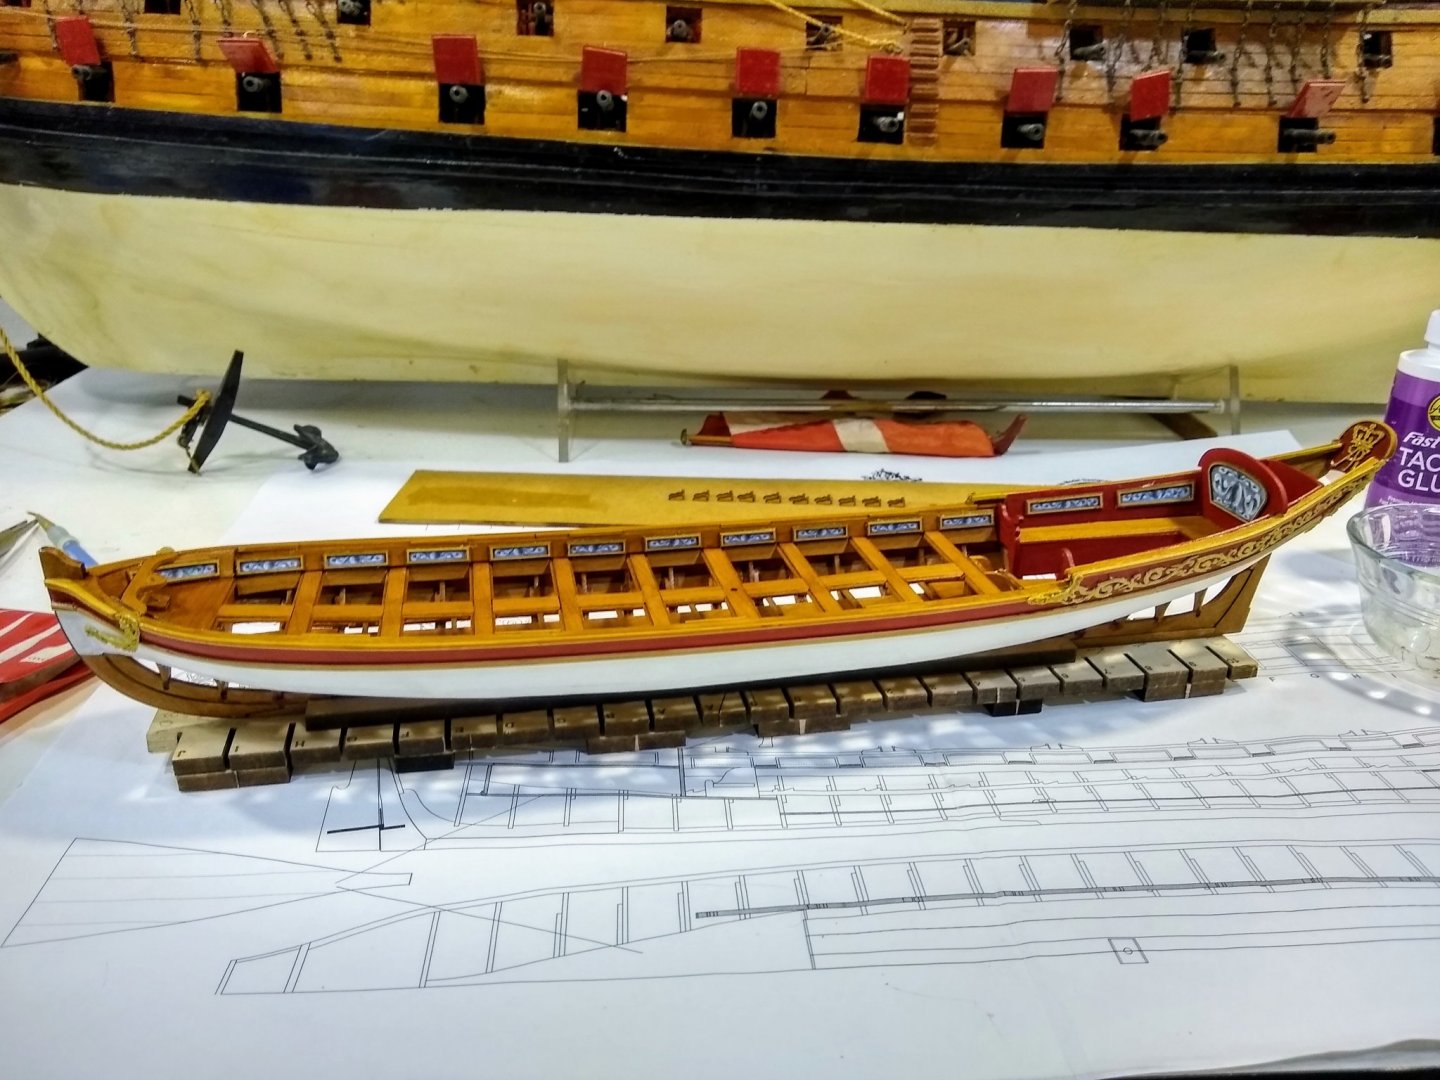
Just to show you a different look with the barge here is a friend of mine building it right now. Early paintings show the planking painting white.......it looks nice.
- 185 replies
-
- 9
-
-
- queen anne barge
- Syren Ship Model Company
- (and 1 more)
-
Excellent work...that just shows how you can make your model very unique. Well done. Chuck
-
Nice and straight....almost at the fun part.
-
Very Nice.....just take care when fairing. It will fair easy enough with a light touch and some sandpaper that is NOT too course. This is a step you dont want to rush. You can just glue that tab back together. No worries with that.
- 185 replies
-
- 1
-
-
- queen anne barge
- Syren Ship Model Company
- (and 1 more)
-
The bottom edge of the front panel sits on the curved counter......NOT on the deck. So you have to bevel it to sit flat on top of it. You will know once you place it in position.....you will see a small gap along the edge if you dont bevel it.
- 1,784 replies
-
- 5
-
-
- winchelsea
- Syren Ship Model Company
- (and 1 more)
-
It is probably easier to adjust the tab on the frame than adjust the slot if need be. It shouldnt be and issue to make any tweaks to get those frames centered and aligned. Its looking great so far. Take care now to make all adjustments to get the frames centered and at the proper height to ensure that keel sits straight and level.
- 185 replies
-
- 1
-
-
- queen anne barge
- Syren Ship Model Company
- (and 1 more)
-
You are definitely over thinking it. You can of course sand a bit that may be preventing a super tight fit. But not too much. Just enough to close any gaps.
-
Its looking great....I just got pictures from a friend of mine also building the barge. He used a 50/50 mixture of shellac and mineral spirits on his cherry. It looked very good. Although I used WOP. My barge has gotten considerable darker since I finished it.
-
That looks great....wonderful workmanship.
-
Isnt that a relief. Making mine for the winnie now. Cant wait until its all done. you did a fine job on those.
- 778 replies
-
- 3
-
-
- cheerful
- Syren Ship Model Company
- (and 1 more)
-
Thank you so much......I just wanted to reach out and let all of you know how grateful we are for every donation you folks have sent during the pandemic. Many of you have sent us donations large and small through the Donation box on the top right side of the forum. I dont know the screen names of those who sent us a donation or I would thank all of you individually......but we appreciate the support. It means a lot to us!!! Thank You from all of us!!! 😍
- 4 replies
-
- 30
-
-
For the most part....but the bow port is a bit of an optical illusion as it curves.
- 1,784 replies
-
- 3
-
-
- winchelsea
- Syren Ship Model Company
- (and 1 more)
-
It varies wildly on contemporary models....some really close to the top edge of the lid while some others are a bit further away. The key is to place them where the lids will open and close in their openings properly. Remember that the lids and port openings are NOT square or at right angles....but the hinges must be squared up to each other to make them work properly. More or less. I tried to place them appropriately on the plans so I would follow that. But one hinge on a lid could be higher than the other one so their tops are level with each other. Its hard to explain....but both hinges need to be level....even though the top of the lids follow the sheer. Because the sides of each port are straight up and down they wouldnt open or close properly unless this was the case. On a model it doesnt have to be so extreme however because you will most likely show them open and they wont be seen....or certainly not opened and closed. They are fixed either open or closed....so you can just make it look good.
- 1,784 replies
-
- 3
-
-
- winchelsea
- Syren Ship Model Company
- (and 1 more)