Chuck
-
Posts
9,704 -
Joined
-
Last visited
Content Type
Profiles
Forums
Gallery
Events
Everything posted by Chuck
-
 I will ship it on Monday but this time it will be more than a few days. Its been tough and sometimes it takes about 2 weeks with the PO these days. So please be patient. Thanks
 -
Dont forget that you will need to get 3 packages of grating strips (with camber) along with the jig. It is available in Yellow Cedar, Cherry or Boxwood. You will probably need more cedar planking sheets to mill strips for the bulwarks as well. Check out the materials list below. Materials List for Winnie fourth.pdf
-
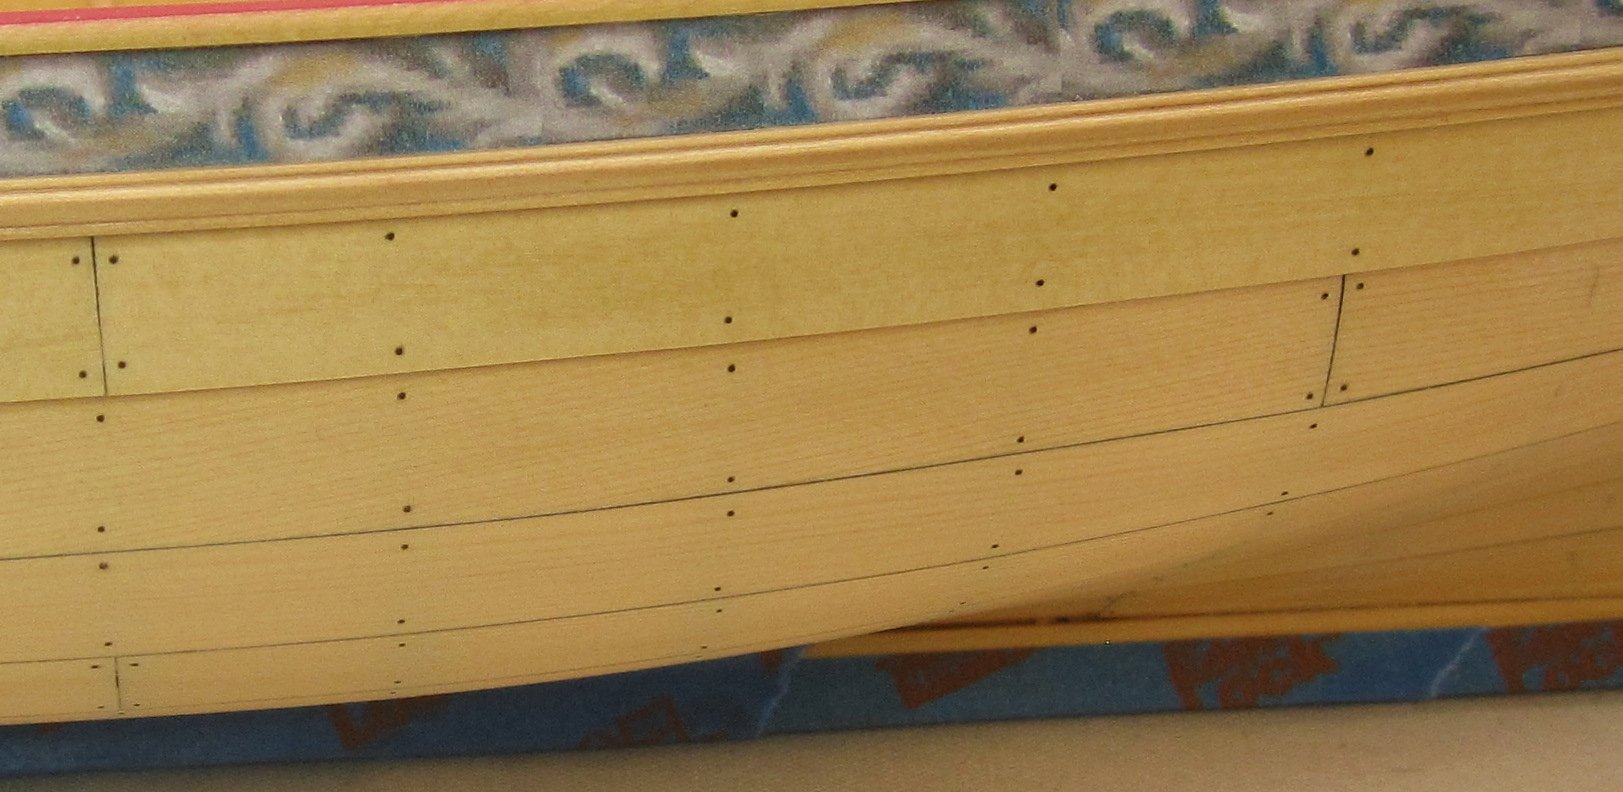
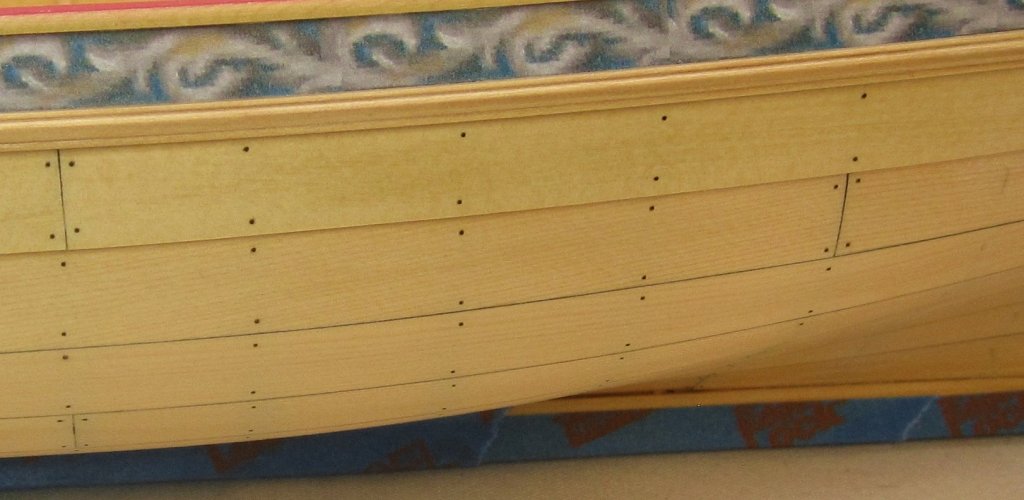
Its a very subtle "s" curve. Everyone usually slopes the plank run up at the bow and that ends up causing problems. The last 5" or so the planks curves downward. When it meets the stem and you look head on with the battens on both sides they should run almost flat into the stem rabbet.
-
Bob The center carving is upside down....you might want to flip that the other way.
-
Absolutely Beautiful Bob.... Wonderful work on those sails. Time for you to start the Winnie next...LOL!!! Chuck
- 87 replies
-
- 2
-

-
- medway longboat
- Syren Ship Model Company
- (and 1 more)
-
The monograph chapter is already available. I just have to finalize the 12 chapter 4 packages I have already laser cut. I am trying!!!! Aside from this I woke up this morning with 26 items out of stock!!! I am having a record breaking month of sales once again during this pandemic and its rather impossible to catch up. I am trying my best and shooting for the weekend. Have to create the part in my online store so you guys can place an order. Chuck
-
Chapter four is below. It isnt completely finished as I still have to complete my planking of the gun deck. But its 98% there. Since I will chapter four parts ready in a few days I wanted to post it ahead of time. I will update it as soon as I finish. But happy reading and dont hesitate to ask me any questions. Chapterfour.pdf - Chapter Four Chuck
-
To try and remove the cupping, wet the top of the concave side only thorougly. Then set it down with the concave side down. Place some weights on it. It should remove some of the cupping depending on how severe it is. You can also iron it. some folks prefer to place the concave side up after wetting. I dont think it matters and i have done both. The important thing is adding weight while it dries. There are many videos online that show the process. If its a hot sunny day this can be done outside on your driveway or sidewalk. This works well with plywood also. Whenever I see some boards cupping in my stacks of boards I try to flip them upside down and place them on the bottom of the stack. This also works but takes a lot of time. If you dont catch the cupping early it is very hard to remove it. Catch it as it starts and flip it over and it will correct itself before setting for good.
-
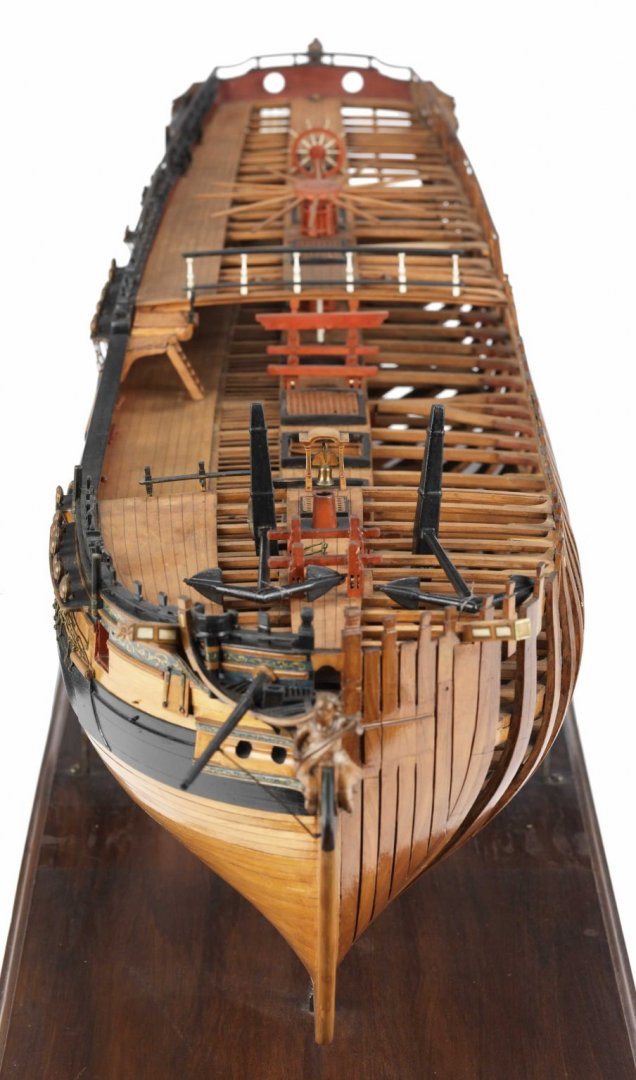
That is a very good start. Looks like a lot of fun to build.
- 322 replies
-
- 5
-
-
- enterprise
- caf
- (and 1 more)
-
Excellent work on the planking. I think you have a nack for it.
-
I would go with the boxwood or pear. all that stiff is painted either red or black. Like the contemporary model. Picture this with the addition of gun carriages painted red also.
- 642 replies
-
- 6
-
-
- winchelsea
- Syren Ship Model Company
- (and 1 more)
-
I wouldnt worry about it. The stuff on the stem will be all painted black so when the time comes you can just fill it and sand it smooth. Not to mention that it would be near impossible to see that detail behind the head rails and head grating.
-
Multiple with staggered sections. Nice joint there!!! well done. 😀
-
Is that pear on the right? Looks dark for boxwood. The cedar would compliment the carvings and friezes better and tie in with them. The holly may be too light. But using Pear would keep it all consistent. I personally like the decks the same color as the hull planking but thats just me. You need to thing about how the deck fittings would look against the deck planks if you use pear and and paint most of the fittings down the deck. Its a tough decision. One I anguish over all the time.
- 642 replies
-
- 2
-
-
- winchelsea
- Syren Ship Model Company
- (and 1 more)
-
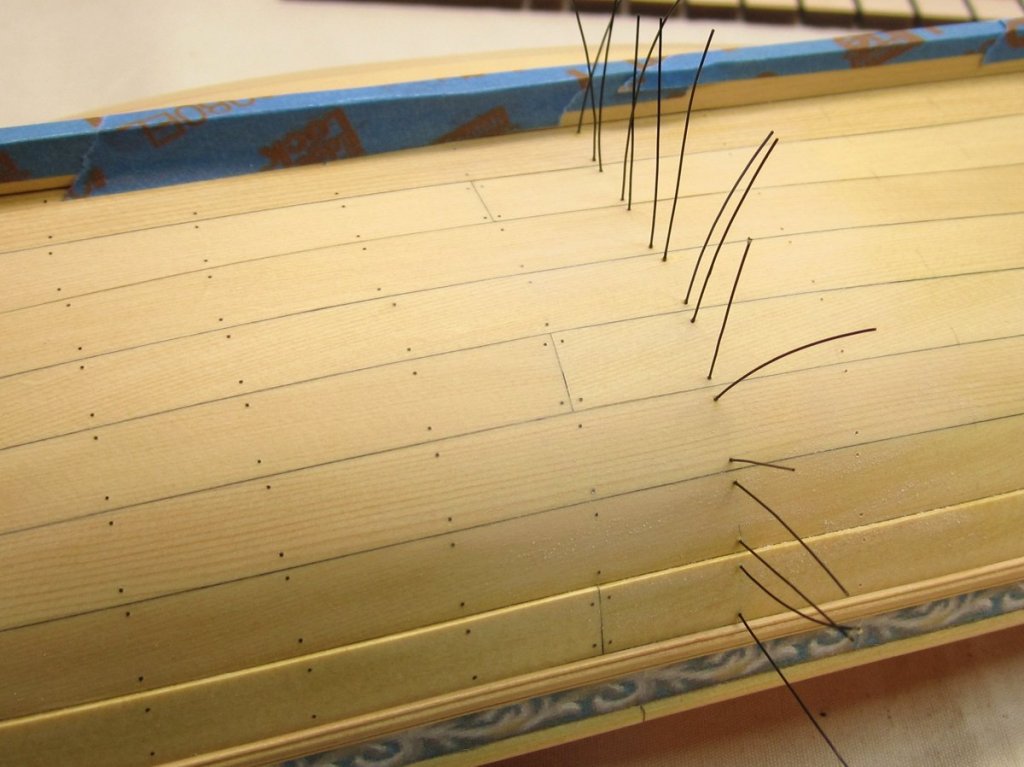
Just use a straight razor blade to slice it flush. Works the best. I use CA to glue them in the holes. But seriously you dont have to use any glue at all. If your hole is the correct diameter and you get a good tight fit. Then when you apply the wipe on poly and it dries it will act like additional glue. You can simply sand the hull to after you use the straight razor to make the line flush. Use a fine grit say 320. Its a very simple process. Your treenails may have started out as #78 bits but my guess is they were made much larger by whatever awl you used or the pencil. They look way too large. Thats the issue. With cedar the wood is soft and prone to enlarged holes. Also....Not that big a deal if you dont add treenails at all. Its a real nice look. Much preferred over a poor job of treenailing. Run more tests before you even touch the model.
- 778 replies
-
- 6
-
-
- cheerful
- Syren Ship Model Company
- (and 1 more)
-
That looks fantastic. Well done. Your order for the other parts shipped out today so its perfect timing. Chuck
-
You did a great job on that planking. It would be a real shame to ruin that with an odd treenailing job. I wouldnt just put them at the butt joints. That looks awful. It only looks right if the treenails are to scale and placed where they would be. The sample board you made is definitely too large. That would really be a mistake in my opinion. I would not go larger than a #78 drill bit. You might want to try using brown mono-filament. You can even use black....I would go with 10 pound stock and nothing larger than 12 lb fishing line. They would be nice and neat. A brown line looks very good and I have seen one Cheerful hull done that way and it looks great. Otherwise the treenails can get too large with irregular shape. The other very good option is to not show treenails at all. That planking looks so good it would be a shame to ruin it with an odd pattern or large treenails. It would look fantastic as it is right now.
- 778 replies
-
- 12
-
-
- cheerful
- Syren Ship Model Company
- (and 1 more)
-
No not at this time. Maybe a lot later down the road. It would be too huge for me to rig. But plans for rigging her may be done way way down the road. Chuck
- 1,784 replies
-
- 2
-
-
- winchelsea
- Syren Ship Model Company
- (and 1 more)
-
Very very nice....try and experiment with all different kinds of threads. You will find one that is excellent and it will be your "go-to" thread for modelling. Keep track of the recipe you use. Make a log of all that for future rope making sessions.
-
Welcome to the group!!!! Looking forward to seeing your model underway. Its never too late to join the group.
-
Yes but unless the eyebolts and hooks are smaller you cant use 2mm blocks. Depending on the size of the cannon...you might be talking a 9" block as as well. Which would be closer to 3/32". 3/32" would be fine at 2.5mm. 1/8" scale is a tough scale to work on.
-
Blocks would have been 8" long and at that scale they would be??? 3/32" long I believe. I know its challenging but I would also consider making the ring bolt smaller in the carriage. That would help. It looks to be about 8" round considering the block size in the photo. Maybe try with thinner gauge wire. Chuck
-
Ripping Planks - what I've learned from others
Chuck replied to glbarlow's topic in Modeling tools and Workshop Equipment
Yupp, thats how I do it. I dont use a push stick or any blocks. I just use my hands. Maybe some would see this as unsafe but i feel I get more control actually with my hands touching the sheet being milled. For me its the safer way to go. With thinner sheets....like 1/32” sheets where I am ripping 1/32” x 1/32” strips, I will use two or three clamps on the fence to keep the wood down on the table. The thin sheets want to bend and buckle and more clamps seem to do the trick as a hold down. Its really not hard to do and just takes a bit of practice getting comfortable. -
Yes that looks very good indeed. Well done.
- 144 replies
-
- 2
-
-
- winchelsea
- Syren Ship Model Company
- (and 1 more)
-
They look OK....the length wont affect things. But yes they are the typical funky shape for commercial ones being very bulbous on the tops. I am more worried about you not being able to get the rope coils over the top of those because they are so close together. But it will probably be OK. I think you should use the longer ones. They are much better than the shorter ones.
- 160 replies
-
- 4
-
-
- cheerful
- Syren Ship Model Company
- (and 1 more)