Chuck
-
Posts
9,704 -
Joined
-
Last visited
Content Type
Profiles
Forums
Gallery
Events
Everything posted by Chuck
-

ancre Coureur by cafmodel - 1/48
Chuck replied to cafmodel's topic in - Build logs for subjects built 1751 - 1800
Wonderful news Tom......😃 -
Chapter four materials list has been uploaded in the first post of this topic. I am working on finishing up the Chapter 4 of the monograph now and should have the parts ready as well. Maybe a few days more. Take a look at the materials list though because when you buy the package for the laser cut parts for chapter four.....you may need to get more 2" planking sheets to rip planks/strips for your gun deck and bulwarks. It depends on how many you have left.....I added how many I used four chapter 4 to the list....as well as two 4" wide sheets of 3/64" cedar so you guys can make your margin planks. Rather than laser cut these it is better if you make them to fit your model perfectly. I uploaded the template for them as they will absolutely need to be tweaked to fit your model well. I uploaded it to the Winnie plans download forum.....where you downloaded the plans. Chuck
-
Nicely done!
-
That planking is looking good. Well done.
-
Beware ordering Trident Alert...no refunds and order cancelled!!!
Chuck replied to wormwood's topic in Wood ship model kits
Thats bad.....Trident has been accused of violating free trade? That sounds very very serious indeed. Accused by who? It all does sound a bit shady. I wouldnt touch this with a ten foot pole. Maybe cut your losses and buy the CAF Coureur instead. Get your refund but I wouldnt send them any more money. I am 100% certain that you would be better off with CAF as they actually have their own website. I am not sure how you would even contact Trident without them having a website. Trident Model is a member here on MSW and I will ask them to respond. I must unfortunately also mention that my last two private messages to Trident some weeks ago went unanswered so we shall see. Keep us posted. -
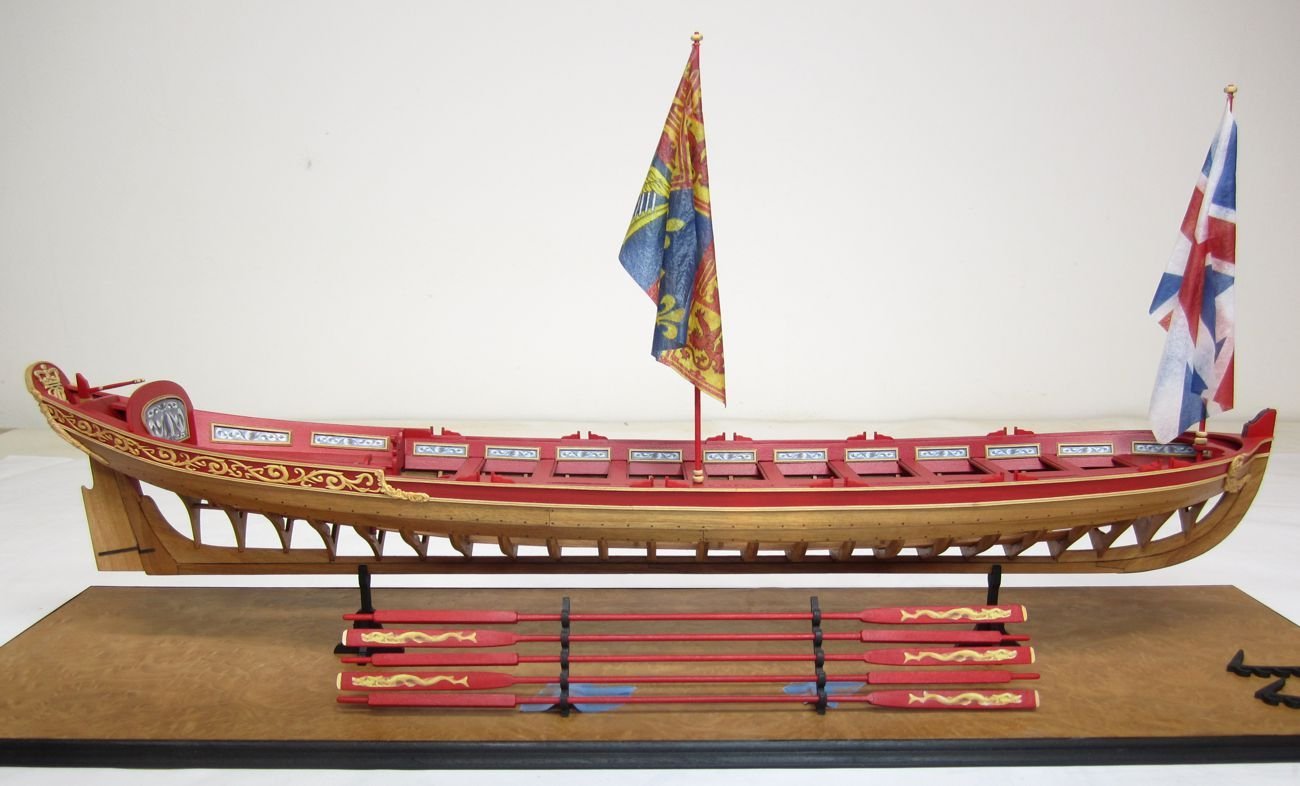
Those flags look really good. Very realistic and to scale. You shaped them pretty darn good too. If you alternate the blades of the sweeps on the left and right sides of each stack, it looks much better and more balanced.

- 221 replies
-
- 10
-

-
- queen anne barge
- Syren Ship Model Company
- (and 1 more)
-
Beware ordering Trident Alert...no refunds and order cancelled!!!
Chuck replied to wormwood's topic in Wood ship model kits
Wormwood, welcome to MSW. You should introduce yourself to the forum in the area we have set up for it here. https://modelshipworld.com/forum/3-new-member-introductions/ As this is your first post, it is customary to do so. However I appreciate you giving us details of your transactions with Trident. It certainly doesnt sound good at all. I have read on SOS that there are many folks who have had their orders cancelled without warning and they have not gotten their money back. This is for the new Alert kit. I would recommend that everyone be very cautious and certainly wait before placing an order. You dont want to get in the middle of a bad situation. I dont quite understand the situation but as far as I have been told and what I have read on SOS, its not a very good situation. I hope it worksd out for you and you get your money back. As it is China....I am not sure what if any protections you might have. Maybe through your CC company. Thanks for letting us know and keep us updated. I edited the title of this topic so folks more readily know what it is about. Chuck -
HMS Winchelsea (1764) 32 gun frigate GROUP PROJECT INFO
Chuck replied to Chuck's topic in Group Projects on Model Ship World
You could try it. I have not heard of that. But there is no way to tell until you try it. It could work well. -
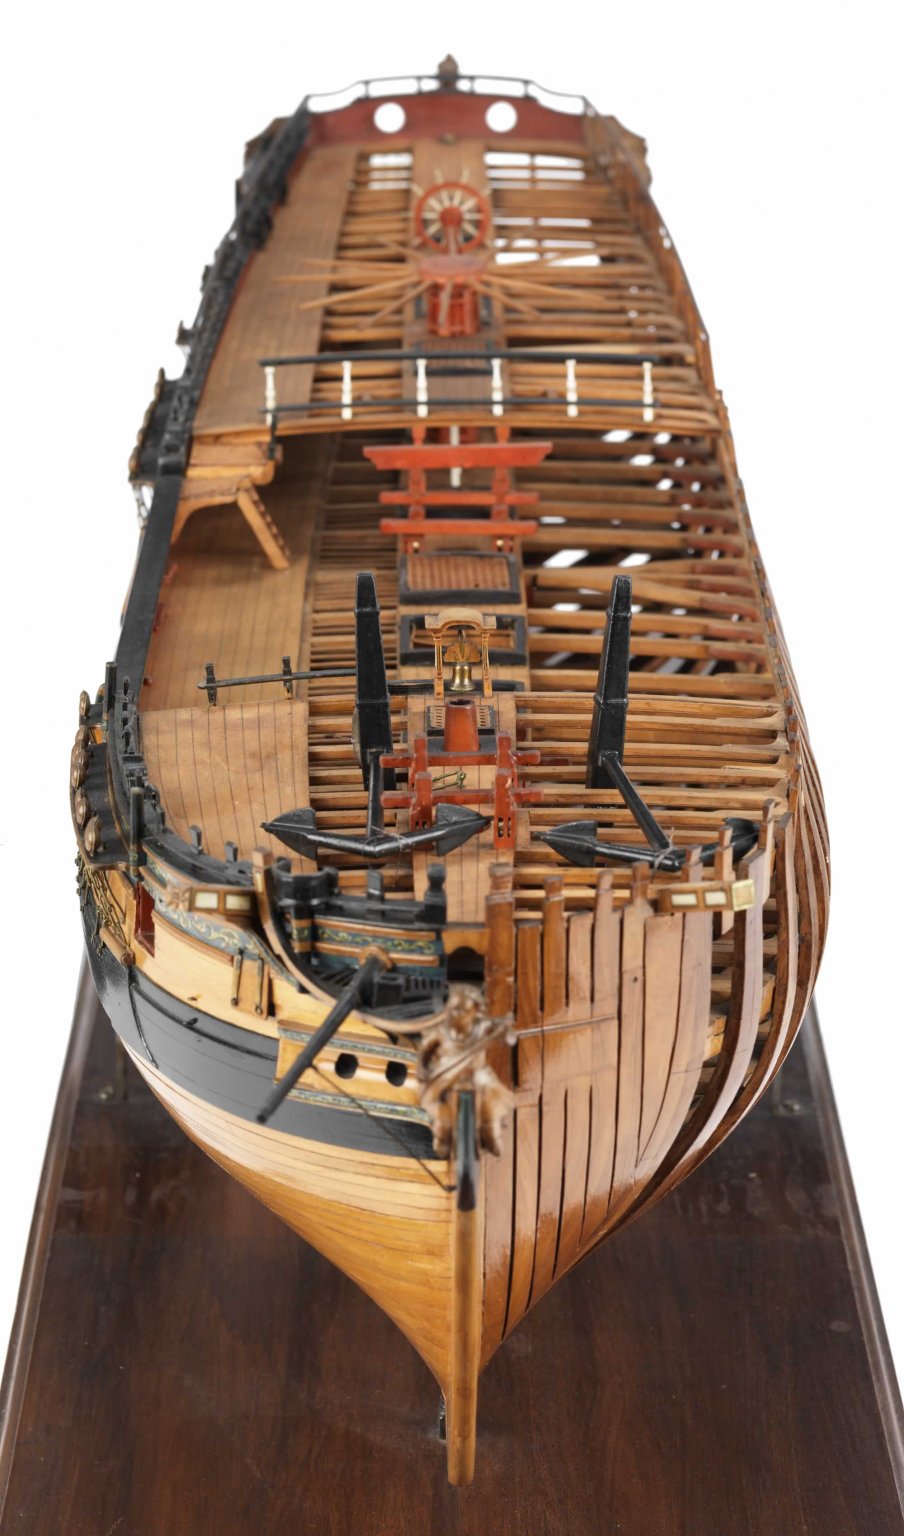
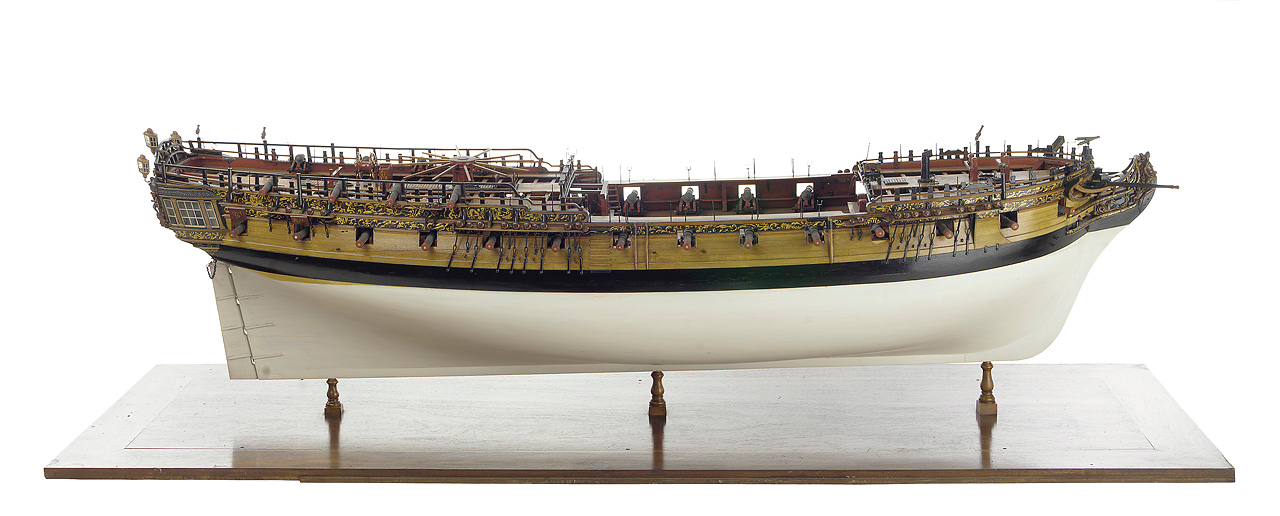
Jorge, the break at the forecastle you see is very much typical and correct. Later they continued it to the forecastle but early on this was indeed the way it done. Just have a look at the many contemporary sources available. Too many to list but here are some contemporary examples.
- 1,784 replies
-
- 14
-
-
- winchelsea
- Syren Ship Model Company
- (and 1 more)
-
Your model looks fantastic. Quite well done and it was a pleasure to follow along as you built it.
- 103 replies
-
- 1
-
-
- queen anne barge
- Syren Ship Model Company
- (and 1 more)
-
Wonderful planking. Once youve planked a hull after lining it off, you will never plank one without doing so again. The results speak for themselves.
-
That looks pretty darned good. Well done.
- 778 replies
-
- 3
-
-
- cheerful
- Syren Ship Model Company
- (and 1 more)
-
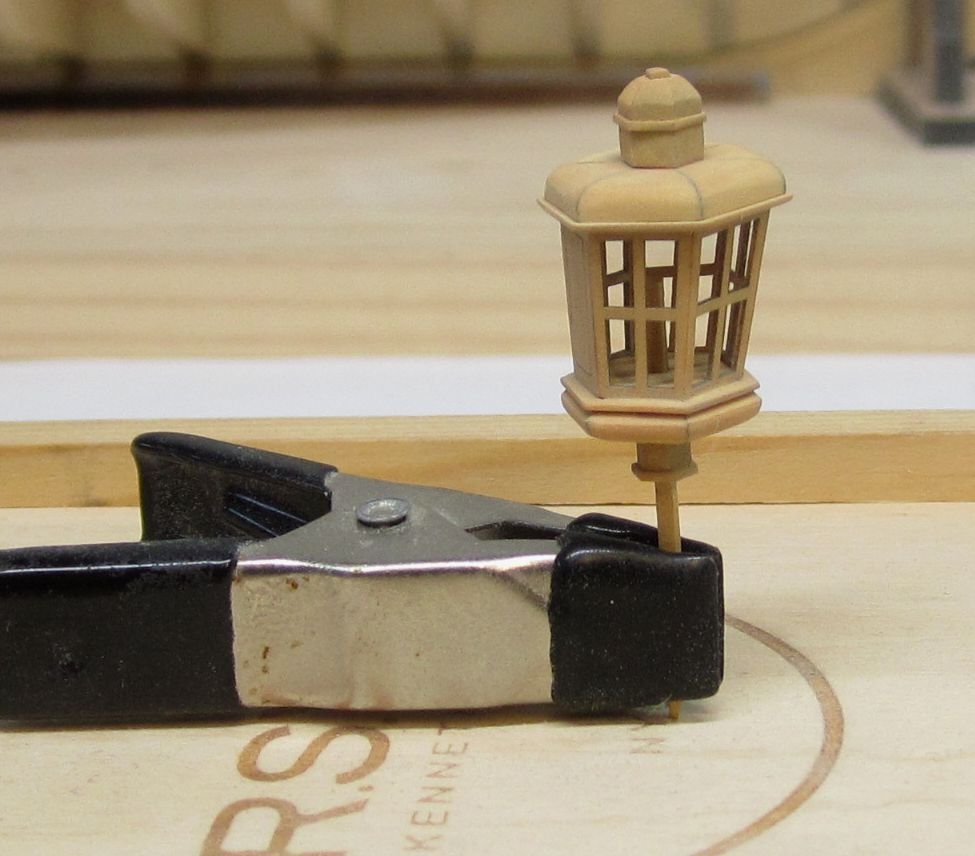
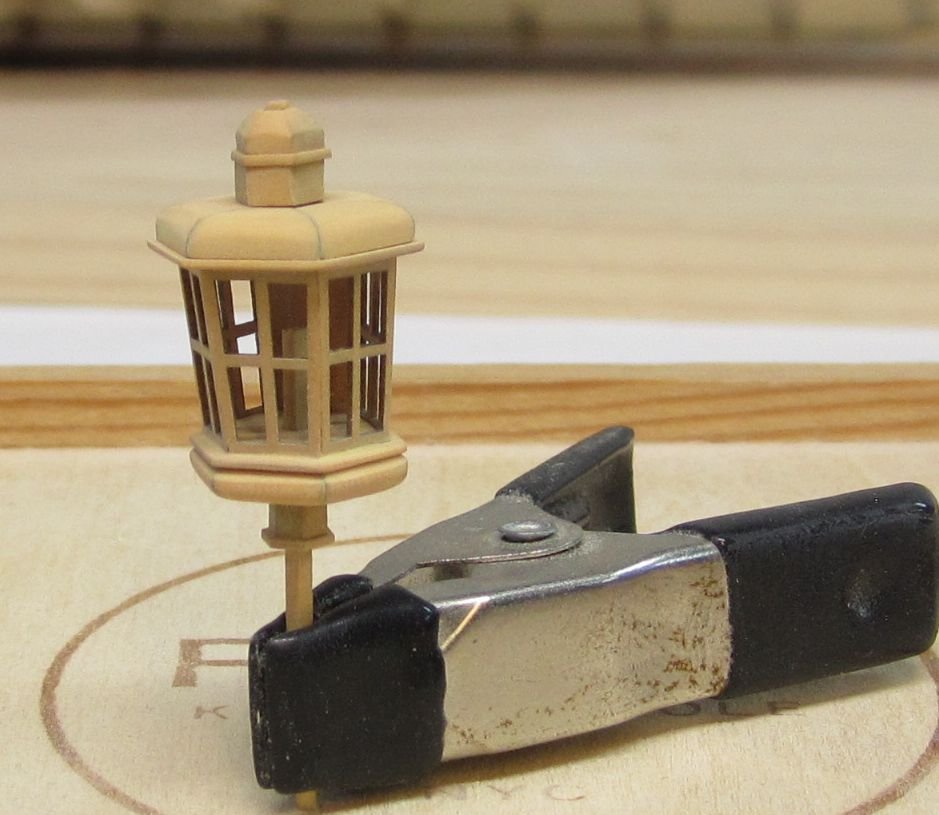
She looks fantastic. You should be quite pleased with that. Very nice and clean model you have. I will note that you will need to turn the model upside down one more time to drill and file out the rudder opening hole in the lower counter. You might want to remove the Lantern for that. I also have a newer design coming for the lantern that is made entirely out of Boxwood so no painting is needed. It is slightly different than the one you used. Just in case that one might get damaged. I was going to leave that until much later in the project. It makes me nervous just looking at it. Here is the prototype for the improved "all boxwood" lantern. The windows are just .015 thick.
- 137 replies
-
- 10
-
-
- winchelsea
- Syren Ship Model Company
- (and 1 more)
-
Indeed it is. The only build logs not welcomed are those which are from pirated kits copied from unethical manufacturers. There is a list of those in our guidelines. Chuck
-
That looks very good. Its a difficult hull to plank and you did an exceptional job.
-
Not something that was done in reality. It would not be historically accurate in the least. But it is your model. As long as you like it. Chuck
- 1,784 replies
-
- 2
-
-
- winchelsea
- Syren Ship Model Company
- (and 1 more)
-
That is typical Cherry. Lots of sap pockets and yes grain visible. You can get lucky and “Cherry” pick some excellent pieces with no grain at all but it not common. It will darken a lot to a brownish red color after about a year. Swiss pear is better but it is also more than double if not triple the price. At least here in the states.
-
Photos
Chuck replied to derekuk's topic in Using the MSW forum - **NO MODELING CONTENT IN THIS SUB-FORUM**
No they are not hosted here.....those are broken links from a third party hosting site. Cant do anything about it. Folks should really really not do that. They should actually upload their photos here. Chuck -
If you can post this then its not a problem with the forum and posting text. My guess is it has something to do with the images you tried posting. They may have been the wrong format or too large to post. Try and post one here in this topic.....just one picture. See how it goes. Did you upload them here or are you trying to post from a third party hosting site. That could also be a problem. Try uploading a photo and they should appear as an actual photo and not a link. You need to click "choose files" to upload them from your computer below. Chuck
-
That looks perfect Mike. Yes it was great to push the laser cutting technology to make those mortices on both sides. I am however contemplating not using them on the quarter deck and forecastle beams for the very reason you mentioned. They take forever to laser cut and the mortices will eventually be covered up anyway by the decking. I will see how time consuming it is once I get that far along. A simple butt joint with the ledges will work just as good.
- 607 replies
-
- 4
-
-
- winchelsea
- Syren Ship Model Company
- (and 1 more)
-
looking great Rusty...really nice work. Congrats on the pup!!! Chuck
- 642 replies
-
- 2
-
-
- winchelsea
- Syren Ship Model Company
- (and 1 more)
-
Oh yes....other than the first center plank all are tapered at the bow and stern.
- 1,784 replies
-
- 3
-
-
- winchelsea
- Syren Ship Model Company
- (and 1 more)
-
Thats all it is and it isnt a severe bend at all. Ot should be a piece of cake.
- 1,784 replies
-
- 5
-
-
- winchelsea
- Syren Ship Model Company
- (and 1 more)
-
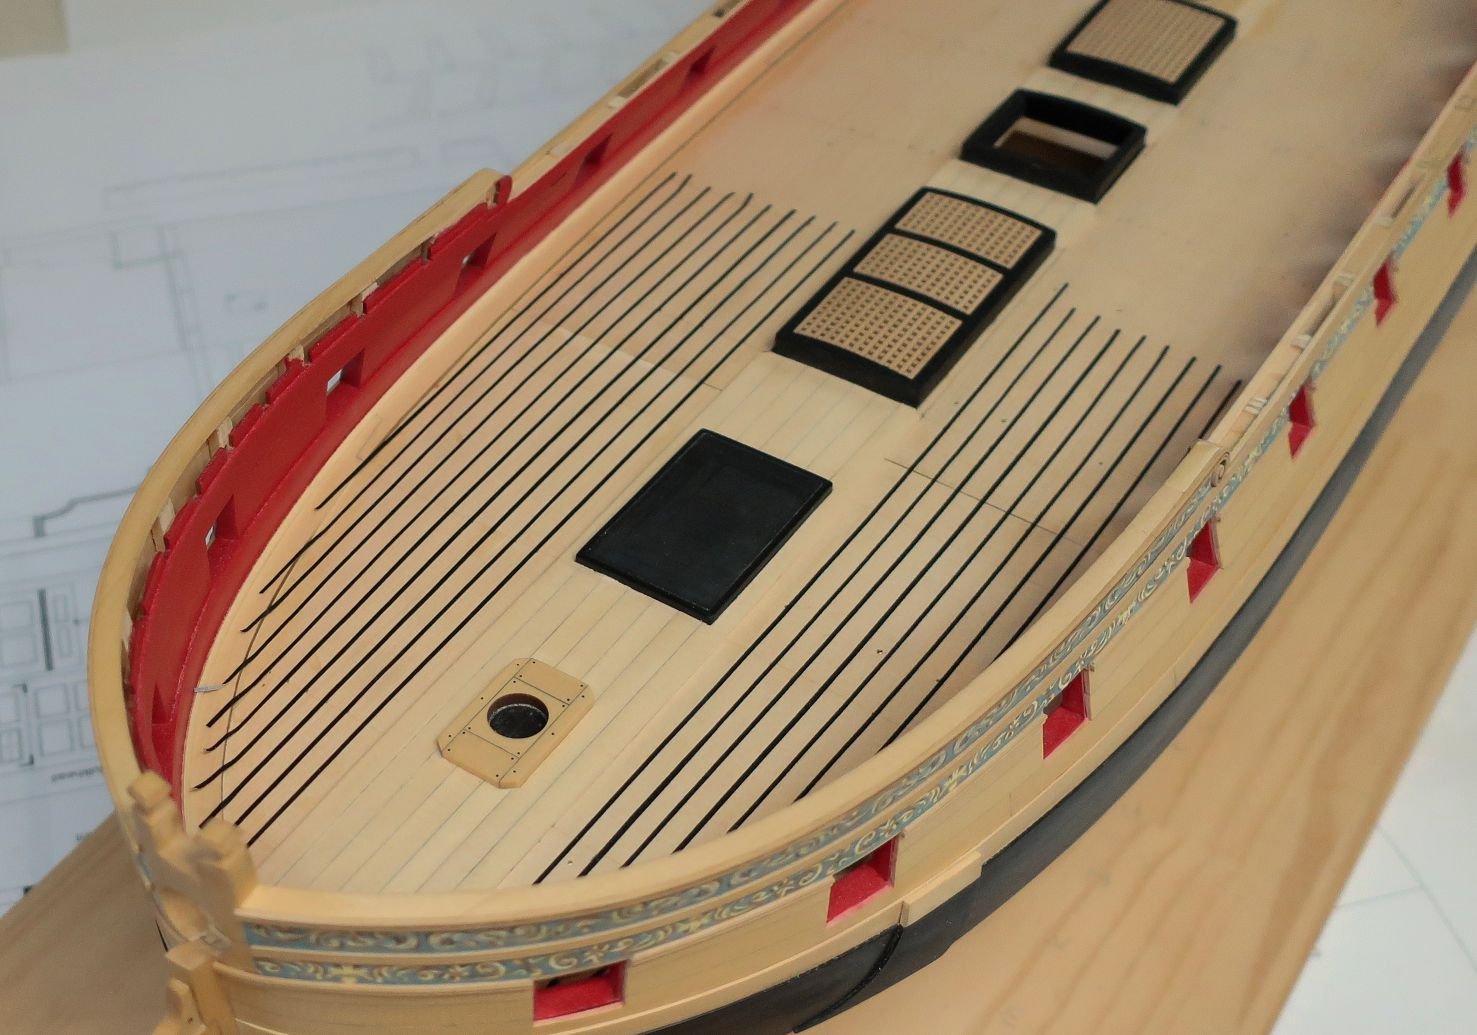
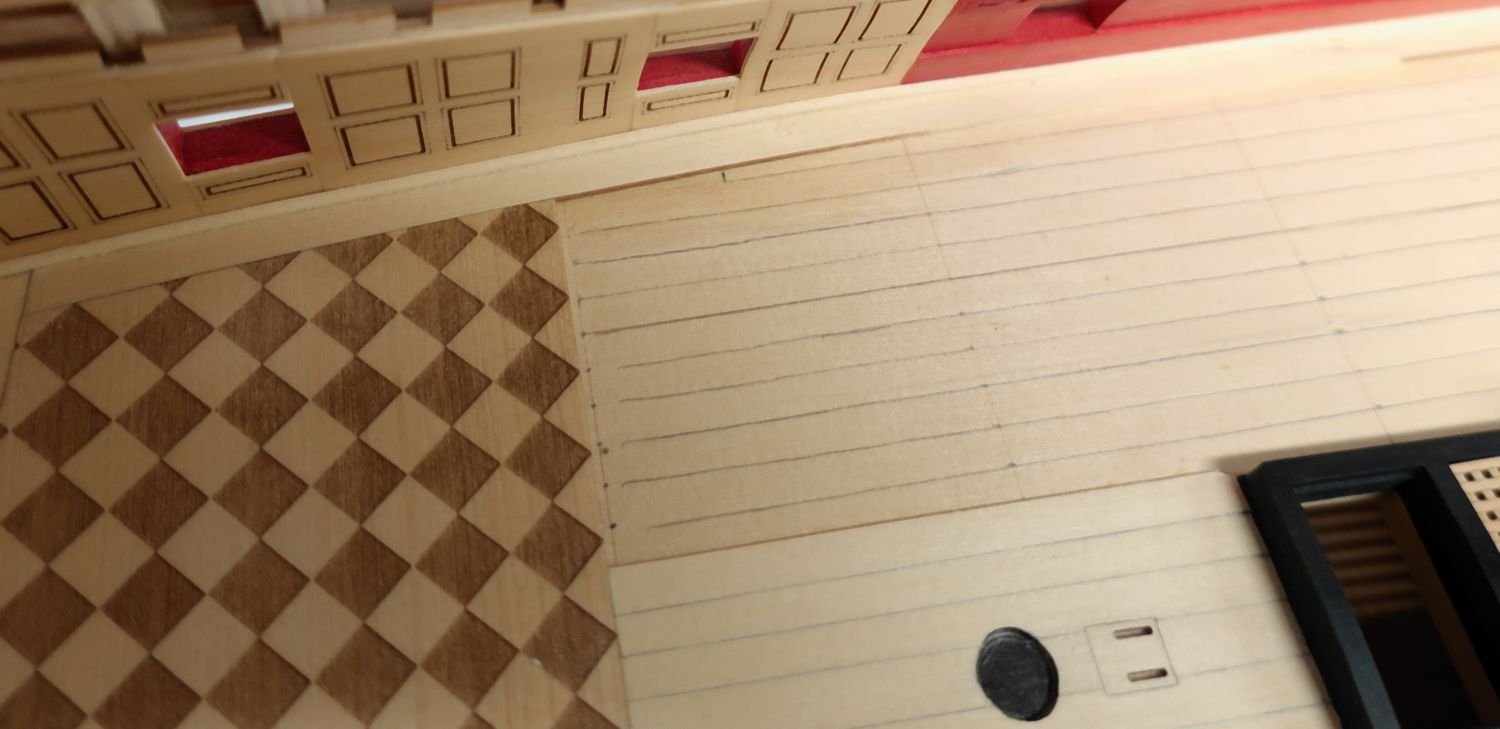
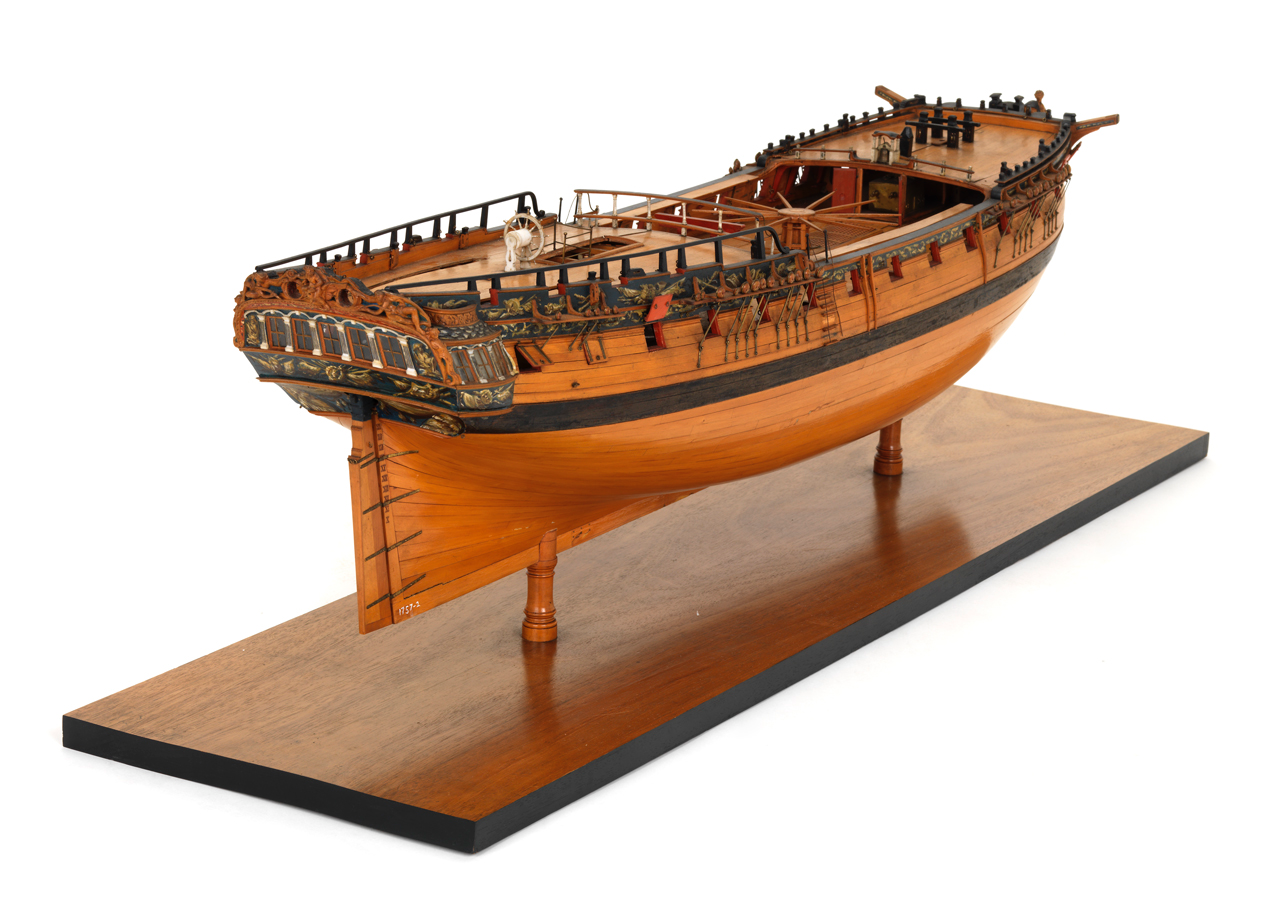
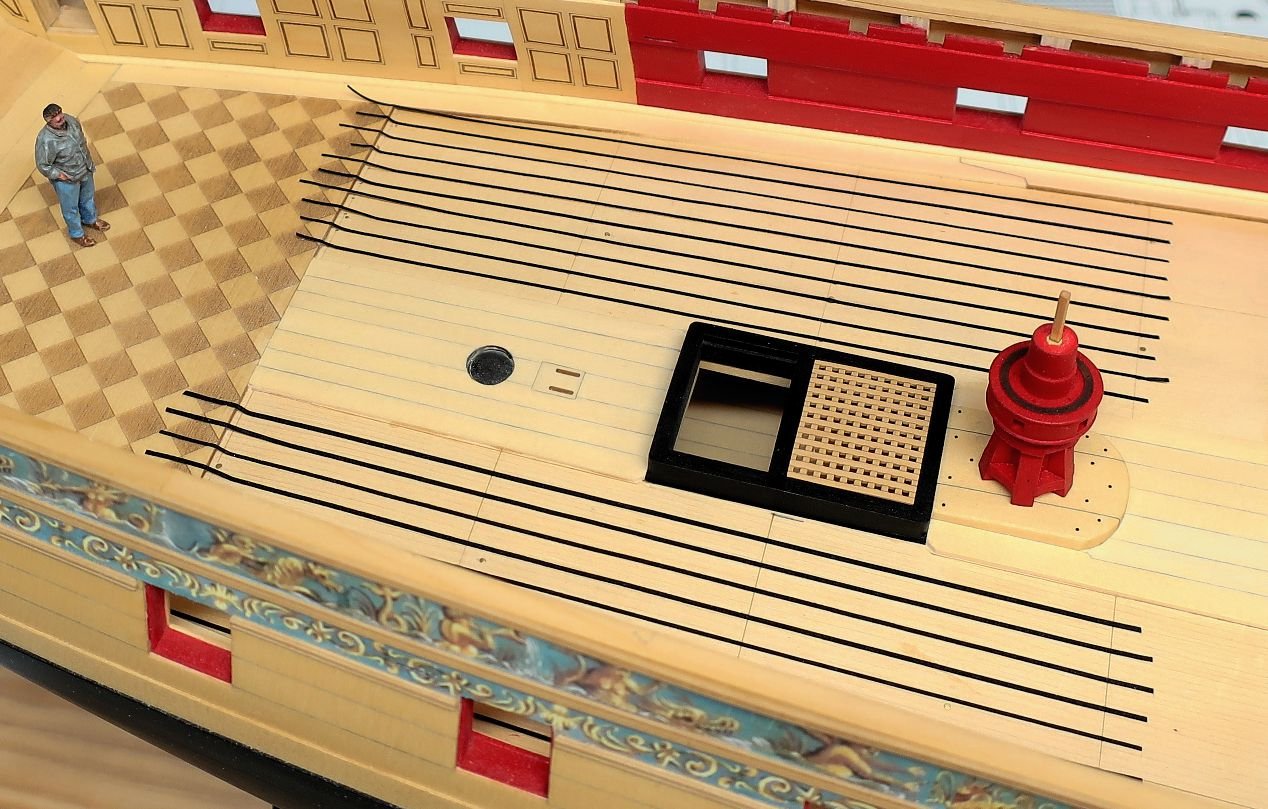
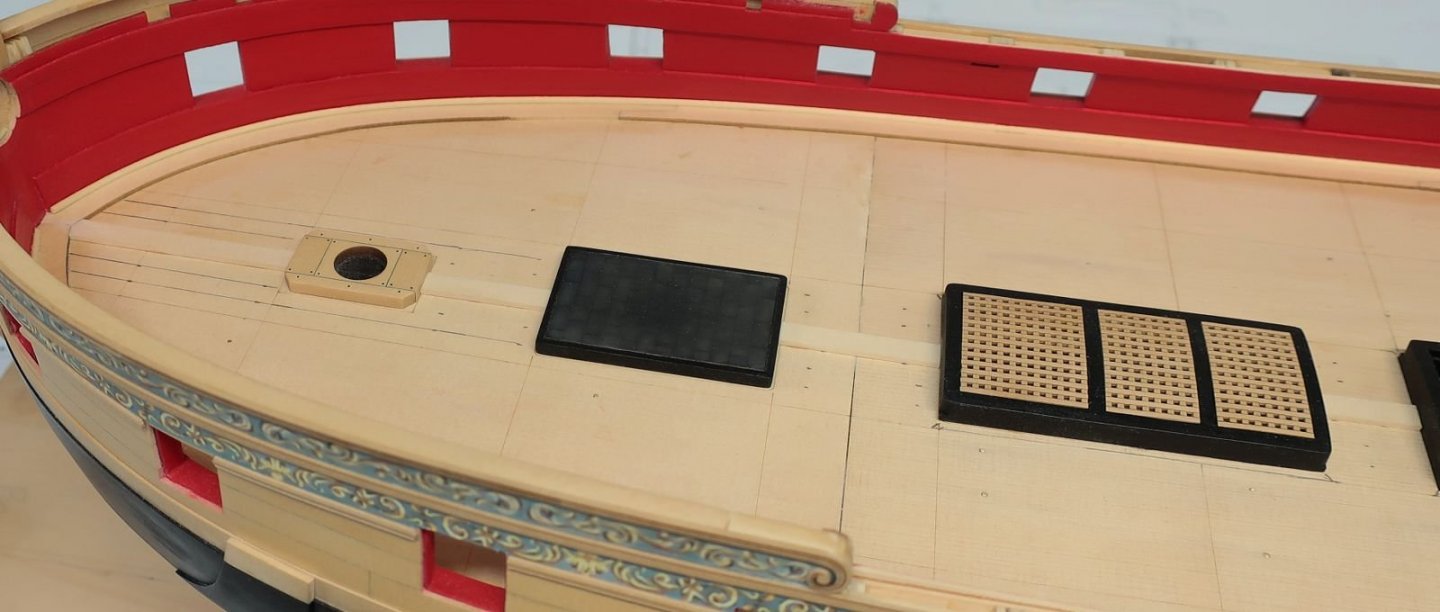
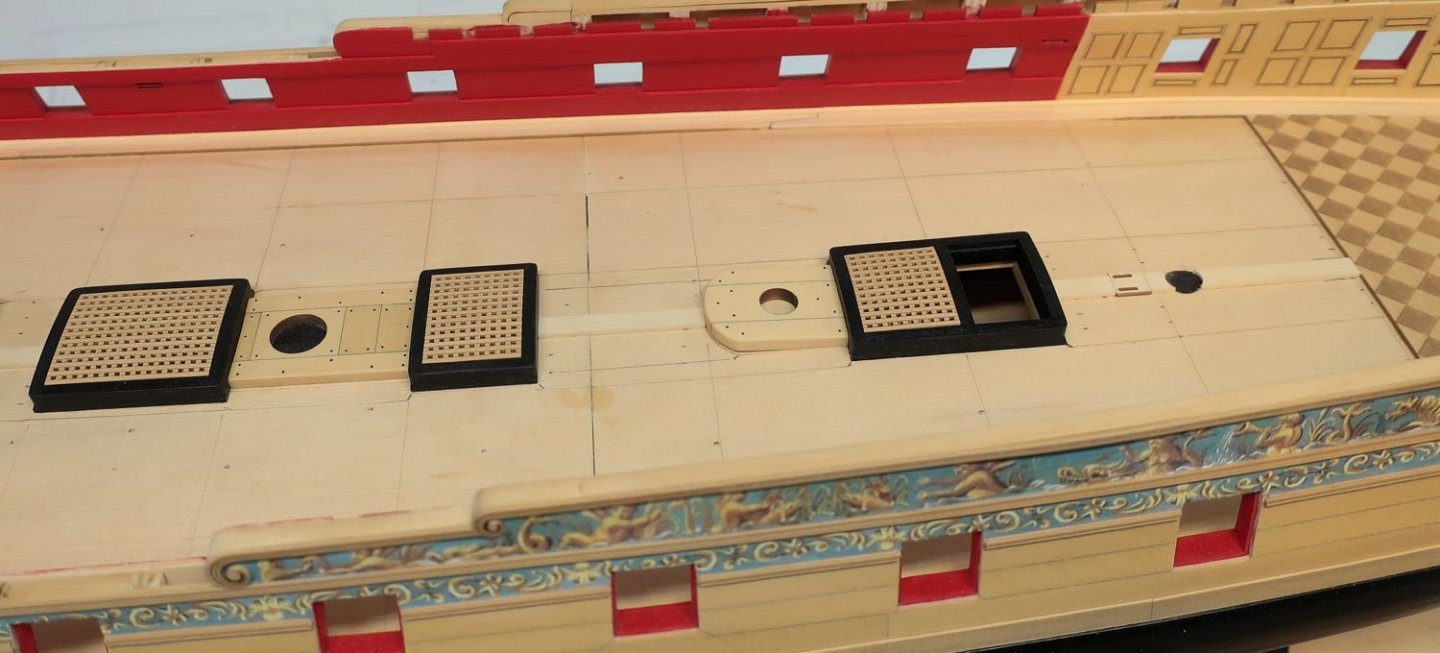
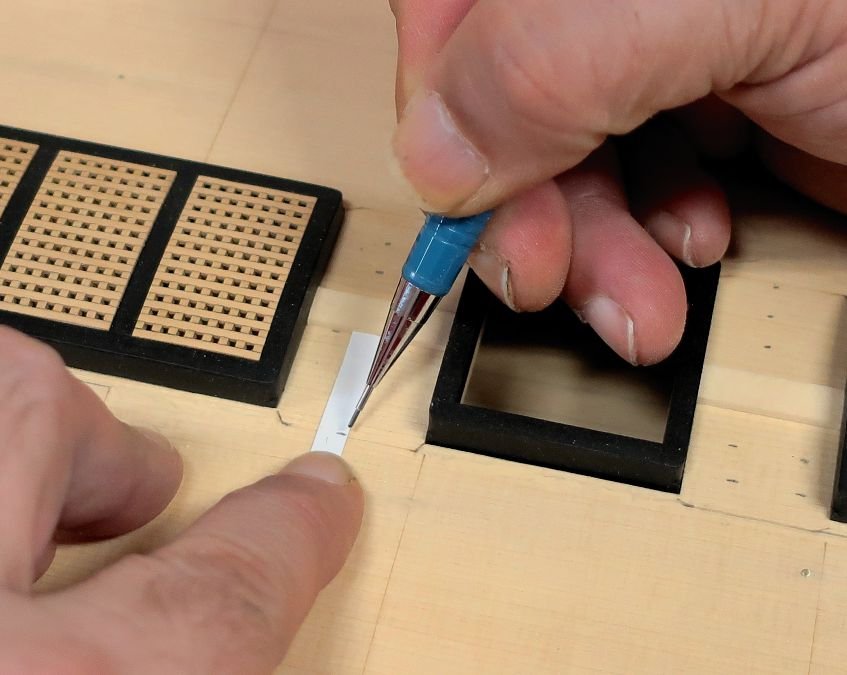
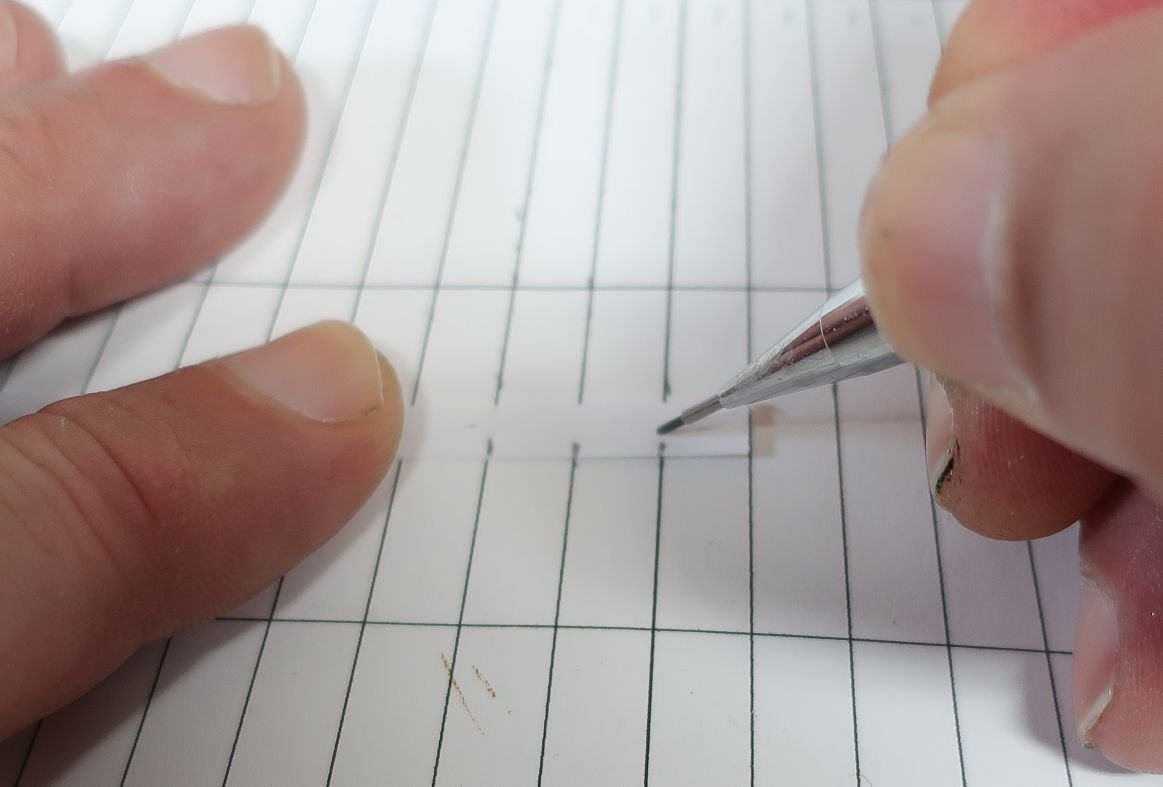
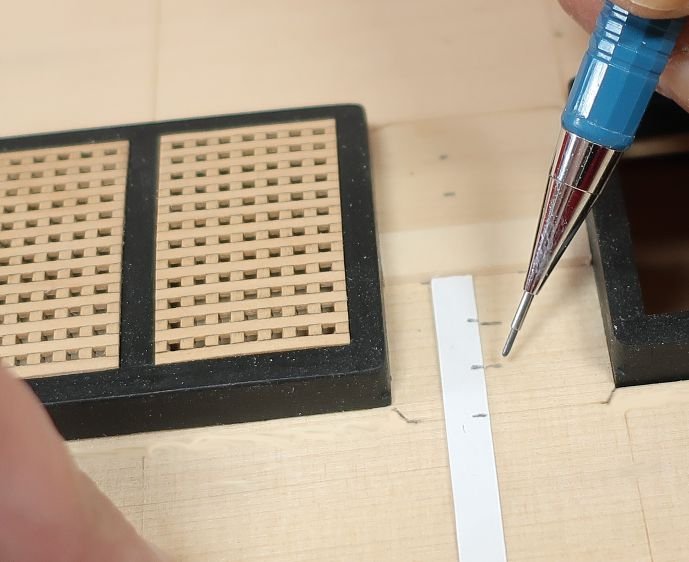
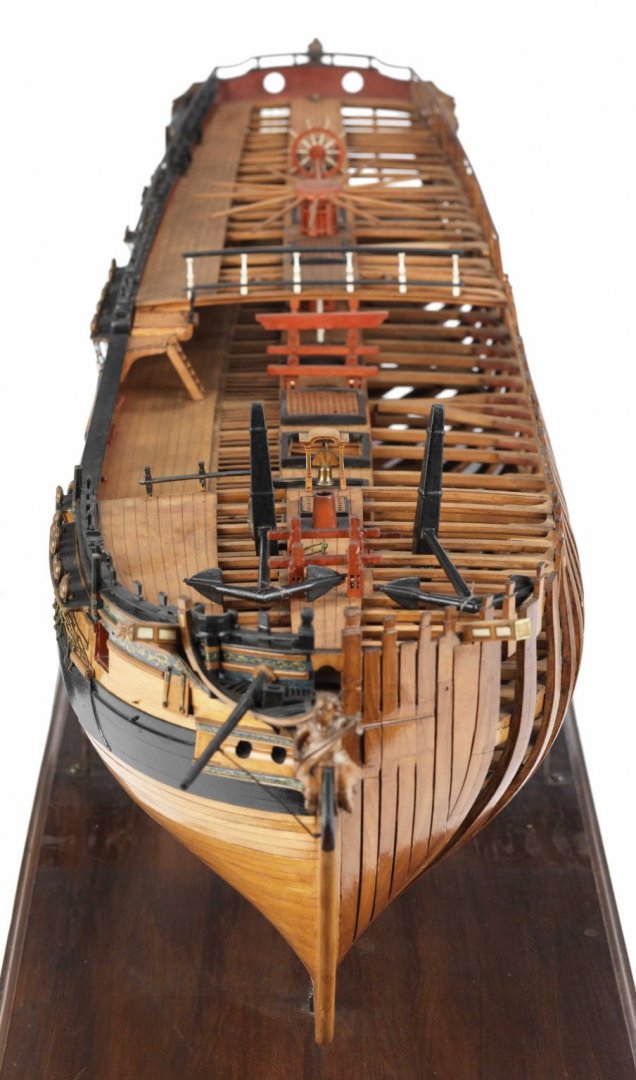
No laser cutting....this is the perfect hull and deck to learn this technique. You wont really even have to bend them with heat. But you could if you wanted to....these planks should bend fine when you glue them on as the curve isnt very severe at all. I was very conservative with it. I saw how folks had a hard time with the hooked scarphs on the Cheerful so I made it so there were just four of them. This meant less curve to the deck planks. Below you can see that the center belt has been planked. I simulated the seams with pencil like I did with the hull planking. There are never any butt joints in this center belt between coamings and partners. This is yet another common mistake seen on models and kits including on kits that provide laser etched planks. The distance was short enough that it was always one length used between the hatches and partners. It was stronger this way. So no need to follow the butt joint pattern you will be developing when we line off the hull on either side of the center belt. You will also notice in that picture above and below that on either side of the center belt I have lined off the deck using thin strips of black masking tape. Looks familiar right? The thin strips follow tick marks I made for the remaining belts. I made them the same way as I did for the center belt. Use your tick strips and planking fan. Use the laser etched lines that represent the deck beams as you repeat this process until you have tick marks on both sides of the deck for all of the remaining belts. The tape runs along my tick marks. You will no doubt have to make adjustments with your tape. Just run it off the deck and onto the margin planks as shown. To finish it up.....use a mechanical pencil with a sharp point to run a pencil line down the "good side" of you tape that follow your tick marks.......then remove your tape. When you remove the tape it will look like this......you can do this down the entire deck but I often do just the bow area and the stern where there is a taper and we need to create the hooked scarphs along the margin planks. Do you see where I created the hooked scarph in the outside deck plank???? I just erased some of the line that followed the tape and added a new short line to create the shape. On this hull there will be just one along the margin plank at the bow and one more aft........by the checkered floor for the great cabin. In addition you can mark all of the butt joints on the deck using the typical 4 butt shift pattern. Use the laser etched reference lines for the deck beams for this and examine the plans for their locations. Now I am ready to plank the remaining two belts on each side of the center belt to finish off the deck planking. I will taper the planks as need to match my lining off just like we did for our external hull planking. You will need just 1/4" x 3/64" strips to plank the deck and a handful of wider 5/16" strips for the planks around the coamings where you need to shape them around the tabbed areas. I feel compelled to mention that you guys could absolutely change the deck planking to a more severe curve at the bow if you want to. Just adjust the bands before you line off. Almost no kits or even most scratch builders fail to curve the deck planks like this. Its very different than what many of you are probably used to seeing. So I split the difference between the drastic curve at the bow and straight planking to show a more conservative curve so it wouldnt seem so drastic to all of you. This is something you guys should play with depending on your preference as the contemporary model for Winnie shows the most severe curve I have ever seen on a deck. Here is a look at the contemporary model of Minerva in the Rogers collection and it shows about the same amount of curvature that I am using on the Winnie. Much less than the contemporary model for Winnie. This also shows two hooked scarphs instead of one. So you can get creative here.


- 1,784 replies
-
- 31
-
-
- winchelsea
- Syren Ship Model Company
- (and 1 more)
-
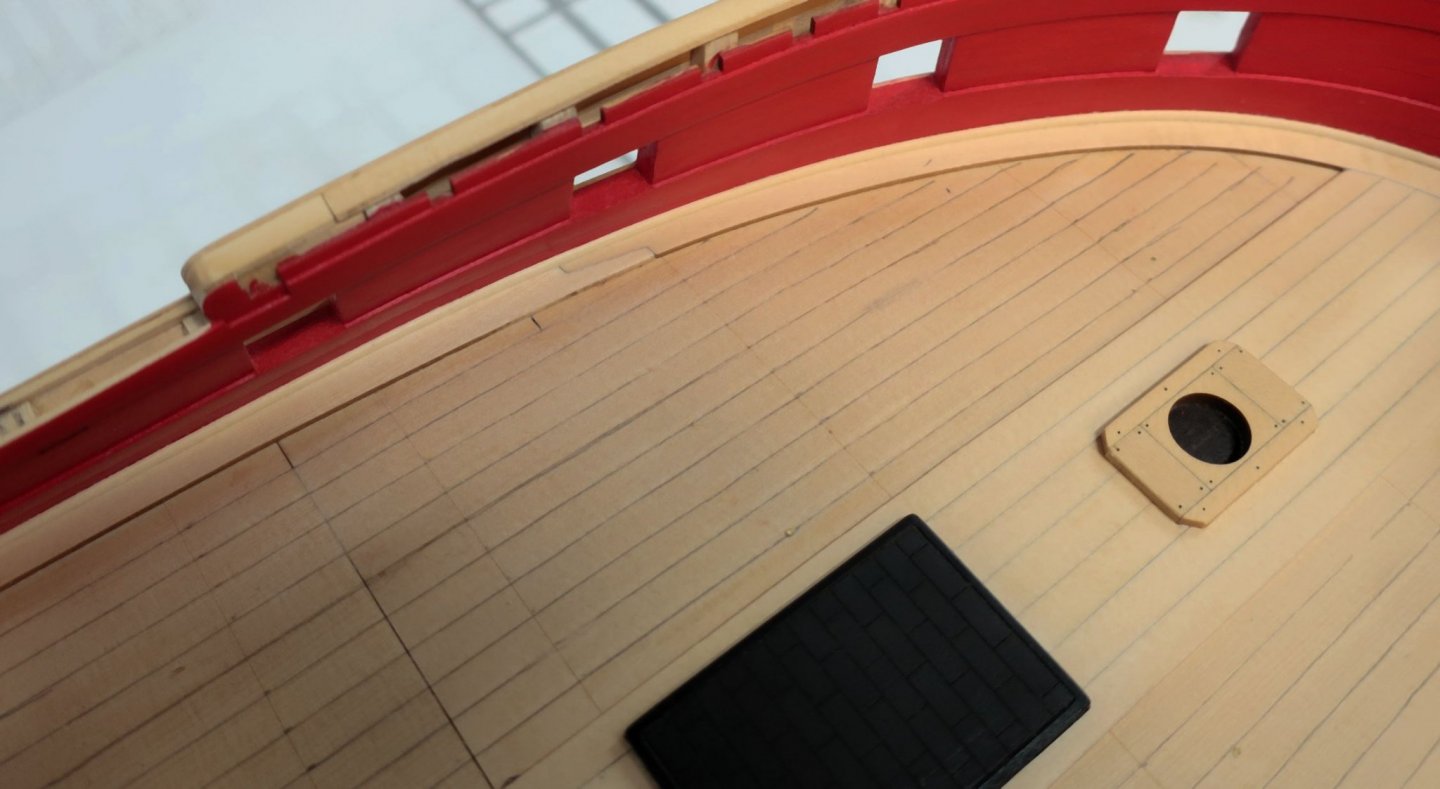
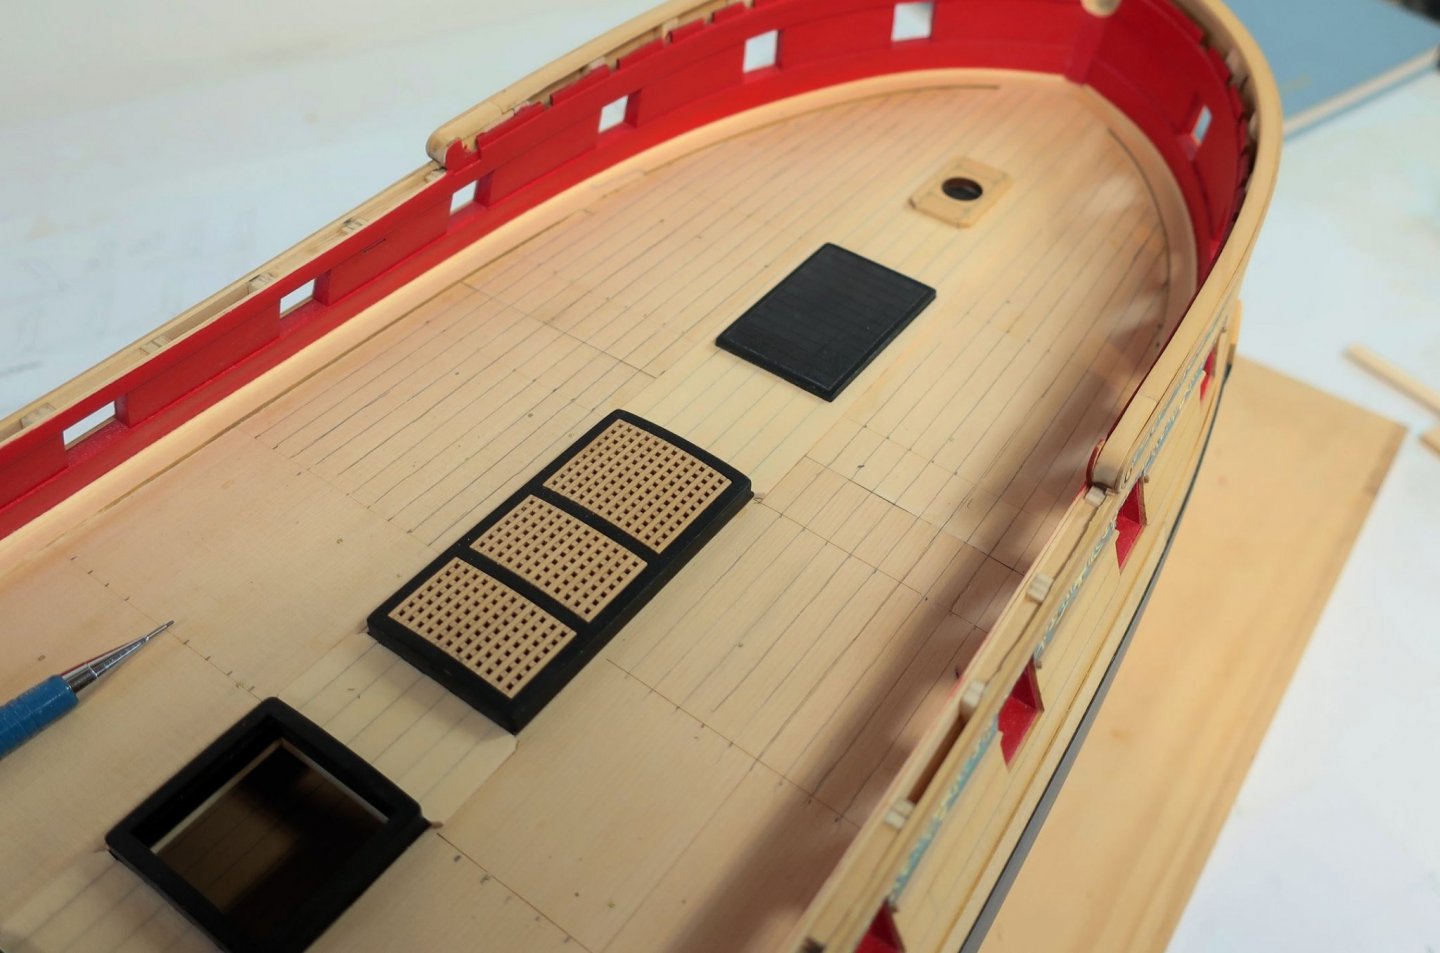
Sorry for the delay since the last update. You guys have been buying huge amounts of blocks and rope. Planking the deck..... First after making all of the coamings, gratings, stove platform and mast partners, they were all glued into position down the center line of the deck. Once placed in position, I immediately added a single deck plank (1/4" wide and 3/64" thick) down the center line between the coamings and partners. Do this very carefully, trying to line it up consistently down the center. You will be lining off the deck on either side and you want to make sure everything comes out even on both sides of the deck. In the photo below you can see the strip down the center. Also note how I decided to paint the frame of the stove platform black to simulate an iron frame instead of a natural wood frame. You will notice that there are laser etched reference lines that break up the deck into belts just like our hull planking. There is the center belt of seven planks.....three more on each side of this center plank we added. Then there are two more belts on either side of this center belt. They are separated by the etched lines which you will use for reference when lining it off. There are also etched lines that run across the deck which indicate where the beams would be and will help you locate the butt joints for the deck planking. NO LASER ETCHED FULL DECK ON THIS MODEL. We will learn how to properly line off the deck so you can do this on any model you build. Note in the photo below the small square forward of the mizzen mast. It has what looks like little sheaves in it. Those arent sheaves at all. They are actually slots which are used for the tiller rope that runs around the drum of the ships wheel and down to the tiller. We will be simulating the rope running below the gun deck and up to the wheels drum later. This is glued down the center line as well and you will plank the deck carefull around it. Now for this era the deck planking wasnt just straight down the deck fore and aft. It was elegantly curved and tapered at the bow and stern. This is a common mistake seen in many kits. See the contemporary model below. I havent given the planks as drastic a curve and I am being a bit conservative with it. Although you can see just the forecastle planking its the same curvature. In order to create a plan we have to line off the hull to find out how much taper is needed for the planks etc. Just like the outboard hull planking. We will first just complete that center belt. This is easy enough. Take out your planking fans!!! Cut some tick strips from some paper. There are three planks on each side of the center strip. Take a tick strip and hold it against the edge of the center strip. Then mark the location of the etched line defining this center belt. Do this in a few places between all the coamings and hatches. Then take the strip over to your planking fan and fit that space so three plank widths fill it up as shown below. Then go back to that spot on your model and transfer those tick strips to the false deck. Note how the deck planking will be tabbed around the coamings just like around the gun ports on the hull. Leaving thin wood planks around the hull would be prone to rot and therefor they would use a tab like shown to avoid such thin strips of deck planking. This is shown on the plans....check them out. Now its time to plank the first center belt after you finish your tick marks on both sides of the center strip. Use 1/4" planks and transfer the width you will need to your strips to cut the tapers.....just like you did when planking the hull. ANY QUESTIONS???
- 1,784 replies
-
- 20
-
-
- winchelsea
- Syren Ship Model Company
- (and 1 more)