michael mott
-
Posts
5,195 -
Joined
-
Last visited
Content Type
Profiles
Forums
Gallery
Events
Everything posted by michael mott
-

Cutty Sark by NenadM
michael mott replied to NenadM's topic in - Build logs for subjects built 1851 - 1900
And so you should be, it takes a lot of determined effort to remove and rebuild areas that you know can be improved. Michael- 4,152 replies
-
- 2
-

-
- cutty sark
- tehnodidakta
- (and 1 more)
-
Lextin I was having difficulty seeing how this was going to work until today, very ingenious. Michael
-
Daniel that is looking good! Michael
-
Ah it is so good to see you back at work, I am enjoying this build a great deal. Michael
- 84 replies
-
- 1
-
-
- esmeralda
- training ship
- (and 1 more)
-
SS Vinal Haven by TBlack - FINISHED
michael mott replied to TBlack's topic in - Build logs for subjects built 1851 - 1900
Tom I look forward to seeing your results. Michael -
That is some very fine small work, The final results will be worth all the effort though as you say. Michael
-
Greg your work is so sharp and clean, the stove looks great. Michael
-
SS Vinal Haven by TBlack - FINISHED
michael mott replied to TBlack's topic in - Build logs for subjects built 1851 - 1900
Tom I see what you mean. What happens if you turn the jaws around? do you have a set of reverse jaws for bigger diameters? failing those two options what about gluing a smaller piece on the back-side or just using some sandpaper to create the curve. Michael -
Thanks for the explanation Russ This would in effect be like a horizontal belaying pin, wouldn't it. Michael
-
SS Vinal Haven by TBlack - FINISHED
michael mott replied to TBlack's topic in - Build logs for subjects built 1851 - 1900
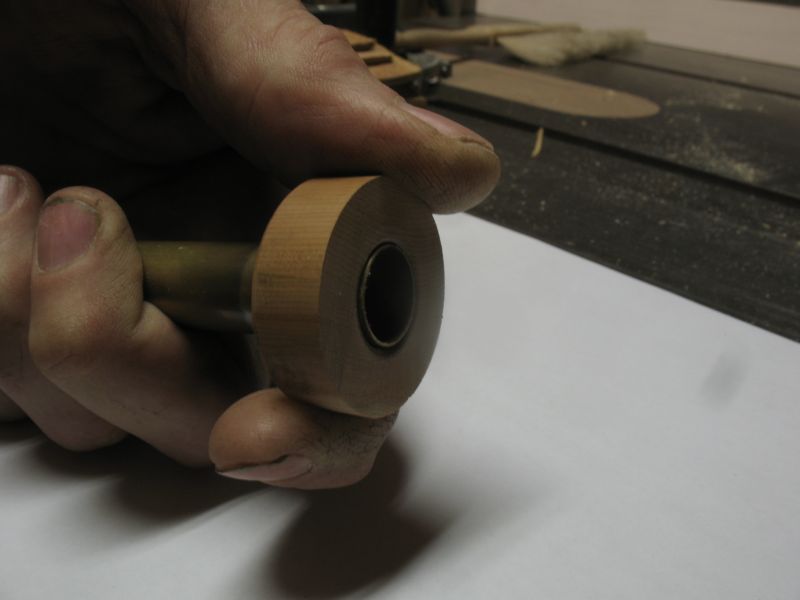
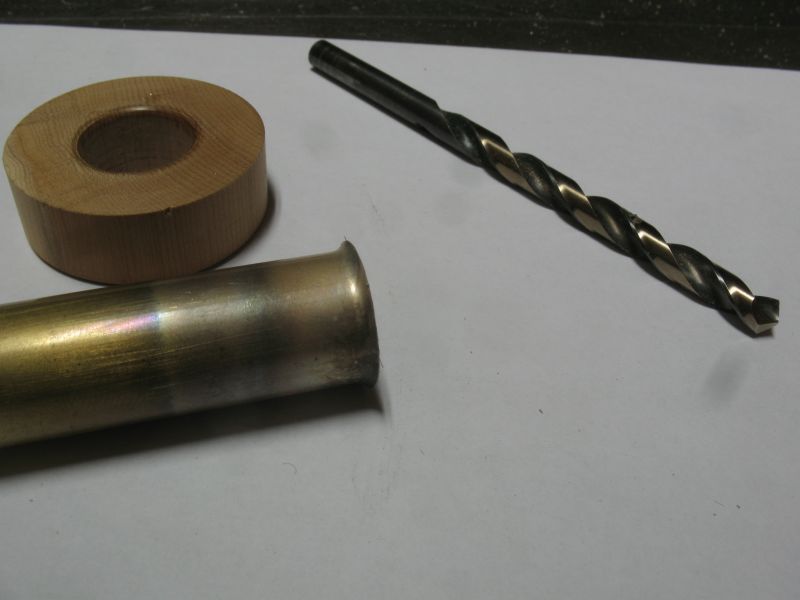
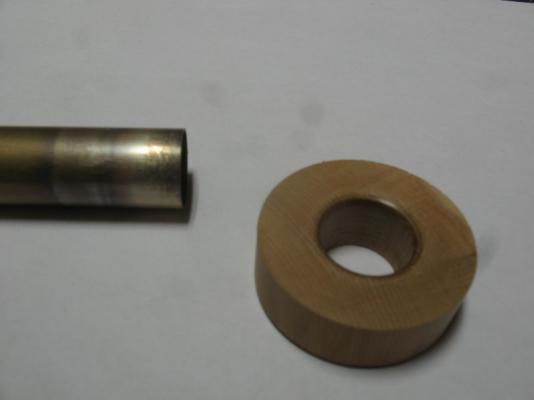
Tom I just did a quick experiment, the teaspoon doesn't work unless is is really tiny. But a 1/4 inch drill bit works fine 1 5/8 brass tube and I just happened to have a scrap of yew wood that I driled a 5/8 hole through then spun in the lathe to create the curved edge. Then annealed the top edge of the tube. then slipped the wood ring over it Then taking the 1/4 inch drill bit and using the shank end worked it around the edge pressing towards the wood. slipped the ring off and there is the result. I think you would have no trouble doing this. Michael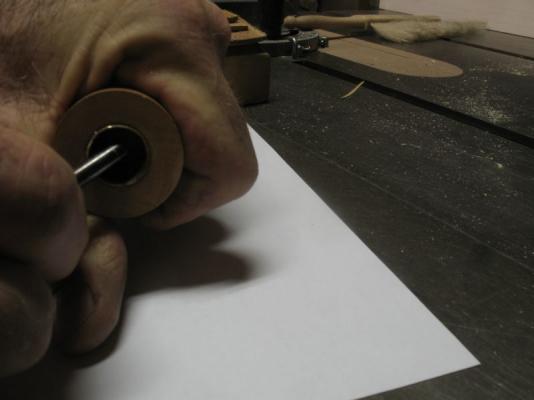


- 326 replies
-
- 6
-
-
- vinal haven
- steam ship
- (and 1 more)
-
SS Vinal Haven by TBlack - FINISHED
michael mott replied to TBlack's topic in - Build logs for subjects built 1851 - 1900
Tom, yes you are right in that the top is flared There is a simple way to do that. if you tade a piece of hard wood and drill or cut a hole that the funnel will slip through. 1 file or turn the radius on one edge of the ring. 2 Anneal the top of the funnel so that it is soft then using a rod of brass, or wood,or even a teaspoon you can gently swedge the top to fit the curve in the wood ring, you might need to anneal it a couple of times. Michael -
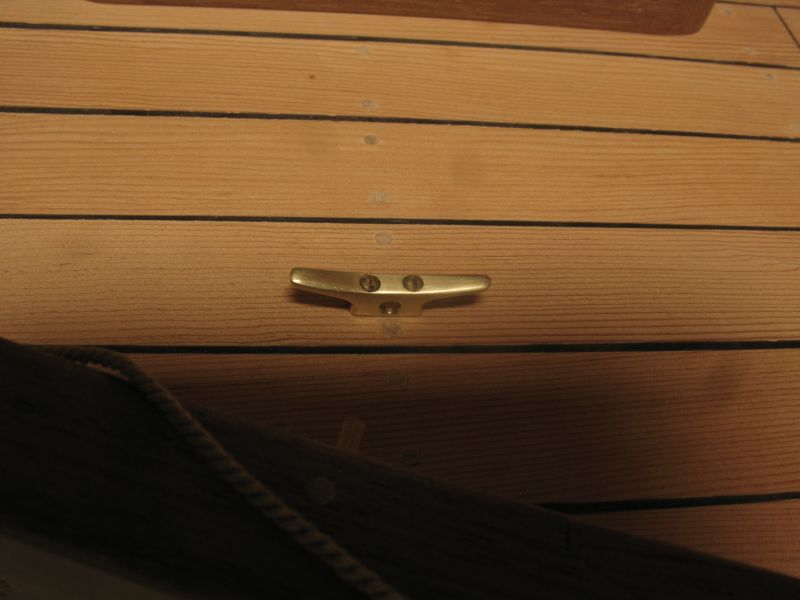
Russ nice work on the deck planks. I do have a question and it relates to the short beam that is shown affixed to the stanchions near the bow. I notice that there is not a lot of room to tie off under the cleat and I came upon the same situation on my own build ,I was wondering if there is some rule of thumb with regard to the clearances in these areas, especially on boats with low gunwales? Michael
-
SS Vinal Haven by TBlack - FINISHED
michael mott replied to TBlack's topic in - Build logs for subjects built 1851 - 1900
Hi Tom, The thickness of .5mm is approximately 15/16th of an inch in 1/48 scale I am not trying to be picky Just helpful. I think that skirt looks great I do still think that the wood looks a bit heavy, but that is just my view. It is your model and your decision is what matters. here is a short chart of the common sizes in 1/48th scale 1/16 = .0013" or .033mm 1/8 = .002" or .066mm 3/16 =.0038" or .098mm 1/4 = .005" or .132mm 3/8 = .007" or .198mm 1/2 = .0104" or .264mm 3/4= .0156" or .396mm 1 = .020" or .525mm My guess is that the straps wrapping around the stack would be less than 1/2 inch thick but again that is just my guess. sincerely Michael -
Hmmmm, that bar just keeps getting higher! Michael
-
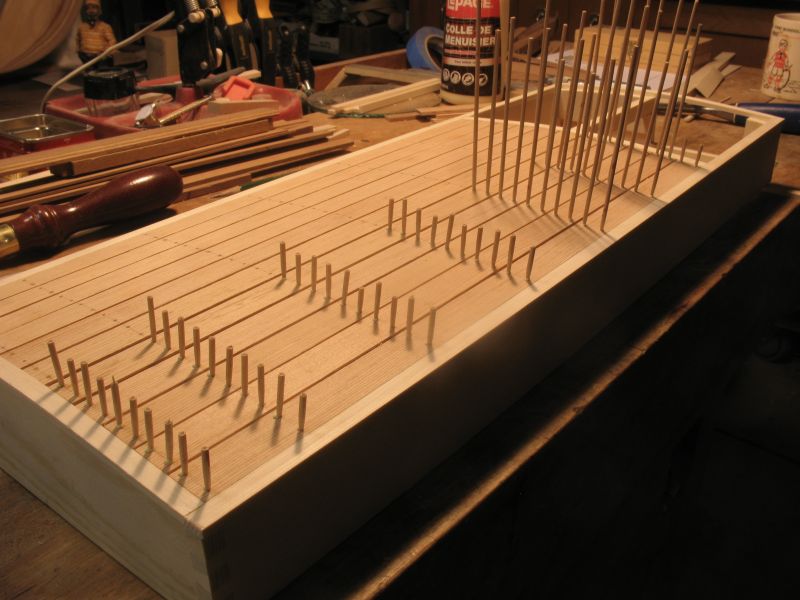
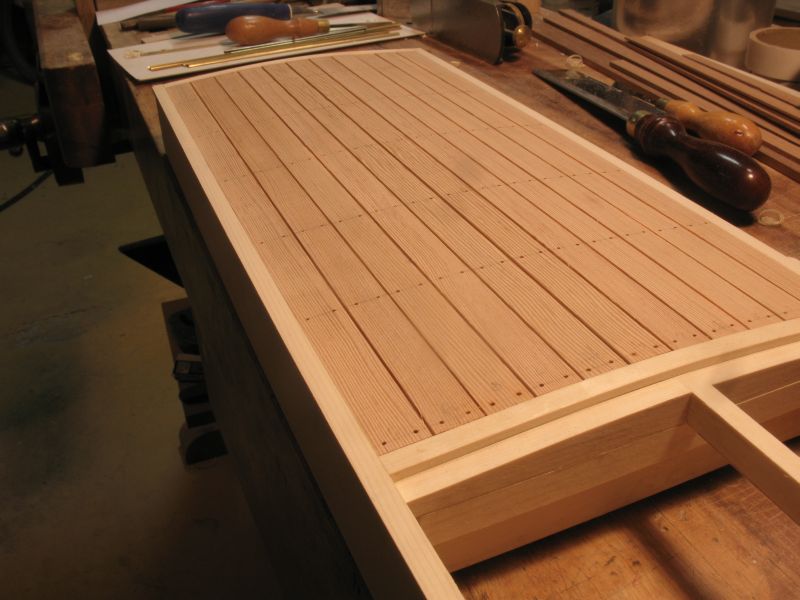
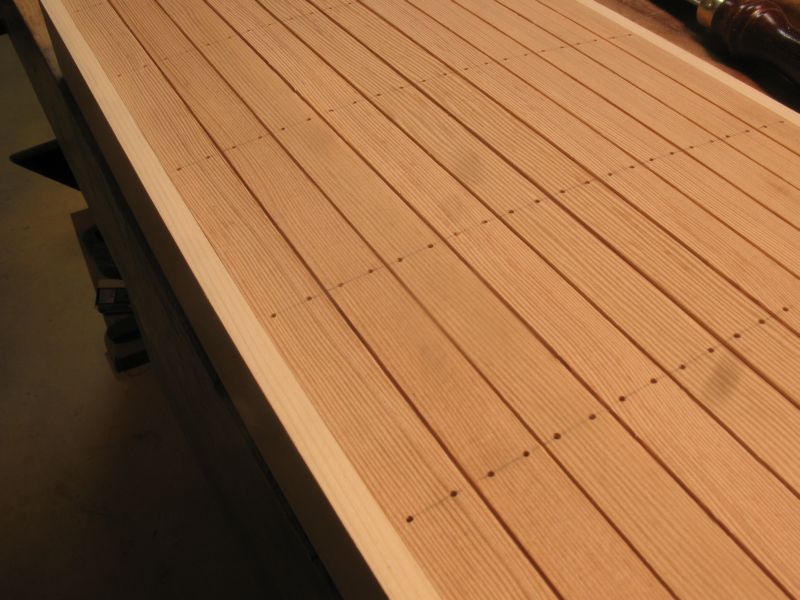
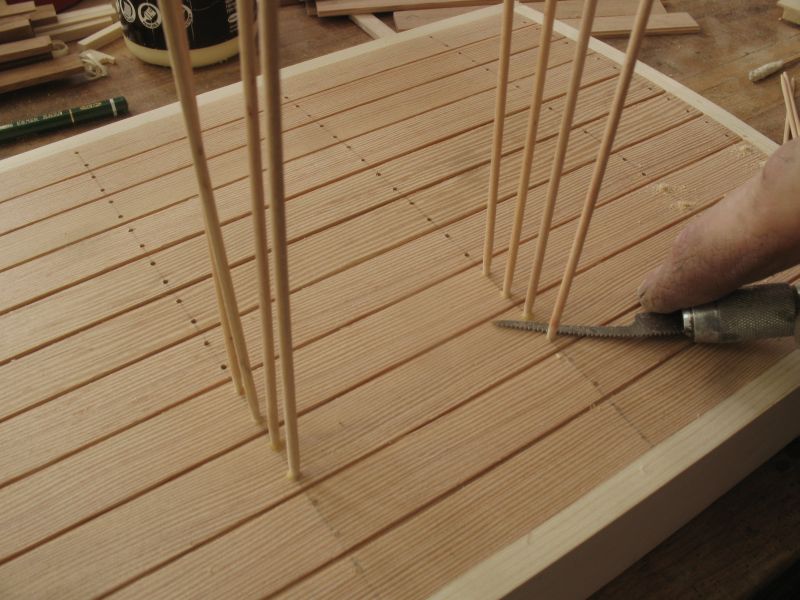
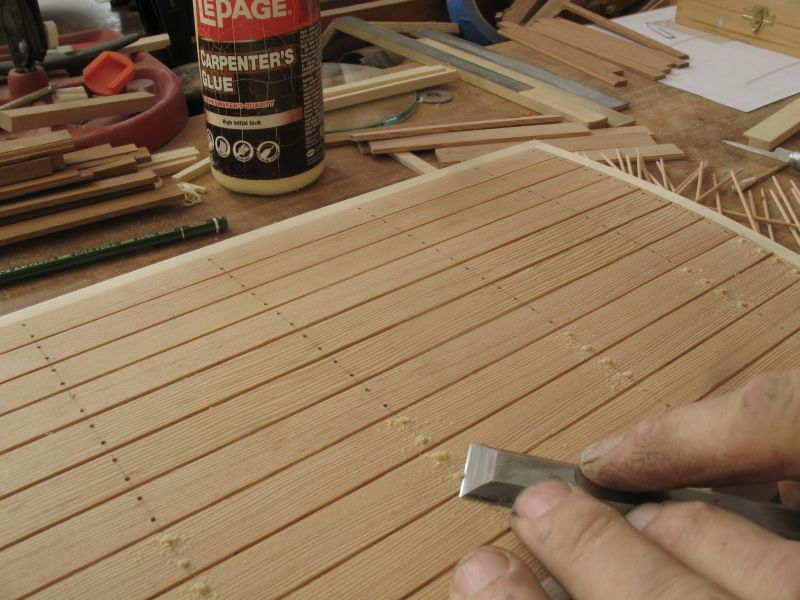
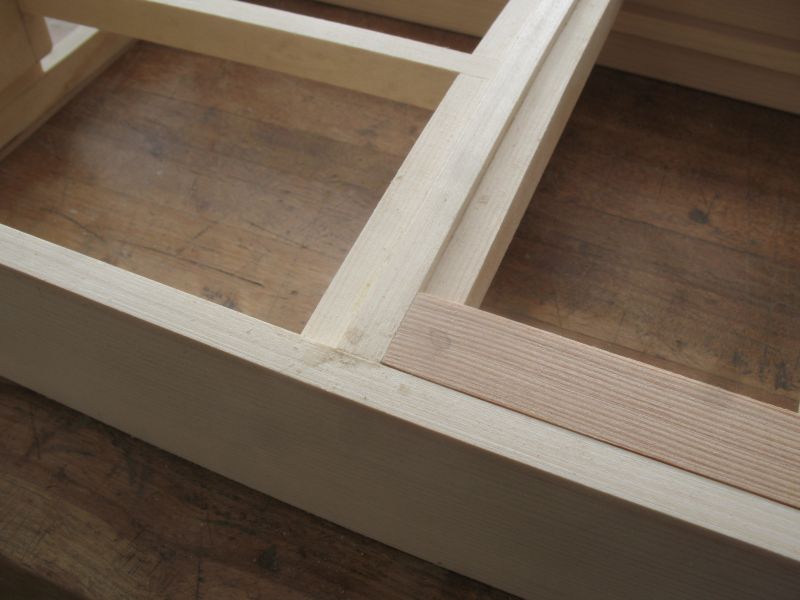
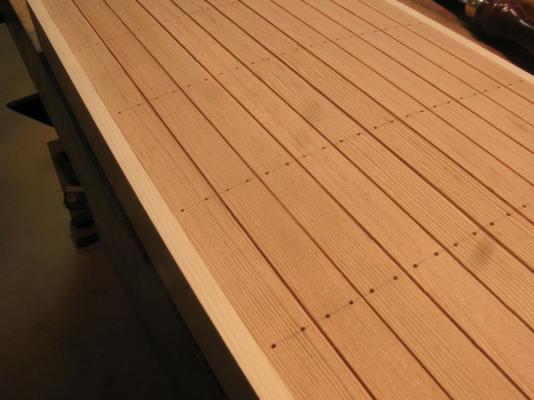
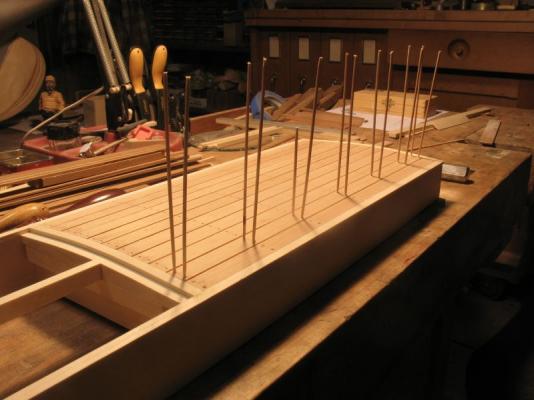
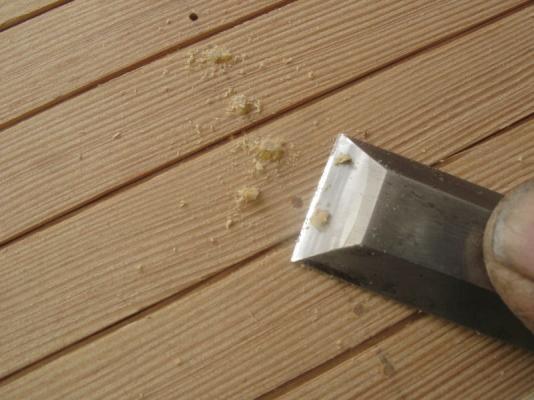
Cabin Structure part 10 This series of pictures shows the laying of the long planks and the inserts of the "Screw Plugs" The first picture shows the planks glued to the beams after they have been drilled with an .048" drill which is close to a 3/8th scale screw plug. a 3/64th would have been more accurate which is .046875" I can live with it. Close up of the caulking rabbet The first plugs glued in. After the glue had set the dowels were cut off with an exacto saw blade proud of the plank surface. The plug was then pared down with a very sharp chisel. The rest of the plugs setting up. The next part will cover the companionway and slide logs. Michael


-
Dan Thanks for the compliment and thought. Hello Spencer welcome I think you must be referring to one of the earlier posts where i began using the coloured glue as a caulking. In the deck planking I used a beveled edge and on the cabin top I am going to use a fine rabbet ti give a more consistent result. Michael
-
Great job on the planking Richard, what wood was supplied for the second planking? nice work putting the mast together as well. Michael
-
I recently purchased some chain from Michael's and discovered that it is steel, so you can heat it to a red and it will burn off the finish, I was doing some tests with the small eyes and jump rings and after they had been heated red the finish was gone. Michael
-
SS Vinal Haven by TBlack - FINISHED
michael mott replied to TBlack's topic in - Build logs for subjects built 1851 - 1900
You know Tom I'm not sure, but looking at the picture of the funnel again I think I would go for a couple of wraps of the brass foil. I would guess in real life they would be somewhere in the range of 1-2 inches high by 1/16th to 1/8th thick which is .002 x .041. Michael -
SS Vinal Haven by TBlack - FINISHED
michael mott replied to TBlack's topic in - Build logs for subjects built 1851 - 1900
Tom, the size depends on what association chart one uses. American or Brown & Sharp is 0.124890 Birmingham or Subs is 0.165 W &M Music Wire is .0243 British Imperial Std Wire is .192 Michael -
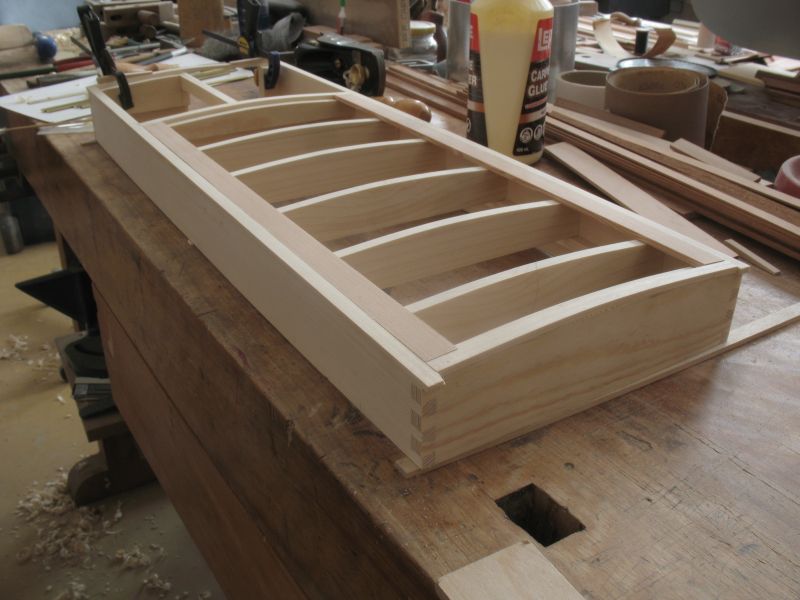
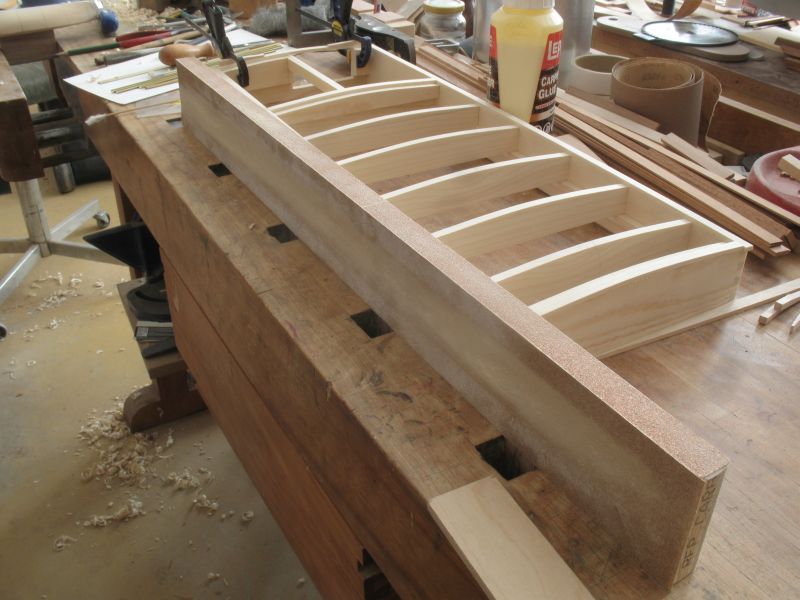
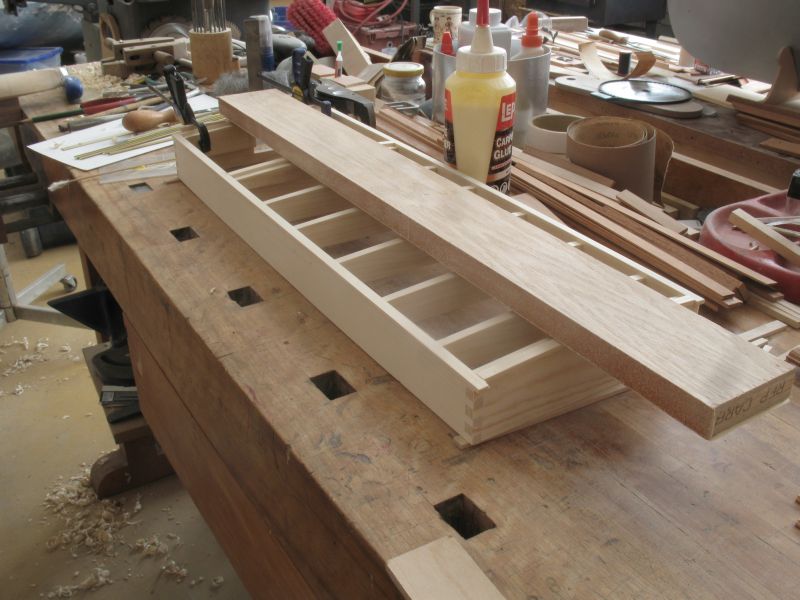
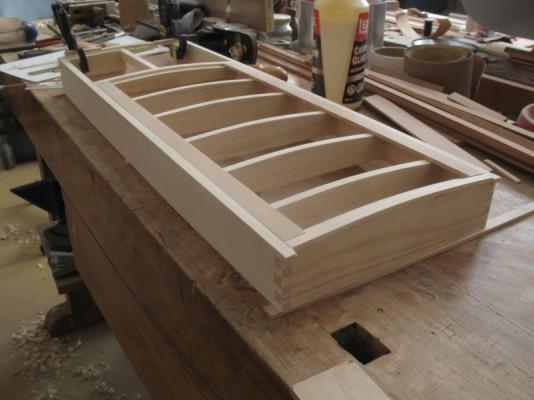
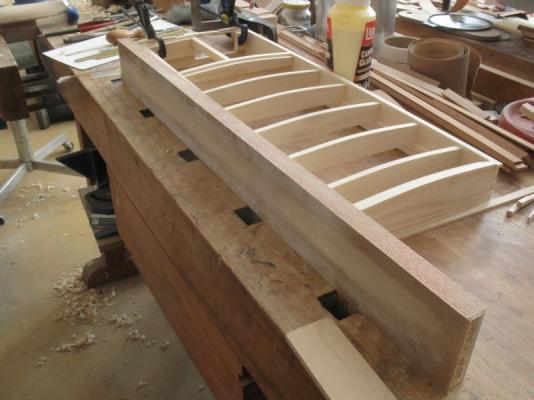
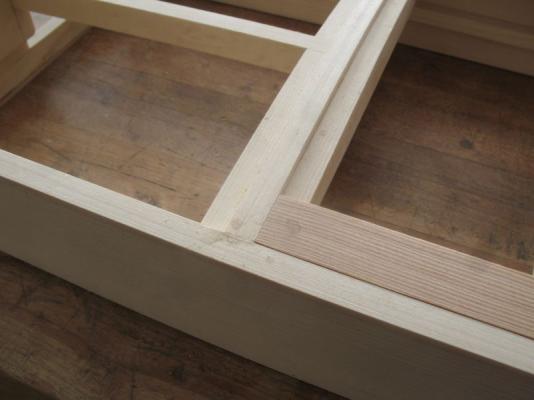
Thanks for the compliments Elmer , and Crackers. I have been thinking about my build entries and like the style that Ed Tosti uses for his entries so I am going to see how it works from here on the numbers are starting at number nine because I have made 8 posts recently regarding the cabin structure. I will follow a similar pattern for different areas in the future. Cabin Structure. part 9 After gluing up the sides and beams I noticed that I had not done as good a job making the beams line up on the top profile and this caused a problem with the gluing of the planks. My solution was to sand down the sides and ends to match the middle beams rather than removing the beams. this then ensured that all the curved surfaces were identical. I made a long sander with some 220 grit and carpet tape strip of oak. I used the narrow side first then the wide side to finish, i did not see the need to go any finer than the 220 grit because all the surfaces will be covered with glue and other wood. This allowed me to set some new pine strips that were all the same thickness as the fir planks. These strips were glued to the perimeter and across the separation beam. The fir planks will be pre drilled for the "screw plugs" (small dowels) before being glued to the top then the dowels and caulking before fitting the companion way slide logs and hatch. Michael

-
SS Vinal Haven by TBlack - FINISHED
michael mott replied to TBlack's topic in - Build logs for subjects built 1851 - 1900
Hi Tom, regarding the brass strips you might try this outfit failing that you could try the cutting a strip off some brass foil sheet with an exacto knife and rolling it upon itself, then use a small soldering Iron to bond it into a ring. I will see if I can do what I am describing as well. Also there are shim-stock sheets supplied by the automotive industry that can easily be cut with scissors. or a knife. Another thought is to use the next size up of telescoping brass tube and thinning it down and cutting off a couple of rings. Michael -
Daniel I will be following along, I am interested to see how you get on with the waxed plug., how will you manage to get the first strips to stay in place before the next? Michael
-
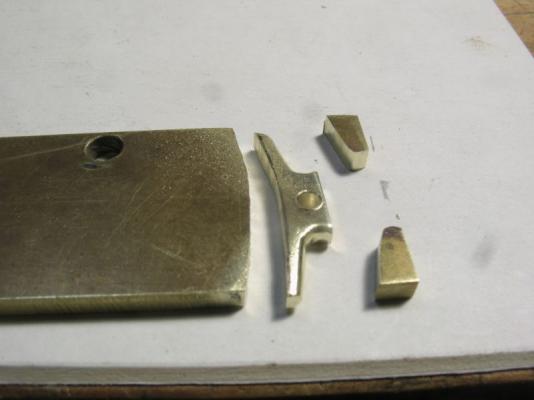
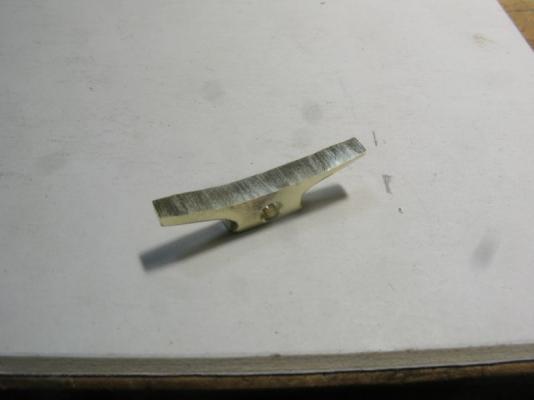
Cutting/Sanding Brass?
michael mott replied to esion's topic in Metal Work, Soldering and Metal Fittings
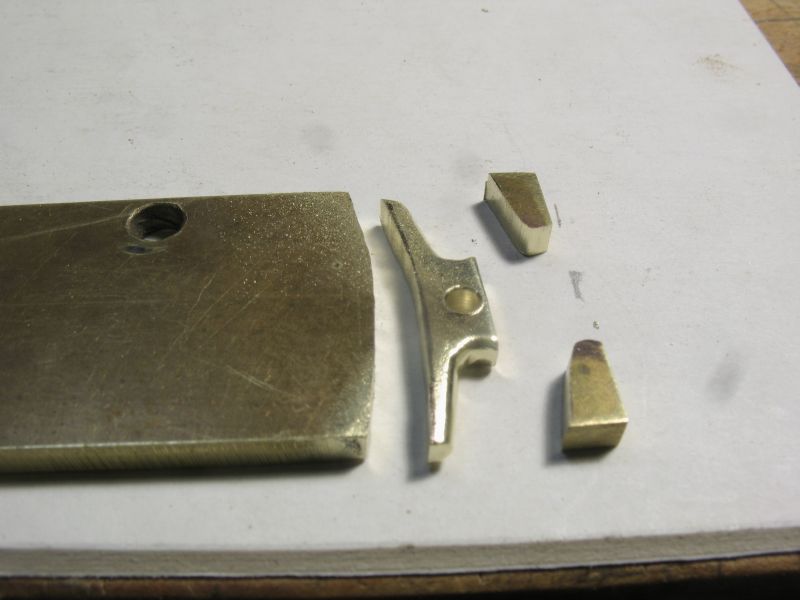
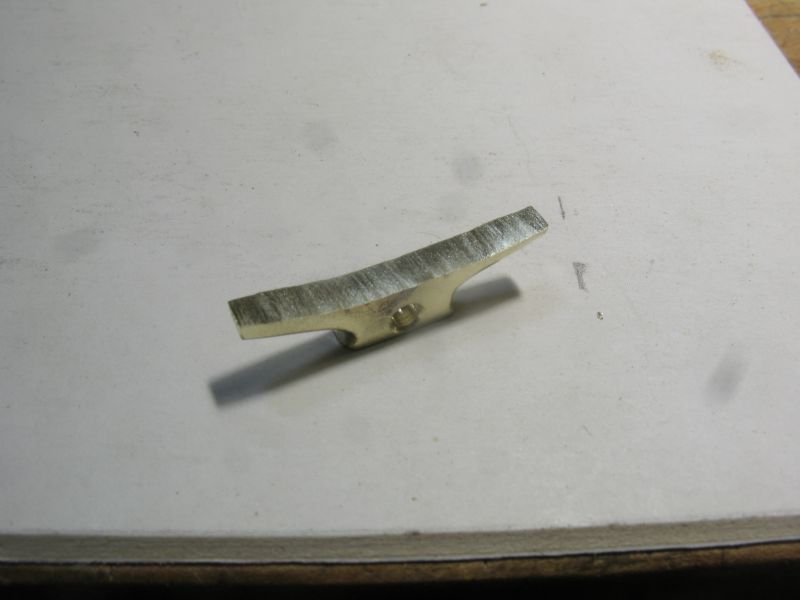
Esion, As ken has mentioned Brass is fairly soft and can easily be shaped with small files. this brass was shaped with small files. then using the 220 that you mentioned it was polished up and steel wool for a final finish. The most difficult part of working with small pieces of brass is holding them while you reshape or polish them, if you have a small hand vice it can be really helpful along with some needle files. The needle files can usually be purchased at craft or hobby shops, the best quality ones can be purchased at a jewlery supply house. Michael