MORE HANDBOOKS ARE ON THEIR WAY! We will let you know when they get here.
×


michael mott
-
Posts
5,195 -
Joined
-
Last visited
Content Type
Profiles
Forums
Gallery
Events
Everything posted by michael mott
-

MDF for forms
michael mott replied to grsjax's topic in Building, Framing, Planking and plating a ships hull and deck
Using the clipper to ship fish I like it. I have used a lot of MDF in displays and exhibits. It is a good material for jigs and as a smooth flat surface I use it all the time for zero clearance inserts on my tablesaw. Michael -
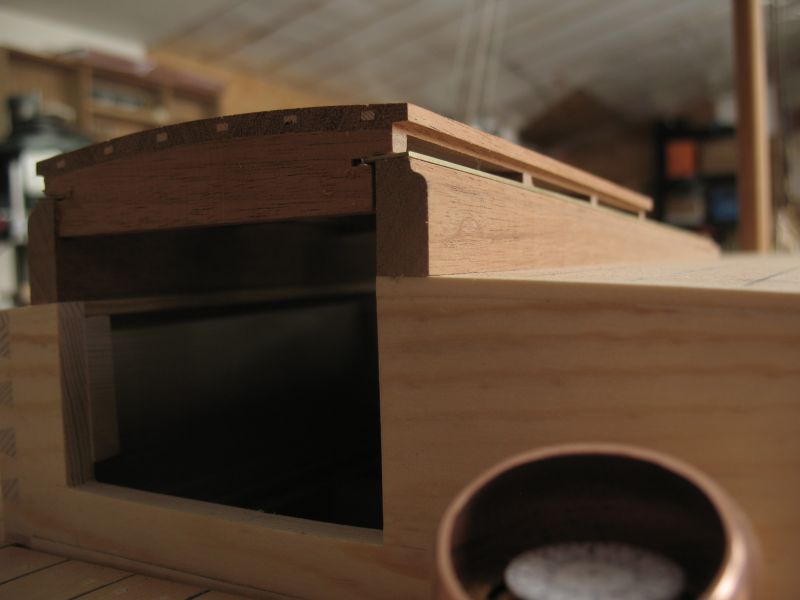
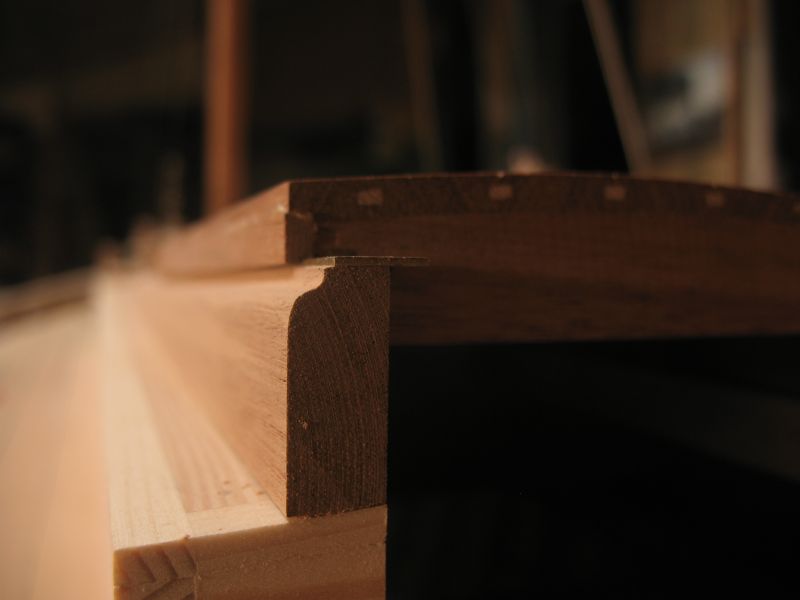
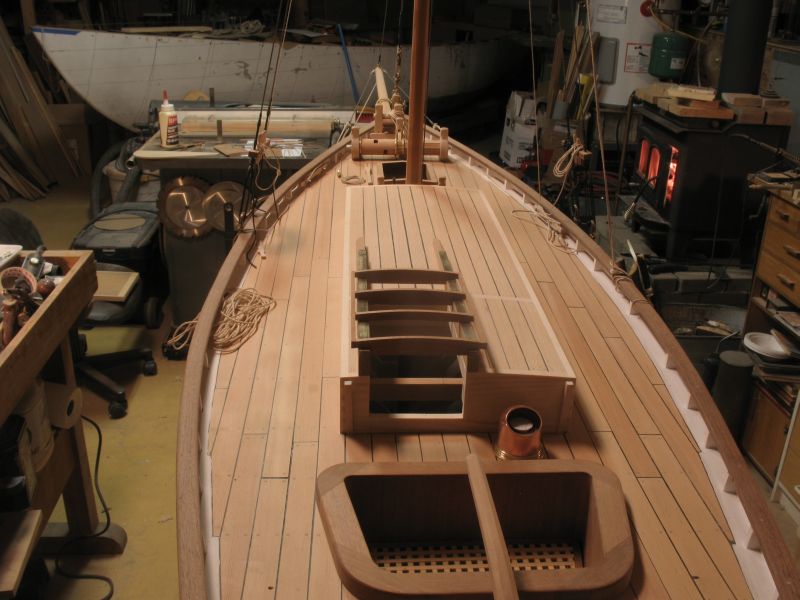
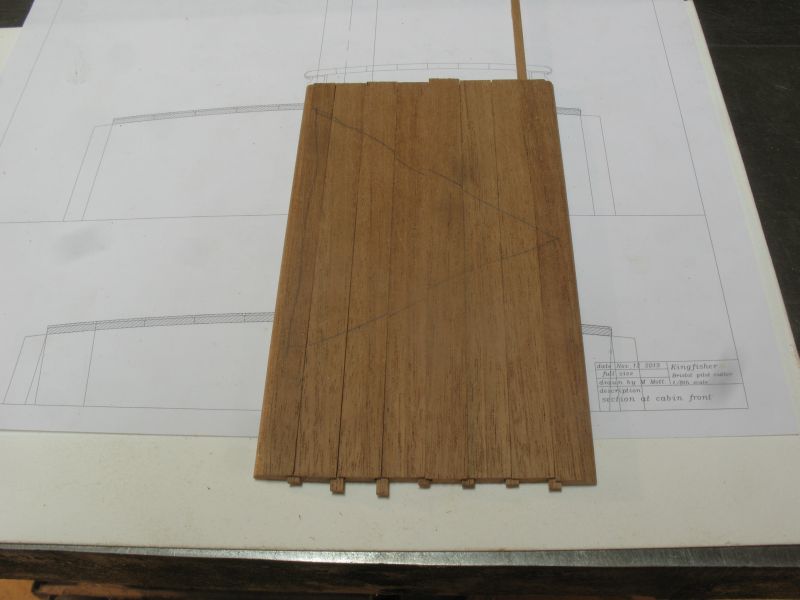
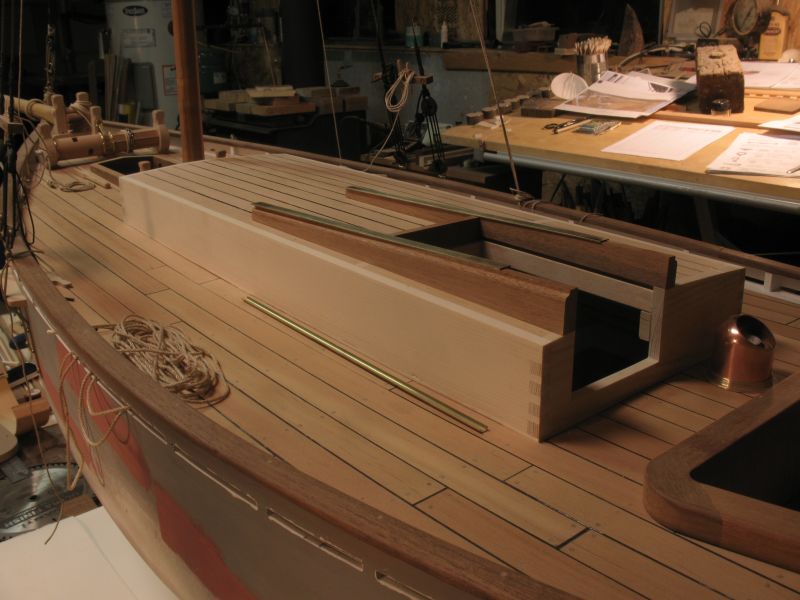
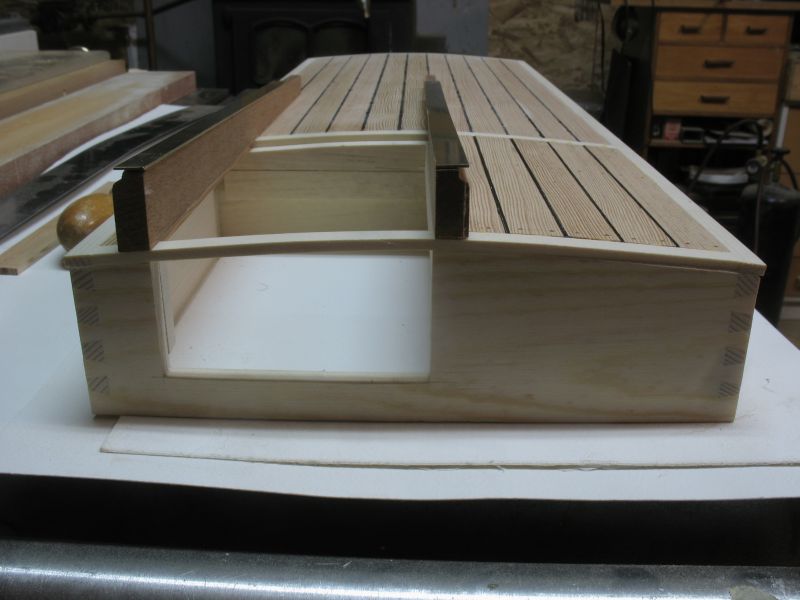
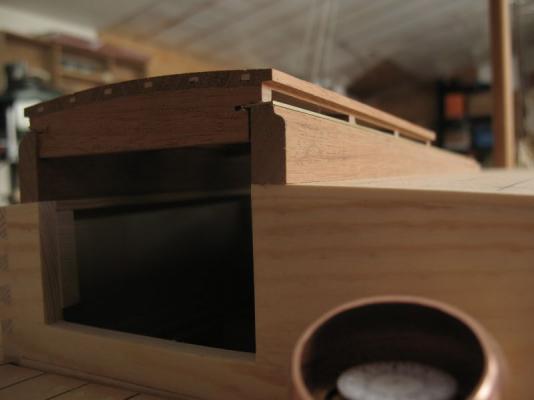
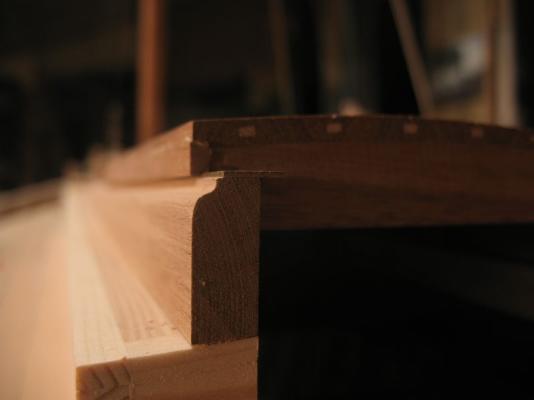
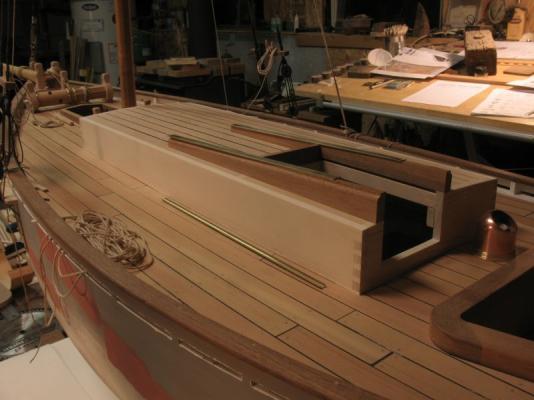
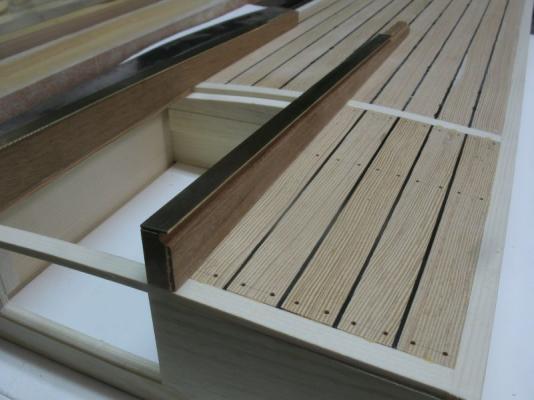
Cabin Structure part 14 The inside beams were shaped with a paring chisel to clear the forward end bulkhead of the companionway. Test fitting the frame of the hatch The new boards were glued to the slightly modified hatch frame. The next picture shows the rebate for a new piece of side rail on the hatch cover. I am more pleased with the aestetics of having the brass rail engage on the inside face rather than the outer ones. This enable the design to be a little narrower and not to overhang. I did not like the way the original design overhung the slide logs, it felt a bit clunky. close up showing the curve detail the ends of slide logs. The top boards will get a half round covering batten. The brass rails are fitted with some #1 flat head wood screws, and the hatch slides nicely In the open position The next part will cover the companionway drop in boards, and trim. Michael


-
Rob I really like the way you are dealing with the water and Base. Michael
-
Elia, great work on the dead eyes and strops, are you silver soldering the chainplates and if so what solder and flux are you using. Michael
-
Rob have you seen this chaps water.it is some of the best model water i have seen. michael
-
I have been mixing black ink into the Lepages Carpenters glue with no problems noted over a couple of years so far. Michael


-
Yes thanks for the larger pictures Ed, the last one clearly demonstrates your skill and the dedication that you put into the research to build a model that will have significance to future researchers. Michael
- 3,618 replies
-
- 1
-

-
- young america
- clipper
- (and 1 more)
-
Antony your skill and workmanship are exemplary. Michael
-
Very Nice recovery Danny, thanks for the Step by Step, I have tucked that one away for the future. Michael
-
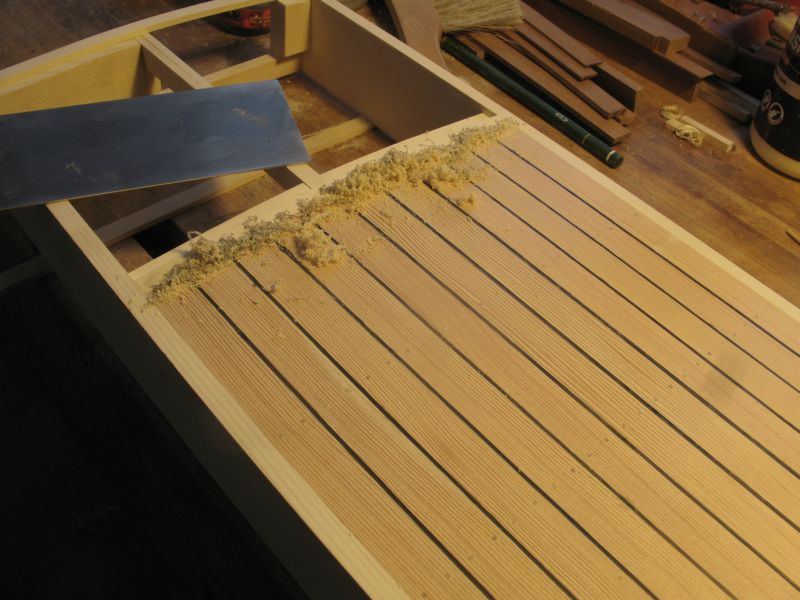
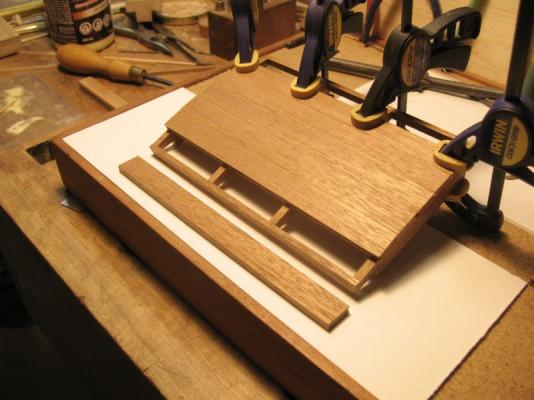
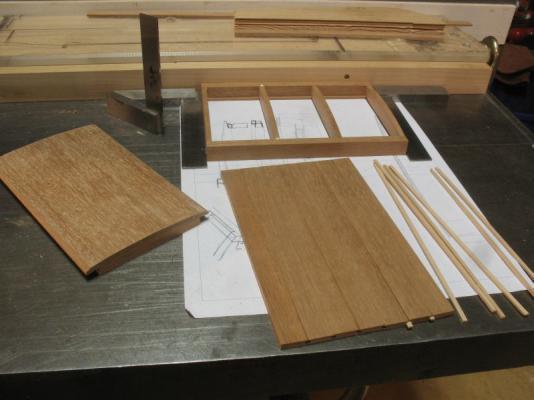
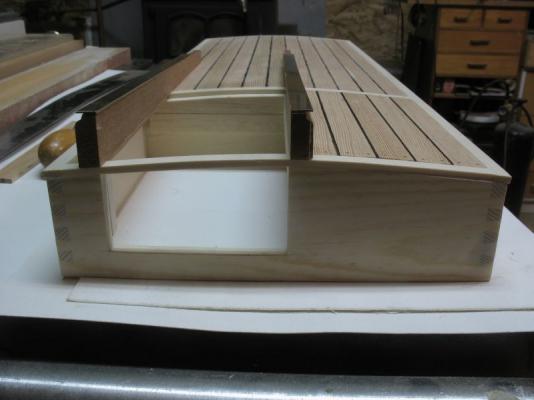
Cabin structure part 13 Well it felt like the 13th today, I was basically not happy with the construction of the hatch. I should have given up on it at this stage. However I persevered sanded and looked at it on the slide logs, and then began a new one. I spent a good part of the time working on getting some accurate cuts on the table saw and in retrospect I need to make some adjustments to the large fence which is slightly out of alignment because I was having some binding problems using the fine adjusting fence, so worked of tuning it but still was not really happy with the cutting. the next picture shows the new frame for the hatch, I should have gone this route in the first place. Next the new planks with fir splines ready to be beveled and then glued. The new frame will be more sturdy and a bit longer I will attach a keeper plate on the bottom side of the hatch side rails instead of the half round tubes. I will use the KISS method Michael


-
Denis, Bob, Elmer, John, Thanks for checking in. John the card catalog cabinet is full of tools and model supplies. Michael
-
Hi Andy just checking in for the first time, that is a long model, and the styrene is an interesting material to build with. Michael
- 382 replies
-
- 1
-
-
- stadacona
- sylvan scale models
- (and 1 more)
-
Amazing Daniel, you are really pushing the limits. Michael
-
Another Gem in the early stages of build. Michael
-
Mike it is very interesting seeing both of these model side by side, if they were the same scale the Pennsylvania would be almost three times the size of the Bomb vessel. Michael
-
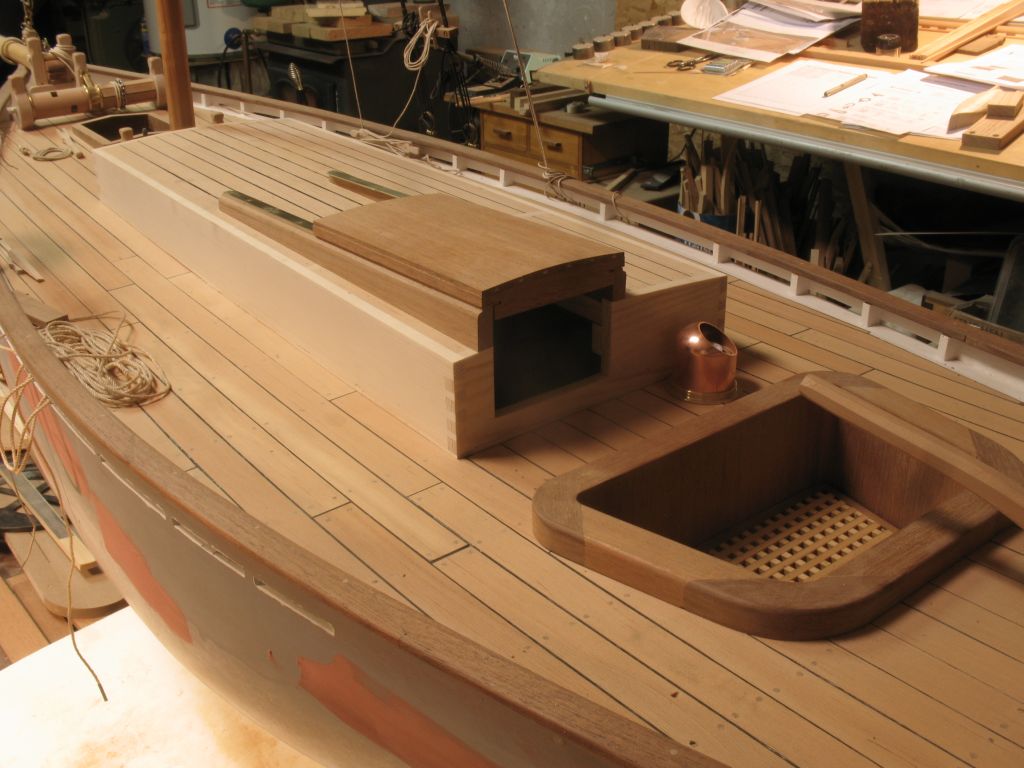
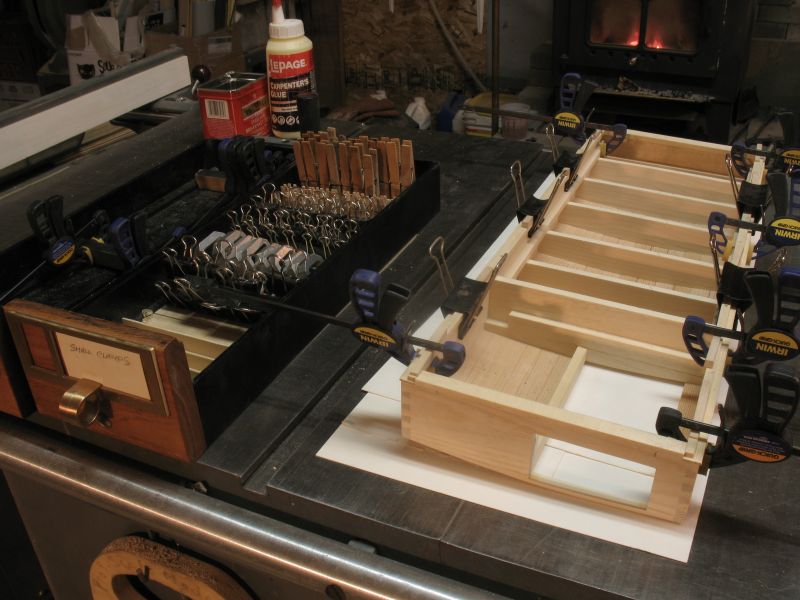
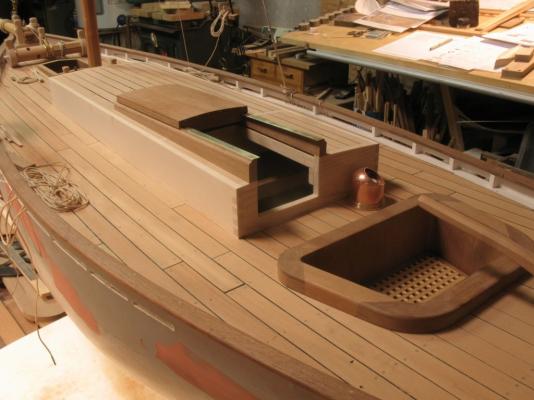
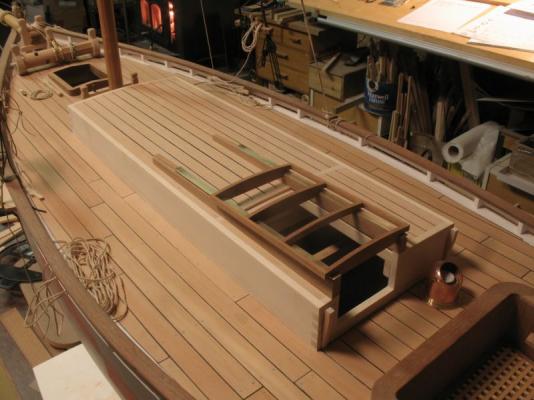
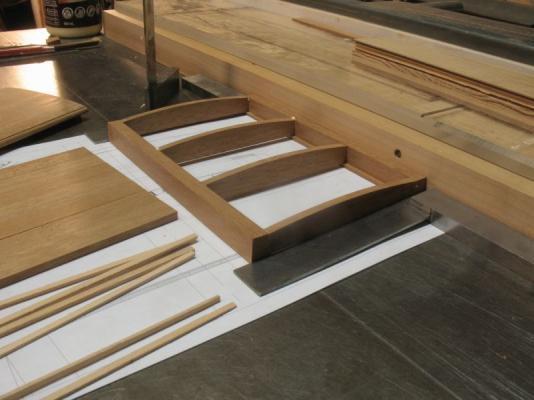
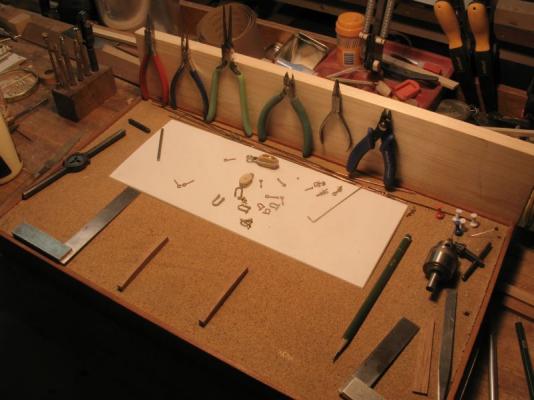
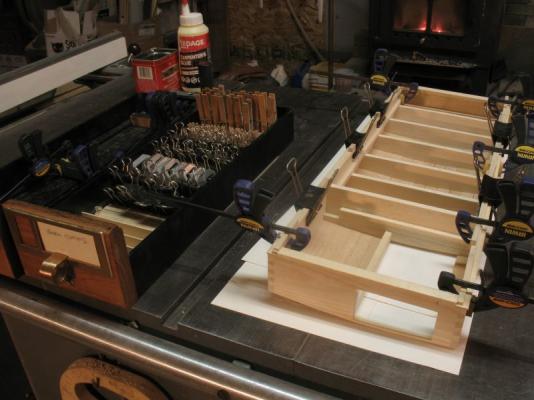
Cabin Structure part 12 The planking and scraping are finished on the top and now the bottom locating cleats are being glued to the bottom this cabin needs to be removable so that the weights and servo etc can be accessed. The second picture shows the cleats being glued and also shows the small clamp draw from the card catalog file cabinet that shows up in some of the pictures. Next is the hatch cover boards and the splines ready to be glued to the cross beams of the hatch. The last picture shows a small work station that I can move quickly off the wood workbench, it has a cork surface and the pliers are held by some small 1/4 inch ceramic magnets glued into the pine backboard. Michael .

-
Thanks Denis, Greg, John, Dan, and Dan for all the kind remarks. Dennis No I did not consider rope caulking. I'm not quite sure what you mean by stops on the rails. Greg, Yes the caulking is coloured Carpenters clue, placed with a syringe, it is the same glue as the deck caulking and that is now over a year old. Dan I am thinking that the cabin will get the same teak oil finish, it will allow the wood to breath. Michael
-
Denis doing three at once seems like a great deal of work! they are beginning to take shape though. Michael
-
Rob on page 211 of the book "the great Age of Sail" there is a photograph of the Glory of The Seas in almost the same attitude only at the beginning of her life just before she was launched. Michael
-
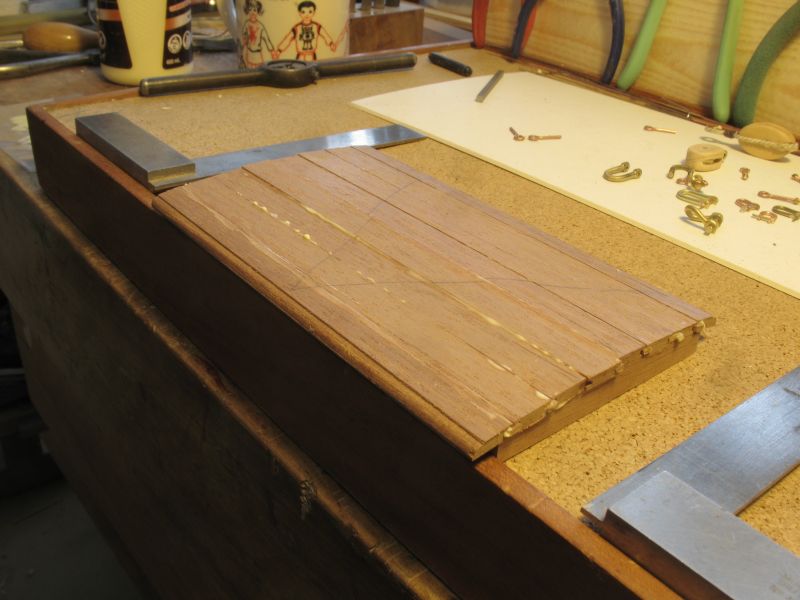
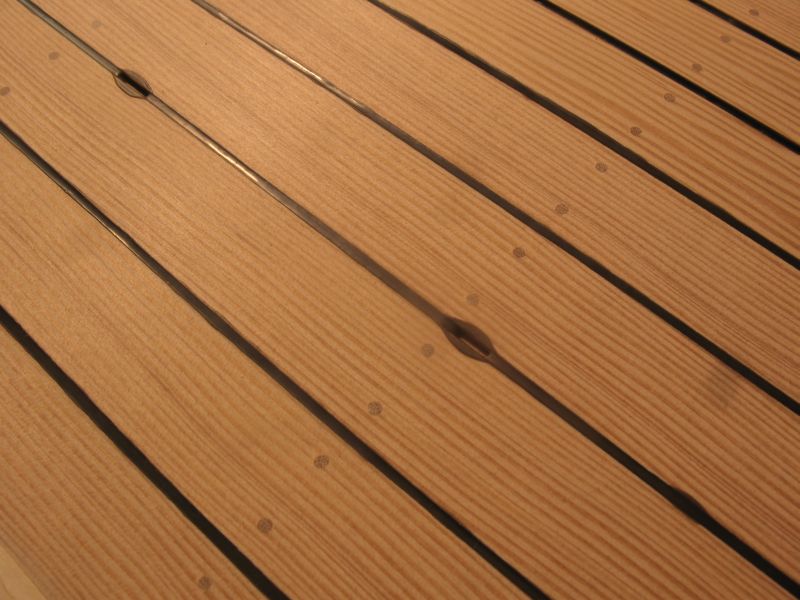
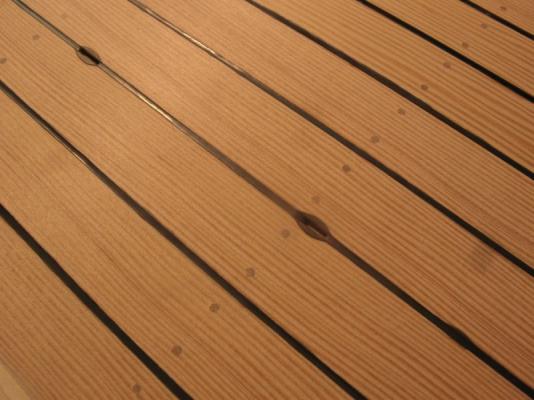
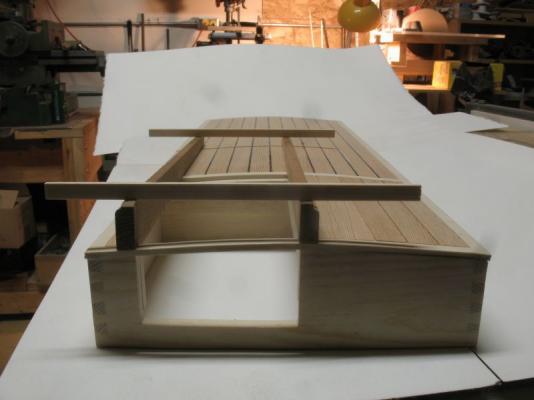
Cabin Structure part 11 Most of the caulking is now completed and scraped. The first picture shows the dark carpenters glue filling the seams befor scraping. A few spots needed to be topped up with more caulking. The second shows the scraping of the planks and caulking. Test fitting the slide logs, these are both different heights because of the slope of the larger area I used a couple of sticks to ensure they remained parallel and level to each other The rear section glued and ready to be scraped, the slide logs are located to measure the forward end panel of the companionway, this will be mahogany. The aft end will also get mahogany side slots for the drop in boards up to the hatch. after the pine section of the curved plank stop is removed. Michael


-
Jay Mark, Mark, Ron, Crackers, Thanks for your encouraging comments. Michael
-
Bob, John, Thanks. The thread in masting and rigging about fly tying has really got me thinking. Michael
-
This was a great resource I had no idea about the fly tying vices. I learned a lot Mobbsie your simple vices seem to be the way to go for using them for the model work. and the bobbin hanger that's a neat device as well. All I have to do now is make myself one! Michael
-
Dave, Your hooks and strops look very nice thanks for the series of pictures. Sudomekh, thanks for showing your blocks and shackles, that tray of blocks looks like a ton of work. I still have a hard time getting my mind around how tiny these are. Michael
-
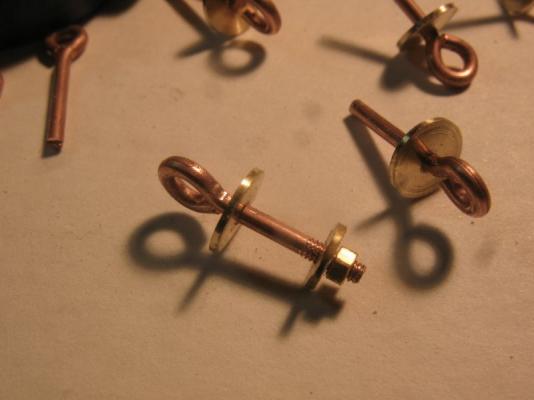
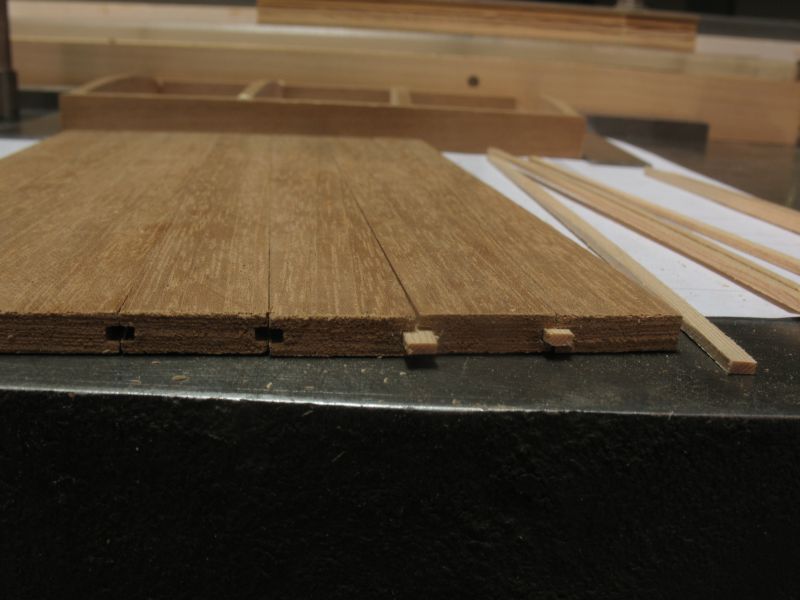
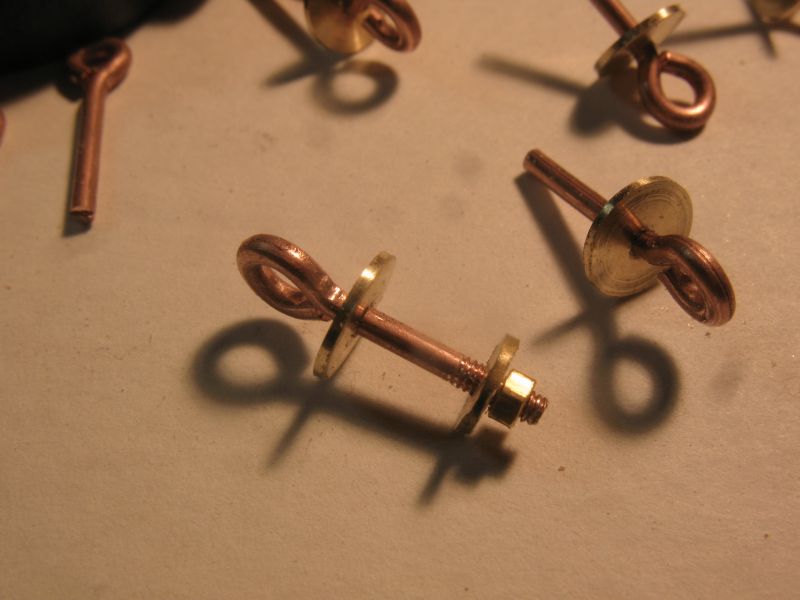
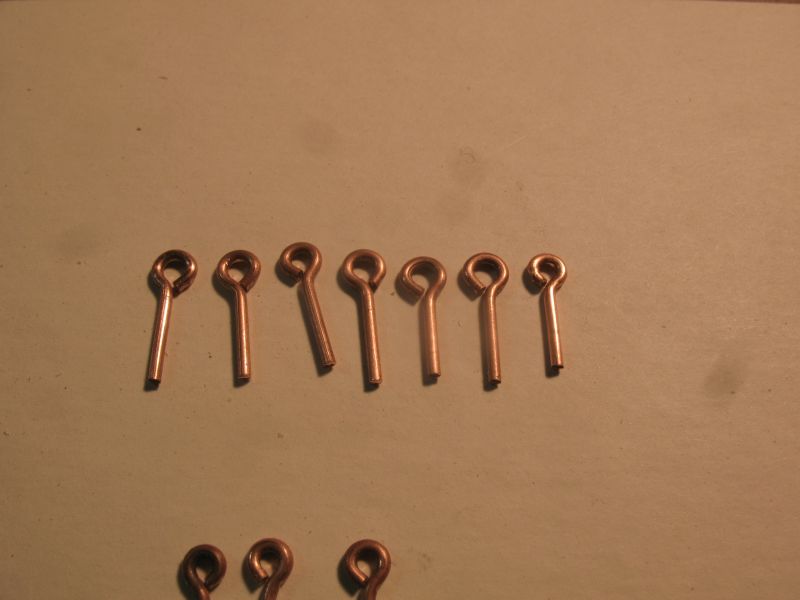
Deck Fittings part 1 While waiting for caulking glue to dry, I unraveled some copper ground wire pulled it through the draw plate for the correct diameter to thread 0x80? I spent some time bending up some deck eye bolts. These are going to receive rings as well. There will be a few sizes from 1 inch to 2 inch OD in scale When they are all made they will be silver soldered. Michael