michael mott
-
Posts
5,200 -
Joined
-
Last visited
Content Type
Profiles
Forums
Gallery
Events
Everything posted by michael mott
-
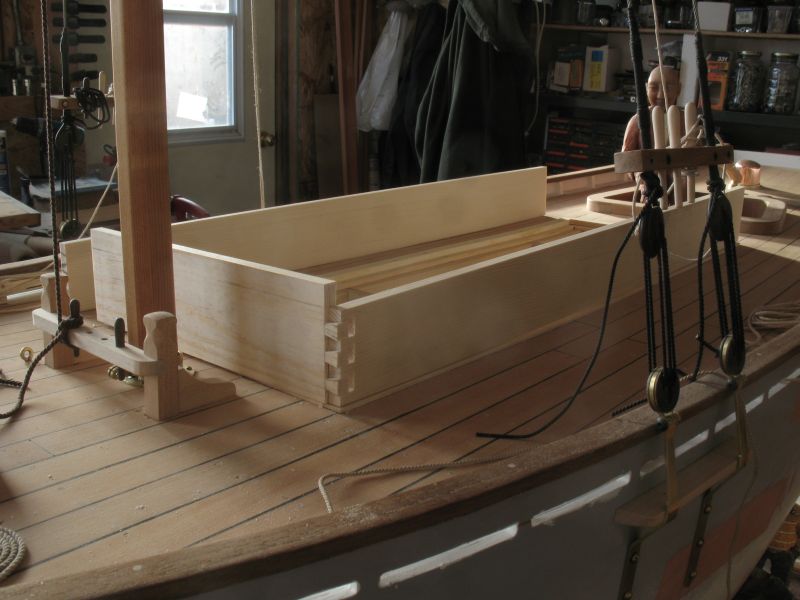
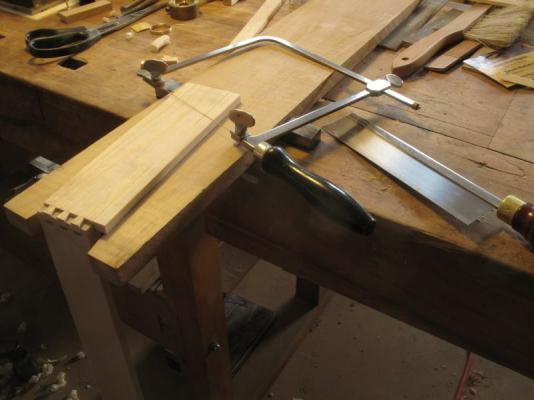
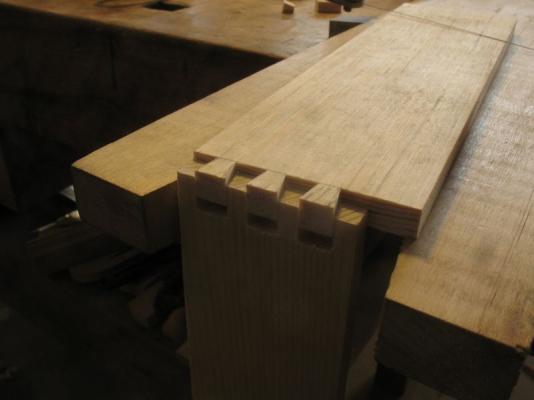
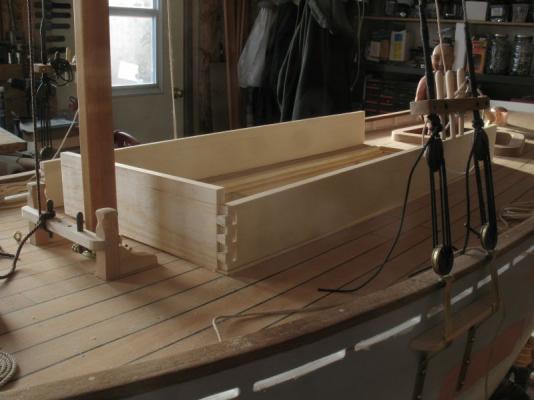
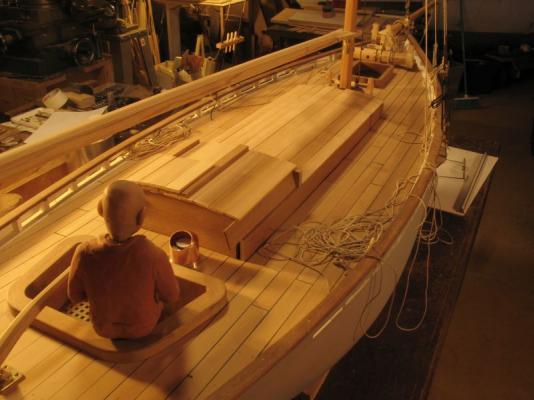
 Mark, John, Yambo, thanks for your thoughts on the cabin planking. Bob, the helmsman is Arnold he is a giant at six foot eight. Walter on the other hand is four foot six. Denis, thanks for your thoughts about the planks. Nils thanks for the ideas about the colour of the sails. I still need to address those. Also thanks for the Likes, it is not something that I do in any of the programs that have that feature, just one of my idiosyncrasies. Dan, thanks for your comments, regarding the approaches to my work. Having the luxury of being retired from commercial model making and exhibit design gives me the time to redo elements that are more appropriate for this model, which for me is a steep learning curve. Greg had said "that for some it is the journey and not the destination" it is that journey which for me gives me the greatest pleasure, and whether something stays or is changed or replaced is part of that journey. Today I made a start on the final cabin walls the mahogany ones had to go, there were too many things I wanted to change. The biggest one was the colour, Having decided upon the Fir for the cabin top I thought that white would look better for the sides with the exception of the companionway which will be in some bright-work and Mahogany But I really am not wanting to paint them so I have changed them to some white pine. in scale it is a single plank of white pine that is 16 inches at the aft end and 12 inches at the fore by 2 inches thick, a large plank for sure but not outside the bounds of reasonable. I built a small thickness sander, which is easier than lots of hand planing to work with the wood. After preparing the planks I cut my first dovetails in 34 years, I am pleased with the result. One down three to go I also set a new more shallow curve for the cabin top. and made a template for the rest of the beams Cut the rough opening for the companionway. Now to make the beams. Michael
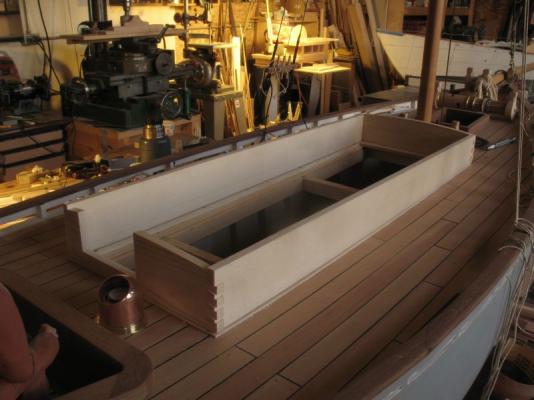

-
That is a big diameter for those bars, were they really that big? I am not familiar with capstans. Michael
-
Ed if I have understood this process correctly you are in fact doing the work of preparing the keel for the cant frames as the builders would have on the full size ship. As I looked at the sequence of pictures the thought crossed my mind that I would have as others have said preferred to do this work flat on the bench. Smile I can just imagine the foreman on the ways "OK lads lay that keel over so we can cut those scores" Michael
- 3,618 replies
-
- 1
-

-
- young america
- clipper
- (and 1 more)
-
HMS Sussex by mij - Scale 1:48
michael mott replied to mij's topic in - Build logs for subjects built 1501 - 1750
Greg I could not agree with this statement more. Mij, Definitely a major step, but it is oneself that one has to satisfy that the materials are giving the desired results. Michael -
Good to see progress John. Michael
-
Just found out about your loss Andy, My thoughts are with you as you go through this part of your life, know that as time passes you will be doing something and smile about something you shared with your grandfather, and that will bring you joy and not grief. Regards Michael
-
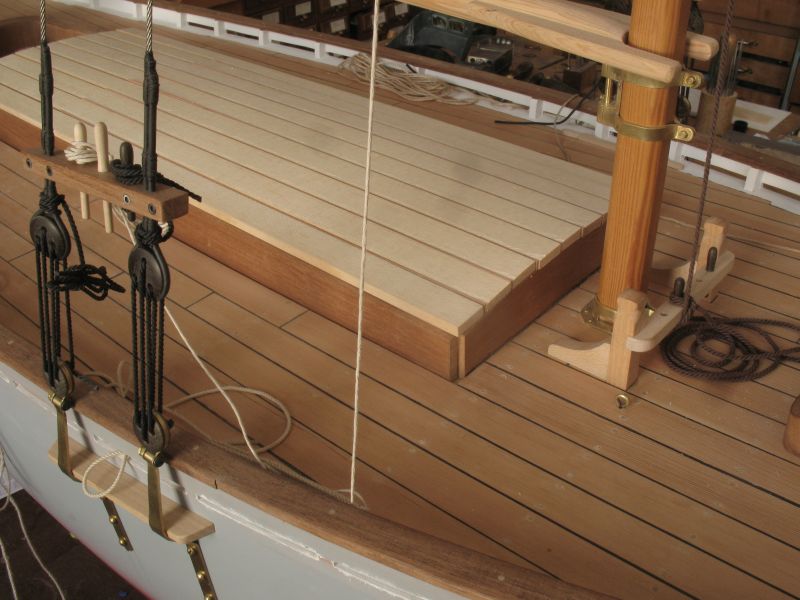
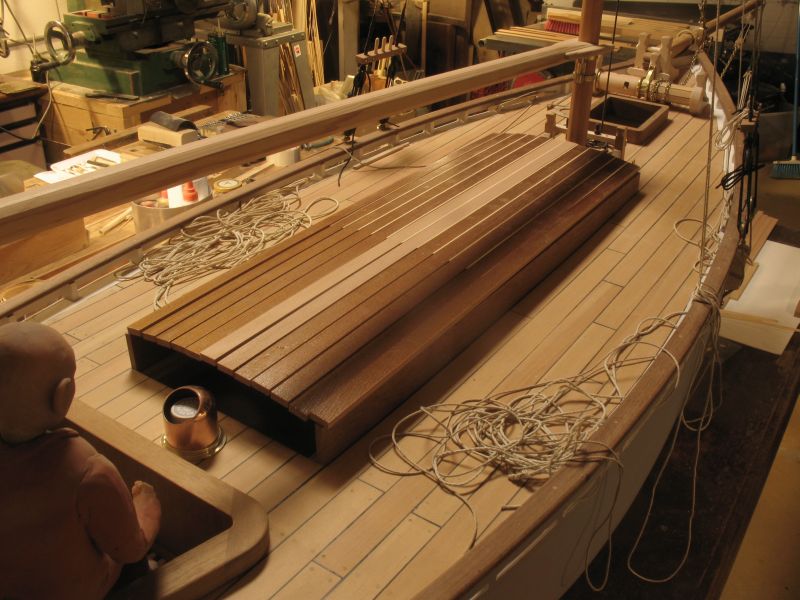
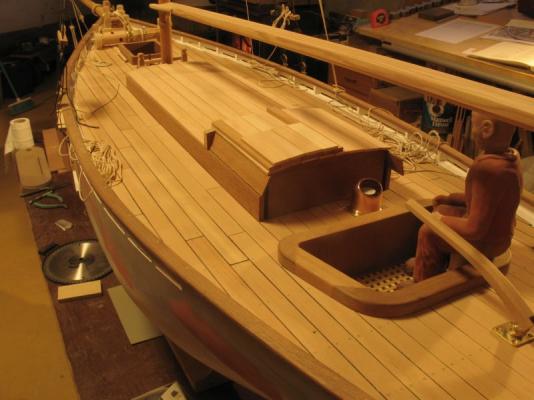
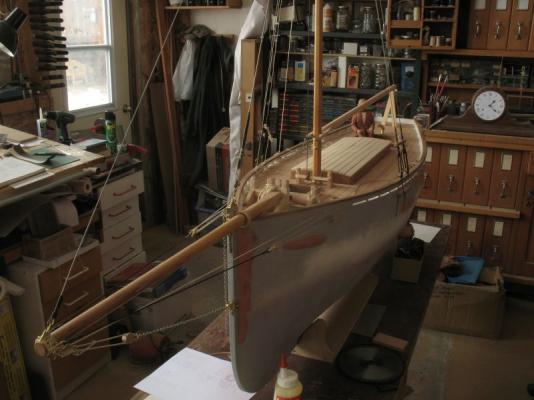
Had a bit more play with some massing and using the fir planks with no pinstripe, I feel that I am on the right track now. I will sit on this for a bit and if it still feels right then start framing it up. I will keep the hatch to the port side, I am thinking also of a small slope forward on the raised section. Michael
-
Russ great to see you back at work on this fine model. Michael
-
ancre Le Commerce de Marseille by Zbigniew
michael mott replied to Zbigniew's topic in - Build logs for subjects built 1751 - 1800
Absolutely beautiful work Zbigniew. Michael -
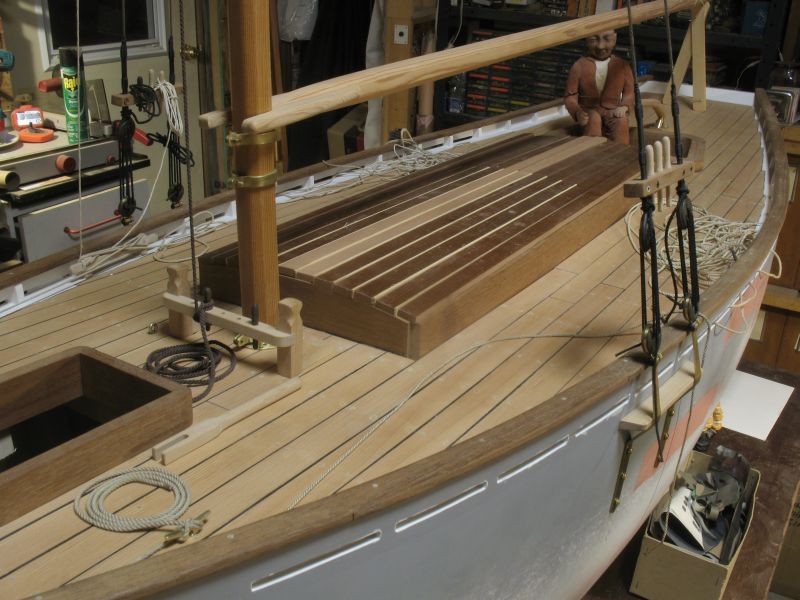
John, Mark, Joe, Tom, Bob, Guy, Thanks for the kind comments. Back to the cabin Planking, I thought about the deck and so did another test this time with the planks being pine and the redwood to simulate the caulking. I haven't tried using Fir yet. I'm feeling more comfortable with this combination. Which I suppose would be better. Michael

-
SS Vinal Haven by TBlack - FINISHED
michael mott replied to TBlack's topic in - Build logs for subjects built 1851 - 1900
Tom, great stuff the little details are what make a great model fantastic. Michael -
Jay, John, thanks for the input on the cabin top planking. I'm torn about it because I really like the pinstripe planking, Like that on the power boats and the water taxi that was featured here on MSW 1, but it does feel a bit over the top on this boat. I'm just going to have to build one of those power boats down the road. I did some other stuff today while I think about the Cabin. Doing this took my mind away from the service this morning-- I placed a wreath at the Stony Plain Remembrance on behalf of the Royal Arch Masons... always a sobering memorial Michael


-
Thanks Mark , I do want to see how the planks look oiled instead of varnished though. Michael
-
Well Denis that is a disappointment. As you say everything happens for a reason so perhaps there was something about the third floor that would have been a problem. Hope you get back to your models soon. Michael
-
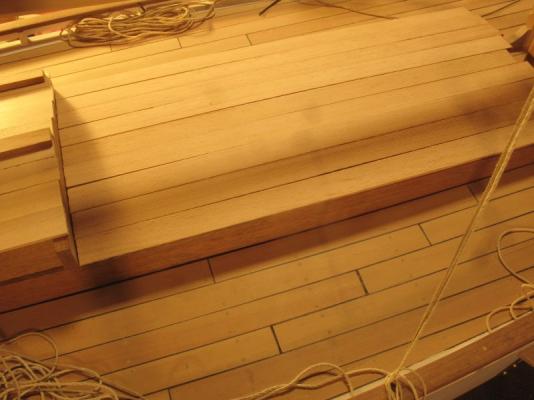
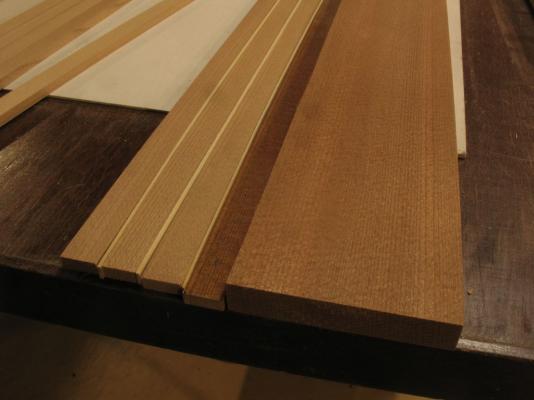
John, Andy, Mark, your comments made me smile. This evening after supper I did a little experimenting with some scrap wood my Brother In Law gave me this summer. He replaced his redwood 16 foot wide door with a new metal one and gave me the old door, some of it was rotten near the bottom but most of the panels are still OK, a couple of them I have done some re-sawing for some planking or panels. the wood on the right is planed with a hand plane the dark piece is the inside original varnish The light wood strip is yellow cedar the lighter redwood is straight off the table saw cut. tomorrow I will see what it looks like oiled. I am wondering about the cabin roof so did a test with some strips just laying them on the end with a temporary beam near the middle, the yellow cedar is short because that is the length of the billet that I have. I am only concerned with the style of the planking at the moment.the light planks in the middle are because I did not have enough cut with the varnished edge. changed the setting to tungsten Should I forget about the contrasting colours and just go with plain dark caulking as on the deck. The other thought is to make it white with canvas. Thoughts? Michael


-
Looking Great Lextin, I like the skylight as well. Michael
-
Wow!..... where are my knitting needles..again! Amazing work Karl, you set a very high bar. Michael
- 662 replies
-
- 2
-
-
- bonhomme richard
- frigate
- (and 1 more)
-
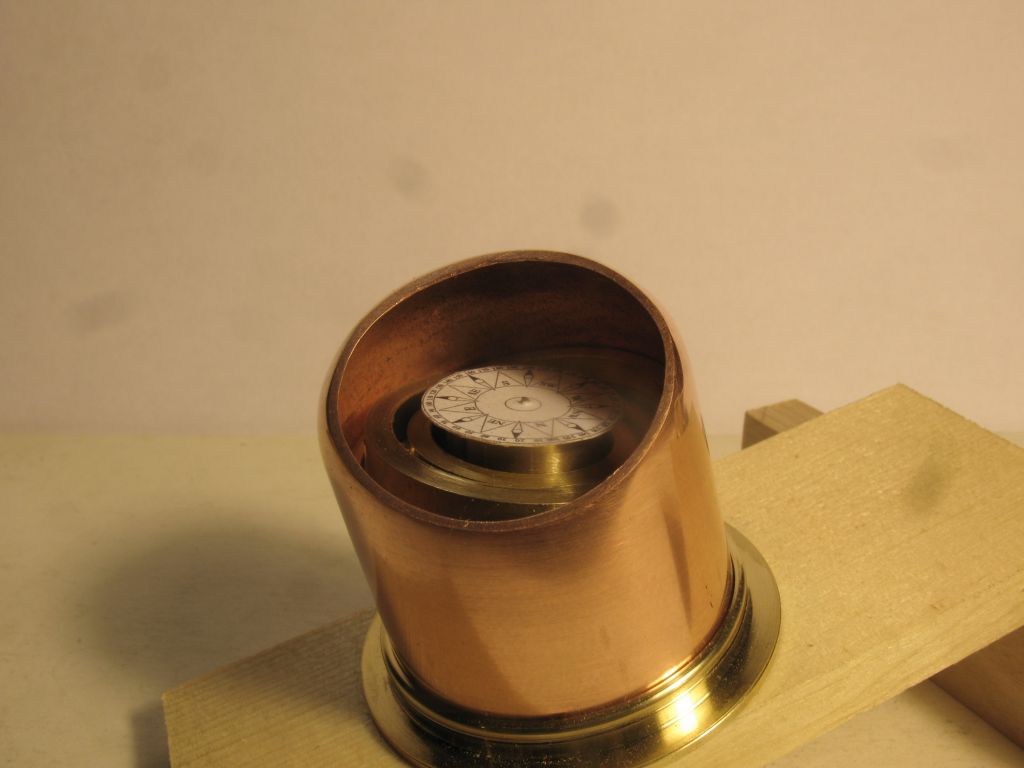
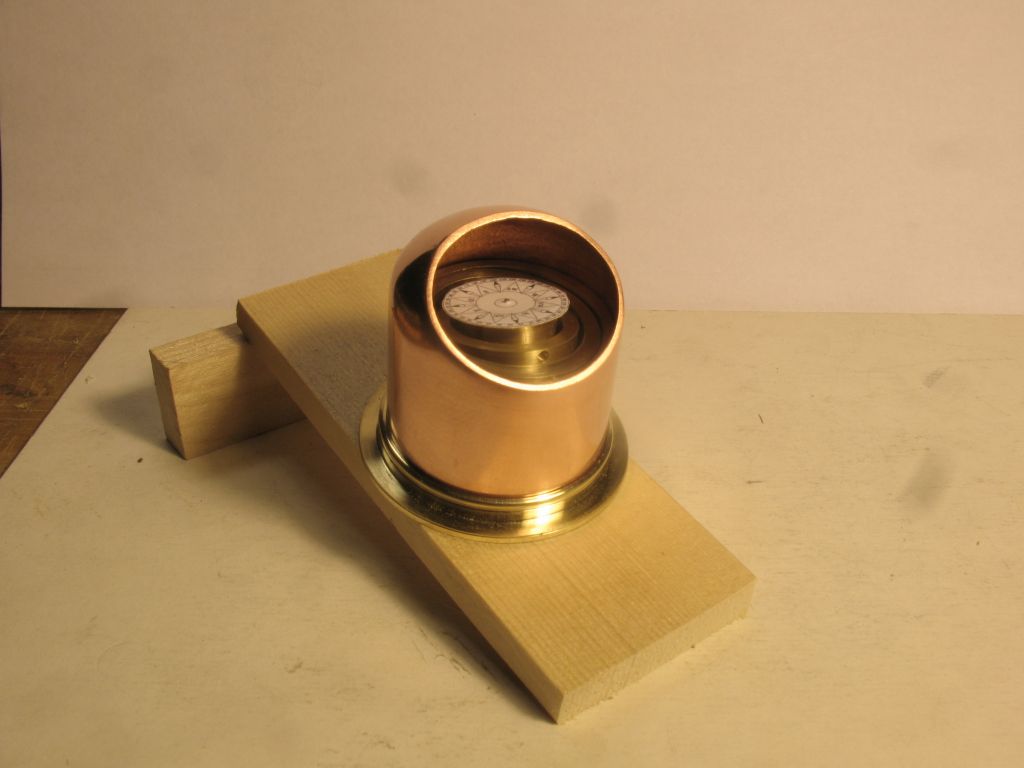
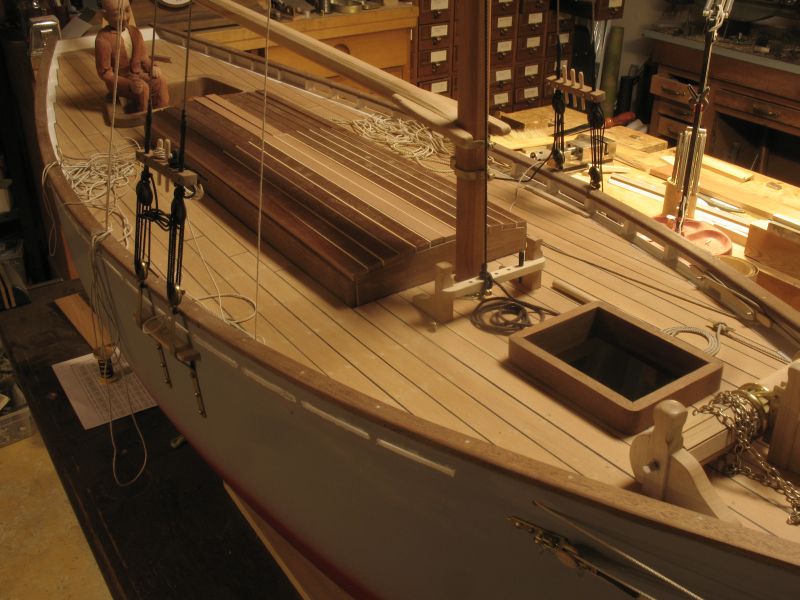
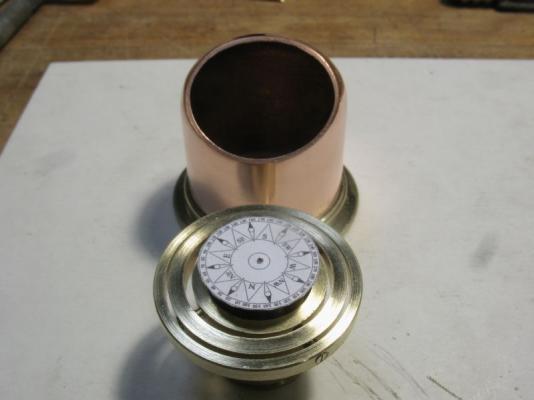
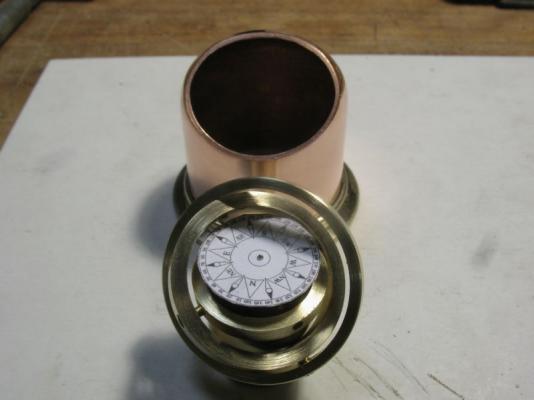
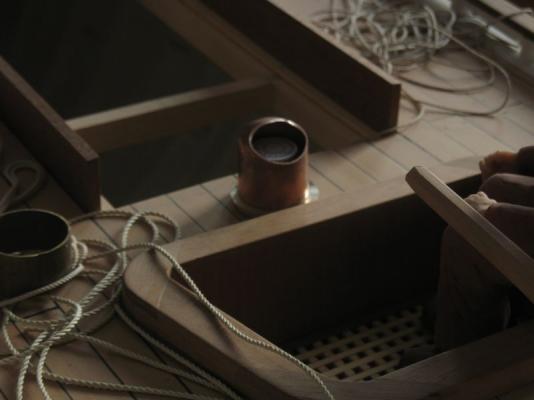
John, no. The inner core is some brass cross bored to accept a couple of small 1/4 inch diameter ceramic magnets the dial is a drawing done in cad I'm still playing with the final design. The centre is bored out to 1/2 inch diameter. The base which still need the holes bored for attaching it to the deck, has a 1/8th diameter rod with a dressmakers steel pin cut and glued into the top, At first I just used the pin but the magnets pulled to it , so with just a short piece the magnets are OK. the diameter is 1 3/16 or 9 1/2 in scale. My silver smith friend had given me a piece of copper that she had drawn into a cup shape on her press the OD is 1 1/4 inches in diameter I had to dome the top a bit because it was rounded but flat in the middle a bit like a copper end cap for plumbing pipe. I machined up a ring of brass that will get the holes drilled for mounting on the deck and some copper rivets to attach it to the copper. A rotation to check that it is still working. placed in front of Arnold who is sitting in the cockpit. I still need to make the glass cover plate and brass ring. and nameplate. I know its not fully gimbled, perhaps the next one. Michael
-
Absolutely exquisite craftsmanship Johann. Michael
-
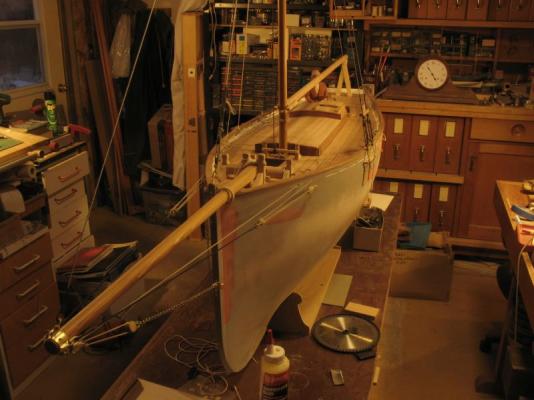
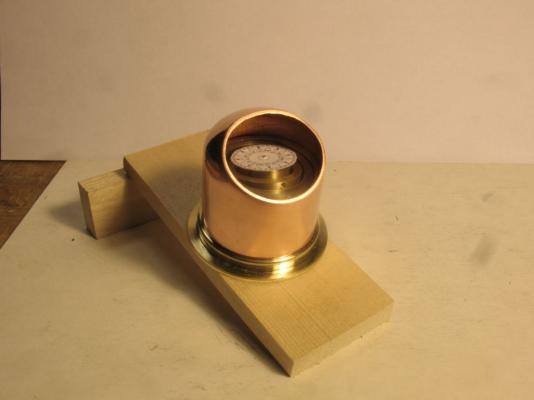
Andy , John, the sun is shining again this morning. Just a teaser shot I ran out of battery, more to follow later. My trip to the town yielded nothing, so a bit of head scratching and I came up with this, and yes it actually works. these parts are just resting on each other I need to finish the fabrication including glass. Michael
-
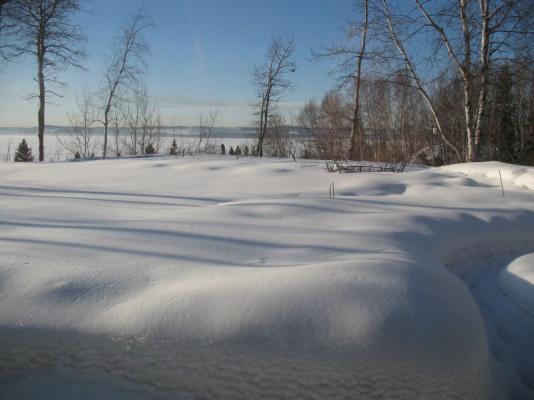
Rob I have not put any radio gear in it yet, I will keep it very simple for this first build. I do live at a large lake it is Lake Wabumun in Alberta I am not lakefront but do have a nice view from the workshop of the lake. This picture was taken from the living room last year, with the frozen lake in the long view. We can walk down to the lake in 5 minutes. the place where I can sail the model is at the Seba village beach which is around the lake a couple of kilometers. Michael
-
Joe, the snow is one of those things I have to put up with every winter. Rob, thanks for your kind compliment. regarding your question, my plan is to sail it at least once, further than that I have no plan for it. Then to design and build another boat, basically along the same general type, now that I have learned a few things I would like to do a better job on the hull, I would like to build a boat similar to the Bawley Doris LO 284 and make it a work boat rather than a recreational one. I will probably stick to the 1:8 scale I like the fact that 1/64th is equal to an 1/8th of an inch. The other thought is to build an open boat like the Minnett designed "Floss" that was built for Andrew Mellon it is pictured on page 36 of wooden boat issue number 116, it is a 19 foot open style launch with padded leather seats. so it would be a smaller model overall at 28 1/2 inches long. But when this first one is finished I will see what takes the lead Michael
-
John, Now would I tell a fib! Adeline, Thanks for your compliment, the tools I used are a jewelers saw with a very fine blade. a couple of lowly needle files, and a 1/8th diameter round file for the initial hogging off the round part at the bottom, The wire wheel is a large bench grinder type about 6 inches in diameter, when I make the next one I will show the files as the shaping is done, and by the way those "proofs" are all smoke and mirrors;~) Joe, Thanks the rigging is a series of models all in themselves, again I think of the line by Remco about treating every part as an independent model. I am having to think about how it all works by doing a lot of reading about the way things are done. what are the best ways to set the lines from an operational point of view. I try to put myself in the position of if I were on this boat how would I want to work and tie off these lines. Knowing how to sail a small boat definitely helps even though I don't know all the nautical terms for things. Nils, I,m happy that you are enjoying the build. Bob, The cleat is made of ordinary 1/8th inch thick brass sheet stock I had cut a bunch of 1 inch strips off the large sheet I purchased many years ago for some commercial work I was doing at the time. I have enough to last the rest of my lifetime. Druxey, thank you! I have to go into town this afternoon I am going to see if I can find a small key-chain compass, anywhere up to 3/4 inch in diameter, for another little piece of the puzzle, at this scale there is no reason why it shouldn't work properly PS its snowing again on top of the earlier stuff that didn't melt away!! Michael
-
Hi Piet , regarding the numbers you might try some of the model railroad decals. Michael