HOLIDAY DONATION DRIVE - SUPPORT MSW - DO YOUR PART TO KEEP THIS GREAT FORUM GOING! (Only 13 donations so far - C'mon guys!)
×


michael mott
-
Posts
5,195 -
Joined
-
Last visited
Content Type
Profiles
Forums
Gallery
Events
Everything posted by michael mott
-
 Hello Ron, I have just been over the last 5 pages of your build. fine work indeed . I have a question, what is the problem with the mast that you have made? you photo journal of making the capstan has given me some ideas so thanks for that. Michael
 -
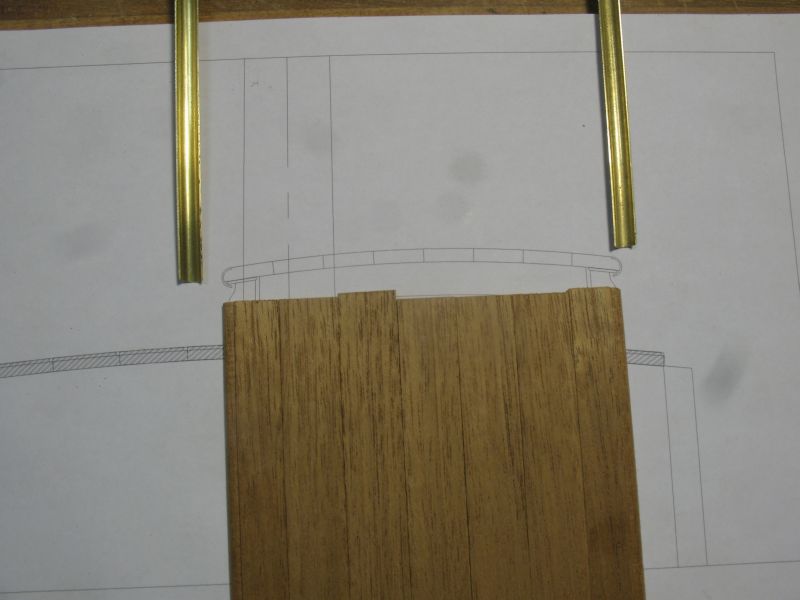
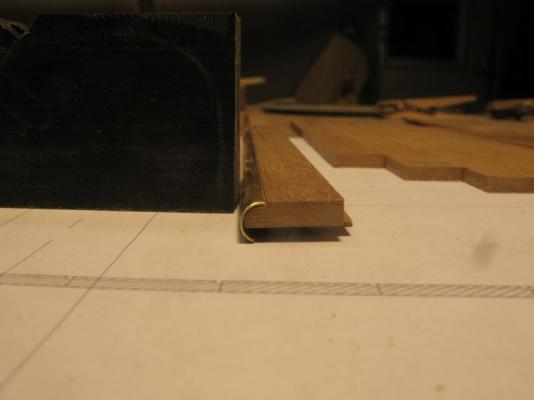
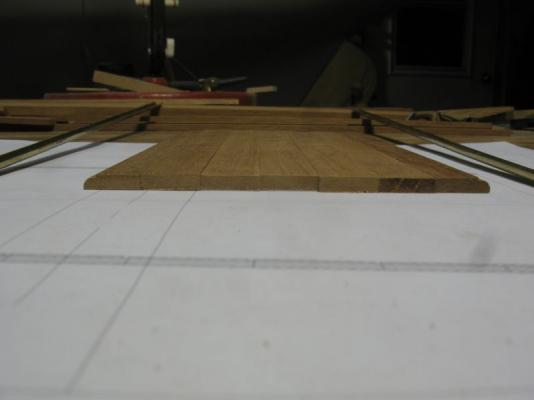
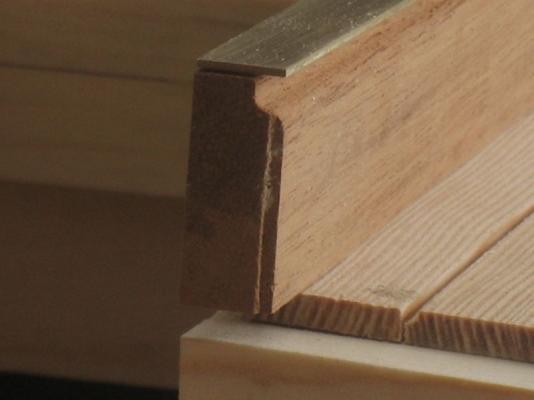
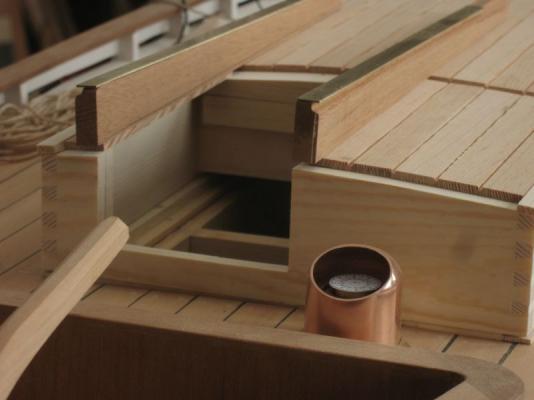
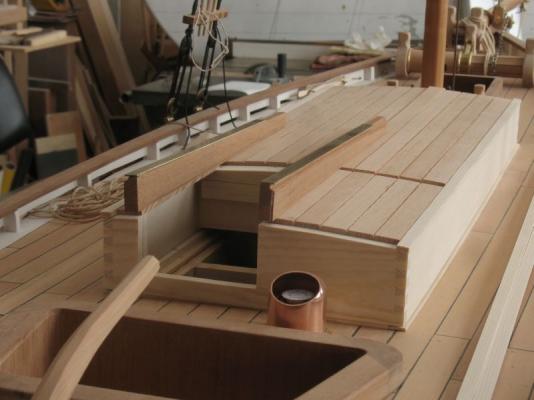
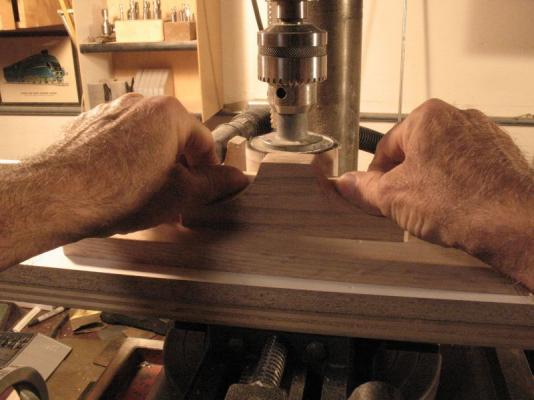
Ron, thanks for stopping by. Today I worked on the edge moulding for the hatch sides the split tube design was described in the fourth edition of "Boat Building Manual" by Robert M Seward on page 244 showing typical slide details. I developed a drawing and the split tube needed to mate to the edge of the mahogany board which is 1/8th inch thick or 1 inch in scale. the boards still need to be tapered and spline d before joining them. Set up the mill Michael


-
micro table saw stop
michael mott replied to michael mott's topic in Modeling tools and Workshop Equipment
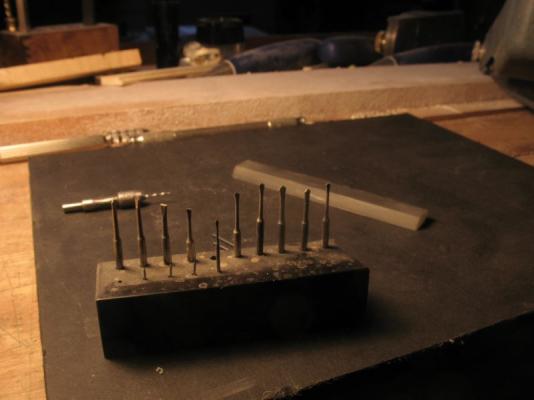
Yambo I finally got round to following your suggestion of using the mitre slot on my own saw. I have made a simple stop using a scrap of oak and some 1/4 x 20 cap screws. The cap screw sticking up is a longer one for in-between sizes without changing the block to another set of bolts, the main block is able to be set for some general wide cuts as well. I looked for some wing nuts but I don't have any. using this stop with the sliding fence allows me to cut very accurately now. Michael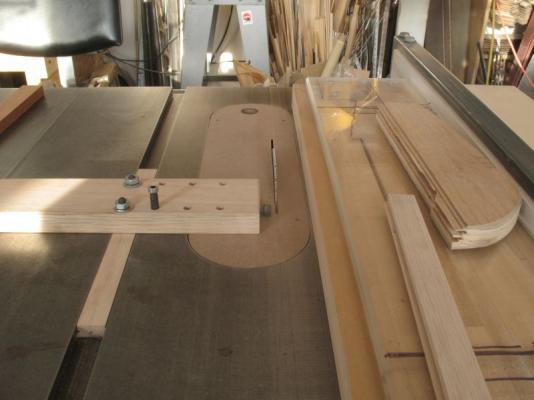
-
Good morning. Jay, Dan, the photo set up is a simple tripod, and a 2 second delay on the exposure and an F7 or F8 on the shutter. Dan I'm happy that the tube slitting is useful. Michael
-
HMS Victory by willz
michael mott replied to willz's topic in - Build logs for subjects built 1751 - 1800
William that is some fine carving! Michael -
Albert what a wonderful start to your build, I will follow along. Michael
-
So the three stooges then? this will be interesting to see how you wangle their personalities into the boats. Michael
-
I admire your tenacity Rob that was a lot of work to redo that mould. The method of building this way is very interesting. Michael
-
Thanks for the explanation Remco I wondered about them as well. The copper gives a nice grip it look like. Michael
-
Thanks John, I think that the next cutter I make will be turned on the lathe out of drill rod then shaped hardened and tempered then sharpened and polished as a double sided cutter I think it woll be a bit easier on my fingers pushing. michael
-
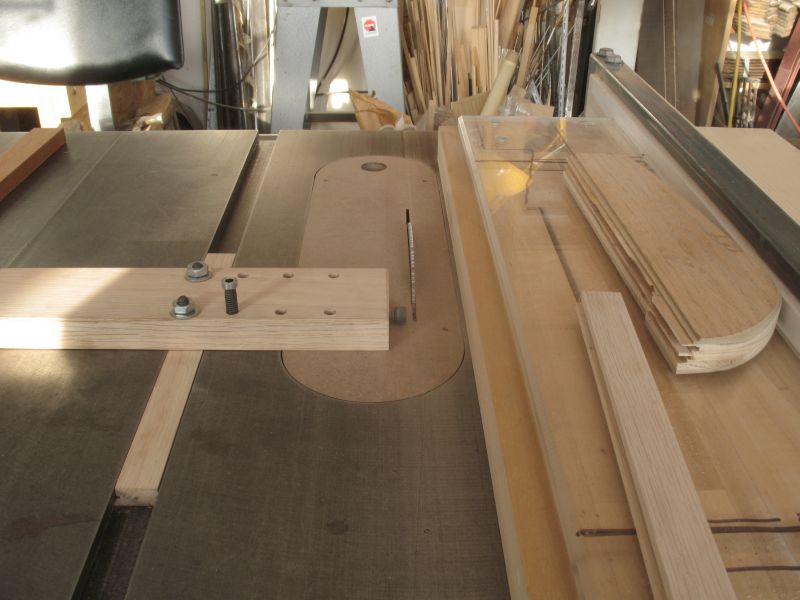
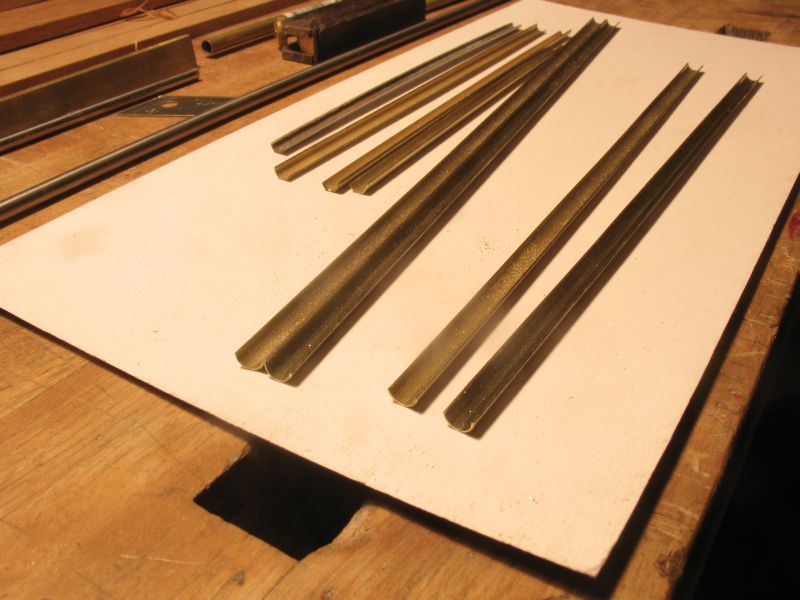
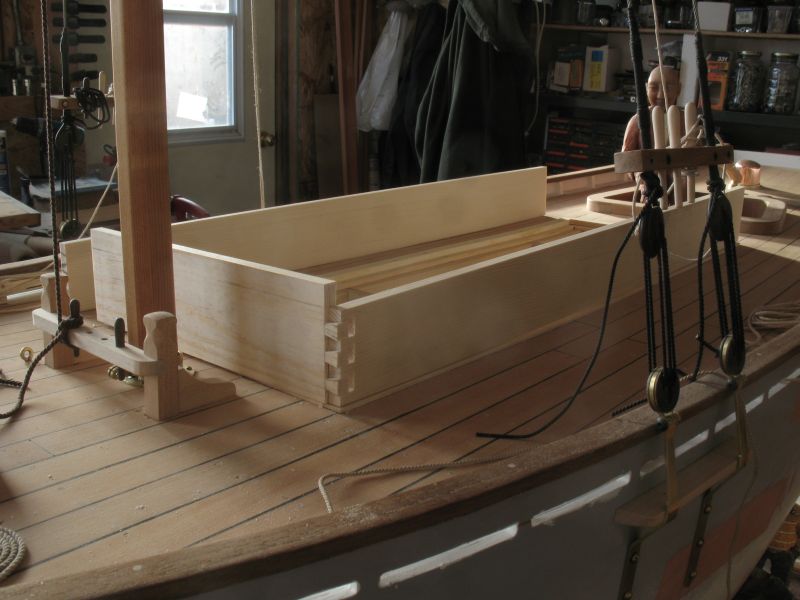
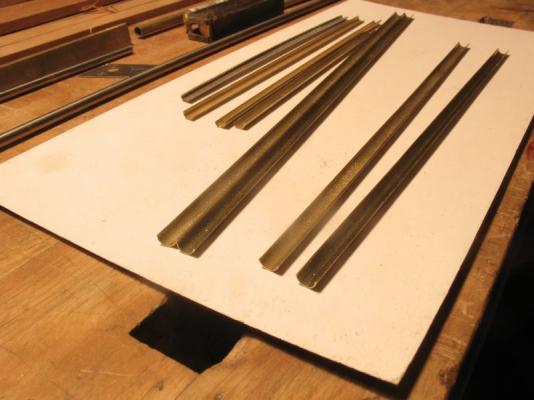
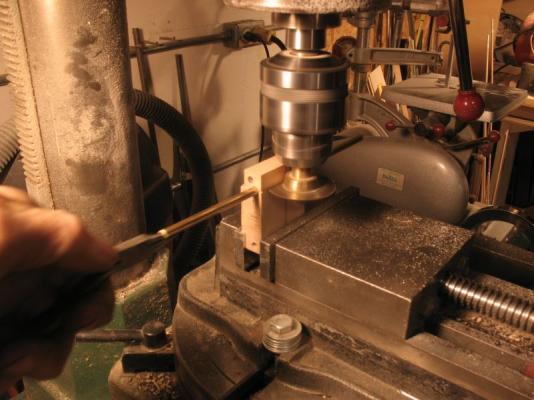
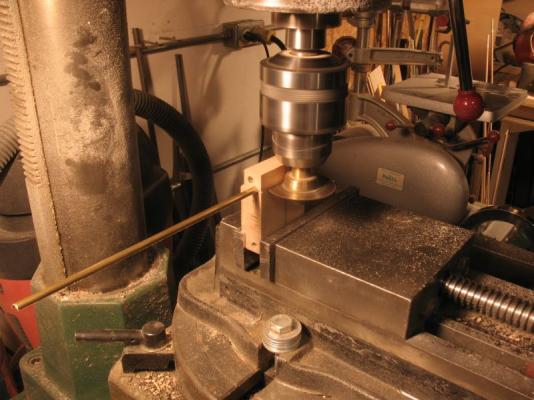
Well a quick jig that I was happy with. A scrap of maple was drilled to accept a slide fit of the 3/16 tube then a .014 slitting saw was set in the middle of the tube and the block , the tube was pushed into the blade untill it came out the other end of the maple. Next the tube was gripped with the needle nose and as evenly as possible pulled through in the same way we use a draw plate. the 3/16 seemed a bit small so I moved up a diameter to 7/32 tube.. I am pleased with the results. Now to make the hatch. Michael

-
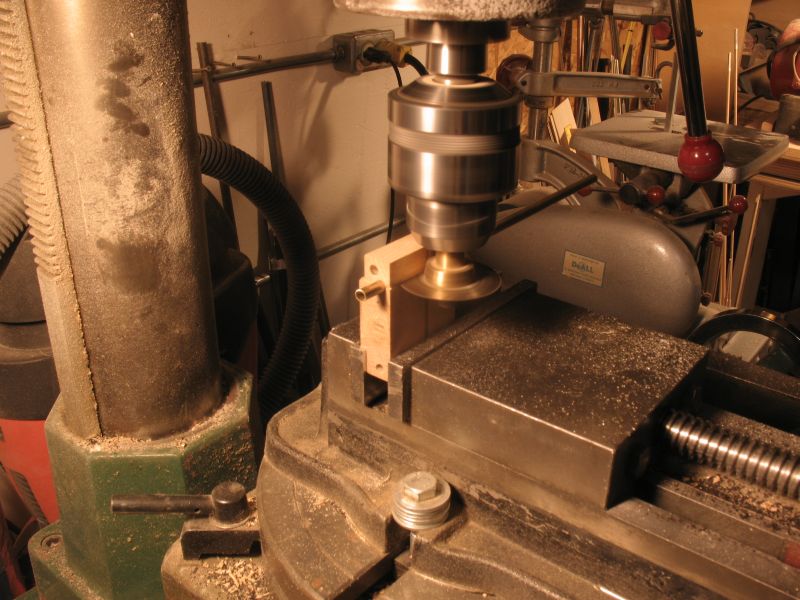
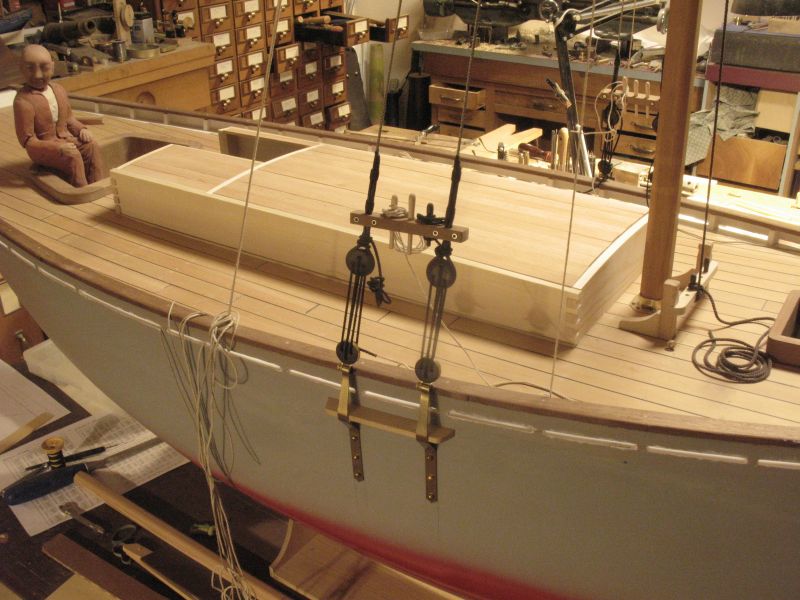
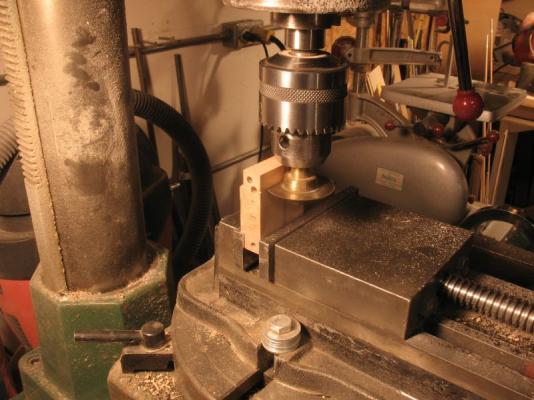
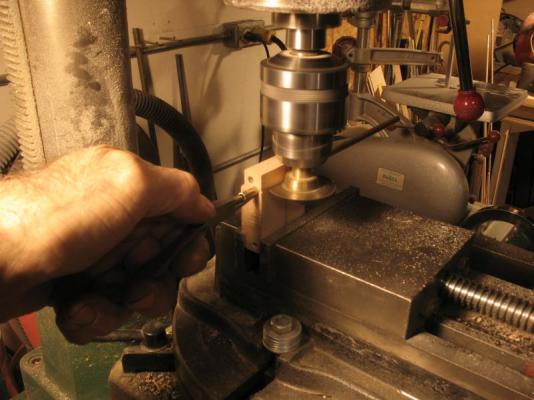
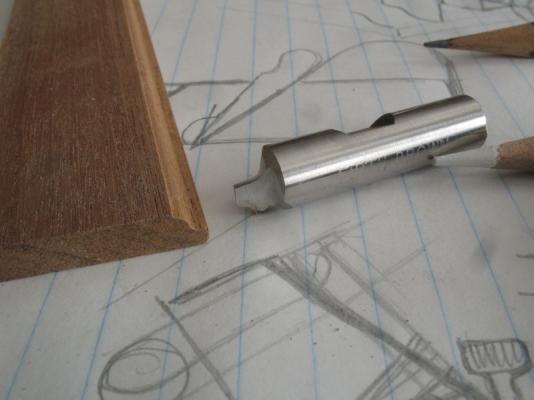
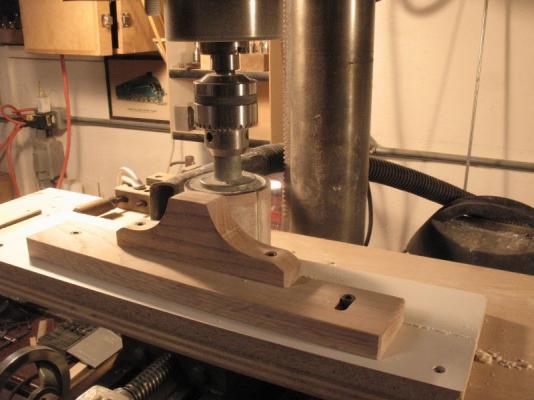
John, thanks Bob, yes Walter is a hard taskmaster. Druxey, The thanks have to go to Mr Prince My old junior school teacher who knew how to teach woodwork and coax the best out of the boys. Woodwork was my favourite class, next to drawing and metalwork. Crackers, I'm not so sure about that. Mark, thanks for looking in, Photography can be deceiving. Getting back to the cabin and working out the slide logs for the companionway hatch I needed to make a sort of Ogee profile, I thought about scrapers and beading tools used by cabinet makers. I have used the razor blade scrapers but this is a rather larger profile and I thought that a router type form cutter would work. it took a few tries to get the cutter working reasonably well. The cutter was ground into the end of a broken end mill. Now all I have to do is slit a 12 inch length of 3/16th brass tube. to cover the sides of the hatch. Michael
-
Mark exquisite work on the mill. edge-finders and wigglers, are a must for working a mill, I just wish I could afford a digital read out, I have an old mill with slip dials. Michael
-
Antony, very clean joinery and the overall effect shows. Very nice to follow along. Michael
-
Very Nice results Alexandru, great to see that you solved your pintle issues. Michael
-
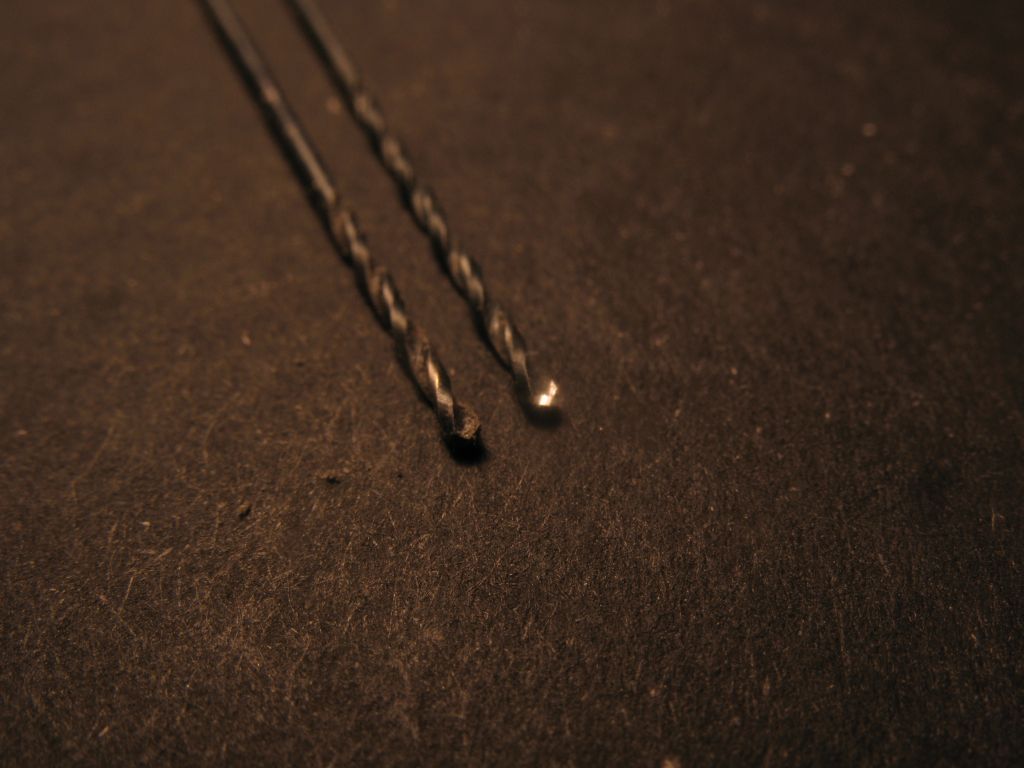
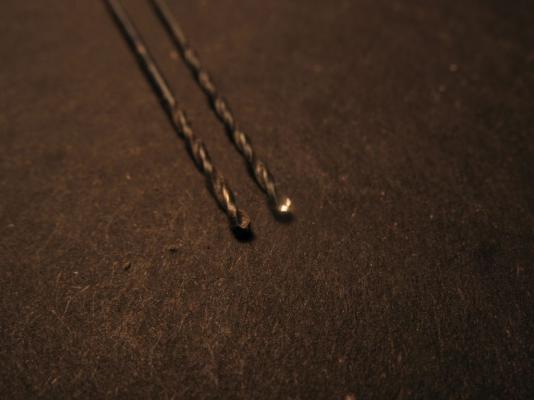
Hello Alex, Brass can be either free machining or not and sometimes the yellow brass is rather gummy or sticky. the best is to use a scraping type tip that is very sharp, the breakage of the drill bits usually happens as the bit cut through and the brass grabs it and snaps the bit. Ask me how I know. If you can sharpen the bit in the normal way then using a small slip Arkansas stone and "Lapp" a small flat on the leading edge, like the one on the right. The flat prevents the bit from grabbing, it is also important to use some supporting material underneath the brass that you are drilling either some more brass or a very hard wood, this also helps to prevent the bit from breaking through too fast (the other cause of grabbing) It only takes a couple of minutes to modify the bit after you sharpen it. The Arkansas stone is in the white stone next to the other type of drills that watchmakers use. I hope this is helpful. Michael
-
Well Bob this is a tease? .....yes and so the next build will be.... Michael
-
Steve, the frames and keel look really solid. Michael
-
Andy, Mennonites eh? John, thanks. Greg, Thank you. Here is a couple of shots of the crude thickness sander, I like the fact that I can use the cross slide to index for fine cuts. The raised block in the centre had the original purpose of making the fence taller, serendipitously it also acts as a finger stop. And a bit of planking on the cabin, all is just resting the rebates are false and glued. Time for a break, its been a long day. Michael

-
Sherry My heartfelt condolences to you and your family for the loss of your brother. Michael
-
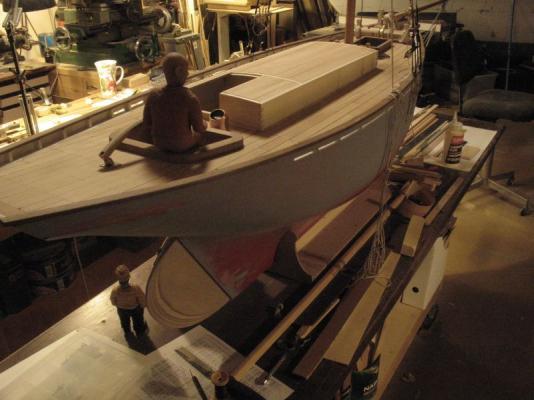
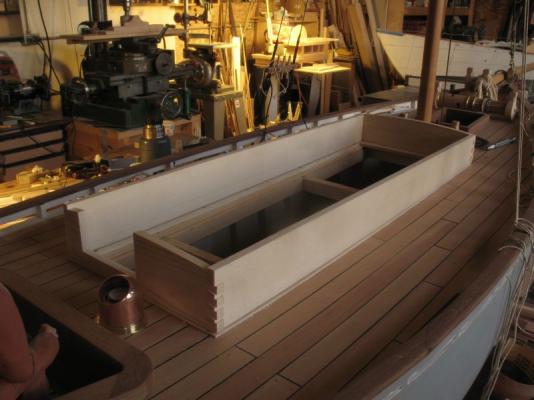
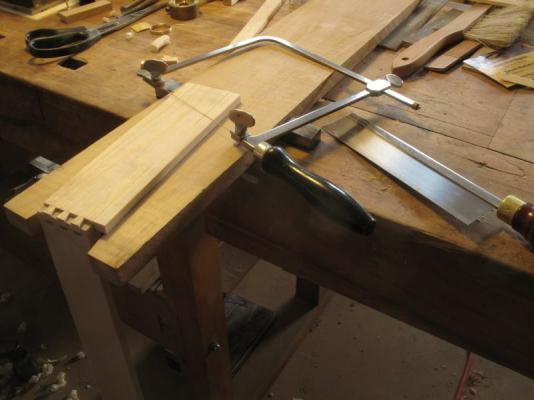
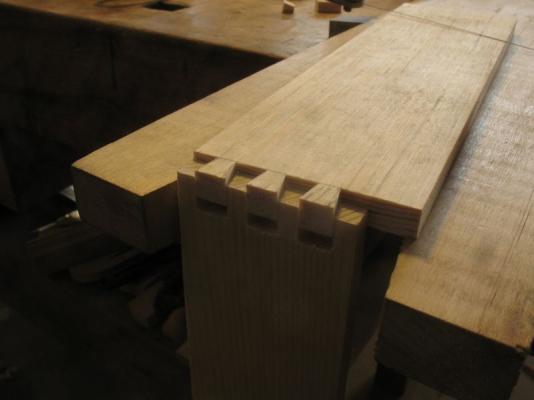
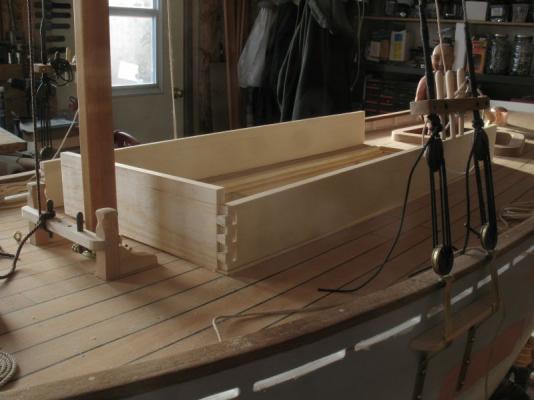
Mark, John, Yambo, thanks for your thoughts on the cabin planking. Bob, the helmsman is Arnold he is a giant at six foot eight. Walter on the other hand is four foot six. Denis, thanks for your thoughts about the planks. Nils thanks for the ideas about the colour of the sails. I still need to address those. Also thanks for the Likes, it is not something that I do in any of the programs that have that feature, just one of my idiosyncrasies. Dan, thanks for your comments, regarding the approaches to my work. Having the luxury of being retired from commercial model making and exhibit design gives me the time to redo elements that are more appropriate for this model, which for me is a steep learning curve. Greg had said "that for some it is the journey and not the destination" it is that journey which for me gives me the greatest pleasure, and whether something stays or is changed or replaced is part of that journey. Today I made a start on the final cabin walls the mahogany ones had to go, there were too many things I wanted to change. The biggest one was the colour, Having decided upon the Fir for the cabin top I thought that white would look better for the sides with the exception of the companionway which will be in some bright-work and Mahogany But I really am not wanting to paint them so I have changed them to some white pine. in scale it is a single plank of white pine that is 16 inches at the aft end and 12 inches at the fore by 2 inches thick, a large plank for sure but not outside the bounds of reasonable. I built a small thickness sander, which is easier than lots of hand planing to work with the wood. After preparing the planks I cut my first dovetails in 34 years, I am pleased with the result. One down three to go I also set a new more shallow curve for the cabin top. and made a template for the rest of the beams Cut the rough opening for the companionway. Now to make the beams. Michael

-
That is a big diameter for those bars, were they really that big? I am not familiar with capstans. Michael
-
Ed if I have understood this process correctly you are in fact doing the work of preparing the keel for the cant frames as the builders would have on the full size ship. As I looked at the sequence of pictures the thought crossed my mind that I would have as others have said preferred to do this work flat on the bench. Smile I can just imagine the foreman on the ways "OK lads lay that keel over so we can cut those scores" Michael
- 3,618 replies
-
- 1
-

-
- young america
- clipper
- (and 1 more)
-
HMS Sussex by mij - Scale 1:48
michael mott replied to mij's topic in - Build logs for subjects built 1501 - 1750
Greg I could not agree with this statement more. Mij, Definitely a major step, but it is oneself that one has to satisfy that the materials are giving the desired results. Michael -
Good to see progress John. Michael