HOLIDAY DONATION DRIVE - SUPPORT MSW - DO YOUR PART TO KEEP THIS GREAT FORUM GOING! (Only 13 donations so far - C'mon guys!)
×


michael mott
-
Posts
5,195 -
Joined
-
Last visited
Content Type
Profiles
Forums
Gallery
Events
Everything posted by michael mott
-
 I really like the way you made the hoops for the mast. Michael
- 219 replies
-
- 3
-

-
- smack
- cross-section
- (and 2 more)
-
Hi Keith, just catching up I have been busy off site for a while. Beautiful work on the hull, and clever solutions on the binnacle. Michael
-
Very nice Paul and good to hear that your mind is in good shape as well, we often take our bodies for granted until something serious happens then we cherish how wonderful life is. Complaining about the weather the heat or cold of it is acceptable in any part of the globe though. One of the reasons I moved to where I am now the outside temp has no affect on the inside temp provided I pay the bills and the heater doesn't have a malfunction. !7 years Hmmm that is dedication to the task and a beautiful result. The nail is intriguing as well. Michael
-
Good evening Keith.... yes I know it's morning there. Have you thought about making a small tube drill saw, by turning a short bit of drill rod or an old 8mm drill into a micro hole saw a with a 2mm pilot drill You would not even need to harden it if toy went slow enough but mate sure to make the teeth knife pointed on the outside diameter I think that would be better than a forstner bit. Michael
-
Your situation does not sound pleasant at all. I hope that you recover soon and that nothing really serious is going on. Michael
- 1,208 replies
-
- 2
-
-
- great republic
- clipper
- (and 1 more)
-
Steve I really don't want to go that route. The ribs were steam bent in this launch and I loose only 100% of the time when I fight with nature. I am doing some tests to see how things look at the bow and some deadwood is definitely in the cards. the cross floors are 1" thick and are made of Castello and there is a space for the limber hole which is formed by the rib not reaching the top plate. this is how it is on the restored launch. I have places a piece that is 3/4 inch thick down on the form then the keel is placed on top the Keel needs to be tapered at the bow and stern. I will set the width of the top plate by a combination of the width of the ribs at the bow and the keel adding a slight bevel to the end of the ribs lets them sit well next to the floors. The ribs are not lined up with the station bulkheads, there were no drawings of this and the ribs are generally spaced at 12 inch intervals which at this scale is 1 1/2 inches apart, so as I am typing this it occurs to me that there would be fewer ribs in any case. I am also guessing that there won't be much of a limber hole on the first couple of ribs in the bow. Michael


-
HMCSS Victoria 1855 by BANYAN - 1:72
michael mott replied to BANYAN's topic in - Build logs for subjects built 1851 - 1900
Nice solution Pat. That jig for holding your dremel is interesting. Did you make it and also tell us about the little saw holder I really like it. Michael- 1,000 replies
-
- 7
-
-
- gun dispatch vessel
- victoria
- (and 2 more)
-
I only asked a question.... Keith your work is masterful and that is the only reason I can rib you, because I have the greatest respect for your skills. Cheers Michael PS Oh yes and the speed control does look respectable now. fantastic work all round, well hexagonal at least.
-
Gary just catching up. If my hull comes out looking anything like as clean as yours I will be a very happy camper. The whole model is looking great. I have followed Chuck's work for a long time, he has to be the consummate artist when it comes to making a scene look absolutely real. I am looking forward to seeing how you finish the hull weathering. Michael
-
Mark, my that link is great those guys are insane... amazing sailors but insane 1000 square feet on a six footer now that is pushing the envelope. Thanks again. Michael
-
Hi Mark thank you yes I can see that they can lie perpendicular to the keel but follow the curve of the hull at the same time . Michael
-
Hi Kurt I missed your post as I was composing at the same time. Thanks for you kind words. Michael
-
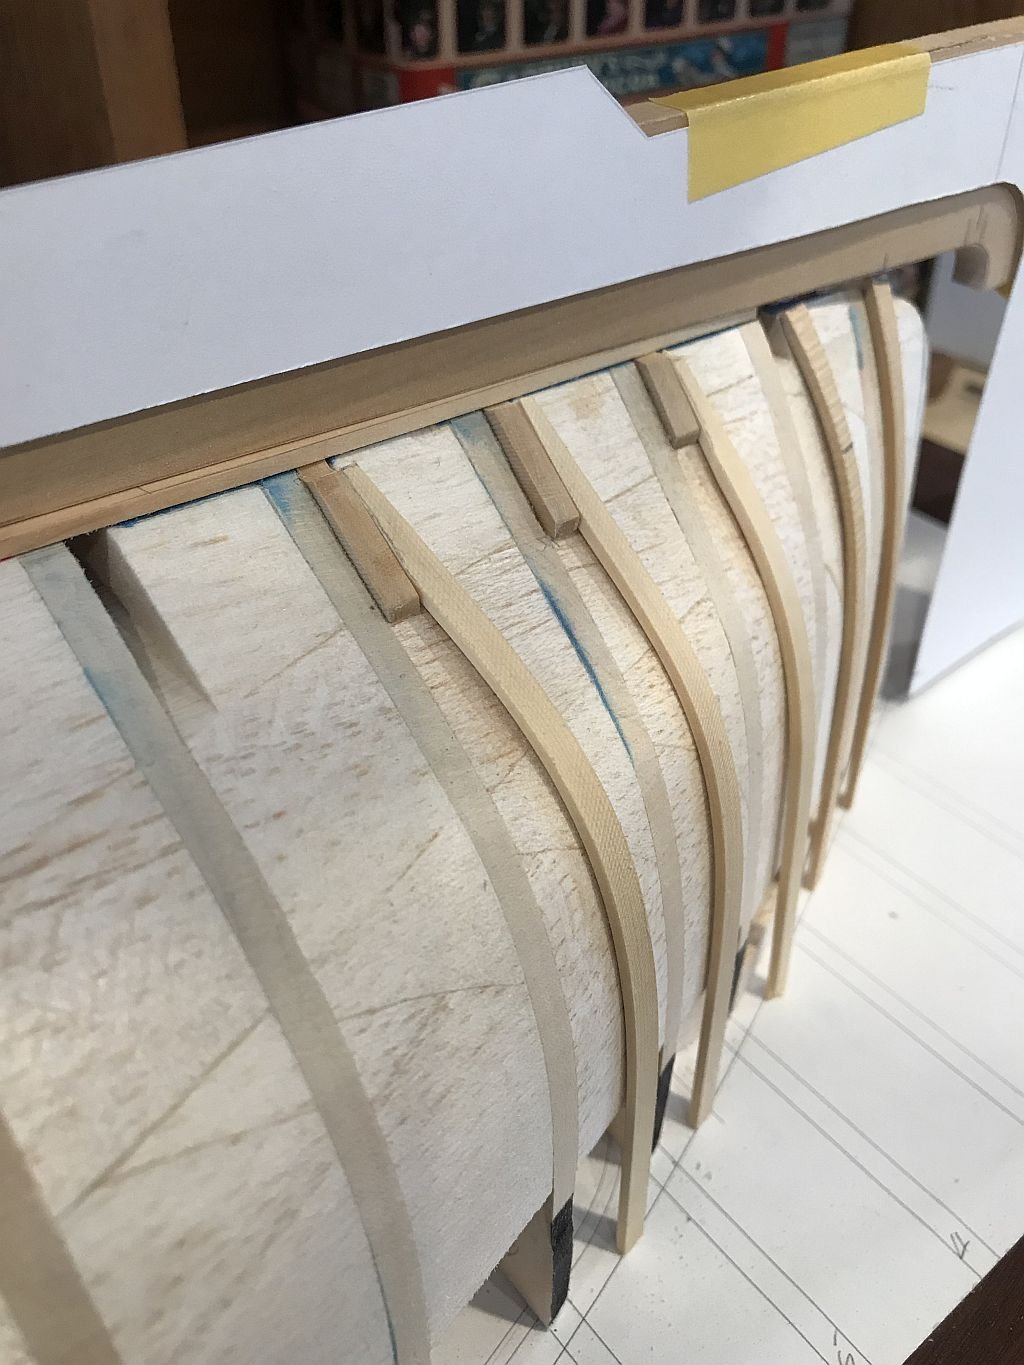
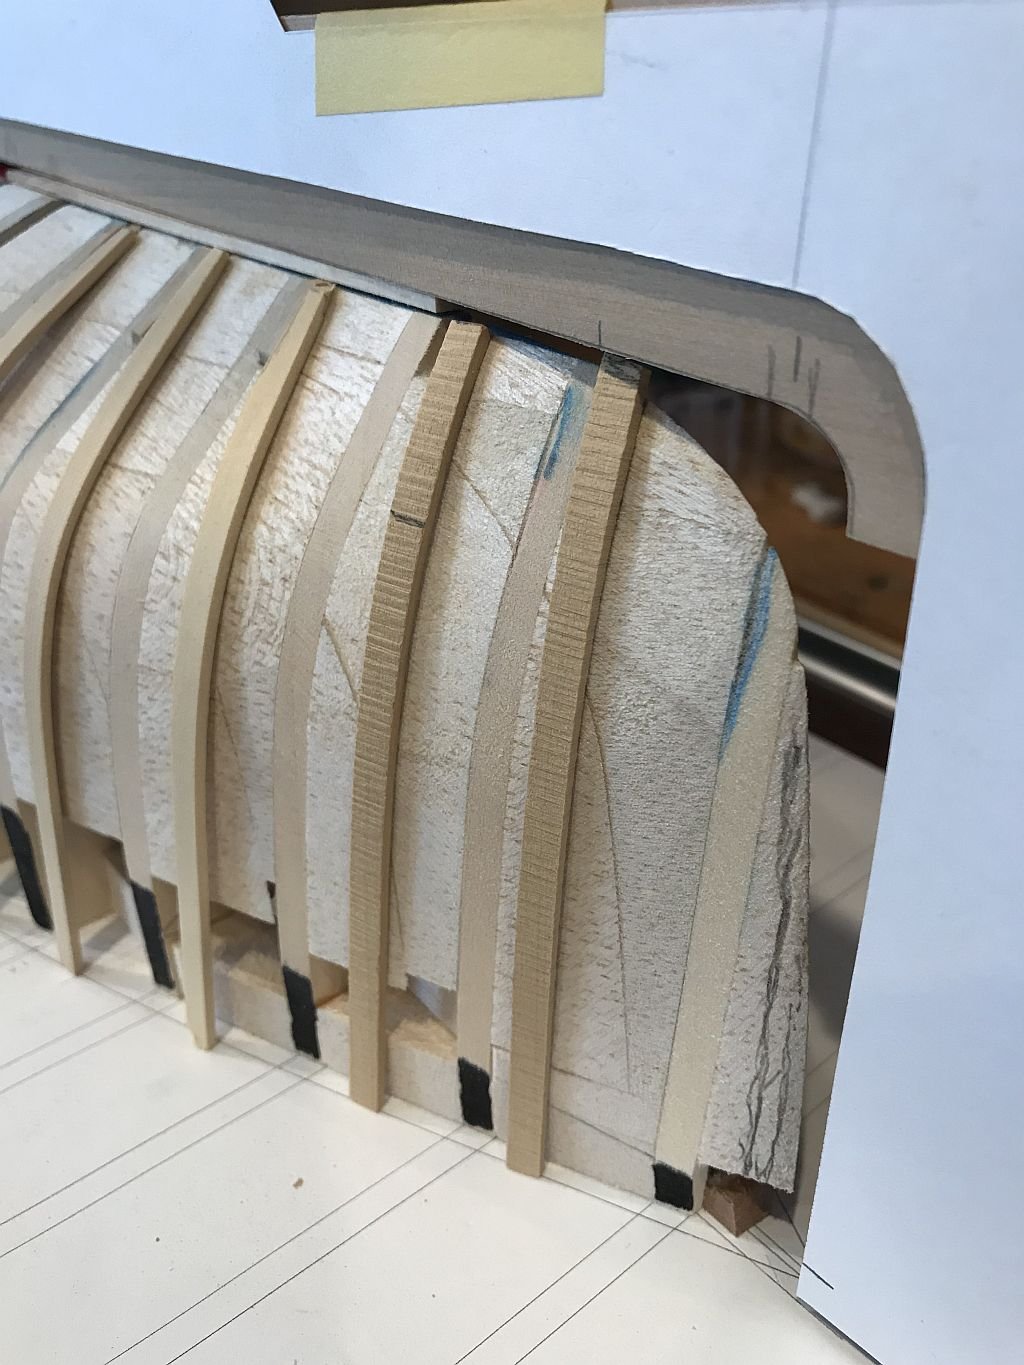
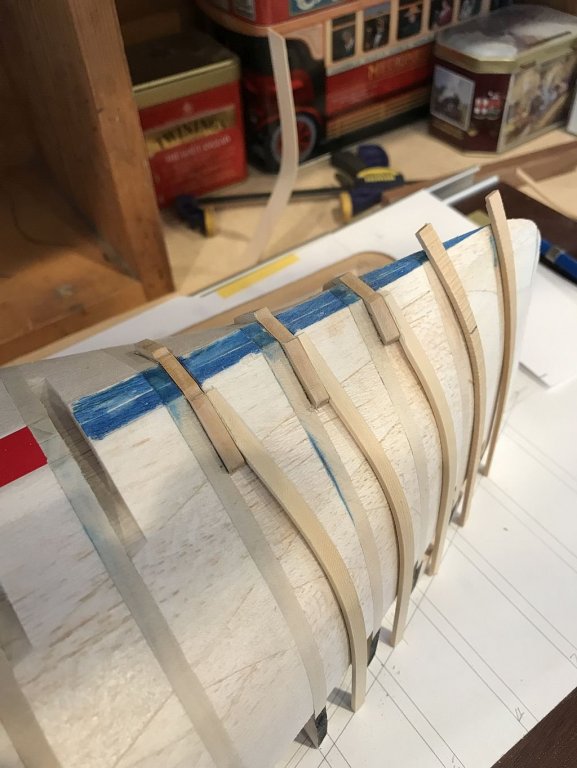
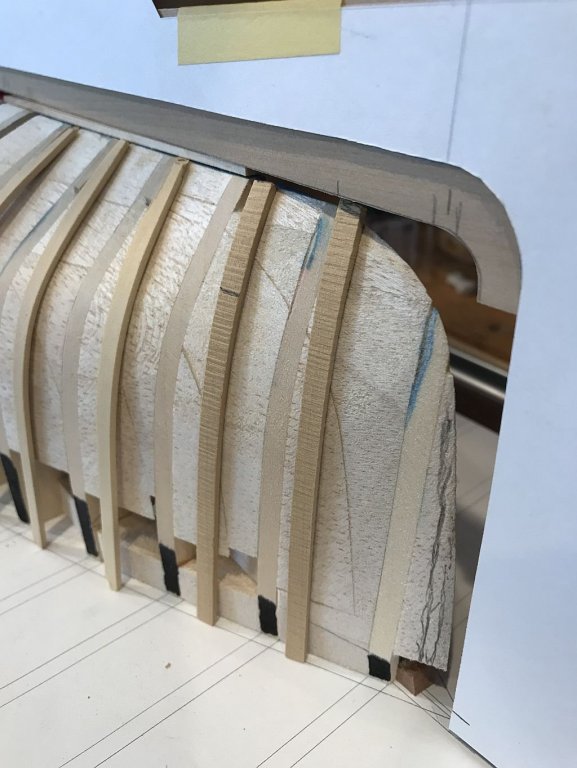
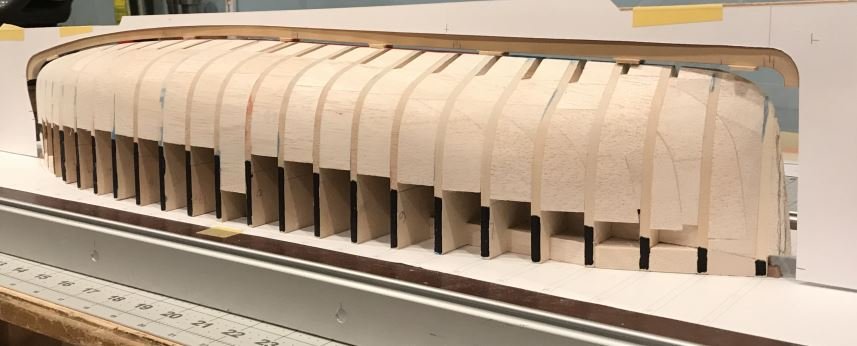
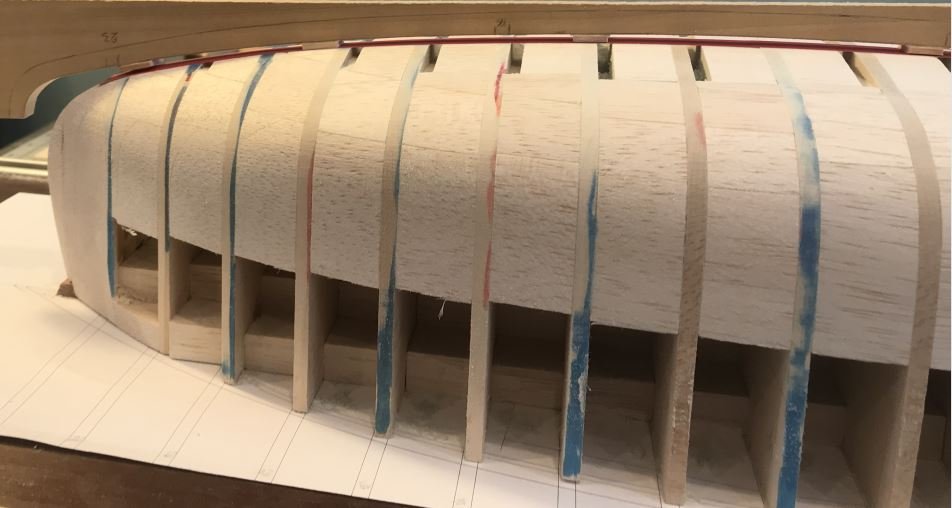
Thanks for the comments and visits. I have a question regarding the ribs in the launch. In the following pictures are some tests with Castello and Yellow Cedar. I am told that the frames or ribs in this launch are 1/2 inch by 1 1/2 inch wide. The bulkheads are for getting the shape of the hull correct, ostensibly. I have been attempting to form the ribs to the shape that is left in the form after sanding and this is not working I have snapped three or four while working to bend the rib against nature which logically does not make sense. if the section of these ribs were square I can see this working but not with these. What does make sense is to make the ribs follow the curve of the hull and lay them flat. This does not then add all sorts of twisting stress to the rib this is obviously not a big issue in the full rounded area but at the bow and stern. I am inclined to space the ribs logically at the bow and stern and let them lie flat next to the hull there will be a slight twist which is ok but not the Houdini twist I was attempting. And of course critical council is welcomed.......Keith. I await the collected knowledge of the membership. Michael

-
Carl, that did cross my mind but I thought that it would have been more work, the error was annoying but small enough that I was able to fix it. Michael
-
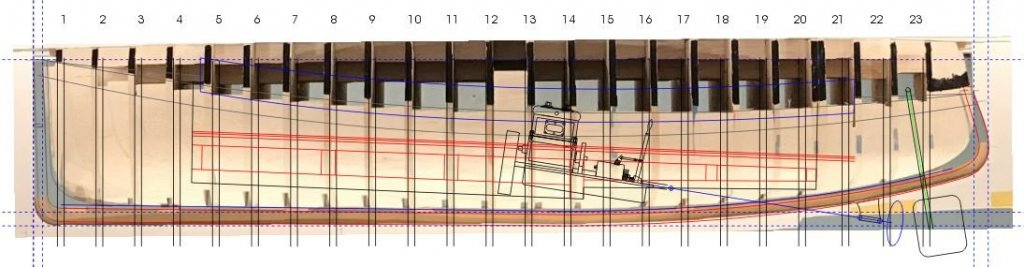
Good morning Druxey, I don't think you are missing anything. It is me who missed an error in my drawing, as it has turned out I would have not got the keel correct at the bow and stern from the drawings. I probably could have done away with the #1 set of ribs because after shortening the hull to match the overall length as per the numbers from Roger it would have been wise to reset the stations but I did not. I really can see how the use of half models was one of the main ways to get the form right. Working from 2 dimensions with a soft form without using all the conventions of waterlines, and buttock lines to check the shape in hindsight was a recipe for what occurred, it would have been the better way to approach this. I will definitely have a greater understanding of this process on the next hull. I will follow the plans of a tried and true hull, instead of a few measurements of a pretty boat, that are mostly of the inside and a bunch of photographs. At this stage I am confident that it will all come together and will fairly represent the actual boat. I can also see why folk build kits. I can accept that I needed to learn all this the hard way. Michael
-
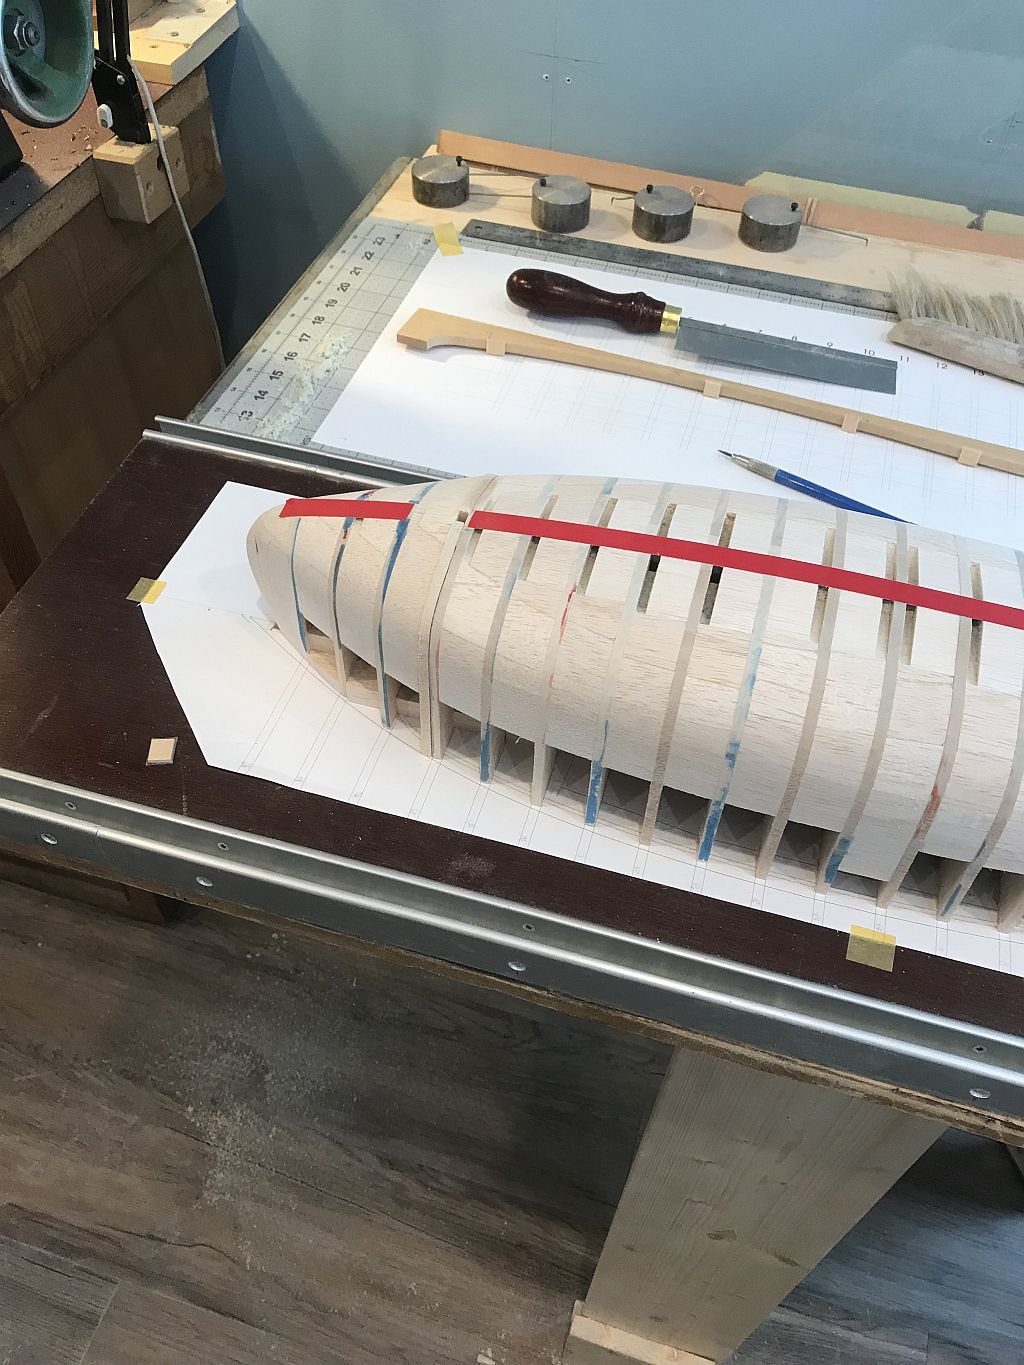
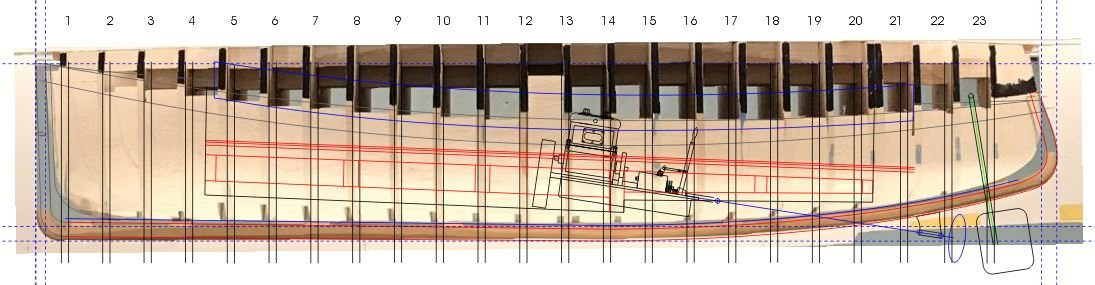
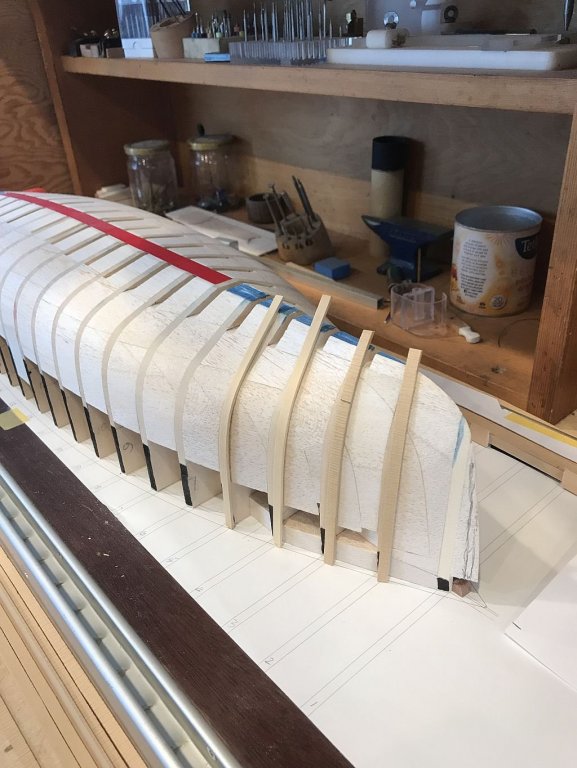
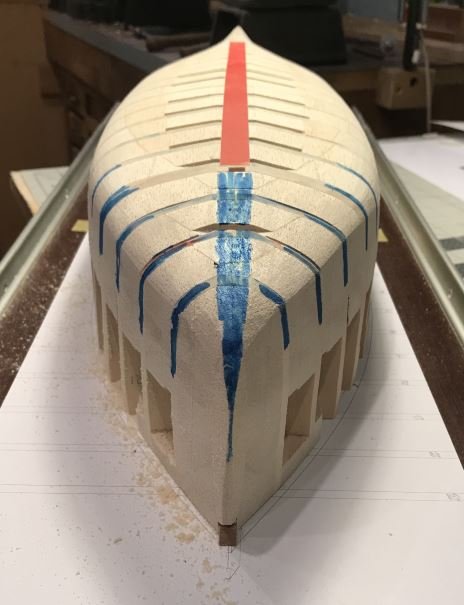
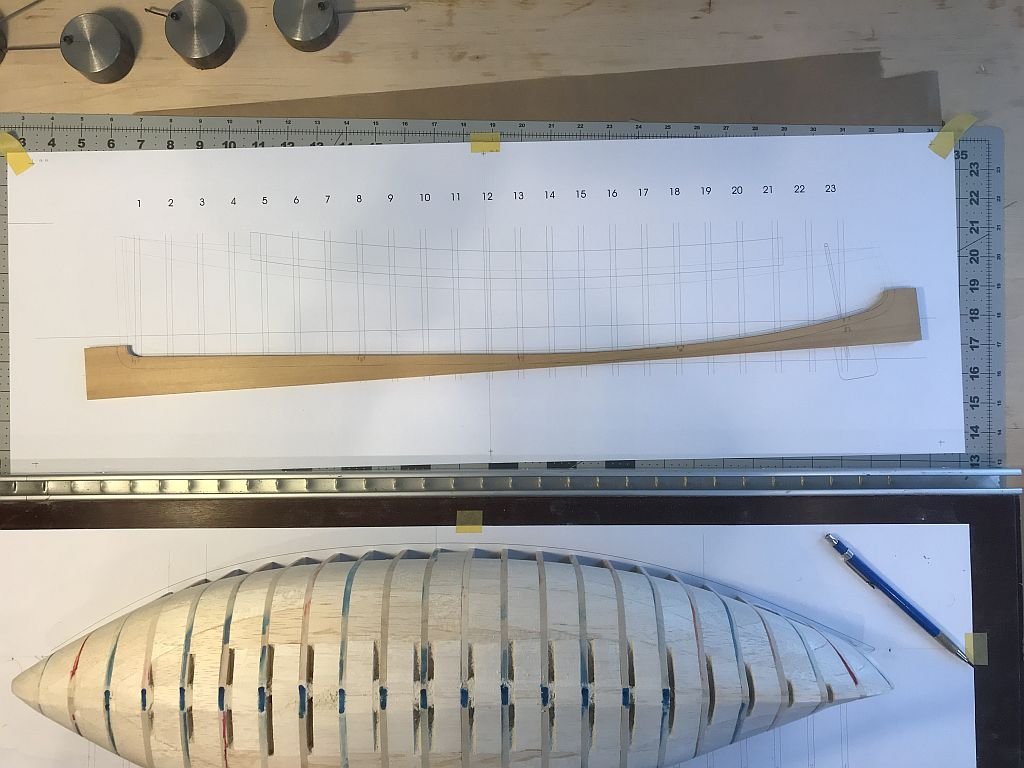
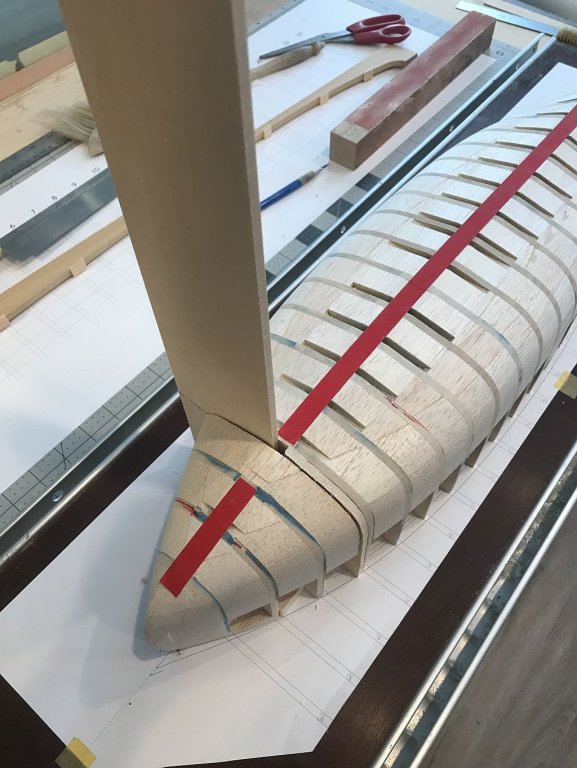
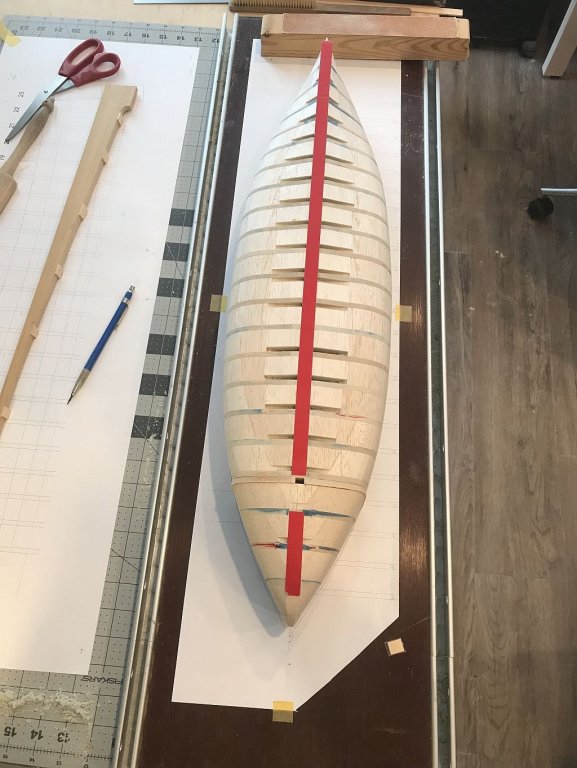
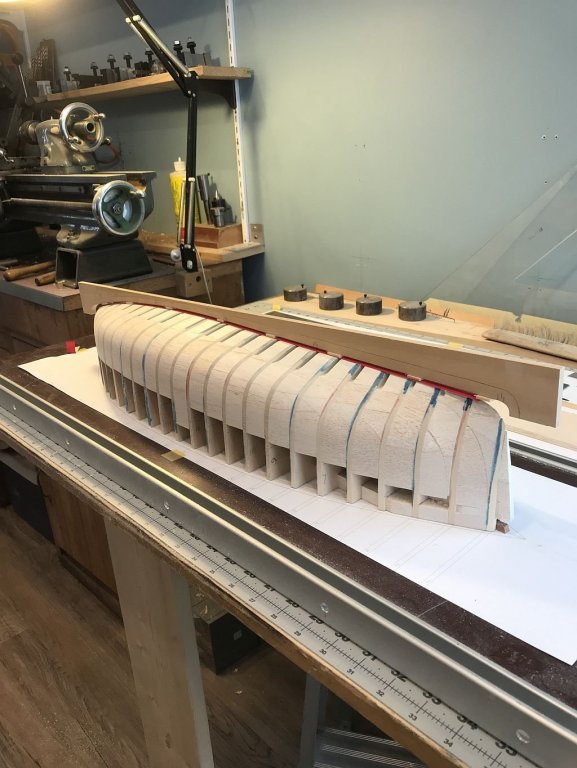
Thanks for all the visits and likes. Discovered a flaw today! When I changed the length in the elevation I did not change the length in the plan view. Don't ask me why because I have no idea why I didn't. I cut the inside shape of the keel but left the outside so that I could use it as a gauge. It was when I stuck the profile of the hull onto this and put it onto the form that I discovered the issues. yes a combination of them. The bulkhead stations were the same on both the elevation and the plan, and there was some spacing error at the stern at station 20 and the plan view of the edge of the deck was too long and needed to be shortened. it was very confusing. Once the errors had been corrected and the edge of the profile changed it left a couple of things to fix the hull form. First I had to add 3/16 aft of station 20. Then the other issue needed to be fixed with a load more sanding because now the bulkheads were wrong at the bow and stern. Onward and upwards. The stern after some extra sanding The red tape represents the 4 inch wide plate that is fixed to the top of the keel and is tapered at the bow and stern. indicated with the blue pen. The next shot shows the re-sanded form with the profile resting on it. I will be adding some deadwood at the bow and stern. This looks better Before I go any further I will set the stem and sternpost with the deadwoods. and fix the top plate after placing the ribs on the bulkheads. Michael

-
Now that is thinking outside of the box....amazing, thank you Kortes, I would never have thought of doing it that way. Your hand is a steady one for sure. Michael
-
MONTAÑES by Amalio
michael mott replied to Amalio's topic in - Build logs for subjects built 1751 - 1800
Finally I see that he is human did you all see the blobs of glue. Phew! and sanding dust too. now my question is how do you clean up the glue with the clamps in the way, or do you do that later? As always superb model making. Michael -
Very nice site Alex, I was curious that of all the links there was no link for Model Ship World. Michael