michael mott
-
Posts
5,200 -
Joined
-
Last visited
Content Type
Profiles
Forums
Gallery
Events
Everything posted by michael mott
-

First Build Bluenose by Billings
michael mott replied to Dave Marson's topic in New member Introductions
Hello Dave, it is great to see that you have taken the plunge, those two photos you sent to my i phone would be a great start in your build log when you get it up and running.....Just sayin' Michael -
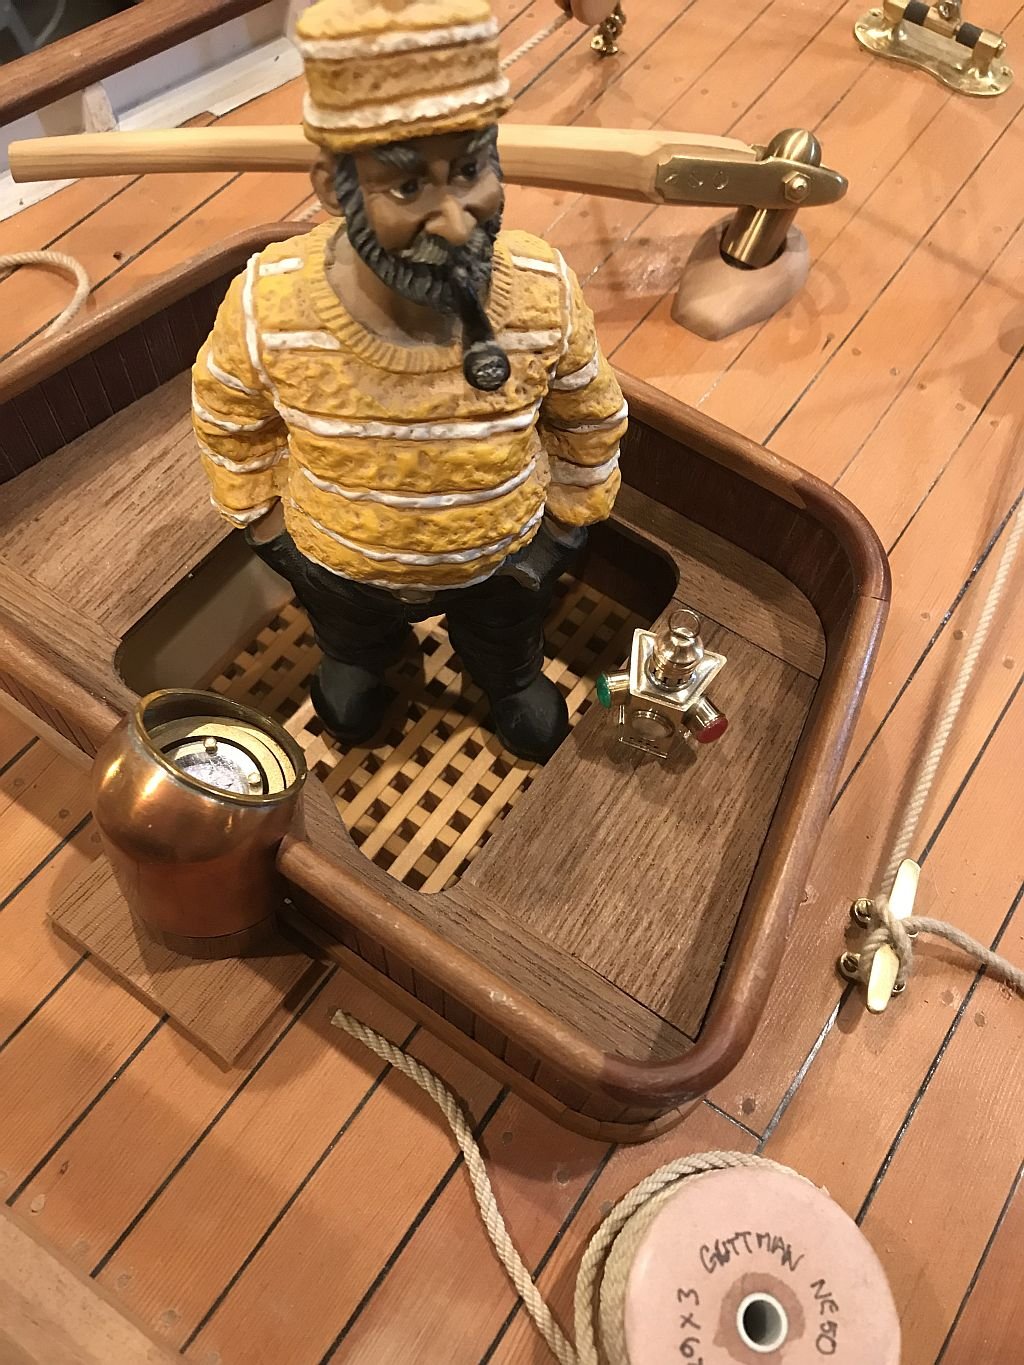
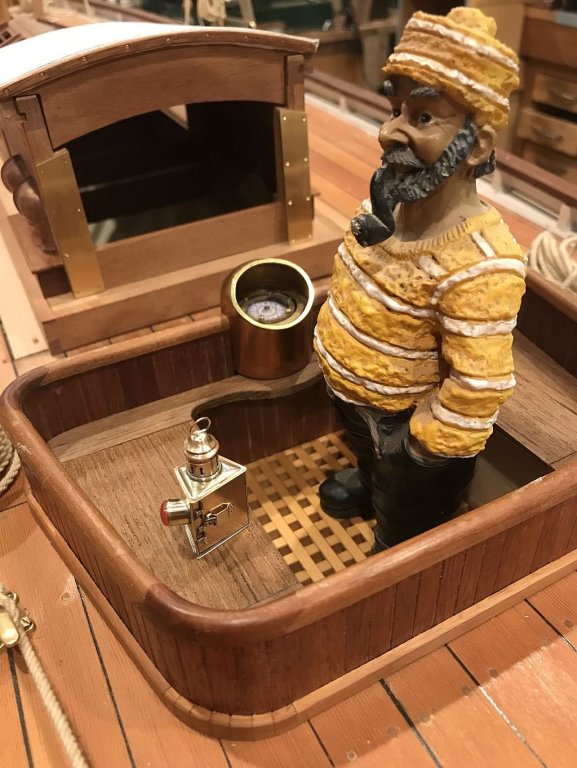
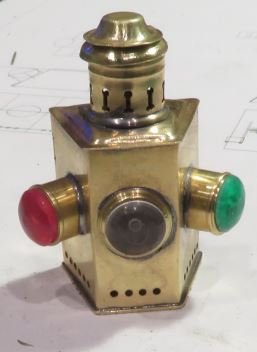
Walter has been watching what was going on over on the Skipjack ways and asked if he could borrow a lamp. I couldn't resist. Today I glued the floor into the bottom of the cockpit. Michael


-
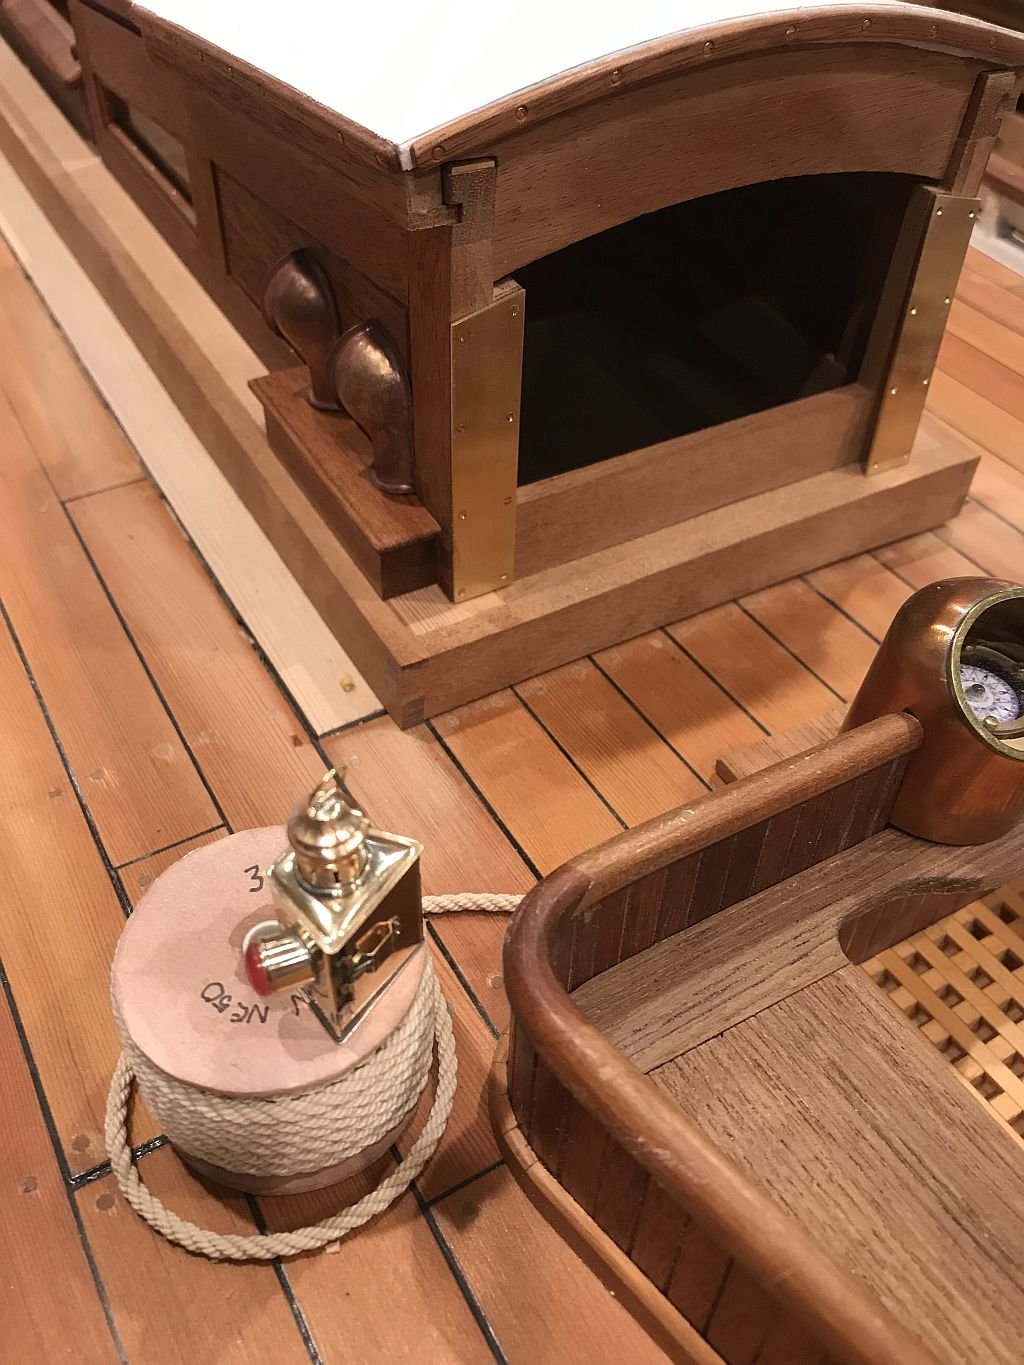
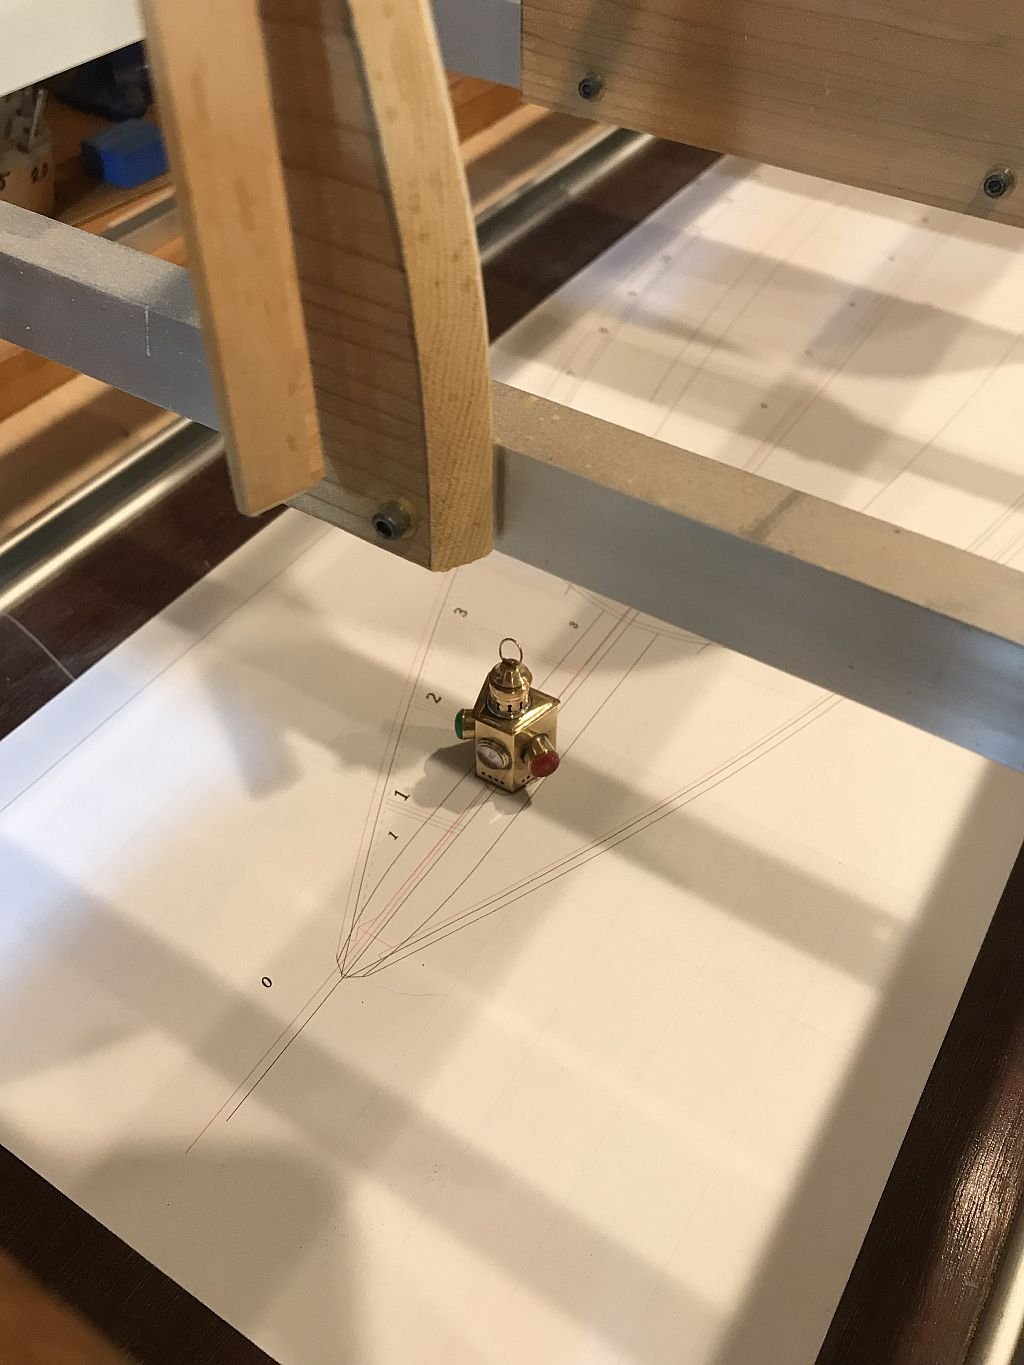
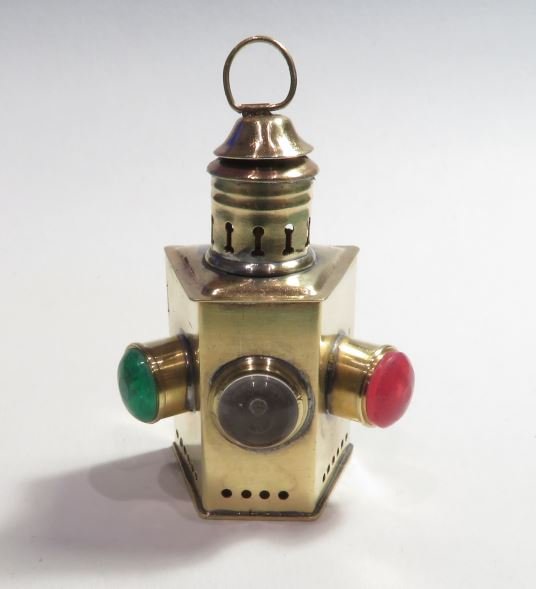
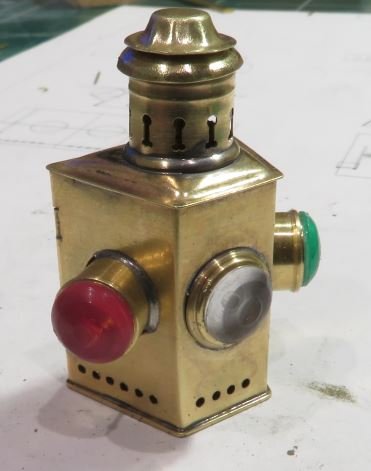
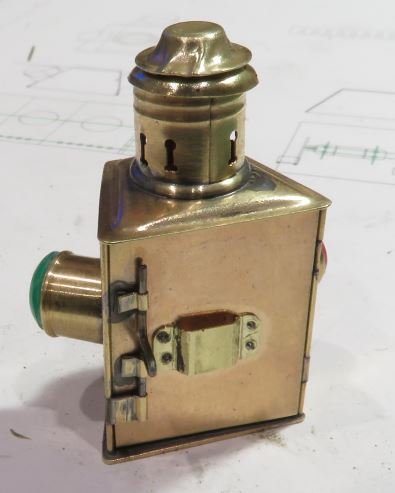
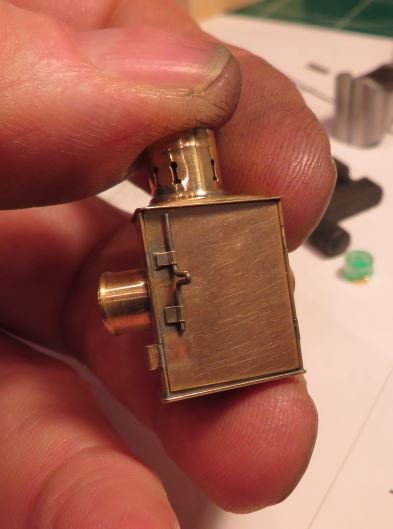
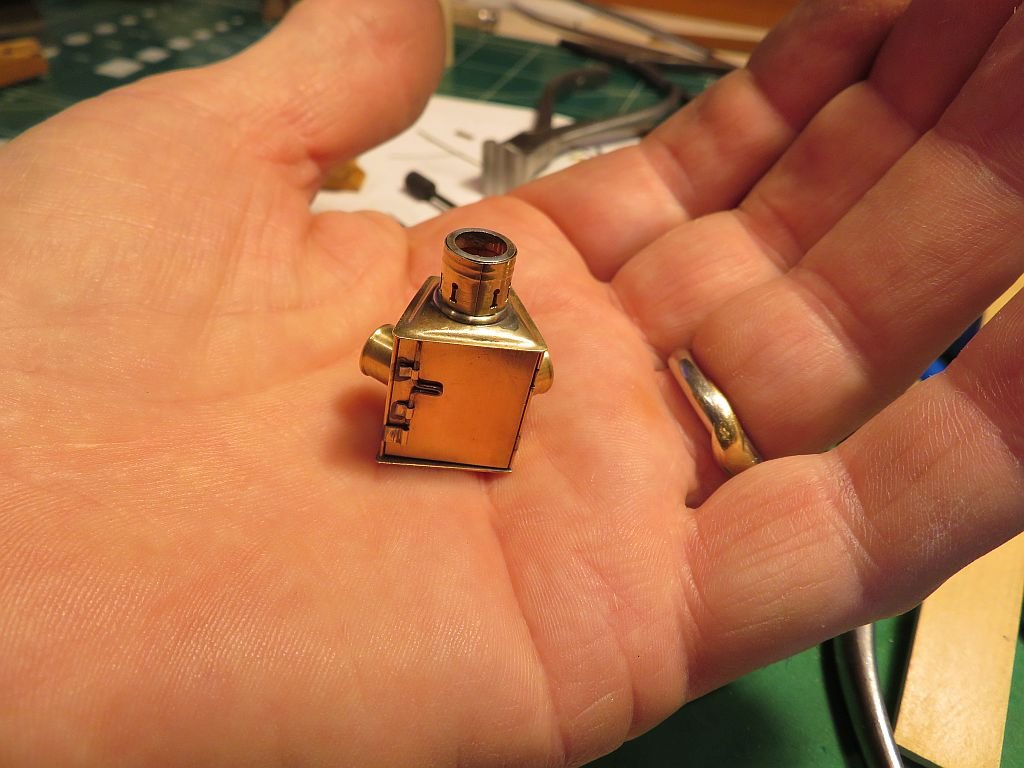
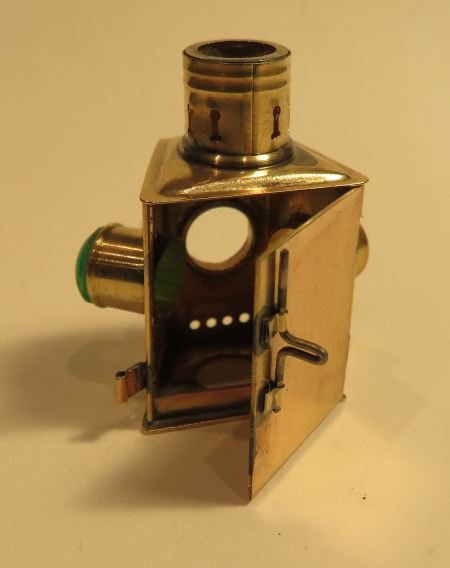
The lamp is finished except for the light inside. It looks a bit beat up, but then it is not brand new. The previous owner dropped it a few times and had to get it repaired. That's my story and I'm sticking to it. Placed on the plan of the launch. It has been an interesting journey and the scrap box has a few more items to add to its collections. The formers, and tests and reject parts. Now that I have some yellow cedar I will be sorting out the planking of the hull.


-
Ah yes good point Andy - always pass the port red wine to your left. Thank you Gentlemen, I am not sure why I did that considering some years ago I did an exhibit on the shipping disaster that talked about the collision in the St Laurence Seaway about the Empress of Ireland that resulted in the loss of many lives. I made a mock bridge with the wheel and the lights in order for the visitors to understand how the lights and signals worked. Michael
-
MONTAÑES by Amalio
michael mott replied to Amalio's topic in - Build logs for subjects built 1751 - 1800
How on earth do you keep everything so absolutely clean? Superb workmanship! Michael -
Hi Mark, Life does show us what we are made of. The lessons it presents teach us how to move forward, and it sounds like you are sorting it out. Happiness comes to us when we engage in what it is that gives us focus, and it sounds like a great idea to begin a fresh build at the moment. I look forward to the new build. Michael
-
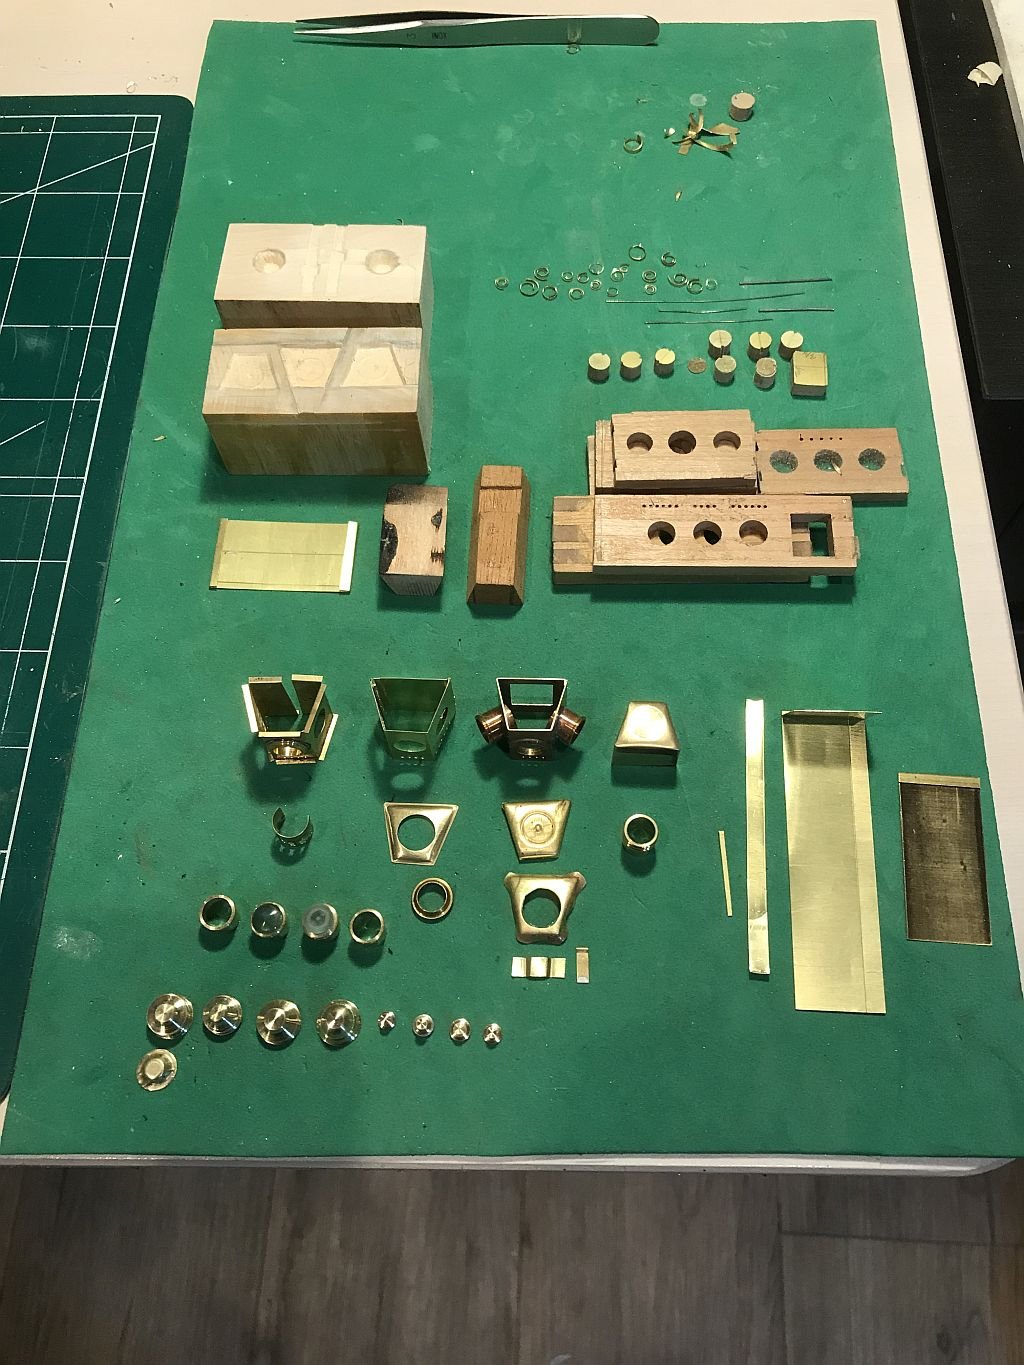
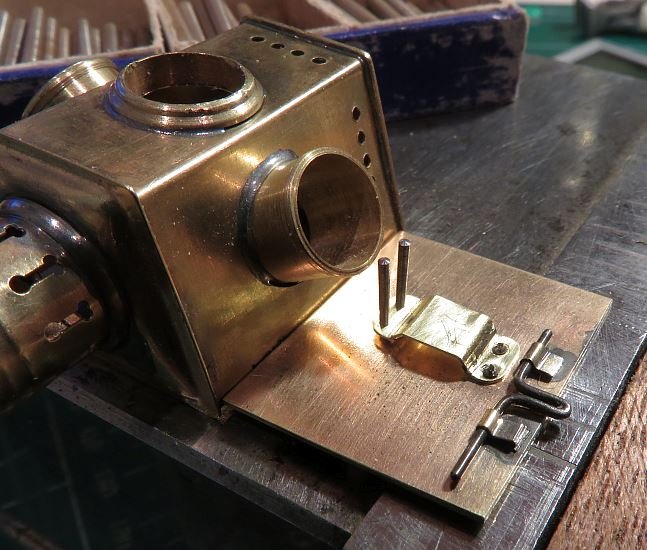
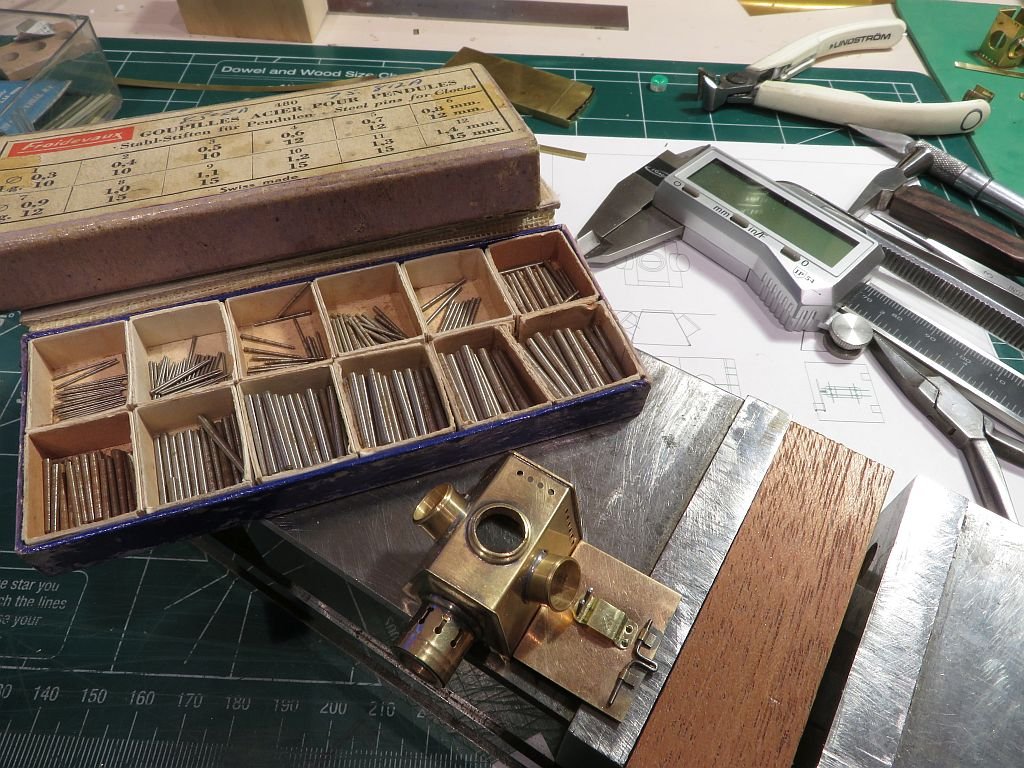
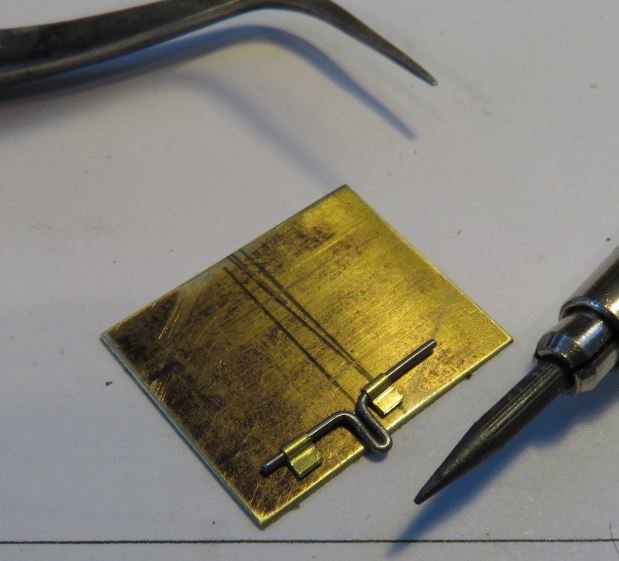
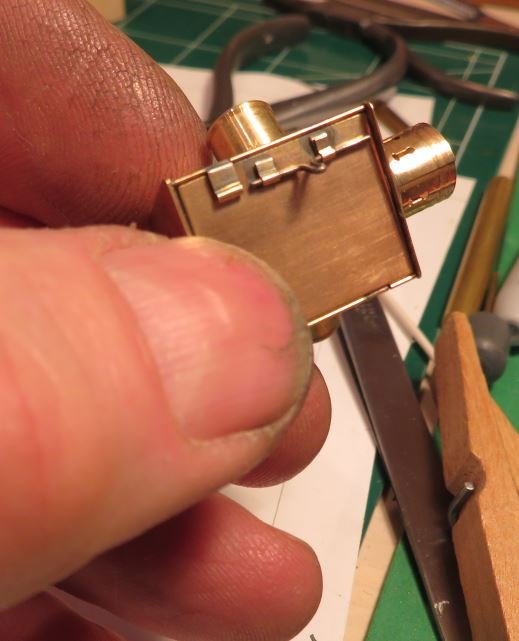
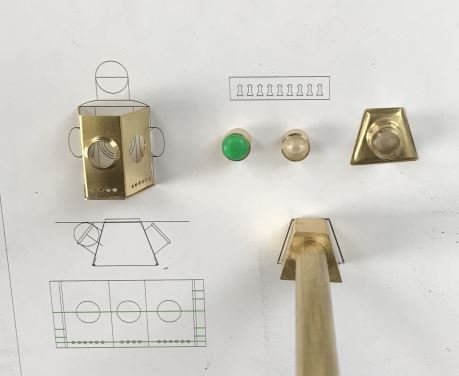
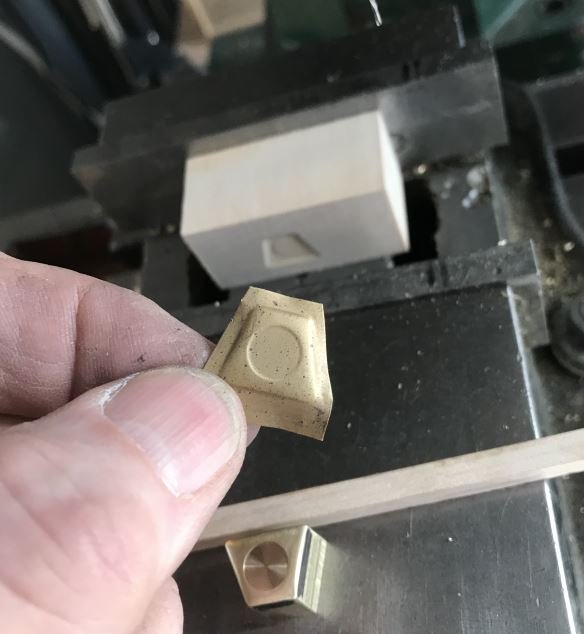
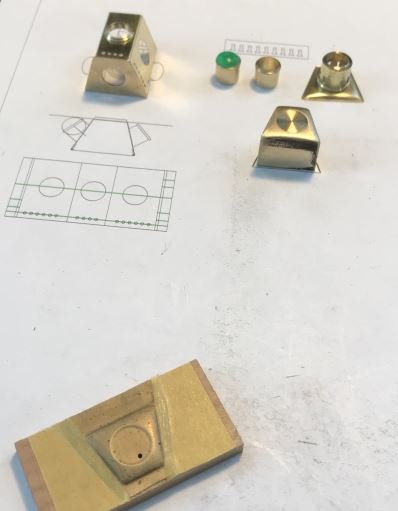
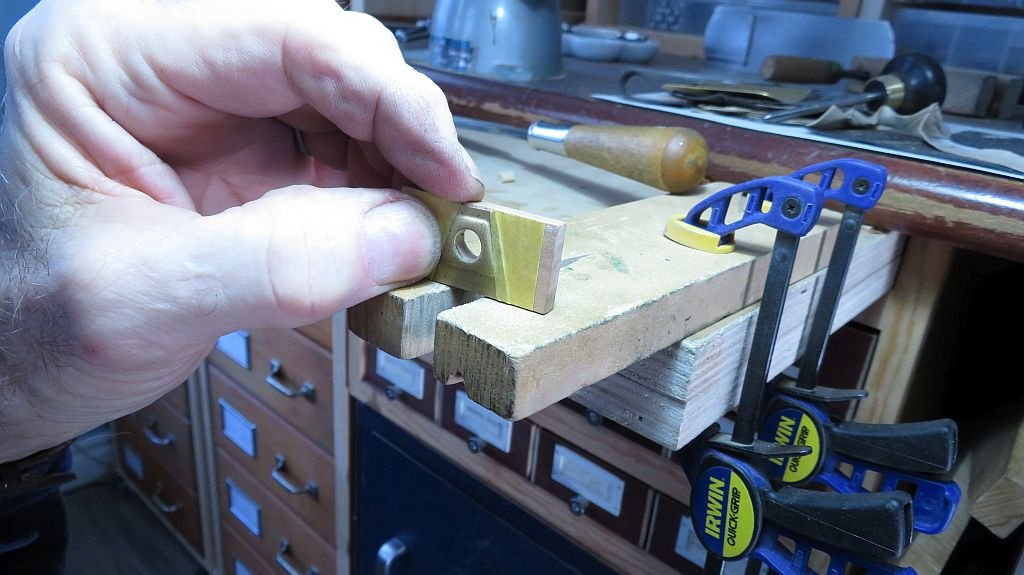
Well let me see that would be 1/4 ish the size so pretty tiny, That would be pushing my limits to the edge..... I'm not sure I want the stress. I fitted the bracket to the door today also turned up the other lenses and began trying to get the cap parts looking right. The bracket for the door was riveted on with some clock-makers taper pins. The cap looks better out of pressed plates than a solid turning I will need to make a couple of new formers I think. I am really pleased with the bracket riveting. Also brought the keel down to contemplate my next move. Michael
-
Hmmmm......let me see.....Kurt I will send you a PM. Michael
-
Kurt, thanks, I am happy that you are enjoying this journey. And as you know practicing what we do does take some time to get proficient at it, seeing the improvements as we go along I think is what keeps us going, there were a few time yesterday when I really was ready to toss this lamp across the room. Carl reminded me that there is a better way to solder this sort of work. Michael
-
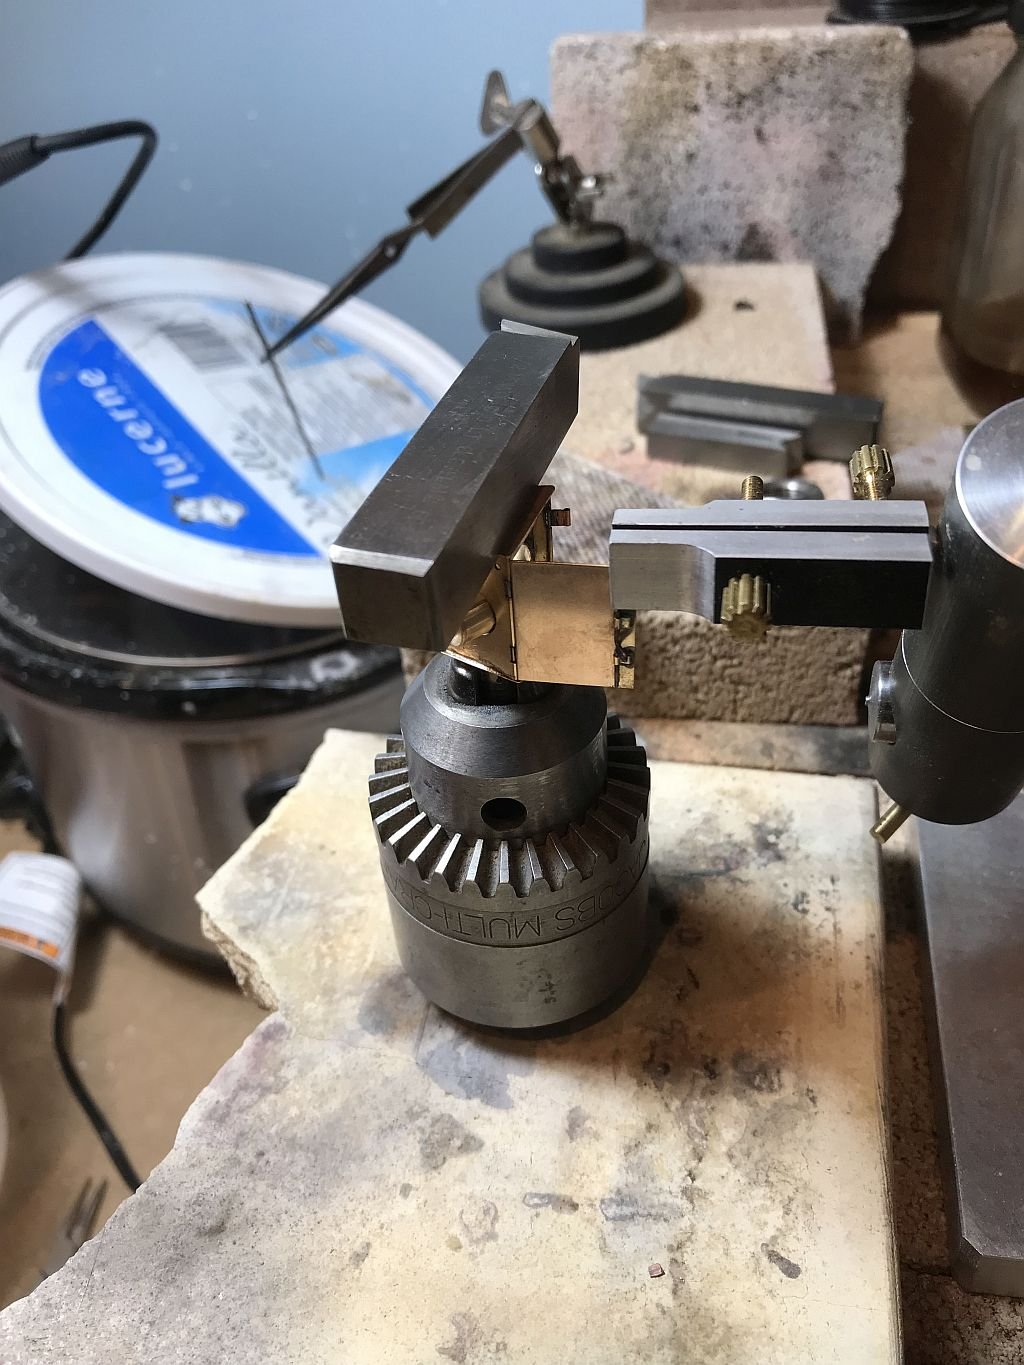
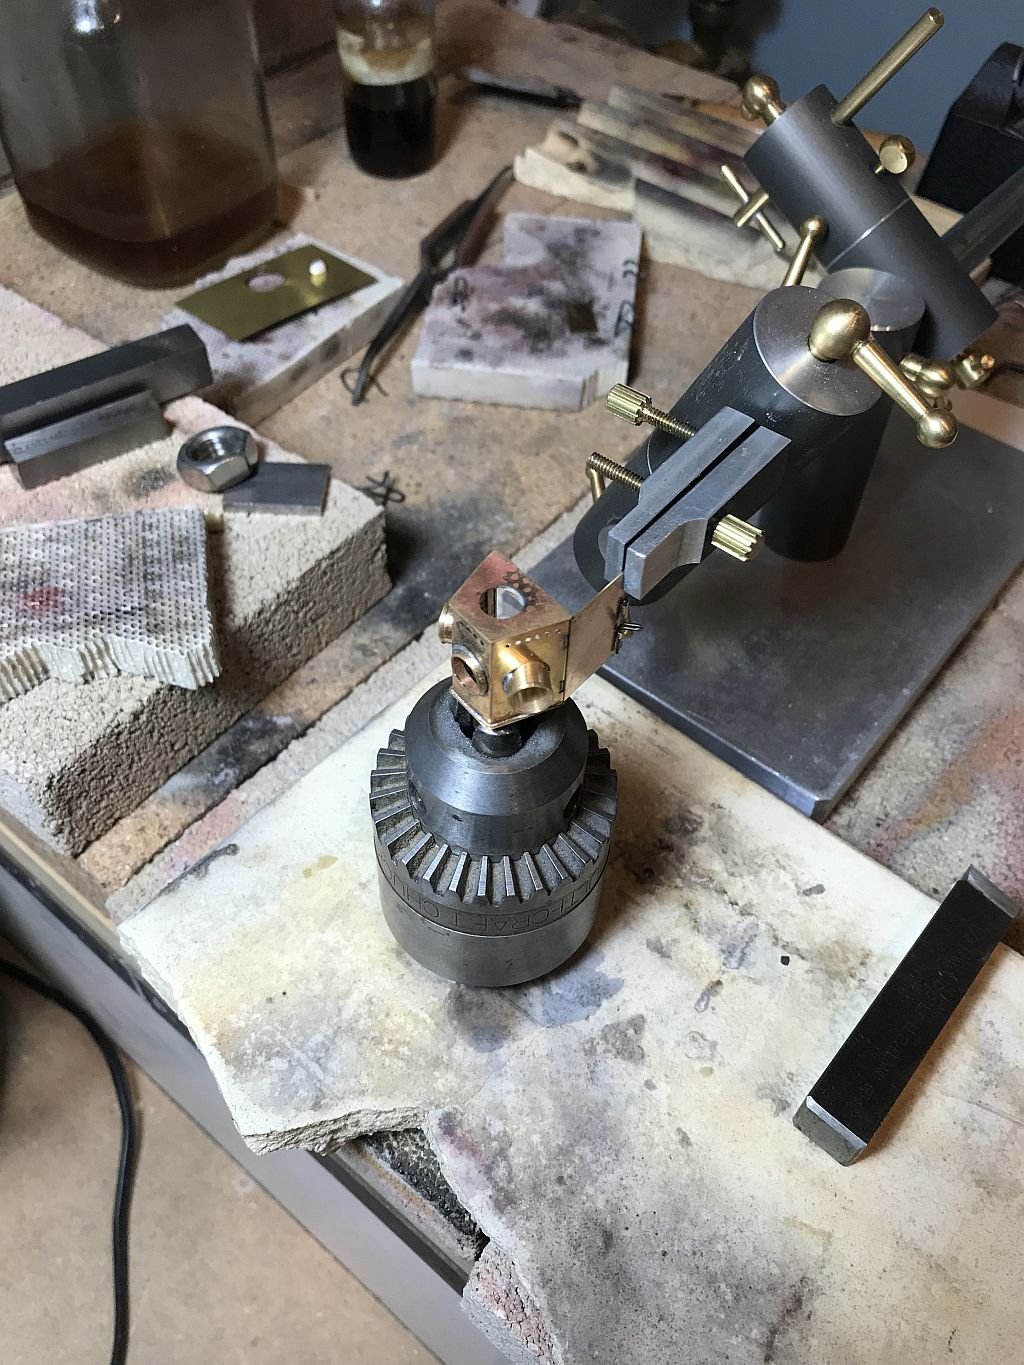
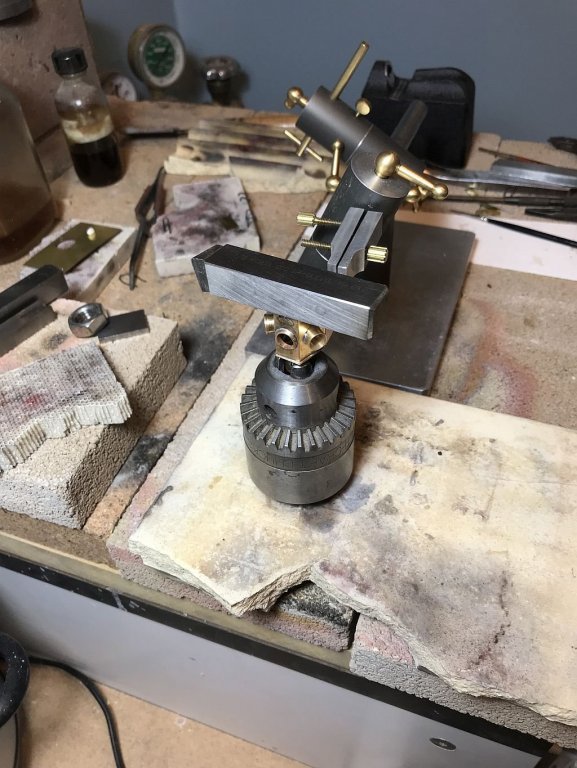
Carl, Yes and working on this project has convinced me that I will need to invest in sorting one out. Druxey, thanks and yes old chucks are very useful. Steve and GL thanks for you kind remarks. Michael
-
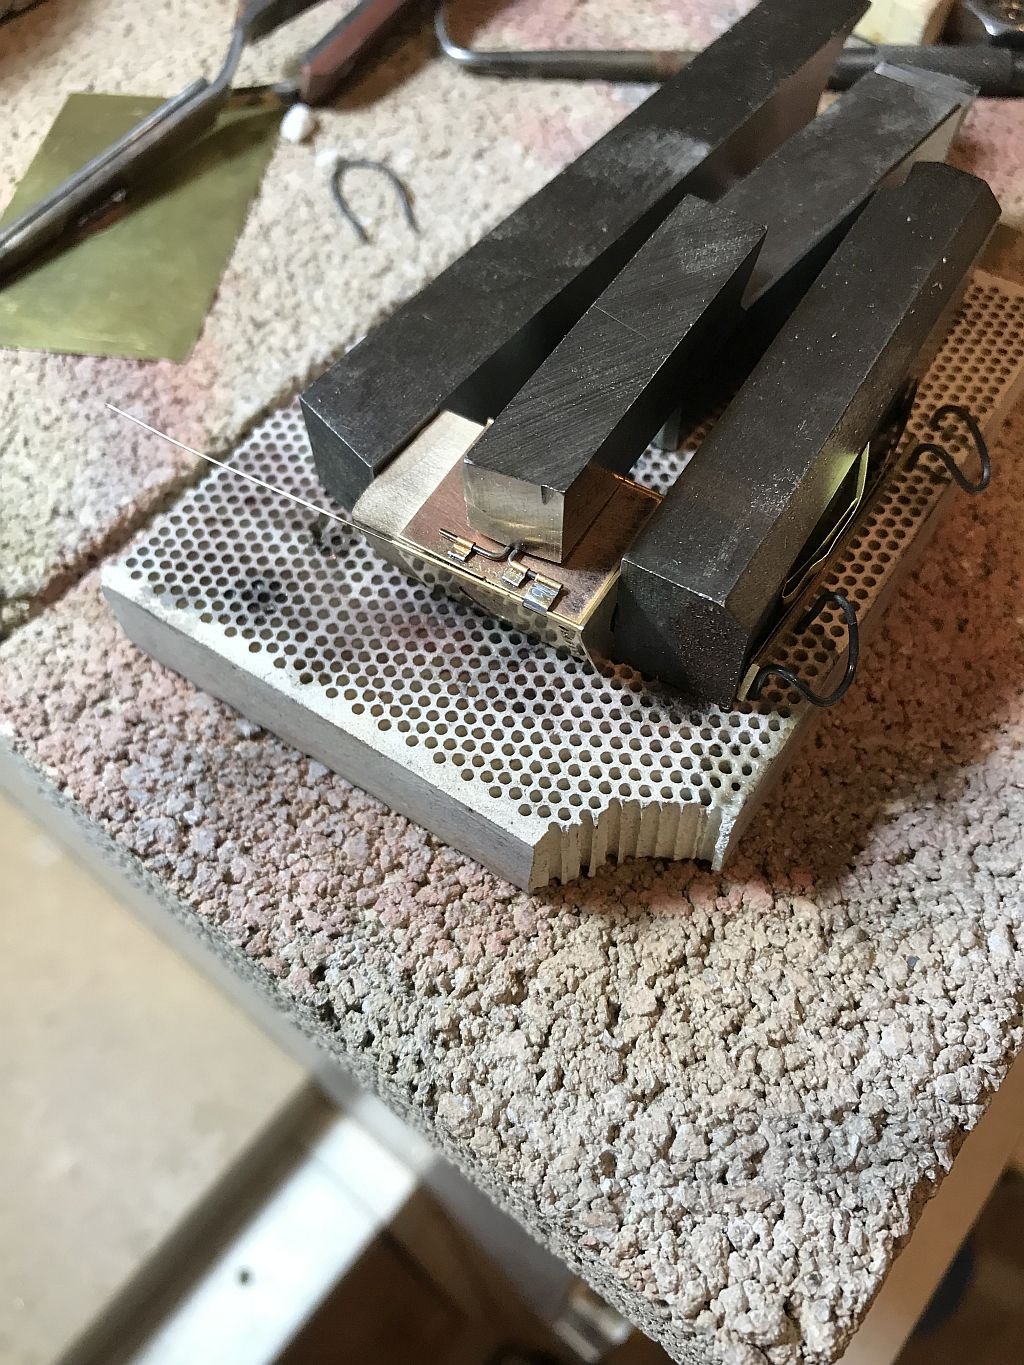
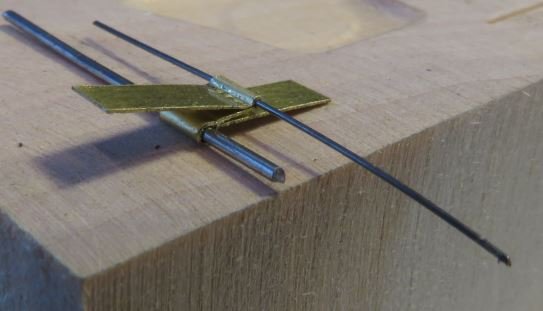
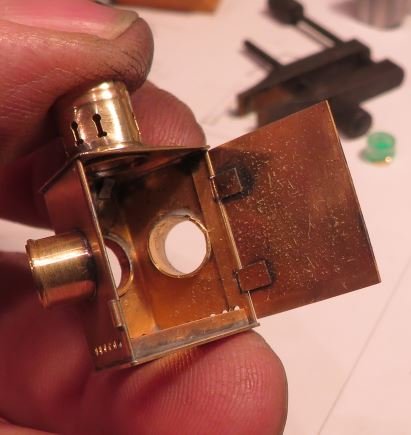
Thank you all for your compliments and encouragement. Today was challenging to say the least,probably the most fiddly soldering I have ever done, I have been at it a good 6 hours or so fiddling around setting it up then rearranging it again, and again. Making the lock for the door took a bit of time I had to anneal the music wire, the first effort the wire snapped. the hinges are just wrapped .008" stips cut with the scissors. then folded over the steel wire, they needed to be soldered with the wire in place and it took three tries to get it done well enough the I could operate the bar. The rotating tab for the locking bar to slide into was done by folding a bit of .008" x 3/32 over 2 different wires the small one for the hinge and the larger one for the locking bar. tab positioned ready to accept the locking bar tab rotated out of the way so that the door can open and the open door, The hinges were soldered onto the door plate in situ I soldered the top together as a unit before soldering it to the rest. then held the top upside down in an old chuck The body was held in the third hand and a weight placed on top of the body before fluxing and placing a few small snips of solder. Still need a bit of cleaning and the cap and the other two lenses but I am happy with this one. It has been a long day. Michael


-
I hear you Eberhard. your comment about the packing tape, when I was a boy we called it "Butchers tape" it is still available and is a good material to use The sail hoops I made for the Buzzards Bay 14 were made from it and once it is completely dry it works like fine laminated veneer. and very strong. Have you thought about using that Keith, the brown gummed tape? Michael
-
Andy wonderful! just the right scale to I might add. can you give a picture or shot of the drawing of the dingy that you used. You mentioned pine and limewood (linden) the ribs look like ply I did not know that you could get pine plywood that thin or did you laminate it yourself from veneers?. Lovely workplace too. Michael
-
Eberhard have you studied some of the work that Doris has done with paper? I have a completely new regard for what can be done with Paper. I had not realized how versatile it can be. Michael
-
Dave, Thanks Judy and I enjoyed our visit this morning, and I am looking forward to seeing that Bluenose kit build log. Michael
- 749 replies
-
- 2
-

-
- albertic
- ocean liner
- (and 2 more)
-
Exquisite work Javier, I too am amazed at the level of detail you achieve on these tiny models. Michael
-
Keith very nice looking hull, a question why the alternating colors for the fairing? Michael
-
Thank you for the close ups Rob. I also appreciate your thoughts on the sails on models in your last two posts. Michael
- 1,208 replies
-
- 4
-
-
- great republic
- clipper
- (and 1 more)
-
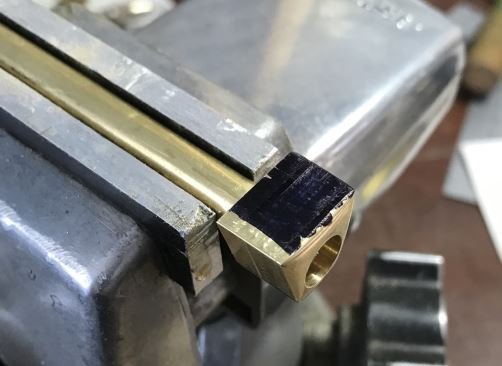
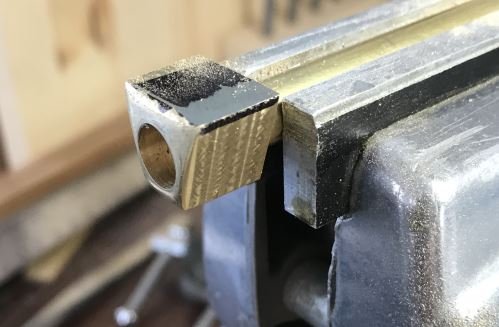
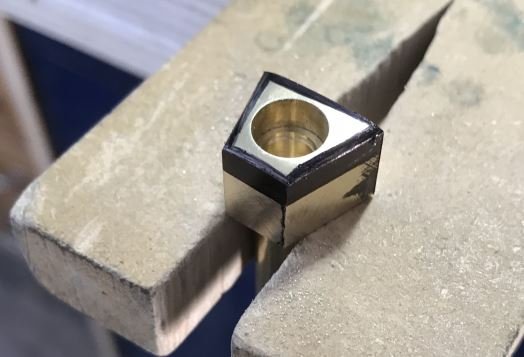
Thanks Greg, But I am already using Vimeo and it works for me so I had to make a new top because the earlier one was just eyeballed and was not quite symetrical and was too wide for and aft. I reworked the original form in the vice with a flat file. I like to use a black felt pen to help with the process of knowing what to remove. Then using the same method described earlier I formed a new top. this was drilled and the hole cut out with the jewelers saw and then the hole was opened up with a round file. Next was to open up the hole as described earlier hopefully this little video will clarify the way I did it. Michael
-
Rob that is a lot of work, is it possible to show a close up of the cringles? The sails are looking great. Michael
- 1,208 replies
-
- 2
-
-
- great republic
- clipper
- (and 1 more)
-
Hello Mark. Thank you for your detailed description of the way you made the sails. replicating a particular material at scale can be daunting, it looks like you pulled off the Dacron nicely. I am guessing that Canvas would be easier at 1:8 But your model of the Dacron sail might work for my cutter since it is a modern refit of an older version. Anyway nicely done! Michael.
-
Hi Carl I can see why you would do that. First I use a round file to open up the hole to close to the right diameter . Then I use the tip of an exacto knife and with practice you can make the knife slide smoothly like a miniature pairing chisel without causing the chattering which causes the saw tooth finish that you speak of. The point of the blade has to be just at the right part of its depth into the hole to work efficiently. I will see if I can make a short video to demonstrate what I mean. It is a simple operation but like many things take a bit of practice to get proficient at it. I have produced the effect you speak of myself on more than one occasion. Michael