michael mott
-
Posts
5,200 -
Joined
-
Last visited
Content Type
Profiles
Forums
Gallery
Events
Everything posted by michael mott
-
 Looks like it is time for me to take up knitting again. Beautifully executed deck work Alex. Michael
 -
Amazing Igor, the sail is a work of art all in itself. Michael
- 185 replies
-
- 4
-

-
- jolie brise
- pilot cutter
- (and 2 more)
-
Very nice work on the details Adrian. Michael
- 184 replies
-
- 2
-
-
- ruby & arthur reed
- lifeboat
- (and 1 more)
-
Thank you Doris for the information about the glues. Michael
- 1,035 replies
-
- 5
-
-
- royal katherine
- ship of the line
- (and 1 more)
-
Thanks for sharing this tip Danny great stuff. michael
-
Doris I am curious about your use of different glues and where you would use them. Your work always looks so clean, could you say a little about your use of glues and your thoughts about them. Especially where you layer one thickness of card over another, as in the planking. Thank you Michael
- 1,035 replies
-
- 8
-
-
- royal katherine
- ship of the line
- (and 1 more)
-
Hello Doris it is great to be able to see another one of your models take shape. Your skill at turning such a humble material into very elegant models is a joy to watch. Michael
- 1,035 replies
-
- 12
-
-
- royal katherine
- ship of the line
- (and 1 more)
-
Hi Nils revisiting this section regarding the covers on the lifeboats. My question relates to the top surface, is the canvas cover supported along the centreline of the lifeboat by a spar or some other element, and would there be a slight sagging like a tent with the lacing pulling the cover tight to keep water from pooling on the top? If this is the case perhaps some fine fabric stiffened up with sizing or glue laid over a thin dowel (toothpick or brass rod) give the desired effect? Just a thought. Michael
- 2,625 replies
-
- 4
-
-
- kaiser wilhelm der grosse
- passenger steamer
- (and 1 more)
-
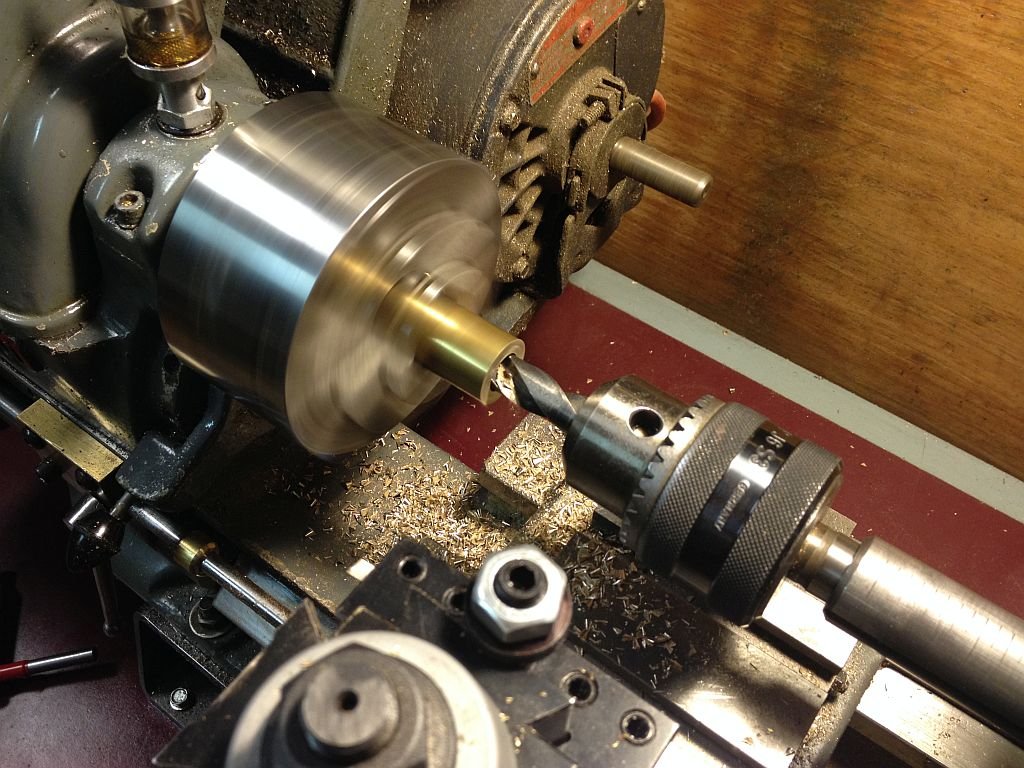
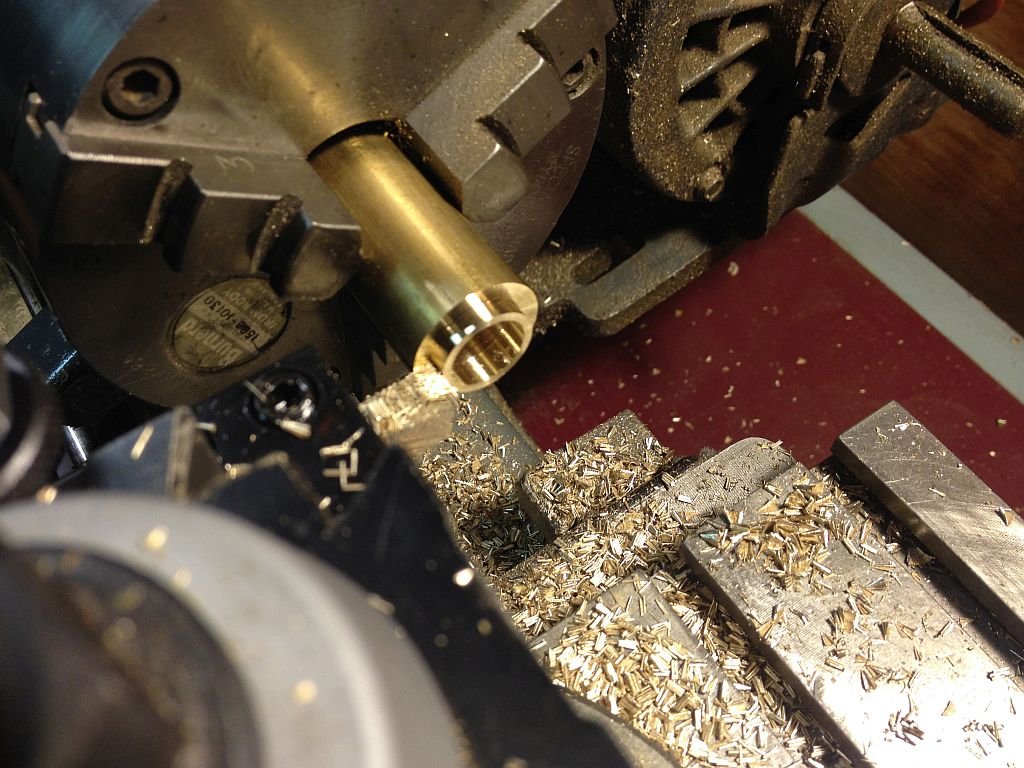
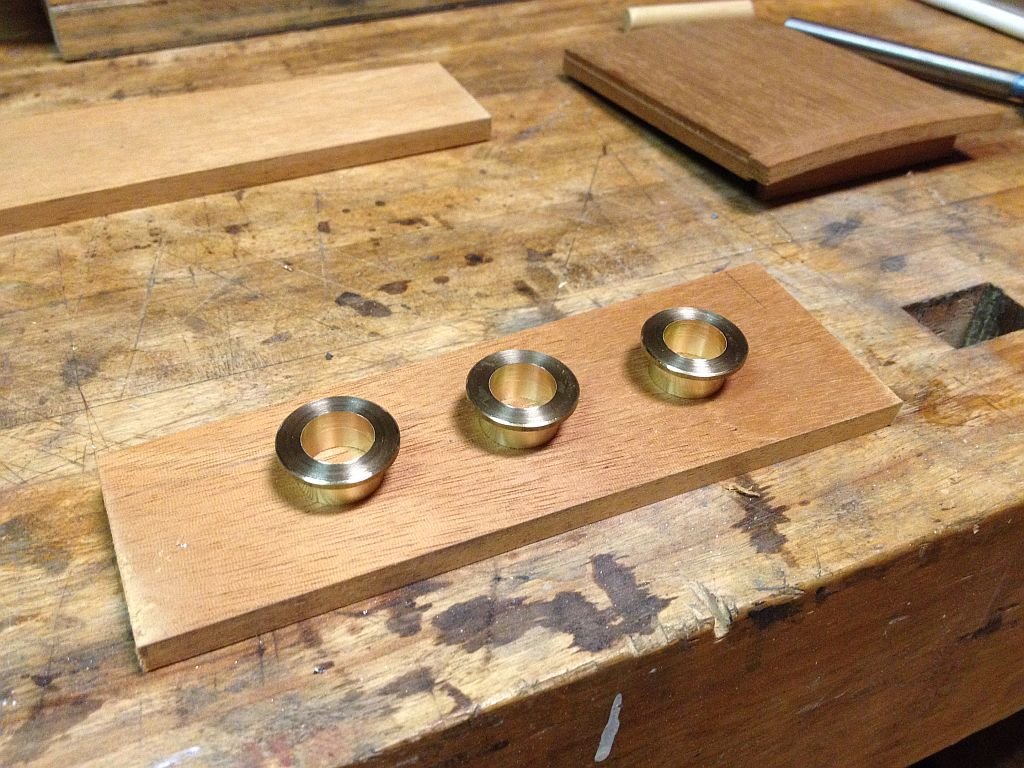
Hi Keith I have not had this problem in all the years I have worked with plex, perhaps it has something to do with the types of Plex, I prefer to use the Cell Cast type and not the extruded type. First I bored out a piece of 7/8ths with a half inch drill Then using a brand new tool bit which I ground from some 5/16 HSS steel, I was pleased that I was able to take a single depth of cut of .125" for a distance .312" which is the thicknes of the side walls of the cabin. The first three porthole shells still a lot of work to do but it feels good to make some progress. Michael
-
Riccardo I think your idea has a lot of merit. The reason I say that is that the stitching is raised not cut ans sweat soldering a bit of brass etch onto the edge of the hoop would be a breeze for Keith. The ends that could be pulled together and squeezed to ensure that the stitching is tight to the hoop would also be where the fixing point could be to the sail. A little bit of work with a paint brush and nobody would know it is not stitched leather. There ya go Keith we have solved your Problem....... Michael
-
Thanks for the kind words Carl, thanks also to all of you who have been visiting. In between the hockey periods I did a little work on the companionway, and lowered the side walls by 1/2 inch 4 inches in scale which leaves them at 17 inches at the aft end and 13 1/2 inches at the forward end. I'm good with that. I will shorten the hatch about 3 inches shorten the sidewalls length by 4 inches to make them 48 long and add a couple of round ports in them. Michael

-
Thanks for the information on the flag Chuck, I shall have to try this. Michael
- 1,051 replies
-
- 4
-
-
- cheerful
- Syren Ship Model Company
- (and 1 more)
-
Chris your fine workmanship shows so clearly with this latest addition with the bow details. Michael
- 290 replies
-
- 1
-
-
- confederacy
- frigate
- (and 1 more)
-
Mark she is looking very nice, your workmanship is reflected in the lovely clean lines and finishes. I like the sculptural shape of the rudder. Michael
-
Hi Pat, the card is 14mm or 35/64, the card rotates very nicely. I printed it up on photo paper and then coated it with CA glue. The Plexiglas was very old I had it left over from my Architectural model building days so since 1984, the trick with removing the protective paper on old Plexiglas is to warm it up with a hot air gun. The paper then comes off as if it were a new sheet. Michael
-
Hi Mark To make the front edge of the drill a scraper similar to a bit for brass. Michael
-
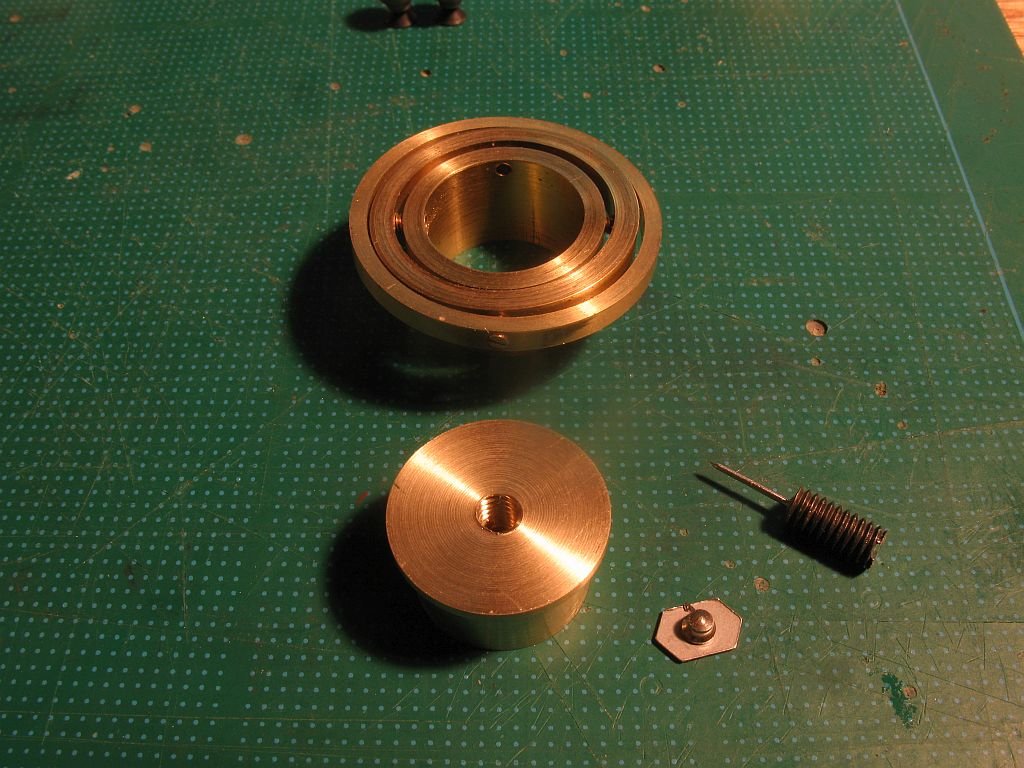
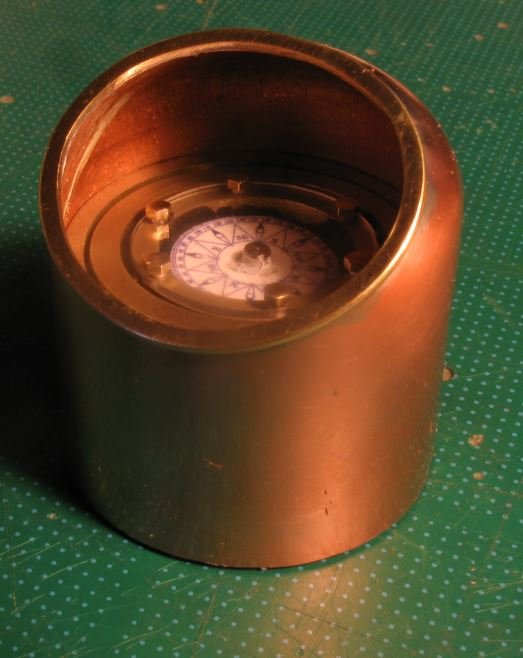
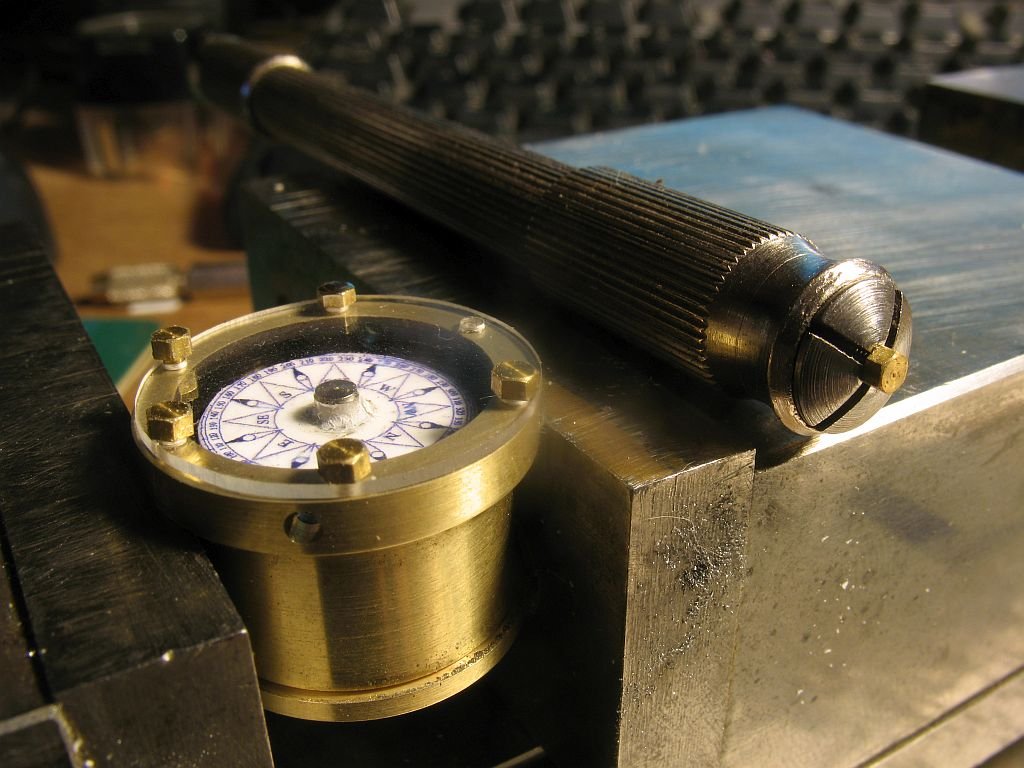
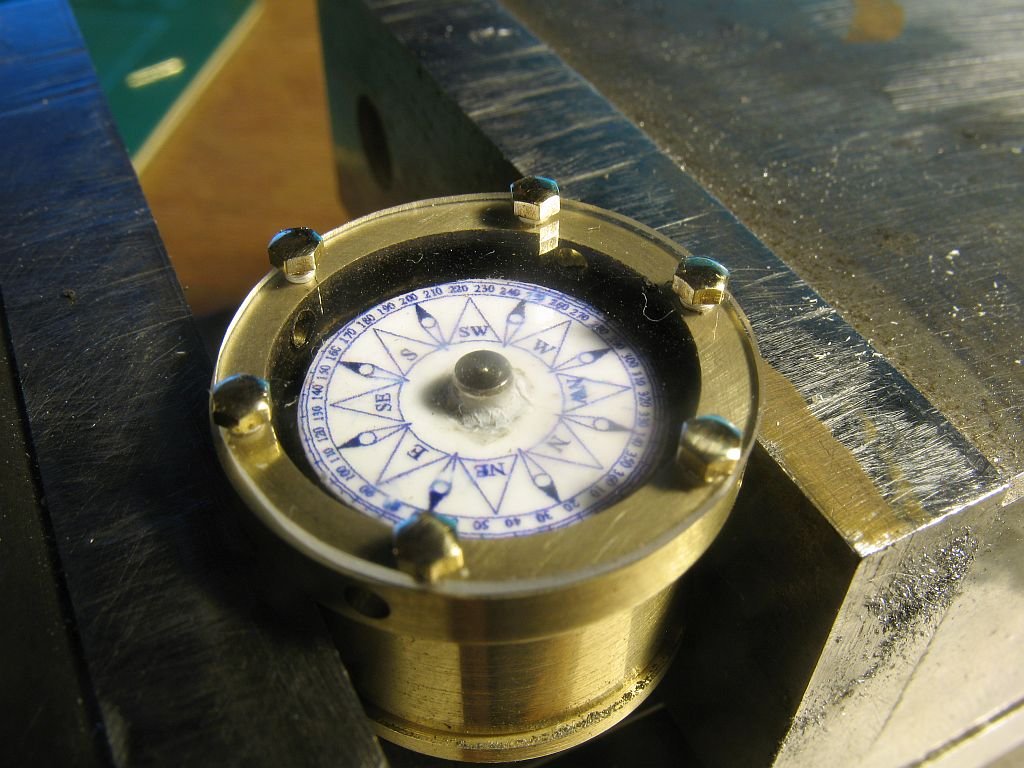
Denis , Elmer , and Piet thanks for the kind remarks. Did a bit more work cleaning up the compass and made the cover from some 1/32 plexiglass. The bolts are some modified 00x90 1/4 in long hex bolts. After cutting them to length and polishing the threaded end they were held in the pin chuck to reduce the hight of the head and to round it up a bit. All the gimbal rings were given a final sanding with some 1200 grit wet and dry. and fitted back into the copper dome. Michael
-
Nice work on the lifeboats and Davits Nils, I like the look of the navigation hardware as well. Michael
- 2,625 replies
-
- 6
-
-
- kaiser wilhelm der grosse
- passenger steamer
- (and 1 more)
-
Ross I should think that boxwood would be fine, will you be applying it over a plywood substructure? Michael
- 10 replies
-
- 4
-
-
- africa
- passenger liner
- (and 1 more)
-
Andy this has crossed my mind, it would entail sorting a couple of things out, not the least of which would be testing the printed card for deterioration in the oil or spirit. also I would need to seal a few spots to prevent leakage, eliminating the air is not a problem. I shall consider my options on this one..... Michael
-
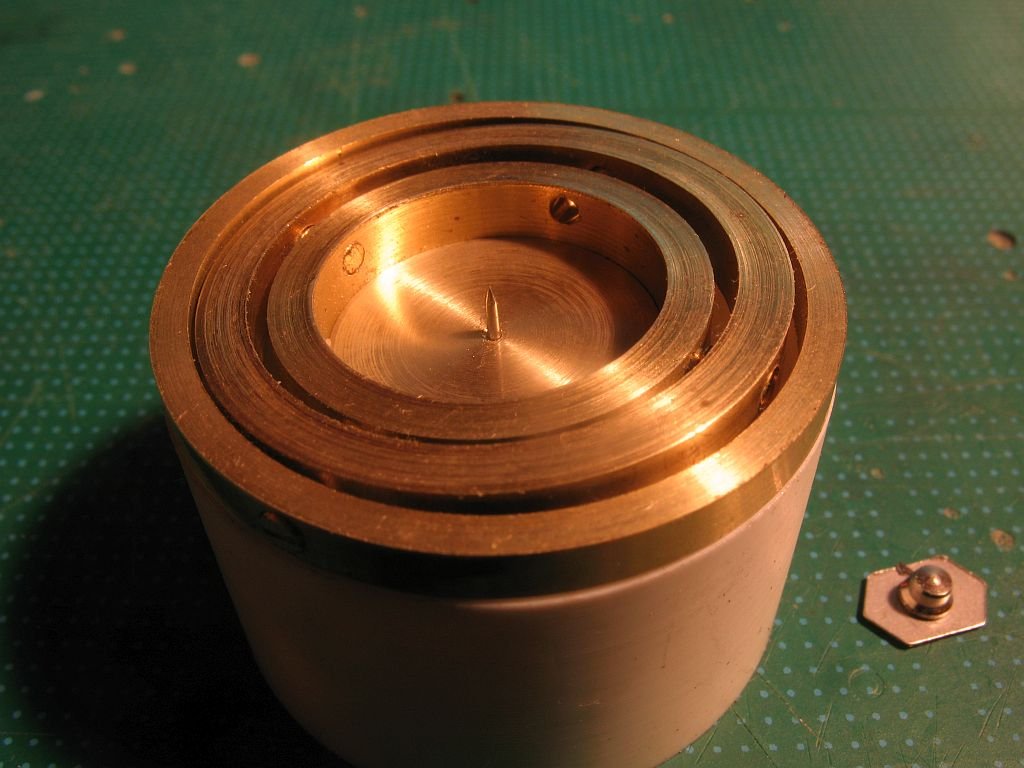
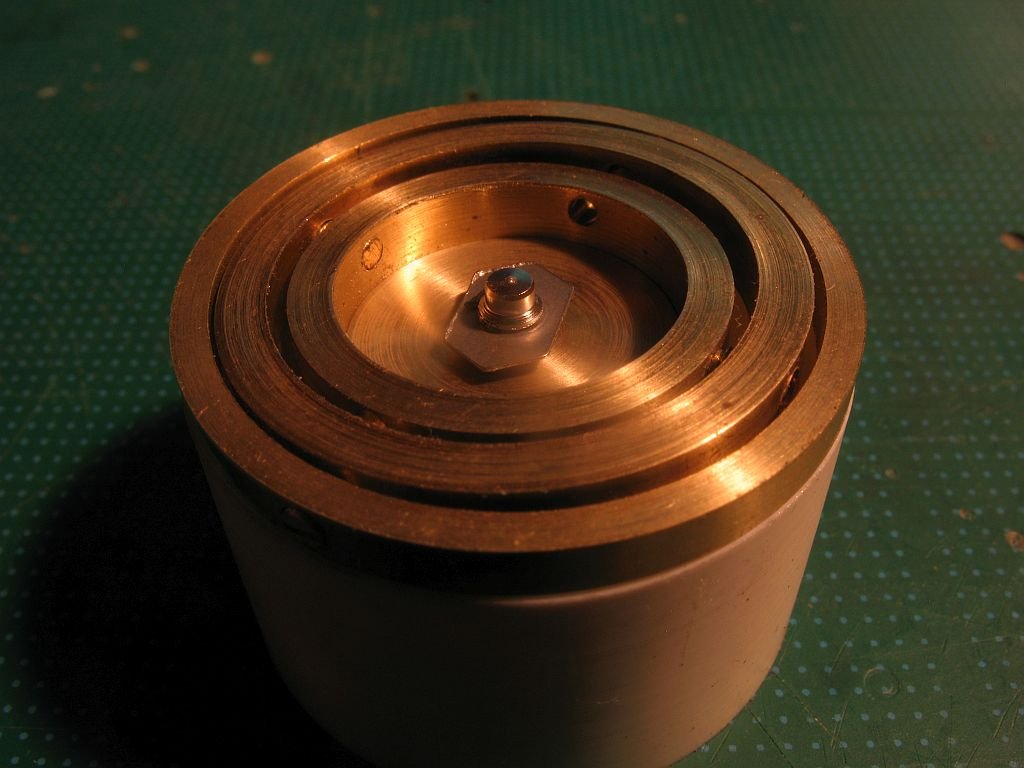
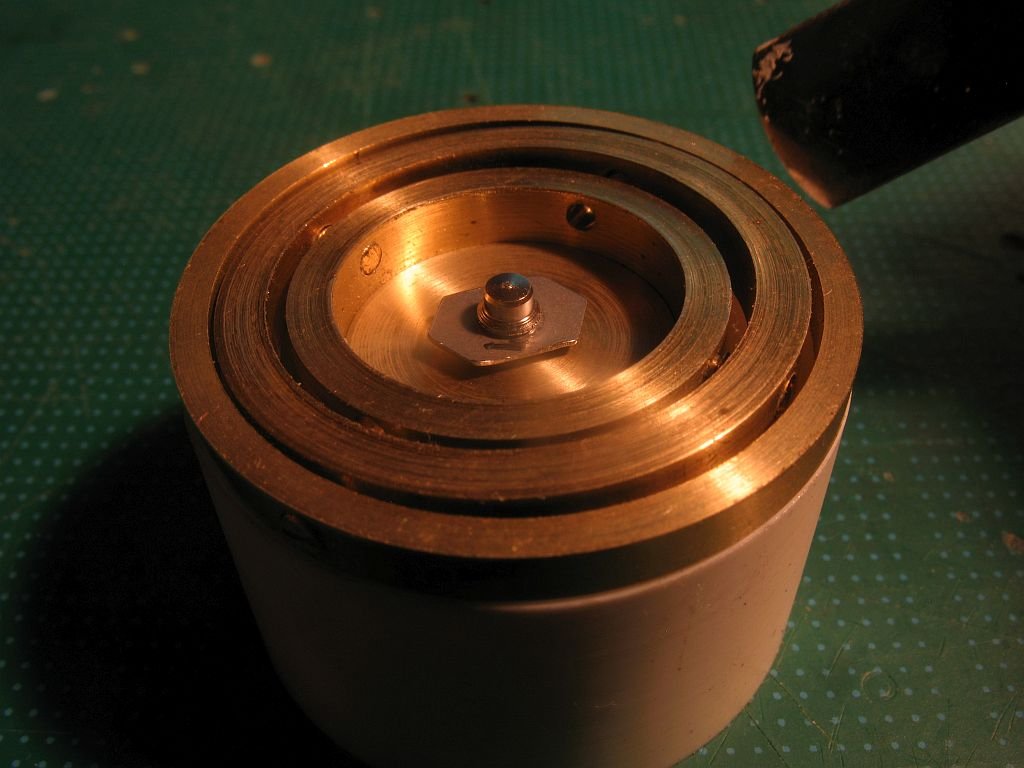
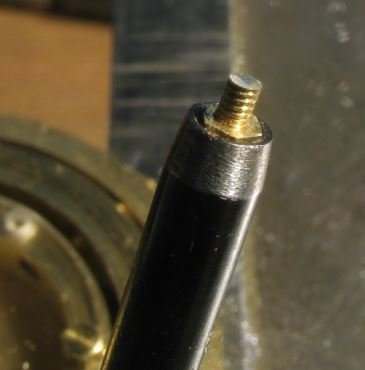
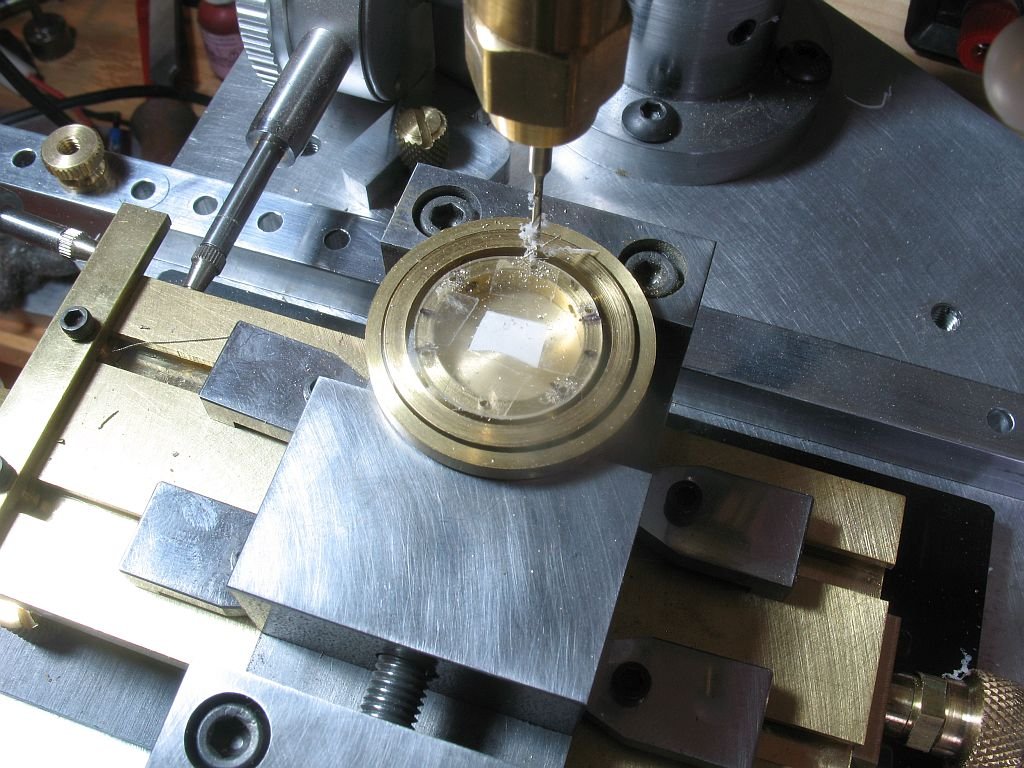
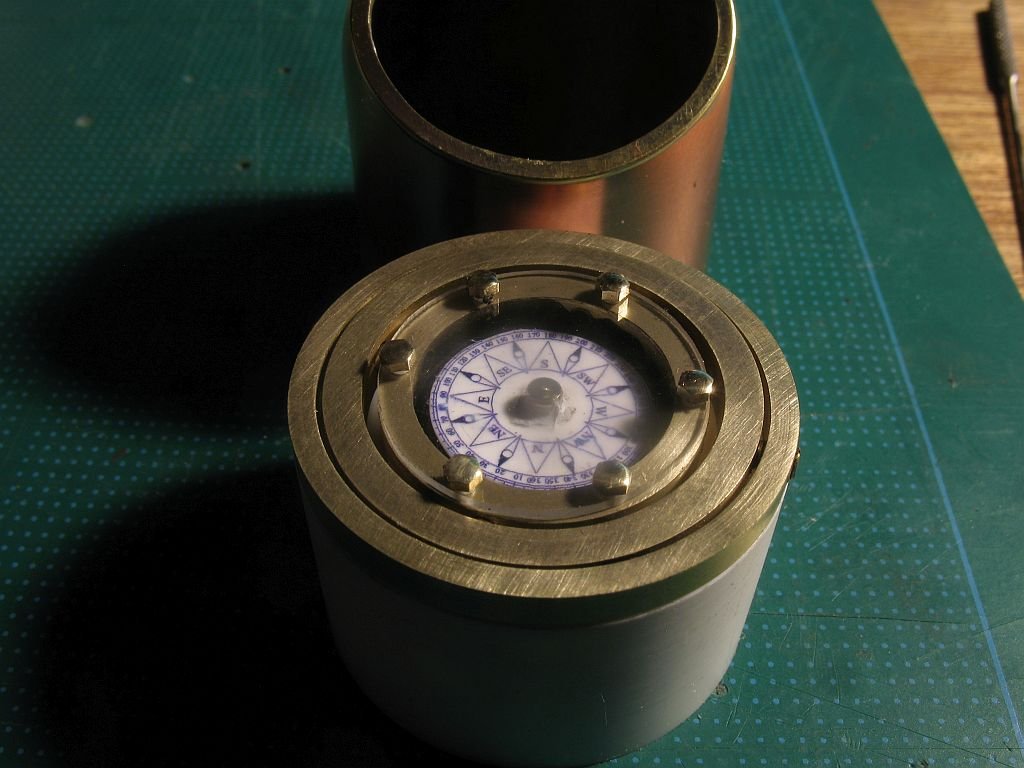
Hi Dan thanks for the kind words. This evening I reduced the depth of the inner cup and machined a new insert it is drilled through with a .6mm hole at the top and threaded 1/4 inch deep x 8/32 thread on the bottom. This allows the needle to be adjusted up or down, the needle is in fact the end of the 8/32 screw machined down and honed to a point to hold the compass. The magnetic part placed on the pin I tested the pivoting by bringing a pair of metal tweezers up to the compass and the needle swung to them Next to find the print that I made for the compass and mount it on the metal magnetic part. Also the plexiglass cover. Michael