


MikeR
-
Posts
147 -
Joined
-
Last visited
Content Type
Profiles
Forums
Gallery
Events
Posts posted by MikeR
-
-
-
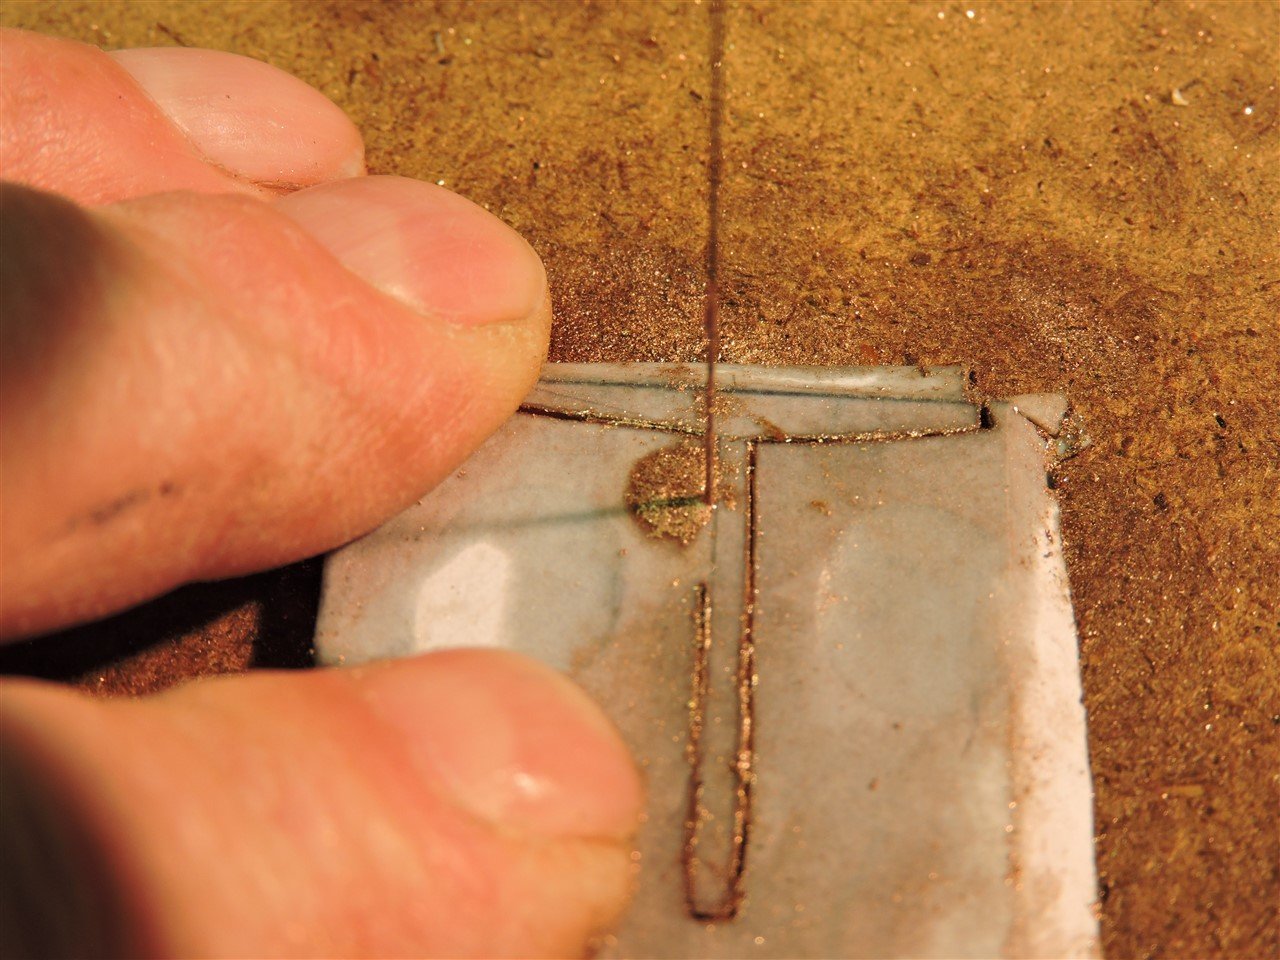
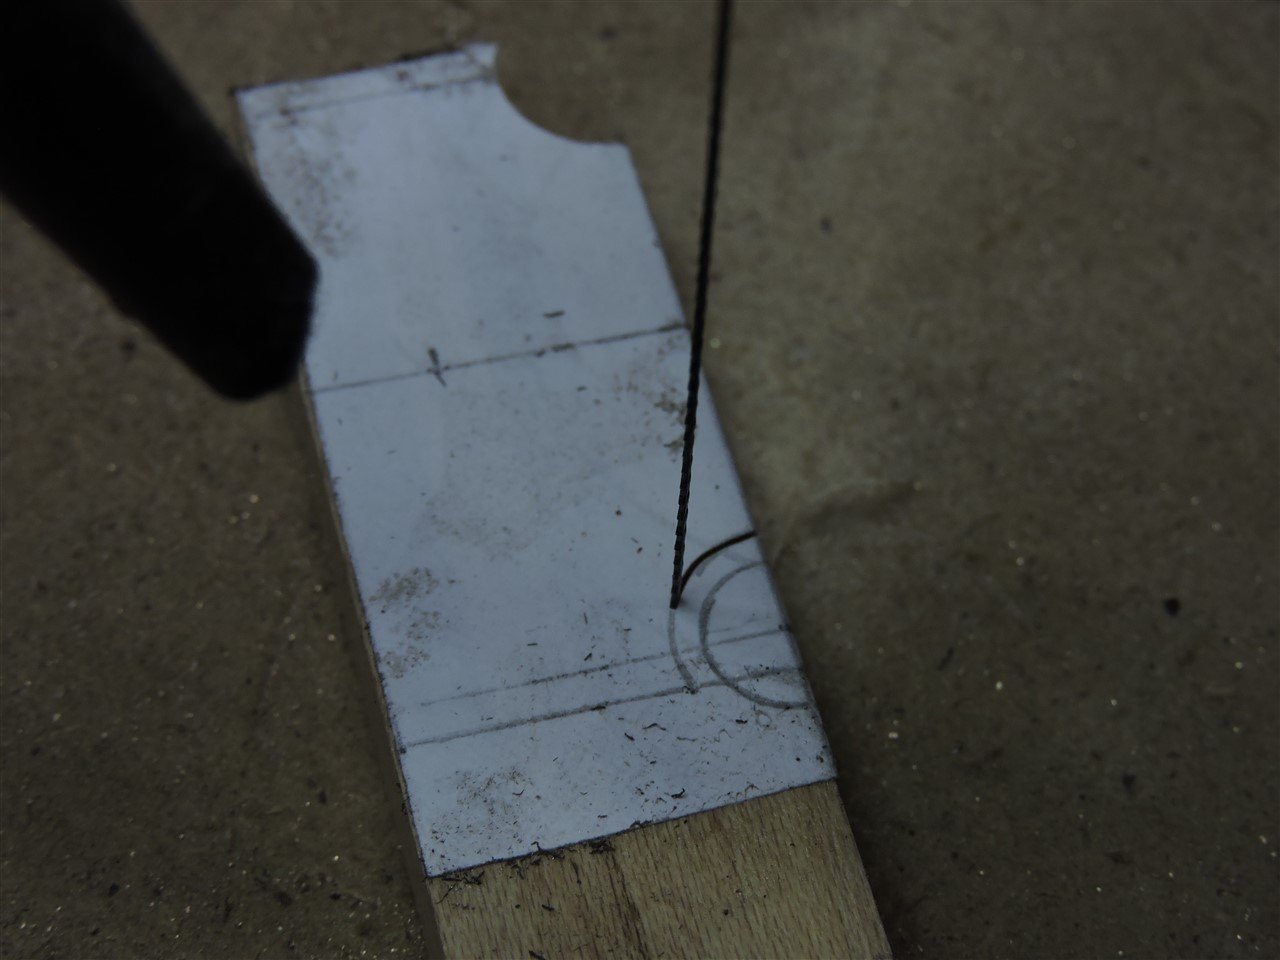
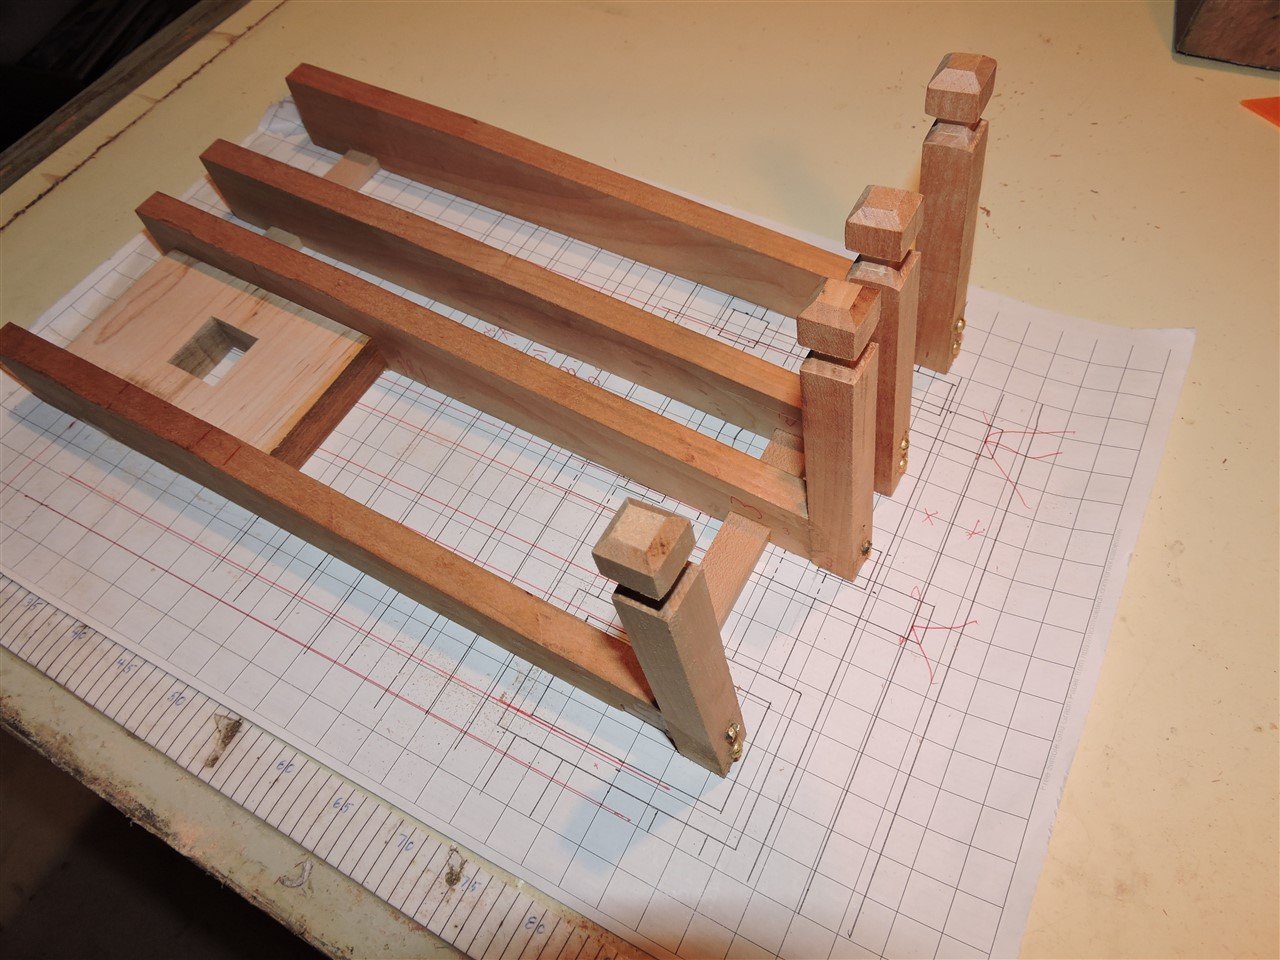
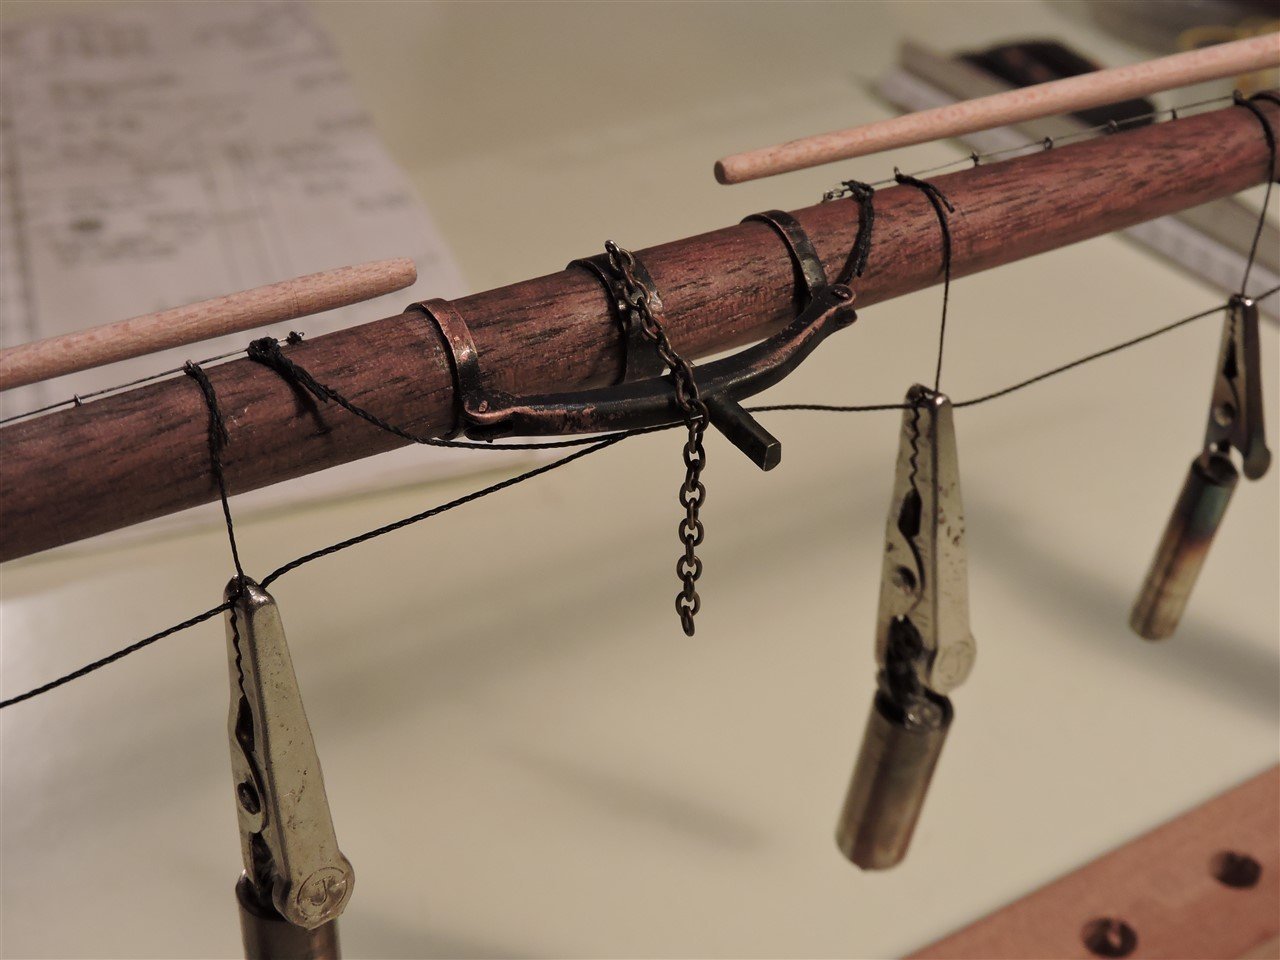
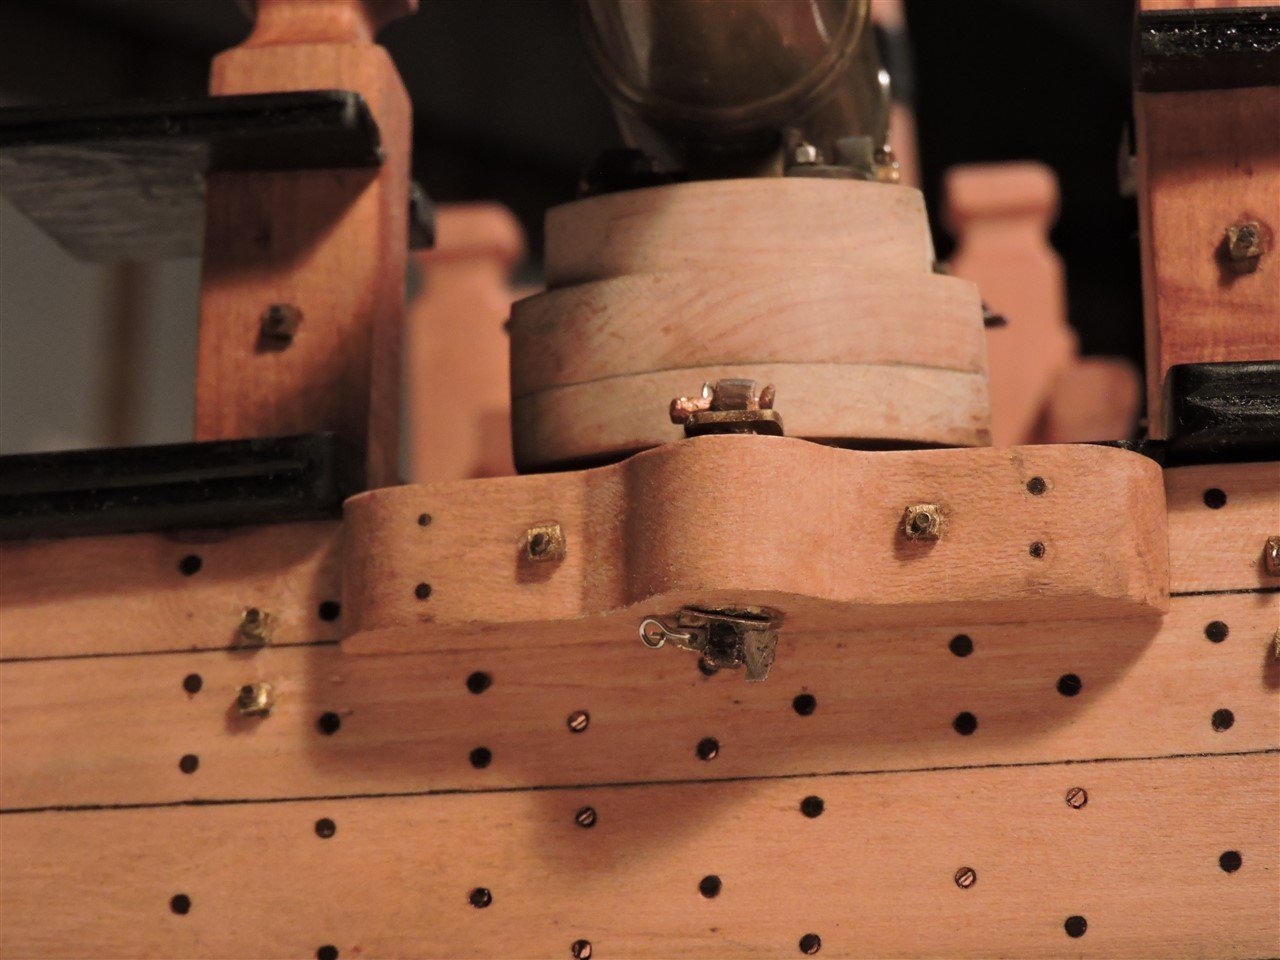
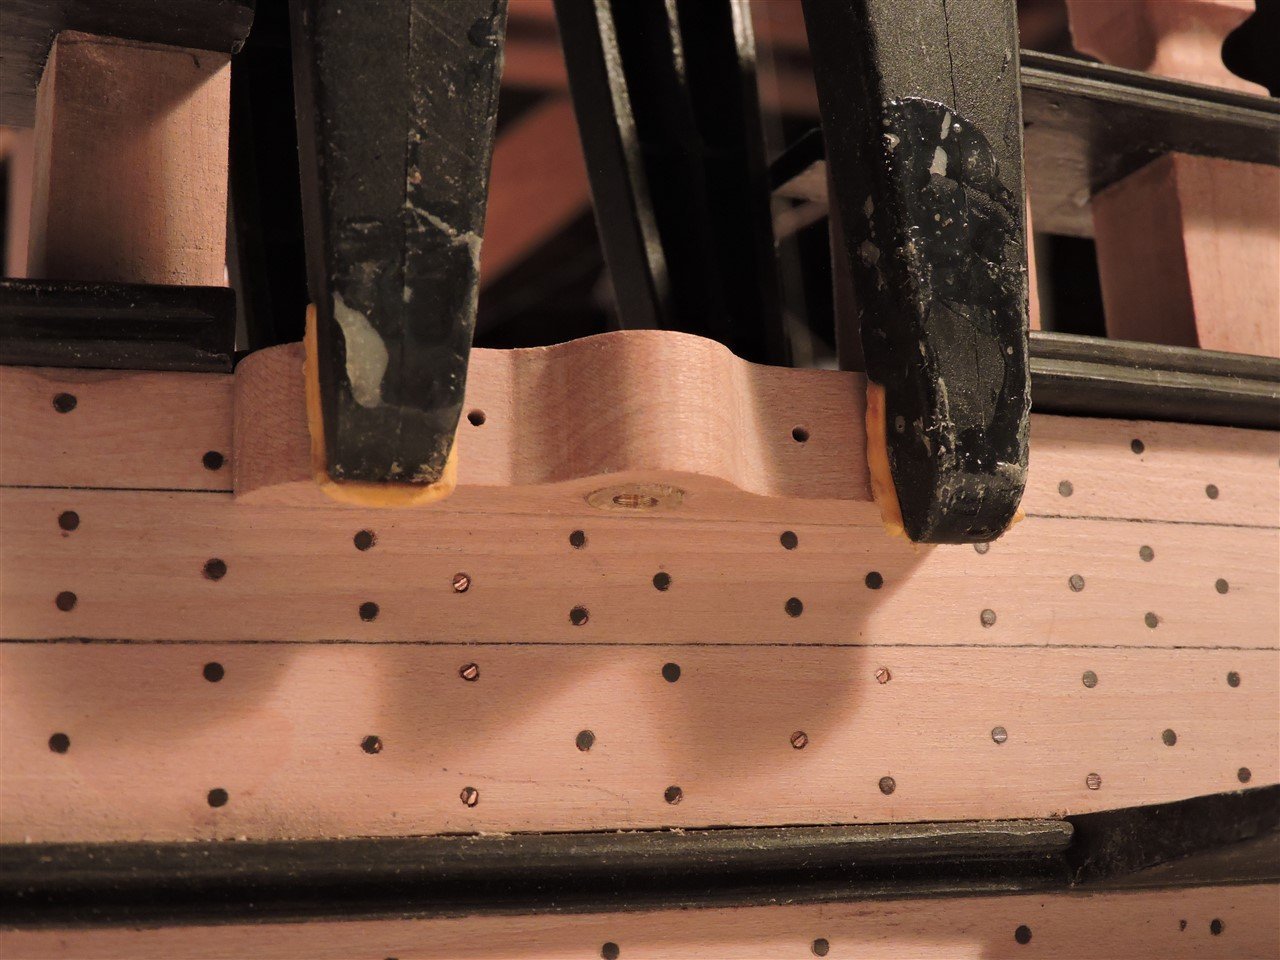
Here I am cutting the channel support brackets out of 1/8" copper
- thibaultron, mtbediz, GrandpaPhil and 8 others
-
 11
11
-
Nick
What are you using to cut them out? If you are using a scroll saw you can stack two layers of wood, I use double sided tape to join the layers and rubber cement the pattern to them. Cut it out and you will have two identical pieces.
Mike R
- Keith Black and mtaylor
-
2
-
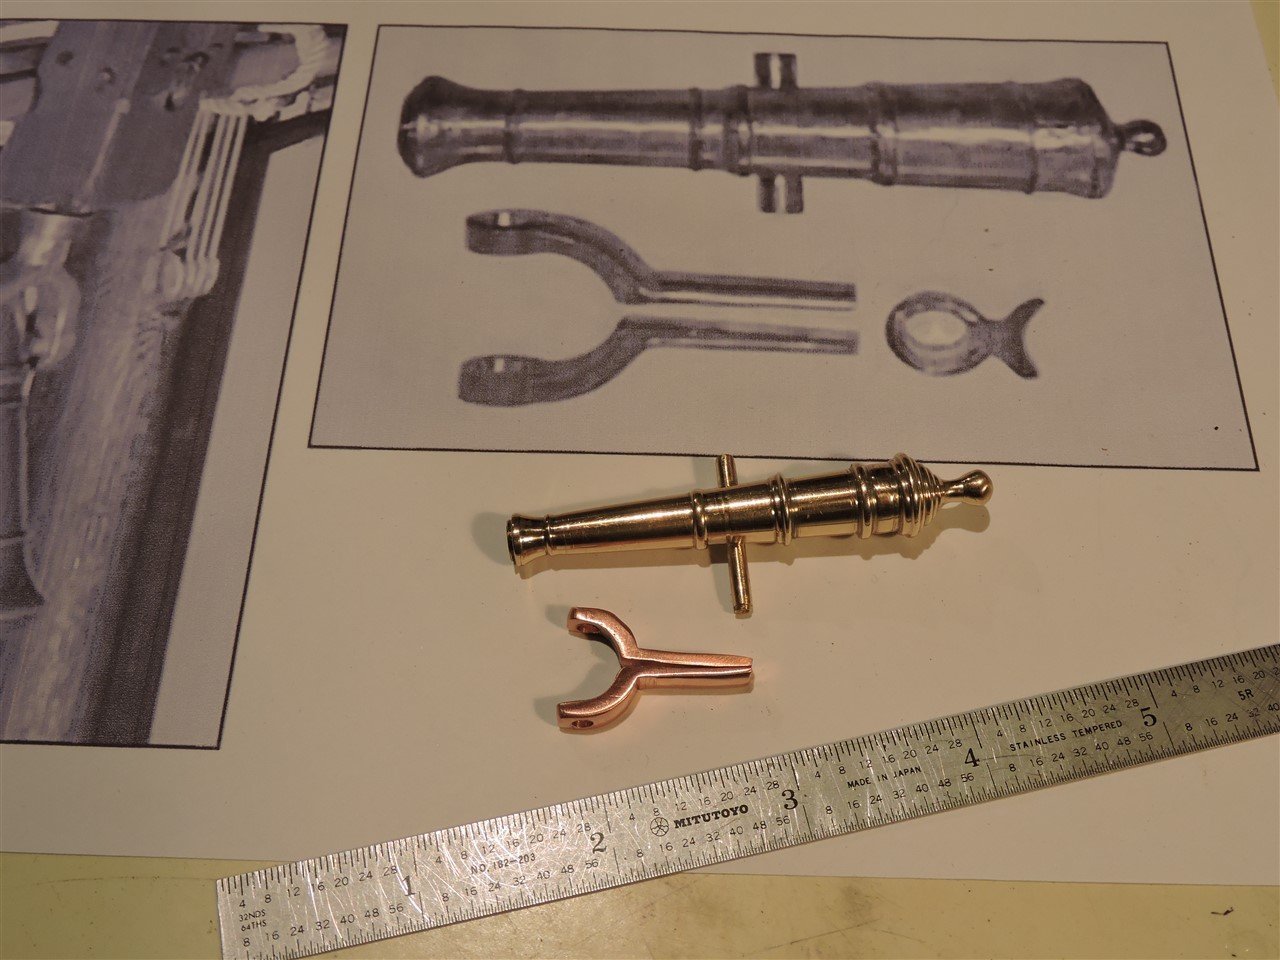
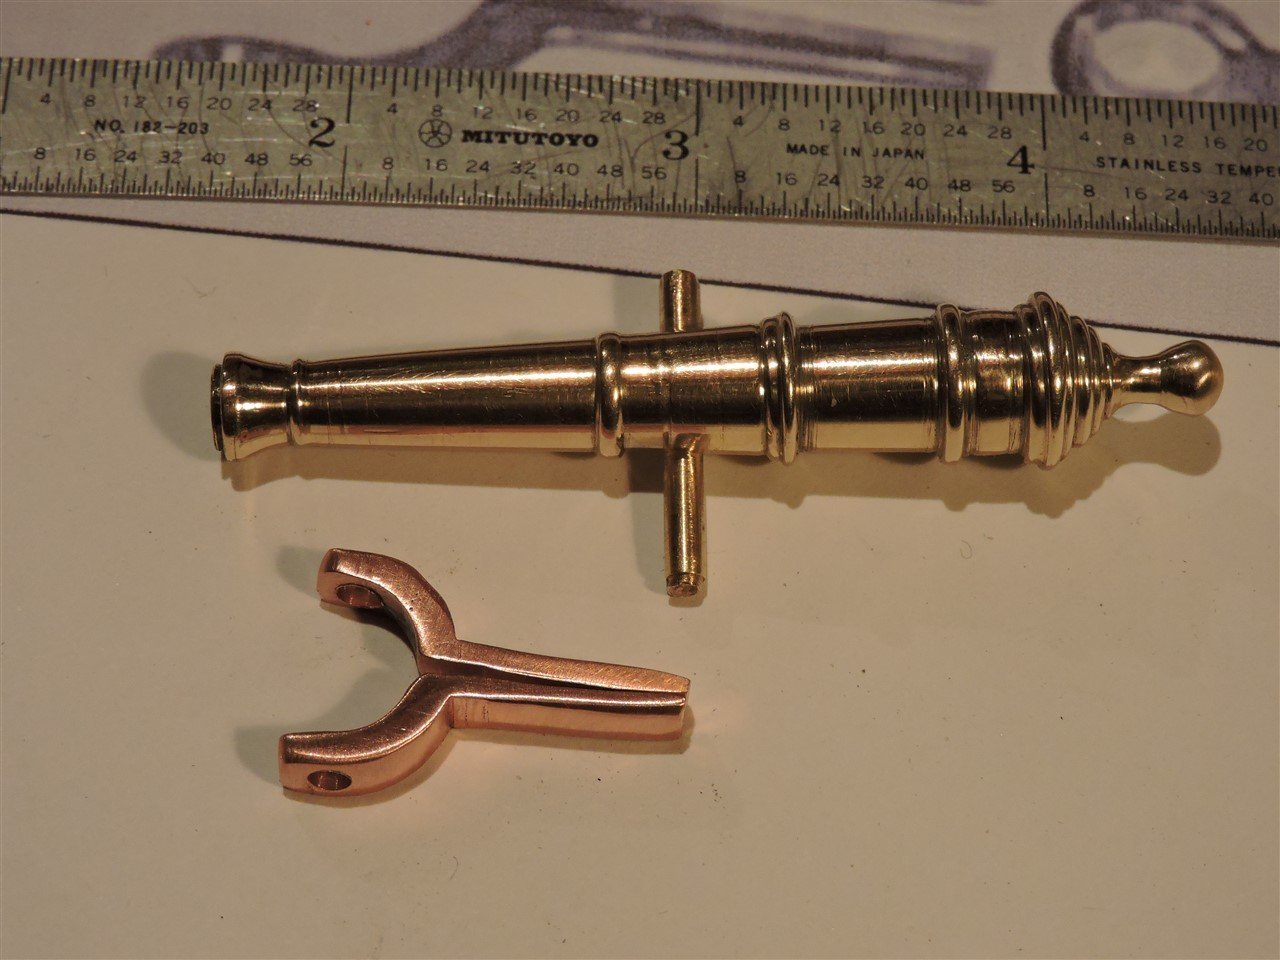
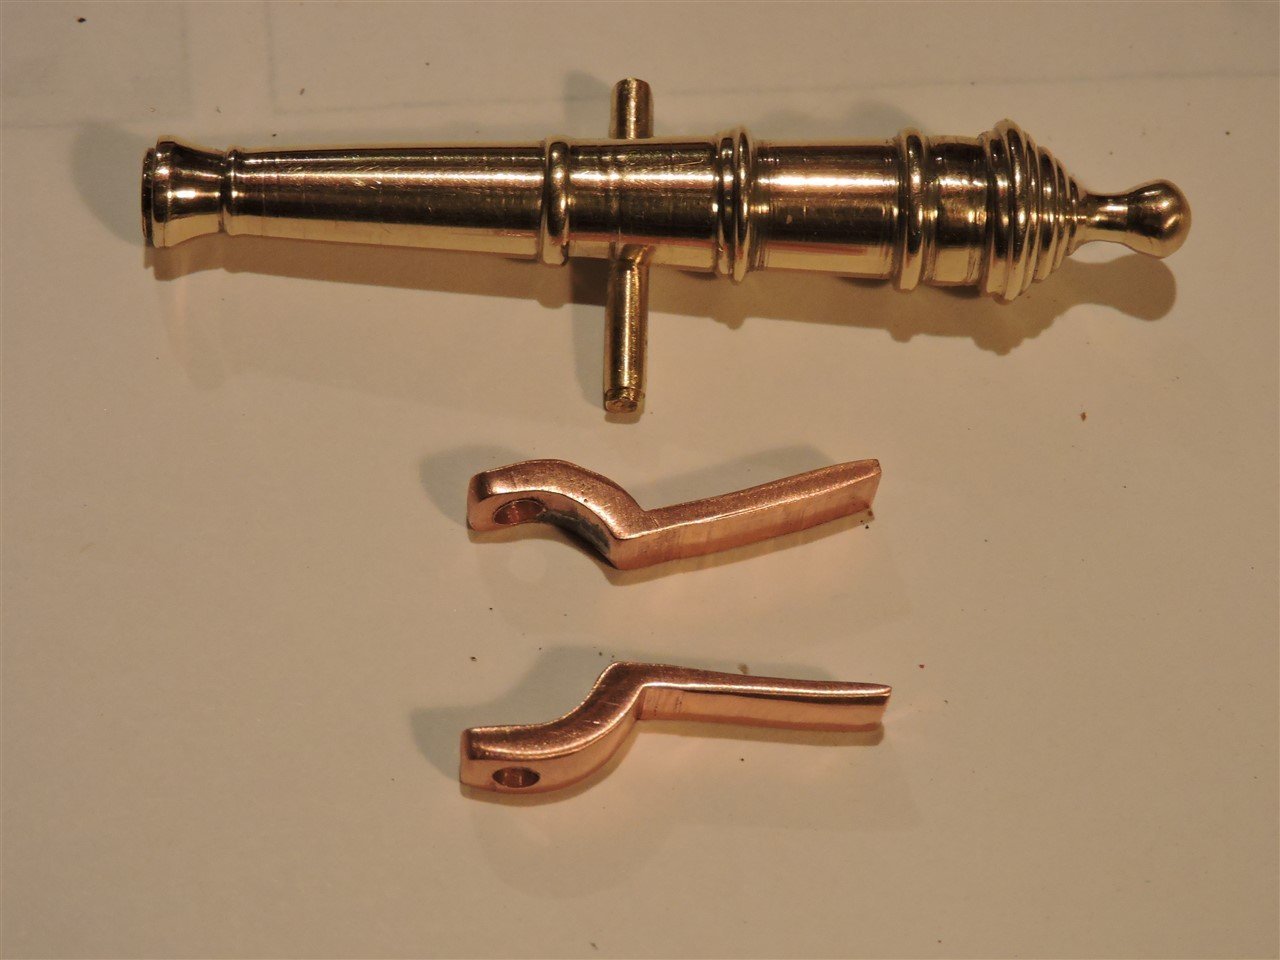
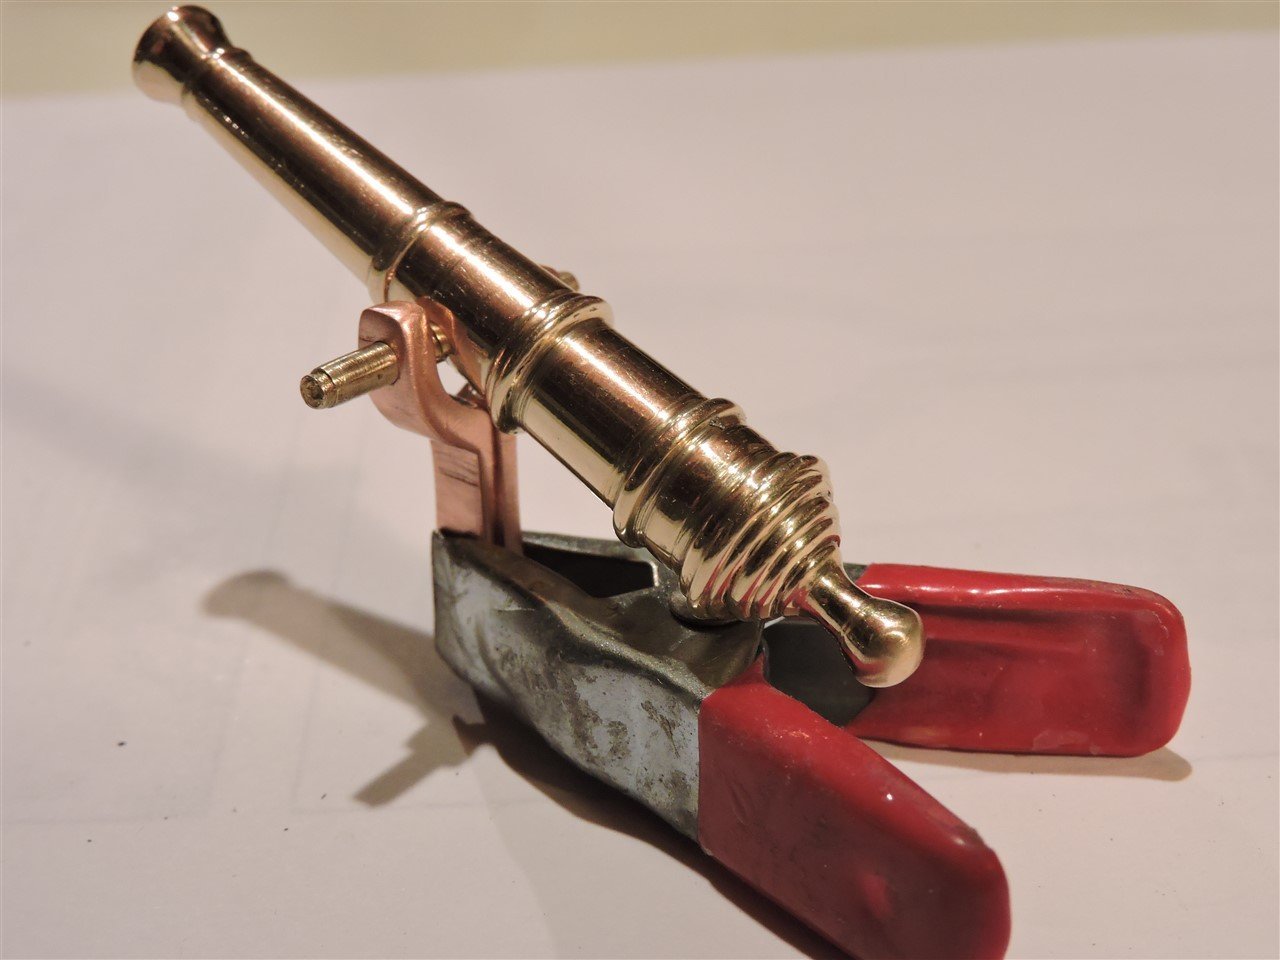
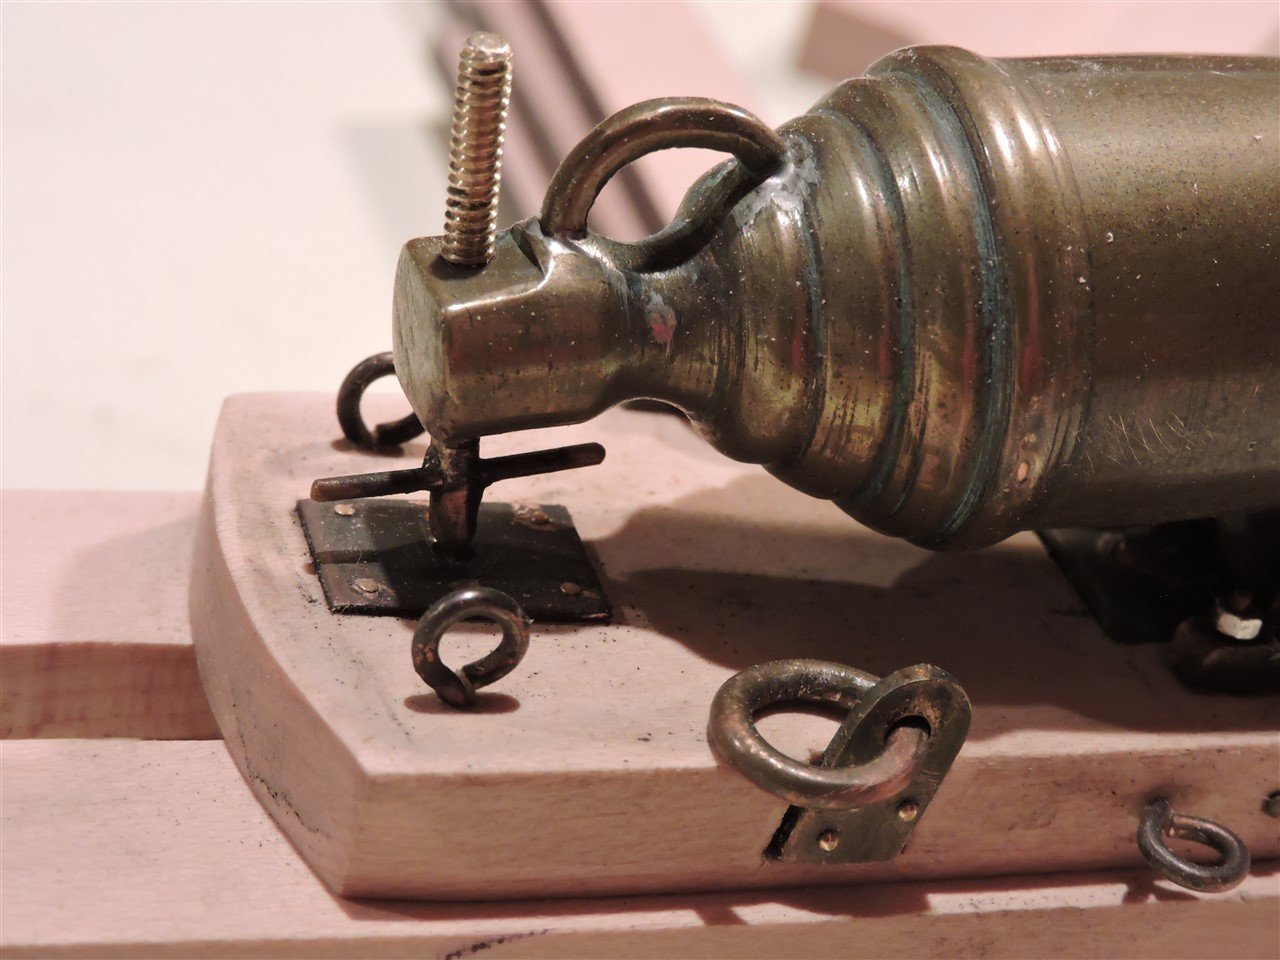
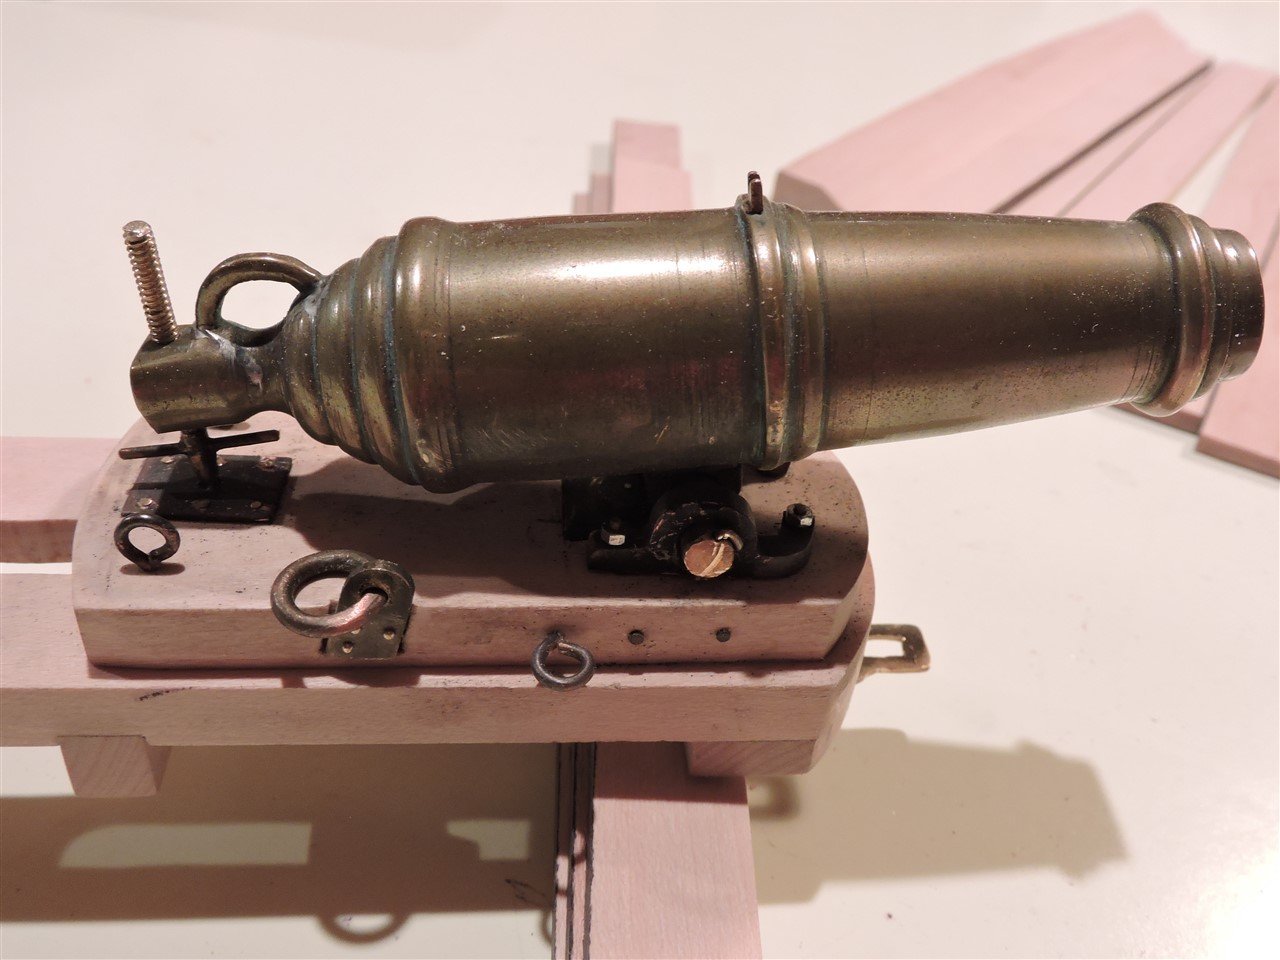
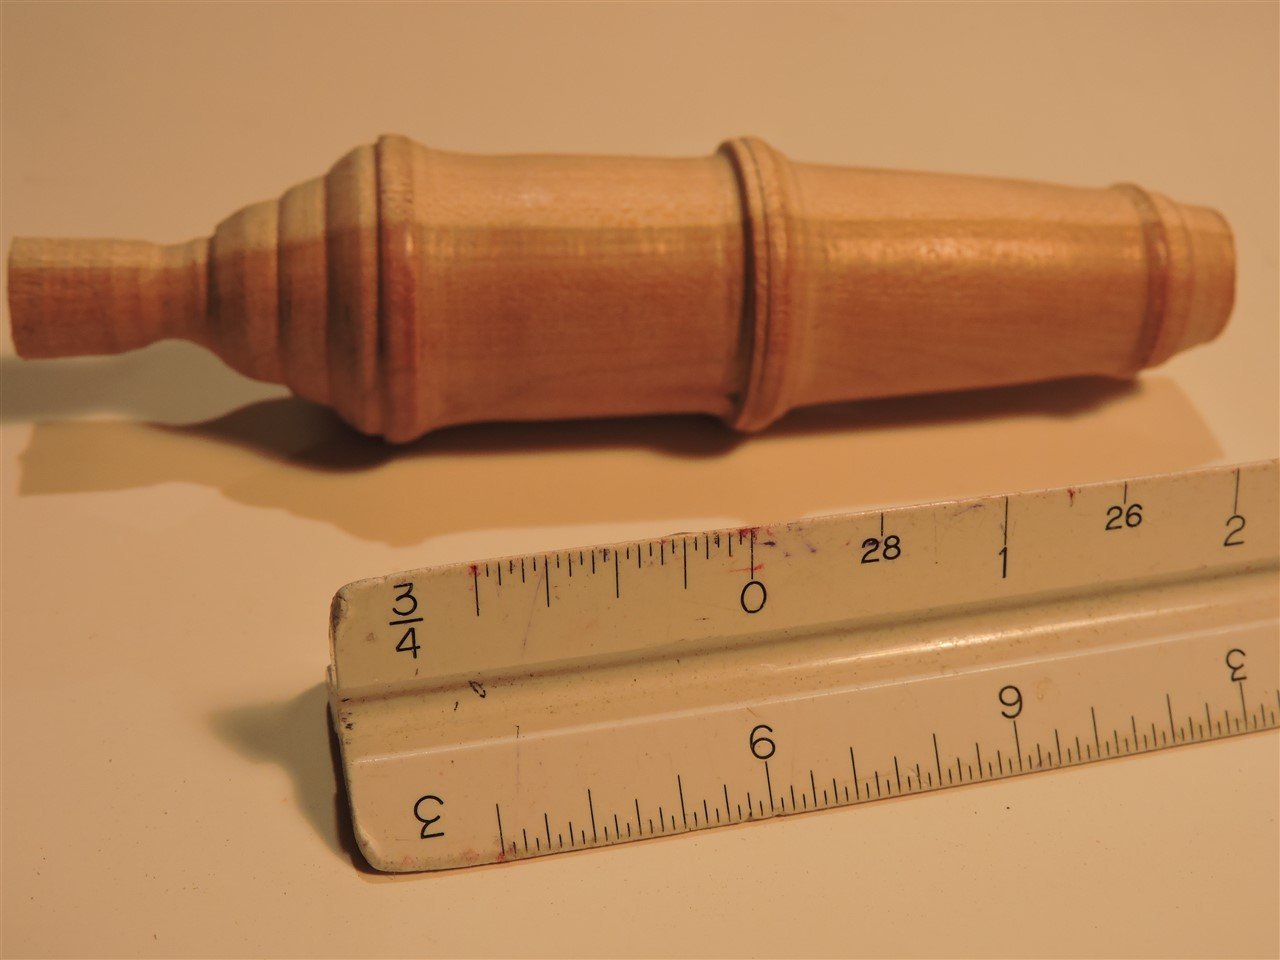
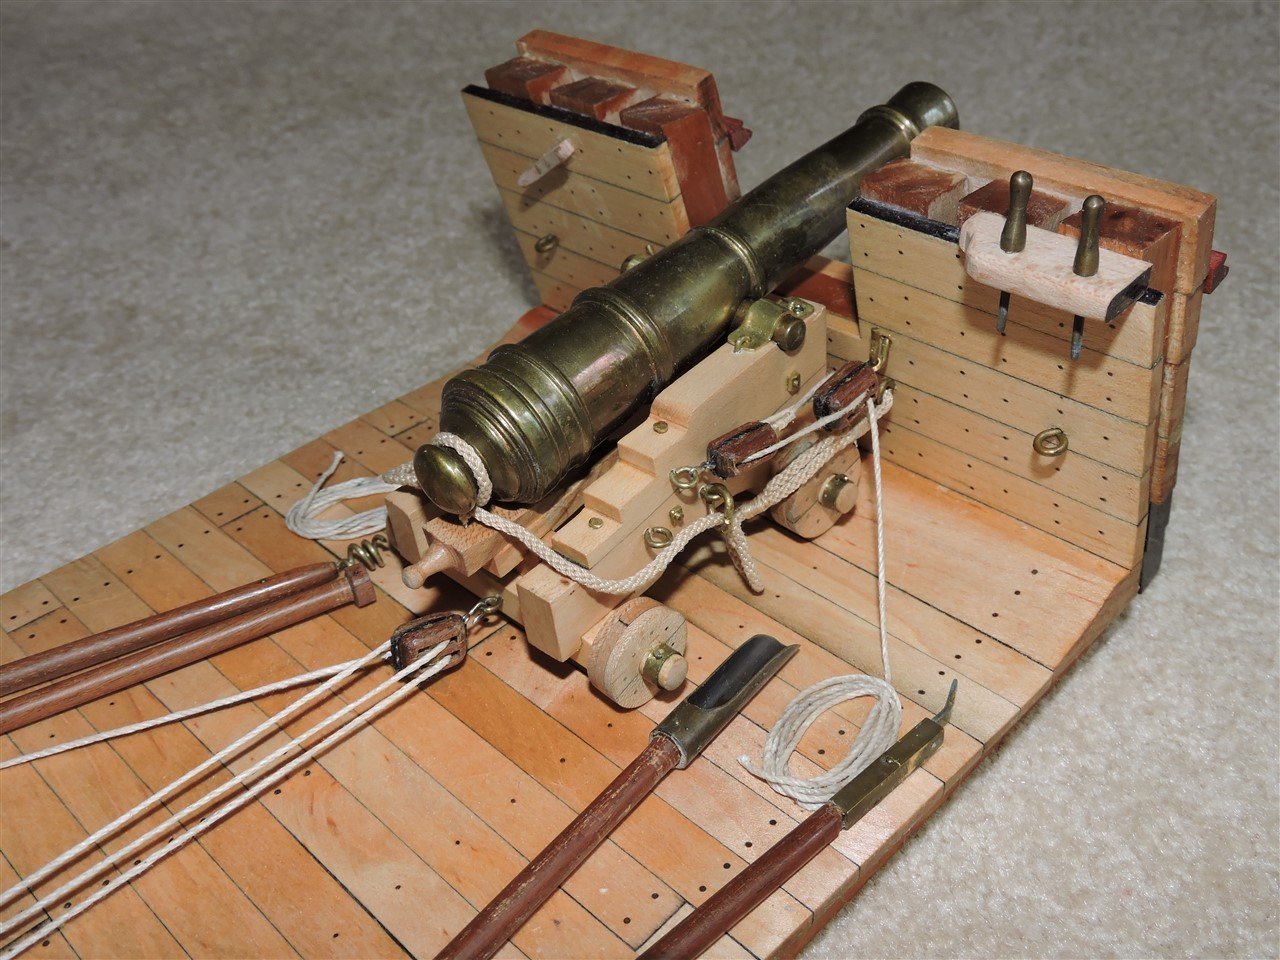
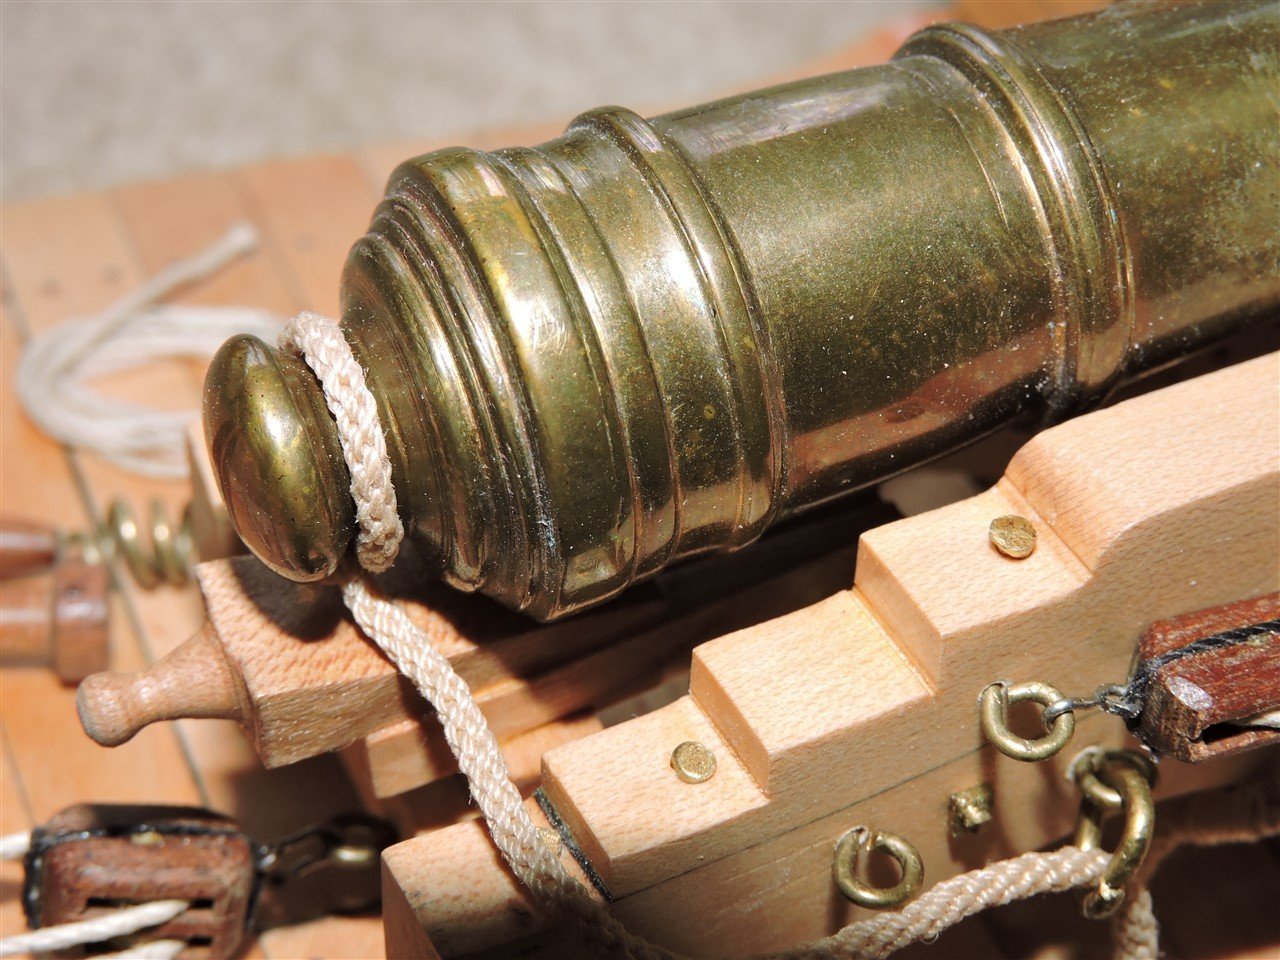
To make this swivel gun I used 1/2" brass rod which I turned on my lathe. The mounting bracket was cut out of 3/16" copper plate.
- thibaultron, CiscoH, GrandpaPhil and 5 others
-
7
-
 1
1
-
-
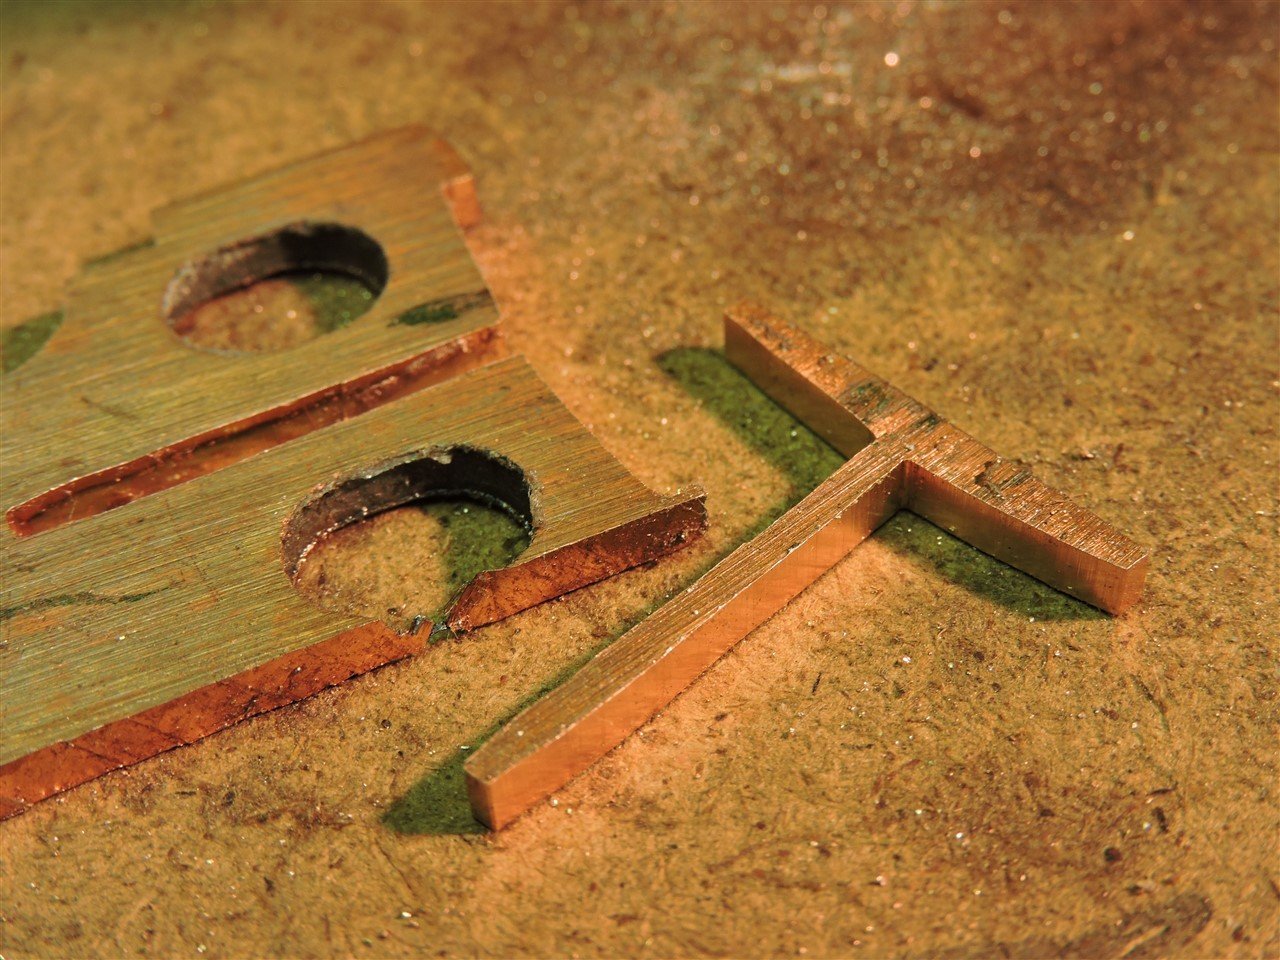
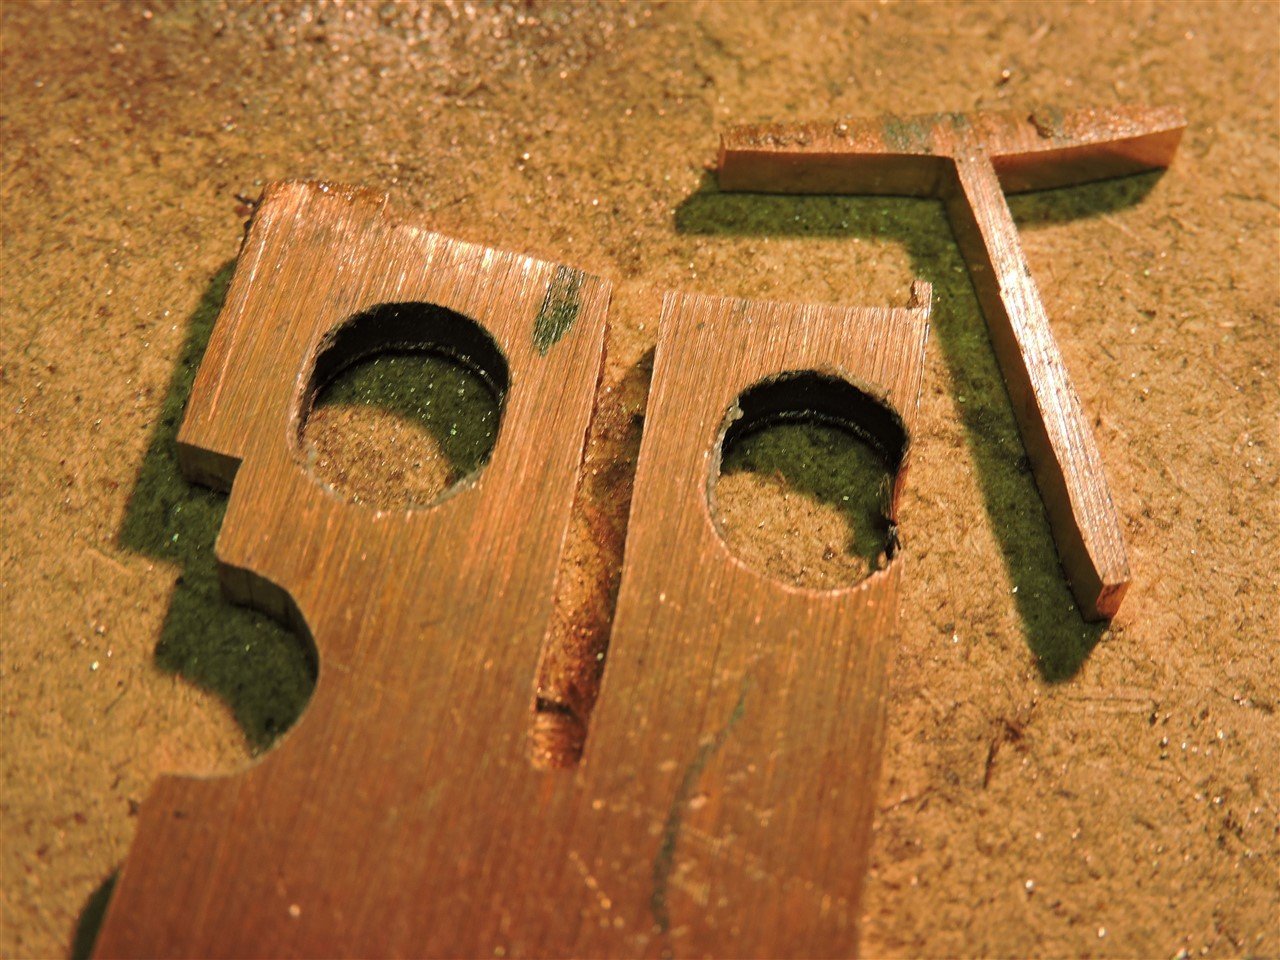
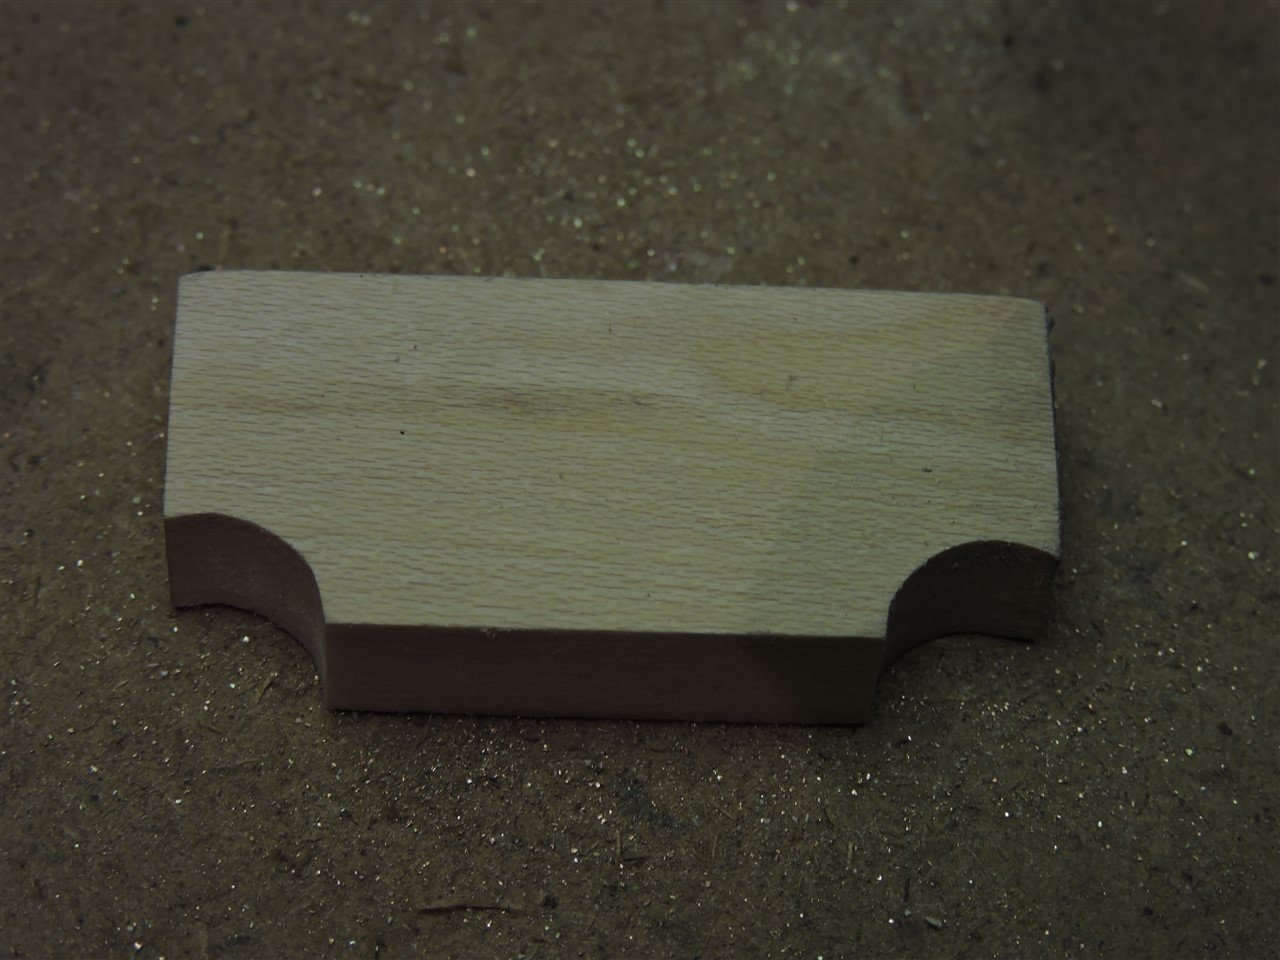
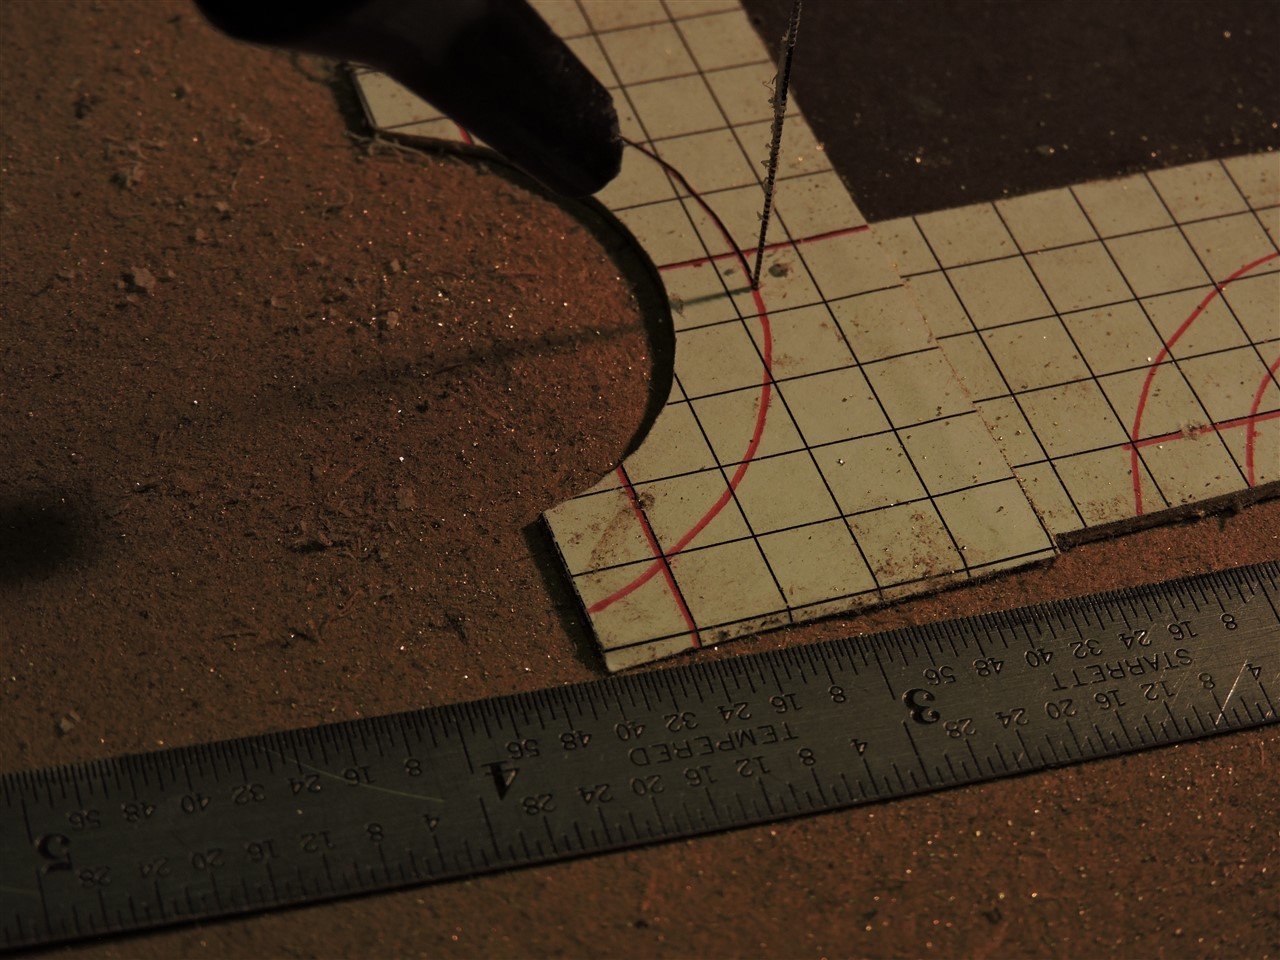
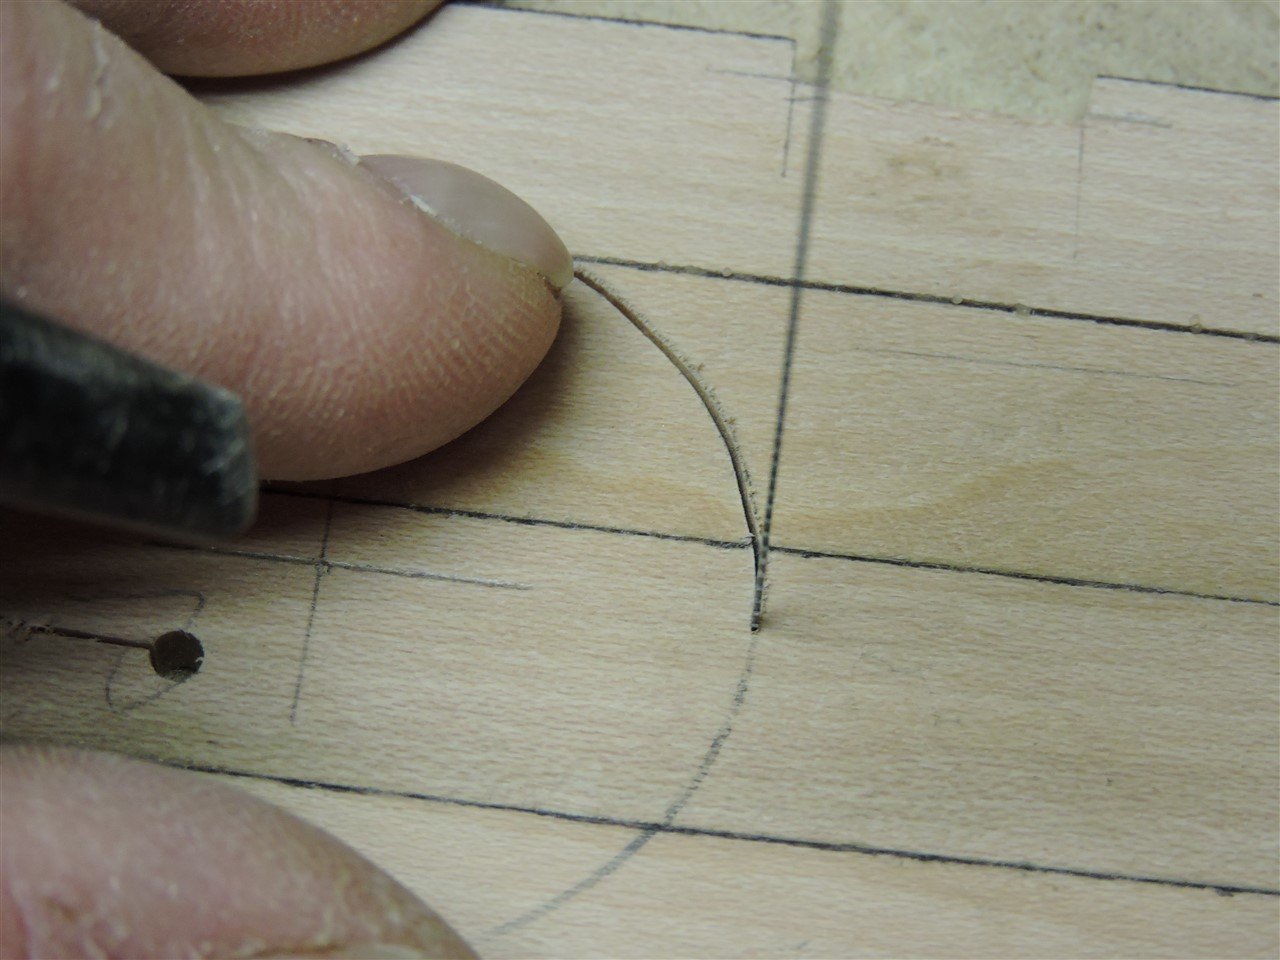
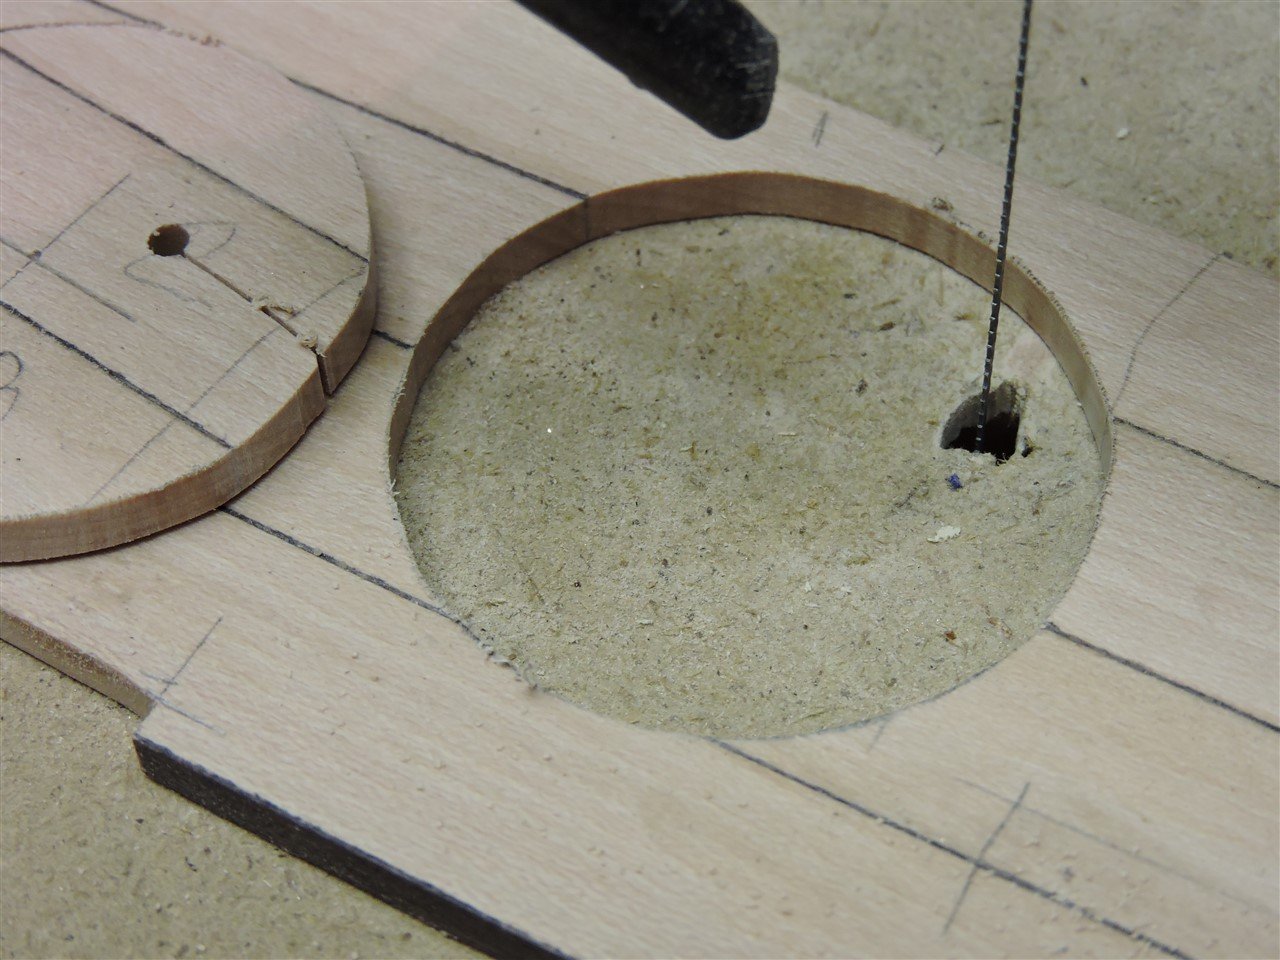
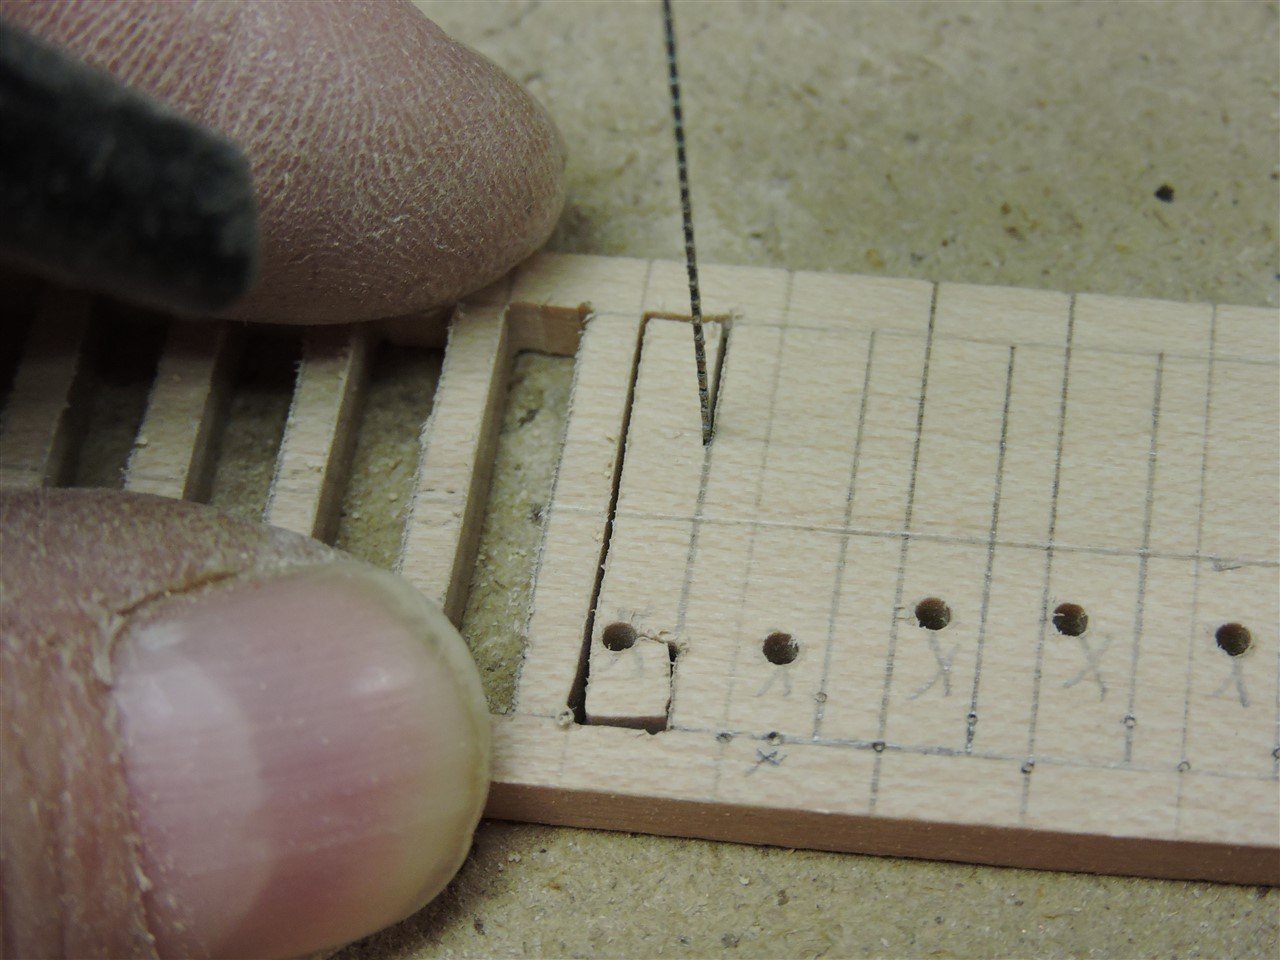
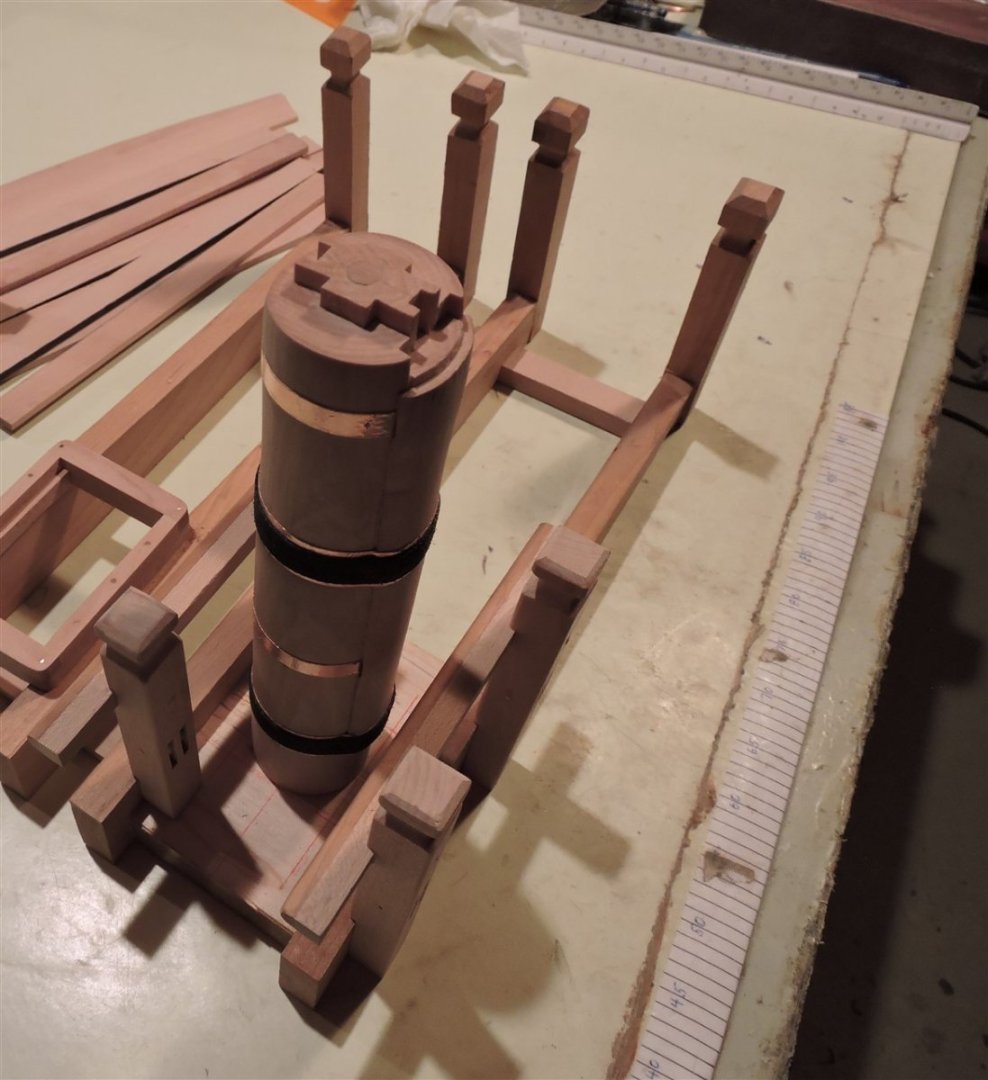
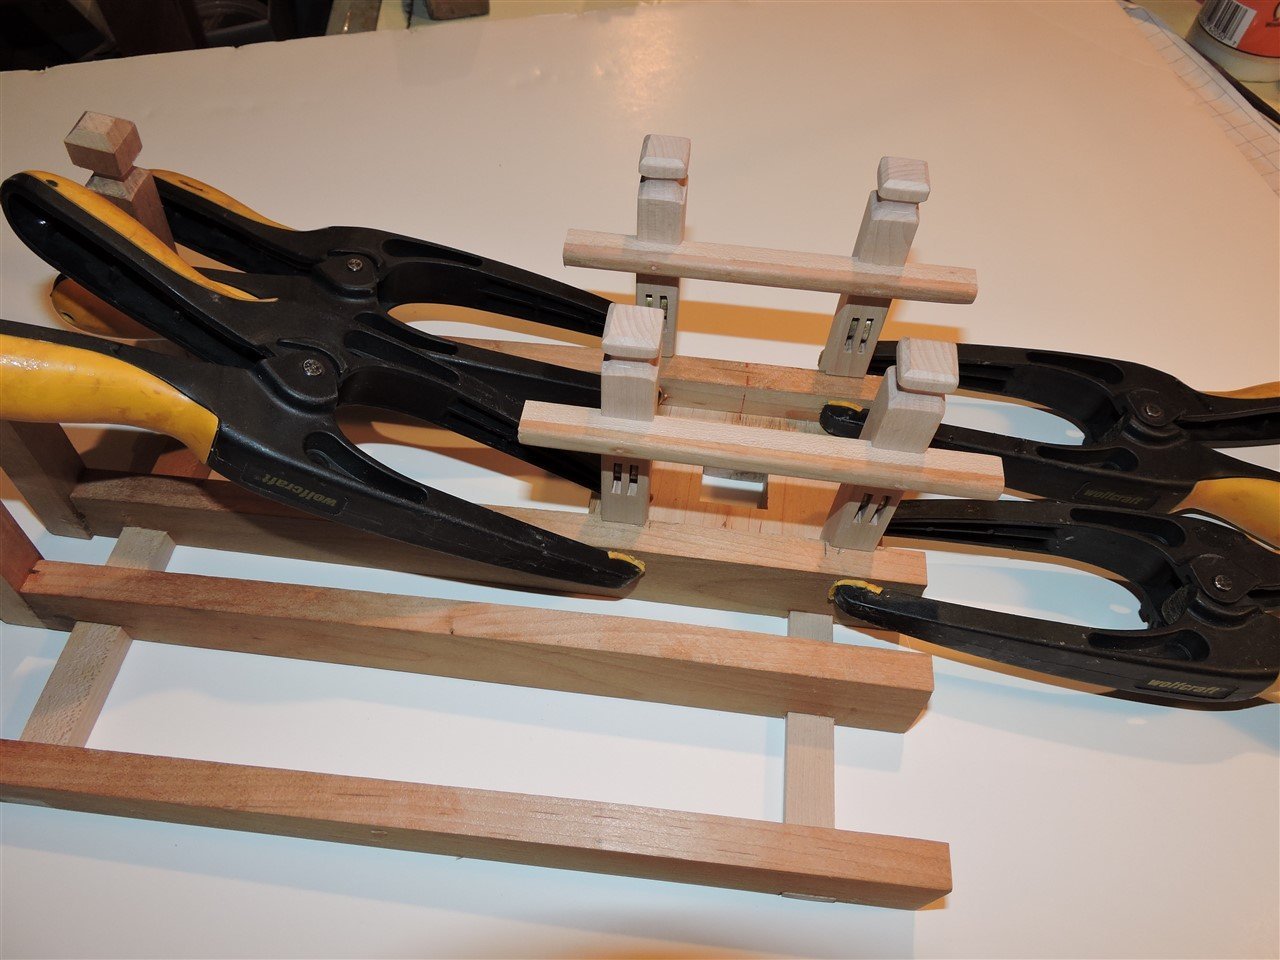
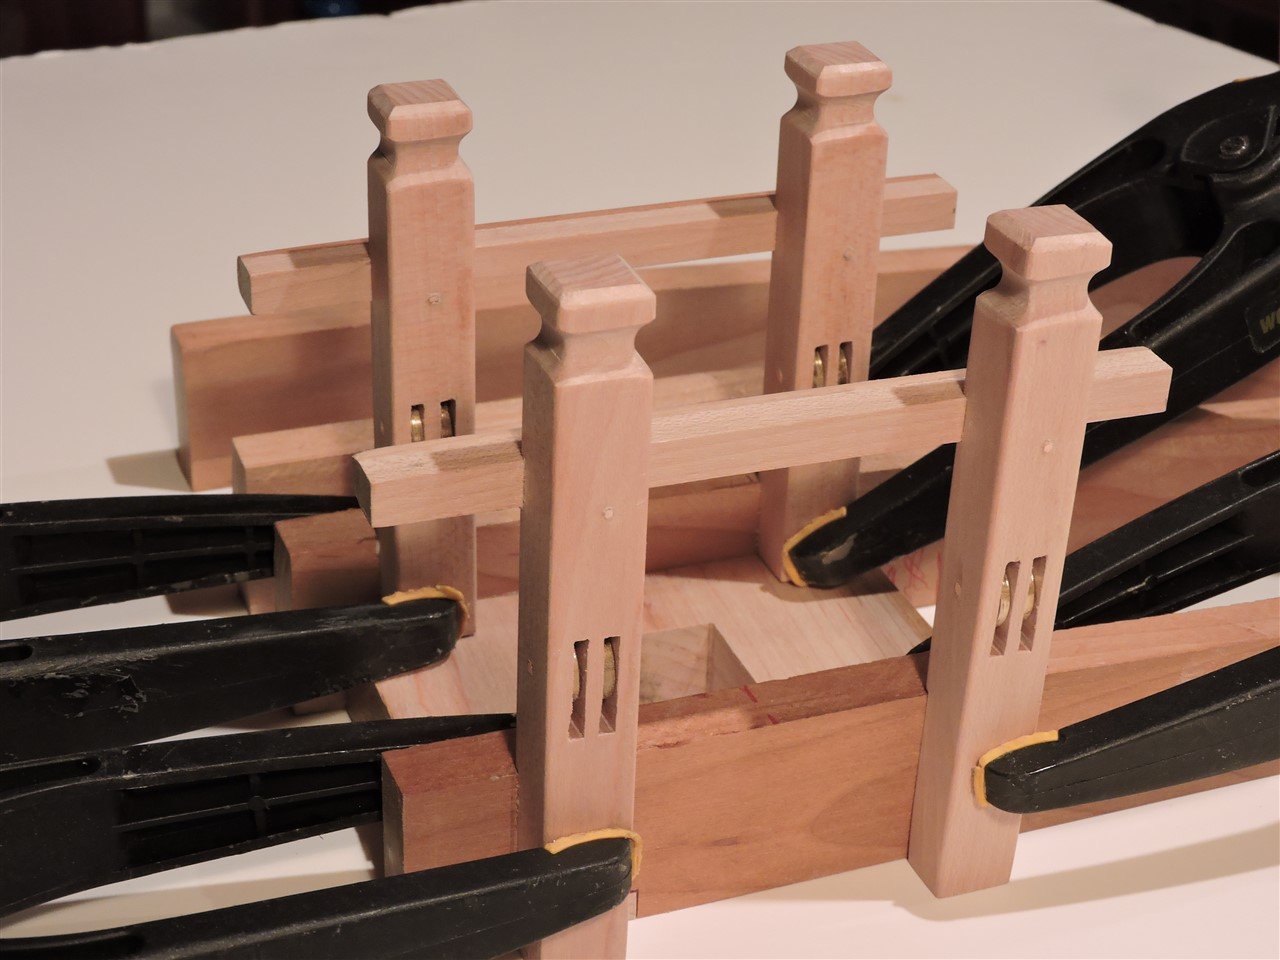
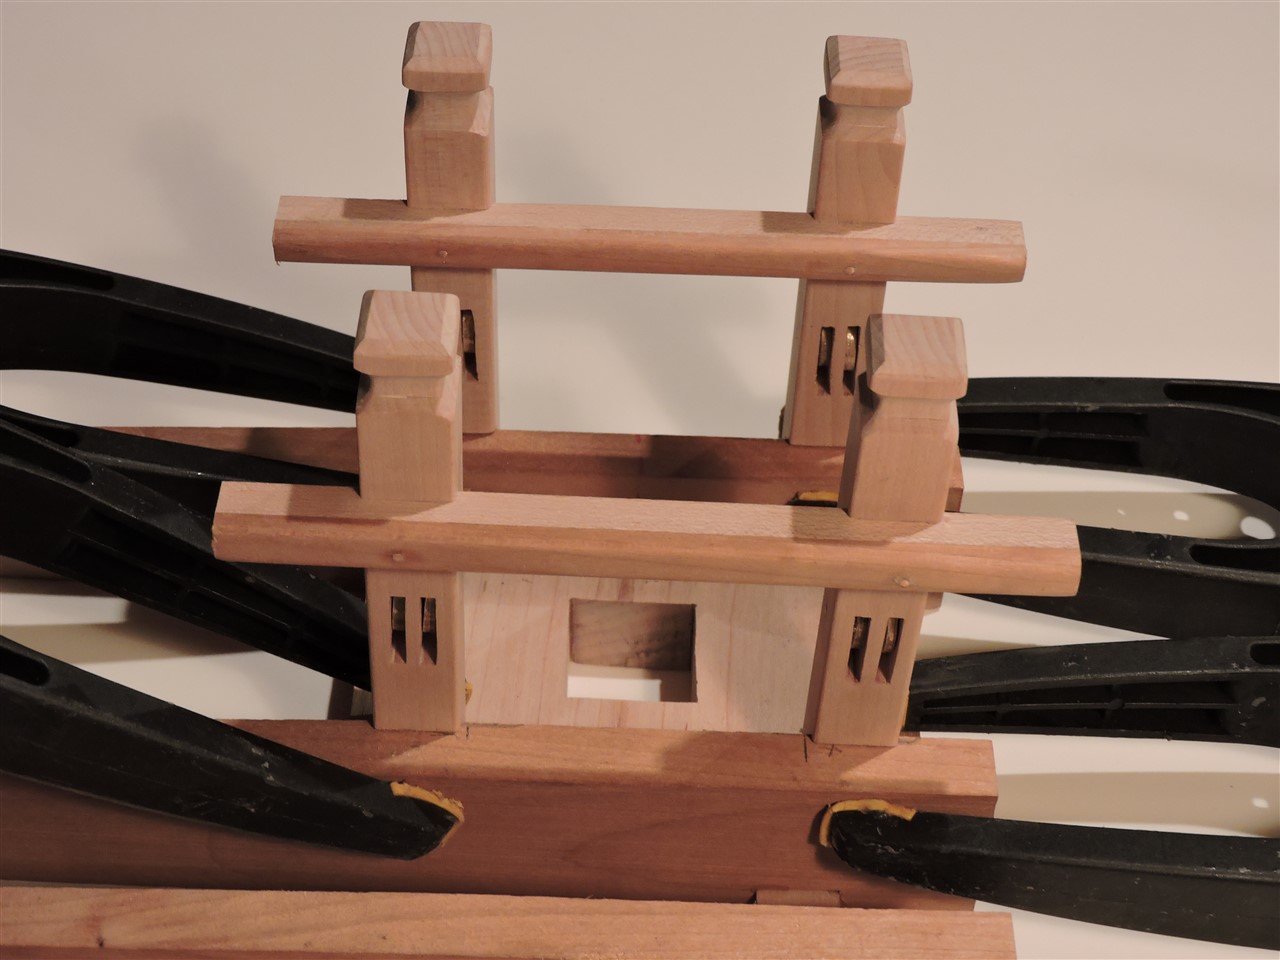
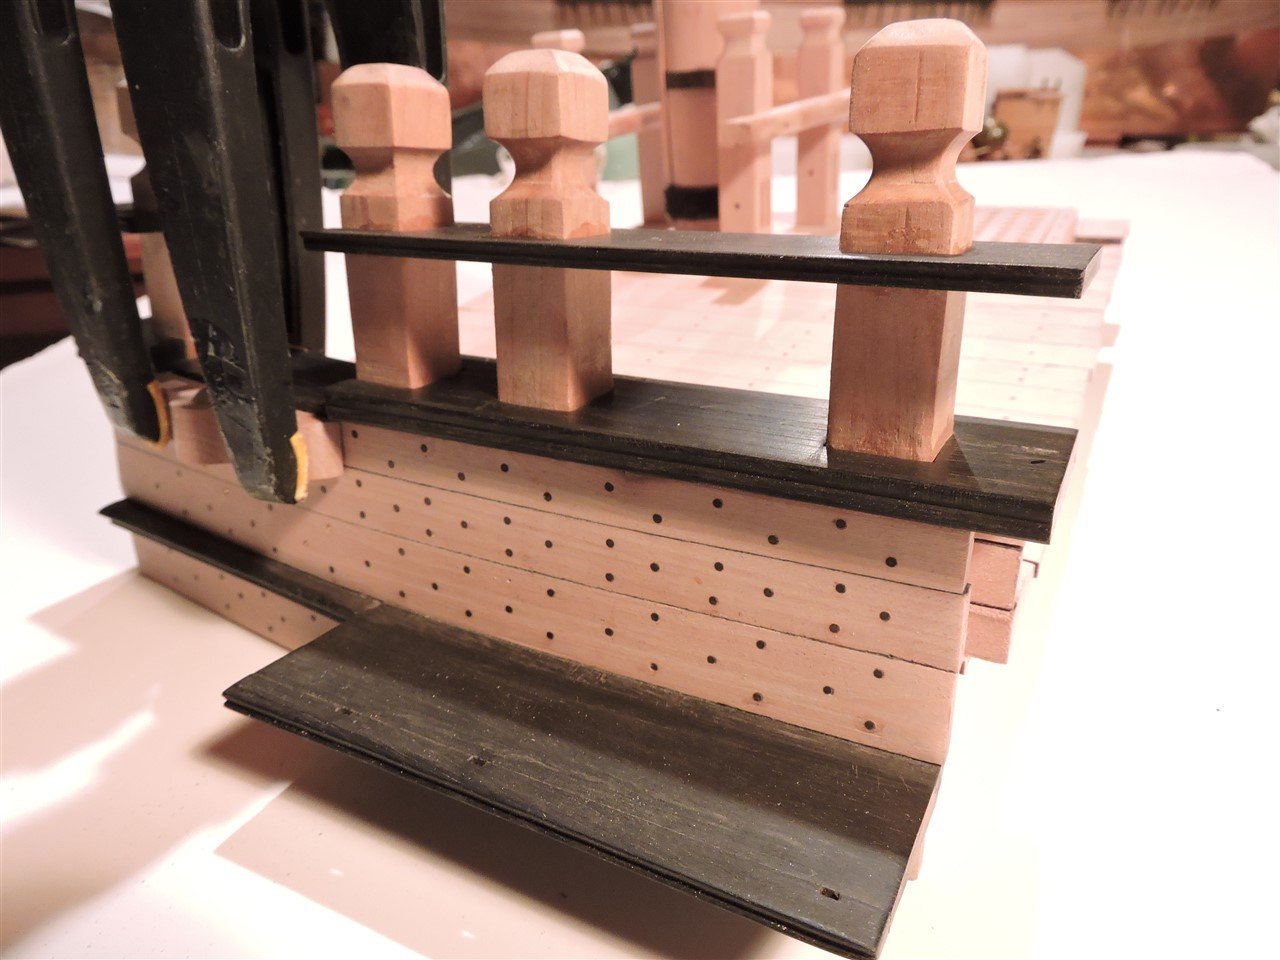
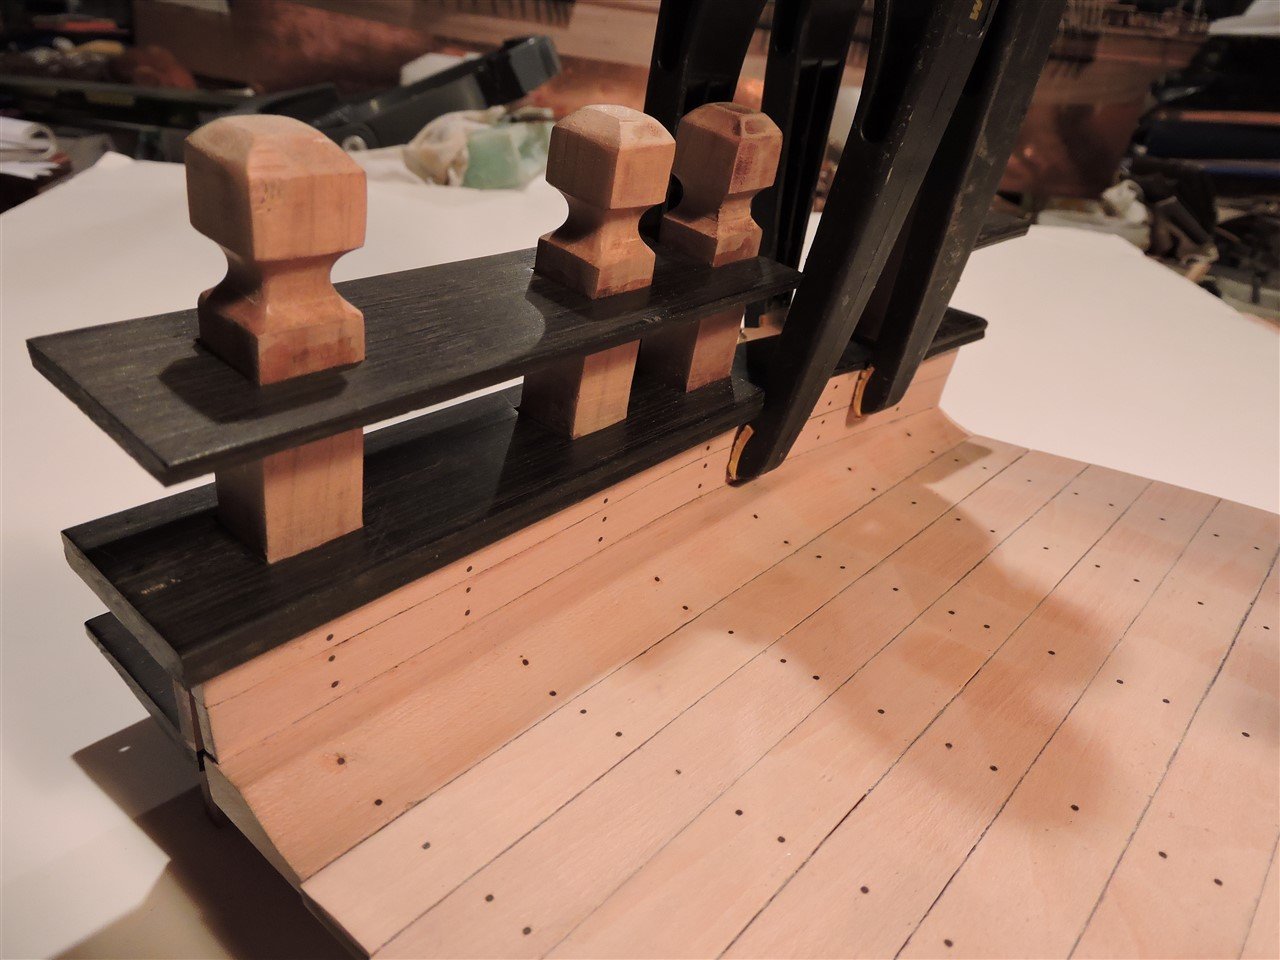
I am using my scroll saw to cut out the wooden and brass pieces for the traversing trucks for the carronade carriage, the hole in the decking for the mast and the mast wedges.
Mike R

- CiscoH, thibaultron, KARAVOKIRIS and 8 others
-
9
-
2
-
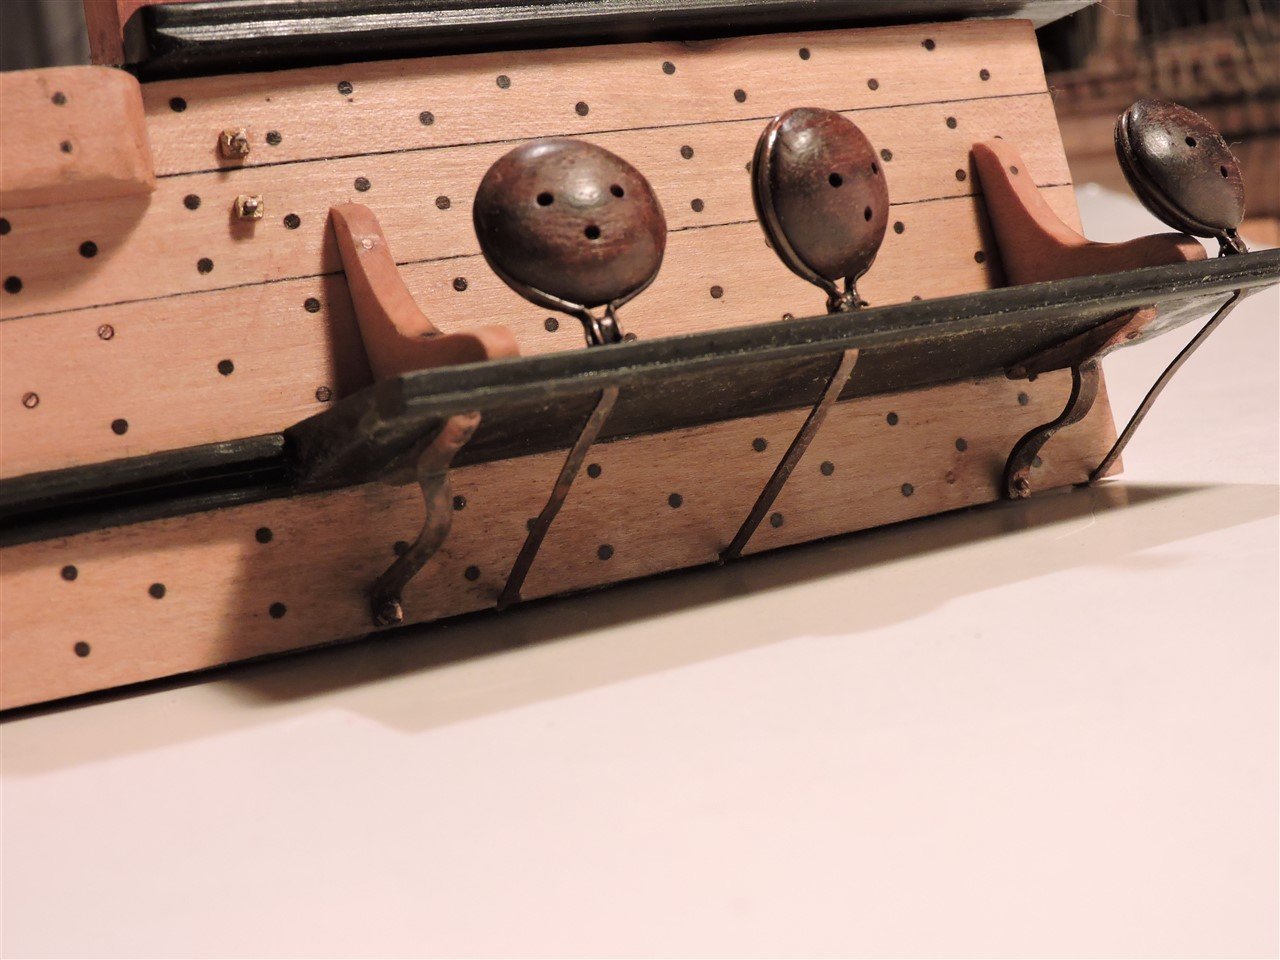
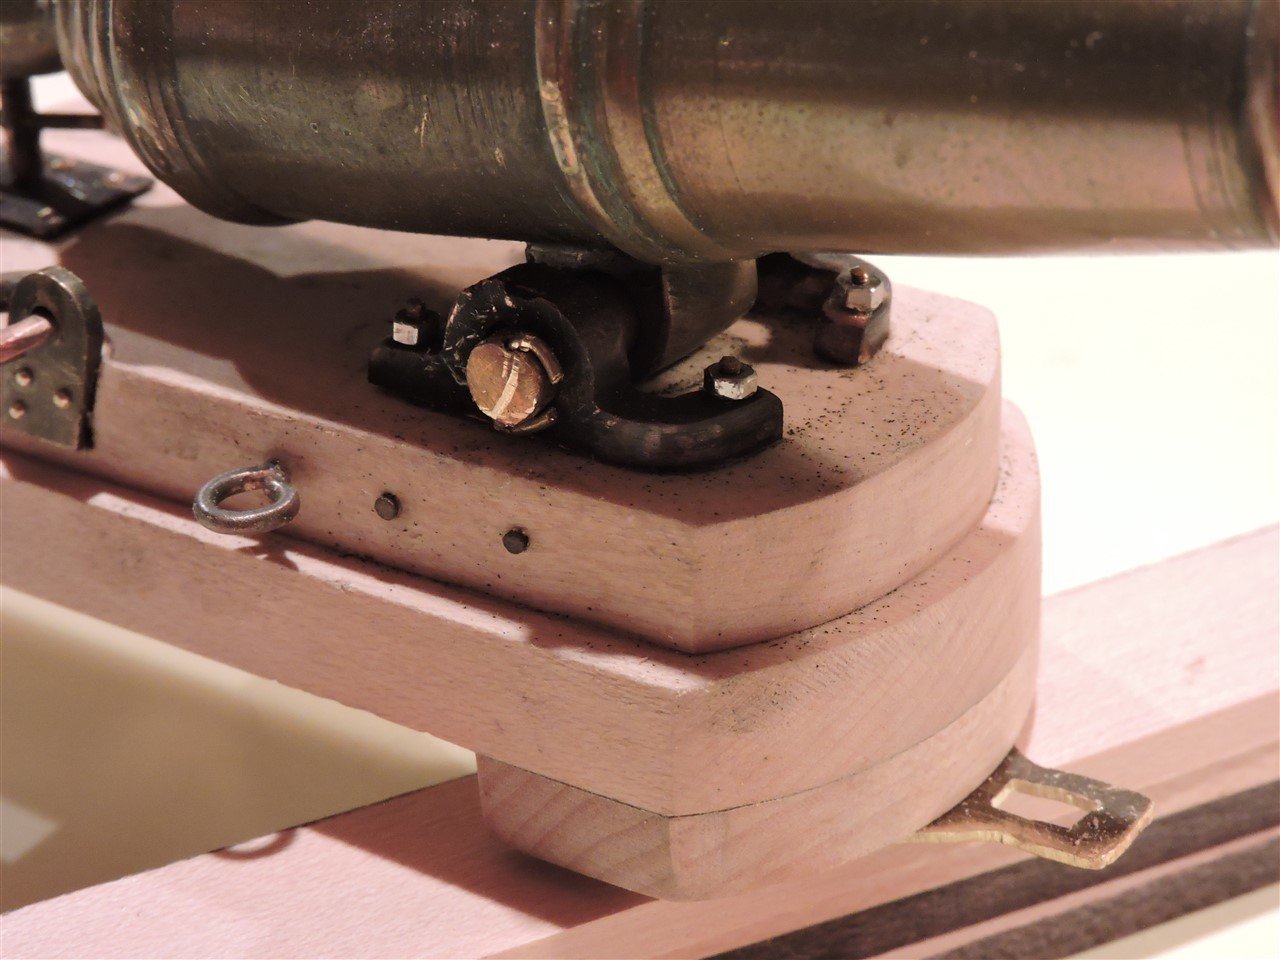
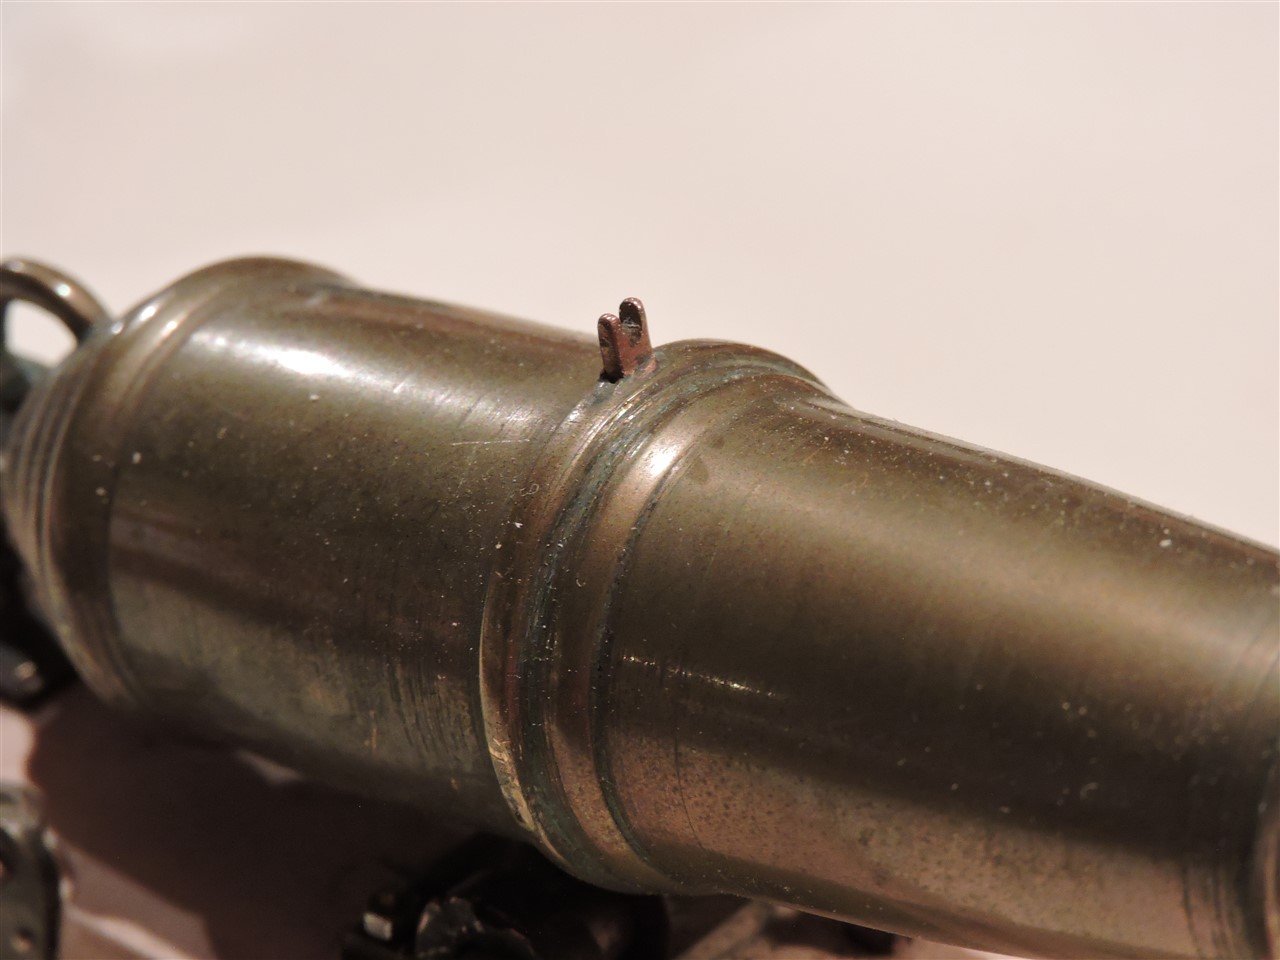
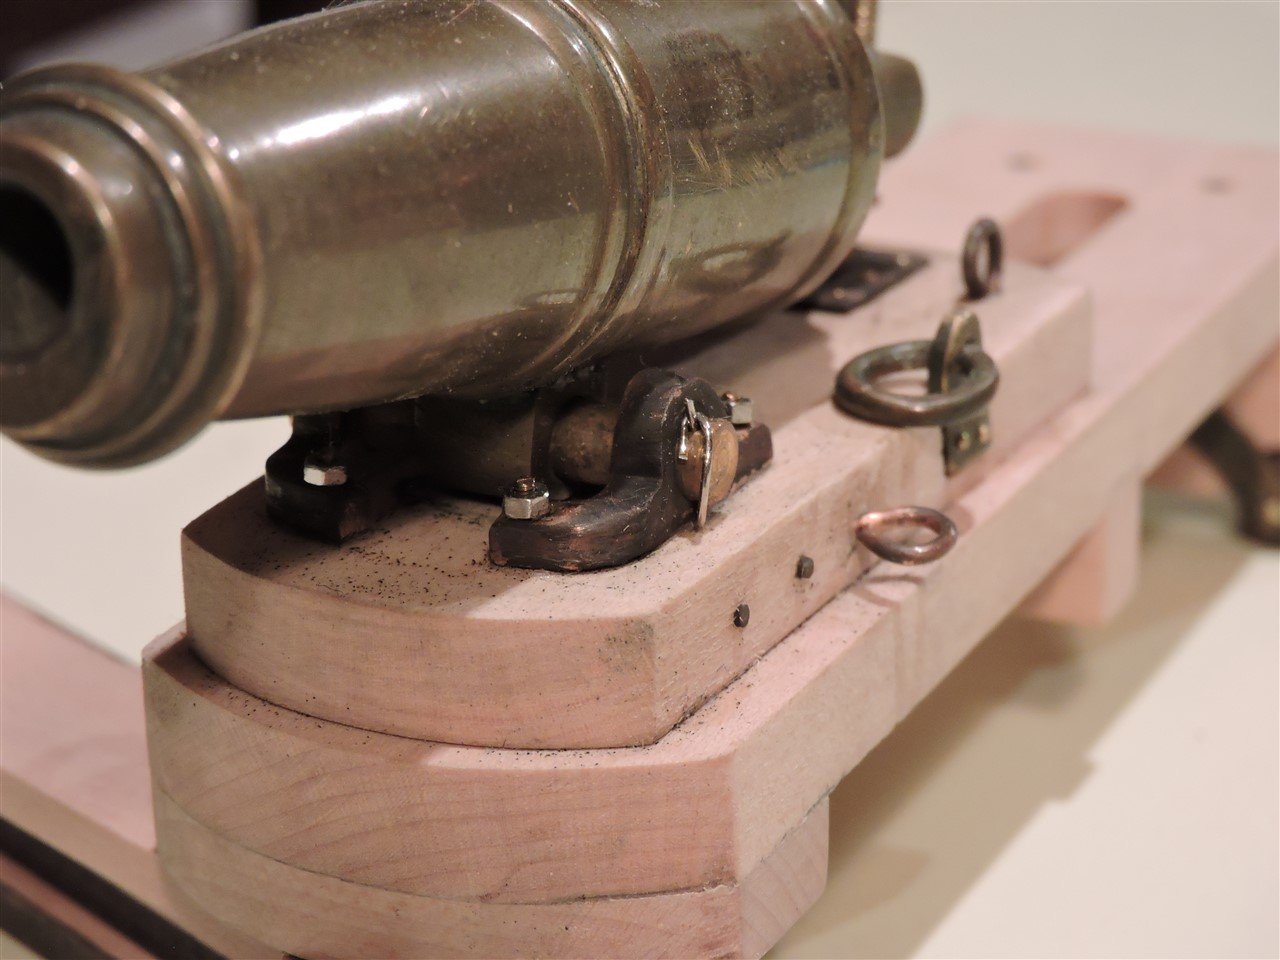
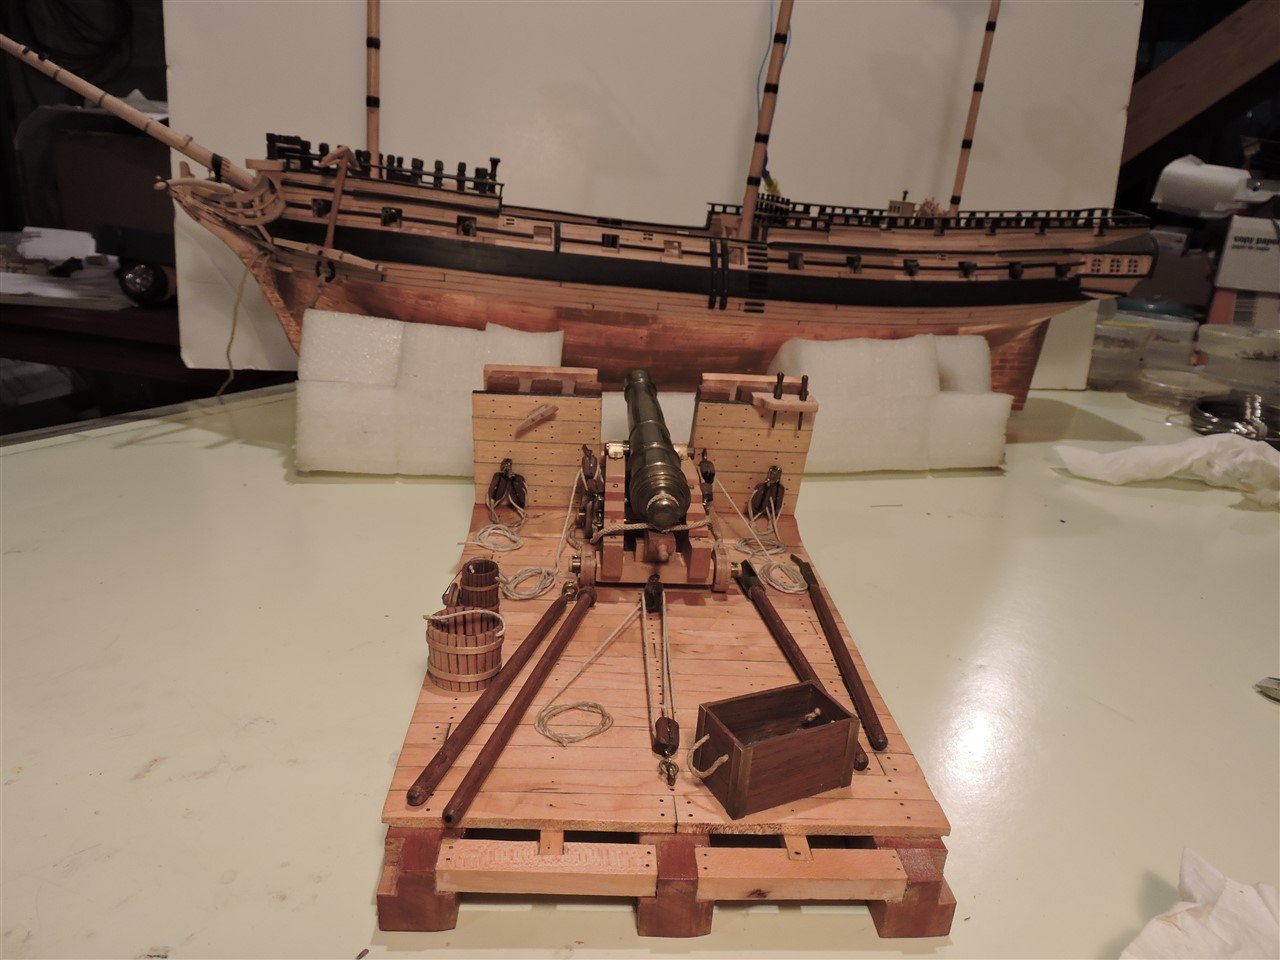
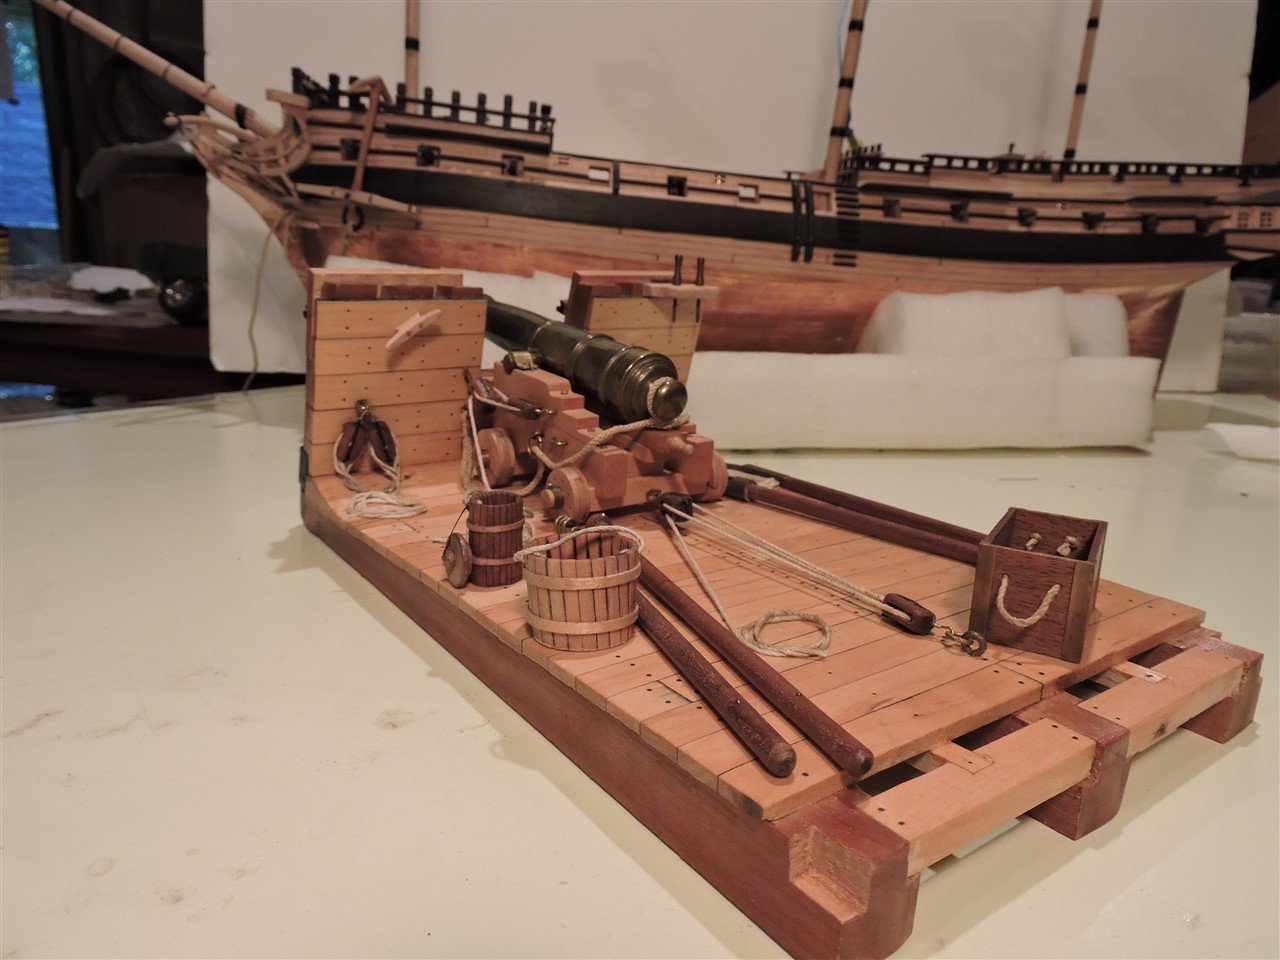
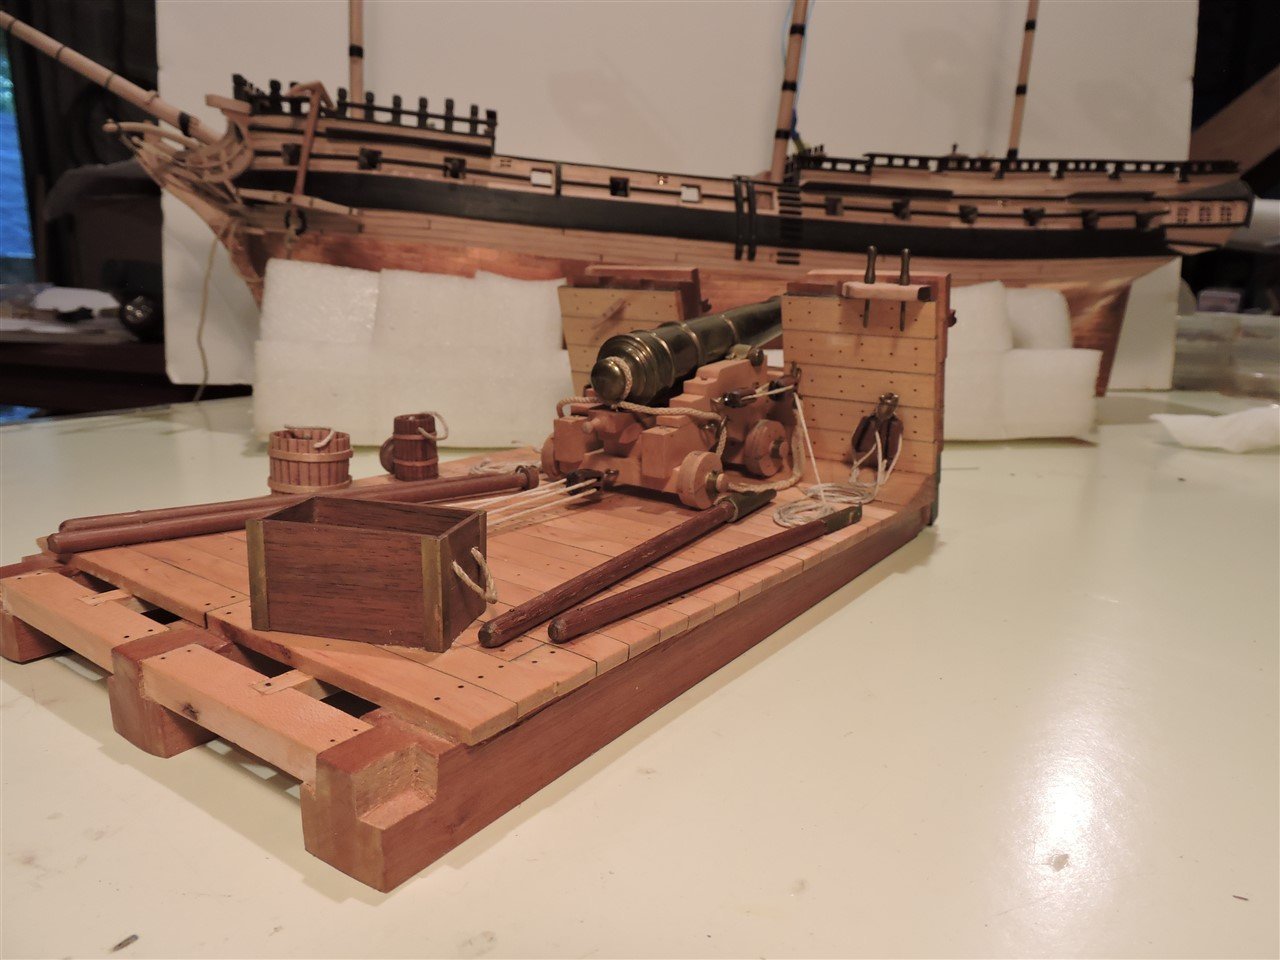
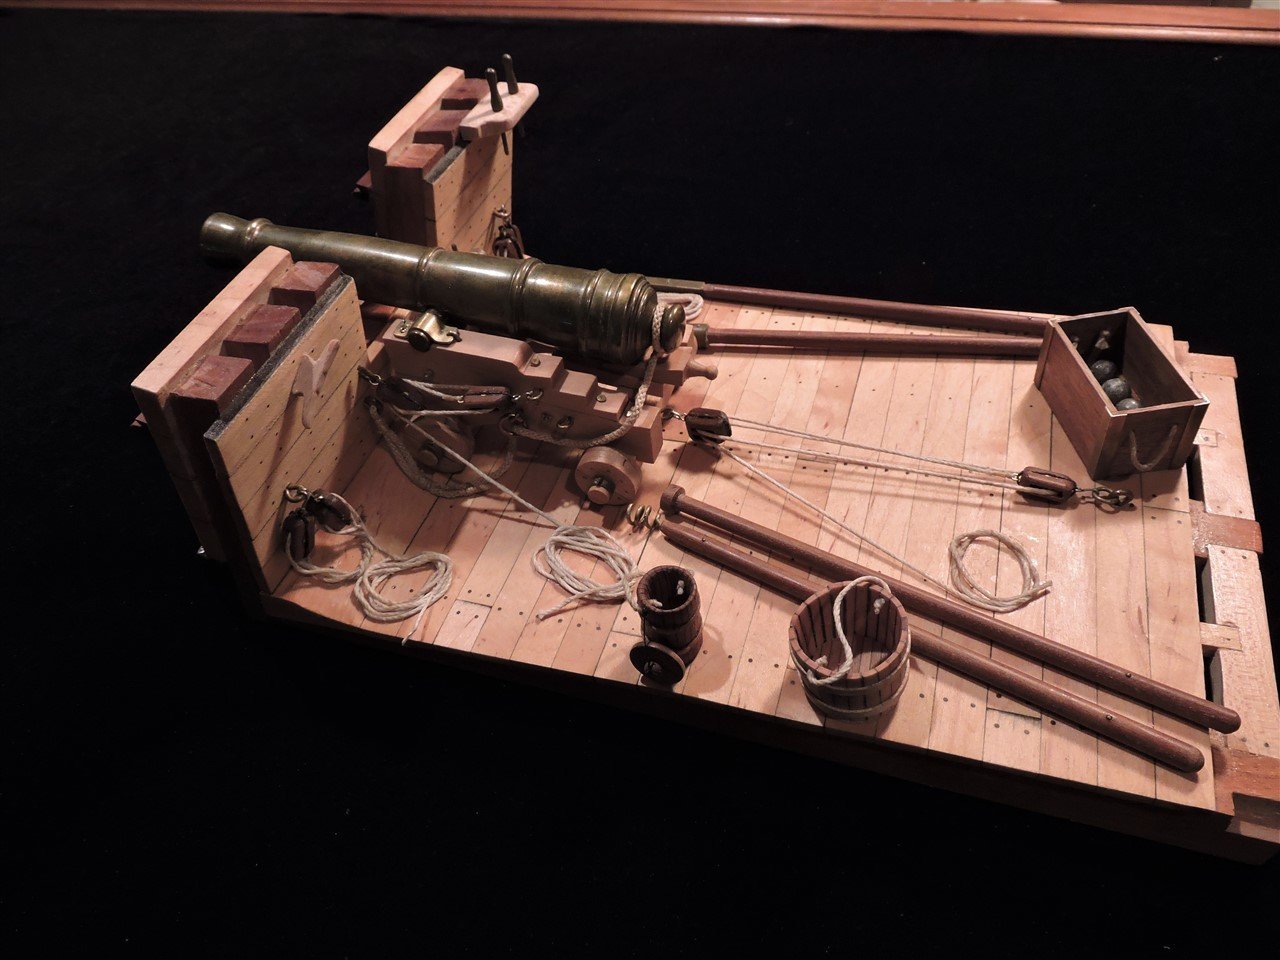
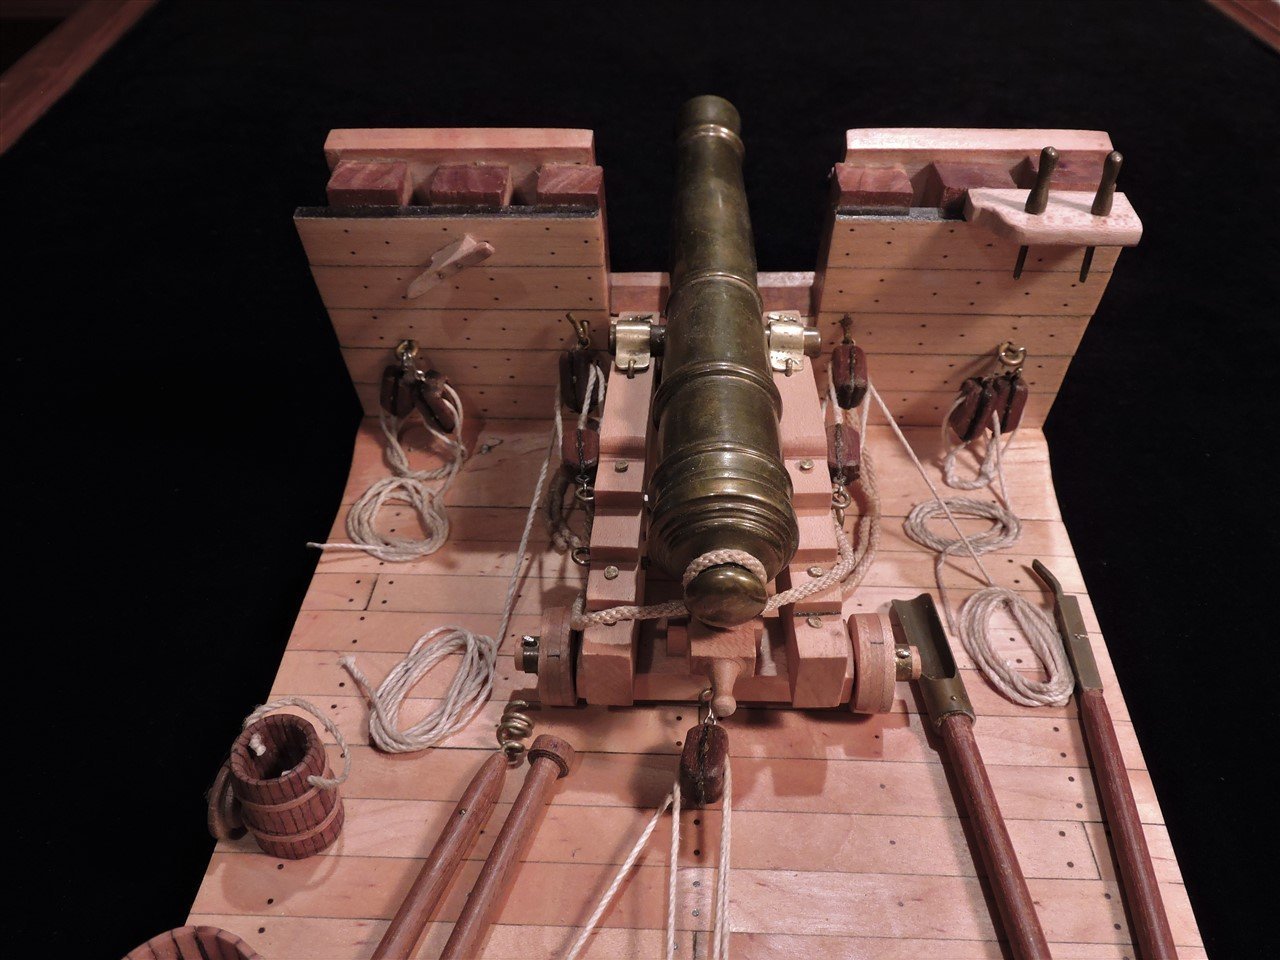
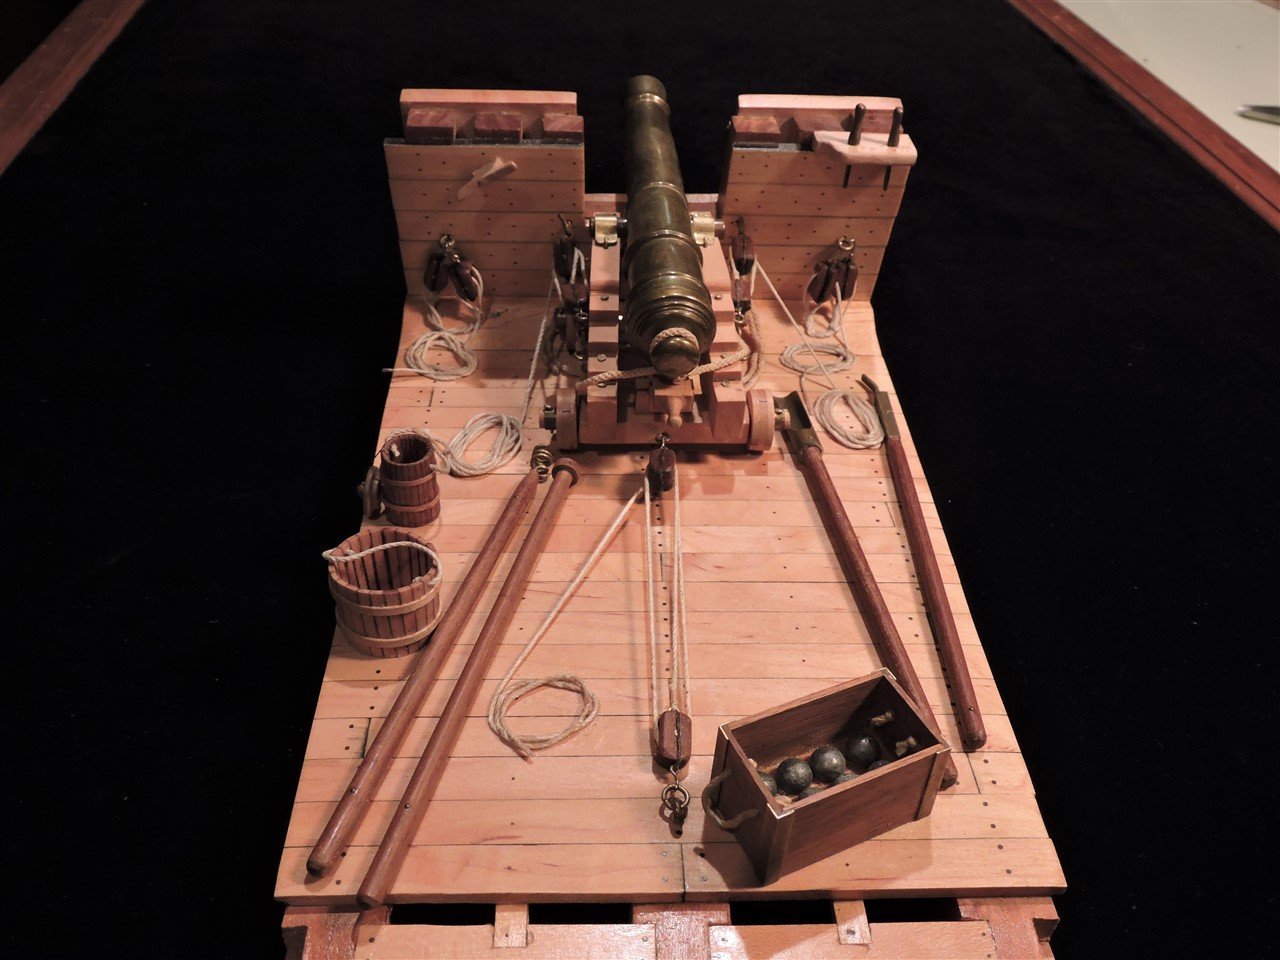
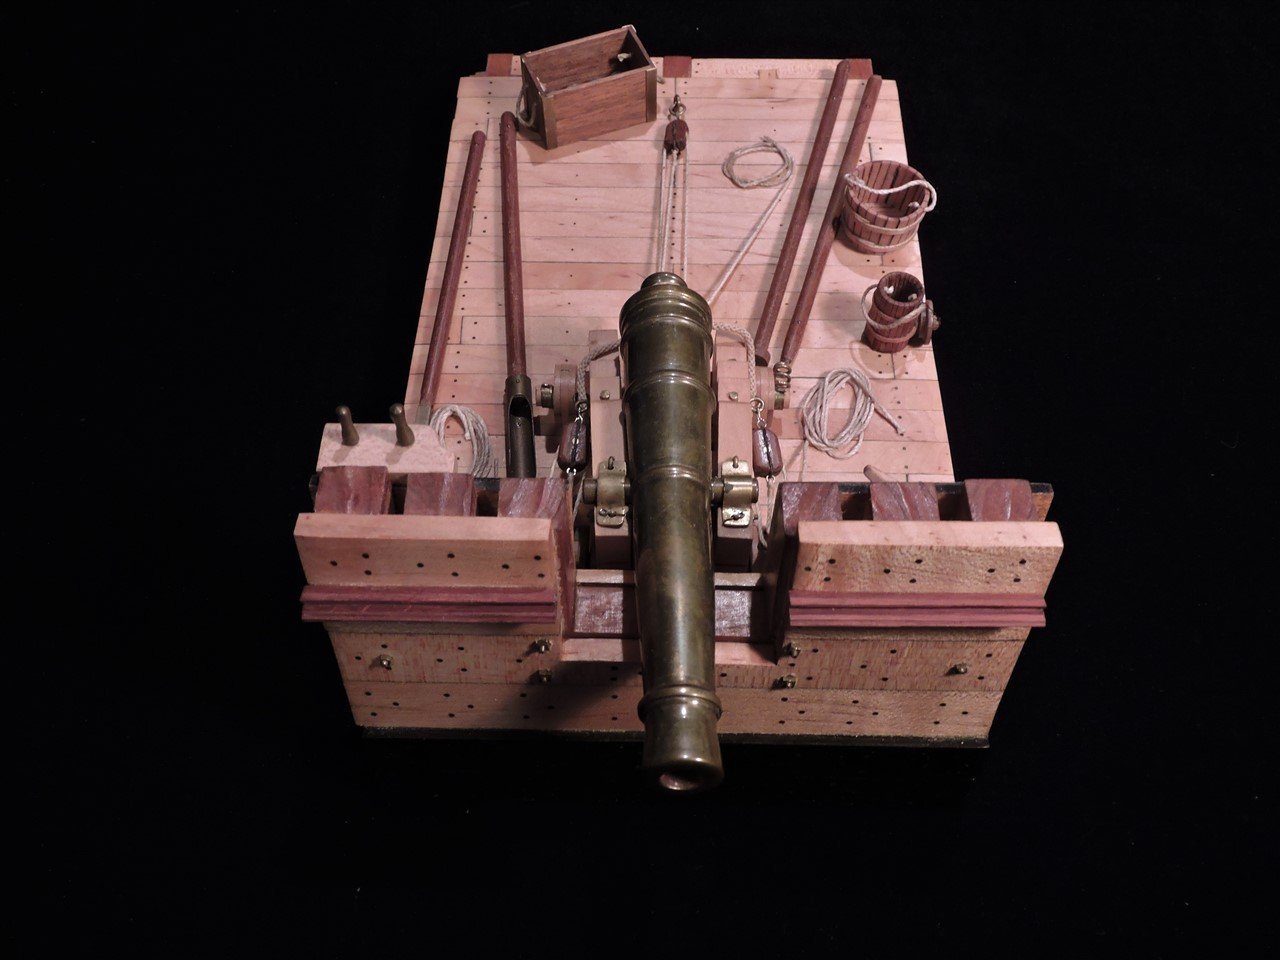
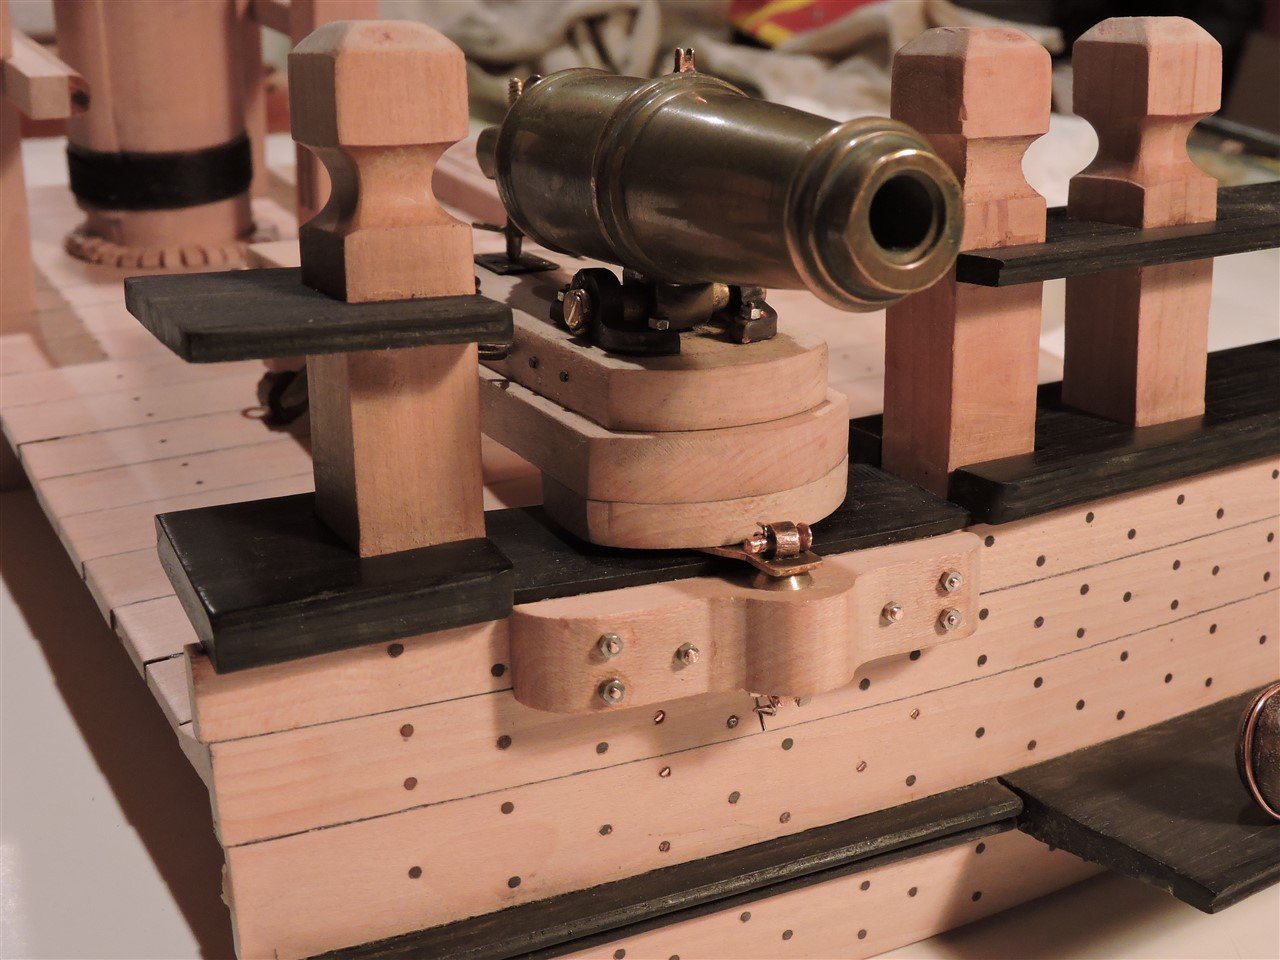
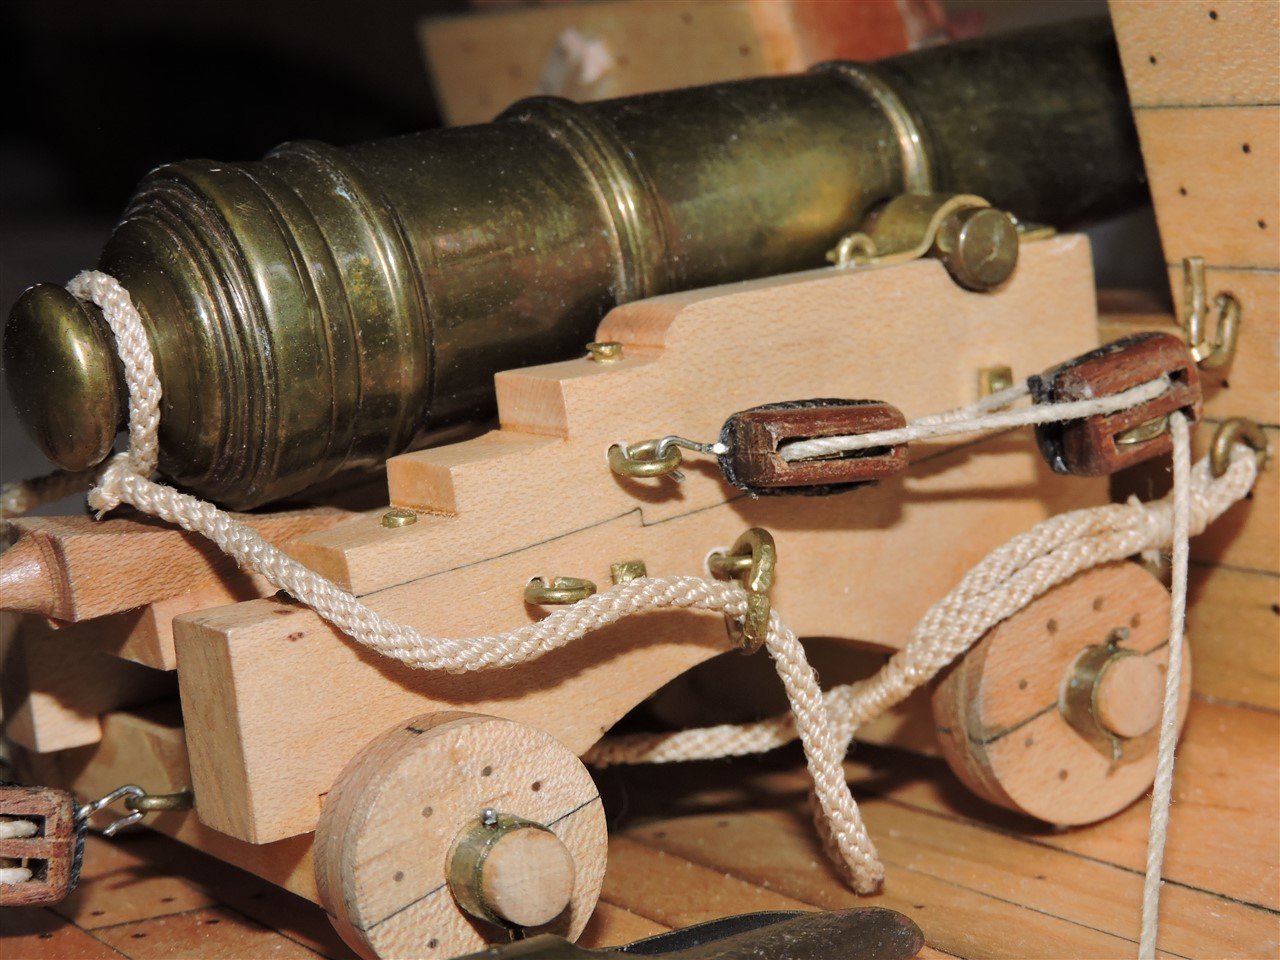
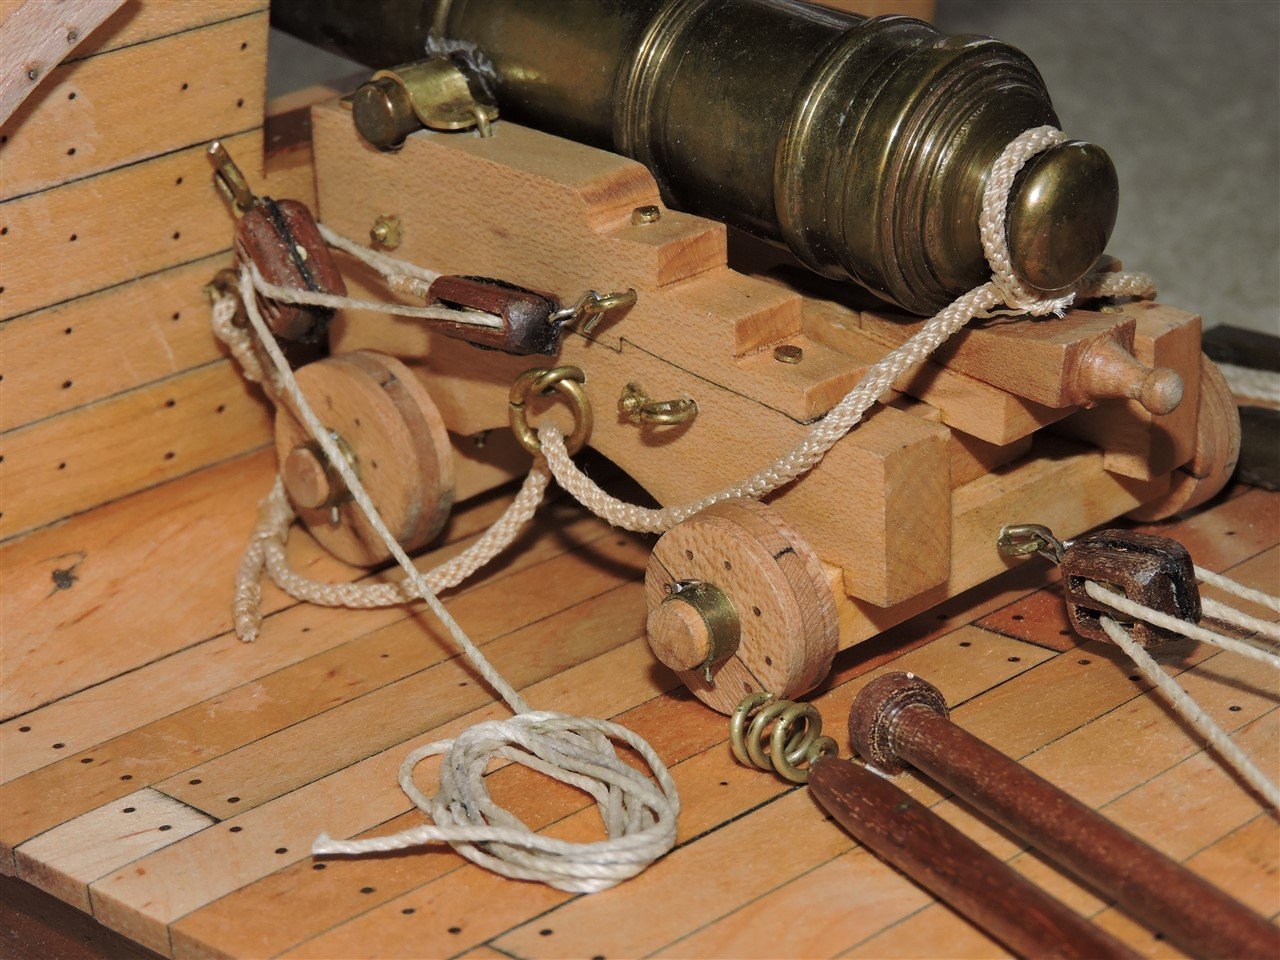
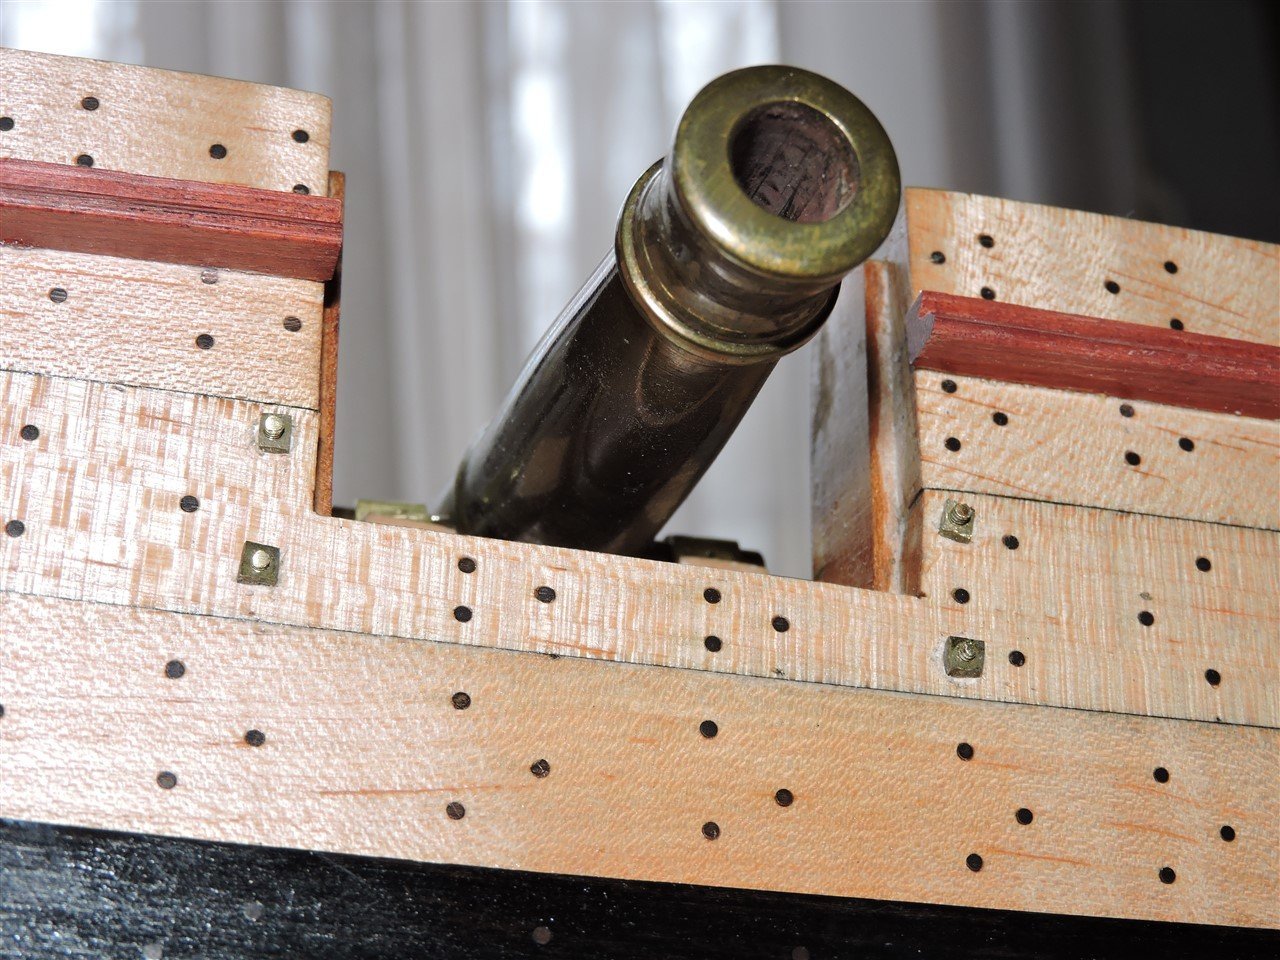
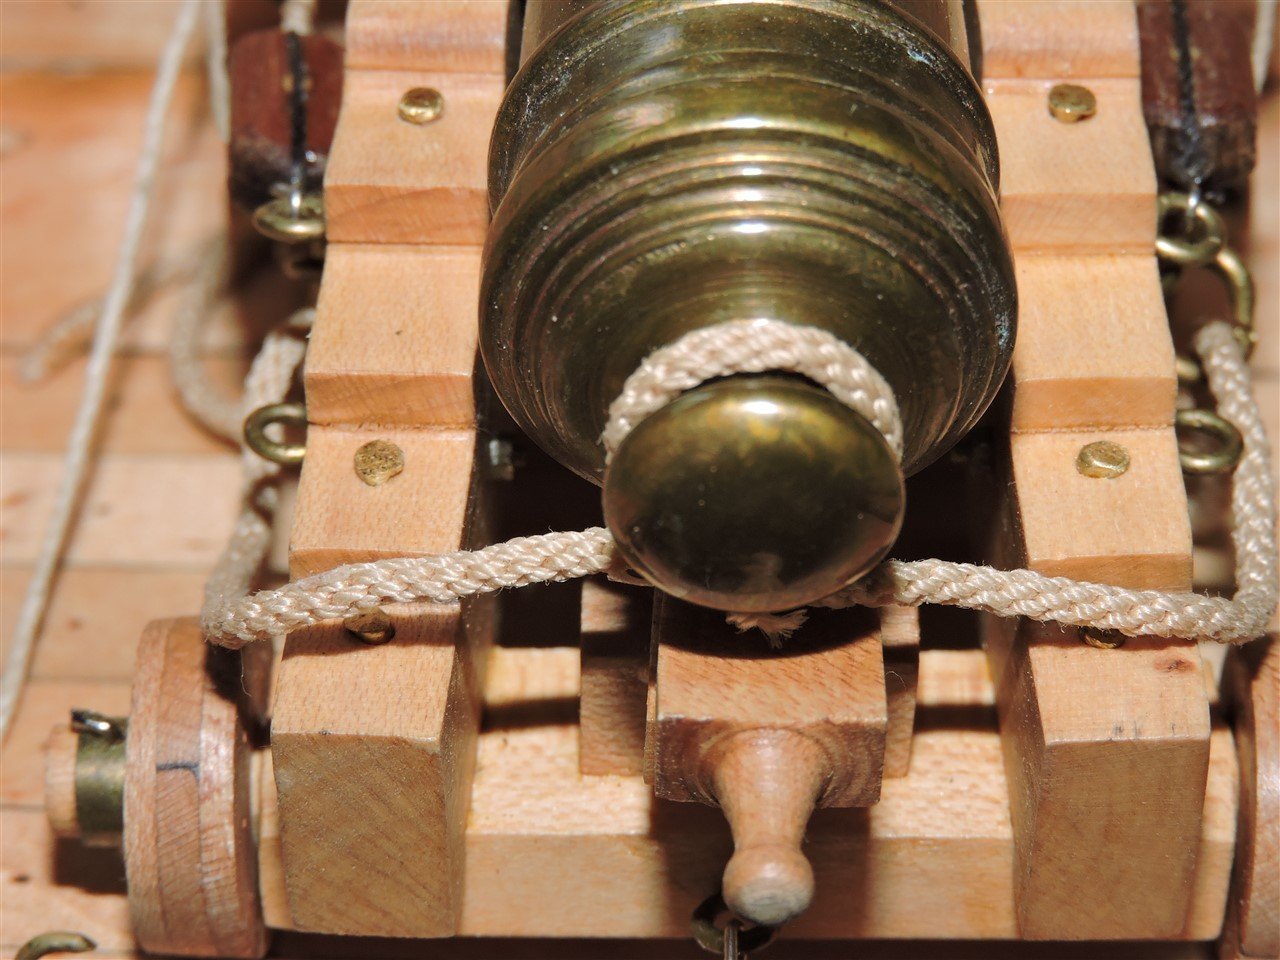
A few detail photos of the cannonade.
Mike R
- Siggi52, JohnB40, thibaultron and 9 others
-
12
-
Thukydides
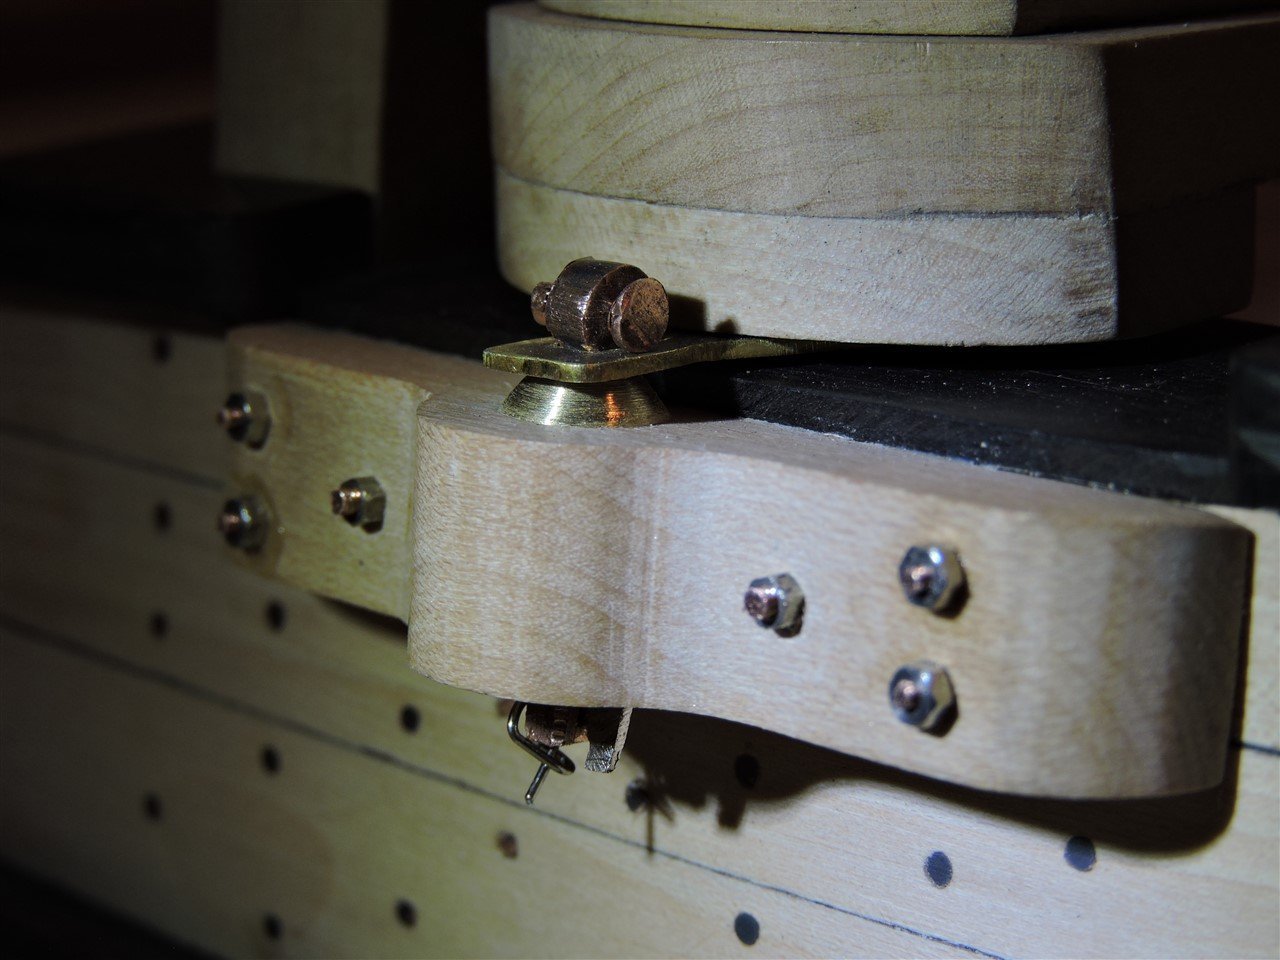
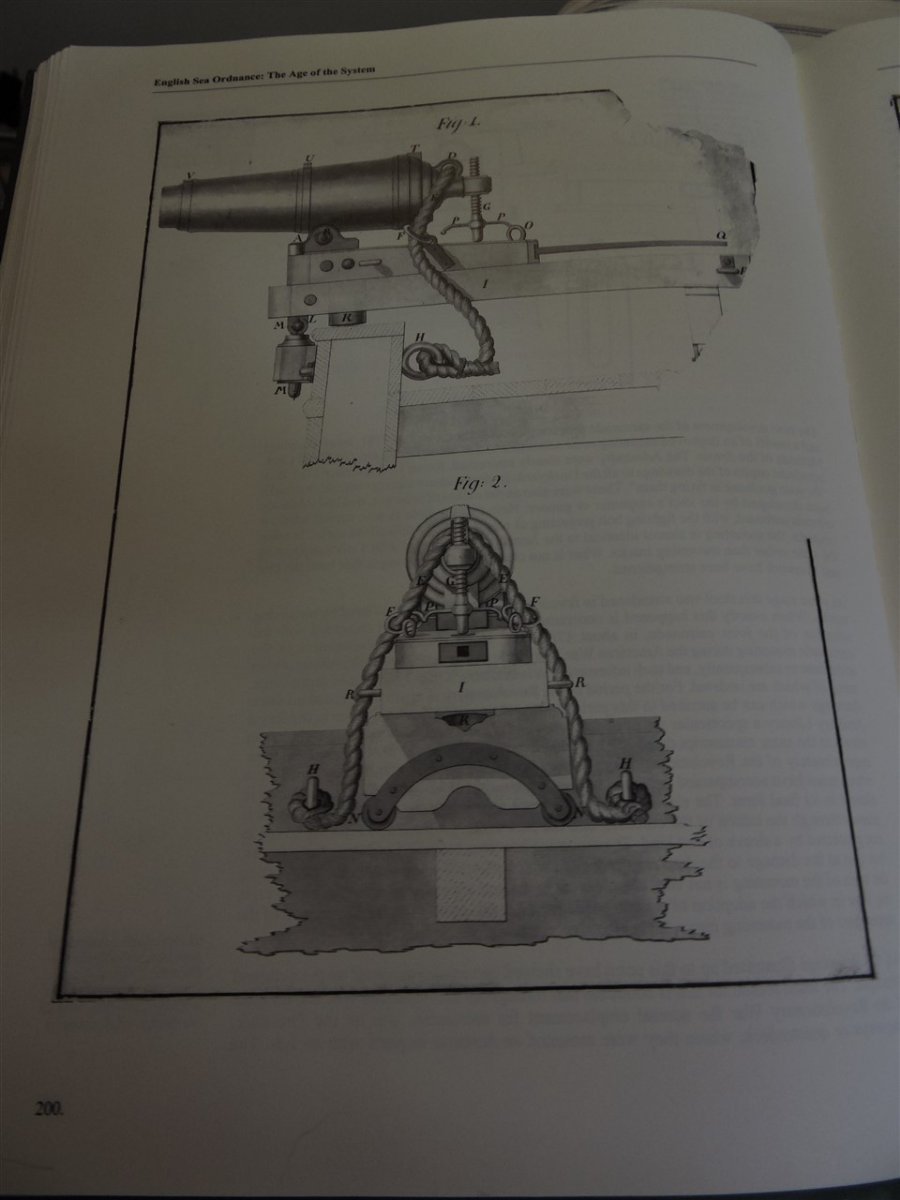
The R.A. Library is the Royal Artillery Library. The information I used was from "The History of English Sea Ordnance" by Adrian B. Caruana and on page 185 it states that between 1782 and 1783 the design changed from trunnions to a carronade loop also called "joint" Which did away with the quoin and handspike for elevation the alternative was using a screw for elevation.
Druxey
That is the same book I used for information. The carronade that I made was a 24-pdr cast by Carron in 1779 Length 32 inches.
- GrandpaPhil, davec, Thukydides and 9 others
-
12
-
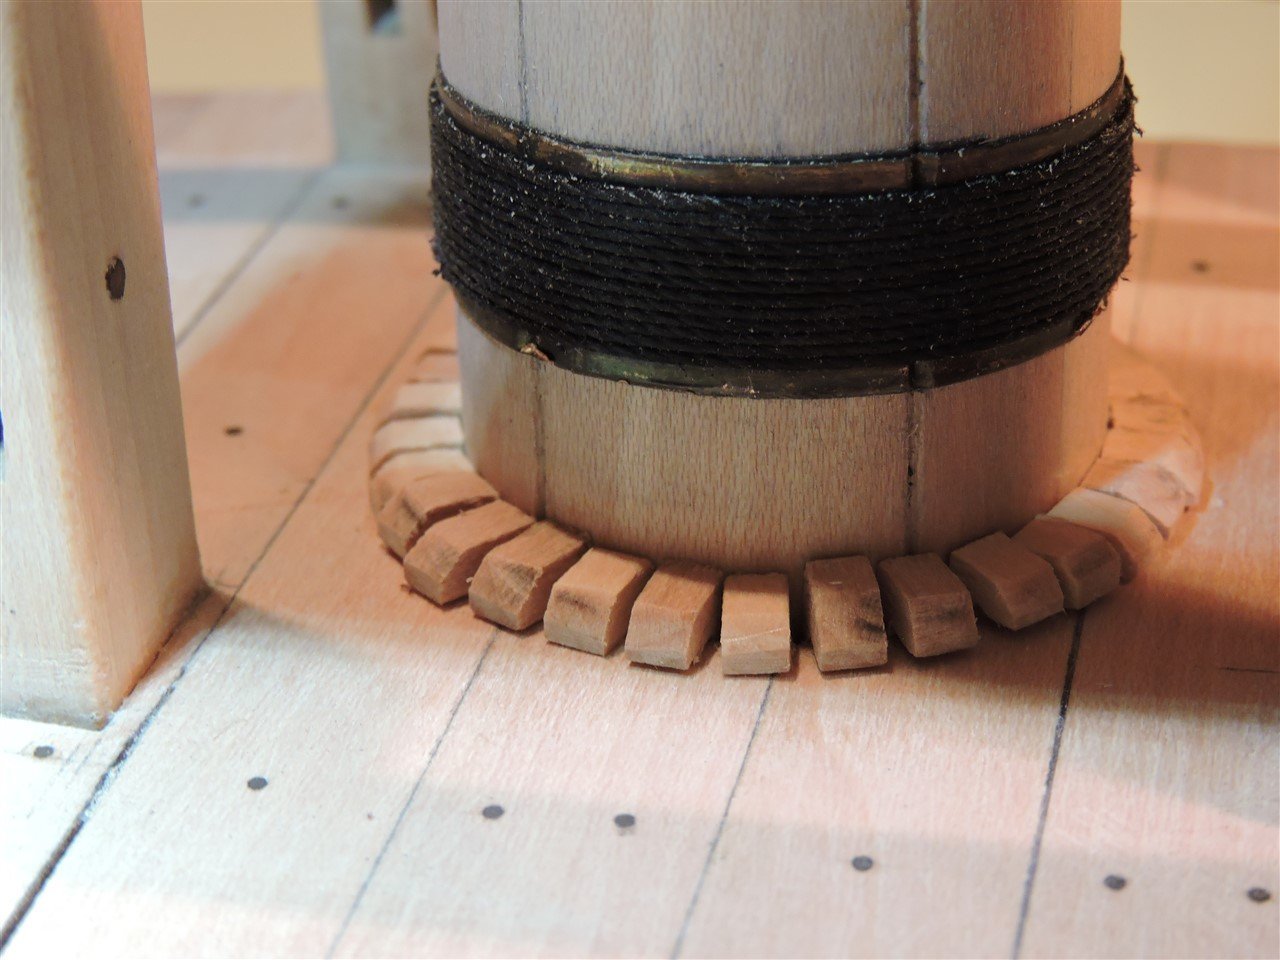
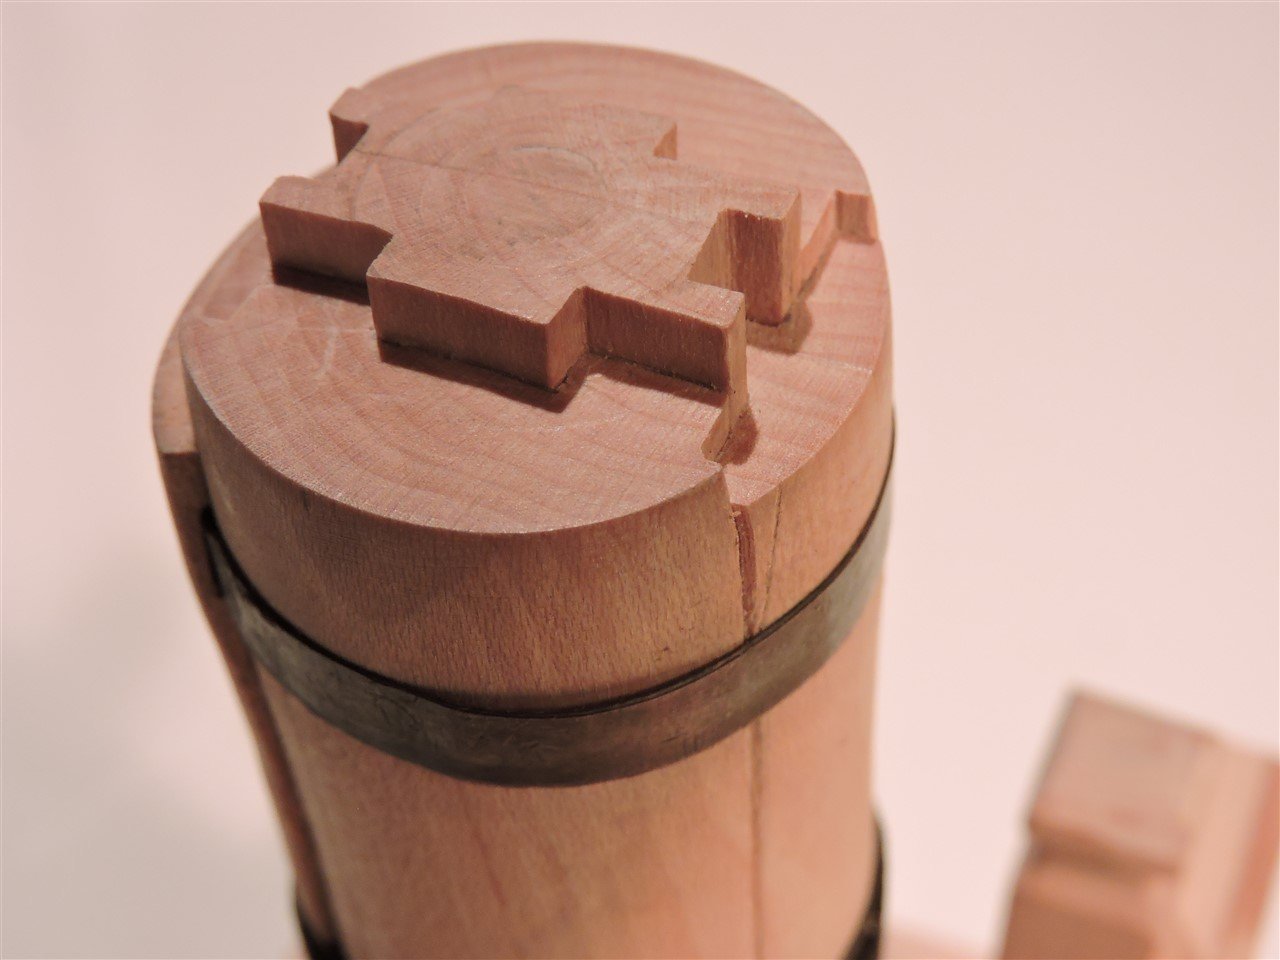
Here is my attempt to make a made up foremast, I glued up two 1" dogwood boards and turned the 1 1/2" mast. I then cut a 3/4" piece off the mast. To this I used rubber cement to glue a pattern of the mast pieces i wanted to cut out. On my scroll saw I used a 2/0 blade (.0087 X .0236) to cut the pieces of the made mast. With this size blade I can cut sharp 90 deg. angles. I then cut these pieces to different lengths and glued them up and attached it to the mast. The top copper band hides the seam. I also added the mast bands, front fish, and rope woolding.
Mike R
-
Carronades by Adrian B. Caruana "The History of English Sea Ordnance"
The main reason for carronades mounted on the outboard principle is doubtless that throughout the American War and for most of the Revolutionary War the normal emplacement for carronades was on the forecastle, gangways or quarterdeck, where they were mounted en barbette in ports with no lids.
Anonymous drawings probably dating from the 1790's of a joint carronade mounted on the outboard principle, with all its fittings (R.A. Library)
I will be using cherry, dogwood, ebony, and ipe. For the carronade I will turn it from 1" brass stock on my wood lathe, but first I turned one out of wood for practice.


-
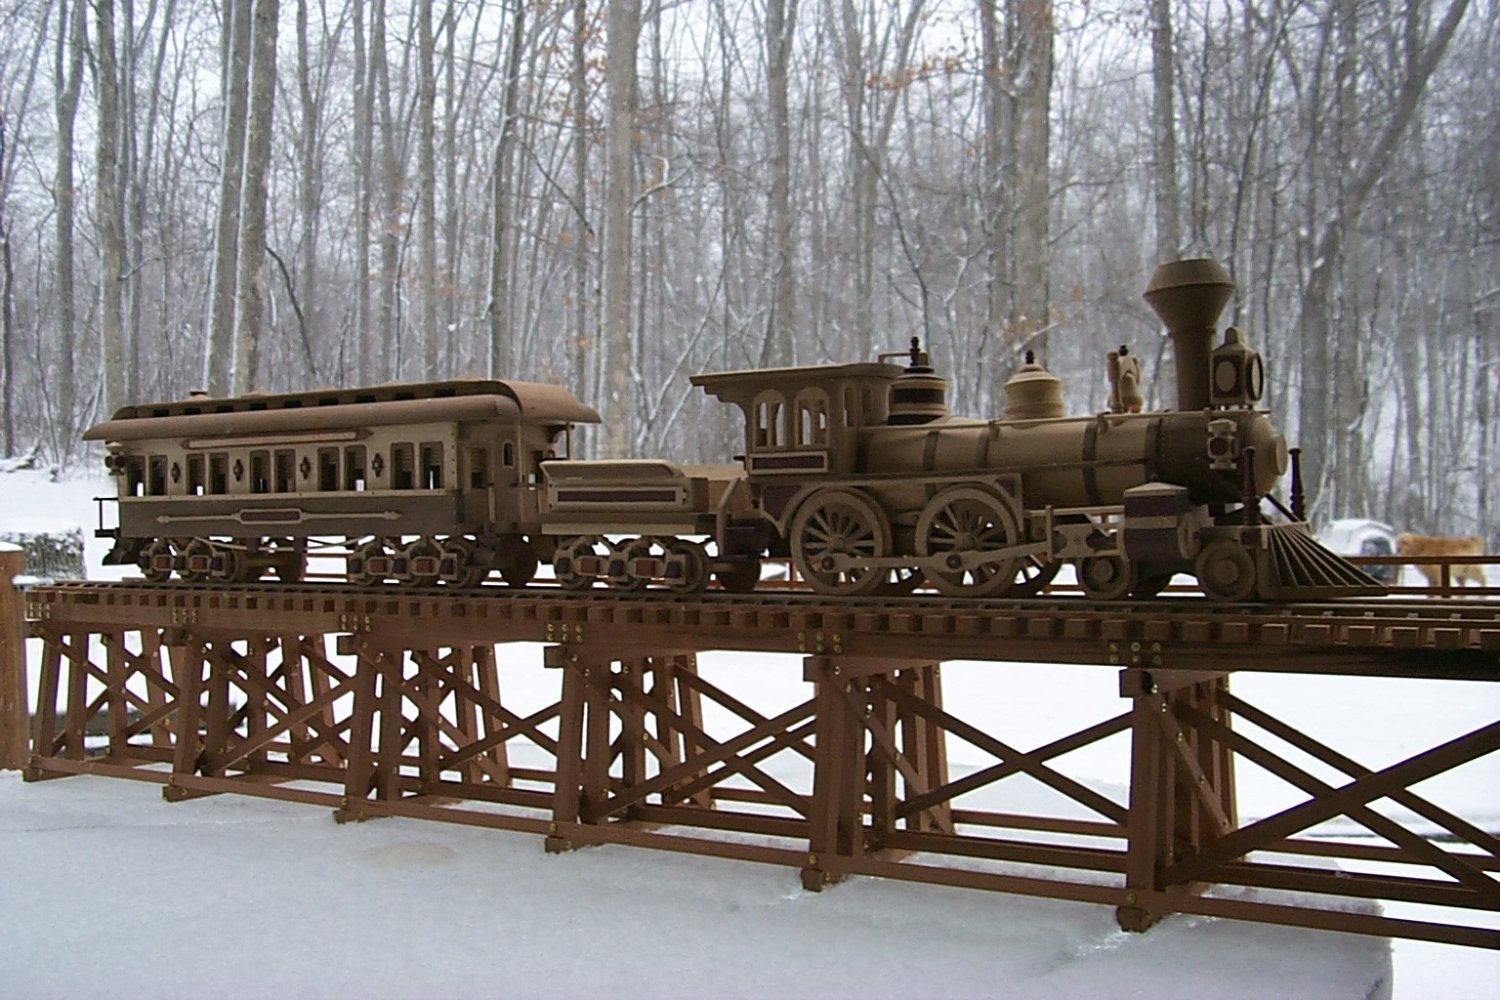
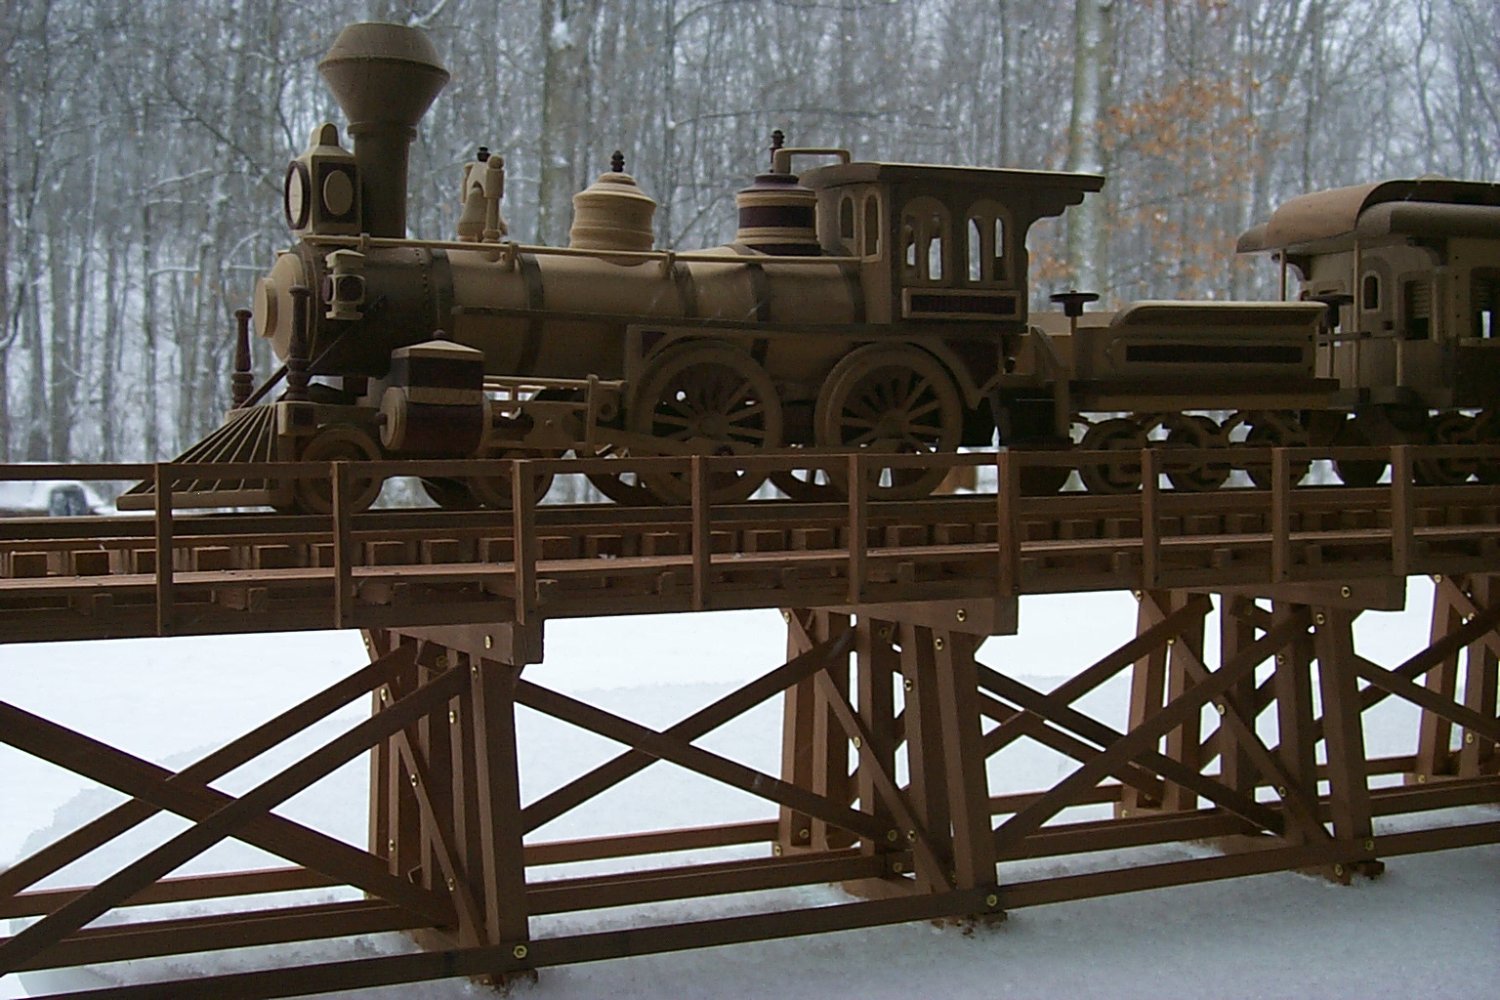
My very first scratch build wooden model was the Iron Horse Locomotive and Wagon. I built this in the 1990's. The plans for this were advertized in the back of several magazines. For the locomotive and cars I used walnut, dogwood, padauk, and purple heart. For the trestle bridge I used redwood, maple and walnut. This was G scale or about 1 : 24.
Mike R

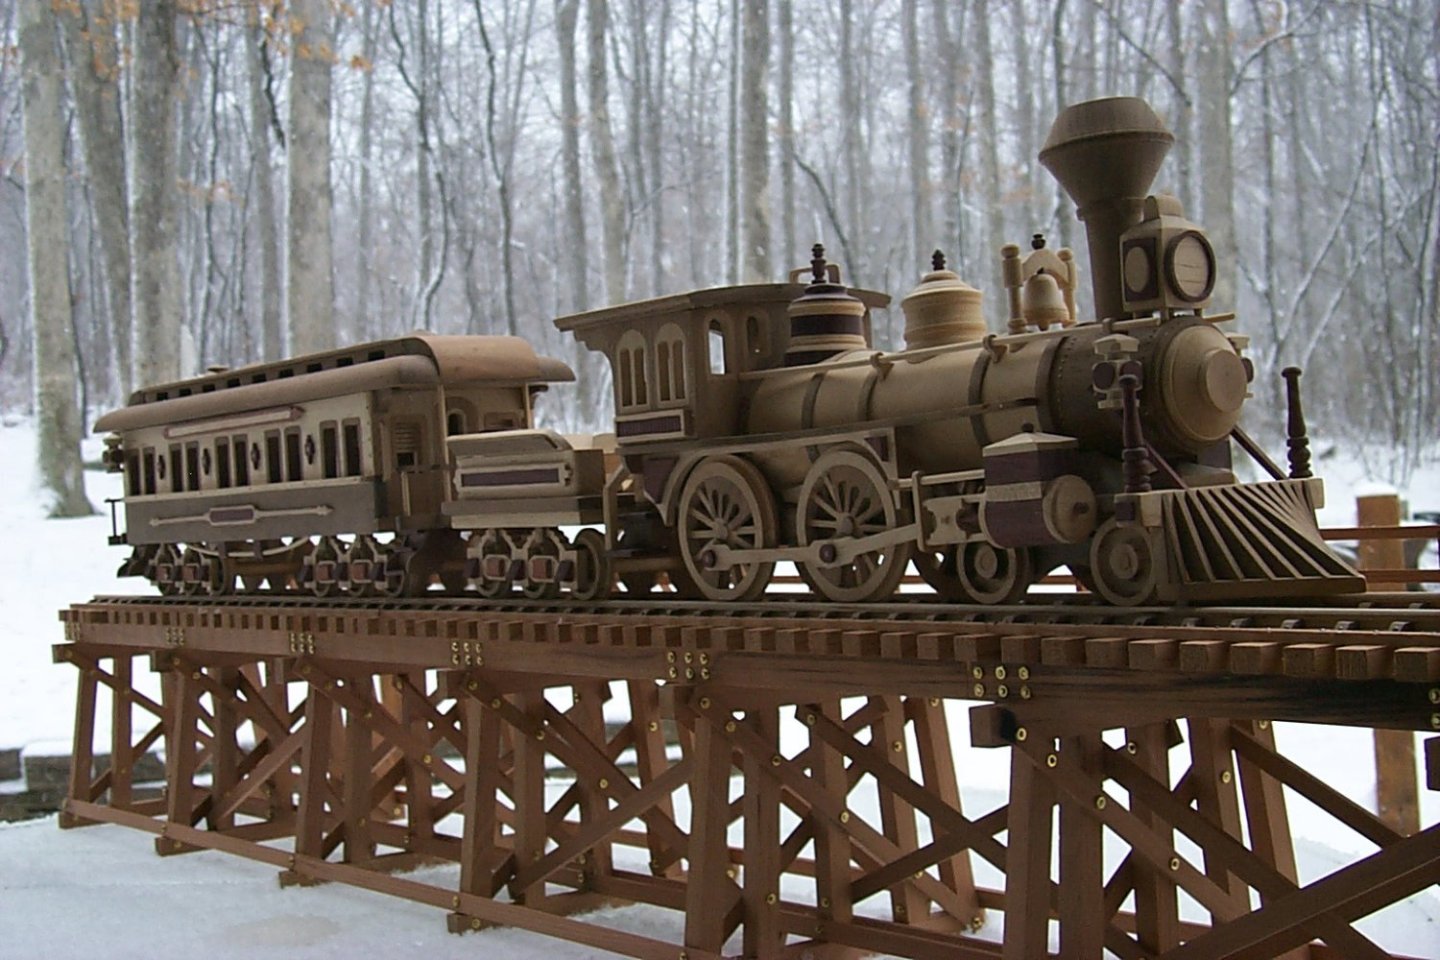
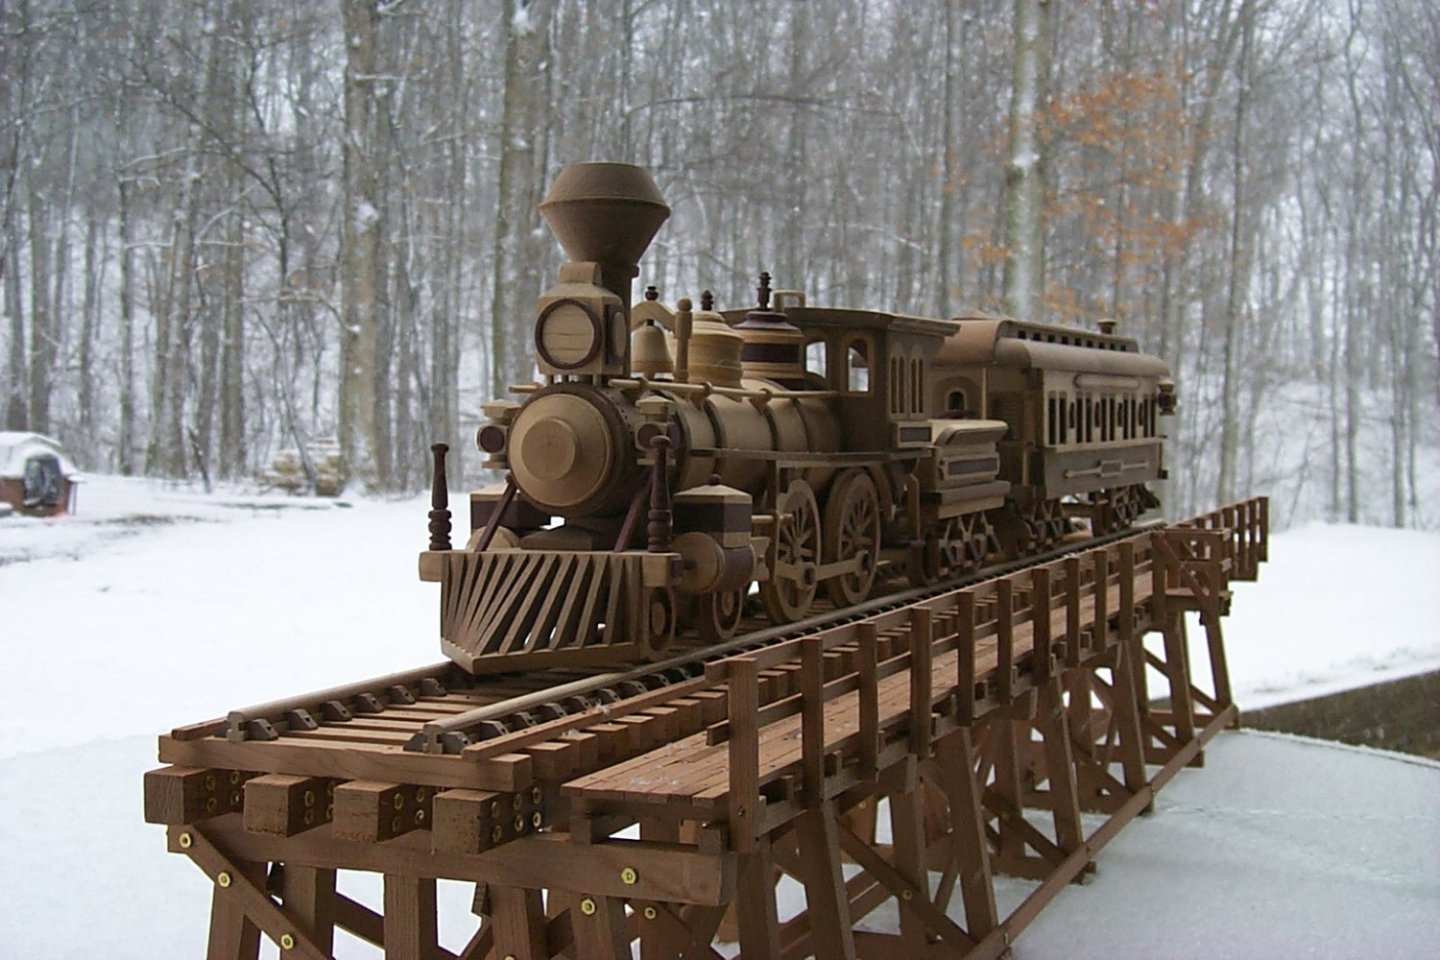
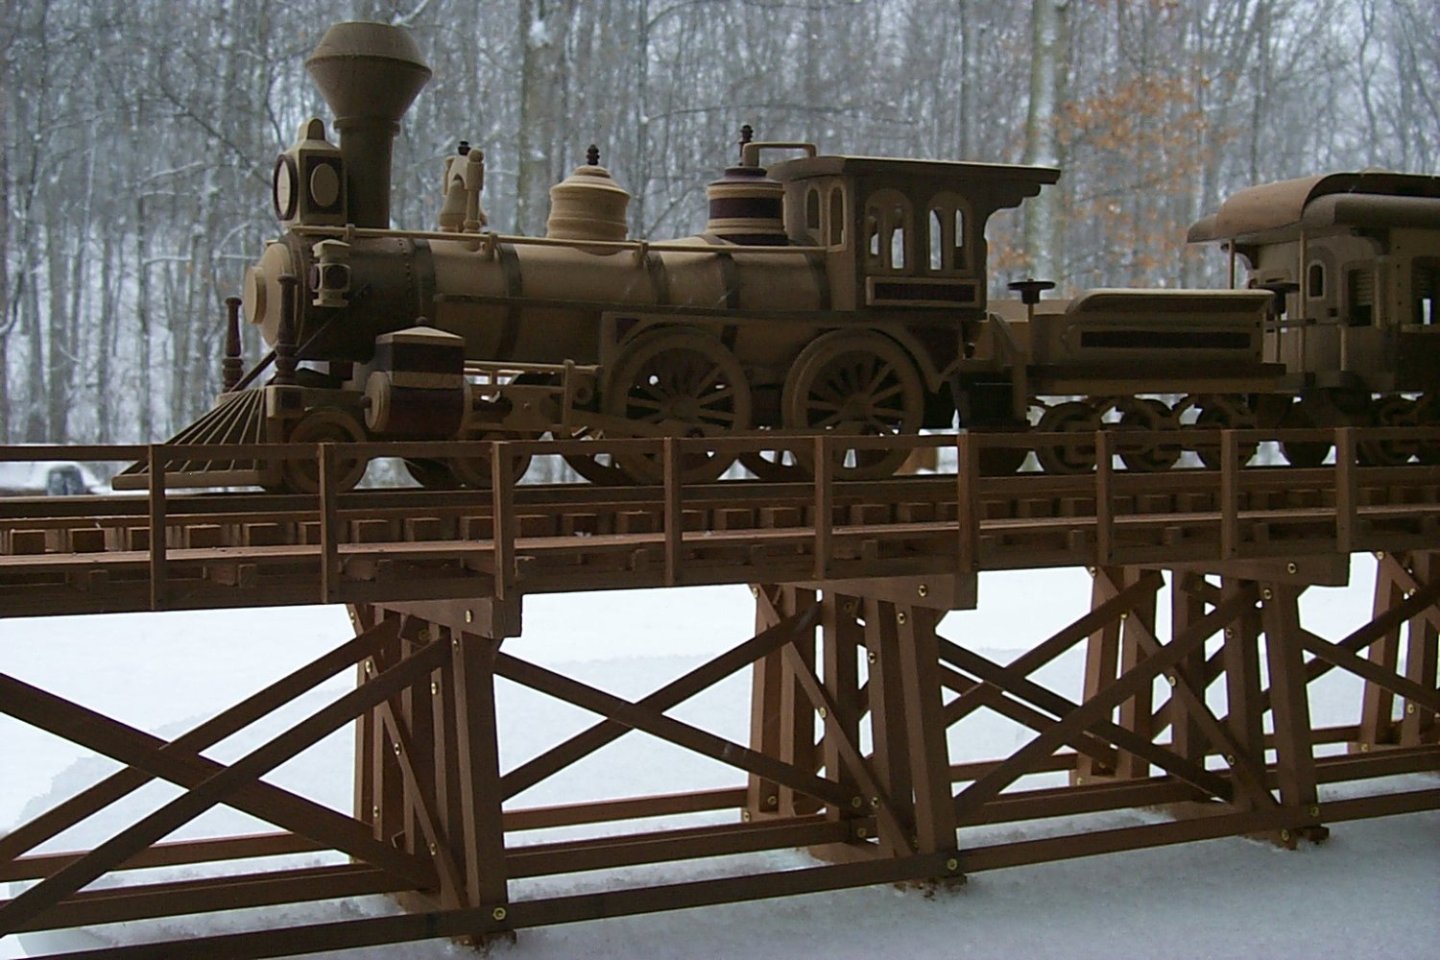
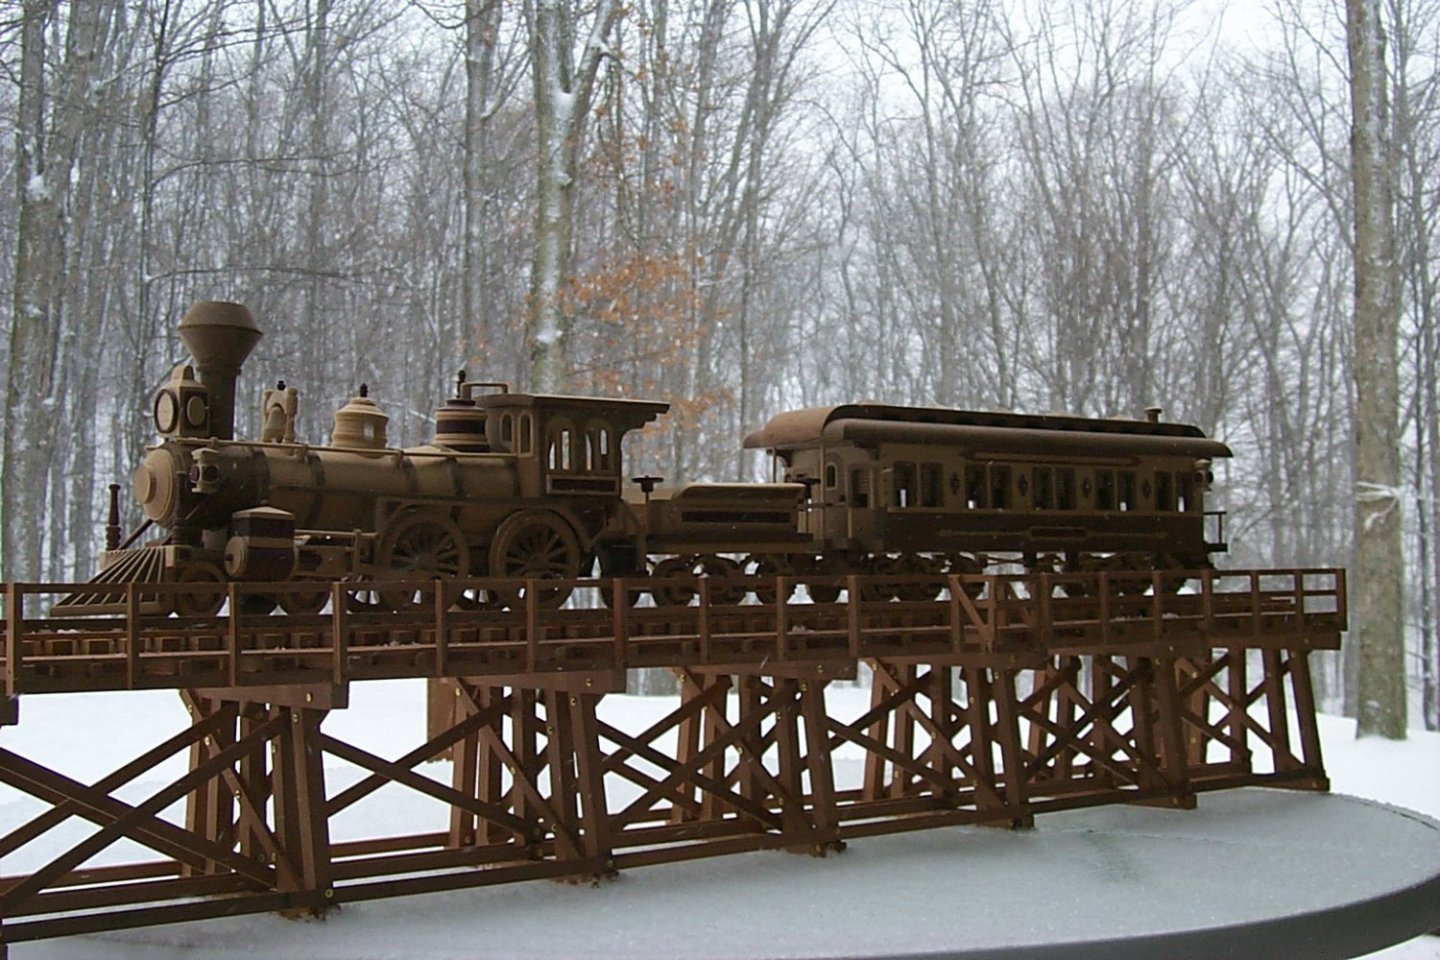
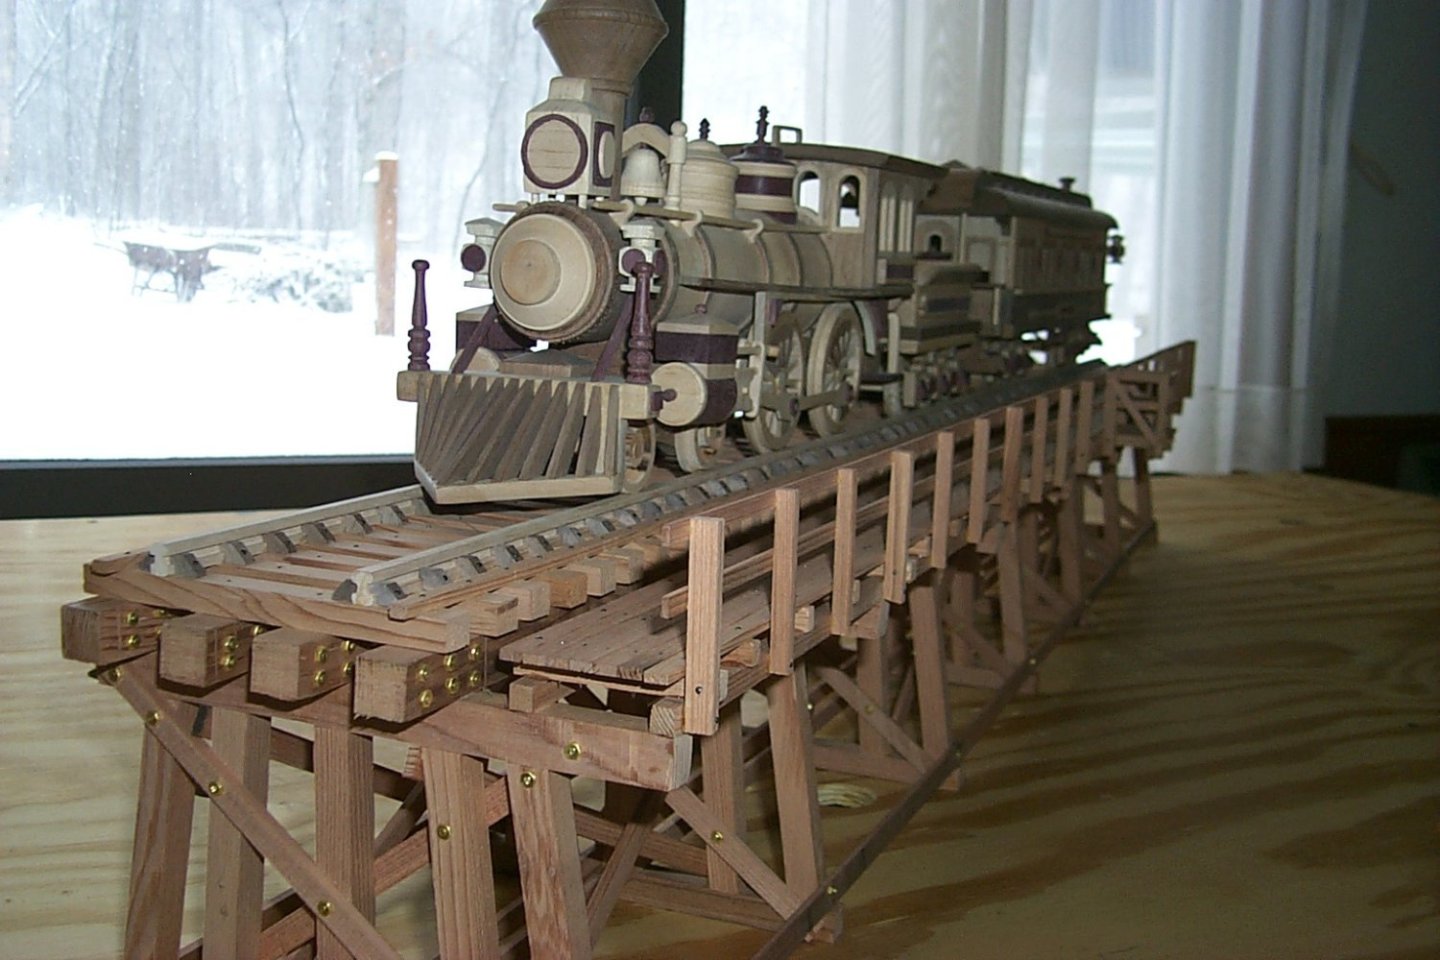
-
I had a lot of fun building this model. This model will be displayed with one of my half complete models when it is done, the HMS Pallas, which is in the back ground of the next few pictures.
Mike R
- GrandpaPhil, KARAVOKIRIS, LEGION 12 and 5 others
-
7
-
1
-
Allan
I am from western PA. so our summer temperatures were not to bad and our last few winters have been mild. Thanks, now I know how to measure barrel length. I have been thinking of another little project, a carronade, but I
have not decided on a sliding carriage or one with wheels.
Mike
-
Allan
You asked if all the Armstrong pattern castings have a chase astragal and fillets between the muzzle astragal and the second reinforce ring and a button ring or were some cast without these? I don't Know. I found this pattern for the barrel on line and I scaled it down from 8 1/2 ft. to 7 1/2 ft. which is the length of the guns on the Pallas. I will be getting back to my Flying Fish soon. Summer time is a slow time for modeling, I will be working outside in the yard and garden.
Mike R
-
Jared
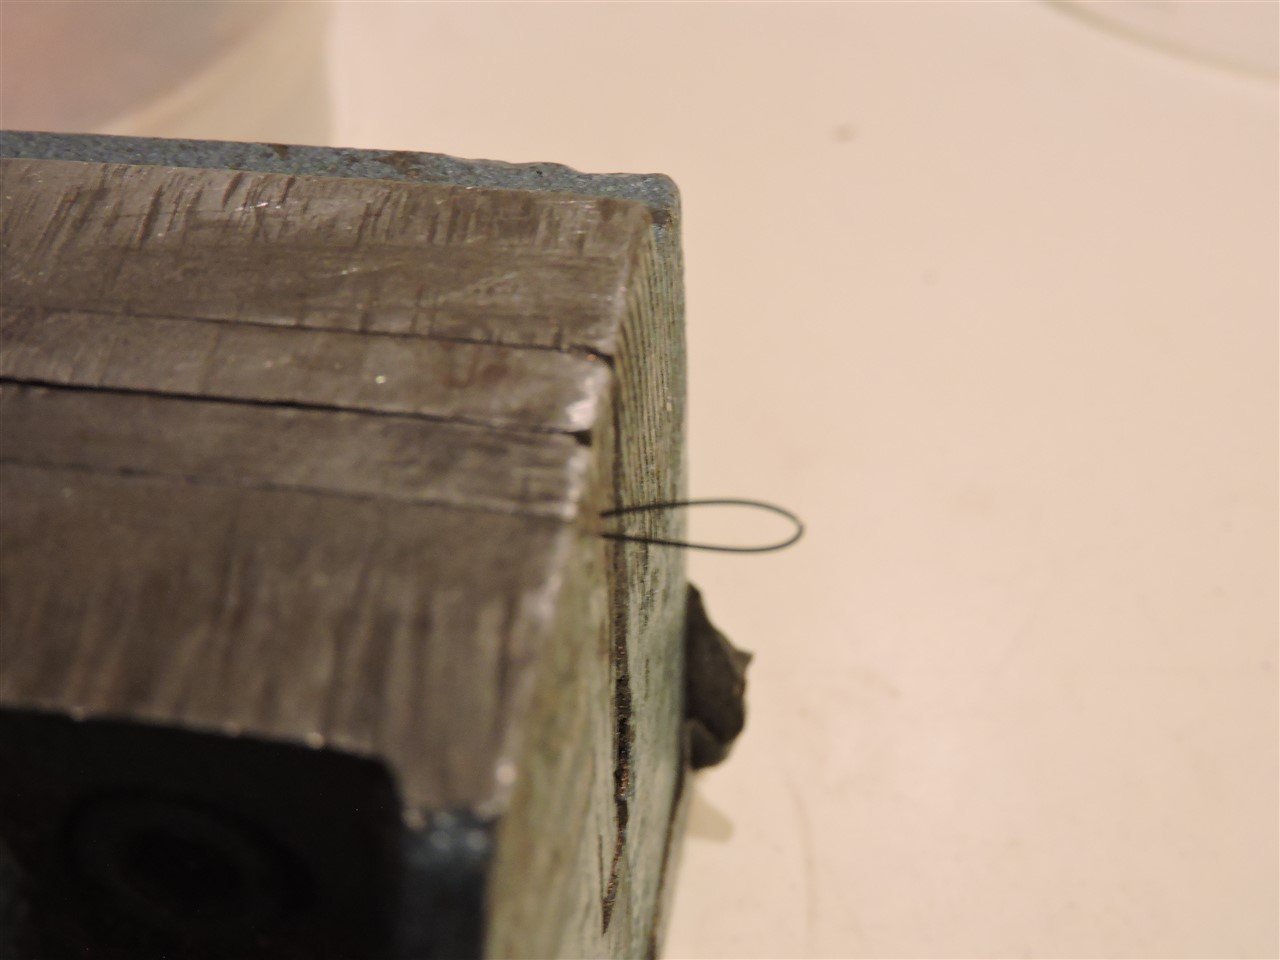
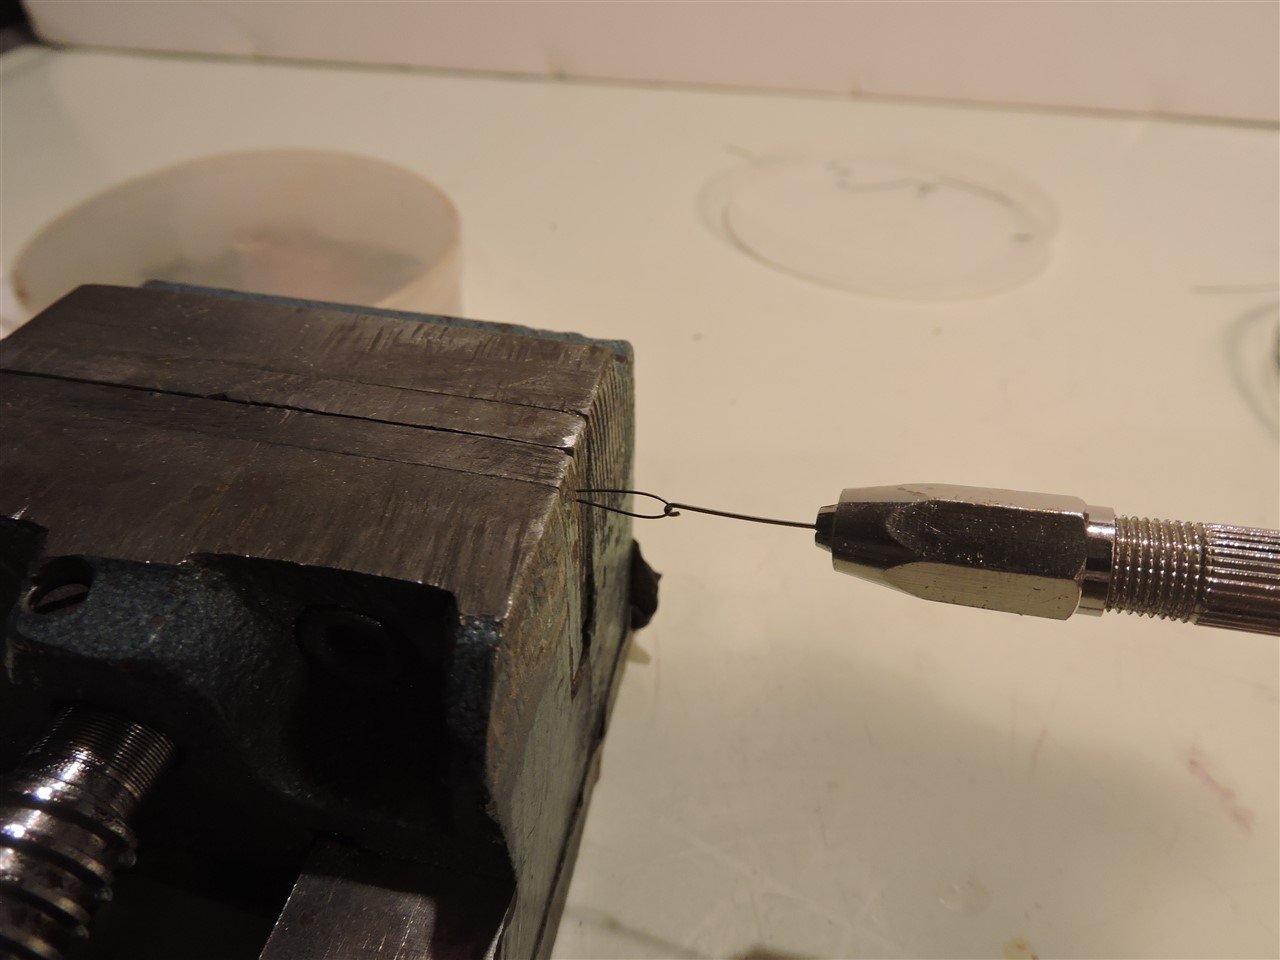
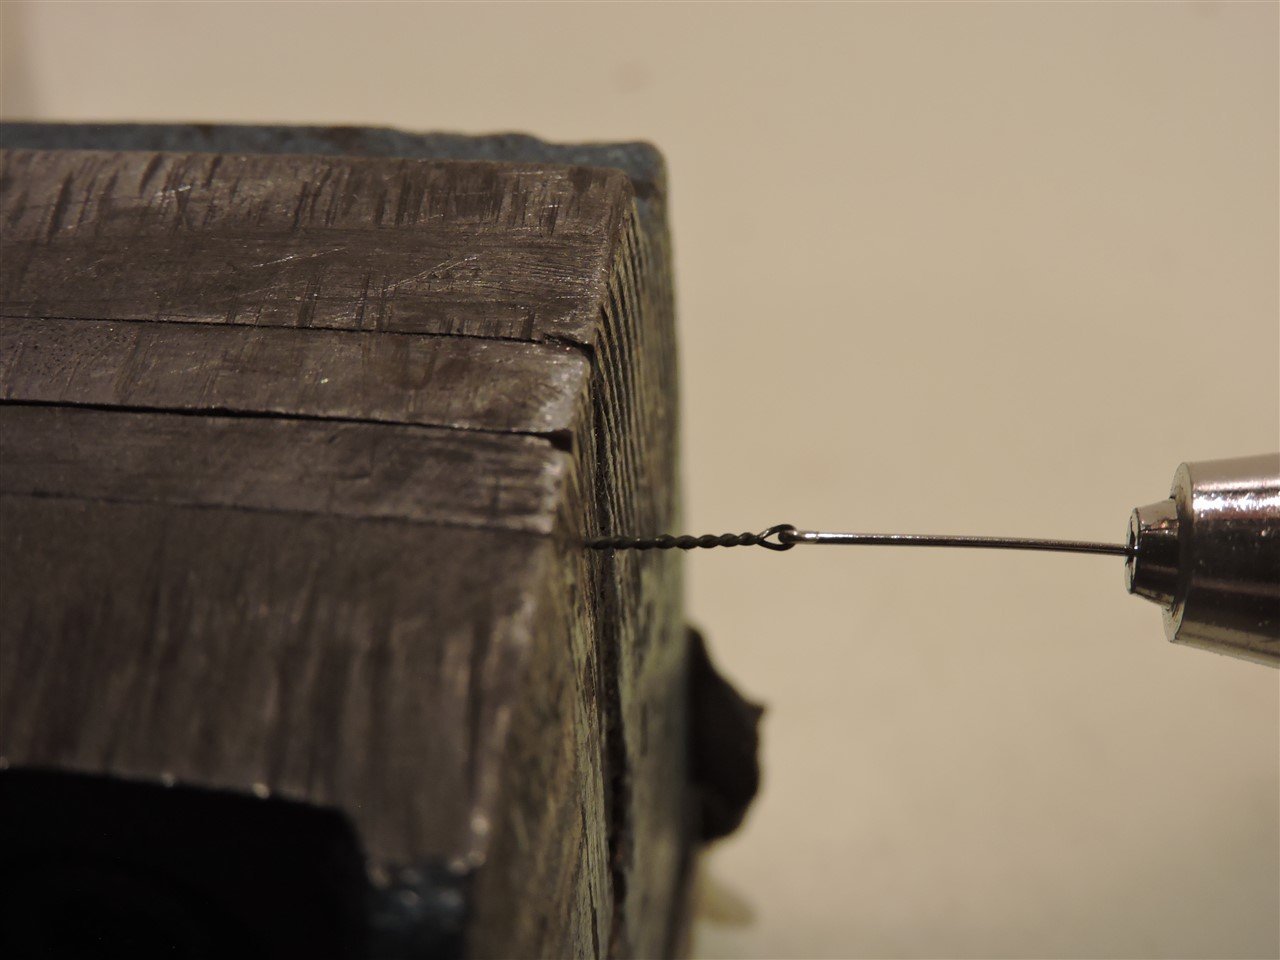
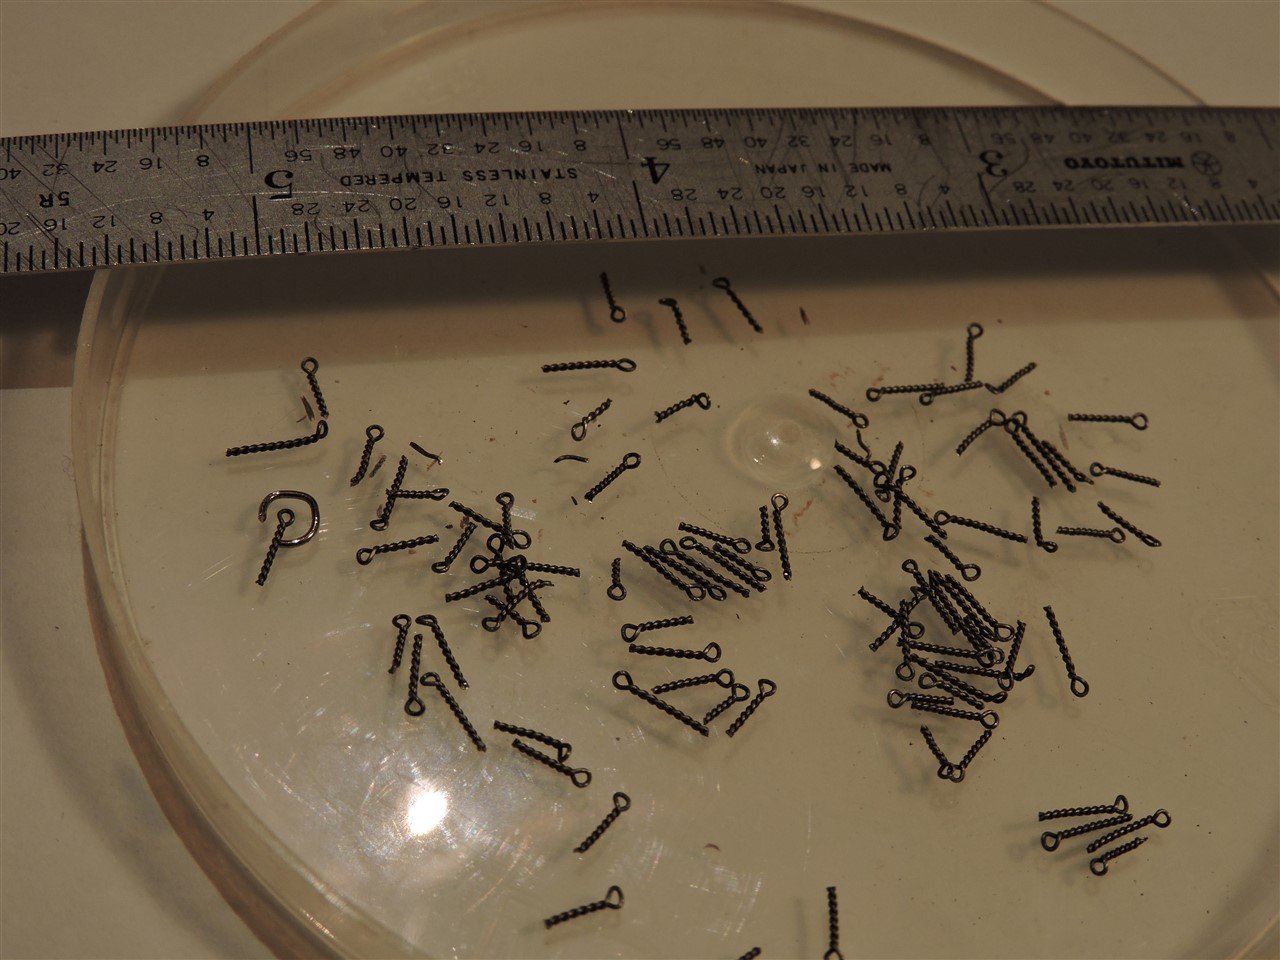
I used the same wire (.010") to pass through the eye bolts. I think it looks pretty close to scale. But my scale is 3/16 to1 not 1/8 to 1
Mike R
-
Jared
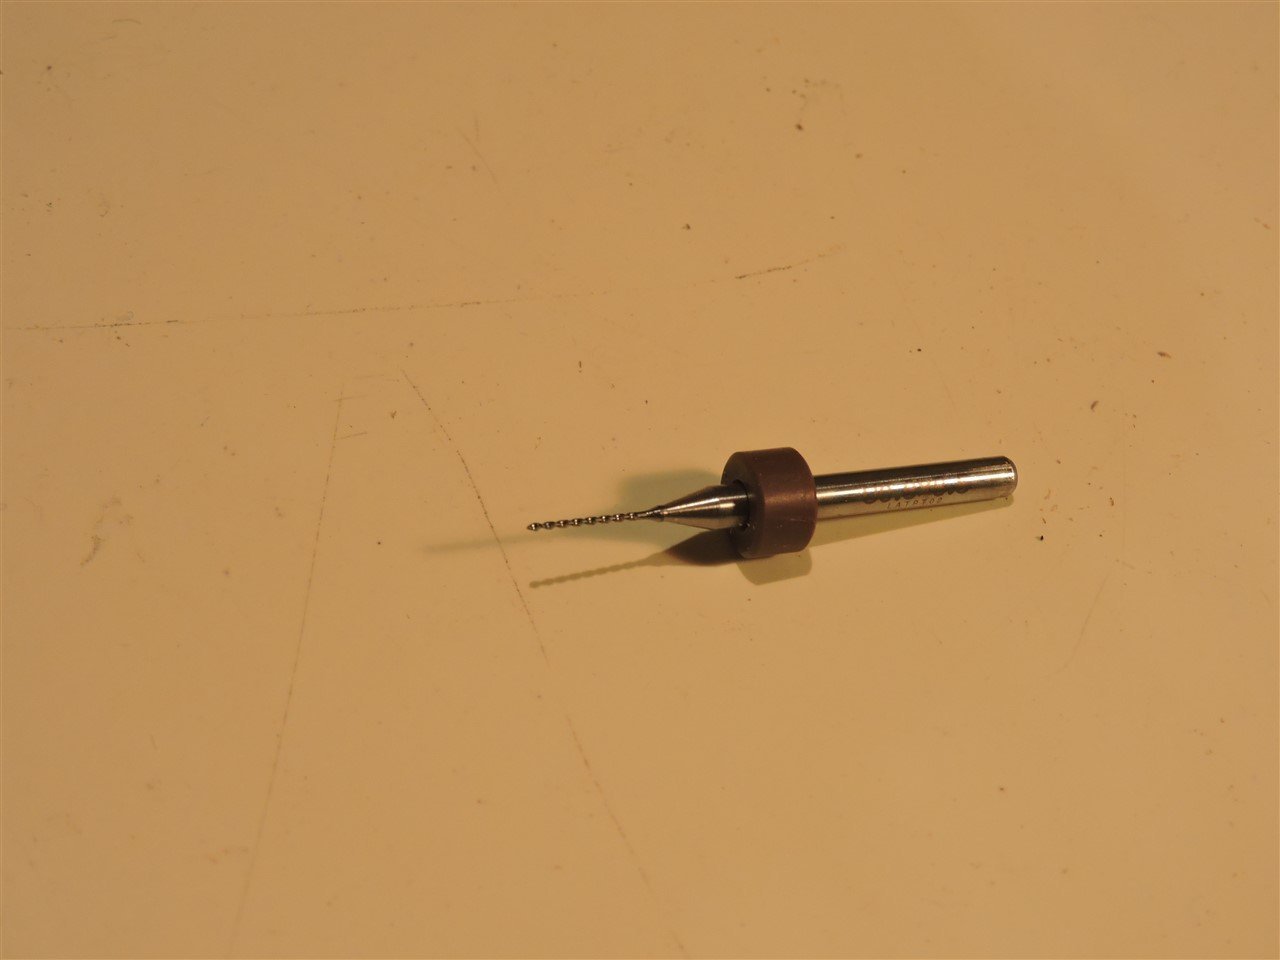
This is how I made the backstays for my Flying Fish. I used .010 wire which cut in about 1" lengths and bent the wire in half. For the holes in the yard I used a .6mm drill bit.
Mike R

-
-
Hamilton
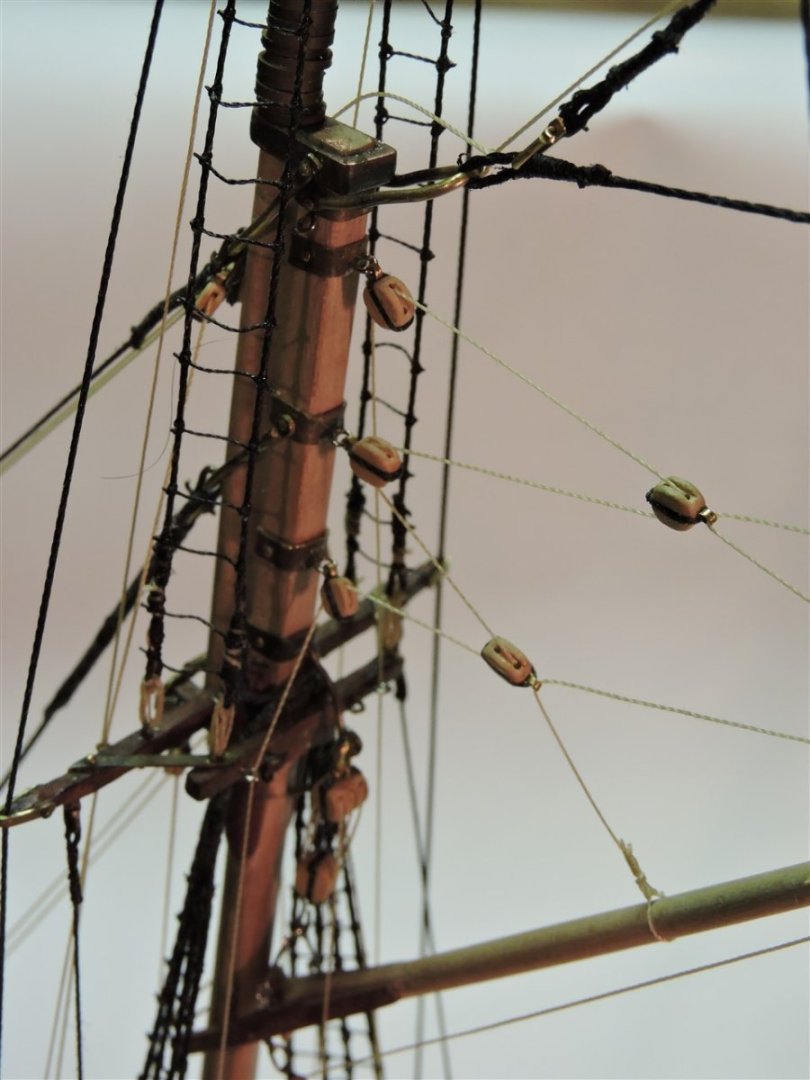
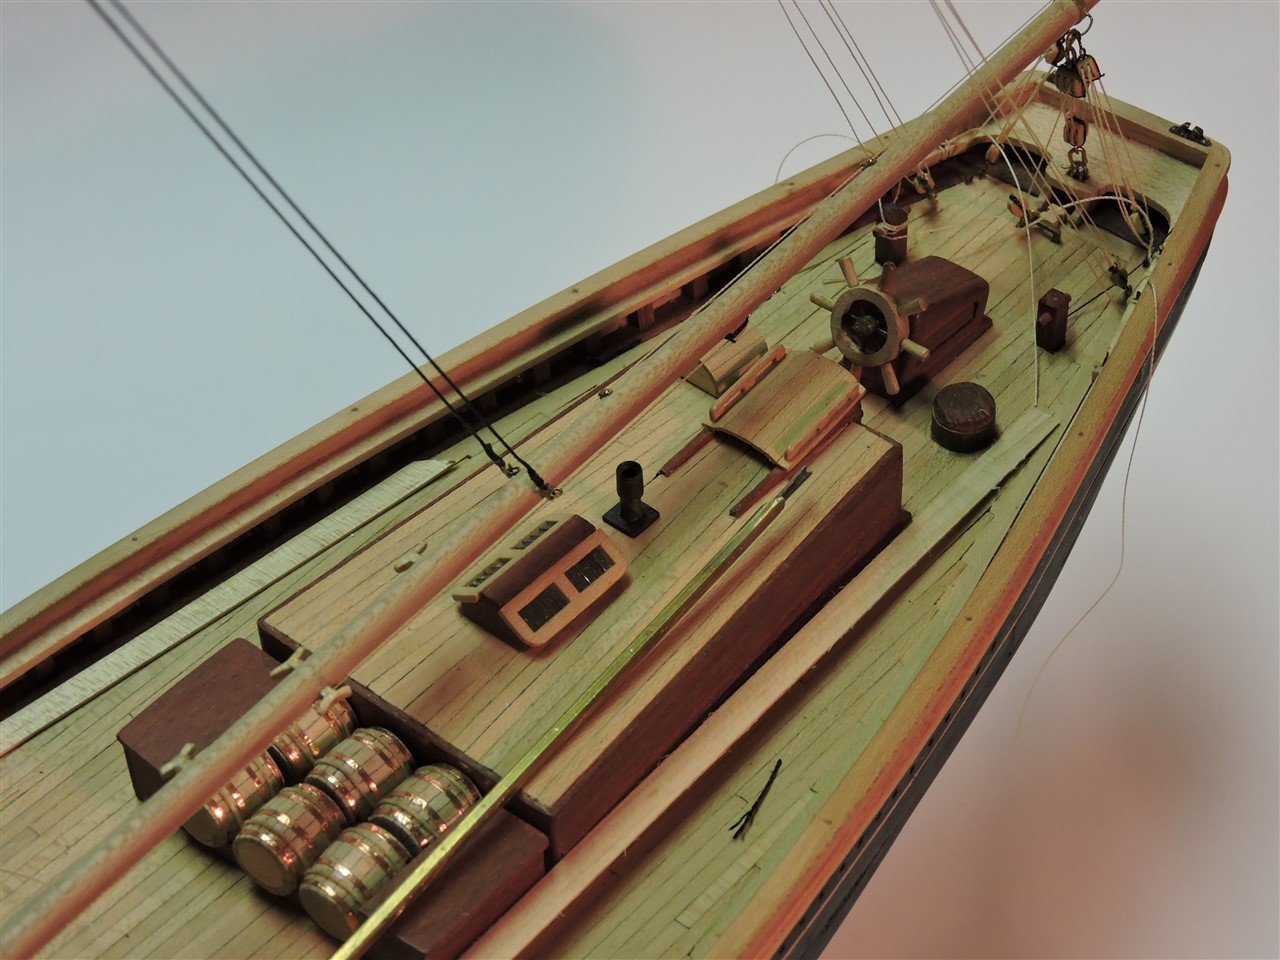
It looks like you are doing a great job on the Bluenose, it is one of my favorite models. The three blocks you have fixed on the foremast I think are upside down. The hole for the rope should be on the top of the block closer to the mast so that the rope passes over the sheave.
Mike
- hamilton and GrandpaPhil
-
2
-
-
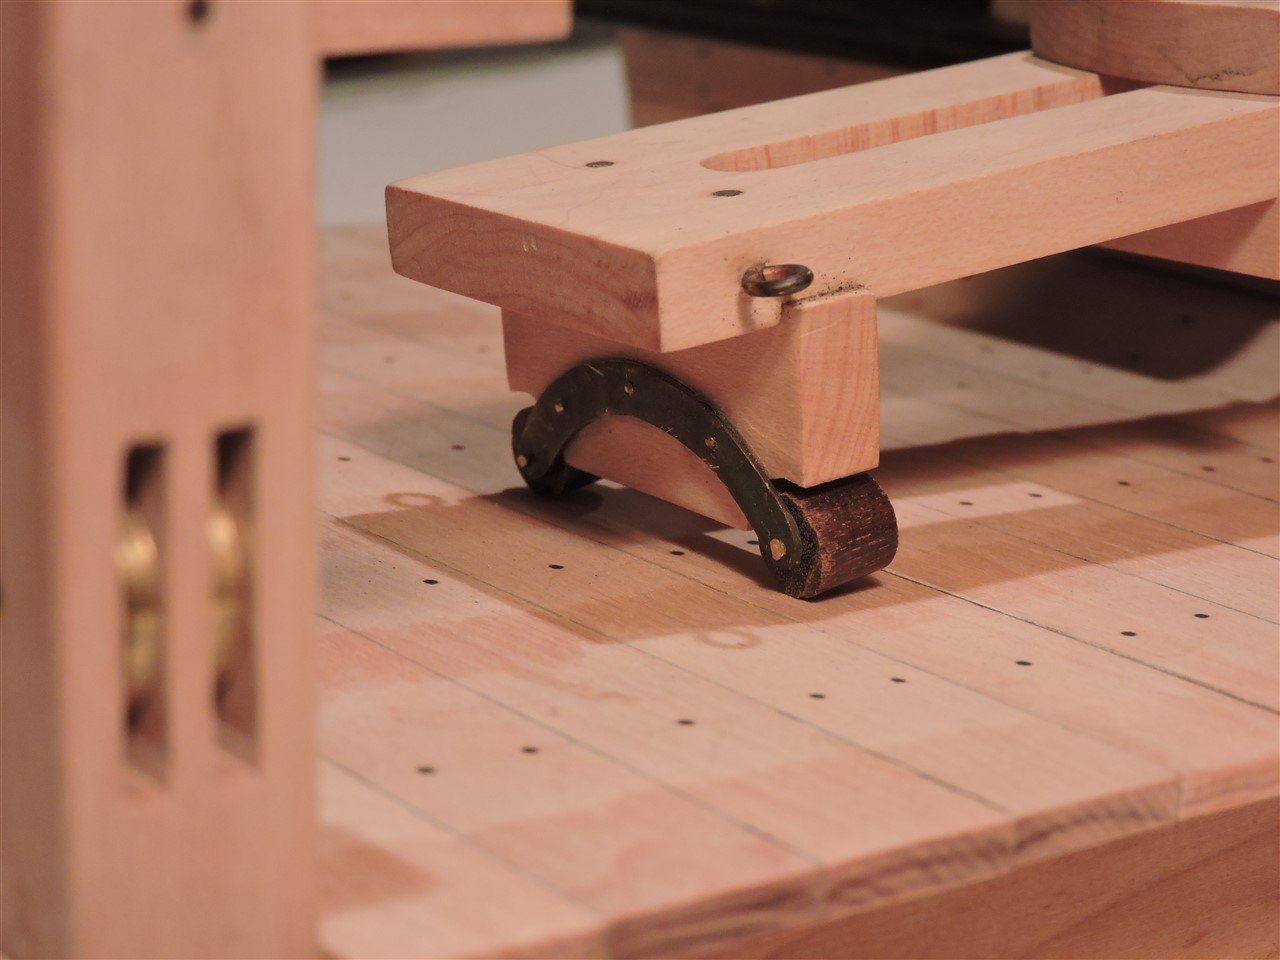
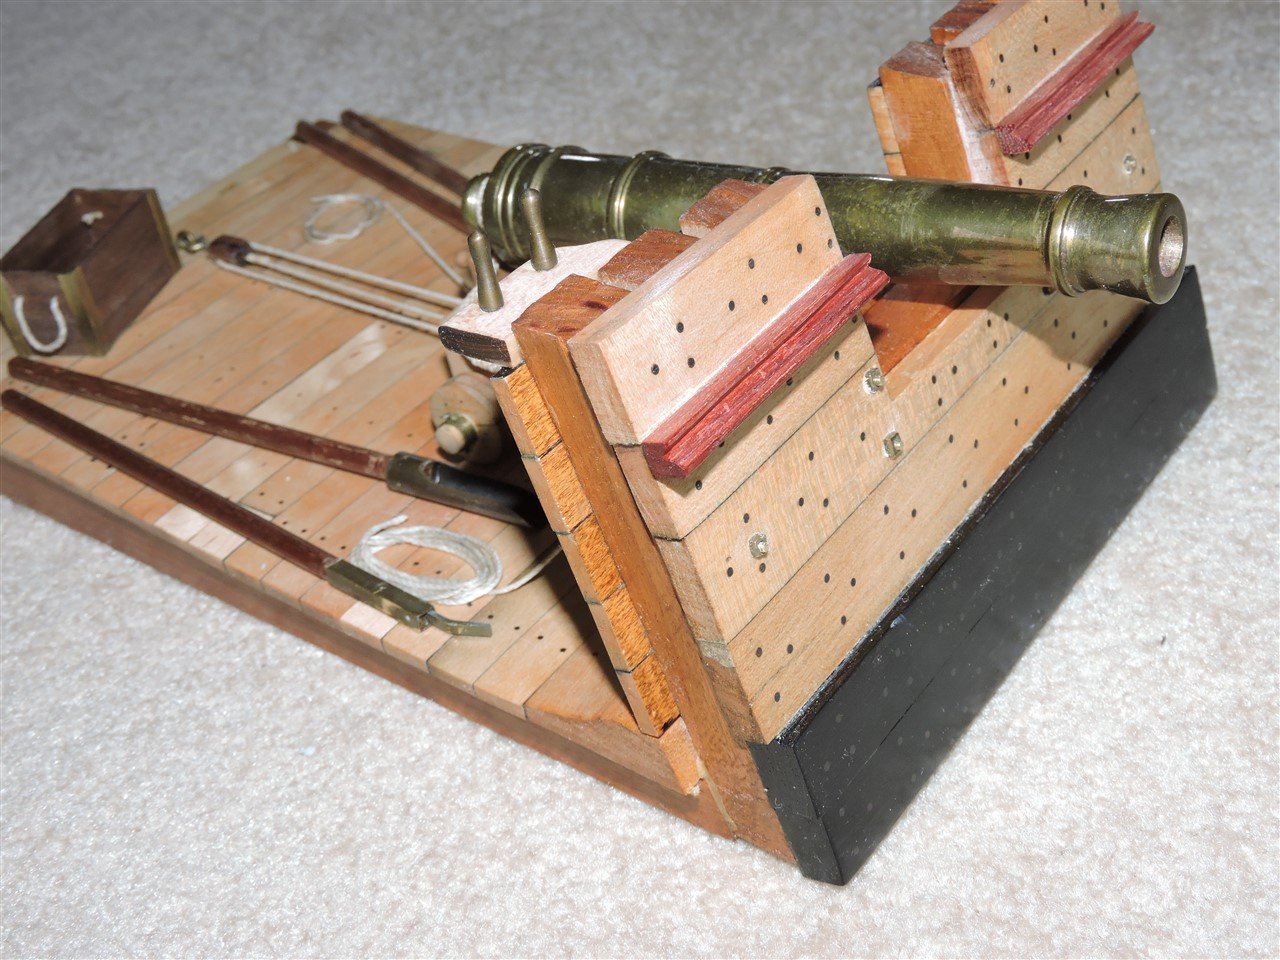
I took some time off from working on my model of the Flying Fish and built this model of a 12 pound cannon. This was something that I have been wanting to build for a long time. I used cherry for the frames and beams, dogwood for the planking and deck, ebony for the wales, and pink ivory wood for the molding. I made the blocks and gun tools out of ipe. The gun was turned on my wood lathe starting with 1" brass bar stock.
The Venus class of 36-gun frigates were designed by Thomas Slade, in 1756, the Surveyor of the Navy and former Master Shipwright at Deptford Dockyard. Alongside their smaller cousin, the 32-gun Southampton class, the Venus-class represented an experiment in ship design; fast, medium-sized vessels capable of overhauling smaller craft and singlehandedly engaging enemy cruisers or privateers.[1] As a further innovation, Slade borrowed from contemporary French ship design by removing the lower deck gun ports and locating the ship's cannons solely on the upper deck. This permitted the carrying of heavier ordinance without the substantial increase in hull size which would otherwise have been required in order to keep the lower gun ports consistently above the waterline.[2] The lower deck was instead used for additional stores, enabling Venus-class frigates to remain at sea for longer periods without resupply.[3]
Armament
Pallas' principal armament was 26 iron-cast twelve-pound cannons, located along her upper deck. The guns were constructed with shorter barrels as traditional twelve-pound cannons were too long to fit within the frigate's narrow beam.[4] Each cannon weighed 28.5 long cwt (3,200 lb or 1,400 kg)[5] with a gun barrel length of 7 feet 6 inches (2.29 m) compared with their 8 feet 6 inches (2.59 m) equivalent in larger Royal Navy vessels.[4]
The twelve-pound cannons were supported by ten six-pounder guns, eight on the quarterdeck and two on the forecastle, each weighing 16.5 long cwt (1,800 lb or 800 kg) with a barrel length of 6 feet (1.8 m).[2] Taken together, the twelve-pound and six-pound cannons provided a broadside weight of 189 pounds (86 kg).[6] She was also equipped with twelve 1⁄2-pound swivel guns for anti-personnel use.[5] These swivel guns were mounted in fixed positions on the quarterdeck and forecastle.[4]

-
Allan
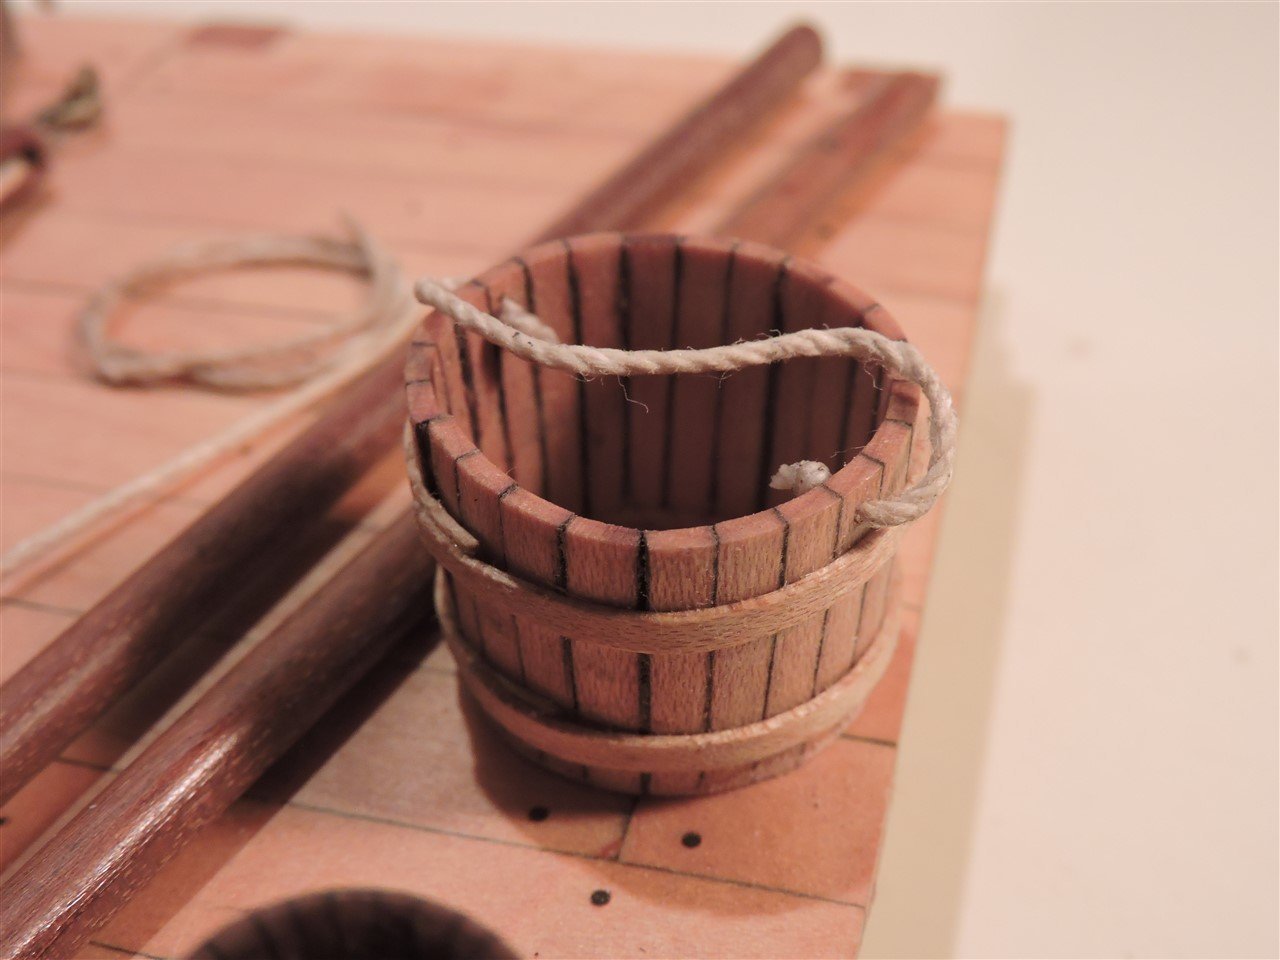
Several years ago 90% of the dogwood trees in my area died off. I cut down several trees in my yard and I have been using the wood for my models. It is a hardwood that cuts and sands and keeps sharp angles very nicely. It turns great in a lathe also. The color of the barrel is off do to the lighting. The bluenose deck above is the color of the dogwood.
MikeR
-
-
-
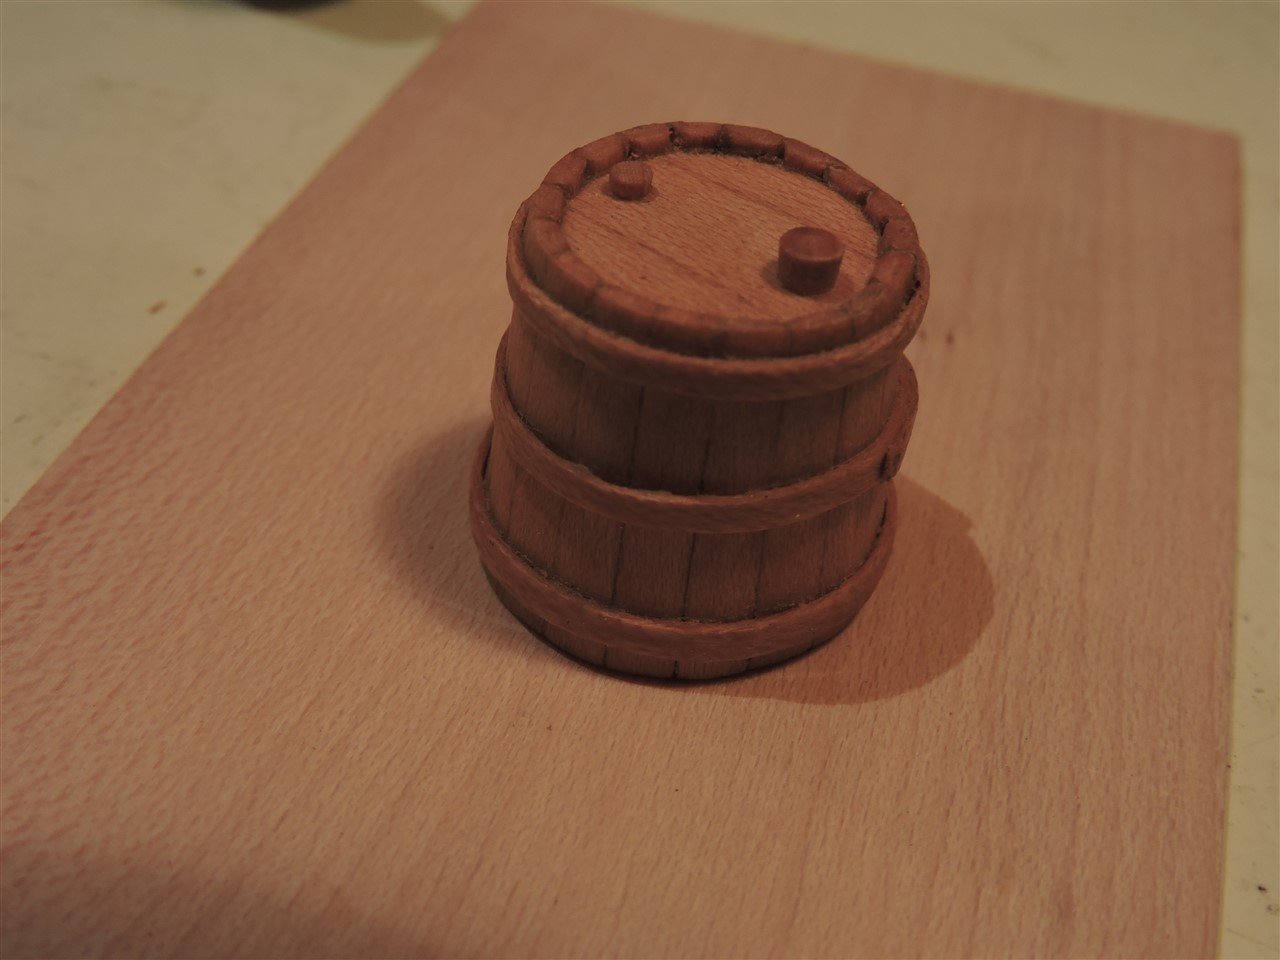
Hello TK1
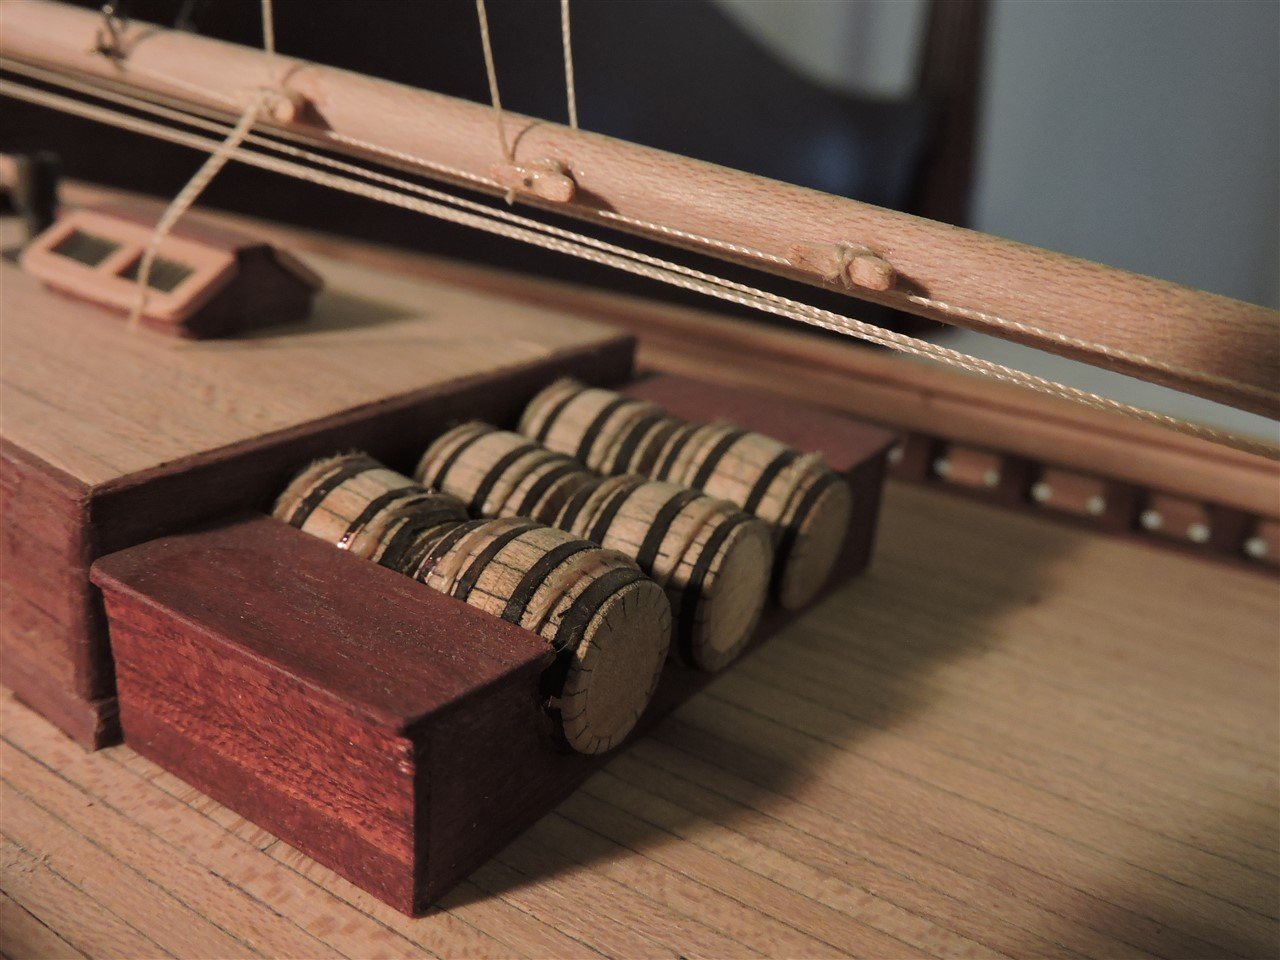
For my model of the Bluenose, these are the barrels I made.
I used a Byrnes table saw and tilt table to cut 6 strips. The material was 24" X 4" X 1/4" I set the tilt table to 9 degrees and cut the strips. I ran the wood through the saw and cut 1 side of the barrel stave then I turned the wood over and advanced the saw fence 3/32" then cut the other side of the barrel stave. After I cut the 6 strips I used a black magic marker to color one side of each strip. Then I cut the strips into manageable 6" lengths and glued groups of 5 strips together. After the glue was set I glued 4 of the groups together to make 1 cylinder. I then used my lathe to shape the barrels, and cut the ends of the barrel to install a top and bottom. For the barrel hoops I used copper tape which I cut to 1/16"widths, and then liver of sulfur to blacken the copper bands.
MikeR


Outboard mounted carronade on the forecastle of a 1790's frigate by MikeR - FINISHED
in - Build logs for subjects built 1751 - 1800
Posted
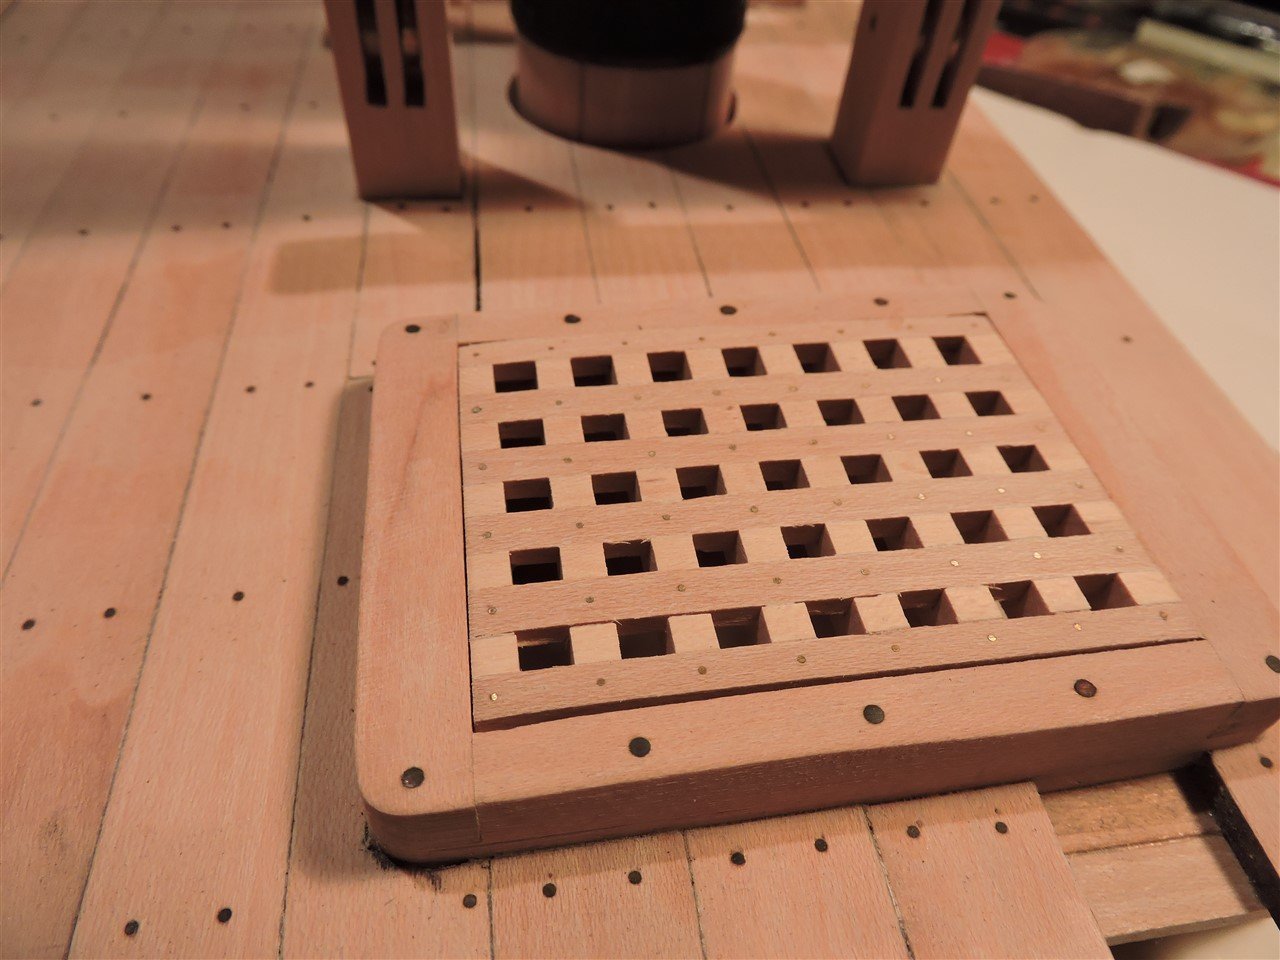
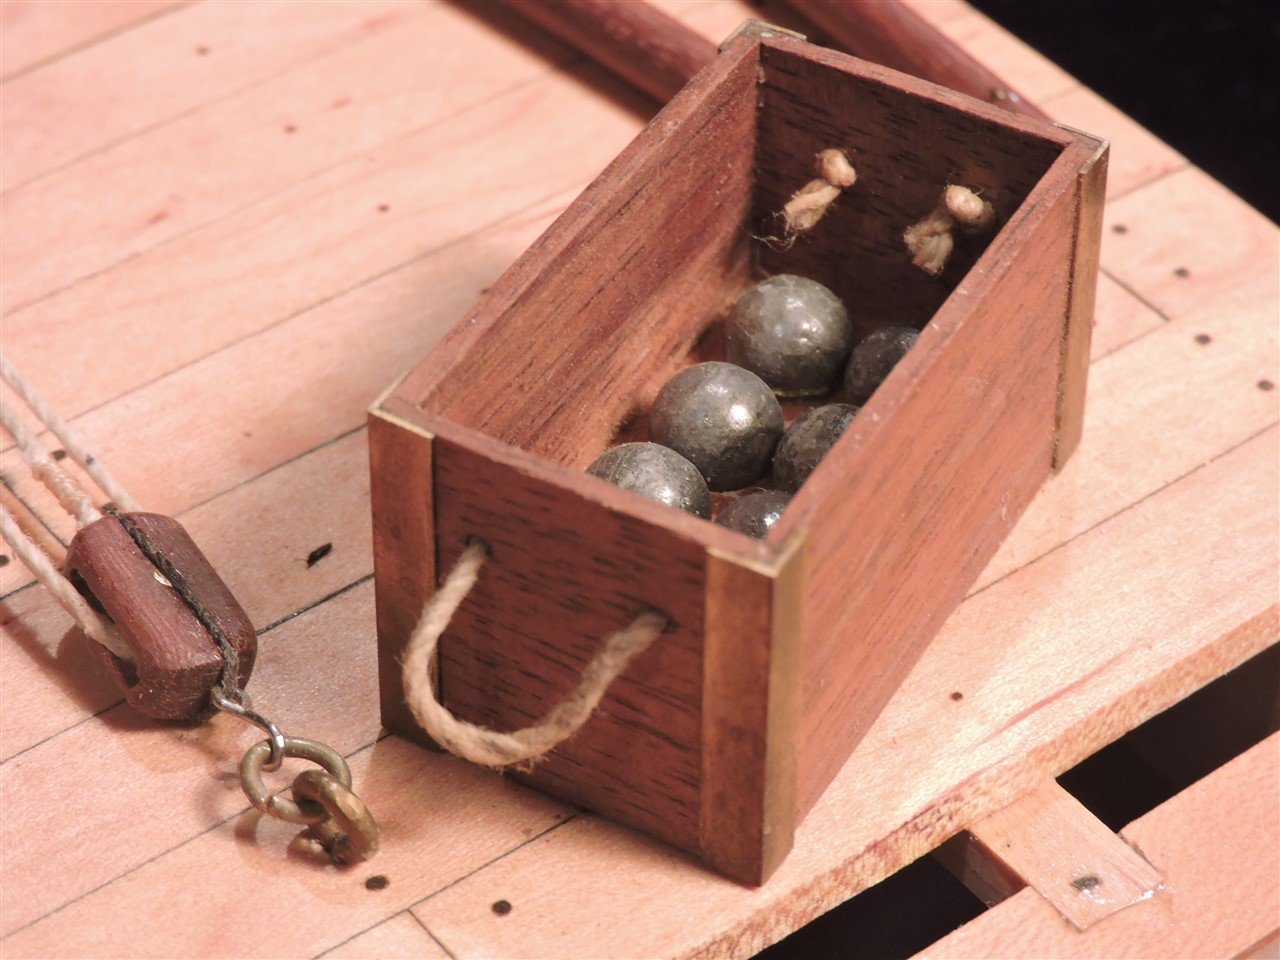
A storage chest will be mounted to the deck