HOLIDAY DONATION DRIVE - SUPPORT MSW - DO YOUR PART TO KEEP THIS GREAT FORUM GOING! (Only 75 donations so far out of 49,000 members - C'mon guys!)
×


EJ_L
-
Posts
2,246 -
Joined
-
Last visited
Content Type
Profiles
Forums
Gallery
Events
Everything posted by EJ_L
-
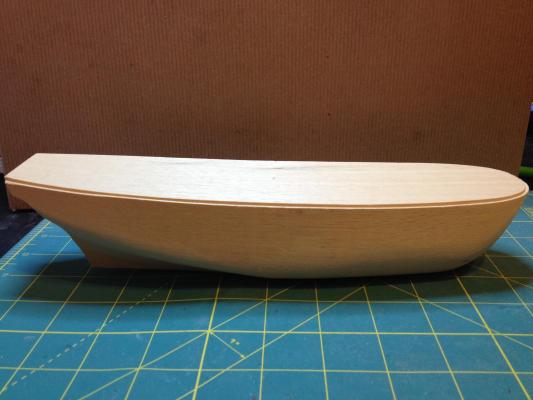
Mike, I helped a friend of mine build the HMS Bounty by Constructo and it was his first kit. It is a solid hull construction so no crazy framing or hard planking to do. In fact, the kit even shows it built without planking the hull, just installing the wales, rails and some trim pieces then painting it. This is how we built his as he did not want to mess with all the planking but it gave him a taste of it with the wales. Of course you can always add more than the plans show. I have included a couple of pictures to show you what it looks like. I have more pictures of it if you are interested I can send them to you when I get home.
-
 This has been a very informative thread. Thank you to everyone who has contributed. I was trying to figure out the same thing plus a few other details as I am starting to plan the port lids for my Couronne. I believe I have all the answers I need now to proceed!
 -
Francis, Yes, I had a lot of easing to do to get everything to fit. I think I would rather this though as it is easier to sand and file the opening gradually bigger to allow for a good fit vs having to try to shim the bulkheads into place if the opening is too large. You are lucky your keel is straight. Mine took a bunch of working to straighten back out and even now I can still see a little twisting. Hindsight being what it is I'm wishing I would have just cut a new keel rather than try to use what was supplied. I will keep an eye out for yours to start. Make sure to start a build log and I will follow along. It would be nice to see another Couronne come together.
- 608 replies
-
- 2
-

-
- la couronne
- corel
- (and 1 more)
-
Don't get me wrong, I love the look of the ship even with it's impractical designs. That is actually one of the major things I love about ships of this era was all the unique features they possessed. Their architecture to me was just such a huge wow factor that it negates the "well that is just dumb" design elements that are often found on these ships. Although ships of the late 18th and 19th centuries were better built they lost the grandeur and awe that the 17th and early 18th century ships had. Granted fancy designs don't win wars and as a former Navy man I appreciate a well designed ship that will win vs something that looks good. However, for modeling purposes bring on the elaborate and impractical!
- 608 replies
-
- 5
-
-
- la couronne
- corel
- (and 1 more)
-
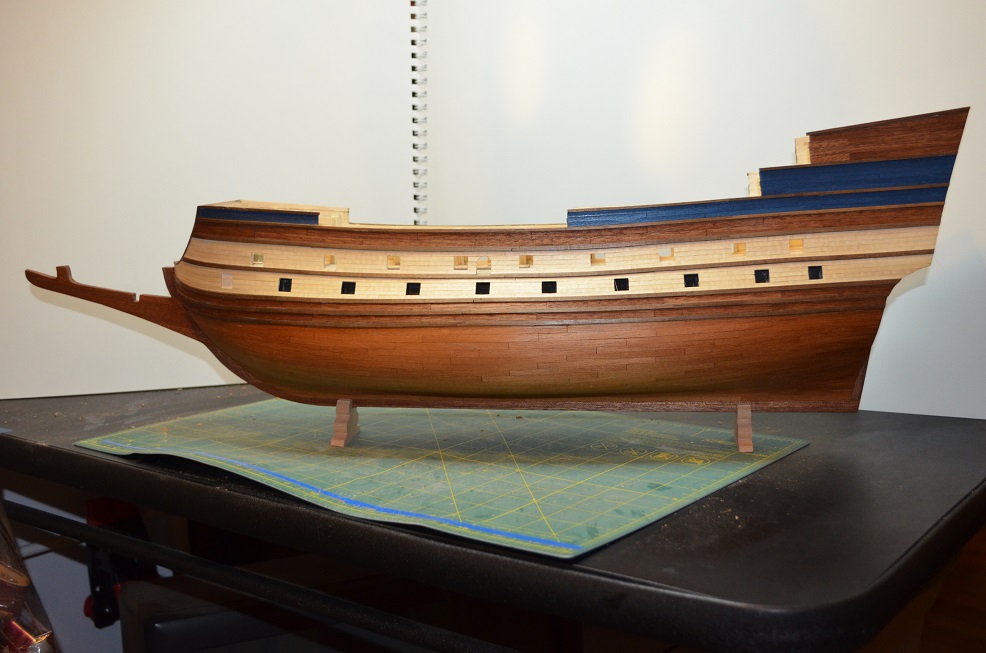
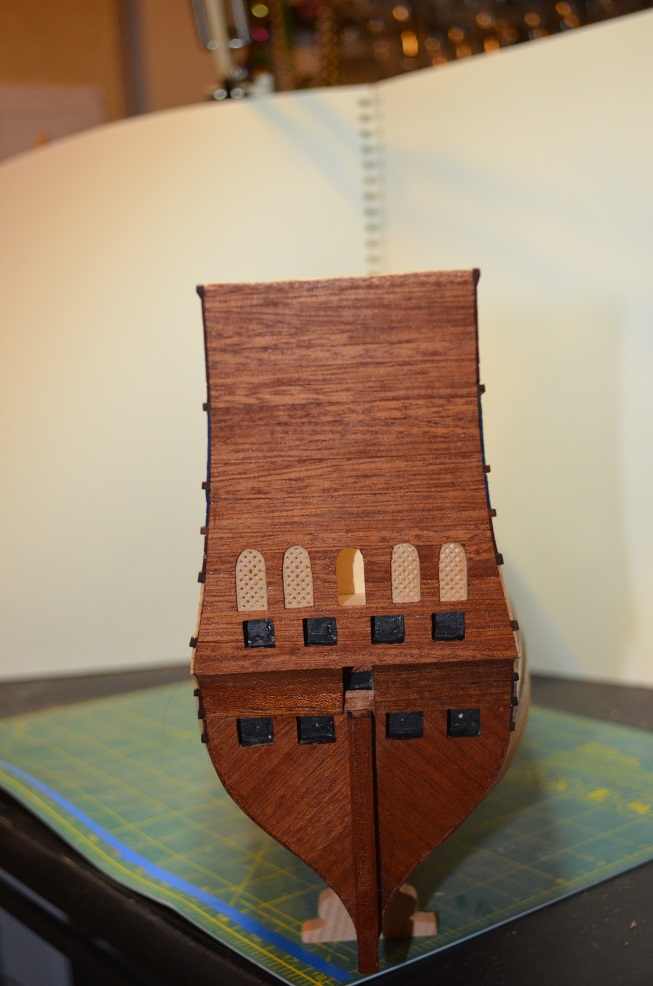
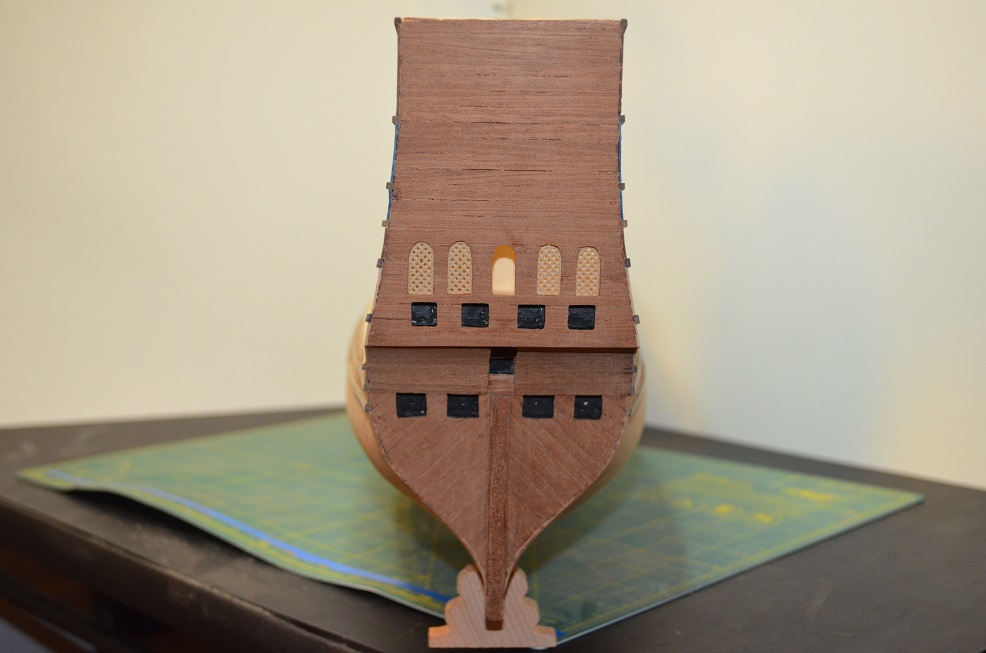
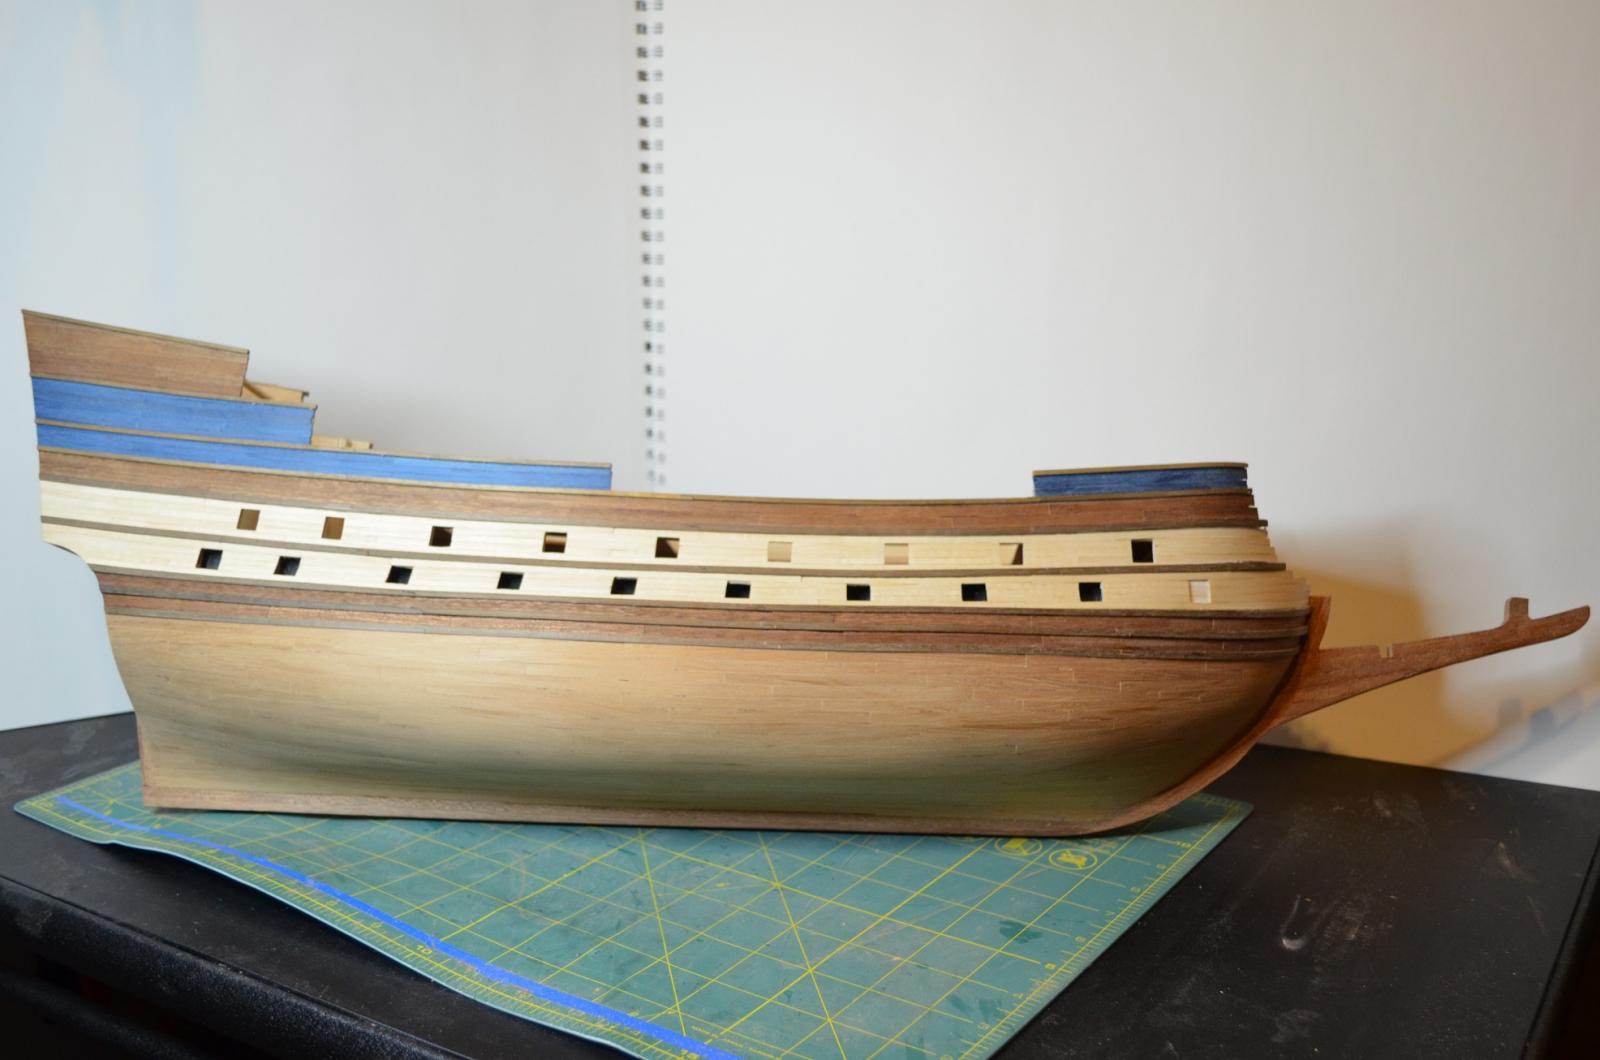
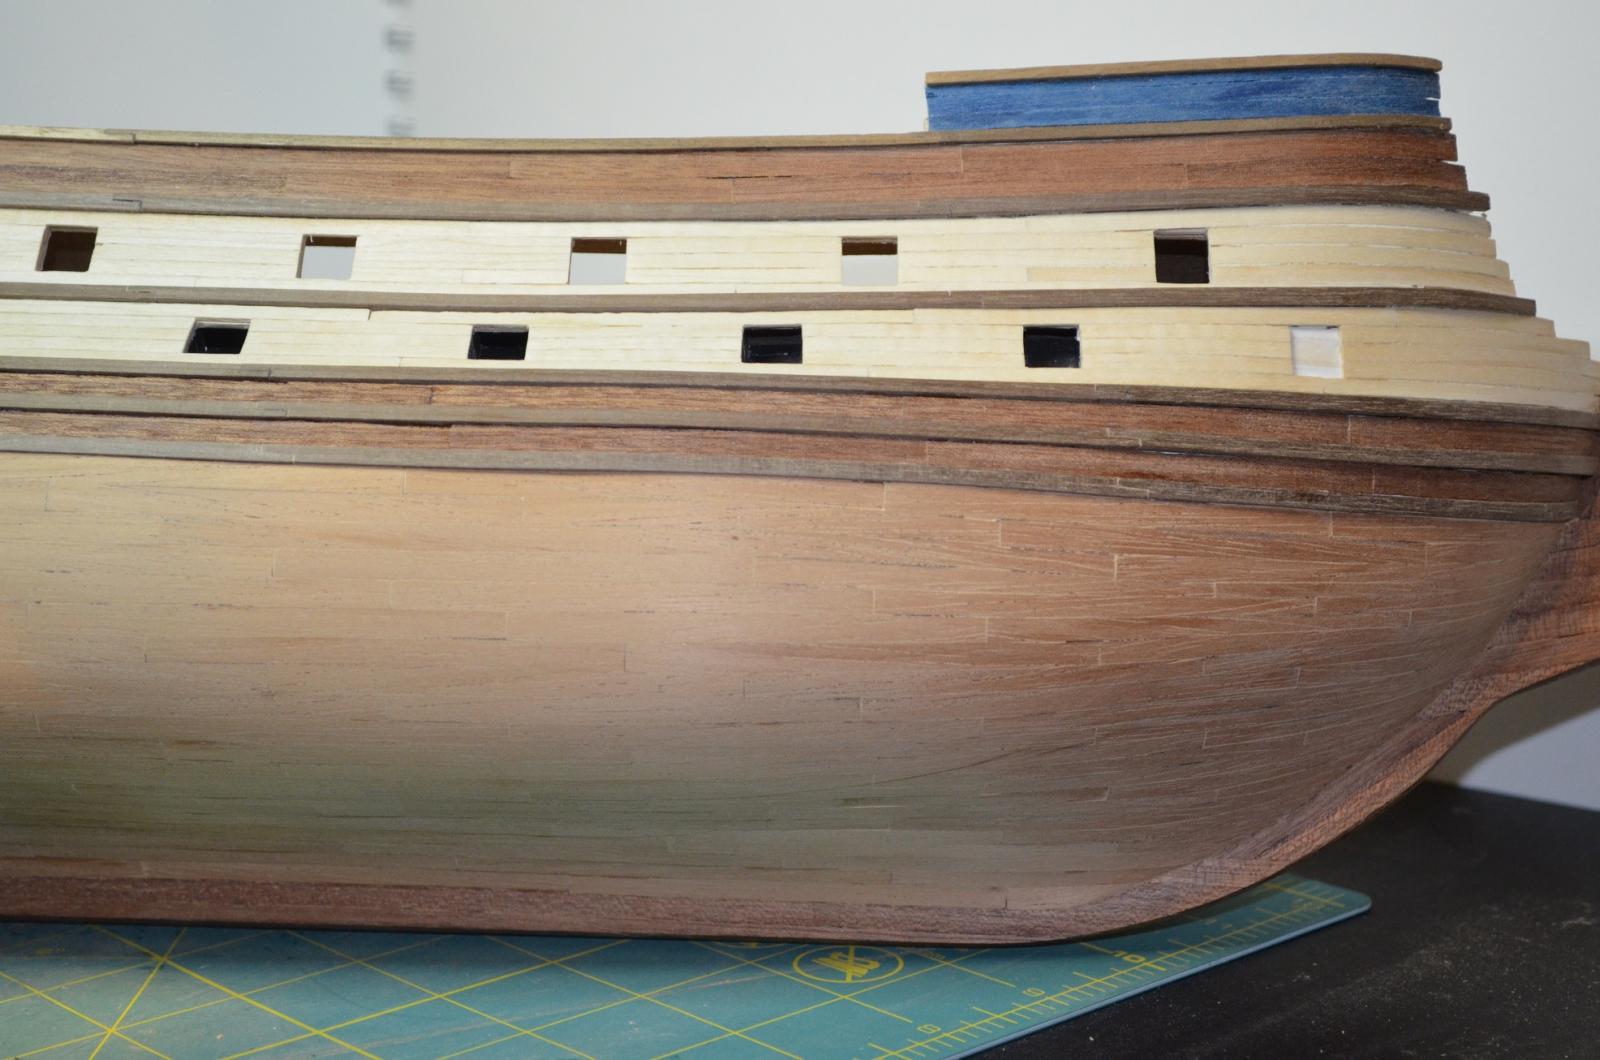
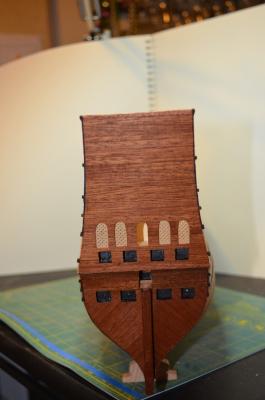
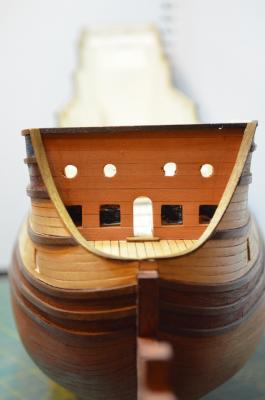
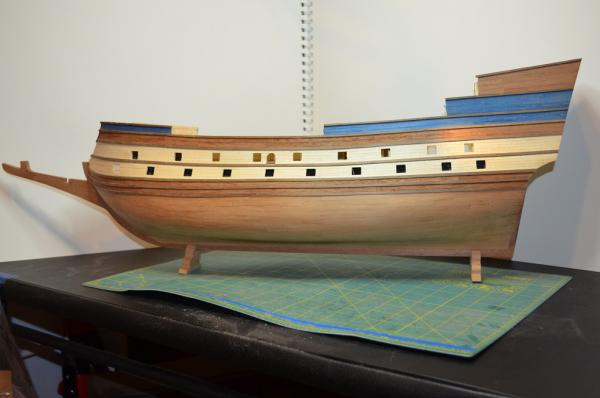
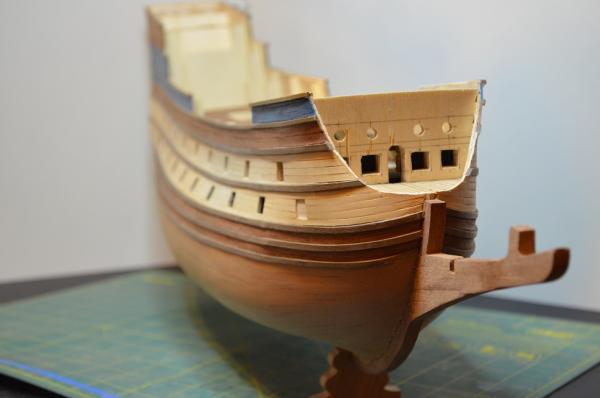
I got the forward bulkhead planked and finished the hull where it wraps around the bow. I still think this was a very impractical design with the gun placement but it does have an interesting look instead of just a flat, blunt front. The weather also cooperated and the rain held which was great as I hate trying to apply finish to wood with high humidity as it takes much longer for it to dry between coats. This allowed me to get the finish applied and I think she looks great now with the wood colors brought out. Although there are a few flaws this is my best planking job I've done. I have removed the temporary decks down to the upper gun deck and I will now begin to plank the interior bulkheads and detail it out. I will also begin the long process of building all the canons. This is where the excitement of seeing all the tiny details take shape begins.

- 608 replies
-
- 14
-
-
- la couronne
- corel
- (and 1 more)
-
I have a similar problem with dog hair on my models as well. My German Shepard sheds horribly and some days I feel like I could carpet my ship with the amount of hair that gets on the work bench after he has come by for what he feels is his required hourly petting.
- 206 replies
-
- 6
-
-
- battle station
- panart
- (and 1 more)
-
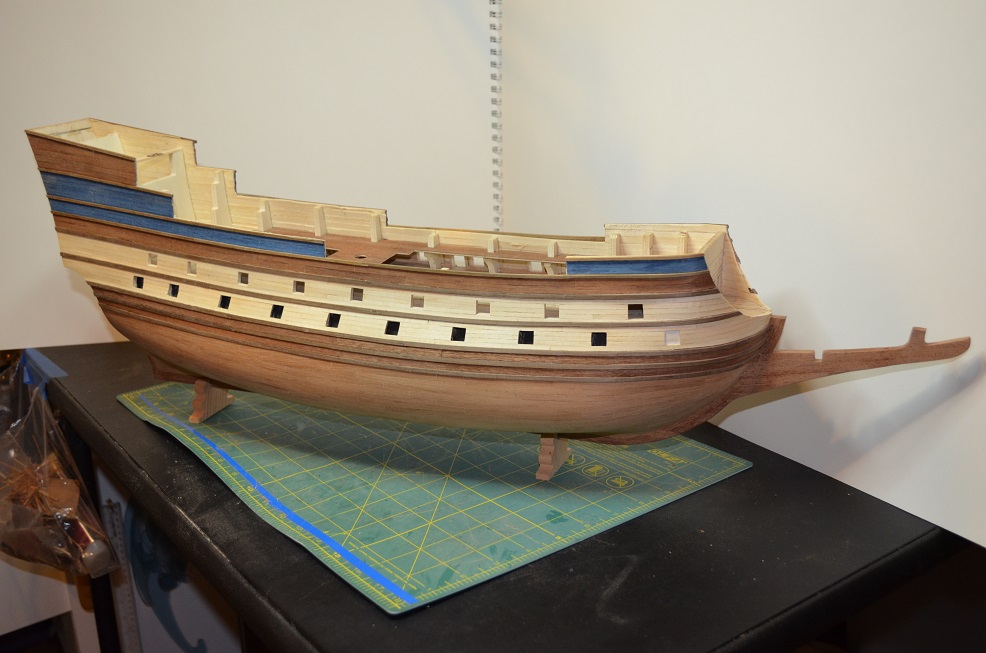
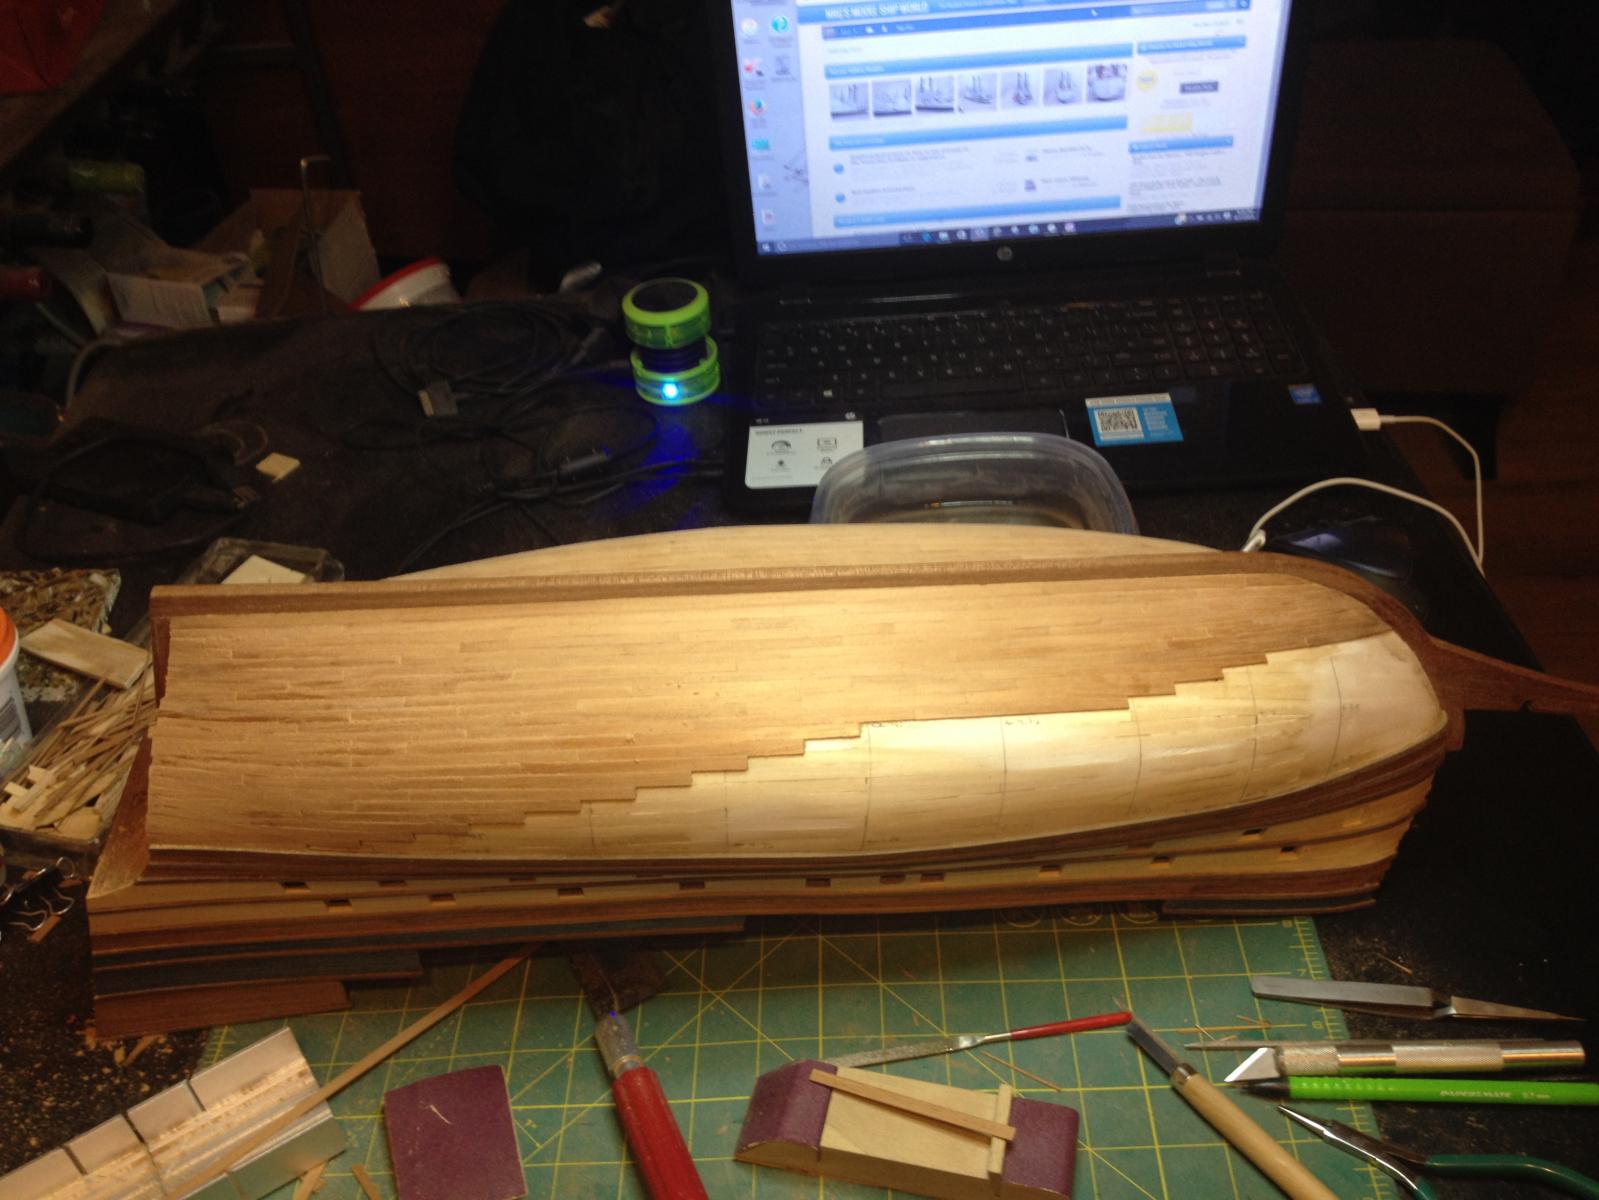
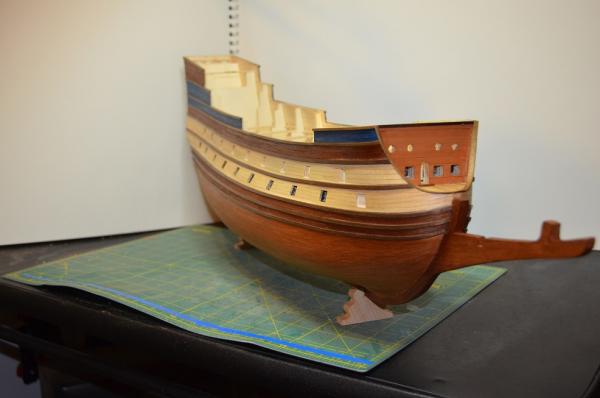
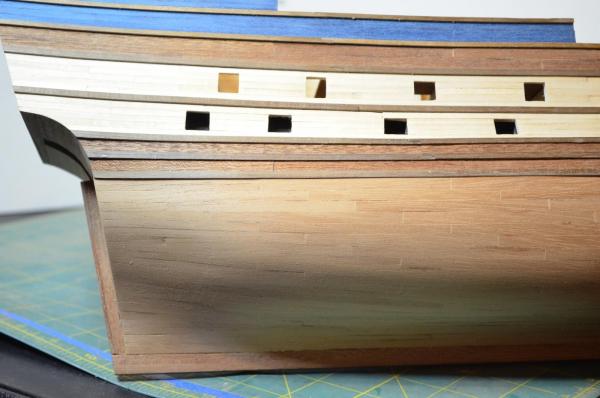
It's now 250 hours into building la Couronne and the hull planking is complete! I still have some sanding and a few areas that I will be filling with saw dust and glue but the hard part is complete and I'm happy with the results. Next up is work on the forward bulkhead at the bow. I need to plank it and trim it out and finish shaping the curve of the hull planking. On another note, the feet that she is resting on are kit supplied. I am just using them temporarily for pictures as she will be going back into the clamps for work. I do not completely like the stands design that the kit instructs me to build but I do like the shape of these feet. I'm thinking I will use them as a template to make new ones with a nicer wood. Now for the pictures. Enjoy!


- 608 replies
-
- 14
-
-
- la couronne
- corel
- (and 1 more)
-
Looks like you are off to a good start Matt. It's been a while since I really watched this ship come together so I think I will pull up a chair and follow along. I will also echo other comments on here that it is better to wait to fair all the bulkheads as one unit rather than individual pieces. The first wood ship I build that was a plank-on-bulkhead build had instructions that also told me to bevel all the bulkhead edges down first and even gave angles to follow. After I spent hours doing that and assembled all the framing and began to plank I quickly realized that I had basically wasted those hours. I still had to go back and fair the hull more and by doing them early I ended up over sanding many of them and had to use filler strips to build the frames back up. After that ship I learned a couple of different things. The first is to assemble the frames and then lay long strips of planking across the frames edges to check to see where I need to sand or fill. The second is that most ship plans and instructions that come in kits are more rough guidelines. They will allow you to make a decent model of your ship if followed but, to get a more accurate and often better constructed and detailed ship, looking for additional information and scratch building will be a large part of your time. Luckily for you you have a background in scratch building through model railroading, (I also enjoy that and have a nice HO scale layout in my basement) and you have chosen a ship in which there is extensive information and pictures easily available both on this site and the internet in general. I look forward to seeing her progress!
- 117 replies
-
- 4
-
-
- constitution
- model shipways
- (and 1 more)
-
Very nice paint job. Those pin stripes look excellent also. I know first hand how difficult that can be to tape those off straight and smoothe with no kinks. She is looking very sharp.
-
Sanding is one of the worst parts of any wooden project but the end results of the hours of misery are worth the effort. Your hull is looking great! Do not short change yourself by stopping an annoying task early. Push through and you will love the results.
- 701 replies
-
- 3
-
-
- phantom
- model shipways
- (and 1 more)
-
Thank you for the suggestions. I've used wipe on poly a lot on other wood projects and I do like it. I may have to try out that danish oil though as I like the sound of it being almost invisible. I've got a couple of sample pieces I've made up of scrap planking so I can try out a few different sealers to see what I like the best.
- 608 replies
-
- 3
-
-
- la couronne
- corel
- (and 1 more)
-
Life has been extremely busy since my last update but, I have still managed to find time to work on la Couronne. The planking on the port side has been moving along smoothly as I have stuck to the same plan that I used on the starboard. This is also why I have fewer progress pictures as it is the same as the last ones just opposite side. I'm hoping another week and I will be looking to finish sanding and prepare it for finishing. I'm planning on just a satin polyurethane but I am open to suggestions if someone has something they like better. I don't want any kind of shine so no semi-gloss or glossy finishes just something to protect and bring out the color in the wood. Also with the exterior hull planking wrapping up I have begun to think about the interior planking that I will need to do as well as building all the canons. There is a lot of detail work I'm wanting to put in on the interior decks and not as much information on these spaces so a lot of it will be guess work based on what I have and similar ships of the era. This will also begin the tying of a thousand knots as my wife calls it with the installation of the canons. Granted, those are still weeks out but I find it best to start planning the process early so I don't forget anything that needs to be there. Anyway, I hope you enjoy the small update. There should be a bigger one coming soon!

- 608 replies
-
- 11
-
-
- la couronne
- corel
- (and 1 more)
-
Looking fantastic!! That is going to be a very sharp looking model. Good to see you back at it and moving along quite nicely. Good choice with the vinyl for the windows.
-
Michael, Welcome aboard! Bob and VIc, thank you both for the kind words.
- 608 replies
-
- 2
-
-
- la couronne
- corel
- (and 1 more)
-
Michael, sorry to see that the damage was worse off than you originally thought. Great idea to use the glass piece under the suction cups. I may have to do a similar setup in the near future. I've already sent the Couronne sliding across my table a couple times while planking the bottom of the hull. This card table has a much slicker surface than my old wood door table that I used to have. Fortunately, no damage has been sustained but I do not have many easily breakable thing on her yet. However, that will be changing before long. Better to learn from this and heed the warnings than cry later. Again, sorry to see the damage to your amazing ship. I know you'll get her back together and we will be enjoying forward progress again soon.
-
I've used epoxy mixed with sawdust when I'm turning larger items such as bowls on my lathe but in that case I have nice sharp tools plus the power of the lathe to knock down the high spots and smooth till it's time to sand. I have never used it on a model but if you can apply it as smooth as possible and don;t let it mound up too high, sanding should not be too difficult. Might be worth giving a try to see if it works better than white glue or I've even had some luck with ca glue by packing the area with dust first then sealing over and by inserting very thin slivers into cracks and sealing those with a thin coat of ca glue. Best if you use the super thin for that or you end up with a big mound to sand.
-
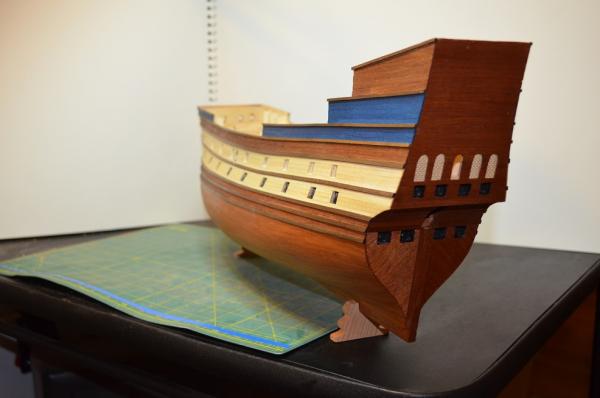
Thanks everyone for the compliments. Francis, I did use the blue dyed boxwood from the kit. I like the coloring and I think that after I put a satin finish on it that it will look very sharp with the mahogany. The quality of the wood left a lot to be desired in terms of straight cuts and even milling but for the small areas I used them they worked fine. I am trying to avoid painting as much as possible as I like the natural colors of the woods and although blue dye is not natural, it looks more so then if I would have painted the blue on top of the wood. The obvious exceptions being the black areas on the dummy decks. I may make some more exceptions if I decide to make my own carvings for the decorative pieces. I'm not overly fond of many of the kit supplied ones but I do not think my carving skills will yield anything better. I plan on making the attempt and then deciding. If they look better I may end up painting them gold.
- 608 replies
-
- 4
-
-
- la couronne
- corel
- (and 1 more)
-
I think I will have to start using that method of indenting the nails as well. I definitely like that look better than just having them put on with a fine point marker which is how I've typically done them in the past. Thanks for the info!
- 206 replies
-
- 5
-
-
- battle station
- panart
- (and 1 more)
-
Looking great Bob! I was curious as to the quality of the wood but if what I'm seeing is the kit lumber then I agree it is very nice. Your planking looks very good. Nice caulking joints in between the boards and the nail heads look indented. Did you use a punch to make them or is that just illusion created by the picture? I do have a question and I may be wrong but should there be nails at the end of the boards where they meet the coamings or do the planks tuck under them so you do not see the nails? I have seen them both ways and I usually will put nails there as I thought that the coamings extend down into the hatch openings but I was wondering if that is correct?
- 206 replies
-
- 6
-
-
- battle station
- panart
- (and 1 more)
-
I hope nothing was too badly damaged. I once caught the bowsprit with the sleeve of a very baggy sweatshirt I was wearing one winter since my basement is very cold. Snapped the jib boom right off just as I had finished rigging the stays for it. Last time I wore that sweatshirt while modeling.
-
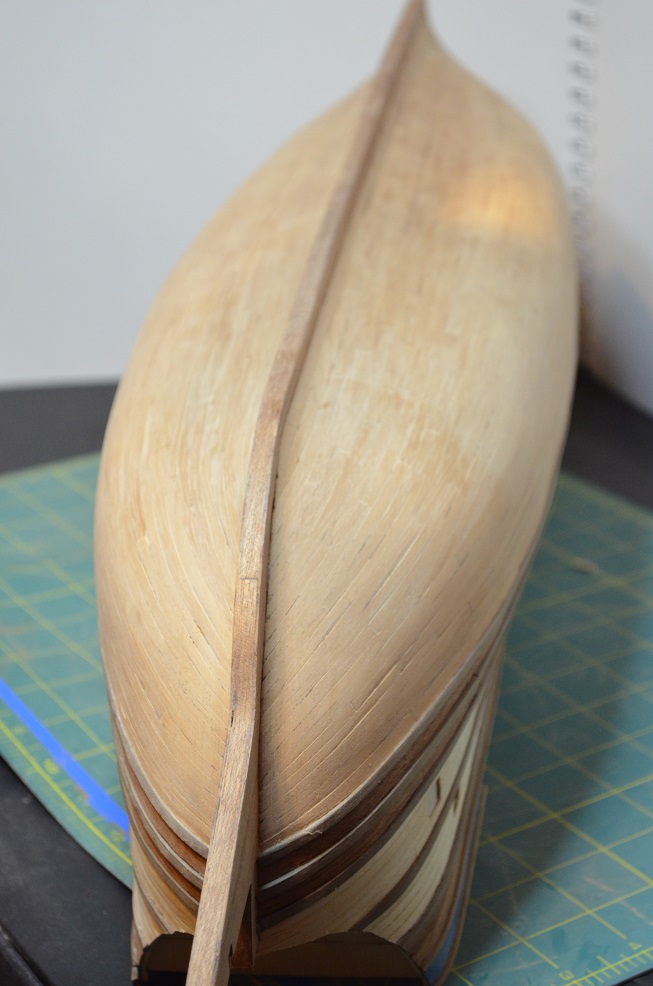
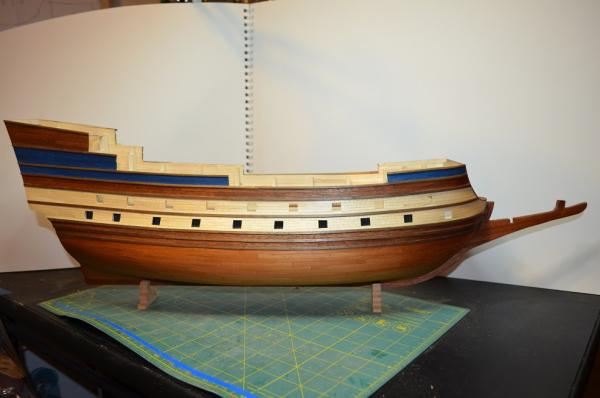
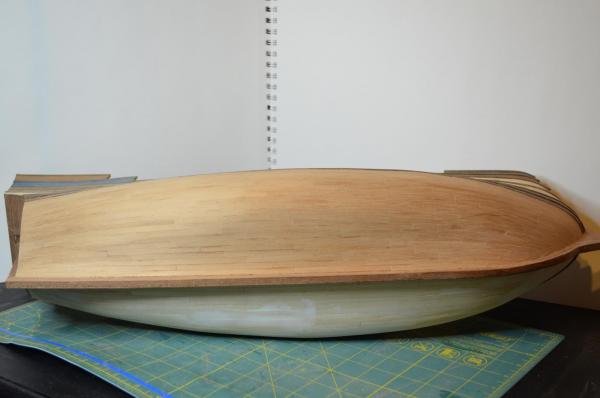
So great news! I've managed to spend the past four hours finishing up the starboard planking. I am very pleased in that I have finally planked a ship with no stealers nor any drop planks. I have 22 strakes plus the garboard from bow to stern. Granted I have to replicate this on the port side but I am confident I can do this now. I think all that reading I have been doing over the past several months on planking has finally sank into my head. One day I may even be able to do it in one planking but lets not rush things. Haha. I've done some initial sanding on the hull but will of course do more before I apply a finish. I must say that the Mahogany wood from Crown Timberyard has been great to work with. Much better than what came with the kit. I honestly do not think I could have gotten the same results using the kit supplied wood as the strips edges left a lot to be desired in terms of straight and square. They do work fine in small areas and for deck furniture so I do not feel they were a complete waste. Now it's onward to the port side. I will start layout tomorrow and planking also perhaps. As always enjoy the pictures and thanks for stopping by.


- 608 replies
-
- 19
-
-
- la couronne
- corel
- (and 1 more)
-
Thank you Bob and Ken and thanks to all the likes as well. It has been a busy weekend but I am still hopeful to have the starboard half completed soon. Pictures to follow soon!
- 608 replies
-
- 2
-
-
- la couronne
- corel
- (and 1 more)
-
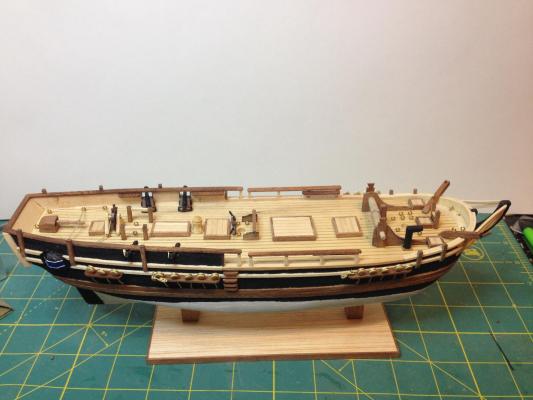
Very nice Ken. I had the same issue with my Rattlesnake of only being able to fit 5 buckets instead of 6. I'm wondering if somewhere along the line the plans for this ship got changed to add a 6th when there should have only been 5 in the rack? In either case, yours looks great! I also debated about adding the temporary gangways and ultimately decided to leave them off so the detail work that I put into the canons could be seen. After all the work it took to put in the rigging for them I wanted people to be able to see them clearly.
- 481 replies
-
- 1
-
-
- rattlesnake
- model shipways
- (and 1 more)
-
Elijah, my wife tells me the same thing all the time but it's funny how no matter how much stuff she thinks I have I always see something I don't! Haha! Needless to say my wishlist is a mile long and never seems to get any shorter. MSW has not helped as almost everyday I read another post about a book I should read or a new tool or jig that looks great. I just write it down on my list and when I can save up some money I treat myself to something new. I also drop several big hints around Christmas and my birthday..... Keep your eyes open though when you are out at different stores. Sometimes the best tools can be found in unlikely places. For example, many of my small, very sharp scissors have come from hair cutting supply stores. Also, jewelry making supplies are real good places to buy stuff. They are considered common use tools in those places and so the costs can be lower but quality better compared to some hobby stores where they are specialty items. It's funny how that works but it does and it also opens up more selection so you can find just what you are looking for.
- 701 replies
-
- 2
-
-
- phantom
- model shipways
- (and 1 more)
-
Your planking looks great and it looks like she weathered the storage box well over the years. I look forward to see your progress.