


petervisser
-
Posts
581 -
Joined
-
Last visited
Content Type
Profiles
Forums
Gallery
Events
Everything posted by petervisser
-
 Thanks for the tip guys. I'll try that in the future. I have an ancient Danmark kit that has a ton of railings as well. And thanks for looking in too! Peter
- 207 replies
-
- 1
-

-
- billing boats
- cutty sark
- (and 1 more)
-
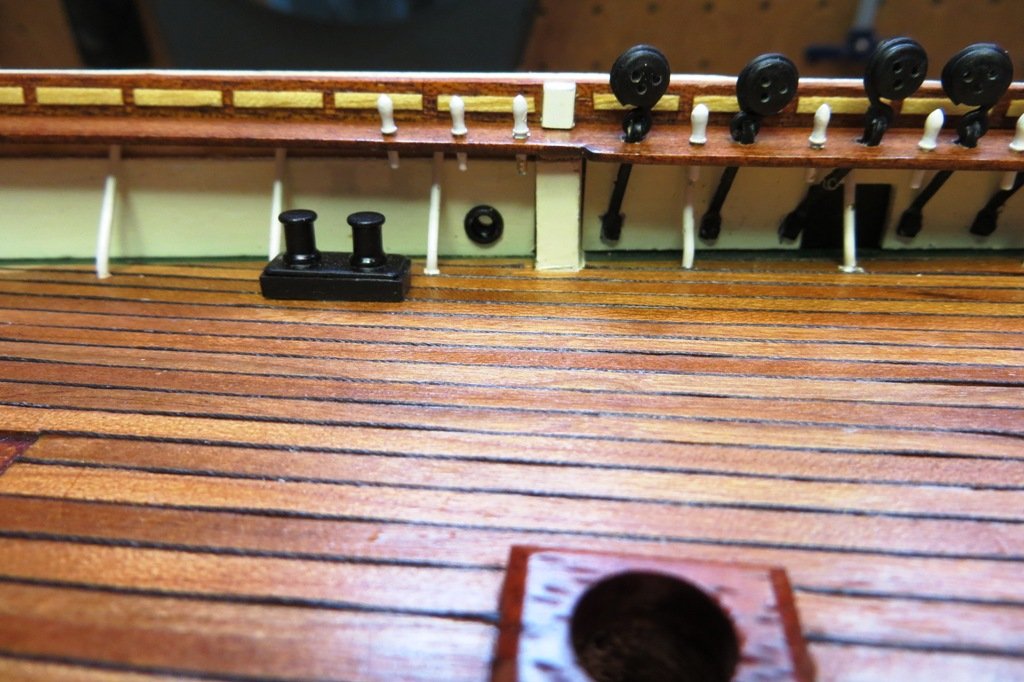
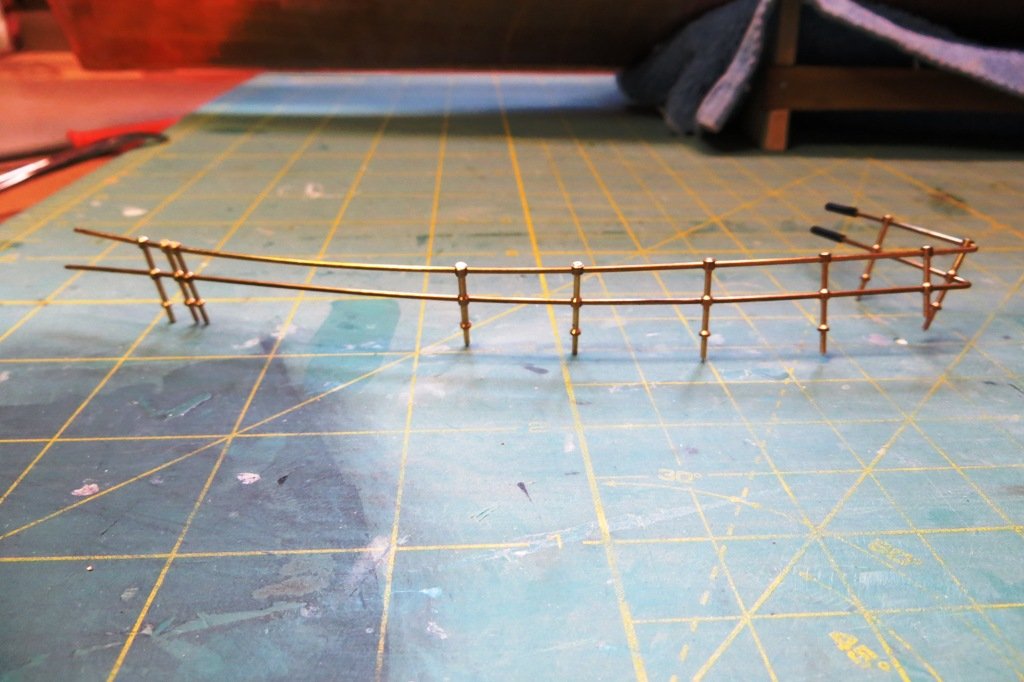
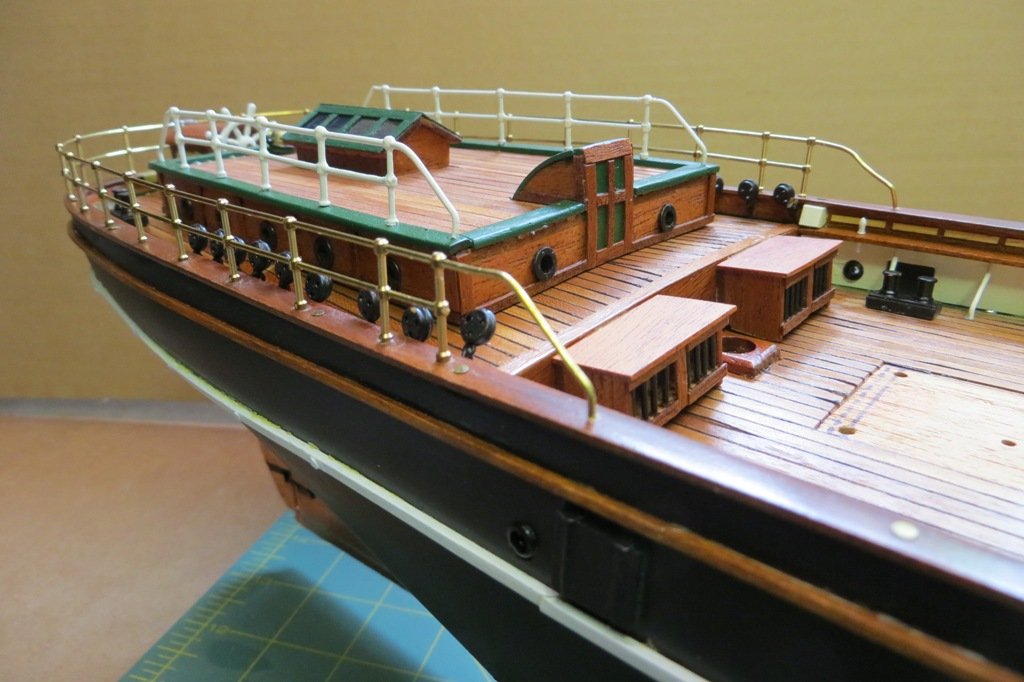
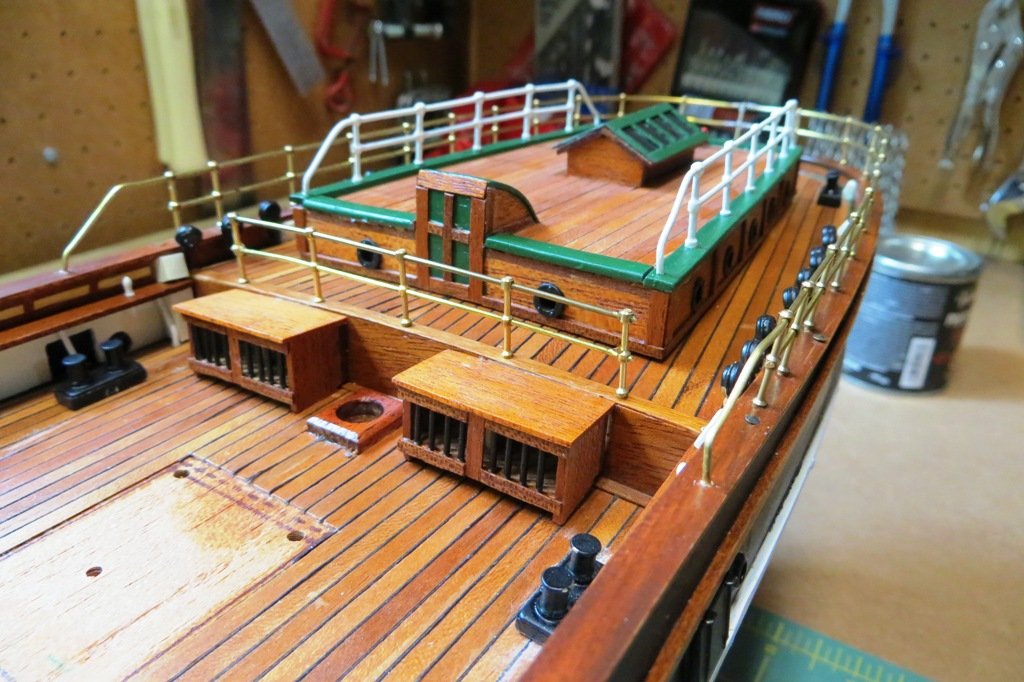
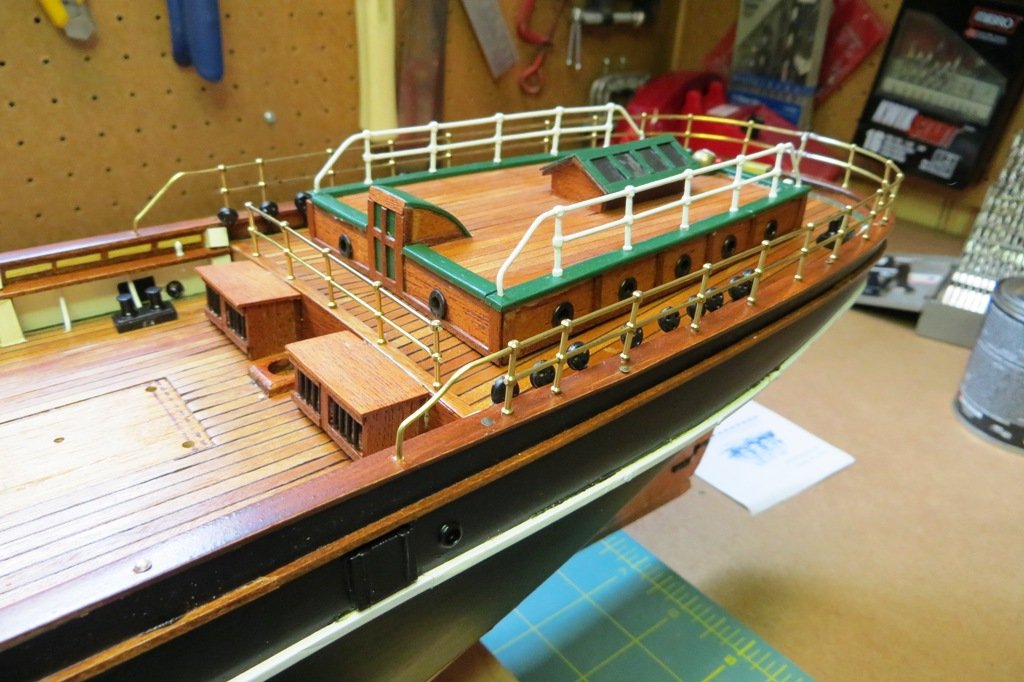
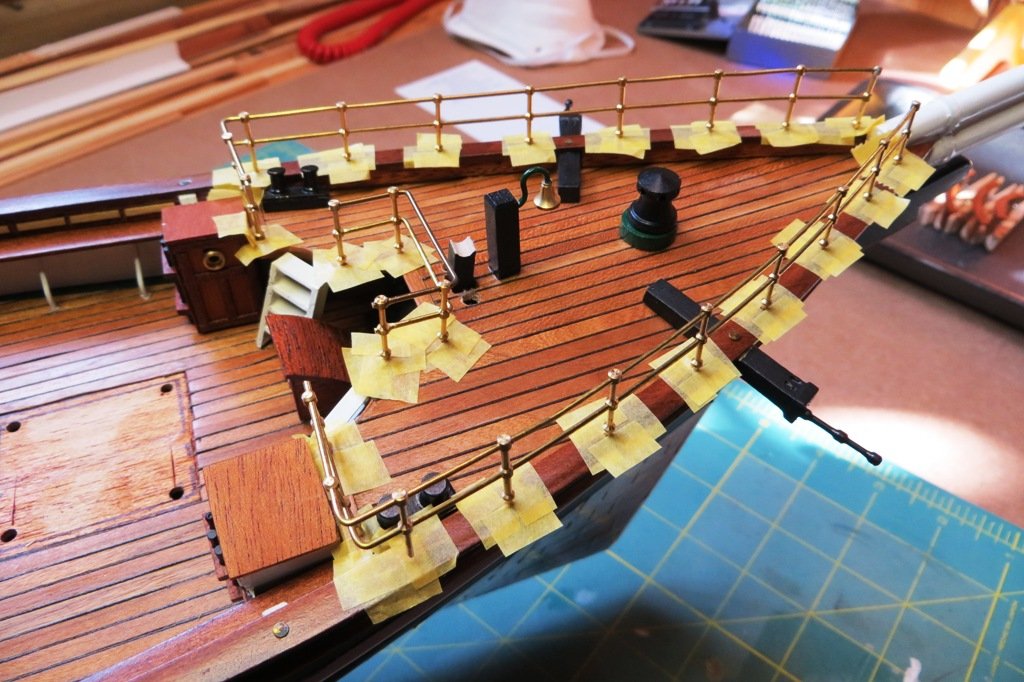
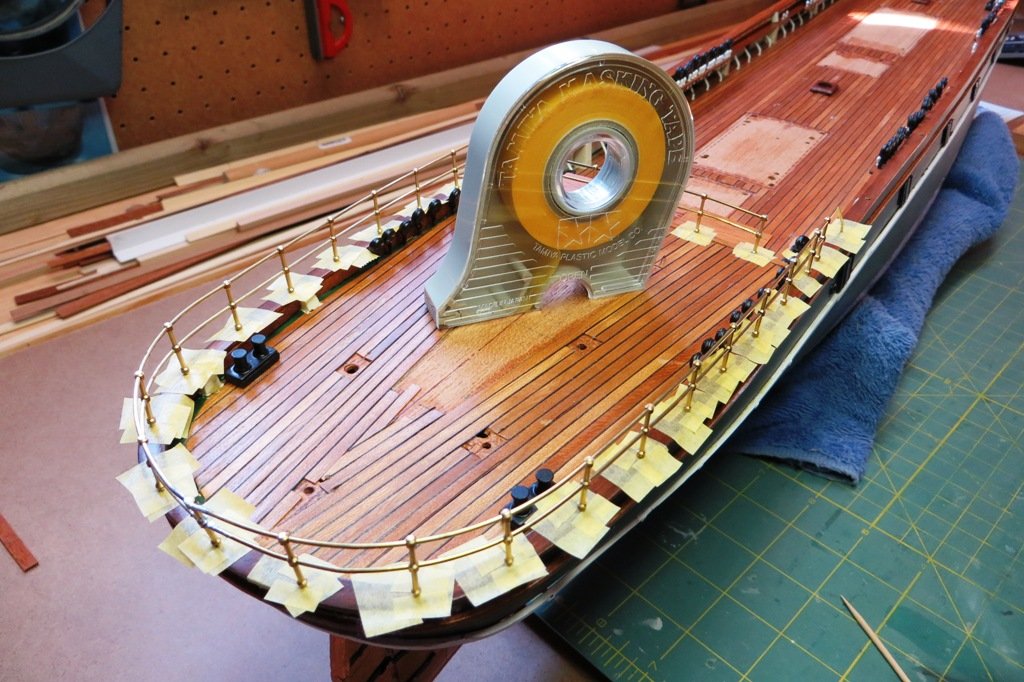
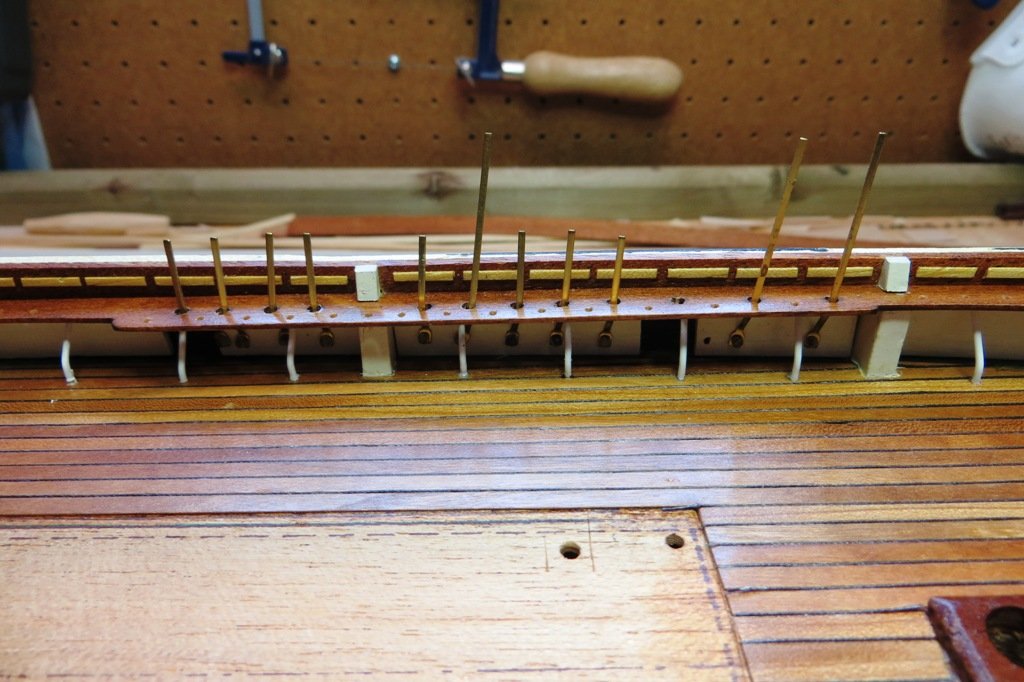
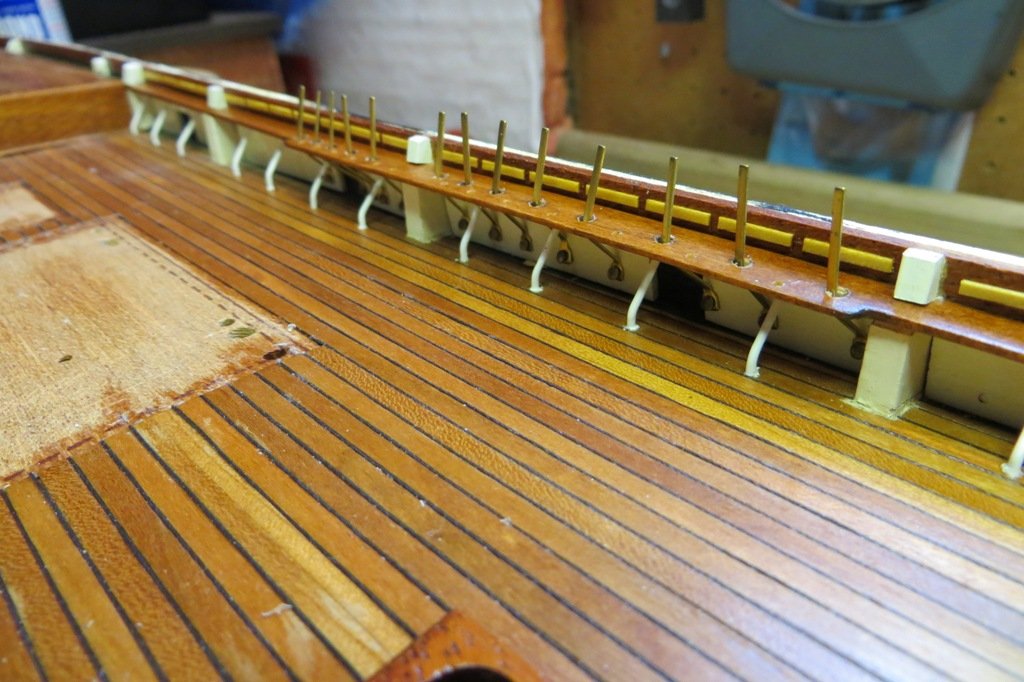
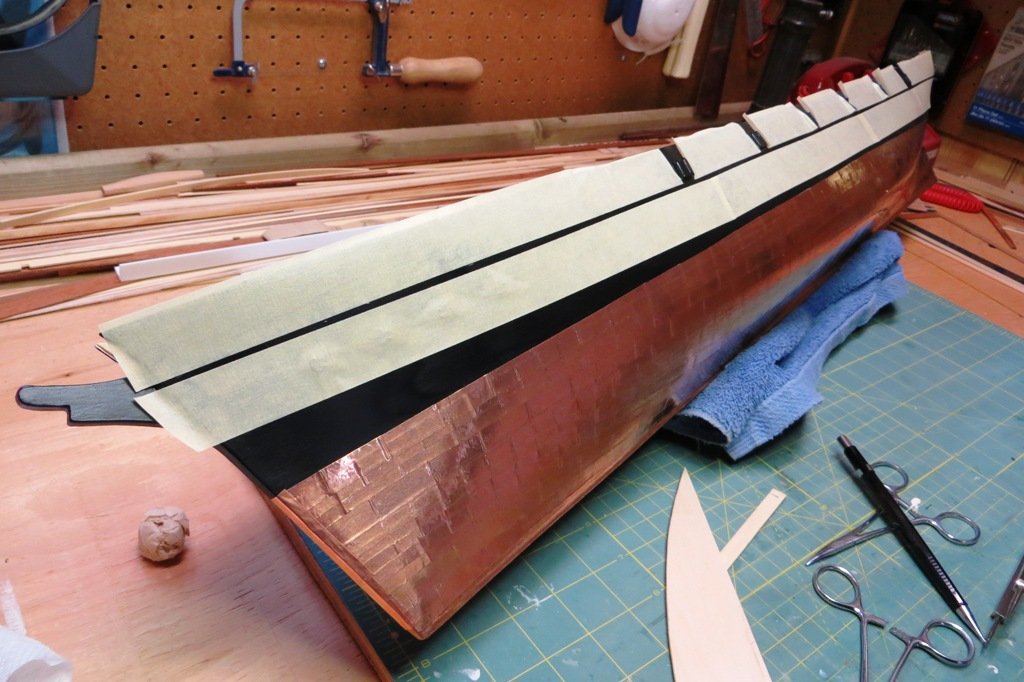
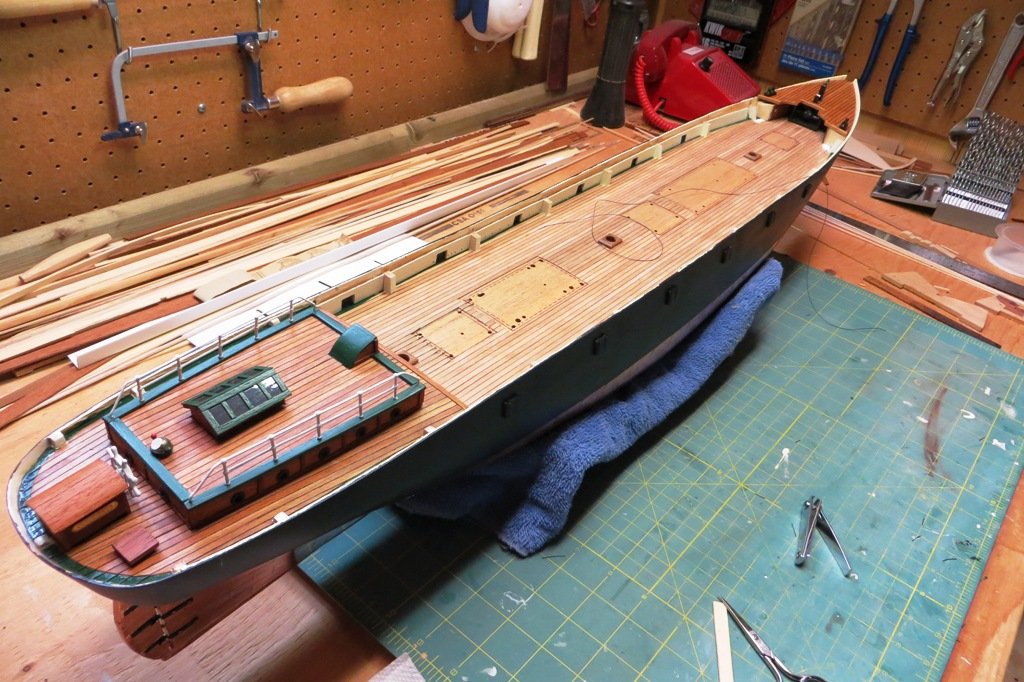
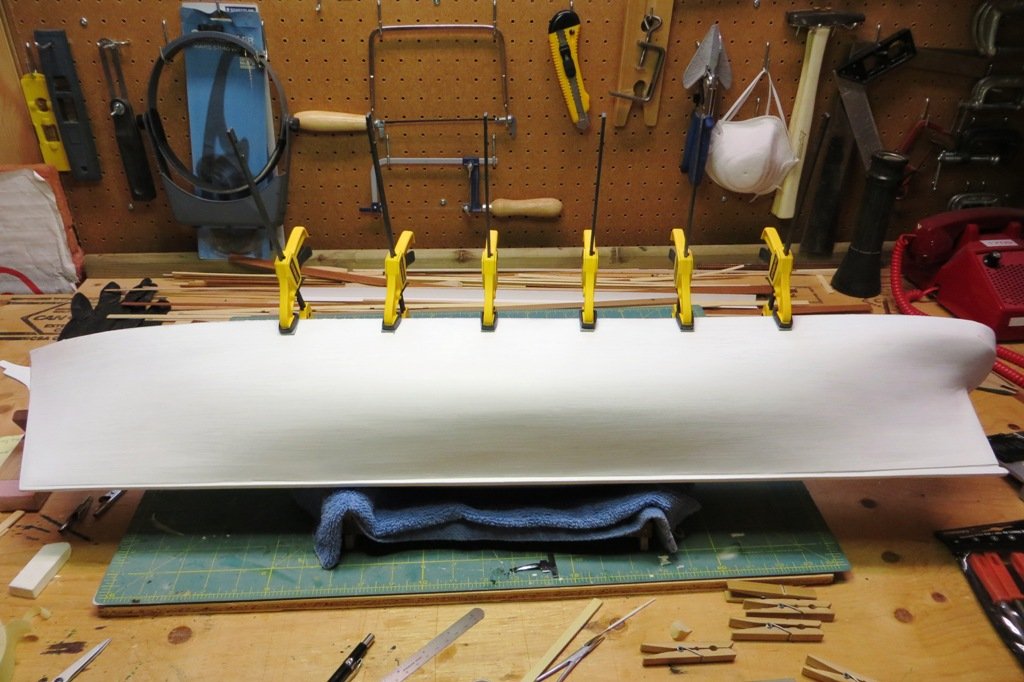
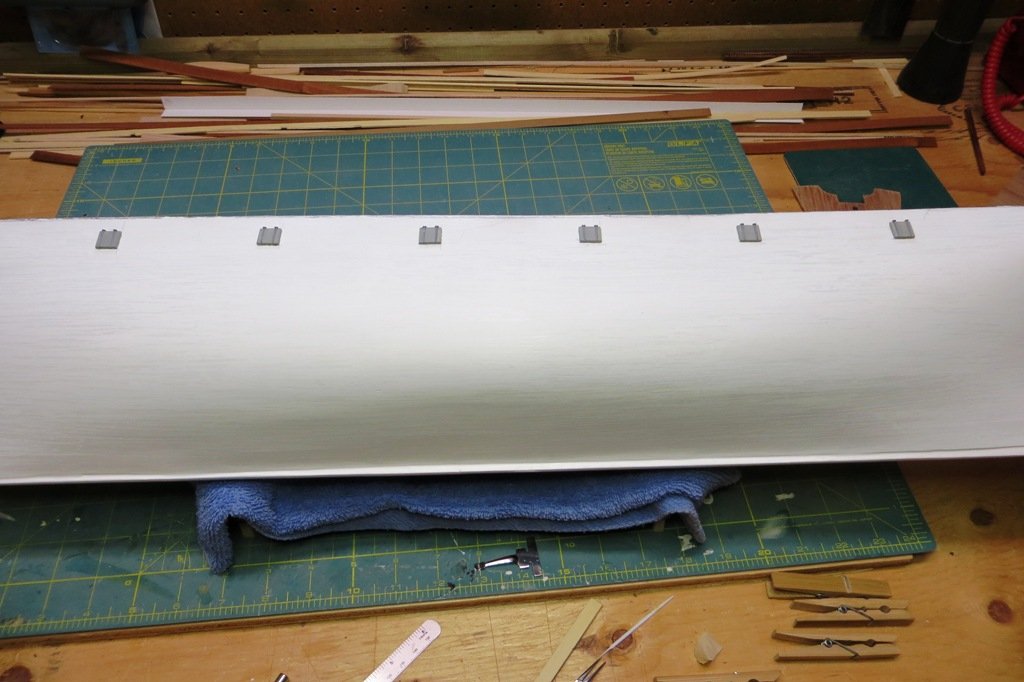
Hi All, I have been busy in the shop of late due to the self isolation and making some progress. But boy, there is no rushing with a model ship so things are going slowly. I have been detailing some more of the main deck and added some fairleads and mooring bits here and there. I have also tackled the railings on the foc'sle and aft deck which went rather well considering. I tried my hand a soldering and it went so-so. In the end, I found that they didn't need it, and all is well seated without. I had intended to solder them so I could paint the railings off the model. But they looked so good without solder that I decided to paint them in situ. Therefore I had to tape off the stanchions at the base. Now the tedious painting begins. One coat of primer and two top coats. It took 2 hours for the first coat. Yikes. As mentioned earlier, model ship building is not done at lighning speed...

- 207 replies
-
- 11
-
-
- billing boats
- cutty sark
- (and 1 more)
-
Thanks for the spreadsheet Allan. When it becomes the Danmark's turn to appear on my bench, your rigging plan will come to good use! Cheers, Peter
-
Hi Keith, Your model is looking fantastic! Have you been able to use all the Billing fittings or have you had to resort to buying third party fittings? Having built a few of their kits myself, I have made due with what they supply but sometimes resort to poaching bits and pieces from other kits I have that are still in the box. I am tempted to purchase the Billing Victory myself. Your model makes it very tempting... Cheers, Peter
-
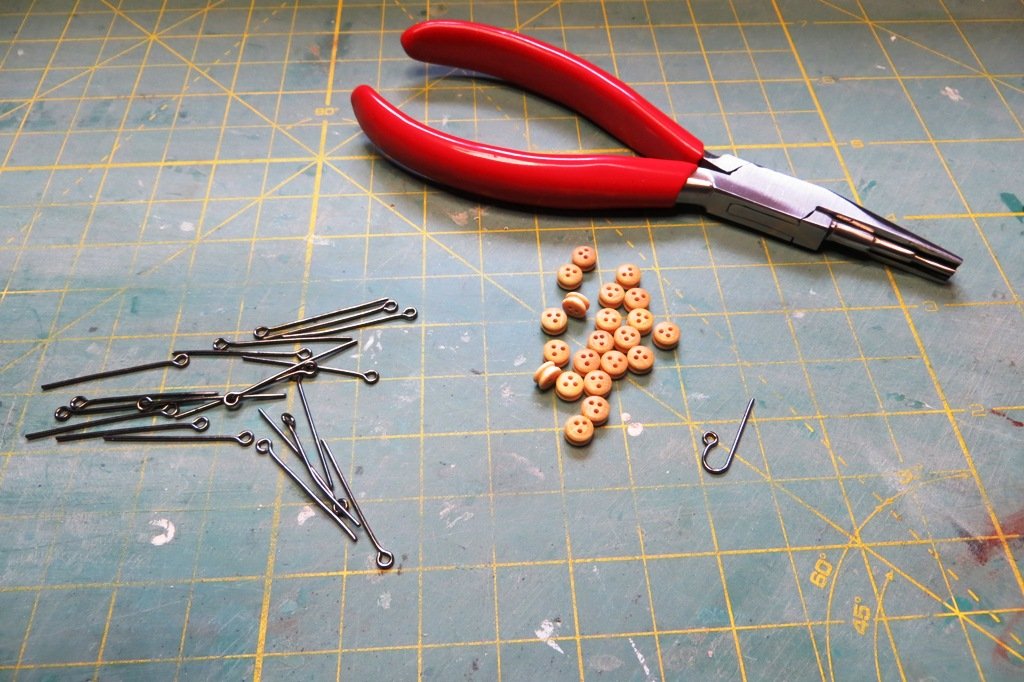
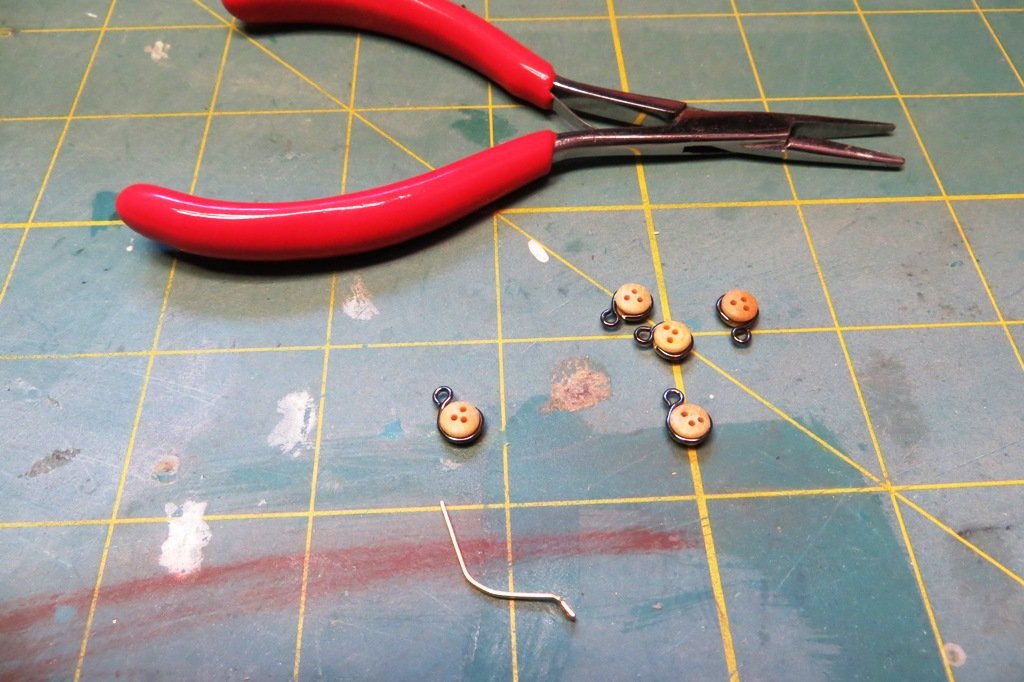
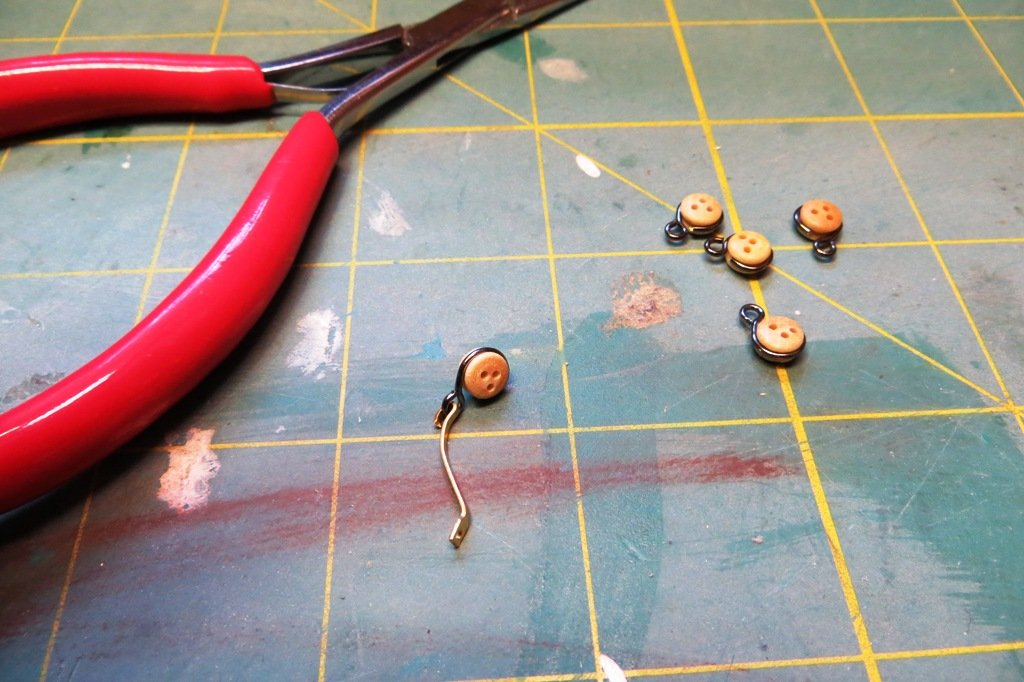
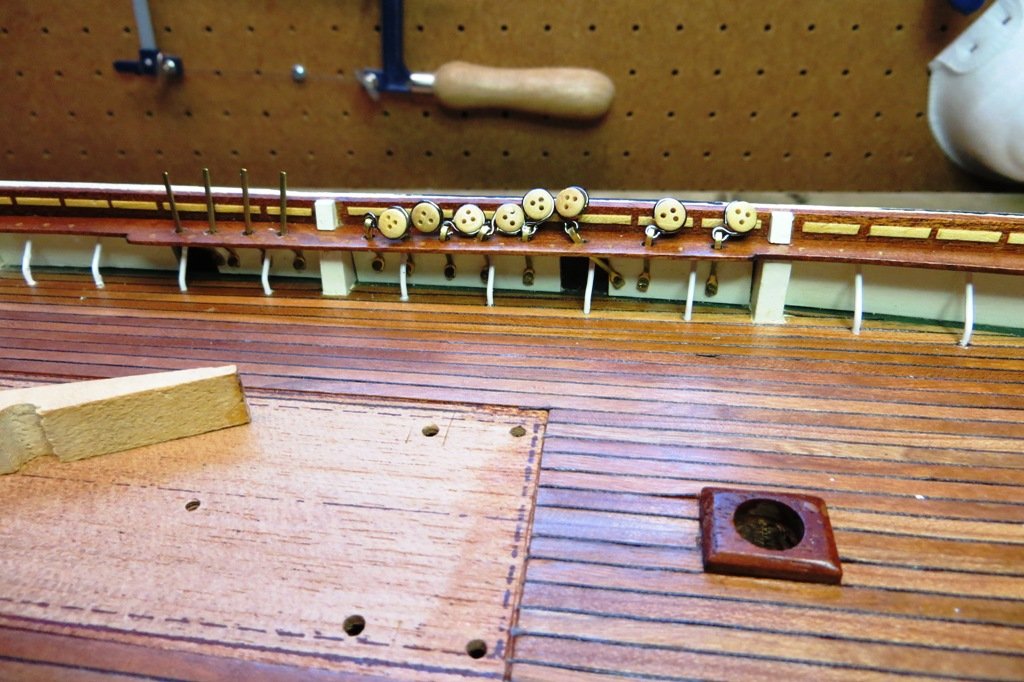
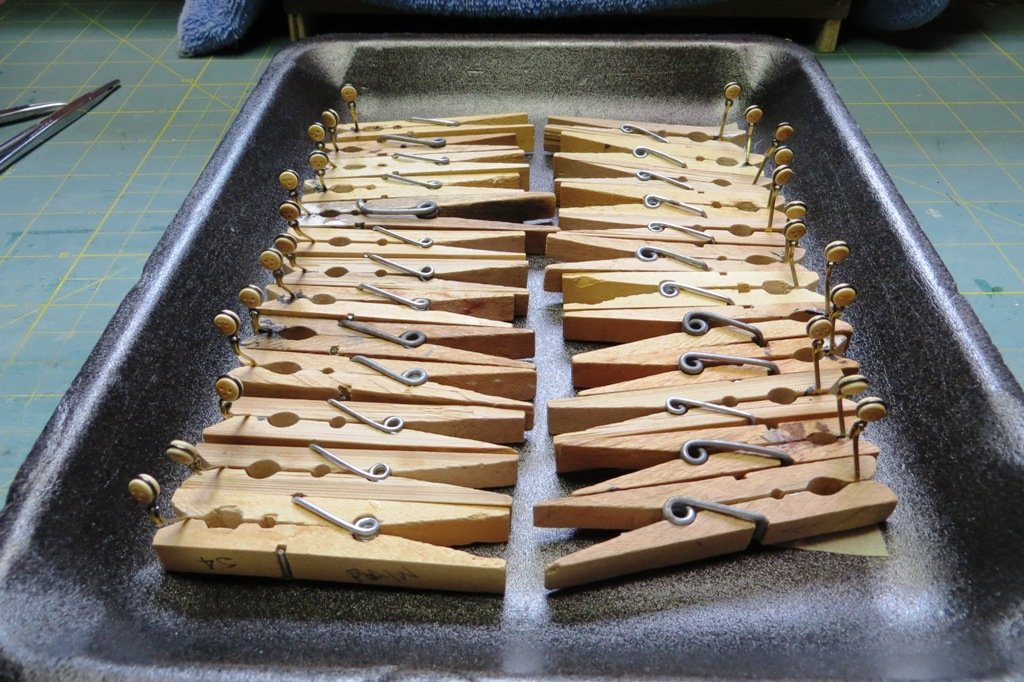
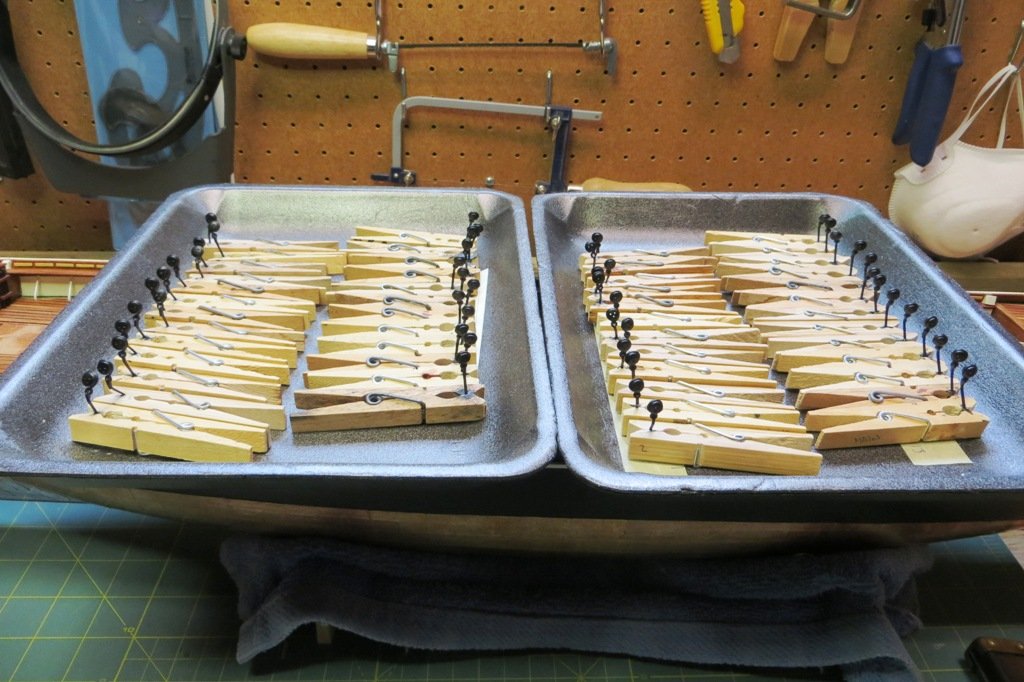
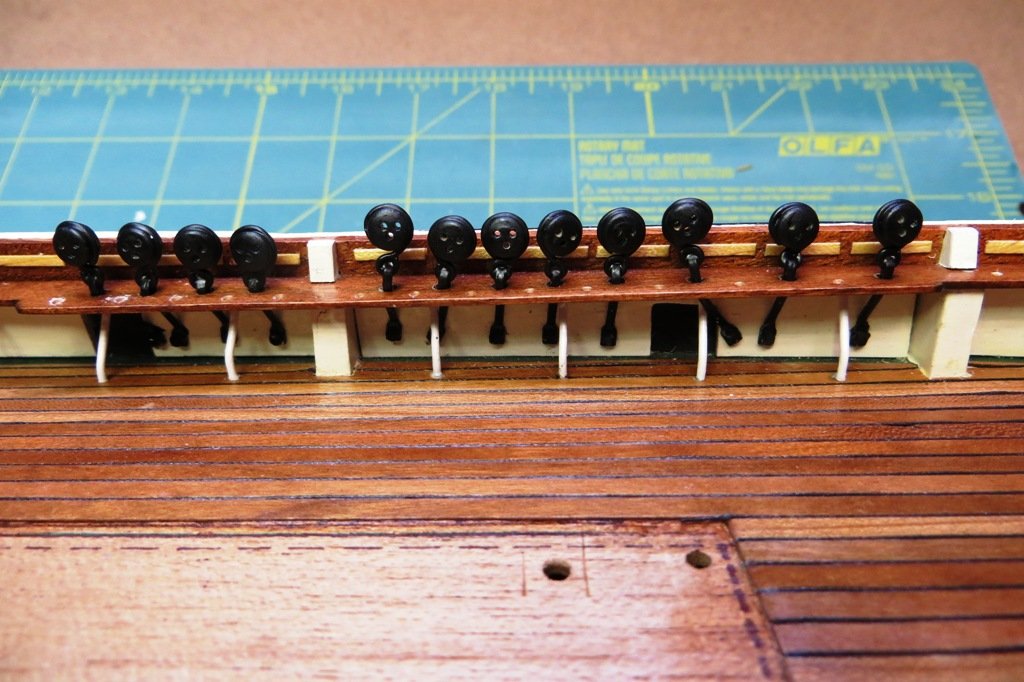
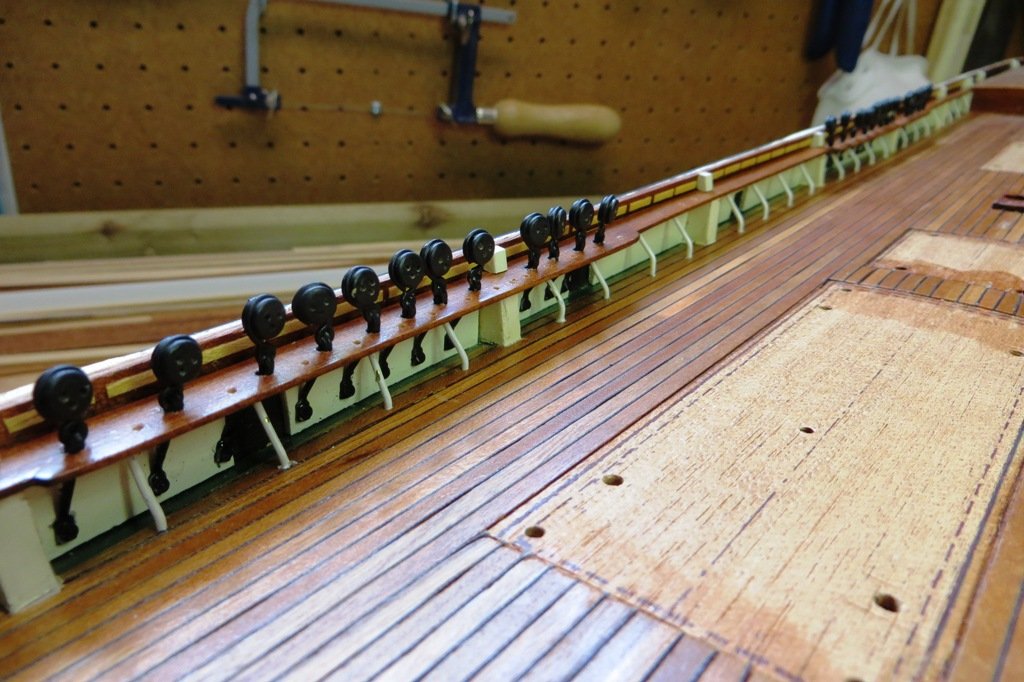
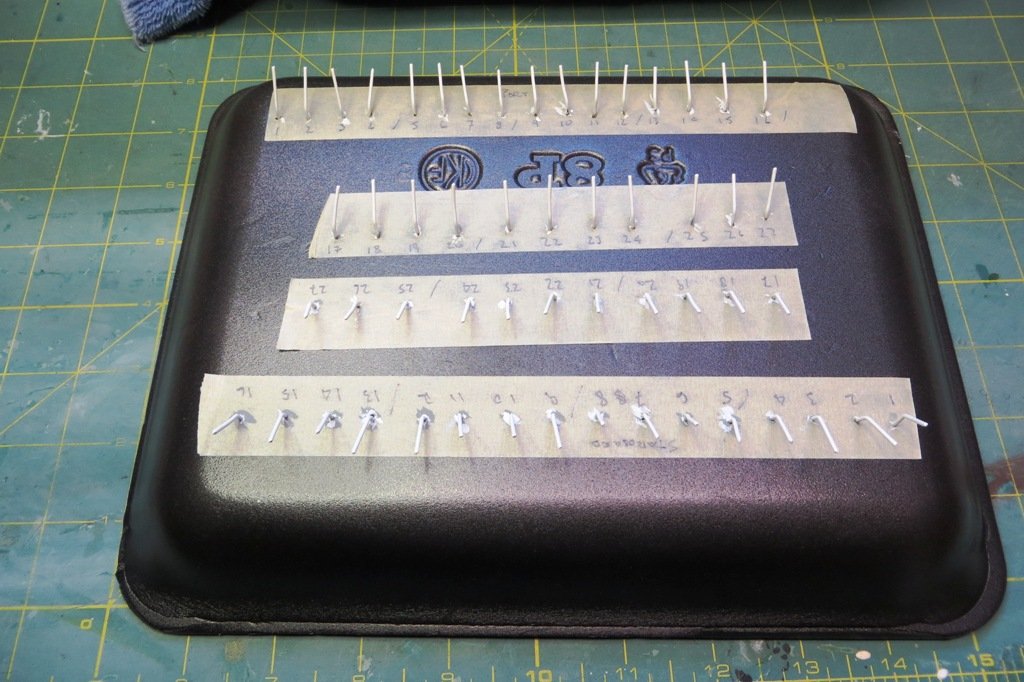
I just finished up the labour intensive work on the deadeyes on the main deck. It was a multi-step process that invoved some "metalwork". Billing supplies the chain plates and a bunch of plastic deadeyes. I opted to poach a bunch of deadeyes from another kit so as to use the chainpates that were provided. It would not have been easy to use them together. Once the chainplates and deadeyes were married, I used a drop of glue to make them rigid so as to paint them easier. Here's a bunch of pictures showing the process...
- 207 replies
-
- 10
-
-
- billing boats
- cutty sark
- (and 1 more)
-
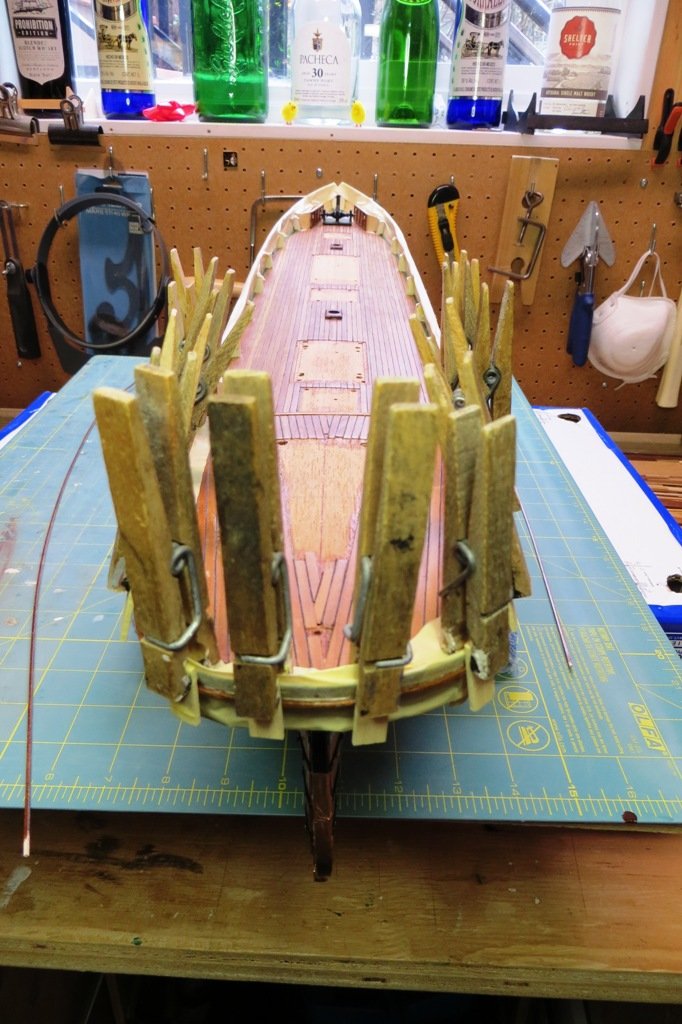
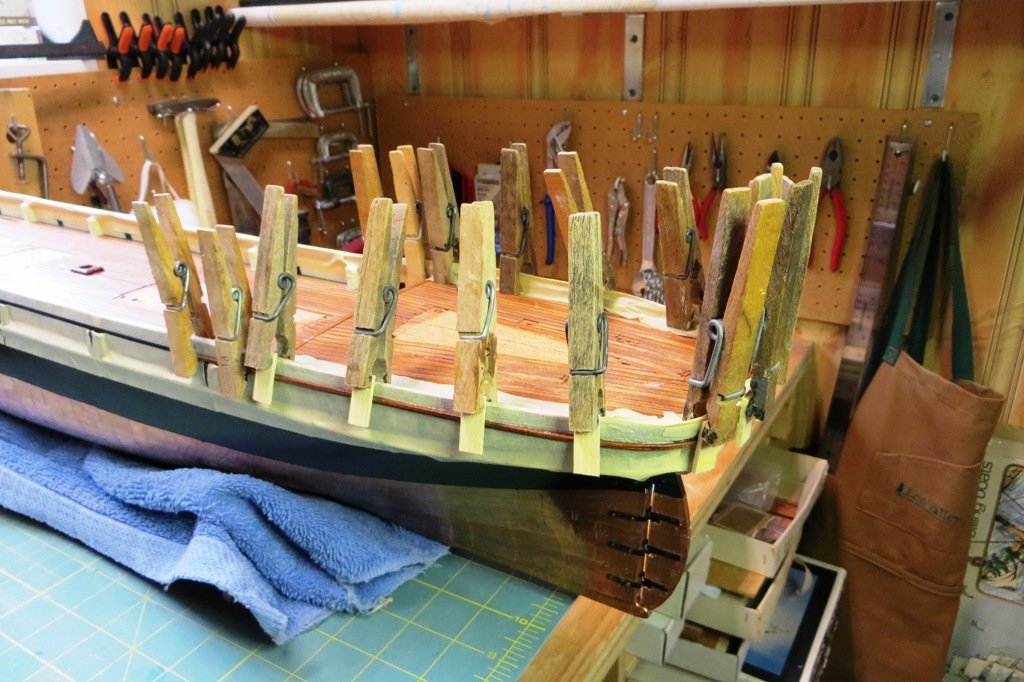
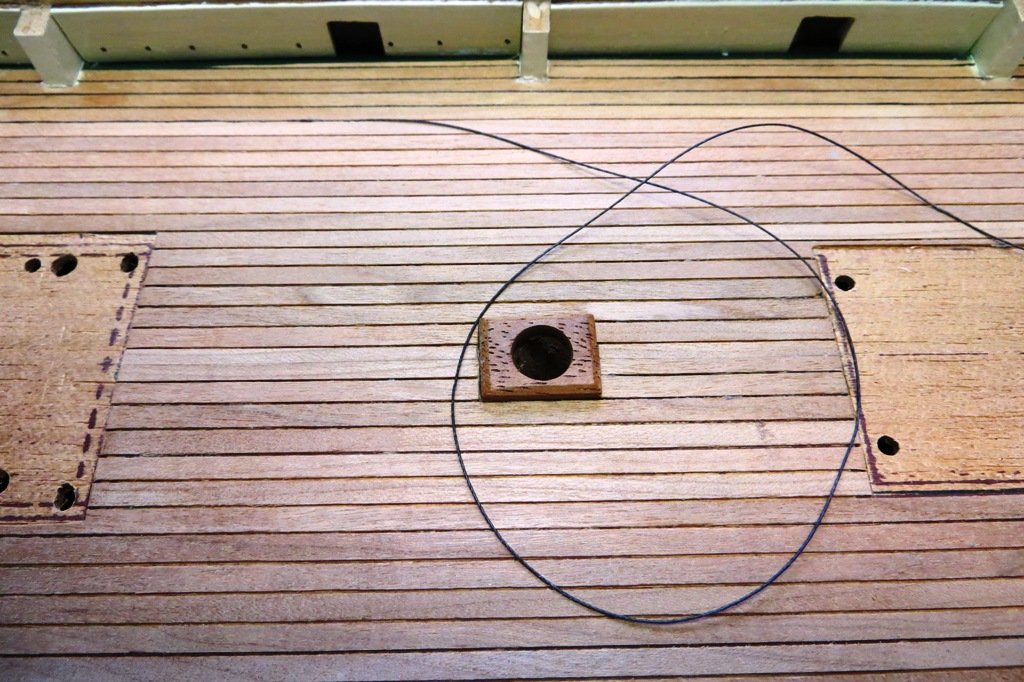
Have to say I have always put black thread between the seams of the planks on the decks of my models. I realize that others do it differently and I really admire some of their techniques, but to each their own. As for the procedure, I now have a method that works for me. First I give all the planks a preliminary sanding before I glue them to the false deck. Then I lay down a plank to glue it. Before the next plank is put down I wax and lay down a black thread adjacent the plank. The wax helps somewhat in keeping the thread in place. Then the next plank is glued down adjacent to the thread, which provides the space between planks. Once the planking is completed, the threads are removed. The planking can now be sanded again to remove any glue and smooth out rough spots. I also take a #19 exacto blade and run it dwon the seams to remove any glue that might have got left behind. Then the thread is laid down again between the planks. I like my decks lacquered so I apply a coat as the threads are laid down. It takes a couple coats of matt lacquer to finish off the decks for me. I realize it's a bit of a process but I like the results, so I keep doing it. Not for everybody I know, but hey, we're snowflakes, we're all different. Here are a few pic's...
.JPG.94a66362a958add4de80212e9bb031f6.JPG)

.JPG.fb756ce5f4b68b6f0809e17ba9d86327.JPG)
.JPG.330449068a09343874b41f8de73f8a27.JPG)
-
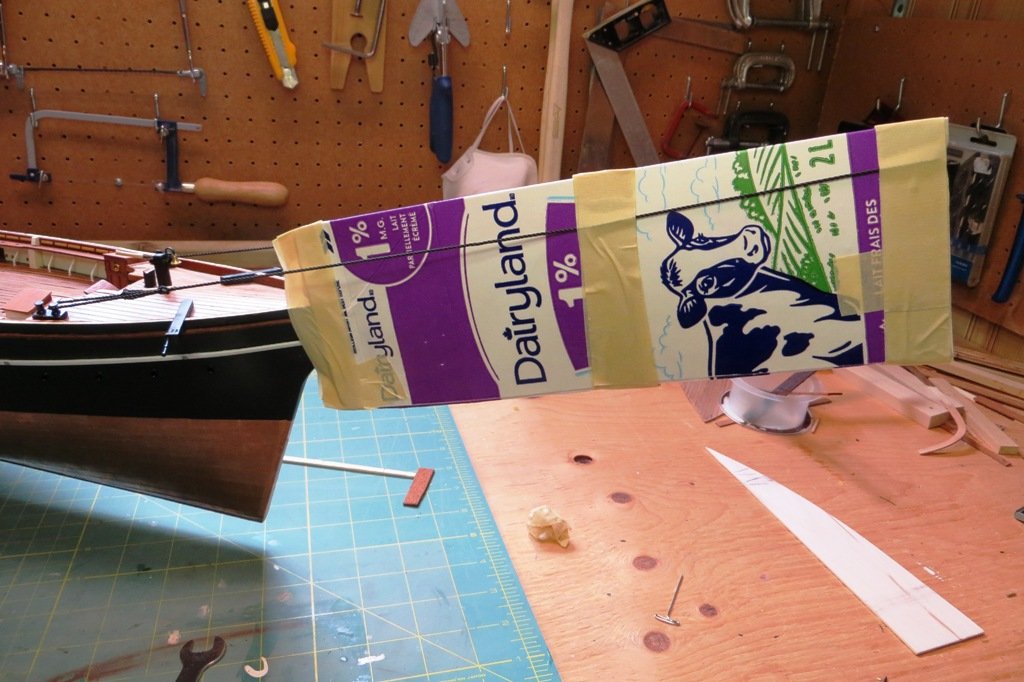
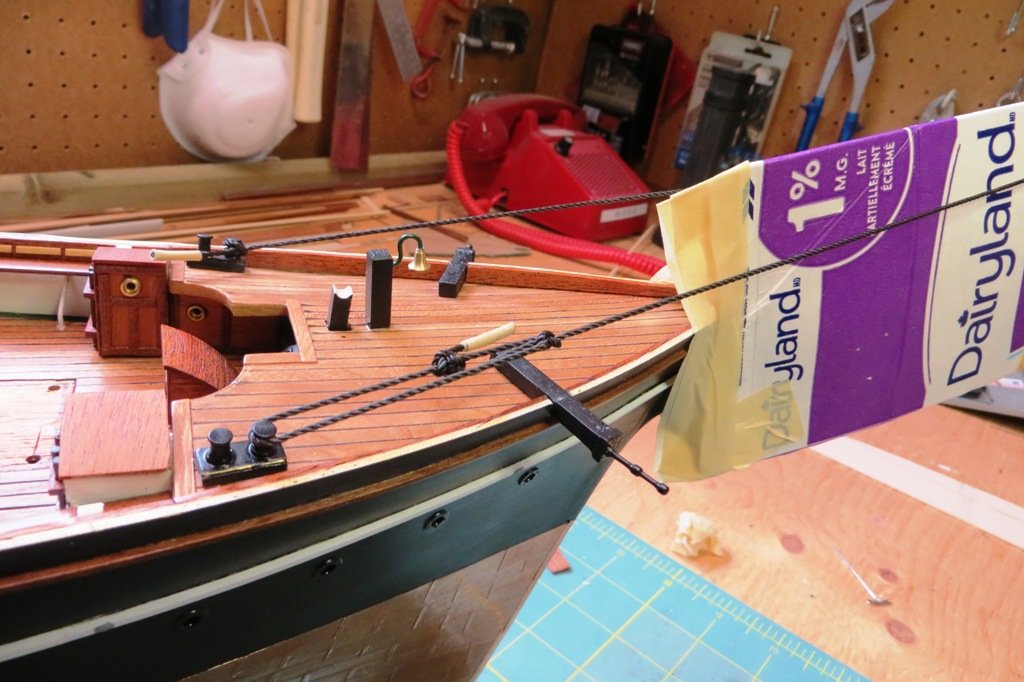
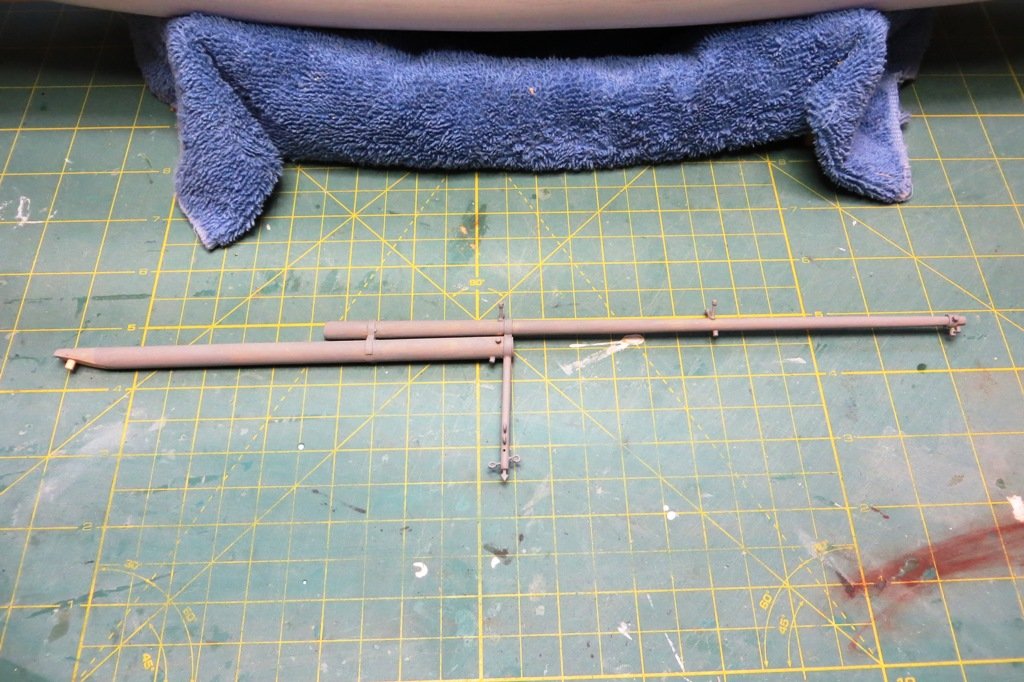
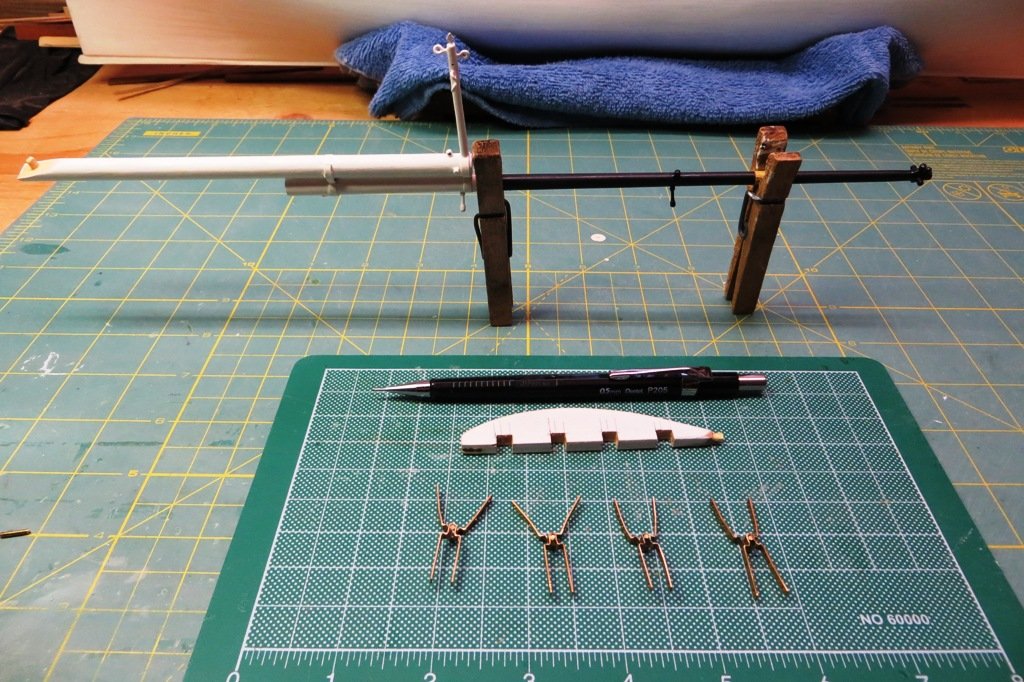
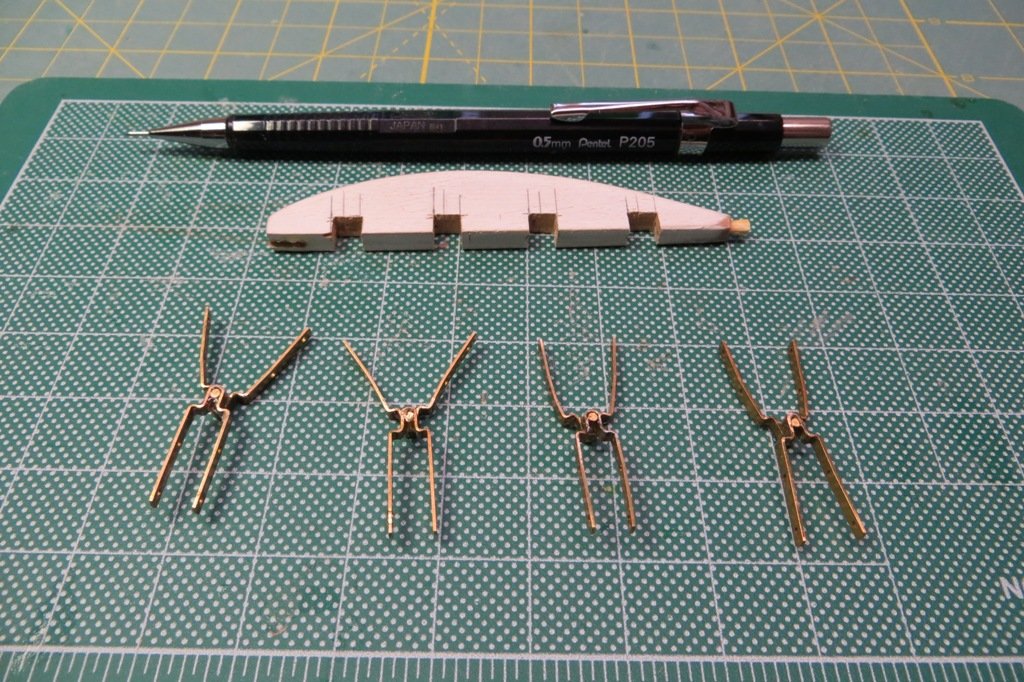
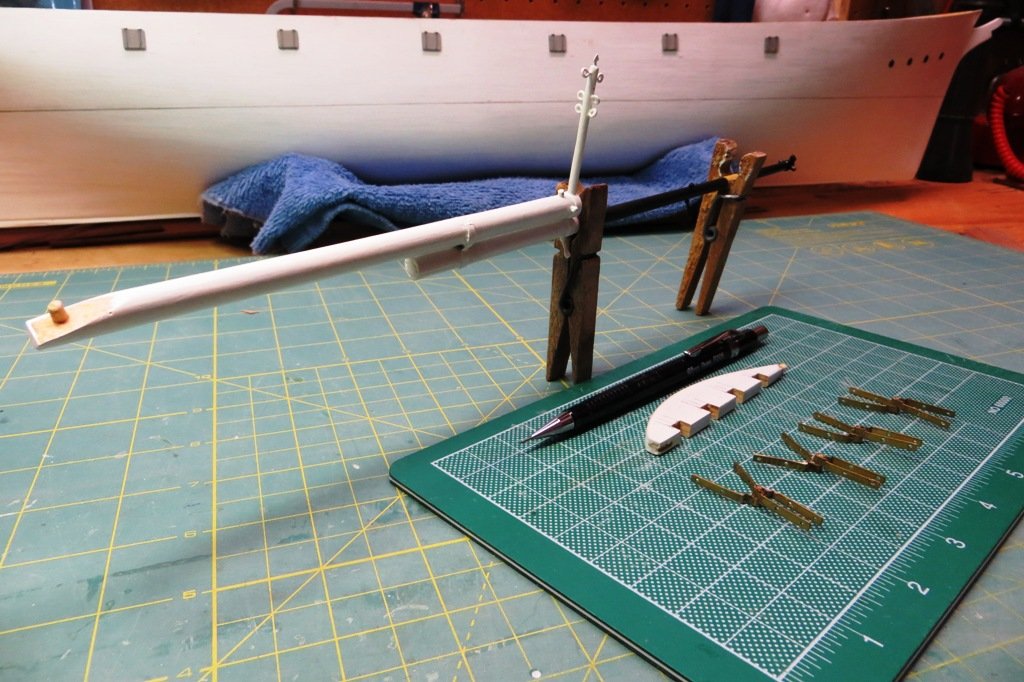
After just about snapping off the bowsprit (several times) and the dolphin striker (once), it was time to take some preventative measures. I decided to "splint" the offending spar so as to avoid some dfficult repairs later on. Here is my solution. Once the bowsprit has some standing rigging in place, I can dispense with the milk carton.
- 207 replies
-
- 5
-
-
- billing boats
- cutty sark
- (and 1 more)
-
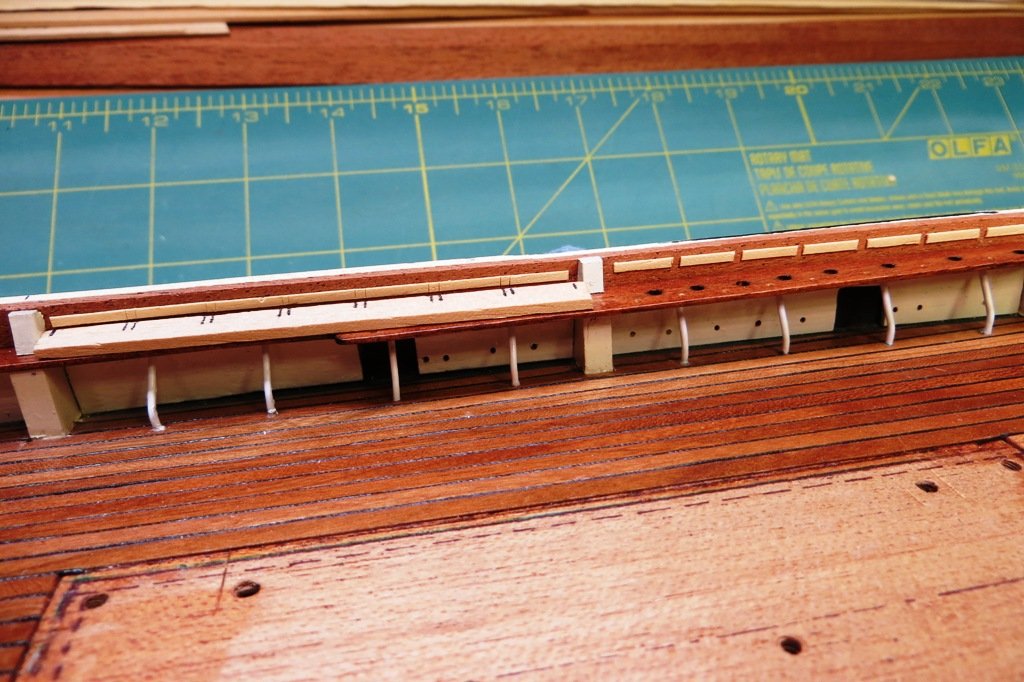
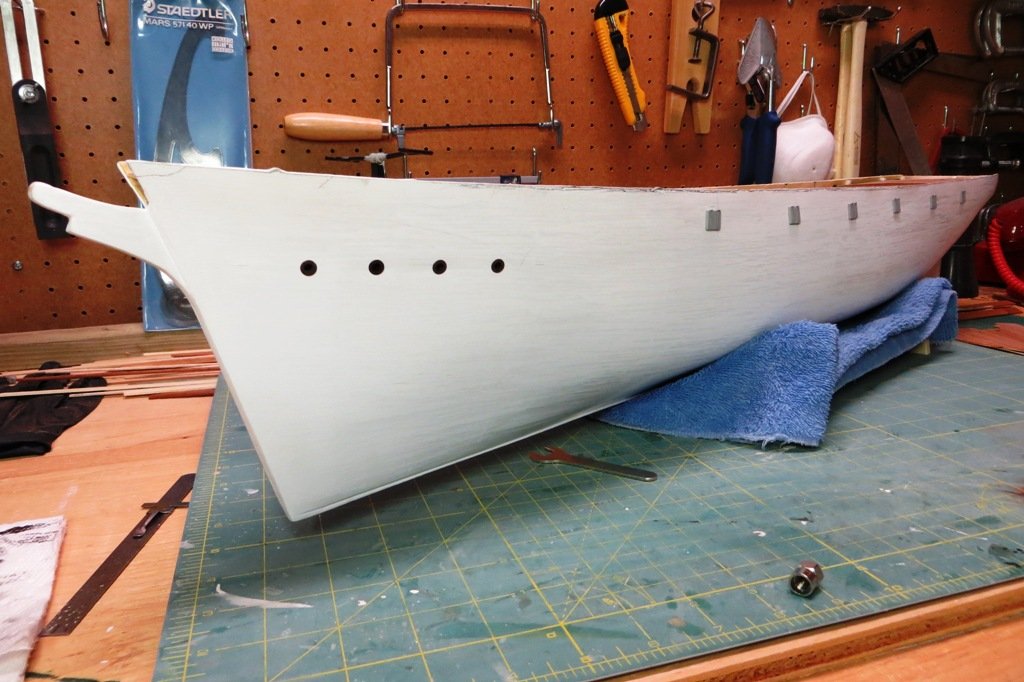
Finally, here are some photos of the gunwale stanchions and trim along with the attachment of the foc'sle deck. I didn't think I would bother with the trim and stanchions but other builders of this model added them so I had to try and keep up. I have finally found a re-purpose for the styrofoam trays our meat gets packaged in. They are perfect for holding tiny fittings while they get painted! What with the foc'sle deck being added, I had to afix the bowsprit in place. This made the model instantly longer by 8.5" so it is alot more susceptible to damage. Yikes!


- 207 replies
-
- 7
-
-
- billing boats
- cutty sark
- (and 1 more)
-
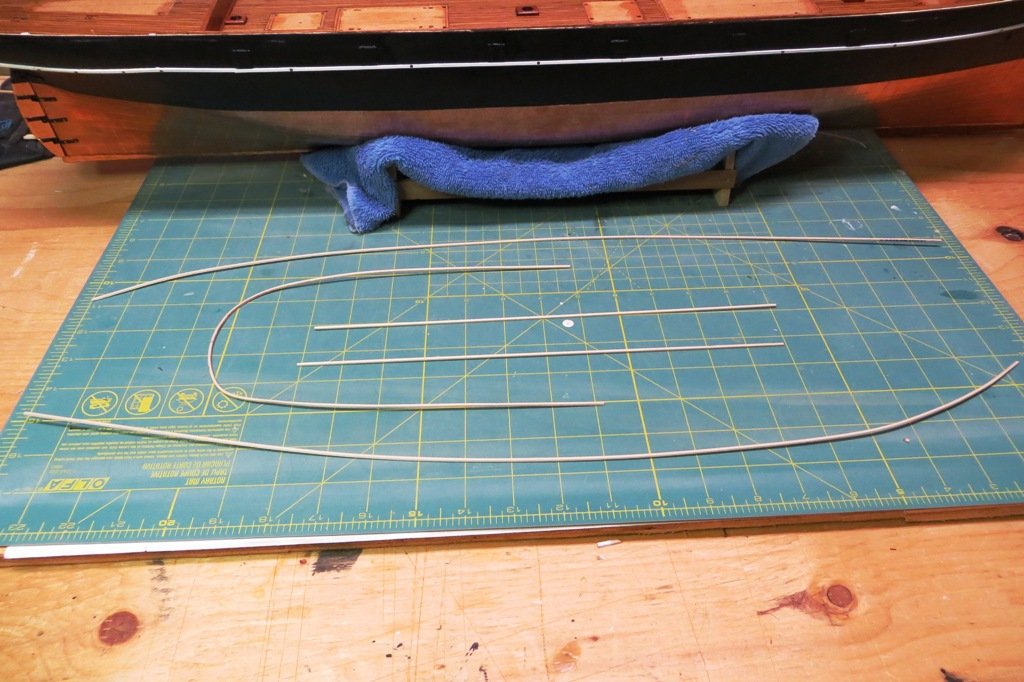
The hull trim has also been added. The strips were pre-bent and prepped with paint or stain before they were nailed/glued to the hull. This whole process was pretty tricky and it did not turn out perfectly, but it will have to do. Next time around I think I will glue them on while the hull is bare wood and paint or finish them in place with masking tape. I did however rough up the paint with sandpaper so that the glue had a better chance of holding.
- 207 replies
-
- 8
-
-
- billing boats
- cutty sark
- (and 1 more)
-
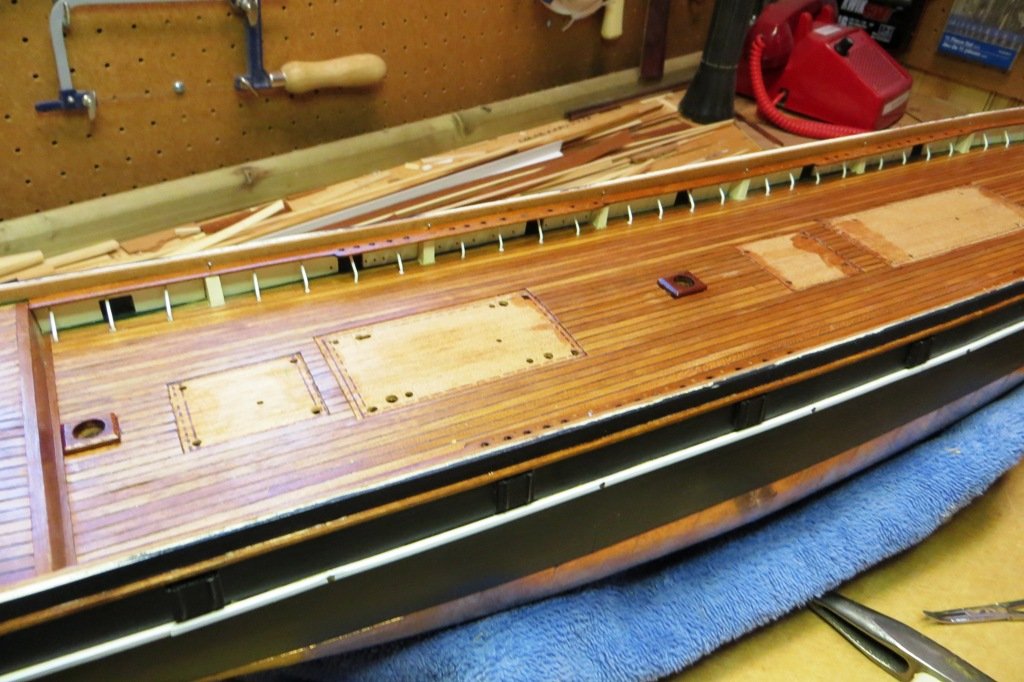
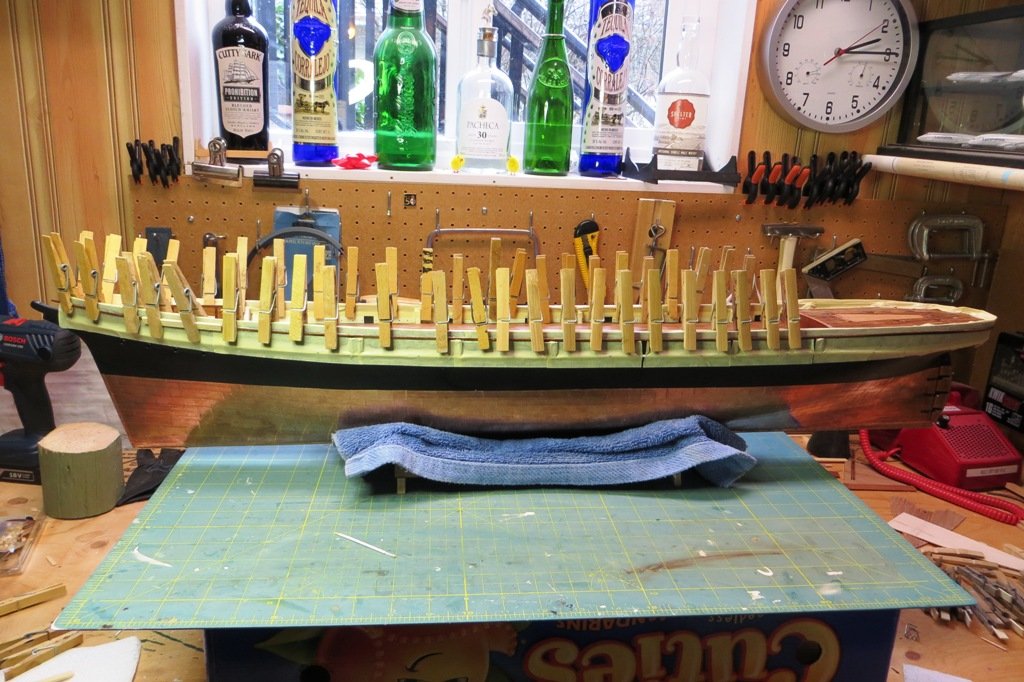
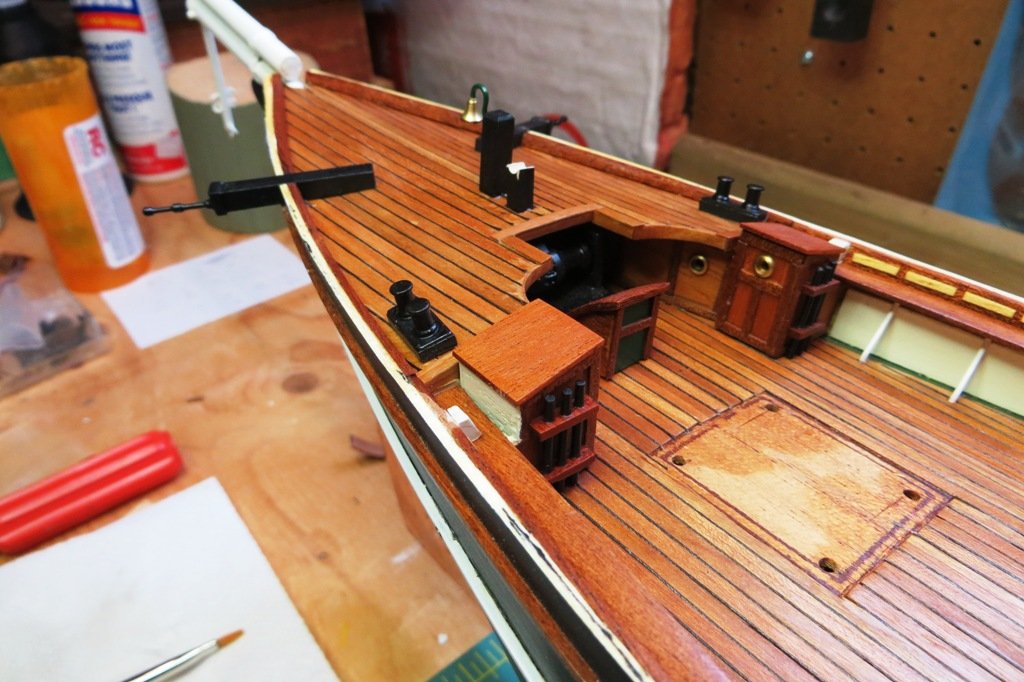
Well, work has been progressing albeit slowly. The decks are finally all caulked and several layers of varathane applied. This is what they look like now...
- 207 replies
-
- 7
-
-
- billing boats
- cutty sark
- (and 1 more)
-
Your ship must be getting to be a challenge to lift and move. She looks amazing! Peter
- 200 replies
-
- 2
-
-
- cutty sark
- clipper
- (and 1 more)
-
Holy cow! By that I mean your model is going to be the size of cow! Amazing. I am building my Cutty Sark at 1:75 scale which means yours will be twice the size. And I thought I had my hands full... At any rate, you have done an amazing job so far. The engineering alone of building a ship to this scale is very impressive and I wish you all the best in going forward. I have to follow along as this is one of the most impressive builds I've seen. Cheers, Peter
- 200 replies
-
- 2
-
-
- cutty sark
- clipper
- (and 1 more)
-
Hi Jens, Just looking in and am really impressed by your model. I also had a look at kpunts Cutty Sark just now and its amazing how this model gets the treatment by various modellers. A real inspiration for me. I am envious that you are working on the masting and rigging already. You have done beautiful work in prepping the masts and yards. I wish I had your talent for making all the fittings for them. All the best going foward! Peter
- 188 replies
-
- 1
-
-
- cutty sark
- billing boats
- (and 1 more)
-
Your model is looking mighty fine. I am neck and neck I think in our build of this model although I am building the Billing version. It's always interesting to me how each one of us tackle their model with regards to how and when bits and pieces get added. I really like how yours is going and it will be stunning when completed. Cheers, Peter
- 82 replies
-
- 2
-
-
- artesania latina
- cutty sark
- (and 1 more)
-
Vanda-lay industry tools
petervisser replied to Moab's topic in Modeling tools and Workshop Equipment
Hmmm, and I thought they specialized in latex... -
Hi Allan. Fantastic work on your masts! They look like the real deal! I came across this youtube video which you have probably seen, but maybe not. I really enjoyed watching it. Not the best quality but the ending is kinda fun!
-
Thanks for the words of encouragement guys. Now that there is some colour on the model, it really starts coming together. I just realized that there needs to be some white trim added to the hull and some decoration. I will start prepping that while I finish the decks. So much to think about and plan. Kinda fun really. Peter
- 207 replies
-
- 2
-
-
- billing boats
- cutty sark
- (and 1 more)
-
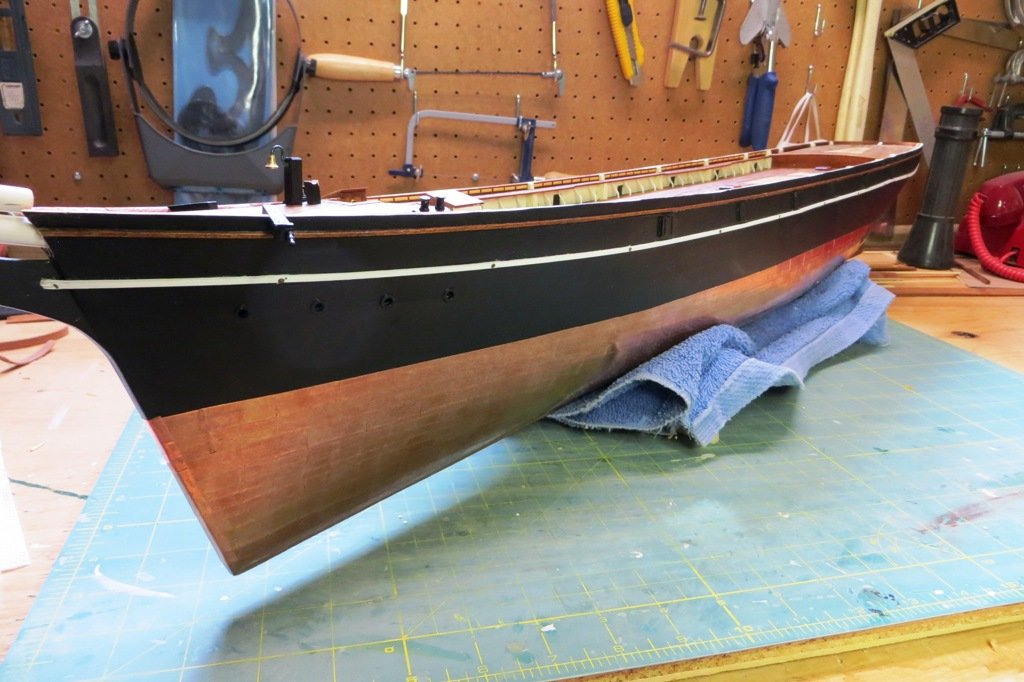
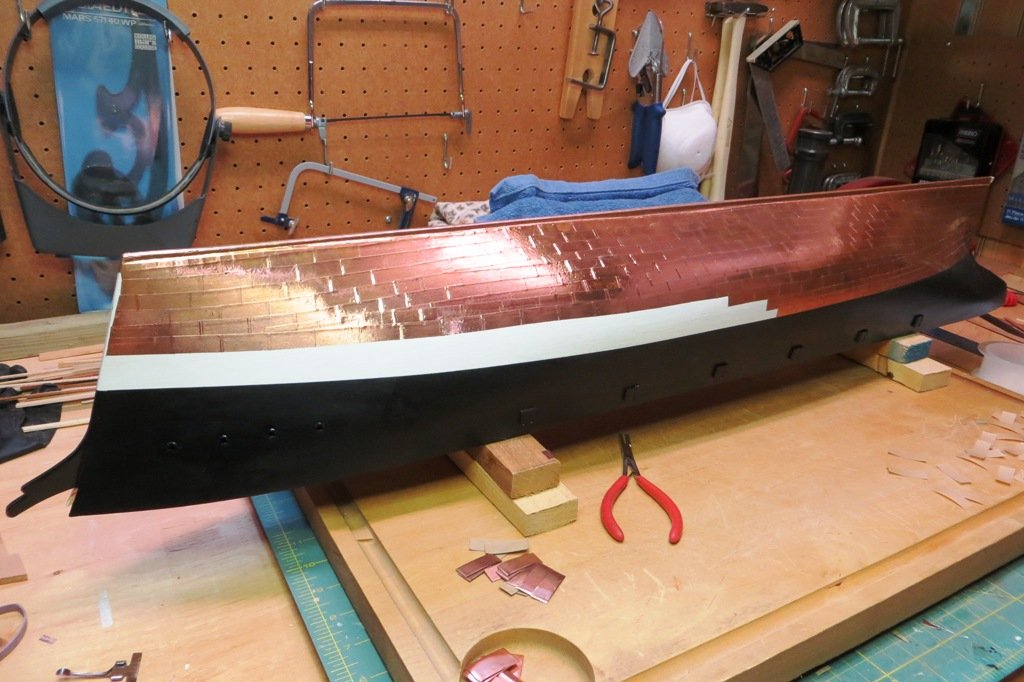
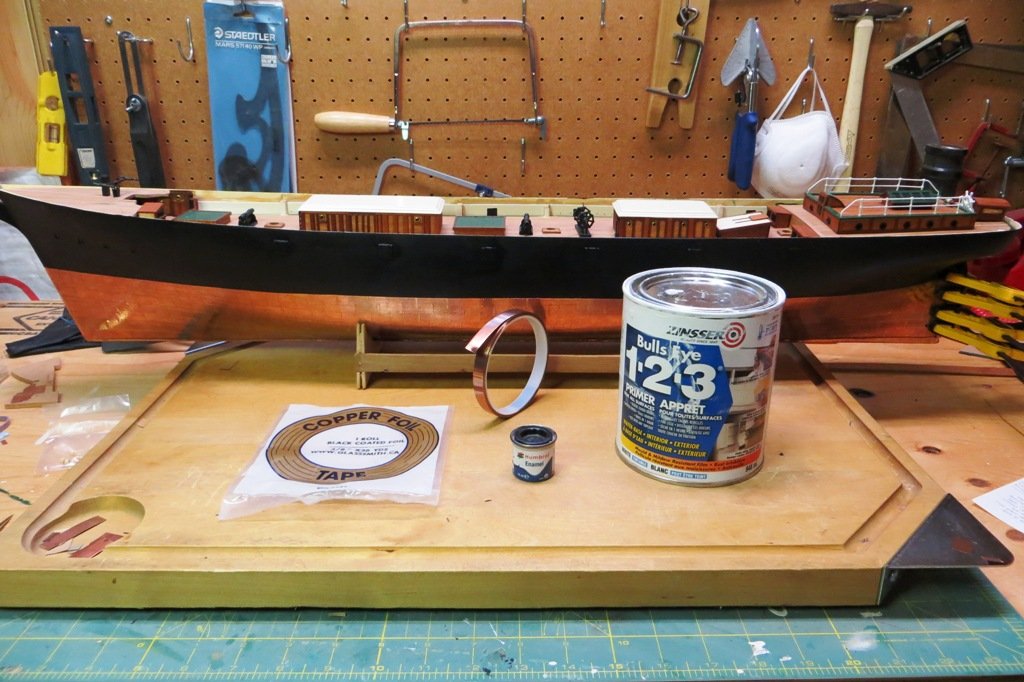
I used the Zinsser sanding sealer to prep the hull and get it nice and smooth. That took several coats, but with this scale of hull I wanted it perfectly smooth. Then several coats of Humbrol enamel paint were applied by brush. Finally the copper plates were applied to the hull. I picked up the copper tape from a shop that specializes in stained glass supplies. The roll of 3/8" tape is 36 yards and cost me about 20 bucks Cdn. That process was a bit of trial and error, plus more errors and some more trialling. But finally I had them all on to my satisfaction, Good from far, but far from perfect. Anyway, here are some pics of the process...

- 207 replies
-
- 10
-
-
- billing boats
- cutty sark
- (and 1 more)
-
Well, things have been progressing in the ole shipyard. I worked on a bunch of the fittings for the foc'sle deck including the bowsprit so that I can eventually finish the decks and put the foc'sle in place. Once those little jobs were done I could start work on finishing the hull.
- 207 replies
-
- 5
-
-
- billing boats
- cutty sark
- (and 1 more)
-
Hello Jens. Really nice work on your masts and yards. I especially like all the fittings you made. Where did you learn to make such detailed fittings? Peter
- 188 replies
-
- 2
-
-
- cutty sark
- billing boats
- (and 1 more)
-
Brilliant! Thanks for the great explanation and thanks to Chuck for the idea! I will try this on my next build as I find the "clinking" affect kinda troublesome. Too much sanding, if you know what I mean. Cheers, Peter
-
Hi Mark, Would you point me to Chuck's method of bending planks. I did not see it in the planking tutorials. Cheers, Peter
-
Great build log Vane! Lots of good photos and explanations. I'm getting some great ideas. Thanks! Peter
-
Outstanding so far Mark. It's a pleasure to follow along on your build log. Lots of great hints and tips! Peter
-
Great looking Cutty Sark David. Congratulations on a very fine model. She's a beaut. Time to celebrrate with a liquid Cutty Sark! Peter
- 133 replies
-
- 1
-
-
- cutty sark
- mantua
- (and 3 more)