HOLIDAY DONATION DRIVE - SUPPORT MSW - DO YOUR PART TO KEEP THIS GREAT FORUM GOING! (89 donations so far out of 49,000 members - C'mon guys!)
×


Tigersteve
-
Posts
1,327 -
Joined
-
Last visited
Content Type
Profiles
Forums
Gallery
Events
Everything posted by Tigersteve
-
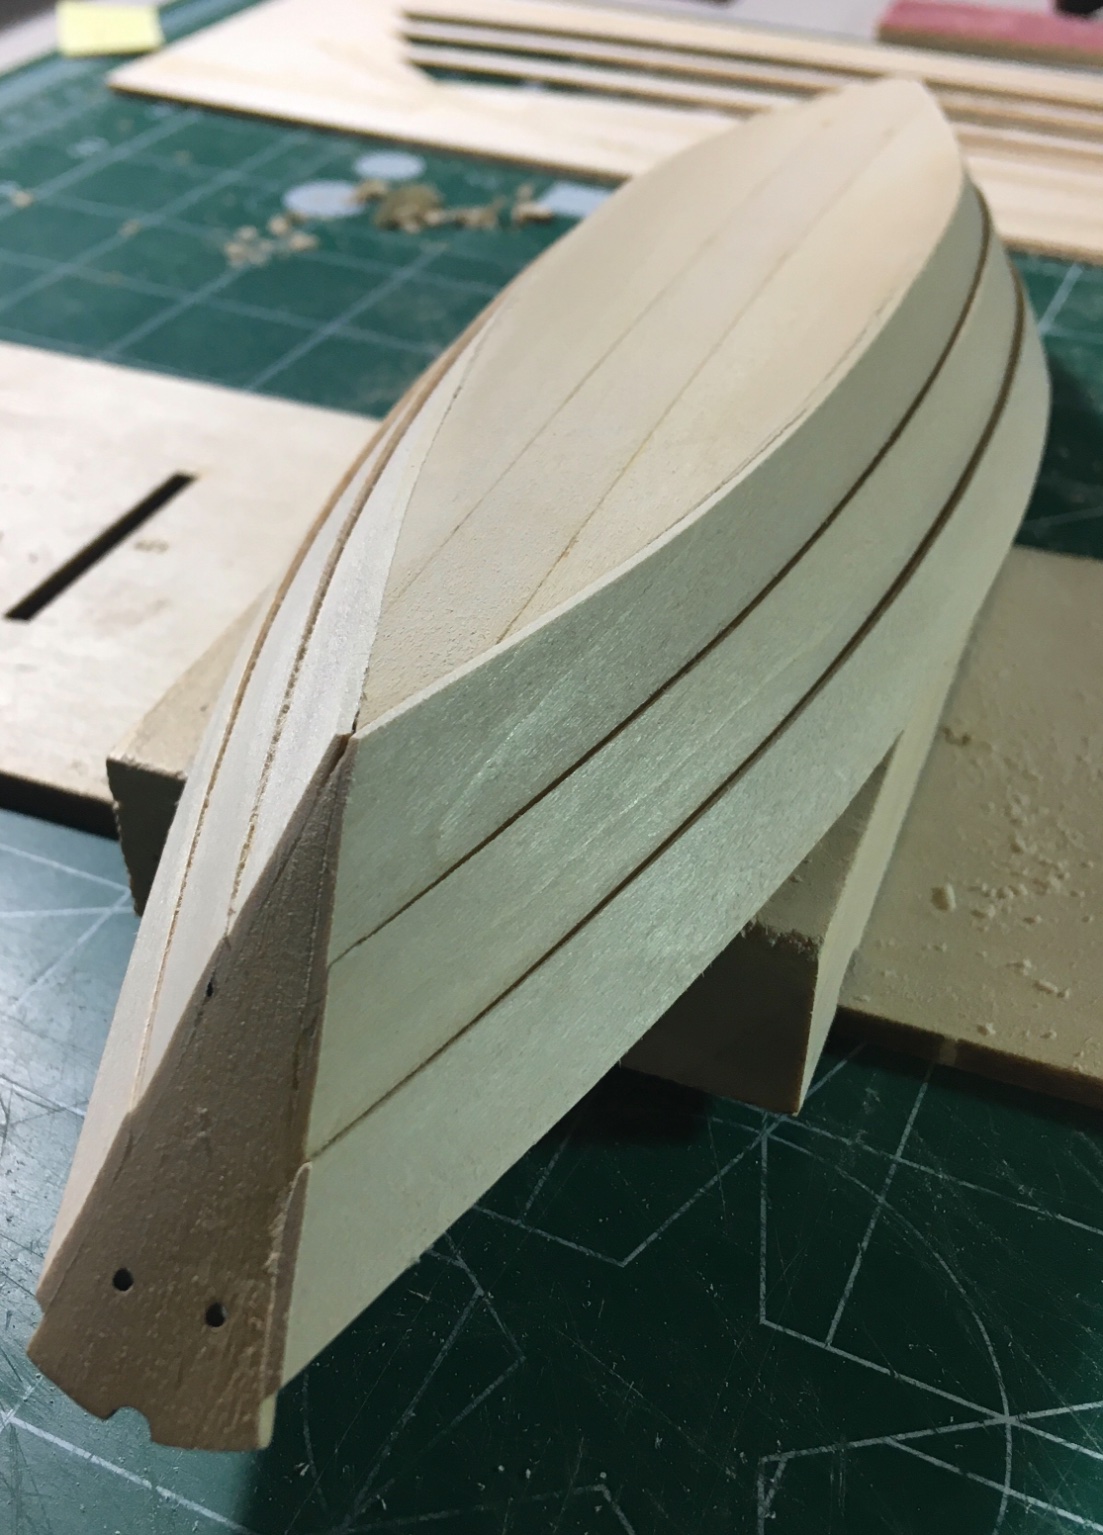
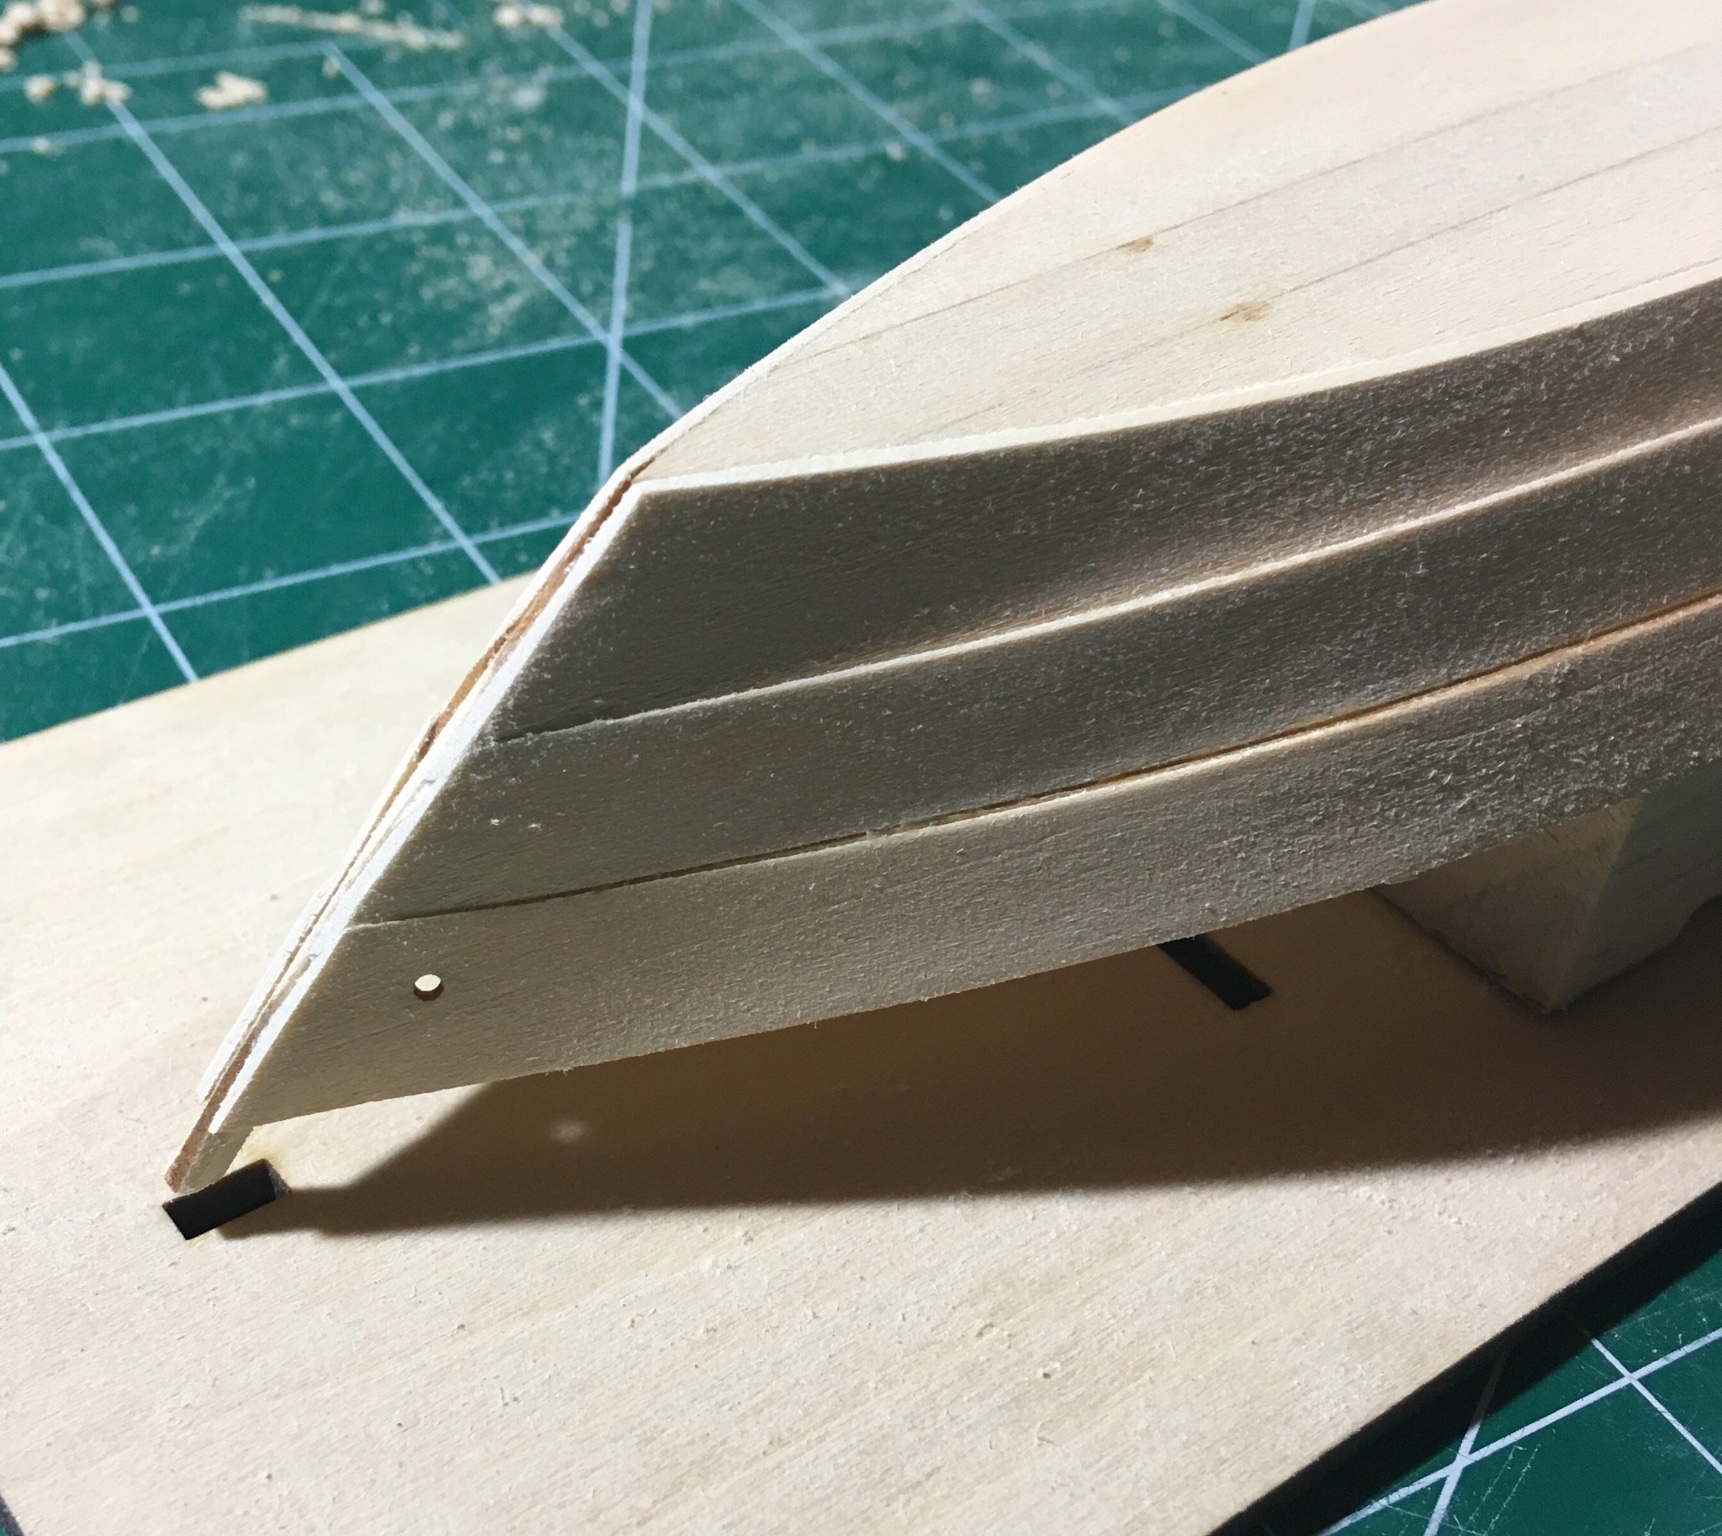
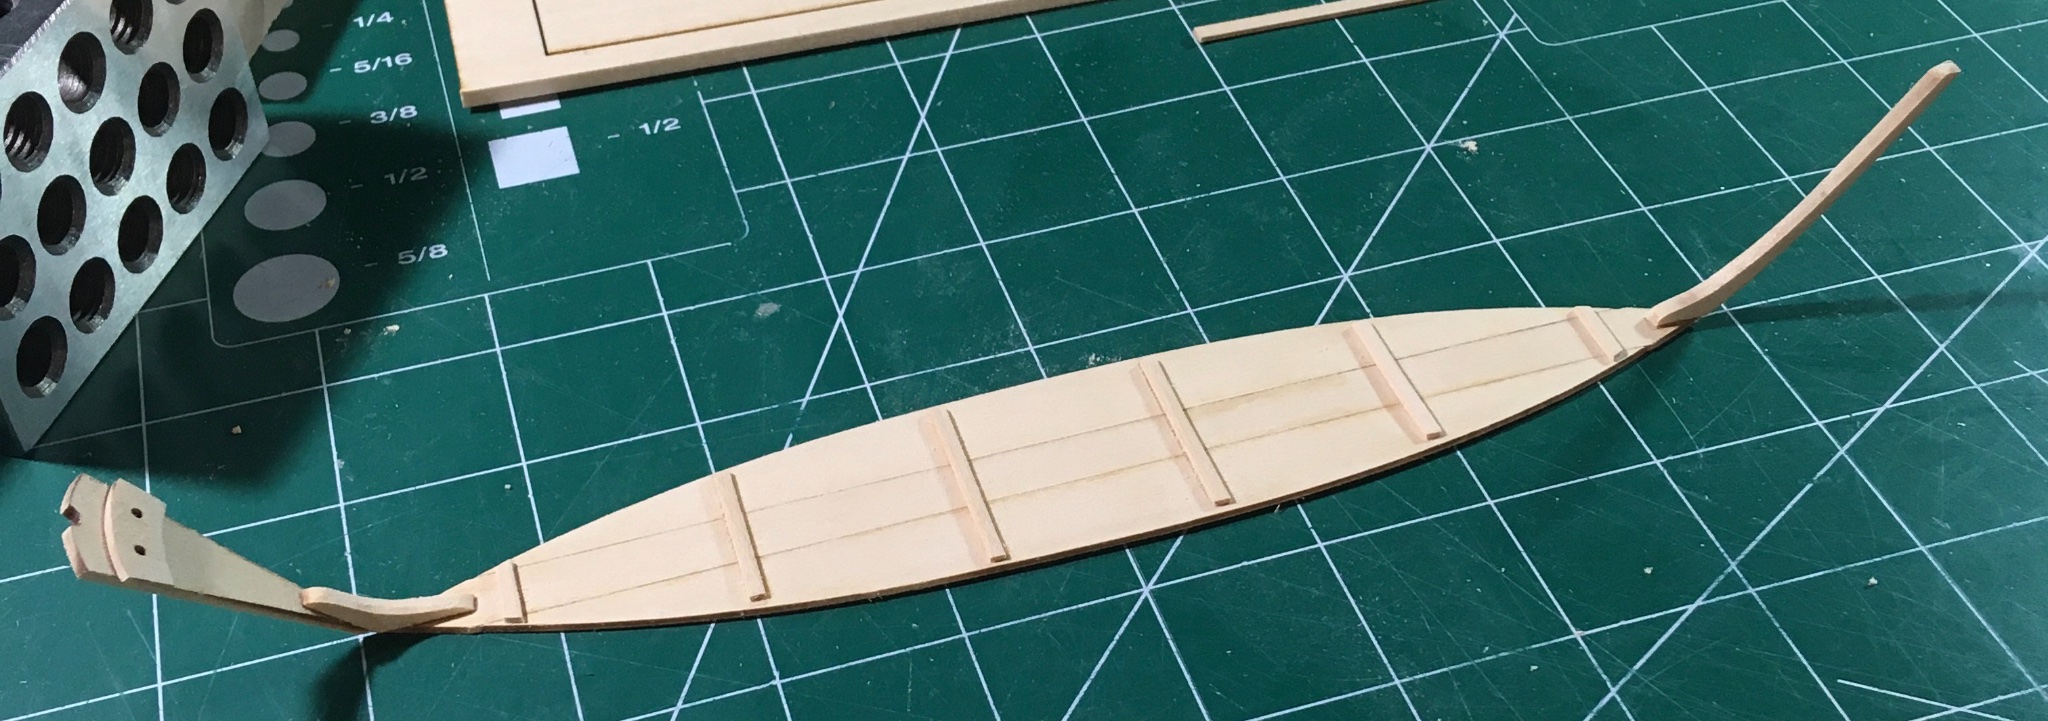
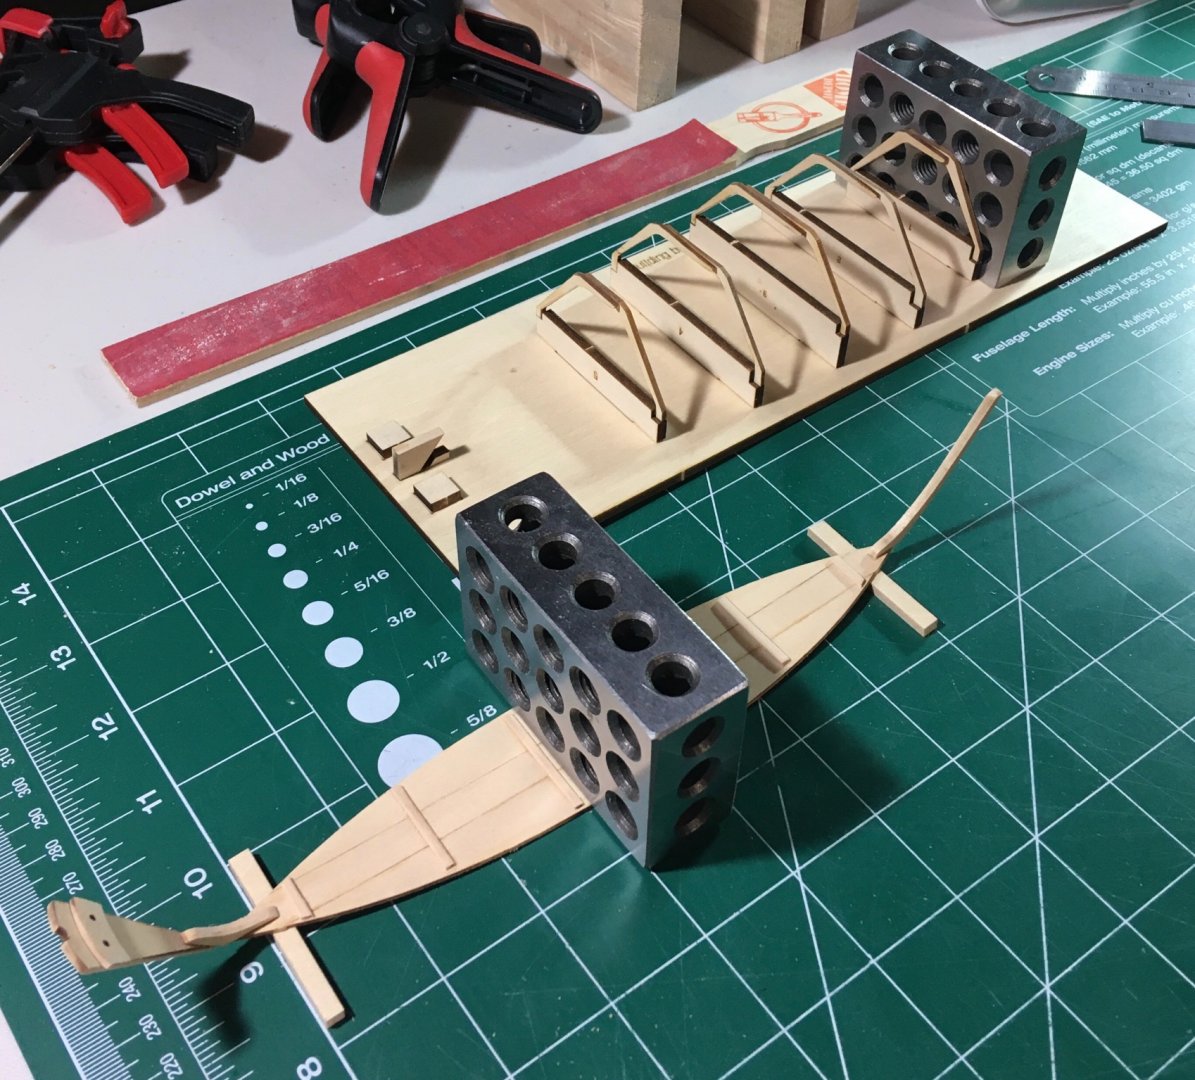
 After planking was complete I removed the boat from the building board and cut off the excess frames. I sanded them down so I could work on the finishing of the exterior of the hull. This is where you address your mistakes. Although I created the rolling bevels, I did not spend much time tweaking the fit to the adjoining bevels on previous planks. To address this I sanded the exterior of the planks as they approach the stem and transom. This created more of a taper and finished look. Sanding sticks and 320 grit sandpaper were used in these steps. At the stern I ended up with some excess curvature. I think this started to occur when positioning the broad strake at the bow. Must have pulled the plank too far toward the sheer. I didn’t notice the error at that point and it just compounded. Not worth ripping off planks, but I will try to make adjustments to the sheer by doing some light sanding later on. (Actually, I think the error is only on one side so I’m not even sure the cause.) Next, I will clean up the interior of the hull. Need some fresh wood filler for the seams at the bottom of the boat. I included some photos of the clamping methods used during planking. Steve
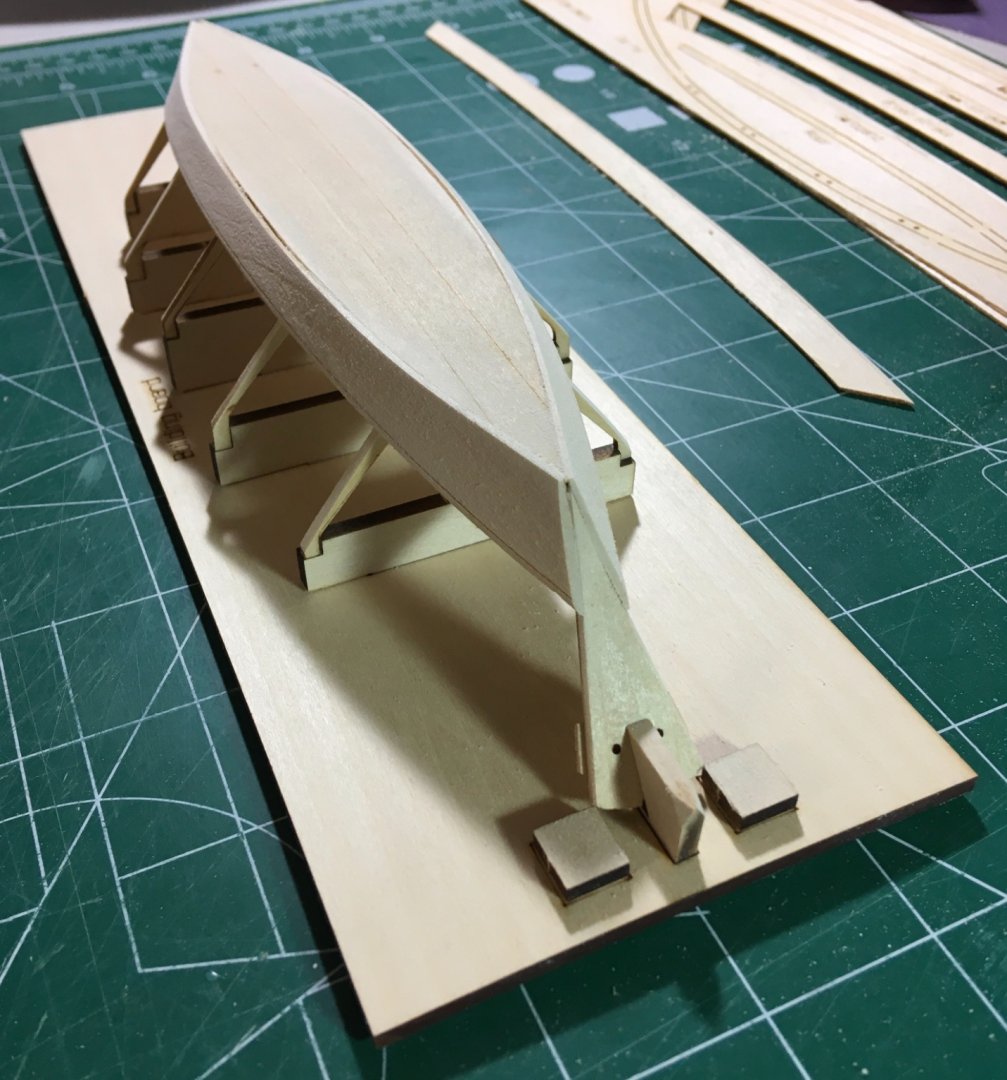


- 70 replies
-
- 6
-

-
- Lowell Grand Banks Dory
- Finished
- (and 1 more)
-
Looks great. Looking forward to the tutorial. Steve
- 421 replies
-
- 3
-
-
- medway longboat
- Syren Ship Model Company
- (and 1 more)
-
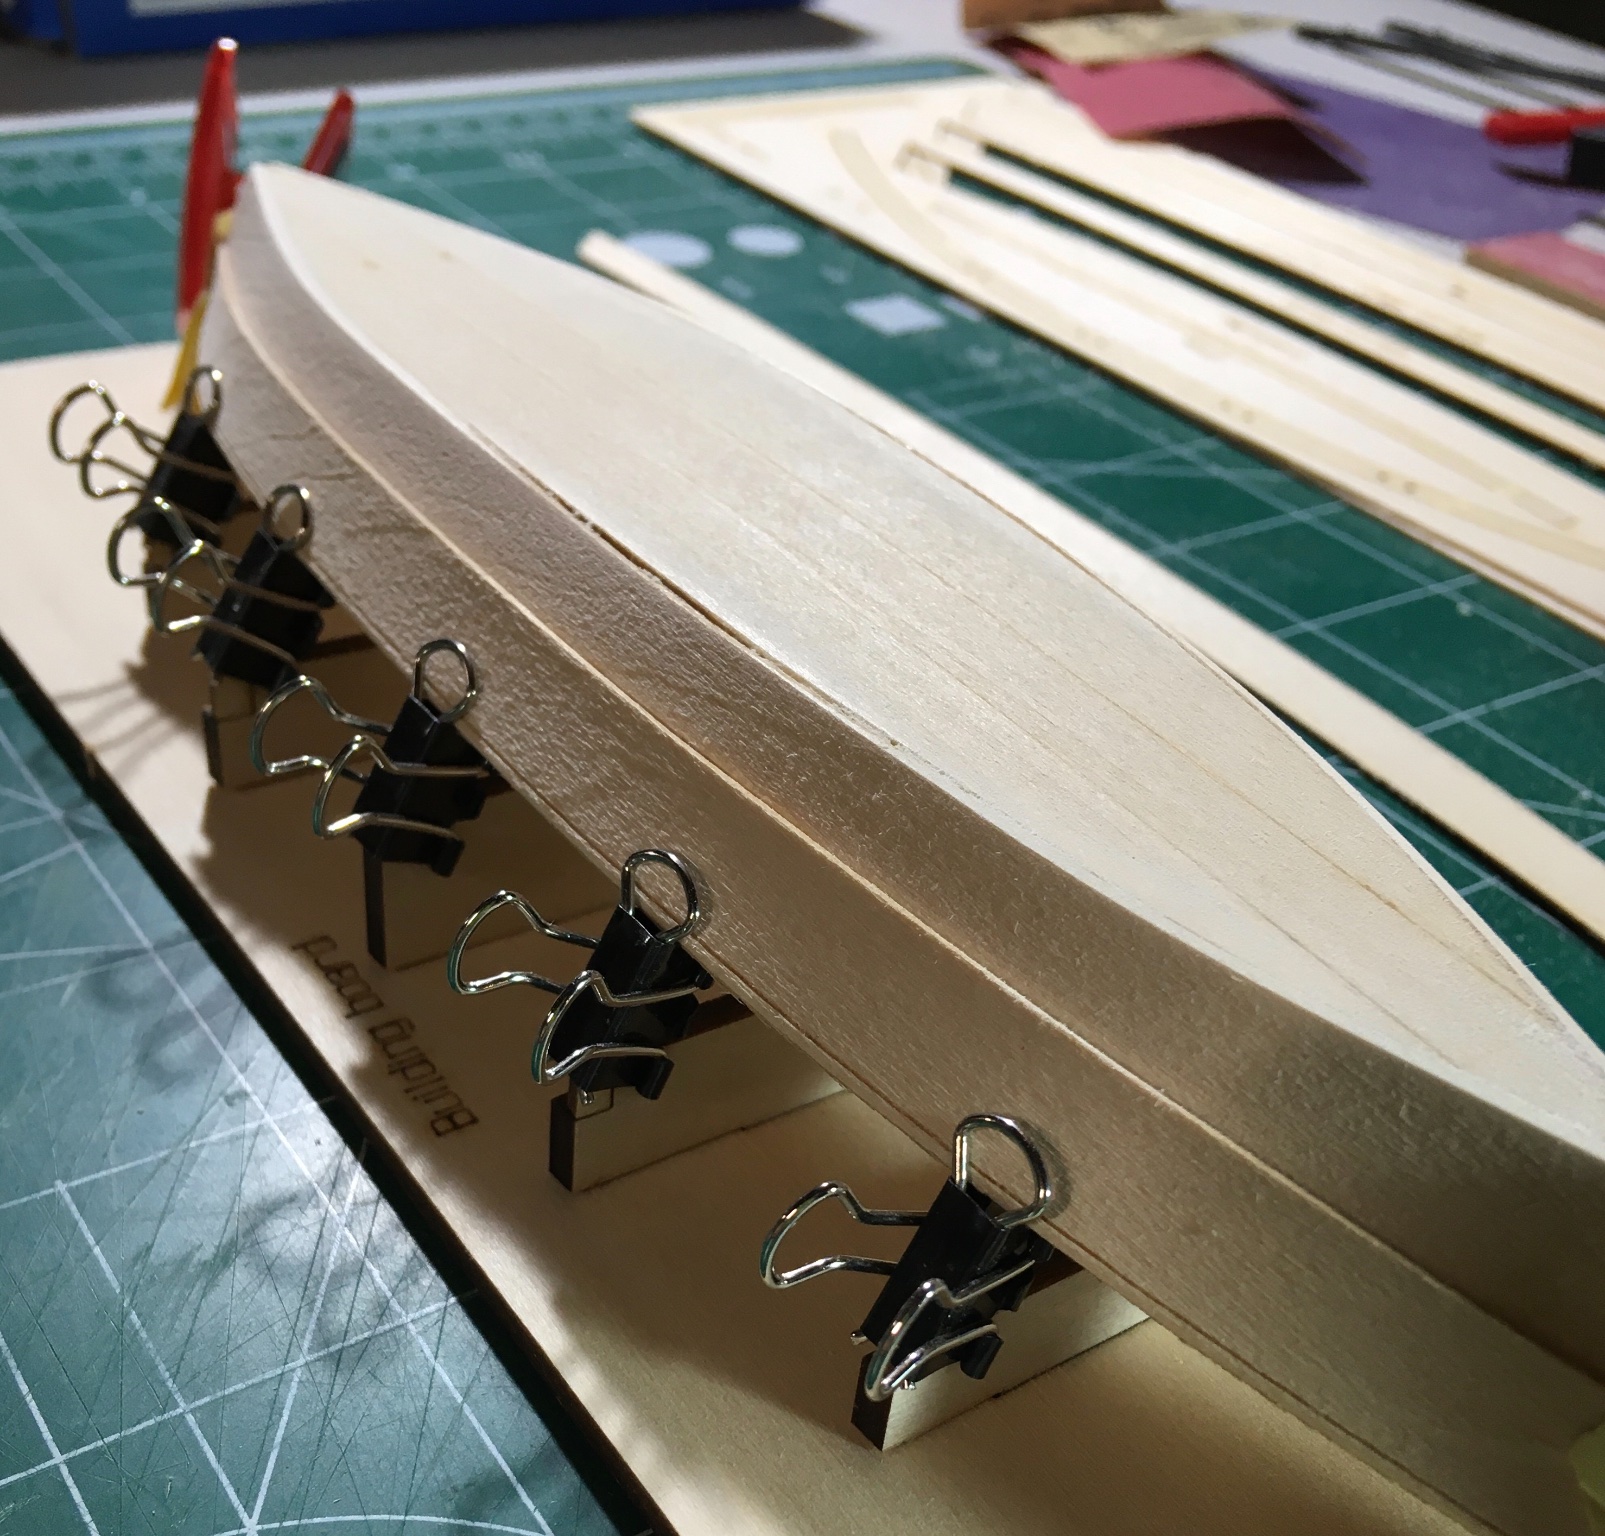
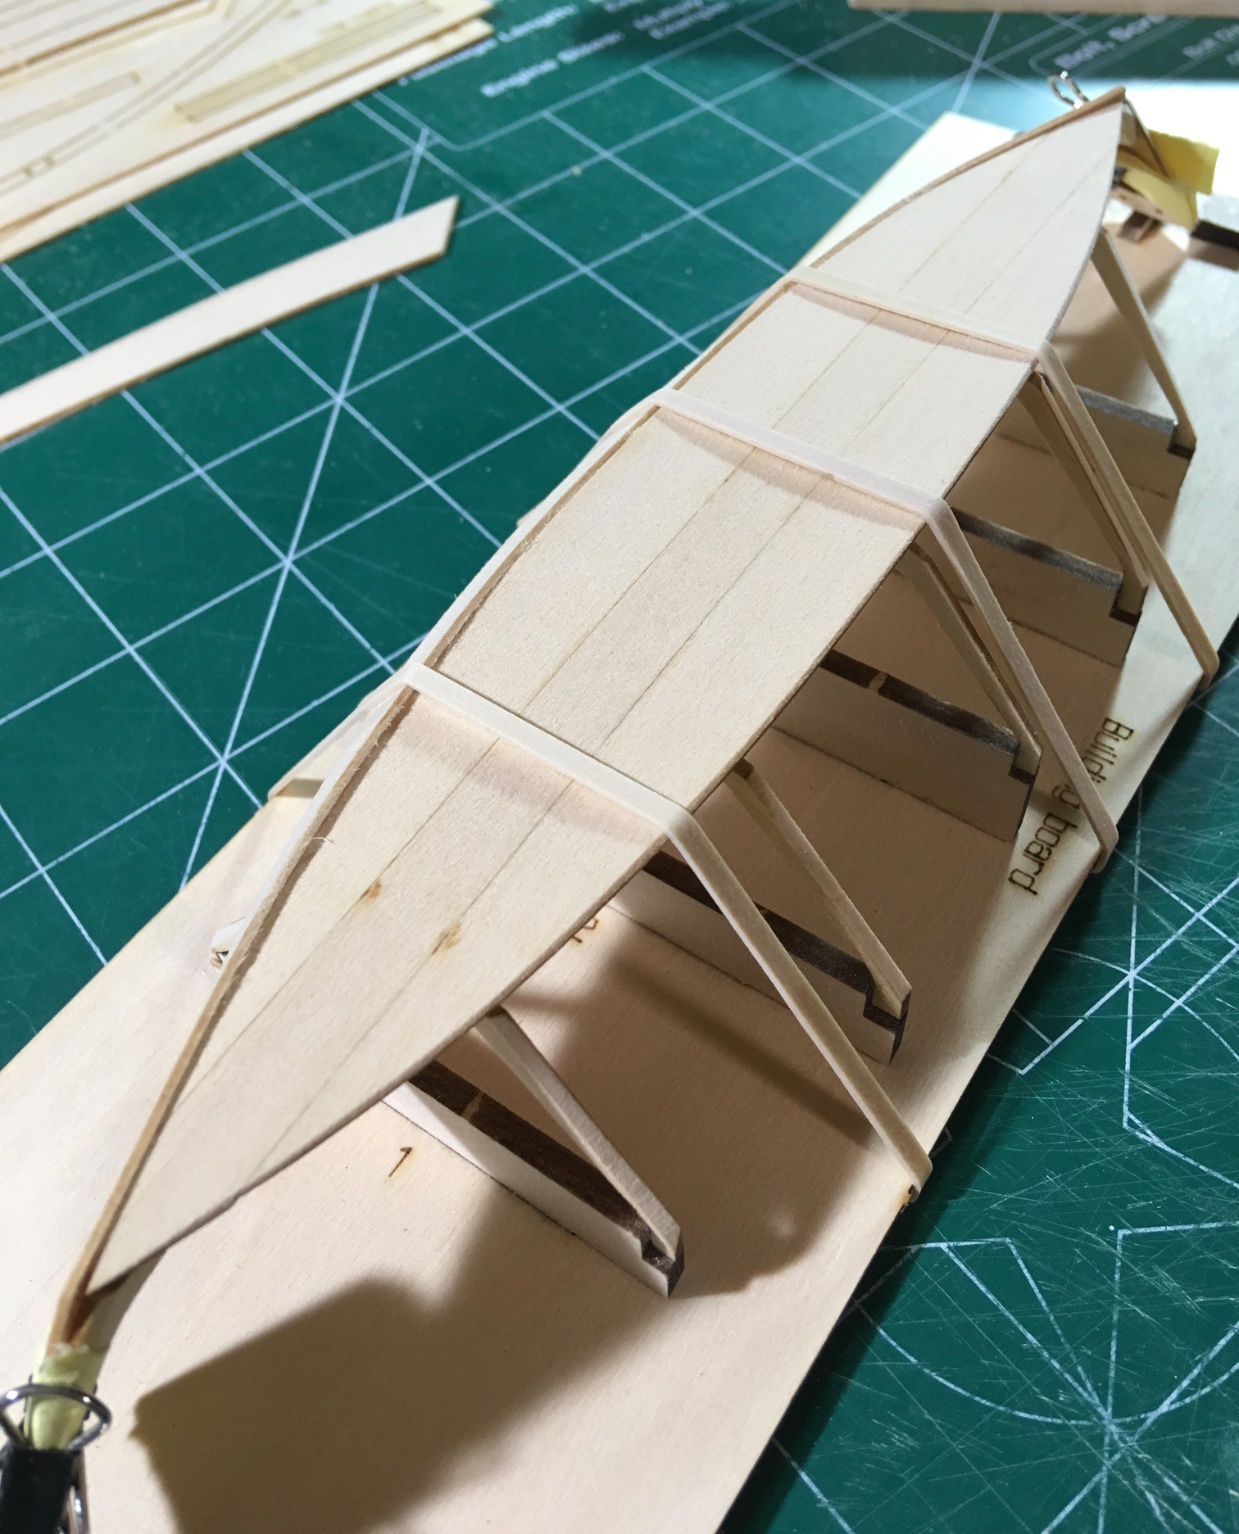
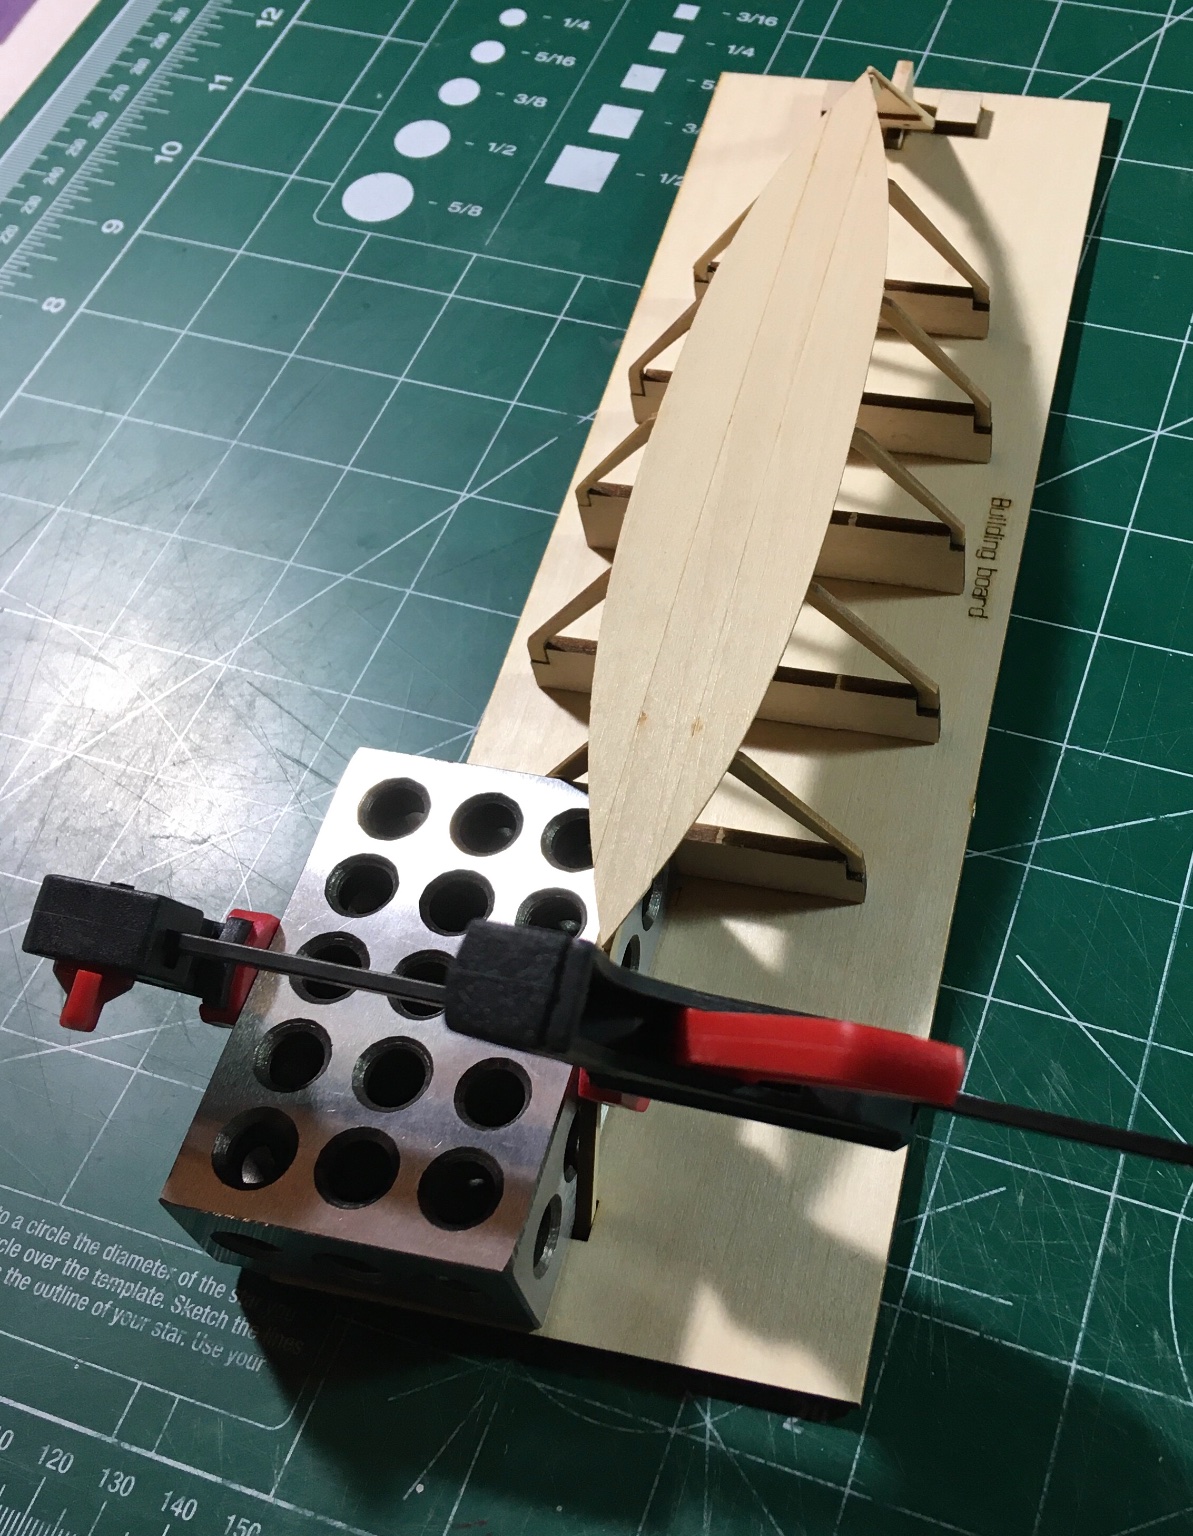
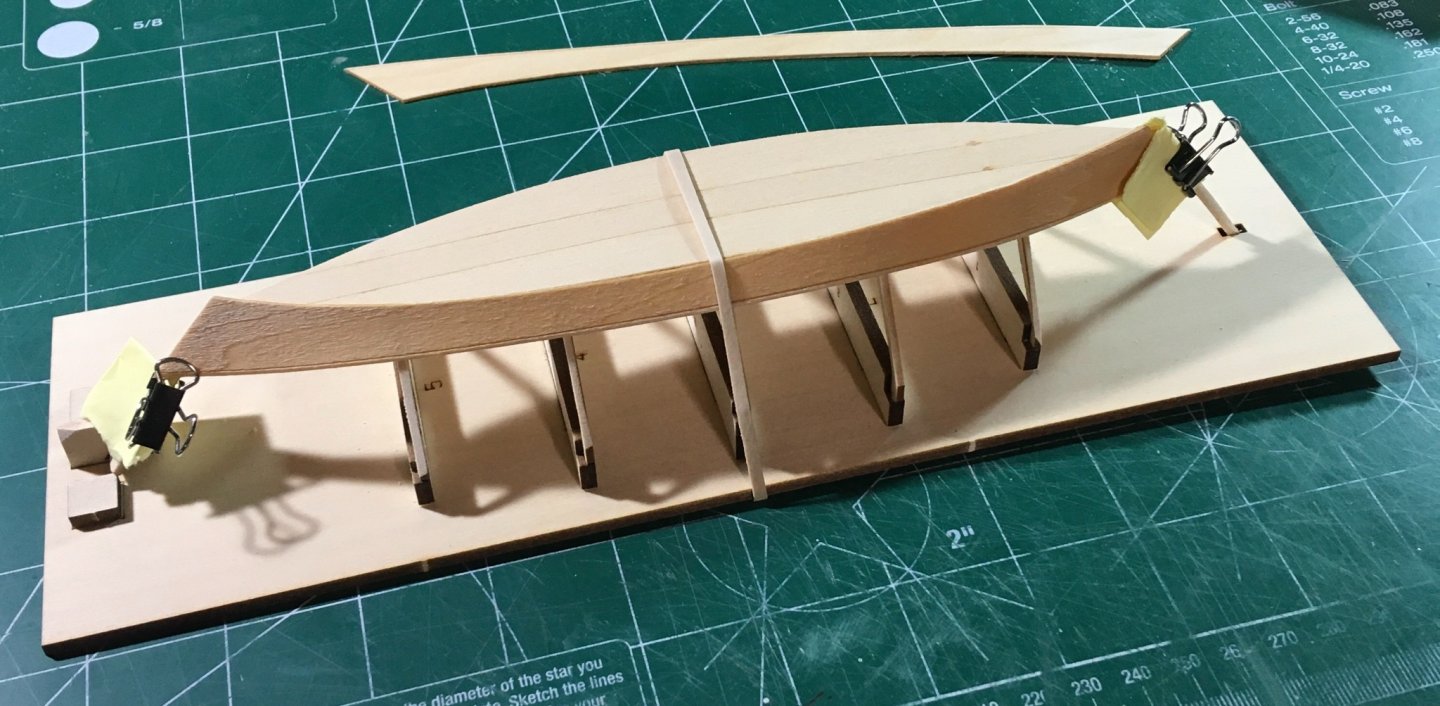
Wanted to share some photos and description of my planking process for some of our new ship modelers to supplement the instructions. 1. After the plank is beveled as per instructions, soak in hot water for a few minutes and pre fit to the hull. Let the plank dry completely. (Photo 1) 2. Position the plank between a rubber band and hull and apply glue to the contact points (frames, stem, transom, bottom floor plank). I apply all glue with a toothpick. You don’t need much glue at all. You’d be surprised. (Photo 2) 3. Carefully shift the plank upwards and clamp at the bow and stern. Check for consistent plank overlap with the floor. Mine has less overlap midship so I will mirror that on the other side. (Photo 3) 4. Lift the build board to check all frames make contact with the plank. Cleanup excess glue with water and small paintbrush. Apply glue to any noticeable gaps. Add additional rubber-bands if needed. Address one plank at a time. It’s not a race and mistakes can be fixed. Next update when planking is complete. Steve


- 70 replies
-
- 5
-
-
- Lowell Grand Banks Dory
- Finished
- (and 1 more)
-
Nice start! Steve
-
This looks great! Steve
-
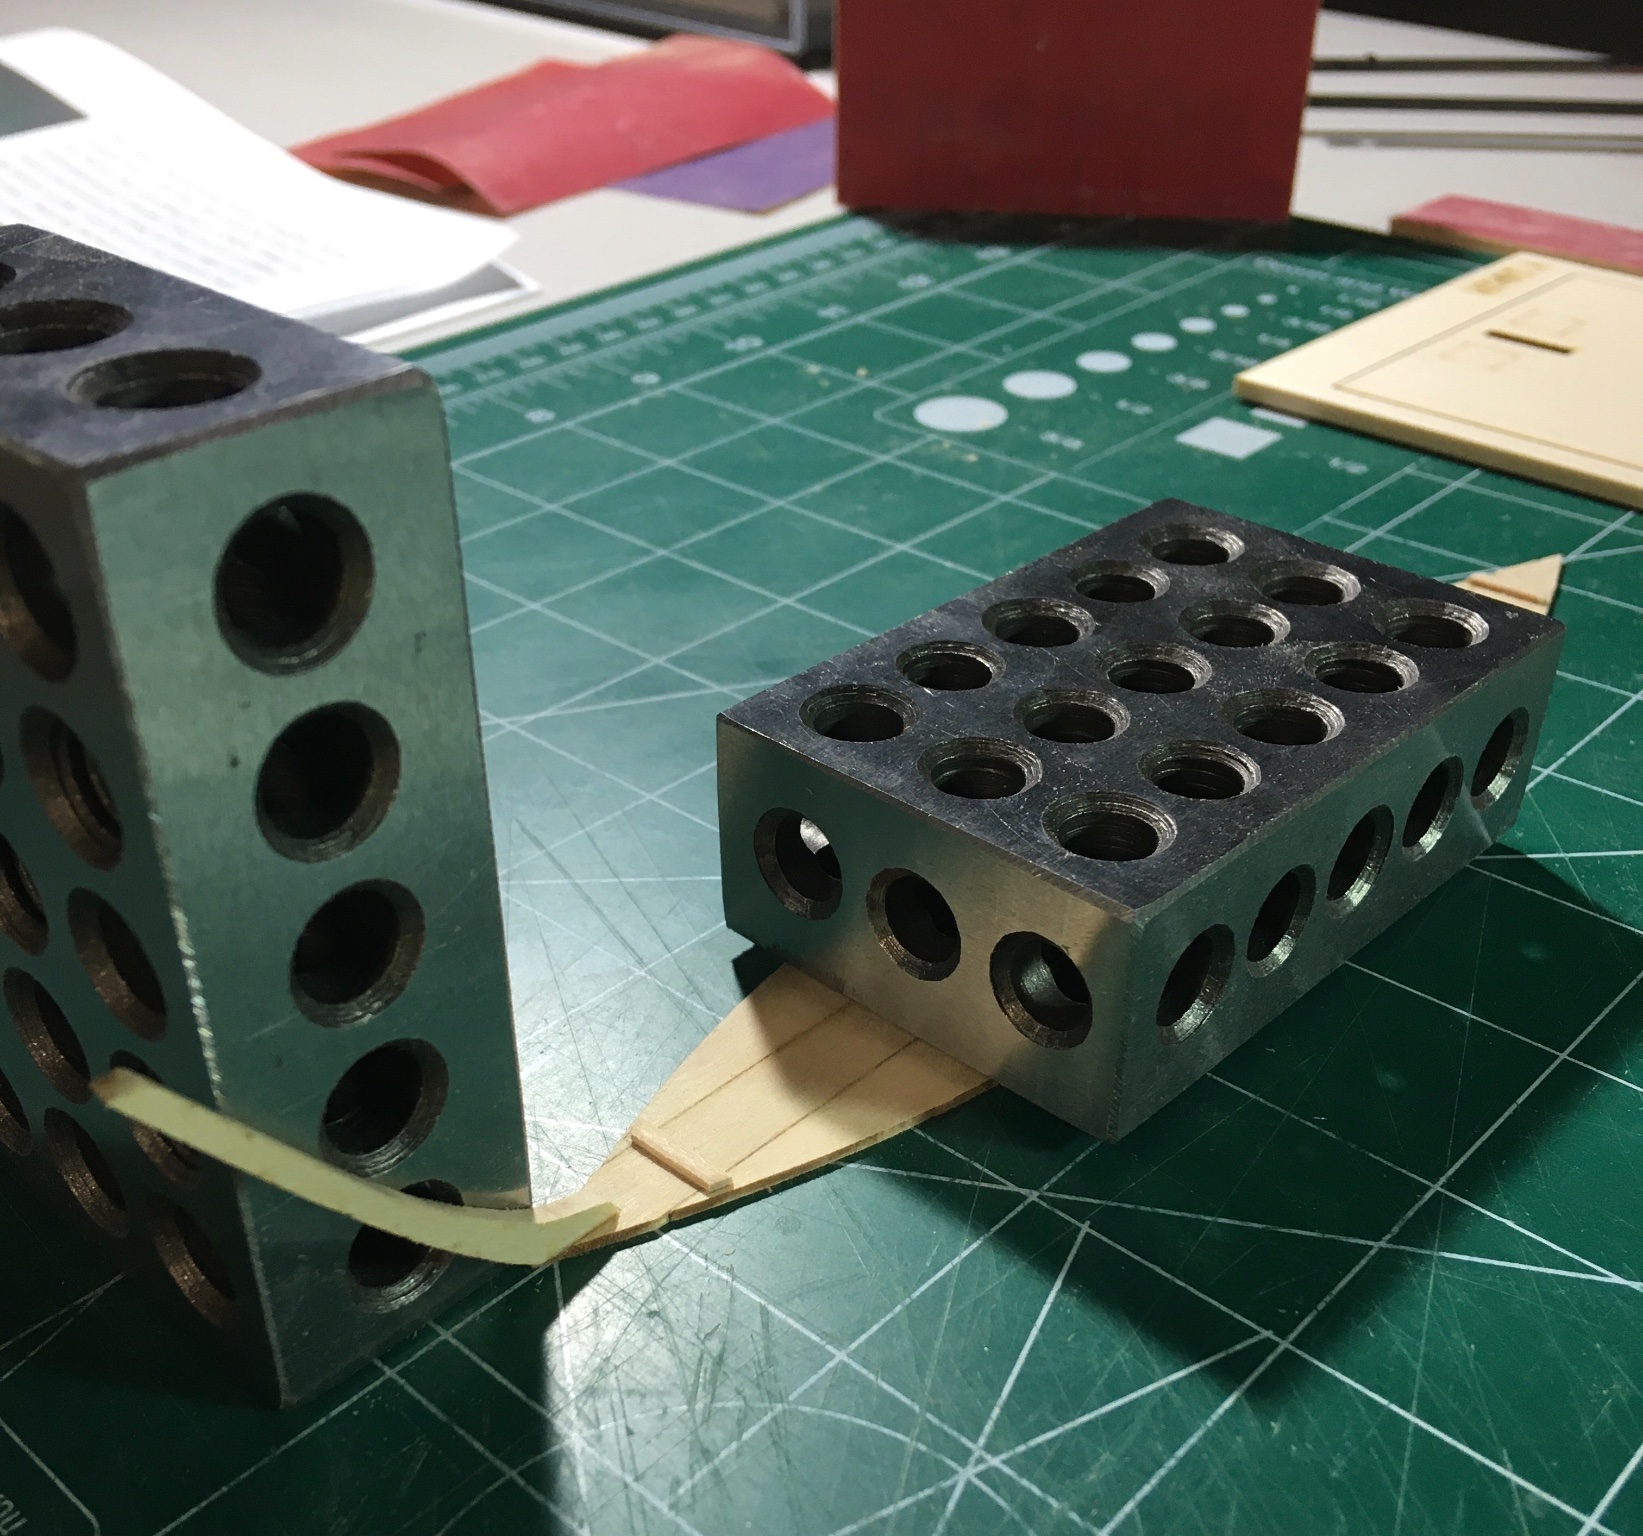
Frames glued to building board. The stem seems a hair askew. Not sure where my mistake was, but it’s not worth disassembling. Applied heat instead and clamped to a 1x2x3 block. Steve

- 70 replies
-
- 5
-
-
- Lowell Grand Banks Dory
- Finished
- (and 1 more)
-
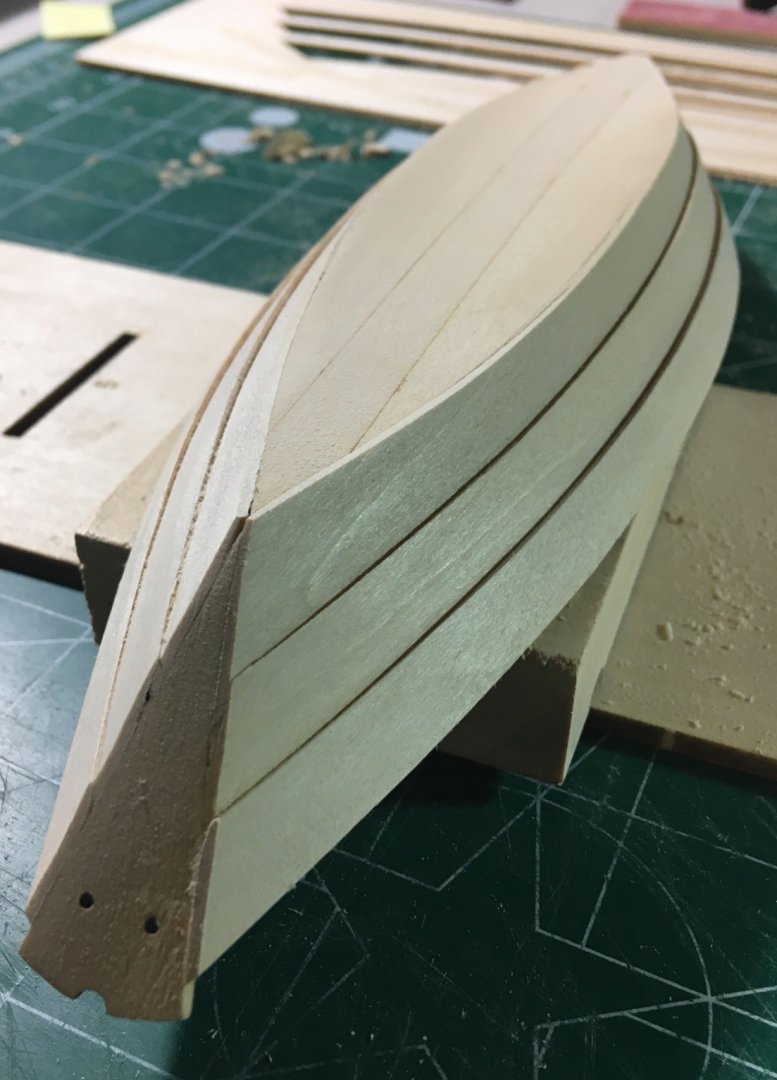
A brush was used to apply water to the underside of the boat to create the curved bottom. Most of the char was sanded from the inside of the frames before they were assembled and added to the building board. Steve
- 70 replies
-
- 6
-
-
- Lowell Grand Banks Dory
- Finished
- (and 1 more)
-
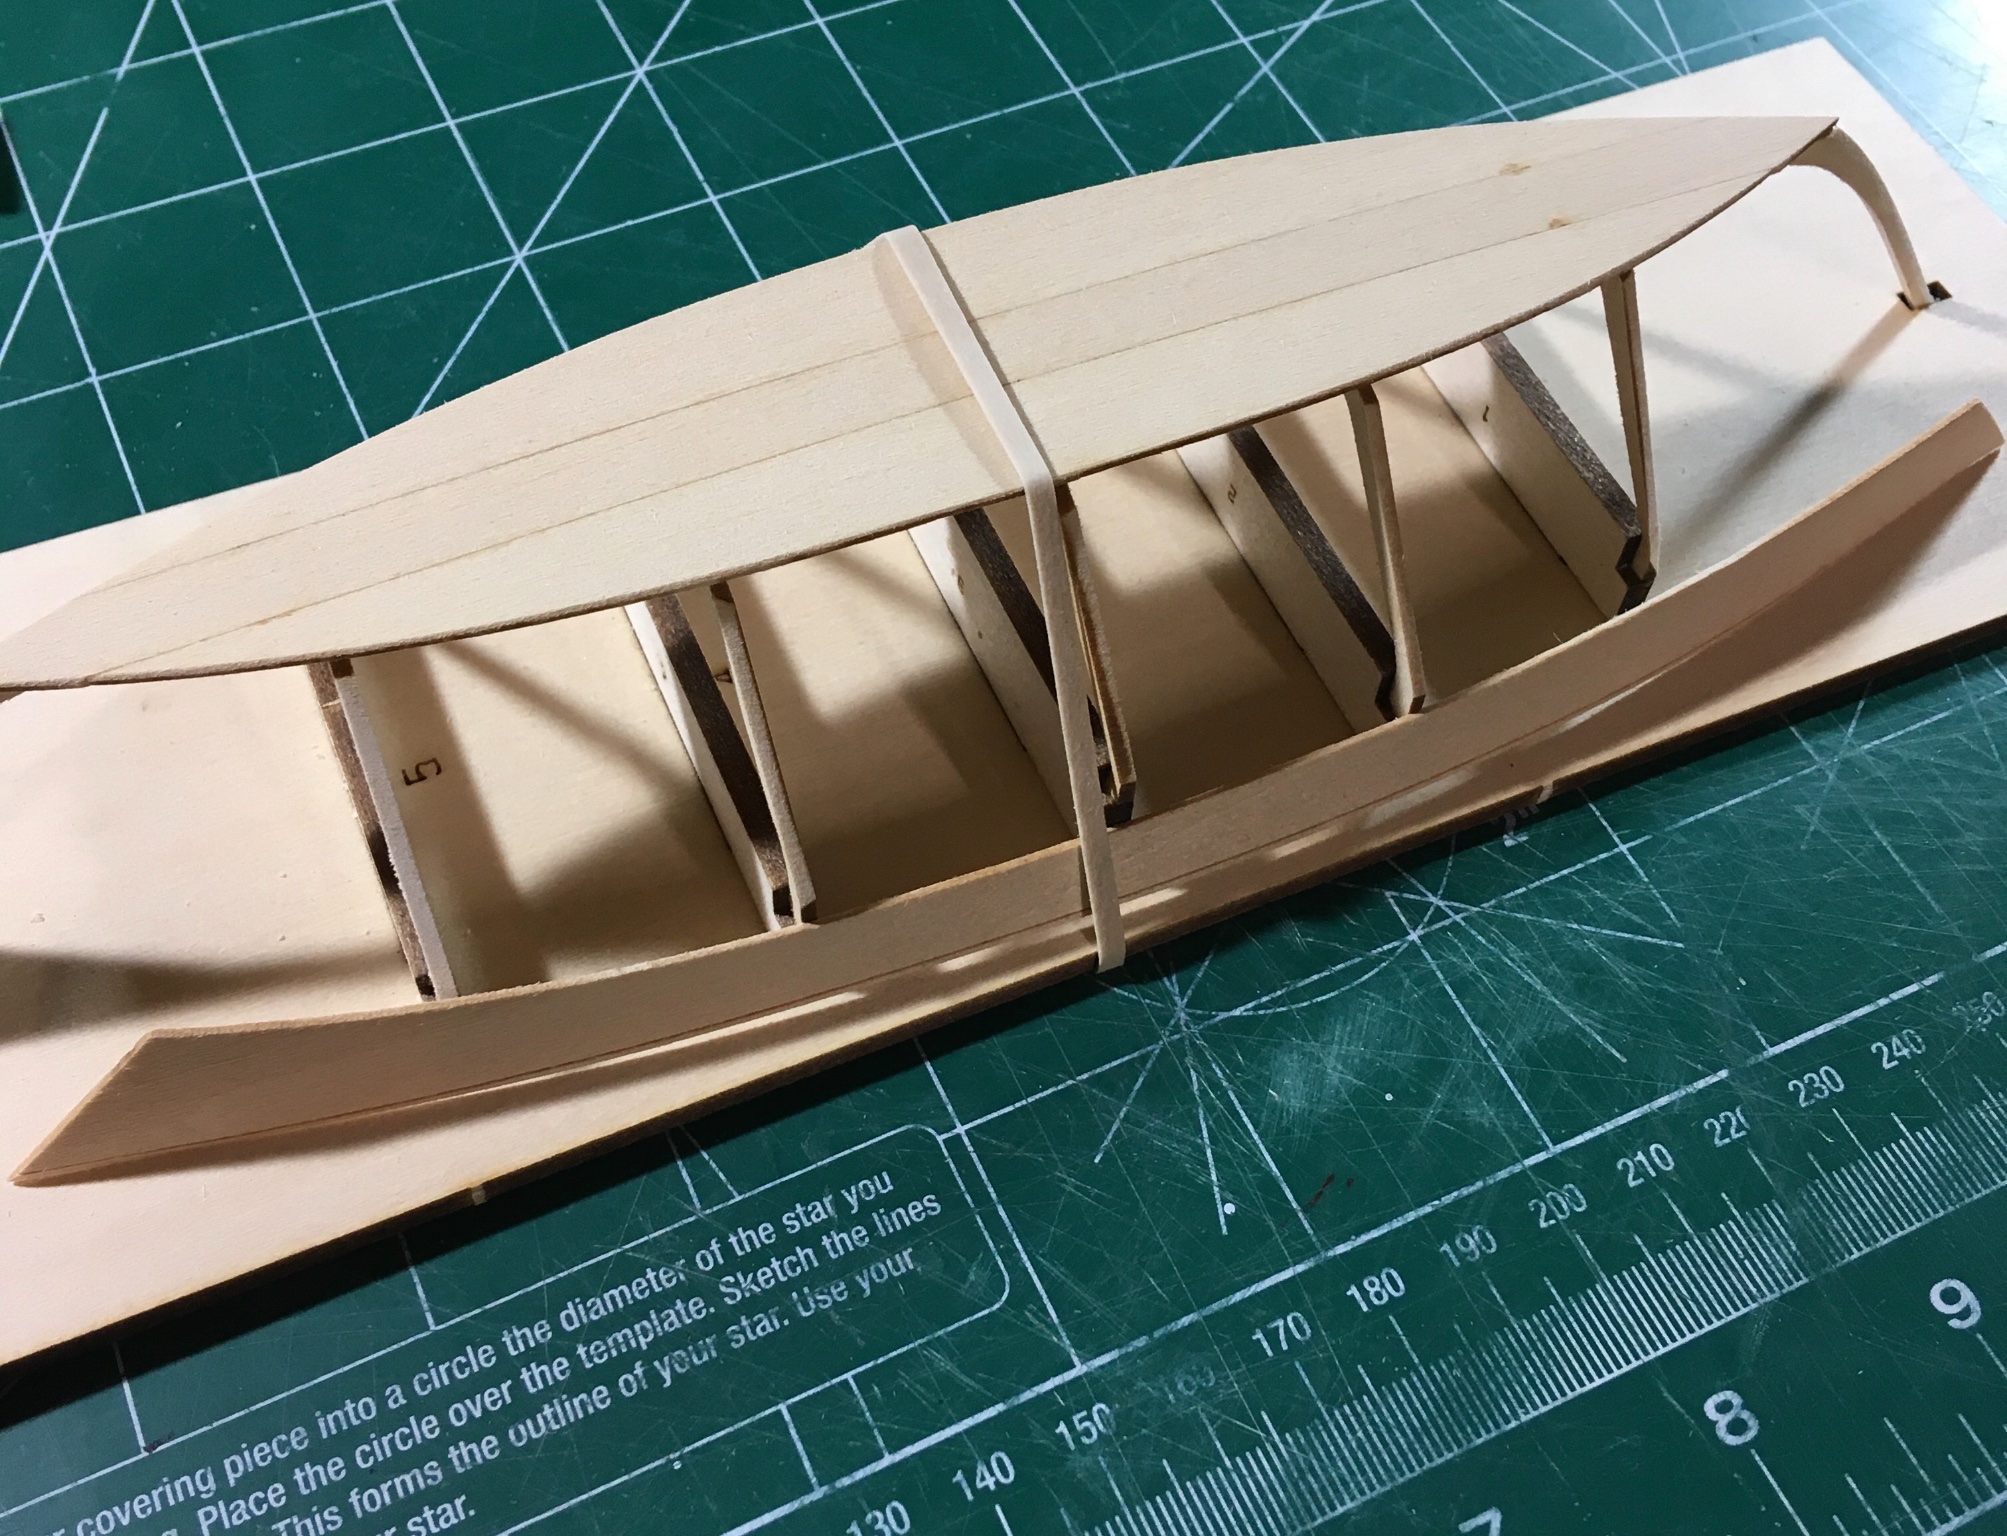
It’s been far too long since my last post. The Mayflower is on hold and I need to get back into building. I came across this Model Shipways kit designed by David Antscherl. While the workshop is in transition, this seems the perfect project to restart the modeling engine. The bottom three planks were glued and sanded when dried. Next, the six bottom cleats were cut and sanded to an appropriate width. The instructions state 1/8” width strip, but this does not match the laser marks on the floorboards or the drawings. Did Model Shipways change the original measurement of this strip? Anyway… Assembly and installation of the stem, transom, and stern knee concluded today’s work. It is good to be back! Steve


- 70 replies
-
- 6
-
-
- Lowell Grand Banks Dory
- Finished
- (and 1 more)
-
Sounds like you have all the tools you need at the moment. Don’t get sucked into the rabbit hole of getting too many tools at once. Looking forward to your progress here. Steve
- 160 replies
-
- 4
-
-
- Model Shipways
- norwegian sailing pram
- (and 1 more)
-
Congrats! I just ordered this kit and looking forward to learning from it as well! No matter how simple the kit appears, you always learn new tricks and it’s usually never as simple as it looks. Steve
- 85 replies
-
- 4
-
-
- Lowell Grand Banks Dory
- First Build
- (and 2 more)
-
Will be following your journey here. Looks like a fine kit! Steve
-
Nice addition with your carvings! Makes the project more fun adding your own extras. Up to you of course but I would leave off the tree nails. You won’t really see them and the effort may not be worth it. Steve
- 123 replies
-
- 2
-
-
- Model Shipways
- Pinnace
- (and 1 more)
-
I don’t believe they are in business any longer. This source for wood is supposed to be good but I don’t know if they mill strips. Doesn’t hurt to contact them. https://ocoochhardwoods.com
- 190 replies
-
- 3
-
-
- pinnace
- model shipways
- (and 1 more)
-
If you haven’t glued this yet, you can flip the step so you don’t have all that excess to sand. Steve
- 123 replies
-
- 1
-
-
- Model Shipways
- Pinnace
- (and 1 more)
-
It’s coming along! I hope you try this color scheme you posted. Steve

- 123 replies
-
- 1
-
-
- Model Shipways
- Pinnace
- (and 1 more)
-
I appreciate the kind words! I enjoyed designing this presentation. The longboat is quite a challenging project. Steve
- 165 replies
-
- 2
-
-
- finished
- model shipways
- (and 1 more)
-
Your base looks familiar. I like it! 😎 Steve
-
Some very nice work all around! Steve
-
Fantastic. Enjoyed following you on this one! Steve
-
What a great model! Well done. Steve
-
Love the finish and wood color you’ve achieved. Steve
- 228 replies
-
- 4
-
-
- gunboat
- model shipways
- (and 1 more)
-
I feel your pain. Take your time with it. I’m sure your repair will work out great! Steve
- 228 replies
-
- 5
-
-
- gunboat
- model shipways
- (and 1 more)