
HOLIDAY DONATION DRIVE - SUPPORT MSW - DO YOUR PART TO KEEP THIS GREAT FORUM GOING! (89 donations so far out of 49,000 members - C'mon guys!)
×


Robin Lous
-
Posts
564 -
Joined
-
Last visited
Content Type
Profiles
Forums
Gallery
Events
Everything posted by Robin Lous
-
 I tried to use those cards also, but it's weird material. Very difficult to cut and indeed immune to plastic model glue. Back to the trusted Evergreen sheet plastic...or a cheaper spin off. Robin
- 133 replies
-
- 5
-

-
- jeanne d arc
- heller
- (and 2 more)
-
Enjoy your vacation and I look forward to see this come together when you return. Robin
- 43 replies
-
- 1
-
-
- first build
- BluJacket Shipcrafters
- (and 1 more)
-
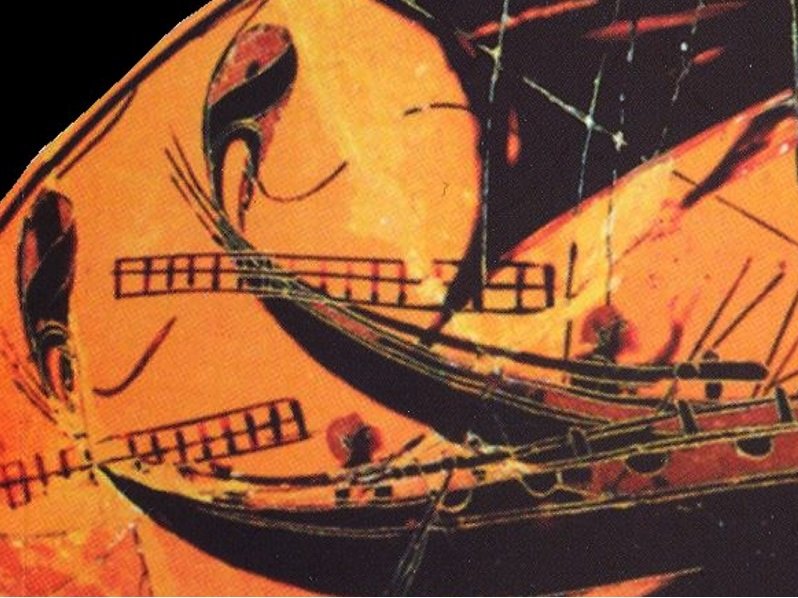
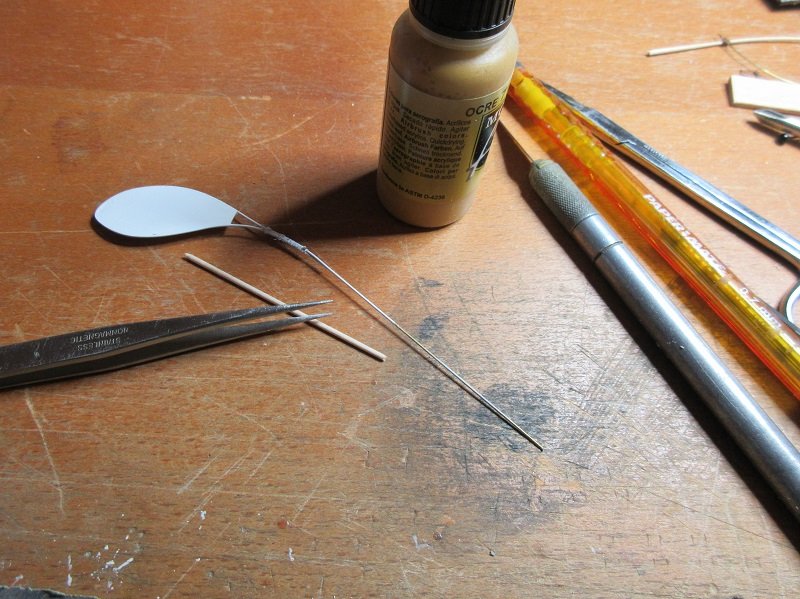
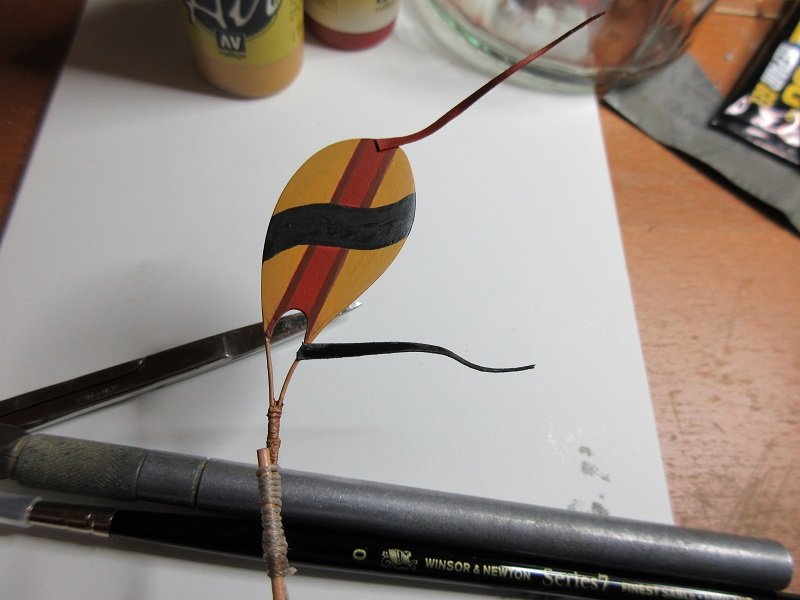
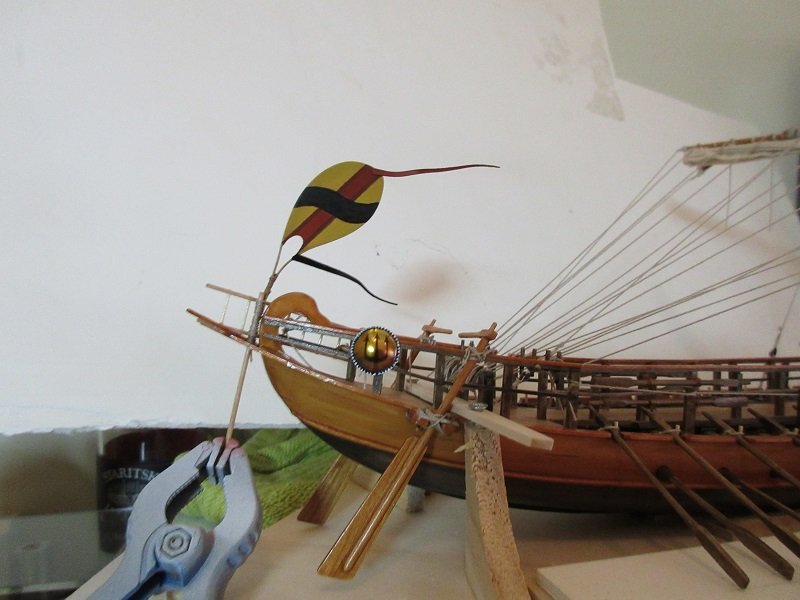
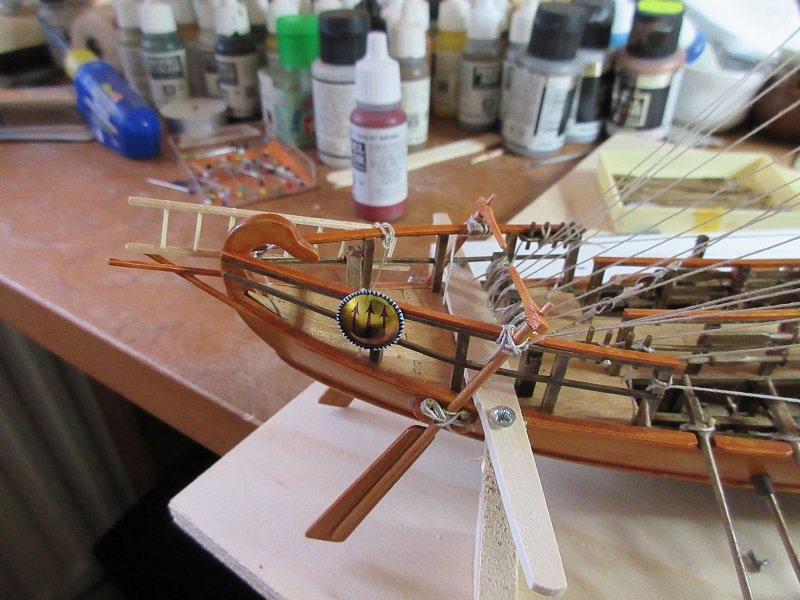
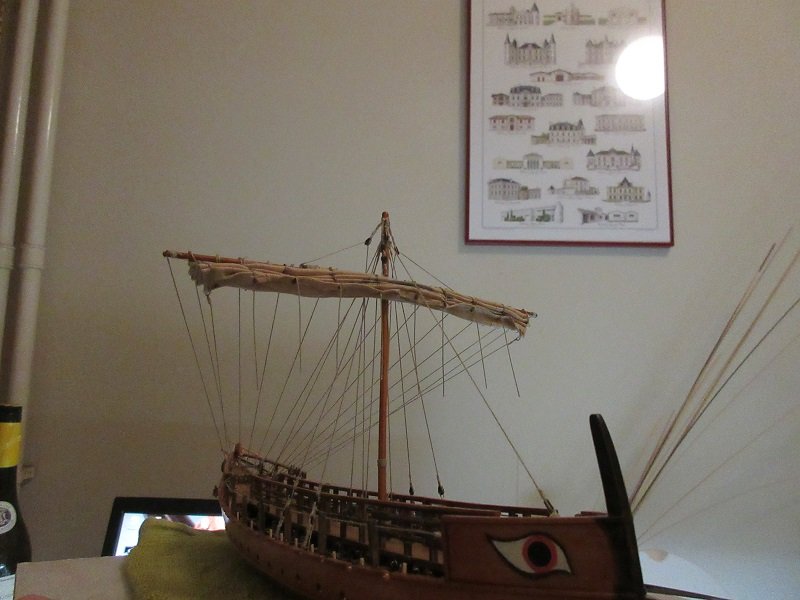
Thanks guys, the support is not only appreciated. Without...this build would likely have ended in the fireplace shortly after opening the box! Anyway, with a severe man flu to deal with...I treated myself to a small fun job. The flag! Now...a flag is a flag, but 550 BC...flags were still a bit different. On Greek ships anyway. Like this... Strange flags.... Not sure what to make of this. Probably a frame of twigs tied together...covered with fabric. It can even be something like a tube shaped wind vane or like a horo on the back of a samurai messenger (Google that lol). After some trial and error I made this... And now painted and with a couple of streamers... The colours can be anything, but I payed a tribute to the Greek black pottery makers. So, different shades of ochre and black A dry fit on the ship... Note: the ochre looks yellow on this photo, but that's because of poor lighting. The streamers are just painted paper. I'll bend the lower one a bit more and I'll make the pole shorther. After a final inspection...matt varnish and done. 6 hours work....was fun! Robin
- 473 replies
-
- 11
-
-
- greek bireme
- dusek
- (and 1 more)
-
Thanks Steven! Aluminium foil is a bit tricky I think. Very weak and it crumples easily. For larger flags I don't think either of them will work. Maybe very thin styrene sheet, or perhaps (tissue) paper with pva glue and water? Today I finished one side and both the steering oars are on now also. I was still not 100% happy with the shield I made. The solid black rim...still a bit boring. So I took the shield off the ship and painted white triangles on the black rim. Looks very Greek, so I'm happy with it now. I take the rest of the day off. I've a bad cold, so I take it easy. More soon though...the finish line is getting closer and closer now. Robin
- 473 replies
-
- 5
-
-
- greek bireme
- dusek
- (and 1 more)
-
My goodness! So glad you managed to fix the problem in such a brave daredevil fashion. Scary stuff! Robin
-
Finished the lower row of oars on one side and started with the top row... Top row not fixed yet, because I need to add the loops to attach them to the tholepins. Must figure out how to do that first. The lower row of oars took me whole day. It wasn't a walk in the park. The leather sleeves were a real pain to install and I broke off an internal beam with tholepins. Retrieving it from underneath two rows of seats was a challenge...glueing it back in place even more. But...it's done and I learned from it, so the other side will be less daunting...I hope. More soon, Robin
- 473 replies
-
- 7
-
-
- greek bireme
- dusek
- (and 1 more)
-
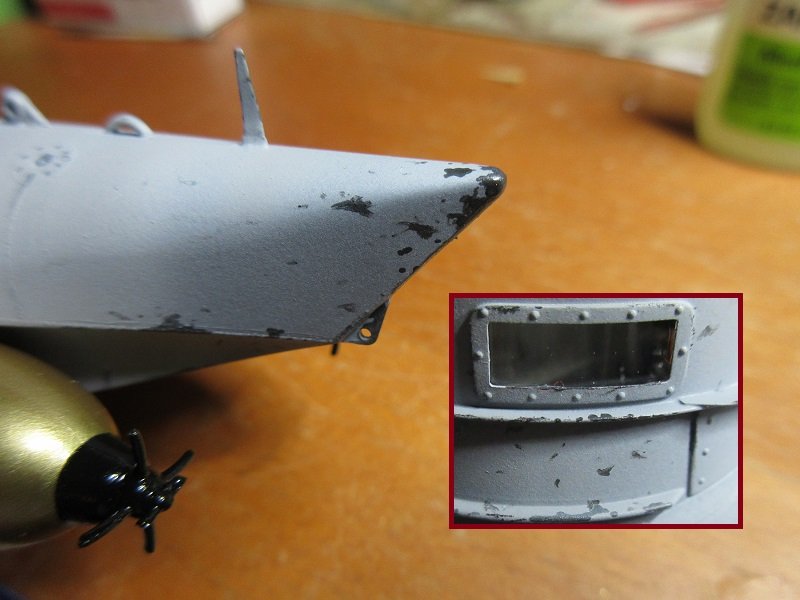
lead pencil paint chipping on a 1/72 Biber midget sub. I don't think this will look ok on a 1/200 Bismarck...sailors would get punished for not maintaining their ship when this kind of paint damage shows.
-
Oh...shut up! It looks great! About the use of a pencil...can look great to apply paint chipping on larger scale models, but I won't recomment it to use that on a 1/200 Bismarck. On a 1/72 scale type VII U-boot after a tour (just to name something)....yes! but not on a well maintained battleship.
-
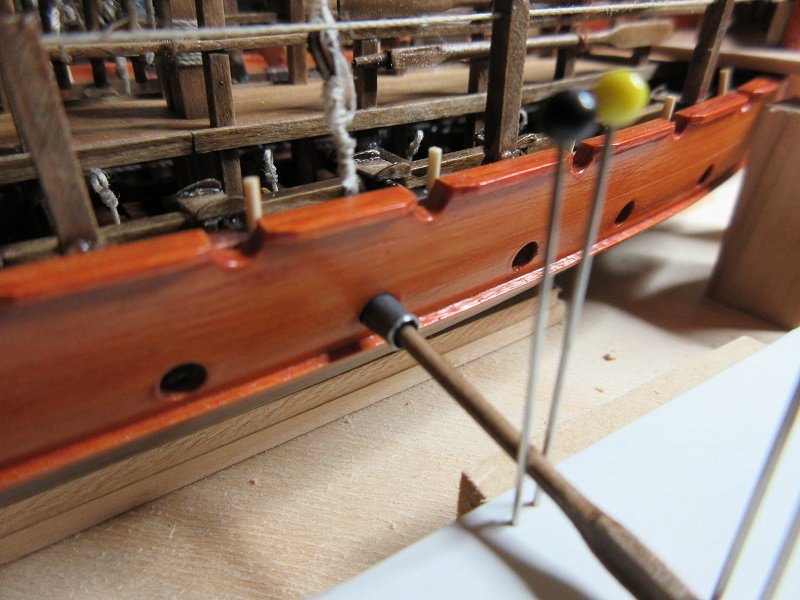
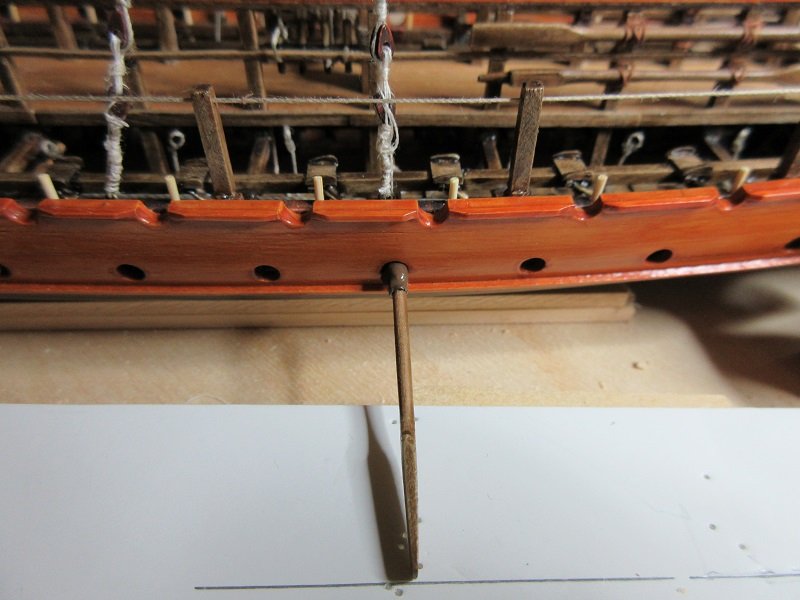
This is what I do with it.... I made the leather sleeves (Greek: Askomata) to prevent water from coming in through the lower oar-ports. Note: the ports need to be fairly large, because the oar blades must fit through them to be able to pull them in...and to replace broken oars from the inside. First I glue the oar to the copper sliding plate and tholepin on the inside. Then I slide the sleeve inside the hole and fix it with a tiny drop of CA glue on the inside. Then I close the sleeve with tweezers and a piece of string. And finally I paint the sleeve leather brown. And that was my first oar!

- 473 replies
-
- 11
-
-
- greek bireme
- dusek
- (and 1 more)
-
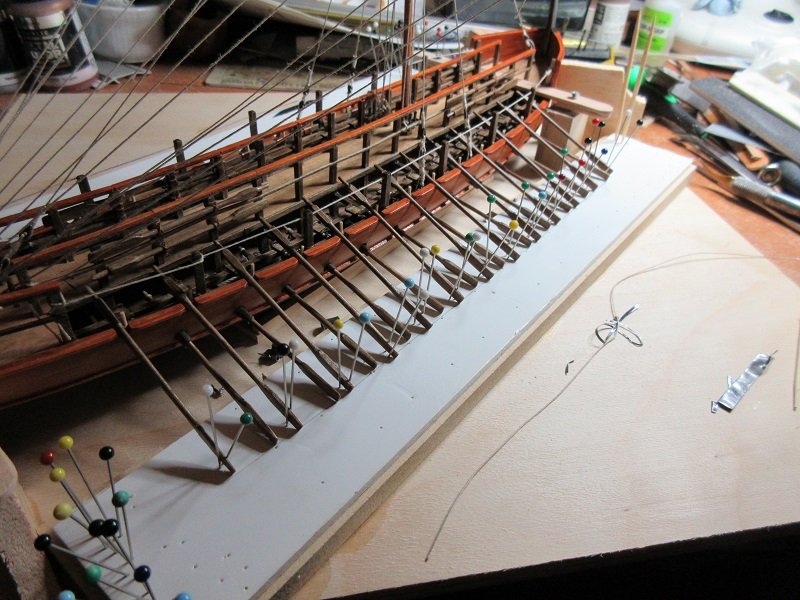
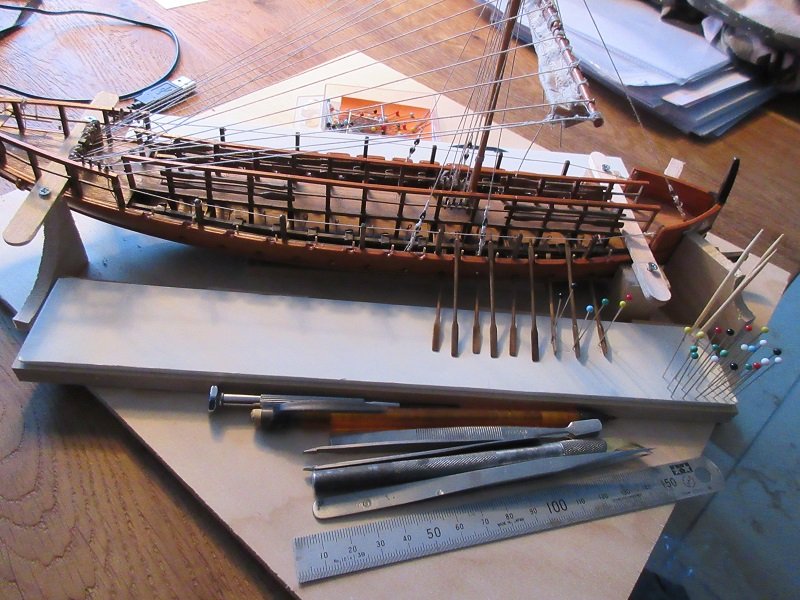
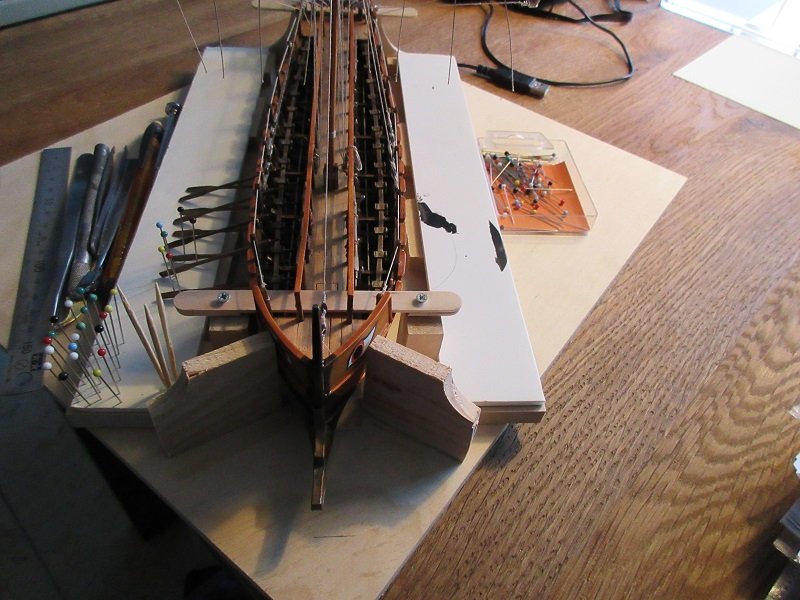
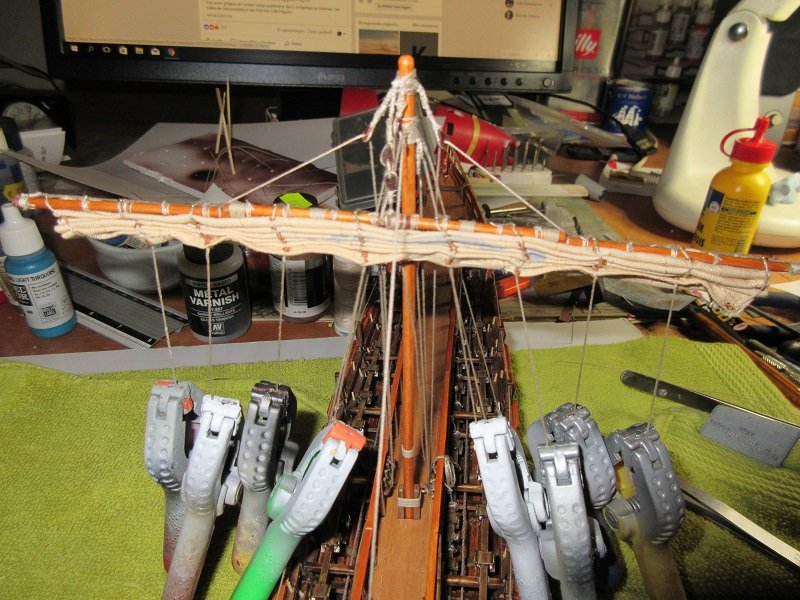
I never thought attaching oars would be easy, but I had plenty of time to think about this....over a year by now. At some point I realised it's a must to build a jig for this. I want my oars to line up neatly without support, because I think that will look most spectacular. So, this is the result of scratching the back of my head for a year... Behold...."le jig". (that's French Canadian I think ) The ship is fixed so it can't move...at all...and made a support for the oars at the right height. With a top layer of foamboard, so I can pin the oar blades in an upright position. I'll do a dry fit with all the oars to see where they must end on the foamboard and mark the spots. This will result in a slightly curved line following the curve of the side of the ship...so not a straight line. I don't think I can do more to be well prepared, so tomorrow this final chapter begins. I hope it will end well...scary stuff.
- 473 replies
-
- 7
-
-
- greek bireme
- dusek
- (and 1 more)
-
Don't feel bad about it EJ, kit bashing is sometimes like playing 3 dimensional chess with Sheldon Cooper. Robin
-
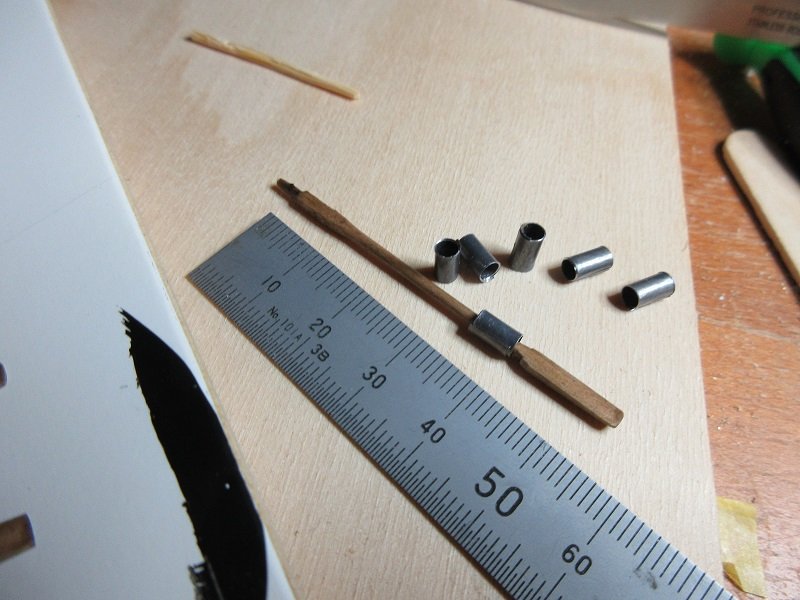
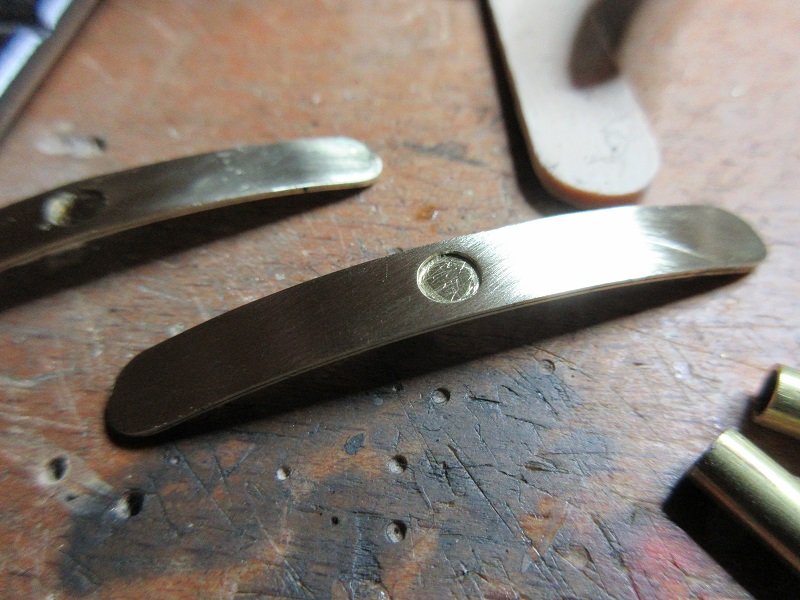
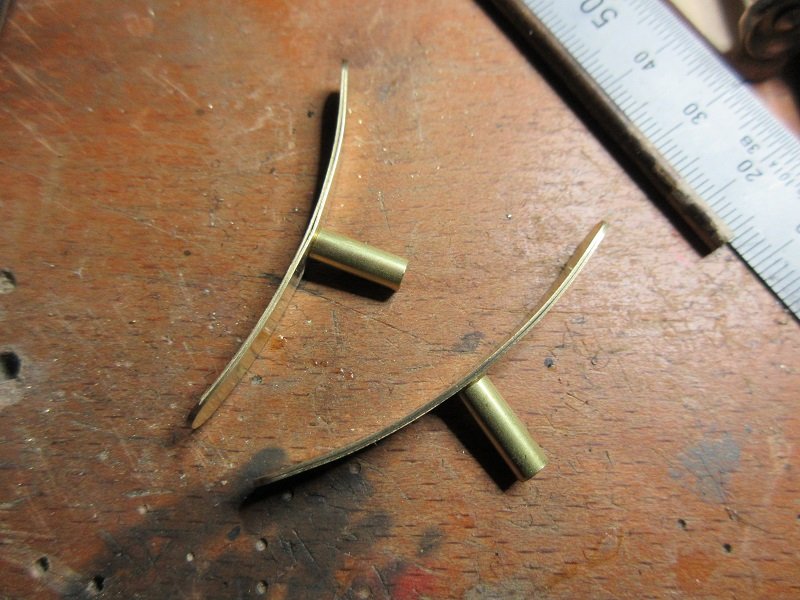
Meh...I mean...in Dutch: transparante anti slip dopjes voor onder de kast...en hele kleintjes op de standaard, zodat de romp niet verschuift. I can show them tomorrow But, for now...I had to finish the display stand before I do the oars. When they're on...the ship will become an almost untouchable hedgehog. So better do it now....(warning...picture heavy explanation) Replaced the short bolt and nut holding the 2 slabs together with a brass 25 mm M4 bolt. A 5 mm brass tube...30mm long over the bolt...secured with 2 part epoxy glue. The "cradles" supporting the hull. Made of 2 layers of 0,4mm brass sheet. Two layers of thin sheet glued together makes it a stiff construction. A hole in the lower sheet to attach the 4mm tube that will slide into the 5mm tube on the base. Ready...some final bending needed to make it fit the bottom of the hull. My "less is more" stand finished. Oars next! (for real now lol) More soon, Robin
- 473 replies
-
- 9
-
-
- greek bireme
- dusek
- (and 1 more)
-
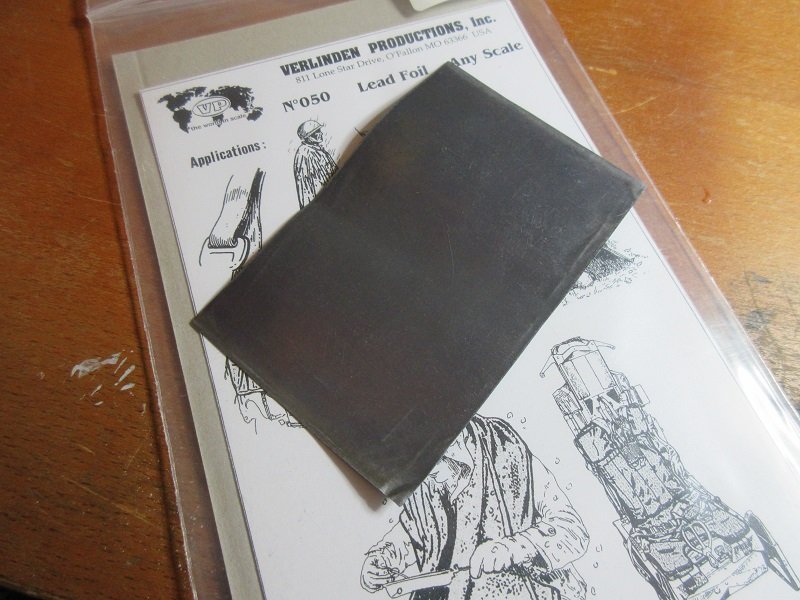
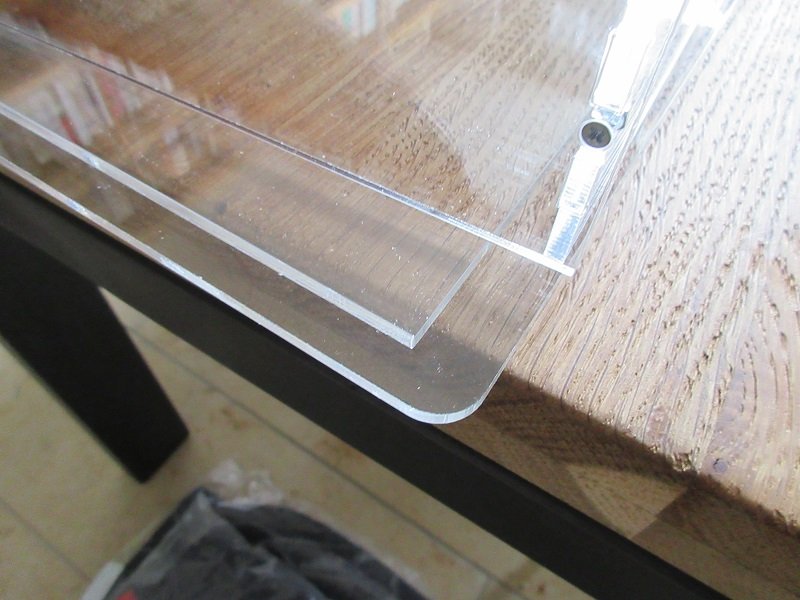
Thanks guys! The base is made of 2 layers, so the case slides over the top layer and sits on the bottom layer. Can also choose a flush base or no base. And it's my lucky day...the lead foil just arrived also! I'll go on a hunt for the longer bolts and brass tubes now...oh..and some small transparent soft rubber feet (3M Bumpon). Robin
- 473 replies
-
- 3
-
-
- greek bireme
- dusek
- (and 1 more)
-
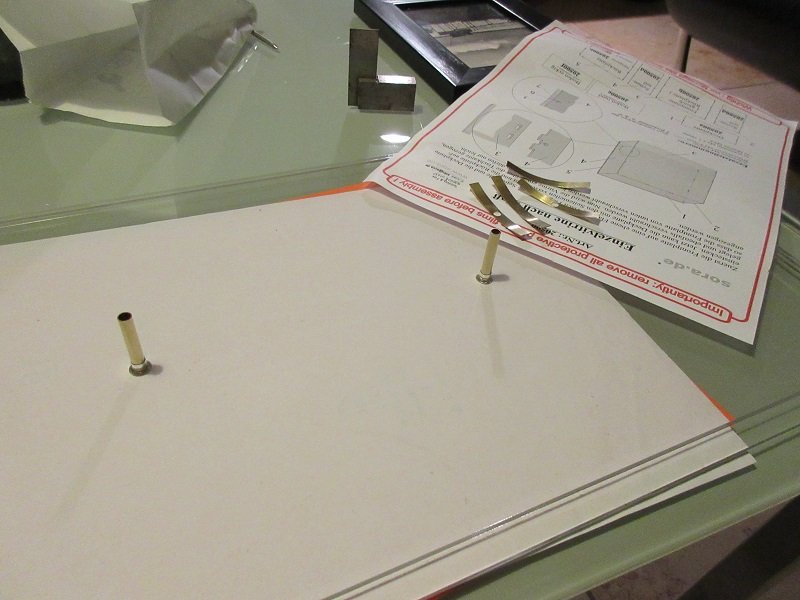
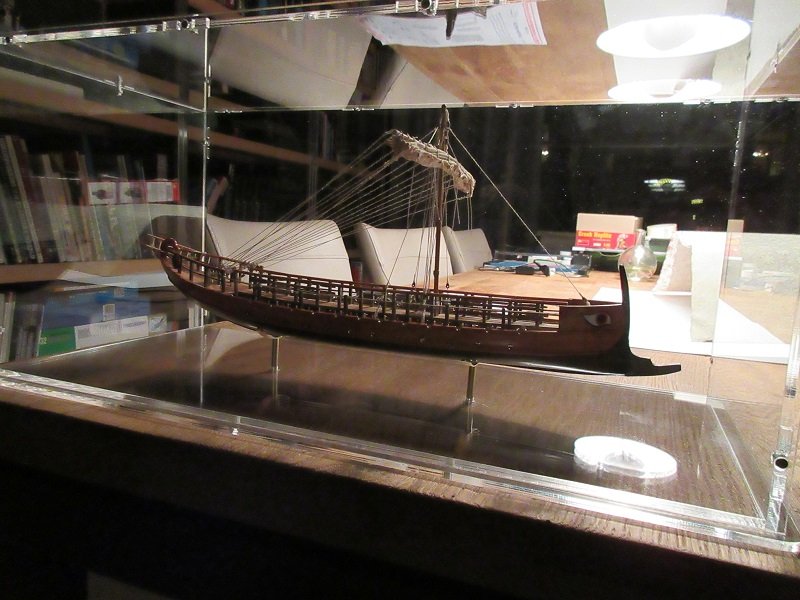
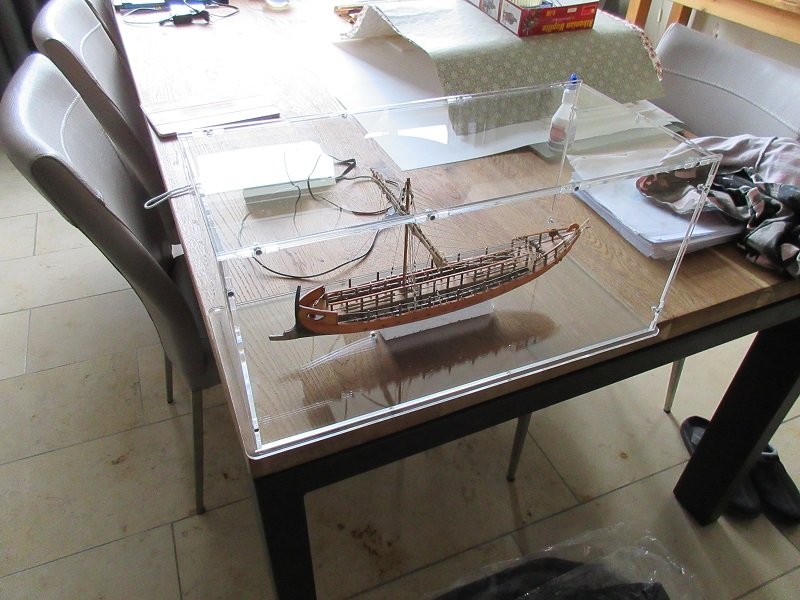
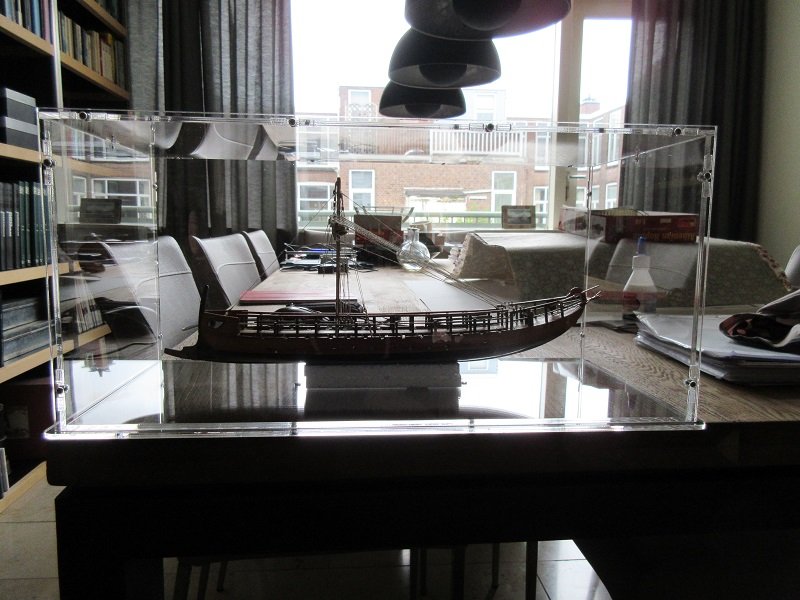
Well then...after a frantic week at work some days off now. And it started nicely with the arrival of the display case I ordered from http://www.sora-shop.com/ A nice affordable (€64 including p&p) plexiglass/acrylic made to measure display case. Two days from ordering to my doorstep. I think that's amazing! Made to measure in Germany...delivered in the Netherlands 2 days later! It's 50cm x 22cm x 22cm. I like it a lot! People might not like the presence of the (tiny) nuts and bolts, but I don't mind...it's the small price you pay for a DIY display case. Construction was idiot proof...I managed to do it! I'll use the 2 holes in the base (the 2 layers of acrylic bolted to eachother there) to make a stand. Will get some longer bolts and brass tube to slide over them. brass strips about 5mm wide and 5cm long on top of them. 2 sided tape and that's it. I have a minimalistic stand in mind....less is more. Now making the wooden base and jigs to attach the oars and I'm waiting for the thin lead foil (from Verlinden) to make the bags for the lower oars. I hope to receive this today. More soon, Robin
- 473 replies
-
- 8
-
-
- greek bireme
- dusek
- (and 1 more)
-
Nitpicking allert! The "bodies" are actually the rangefinders...not just the radar mounts.
-
Gorgeous! How you did this (ready or not) in such a short period of time is amazing! Fabulous paint job also. Robin
-
Mind over matter! Well done OC. And don't forget, when something isn't perfect...you're the only one who knows and probably nobody else will notice it. The builder himself is always his own worst "food critic". Robin
-
A huge difference...well worth the effort. Beautiful build and I like the refreshing range of kits MarisStella has. Quality of them seems to be top notch also. Robin
- 653 replies
-
- 3
-
-
- trabakul
- marisstella
- (and 1 more)
-
Nice start! For me...part of the fun of a build is the search for more information about what I'm building. I tend to go completely over the top with that. Not only many hours of internet searches for the real thing and other builds of the same, but also books and when not too far away...a museum where I can see it. Has a downside also...I always find things to improve and that can be frustrating, specially since I'm not overly handy and often don't have a clue how to do it.
-
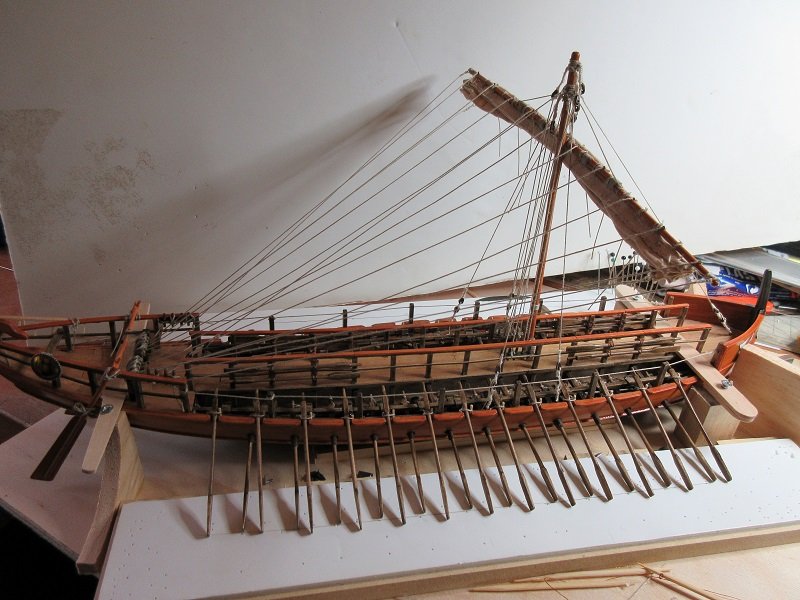
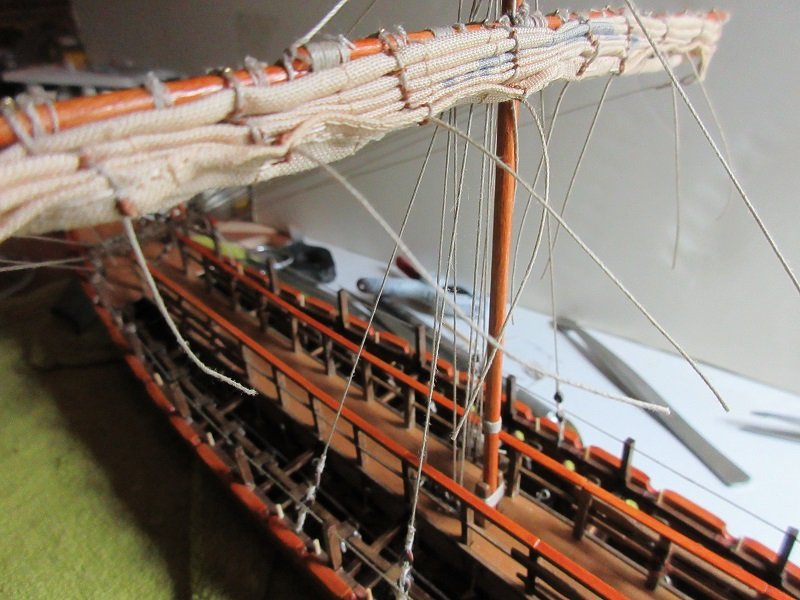
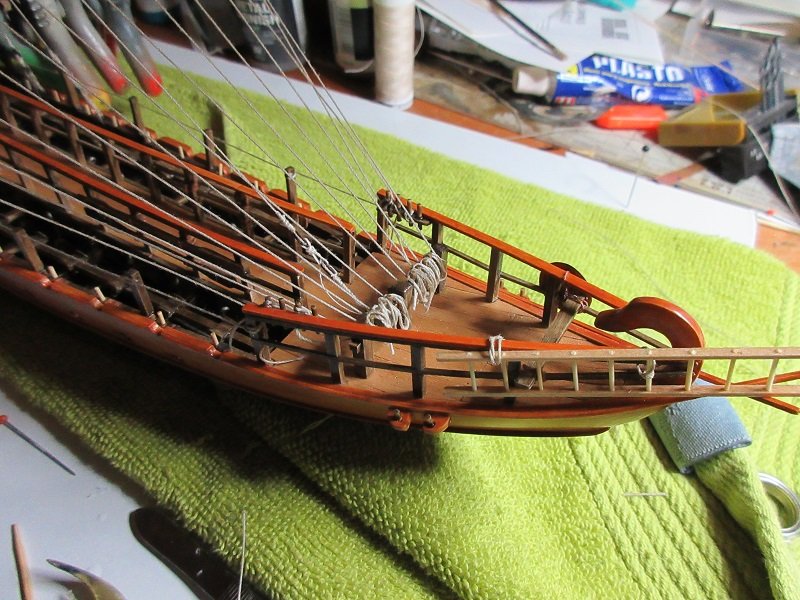
Found shipyard time...a late nigther I'll probably regret tomorrow..ah well. Finished attaching the lines to the pin rails... And found a solution for the free hanging lines underneath the sail...pointing in all directions. Made a mixture of PVA wood glue and water and soaked the lines with it. Clamps and let dry... The result was nice...the lines were straight, but still not hanging down enough. Clamps on again and a tiny drop of CA glue on the lines just underneath the sail. Bending this stiff part of the lines with a tweezer until it looked ok. Not 100% straight down, but that's fine. Much better anyway...I think. Oars next! More soon, Robin
- 473 replies
-
- 11
-
-
- greek bireme
- dusek
- (and 1 more)
-
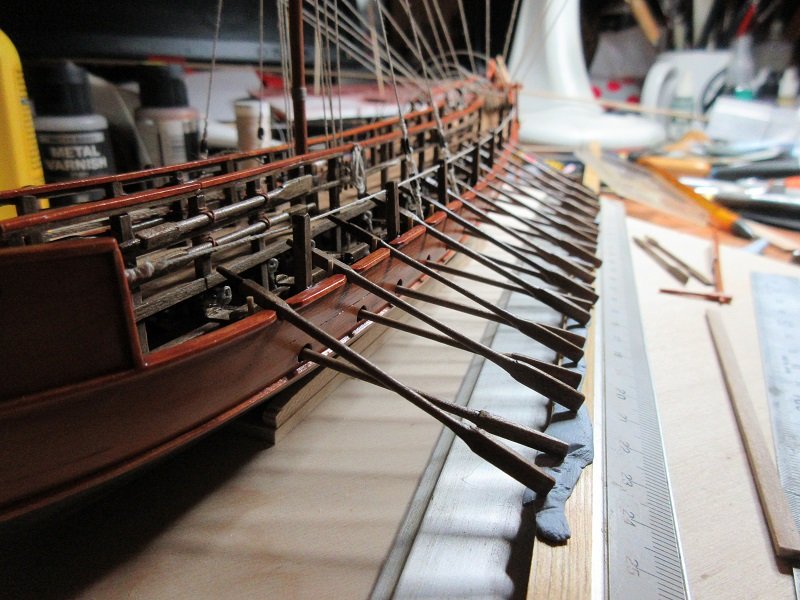
Busy week, so not much shipyard time until friday, but I couldn't resist to dry fit the oars on one side... More end of the week...still must do the "rope ends thing". I'll be happy when I can do that this weekend. Robin

- 473 replies
-
- 6
-
-
- greek bireme
- dusek
- (and 1 more)