HOLIDAY DONATION DRIVE - SUPPORT MSW - DO YOUR PART TO KEEP THIS GREAT FORUM GOING! (89 donations so far out of 49,000 members - C'mon guys!)
×


Robin Lous
-
Posts
564 -
Joined
-
Last visited
Content Type
Profiles
Forums
Gallery
Events
Everything posted by Robin Lous
-
 Thanks guys...it's either the Kolderstok Duyfken or the Dusek Trireme. Dunno yet, Robin
- 473 replies
-
- 1
-

-
- greek bireme
- dusek
- (and 1 more)
-
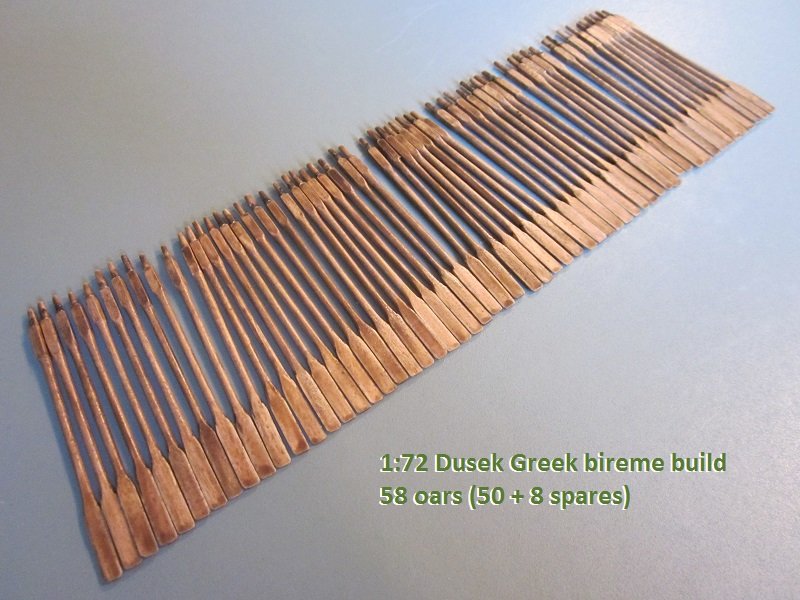
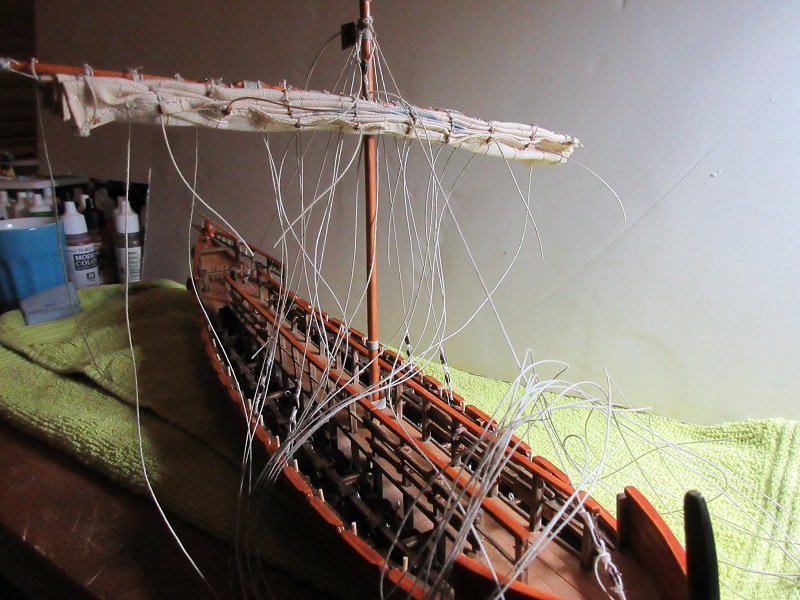
Thanks HOF Well...rigging... All the lines tied to the pinrails. I must now make nice looking bundles and loops of the rest of the lines. I also must find a way to get the 8 loose hanging lines underneath the sail to hang down and cut them to the right lenght after that. When done I need to make a work stand to get the oars at the same height. Oars soon...oh my...so looking forward to see the oars in place. And all the sudden I must start thinking about a next build...still undecided. Exciting! More soon, Robin

- 473 replies
-
- 8
-
-
- greek bireme
- dusek
- (and 1 more)
-
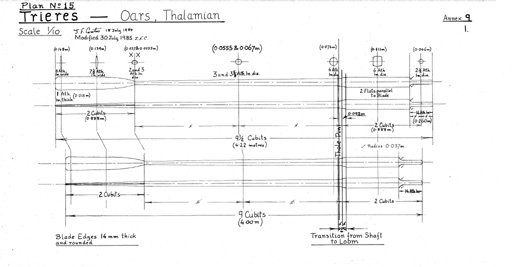
Sadly I don't have a higher resolution image of the oar plan, but....the lenght of the oars are 9 and 9,5 cubits. A cubit is 45,72cm. What I read about the testing of oars for the Olympias reproduction trieres...9,5 cubits is about the maximum practical lenght one oarsman can handle (with the wooden counterweight). Also note...they changed the shape of the blades to the teardrop shape you have, because they perform better on a calm sea. The staight blades are more suitable on a rougher sea, but need strong and highly trained oarsmen to perform well with. The Olympias trials were done with volunteers. I think your oars look wonderful and I wouldn't change them!
- 122 replies
-
- 2
-
-
- greek bireme
- scale-1/35
- (and 2 more)
-
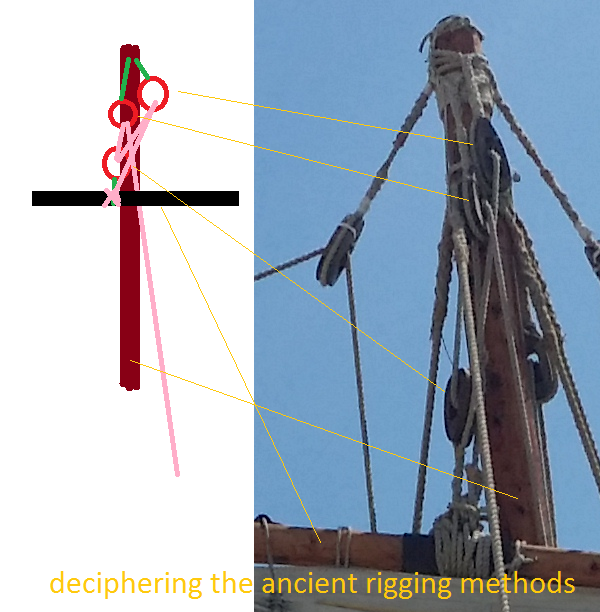
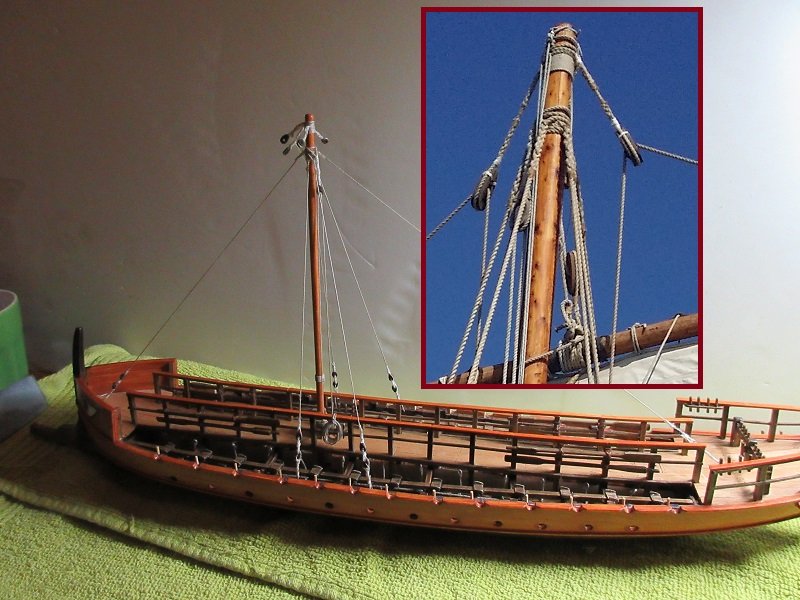
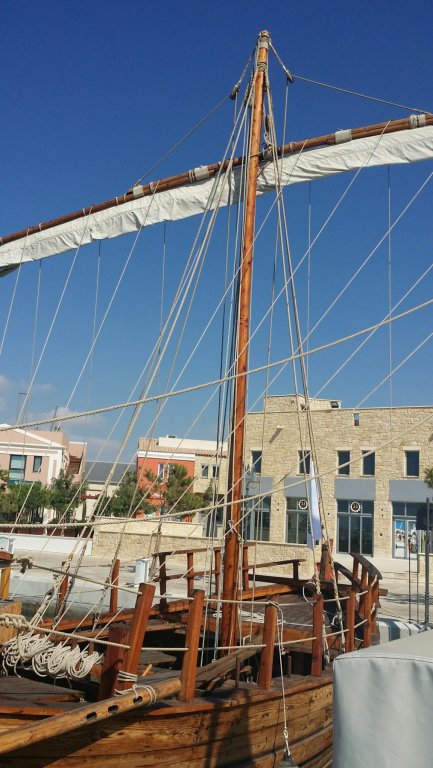
The yard is fixed to the mast... 3 bloks involved. 1 on the yard and 2 on the mast. Like this... With so many lines involved, I'm not sure when to secure a rope to the pinrail. I'm afraid when I fix a line it might slack after I fixed the next...or next...or the one after that. I guess there's a lot to adjust later on. I keep the glue away until I know what will happen. And I have no clue what will happen. More soon...scary stuff this! Robin
- 473 replies
-
- 4
-
-
- greek bireme
- dusek
- (and 1 more)
-
A agree with HOF. Also a nice way to stay involved on the forum...until your next ship build. Robin
- 291 replies
-
- 2
-
-
- bounty
- billing boats
- (and 1 more)
-
In the ancient world the counterweigt was thicker wood (inboard) between the loom and the handle. Used on long oars pulled by a single oarsman. This was not used when the oars were pulled by 2 or more oarsmen. Likely the oars with 2 or more oarsmen had no counterweight...or the lead counterweight. The Amati bireme is a bit of a problem. On the box it says "Greek bireme 480BC", but it's clearly a later type of bireme. Probably not in use before 300BC...certainly not in use at the time of the battle of Salamis. This type of ship might have 2 or 3 oarsmen per oar, but I'm not sure about that.
- 122 replies
-
- 2
-
-
- greek bireme
- scale-1/35
- (and 2 more)
-
Always use a primer before painting. Tamiya and Mr.Surfacer spay cans are very good. It's recommended to clean resin parts with a mild soap before painting.
-
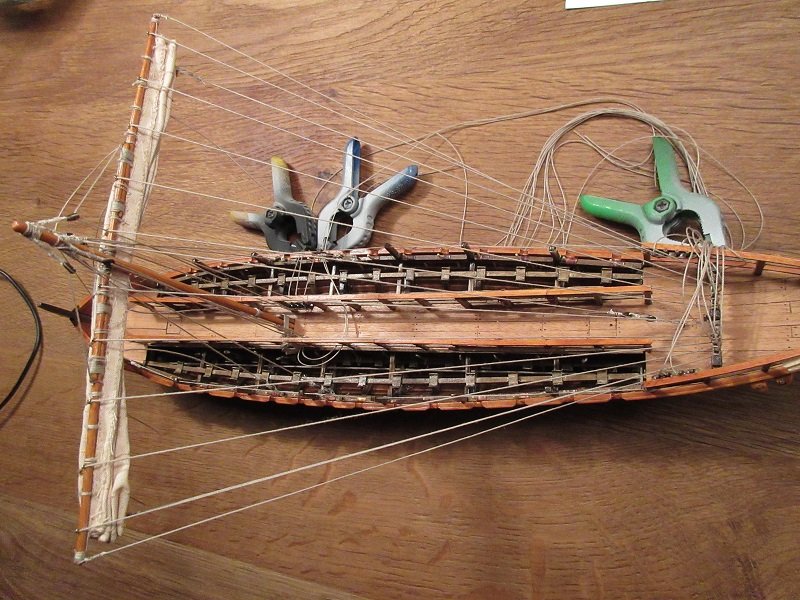
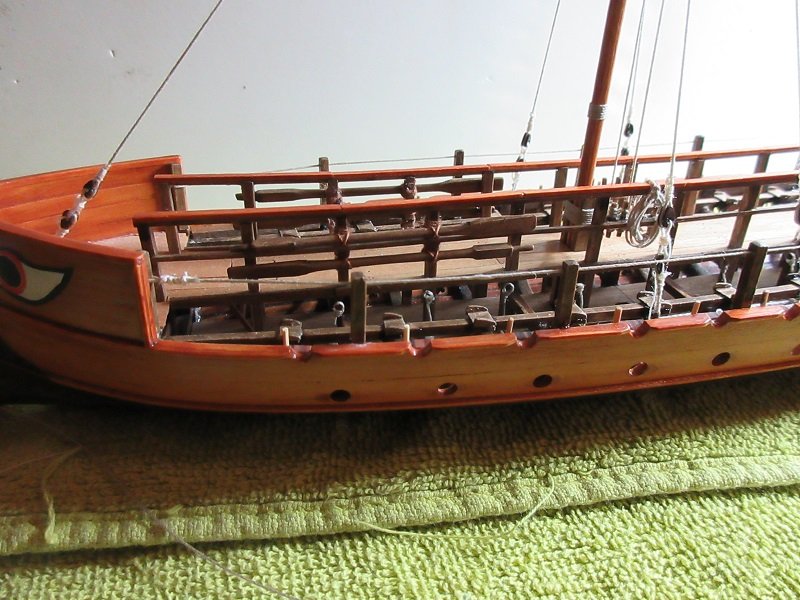
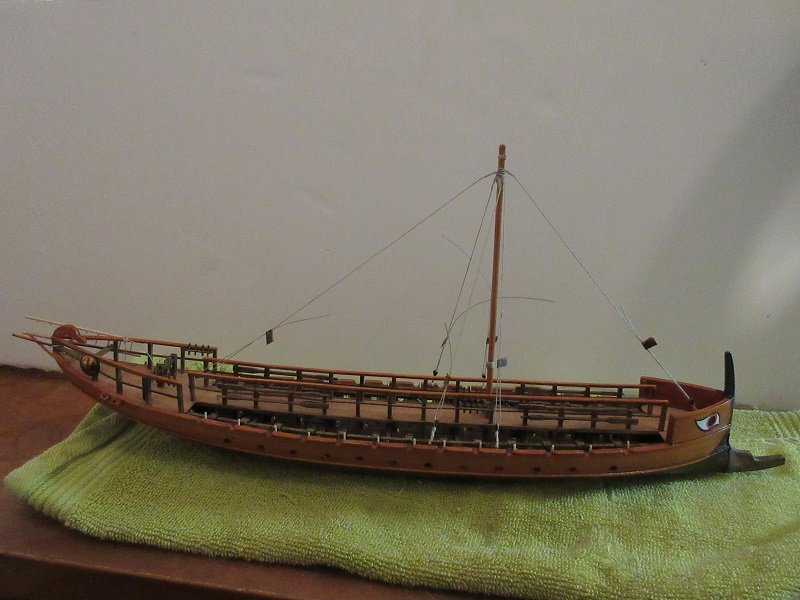
Thanks OC! After 8 hours on the shipyard I finished the last construction part of the build. The outer railing... I decided not to make the sun roof, because I think it won't make it any nicer. What's left to do is already pre fabricated. The yards with all the rigging attached to it, the oars and the steering oars. Oh..wait...I still need to make a base. Yard is next...more soon. Robin

- 473 replies
-
- 9
-
-
- greek bireme
- dusek
- (and 1 more)
-
Beautiful! Nice to see something different...love the lanterns btw Robin
- 4 replies
-
- 1
-
-
- red dragon
- artesania latina
- (and 1 more)
-
QUICK-FIND INDEXES to BUILD LOGS FOR KITS
Robin Lous replied to Dan Vadas's topic in - Index of all kits by brand and subject
This is the best invention since when someone figured out how to make wine! Robin -
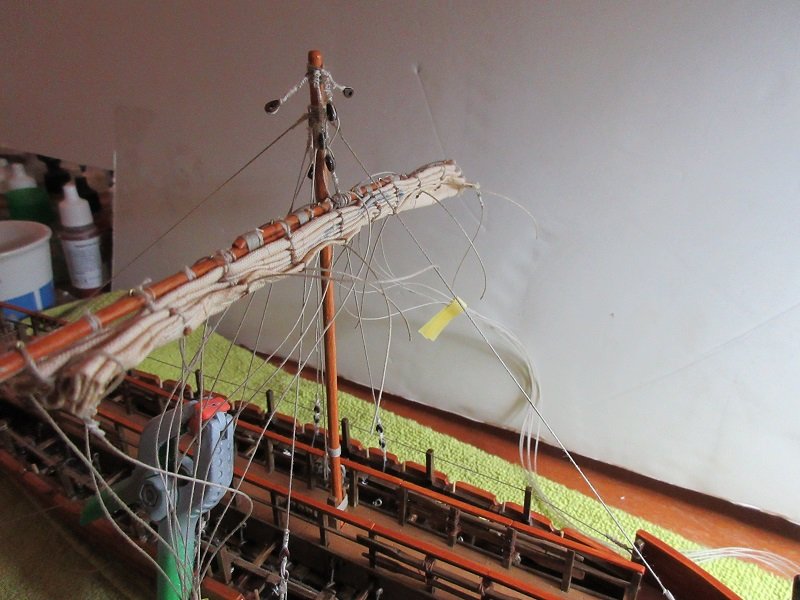
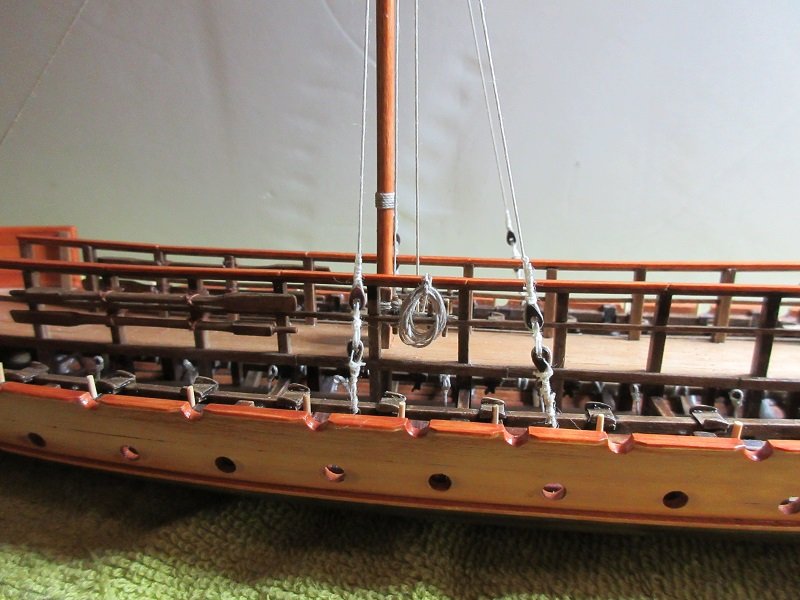
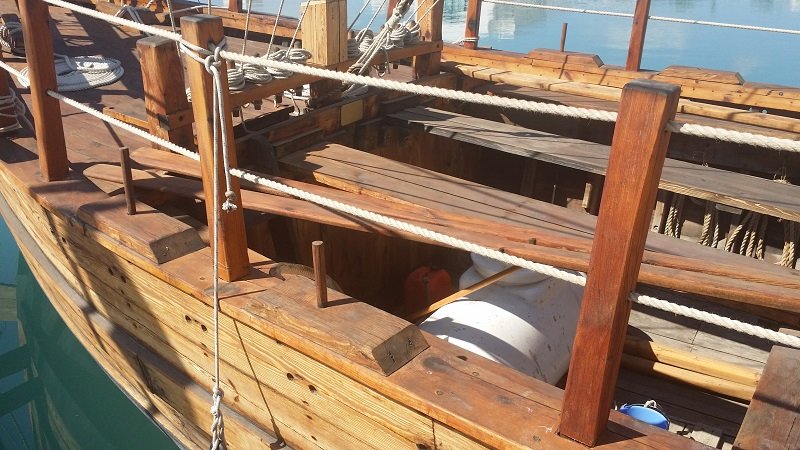
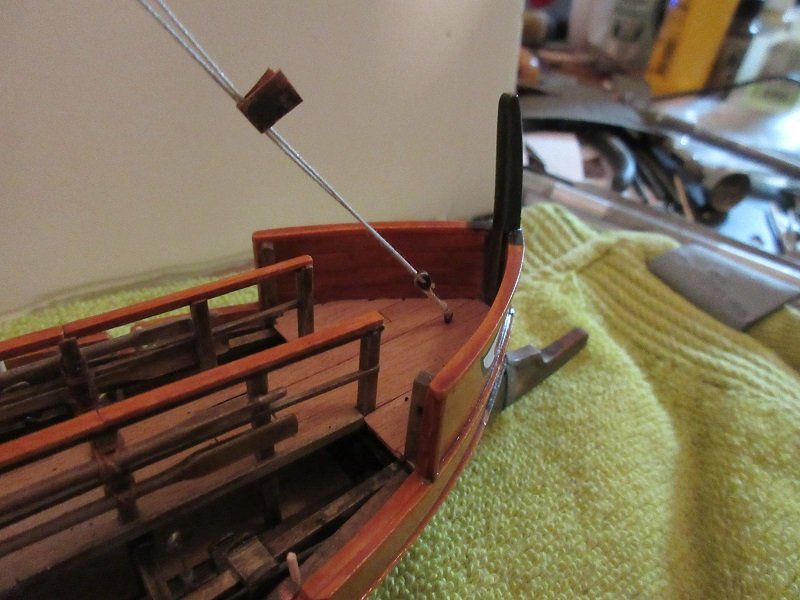
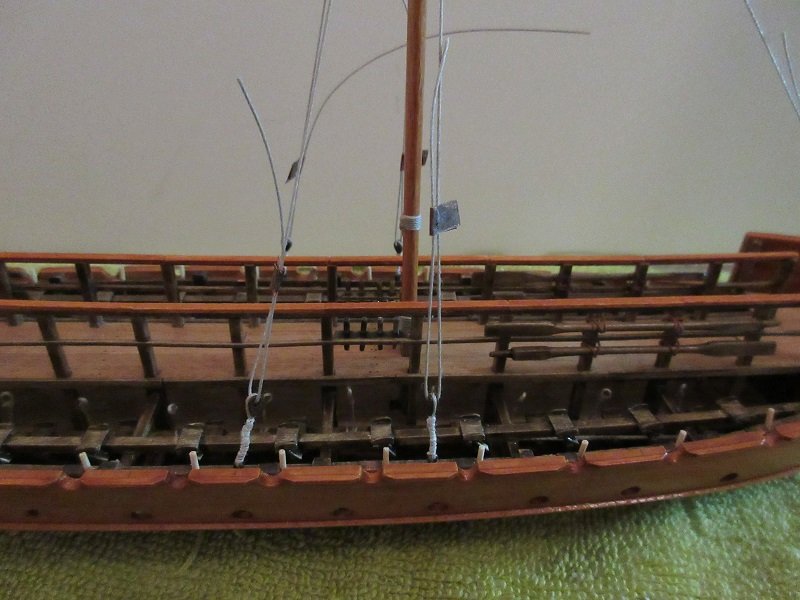
Little progress (but glad it's done). The 5 blocks in the top of the mast. Was a pain to attach the line running down from the mast to the tiny pin rail. And it was an outright nightmare to neatly loop the rest of the rope and make it look okeyish. 3 more lines will come down there when the yard goes on. Not looking forward to that, but I had a bit of practise doing this one, so ...uhm..pfff! But...before I do the yard, I'll make the rope railing on the outside. 6 (fairly short) stanchions per side...1 rope per side only. And again....I can take a good look at the Olkas. I can't thank Messis enough for the Olkas photo's! I must do this before the yard, because I have to drill small holes in the top of the frames to pin the stanchions. More soon, Robin
- 473 replies
-
- 6
-
-
- greek bireme
- dusek
- (and 1 more)
-
Welcome to the secret brotherhood of oar nutters.
- 122 replies
-
- 7
-
-
- greek bireme
- scale-1/35
- (and 2 more)
-
Good to see you're back OC! It's what you said...make the best of it and take it easy. Robin
-
Thanks gentlemen! Carl...2 clewlines and 8 buntlines go from the yard to the "large" pinrail aft. And the 2 brace and 2 sheetlines....3 more to hoist the yard and 1 for a flag or to get a crewmember up. So...that's 18...or so. Something like this... Robin
- 473 replies
-
- 4
-
-
- greek bireme
- dusek
- (and 1 more)
-
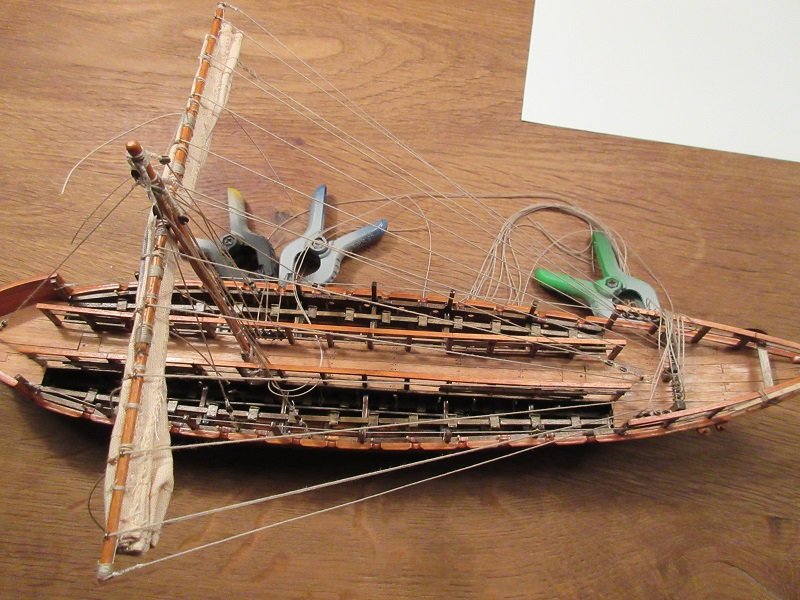
With the stays done... The yard... This jigsaw puzzle will keep me busy for a while. Robin

- 473 replies
-
- 11
-
-
- greek bireme
- dusek
- (and 1 more)
-
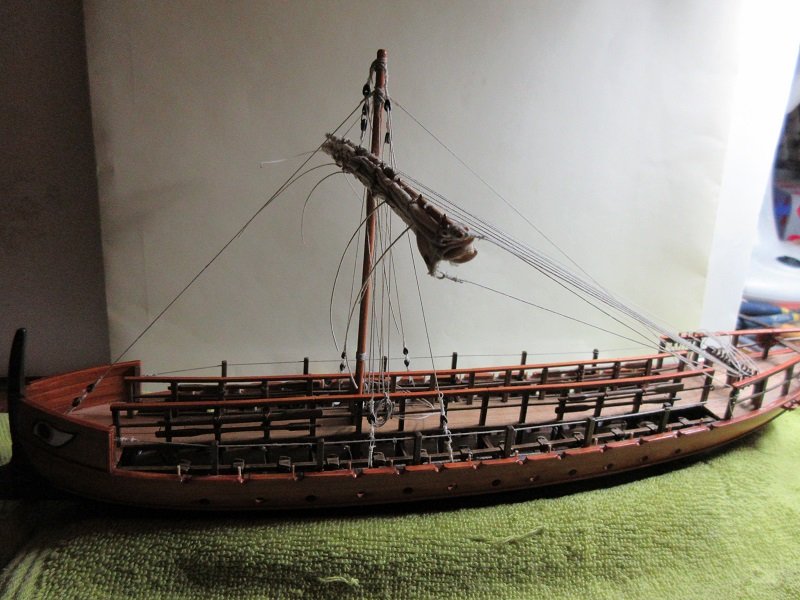
Thanks! The kit came without a colour scheme. I did a lot of research...and used my imagination. There isn't much to rely on really. Some Greek black pottery images, Homer mentioned black bowed ships and some shipyard records about the use of resin and pine tar. Most artist impressions you see in books are pure fantasy, so there is very little you can trust. Most helpful to me are the reconstructions of the Argo (pentakontor), Olkas (trade ship) and Olympias (trieres). Most of my modifications come from the 3 ships. I'm not saying my modifications and colours are right, but they're plausible. The Dusek kit is very good imho, a bit basic though. Robin
- 473 replies
-
- 2
-
-
- greek bireme
- dusek
- (and 1 more)
-
Fantastic build! Great pe handling and I love the shading of the paint. Just right! not over the top. Awesome! Robin
-
Thanks Nils...and the likes. It's a "quick release system" to make it possible to lower and raise the mast easily. Mast was lowered for battle...or even left ashore to reduce weight. More soon, Robin
- 473 replies
-
- 9
-
-
- greek bireme
- dusek
- (and 1 more)
-
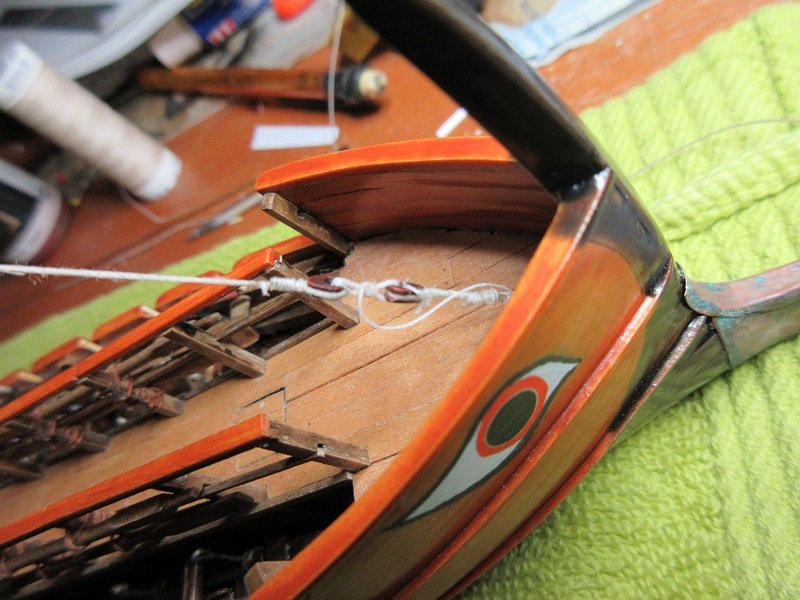
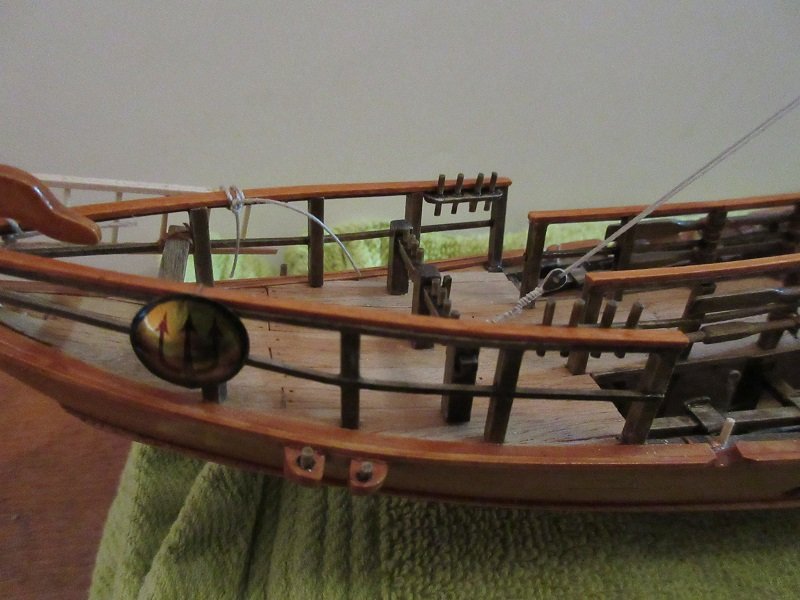
My first small steps in the world of ship model rigging Made the blocks to fix the stays and attached them to the sides, bow and stern. I used the eyes of bronze coloured fishing hooks. I must now attach the same blocks to the stays themselves. I copy the rigging from the Greek olkas merchant ship reconstruction. Mentioned before. Note the 600 BC copper paperclips! More soon. Robin
- 473 replies
-
- 10
-
-
- greek bireme
- dusek
- (and 1 more)
-
Congrats! Nice and stylish. I don't think adding weight to the rear is the solution. The bigger prop wil probably do the trick already. Robin
- 339 replies
-
- 4
-
-
- dumas
- Chris-Craft
- (and 3 more)
-
Since I've been away for a bit I missed a lot of great stuff it seems. Sublime build Don! Robin
- 653 replies
-
- 2
-
-
- trabakul
- marisstella
- (and 1 more)