


aliluke
-
Posts
1,359 -
Joined
-
Last visited
Content Type
Profiles
Forums
Gallery
Events
Everything posted by aliluke
-
 That stern and fashion pieces look fine to me Brian. I didn't glaze the windows until much later in the build - not a consious decision with respect to sawdust - but just because I struggled to find a source for Microglaze. As for counting the costs I never go there!!
- 831 replies
-
- 1
-

-
- Armed Virginia Sloop
- Model Shipways
- (and 1 more)
-
Hi Ryland This is a part of the forum that I've never really looked at. Now I'm here I've found your log of your stunning longboat. A fascinating project and beautifully rendered by you - no surprise there! I'll keep following.
-
Hi Hamilton I'm bemused that no one seems to want to try my technique! Not only easy but effective. Since I finished it I gave the copper at least 5 coats of Testors Dullcote and no further aging has occurred. I would guess that a sealing coat will slow aging as it will stop oxygen getting at the copper. But that is a guess. Any way your coppering looks very fine.
-
Looking really sharp to me Brian. You are in total control as far as I can see. Remember to drill the upper counter for the rudder - easier done earlier than later. So many makers of this kit talk about snapping the bulkhead extensions - it was never an issue for me...I'm now thanking luck for that.
-
Looks great Rusty. Although spilling maybe an OMG moment I'm sure it still takes a lot of skill. It is certainly a skill that I wish to attain on my next build!
-
Yep time for bed! I think you are whacking yourself around the head too much. More annoying things are coming - sleep on them and no one will notice...I sanded right through the deck at one stage and then had to rip it up and replace that section. Why? Because a huge moth landed in my just painted varnish! I was so annoyed I sanded the thing right through to the ply. Shoud have slept on it!! Your work is looking really good. Way better than mine at the same stage. Rock on and roll with the punches - she'll sort herself out, believe me.
- 831 replies
-
- 2
-
-
- Armed Virginia Sloop
- Model Shipways
- (and 1 more)
-
Never mind. Only us evil eyes will see. It all still looks, overall, very, very fine to me and when the other details are layered in, this subtly will disappear from the eye. I now feel bad for pointing it out....
- 69 replies
-
- 1
-
-
- fair rosamund
- occre
- (and 1 more)
-
Looks great Hamilton - very precise and crisp and great lines. I'm going to pick you up on one thing though...are those central gratings fixed down? If they are the aft one has the upper comb running fore/aft which is correct but the forward one has the upper comb running starboard/port which is incorrect. Correct or incorrect they should at least be the same. Probably teaching you to suck eggs but that is what we are here for .
- 69 replies
-
- 1
-
-
- fair rosamund
- occre
- (and 1 more)
-
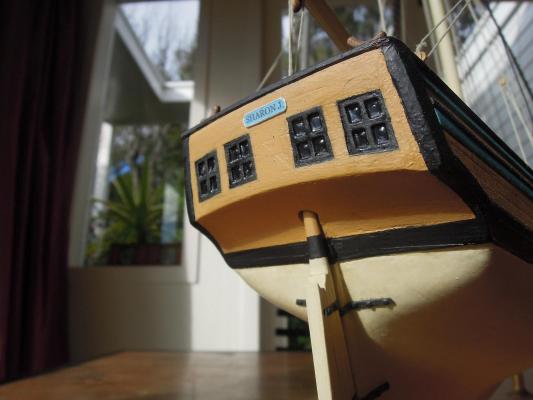
Hi Brian asked me to send him a photo of the finished stern of my AVS. I was never very happy with this aspect of the model and we had a little saga with P.M's about it. Oh well, here is my stern...if it helps Brian or others to do a better job of it I'd be happy!
- 55 replies
-
- 4
-
-
- armed virginia sloop
- model shipways
- (and 1 more)
-
Brian - It is difficult little piece - go for it. It looks fine to me. I'll delete my two pictures of my AVS stern from your log as I think your log should be clean of other photos. Might re-post them in my own log.
-
Personal Messages
aliluke replied to aliluke's topic in Using the MSW forum - **NO MODELING CONTENT IN THIS SUB-FORUM**
I echo Brian's thanks Mark. I think this might be a one-off glitch so I'm not to fussed about a fix. -
That windlass is one sweet little kit. Just all too tempting while I watch the NZ$ plummet against the US$ .
- 1,051 replies
-
- 1
-
-
- cheerful
- Syren Ship Model Company
- (and 1 more)
-
I'm not sure about your issues. I sanded back these extension parts to get a flow across the stern - a curve from side to side. This is not very apparent. My advice is to just work it to your satisfaction.
- 831 replies
-
- 2
-
-
- Armed Virginia Sloop
- Model Shipways
- (and 1 more)
-
Personal Messages
aliluke replied to aliluke's topic in Using the MSW forum - **NO MODELING CONTENT IN THIS SUB-FORUM**
I'm a Firefox lad too. IE is disabled on my computer and has been for a while. -
Personal Messages
aliluke replied to aliluke's topic in Using the MSW forum - **NO MODELING CONTENT IN THIS SUB-FORUM**
Thanks Mark. I've had a hard time cleaning my computer of malware,adware and spyware in the last few days - I wonder if these nasty things infected my membership and activity here. My daughter caused the infection on Tuesday but we have no idea how she did it. My computer is all clear now through a long cleaning process... -
Personal Messages
aliluke replied to aliluke's topic in Using the MSW forum - **NO MODELING CONTENT IN THIS SUB-FORUM**
Yep I "unblocked" you a while back but didn't make any difference. Don't know how I might of "blocked" you in the first place. I certainly didn't intend to -
Personal Messages
aliluke replied to aliluke's topic in Using the MSW forum - **NO MODELING CONTENT IN THIS SUB-FORUM**
Not an issue for me either. My message now is: "You cannot reply. All other recepients have left this conversation". Brian is "Blocked". Weird. -
Personal Messages
aliluke replied to aliluke's topic in Using the MSW forum - **NO MODELING CONTENT IN THIS SUB-FORUM**
I'm that other user and posted on the same topic at the same time! I'm wondering if my membership has been hacked somehow???? -
I'm having a PM conversation with another member about stern details on a model and am getting the message that the user is blocked and can't participate. He in turn is getting the message "You have been banned from this conversation". What is this about? I haven't pushed he buttons that I can recall that would lead me to ban him...and I have no reason to.
-
Looking good to me Larry. Keep it up and I look forward to more.
-
Hi Chuck Hear what you are saying about the DXF files. I sort of expected your sensible reply. I'll continue to follow and be a customer for Cheerful when she's ready to ship in whatever package. It is a fine little ship and I can see it being a great introduction for me into scratch modelling. Hopefully it may turn into a group build as well!? Looks like a scroll saw is on my buy list as well - luckily my wife doesn't read these posts!!!!
-
Very nice. The machinery as well as the progress! Do you laser cut the keel/stem/stern pieces as well? Another question: Will you being providing the DXF files as a part of the plans package? Thanks.
-
Copy away Mike. I don't know about this king plank stuff. I certainly didn't do one. I did however centre my central plank on the centreline of the deck rather than flanking the centreline with two planks. I've seen it done both ways but I believe that central plank should be centred. Another decision you need to make before starting is whether you are going to overlay the hatches on the deck or inset them (where the planks butt into the sides of the hatch and a caulking line is created at the butt). I inset my hatches which I think looks better and is more accurate but it requires more forward planning. If you inset them you need to lay out your hatches to the correct outer dimensions and cut your planks to suit. This leaves a gap between the plank ends and sides and the hatch cut outs in the false plywood deck - I think there are photos in my log that show this.
-
Hi Mike On page 4 of my log you can see the planking plan that I drew for the main deck. This shows in red where I located the butts. My planks were 1/8" X 1/32" = 3.175mm x 0.8mm. Doing the drawing really helped me work my plan for the planking - you welcome to follow it but with wider planks yours will work out differently. The partners and capstan step were just made flat and laid directly on top of the deck - see page 8 of my log. I think replicating the exact details as per the FFM would be very difficult and ultimately pointless i.e. invisible. Using a contrasting timber might be a nice touch. Mine were just the same colour as the deck.
