tlevine
-
Posts
1,946 -
Joined
-
Last visited
Content Type
Profiles
Forums
Gallery
Events
Everything posted by tlevine
-
 Although you are giving this to HP as a throw-away model, can you transform it into something useful?
- 209 replies
-
- 6
-

-
- cheerful
- Syren Ship Model Company
- (and 1 more)
-
I am leaning toward the self-centering chuck as I see myself utilizing this more with the lathe. Since I have a mill vise, as long as two sides are parallel I can securely hold anything for milling.
-
Thanks, Martin. Danny, can you give me an example of the use for the "normal" 4-jaw chuck? I had planned on the self-aligning.
-
Thanks gentlemen. My only regret is that I did not purchase this toy a few years ago. Now on to the chocks.
-
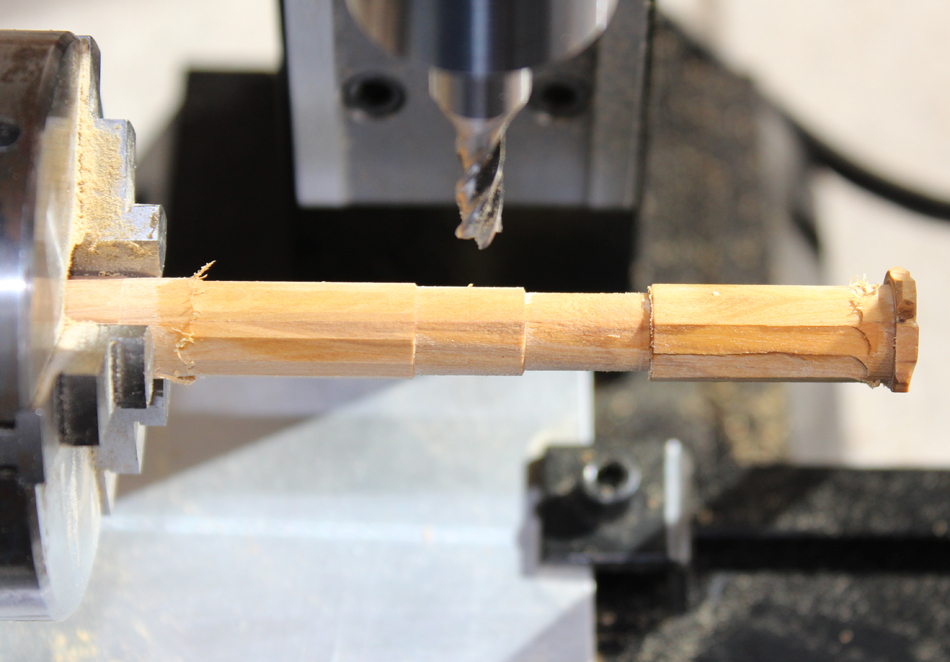
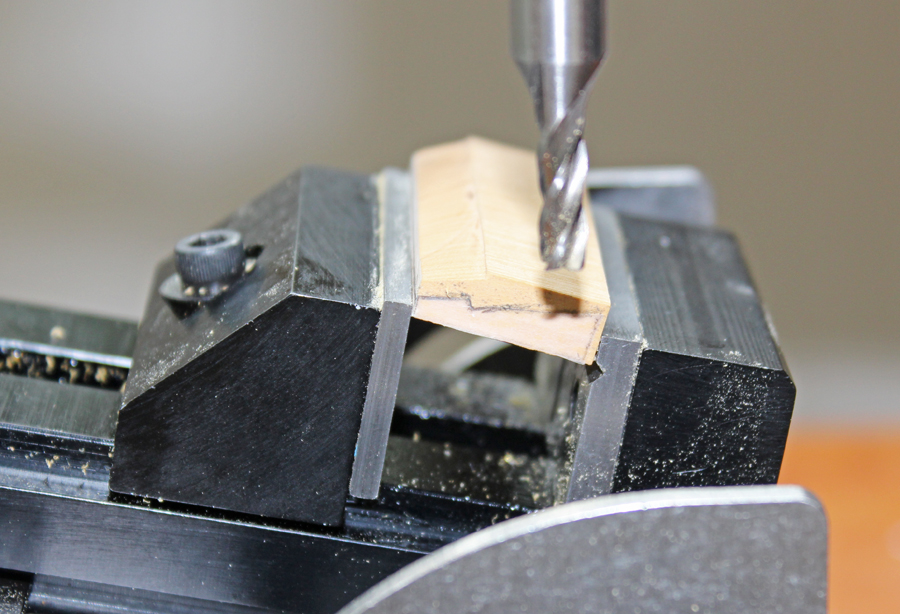
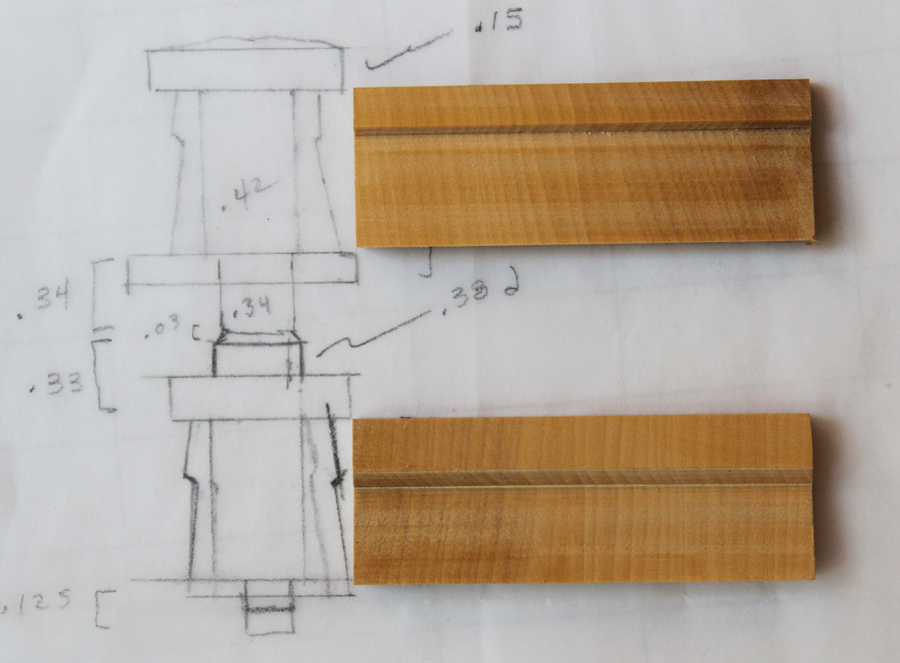
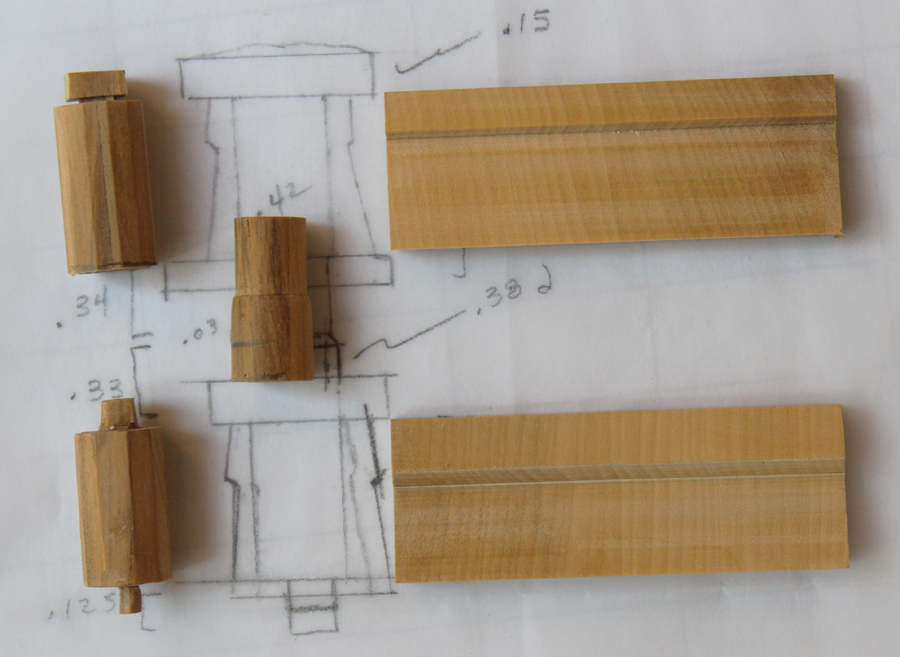
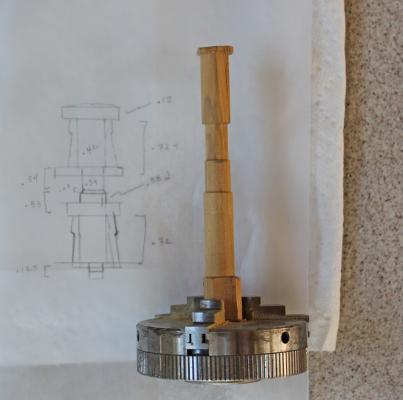
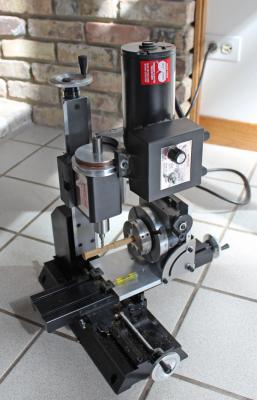
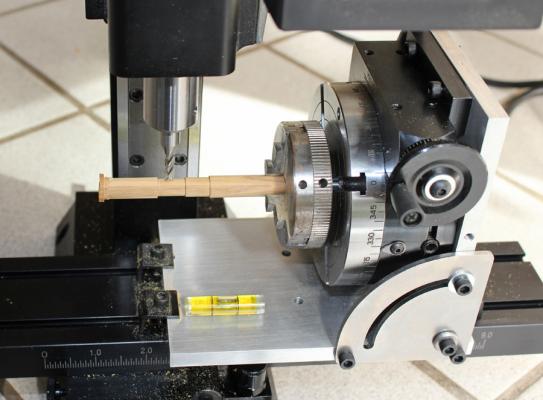
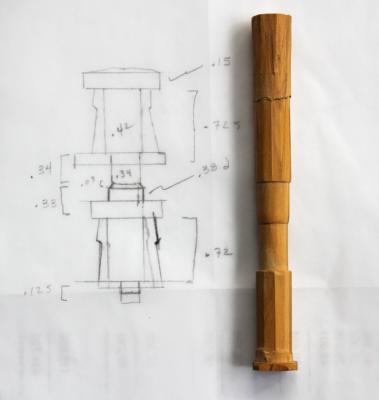
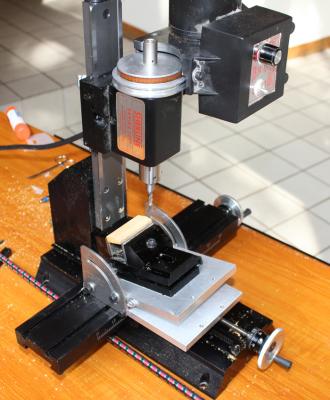
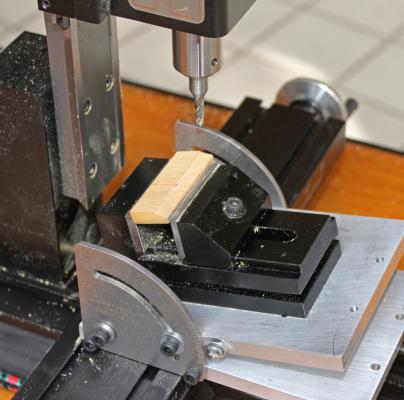
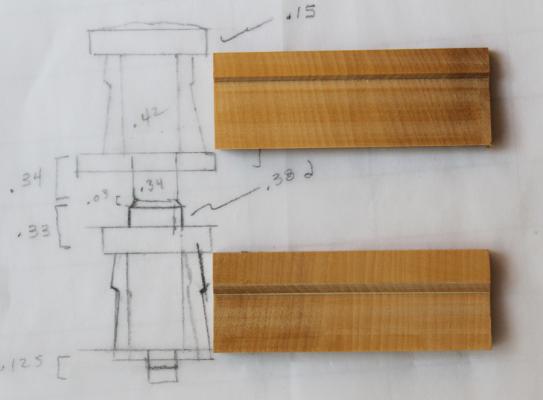
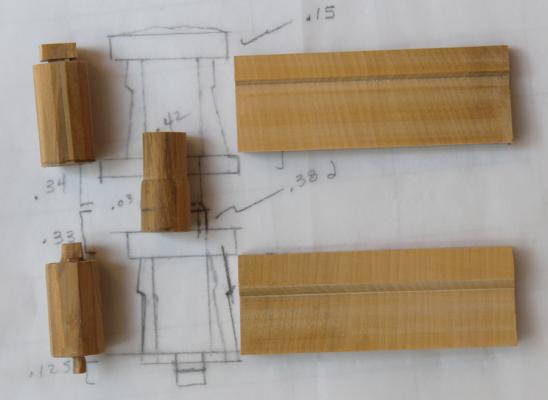
I have started the capstan. The diameter of the capstan on the Atalanta plans (as well as the Fly) is larger than shown in TFFM Vol 2, which represents Pegasus. I redrew the capstan to reflect this. The first thing I did was look at Greg's pictures in TFFM Vol 3. Next, I re-read Dan's tutorial for Vulture's capstan. Finally, I put wood to machine. After several years of threatening, I finally took the plunge and bought a Sherline mill. I already own their lathe and so saved some money by using the motor from the lathe. It takes less than two minutes to swap it out and that includes walking from one end of the house (where I have the lathe in my workshop) to where I set up the mill (better natural lighting this time of year). I used English boxwood for the barrel and whelps to provide a subtle color contrast between the capstan and the framing. The barrel wood has a few checks in it but the flaws will be hidden under the whelps. The whelps are of good clear wood. I took a square piece of boxwood and rounded it down to eight sides, like one would do for a mast. I do not own a 4-jaw chuck and this made holding the wood blank easier in the 3-jaw chuck. In the lathe, I turned the blank to the proper dimensions. I made all three sections longer than necessary to make sure there was sufficient length for final assembly. Now I was able to play with the new toy! The upper barrel is divided into 12 sections for the 6 whelps and the lower barrel is divided into 10 sections for 5 whelps. I mounted the blank onto a rotary table so that all of the sections could be milled to the same width. The flats were milled while supporting the end of the blank to prevent downward deflection. The upper and lower sections were then cut away from the central round section. The next things to make were the whelps. The upper and lower whelps are different in shape and width. I traced the outline onto the end of a piece of boxwood, orienting the whelp along the grain. The blank was mounted into the vise, which was attached to a tilt table. The first one took over an hour (but half of that time was figuring out the correct setup); the second one took 30 minutes. They will be sliced off the loaf when I am ready to install them.


-
Absolutely gorgeous.
-
Alligators come in different lengths, depending on their intended uses. I use the long ones in your photo more for nasal work and shorter ones for the ear. There are even longer ones intended for neurosurgery. Many surgical instruments can be adapted to our uses. My OR team knows that if something isn't good enough for surgery, it might work fine for the ships and they give me first dibs before throwing them out. Bits used in ear surgery typically are not allowed to be re-sterilized but work great for carving wood.
- 209 replies
-
- 4
-
-
- cheerful
- Syren Ship Model Company
- (and 1 more)
-
Sawdust, let me answer you question regarding alligator forceps. I am an ENT surgeon and use them daily in my work in the office, the OR and the shipyard. There is a tremendous quality difference between the $15 hobby quality alligators and the real McCoy. However, a good, not great, pair of forceps will run you $150. The difference is in the set of the jaws, the strength of the grip, the weight and the quality of the metal finish. Is it worth it for our hobby? No. Alligators also come in scissors (Bellucci scissors). These are wonderful for cutting the ends of rigging in those hard-to-reach spots. Hope that helps.
- 209 replies
-
- 11
-
-
- cheerful
- Syren Ship Model Company
- (and 1 more)
-
Echo by Maury S - FINISHED - Cross-Section
tlevine replied to Maury S's topic in - Build logs for subjects built 1751 - 1800
But Greg, you know that planking was done correctly. Isn't that all that matters? -
Beautiful work, as always, Remco. I hope nothing else "needs" rebuilding.
- 1,192 replies
-
- 1
-
-
- sloop
- kingfisher
- (and 1 more)
-
Greg, Mark, thank you. Druxey, I felt the same way until I was rummaging through a pile of wood and found a piece of holly marked "save for deck planking". The color is a little darker and will be a much better match. So, time to remove the new decking and install the new-new decking.
-
Echo by Maury S - FINISHED - Cross-Section
tlevine replied to Maury S's topic in - Build logs for subjects built 1751 - 1800
Anyone who would try and turn the crank ought to have their hand severely slapped. Maury, looks great. -
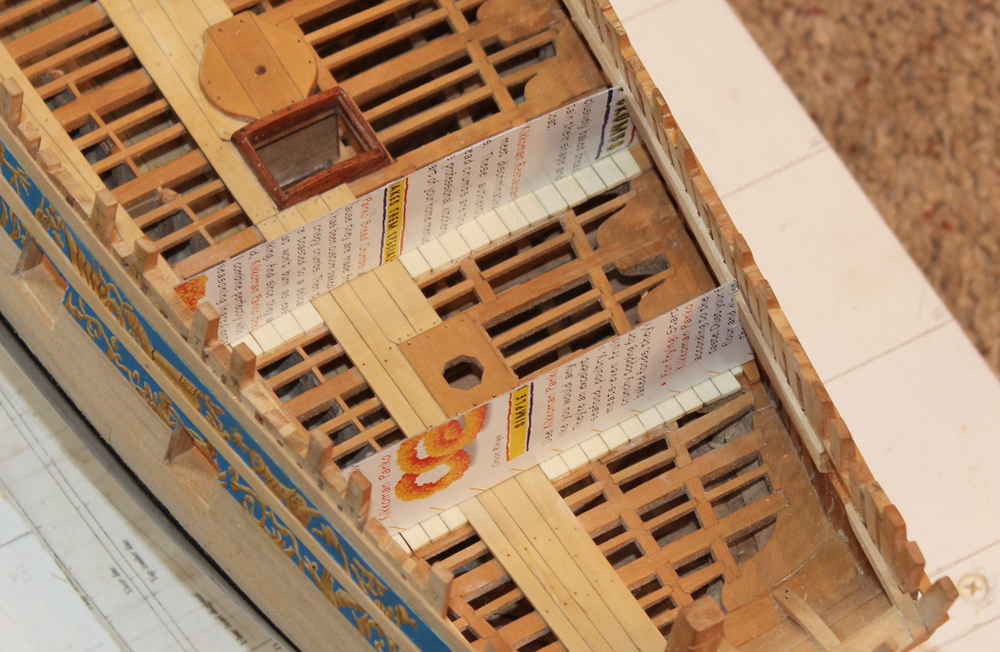
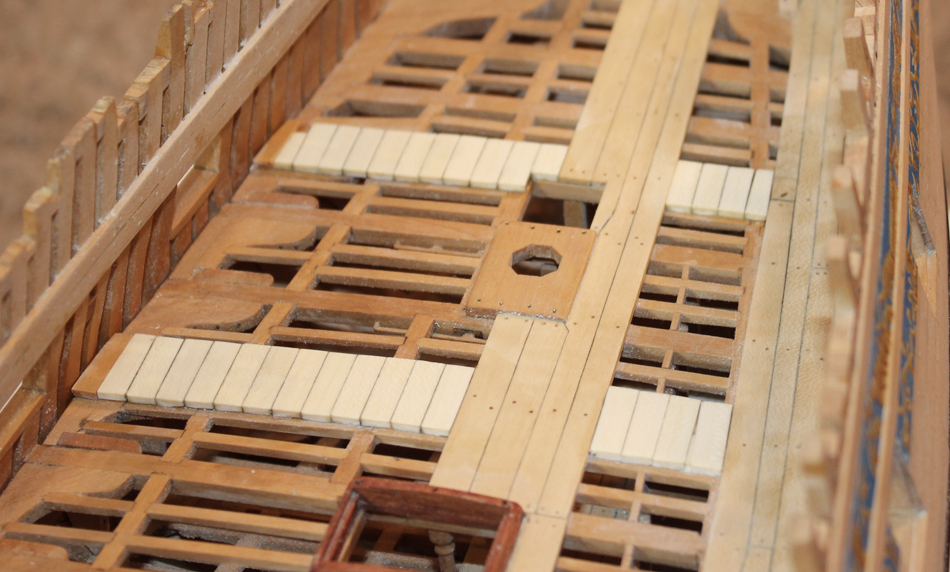
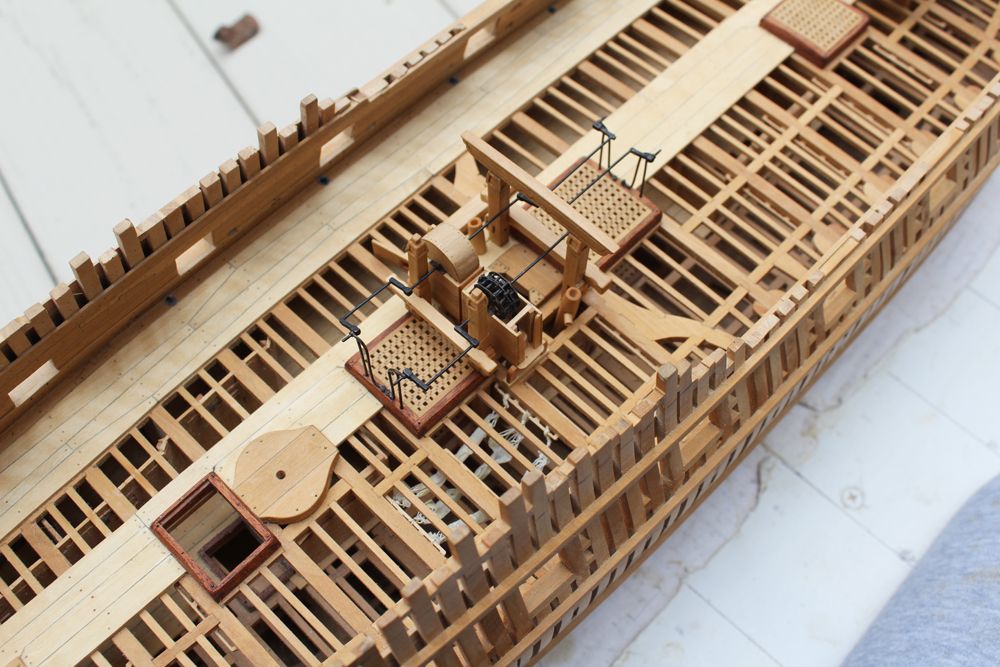
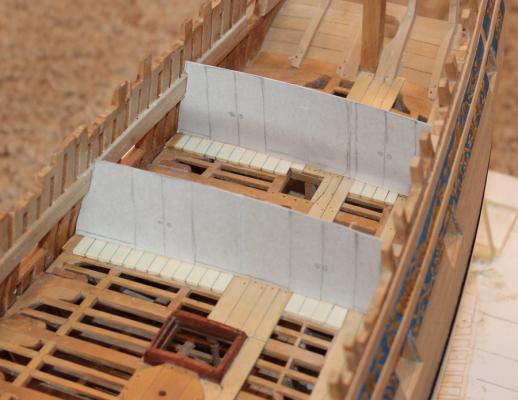
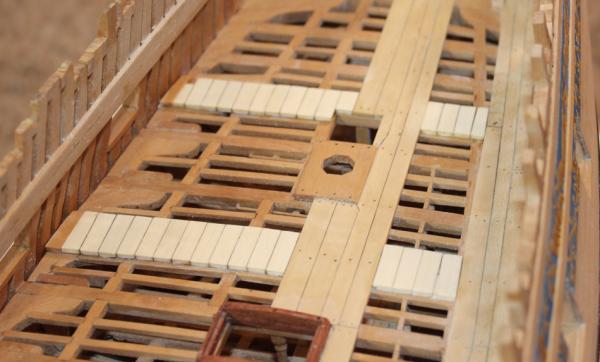
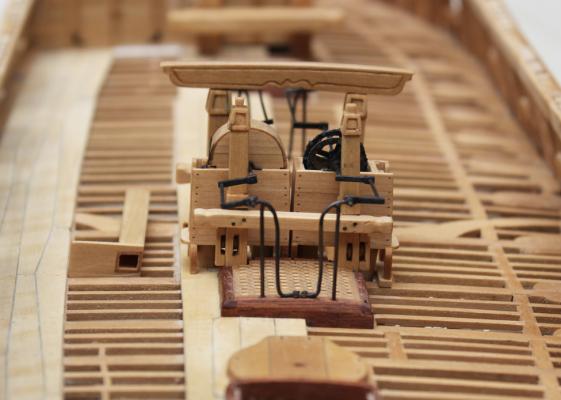
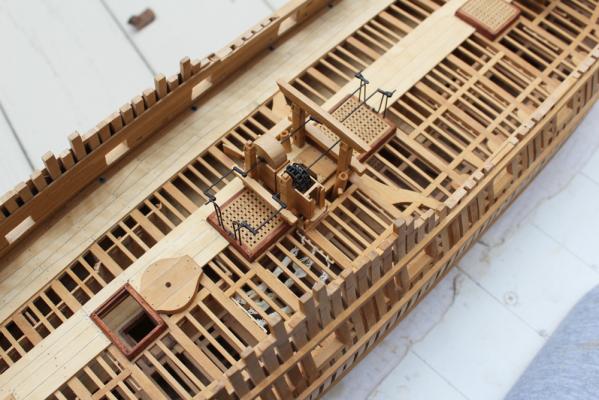
I held off on fabricating the brake pumps because of their fragility and small size. I know I will lose them so they will be made when I am ready to install them. My approach to the rhodings is not quite prototypical. Because they are black and the axletree is also black, detail is difficult to see, so I went for ease of construction. The rhoding on the main jeer bitt is a simple brass strap that has been cinched around the axletree and glued to the bitt. There is a spacer block between the main topsail sheet bitt and the rhoding. The spacer block is wood that has been shaped and painted black. The rhoding is another brass strap. I have drilled the bitt to represent the bolts holding the spacer block/rhoding assembly. In the picture these have not been blackened yet. I put together another short length of chain and inserted it into the port pump tube. There are two athwartship bulkheads aft. So far, everything on the starboard side has been left open to highlight the structure. I am changing course and building the bulkheads port and starboard. I am toying with the idea of furnishing these cabins. First, stubs of deck planking are laid to support the bulkhead. Then, card templates are made. The bulkhead will be made sandwich fashion, with outer wood planking and a "meat" of template. There is a big color difference between the old and new planking. All this planking came from the same sheet of holly. The rest of the planking was installed in July, 2014 (page 29 of this log). Since I will not be permanently installing the bulkheads for some months, hopefully the colors will blend together.


-
Echo by Maury S - FINISHED - Cross-Section
tlevine replied to Maury S's topic in - Build logs for subjects built 1751 - 1800
Looks great Maury. Gosh, it's been awhile since I inspired anyone! -
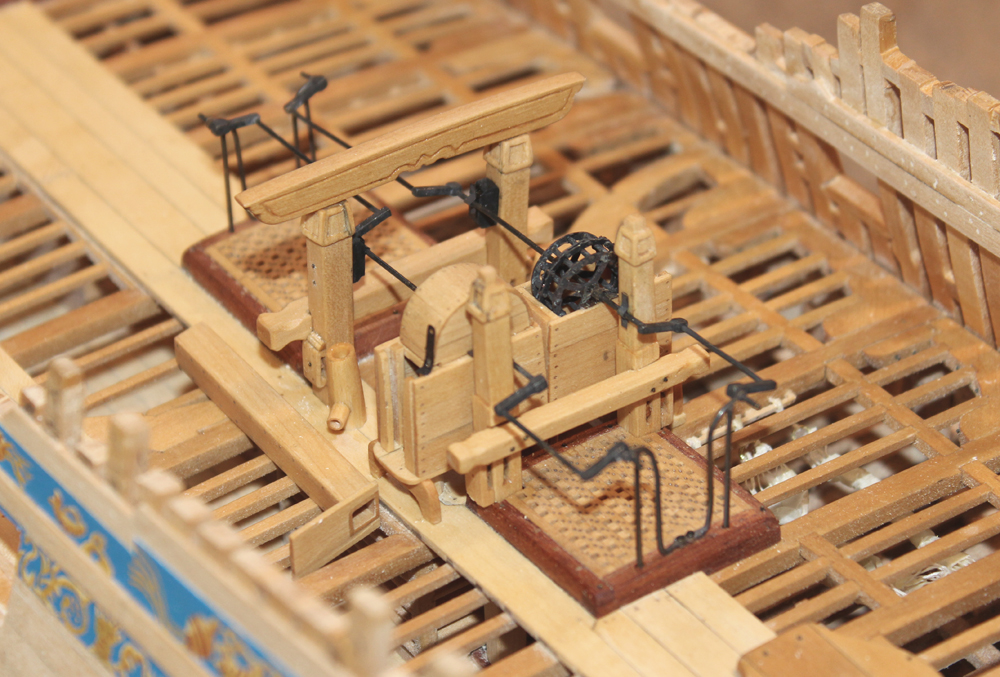
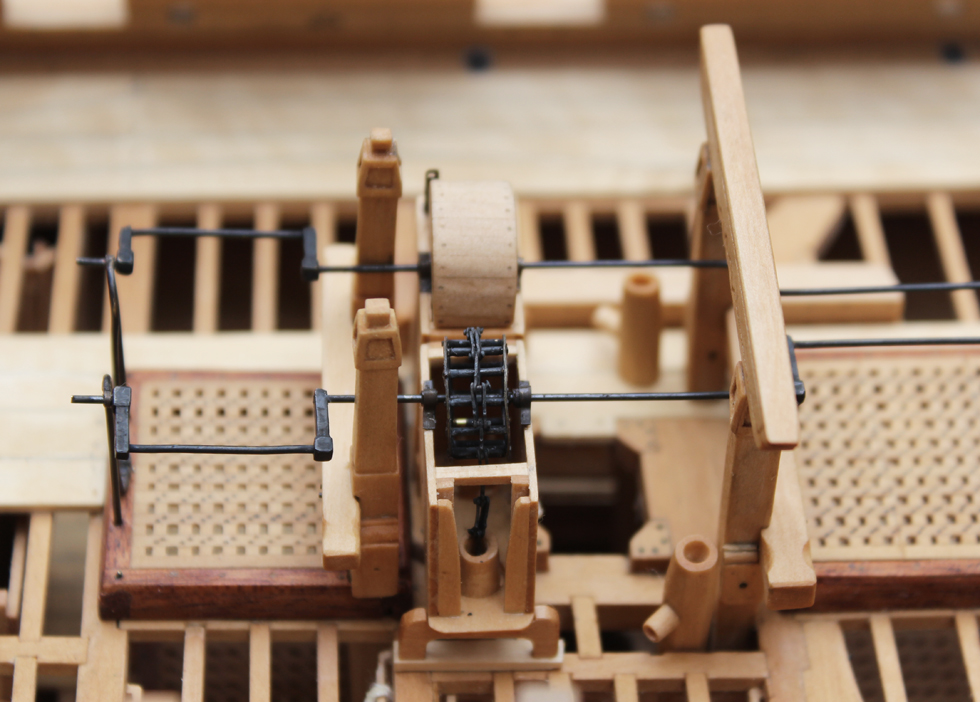
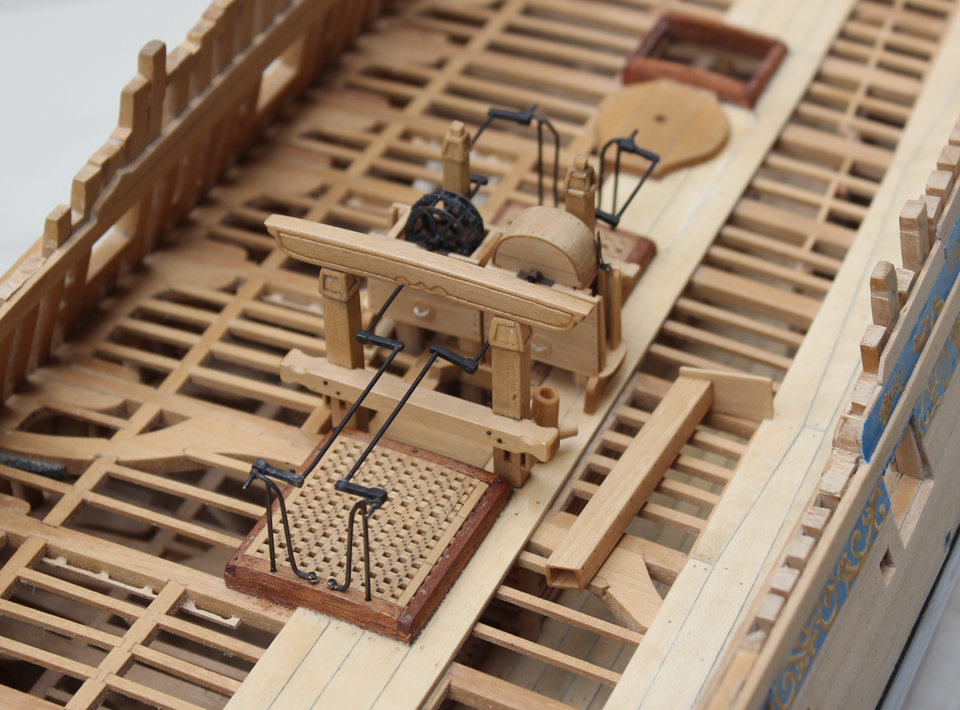
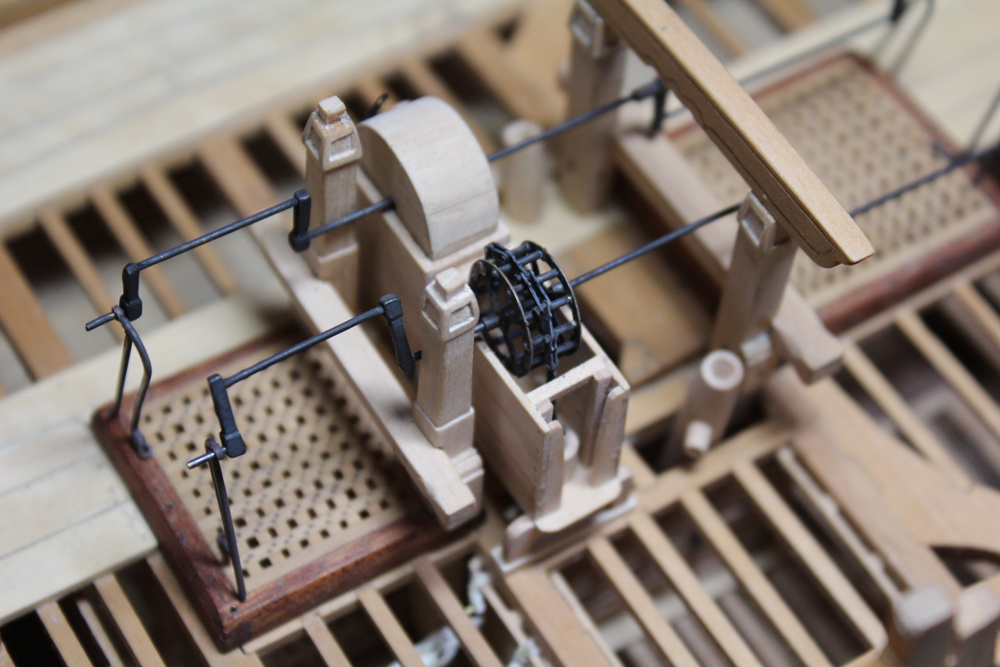
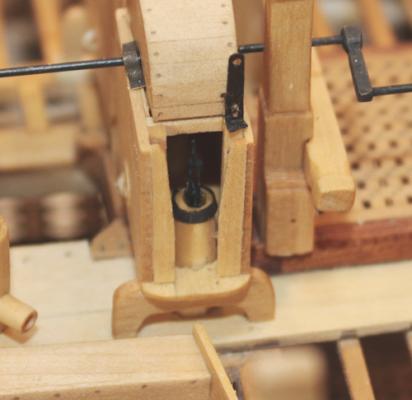
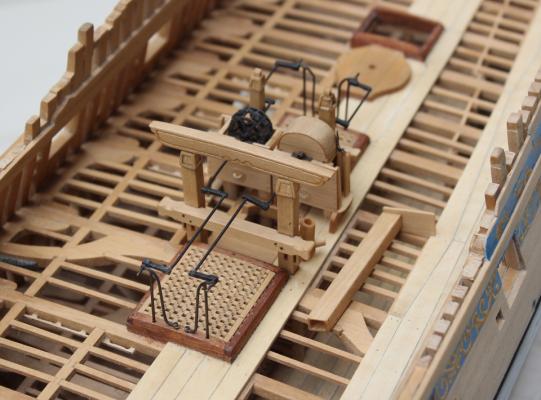
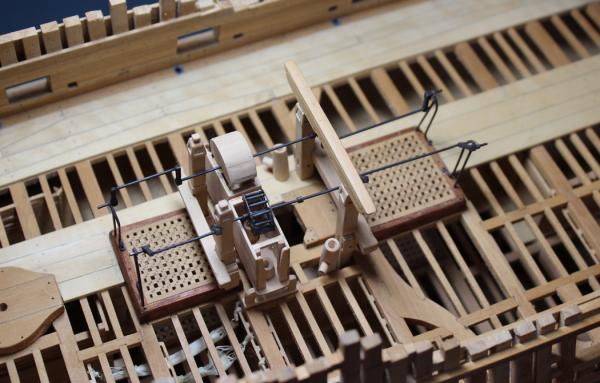
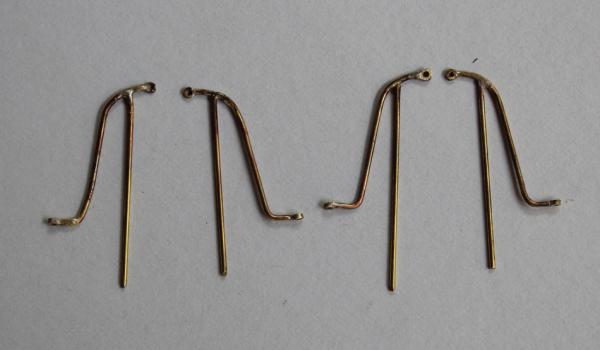
Robin, just to make sure he didn't creep back into sight, I snapped off his feet and threw him into the brink. Thank you Druxey, Mark, David and Maury. And thank you everyone for the likes. The final assembly is complicated by the fact the the height of the axletree must exactly fit the opening in the cistern cover, both in height and distance from the midline. I had to remake the stanchions twice (and in one case, three times) to get the perfect fit. The outer leg of the stanchion is inserted into a hole drilled in the hatch coaming. The inner leg is secured with a bolt. In the photos the metal looks unevenly blackened. In real life it does not look blotchy. This is one of the rare times I used CA. I was concerned that the Elmer's Yellow would not hold the metal. Once everything was secure, the chain was glued into the outer pump tube and then draped over the wheel assembly. The port assembly turns; the starboard does not. You can also see the pump dale sitting next to the port cistern. This is a straight-forward box with a tongue to insert into the side of the cistern. Since I have not decided what I will eventually do with the ordinance, I decided not to install it onto the cistern. Now that everything is secure, I will make and install the rhodings.

-
Bob, the fittings look great. I love how you used the low temperature Stay-Brite to snug up the top bracket. Did the two solders blacken the same or can you see a color difference where you added the fillet of Stay-Brite?
- 277 replies
-
- 1
-
-
- model shipways
- 18th century longboat
- (and 1 more)
-
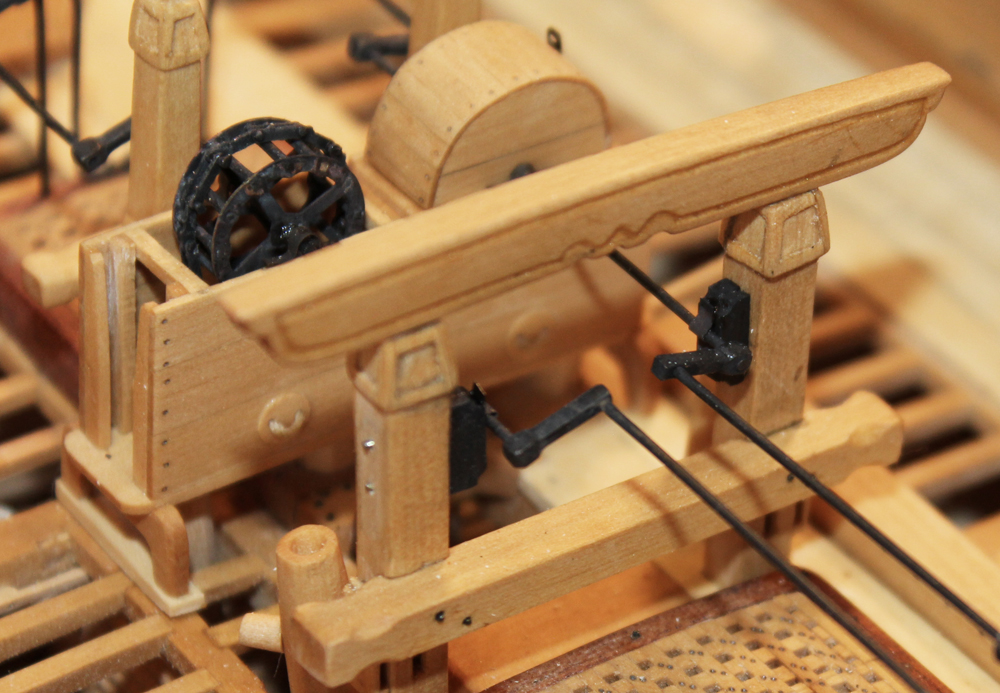
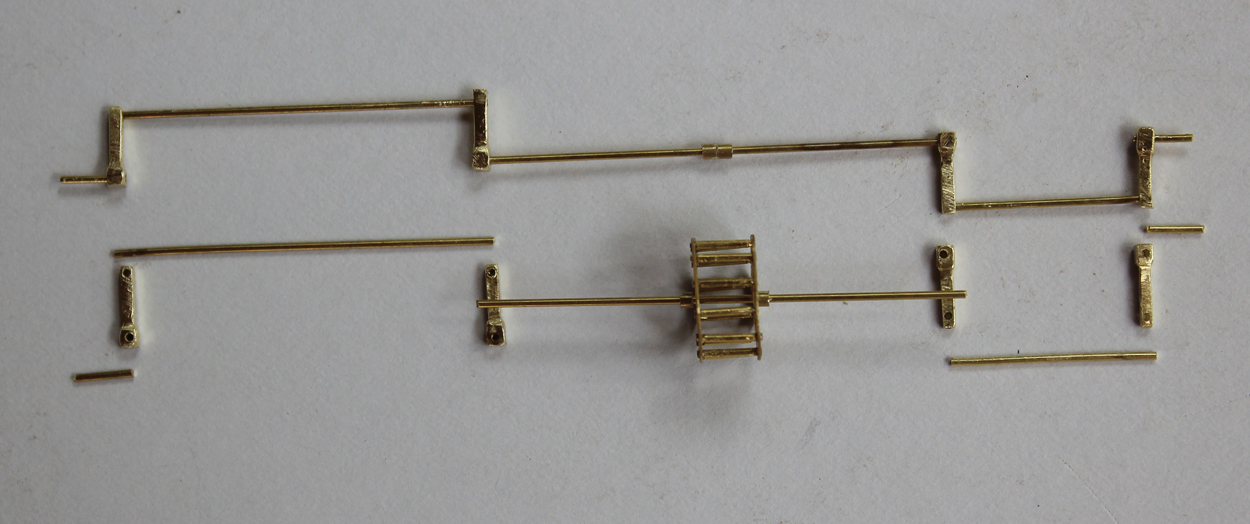
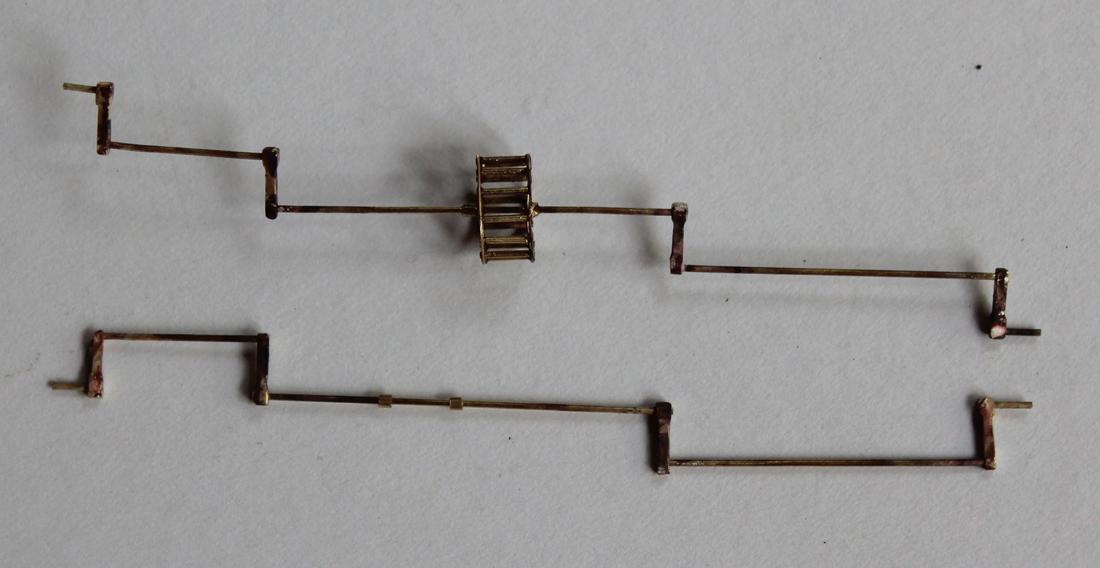
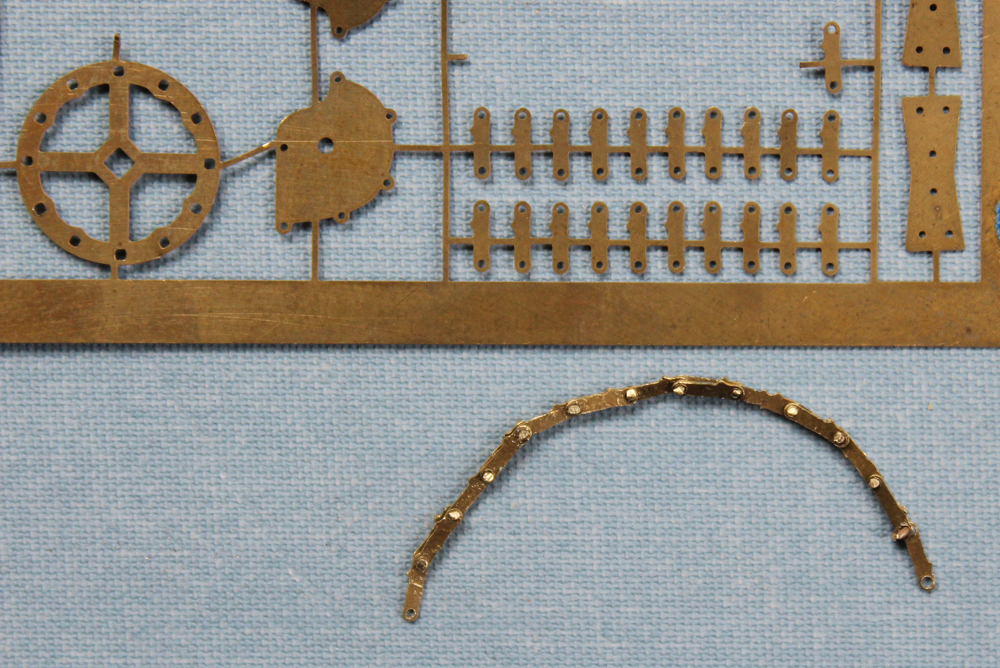
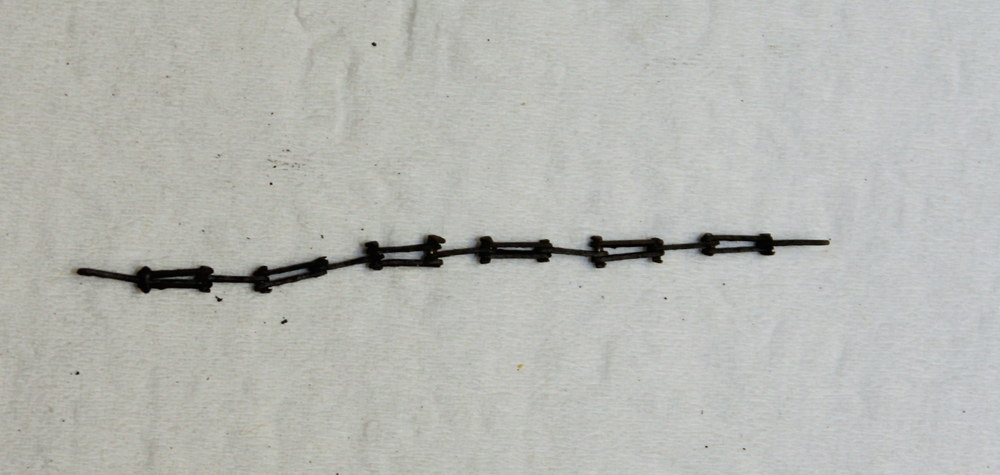
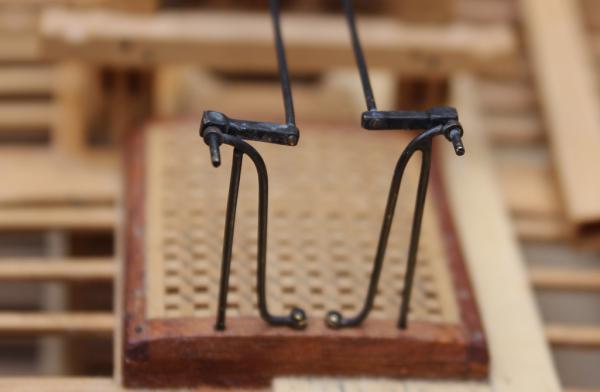
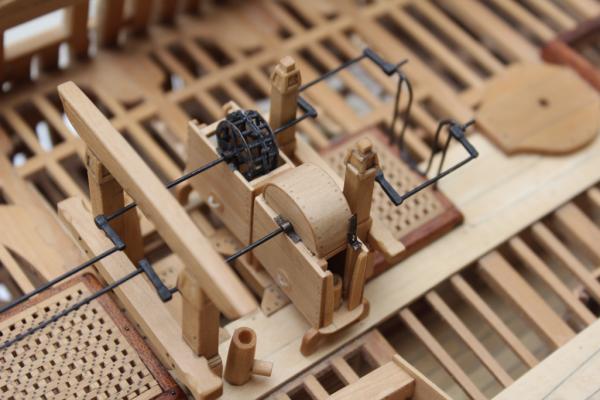
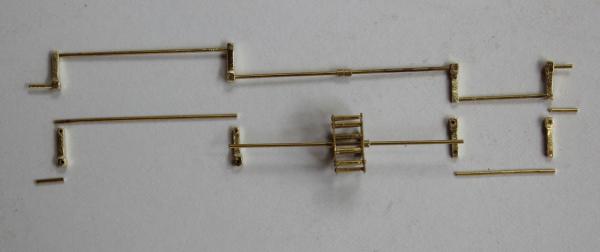
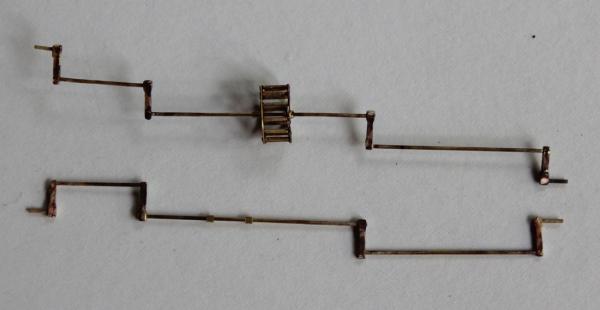
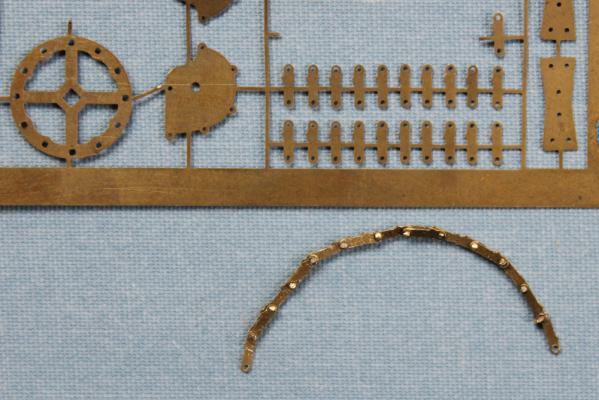
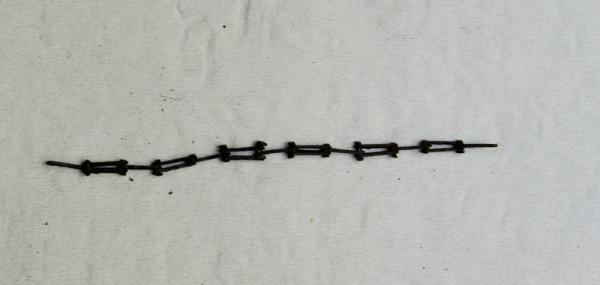
At first glance, the pump brake is an imposing structure with its multiple right angles. Add to that the need to make the port and starboard brakes look alike. The axletree is made from five segments of 1.5" brass wire. The vertical connectors are fabricated from 3" square brass rod which has been drilled to accept the axletree segments and shaped with files. The various pieces were silver soldered together except where the long segment inserts into its fore connecting rod. This allows for fine adjustments in length during the final installation. Don't forget to insert the wheel! I am lucky enough to have Admiralty Models' PE set for the Swan class and this includes the wheel components and links of chain. This is assembled like a bicycle chain, alternating double and single links. Brass wire was inserted through the holes and the ends peened to secure it. The picture also shows other components of the PE sheet. After blackening, the chain look great in person but terrible on camera so I only am showing a top view to demonstrate the linking process. As a next step, everything is temporarily assembled to check for gross mistakes.

-
Gosh, guys, it's nice to be missed. More pics today or tomorrow (having computer issues).
-
It has been a long time between posts but I hope to make up for that over the next month. There is always so much to do in the summer that there is not much time for sitting inside and breathing in sawdust. For months now I keep "hearing" robin's not-too-complementary comment about my lazy sailor. Of course he was right and so he has been evicted from his bunk and set off to work somewhere where he cannot be seen. Since his bunk is no longer occupied, I have rolled and tied it to match the other two bunks. I went back to the plans and David's drawing and reworked the cistern cover. It looks much better now. The pump axletree is supported at the ends by support brackets. Most of the Swan class ships used wood standards but Atalanta's plan show a metal bracket instead. These are bolted to the hatch coamings. These were made with 1.5" brass wire and tubing. The parts were then silver soldered. I have left one end long; this will be inserted into the coaming. I assume there is a bolt on the underside of the coaming. They will be blackened.
-
Let me add my congratulations as well. Your build is an inspiration to us all. Hopefully, in a few years my Swan class will be able to hold a candle to yours. And now to check out your tutorial on the axletree and winch.
-
That garboard strake is the key and yours look great.
- 222 replies
-
- 1
-
-
- 18th century longboat
- model shipways
- (and 2 more)
-
Thank you, John. And thanks for all the likes. Maury and Danny, I agree with both of you. I will be sanding it down before final installation. Overhead stowage of the pump dale between the beams makes sense to me Druxey. I will probably install the port side dale.