


Hubac's Historian
-
Posts
2,946 -
Joined
-
Last visited
Content Type
Profiles
Forums
Gallery
Events
Posts posted by Hubac's Historian
-
-
-
-
That’s an excellent scale upgrade with the deadeyes. I will have to remember this for later.
- mtaylor, Blue Ensign, hollowneck and 1 other
-
 4
4
-
Nice job on the caprail, Eric!
-
Bill and Gary - thank you very much! Bill, I have occasionally had this problem, but not lately. I don’t know why. Gary - I like your descriptor: the “nautilus” carving! And, you are right about the natural light - the while thing appears a lit less garish in-person, and in the day.
- FriedClams, mtaylor, Bill Morrison and 1 other
-
4
-
Thank you, John, and you are welcome. My hope with the log is to demonstrate what is possible with plastic, and I would love it if this project inspires people to take the Heller kit in different directions. There is a La Reine, in-process, on this site. Maybe someday, some intrepid soul will really launch into a Royal Louis, 1668, which I think is eminently possible to make a representative, if not wholly authentic model of from the Heller kit. Plastic is fun. I hope to encourage people to play with it.
-
B.E., here's another gem that I've been missing out on! Beautiful work, as always. I am particularly drawn to your shade-painting of the frieze elements; the effect is really outstanding.
- mtaylor, Blue Ensign and Nipper
-
2
-
 1
1
-
Gary, this model is such a gem, and I'm sorry I missed its construction. You are just too agile a builder for me. I won't miss-out in the future, though. I really loved the alignment tools that you made for the ribs. Just beautiful!
- Jack12477, FriedClams, thibaultron and 3 others
-
5
-
1
-
-
-
-
Thank you, Druxey! I based the horseheads, somewhat, on the Ford Mustang emblem, but who says I can’t tackle a little rhinoplasty?
- FriedClams, mtaylor, Keith Black and 1 other
-
4
-
Thank you, Mark! There is no need to give up the hobby; angles are everything in photography, and that angle lies a little bit.
- FriedClams, mtaylor, Bill Morrison and 2 others
-
5
-
Vic - you are a bonafide ship-modeling legend and a true artist. You are among the very few to have sailed their historic creations on open water, and the pure magic of all of that is an inspiration to everyone that sees them. I’ve seen the bare bones of what you have planned - it’s going to be amazing, no matter what way you get there, and particularly because you think outside the ol’ sea chest.
-
As always Victor, I appreciate your continued interest in my log! I would especially like to highlight a new project that Vic has begun, because I think it presents a really interesting approach to the ever-vexing problem of what Soleil Royal may have been:
-
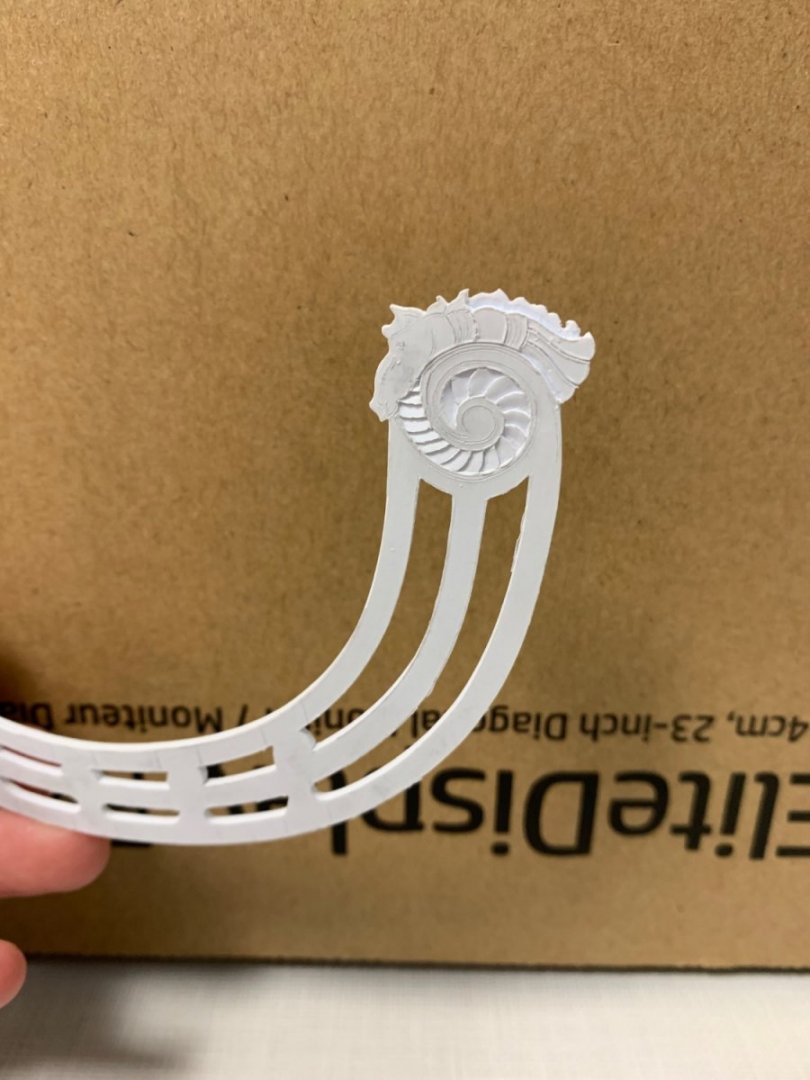
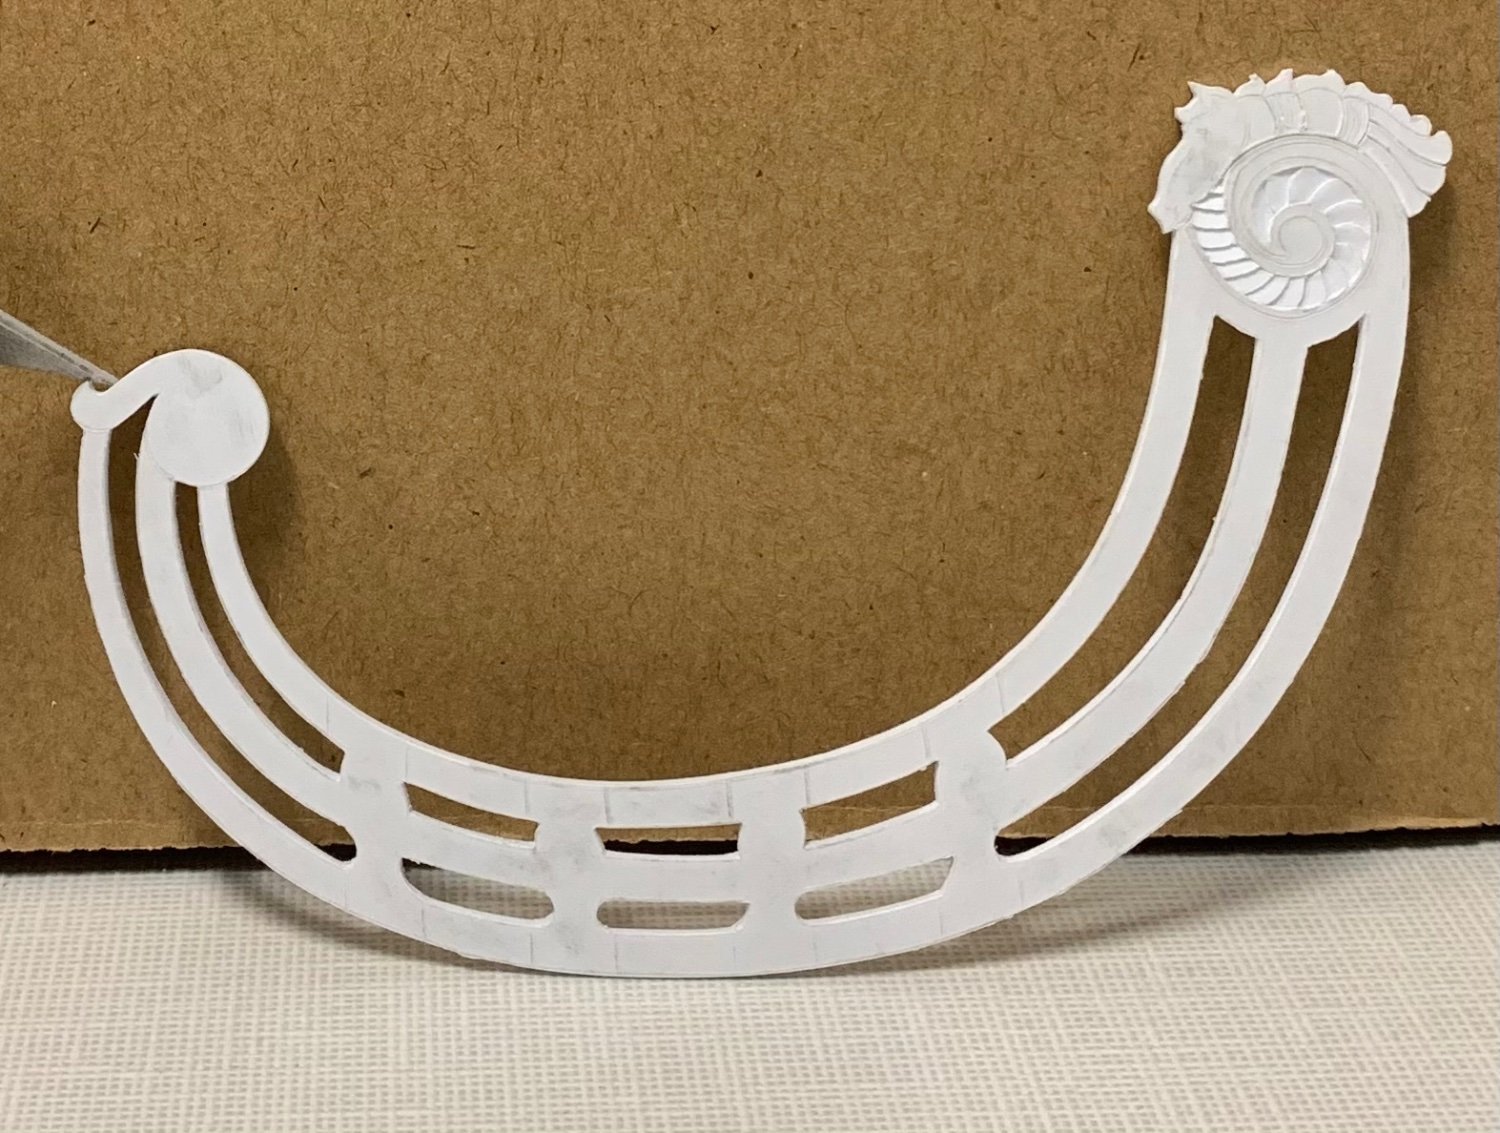
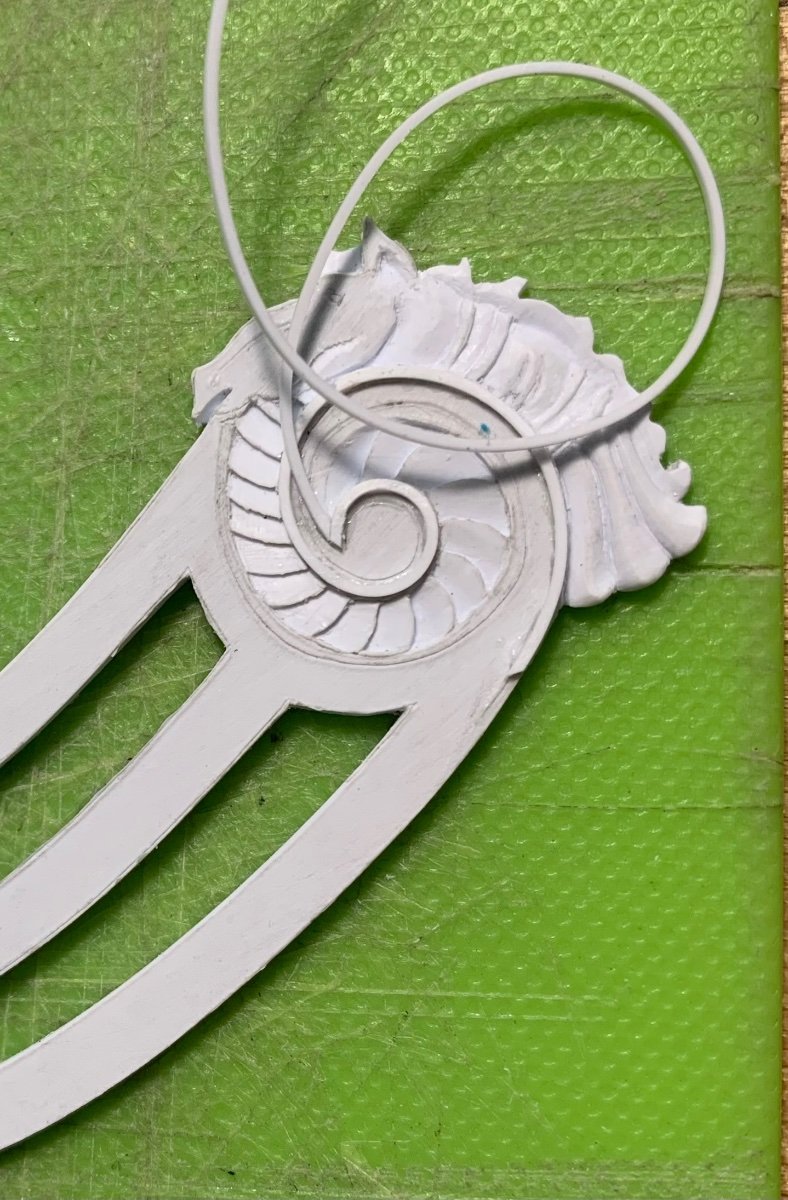
In consideration of Thomas’s request, I’ve been photographing the headrails as I carve the horse ornament. The starting place was to carve the fanned relief in the inner scroll:

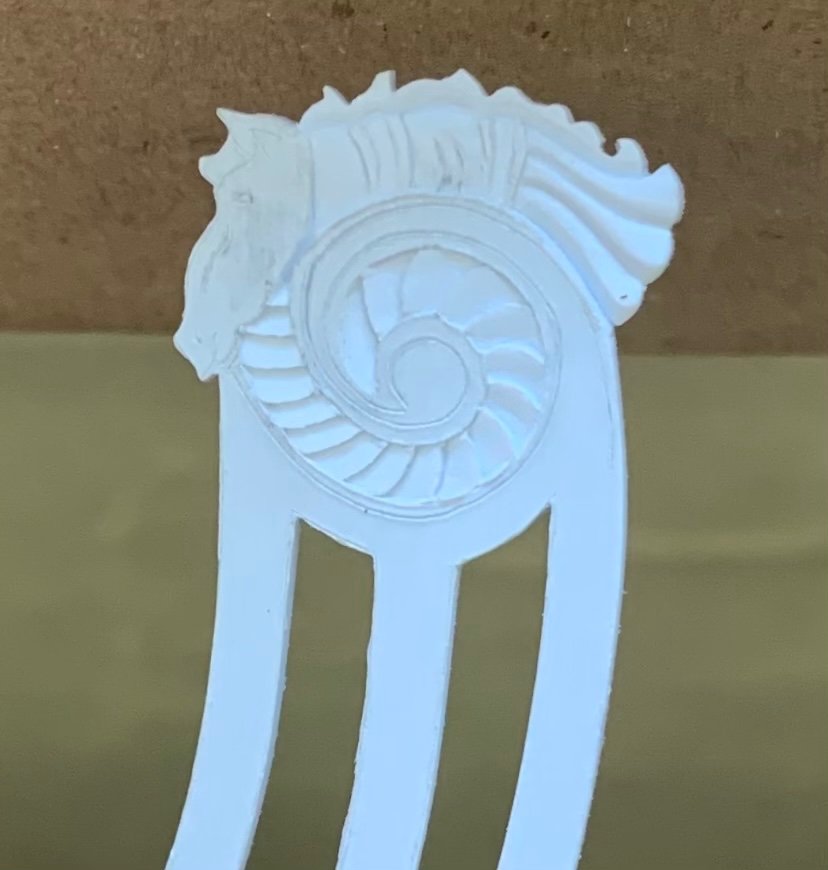
From there, carving the horse is mostly about establishing levels within the carving. Here, I’ve determined that where the mane meets the horse’s back will be the lowest-depth cut of the carving, my baseline:
After undercutting the mane a bit, which helps give dimension, later during the modeling of the mane, I decided to proceed from the tail to snout, as this Roman skirt was an easy thing to understand and model:
It all proceeds smoothly enough, until the head, which presents some challenges. For the record, I have not done any involved study of horse anatomy. I am merely attempting to hint at the major muscle groups that animate the animal’s jaw and face.
I wanted to experiment with my idea to add the bordering of the headrails. It was easy enough to induce a curl into this square styrene strip (.020) with my finger nail. I anchor the starting point with thin CA, and then I work my way around the scroll, 1/4” by 1/4”, with liquid styrene cement. It turned out about as well as I could have hoped.


Today, I finished up with the modeling of the head and mane.
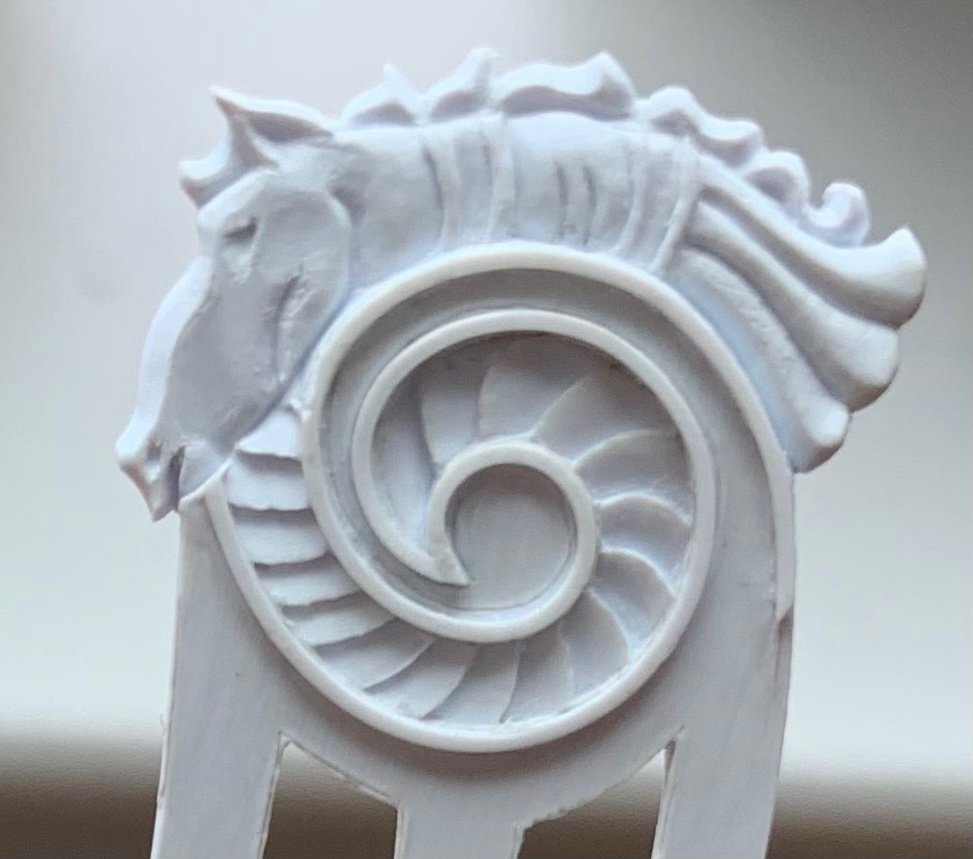
I still need to add a few applied “buttons” to the two bands that wrap around the horse’s body, but this is a simple thing. It is not an anatomically perfect study, but there is shape and movement that will catch the light and create shadows when painted.
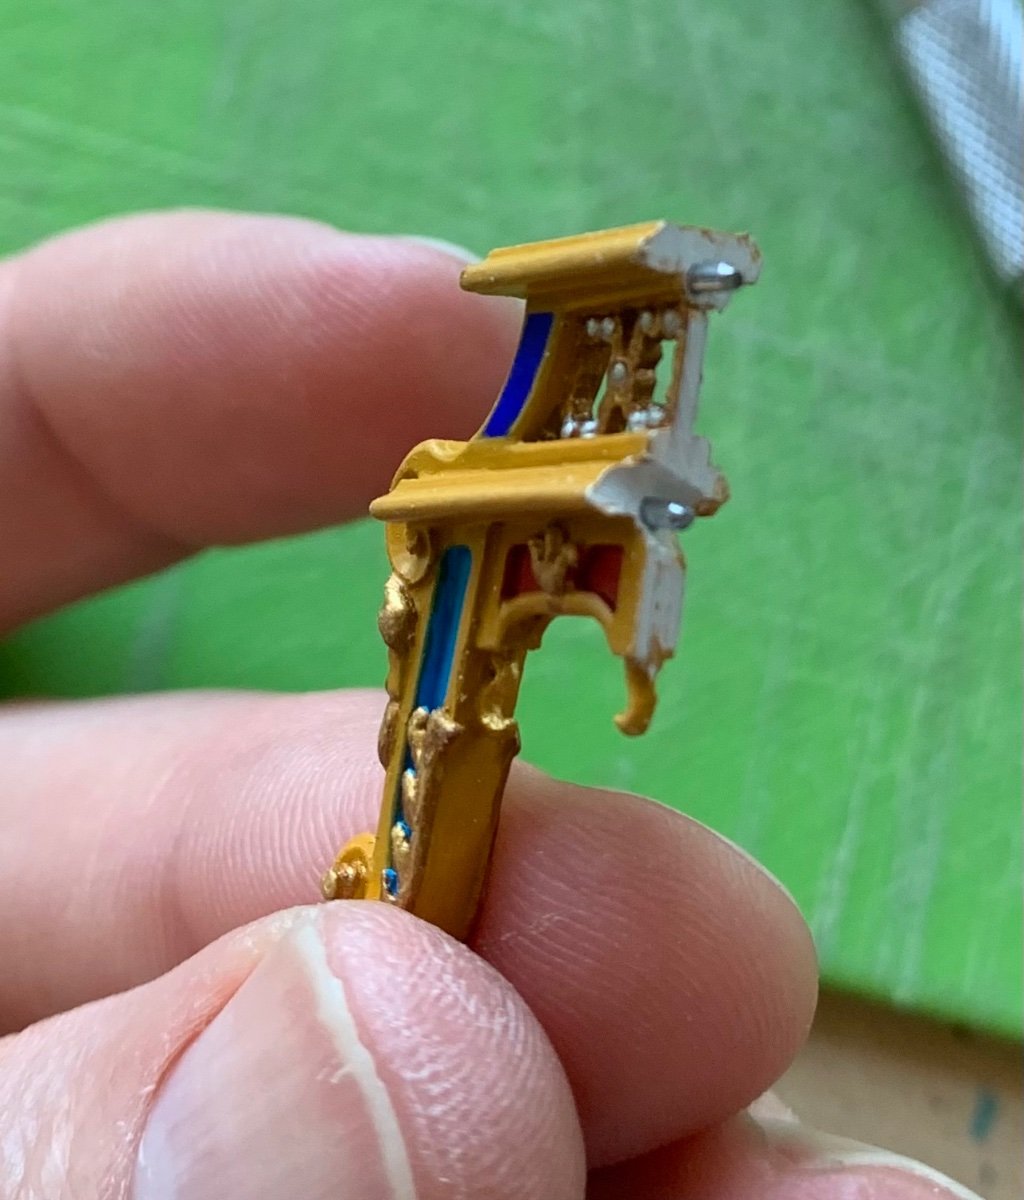
In other news, I have installed the pass-through archways. Because boxwood carvings will sit upon these, I wanted to ensure that they were very securely affixed. After much fitting and strategic scraping of paint, I fit two pins (from a paper clip) into each bracket:
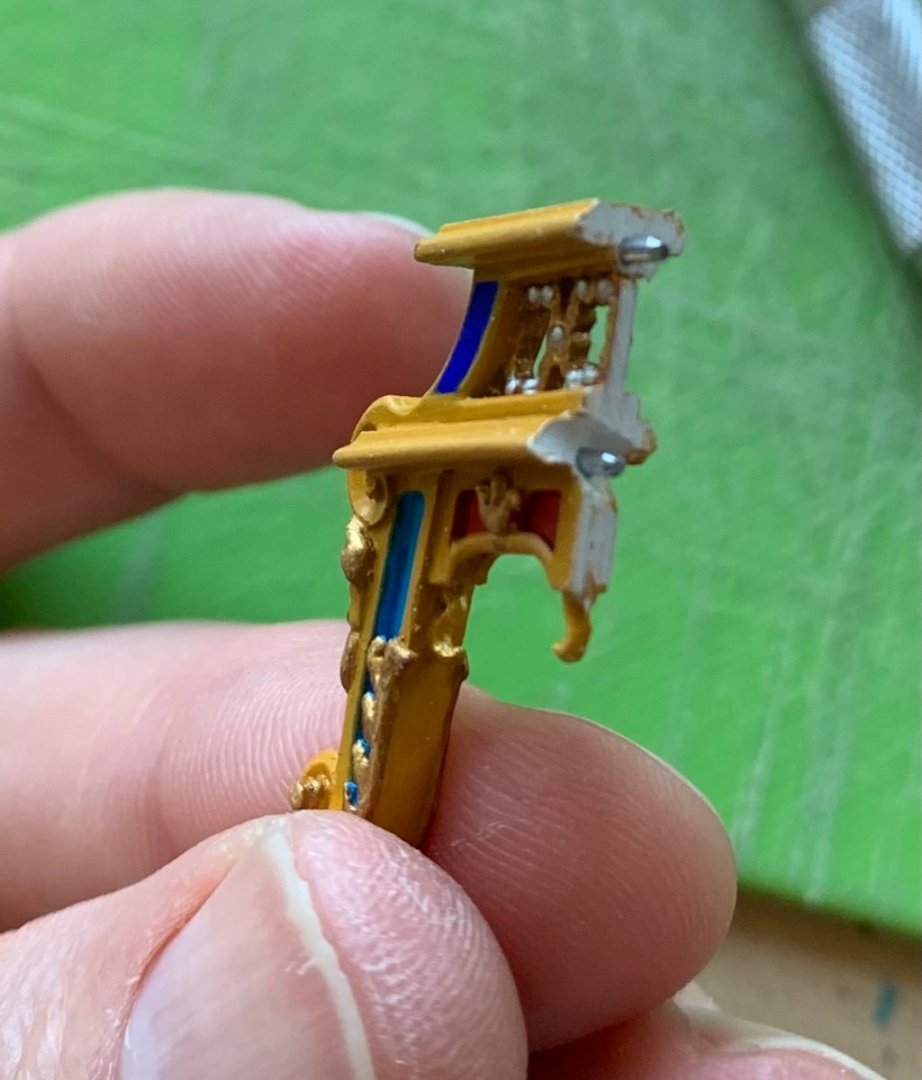
The plan was to glue these in using CA in the sections where the pins are, and liquid styrene cement in-between and at the foot.
I got the correct rake and alignment for the port side, on the first try. There were, however, a pair of gaps that needed filling for a secure welded bond:
I added styrene pads to the foot and below the lower pin and then faired these to fit seamlessly.
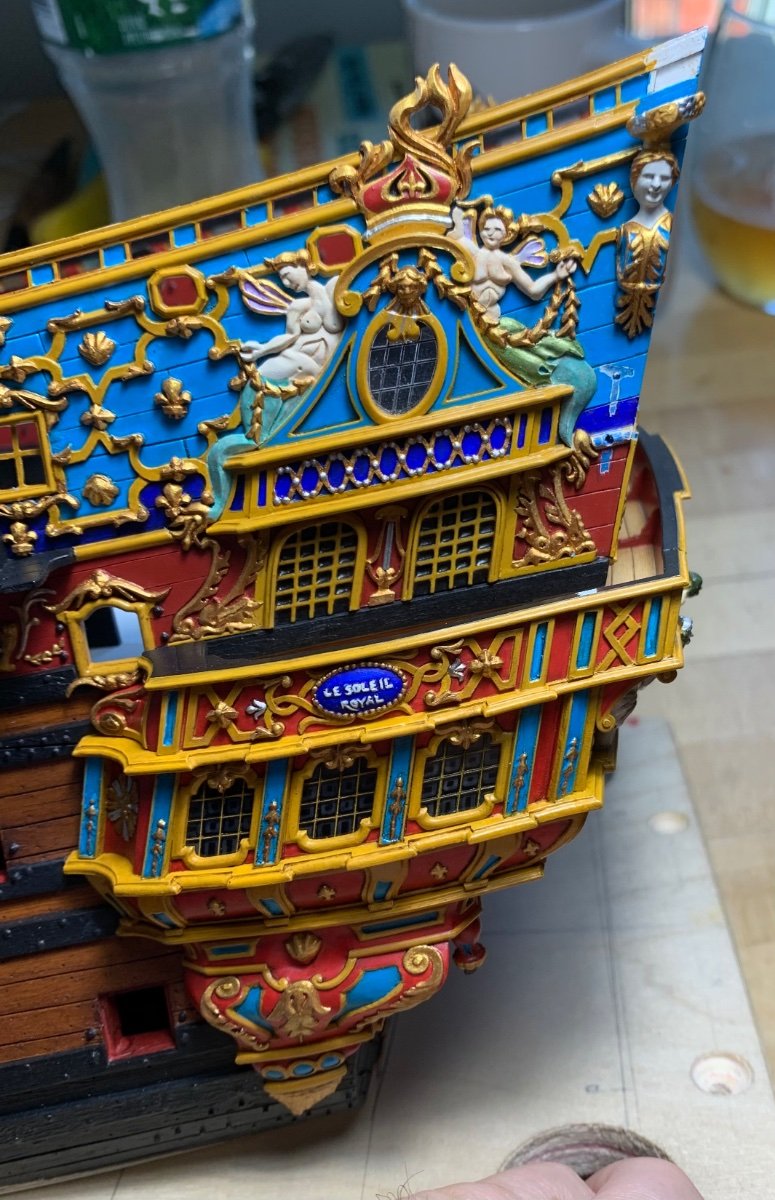
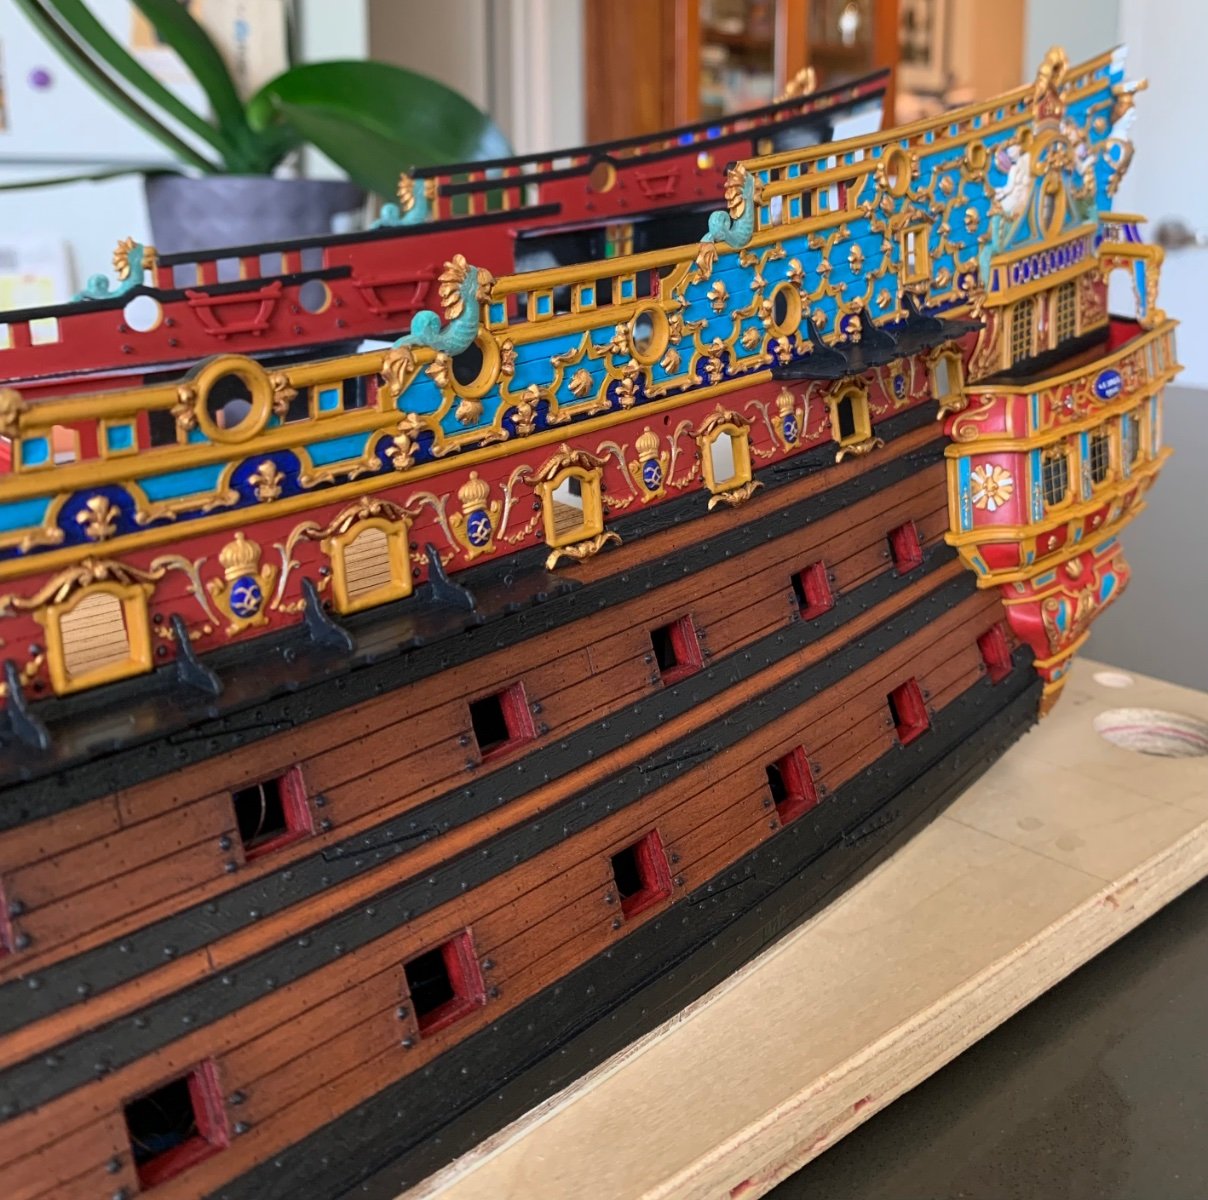
With these brackets in place, my conception of the way Berain’s stern relates to these quarter galleries can be clearly understood:

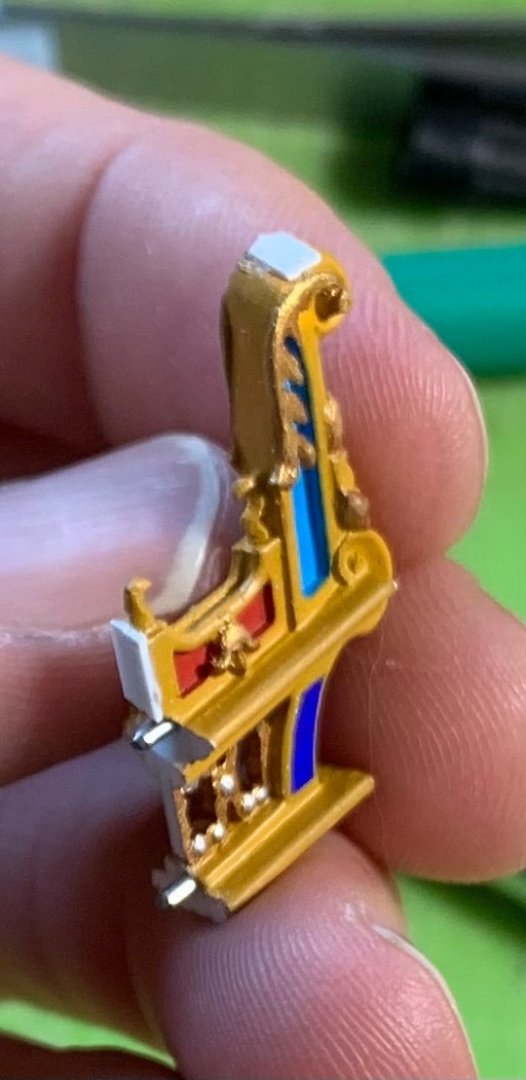
As a side note: it was really challenging to get the foot of each bracket to align with the pilaster of the gallery bulwark beneath it. The starboard side is acceptable, but the port side (showing the merely acceptable side) came out perfectly:
I also wanted the brackets to follow the round-up of the stern, so their in-board surfaces had to be beveled, accordingly:

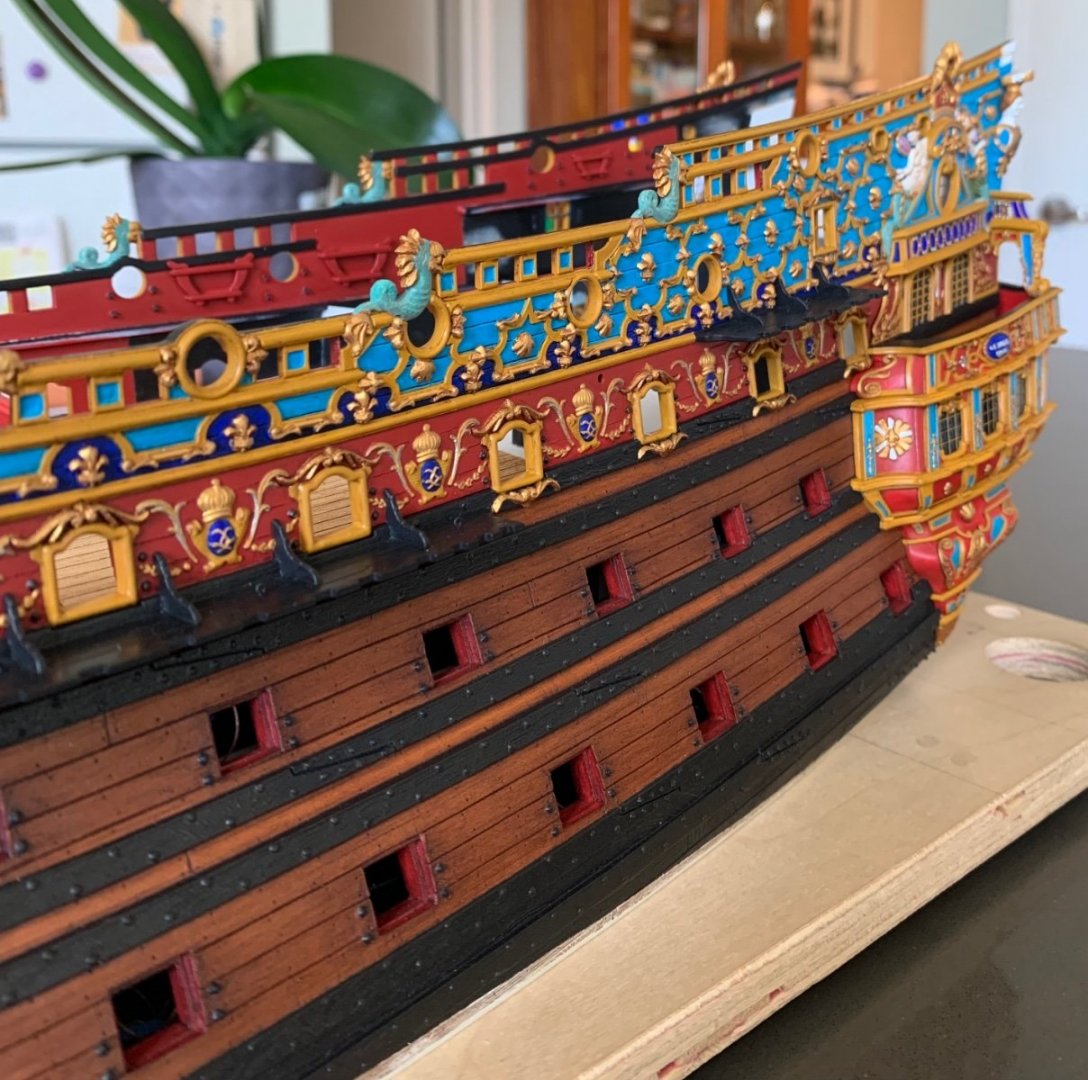

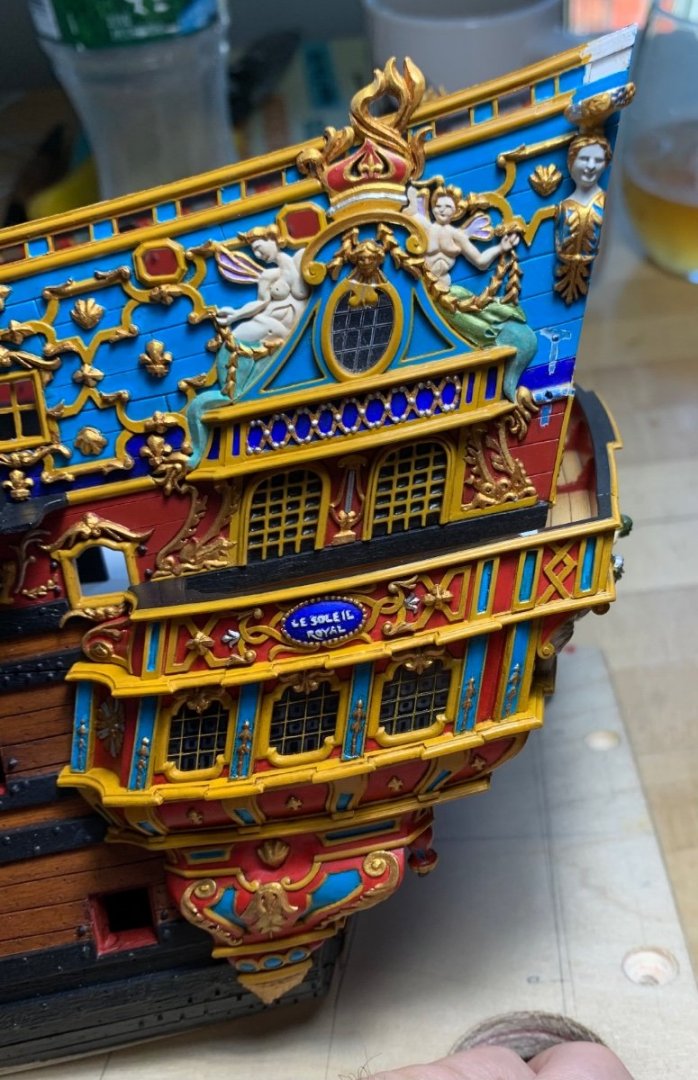
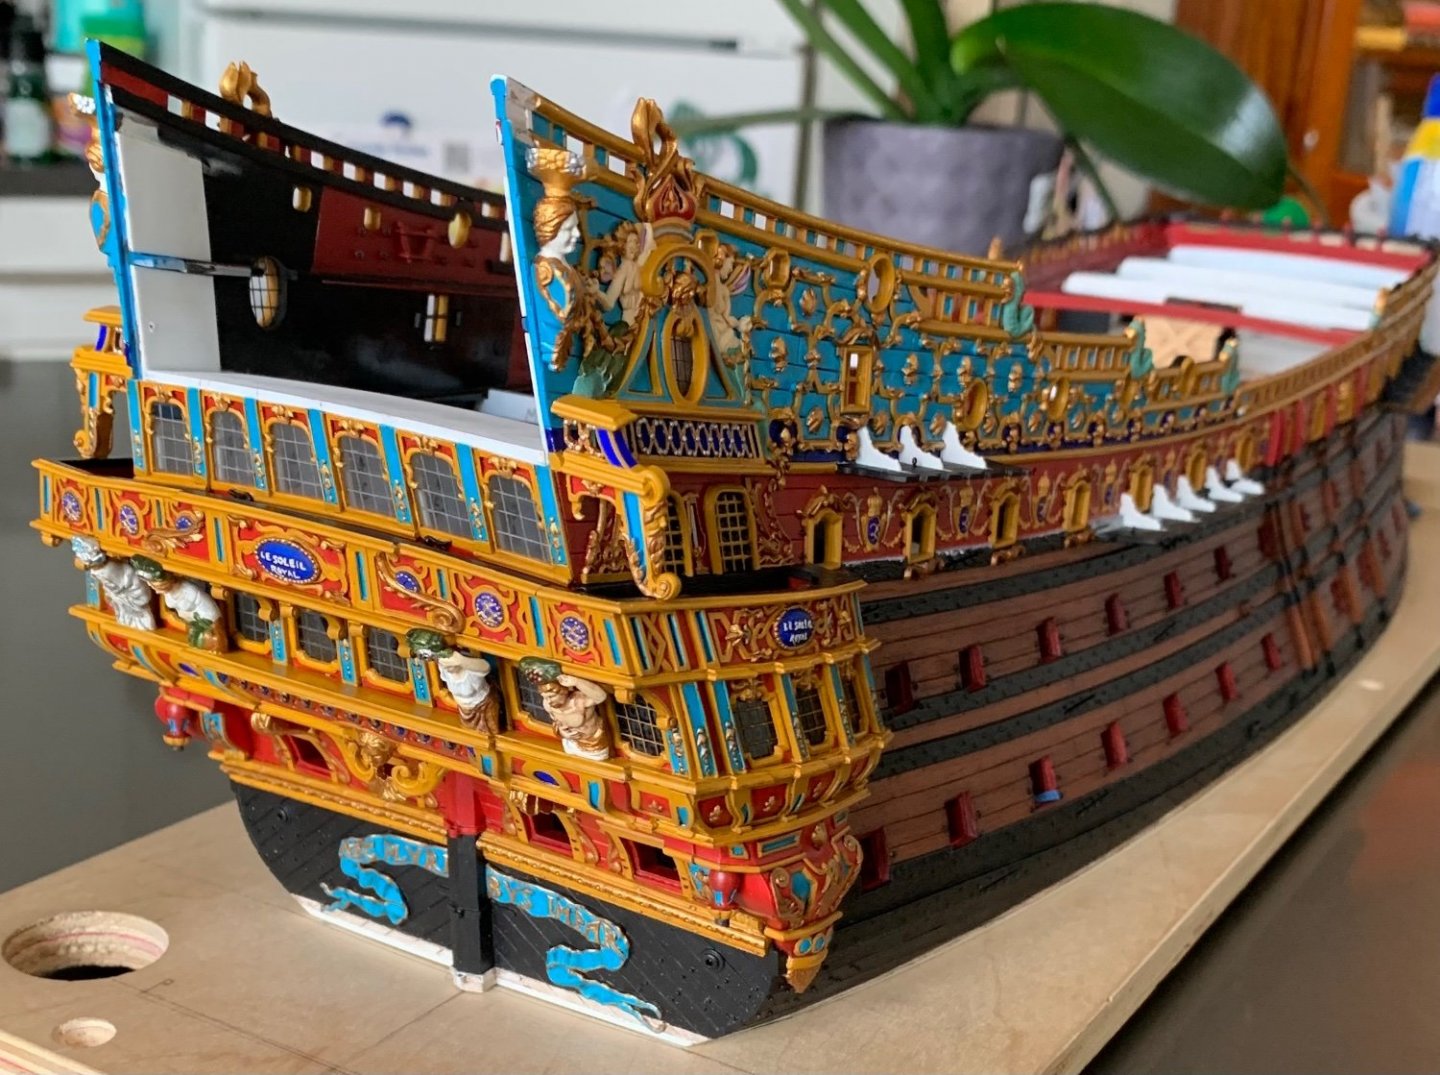
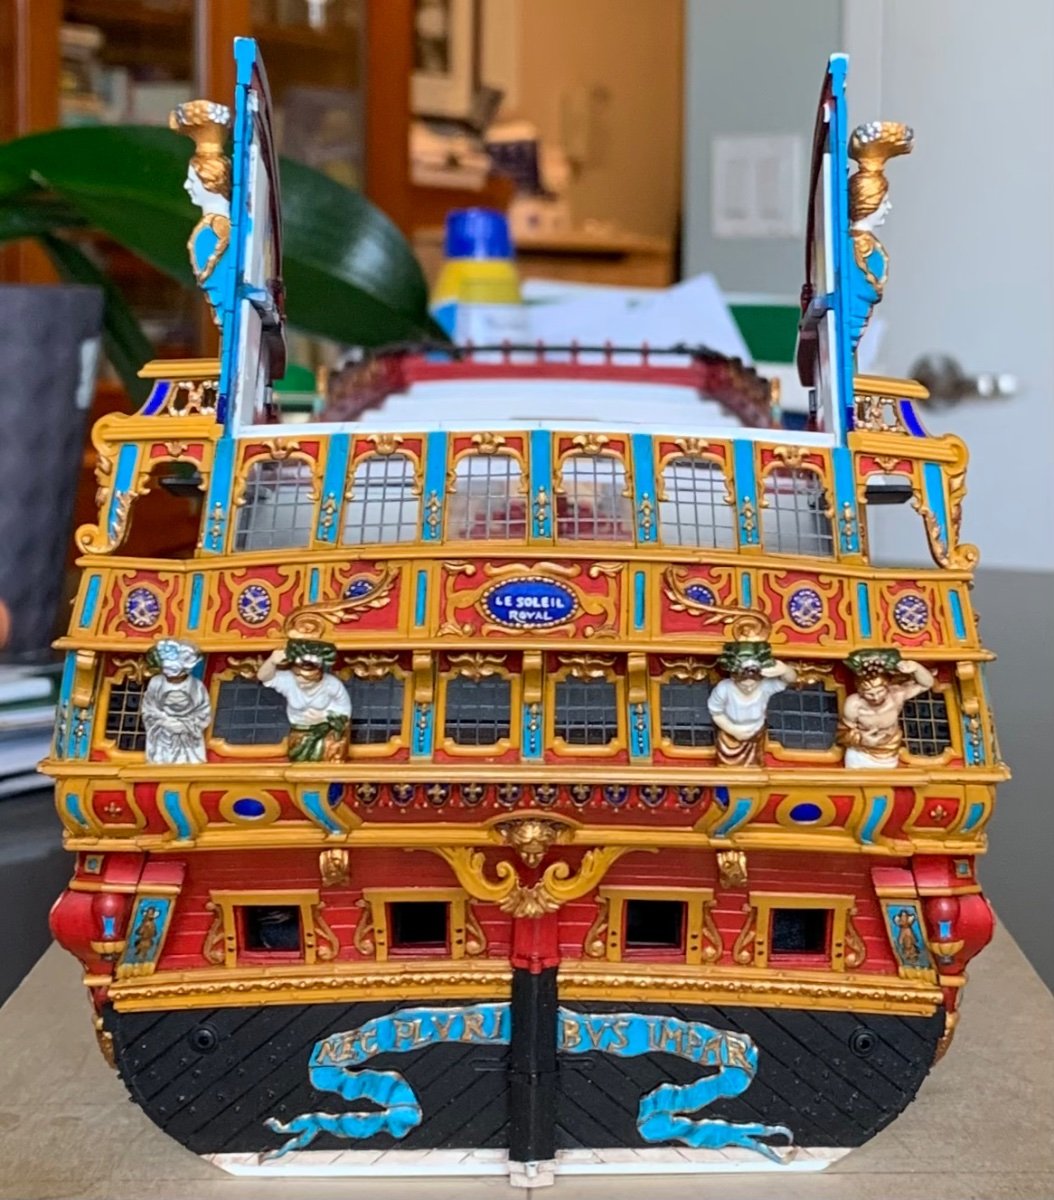
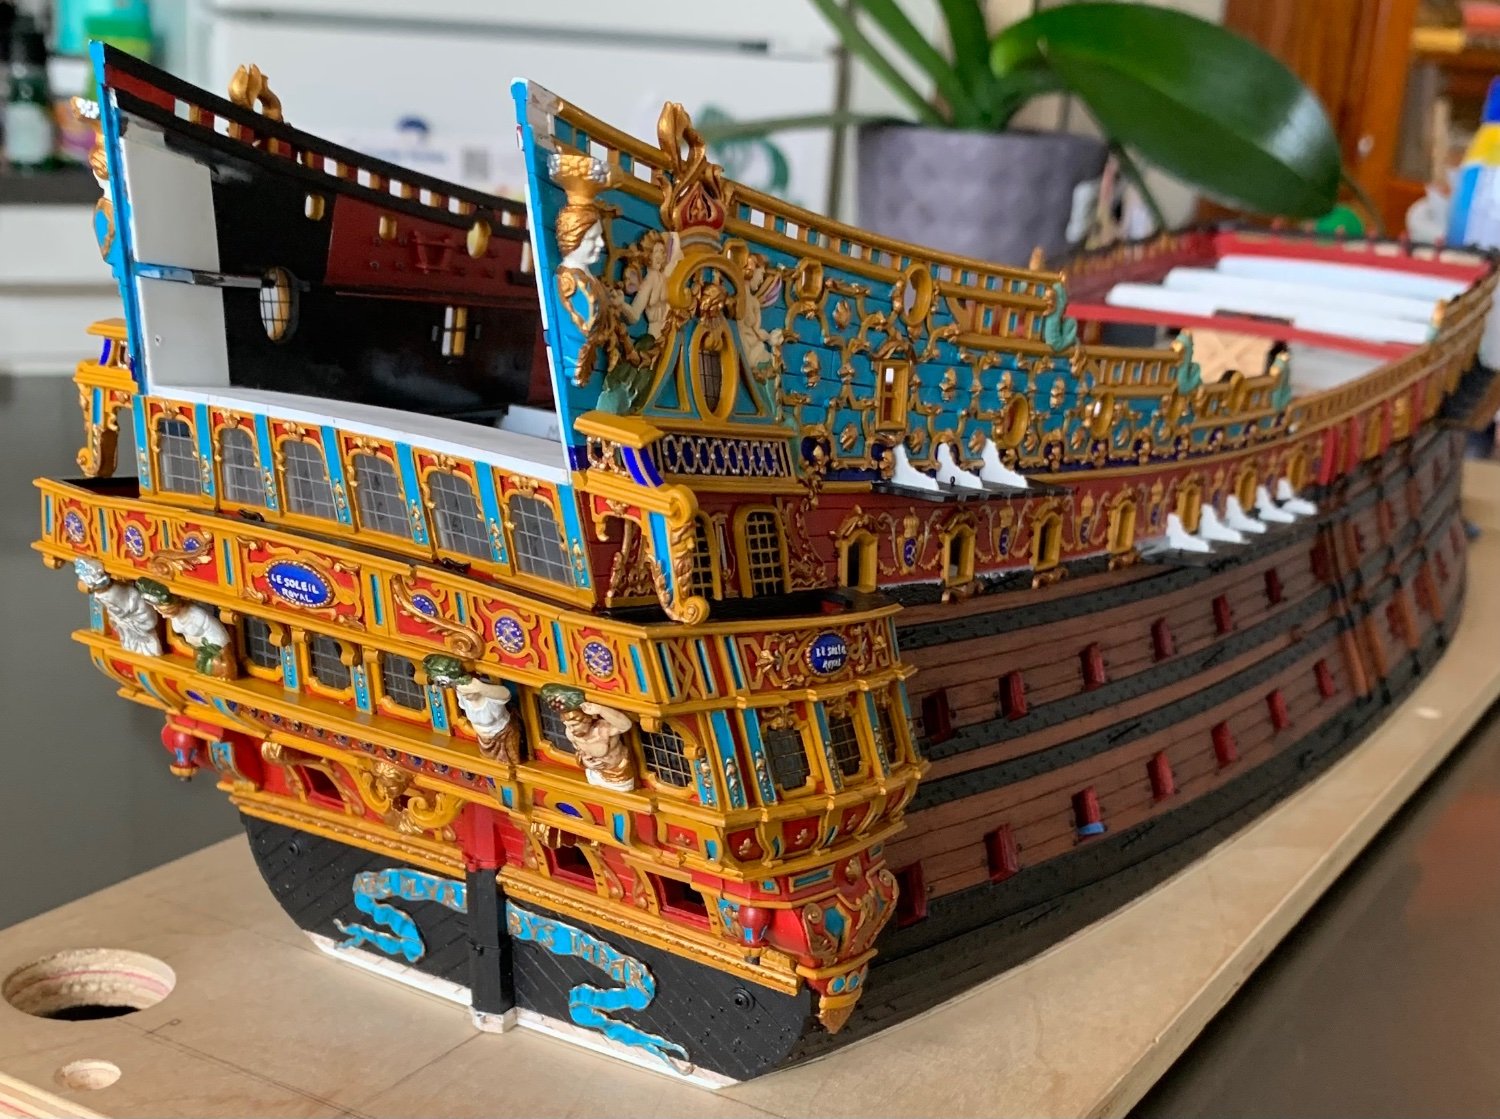
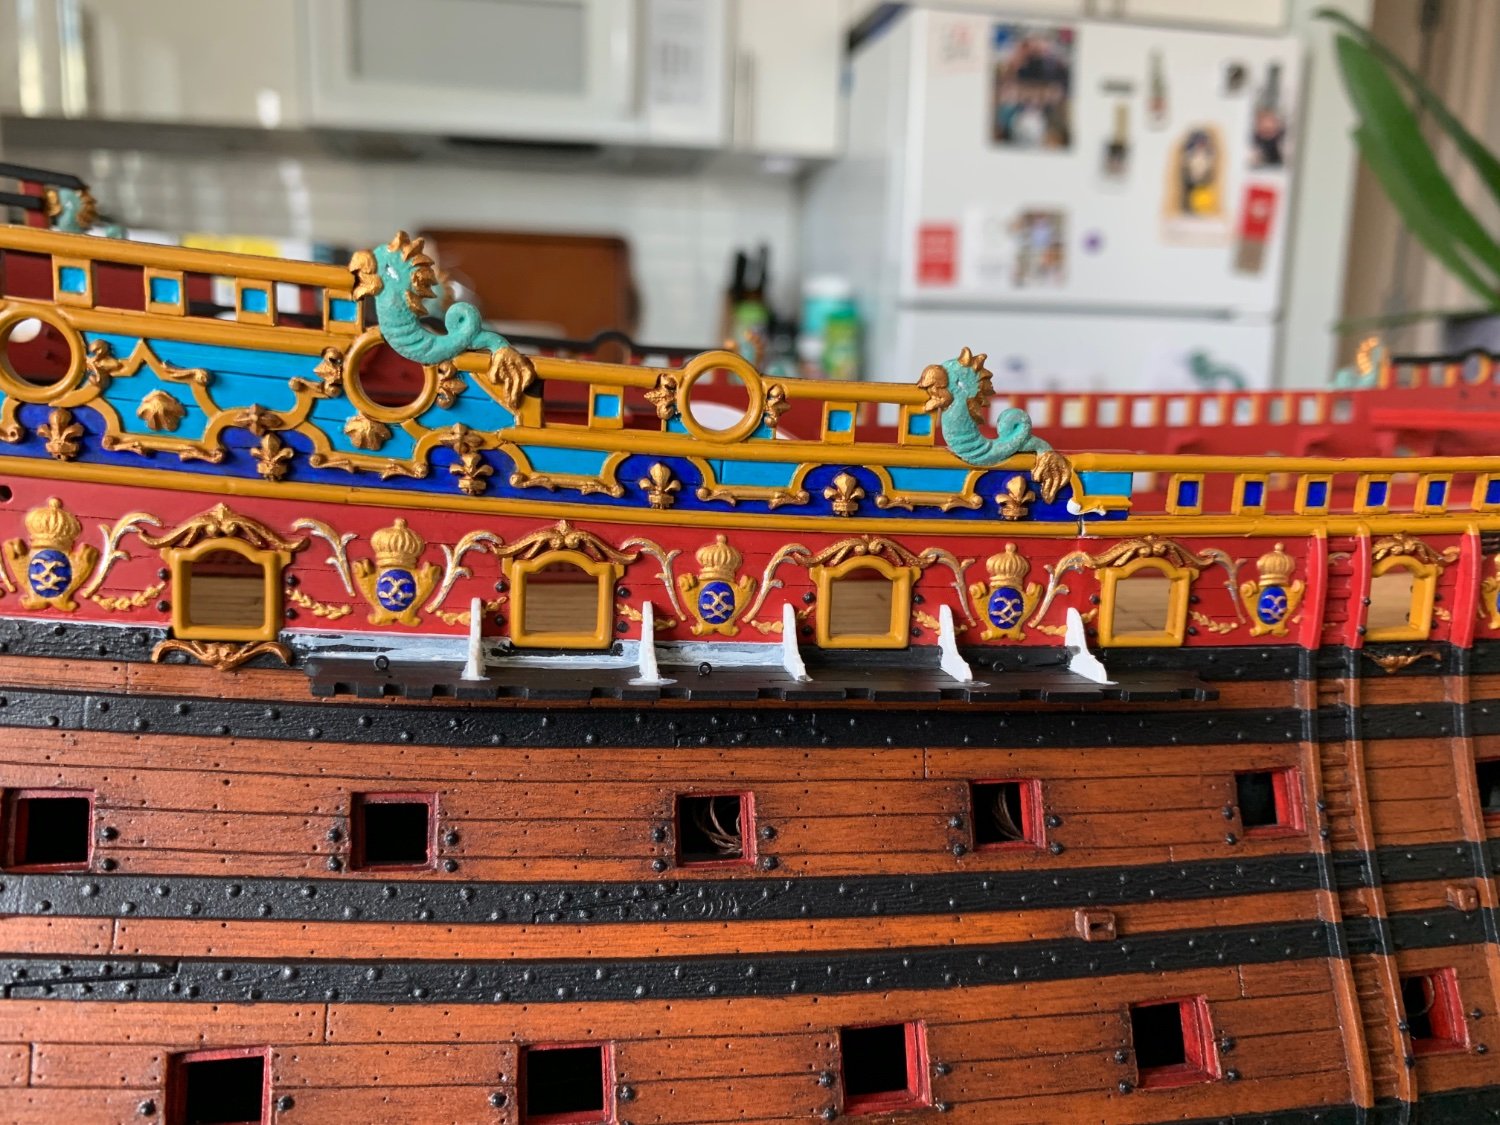
In natural light, this is a very accurate reflection of my colors. Presently, I continue to do all of the necessary touchups, distress washing (not applied to brackets yet, in these pictures), and blackening of the upper main wales and channels, on the starboard side.
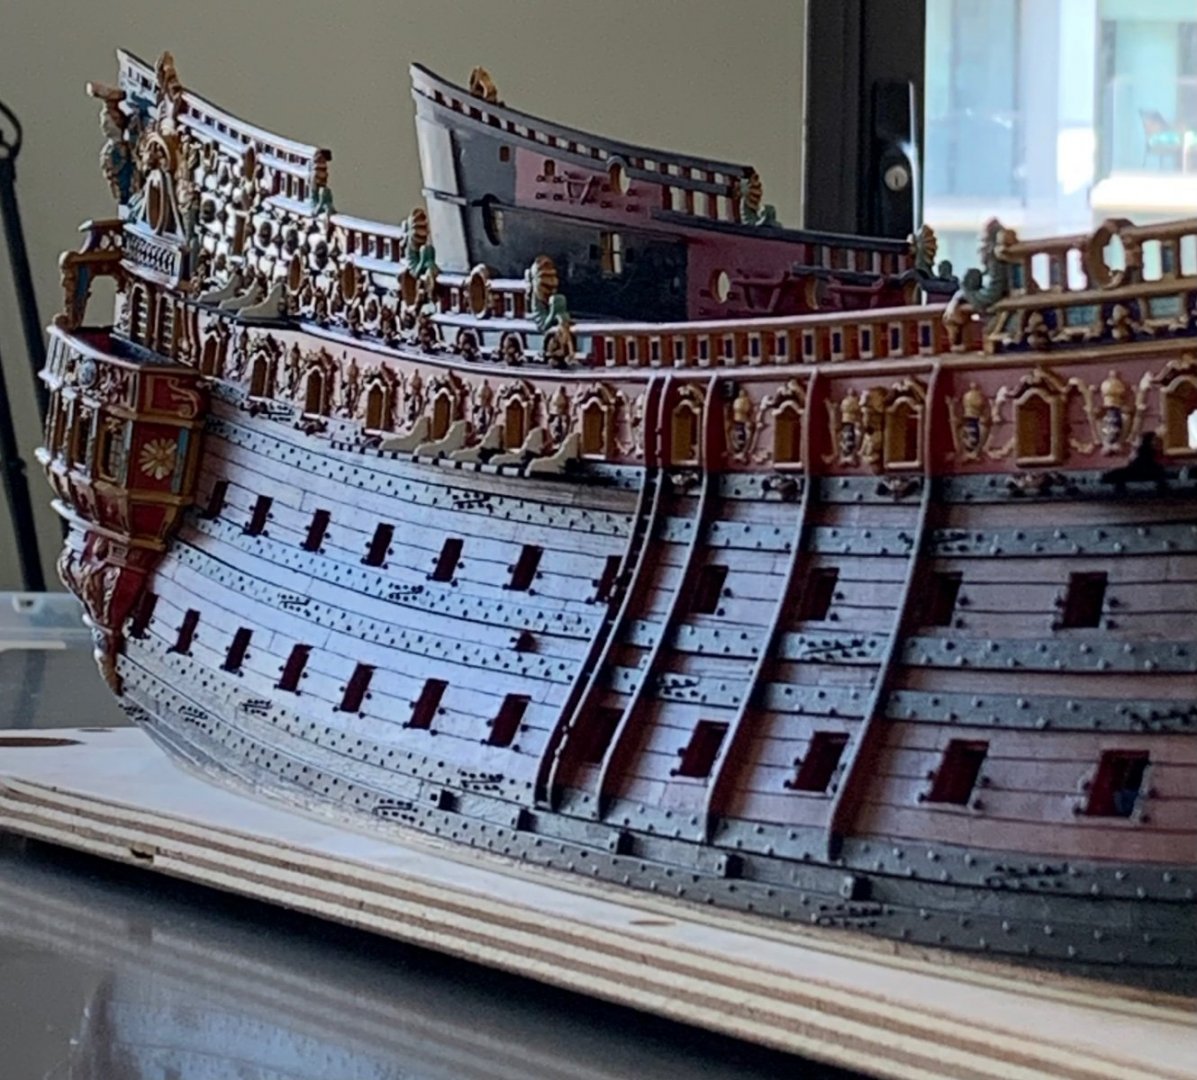
My least favorite aspect of this build is attempting to cut super-clean lines directly onto the model. The plywood base is a tremendous asset for these circumstances, but it is always awkward and difficult. Here, my line began to waver, after I had been at it for a few hours:

The back and forth process of revision is on-going. The Heller kit has many flaws, but I do think it is fair to say that they get the aft sheer, pretty close to the mark:
More to follow!
-
-
Your work is looking very good and clean! I think it is good to do as you are, which is to take whatever small mistakes there may be in-stride. Your next models will be better and better still. This one is shaping up beautifully.
- Keith Black and Oldsalt1950
-
2
-
Yeah, sorry about that, Bill.
-
-
I am 13 1/2 interminable years away from retirement. My personal life is just ripping by, but work feels like time has just stopped.
-
-
-
Mark, I am enjoying your sense of milestone achievement because I know that feeing when you finally get past what you initially estimated to be a huge hurdle, and you stick the landing without any lean or falter. Congratulations, Man! This truly is an inspirational log and certainly one I will be referring to, down the road.


Soleil Royal by Hubac's Historian - Heller - An Extensive Modification and Partial Scratch-Build
in - Kit build logs for subjects built from 1501 - 1750
Posted · Edited by Hubac's Historian
In a couple of days, I will embark upon my first honest-to-goodness vacation in about 12 years. Sure, we’ve taken family trips, but we have never been to any place quite as breathtaking as Hawaii. To say that we are excited is an understatement for all-time!
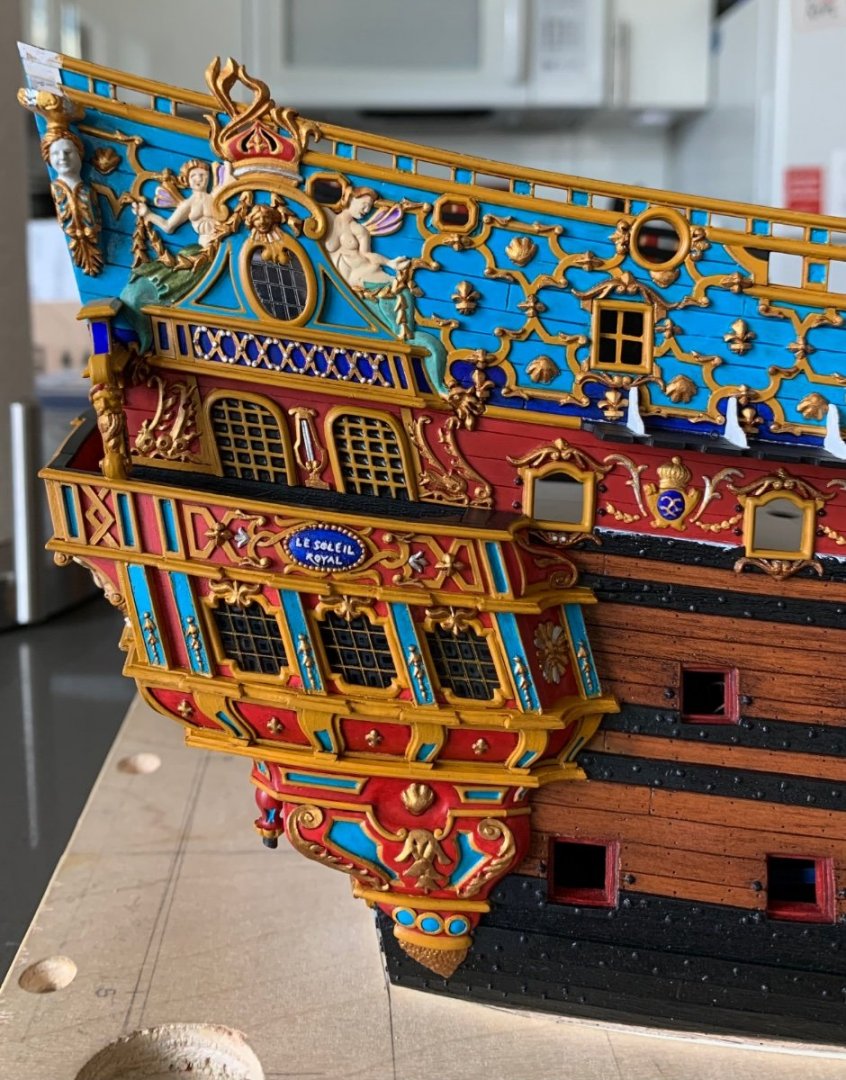
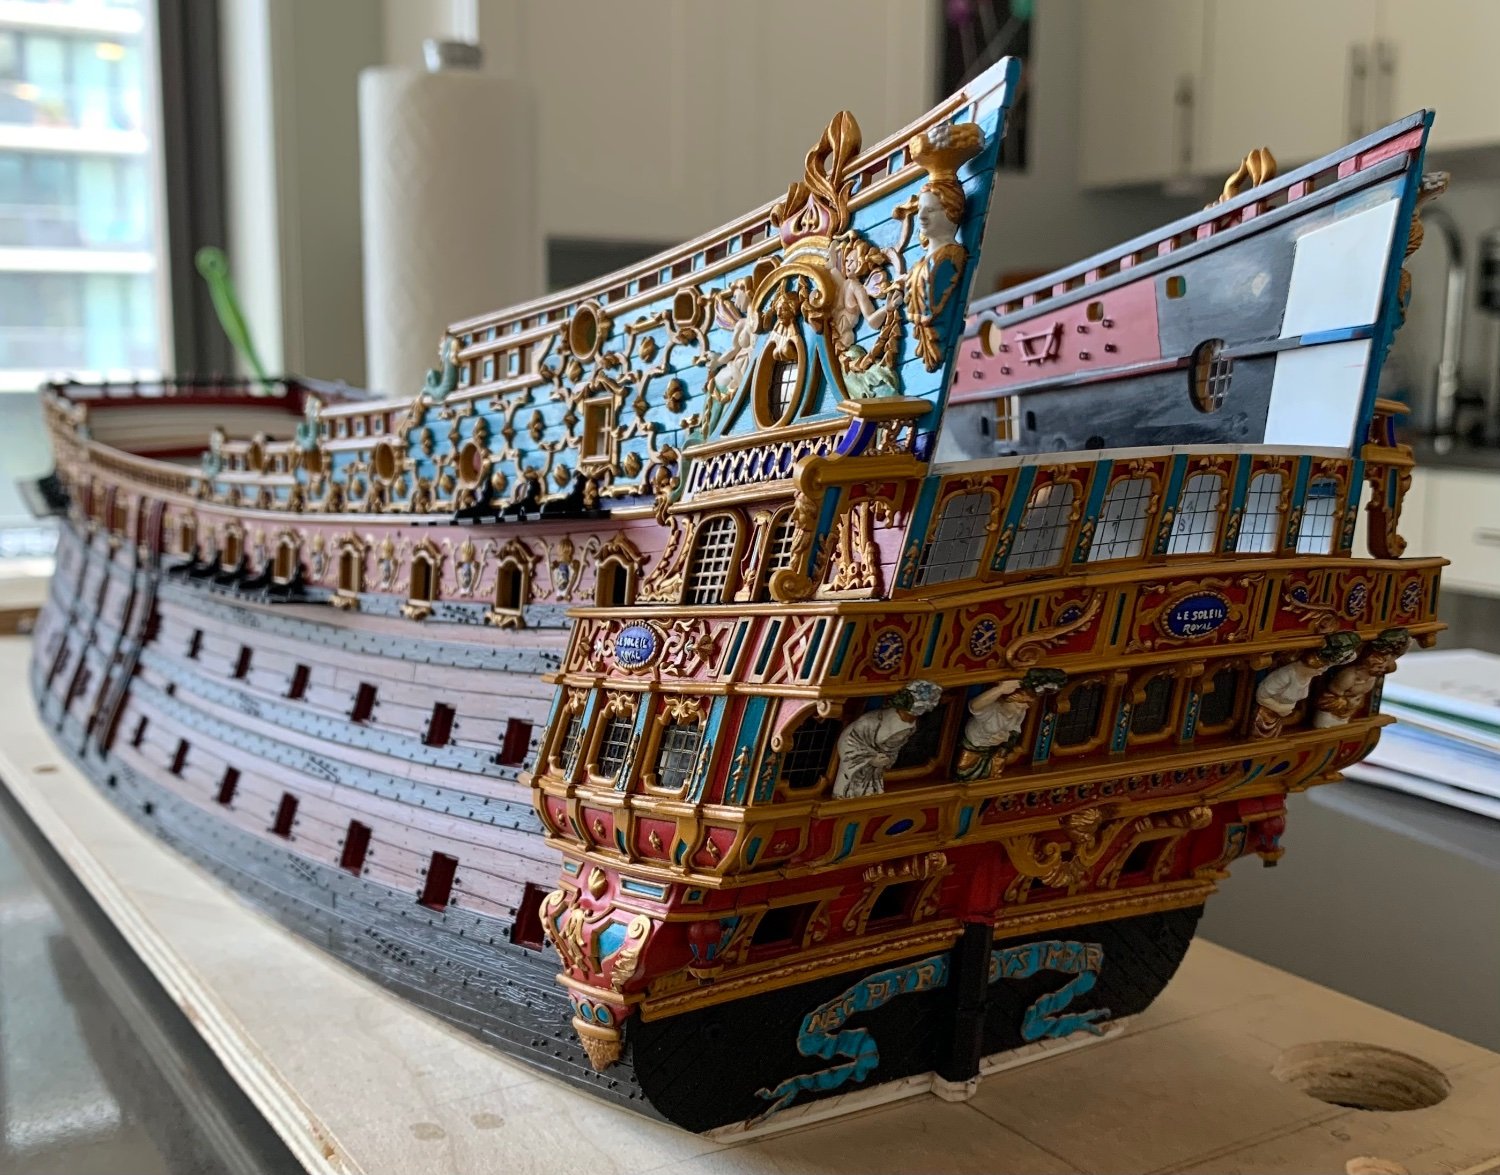
I’ve taken things with the model to a nice break-point, to walk away and not obsess about it for a little while. I finished up the paint re-touches on the starboard side. While I will continue to modulate the walnut wash, right up to the clearcoat stage, I’m pretty happy with the ship’s sea-legs appearance.
I have both headrails to the point where I need to induce a series of curves, before I fit them to the ship and then go whole-hog on the decorative detailing. I’ve decided that the best approach would be to set these up in mirrored forms, and allow them to sit in my Eastern exposure window, while I’m away. The sheet plastic these are made from is relatively supple, and I think they should relax into these shapes fairly well, with the ability to tweak their final shape by hand.
Per David’s suggestion, I performed a light rhinoplasty on my horseheads, and think that these now look much better. I appreciate the heads’up!
My plan for the head is pretty ambitious😜 as I will attempt to create a properly framed and cambered head-grating that also follows the upward sweep of the headrails. What I’m aiming for is pretty well illustrated in Marc Yeu’s photo of Frolich’s L’Ambiteaux:
I will add additional seats of ease, just forward of the turrets.
While I don’t need them anytime immediately soon, I thought it might be nice to complete the detailing and begin painting the gun carriages for the main deck guns.
I attempted, in vain, to create these open hooks the French used for the haul-in tackles. I just couldn’t get the scale or shape right, and I could not manage to get them to set properly without making a mess of CA glue:
I thought that if I flattened the back face with a file, I’d have enough of a glue surface to set these onto the carriages.
In the end, I just didn’t think they looked good, so I abandoned them for the English practice of eye-bolts, which I found much easier to keep neat and in-scale:
I have only bothered to super-detail the sixteen waist guns that you have any possibility of seeing. These will be the only guns that I rig on the main deck.
I have made a few more carriages than I need here, but I may mount a pair of carriages (sans barrels) behind the first vestigial main deck “windows” of the amortisement, as this would likely have been an additional space for adding artillery, when needed. No one will ever see it, but I will know they are there.
After walnut wash and blacking the iron bits, they look like this:
I’ve blacked-out the styrene under mounts that are really my attachment point to the deck. On the ship:
You may recall (way too long of a build log!) that these carriages are really the stock middle deck carriages. After manually scaling-up the lower and middle deck batteries with 1/32” inserts, I realized I could just bump the remaining calibers up a deck and achieve a satisfying increase in scale without too much of a hassle.
As always many thanks to my benefactors on this build who have supplied me with a wealth of spare parts from which to draw upon. The way this has all come together would not be possible without your generous contributions!
As ever, thank you for your continued interest, and I will see you all soon. More to follow..