


Hubac's Historian
-
Posts
2,946 -
Joined
-
Last visited
Content Type
Profiles
Forums
Gallery
Events
Posts posted by Hubac's Historian
-
-
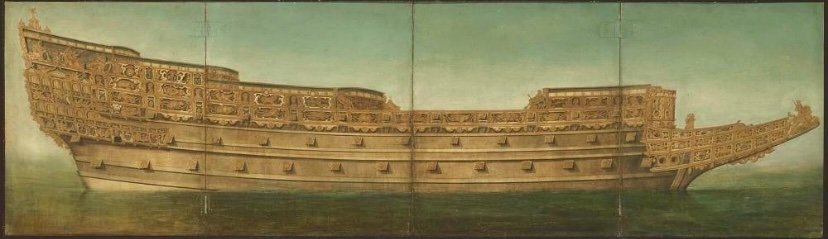
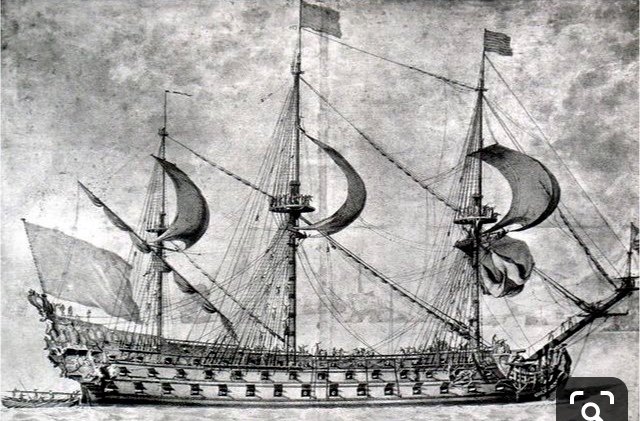
Here are a pair of fairly spectacular portraits of the Sovereign, in her original incarnation. The first Van de Velde portrait shows the correct bowsprit entry angle:
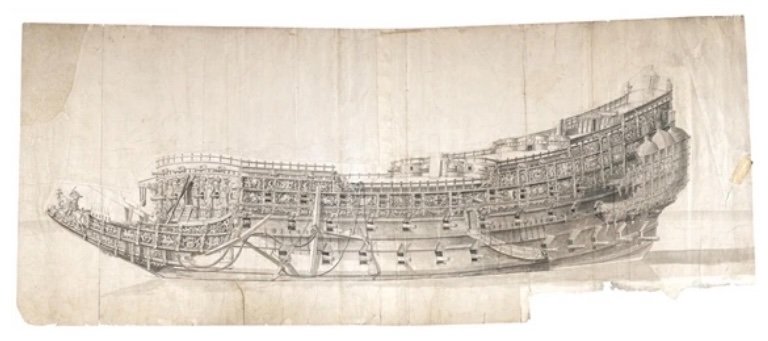
This second portrait, in colors, is really fascinating because it illuminates pretty clearly how the particular compartmentalization of the ornamental frieze is organized, visually. In the pen and ink drawing, this impression flattens out a bit.
In life, she must certainly have lived up to her moniker as the “Golden Devil.”
- Ulises Victoria, GrandpaPhil and EJ_L
-
 2
2
-
 1
1
-
I’m not, by any means, a Victory expert, but I think what may be confusing, here, is that Daniel’s photo guide illustrates the widening of the wales with Evergreen strip (what is necessary for less complicated seating of the chain plates), but he also shows scratch-built upper bulwark extensions that rise above the gently curved sheer-line; I believe (although, I could very well be wrong), these were modifications that were made to the ship, prior to her engagement at Trafalgar, in 1805. The restored ship, at Portsmouth, does not display these raised bulwarks.
- dafi and Old Collingwood
-
2
-
I haven’t seen Daniel’s set or the instructions, up close. Can you please post a pic or two of what you are looking at?
-
-
-
-
For my part, I use CA glues when I am bonding dissimilar materials; wood to plastic, metal to wood, or even metal to metal, when I need a good mechanical bond.
When it’s plastic to plastic, I always use Testors liquid cement with the needle applicator. I like this stuff because it is not too thin that it has no body, but the viscosity is not so much that it won’t still wick into a joint. It melts the plastic pretty efficiently and always ensures a really good welded bond, as long as your parts mate nicely.
- Ian_Grant, Bill Morrison and Jeff T
-
3
-
-
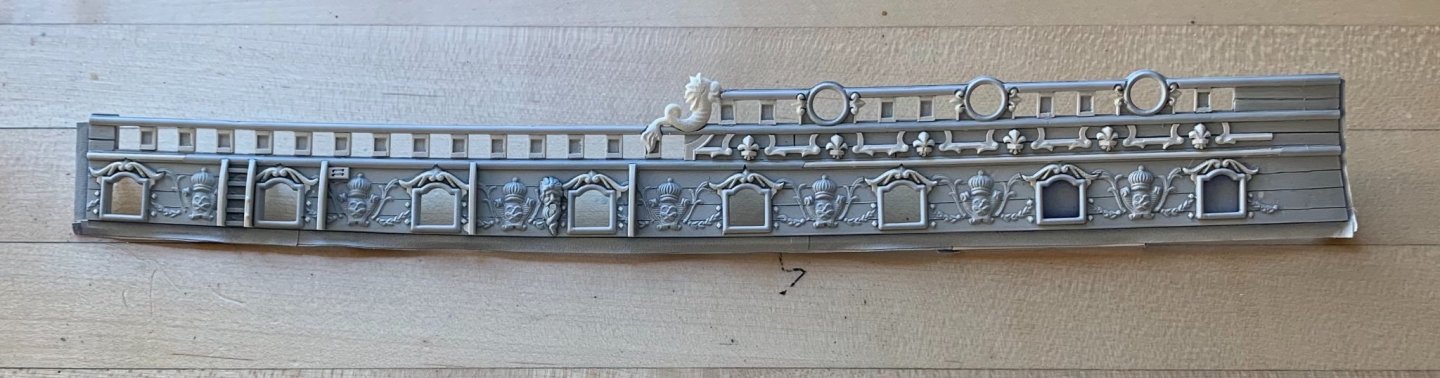
That is just picture perfect, Mike!
If I were building this model, one thing I would be tempted to experiment with would be to use the printed frieze as a template to overpaint with either an oil, or a full-bodied acrylic. My objective would be to try and approximate the slight relief one sees on the original models.
As it is, the printed frieze looks fantastic, but it could be interesting to see whether hand-painting enhances or detracts.
Anyway, it is just a thought. I really enjoy watching your progress, here, Mike.
- Stuntflyer and FrankWouts
-
2
-
Actually, Kirill, I am definitely going to make split-rings for attaching the breaching ropes. I just need to purchase a pair of super-fine jewelers’ shears to cut them.
Speaking about the breaching ropes, I had an idea for a cheat to make it easier to seize to the rings. Off the model, I could seize each end to a ring; cut the breaching rope in the middle; attach the rings to the eyes; feed each cut end into the breaching rope holes in the carriage; a spot of thin CA will hold the ropes in their holes. Otherwise, I have no idea how one would get into such a cramped space to actually seize directly on the model.
My haul-in tackles will be fine PE, and while I will probably fasten rings to the deck for the haul-out tackles, I may not actually rig haul-outs. I’m un-decided as to whether that makes the deck look too busy.
-
This is excellent Kirill! I will need to make hooks like that, eventually, so this is very timely advice. You appeaR to flatten the hooked end to give it a more "forged" appearance. Do you achieve this with pliers, or do you actually peen the hook with, like, a fine nail-set maybe?
What I found most interesting is your method for lashings/seizings; a series of single, over-hand knots. This is really great, because I was searching for an easier method to do this, without a serving machine. I will be well-served 😜 to re-read both your log for the Galleon, and Popeye2Sea's log for SR, as I begin to think about the rigging. I really want the rigging to be good!
-
Again, much appreciated, Bill! I am happy that you have continued to support the project.
- mtaylor, EJ_L and Bill Morrison
-
3
-
Thank you, Bill! I am more than happy to elaborate.
Over the course of this project, I have come to the conclusion that Tanneron was attempting to show Soleil Royal at both ends of the spectrum of her development; 1669 and the newly-build SR2 of 1693. His model’s stern embodies specific characteristics of these two very different eras in French naval architecture.
Specific to 1669/1670, you have an extremely tall sheer, with an expansive tafferal space in which to display Apollo’s horse-drawn chariot. Tanneron also chose to show three tiers of open, walkable stern balconies that wrap to open, walkable quarter galleries. This detail is mostly consistent with the Vienna portraits of what I still believe to be the Monarque.
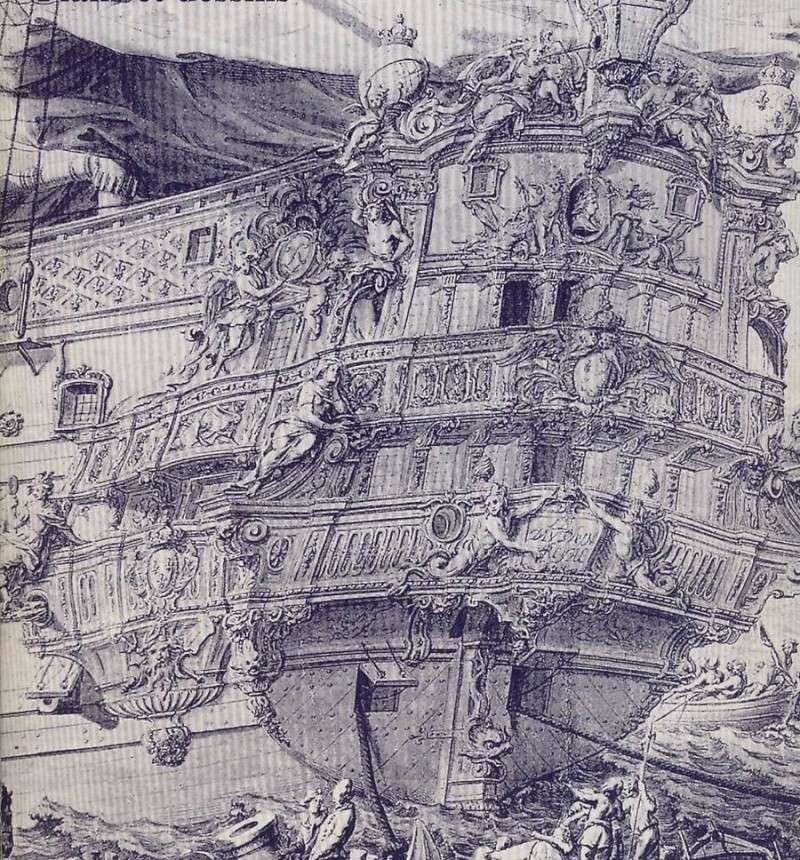
It is my observation of Puget’s portrait of the Dauphin Royal, however, that this lowest stern balcony was most likely only a centralized Juliet balcony that did not allow direct passage to the quarters:
The primary difference between Tanneron’s representation of the quarters, and what appears to have been actual practice in 1669, is their shape. Above, on the Monarque, you have three balustraded tiers, supported by split-tail tritons between the first and second tiers, and by corbels for the third tier.
Yet, Tanneron chose an overall shape and structure that is more consistent with the late development of the “bottle” style of quarter gallery, in which, the quarters are completely closed. This is what I believe to be the re-worked quarter drawing for SR2, in 1693:
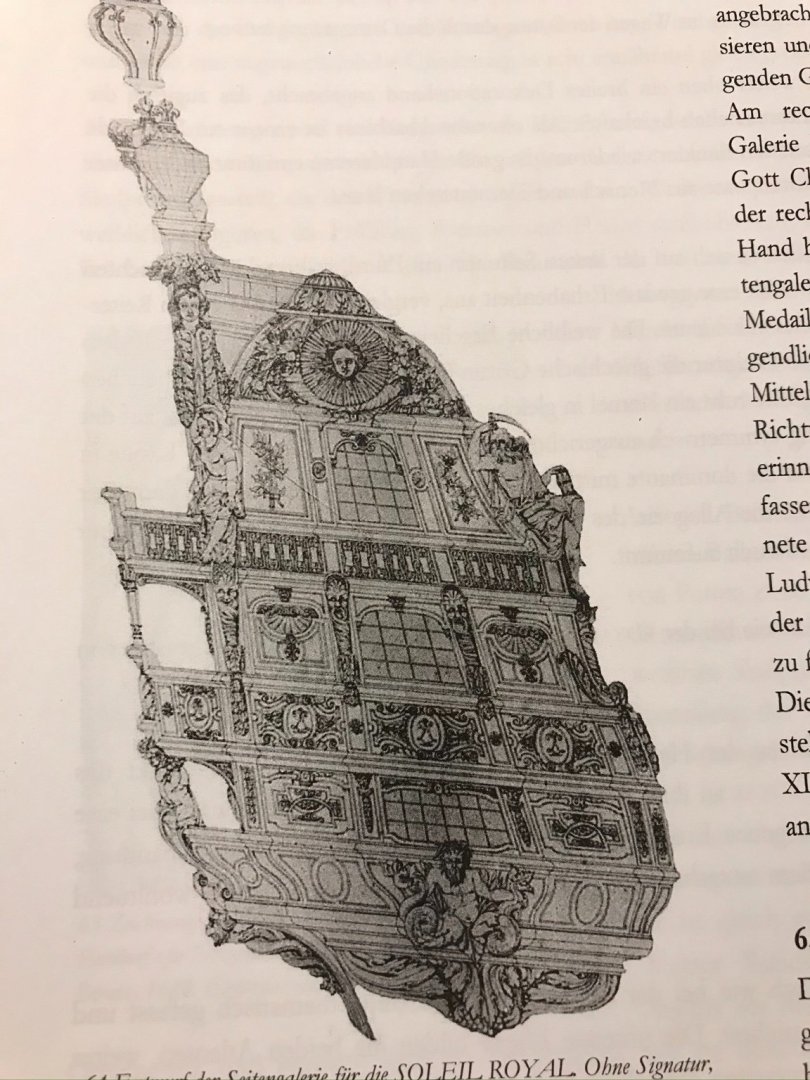
And so, likely owing to the multiplicity of conflicting and fragmentary primary sources, it is my opinion that Tanneron tried to have his cake and eat it too.
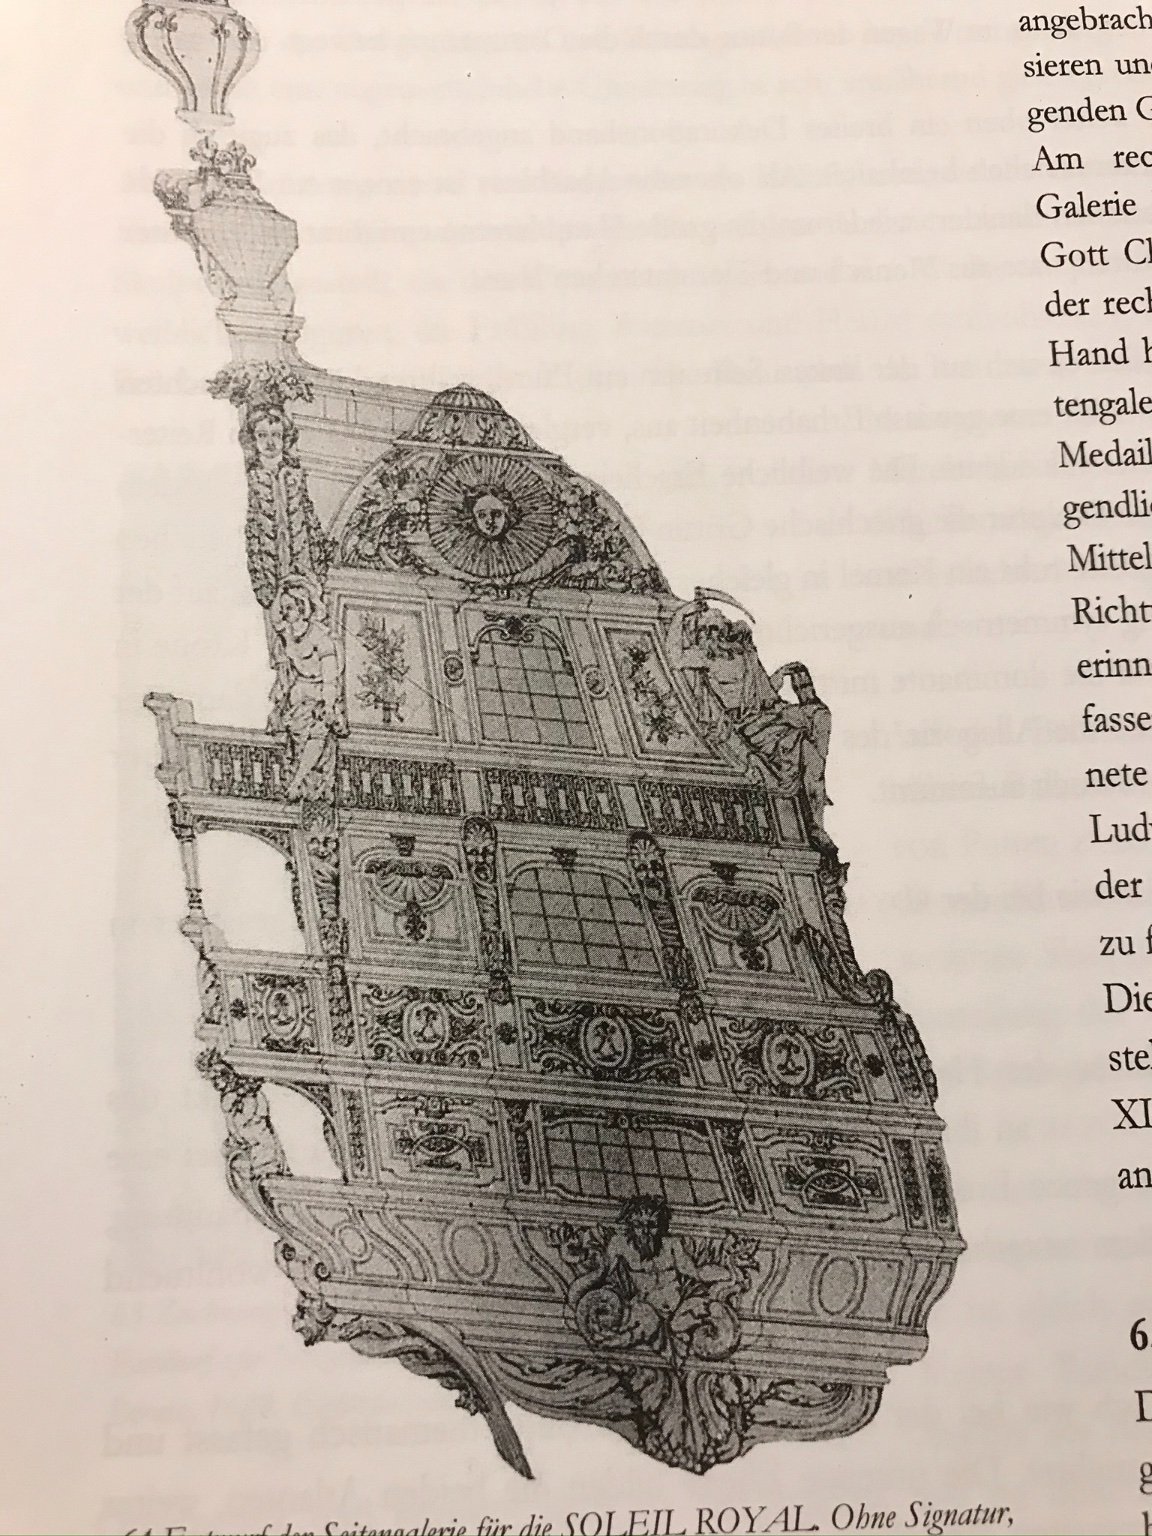
While I have yet to find an authenticated confirmation, I do believe that Puget was initially contracted to refine LeBrun’s original draft for the stern allegory. With a few exceptions - notably, that the figures of Africa and the Americas were male, and that a docile tiger sat at the foot of Asia - the composition was only lightly altered to fit within the more restrained and compartmentalized style of Berain.
The model I am making reflects a particular transitional moment in the evolution of the French quarter gallery - a middle stage between completely open and fully closed. The lowest tier is fully closed, as that was the functional toilet. There is one open walk on the main deck level that communicates directly between the stern and quarters. The upper stern balcony does not extend beyond the quarter pieces that support the side lanterns.
The tromp l'oeil structure of the upper amortisement is a weight and cost saving measure that came into voque as so many of the early First Marine ships had their sheer reduced (1672), and their ornament pared-down, in an effort to improve their handling characteristics.
My belief that this is what is intended by the Berain/Vary quarter portrait is perfectly supported by the 1677 refit portrait of the Royal Louis:
The only notable difference, here, is that the third level of the amortisement, that corresponds with the rail of the upper stern balcony, projects away from the hull and is supported from below by female figures. The windows, above that, are a more flattened tromp l'oeil structure.
And so, that is essentially why I am doing what I am doing.
- druxey, GrandpaPhil, John Clements and 4 others
-
7
-
That sounds like a solid plan, Bill. When I become overwhelmed with one aspect of the project, I have always found that there are any number of smaller assemblies I can work on, until I get my motivation back for the big stuff.
-
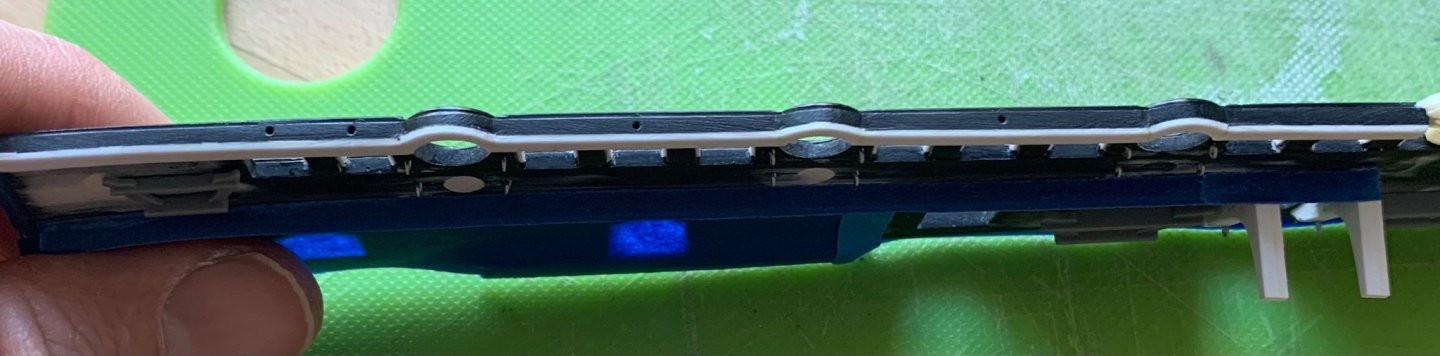
Progress has been a bit slow, lately. I have continued to be amazed by the amount of prep that is necessary before painting the forward bulwark pieces.
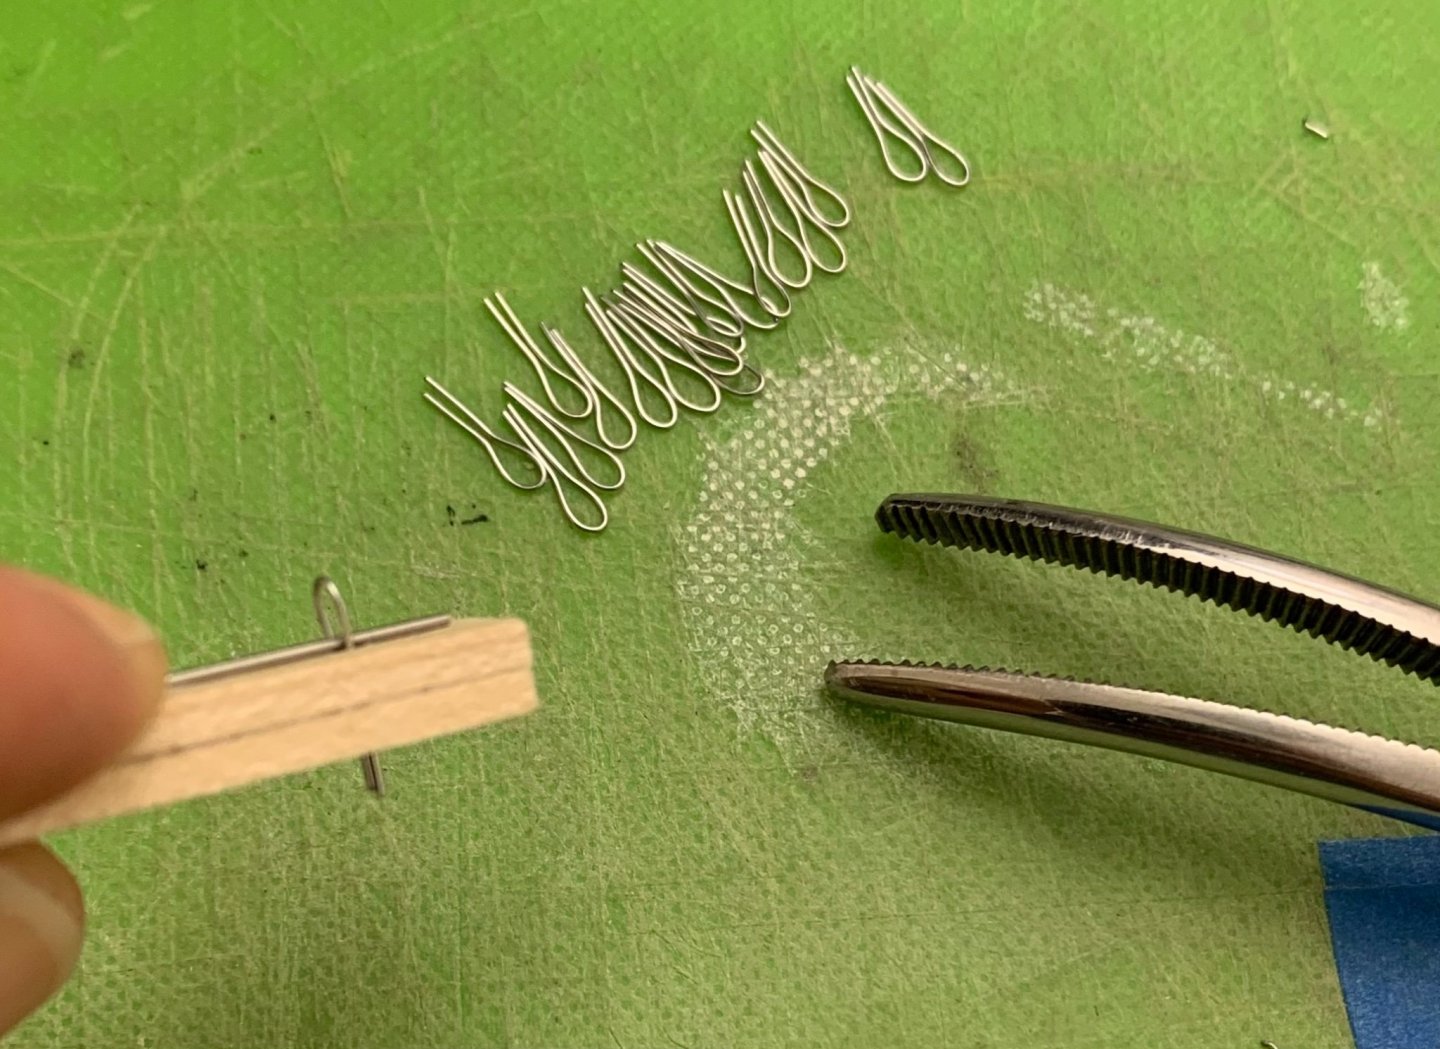
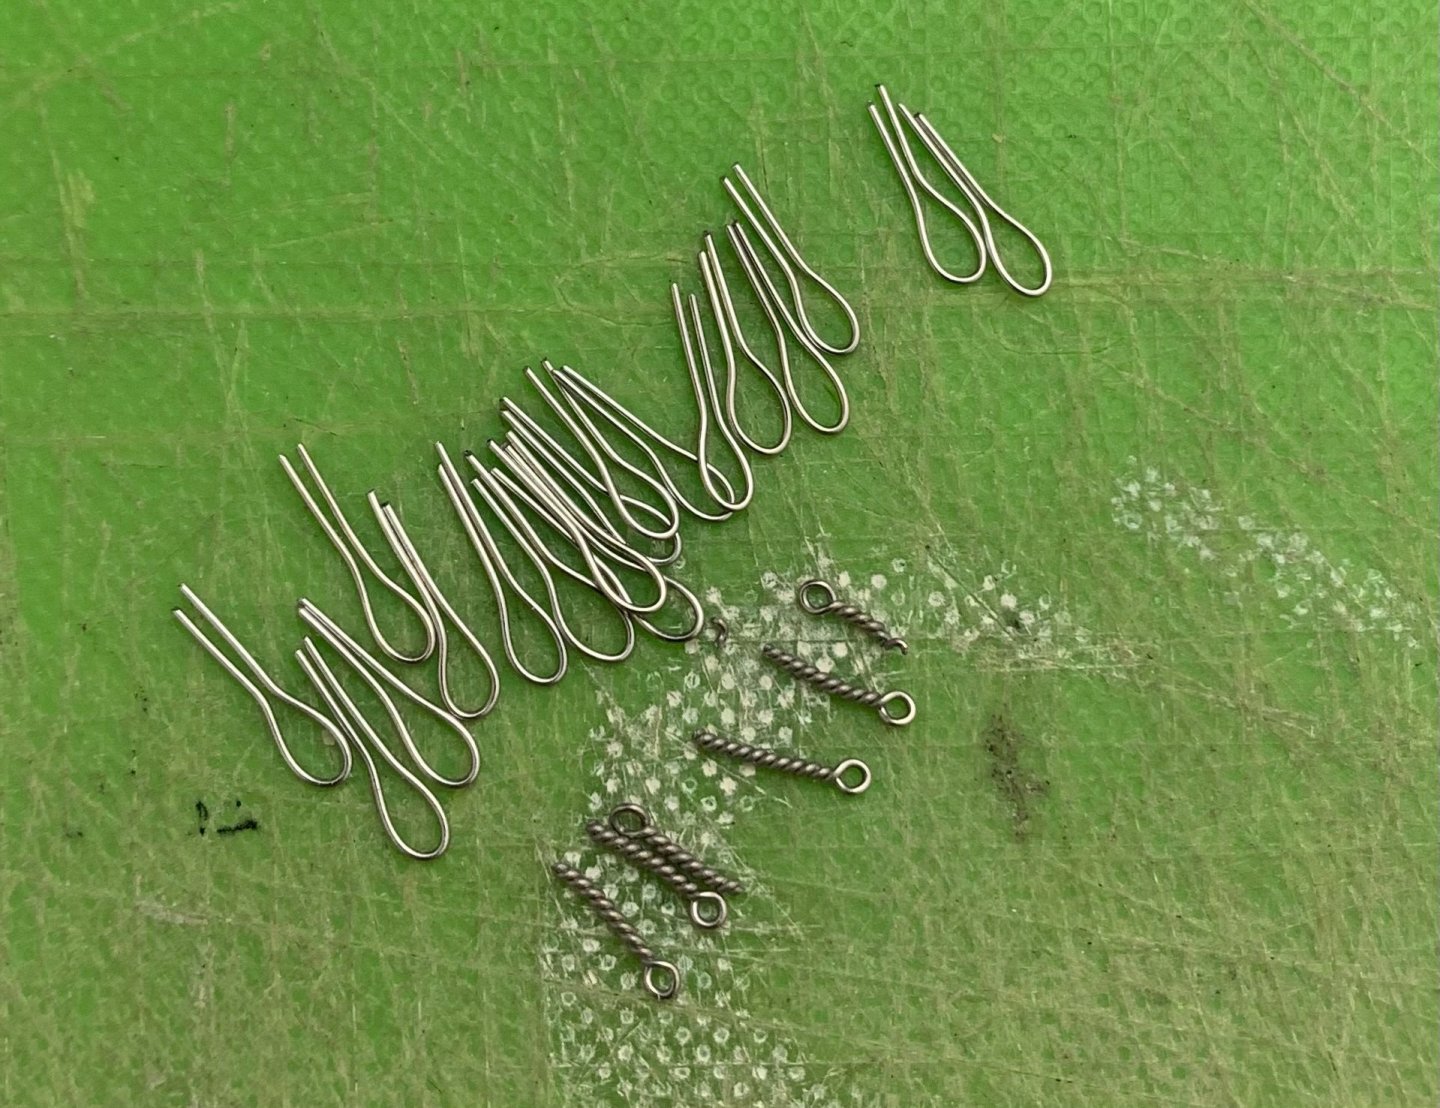
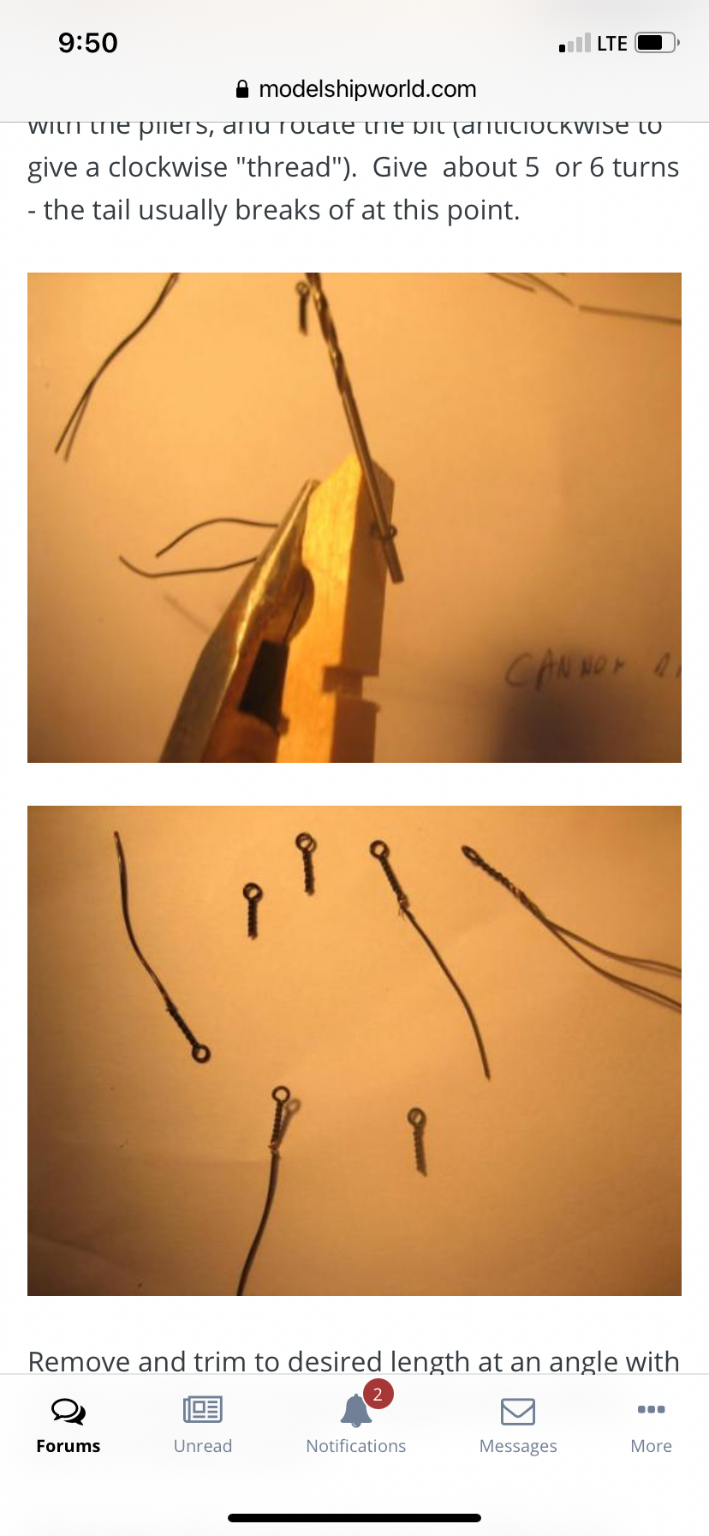
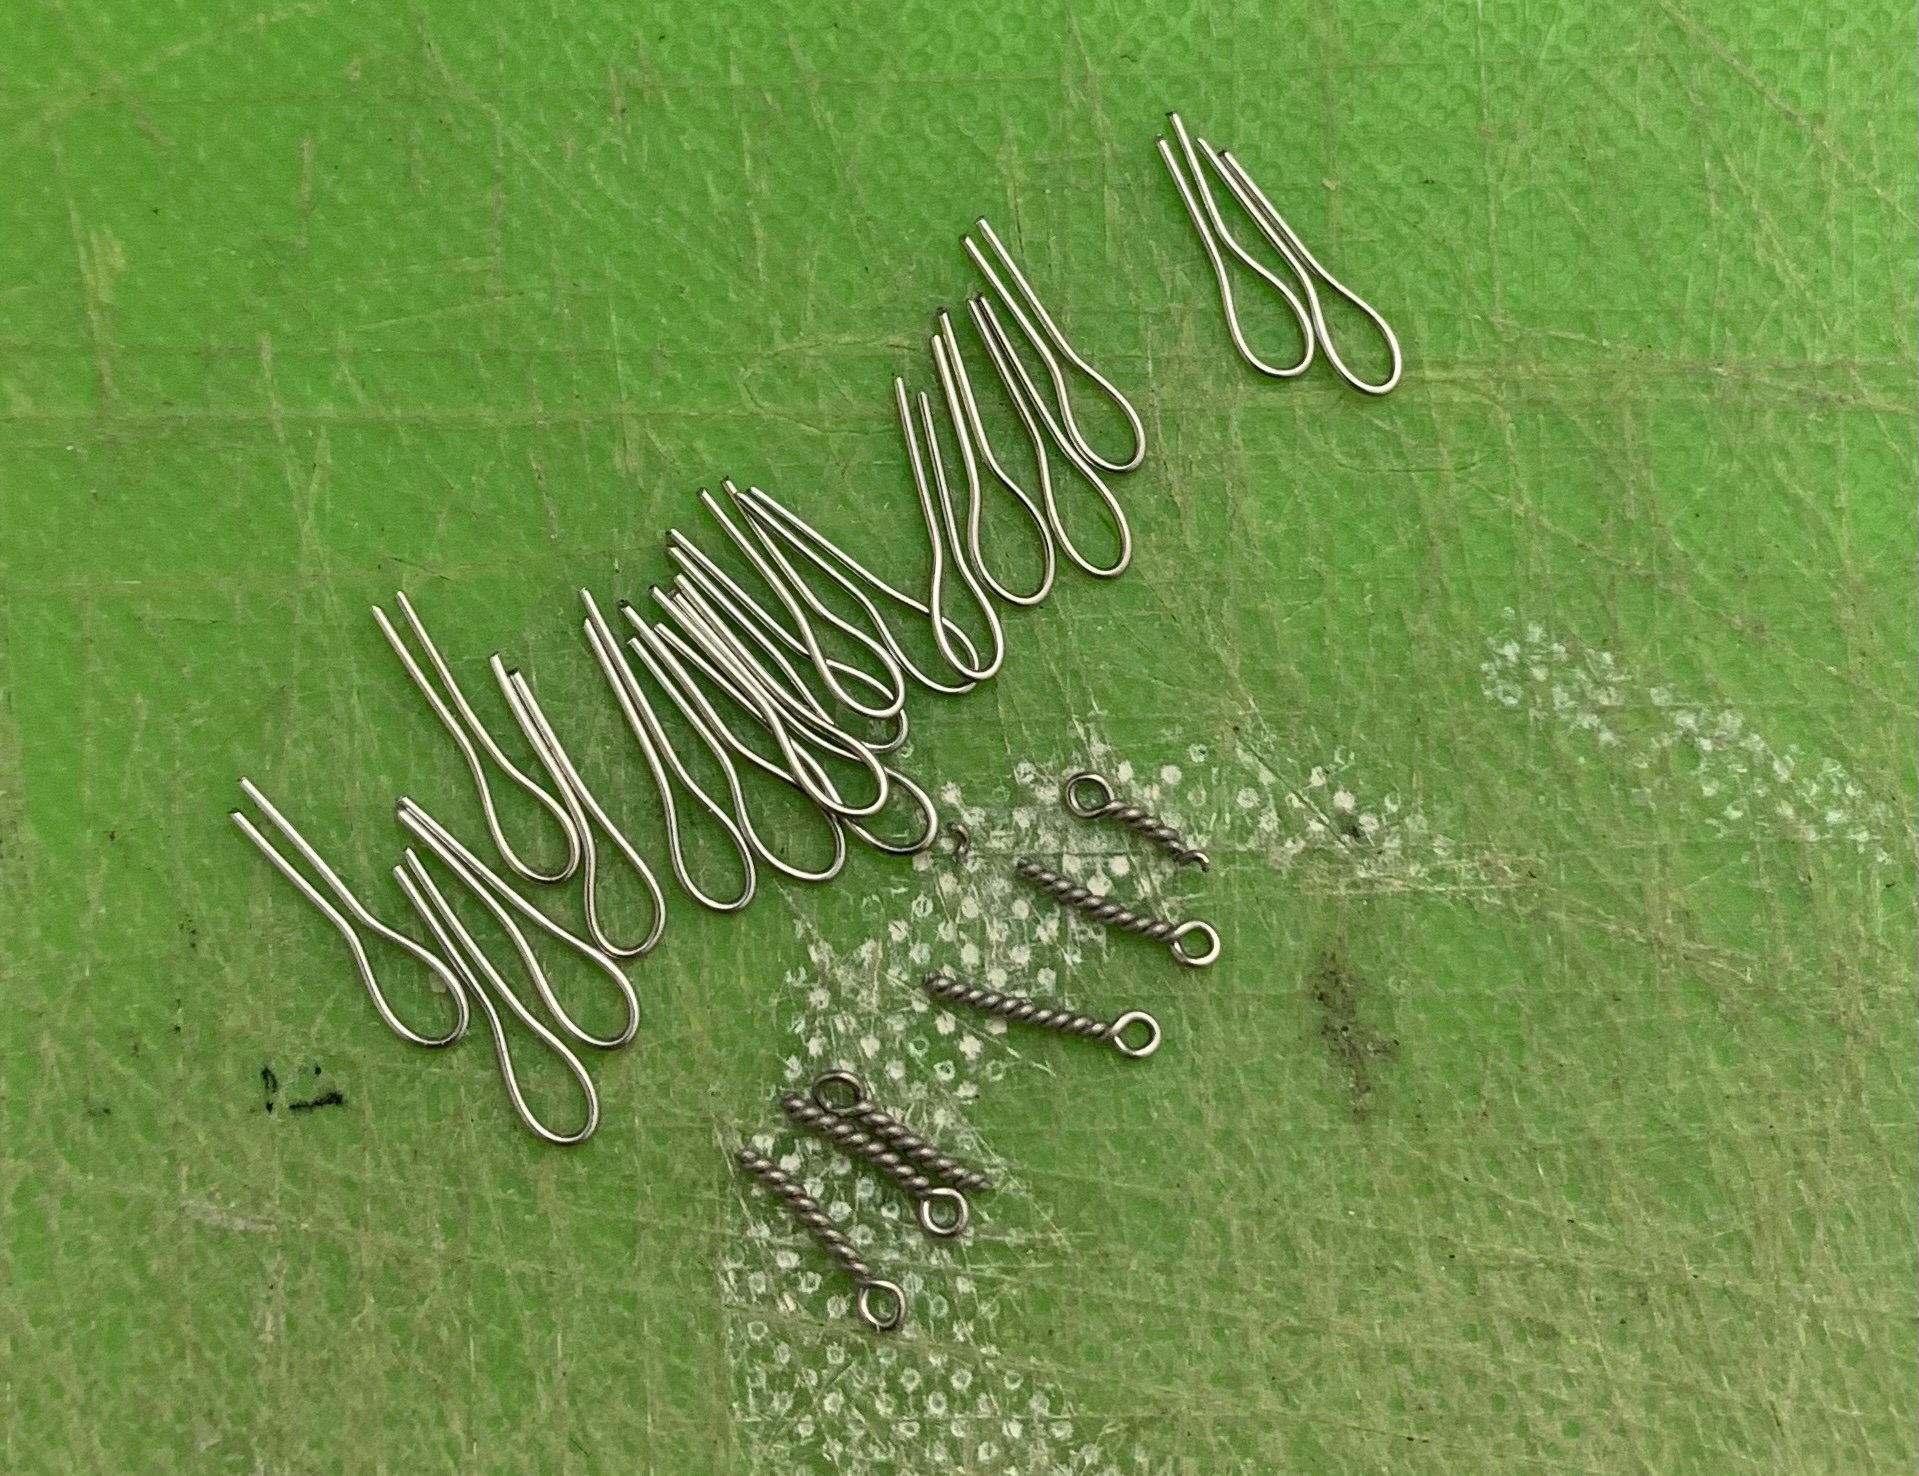
I was having trouble making good eyebolts out of 28 gauge annealed wire. The scale wasn’t quite right, and the eyes were more ovoid than round, before the stems would break from twisting. So, I switched to 32 gauge galvanized steel wire, and consulted Marsalv’s amazing log for Le Gros Ventre:
Somewhere, in there, he shares his particular technique for making these eyes, and it involves twisting the shank through a hole drilled into a clothes pin; doing so ensures a straight shank and a neatly centered eye:

I did not happen to have any wooden clothes pins, on hand, so I took a poplar scrap and was able to achieve the same results:
I found that I had some difficulty while drilling into the bulwarks for these eyes. I repeatedly drilled all the way through the bulwarks. On a wood model, this would be a disaster! On this model, I could simply plug and fair the holes, on the outside, with .030 styrene rod.

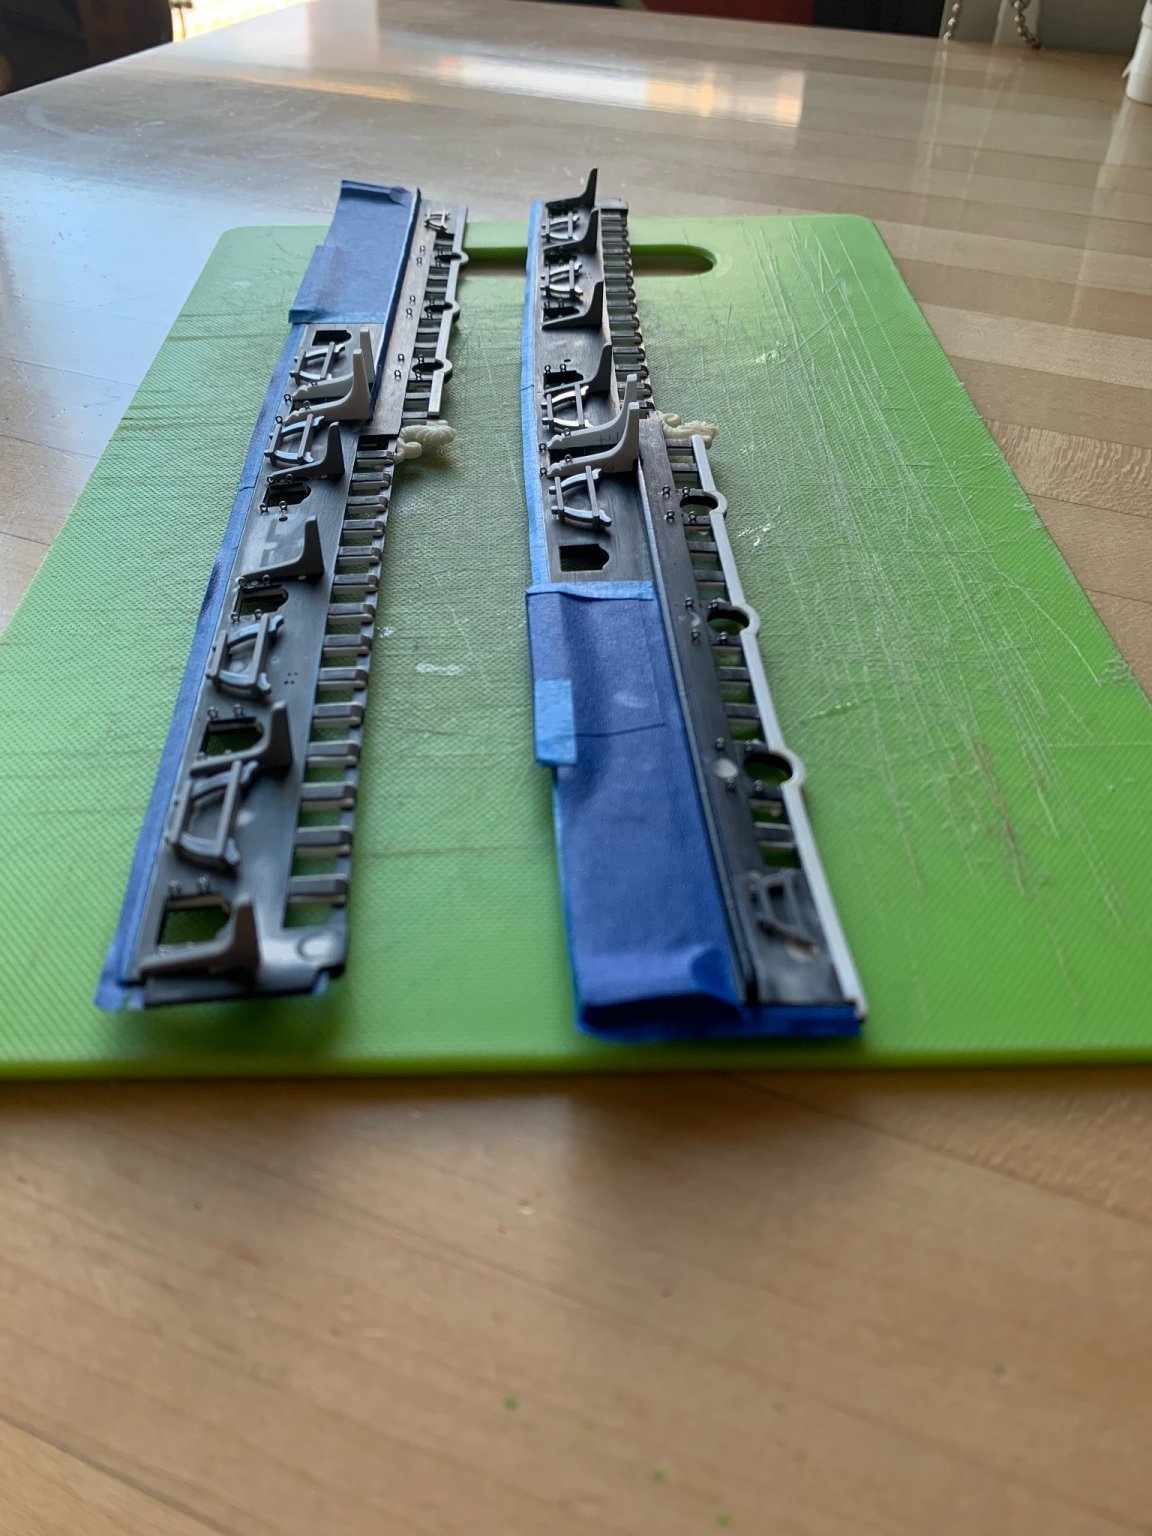
I had been debating whether to glue-in the gangway supporting knees, before paint and assembly. Ultimately, I decided that it would be much easier to locate these accurately before assembly. As with all of the stock kit parts, I spend a significant amount of time and effort cleaning these parts up and breaking all sharp edges.
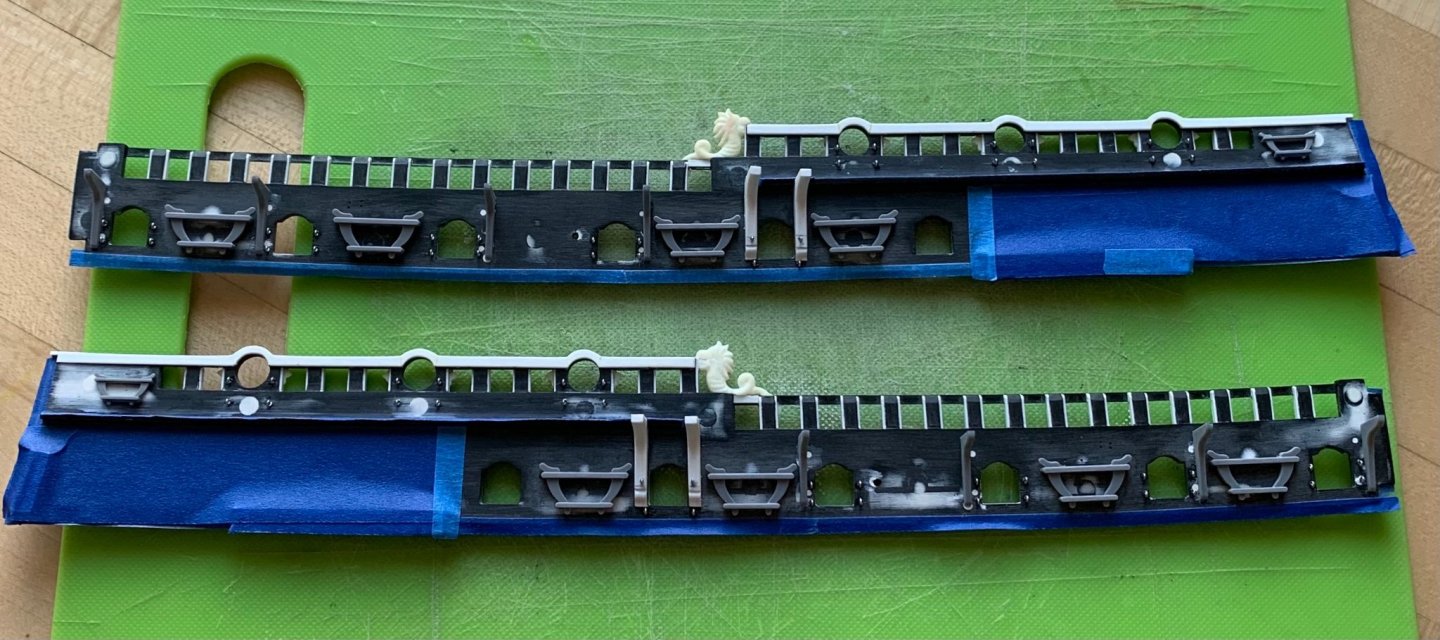
Lastly, I drilled through the cap rails for the baying pins that I will add later:
After masking any surface that I didn’t want to scrape away paint from, later, the parts were ready for a coat of spray primer:
The beauty of the primer coat is that it always reveals whatever might need a little additional attention. I can see that there are a few places where I let the upper port enhancements into the drift rail, above, but was a little overzealous. A small bit of filler will clean that up.
Thank you all for looking in. More to follow!
-
I do not take the least bit of offense, Ian. I have great affection for the Heller kits, as they are, but that certainly doesn’t mean they can’t be improved.
In my estimation, the efforts of people like Michel Saunier - who refused to listen to the orthodoxy that an authentic rendition of Soleil Royal was even possible - opened the door for people like me to continue digging. Likewise, Daniel’s work on the Victory has legitimized plastic ship modeling as something much more than an enjoyable pass-time for teenagers and retirees. Accomplished modelers from all over the world now view his work through the same prism of appreciation and respect as they do any of the best arsenal-style models.
I don’t think of it as “bashing” the kit in a negative way. I think of it as bashing down orthodoxy and conventional thinking about a subject; that any given kit represents the sum-total of all there is to know about the ship.
Kit-bashing on forums like MSW only serves to bolster the hobby, as others begin to see that various techniques for modification and augmentation aren’t merely possible, but quite achievable, with only a little extra effort.
Your deck weathering looks really good, Bill!
- dafi, Old Collingwood, Jeff T and 1 other
-
4
-
…And, the undertow grows stronger.
Yup, these plastic sheet and strip goods open up whole other worlds. I thought you would like the thickening of the ports!
-
Okay, Ian - what did you do for thread to rig the model? Did you purchase someone else’s scale rope? Make your own scale rope?
Syren got out of the rope making business. I’m debating whether to lay-up my own line.
-
Do you have any after-college age children still living at home, upon whom you can impose a modest ship-tax?
- europapete and Ian_Grant
-
 2
2
-
This is just a remarkable piece of work, all around!
-
Yes, that’s me - Marc LaGuardia.
Interesting application of foils. I am considering something like that for deck sheathing under my stoves.
-
The coppering of the belfry is also an interesting detail, as it makes perfect sense to sheath the belfry roof in copper.
-
Fantastic post, Ian! Also, amazing eye-candy of a model that you have built, there! Incorporating wooden deadeyes is such an improvement.
-
Thank you all very much. I am ever grateful that so many of you have stuck around from the earliest stages, when not much was happening, to now, when the project is finally taking shape. I take away as much and more from your respective builds as you might here.
Happy Fathers’ Day to all!


Sovereign of the Seas 1637 by Ulises Victoria - Mantua/Sergal - 1/78
in - Kit build logs for subjects built from 1501 - 1750
Posted
No problemo! Another interesting detail is the anti-chaffing protection, over the tops of the gammoning. I have never seen that detail before. but it makes perfect sense. Most likely, it is leather that is nailed to the sprit-mast.