


Hubac's Historian
-
Posts
2,946 -
Joined
-
Last visited
Content Type
Profiles
Forums
Gallery
Events
Posts posted by Hubac's Historian
-
-
There are excellent arguments for both approaches. For my part, I appreciate the practicality of builders long-gone-by; I am certainly guilty of “historical bias,” whereby I assume that earlier craftsmen were just so supremely skilled at all aspects of fabrication, that they’d hardly blink at the daunting prospect of painting frieze-work directly onto the model. Despite the difficulty, I know you will succeed, Siggi!
- FriedClams, Keith Black, shipman and 1 other
-
 4
4
-
Also of interest, here, is that the frieze appears to be painted on paper that is applied to the hull - much like Chuck’s Winchelsea.
- allanyed, mtaylor, Keith Black and 2 others
-
5
-
I somehow failed to comment on your quarter piece carvings, EJ, but I think they came out really well; nice relief and I really like the use of color.
- EJ_L and Old Collingwood
-
2
-
Ondras, you are moving at a fast and furious clip, without any sacrifice in quality. I love all the detail - particularly the scarfing of the stem - NICE! Thank you for bringing to my attention this Barent’s ship replica project. I will look that up - looks fascinating.
I’m not sure what to say about the pinrail issue on early 17th century vessels, other than perhaps Vasa is your best guide. When in doubt, personally, I like to fall back on the Van de Veldes for the clarity of their drawings.
-
Oh, WOW, this is truly excellent and exciting! I love the work of the card modelers on this site. This is really a very finely worked model. I will be following along. The hull form is very reminiscent of the Dutch-built Vasa - particularly the bluff bow and the bow form below the water line, as it approaches the stem boxing.
- mtaylor and GrandpaPhil
-
2
-
Oh, WOW, Allen - the clay carvings look really terrific. I also watch Doris with equal parts fascination and awe. I have watched her carving tutorial videos. One thing I can’t figure out is how she and you (now) manage to scale the uncured clay sculptures so that they all fit perfectly within their allotted spaces, without looking crowded. I’ve experimented a little with FIMO and Sculpey, but my results were more Picasso than Van de Velde. Any tips?
-
-
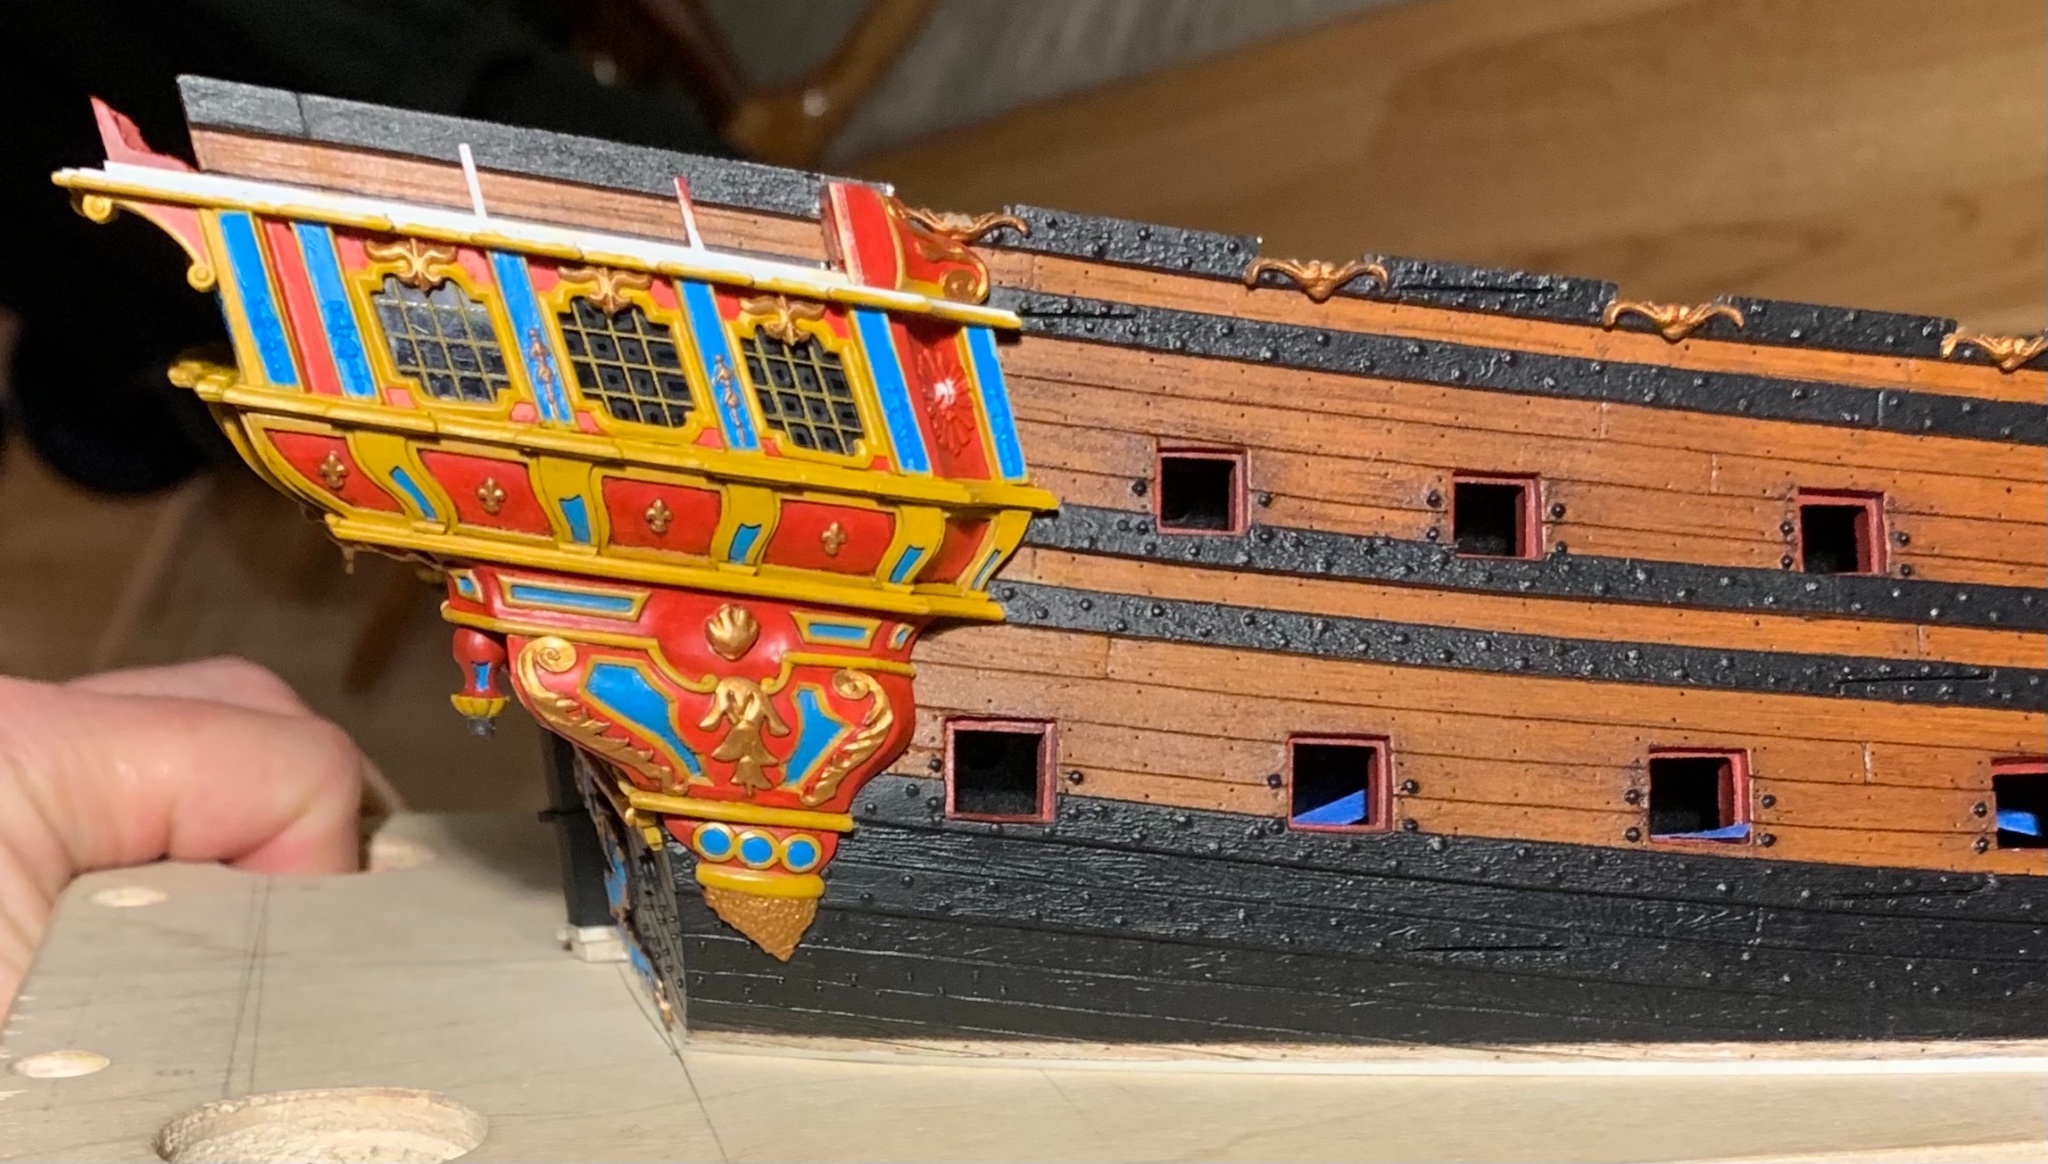
Painting continues. Although the following pics don’t reflect it, all the yellow ocher is done and the walnut ink distress wash has been applied. I’ve begun the gilt work, and am making my way around the gallery.
The purpose of these photos is to illustrate the middle balcony tier, supporting corbels. The middle three are stock kit parts. The outer two were scratch-made because even the secondary kit corbels that are more shallow, in depth, still extended beyond my balcony edge; I had made a conscious decision to reduce the depth of my middle balcony because I knew there were limits to how far I could stretch the Four Seasons figures - more on them, in a moment.


Among the myriad tiny considerations is the fact that the corbels must align with the tilting angle towards the centerline, as delineated by the pilasters, but they must also account for the secondary angle introduced by the round-up. These were very fiddly to fit.
As is my practice, I had masked-off strips on the underside of the balcony to ensure a welded styrene bond. Naturally, this necessitated a certain amount of re-touching to the yellow. The Vallejo paint I’m using is not model-specific, but from their artist’s line, instead. It thins beautifully, but requires numerous passes to achieve good color saturation with a brush. The paint also remains rather soft for a number of weeks after application. For my tastes, these are worthwhile trade-offs for the ease of application and a smooth painted surface.
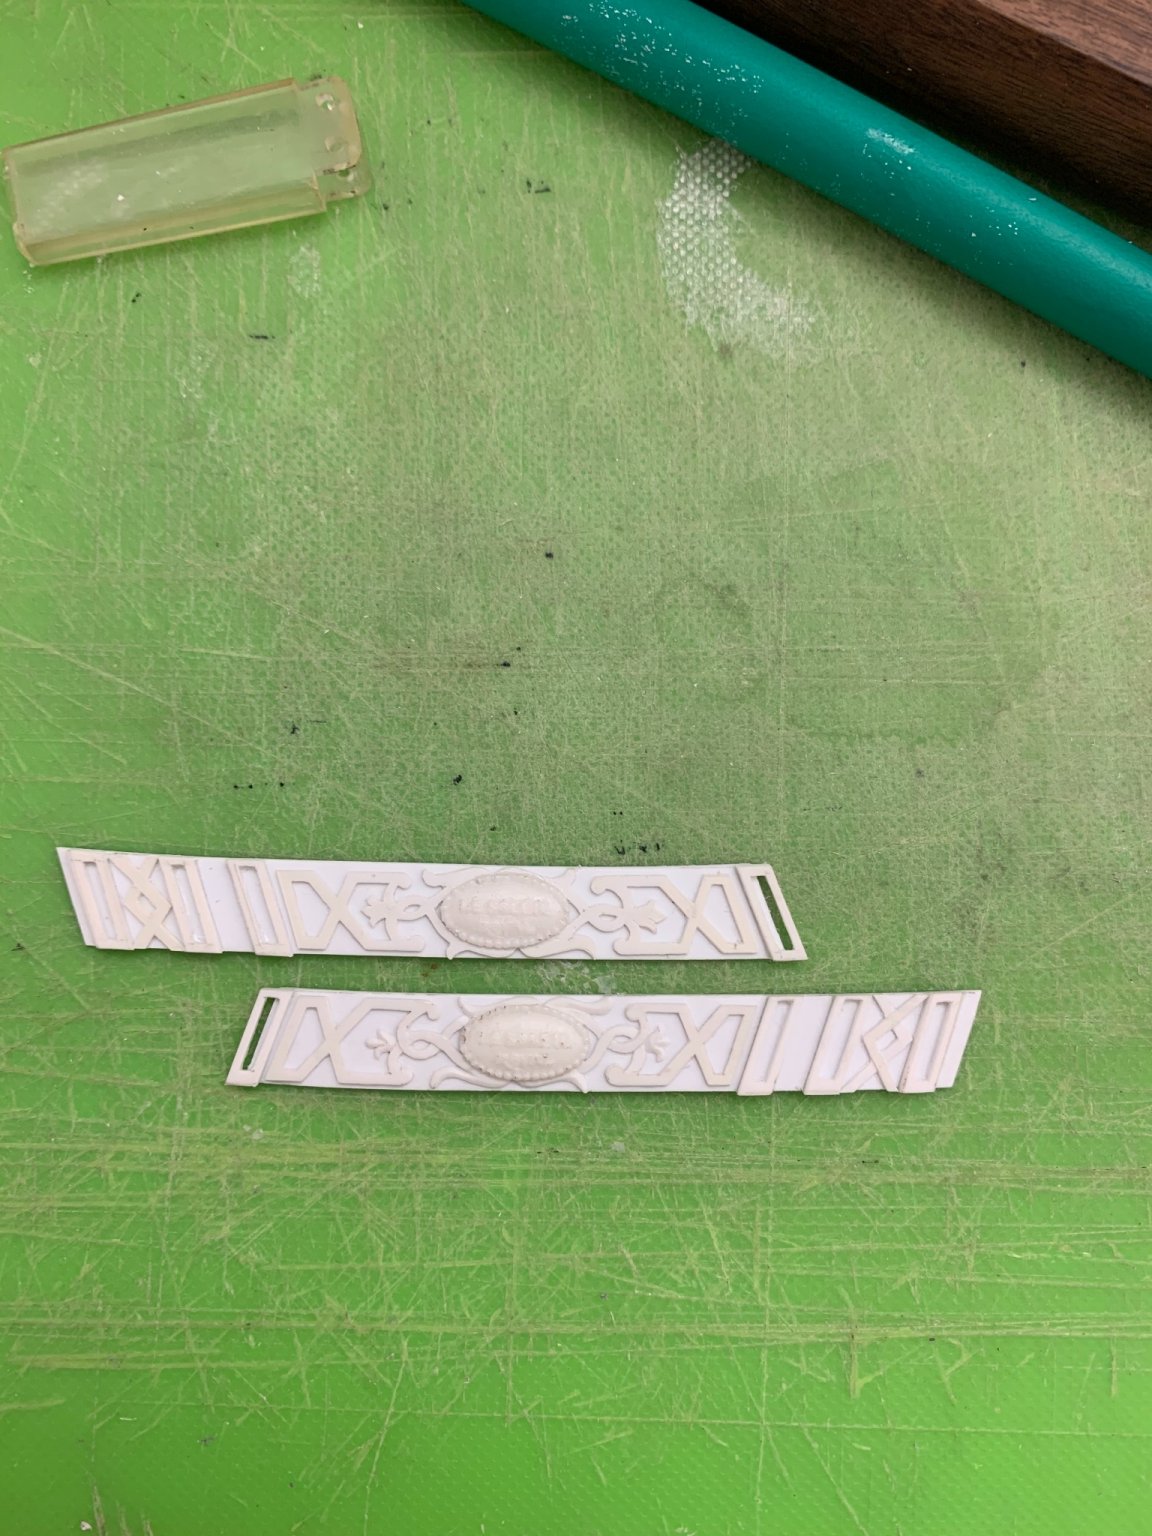
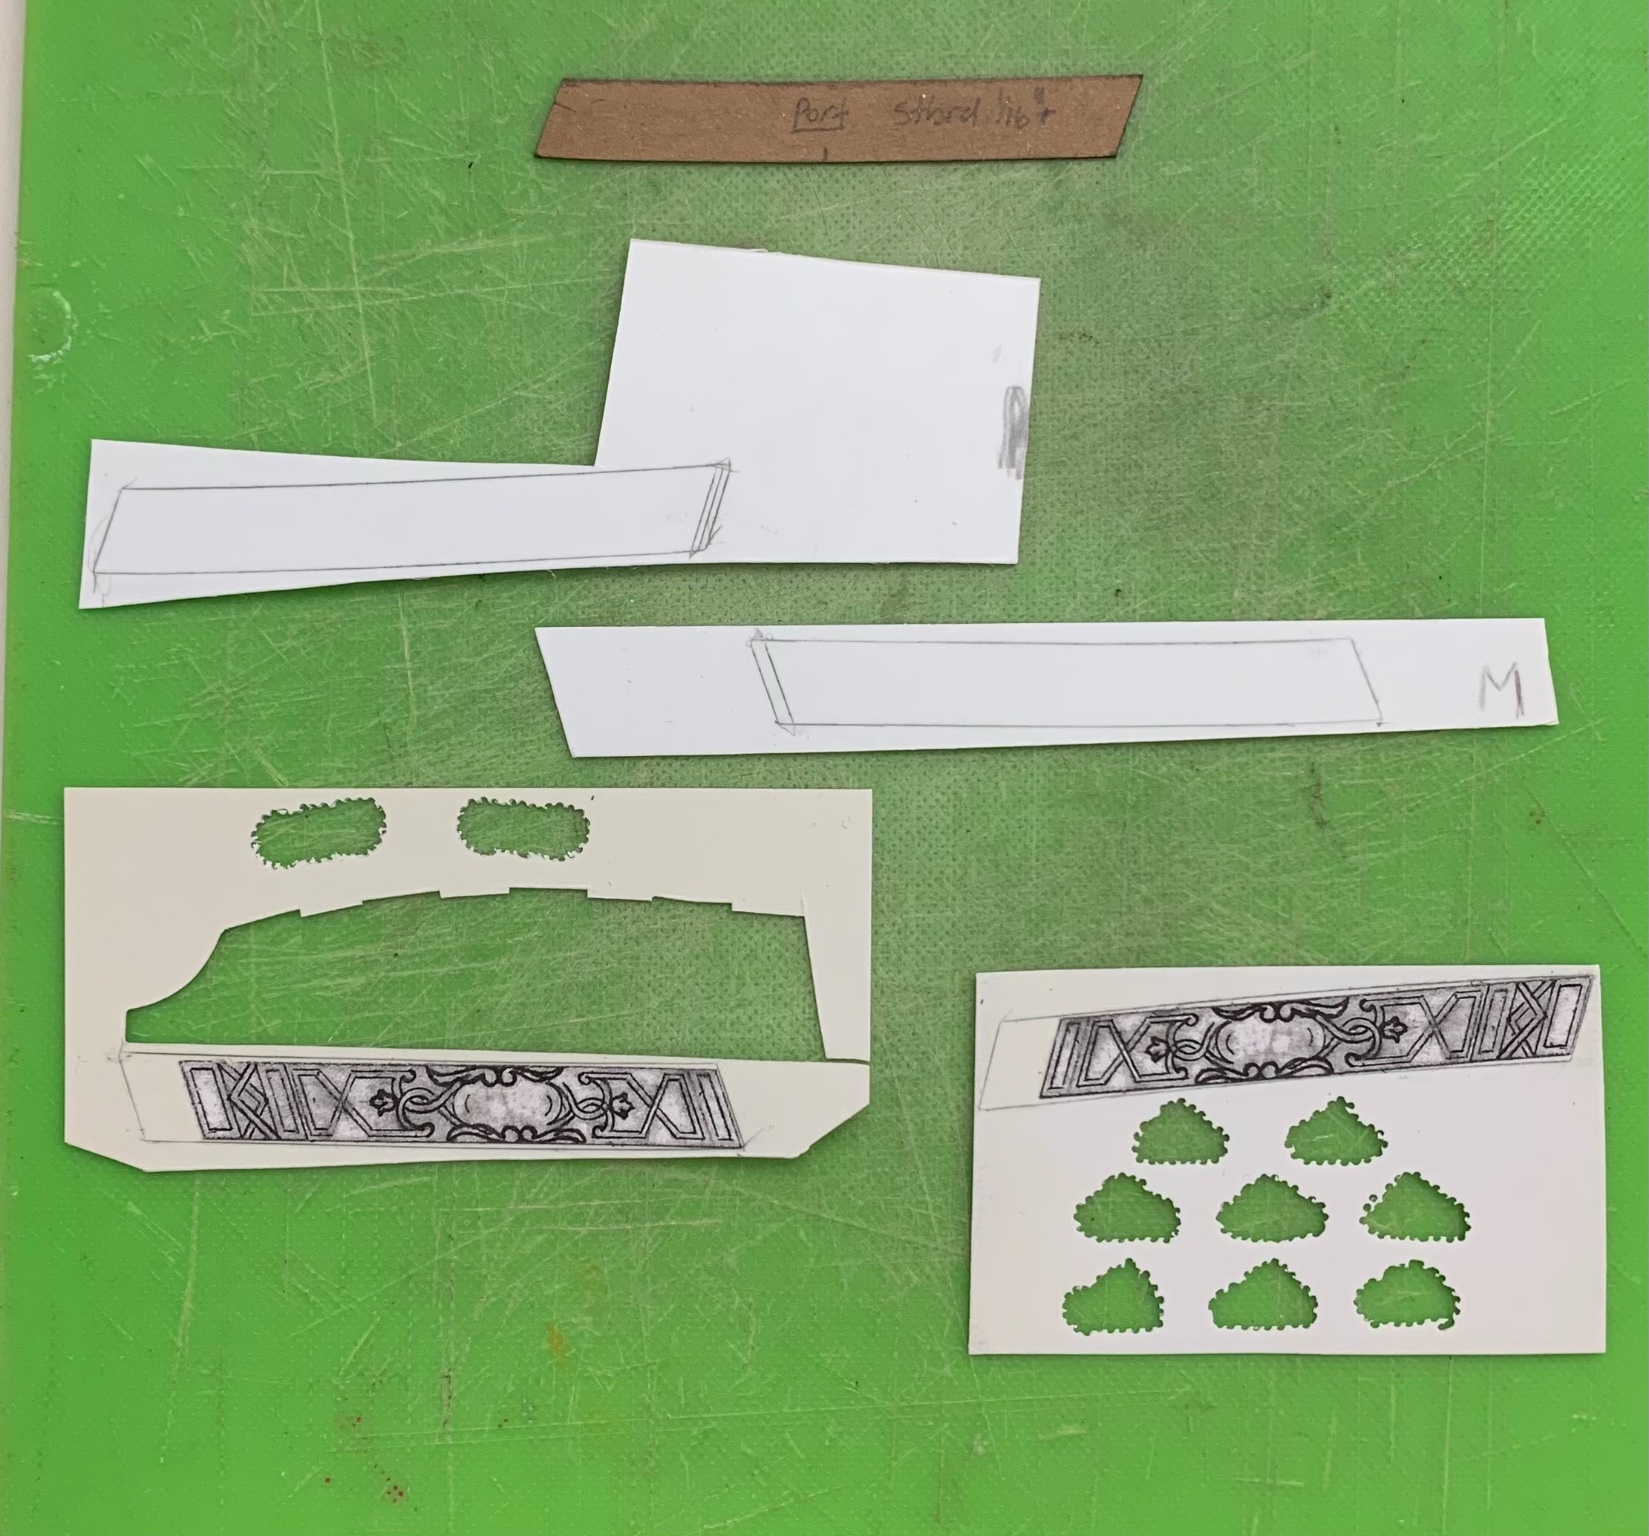
The middle gallery side bulwarks are rounding into form. I made and fit the pilaster pieces, and carved the port side lattice:
Not surprisingly these pieces became significantly more stiff when I CA-glued the resin name badges. I will have to heat-form these, before painting and installation, with a hairdryer so that they take the curve of the gallery without introducing stress.
As I did for the upper bulwark frieze, I cut hard shoulders and shallow reliefs to suggest an intertwining of the frieze banding:
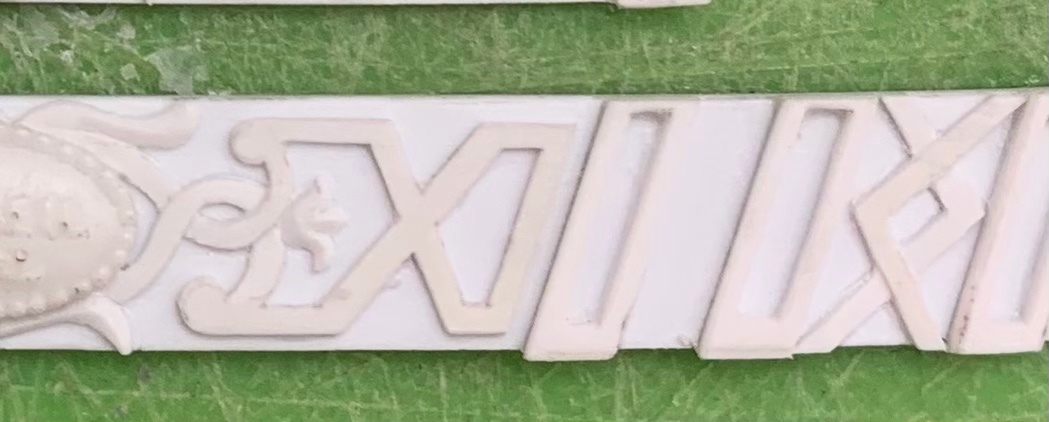
This may seem hard, but it really is not and can be accomplished with nothing more than a #11 blade to cut the shoulders, and a narrow, curved blade to sneak in and cut the reliefs.
I was going to add resin scrolls around the name plate, but the flexibility issue, together with the fact that I’d have to relieve these resin scrolls too far into the nameplates, changed my course; I decided, instead, to simply model and define the scroll shapes surrounding the nameplates. I still have yet to add the diamond flower ornaments to the Xs on either side of the nameplates.
By far, the most enjoyable phases of this project are those times when I discover an opportunity to re-incorporate stock parts of the kit to my new architecture. Adding the bow extension pieces was the first formidable challenge of this kind. The Four Seasons figures present a similarly challenging attempt at plastic surgery.
Tanneron most likely drew inspiration from this later drawing of what I believe is SR1693:
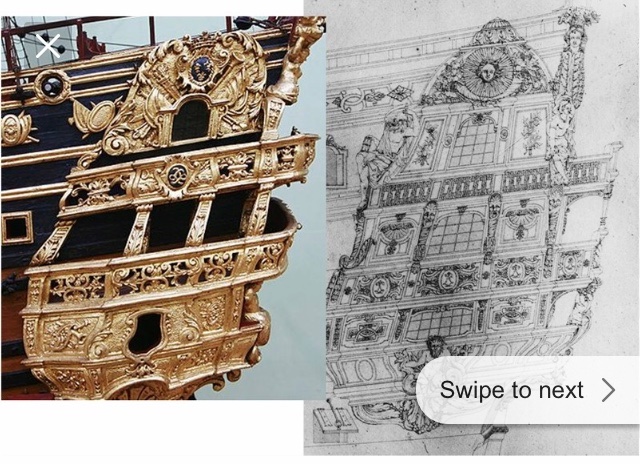
As such, there is a projecting lower stern balcony, and the Four Seasons figures have a more upright posture, in supporting the balcony above. The Heller kit reflects this same architecture.
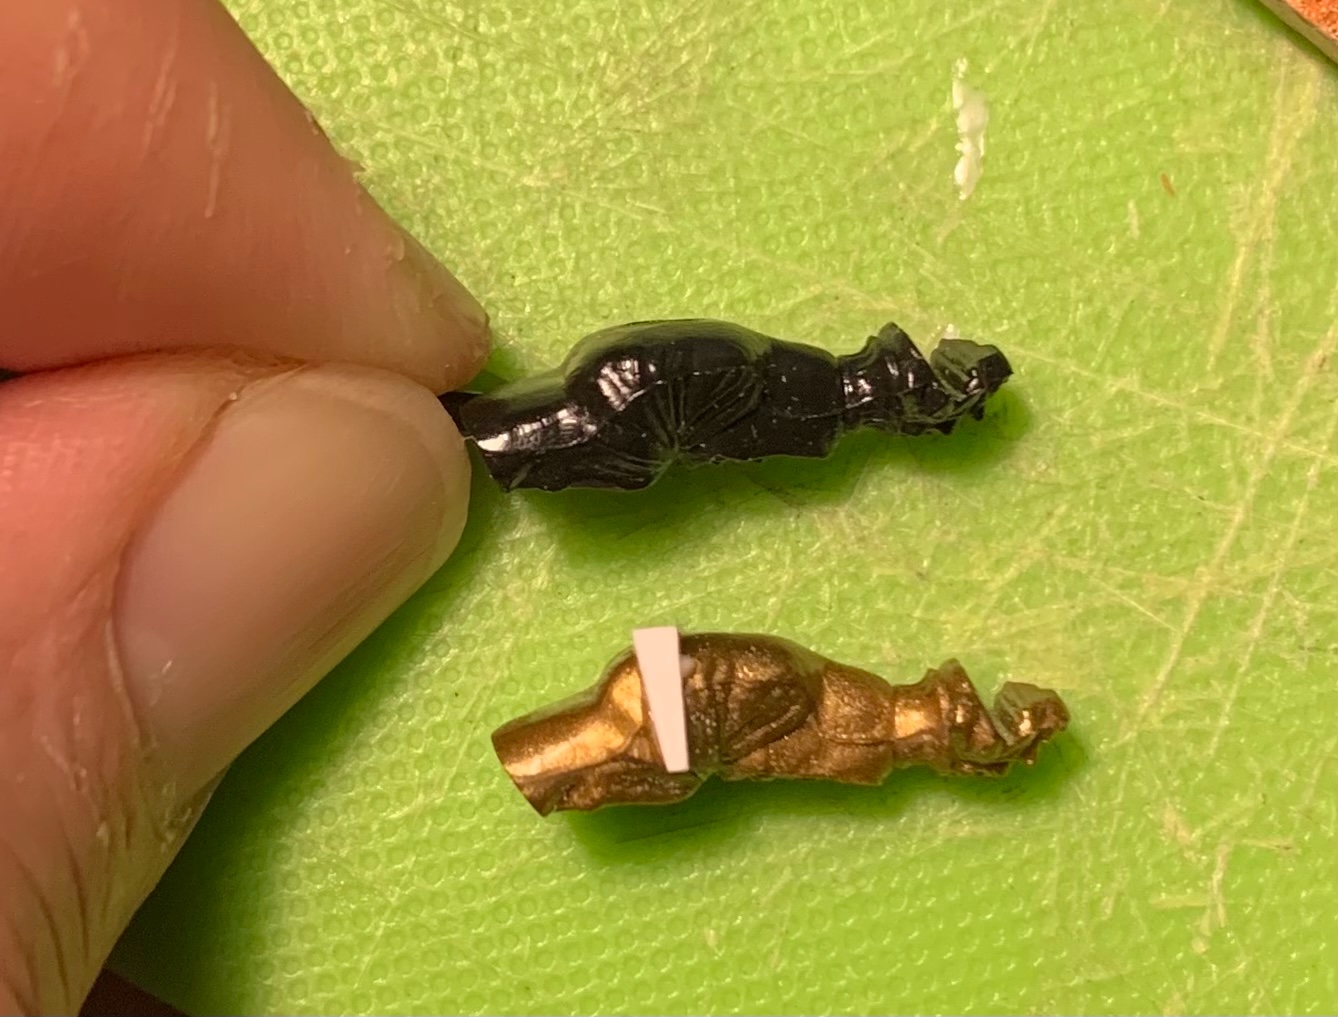
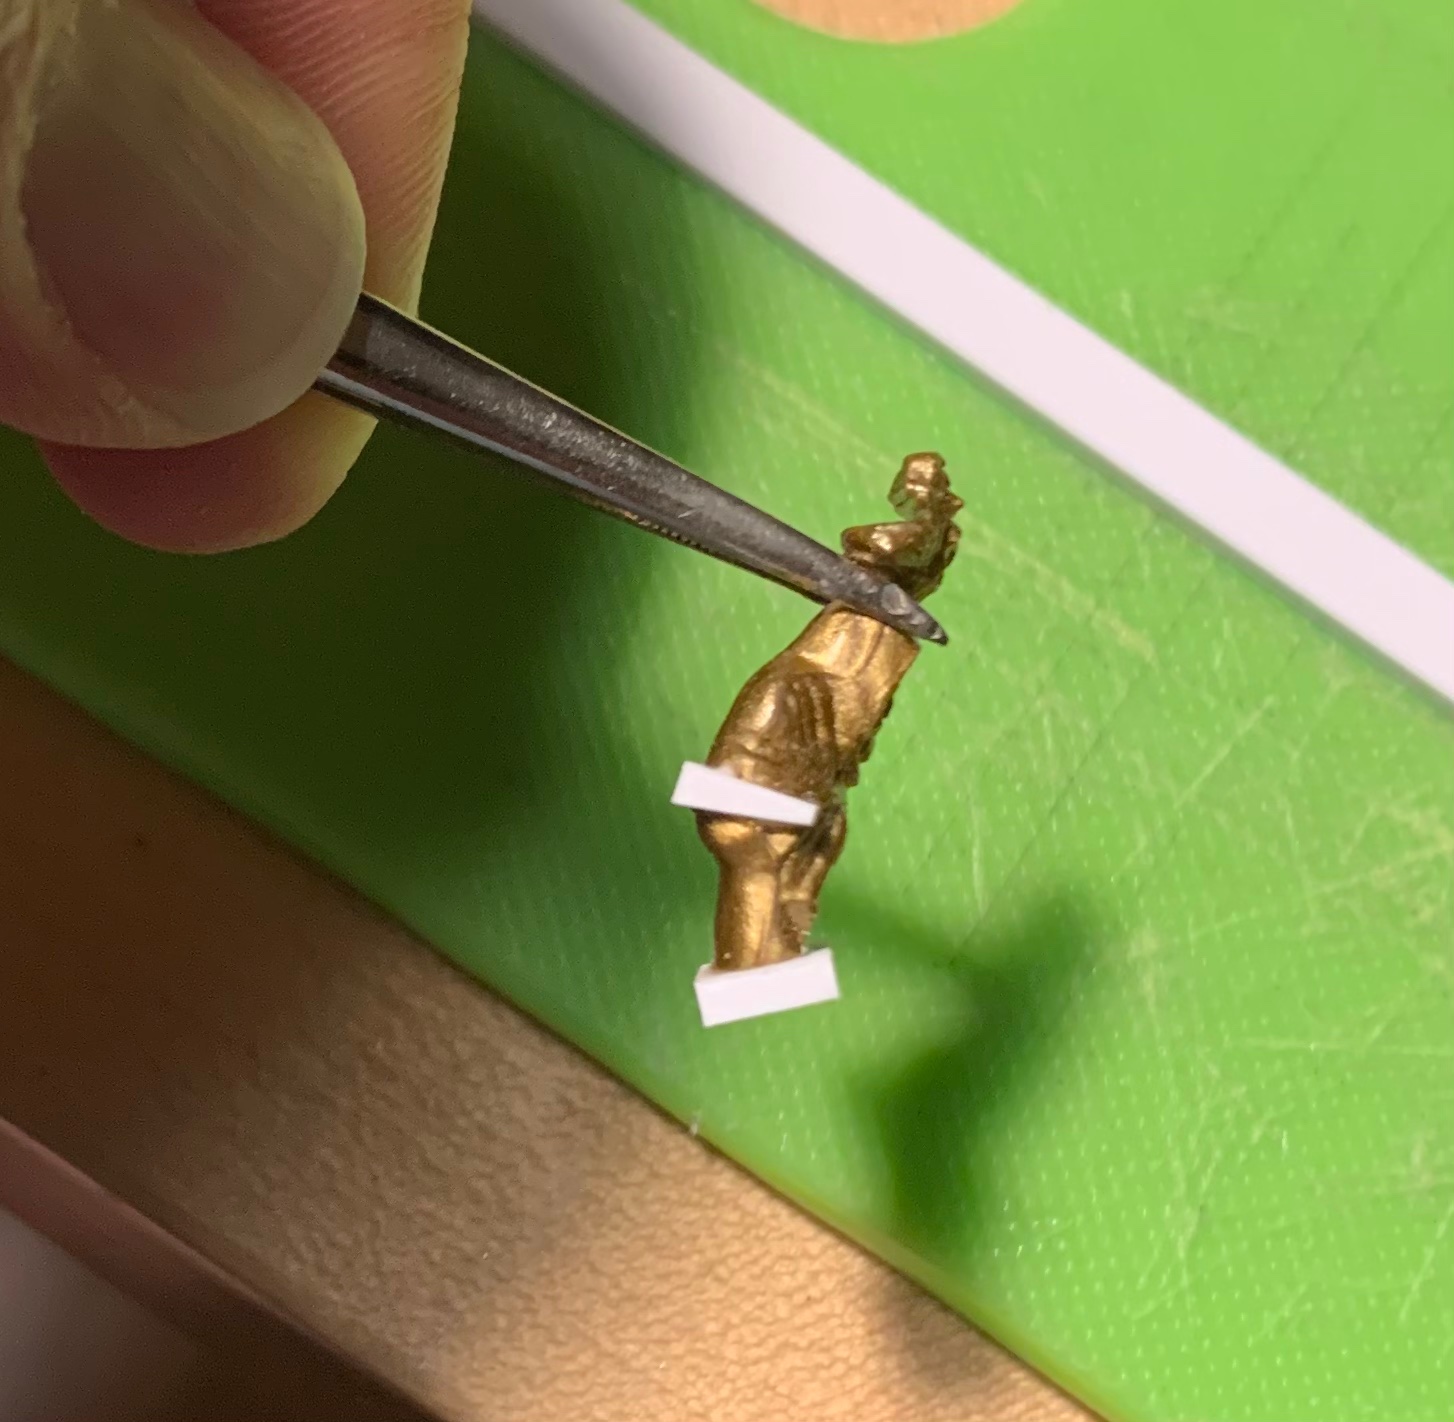
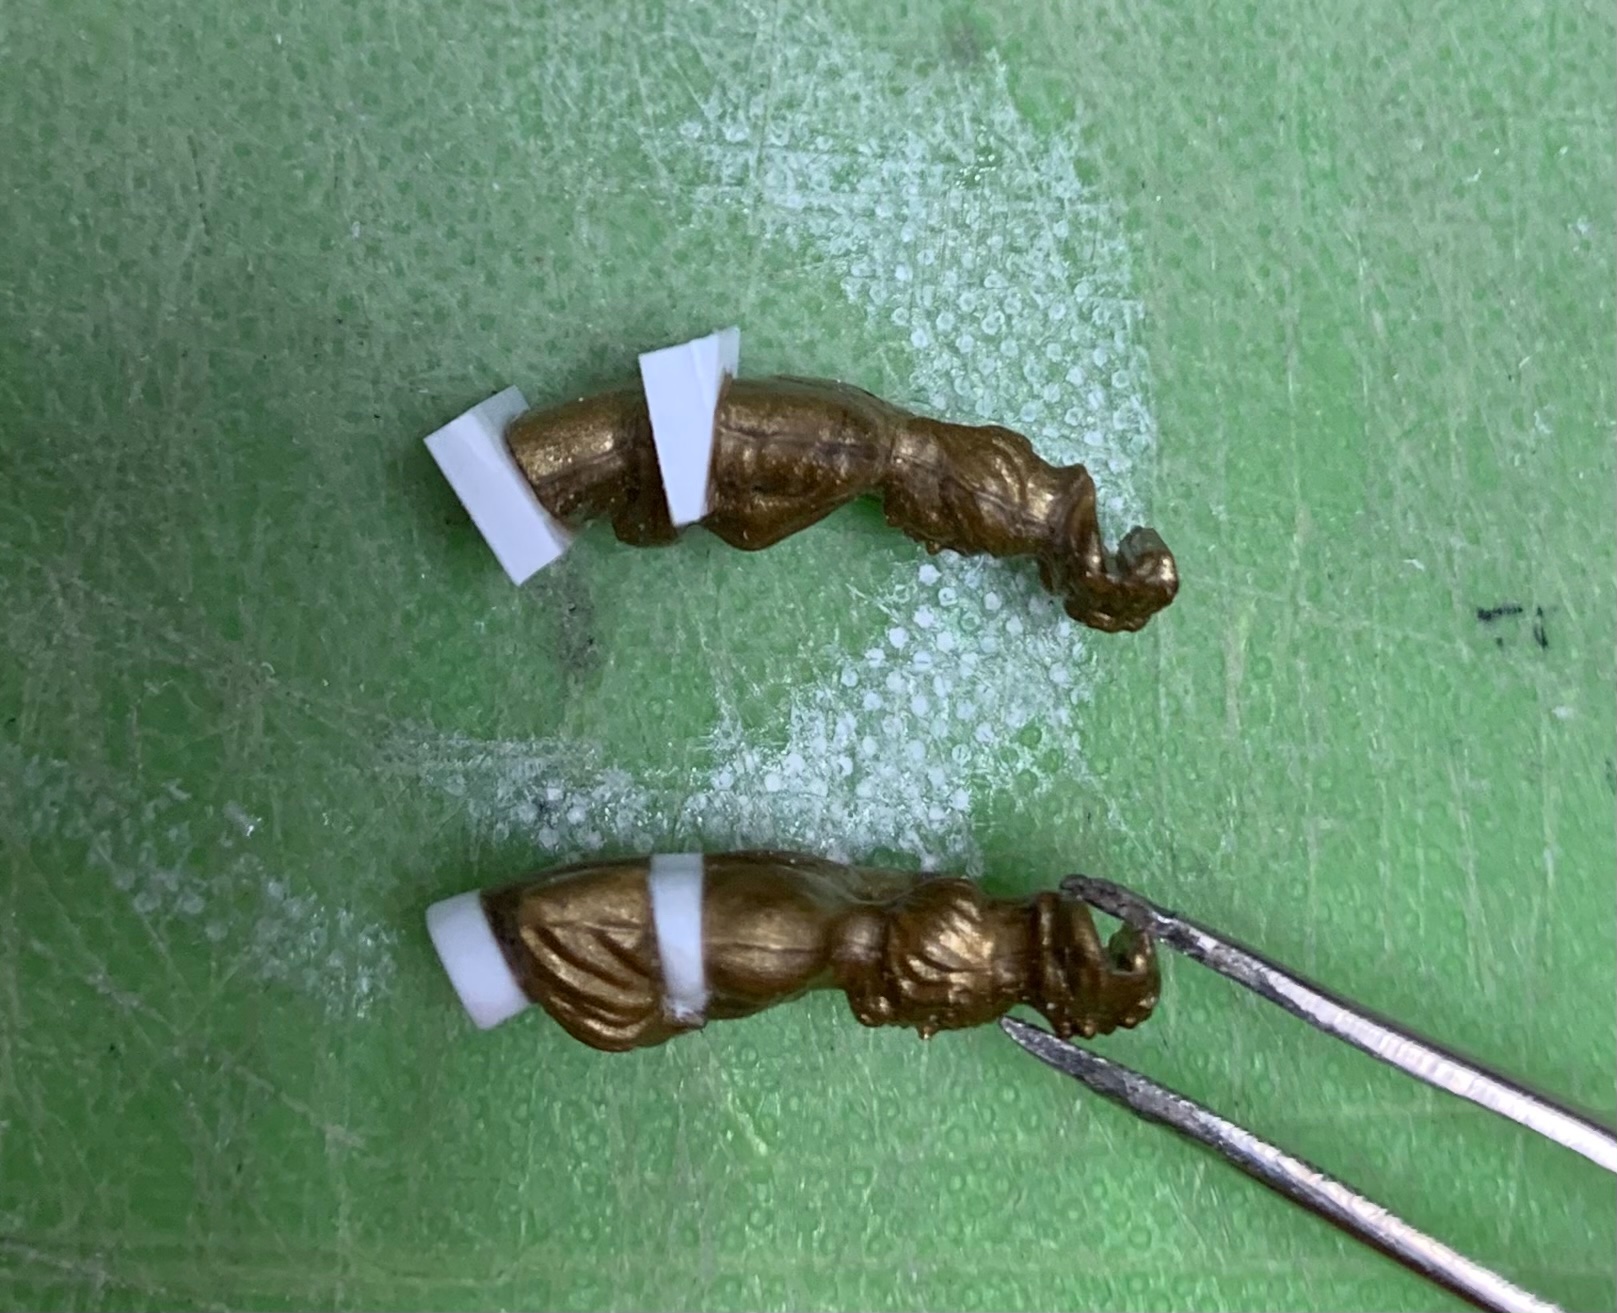
In closing-in this lower stern balcony, I have also brought it in, closer to the stern. Consequently, if I want to use the stock figures, I realized I would have to alter their posture and lengthen them. Starting with the outer two male figures of Winter and Autumn, where the overhang is less extreme, this is what I have done:
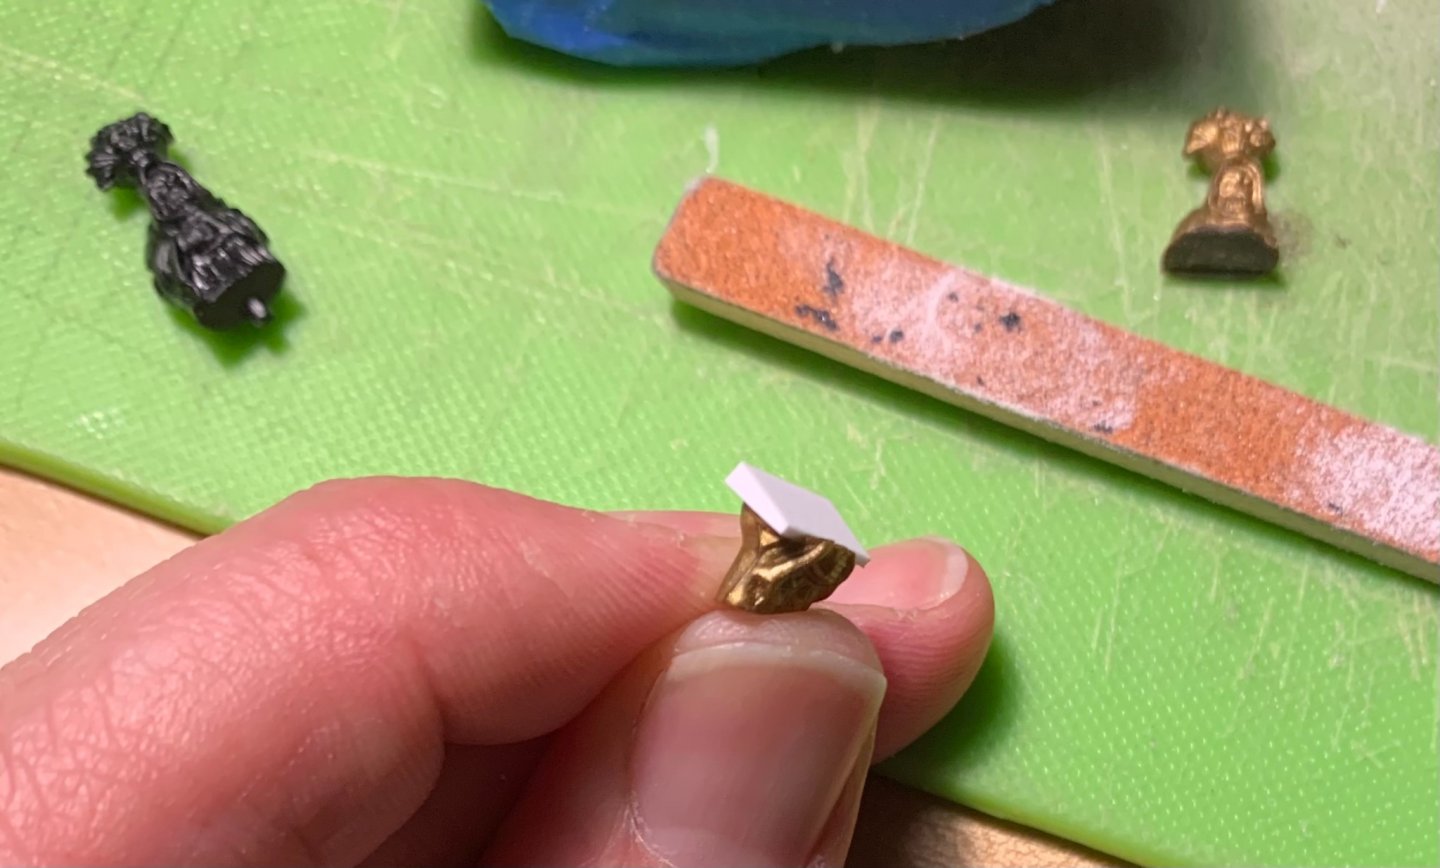
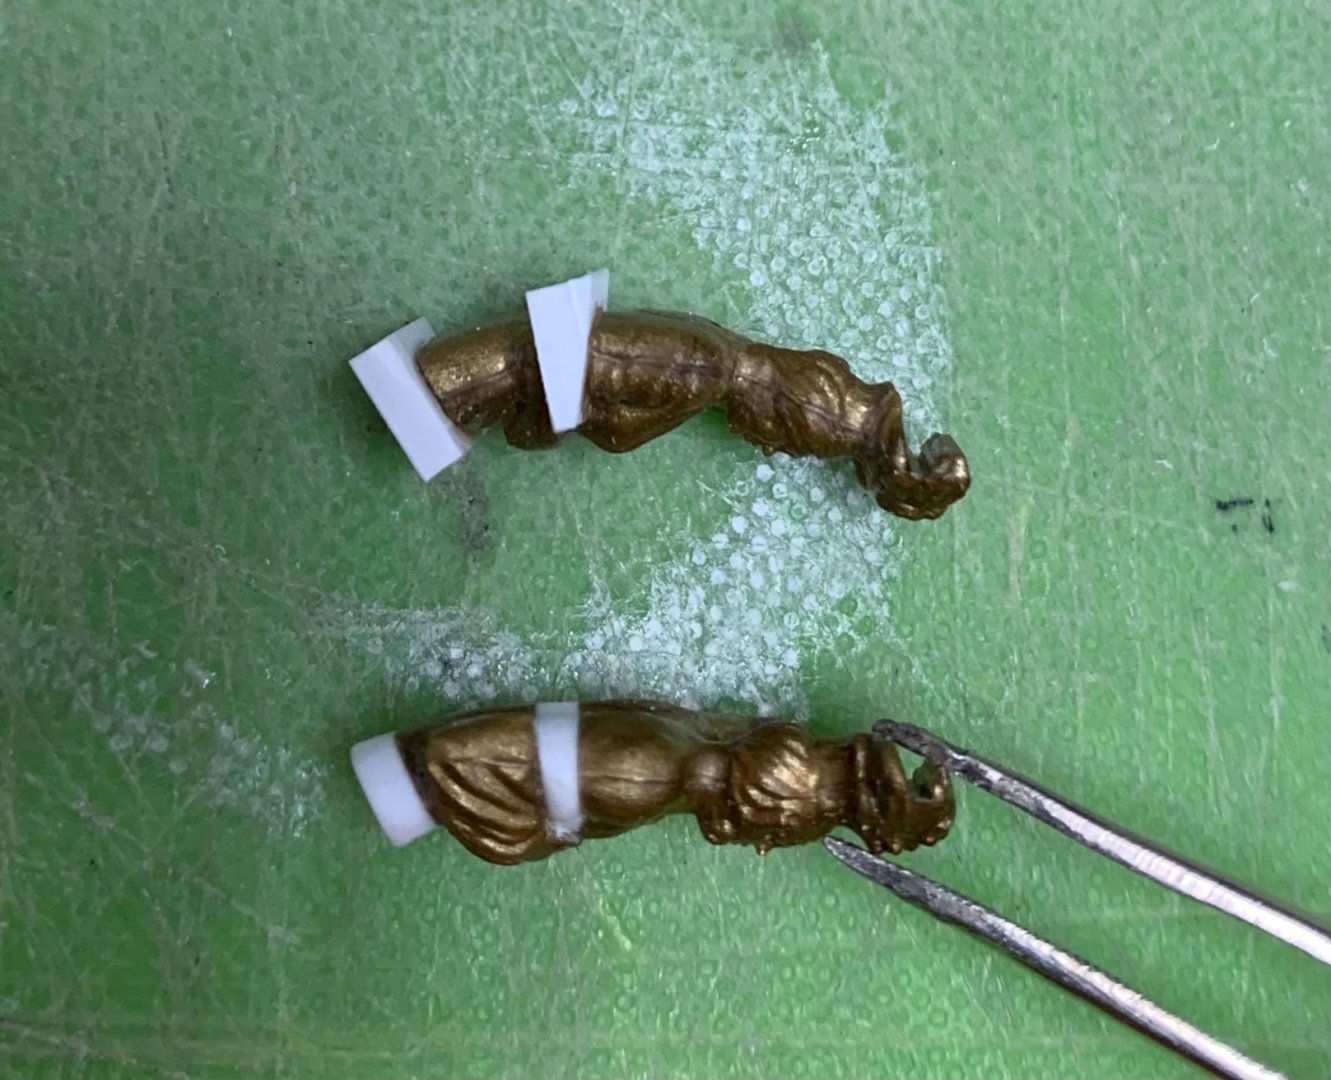
The magic entry for cutting these figures is through the back, just above the elbow, and stopping the cut before breaking through just above the hand. This weird gold plastic is more brittle than the black stuff, and I snapped the first figure, Winter, just above the hand. This was not a problem, though.
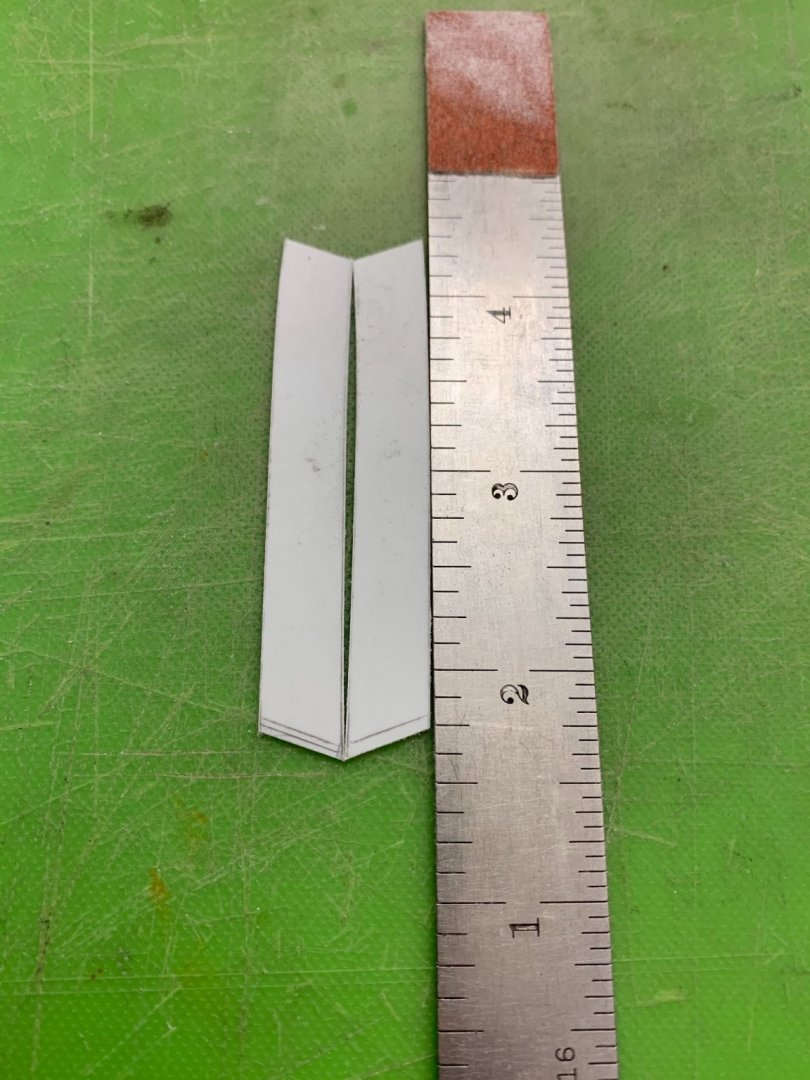
I then took a piece of 1/16” styrene strip, double-stuck it to the edge of a piece of scrapwood, and then filed a taper ranging from the thickness of the kerf (about a 1/32”) to the full 1/16”, at back.
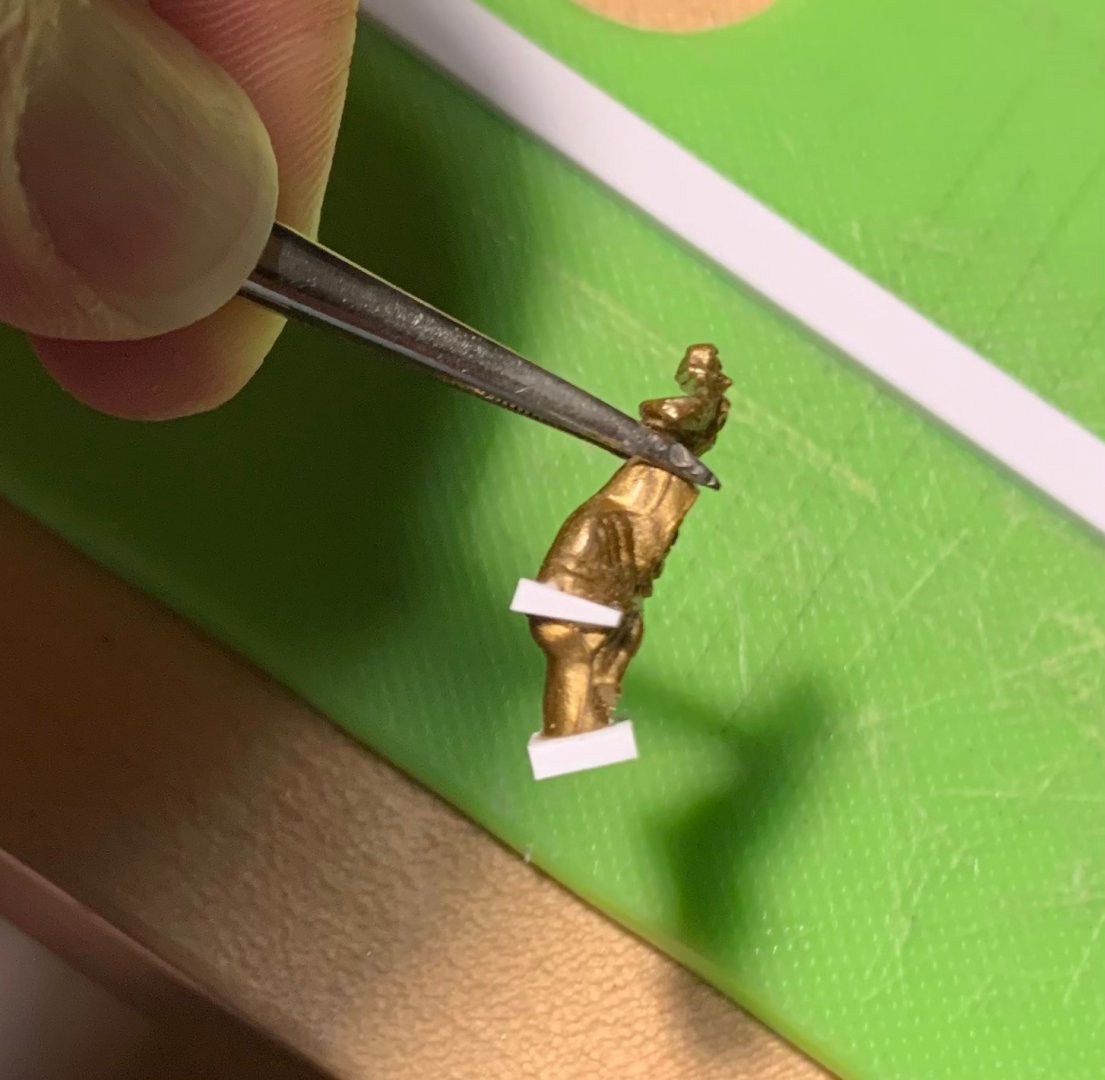
I am always emboldened, in these surgeries, when I have a fall-back set of parts. The difference in posture is slight, but it is just enough to help these side figures conform:
I then added a piece of 1/16” styrene to the bottom, so that I can simultaneously increase the height of the figures, as necessary, to meet the underside of the balcony, while simultaneously adjusting the outboard angle. Here is how these two outboard figures took shape:
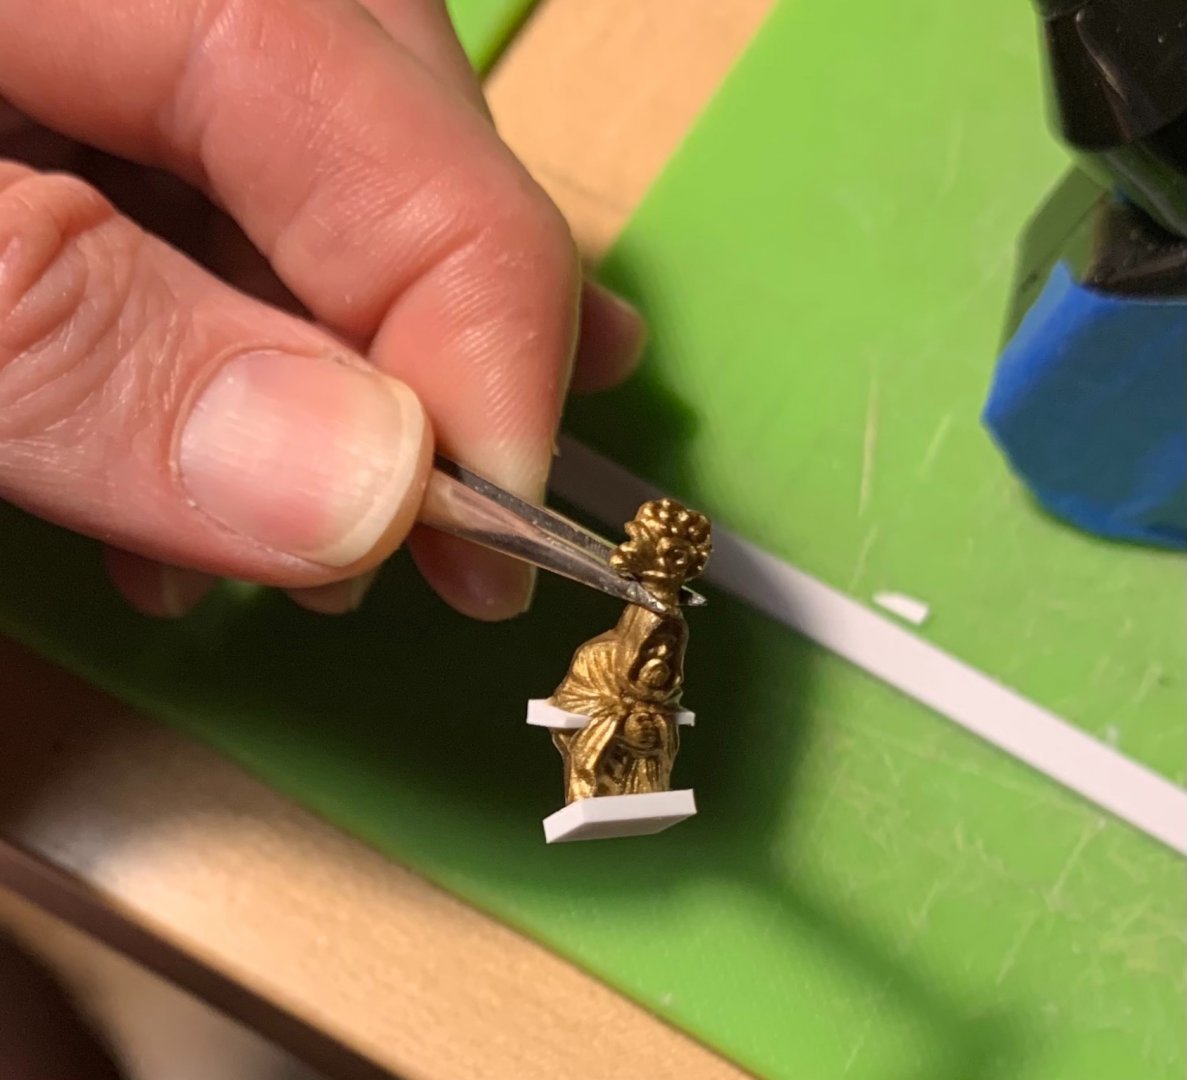
It may seem difficult, but modeling the new plastic to appear like a seamless continuation of the clothed figures really isn’t that hard:
The road map of where you need to cut in and continue lines is already there for you. Also, draping clothing is fairly forgiving:
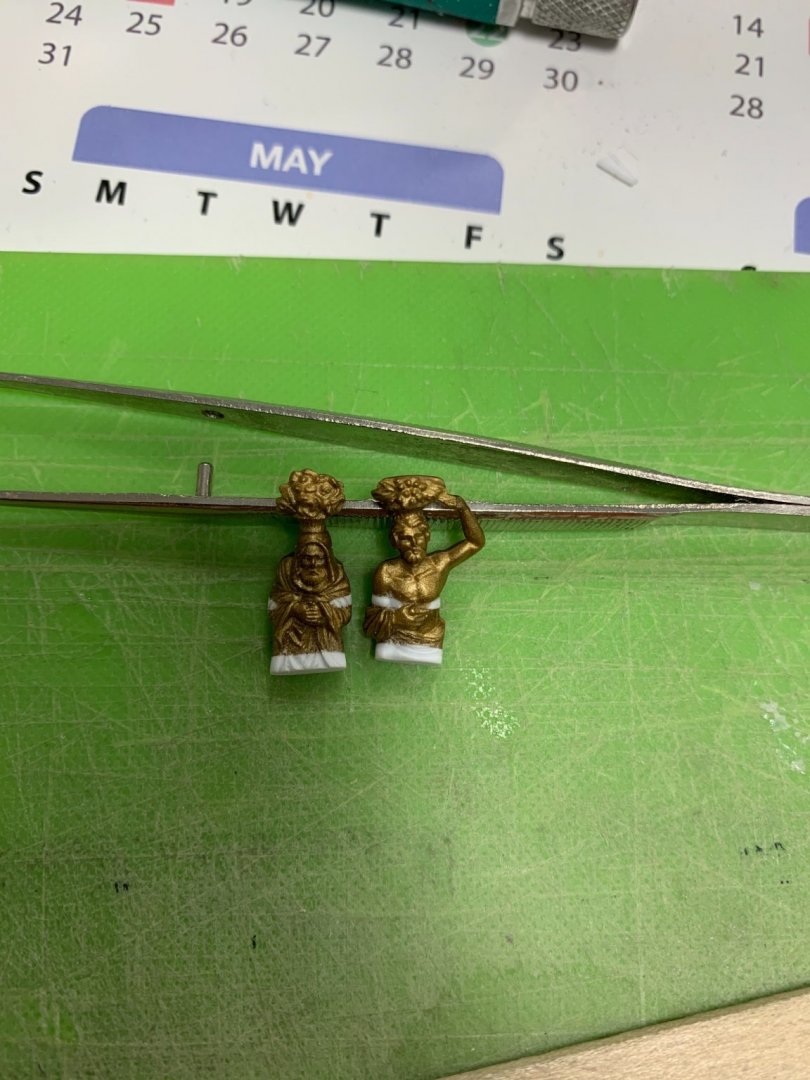
Autumn (right) really made out well, in the deal, with some additional bicep definition! It makes me wonder how well my own living body might respond to a little styrene enhancement. I haven’t been to the gym much, lately.
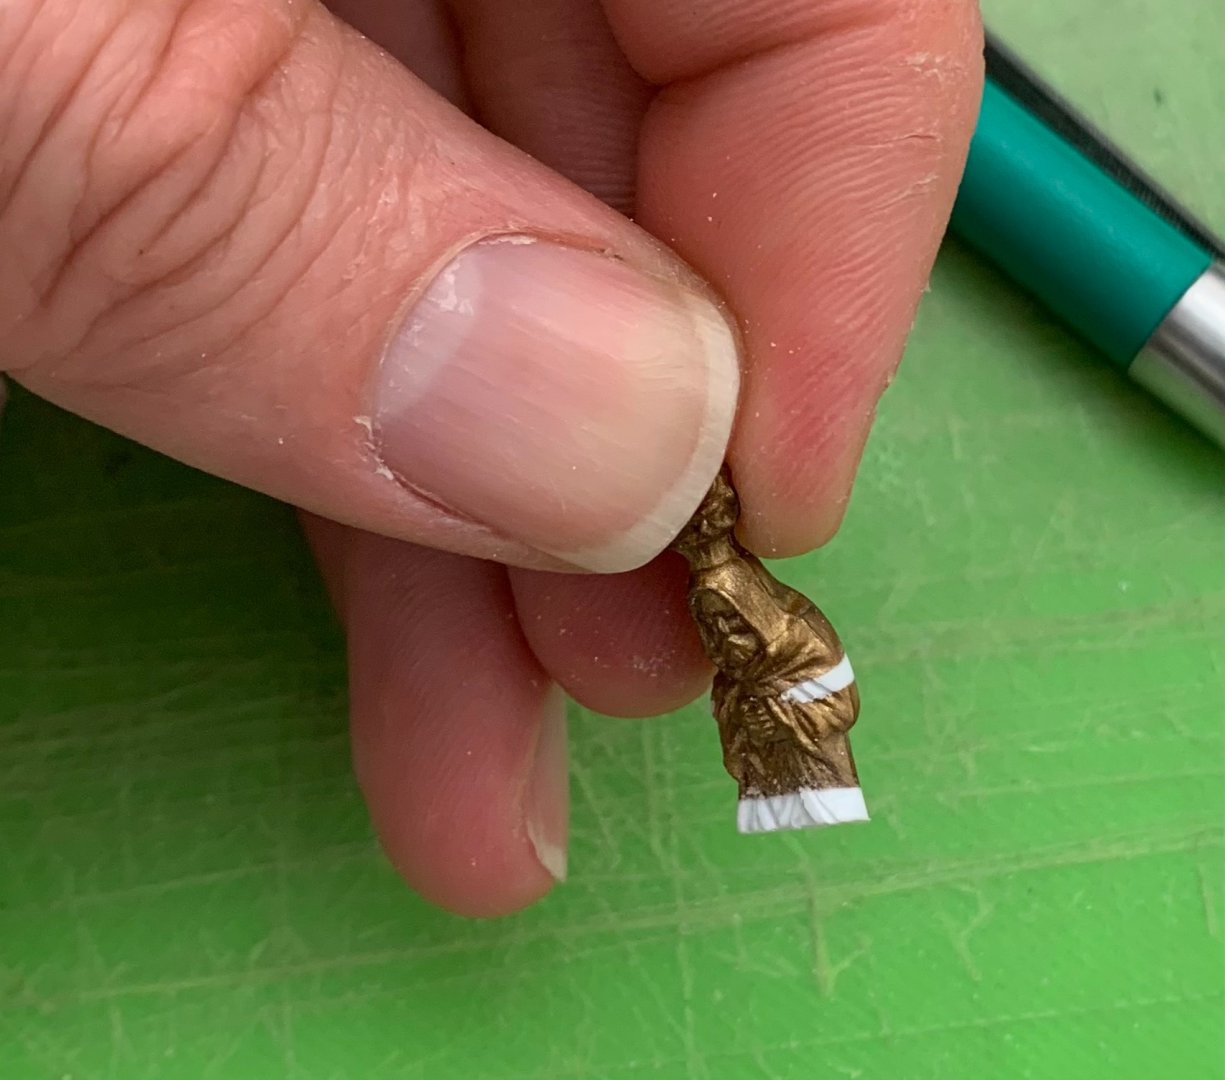
That is all well and good for the outer figures. I will still need to add another 1/32” at bottom, and fettle the top joint to the balcony, but I should be able to fit these without much trouble.
The middle figures required a little more extreme hunching of their posture, because the balcony above steps out, away from the stern, by about an additional 1/16”. It seemed reasonable to laminate two different thicknesses of styrene strip (1/16”&1/32”), for my torso wedge. Here is how that is taking shape:
As can be seen next to the Autumn figure, now the arching of the female backs is notably more pronounced. I will probably need to add some extra plastic to the top edge of the bouquet and model it so that it appears to cope neatly around the bottom moulded edge of the balcony above. All of this may seem like a lot of fiddling about with these figures, but I can assure you that the investment in time is far less than making them from scratch. Besides, Heller did too nice a job of modeling them to believe I could do any better on my own.
So, that’s where things stand as of today. In the coming weeks, I will likely have to take a break from Soleil Royal, as my wife and I have made the difficult decision to move, yet again. We barely got to know Brooklyn, and certainly the Pandemic robbed our neighborhood of much of its charm. Nevertheless, an “affordable” 3-bedroom apartment is a unicorn worth chasing. I will periodically still post updates as small work progresses.
As always, stay well, and thank you for stopping by.
-
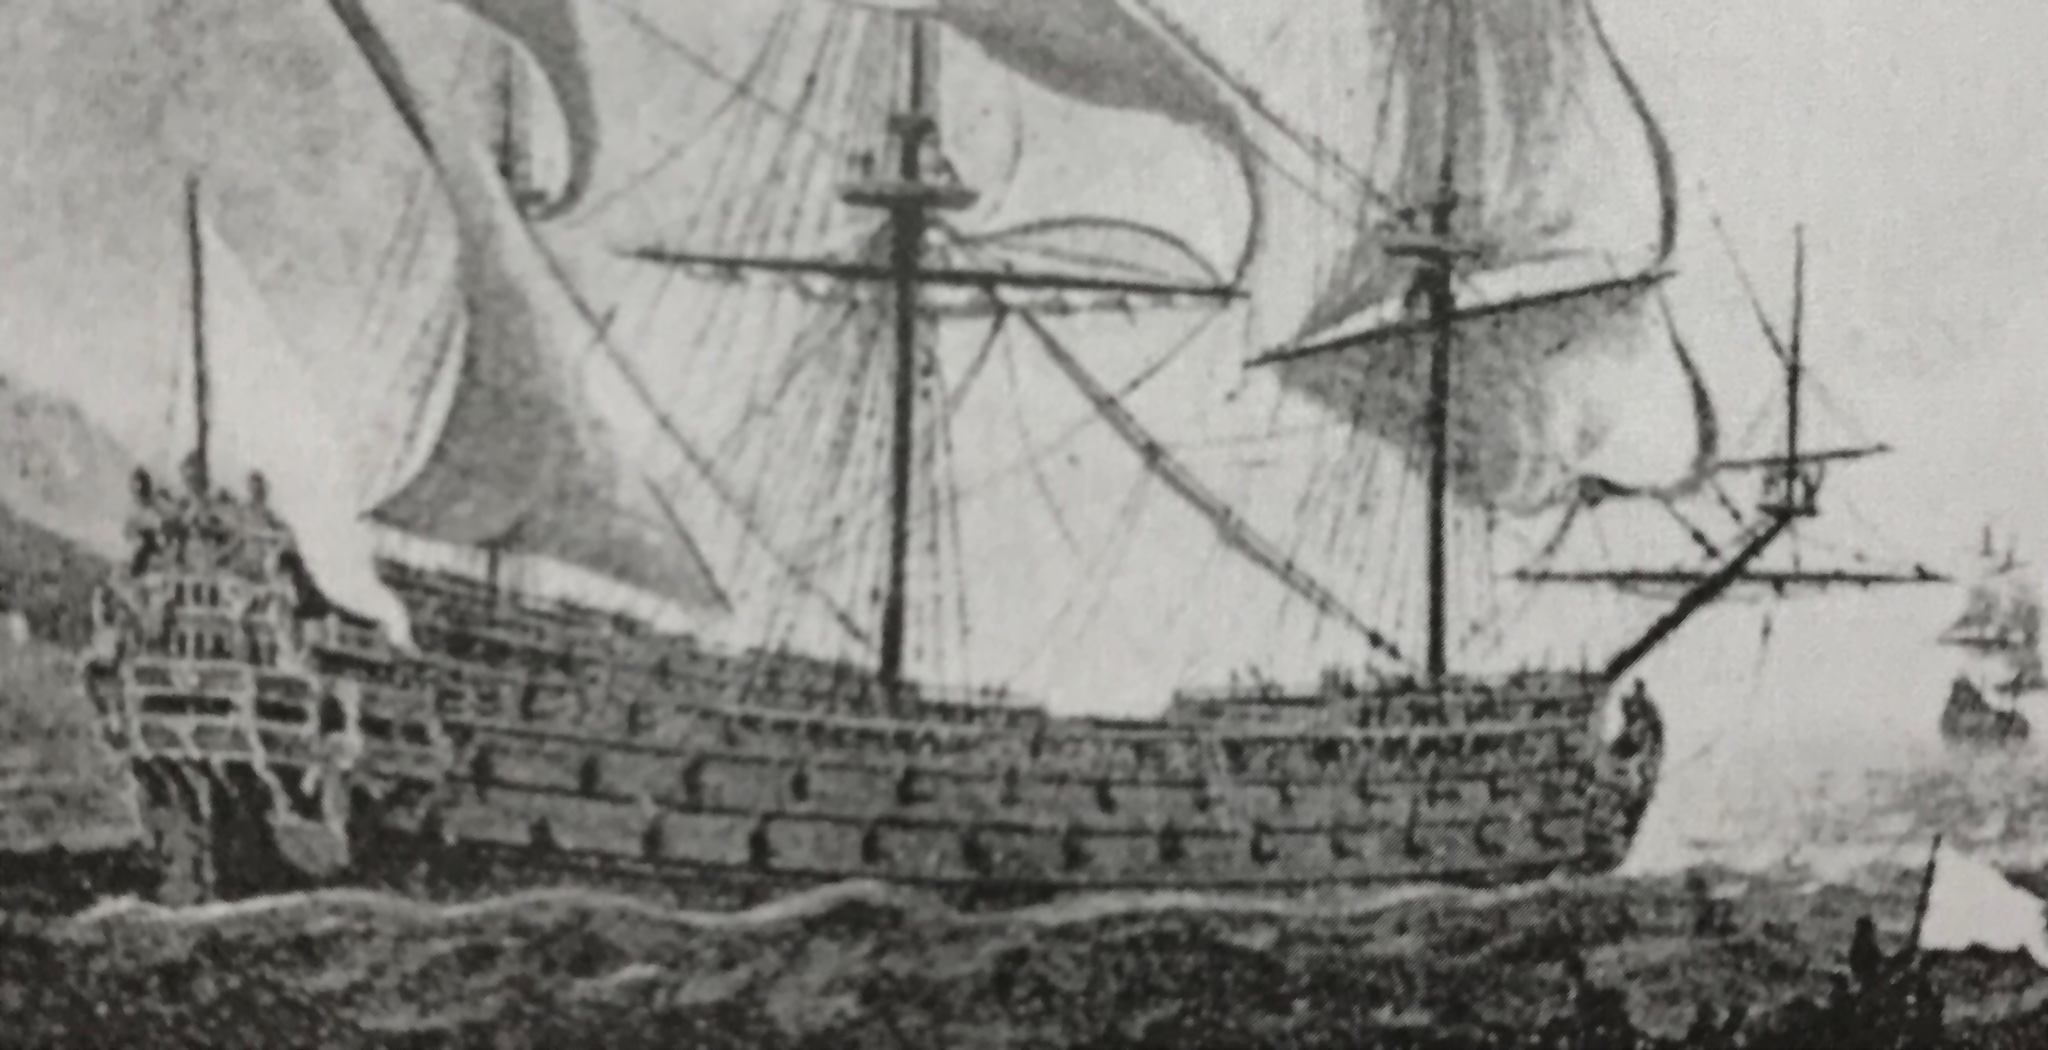
I can appreciate the likelihood that Vasa's launch wasn't stowed on deck because the waist of the ship is not fitted with skids that would have facilitated the lowering of the boat along the ship's side. What puzzles me is what the crew would have done to keep the launch free of water, if it were towed behind the ship, as is often seen in battle portraits; if there's any kind of weather happening, that little boat will fill with water, pretty quickly - especially if rough and pitching seas threatened to capsize this little craft. I wonder how 17th C. crews managed this.
-
As long as it does the job without burning the tape, I can't see why it would be a bad idea.
- Gregory, Canute and thibaultron
-
3
-
-
-
As you should be - the canopy looks really good! Is this the temporary dust shelter that you built to house the model during the masting/rigging stage.
I have to say, this is a very good solution to the problem. At some point my built will grow beyond the plywood build box that I made to house it during construction. Until my son turned out to be extremely allergic, we briefly had a cat, whom I imagined would eventually take up residence on top of the build box, as it is at a nice perching height.
The cat now lives with my sister, but dust is always a problem. I like that the corrugated plastic panels are rigid enough to drape a sheet over the whole thing when you aren’t working on the model.
Every time I see this model, I am tempted to add it to my stash. It is such an elegant and beautiful vessel.
- GrandpaPhil, fmodajr and EJ_L
-
3
-
That rope looks very good, EJ.
- Old Collingwood, EJ_L and md1400cs
-
3
-
-
This is going to be a lovely little boat, and I will gladly follow along.
- druxey, FriedClams, Keith Black and 2 others
-
5
-
Hey Vic! The old adage about loving your work making it feel less like work, definitely applies, here. I am fortunate to have significant chunks of time to home-in and focus, but even incremental progress in the smaller 15-30 minute windows adds up. The truth is, though, that it is hard to sit and work at something like those lattices for much longer than an hour, without a break. I’m driven forward by the gradual materialization of something that I could see quite clearly in my imagination.
- kirill4, EJ_L, GrandpaPhil and 6 others
-
9
-
If it were solid timber, John, they could conceivably laminate several pieces of spruce, for example, as would be done for the figurehead. That assembly could then key into the wales, just as I made for the model, and then be through-bolted into the hull framing, so that the quarter gallery structure, itself, weren’t carrying the weight. This approach would allow complete freedom of form. Maybe though, as you suggest John, it was all light framing and thin plank. I have no idea, really.
Painting of the stern continues at a snail’s pace. It is all crisply done, though, so the time is well spent.
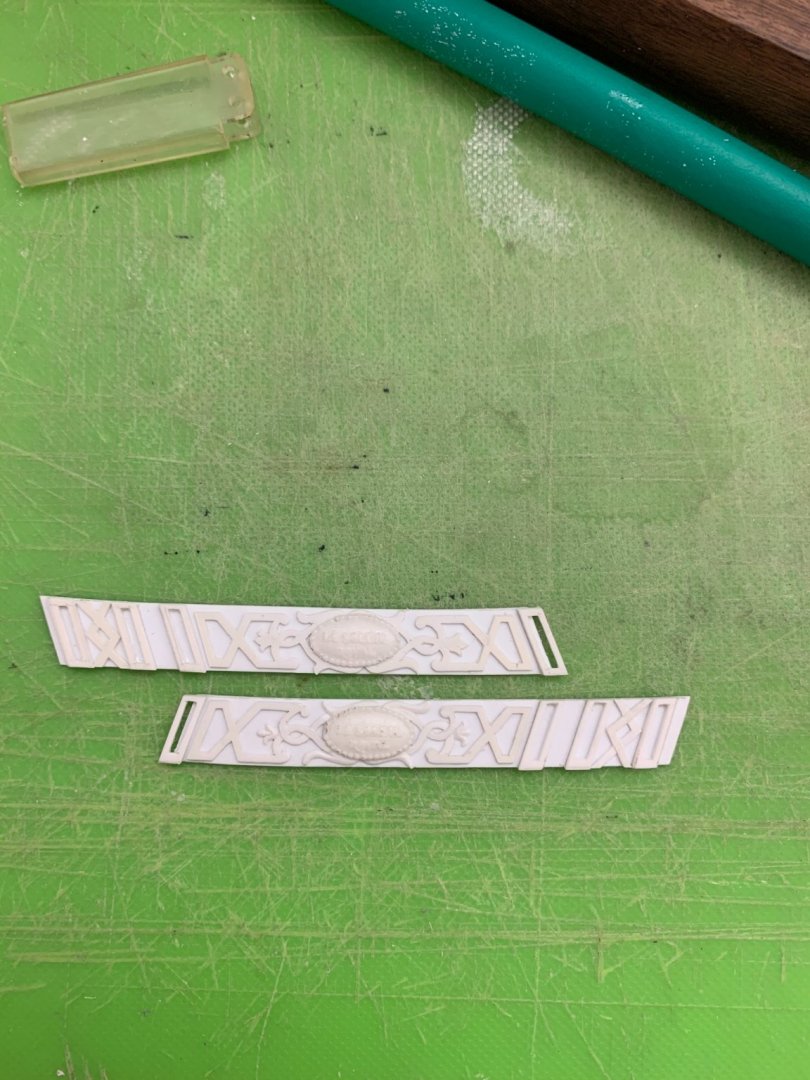
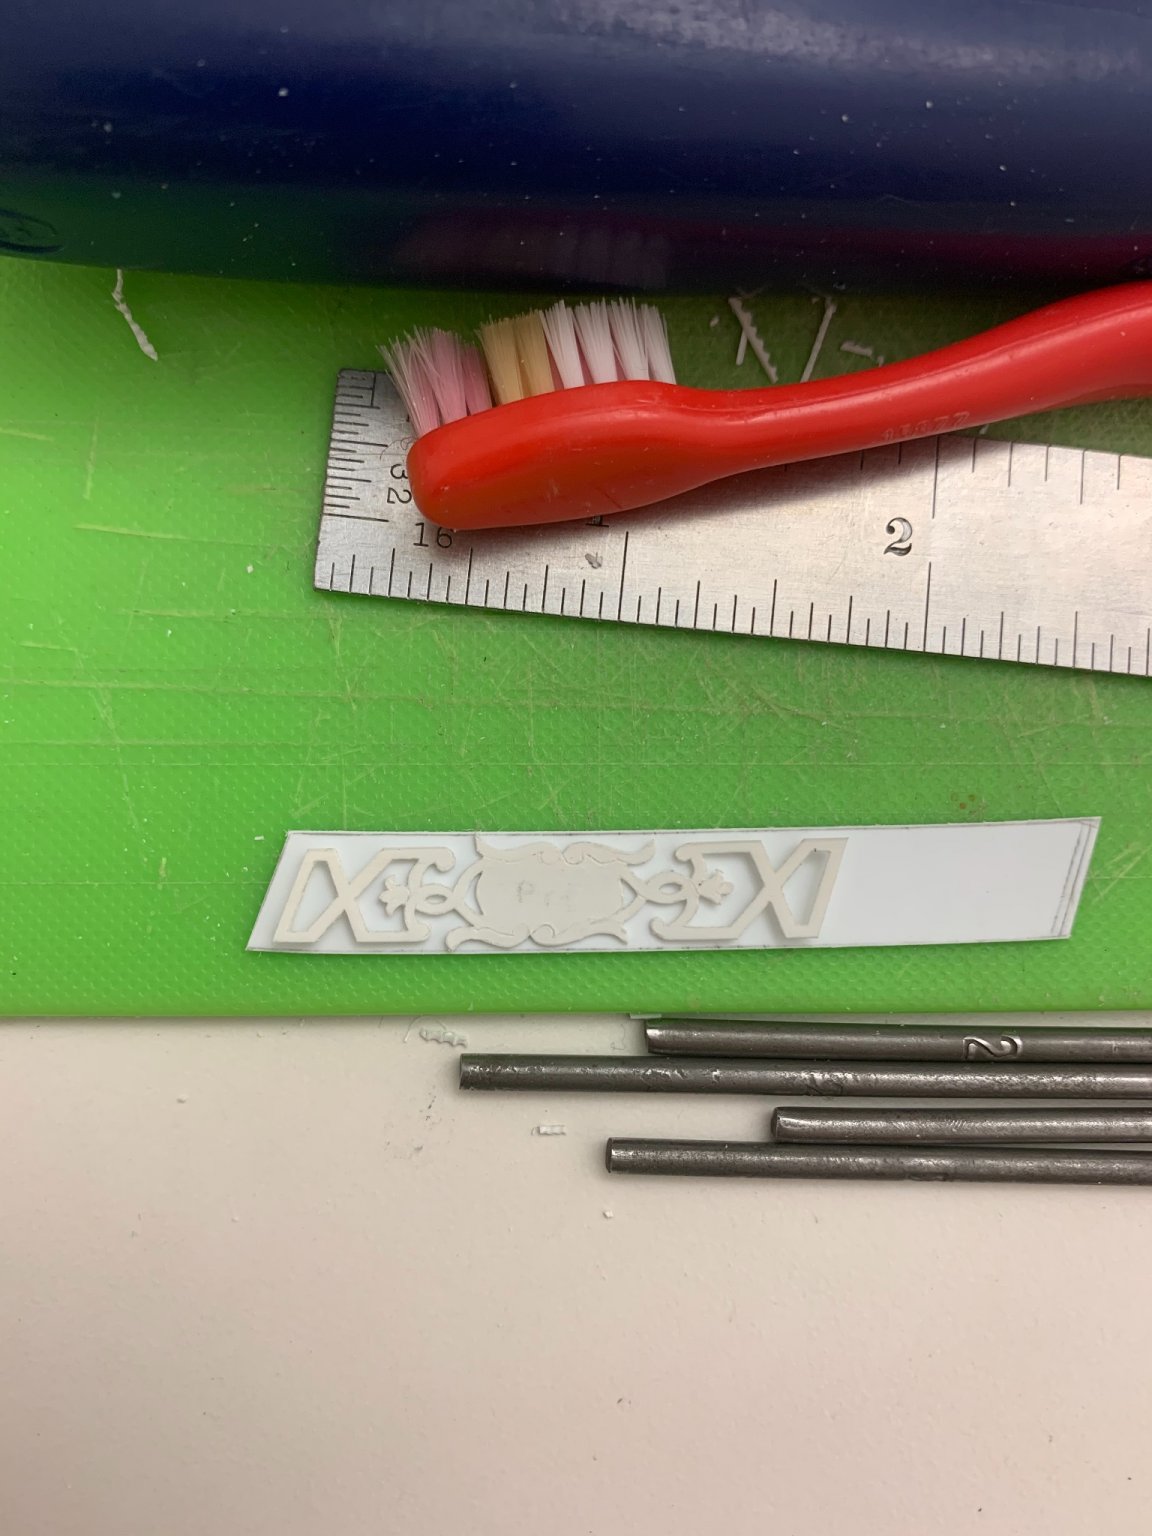
I’ve been making the port and starboard gallery bulwark lattices. My technique has improved since the making of the trailboard, so I am no longer breaking these delicate lattice pieces as I go.
Rather than mostly trying to file these delicate pieces into shape - which fatigues the plastic in the narrowest sections of the design - I have learned to pare to my lines with a razor sharpe no. 11 blade. I’ve also learned my lesson about how to scribe part blanks for the bulwarks around an angled, curving surface:
The trick to this sort of multi-level relief is to use styrene sheet of varying thickness. The bulwark uprights are cut from .030 sheet, while the lattice relief is .020.

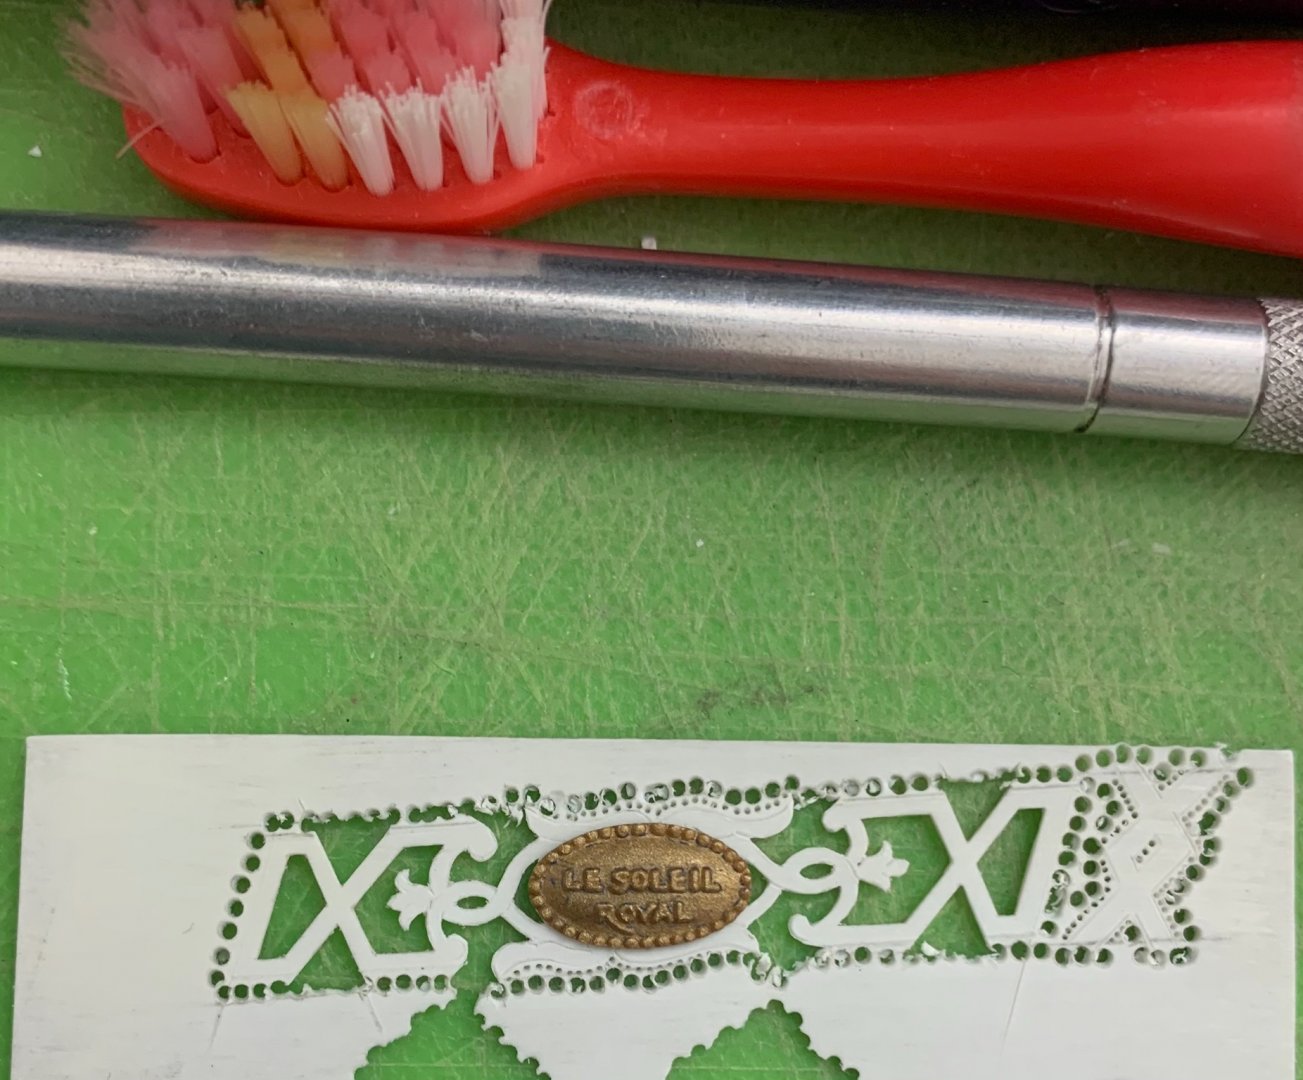
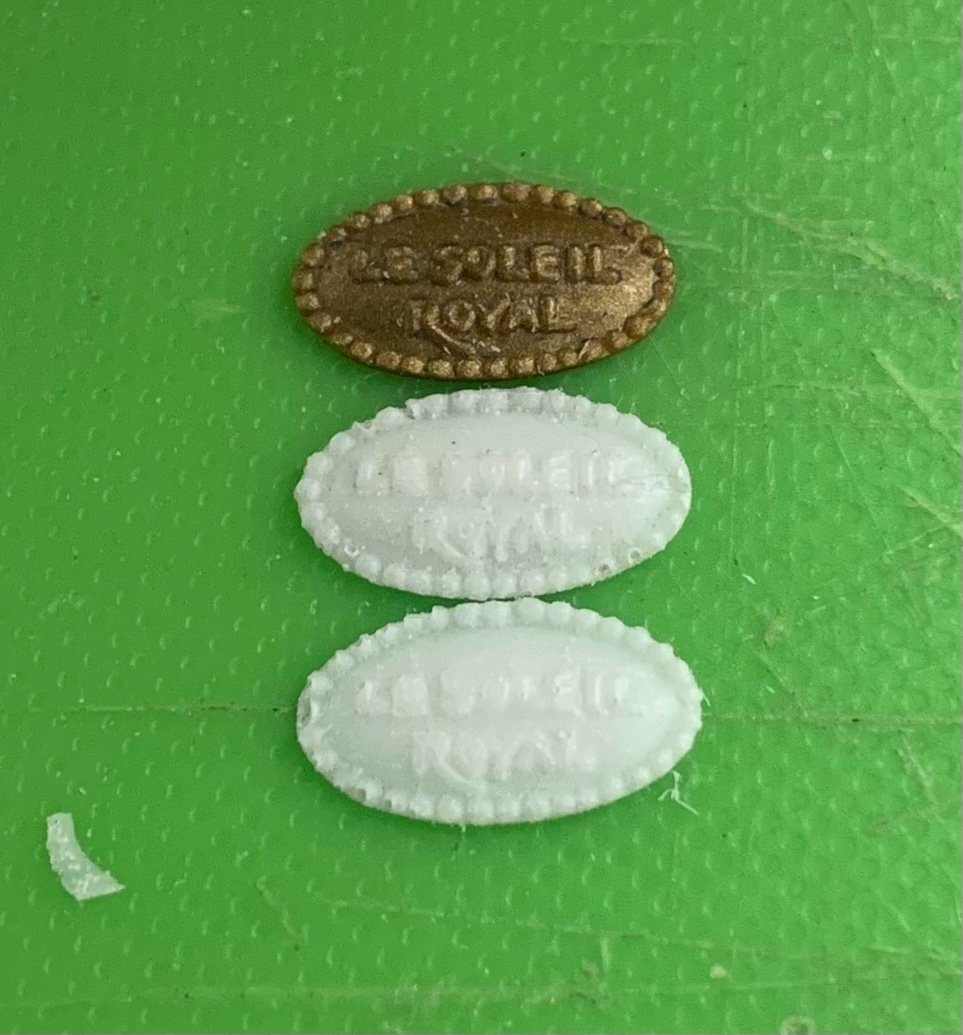
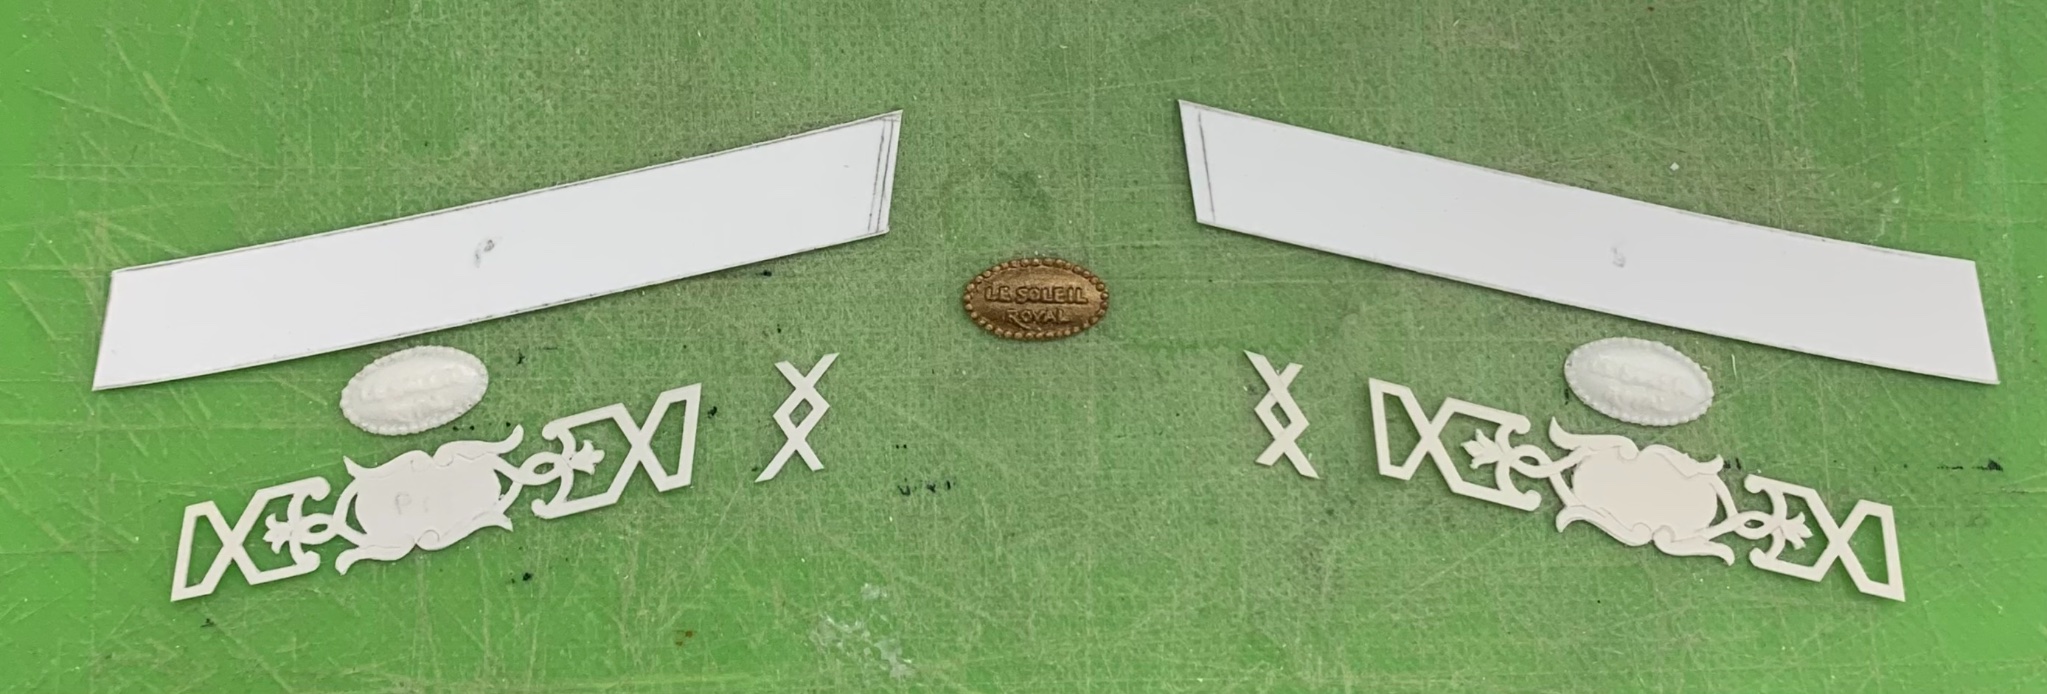
From the stock middle balcony rail, I extracted the ship name plate
I will have to offer the bulwark blank up to its place on the QG, so that I can mark out the exact pilaster locations from the level below. Then, I can glue the lattice to the bulwark, and secure the pilasters and the diamond lattice detail. The pilasters will be cut from .030 sheet, and will sit just a little proud of the lattice, thus creating the desired depth effect.

I made rubber moulds of the nameplate, so that I could duplicate it and have the name on both the stern and quarters.
There is a significant investment in time just to get to this:

I will also surface mount smaller resin scroll ornaments around the name plates, as well as diamond flower ornaments to the lattice.
In other musings, I have been in contact with Mr. Portanier. He has been helpful in sharing several of his sources. Among those were several key articles from the French nautical journal Neptunia, published by Les Amis Des Musees de la Marine.
In a separate posting, site members directed me to the following resources for finding back issues:
https://www.aamm.fr/neptunia/recherche_articles
The above links to an index of every issue and article that Neptunia has ever published. The index spans 75 years and over 300 issues. I am indebted to all of you who have been so helpful to me and this project.
A listing of issues in print that are available for sale can be found here:
https://boutique.aamm.fr/neptunia
In going through the index, I discovered around 25 articles that are specific to my time period and/or subject. A number of additional articles, based on the abstract description, seem like they may he helpful. For 5 euros, per older issue, that seems well worth the gamble.
A number of issues that I would really like to have, like a multi-part series by Bernard Frolich on the development of his model of L’Ambiteaux, are currently unavailable in print. Courtesy of Mr. Francis Graviou, I can contact the site administrator to see about obtaining those issues digitally, perhaps:
contact@aamm.fr
I think, perhaps, the greatest value of a substantial piece of research, like Mr. Portanier’s dissertation, is where else it may lead you to keep searching for answers. His cited works are extensive, and I can assure you that there is often great value in the reading of footnotes.
I may never find the portrait of my gilded ghost ship:
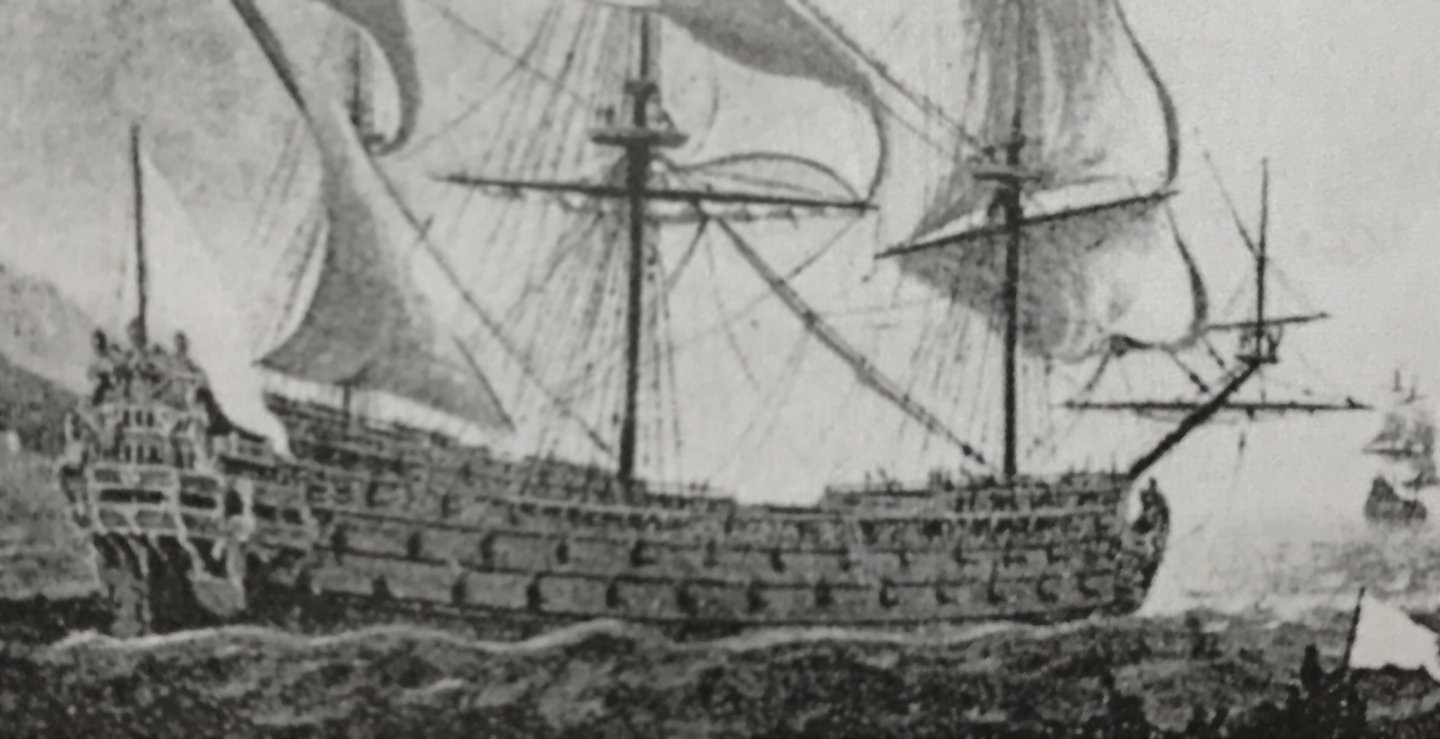
But I do, now, know where to look for the following:

Now, I merely need to figure out how to contact the national archives and obtain a copy of these documents.
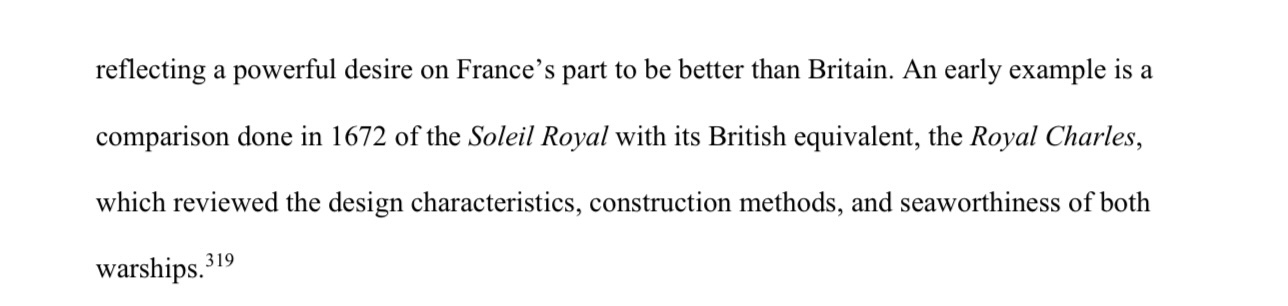
I am not expecting the expansive detail that Hyatt provides in his description of the RL, but it would be reasonable to expect to glean some key information about Soleil Royal’s original structure and appearance. That could go a long way toward fleshing out a portrait of her appearance between the years 1670 and 1685.
I also stumbled across this:
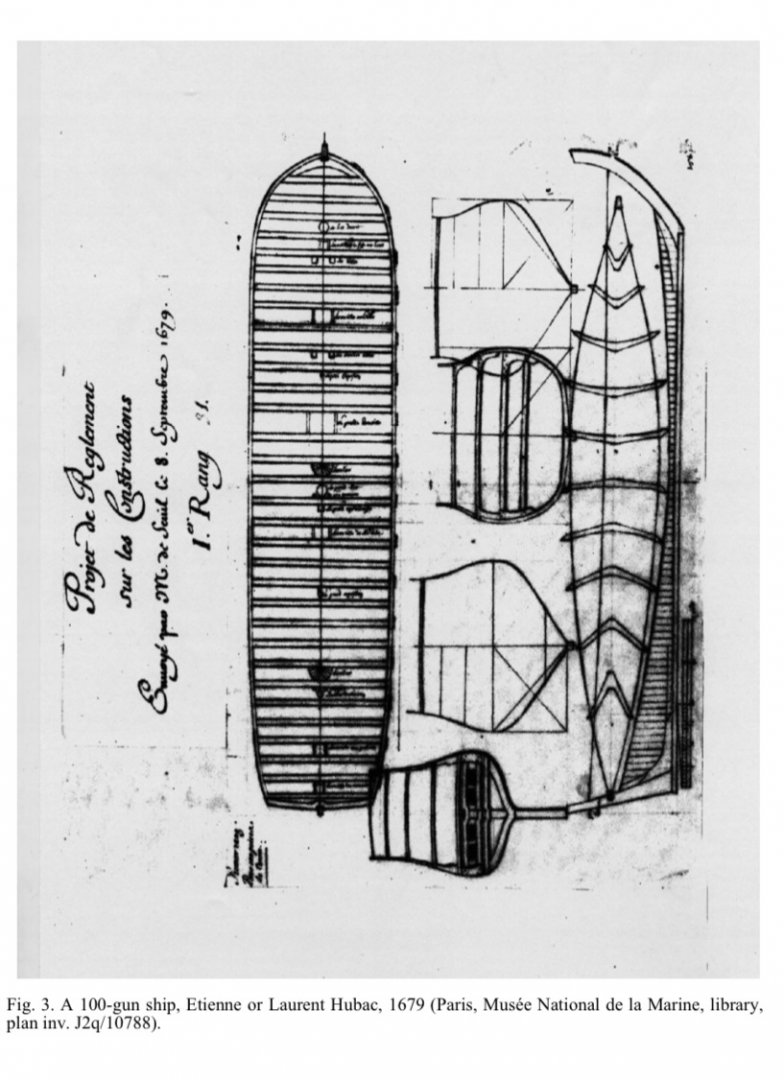
From a time when the lead architects like Laurent Hubac were being continually nudged by Colbert’s administration to conform to a codified prescription of dimensions, this I would say, is a pretty good insight into the design modality of, perhaps, the most intractable of the arsenal shipwrights. Laurent Hubac liked a broad-beamed ship, and that is exactly what this drawing indicates.
Also, if one makes a very close examination of the starboard side of this drawing, they will discover a series of regularly spaced hash marks. This drawing is of the broadest, lower main battery deck. I believe that these hash marks represent port piercings. There are 15 broadside hashmarks, with what appears to be one more “hunting” port hash mark, near the hawse entry. In other words, something very like this closeup of La Reine’s port bow:
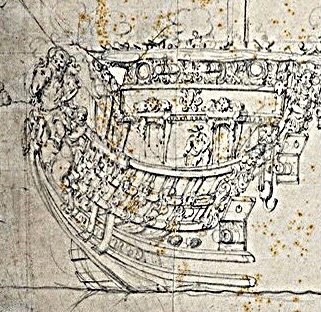
photo, courtesy of Chapman
There were only two Hubac-built ships, that I know off, that were pierced for 16; La Reine and Soleil Royal. Very interesting, indeed!
As always, stay well, and more is to follow...
-
-
-
Closer examination of the oil portrait also seems, albeit vaguely, to show this vertical plank detail.
-
It is remarkable how much life has changed since the Pandemic began. Going forward, I’m sure life in American cities will be different in ways great and small. As crazy as it all has been, I’m very happy to still be healthy and working, and that my family has also been as lucky.
Well, I look forward to this project of yours. The Charles Galley is such an interesting subject. That is a curious detail in the VDV drawing, re: the apparently un-planked framing. Perhaps the drawing shows the end stages of a refit in-process?
- Keith Black and mtaylor
-
2
-
-
Well, I'm 2for2 2night; first Matiz's 74, and now this! Allan, I'm happy to have caught this in the early stages. I'm really looking forward to seeing your journey on this one.
- mtaylor, druxey and Keith Black
-
3


Soleil Royal by Hubac's Historian - Heller - An Extensive Modification and Partial Scratch-Build
in - Kit build logs for subjects built from 1501 - 1750
Posted · Edited by Hubac's Historian
Thank you, John!
Short update; two fitted and two to go:
This has been a little bit of a guessing game. I had to add significantly more new plastic to the bases of the two middle figures (Spring and Summer) because of the more pronounced arching back posture that the extra overhang of the balcony necessitated; I literally had to stretch these figures to their max.
Some careful filing of the base angles aligned the figures with the inboard pitch of the window pilasters. After establishing the base angle/joint, it was necessary to add back some plastic to the top mounting surfaces, in order to make a good plastic to plastic bond. I promise that painting of these figures will be interesting, and I will be taking cues from this portrait:
As is intrinsic to this kind of reverse-engineering kit-bash, it is impossible to truly capture the original; the figures obscure more of the windows than I would like, but this is an acceptable compromise.
I always appreciate your support, your likes, kind compliments, and even your criticisms. Enjoy the weekend!