


drobinson02199
-
Posts
917 -
Joined
-
Last visited
Content Type
Profiles
Forums
Gallery
Events
Posts posted by drobinson02199
-
-
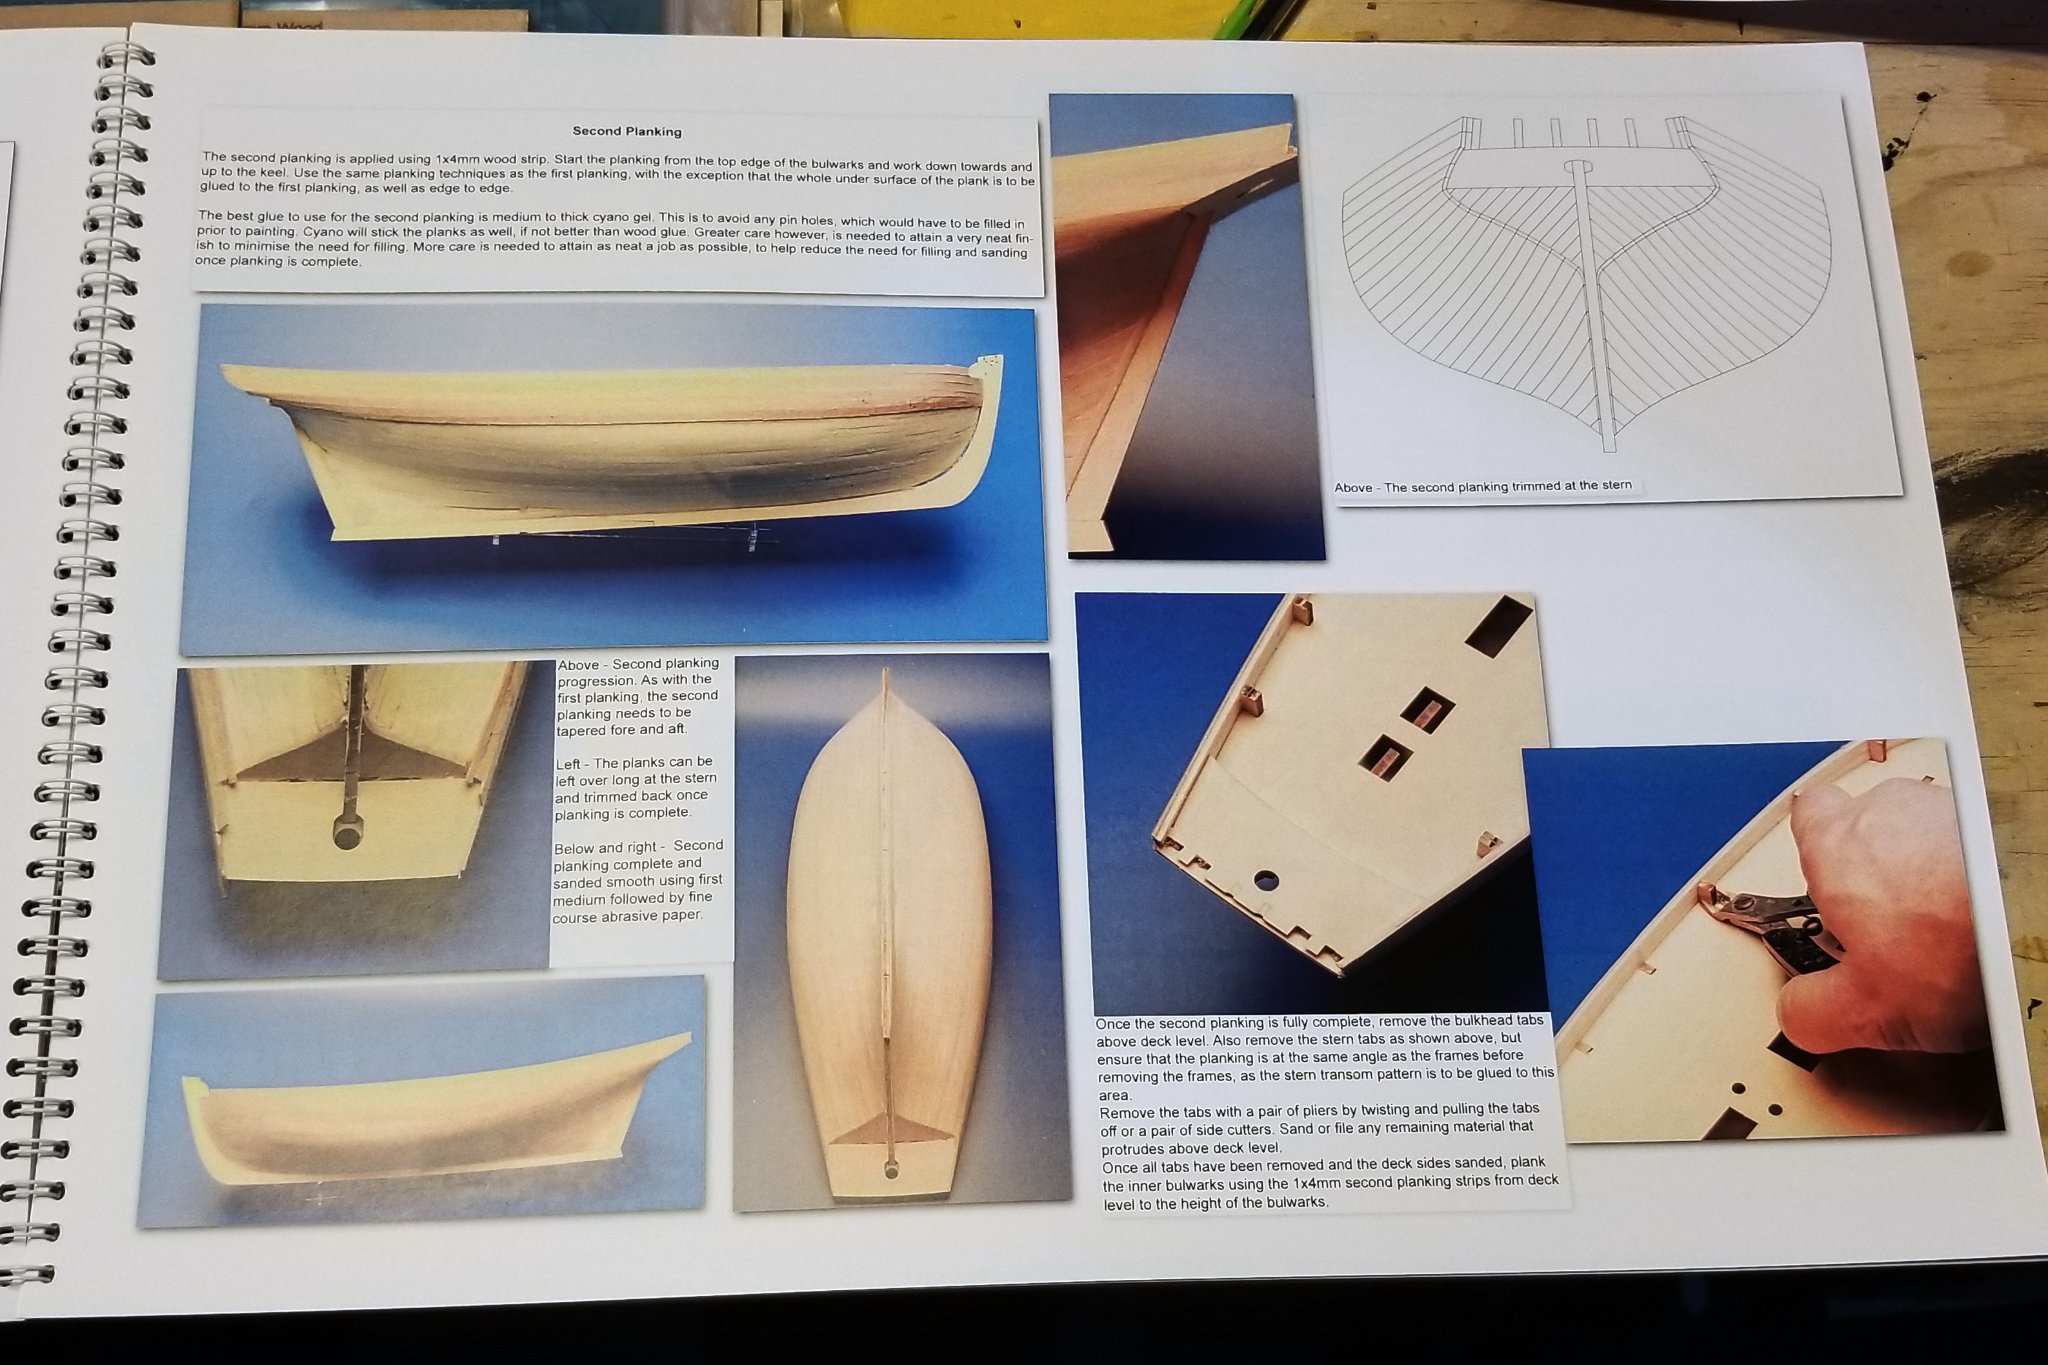
Finished planking and painting the inside bulwarks. The manual calls for the 1x4 second planking strips for the inside bulwark planking, which I used, but for the short piece across the rear I used a 1x5 first planking strip, because the strip width fits better.
Regards,
David

- bruce d and Edwardkenway
-
 2
2
-
Flavia:
I left the deck natural and just used clear satin polyurethane varnish.
It's a great kit. Enjoy it!
Regards,
David
-
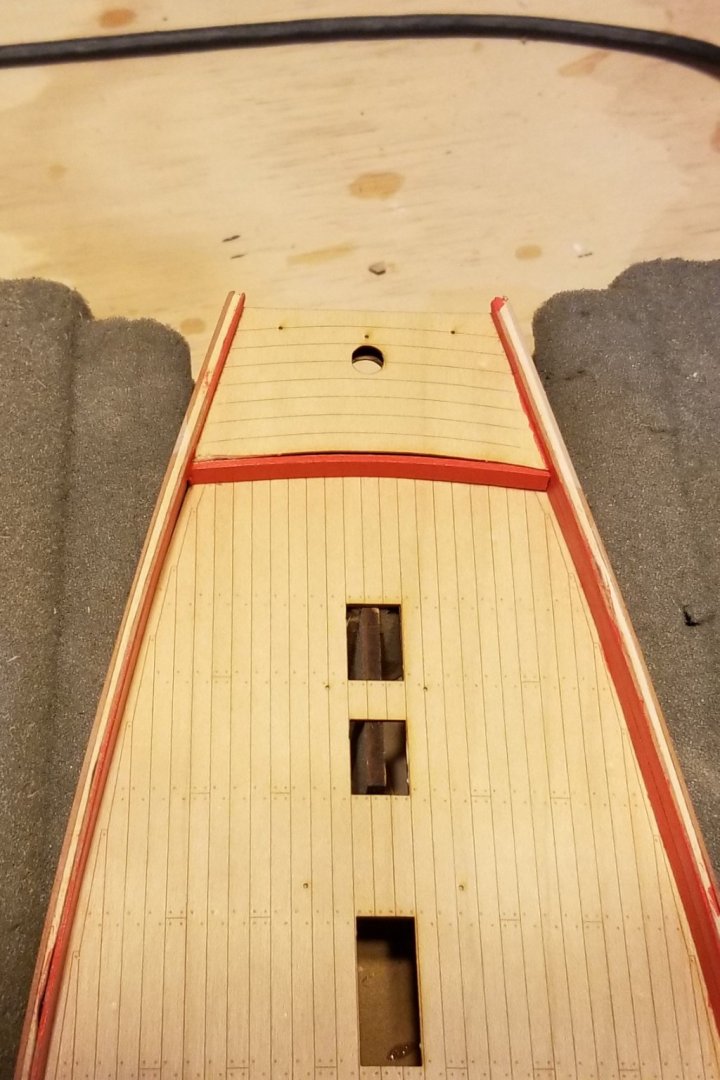
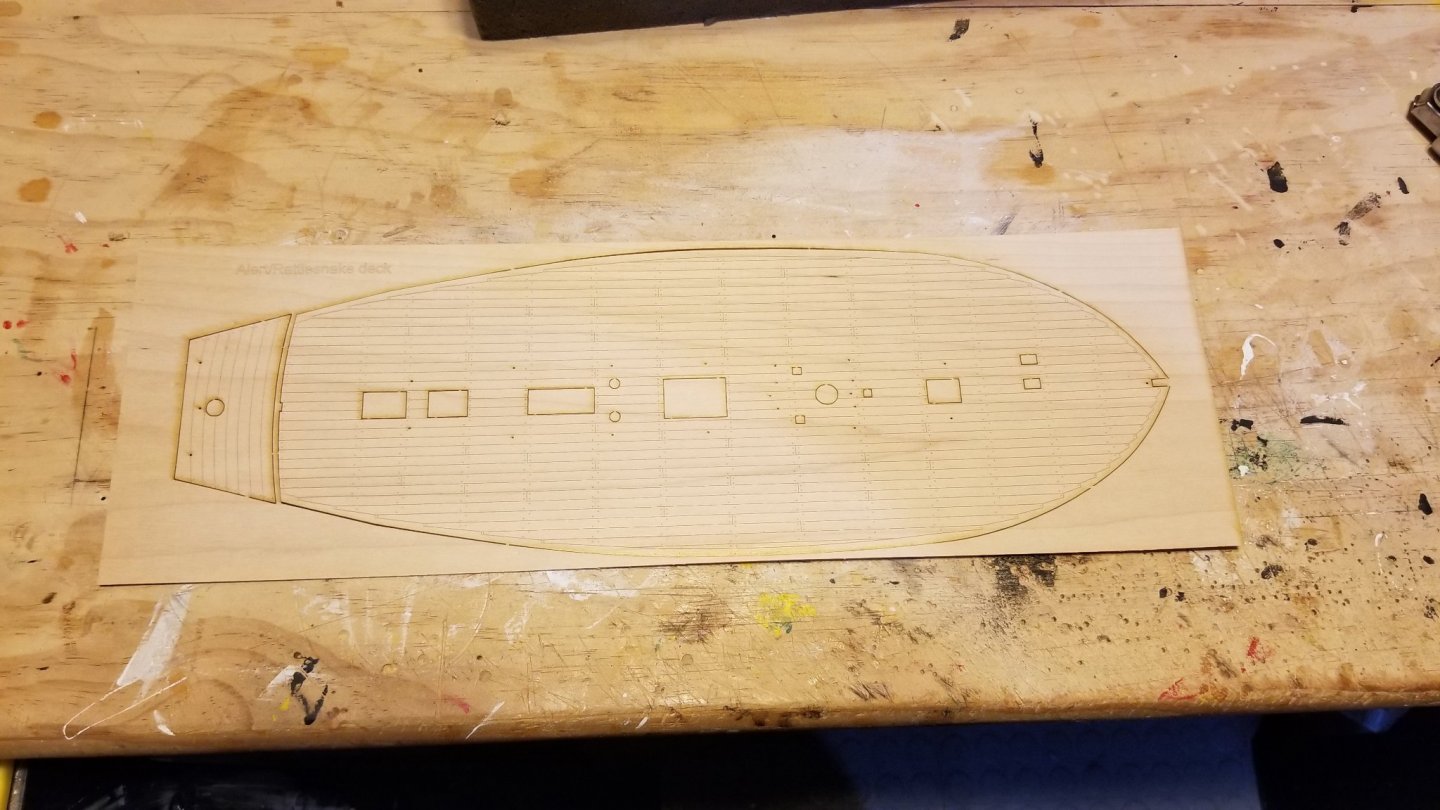
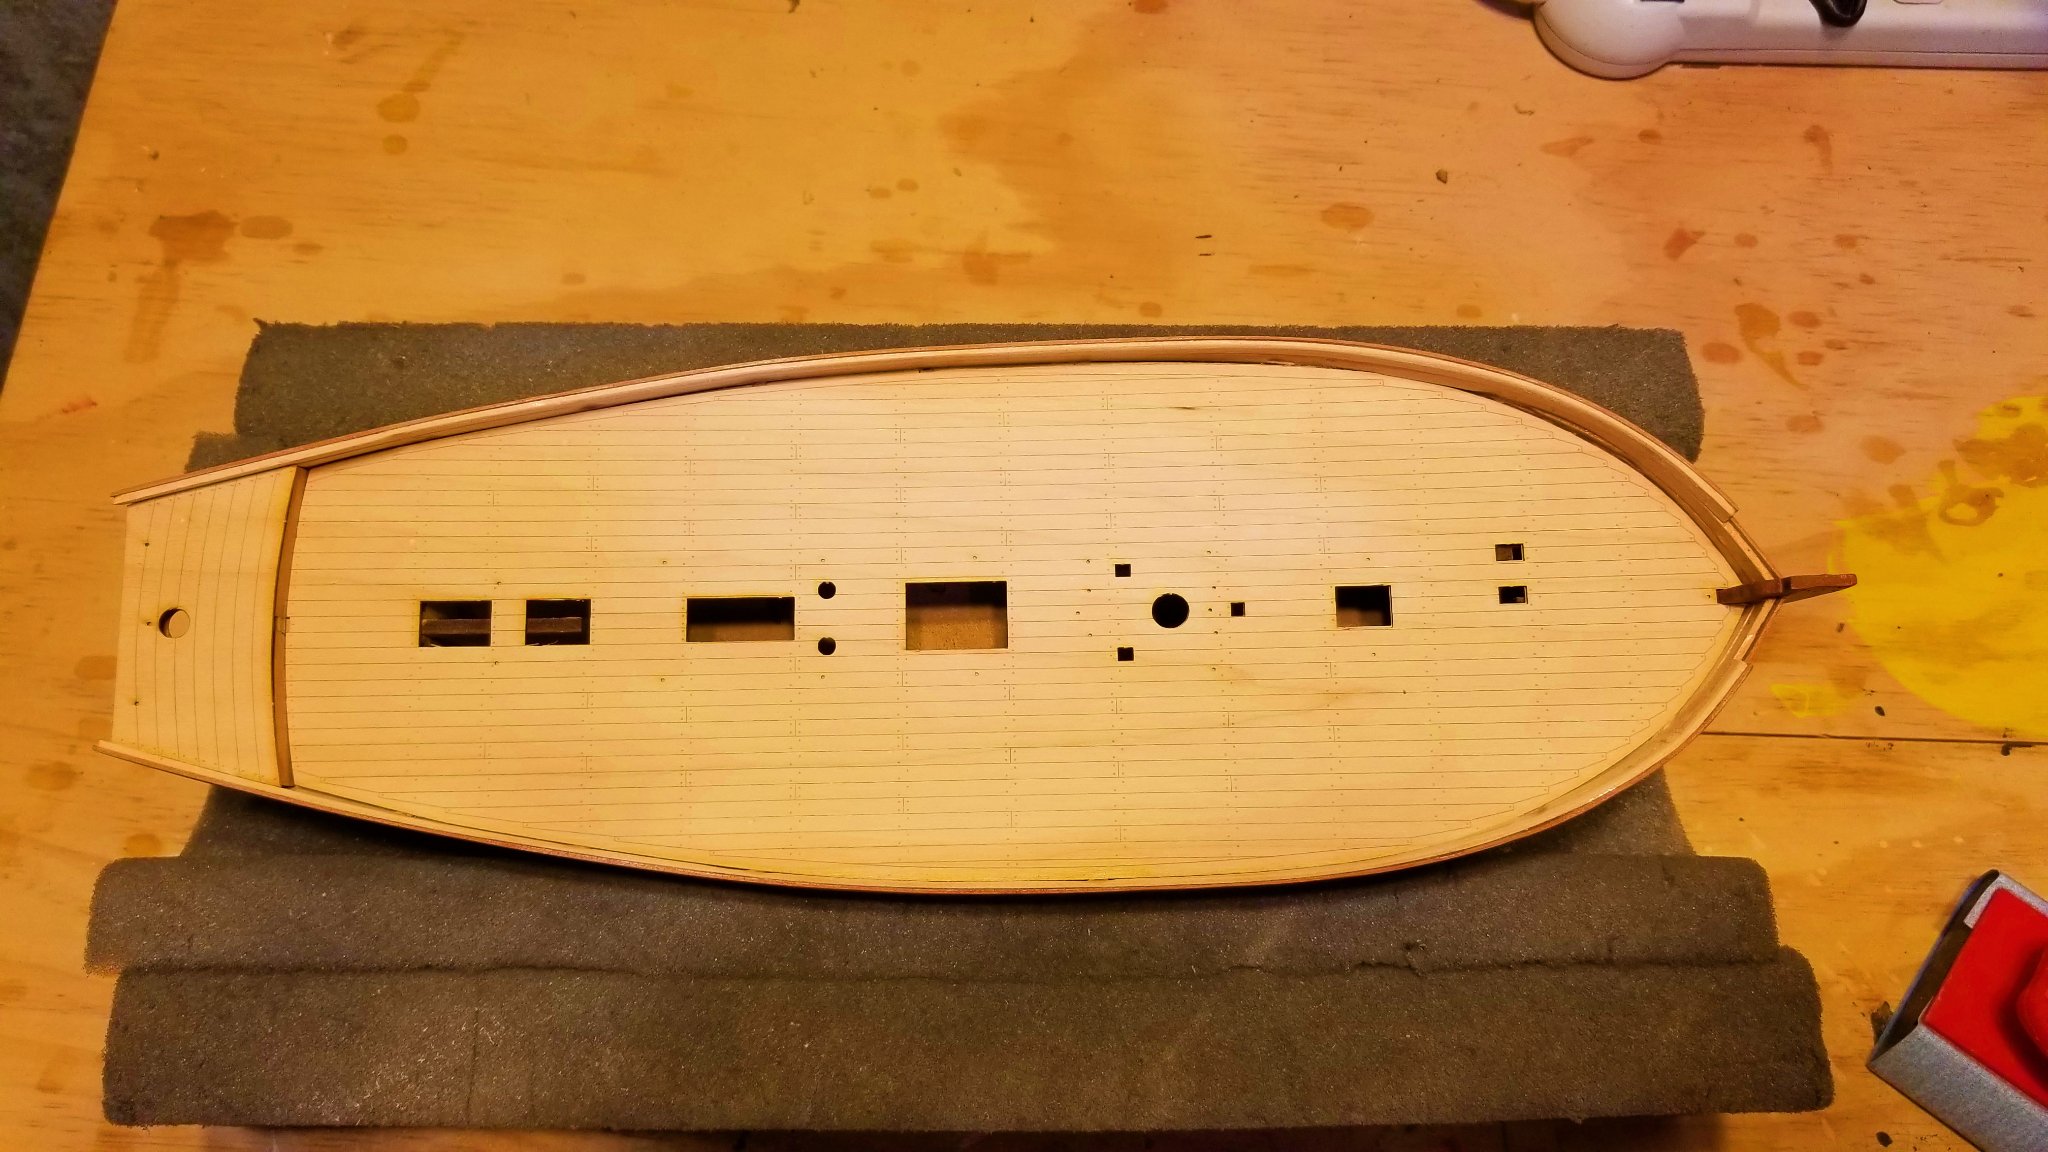
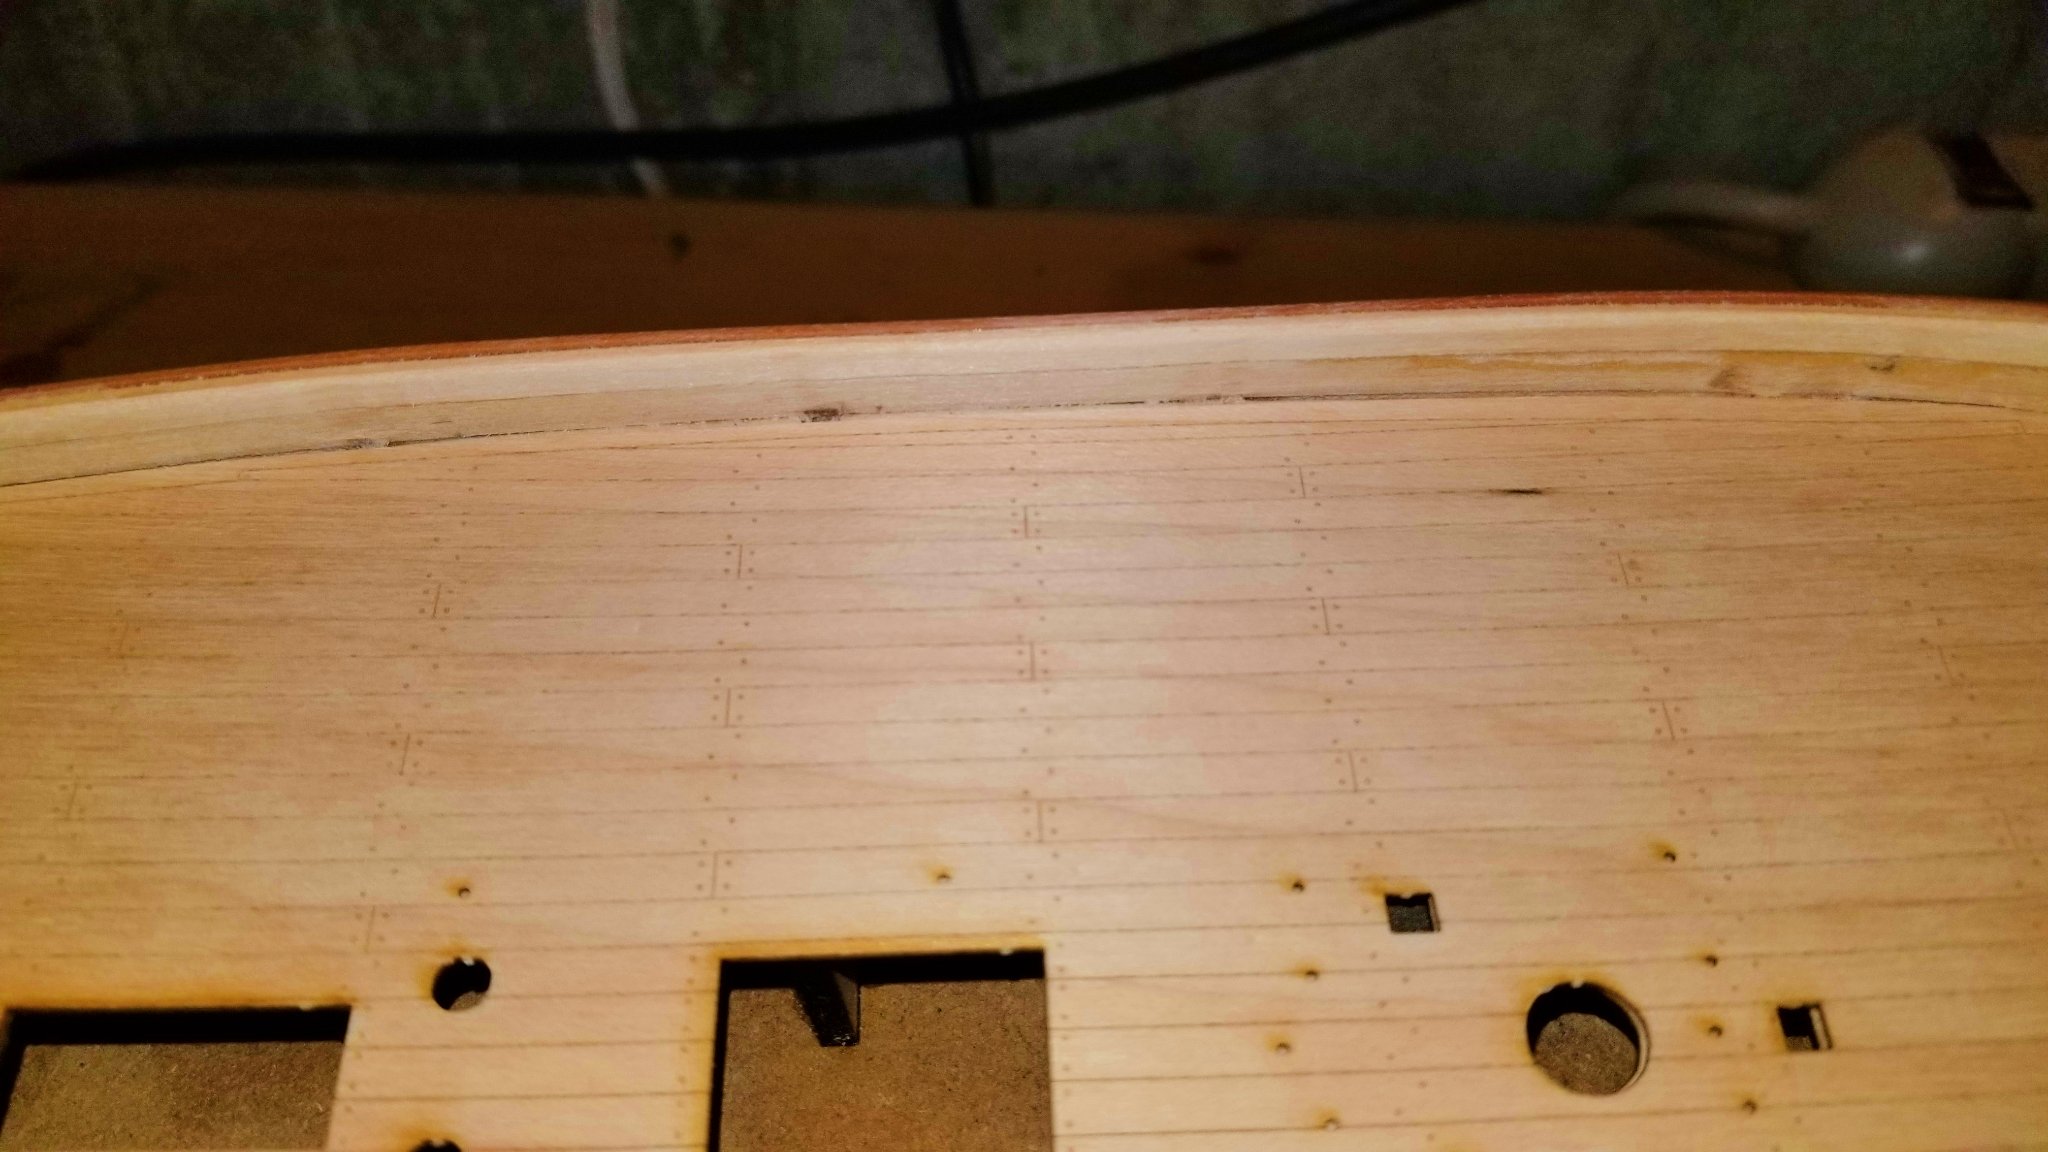
One option when you buy this model is to get a pre-etched deck (so you don't have to plank it), and I took that.
In the photos, you can see the deck on the laser-cut sheet, and then mounted on the ship.
The manual reads as if you are planking the deck, and it has the side bulwarks planked before deck planking, and then painted red after. When you use the pre-etched deck you really need to plank the bulwarks after you mount it. So you can see that at this point they aren't planked yet.
Further, if I paint the side bulwarks after I plank them, I'll need to do a lot of careful masking around a curved bulwark (this is how the manual reads), but what I think I'll do instead is pre-paint the lower planks that run along the deck, which will give a nice finish and obviate the masking.


- VTHokiEE, Rik Thistle and bruce d
-
3
-
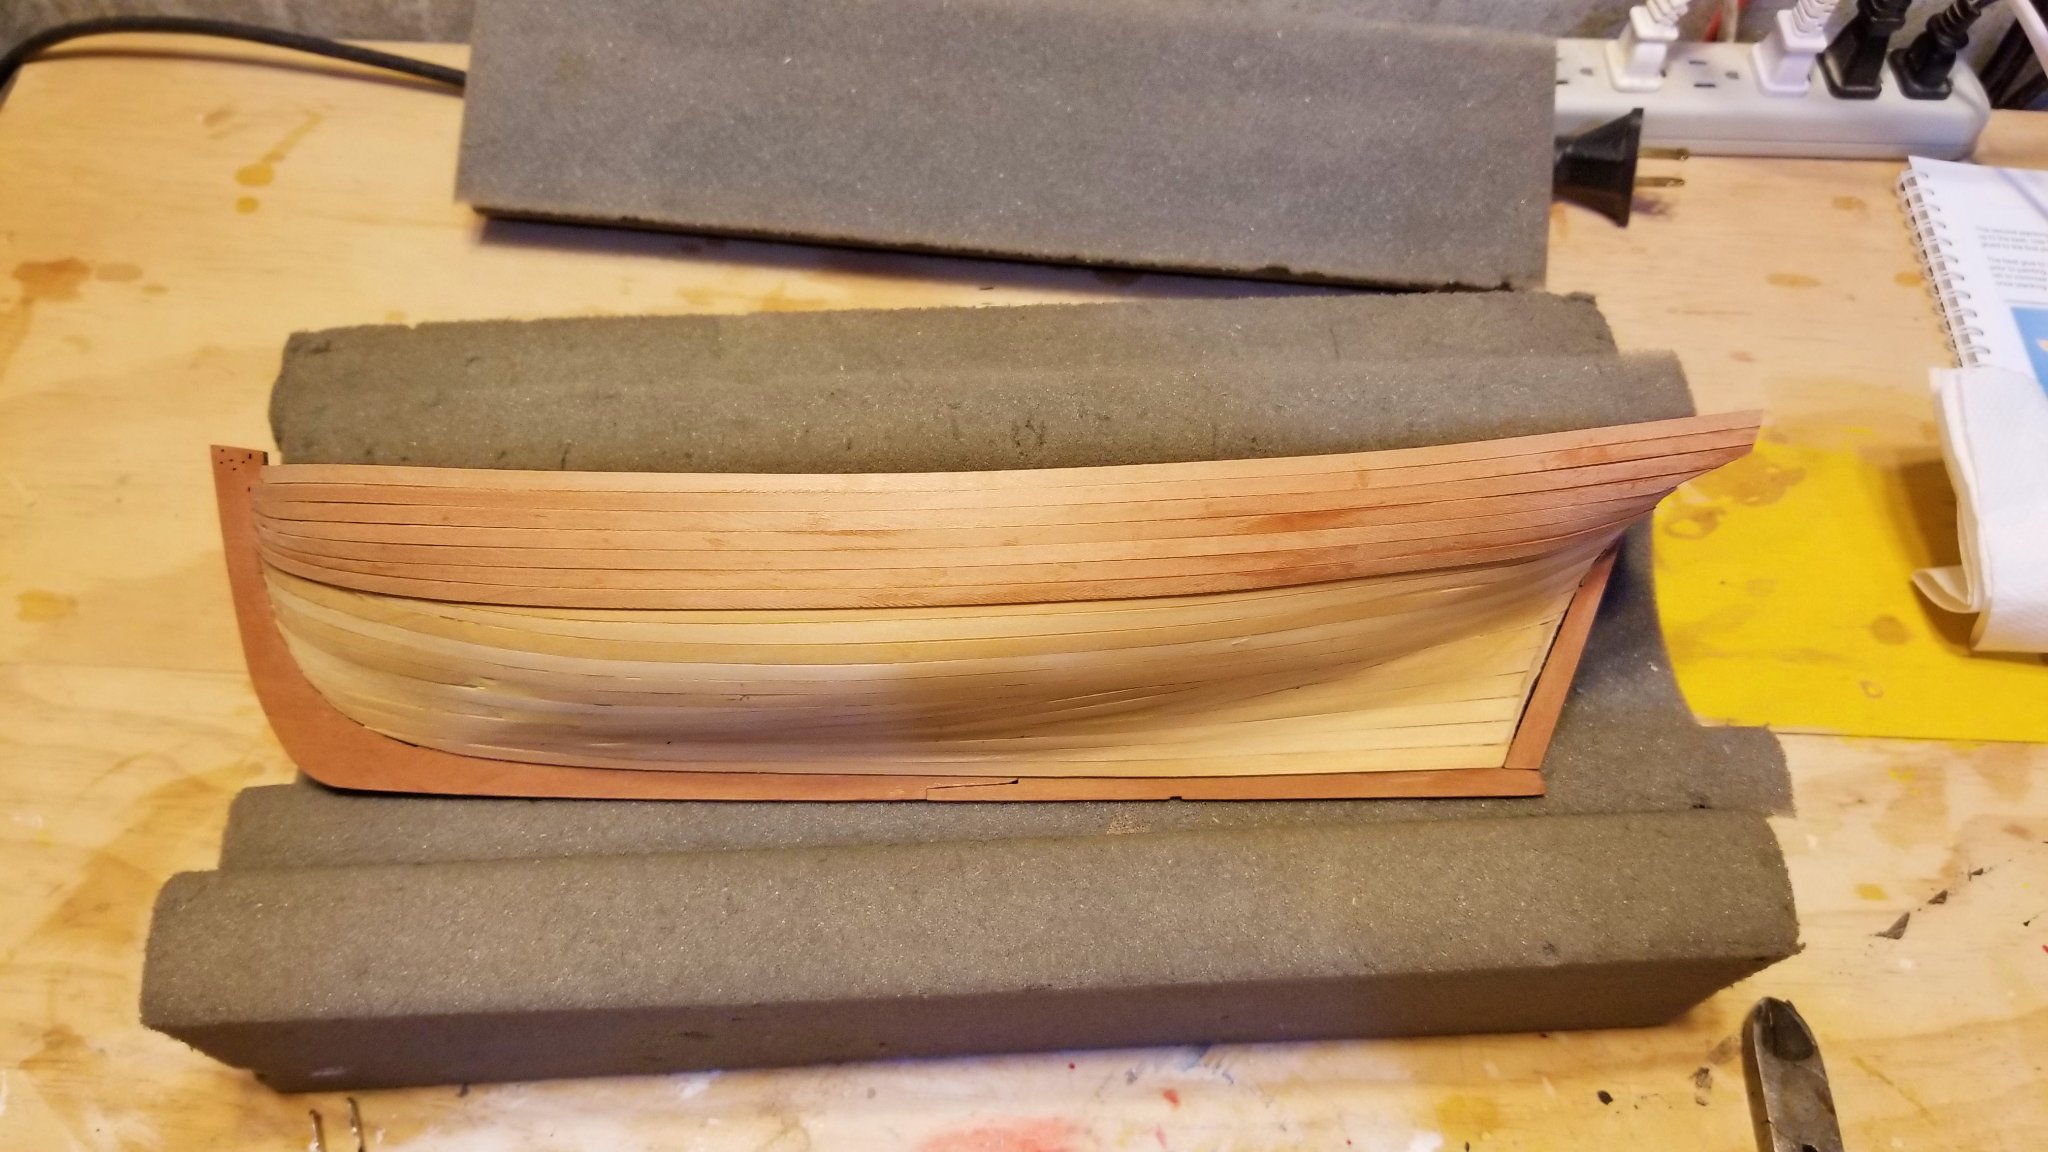
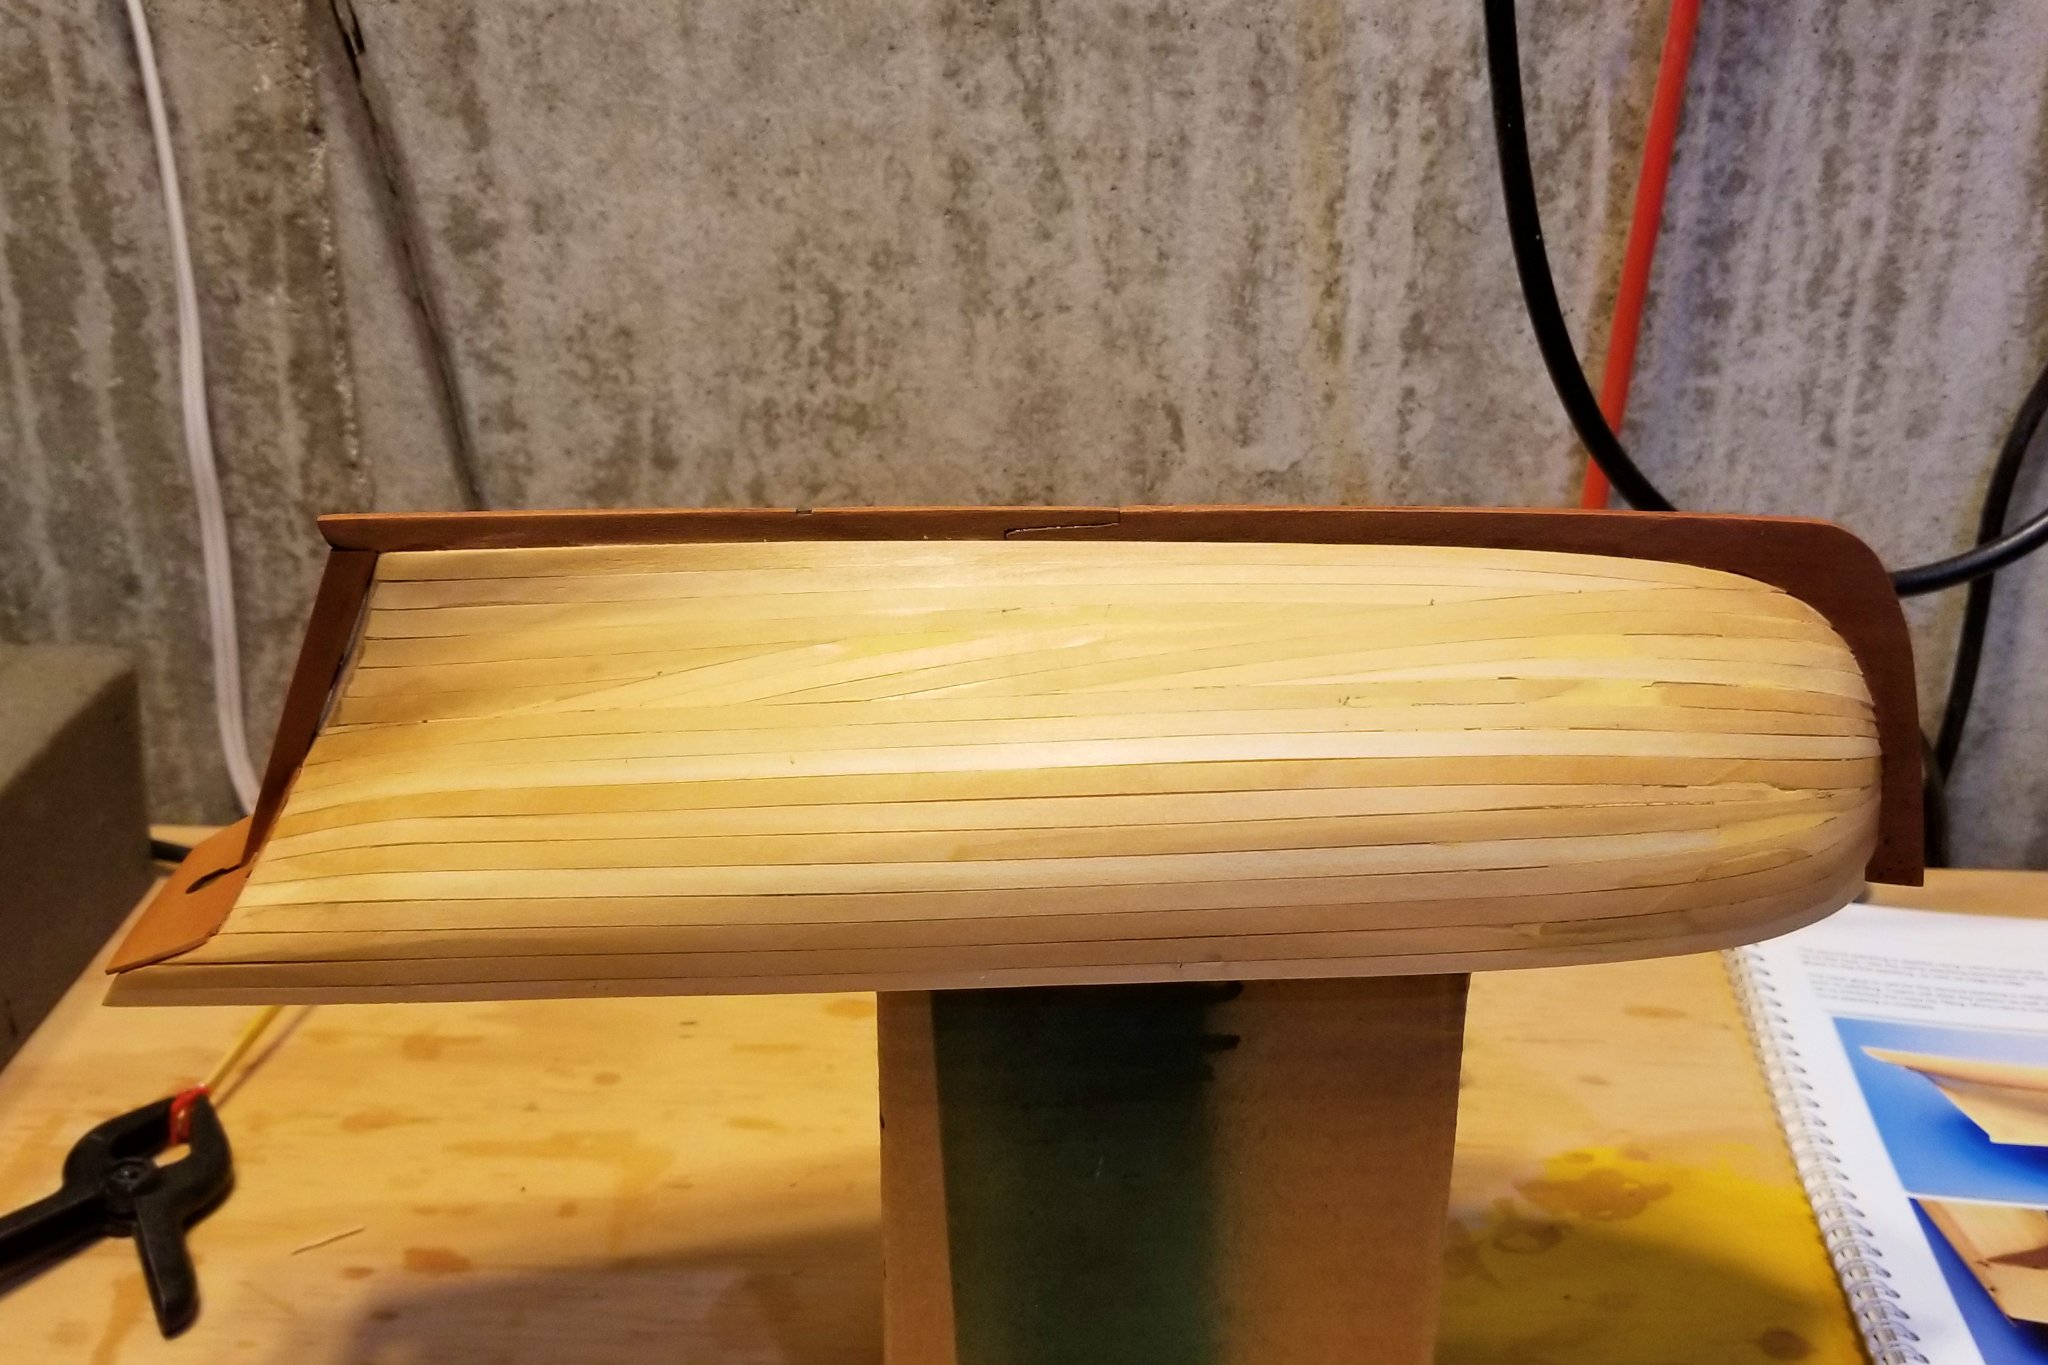
Second planking done, sanded and first coat of varnish applied. The pear wood Chris Watton used on this ship reminds me of the Tanganyika wood he used on the Revenge.
Regards,
David


- bruce d, DPhilbrick and Edwardkenway
-
3
-
Started on the second planking. The pear wood for that installs very easily and lies flat.
Regards,
David
- bruce d and Edwardkenway
-
2
-
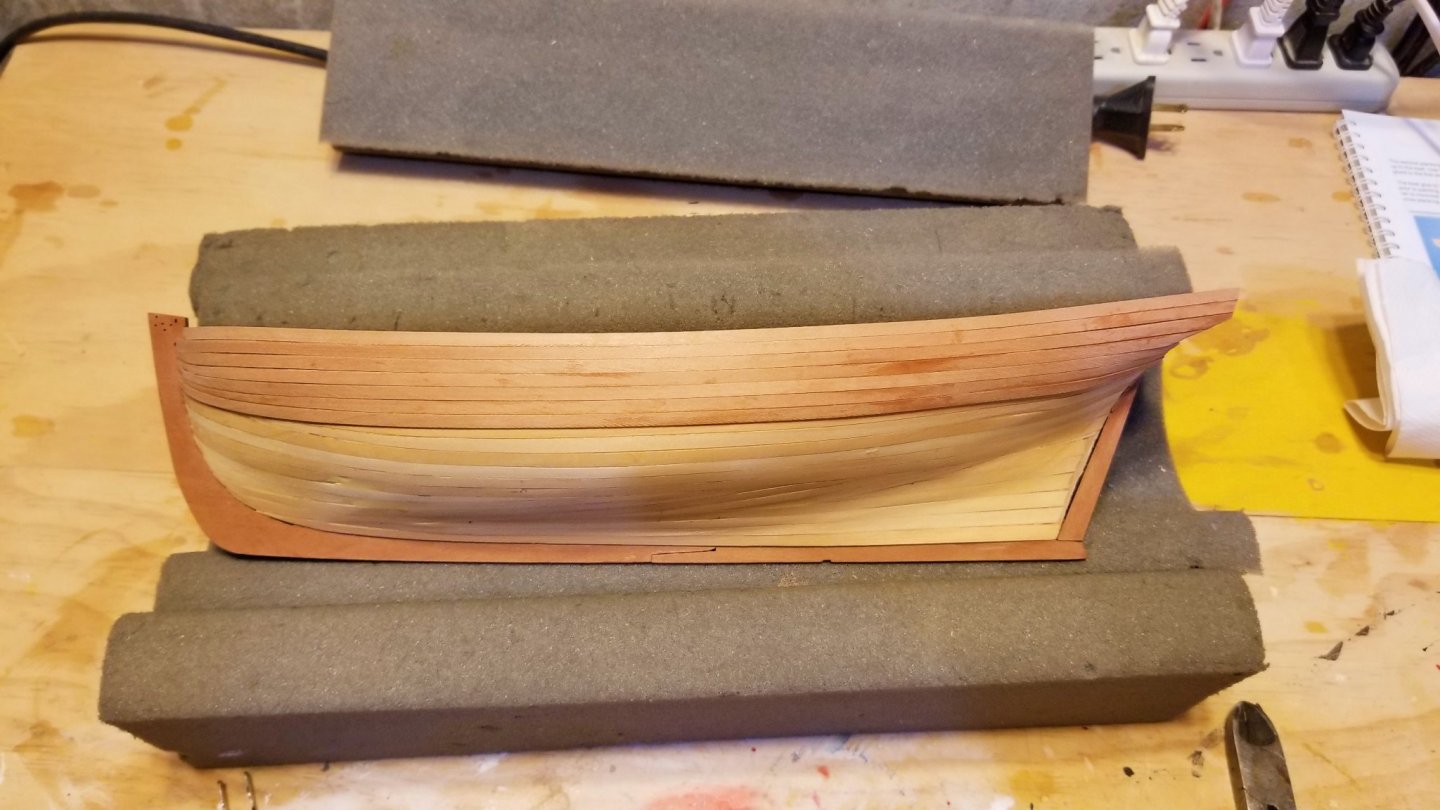
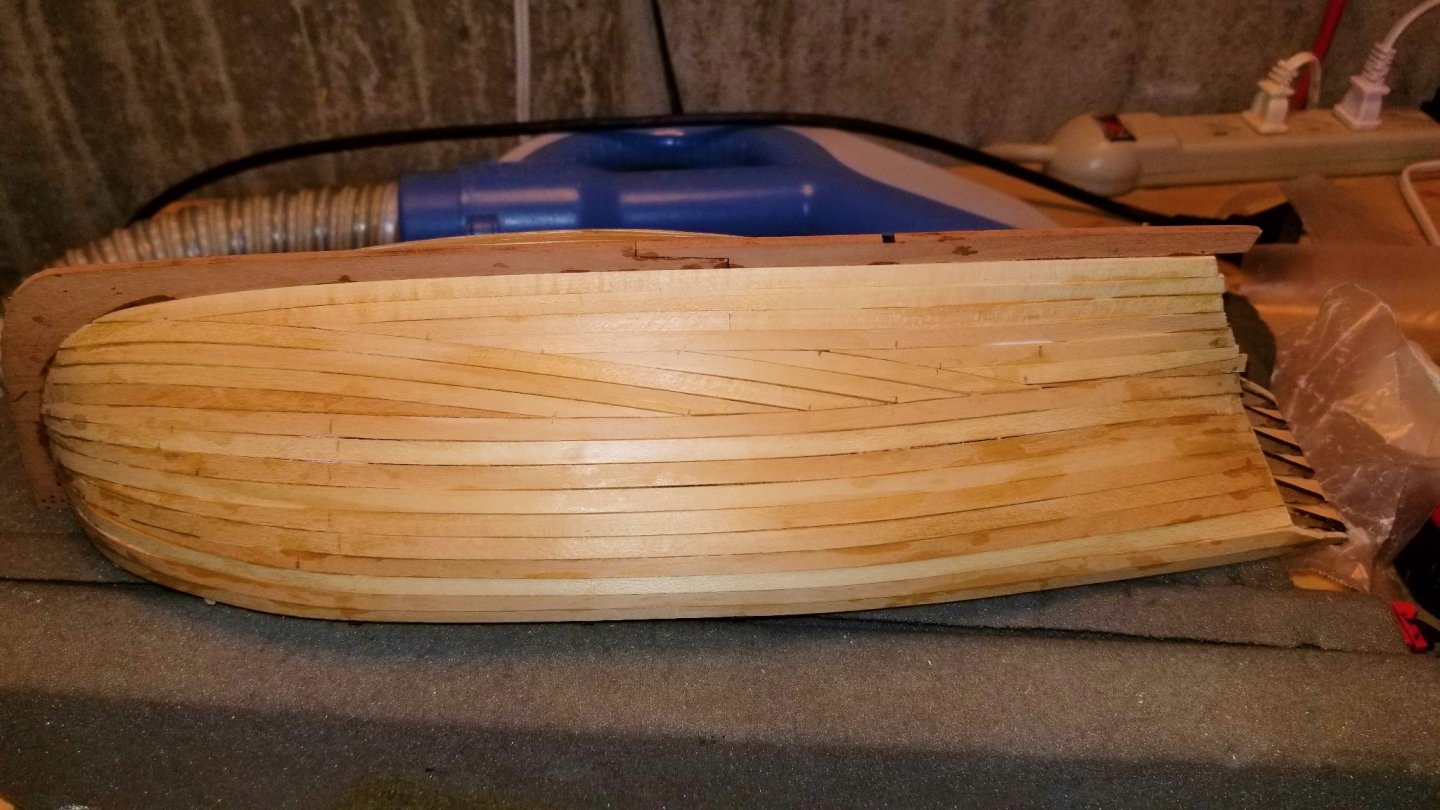
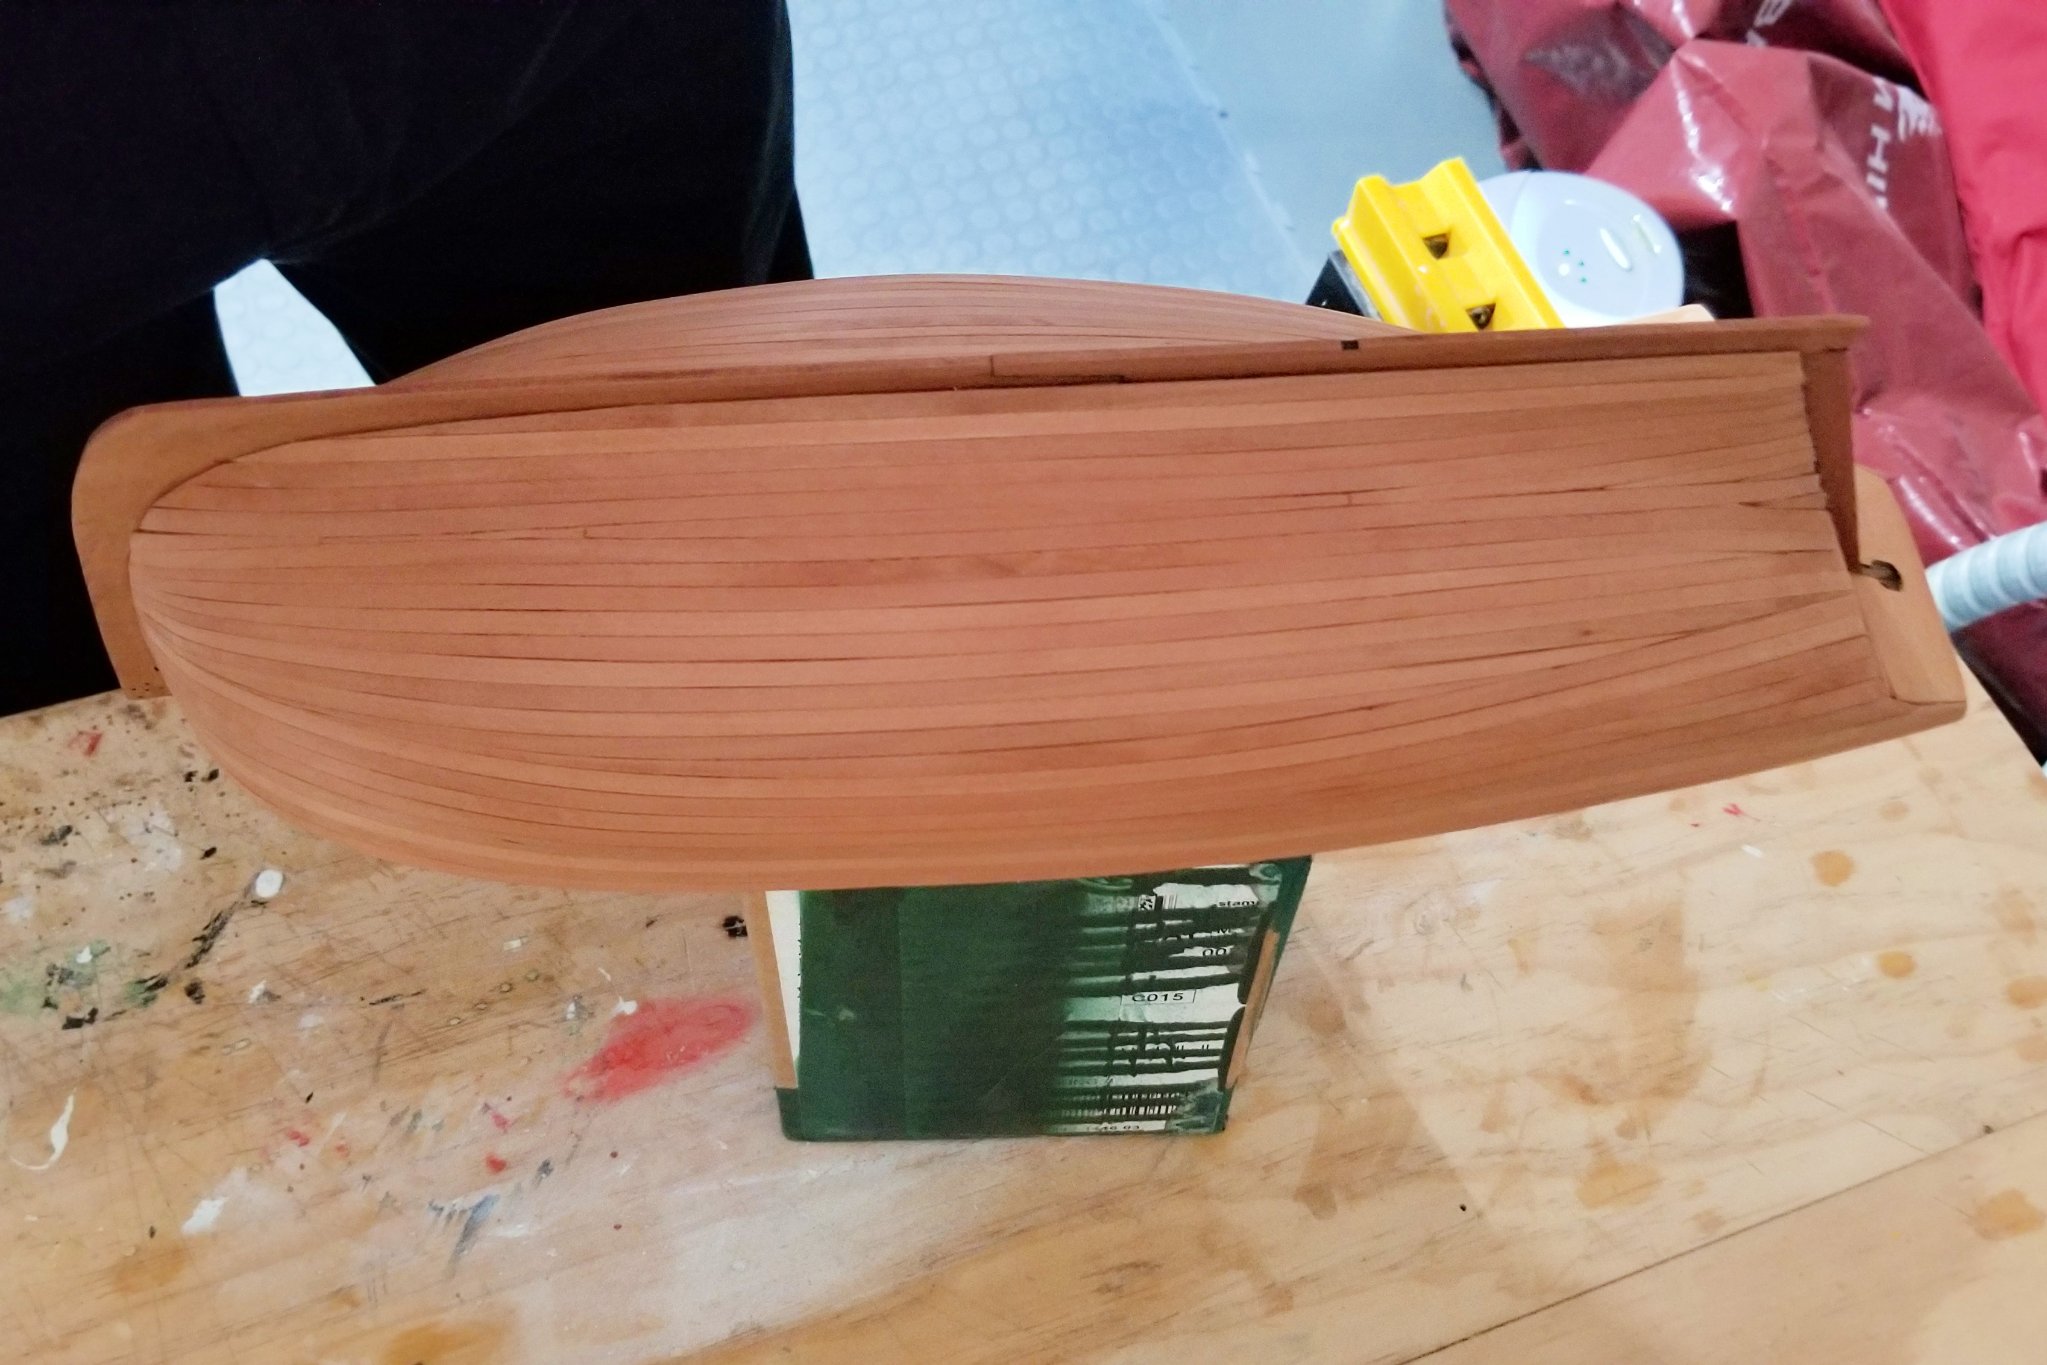
I've filled, sanded and varnished the first planking, and done some work on the stern. The diagonal planks you see at the stern are the pear wood that will be used for the second planking (which is next). As I mentioned earlier, I will probably not paint the hull white as I really like the look of the finished wood.
Regards,
David
-
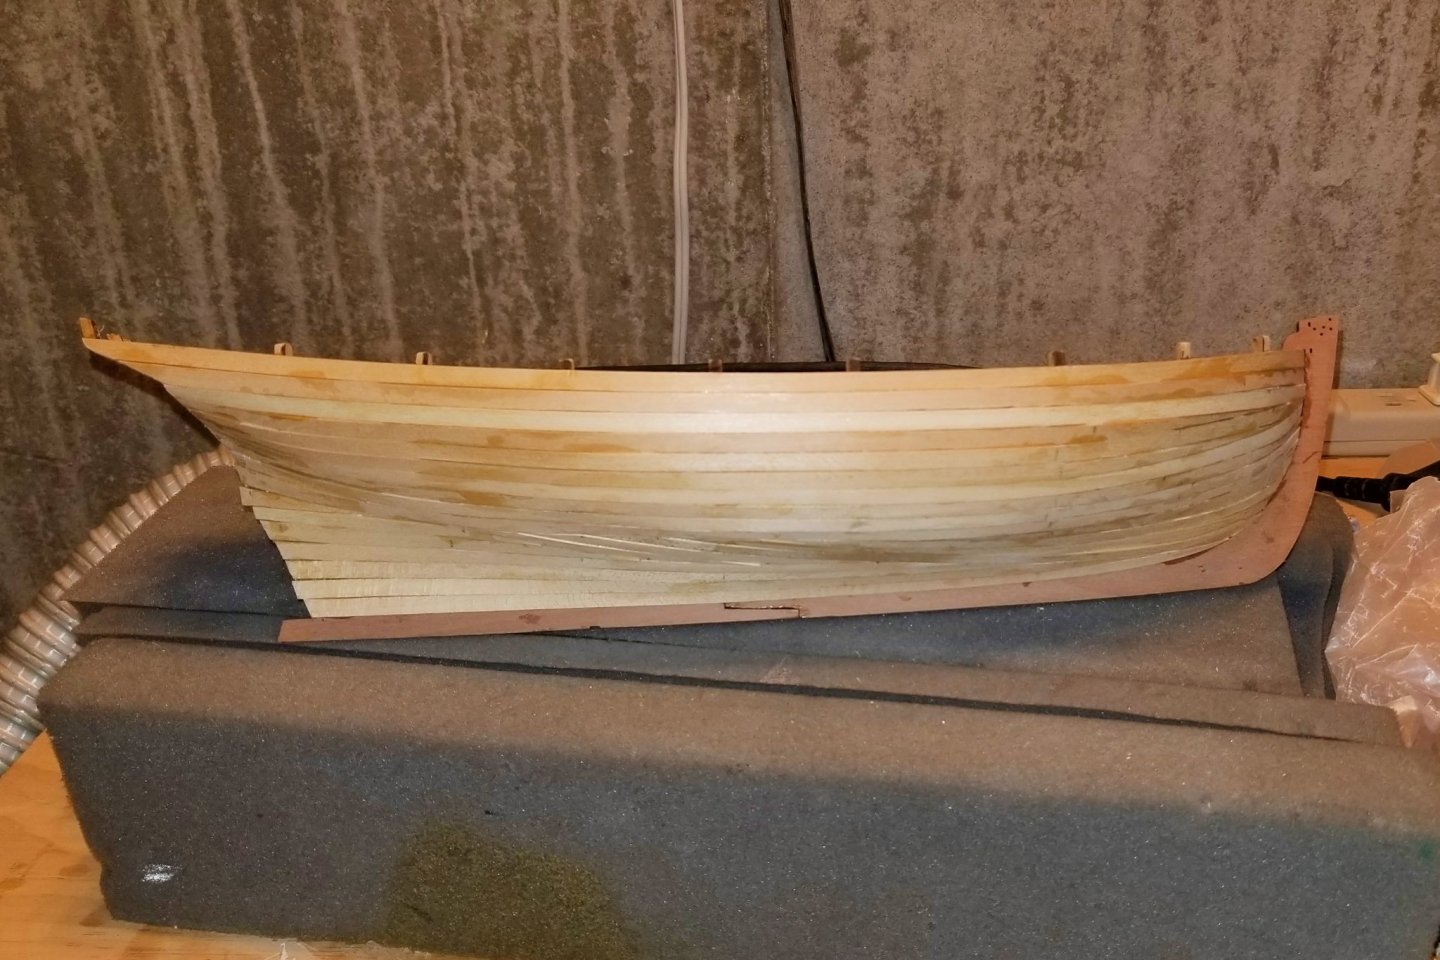
Except for the top rail, first planking is done.
I experience hull planking as an existential art form. You never quite know what pattern you're going to end up with. This one reflects my continued use of side-bending (with the help of my steamer) until I finally threw in the towel and let the planks run.
The result is the most interesting planking pattern I've ended up with to date.
Regards,
David
-
First planking underway.
Regards,
David
- VTHokiEE, Sooty and Edwardkenway
-
3
-
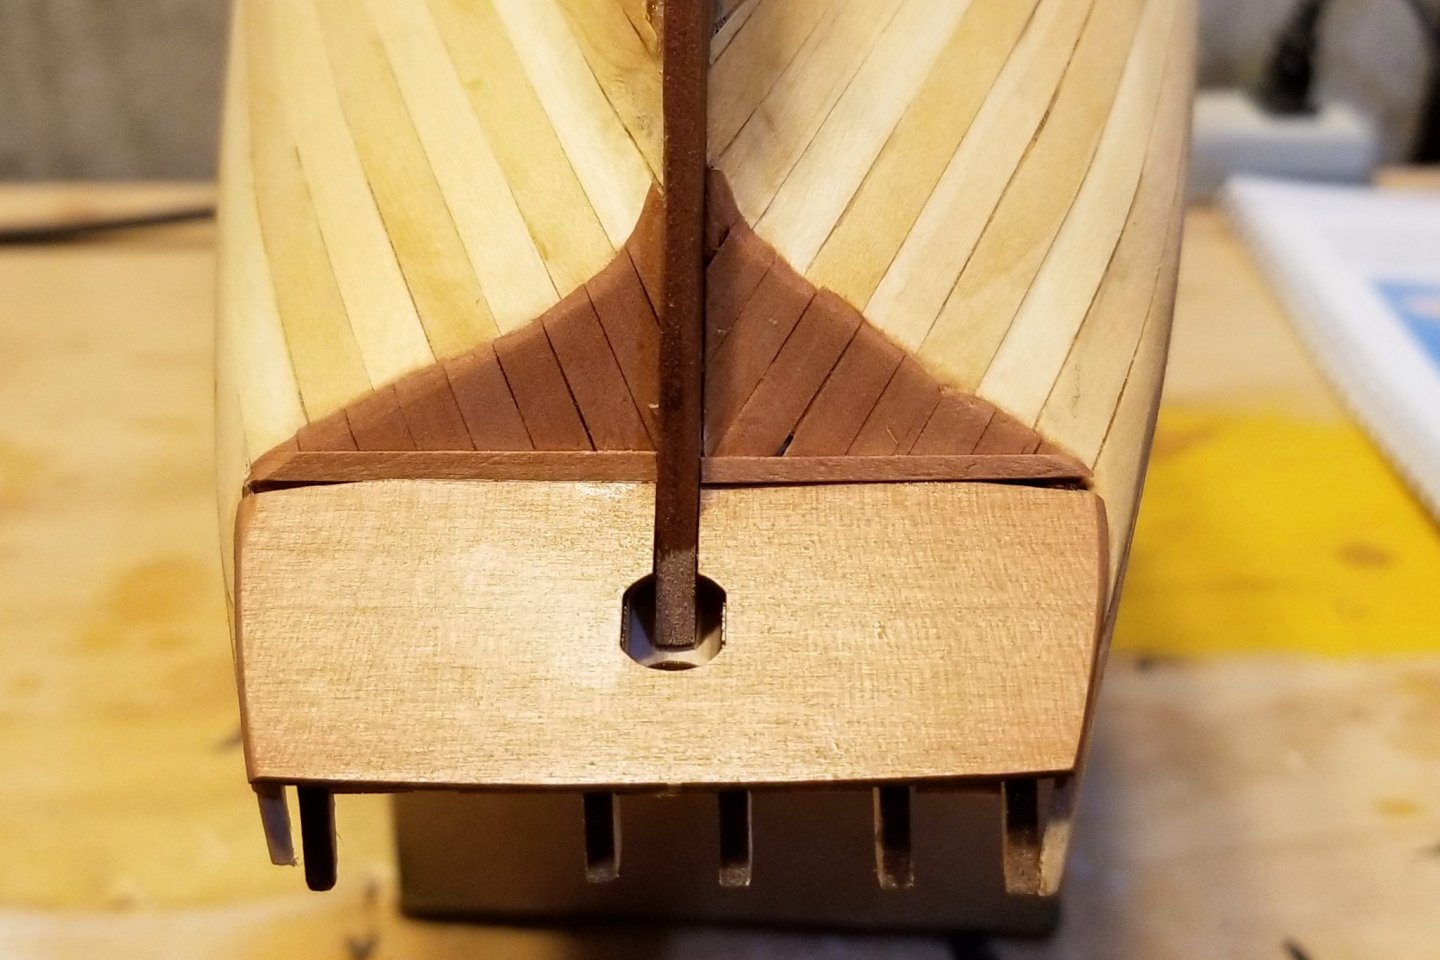
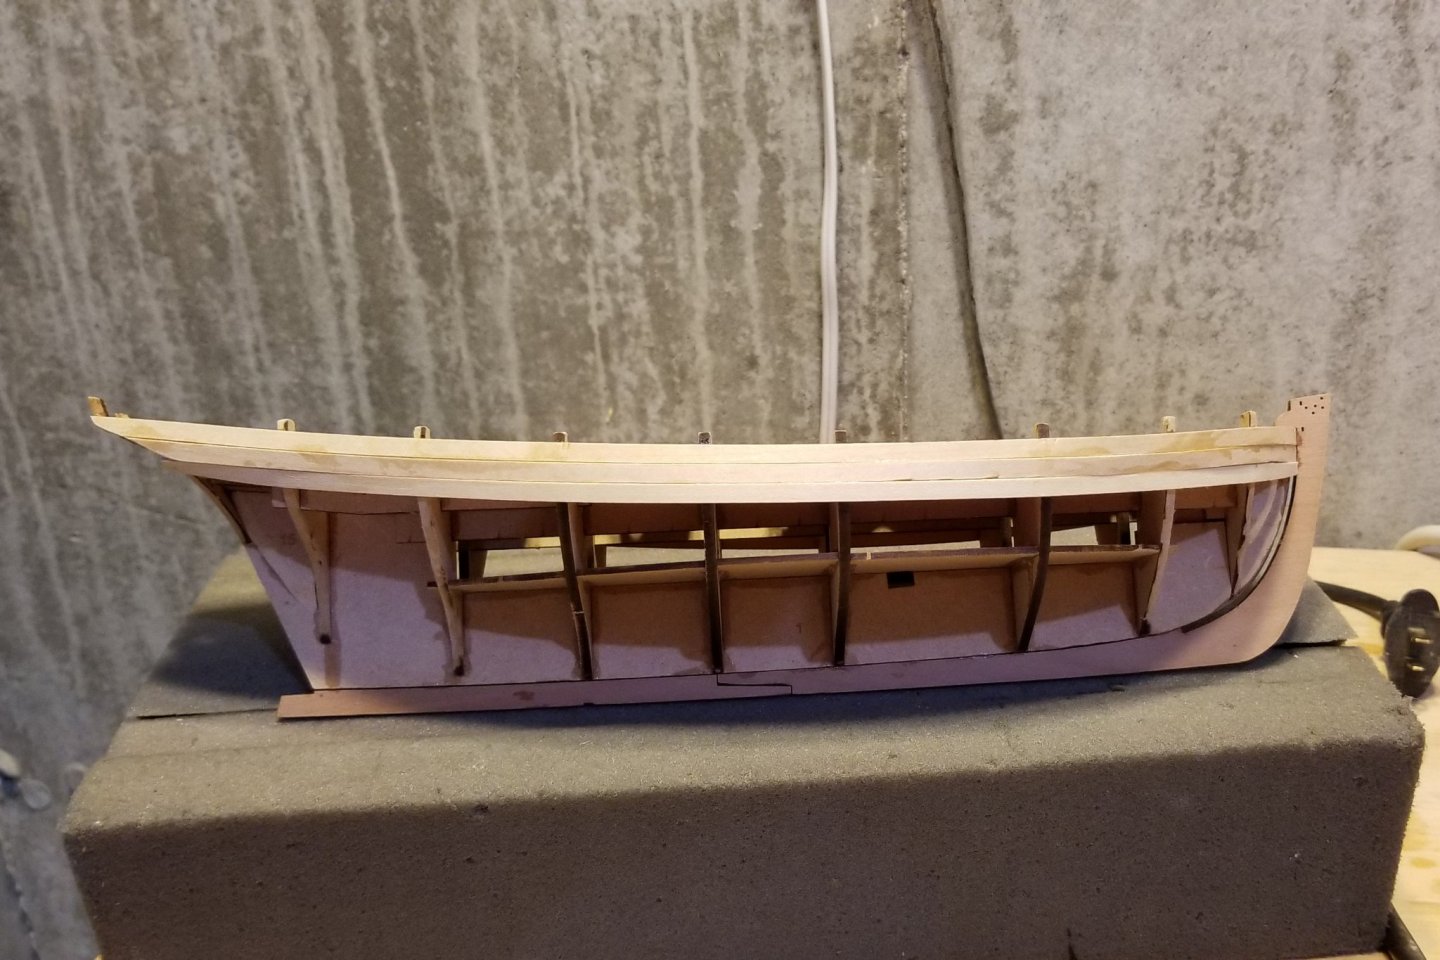
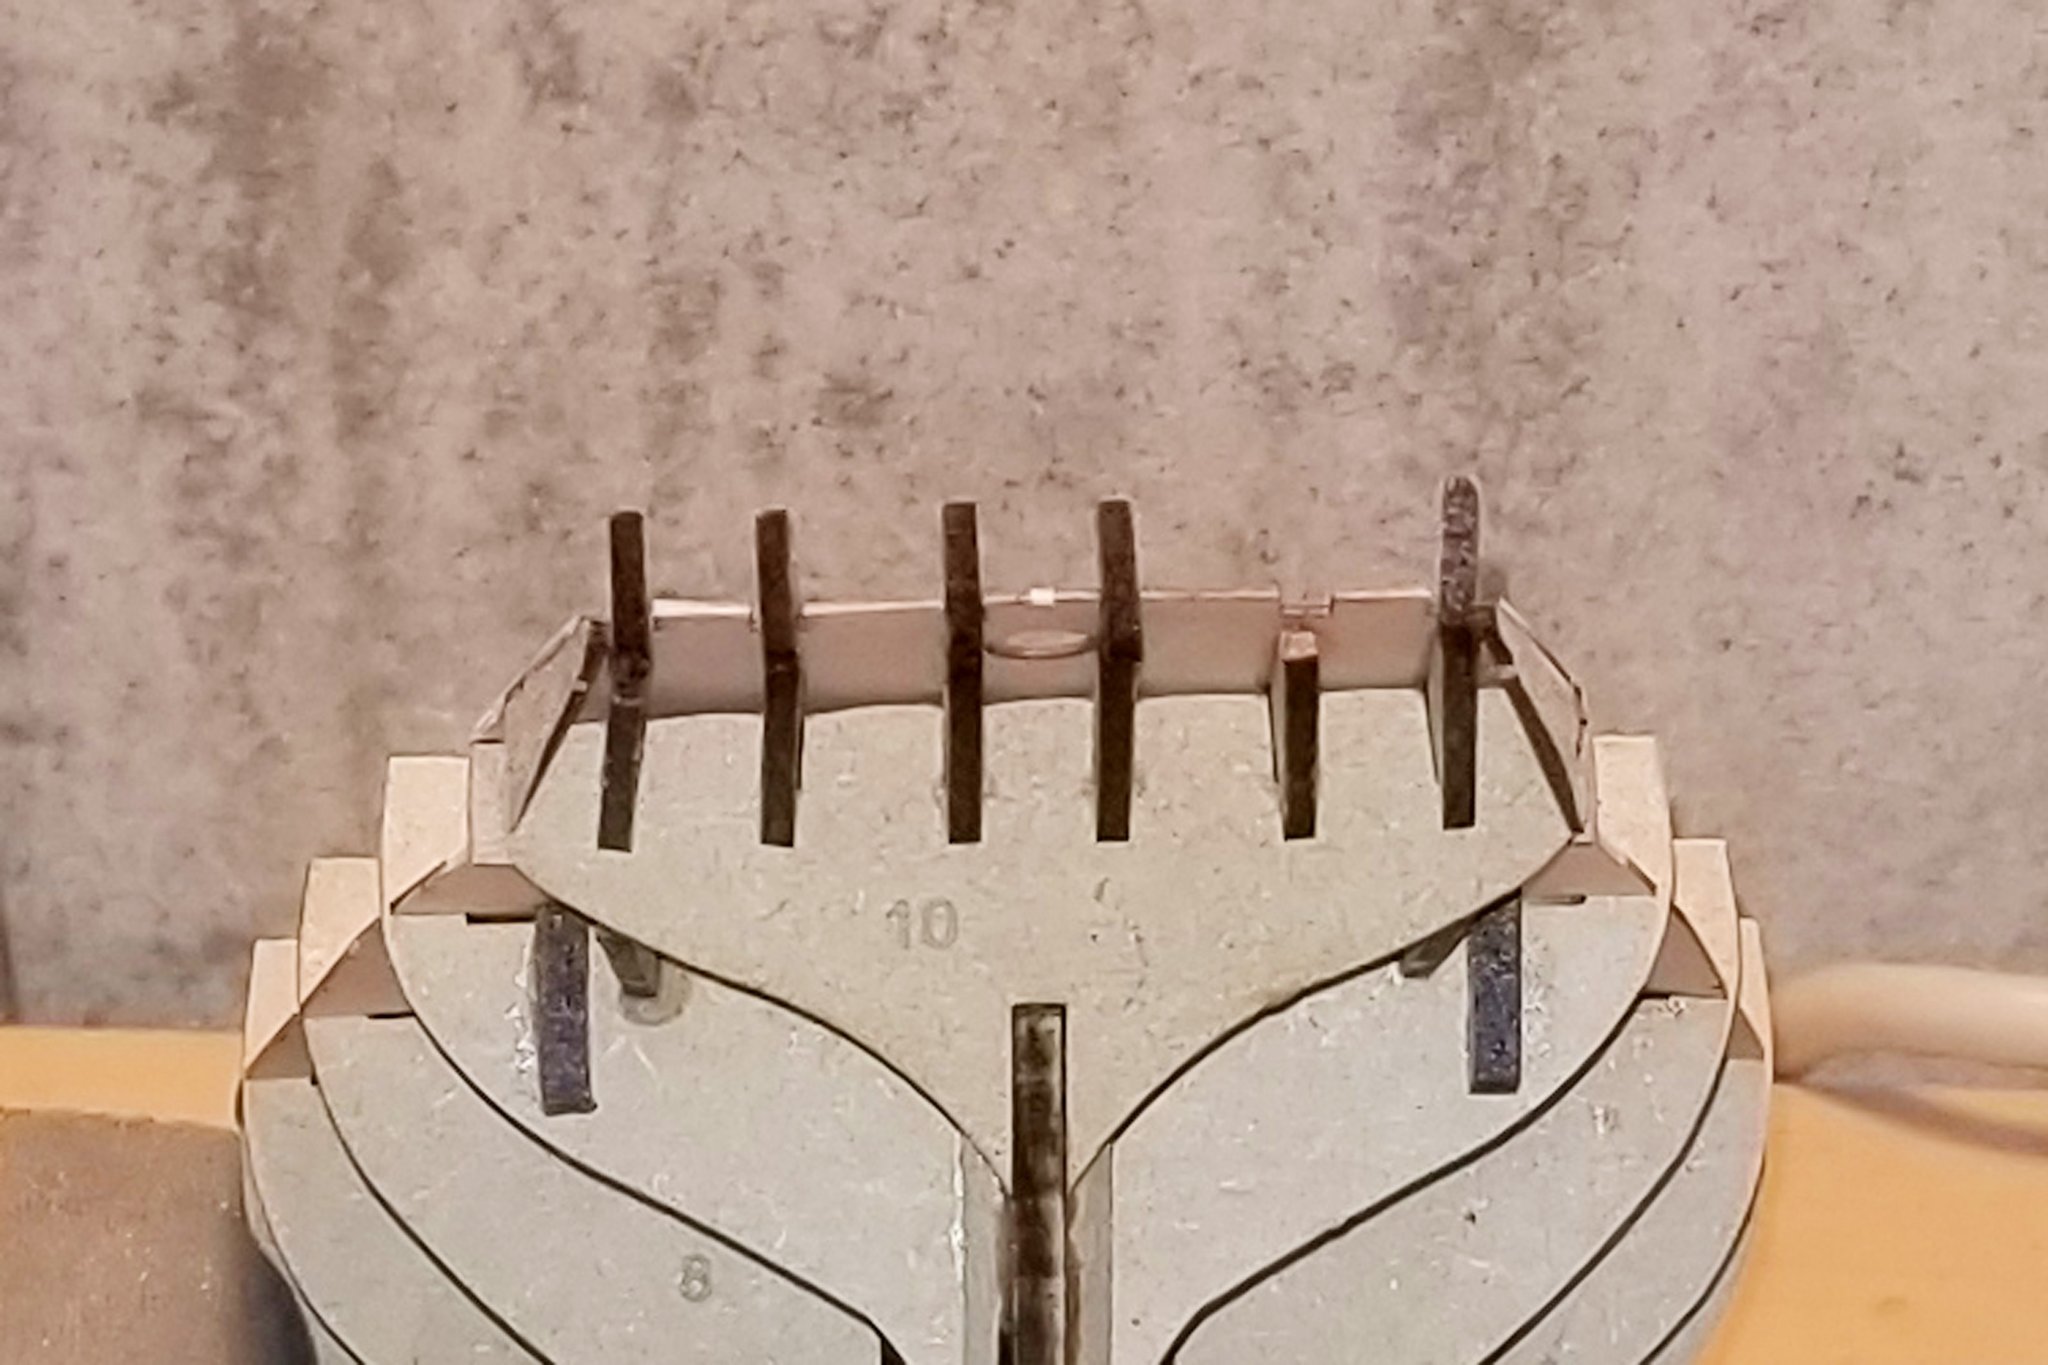
The upper deck is now mounted. One issue I had is that the rear flanges are very fragile, and before I mounted the deck I set the boat down on its stern and they all snapped off. So I glued them back on, paying attention to the angle, and then glued on the rear deck.
One is missing, because I couldn't find it after it snapped off, but I've looked ahead and it won't matter to the build.
So that's something to be careful of when building this model.
Regards,
David


- Sjors, ccoyle, Edwardkenway and 3 others
-
6
-
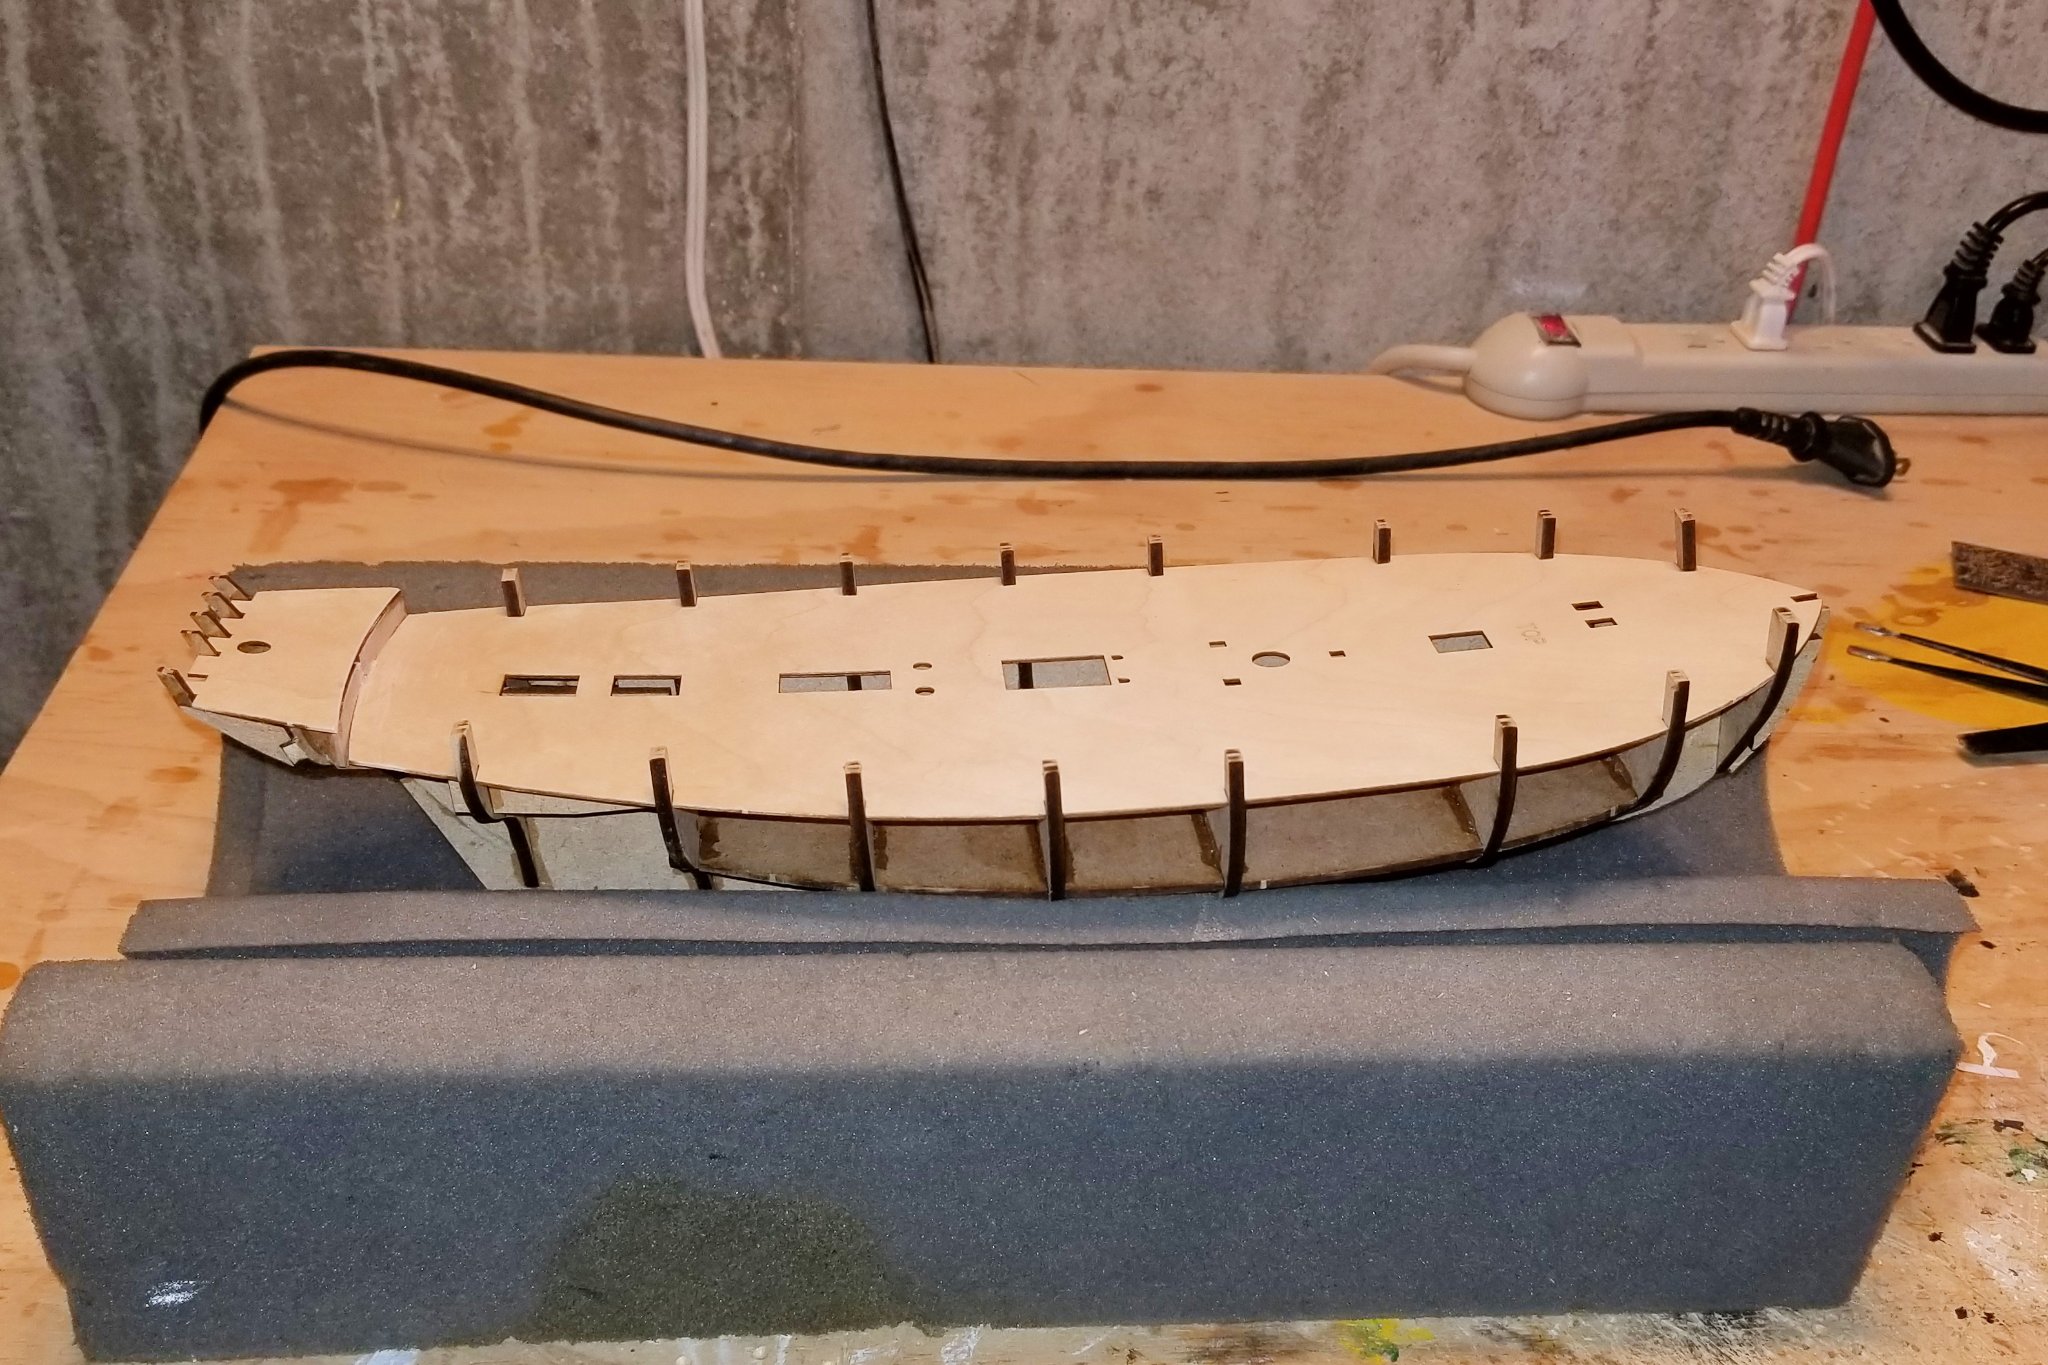
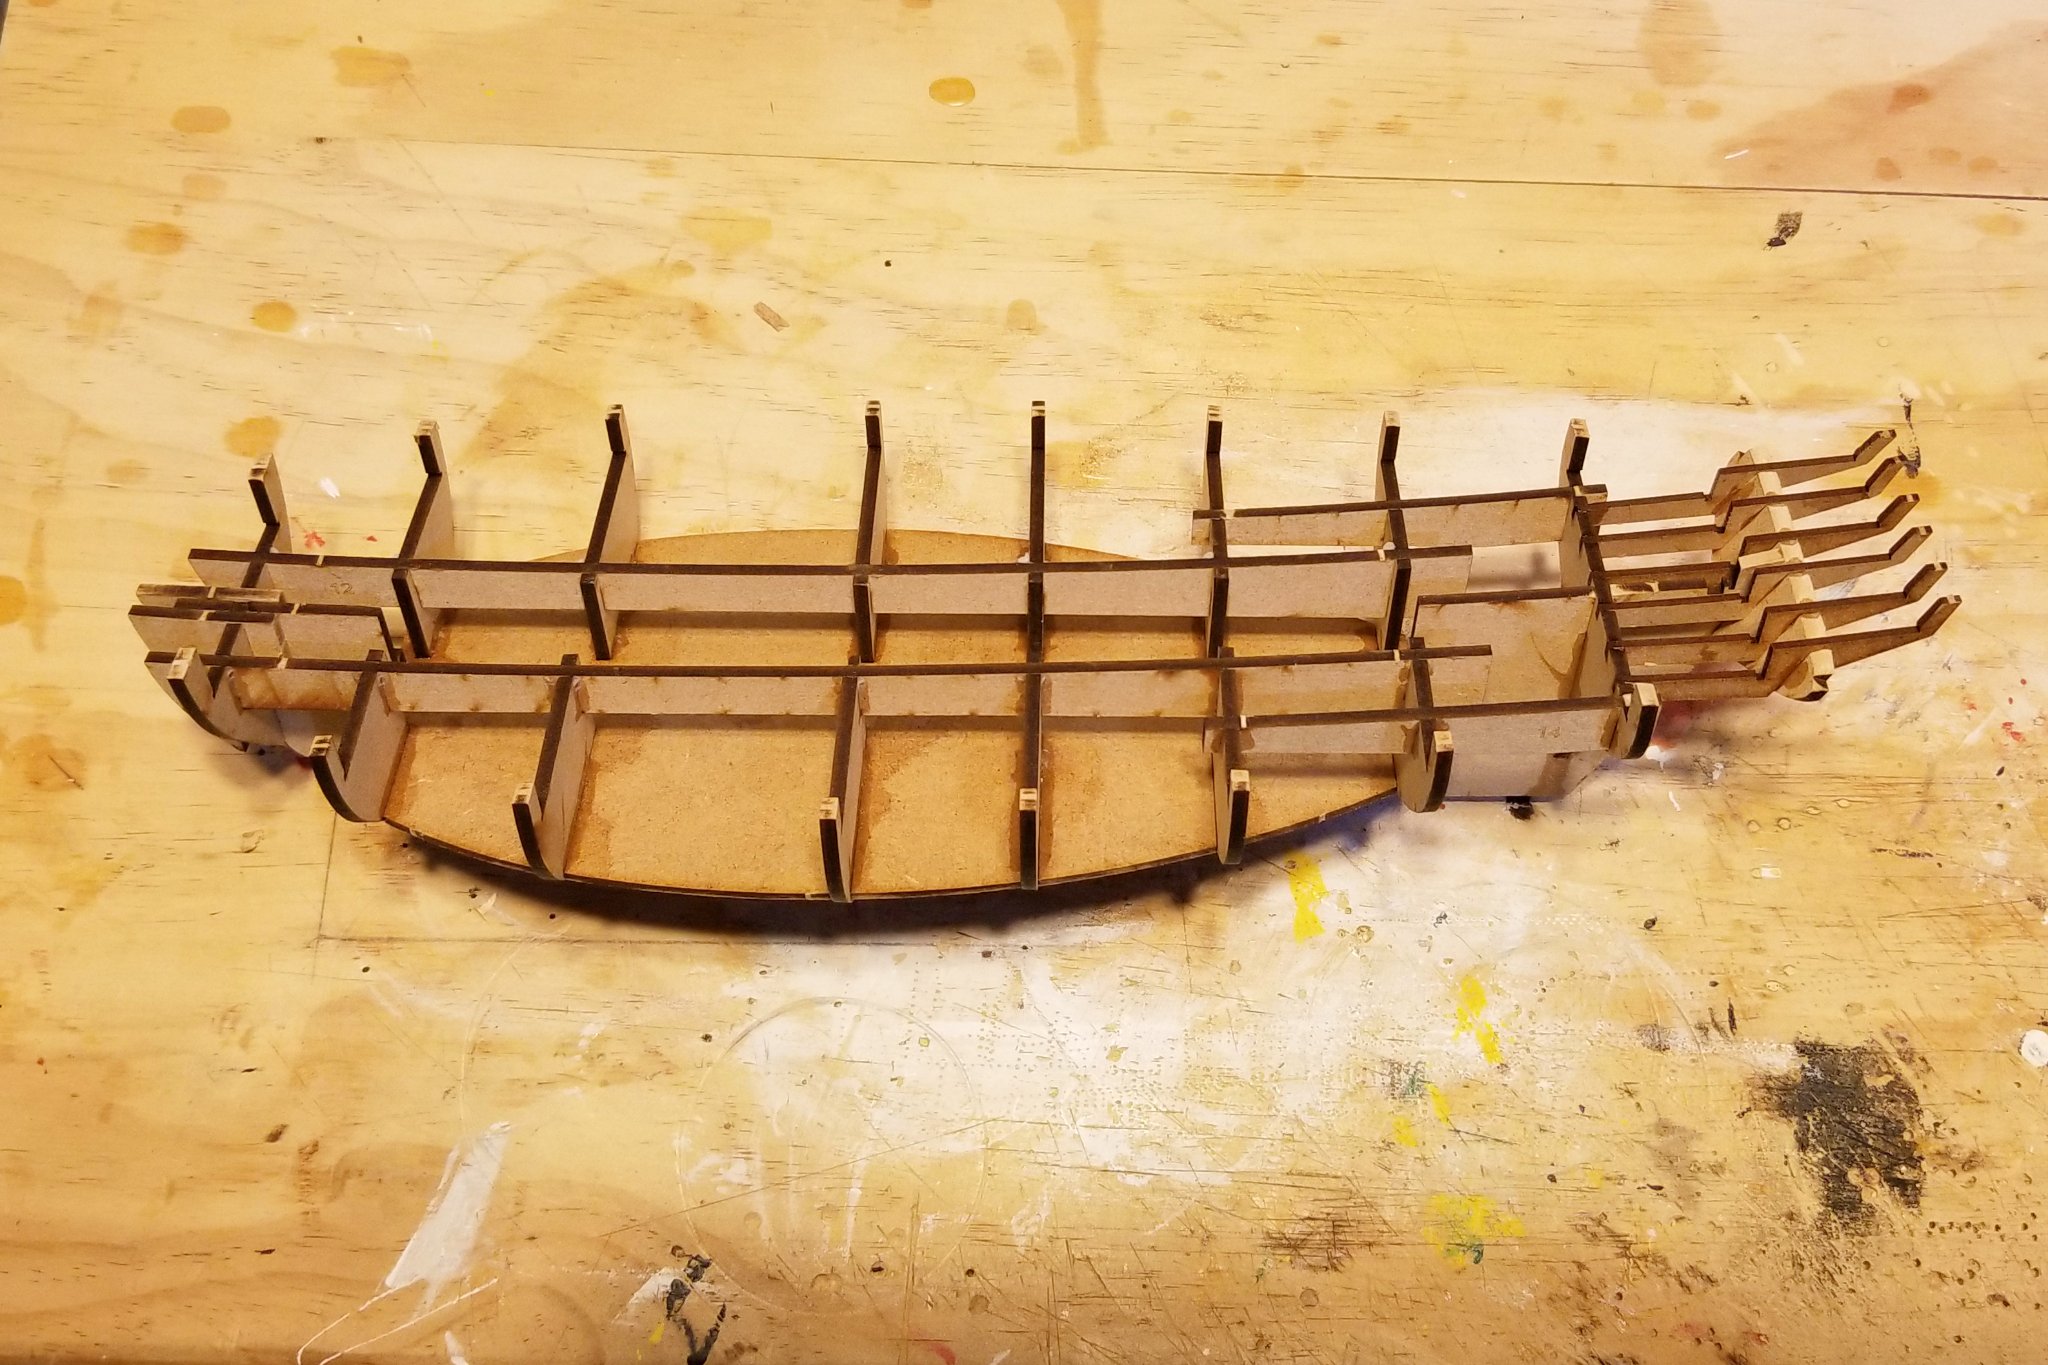
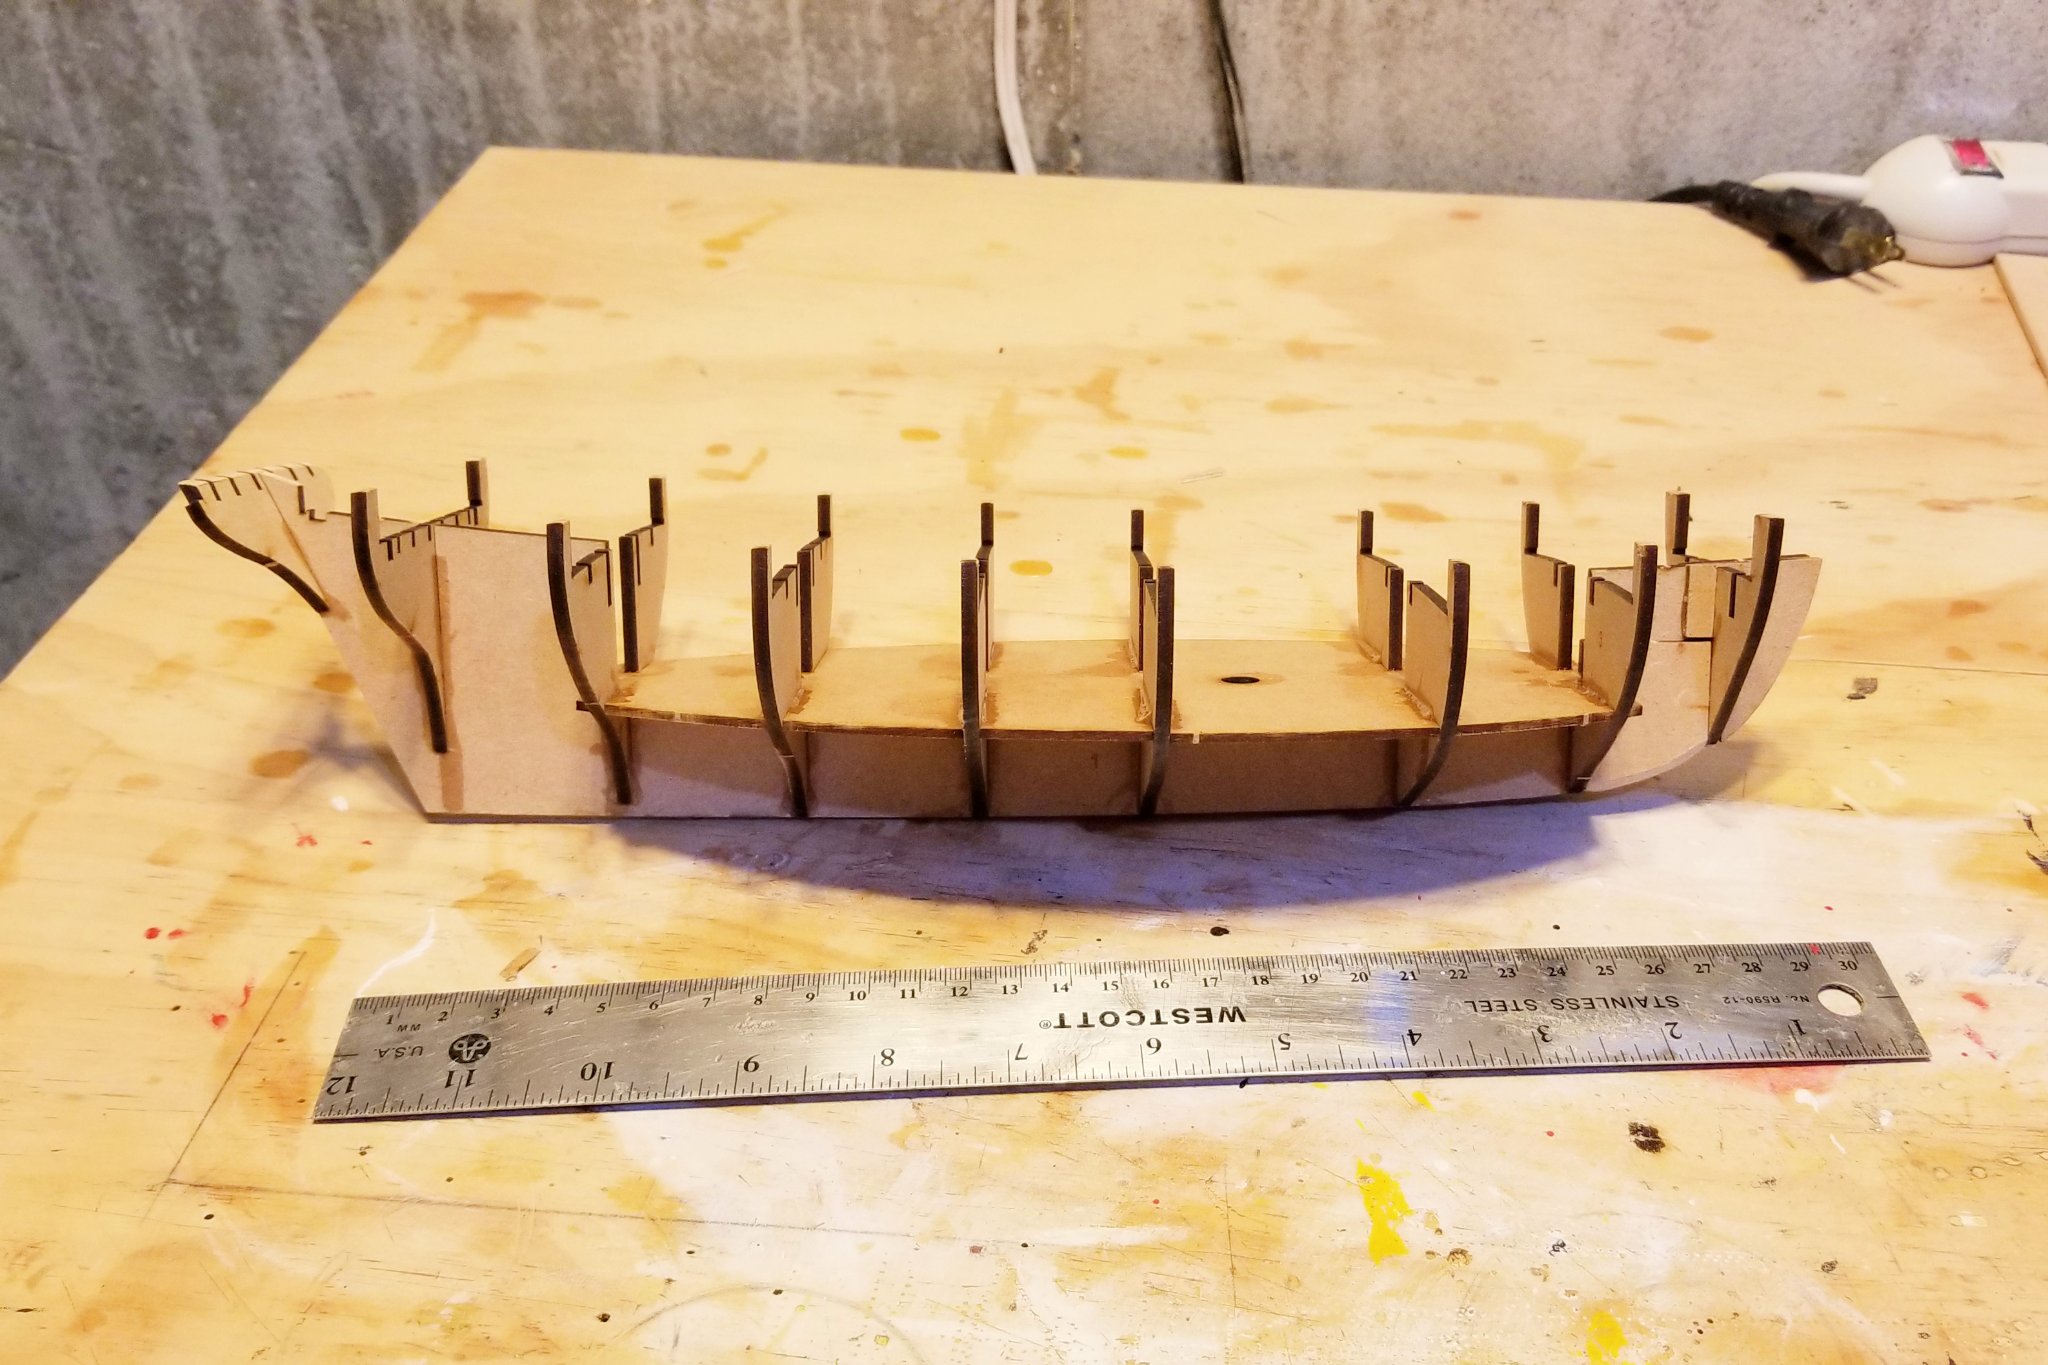
Here's more of the hull structure.
Regards,
David
- Sjors, VTHokiEE, Edwardkenway and 1 other
-
4
-
-
VTHokiEE:
Timely question. I hadn't planned to. What is the angle -- through the hatchways? All of them or just one?
I'm also going to leave the hull natural vs. painting it white.
Regards,
David
-
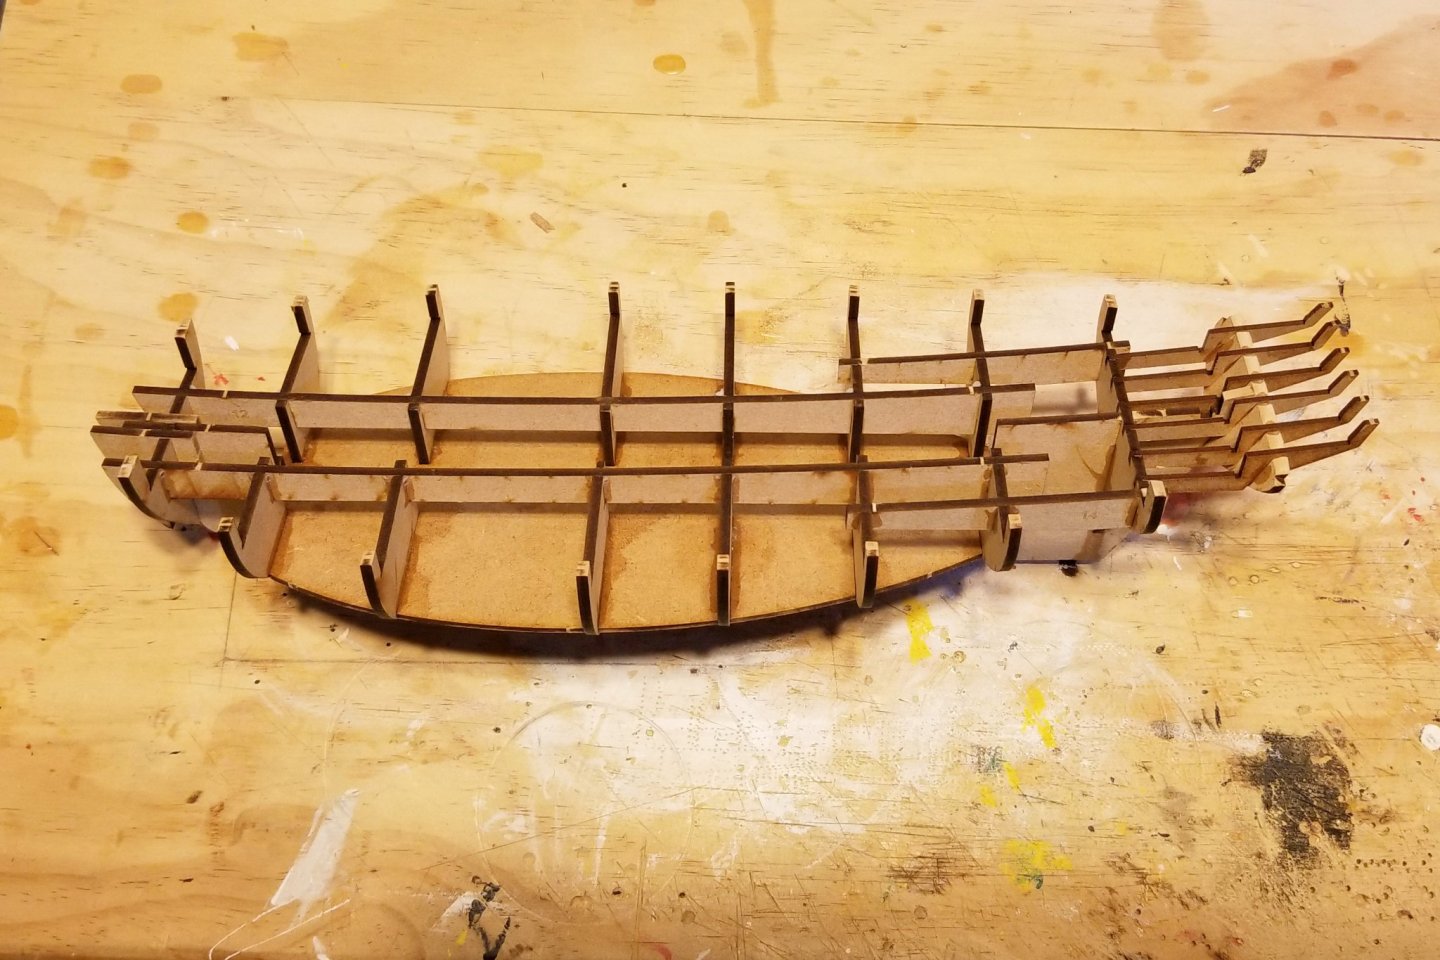
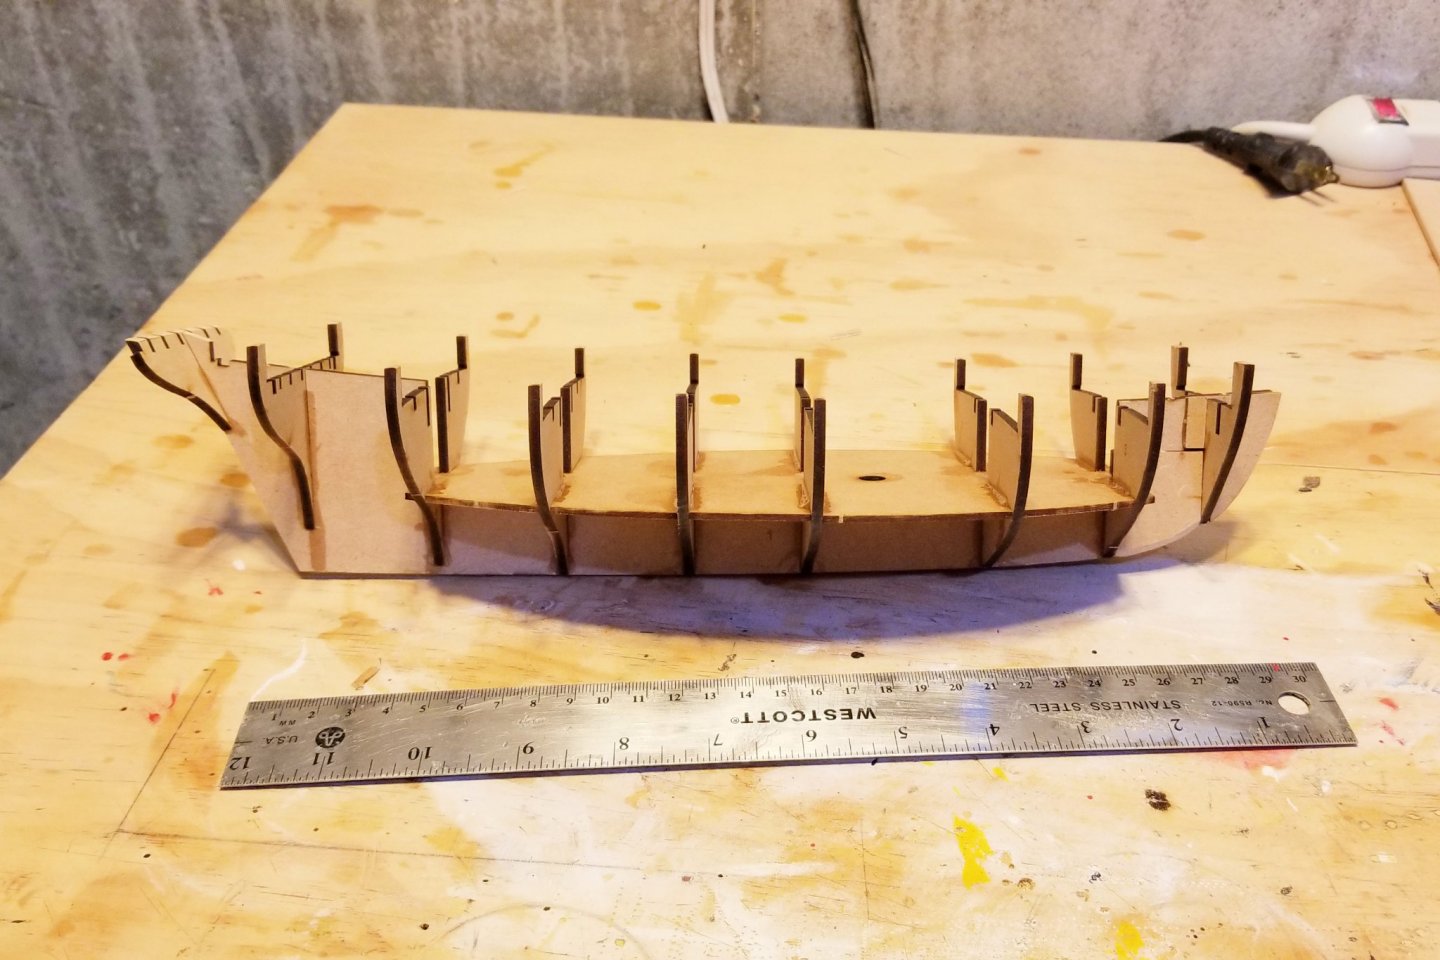
Have partially finished the hull structure. Some more to go.
The ruler is 300mm long and gives you a sense of the size of this ship.
Regards,
David
- Sjors, Edwardkenway and VTHokiEE
-
3
-
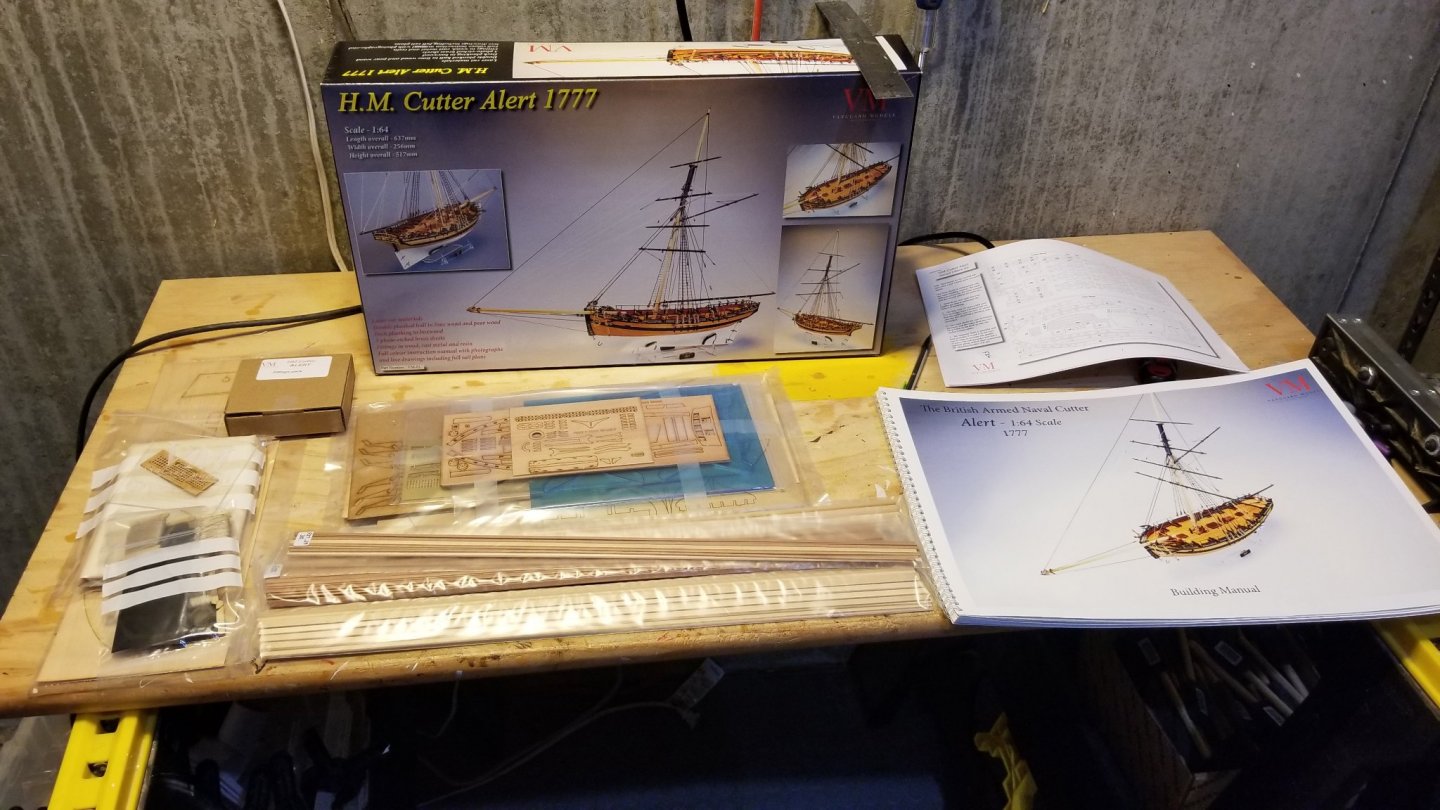
I have built the Amati Revenge and Fly from the Victory Models series, and both were terrific builds with outstanding kit quality. These were designed by Chris Watton, so when I saw that he had formed his own modeling company, Vanguard Models, I really wanted to try one to see how the kit quality and ship appearance compared.
Opening the box, the kit quality looks outstanding. Everything neatly packed and shrink-wrapped, and the wood looks great. The manual is also something to behold: large lie-flat with heavy pages and lots of 4-color pictures and drawings. I'm looking forward to starting this one and will post a log as I go.
Regards,
David

- Edwardkenway, ccoyle, CTDavies and 1 other
-
4
-
Thanks, Hans. 7 months almost to the day, which for me seems like a longer time. My longest build to date.
Regards,
David
-
-
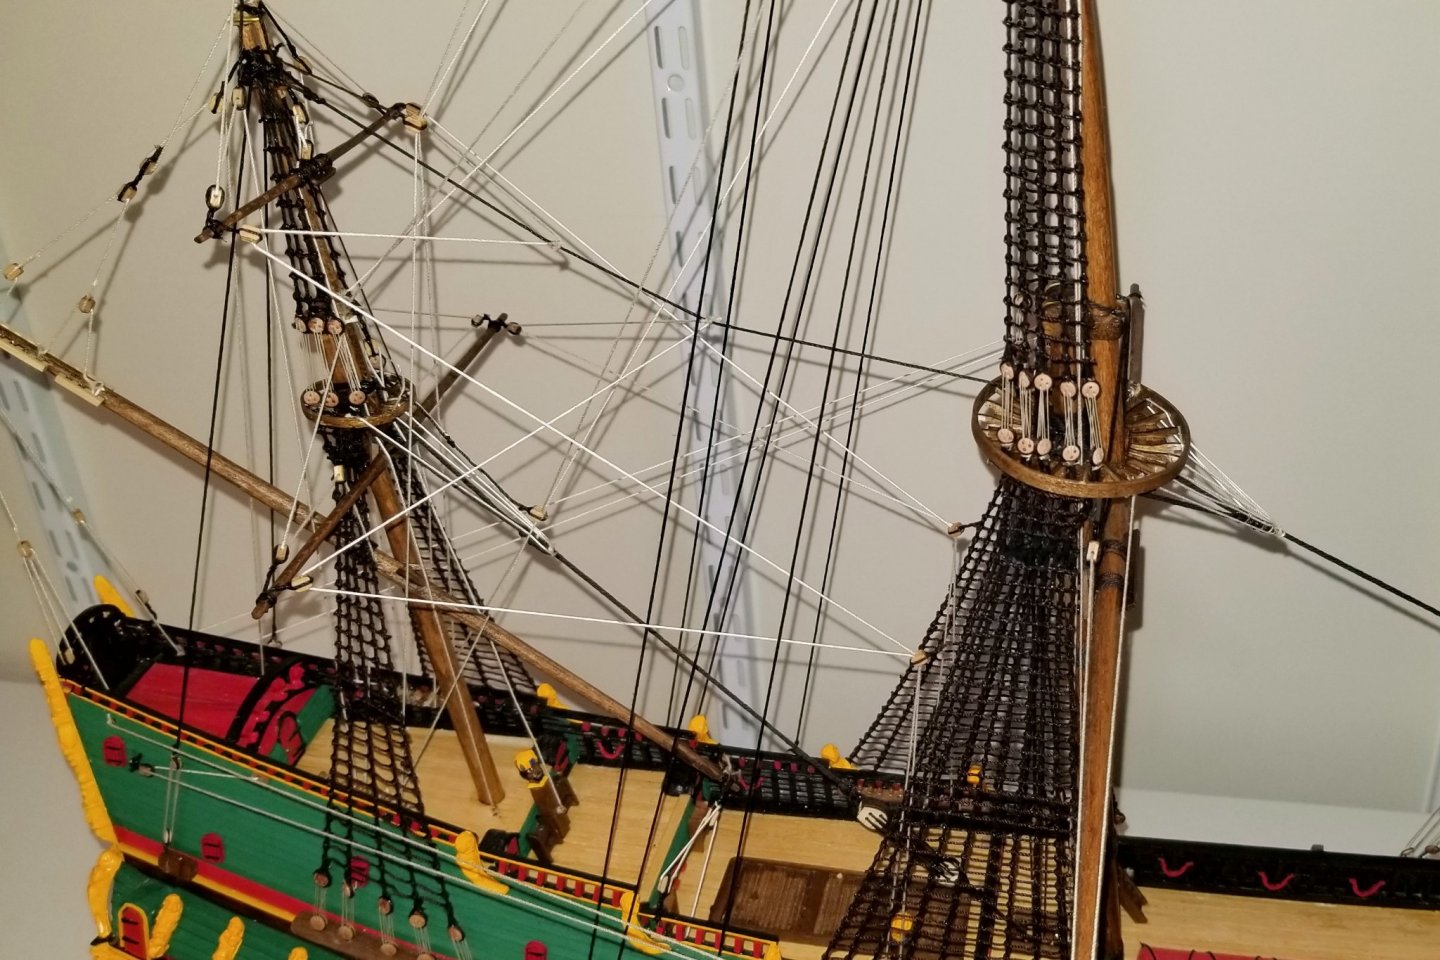
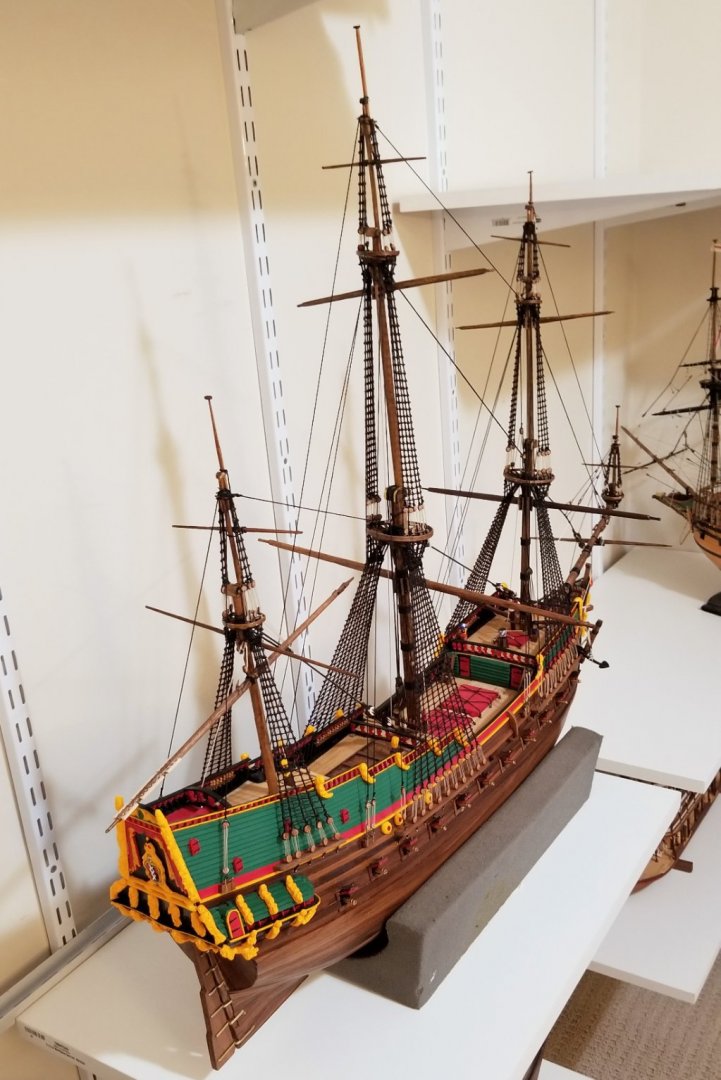
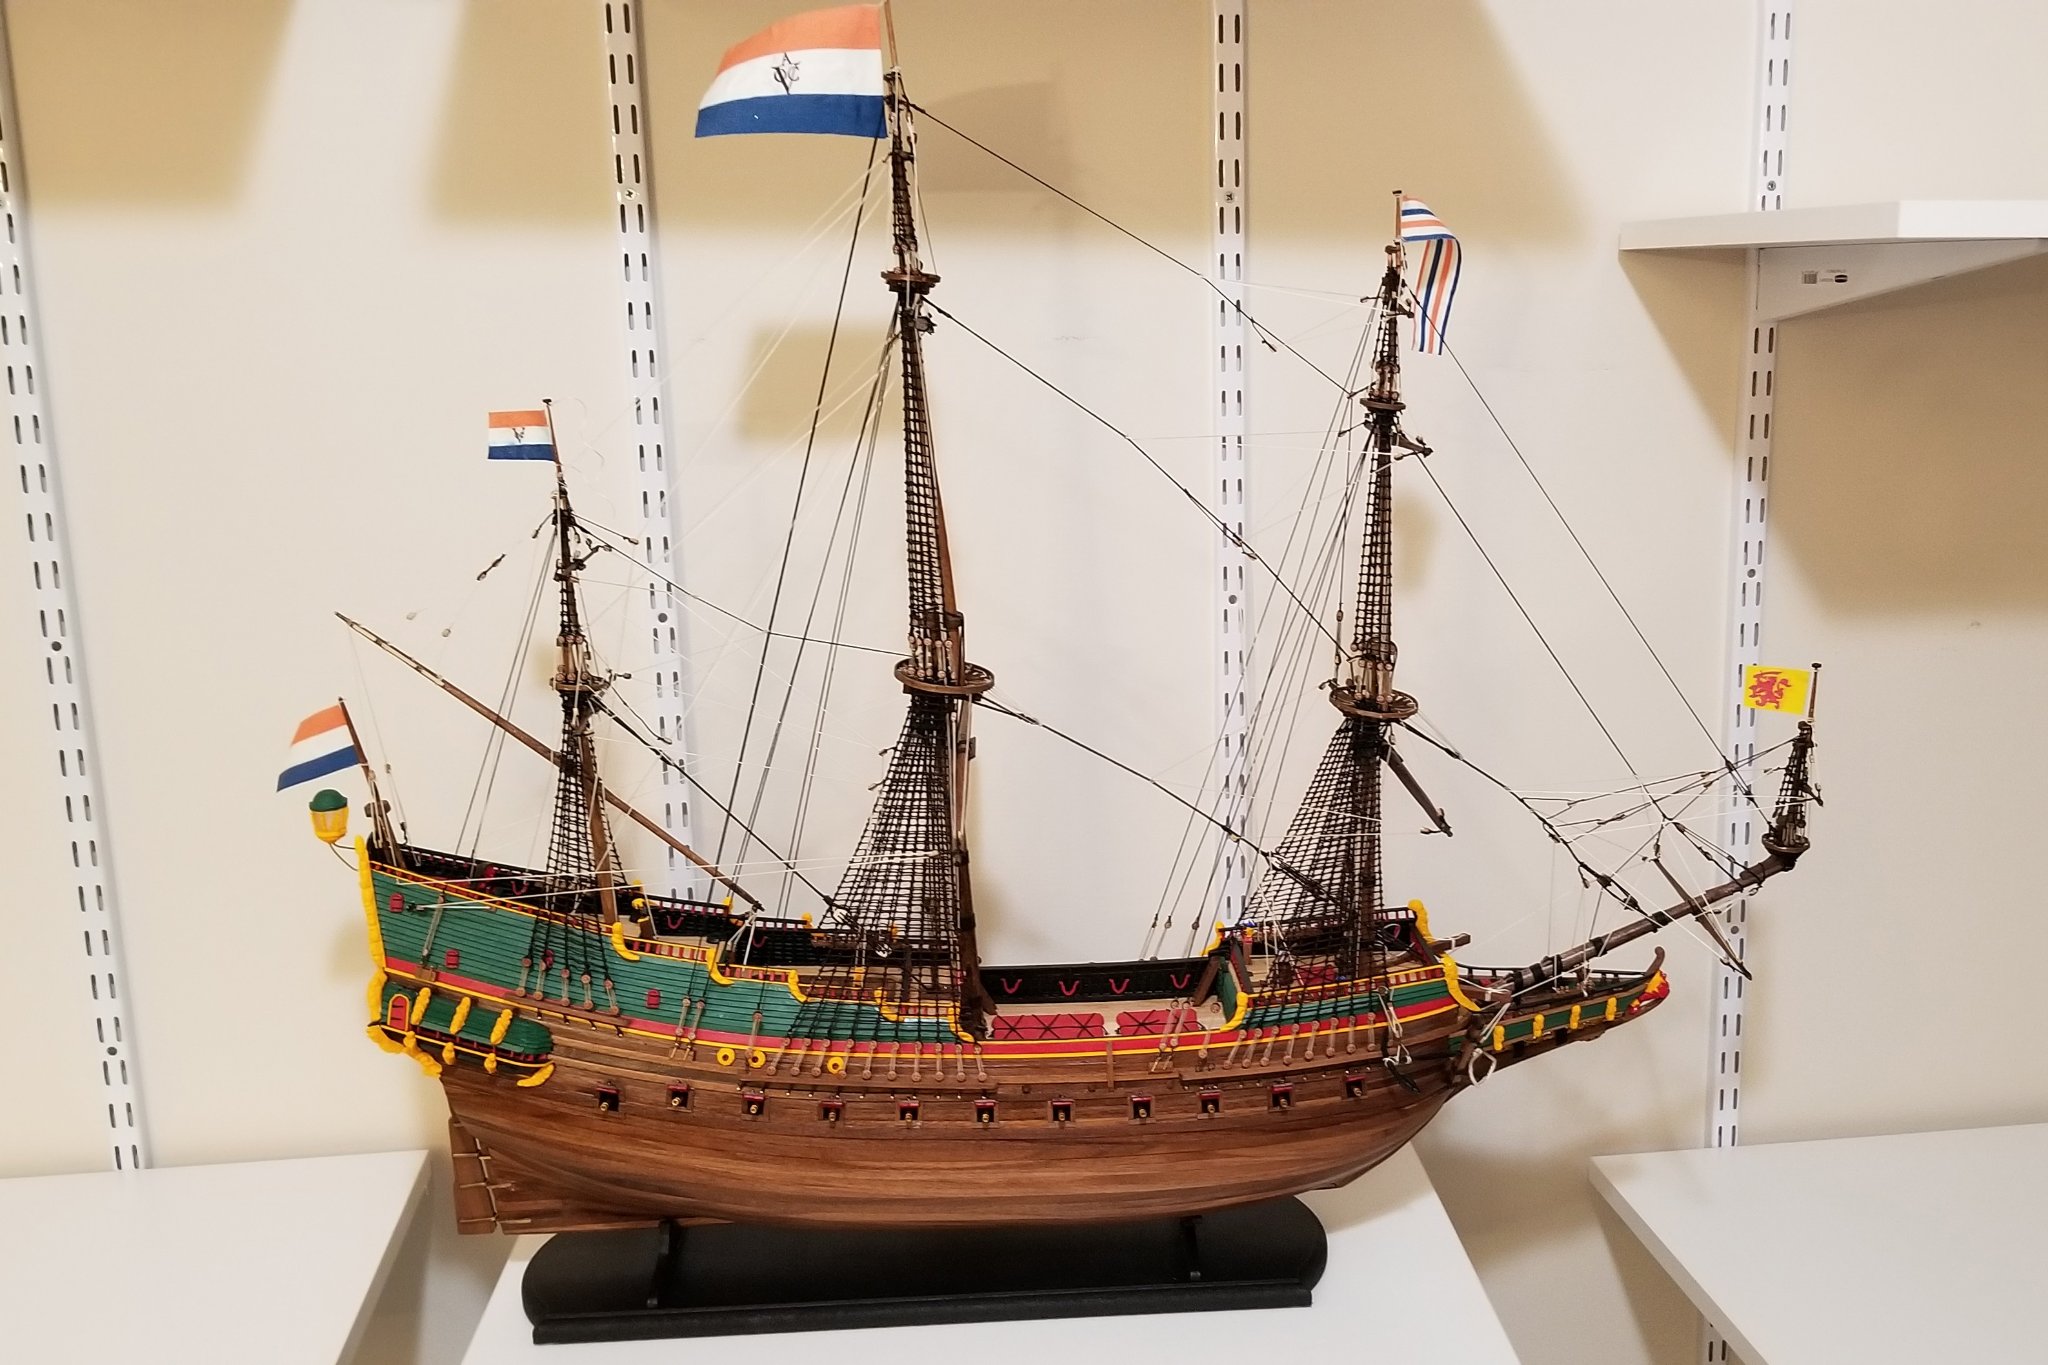
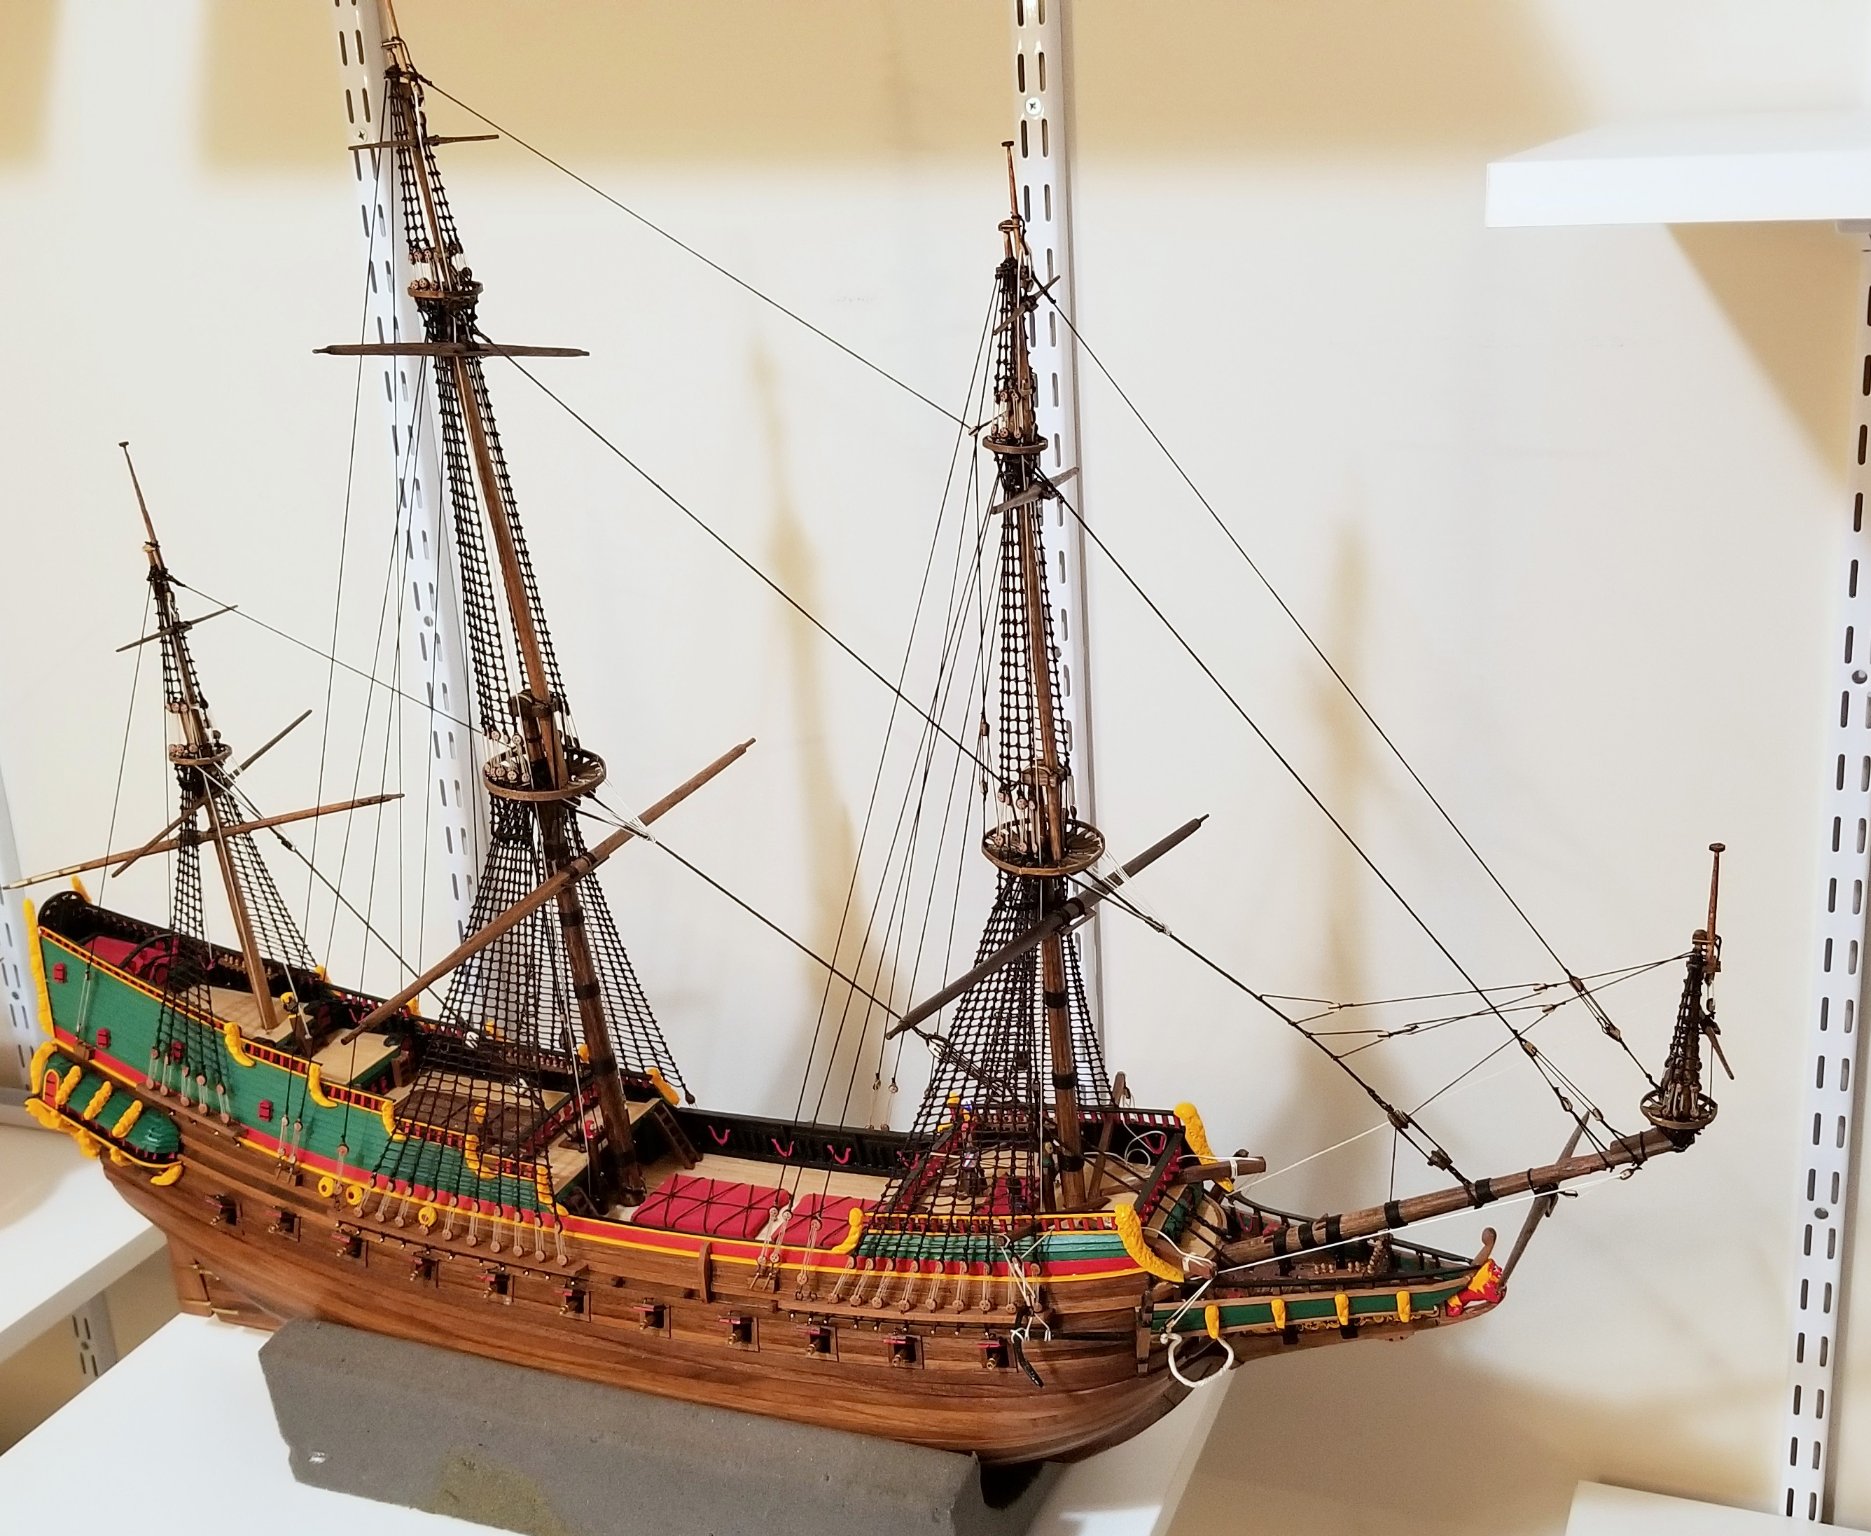
Running rigging is complete now. All that remains is the rear flagpole, the rear lantern, the flags, and the stand.
Getting close!
Regards,
David

- marktiedens, GrandpaPhil, *Hans* and 4 others
-
7
-
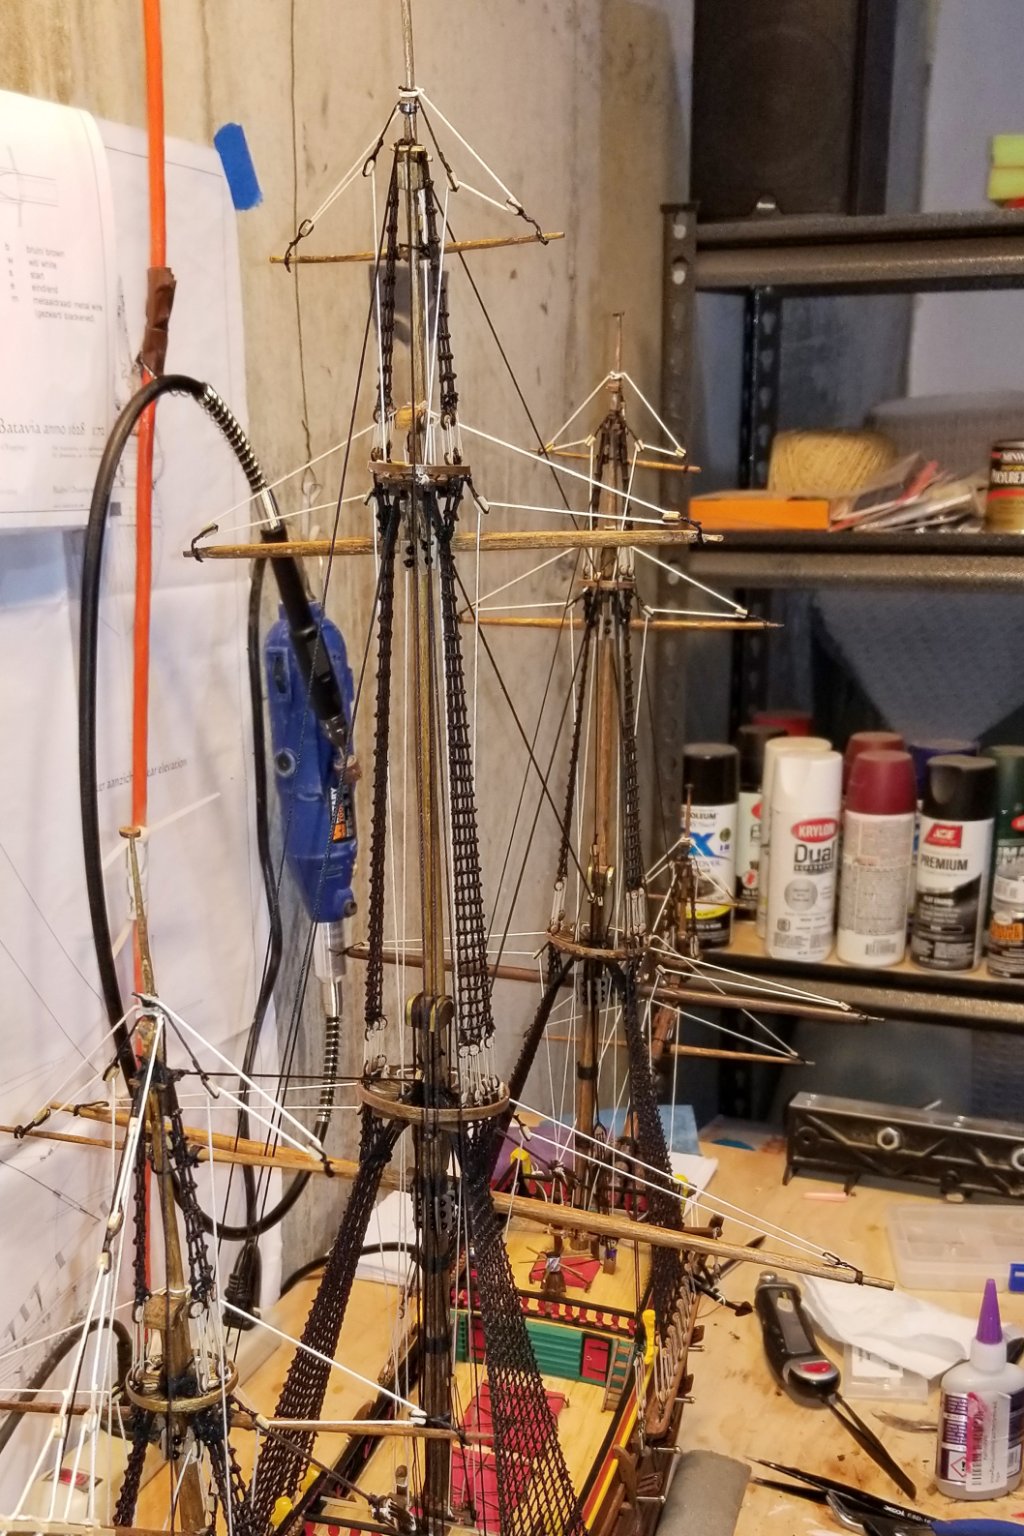
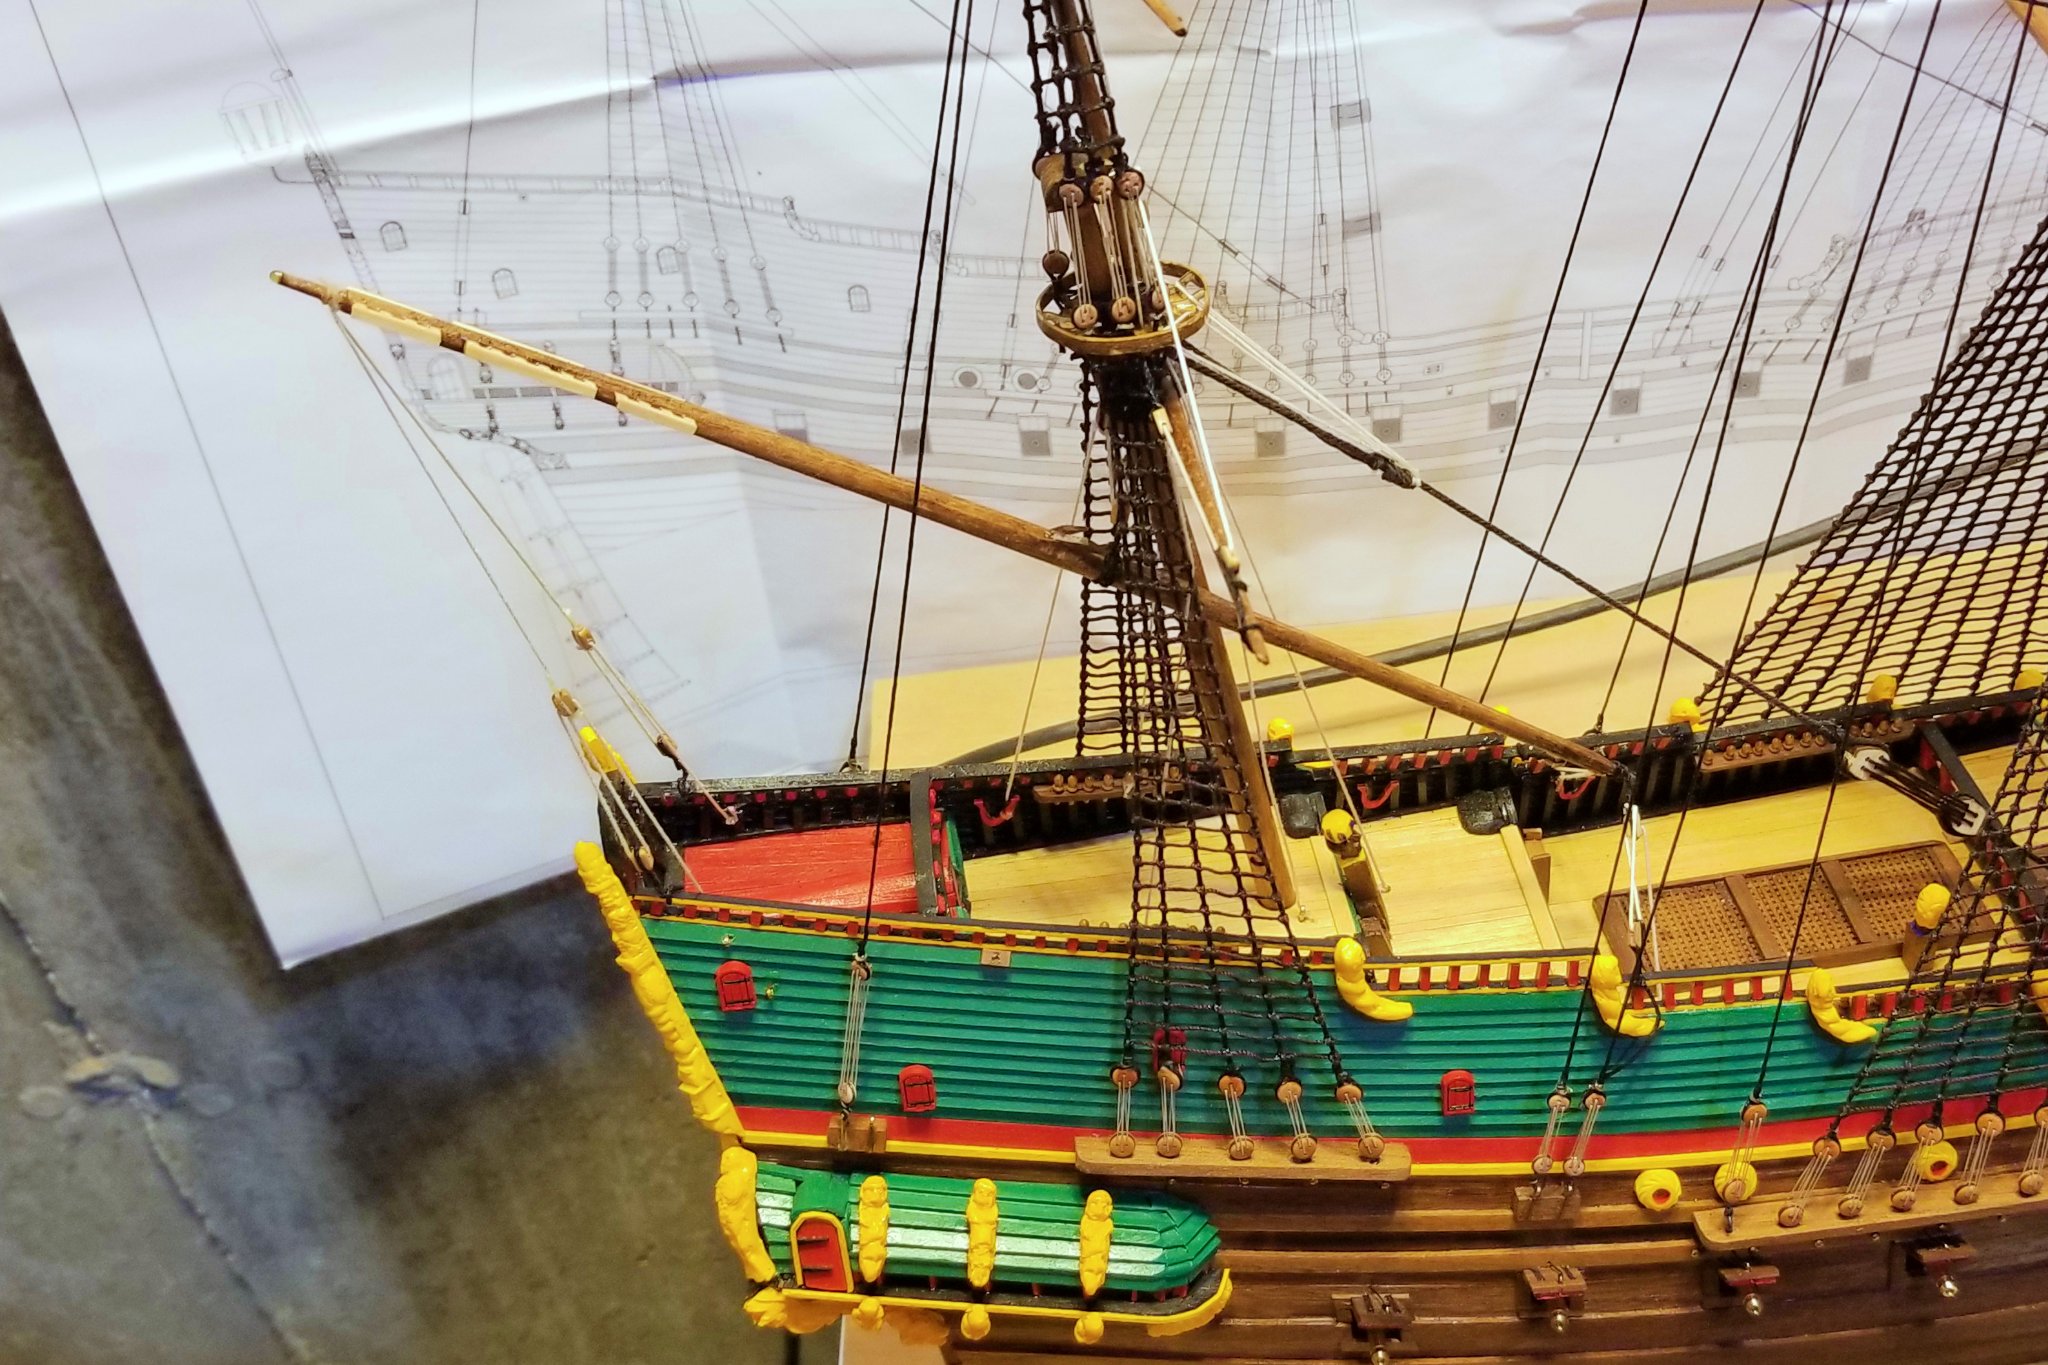
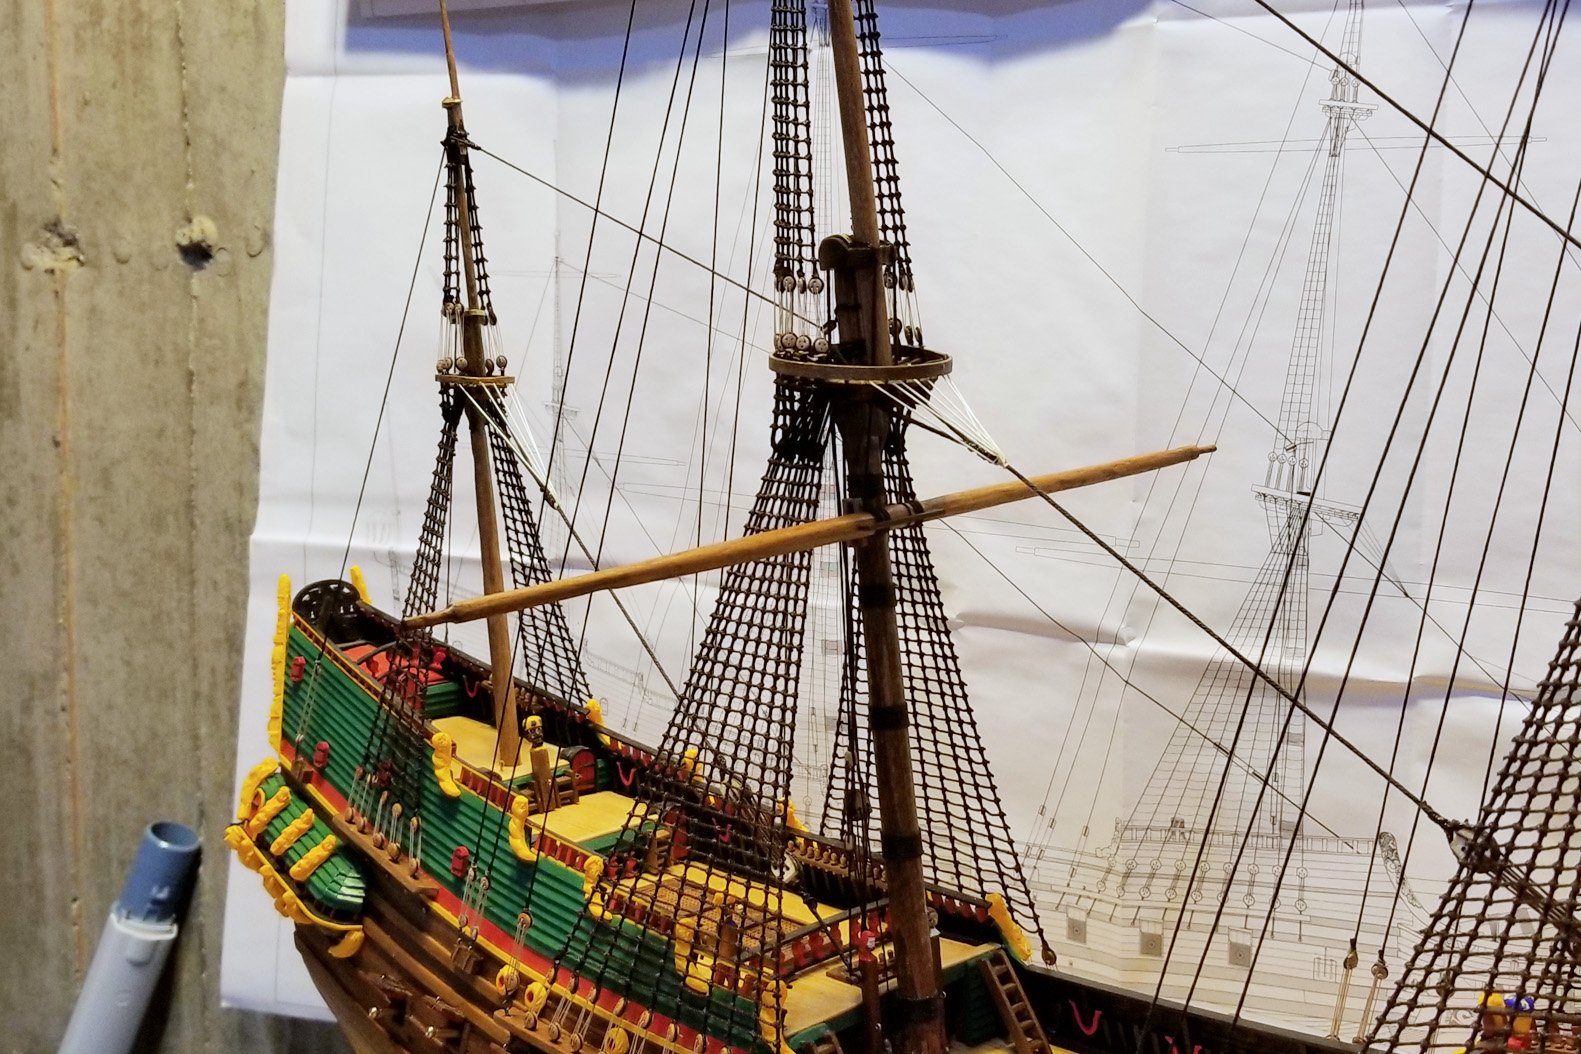
Now all the yard lifts are up.
Regards,
David

-
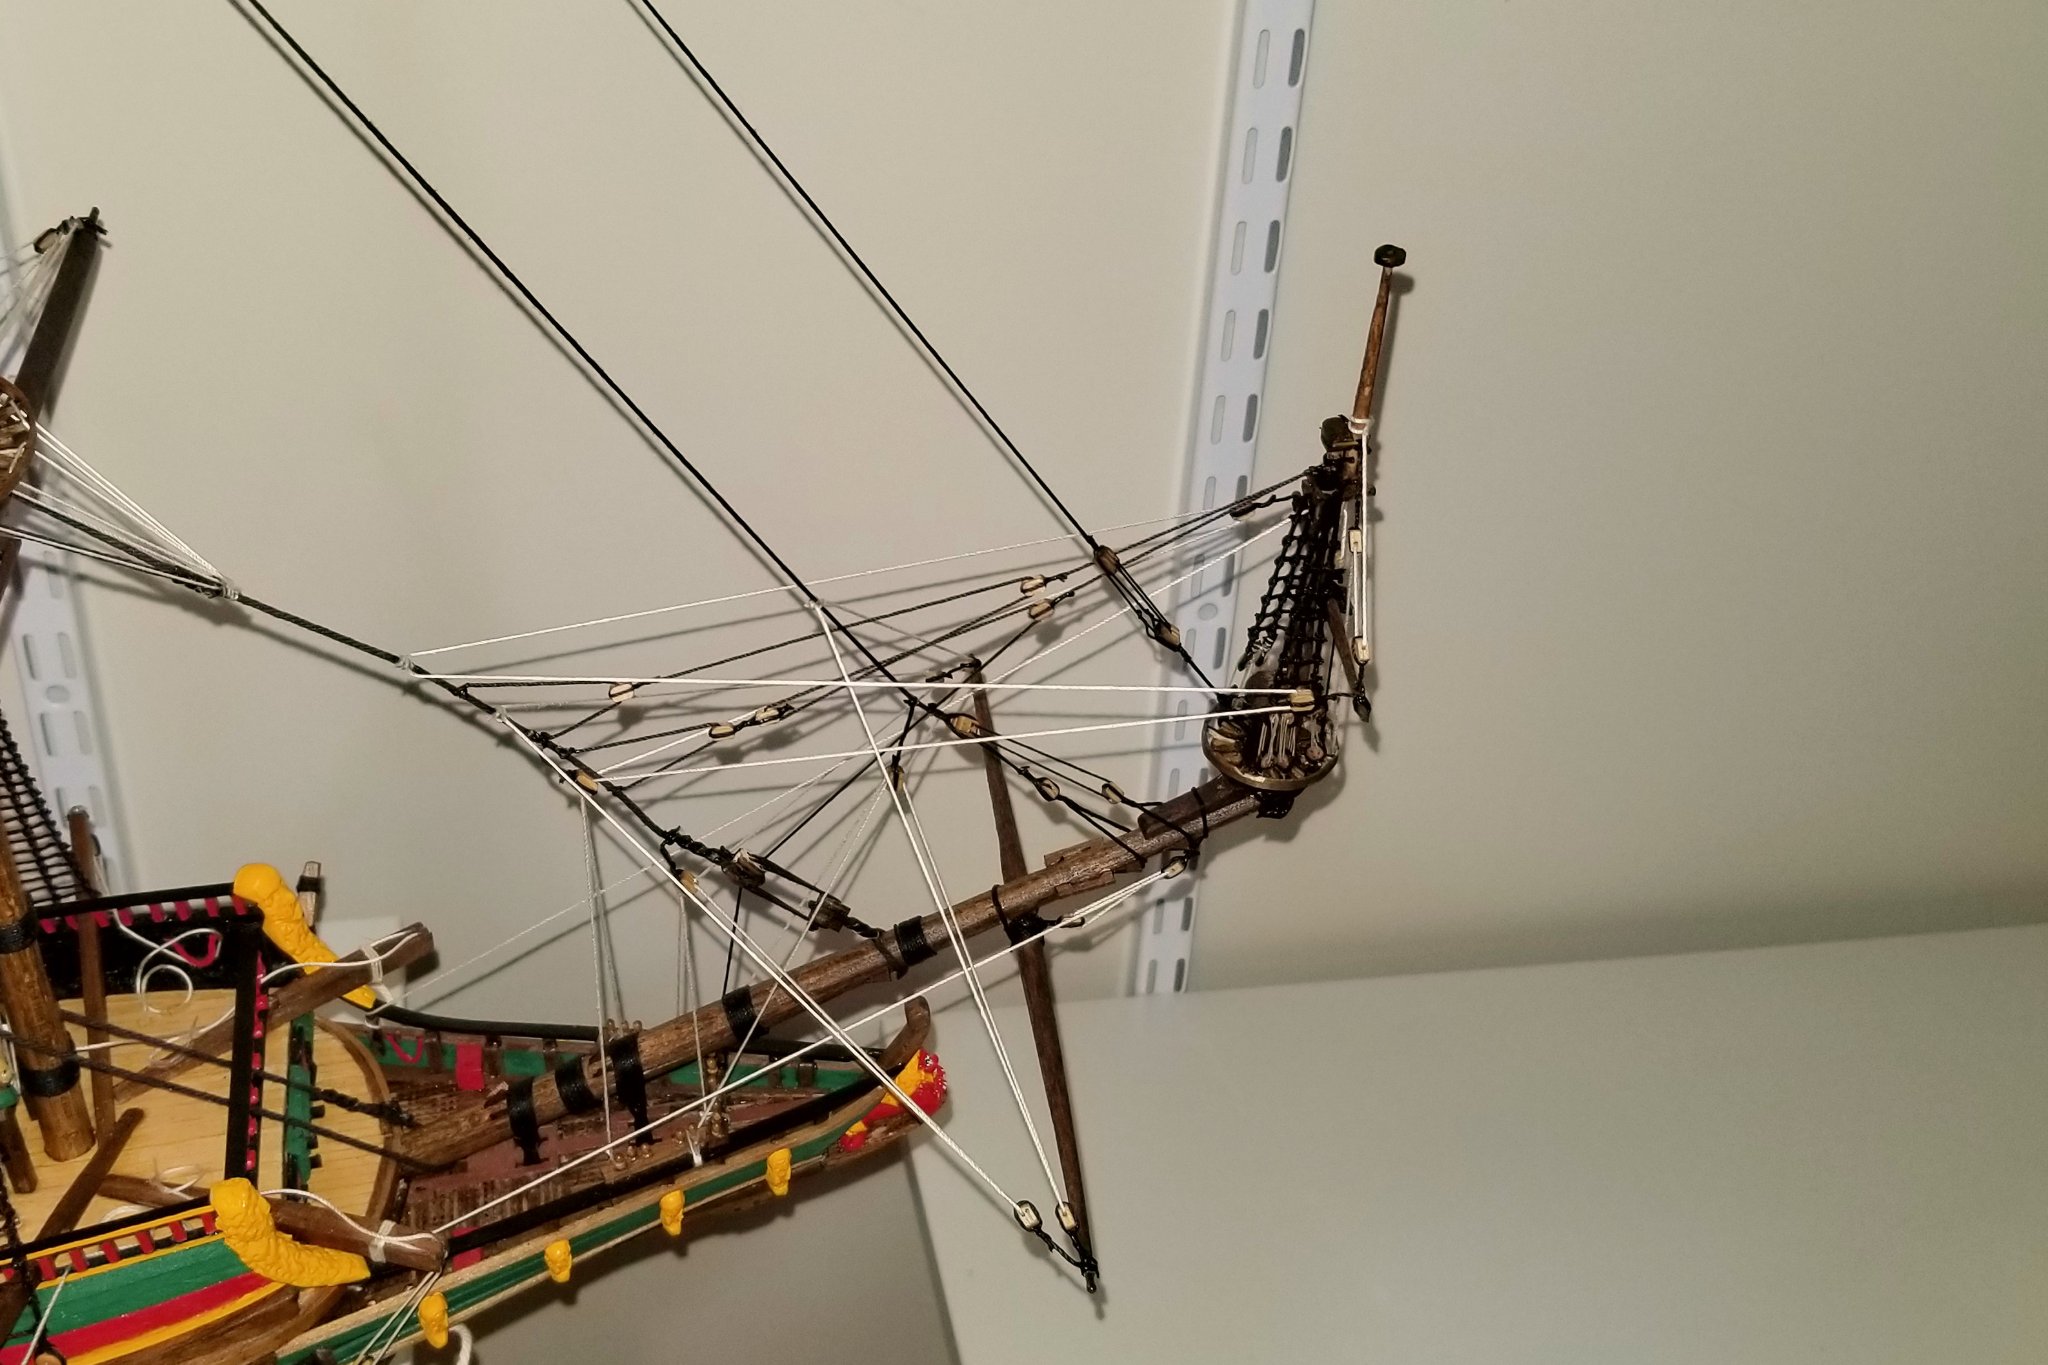
And here's the remaining lateen rigging that wasn't in the previous post.
Regards,
David
- GrandpaPhil, *Hans* and Edwardkenway
-
3
-
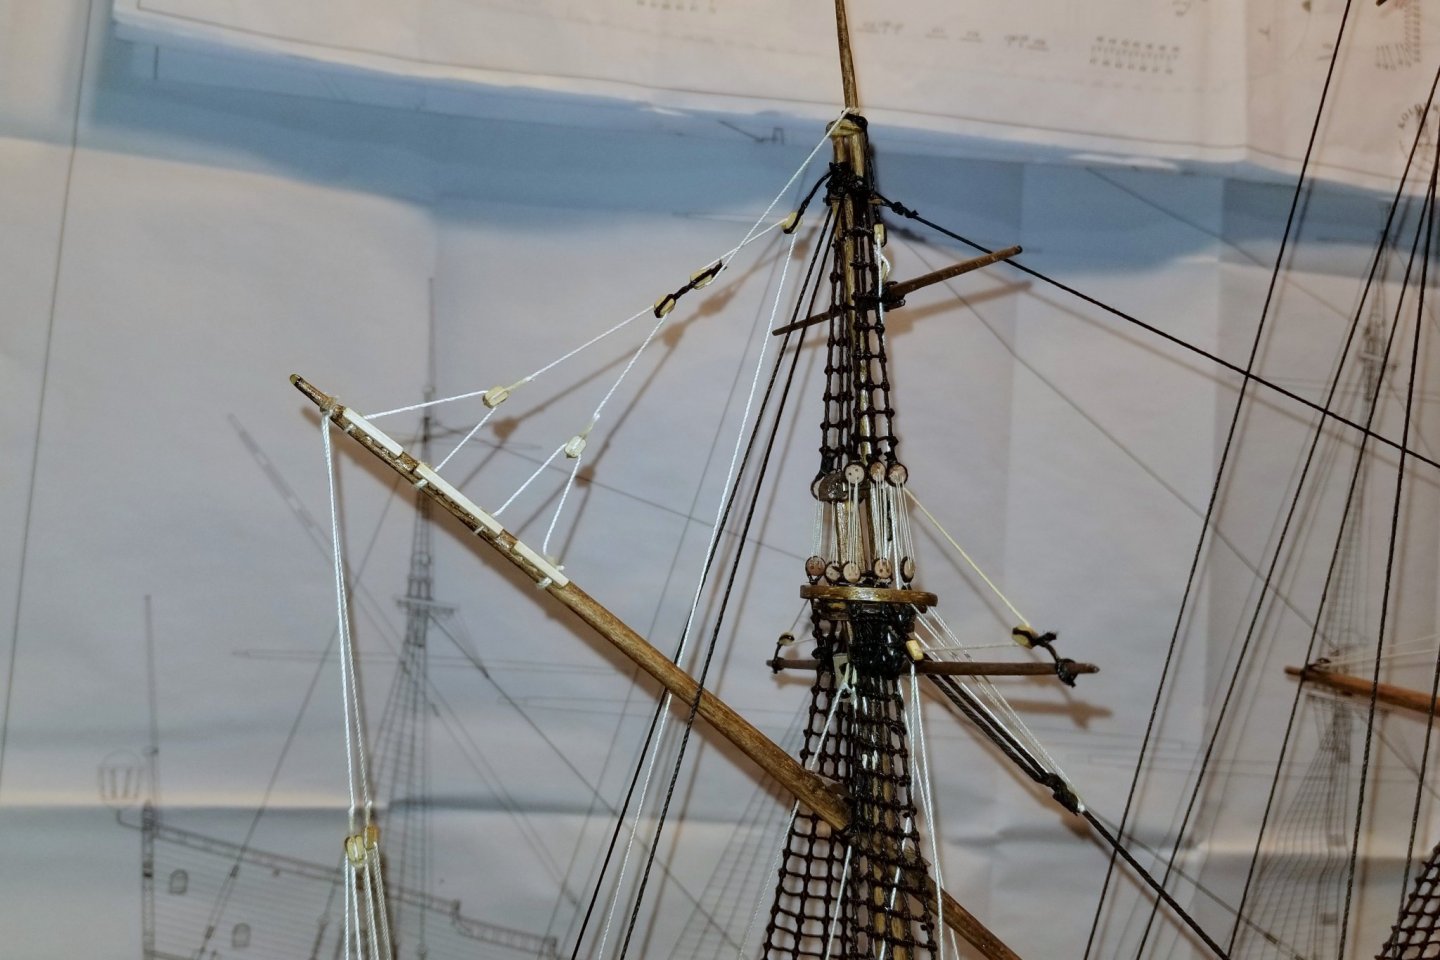
Lower yard lifts done; lateen yard rigged. Actually, partially rigged. There is some more rigging from the lateen to the mizzen that I have to do.
Regards,
David


- marktiedens, *Hans*, GrandpaPhil and 3 others
-
6
-
I used the wood supplied in the kit and finished it with satin polyurethane varnish -- no stain. I wonder if you got a different wood type?
Regards,
David
-
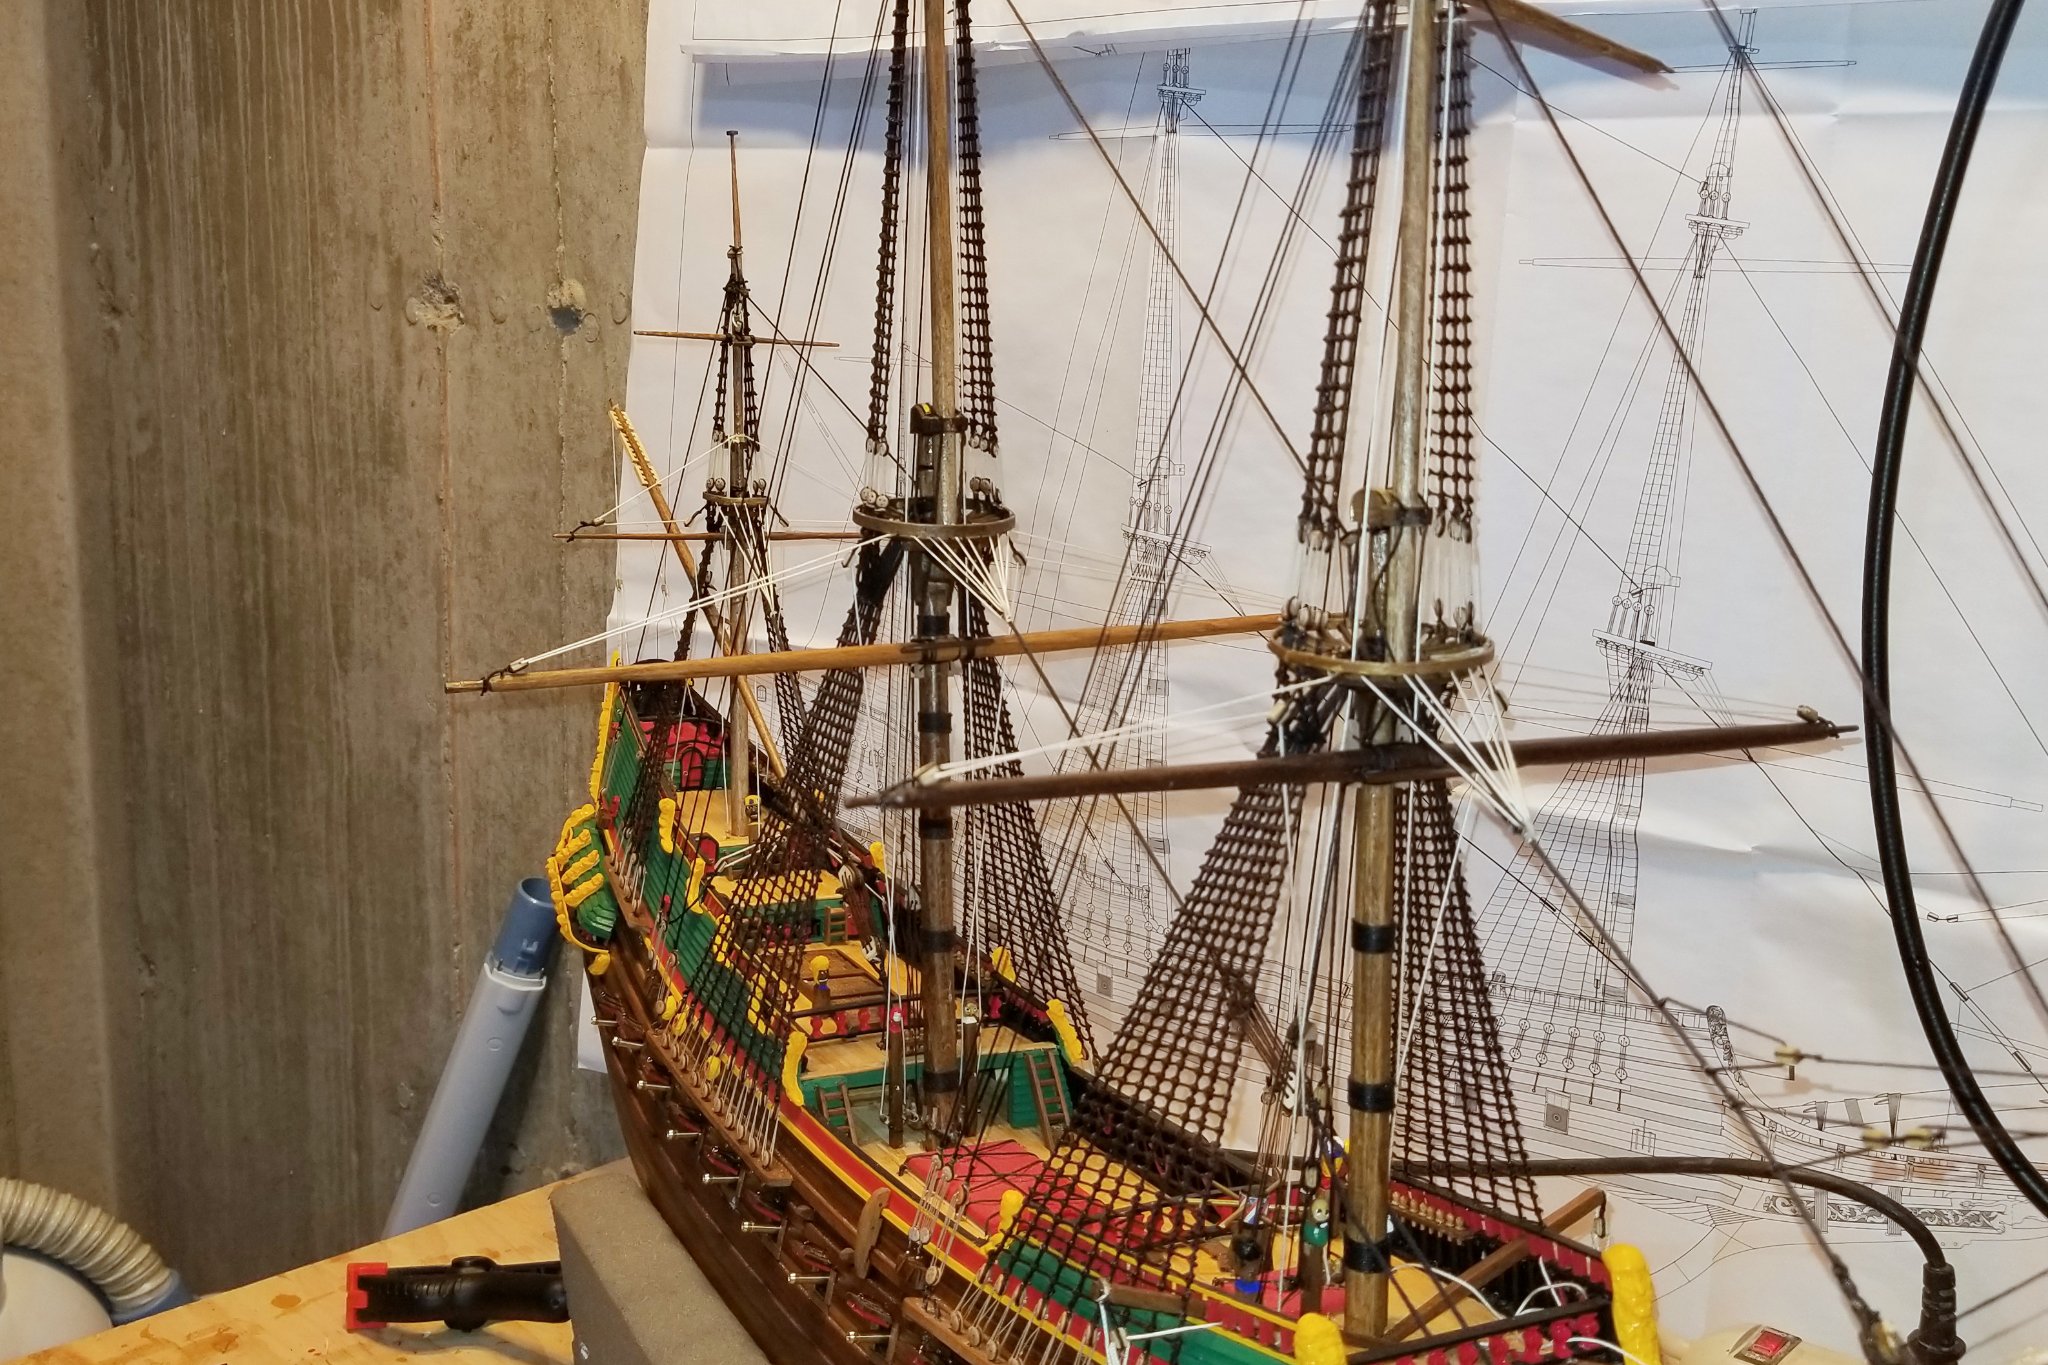
All yards now mounted. Ready for running rigging.
Regards,
David

-
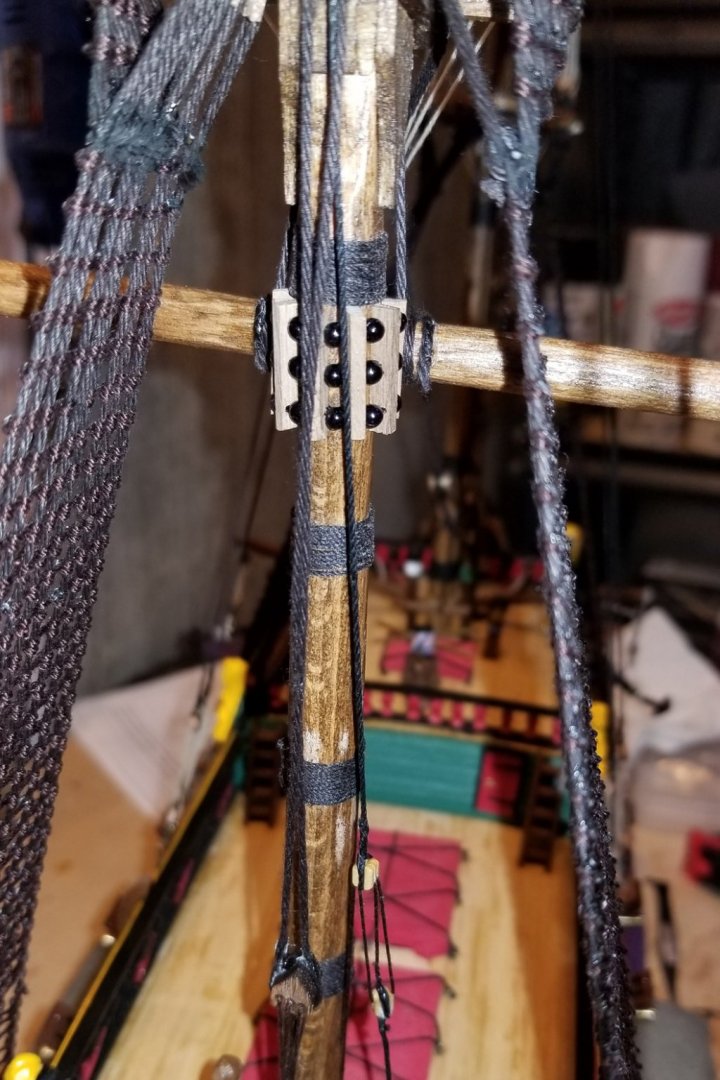
Lower main yard mounted. Close up of parrel beads & blocks.
Regards,
David

- *Hans*, GrandpaPhil, catopower and 2 others
-
5
-
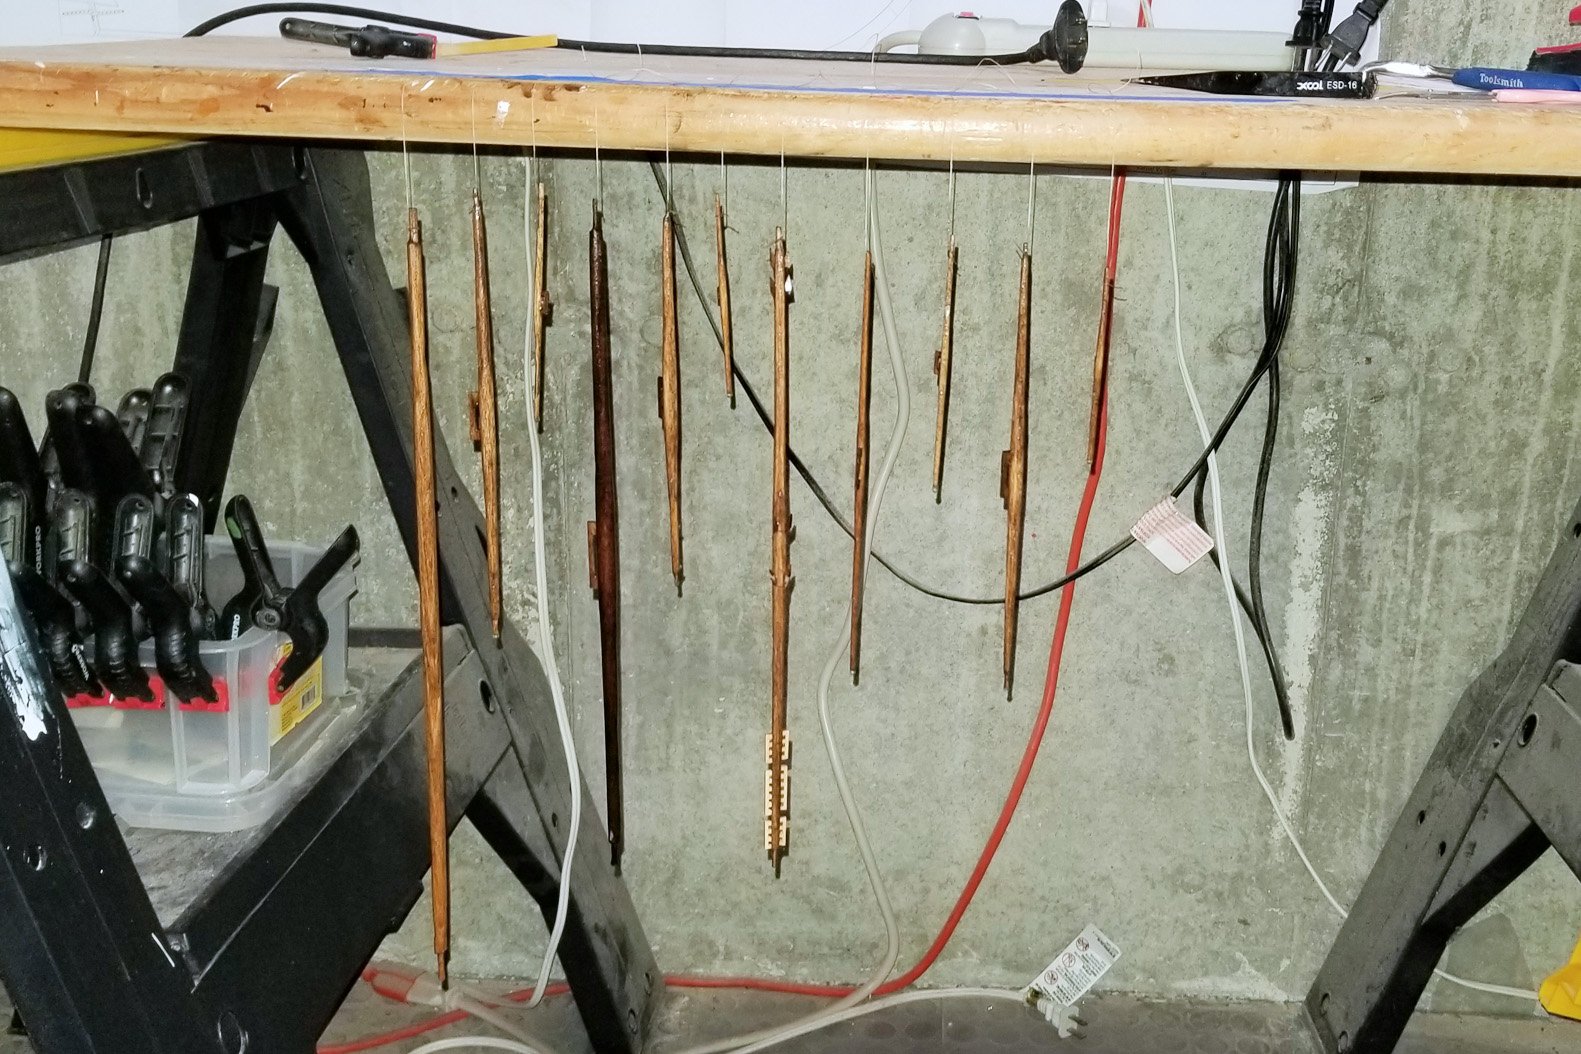
For fun, I took this picture of the yards with varnish drying. They look like sausages hanging.

I may have mentioned this in an earlier post, but before starting the masts and yards, I went through all of my dowels and labeled them in terms of which piece would be shaped from them. Important so you don't run out of a size you need. You'll notice one of the yards is darker. That's natural walnut that I took from my spare wood supply -- the others are stained. The issue was that the dowel I had allocated for that yard was double the diameter needed (the only option), and when I got to it I didn't feel like shaping all that wood down. I did have a walnut piece that was the right diameter, so used that. The mismatch in color isn't as dramatic as it looks in the picture.
Regards,
David


HM Cutter Alert by drobinson02199 - Vanguard Models - Scale 1:64
in - Kit build logs for subjects built from 1751 - 1800
Posted
Gunports cut and painted and bulwark tops installed.
Regards,
David