


drobinson02199
-
Posts
919 -
Joined
-
Last visited
Content Type
Profiles
Forums
Gallery
Events
Posts posted by drobinson02199
-
-
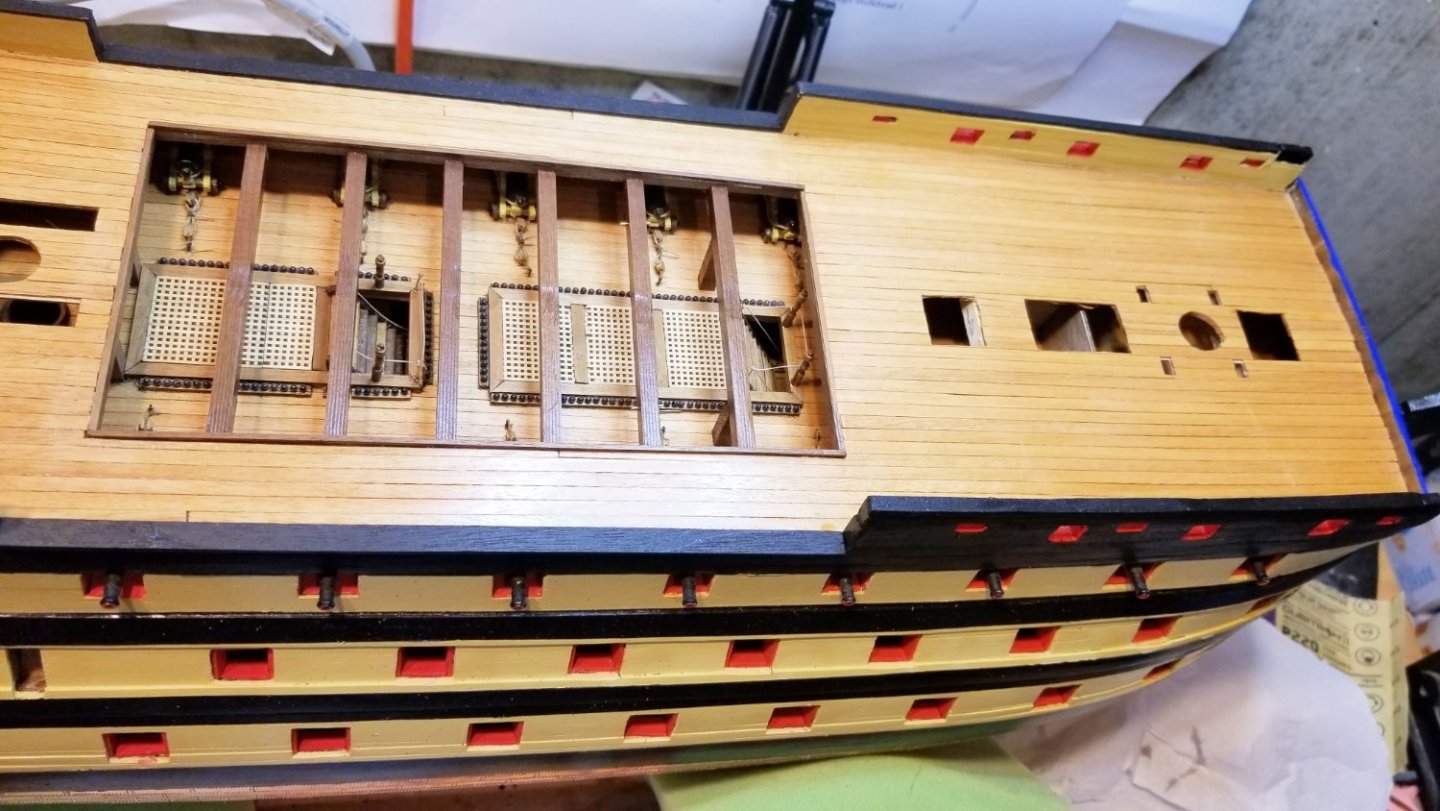
Installed bulwark fittings on quarterdeck and forecastle: shot racks, kevels, and pin racks.
I did the side pictured below second, and changed my approach after doing the port side first. On the port side, I tried to install the shot onto the shot racks after they were installed, and with the bulwark there to get in the way of the tweezers, it was really difficult. So on the starboard side (pictured), I installed the shot onto the racks off the ship (same for the pinrails), and then installed them. Also note that these pinrails are much better spaced than the ones on the bitts, about which there was discussion above.
The side pictured is the one that will show when I display the model.
Regards,
David

-
Allan:
I admire your attention to historical detail (and am amazed at some of the details you come up with), but I don't have the motivation to change the pins out. I've had cross-pieces become difficult in the past, and I solve it by either doubling up on a pin, or wrapping line on the cross piece. I took a sideways look at the assemblies after I got your first message, and there's actually a bit of room between many of the pins -- enough to sneak lines through if they aren't too thick.
But thanks for the suggestions -- I'm always interested in getting them 😁
Regards,
David
- allanyed and Bill Morrison
-
 2
2
-
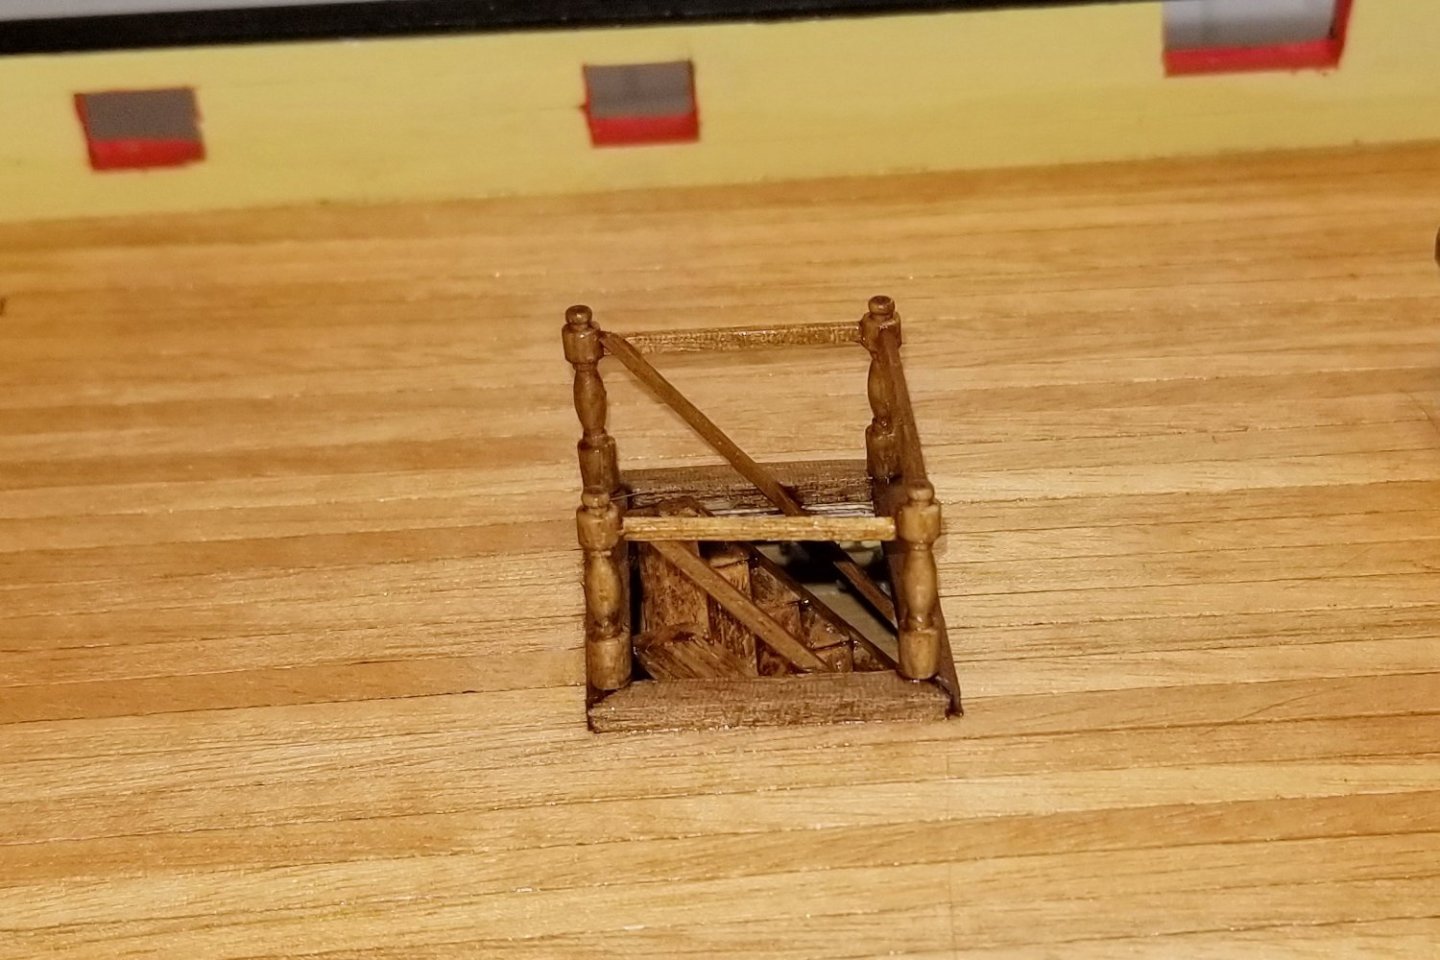
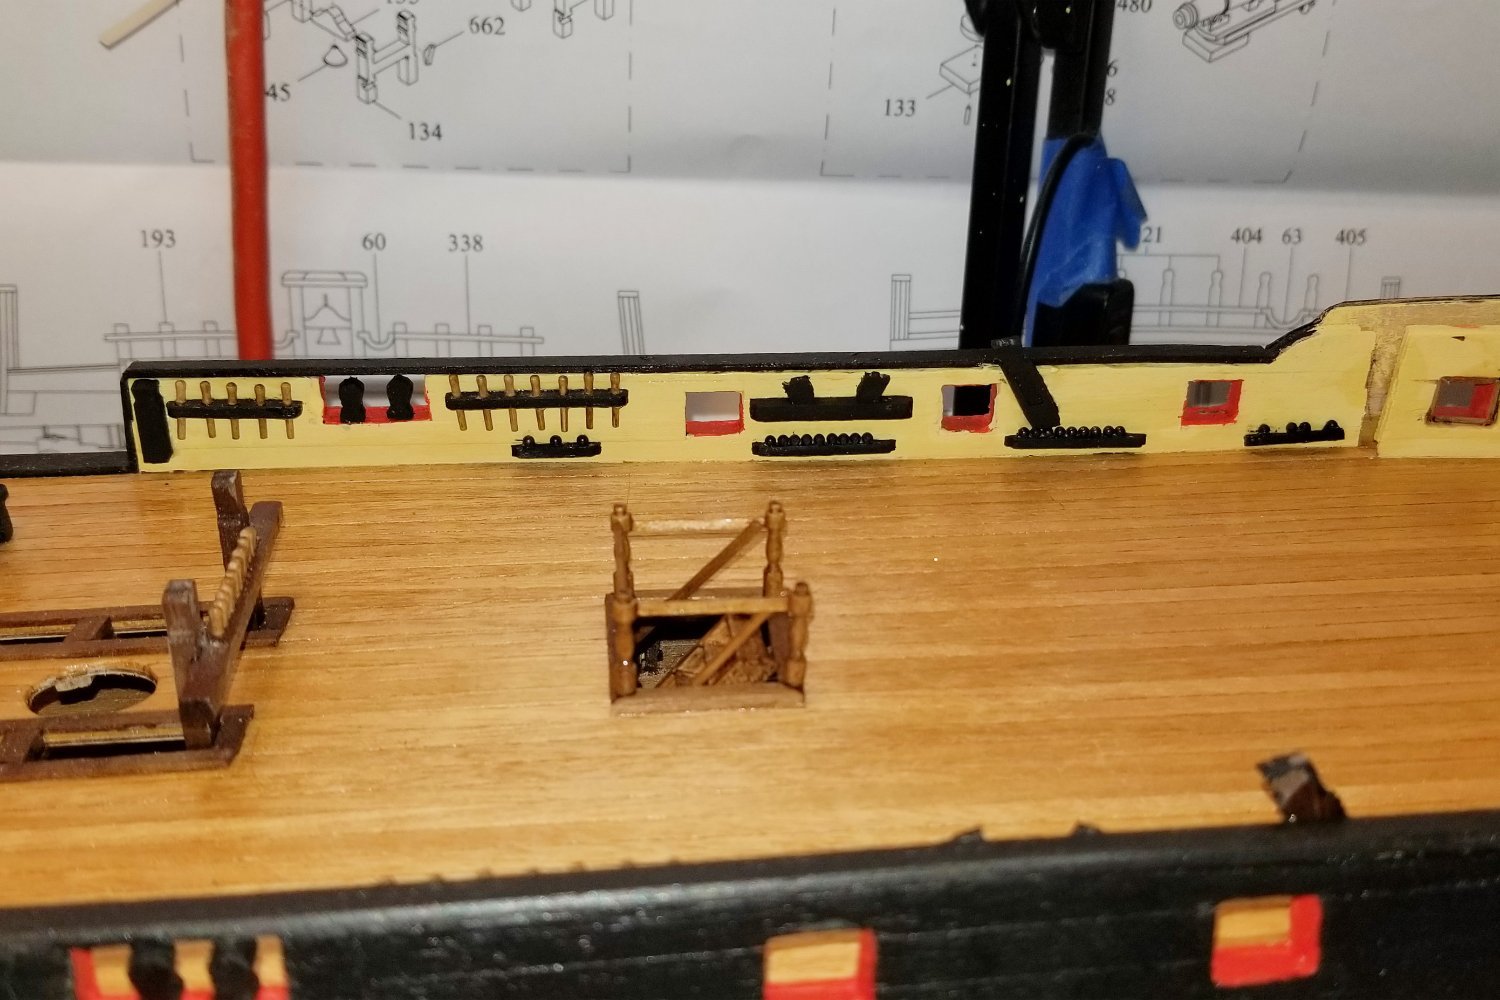
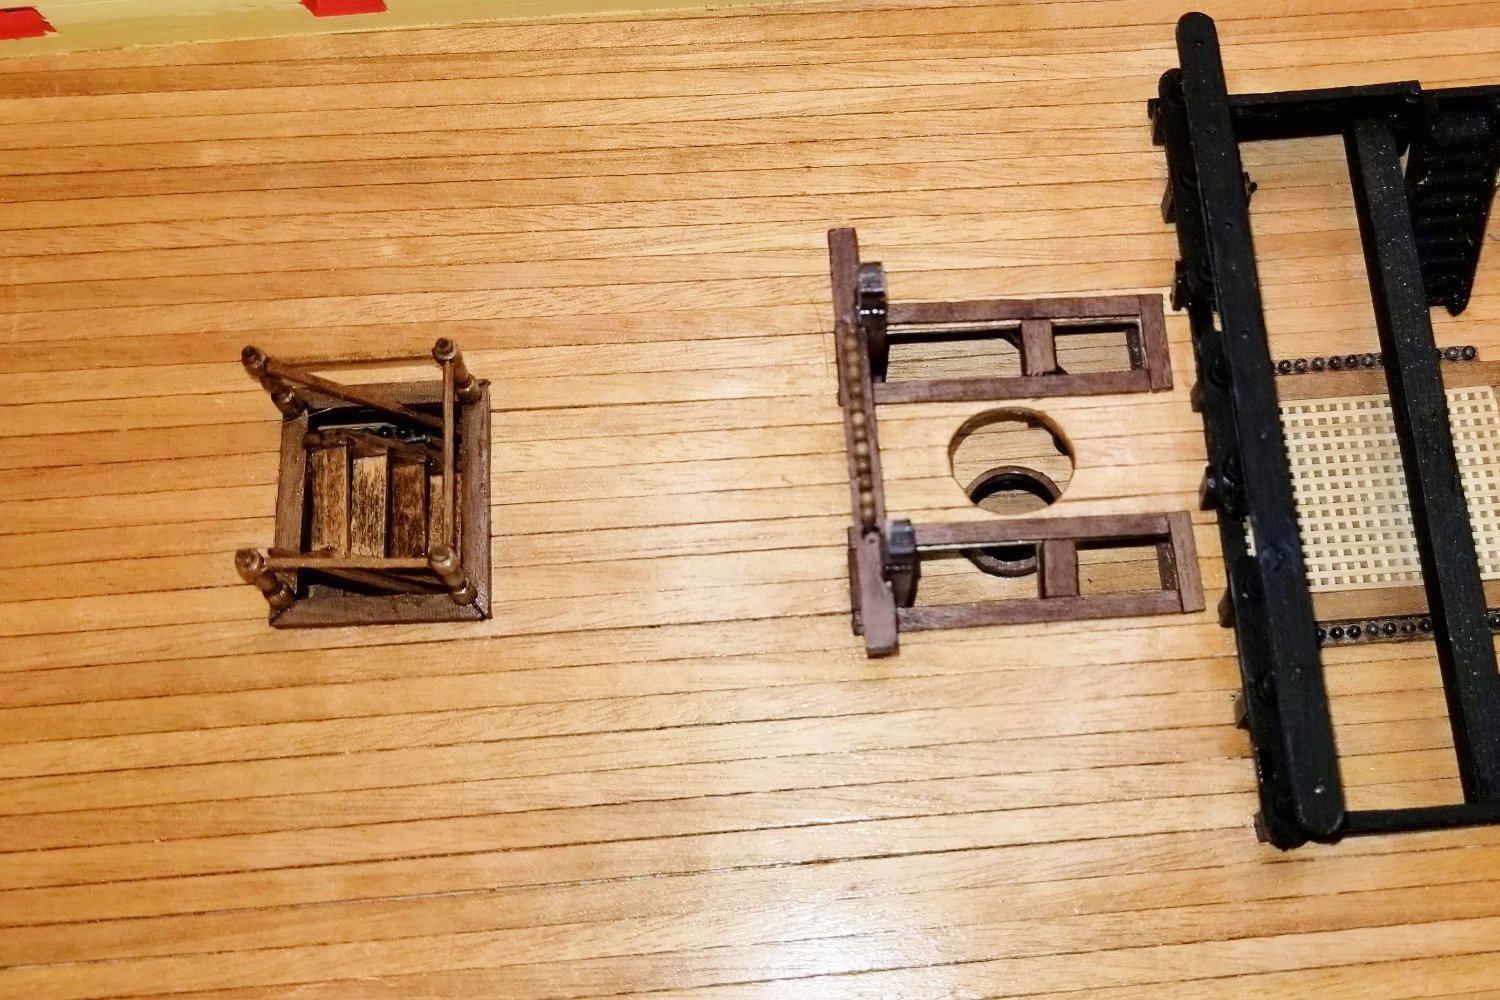
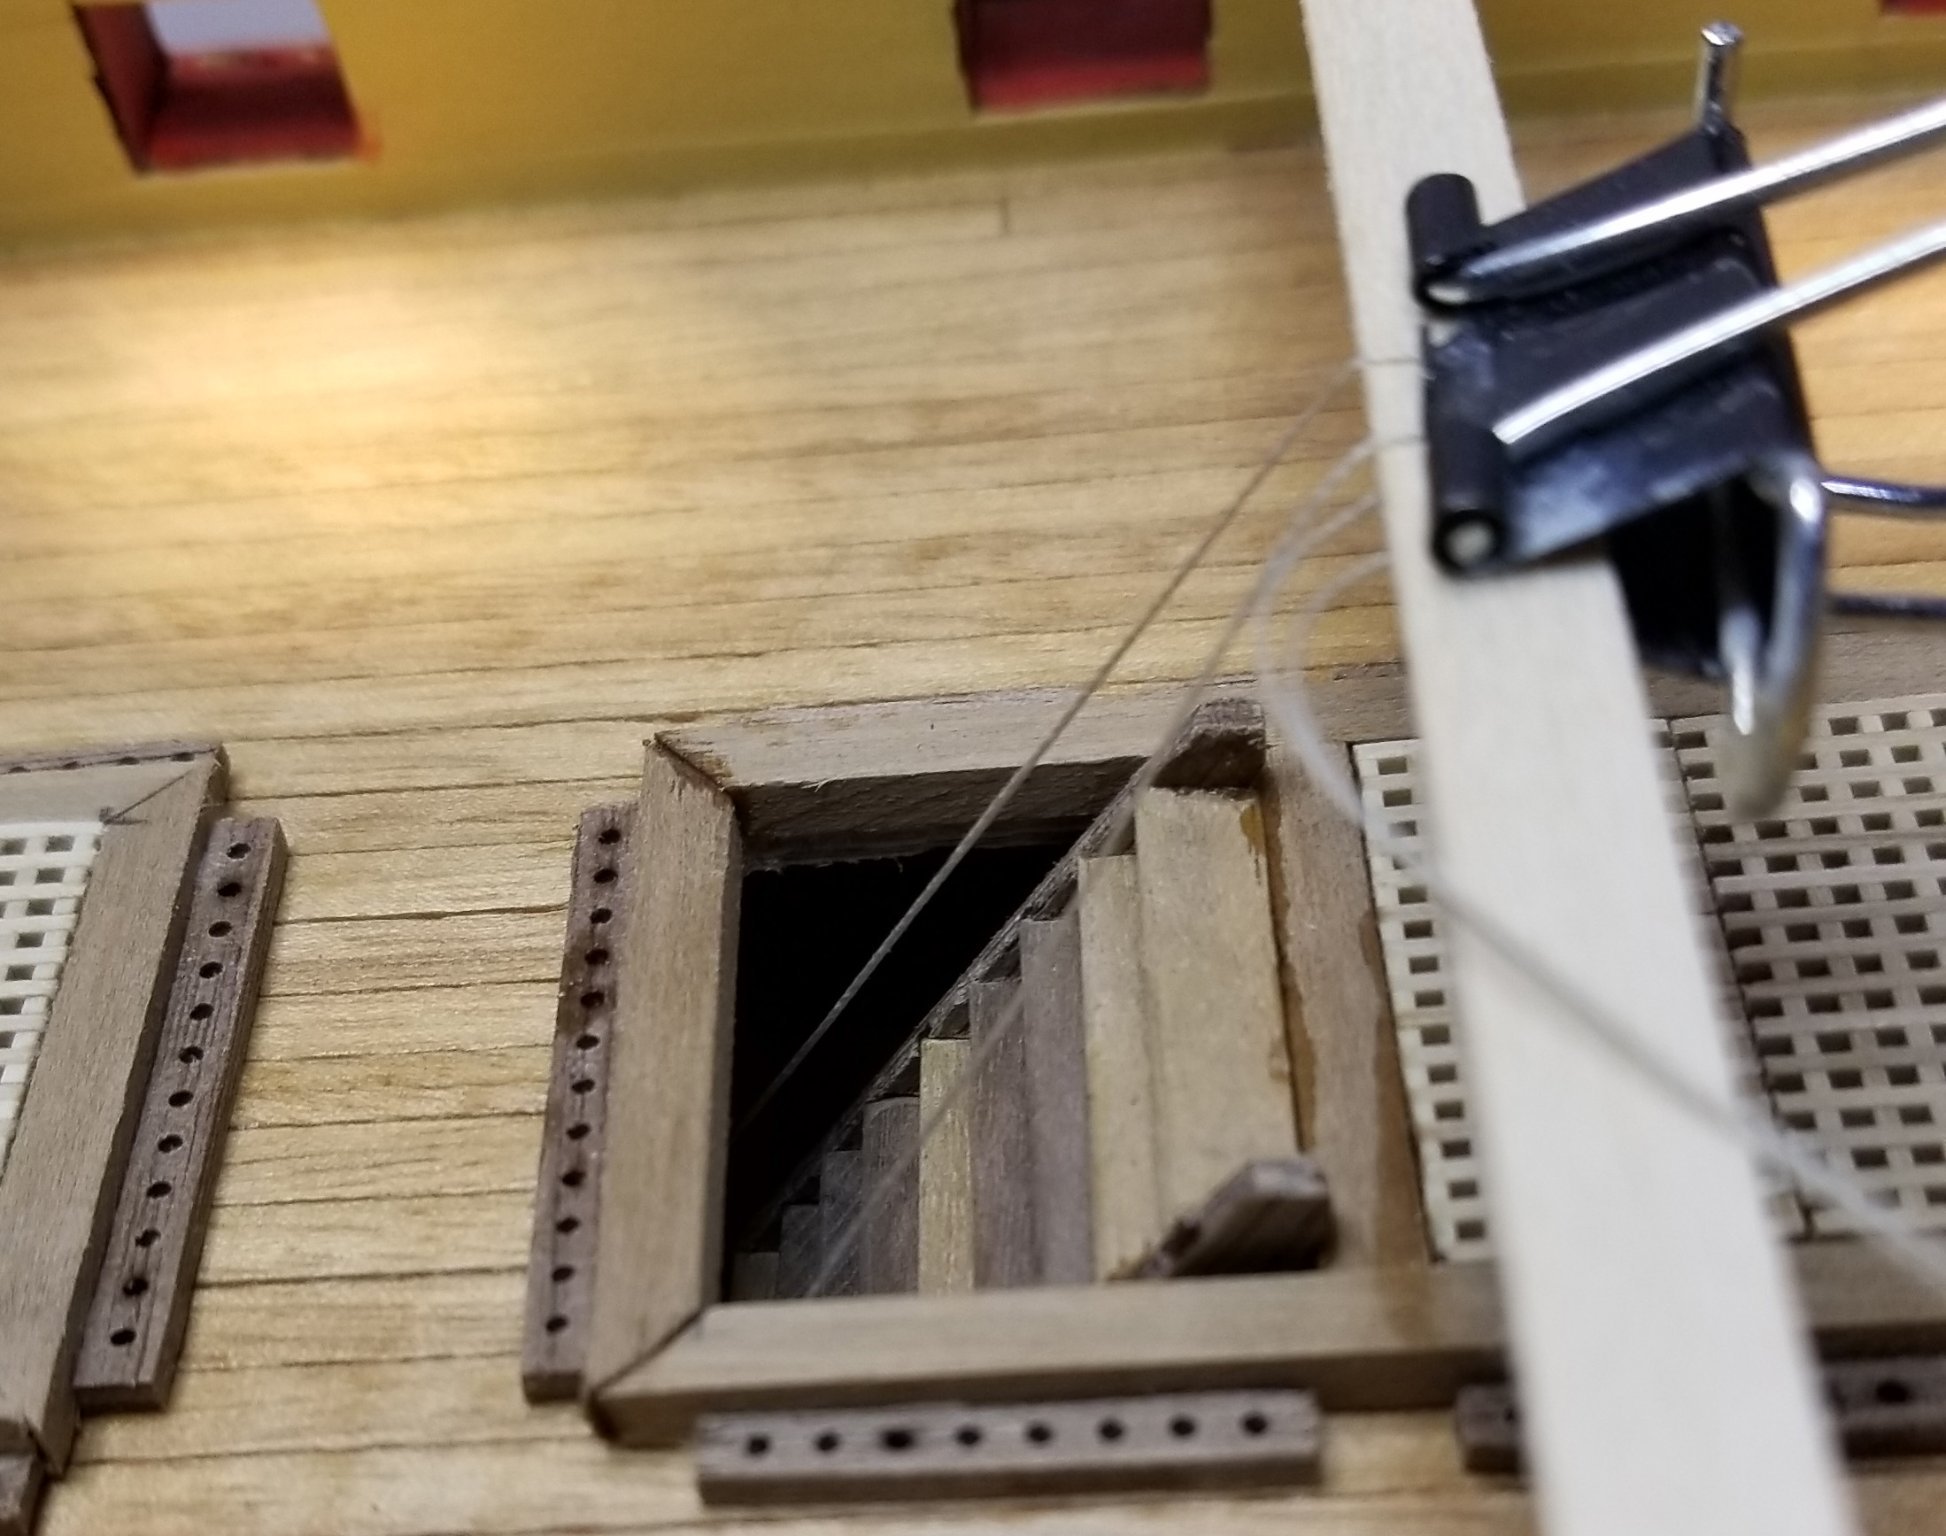
Lined the quarterdeck rigging opening and constructed the Main Companionway.
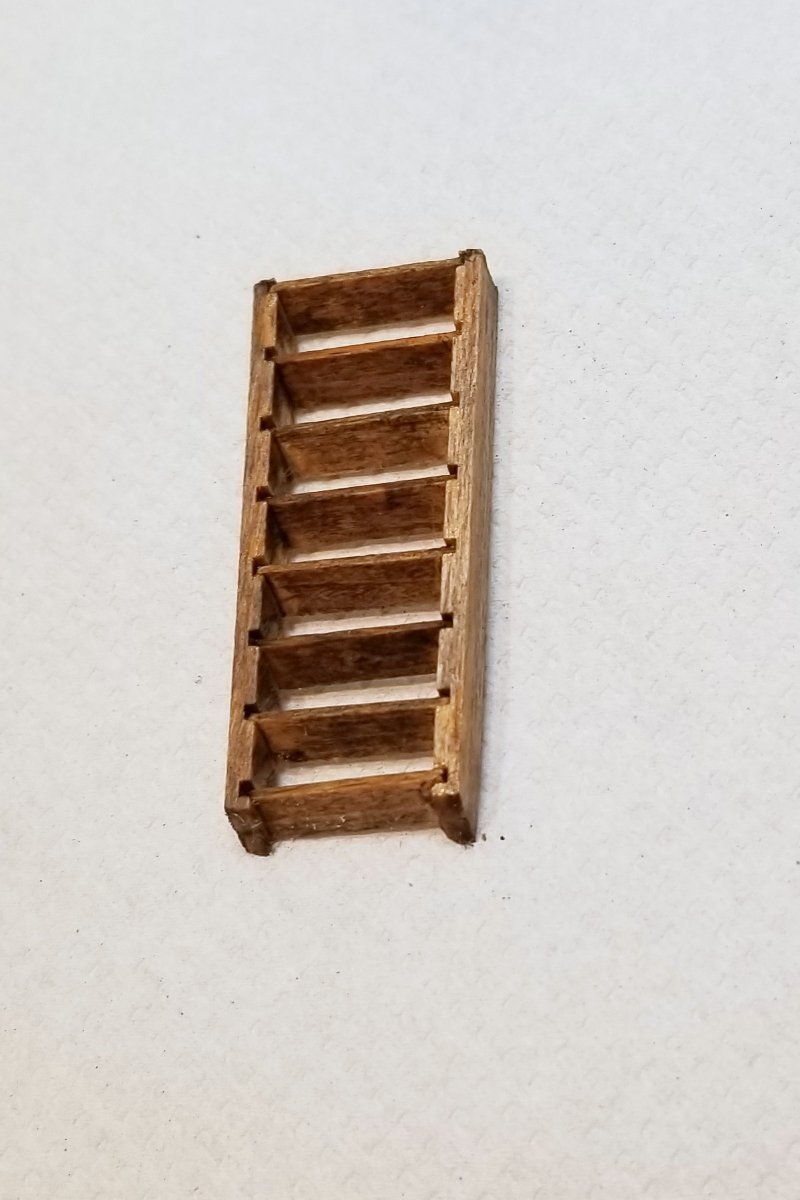
The latter of those two was something of an adventure. The ladder for that opening was constructed many steps ago, to match in width to balusters already installed below on the upper gun deck. I was positioning it for gluing, it slipped out of the pliers, and fell down not just to the upper gun deck below, but through the opening in that deck and down to the lower gun deck (two decks below), and then out of sight. I had put some glue on the bottom of the ladder, and so I couldn't dislodge it by shaking the ship upside down, although I suspect I'd never have retrieved it anyway. Out of sight, gone forever.
Fortunately, in my leftover parts box from prior builds, I had a ladder (in plain wood), so I stained it (picture below), and installed it into the main companionway. Not as elegant as the original, but serviceable.
Now as I look at the Main Companionway railings, I realize that there are supposed to be lower railings parallel to the upper horizontal ones. I'll get to that later (maybe 🤔)
Regards,
David

-
Allan:
You are quite right -- they are VERY close together, and I had that concern about rigging when I installed them. The holes in the cross-pieces are pre-drilled, and the pins are supplied, so this is the spacing that results.
I was reluctant to install fewer pins for fear that I would need them all when it came time to rig. So I'll just make it work when that time comes.
Regards,
David
- Bill Morrison and src
-
2
-
Built, painted and mounted the waist ladders.
Regards,
David
-
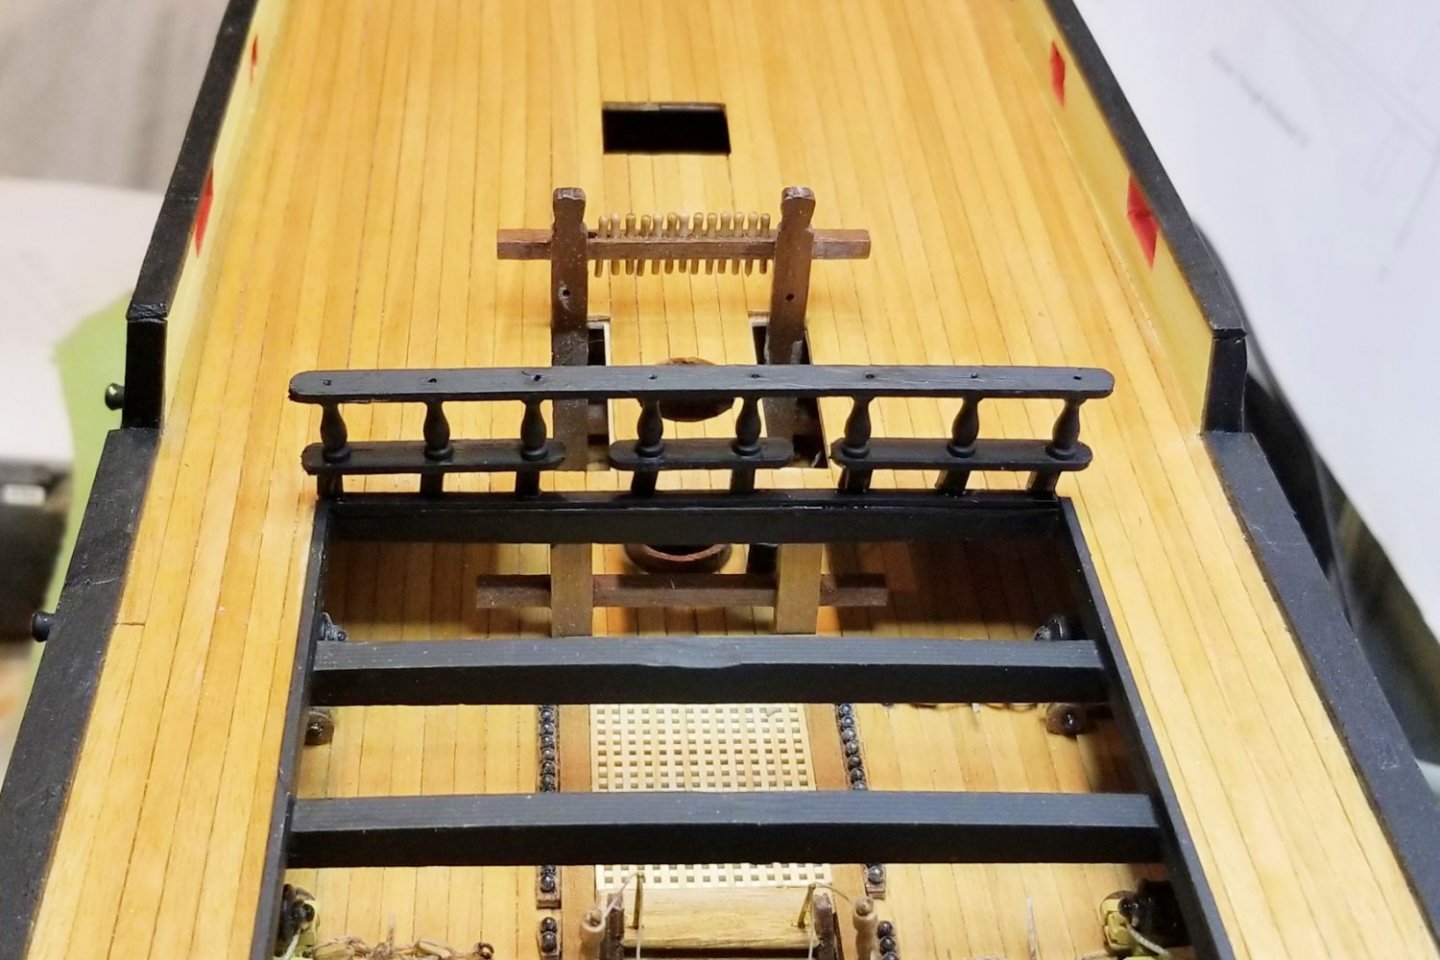
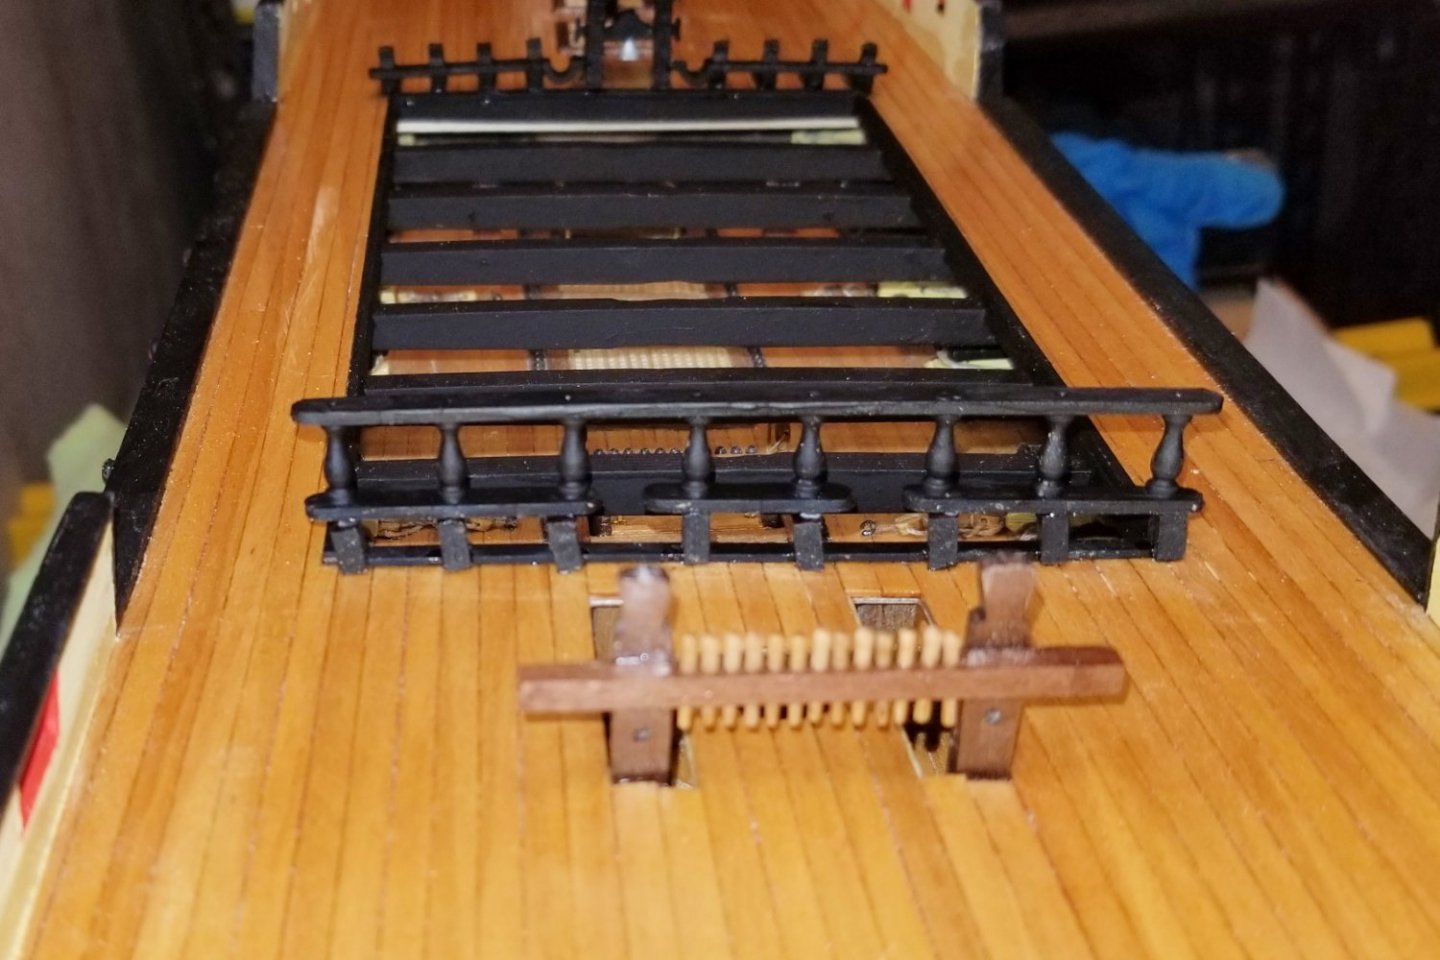
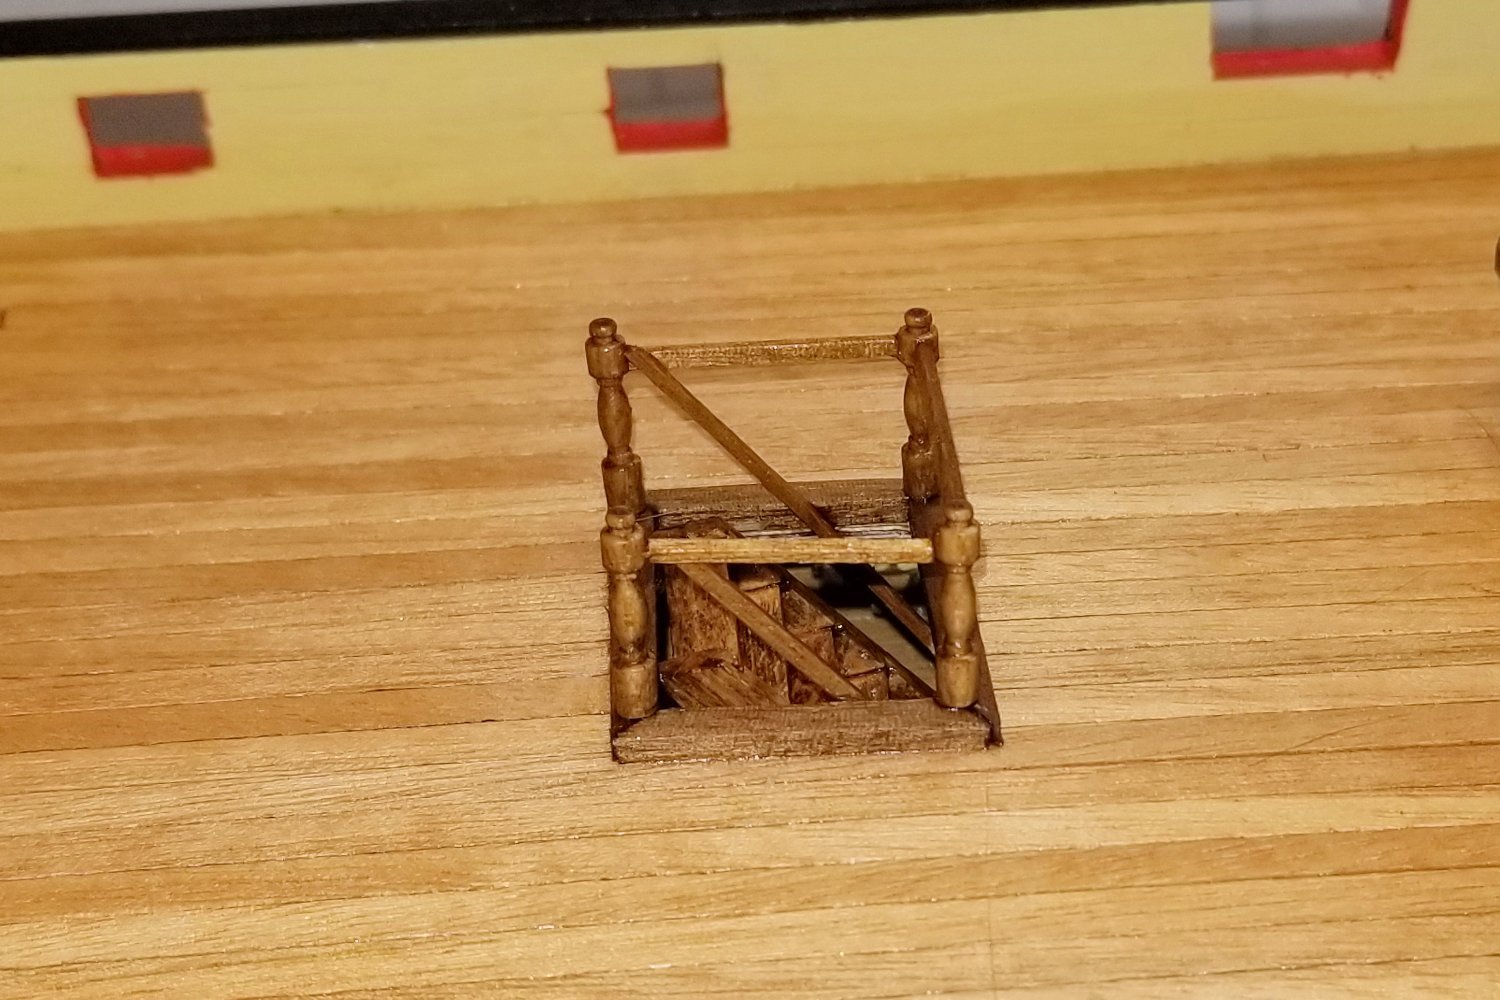
Quarterdeck Barricade assembled, painted and mounted.
The instructions say to build this from the bottom up, but I found that alignment was easier if I built it from the top down to the lower rail, then mounted the wooden posts to the deck, and then mounted the assembly to those.
Regards,
David
- Bill Morrison, Kingspoke, mort stoll and 1 other
-
4
-
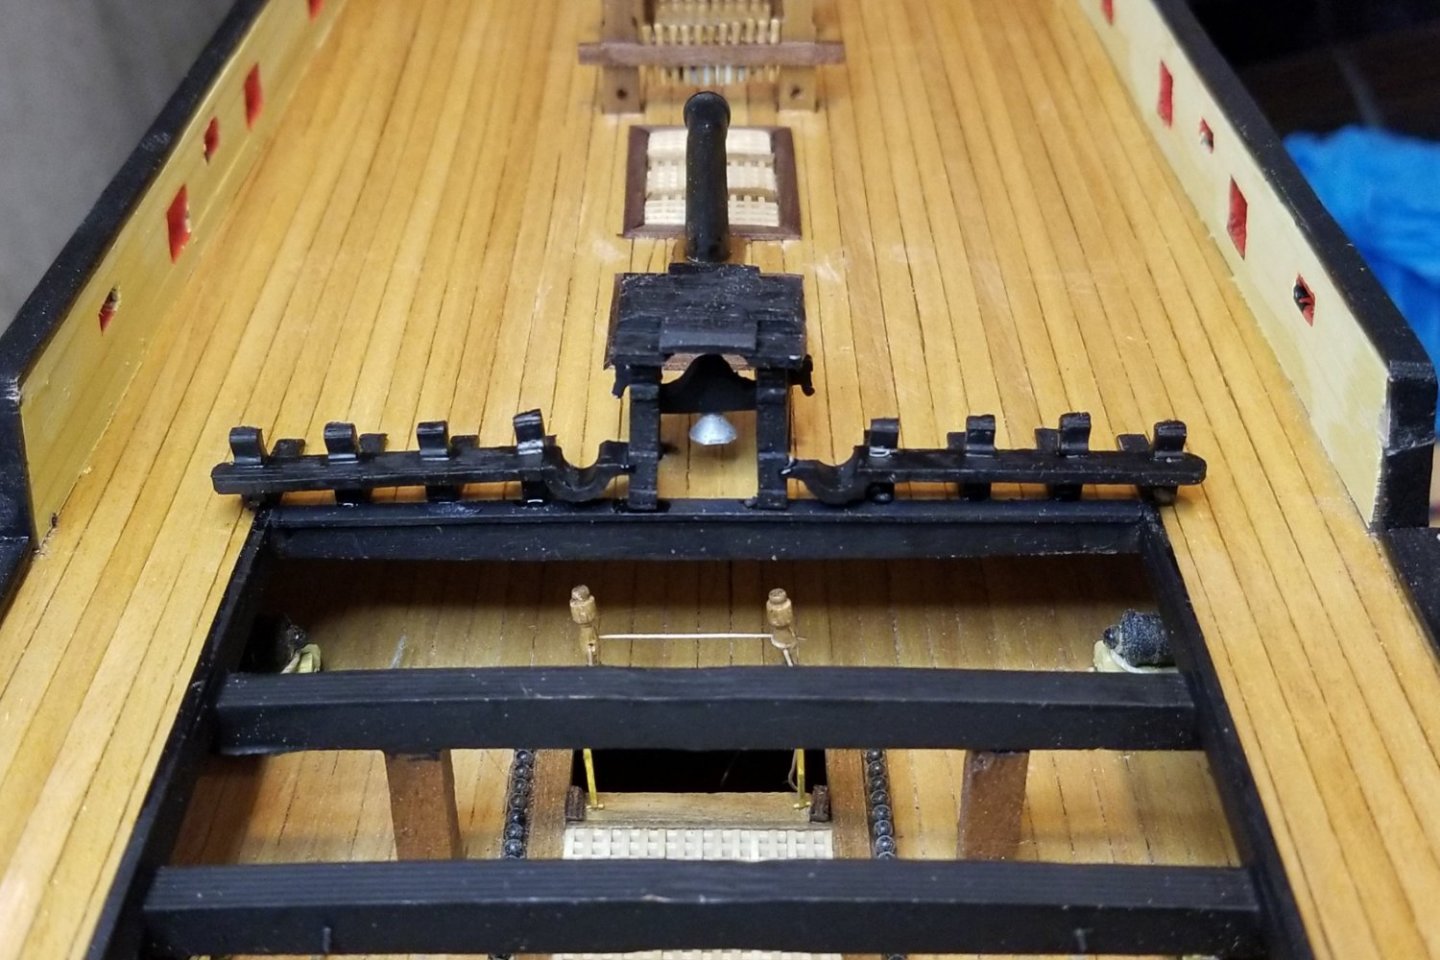
Assembled, painted and mounted the forecastle breast beam assembly.
This was a tricky assembly -- getting the belfry started and aligned, and finishing off the U parts of the horizontal beam.
Regards,
David
-
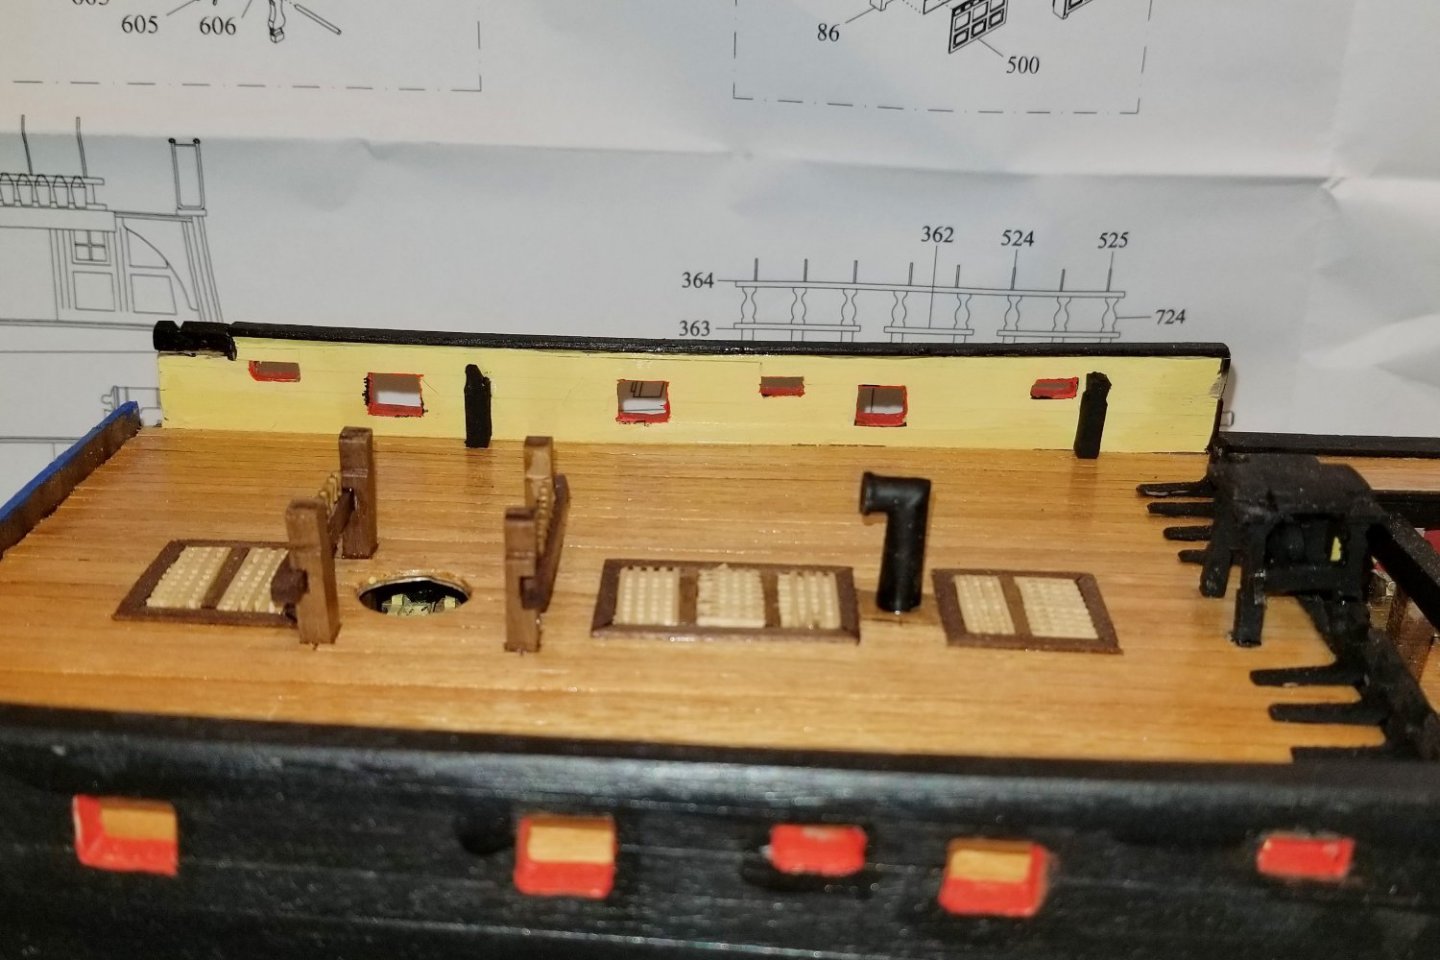
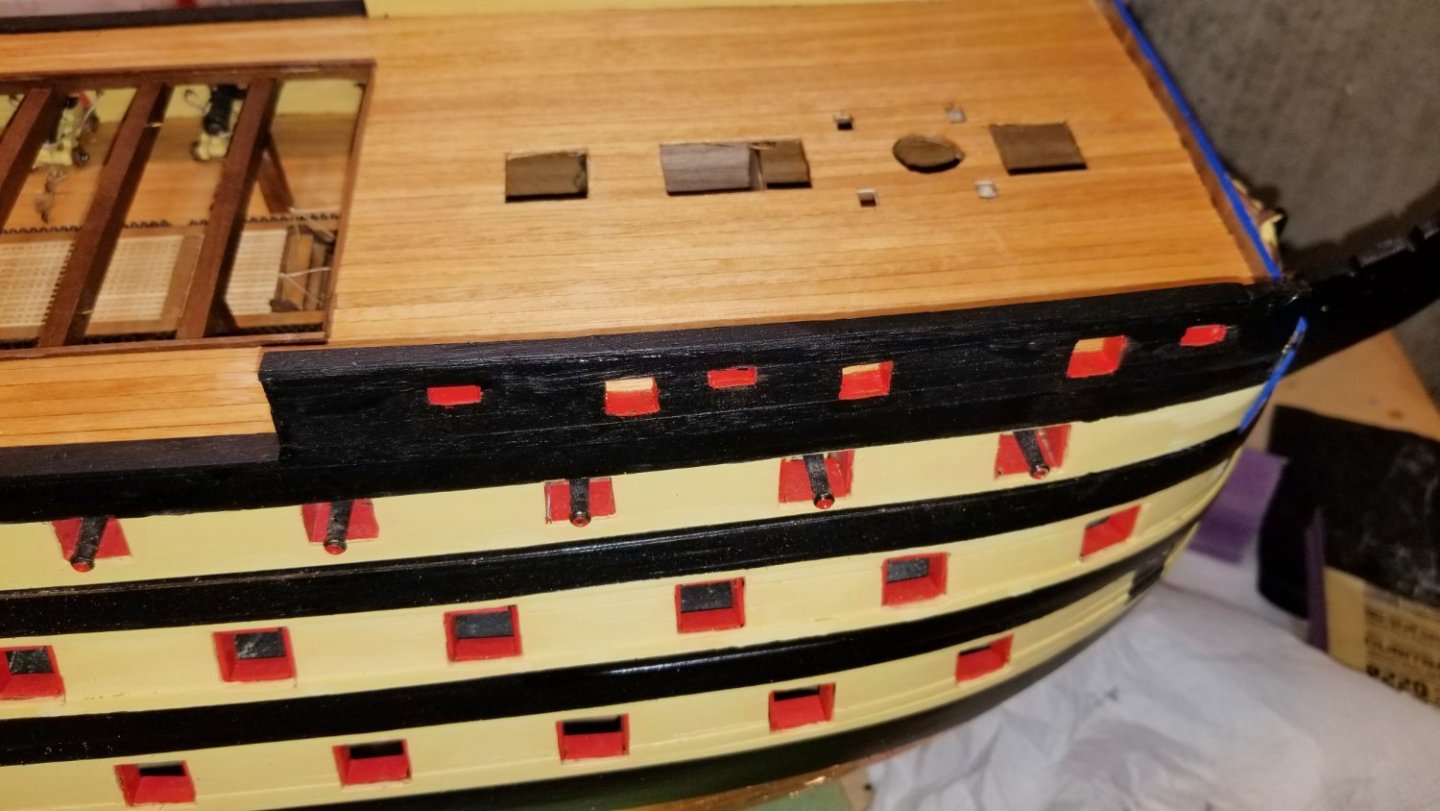
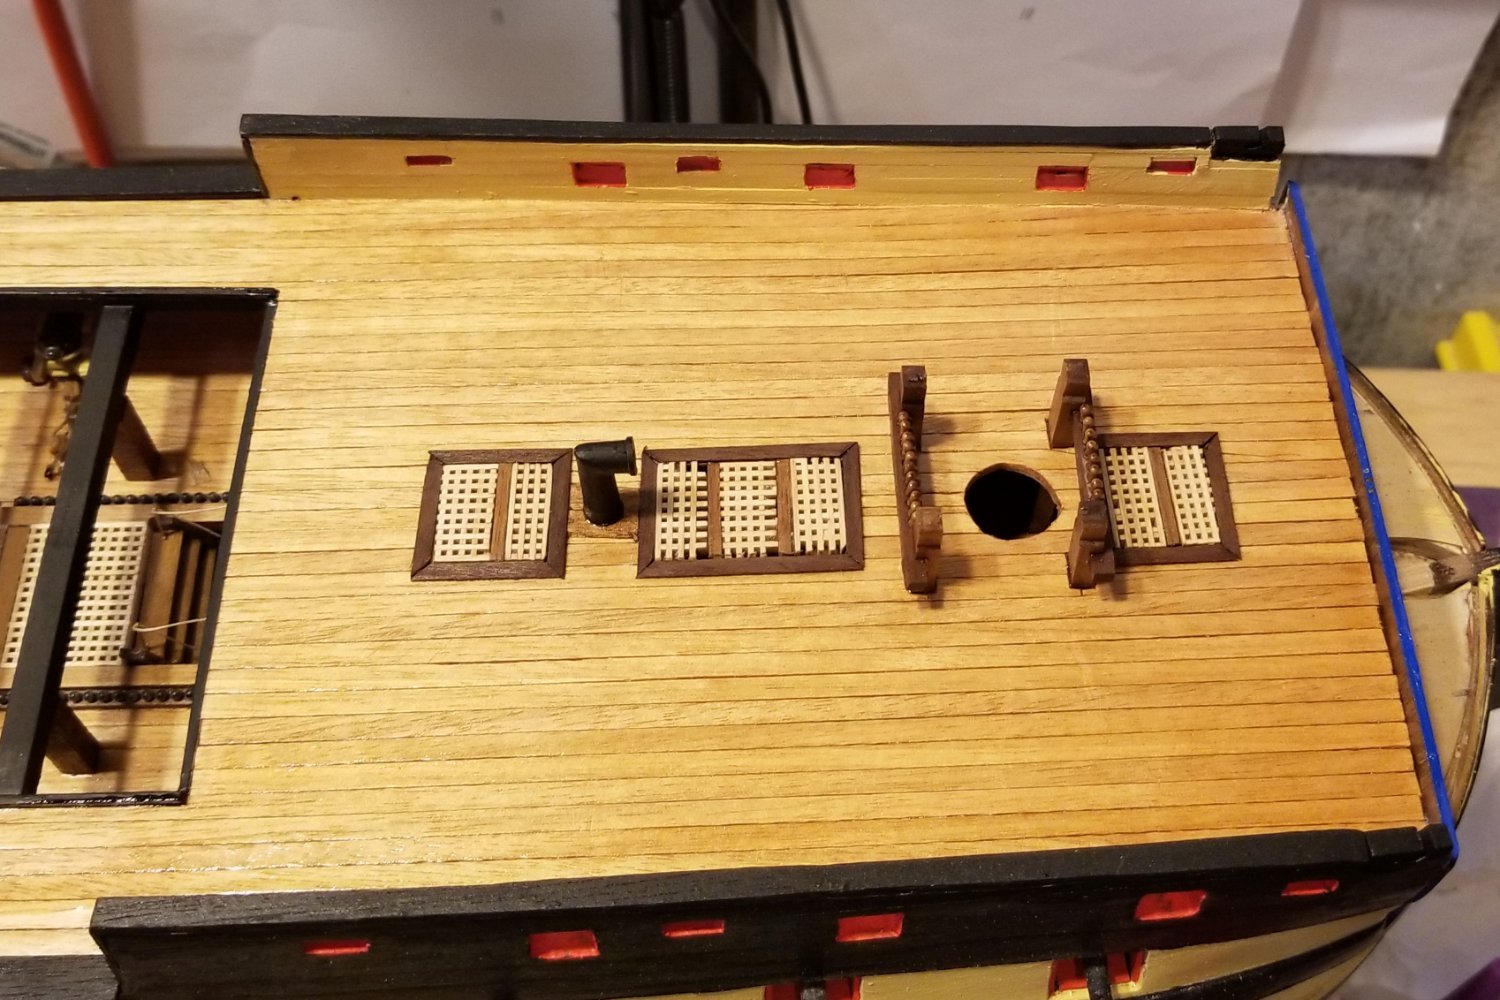
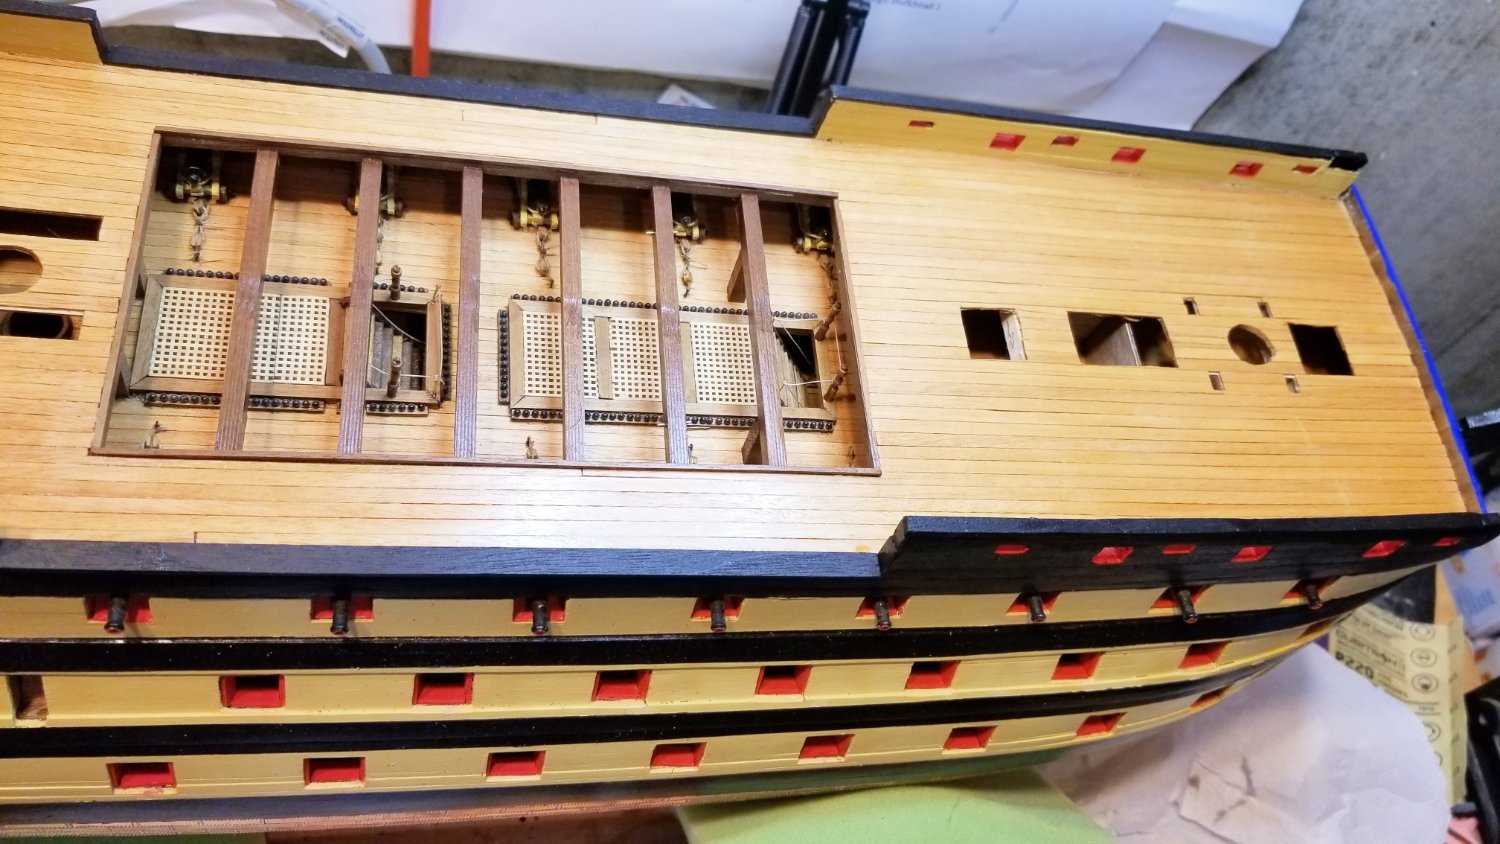
Finished the hatches and bitts on the forecastle, and varnished them.
As I started the next assembly, I realized that if I stayed with natural walnut vs. black, the deck would not look as sharp as it should. So I went back and painted the skid beam (in place) black, as per the picture below.
Regards,
David


- Charter33, BobG, mort stoll and 3 others
-
6
-
Allan:
After I finished the center hatch, I wished I had decided to do it that way. Would look very nice, although higher hatches than what's called for in the plans (higher like the ones on the lower deck, as you note).
I'm happier with the result on the second hatch using the bottom support strips.
Regards,
David
- BobG and Bill Morrison
-
2
-
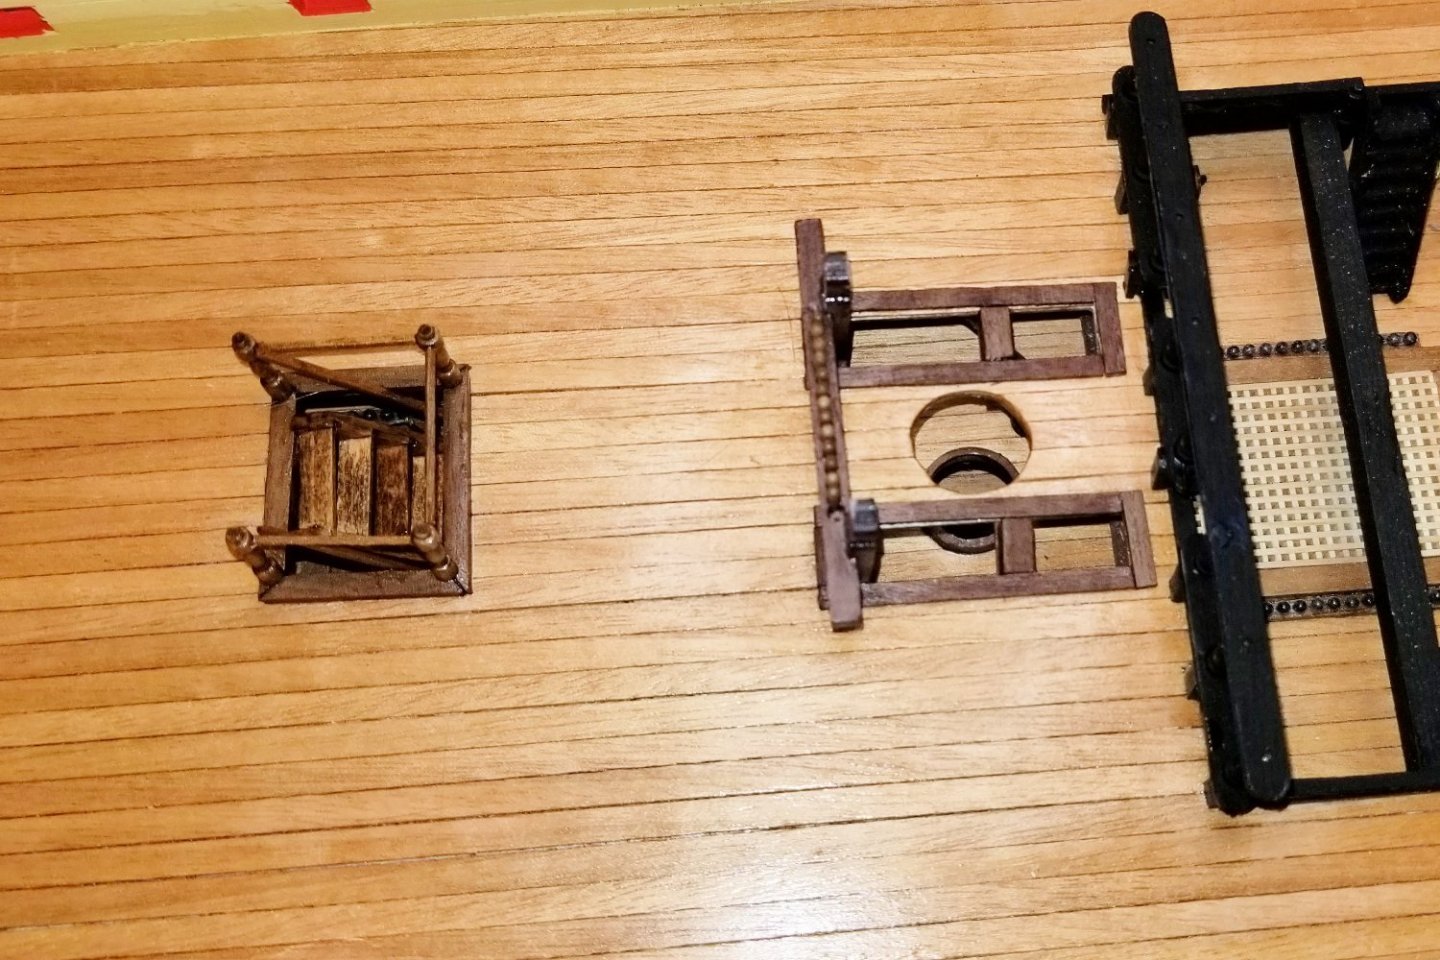
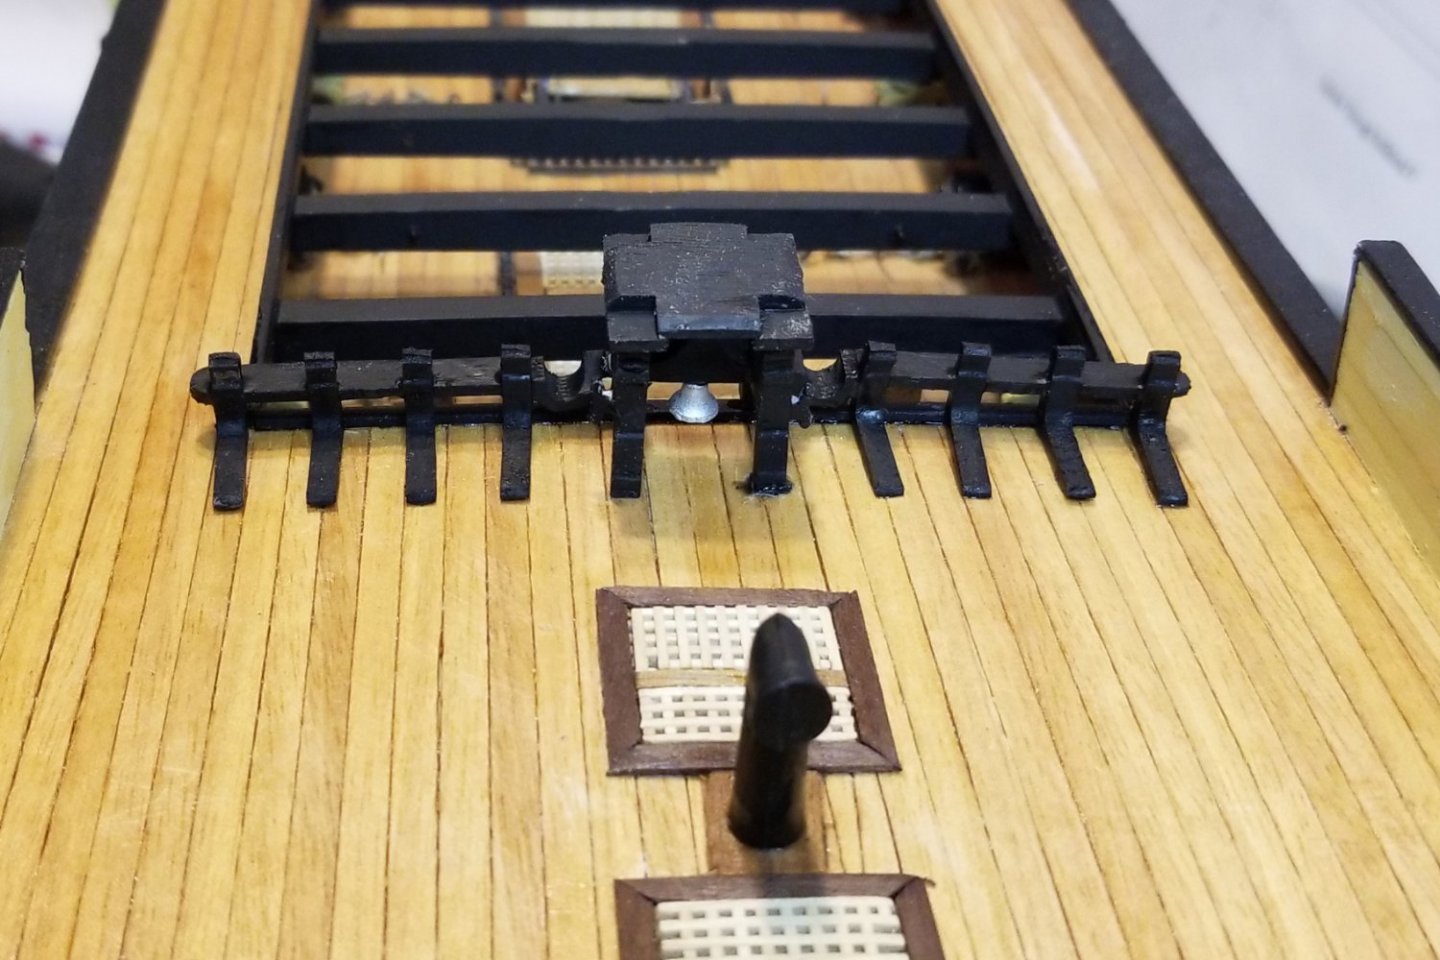
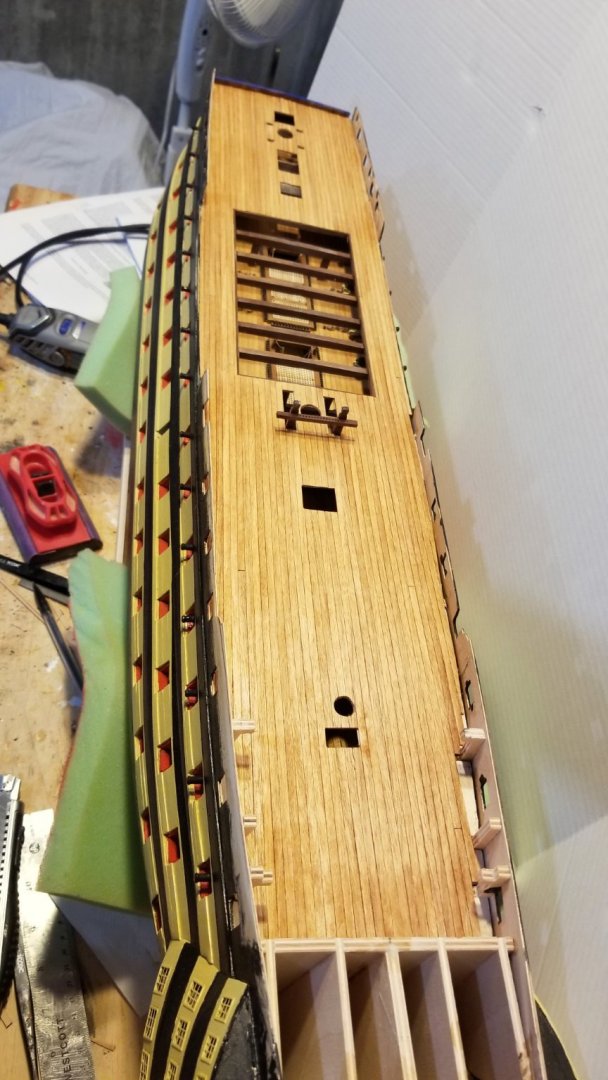
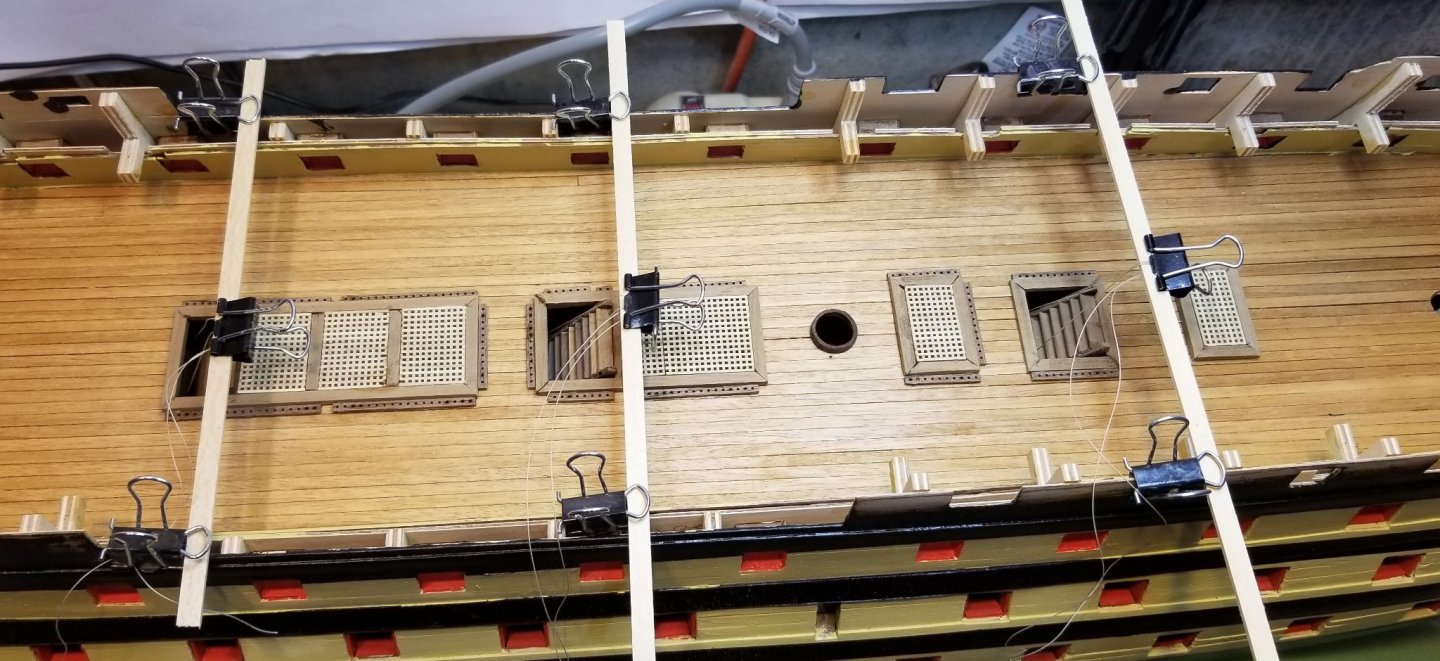
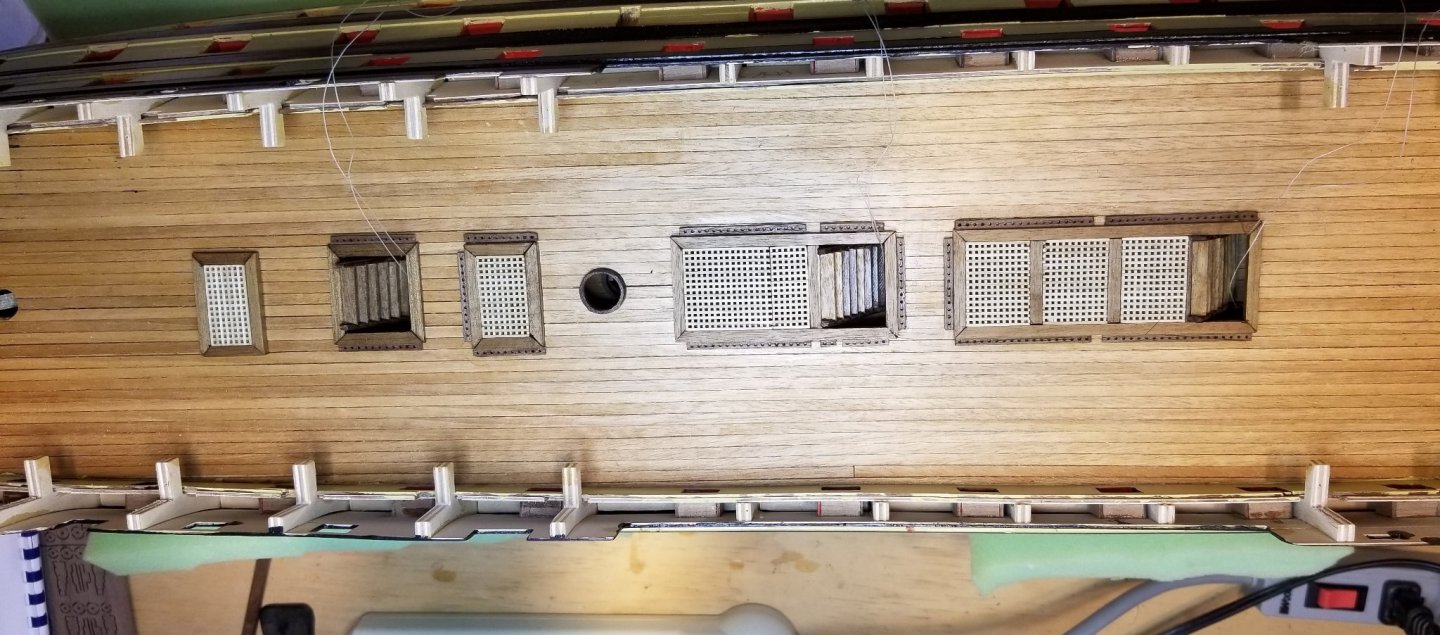
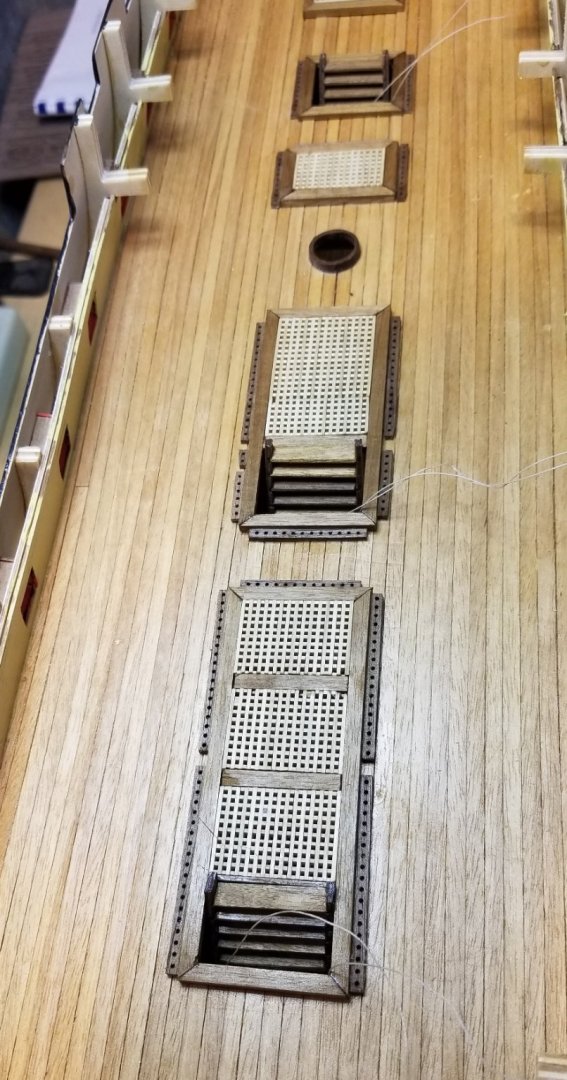
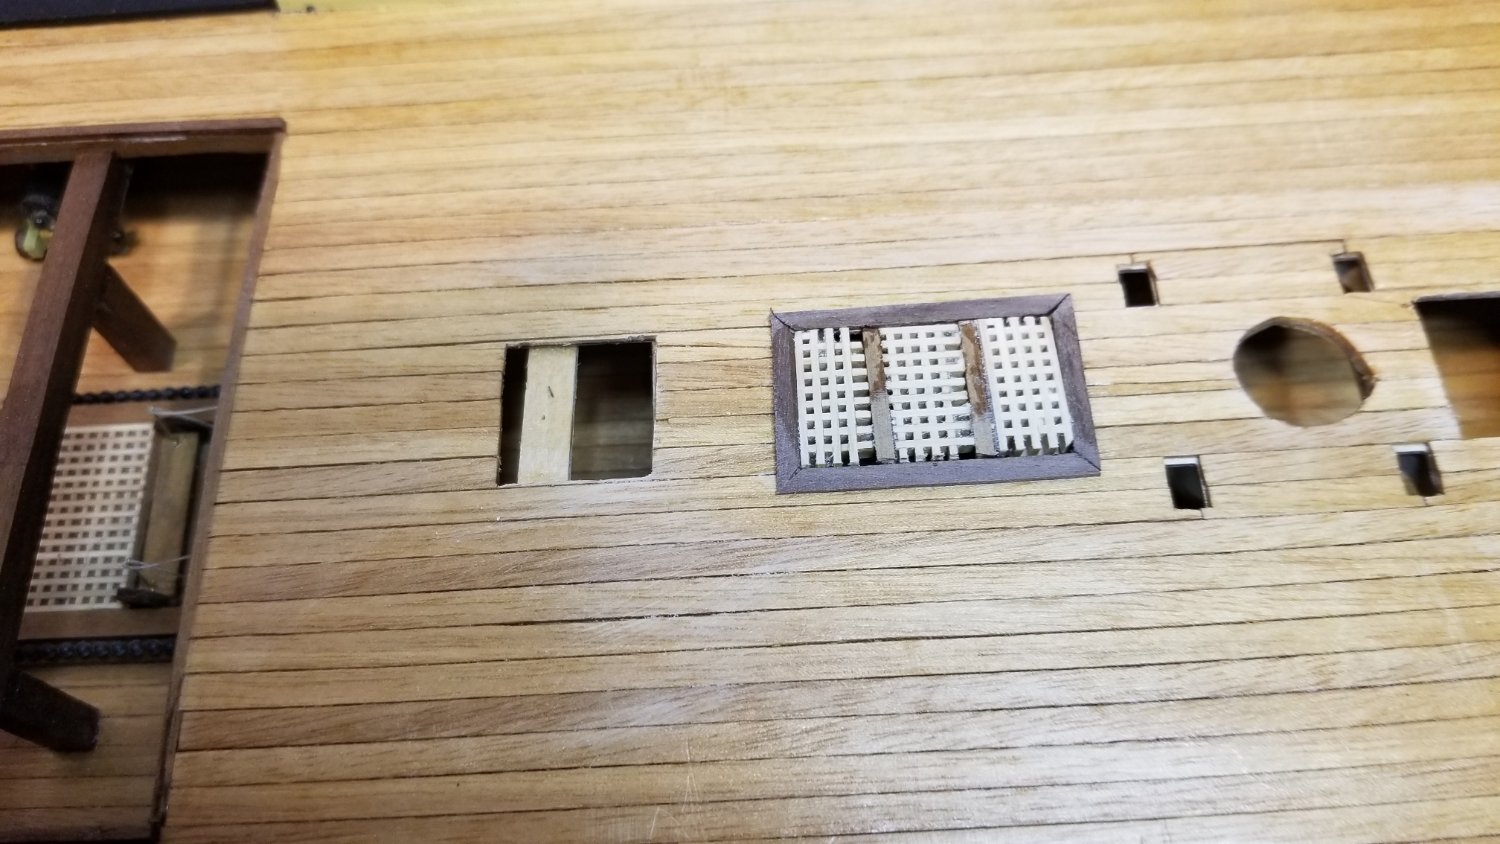
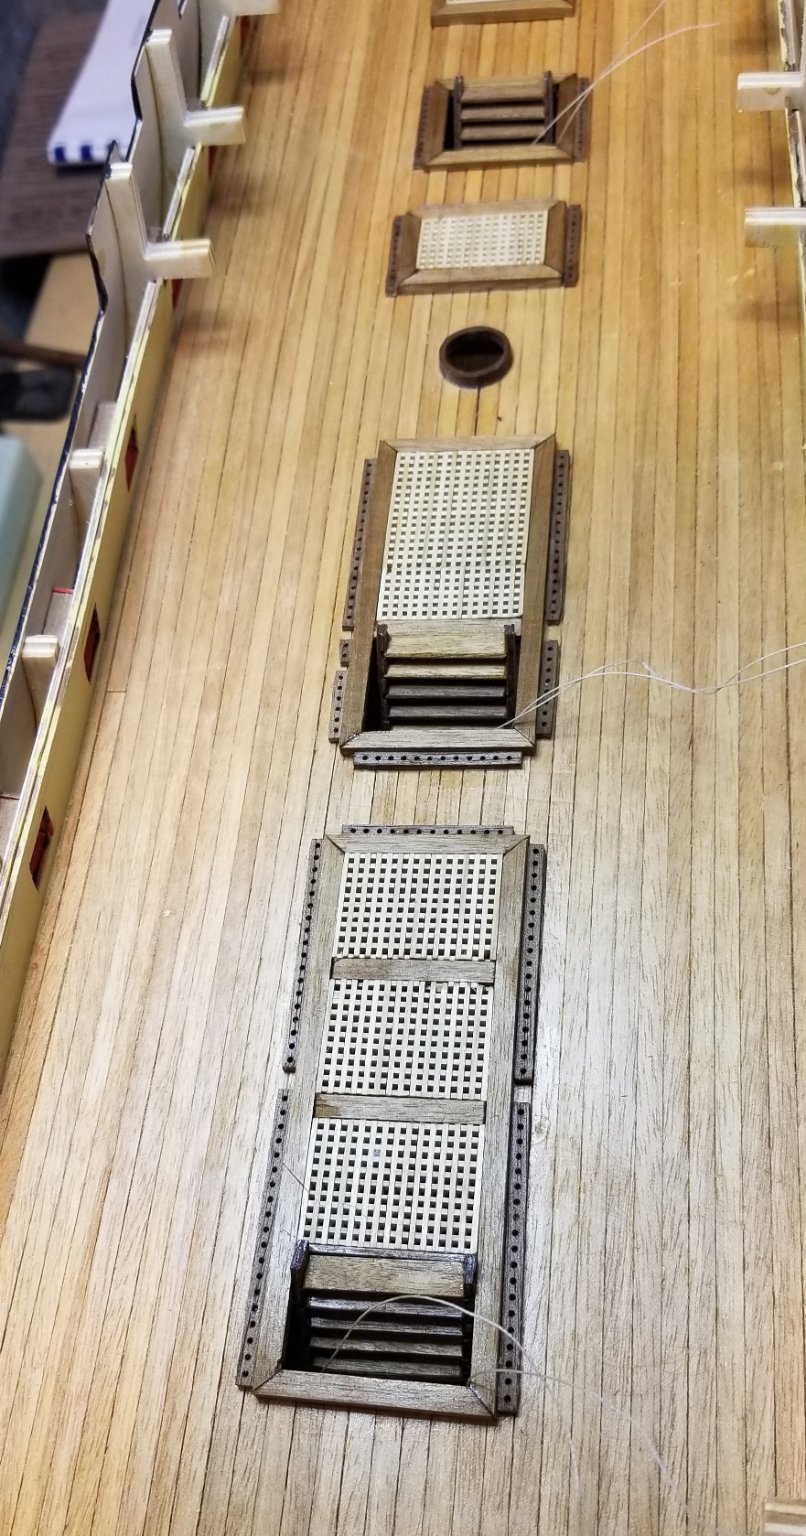
Working on the forecastle gratings. The gratings and spacers are mounted inside the hatch openings, and with no support I found that really difficult. On the one I've assembled, I had to put a support strip in to get the third grating section in. It will look better once varnished, but I'm not thrilled with it.
So for the square hatches, I'll pre-mount support strips. The first of two that I've mounted is shown, and since taking the picture I have started to assemble that grating, and it's much easier -- and facilitates dry-fitting the components.
Regards,
David

- GrandpaPhil, BobG, yvesvidal and 2 others
-
5
-
Capping rails painted, mounted, sanded and repainted on forecastle, waist and quarterdeck.
Regards,
David

- GrandpaPhil, Ian_Grant, Tom E and 4 others
-
7
-
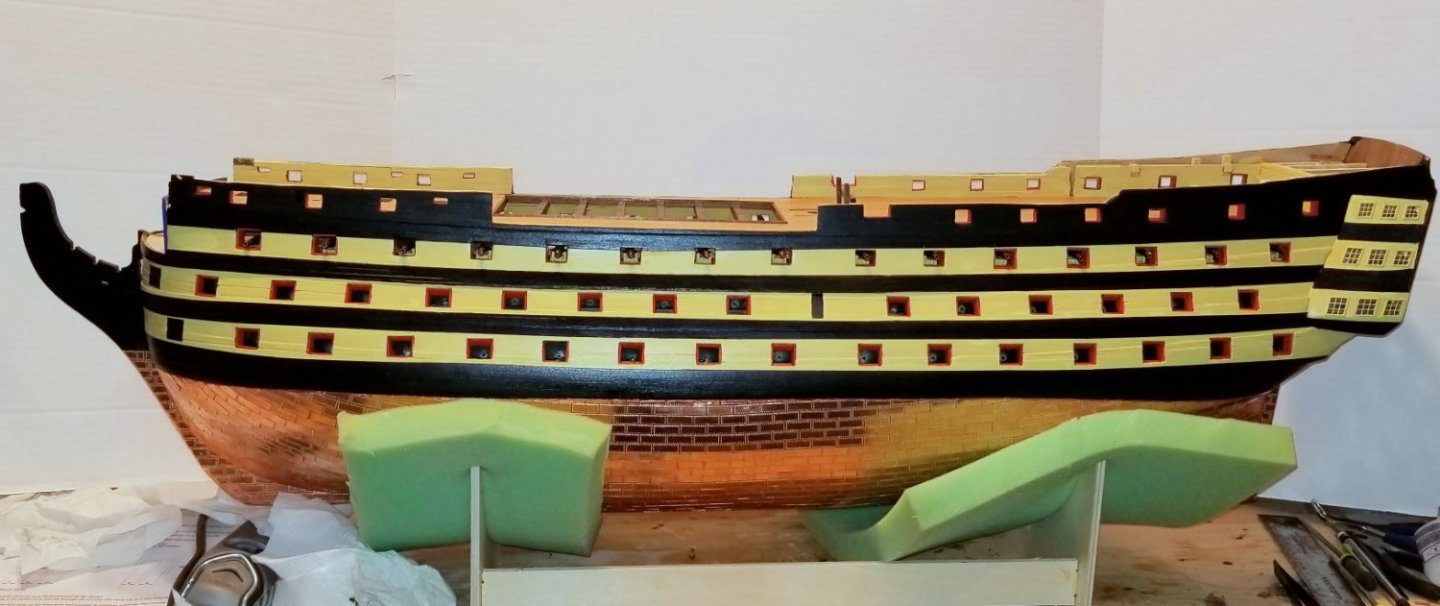
For those of you who were following this log in late 2021 and have picked this post up, I've been on a hiatus from the Victory primarily due to a Jan-Mar winter trip. But then I got home at the end of March and snagged a case of Covid. Nothing serious, but unpleasant symptoms and really didn't feel like working on the ship until a couple of weeks ago.
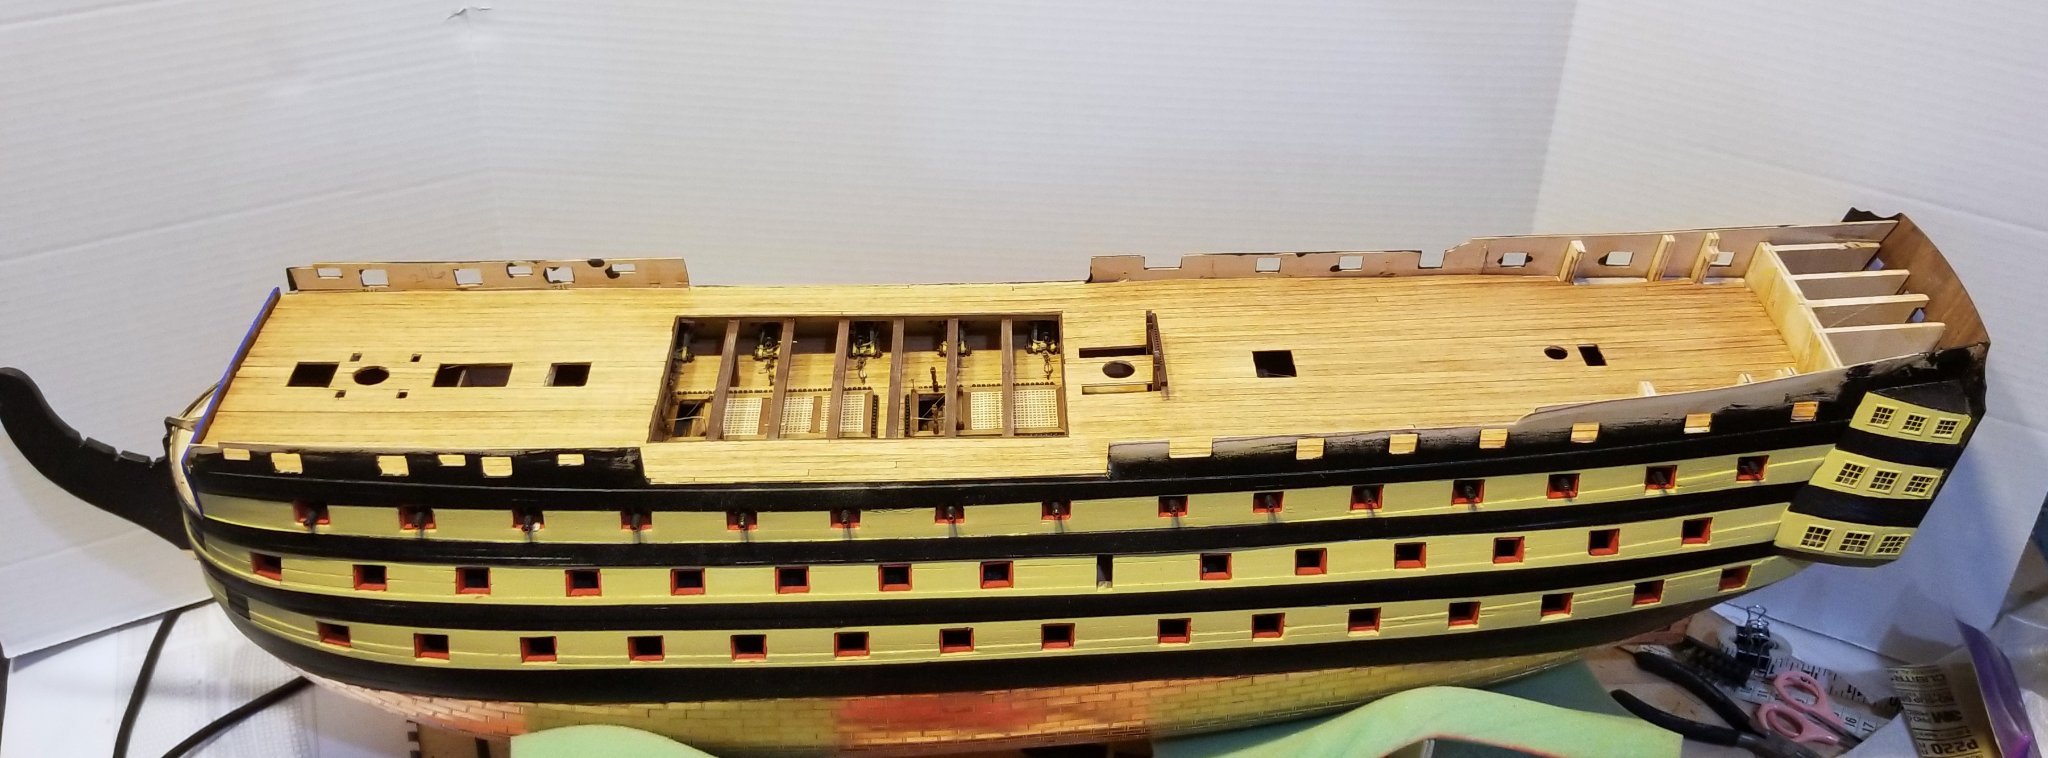
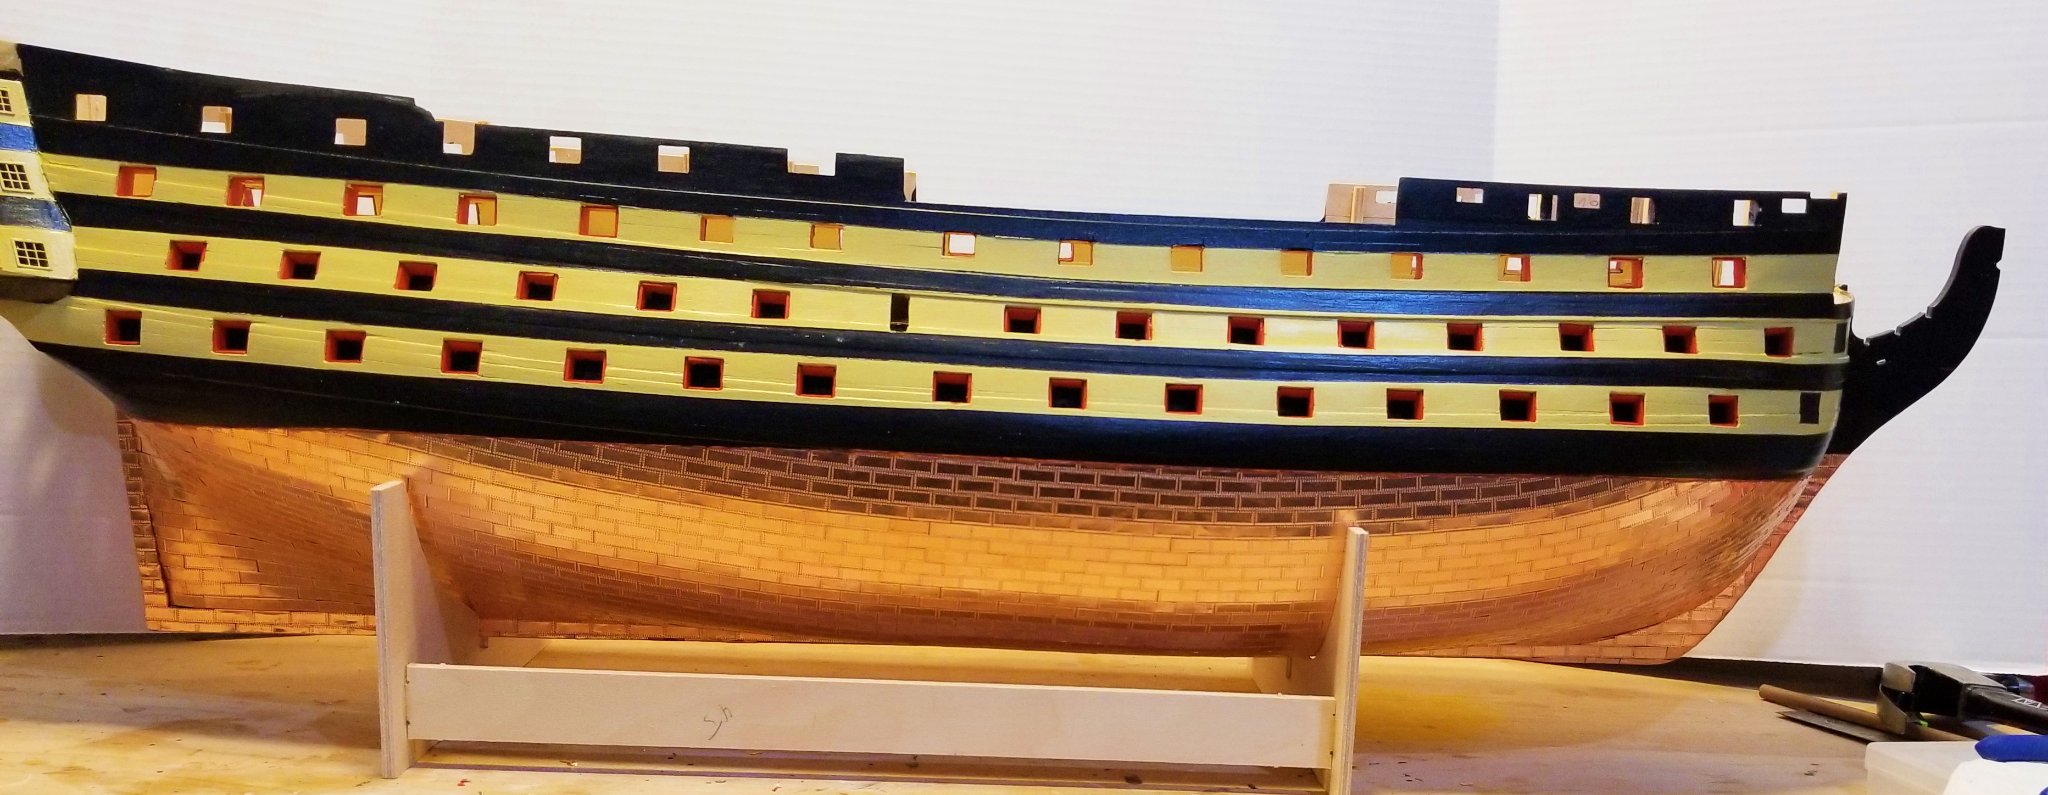
But have jumped back into it now. Finished the second planking up to the top of the bulwarks, finished painting it, and then installed the final gunport linings. Did lots of touch ups in red, ochre and black to correct painting errors, and now it's done. Picture below.
Regards,
David
-
Bob:
I'm going to lump Amati and Vanguard together, because the things that stand out are similar in both. Feels like Chris Watton took the standards he had used with Amati and maintained them in Vanguard. Here is my comparison:
Standout items:
- Quality of wood: Amati and Vanguard are the best I've seen in a model. Caldercraft seems close -- I'd say that the Caldercraft decking is perhaps a step below the others. Hull wood is similar. More of the laser cut wood parts are walnut in Caldercraft, even when they will be painted vs. varnished.
- Frame material: I prefer the MDF that Amati/Vanguard use, but the Caldercraft plywood was very high quality with no warping. It did require a lot more sanding in the slots to make it fit.
- Manual: the Amati and Vanguard manuals (particularly the Amati Revenge manual) were clear and logical. The Caldercraft manual requires more checking between plan sheets and the manual, and some things aren't (in my view) clearly stated and require looking at the JoTika website pics and other builds to be sure about. On the Amati Revenge, there are 3D rotatable pics on the Internet that are a marvel in helping the buil
With all that said, I'd easily add Caldercraft to my "top 3" kit makers -- above Artesina Latina, Bluejacket, Mantua and Dumas in terms of the "standout items" above.
Hope this helps.
Regards,
David
- BobG, Bill Morrison and Kingspoke
-
2
-
 1
1
-
Quarterdeck planked and first coat of varnish. Three coats planned.
Regards,
David

-
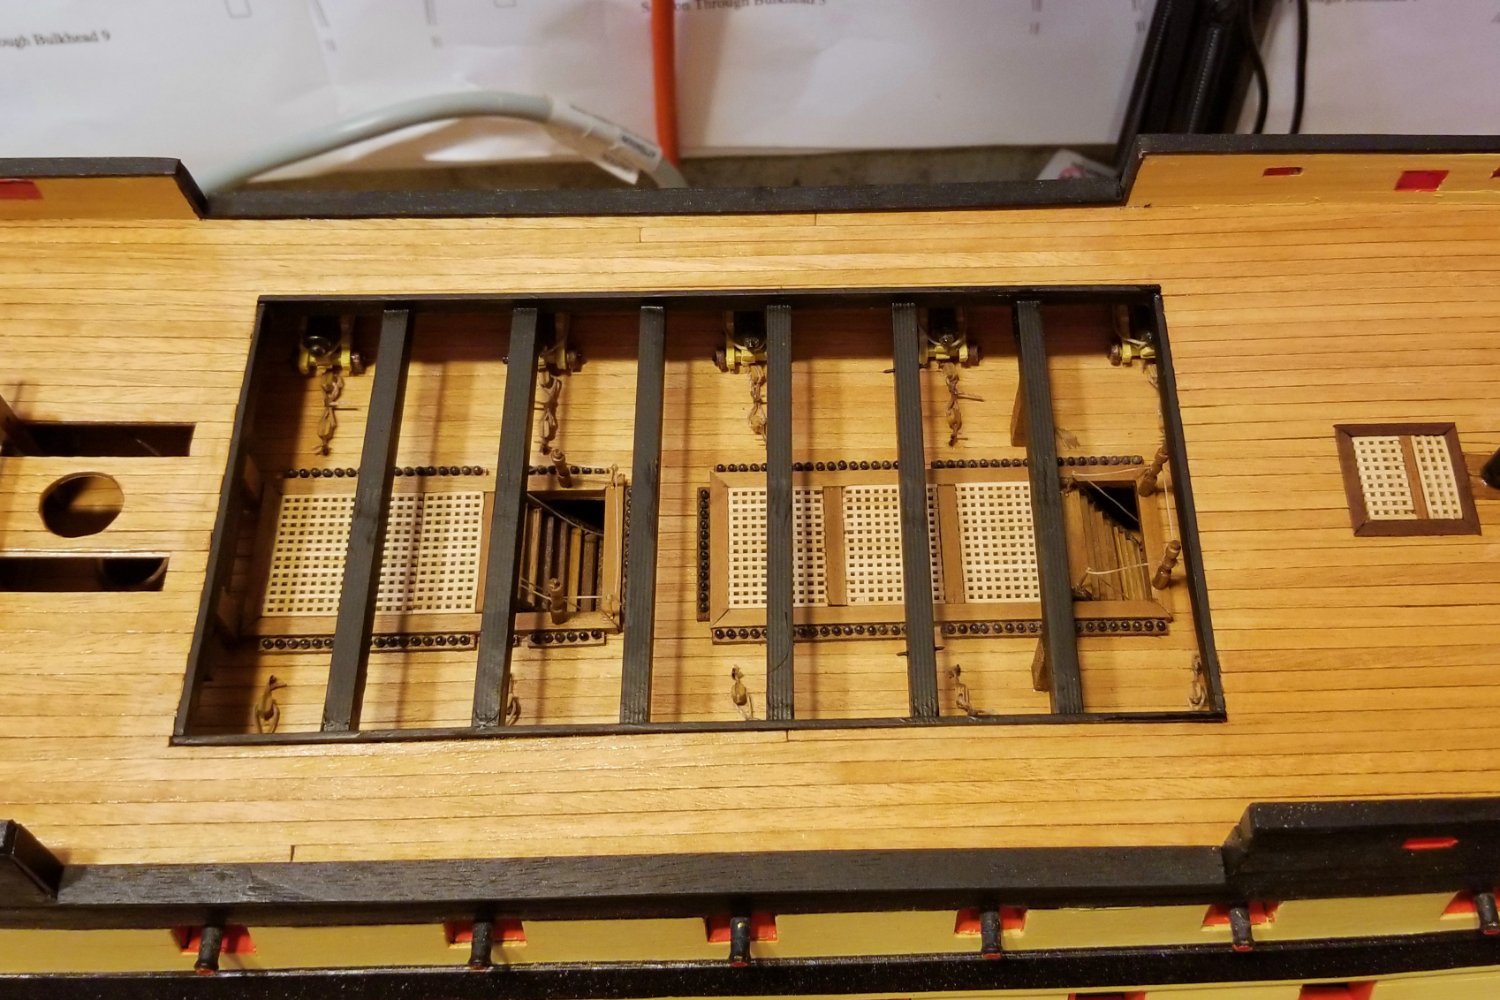
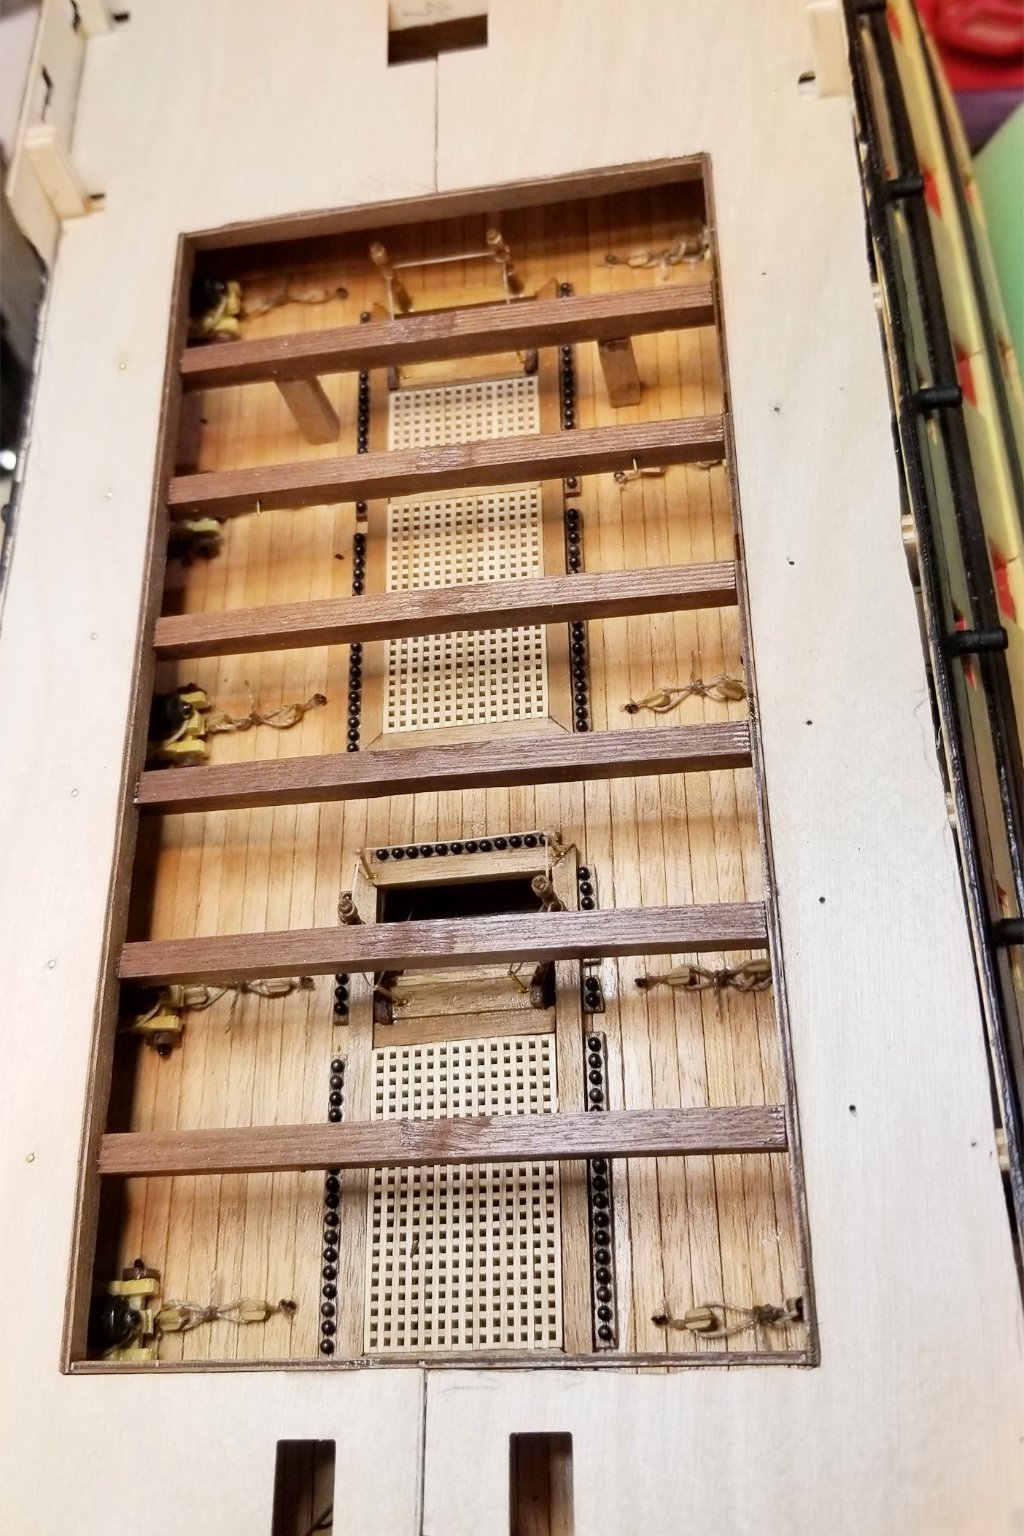
I've now mounted the quarterdeck (main deck). Took a lot of dry fitting done over & over. It went differently than in the manual because I split the deck, as you can see, and I'm frankly not sure how you'd do it the way the manual says.
I decided to keep the skid beams and bitts in natural walnut vs. painting them black. I may live to regret this choice, as I'll need to carry it through the other fittings, but for now I'm happy.
I also made a goof while finishing up the upper gun deck. I finished off the stair railings, and didn't read far enough ahead so used the wrong balusters on two of them. Those were supposed to be supports for the skid beam. So . . .
- I have mounted two square posts (you can see them) under the skid beam where it needs support.
- I will use the support posts (which look like balusters) for the quarterdeck railings (because I now don't have enough of the regular balusters). They will look fine once I cut them down.
It's not a major thing, and the missing support posts won't be noticeable.
One thing I have noticed is that there are some finished items on the upper gun deck that are now totally invisible with the quarterdeck mounted. So I guess they are just there for the spiritual reinforcement of the builder.

Regards,
David

- ccoyle, Landlubber Mike, kiwiron and 3 others
-
6
-
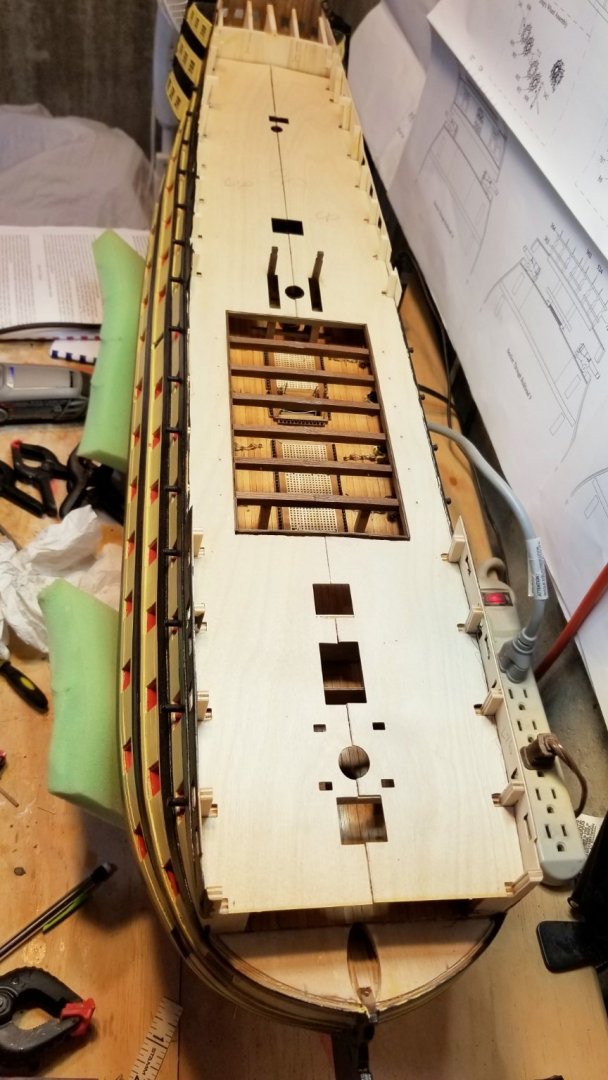
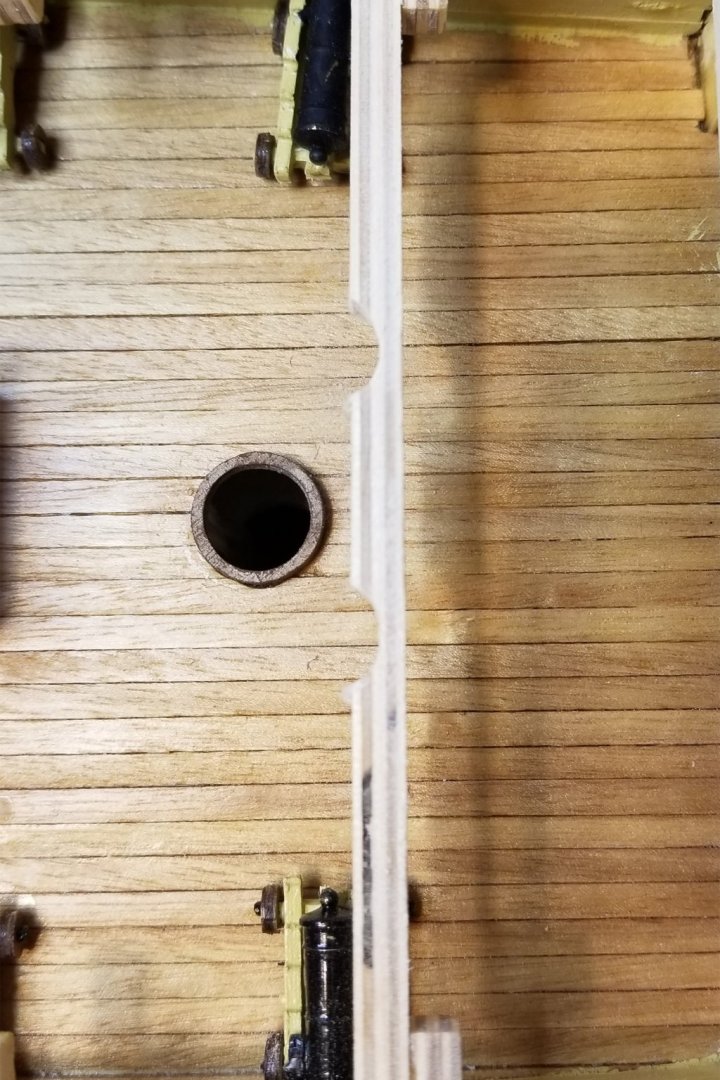
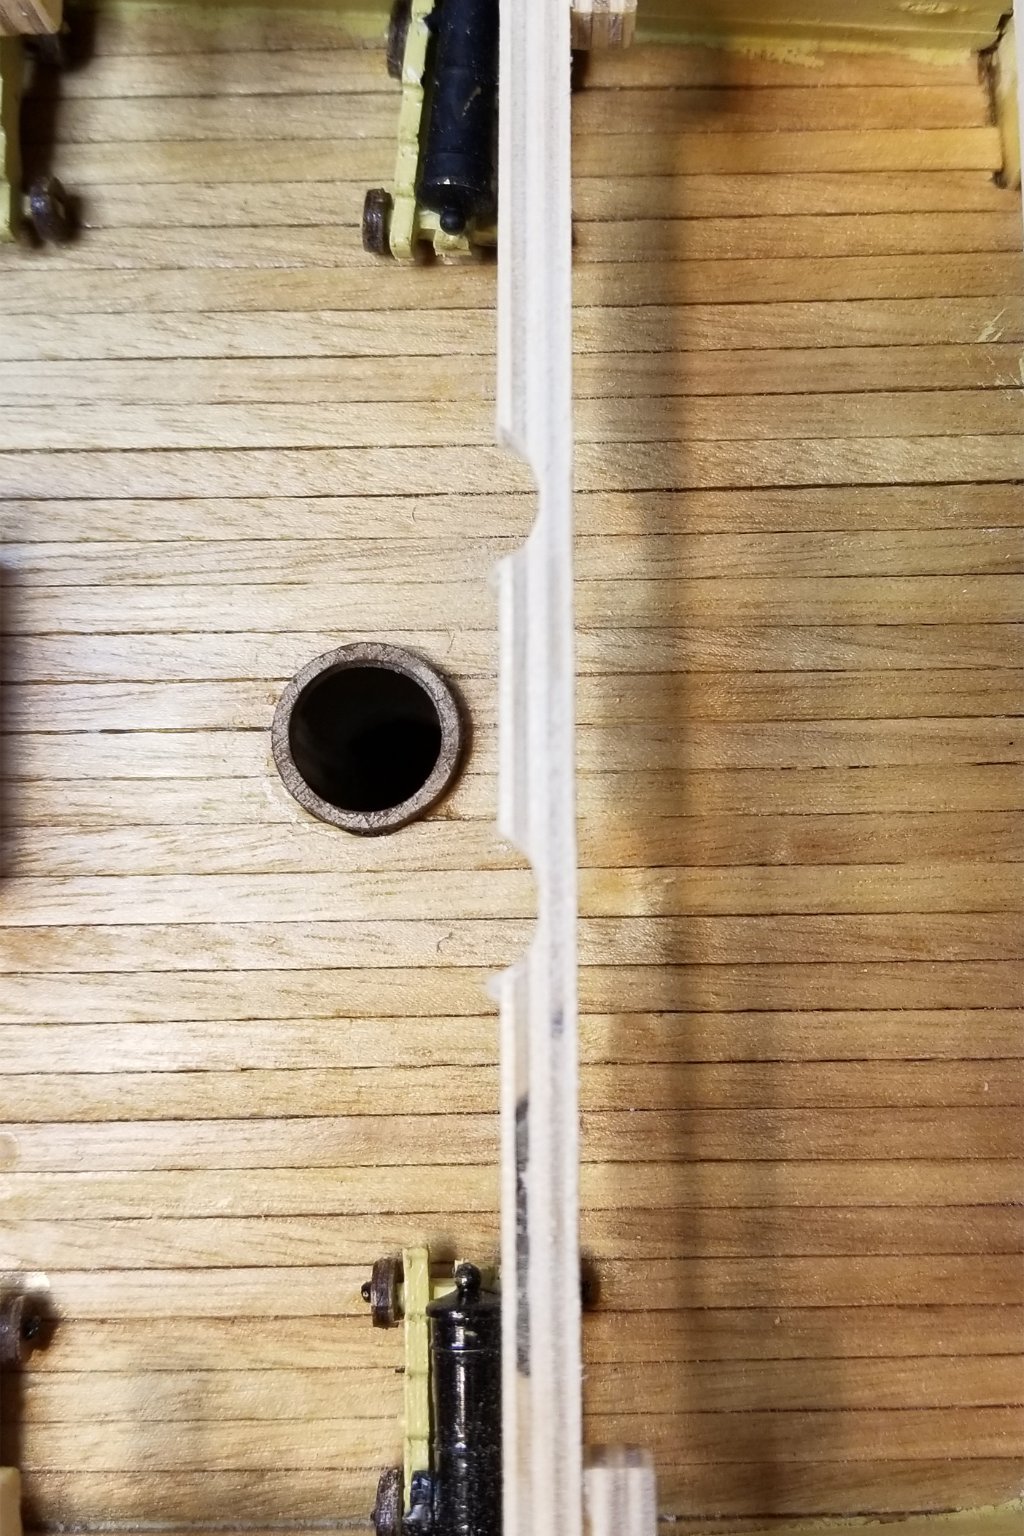
I have started work on the quarterdeck (main deck). As was the case with the gun deck, I split it lengthwise to make fitting easier. [I don't understand why this isn't recommended in the manual. Mud wrestling those decks in one piece is much harder].
I've been carefully dry fitting everything, and one thing I noticed is that the second camber beam back from the bow interferes just slightly with the square bit holes in the deck. I double checked, and I did mount that camber on the correct side of the frame. The picture shows the adjustment I made.
This would be really easy to miss until after the deck is mounted, and it would be a bear to clear at that point. So I'm glad I caught it.
Regards,
David
-
-
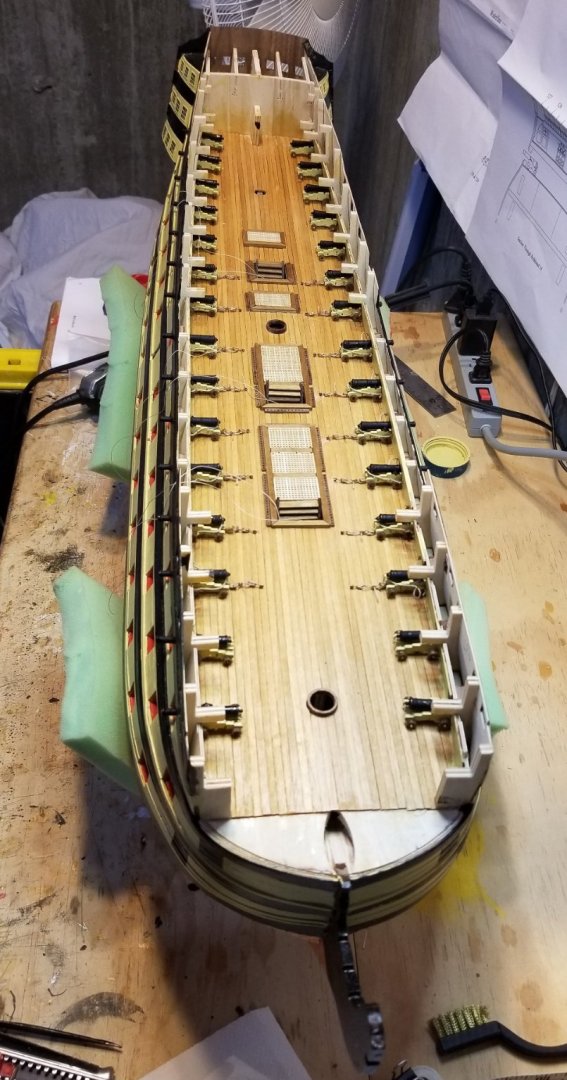
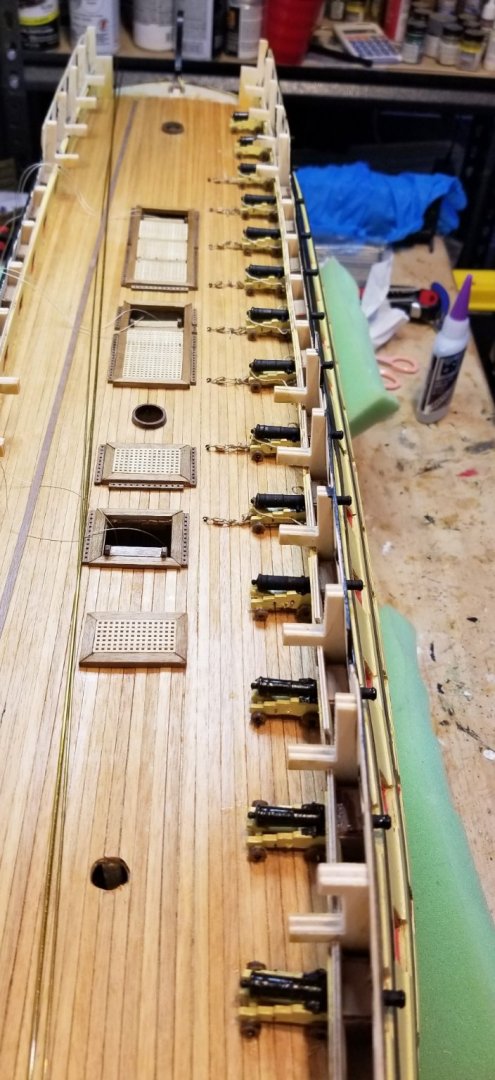
Finally finished all of the gun deck cannons. Took about 3 weeks to get through all of them. See picture.
I only rigged the ones that are visible from the deck above.
Regards,
David
-
Cannons completed on one side. A few comments:
- I only rigged the ones that are visible.
- Regarding rigging: there are three elements (inhaul, outhaul, breech line), and I only used two -- inhaul and breech. Two reasons: first, adding the outhaul tackle on each side just seemed busy, and I felt that the breech line would add enough interest on the side. Second, I'm lazy.
Regards,
David


- GrandpaPhil, mort stoll, Ian_Grant and 3 others
-
6
-
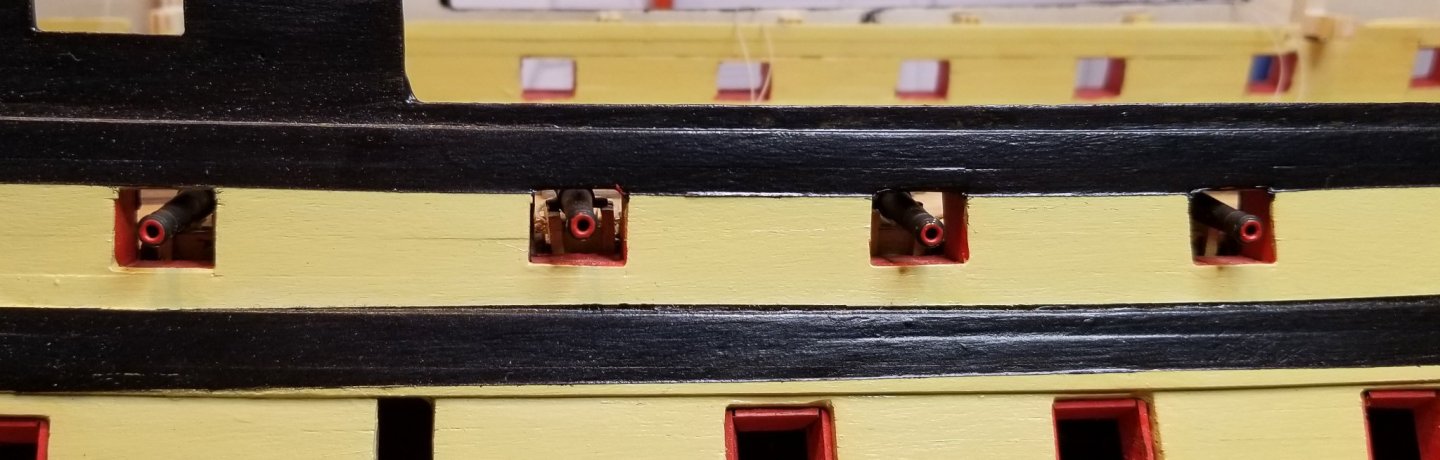
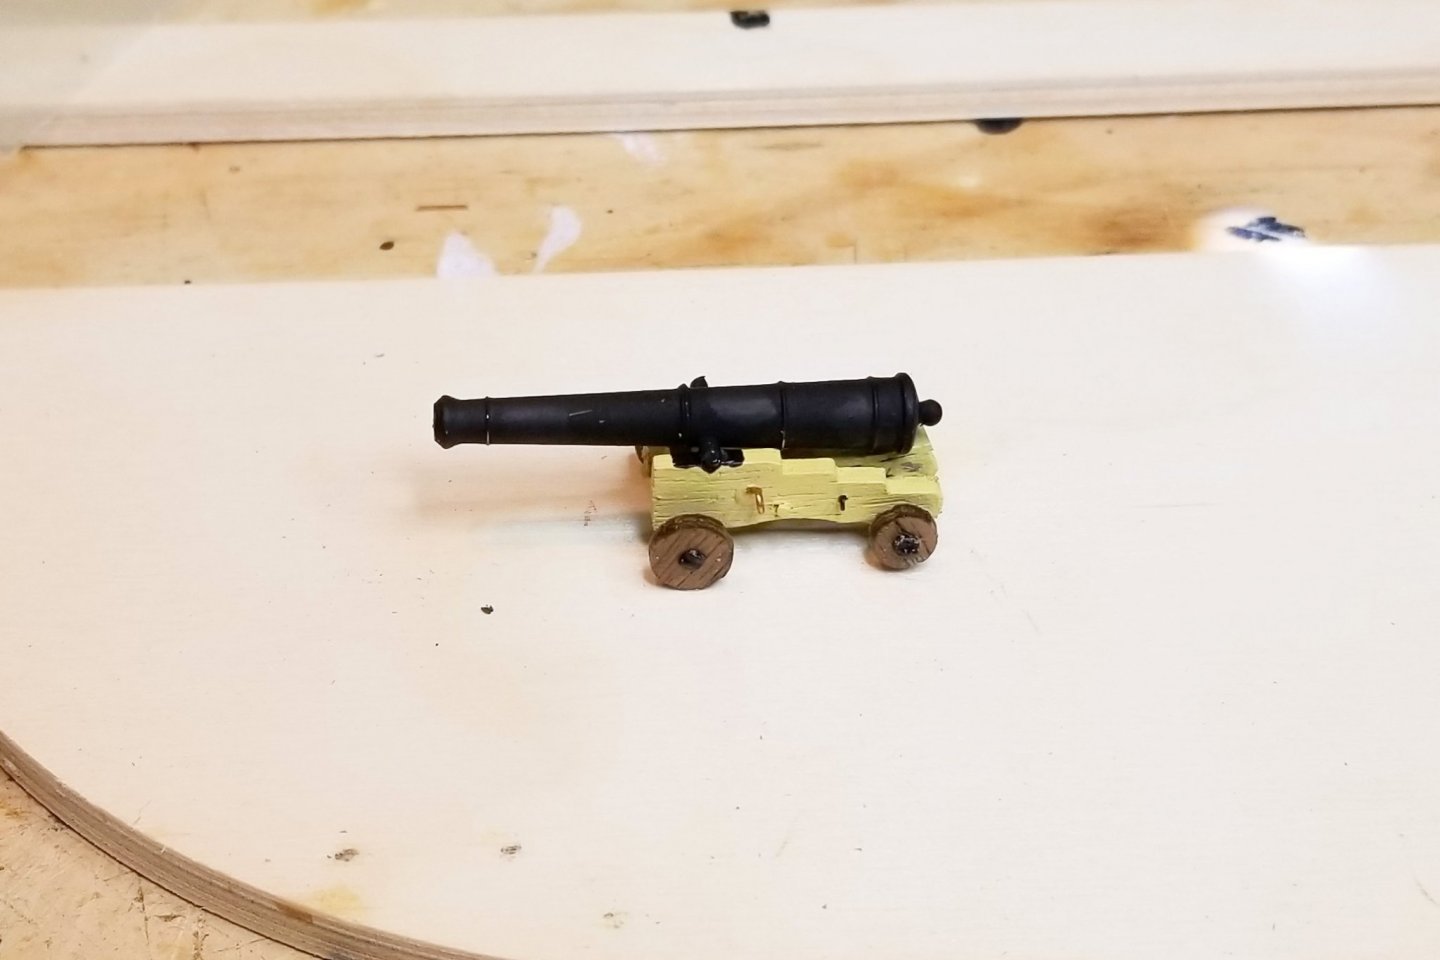
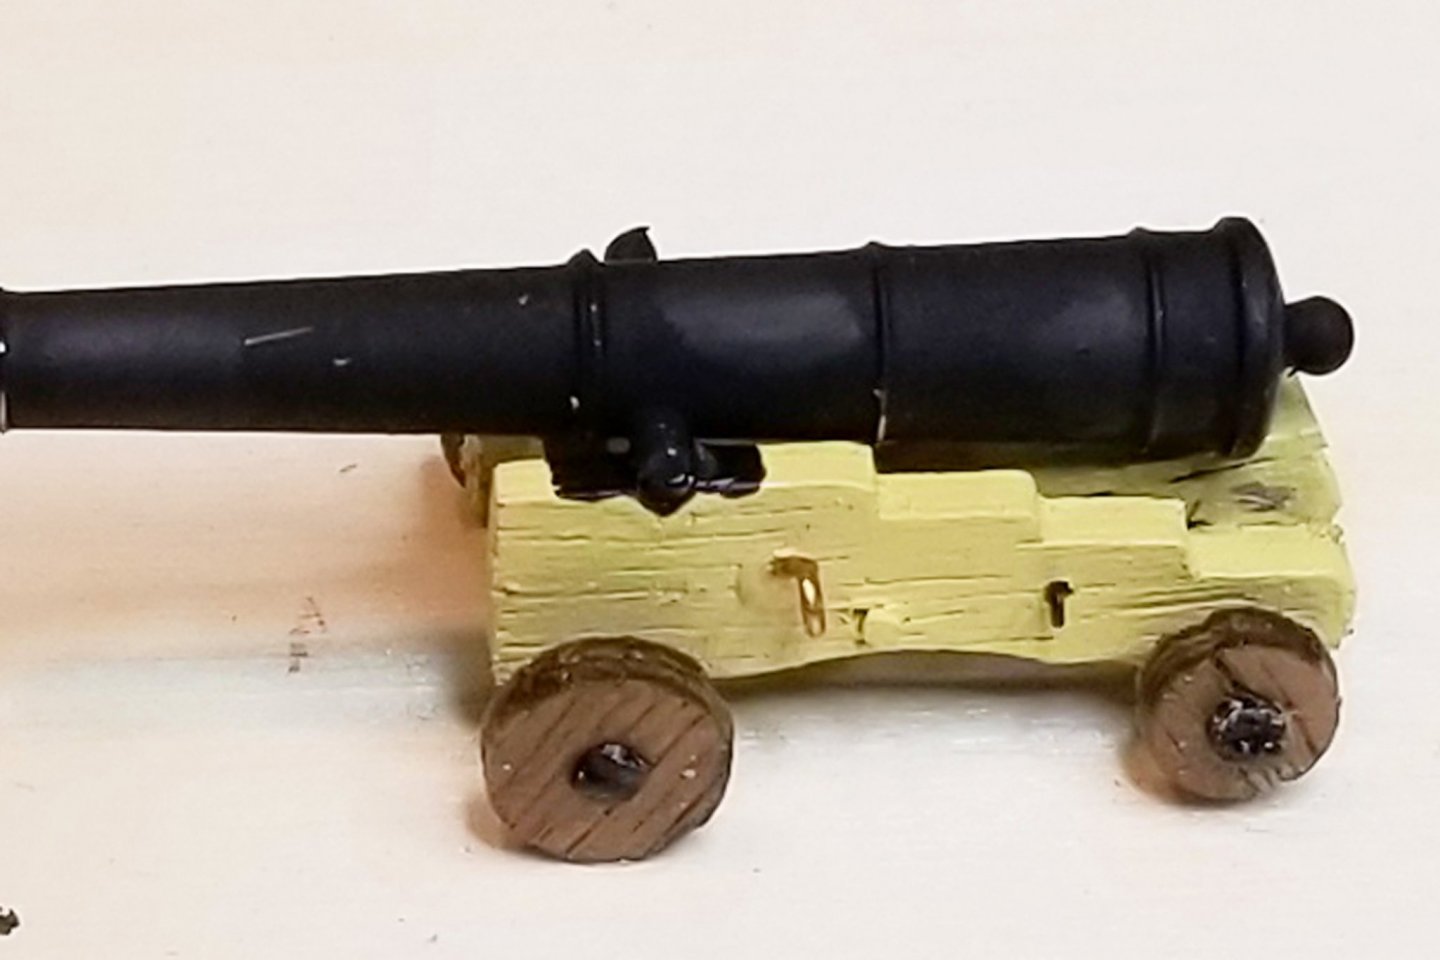
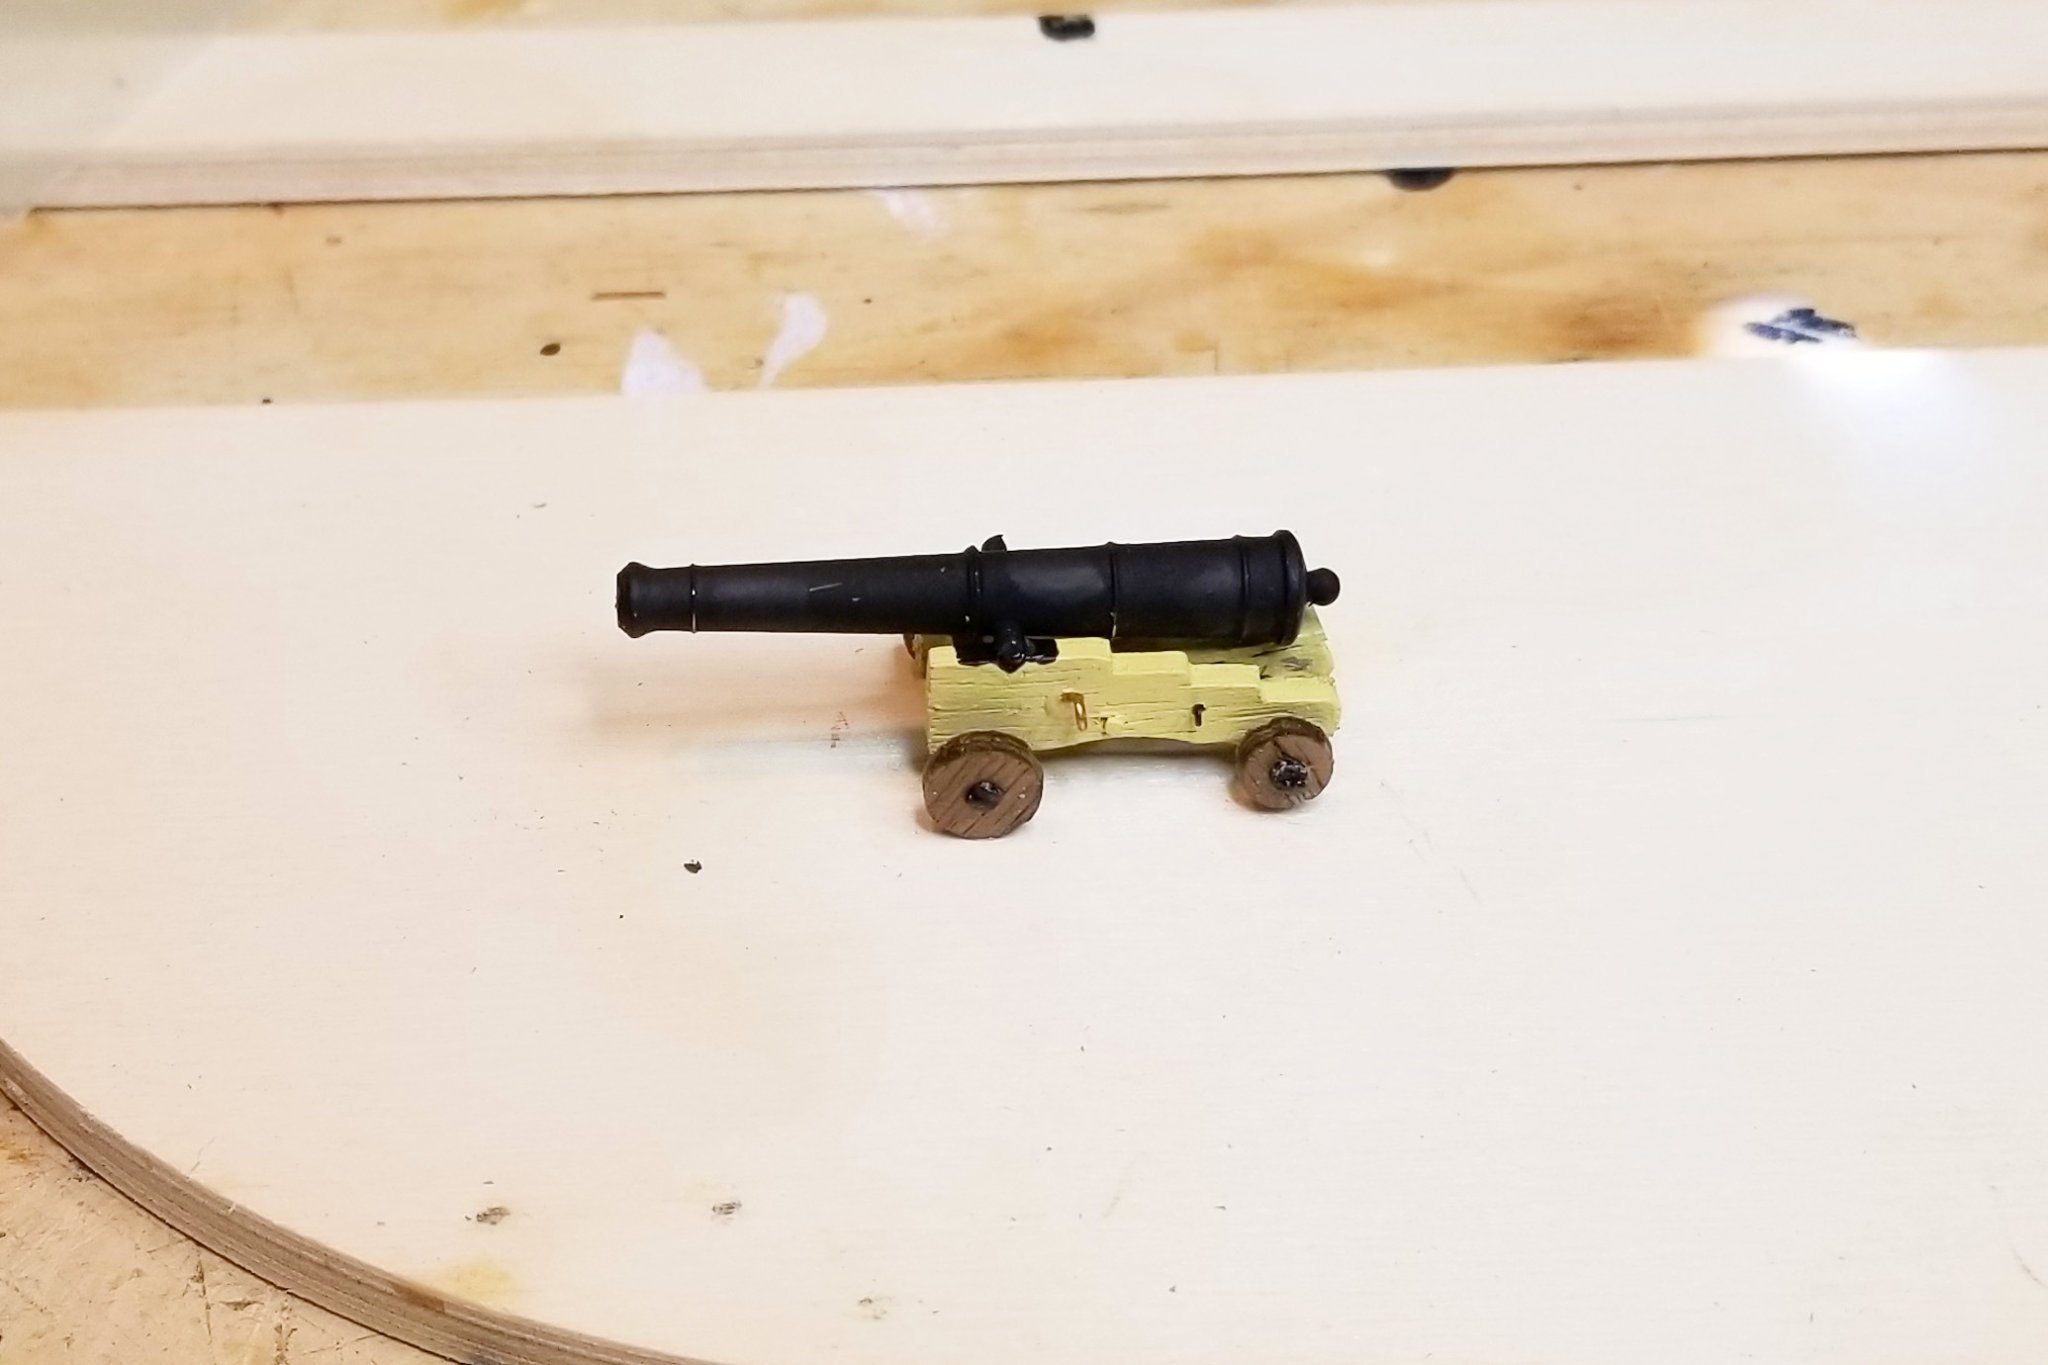
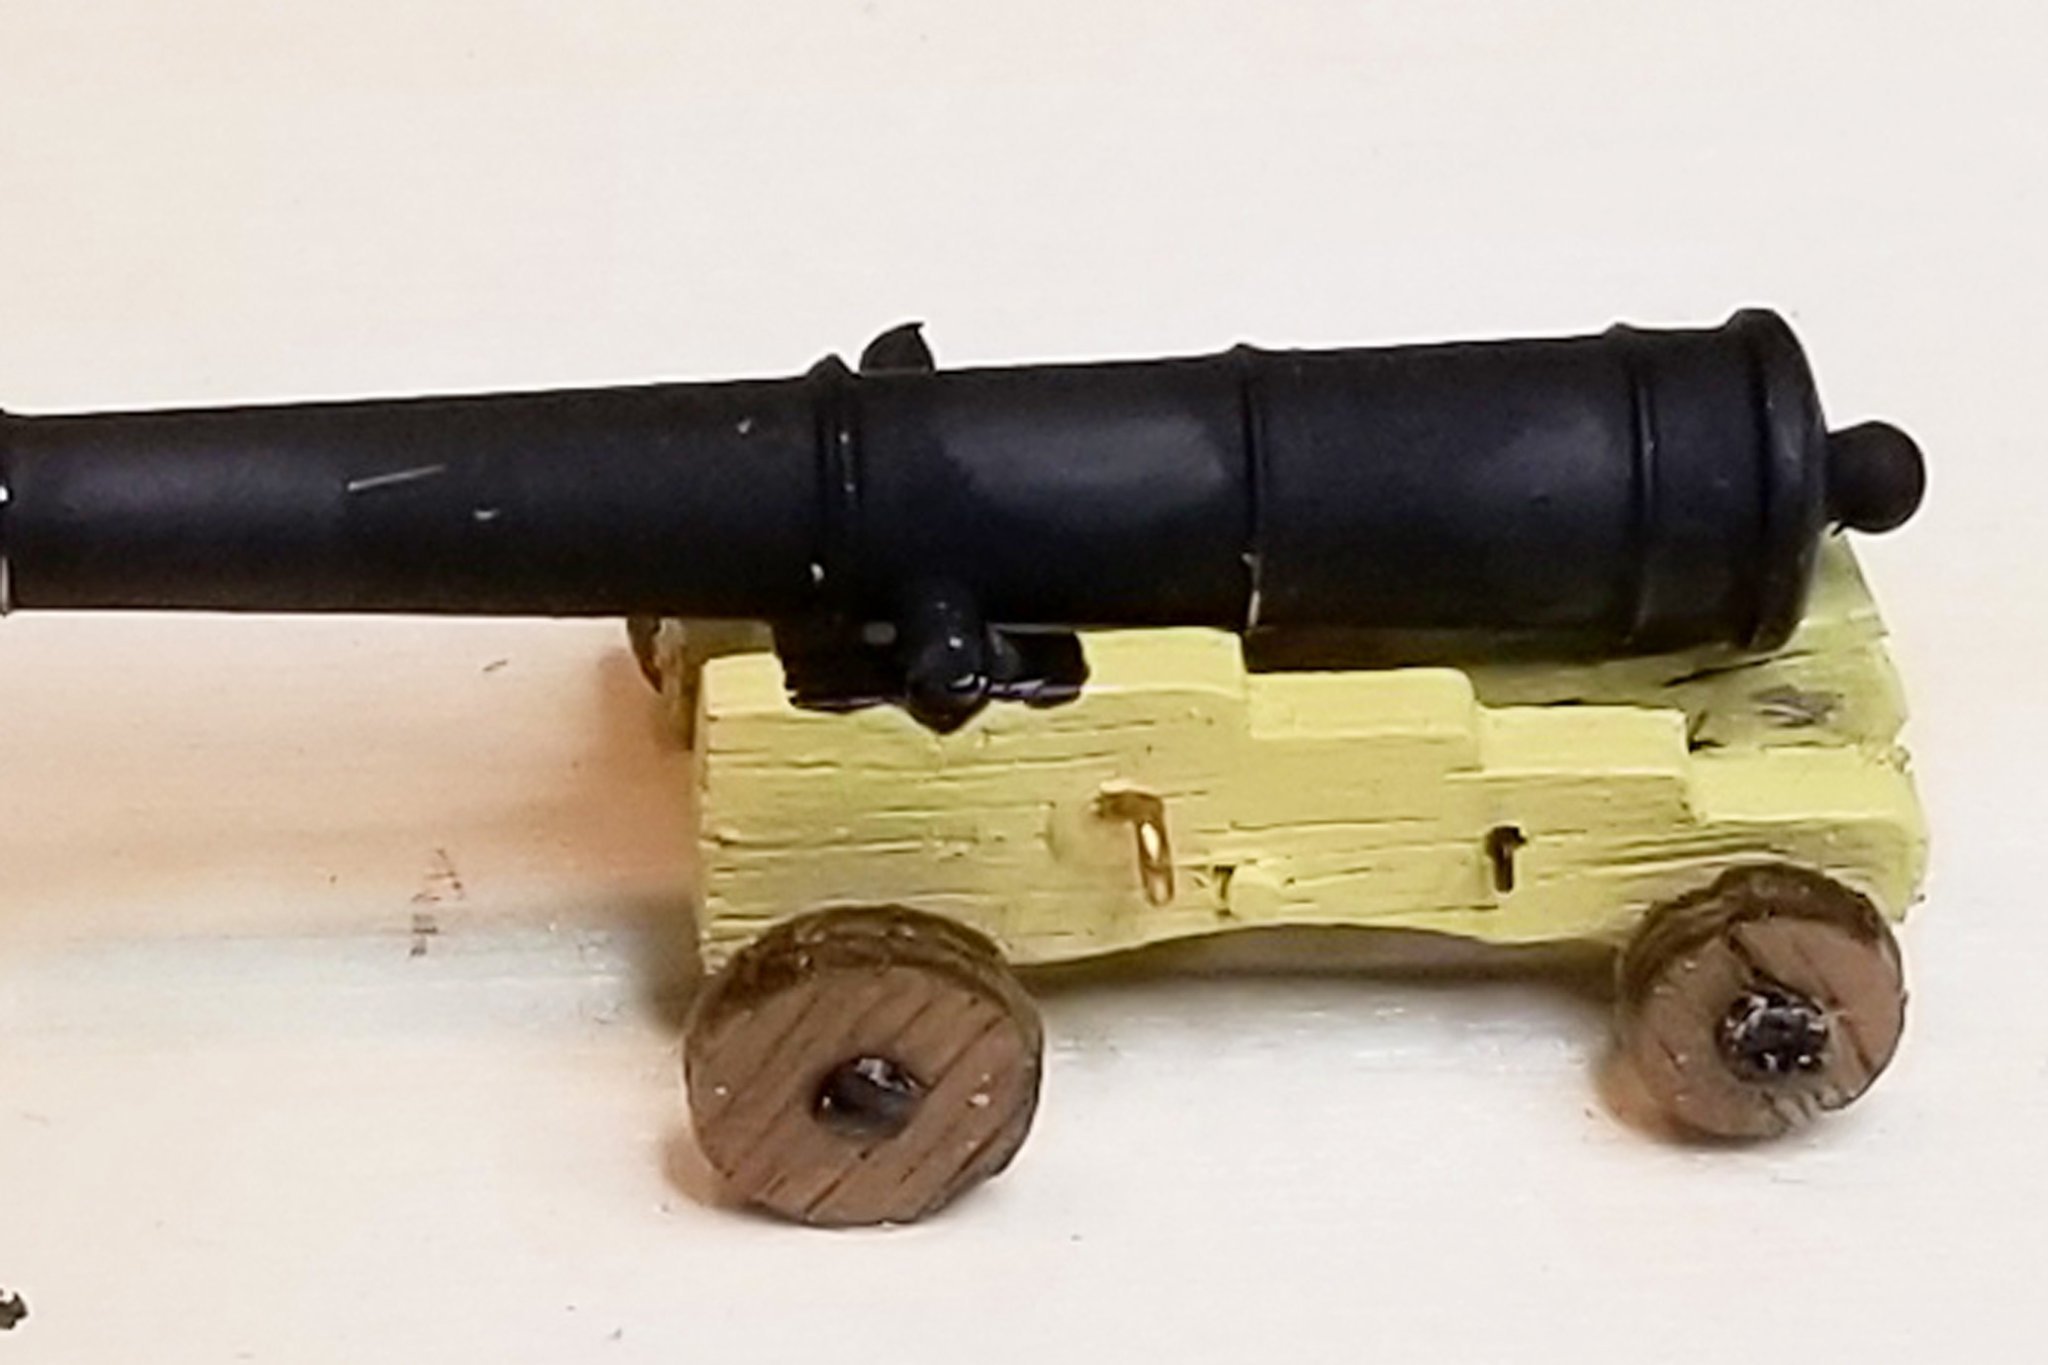
I've started building cannons in batches of 6 (to break up the work). This one is from my second batch. I tried to fit the trunion brackets in the first batch, and wasn't able to get them to fit well, and ended up just gluing them down -- but in closeup they look sloppy. So those 6 cannons are mounted in a not-visible part of the ship.
For the second batch, I just painted the trunion brackets on, and I think they look pretty good -- and much better than the real ones that I couldn't get to fit. Closeup below so you can see it.
Regards,
David
-
Here's a building board I made out of plywood scrap from the kit for painting the cannon carriages and cannons.
Regards,
David

-
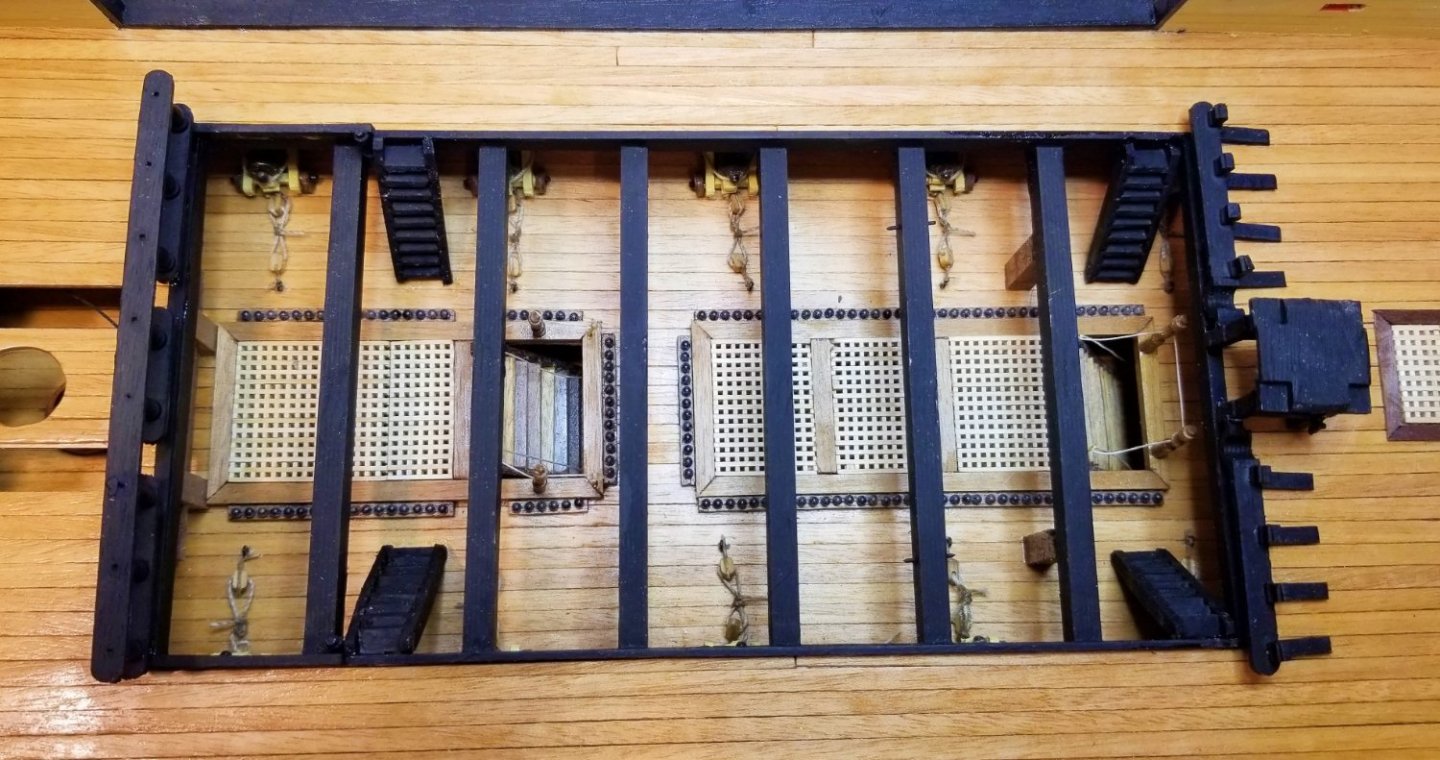
Built and installed the upper gun deck hatches and stairs to the lower gun deck.
I ran into a kind of sequence issue. You have to install stanchions at the bottom of the stairs, and then put thread into them which leads up to the upper gun deck for later use as part of the hatchway guard rails. So when I went to varnish the whole hatch/stairs assembly, I had those threads in the way. If I had thought of it, I could have varnished the stairs before installing them, but I didn't -- so I rigged a temporary set of crossbeams to hold the threads up while I varnished the stairs and hatches. Those are shown below, along with the finished product.
Regards,
David

- Bill Morrison, Ian_Grant, kiwiron and 4 others
-
7
-
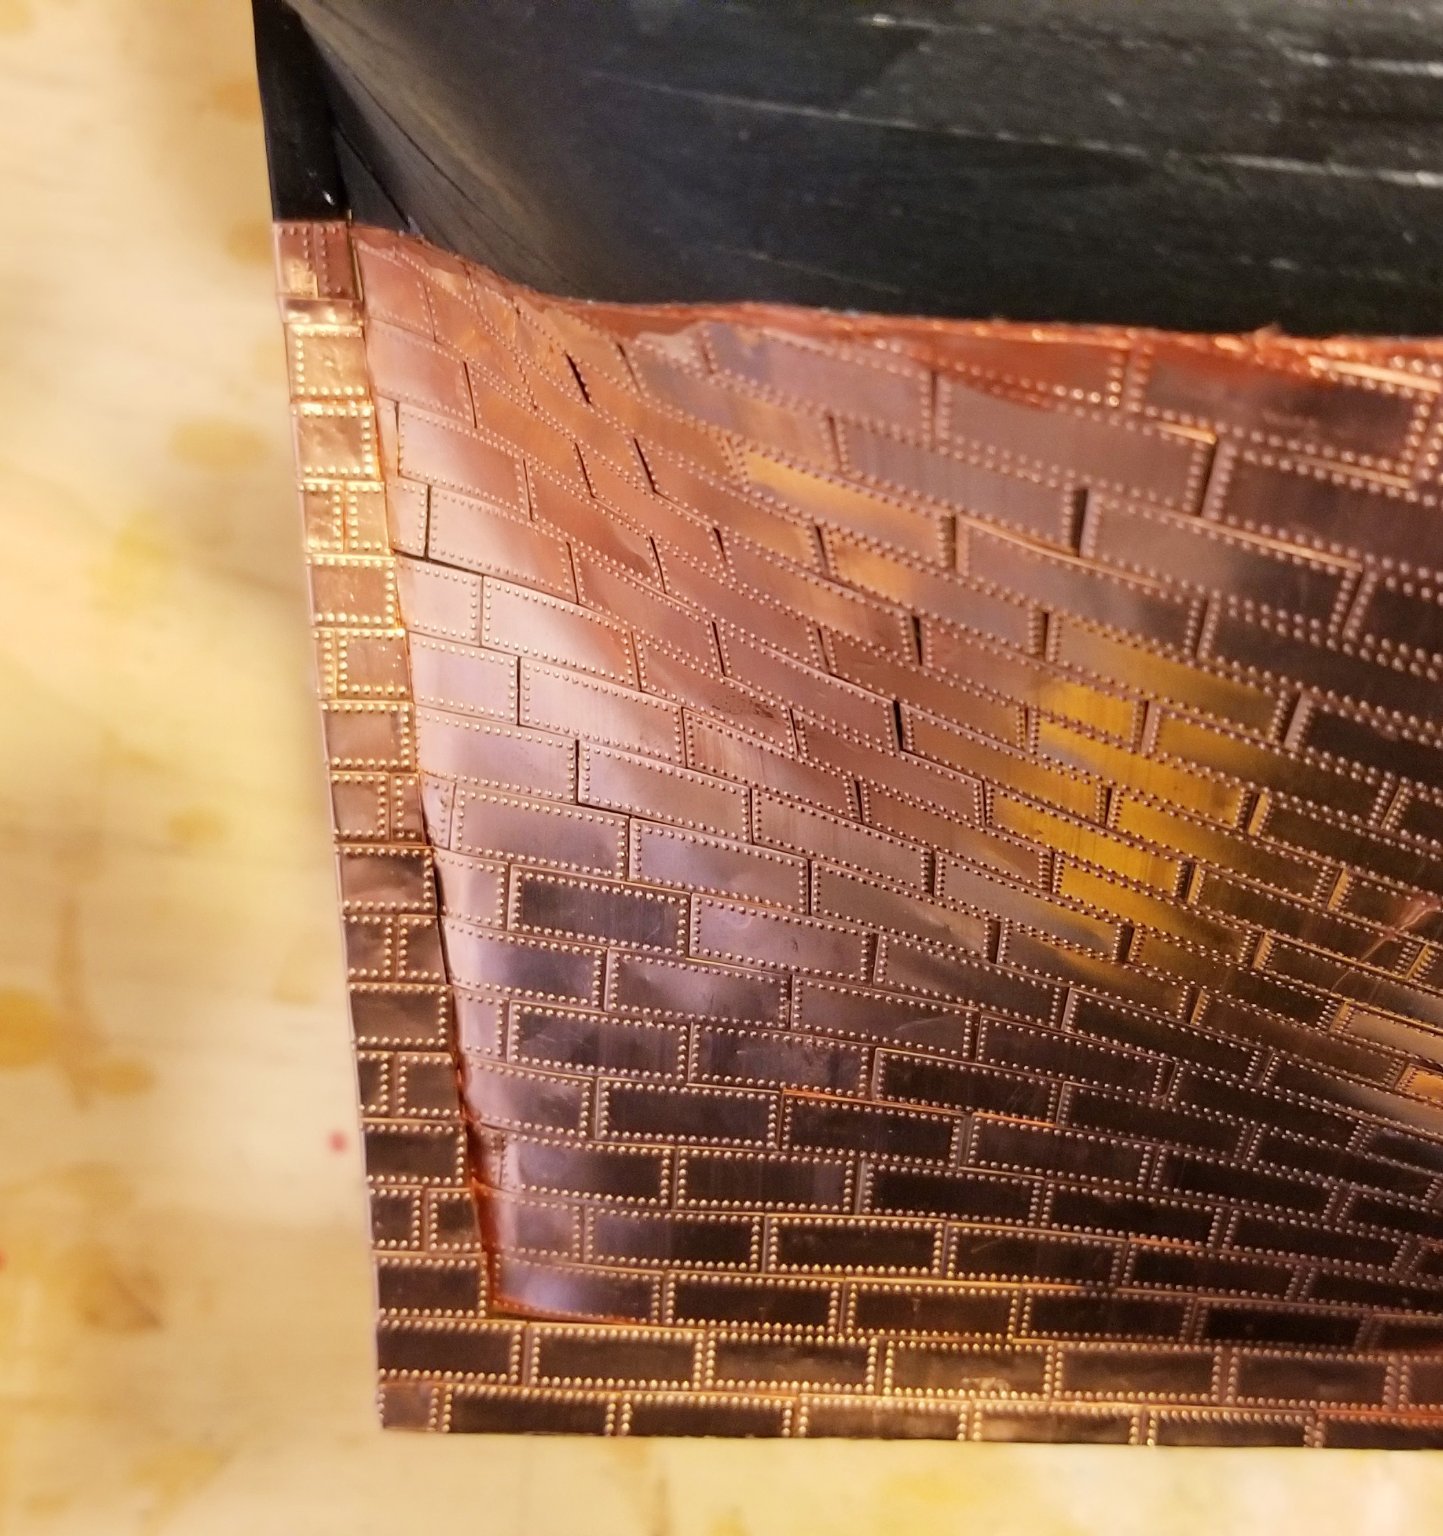
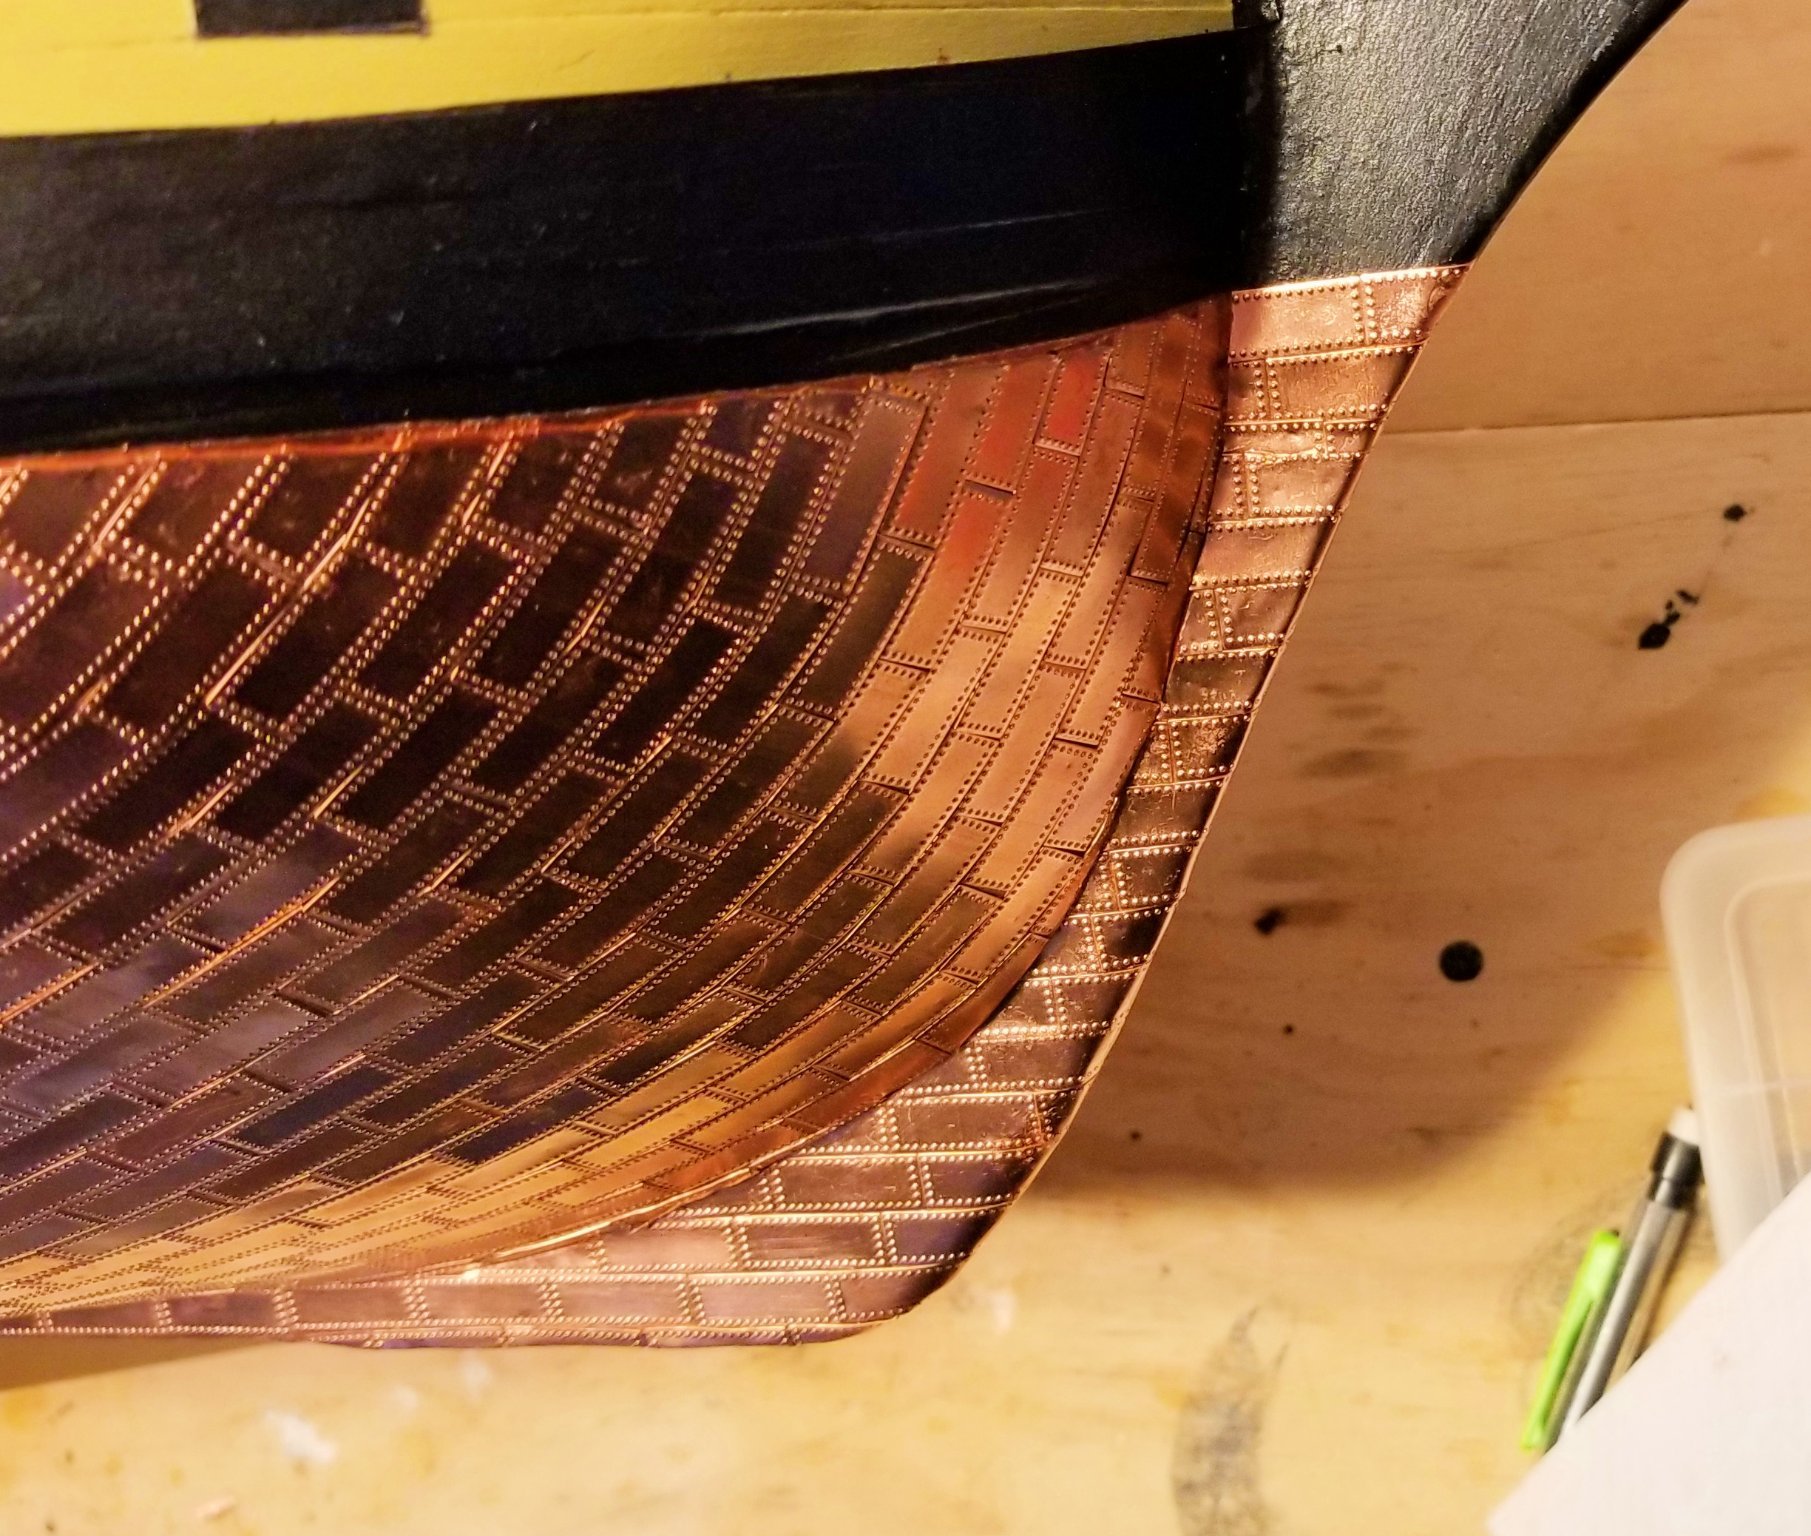
Allan:
Sorry, it's a trick of the photography. My bumps face outward. It's my second coppered model, and I've always assumed that the bumps are supposed to represent the nail heads. The copper plates are also shaped to glue down more easily that way -- it's more difficult with the bumps facing in, and the edges wouldn't mate cleanly. Interestingly, there have been a few plates that have black paint stripes on the "bumps in" side, which would indicate that that manufacturer intends for them to face out.
So no kudos for me on that one.😛
On your second point -- I don't know what you mean by "gun port stops". Are you talking about the lining that I did in red -- or is it something that I will encounter further on in the model?
Thanks, and regards,
David
-


HMS Victory by drobinson02199 - FINISHED - Caldercraft - Scale 1:72
in - Kit build logs for subjects built from 1751 - 1800
Posted
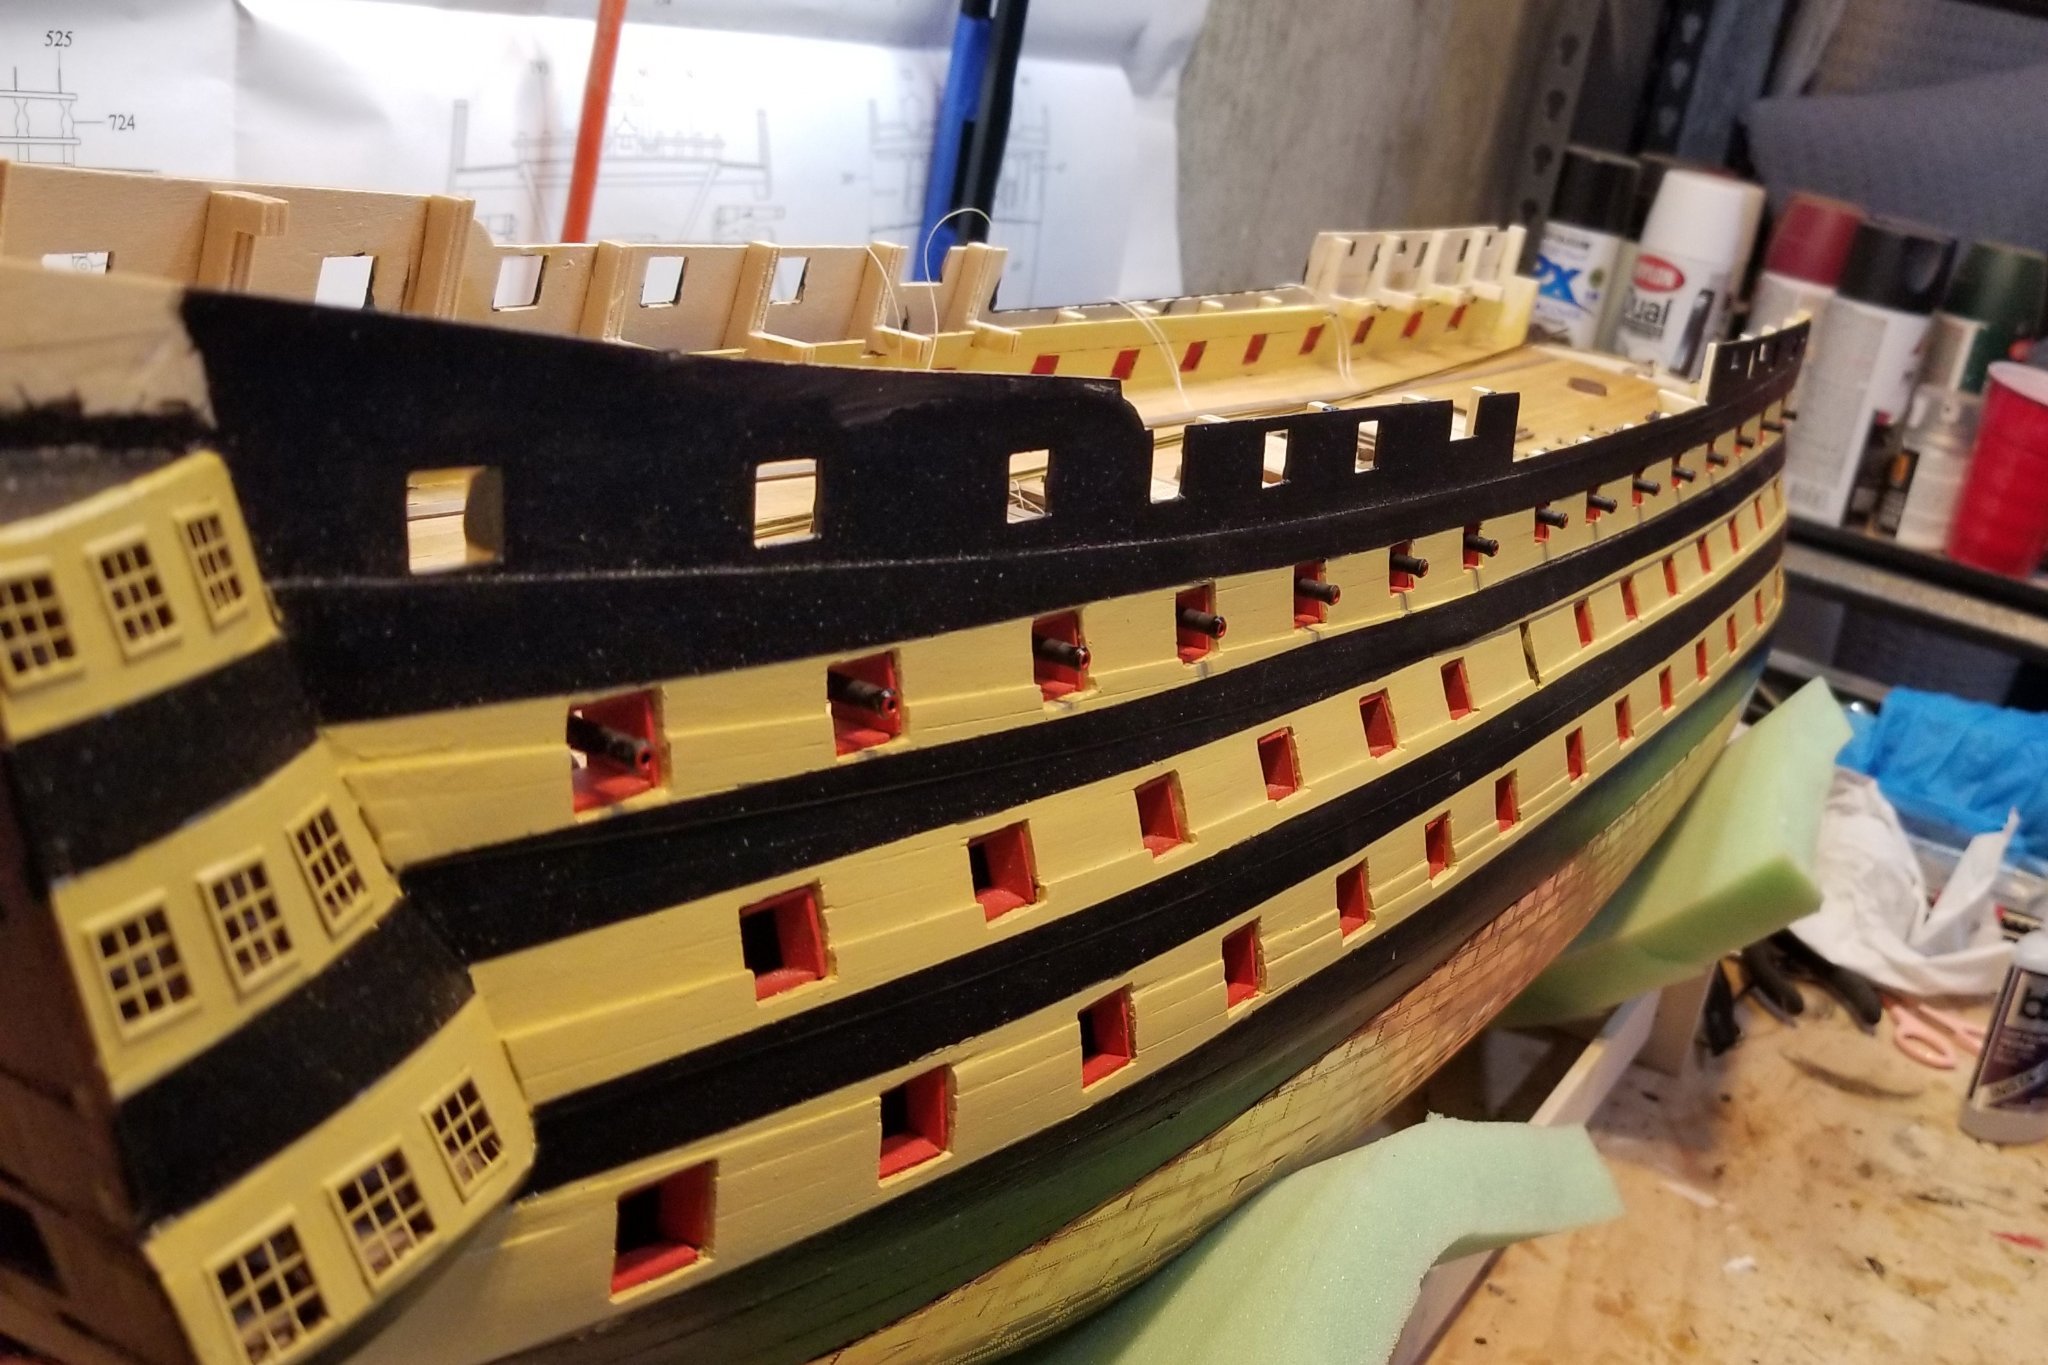
Quarterdeck and two forecastle cannons built, painted, mounted and rigged.
Full Disclosure: Those of you who are Victory aficionados and are sharp-eyed may see that I goofed with the two medium cannons. They are longer than the rest, and I was careful all through the building stage to isolate the slightly larger carriages and mount the right cannons to them. All good so far. Then as I started mounting the cannons, I picked those two up, intending to mount them on the forecastle where they belong. Phone call causes distraction. I come back, pick them up and promptly mount them at the stern in the lashed down position behind the screen. 🧐
They were glued down well, and rigged, so there they stay, and the forecastle gets two of the smaller cannons. It's a goof, but a small one in the scheme of things and the ship will look fine for me, and less fine for those of you who pay close attention to historical accuracy.
Regards,
David